USER MANUAL KX-TG994SK PANASONIC
Operating Instructions
Cordless Phone
Model No.
KX-TG994SK
KX-TGF975


Bluetooth®
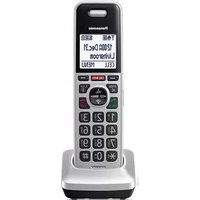
Model shown is KX-TG994SK.
Before initial use, see "Getting Started" on page 12.
Thank you for purchasing a Panasonic product.
Please read these operating instructions before using the unit and save them for future reference.
For assistance, visit our Web site: http://shop.panasonic.com/support for customers in the U.S.A.
Please register your product: http://shop.panasonic.com/support
Table of Contents
Introduction
Model composition 4
Accessory information 4
Graphical symbols for use on equipment and their descriptions ....7
For your safety 8
Important safety instructions 9
For best performance 10
Other information 10
Specifications ......11
Getting Started
Setting up 12
Controls 14
Display icons/Indicators 16
Language settings 17
Date and time 18
Recording your greeting message .....18
Other settings 18
Link to Cell
Link to cell feature 20
Pairing a cellular phone 20
Link to cell settings 21
Making/Answering Calls Using the Handset
Making cellular calls 24
Making landline calls 24
Answering calls 25
Useful features during a call 25
Power backup operation for landline .....29
Making/Answering Calls Using the Base Unit
Making cellular calls 31
Making landline calls 31
Answering calls 32
Useful features during a call 32
Answer by Voice Command
Answer by voice command ....35
Intercom
Intercom 37
Call Block
Call block 38
Storing unwanted callers ....38
Enhanced Call Block
Automated call block 42
Telemarketing call block 44
One ring scam alert 45
Phonebook
Phonebook 47
Speed dial ....50
Programming
Menu list 52
Alarm 62
Silent mode 63
Baby monitor 63
Other programming 65
Registering a unit 66
Caller ID Service
Using Caller ID service ....67
Caller list 67
Using Bluetooth® Devices
Copying phonebook from a cellular phone (phonebook transfer) ....70
Link to Cell app 71
Text message (SMS) alert 72
Alert settings for your DECT phone .....72
Remote voice assist .....73
Using a Bluetooth headset (optional) .....74
Answering System for Landline
Answering system for landline .....76
Turning the answering system on/off .....76
Greeting message 76
Listening to messages 77
Advanced new message alerting
features 79
Remote operation ....80
Answering system settings 81
Voicemail service for landline 83
Wall mounting 84
Error messages 86
FCC and other information .....97
Customer services ....111
Limited Warranty (ONLY FOR U.S.A.) .....112
Index
Index....114
Introduction
Model composition
| Series Model No. | | Base unit Handset |
| Part No. Part No. | Quantity | |
| KX-TGF970 series | KX-TG994SK KX- | TGF970 KX-TGFA97 4 | |
| KX-TGF975 KX-T | TGF970 KX-TGFA97 5 | |
Supplied accessories
| No. | Accessory item/Part number | Quantity |
| KX-TG994SK | KX-TGF975 |
| 1 | AC adaptor/PNLV226-0X 1 1 | | |
| 2 | Telephone line cord/PNJA1186Z 1 1 | | |
| 3 | Desk stand/Wall mounting adaptor/PNKL1075Z11 | 1 | 1 |
| 4 | Rechargeable batteries 2 | 8 | 10 |
| 5 | Handset cover/PNYNTGFA71SR 3 | 4 | 5 |
| 6 | Belt clip/PNKE2142Z1 4 5 | | |
| 7 | Charger/PNLC1084ZS or PNLC1084YS 3 4 | | |
*1 The desk stand/wall mounting adaptor comes attached to the base unit. *2 See page 5 for replacement battery information. *3 The handset cover comes attached to the handset.
①
④


⑥
⑦ PNLC1084ZS
OR PNLC1084YS
Additional/replacement accessories
Please contact your nearest Panasonic dealer for sales information (page 111).
Introduction
| Accessory item Model number/Specifications |
| Rechargeable batteries | HHR-4DPA*1To order, please visit http://shop.panasonic.com/support |
| Battery type:-Nickel metal hydride (Ni-MH)-2 x AAA (R03) size for each handset |
| Headset KX-TCA93, KX-TCA430 |
| Range extender | KX-TGA407*2 |
| Key detector | KX-TGA20*3 |
*1 Replacement batteries may have a different capacity from that of the supplied batteries. *2 By installing this unit, you can extend the range of your phone system to include areas where reception was previously not available. This product can be purchased online. Please visit our Web site: http://shop.panasonic.com/support *3 By registering the key detector (4 max.) to a Panasonic Digital Cordless Phone and attaching it to an easy-to-lose item in advance, you can locate and find the mislaid item to which the key detector is attached. Please visit our Web site: http://www.panasonic.com/tga20
- Design and specifications are subject to change without notice.
- The illustrations in these instructions may vary slightly from the actual product.
Expanding your phone system
| Handset (optional): KX-TGFA97 |
| You can expand your phone system by registering optional handsets (6 max.) to a single base unit.Optional handsets may be a different color from that of the supplied handsets.To order, please visit http://shop.panasonic.com/support |  |
Bluetooth® devices
You can expand your phone system by pairing the following units to a single base unit.
| Your Bluetooth cellular phone 1 : 2 max.(for cellular calls: page 20) | |
Introduction
Your Bluetooth headset 1 : 1 max.
(for a wireless hands-free conversation: page 74)

*1 Your cellular phone and headset must be Bluetooth wireless technology compatible. For more details and the list of compatible cellular phones, please visit our Web site: http://shop.panasonic.com/bluetooth-phone
Trademarks
- The Bluetooth® word mark and logos are registered trademarks owned by Bluetooth SIG, Inc. and any use of such marks by Panasonic Corporation is under license.
- iPhone and Siri are registered trademarks of Apple Inc.
- Android, Gmail, Google Calendar and Google Assistant are trademarks of Google LLC.
- Facebook and Instagram are trademarks of Facebook, Inc. • Twitter is a trademark of Twitter, Inc.
- All other trademarks identified herein are the property of their respective owners.
Graphical symbols for use on equipment and their descriptions
| Symbol Explanation | Symbol Explanation | | |
 | Alternating current (A.C.) Class II  | (equipment in which protection against electric shock relies on Double Insulation or Reinforced Insulation) |
 | Direct current (D.C.) “ON” (power) | |
| Protective earth “OFF” (power) | |
| Protective bonding earth Stand-by   | |
 | Caution, risk caused by visible radiation | | “ON”/“OFF” (power; push-push) |
| For indoor use only Caution, risk of electric shock | | shock |
For your safety
To prevent severe injury and loss of life/property, read this section carefully before using the product to ensure proper and safe operation of your product.
WARNING
Power connection
- Use only the power source marked on the product.
- Do not overload power outlets and extension cords. This can result in the risk of fire or electric shock.
- Completely insert the AC adaptor/power plug into the power outlet. Failure to do so may cause electric shock and/or excessive heat resulting in a fire.
- Regularly remove any dust, etc. from the AC adaptor/power plug by pulling it from the power outlet, then wiping with a dry cloth. Accumulated dust may cause an insulation defect from moisture, etc. resulting in a fire.
- Unplug the product from power outlets if it emits smoke, an abnormal smell, or makes an unusual noise. These conditions can cause fire or electric shock. Confirm that smoke has stopped emitting and contact us at http://shop.panasonic.com/support
- Unplug from power outlets and never touch the inside of the product if its casing has been broken open.
- Never touch the plug with wet hands. Danger of electric shock exists.
Installation
- To prevent the risk of fire or electrical shock, do not expose the product to rain or any type of moisture.
- Do not place or use this product near automatically controlled devices such as automatic doors and fire alarms. Radio waves emitted from this product may cause such devices to malfunction resulting in an accident.
- Do not allow the AC adaptor or telephone line cord to be excessively pulled, bent or placed under heavy objects.
- Do not place the handset on the base unit when battery cover is removed.
- Do not place the handset on the base unit when the headset cover is opened.
Operating safeguards
- Unplug the product from power outlets before cleaning. Do not use liquid or aerosol cleaners.
- Do not disassemble the product.
- Do not spill liquids (detergents, cleansers, etc.) onto the telephone line cord plug, or allow it to become wet at all. This may cause a fire. If the telephone line cord plug becomes wet, immediately pull it from the telephone wall jack, and do not use.
- The use of excessive sound volume through earphones, headphones, or headsets may cause hearing loss.
Medical
- Consult the manufacturer of any personal medical devices, such as pacemakers or hearing aids, to determine if they are adequately shielded from external RF (radio frequency) energy. (The product operates in the frequency range of 1.92 GHz to 1.93 GHz, and the RF transmission power is 115 mW (max.).)
- Do not use the product in health care facilities if any regulations posted in the area instruct you not to do so. Hospitals or health care facilities may be using equipment that could be sensitive to external RF energy.
CAUTION
Installation and location
- Never install telephone wiring during an electrical storm.
- Never install telephone line jacks in wet locations unless the jack is specifically designed for wet locations.
- Never touch uninsulated telephone wires or terminals unless the telephone line has been disconnected at the network interface.
- Use caution when installing or modifying telephone lines.
- The AC adaptor is used as the main disconnect device. Ensure that the AC outlet is installed near the product and is easily accessible.
- The product is only use for mounting at heights ≤ 2 m.
Note:
- This height is not guaranteed for product reliability.
- To prevent serious injuries due to the product unexpectedly falling, the product must be installed at a height of 1.5 m or lower.
- This product is unable to make calls when:
- the handset batteries need recharging or have failed.
- there is a power failure.
Battery
- We recommend using the batteries noted on page 5. USE ONLY rechargeable Ni-MH batteries AAA (R03) size.
- Do not mix old and new batteries.
- Do not open or mutilate the batteries. Released electrolyte from the batteries is corrosive and may cause burns or injury to the eyes or skin. The electrolyte is toxic and may be harmful if swallowed.
- Exercise care when handling the batteries. Do not allow conductive materials such as rings, bracelets, or keys to touch the batteries, otherwise a short circuit may cause the batteries and/or the conductive material to overheat and cause burns.
- Charge the batteries provided with or identified for use with this product only, in accordance with the instructions and limitations specified in this manual.
- Only use a compatible base unit (or charger) to charge the batteries. Do not tamper with the base unit (or charger). Failure to follow these instructions may cause the batteries to swell or explode.
- Avoid the use in the following conditions
– High or low extreme temperatures during use, storage or transportation. - Replacement of a battery with an incorrect type that can defeat a safeguard. - Disposal of a battery into fire or a hot oven, or mechanically crushing or cutting of a battery, that can result in an explosion. – Extremely high temperature and/or extremely low air pressure that can result in an explosion or the leakage of flammable liquid or gas.
Attention:

A nickel metal hydride battery that is recyclable powers the product you have purchased.
Please call 1-800-8-BATTERY
(1-800-822-8837) for information on how to recycle this battery.
Important safety instructions
When using your product, basic safety precautions should always be followed to reduce the risk of fire, electric shock, and injury to persons, including the following:
- Do not use this product near water for example, near a bathtub, washbowl, kitchen sink, or laundry tub, in a wet basement or near a swimming pool.
- Avoid using a telephone (other than a cordless type) during an electrical storm. There may be a remote risk of electric shock from lightning.
- Do not use the telephone to report a gas leak in the vicinity of the leak.
- Use only the power cord and batteries indicated in this manual. Do not dispose of batteries in a fire. They may explode.
Check with local codes for possible special disposal instructions.
SAVE THESE INSTRUCTIONS
Base unit location/avoiding noise
The base unit and other compatible Panasonic units use radio waves to communicate with each other.
- For maximum coverage and noise-free communications, place your base unit:
- at a convenient, high, and central location with no obstructions between the handset and base unit in an indoor environment. – away from electronic appliances such as TVs, radios, personal computers, wireless devices, or other phones.
- facing away from radio frequency transmitters, such as external antennas of mobile phone cell stations. (Avoid putting the base unit on a bay window or near a window.)
- Coverage and voice quality depends on the local environmental conditions.
- If the reception for a base unit location is not satisfactory, move the base unit to another location for better reception.
Environment
- Keep the product away from electrical noise generating devices, such as fluorescent lamps and motors.
- The product should be kept free from excessive smoke, dust, high temperature, and vibration.
- The product should not be exposed to direct sunlight.
- Do not place heavy objects on top of the product.
- When you leave the product unused for a long period of time, unplug the product from the power outlet.
- The product should be kept away from heat sources such as heating devices, cooking appliances, etc. It should not be placed in rooms where the temperature is less than
0 °C (32 °F) or greater than 40 °C (104 °F). Damp basements should also be avoided.
- The maximum calling distance may be shortened when the product is used in the following places: Near obstacles such as hills, tunnels, underground, near metal objects such as wire fences, etc.
- Operating the product near electrical appliances may cause interference. Move away from the electrical appliances.
Routine care
- Wipe the outer surface of the product with a soft moist cloth.
- Do not use benzine, thinner, or any abrasive powder.
- The applied nameplate is located at the bottom or rear of the product.
CAUTION: Risk of explosion if battery is replaced by an incorrect type. Dispose of used batteries according to the instructions.
Notice for product disposal, transfer, or return
- This product can store your private/confidential information. To protect your privacy/confidentiality, we recommend that you erase information such as phonebook or caller list entries from the memory before you dispose of, transfer, or return the product.
Notice
- This product is designed for use in the United States of America. Sale or use of this product in other countries may violate local laws.
- This device is designed for use in the United States of America. Sale or use of this device in certain other countries may constitute a violation of local legislation.
- This product is designed for use in the United States of America. Sale or use of this product in certain countries may constitute a violation of local legislation.
- This product is designed for use in the United States. If sold or used in other countries, it may violate local laws.
- This product is designed for use outside Japan, and use within Japan is a violation of the law. Therefore, we generally cannot provide services such as repairs within Japan.
Specifications
- Standard: Bluetooth wireless technology 4.2
- Hands Free Profile (HFP)
- Headset Profile (HSP) – Phone Book Access Profile (PBAP)
- Object Push Profile (OPP)
- Serial Port Profile (SPP)
- Message Access Profile (MAP)
• Frequency range:
1.92 GHz to 1.93 GHz (DECT)
2.402 GHz to 2.480 GHz (Bluetooth)
• RF transmission power:
115 mW (max.)
- Power source: 120 V AC, 60 Hz
• Power consumption:
Base unit:
Standby: 1.2 W
Maximum: 4.5 W
Charger:
Standby: 0.1 W
Maximum: 1.8 W
• Operating conditions:
0 °C - 40 °C (32 °F - 104 °F), 20 % - 80 % relative air humidity (dry)
Getting Started
Setting up
Connections
- If you do not connect the telephone line cord and use only cellular lines, set the cellular line only mode to use this unit more conveniently (page 22).
■ Base unit
① Connect the AC adaptor to the unit by pressing the plug firmly. ② Fasten the cord by hooking it. ③ Connect the AC adaptor to the power outlet. ④ Connect the telephone line cord to the unit, then to the single-line telephone jack (RJ11C) until you hear a click. ⑤ A DSL/ADSL filter (not supplied) is required if you have a DSL/ADSL service.
Note:
- Use only the supplied Panasonic AC adaptor PNLV226.

Charging
① Connect the AC adaptor to the power outlet.

Battery installation
- USE ONLY rechargeable Ni-MH batteries AAA (R03) size (A).
- Do NOT use alkaline/manganese/Ni-Cd batteries.
- Confirm correct polarities (+, ⊕)

- Follow the directions on the display to set up the unit.
Getting Started
Removing the battery
Battery charging
Charge for about 7 hours.
- Confirm "Charging" is displayed (A).
- When the batteries are fully charged, "Fully charged" is displayed.
![graph TD A["Mobile Phone 1"] --> C["Phone"] B["Mobile Phone 2"] --> D["Terminal Device"]](/content/2026/06/1370672/images/81fe5bffc11ccc5c8bf9316e308d616a277e8d7d7663686720a6b03e2f36a799.jpg)
Note when setting up
Note for connections
- The AC adaptor must remain connected at all times. (It is normal for the adaptor to feel warm during use.)
- The AC adaptor should be connected to a vertically oriented or floor-mounted AC outlet. Do not connect the AC adaptor to a horizontally oriented AC outlet that faces the floor, such as an AC outlet installed on a ceiling or under a table, as the weight of the adaptor may cause it to become disconnected.
Note for battery installation
- Use the supplied rechargeable batteries. For replacement, we recommend using the Panasonic rechargeable batteries noted on page 5, 9.
Note for battery charging
- It is normal for the handset to feel warm during charging.
- Clean the charge contacts of the handset, base unit, and charger with a soft and dry cloth once a month. Before cleaning the unit, disconnect from power outlets and any telephone line cords. Clean more often if the unit is exposed to grease, dust, or high humidity.
Battery level
| Icon Battery level |
| High |
| Medium |
| Low |
| Needs charging. |
| Empty |
Note:
- At the end of each call, the unit displays a large icon for a few moments to indicate the battery level.
Getting Started
- You can set the unit to play a voice announcement when the battery is low or needs charging. (page 18)
Ni-MH battery performance (supplied batteries)
| Operation Operating time |
| In continuous use | 10 hours max.* 1 |
| Not in use (standby) | 5 days max.* 1 |
*1 If eco mode is on except when using link to cell function.
Note:
- Actual battery performance depends on usage and ambient environment.
Intelligent eco mode
This feature automatically reduces handset power consumption by suppressing handset transmission power when the handset is close to the base unit.
- When this feature is activated, displayed.
- Even though this feature is activated:
– during a cellular call.
- when answer by voice command is turned on (page 35).
Controls
Handset
① Belt clip holes
② Speaker
③ 【◀】(SP-PHONE: Speakerphone)
④ Headset jack
⑤ →
6 Dial keypad
※: Temporary tone dialing
0: (2) Ringer off
⑦ Microphone
8 Receiver
9 Display
10 [CALL BLOCK]
Getting Started
⑪ 【】(Assist)【FLASH】
- You can use the handset to operate the voice recognition feature of your cellular phone by pressing [💡]. (page 73)
■ Control type
Ⓐ Soft keys
By pressing a soft key, you can select the feature shown directly above it on the display. After a cellular phone is paired, [CELL] is displayed.
B Navigator key
- [▲], [▼], [◀], or [▶]: Scroll through various lists and items.
- VOL. (Volume: [▲] or [▼]): Adjust the receiver or speaker volume while talking.
- [◀] □□: View the phonebook entry. - [▶] REDIAL: View the redial list. - [▼] CID (Caller ID): View the caller list.
Base unit
② Speaker
③ Display
④ [ANSWER ON/OFF]
ANSWER ON/OFF indicator
⑤ [](ASSIST)
- You can use the base unit to operate the voice recognition feature of your cellular phone by pressing [O]. (page 73)
6 [CELL 1]
CELL 1 indicator
⑦ [CELL 2]
CELL 2 indicator
8 [LOCATOR] [INTERCOM]
- You can locate a misplaced handset by pressing [LOCATOR].
⑨ [ERASE][MUTE]
10 [EXIT]
⑪ [CALL BLOCK]
12 [▶](PLAY/STOP) Message indicator ▶)
13 Desk stand/Wall mounting adaptor
- The adaptor is a removable attachment for desk stand or wall mounting use (page 84).
14 [HOLD]
15 [REDIAL] [PAUSE]
16 [FLASH] [CALL WAIT]
⑰ [SP-PHONE] (Speakerphone) SP-PHONE indicator
18 Microphone
19 Dial keypad
※: Temporary tone dialing
■ Control type
Soft keys
By pressing a soft key, you can select the feature shown directly above it on the display.
Navigator key
- [▲], [▼], [◀◀], or [▶▶]: Scroll through various lists and items.
- VOL. (Volume: [▲] or [▼]): Adjust the speaker volume while talking.
- [ ] Repeat/skip messages during playback.
Getting Started
Display icons/Indicators
Handset display items
| Item Meaning |
| | Within base unit range |
| | Out of base unit range |
| The landline is in use.When flashing slowly:The call is on hold.When flashing rapidly: An incoming call is now being received. |
| 21 | – A cellular line is in use. *1 When flashing slowly:The cellular call is on hold.When flashing rapidly:A cellular call or text message is being received.– The remote voice assist feature is in use. *1 |
| ECO | Eco mode is on. *2 (page 14) |
| ×21 | A cellular phone is connected. *1 Ready to make/receive cellular calls.When turned off:A cellular phone is not connected to the base unit. (page 22) |
| C1C2 | – A cellular call is in progress on that line.– The cellular line is selected for the setting. |
| NR | Noise reduction is set. (page 26) |
| EQ | Equalizer is set. (page 26) |
| Speakerphone is on. (page 24) |
| α11 | Ringer volume is off. *3 (page 25, 54, 56) |
| Z23 | Silent mode is on. (page 63) |
| Item Meaning |
| PRIV. | Call sharing mode is off. (page 58) |
| Alarm is on. (page 62) |
| Handset number |
| Battery level |
| Answer by voice command is on. (page 35) |
| Blocked call (page 38) |
| Automated call block is set to “Block”. (page 42) |
| Blocked automated call (page 42) |
| Scam call (page 68) |
| Baby monitor is activated. The name/number displayed next to the icon indicates the monitoring unit. (page 63) |
| In use | Answering system is being used by another unit. |
| Cell1 in use | Someone is using the corresponding line. |
| Cell2 in use |
| Line in use |
*1 Corresponding lines (1, 2: cellular line) are indicated next to the item.
*2 During a cellular call, the item is not displayed even though the feature is activated.
*3 Corresponding lines (1, 2: cellular line, L: landline) are indicated next to the item. If all lines are turned off, no line is indicated.
Base unit display items
| Item Meaning |
| LC1 | Ringer volume is off.*1(page 32, 60) |
| 24 | Silent mode is on. (page 63) |
Getting Started
| Item Meaning |
| PRIV. | Call sharing mode is off. (page 58) |
| GO | “Greeting only” is selected. Caller messages are not recorded. (page 82) |
| C1C2 | - A cellular call is in progress on that line.- The cellular line is selected for the setting. |
| Answer by voice command is on. (page 35) |
| # | Blocked call (page 38) |
| Automated call block is set to “Block”. (page 42) |
| Blocked automated call (page 42) |
| Scam call (page 68) |
| A Bluetooth headset is connected to the base unit. It is ready for use. |
| A Bluetooth headset is in use. |
| In use | Answering system is being used by the handset. |
| Cell1 in use | Someone is using the corresponding line. |
| Cell2 in use |
| Line in use |
*1 Corresponding lines (C1, C2: cellular line, L: landline) are indicated next to the item. If all lines are turned off, no line is indicated.
CELL indicators on the base unit
The CELL indicators show each cellular line status.
| Status Meaning |
| On A cellular | phone is connected.Ready to make/receive cellular calls. |
| Status Meaning |
| Flashing slowly | – The cellular line is in use.– Phonebook entries are being copied from a cellular phone (page 70).– The base unit is searching for the paired cellular phone.– The base unit is pairing a cellular phone.– A cellular call is on hold.– The remote voice assist feature is in use (page 73). |
| Flashing rapidly | A cellular call is being received. |
| Light off – A | cellular phone is not paired to the base unit.– A cellular phone is not connected to the base unit (page 22). |
Language settings
Display language
Handset / Base unit
1 [MENU]#110 2 [◆]: Select the desired setting. → [SAVE] 3 Proceed with the operation for your unit.
Handset: [OFF]
Base unit: [EXIT]
Note:
- The language selected will also be used for the low battery alert announcement (page 18).
Voice announcement language
You can select the language used for the following features.
– Answering system guidance – Automated call block guidance – Telemarketing call block guidance - Talking Caller ID
Getting Started
– Answer by voice command announcement - 2-way recording announcement – Application (App) alert announcement - Text message (SMS) alert announcement
Handset
1 [MENU]# 1 1 2 2 [◆]: Select the desired setting. →
[SAVE] → [OFF]
Date and time
Handset
1 [MENU]# 1 0 1 2 Enter the current month, date, and year by selecting 2 digits for each.
Example: July 12, 2021
0 7 1 2 2 1
3 [OK]
4 Enter the current hour and minute (12-hour clock format) by selecting 2 digits for each.
Example: 9:30
0 9 3 0
5 ☒: Select "AM" or "PM".
6 [SAVE] → [OFF]
Note:
- When English is selected as the display language, 12-hour clock format is used. When Spanish is selected, 24-hour clock format is used.
Recording your greeting message
You can record your own greeting message instead of using a pre-recorded greeting message. See page 76 for details.
Handset
1 [MENU]#302 2 [▲]: "Yes" → [SELECT]
3 Record a greeting message. → [STOP] → [OFF]
Other settings
Dialing mode
If you cannot make calls, change this setting according to your telephone line service. The default setting is "Tone".
"Tone": For tone dial service.
"Pulse": For rotary/pulse dial service.
Handset
1 [MENU]# 1 2 0 2 [▲]: Select the desired setting. → [SAVE] → [OFF]
Low battery alert
This feature plays a voice announcement when the battery is low or needs charging. When this feature is turned on, the unit notifies you as follows.
■ When you end a call: - The unit plays a voice announcement when the battery is low or needs charging.
■ When the handset is in standby mode:
- If the battery is low or needs charging, the unit plays a voice announcement at the selected interval up to 3 times.
Note for handset:
- At the end of each call, the unit displays a large icon for a few moments to indicate the battery level.
Getting Started
Setting low battery alert
To turn this feature on, select the desired announcement interval, or select "Off" to turn this feature off. The default setting is "Every hour".
Handset
1 [MENU]# 1 7 6 2 [SELECT]: Select the desired setting. →
[SAVE] → [OFF]
Link to Cell
Link to cell feature
You can connect your base unit and cellular phone using Bluetooth wireless technology, so that you can make or answer cellular calls using your phone system. This allows you to:
- use the unit to talk on cellular calls even if some areas of your home have poor cellular reception, simply by placing your cellular phone in an area with good reception.
- talk on cellular calls even if your cellular phone is in your pocket or bag.
- enjoy cordless cellular calls even if your cellular phone is plugged in and charging.
Important:
- Your cellular phone must support the Hands Free Profile (HFP) specification.
- You may pair 2 cellular phones and 1 Bluetooth headset.
- The unit cannot be used to talk on 2 cellular lines at the same time.
- Only 1 Bluetooth device can be used with the unit at a time 4 .
- Locate your cellular phone near the base unit. If the cellular phone is too close to the base unit during a cellular call, you may hear noise. For best performance, we recommend placing the cellular phone between 0.6 m to 3 m (2 feet to 10 feet) away from the base unit.
*1 You cannot use a Bluetooth headset to talk on a cellular line.
Pairing a cellular phone
Important:
- For more details and the list of compatible cellular phones, please visit our Web site: http://shop.panasonic.com/bluetooth-phone
- Before pairing a Bluetooth enabled cellular phone to the base unit, make sure that no other Bluetooth device such as a Bluetooth headset is connected to your cellular phone.
1 Base unit:
Press and hold [CELL 1] or [CELL 2] for about 5 seconds.
- After the corresponding CELL indicator on the base unit starts flashing, the rest of the procedure must be completed within 5 minutes.
2 Your cellular phone:
While the corresponding CELL indicator is flashing, follow the instructions of your cellular phone to enter the pairing mode.
- Depending on your cellular phone, it may ask you to enter the Bluetooth PIN (default: "0000"). If your cellular phone shows PassKey confirmation on its display, follow the directions to proceed.
3 Base unit:
Wait until a long beep sounds.
- It may take more than 10 seconds to complete pairing.
- When the corresponding CELL indicator lights up, the cellular phone is connected to the base unit. You are ready to make cellular calls.
Note:
- If the cellular phone has already paired to the base unit, it is overwritten.
- Make sure that your cellular phone is set to connect to this product automatically. Refer to your cellular phone's operating instructions.
- Make sure you cancel your cellular phone's current pairing if you want to pair it to the other line (page 20).
- The default setting for the alert feature is "On", so when you pair your cellular phone to the base unit, this feature may be activated (page 72). (This depends on the version and type of cellular phone you are using.)
Unpairing a cellular phone
You can cancel the pairing of a cellular phone that is stored in the base unit.
Handset
1 For CELL 1: [MENU]#6111
For CELL 2: [MENU]#6112
2 [▲]: "Yes" → [SELECT]
- When the cellular phone is unpaired, the CELL indicator is turned off.
3 [OFF]
Link to cell settings
Selecting which unit receives cellular calls
You can select which unit rings and receives calls for a cellular line. When "All" is selected, all handsets and the base unit ring.
Handset
1 For CELL 1: [MENU]#6271
For CELL 2: [MENU]#6272
2 【▲】: Select the desired handset or "A11".
→ [SAVE] → [OFF]
Note:
- When you select a specific handset to receive calls for a cellular line:
- other handsets cannot answer the calls.
- the base unit can answer the calls even though it does not ring. However, you can make the base unit ring by adjusting the base unit ringer volume (page 60).
- When you change to "A11" from another setting, the base unit ringer volume also returns to the lowest level even if the ringer volume was changed.
- The units selected with this setting have the alert feature (page 72) applied to them.
Ring as cell mode
Once this feature is turned on, the handset and base unit ring using the same ringer tone as your cellular phone.
The following settings are available:
- "Off": Turn this feature off to use the ringer tones of the handset and base unit. Caller information is announced depending on the Talking Caller ID setting (page 56, 60).
- "On (with Talking CID)" (default): The handset and base unit use your cellular
phone's ringer tone. Caller information is announced even if the Talking Caller ID is turned off.
- "On (without Talking CID)": The handset and base unit use your cellular phone's ringer tone. Caller information is not announced even if the Talking Caller ID is turned on.
Important:
- To use this feature, your cellular phone must support Bluetooth in-band ringtone. Refer to your cellular phone's operating instructions.
Handset
1 For CELL 1: [MENU]#6141
For CELL 2: [MENU]#6142
2 [▲]: Select the desired setting. → [SAVE] → [OFF]
Note:
- The units use the preset ringer tones instead of your cellular phone's ringer tone when a cellular call is being received if:
- your cellular phone is in silent mode (depending on your cellular phone).
- the base unit is in use.
- 2 handsets are sharing a landline call.
- answer by voice command feature is turned on (page 35).
- If your cellular phone is in silent mode with "On (with Talking CID)" set, the unit announces caller information even when Talking Caller ID is turned off (page 56, 60).
- When ring as cell mode is set to on, the ringer volume depends on the cellular phone Bluetooth output level specification. If the ringer volume in this mode is low, turn this feature off to use the ringer tones of the handset and base unit.
To use the handset ringer tone instead of your cellular phone's ringer tone
Select "off" in step 2, "Ring as cell mode", page 21.
To change the handset ringer tone for a cellular line, see page 54.
Auto connection to the Bluetooth devices (cellular phones)
After pairing, your Bluetooth devices are connected to the base unit. If you move the Bluetooth devices out of base unit range, the Bluetooth devices are disconnected from the base unit. This feature allows the base unit to try to reconnect the Bluetooth devices at regular intervals when it returns within base unit range. You can set the interval. The default setting is "1 min".
Important:
- Only 1 Bluetooth device can be used with the unit at a time, and the base unit loses its connection from other Bluetooth devices. To automatically resume the connection to Bluetooth devices, leave the auto connection on.
- Some cellular phones lose connection after usage, please check the specifications of your cellular phone for more details.
Handset
2 【◆】: Select the desired setting. →
【SAVE】→【OFF】
Note:
- Some cellular phones may ask you if you accept the connection requirement from the base unit. In that case, select "Off" in step 2. Check the specifications of your cellular phone.
Connecting/disconnecting the cellular phone manually
If you will not be using the paired cellular phone's link to cell feature temporarily (for example, you do not want the unit to ring when your cellular line receives a call), you can disconnect your cellular phone from the base unit. If you want to use it again, reconnect the cellular phone to the base unit.
Note:
- After you disconnect a paired cellular phone from the base unit manually, it will automatically be connected to the base unit in 30 minutes. If you do not use the link to
cell feature anymore, unpair the cellular phone (page 20).
- A disconnected cellular phone is not unpaired from the base unit, so pairing it to the base unit again is unnecessary.
Handset
1 To connect/disconnect:
For CELL 1: [MENU]#6251
For CELL 2: [MENU]#6252
• A long beep sounds.
2 [OFF]
Cellular line only mode (If you do not use the landline)
If you do not use the landline, we recommend setting the unit to the cellular line only mode. The default setting is "Off".
Important:
- If you turn on the "Cell line only mode", disconnect the telephone line cord from the base unit. Otherwise the "Cell line only mode" cannot be activated.
Handset
2 To turn on:
[ ]: On'' → [SELECT ]→ [ ]: Yes''; rightarrow [SELECT ]
To turn off: []: "Off" → [SELECT]
Note:
- Once you set this mode, you can use the following buttons to make cellular calls:
- for the handset, press [] or [] instead of [CELL] (page 24).
– For the base unit, press [SP-PHONE] without pressing [CELL 1] or [CELL 2] set for the cellular line selection (page 23, 31).
- Once you set this mode, the following features cannot be used:
- Landline features (incoming ringer volume, incoming ringer tone, dial mode, flash time, and line mode)
- Answering system (page 76)
Messages cannot be received.
– Voicemail features (page 83)
- After this mode is turned on or off, the base unit reboots.
- Bluetooth connections from cellular phones or Bluetooth headsets are disconnected. If the auto connection is turned on (page 22), the cellular phones are reconnected.
- will be displayed on the handset momentarily. The handset can be used once Y is displayed.
When you use the landline again
Before connecting the telephone line to the base unit, select "Off" in step 2, "Cellular line only mode (If you do not use the landline)", page 22.
Cellular line selection
This feature determines which cellular line is selected to make cellular calls when:
- you press [CELL] on the handset.
- you press [◀] or [◀] on the handset while the cellular line only mode is turned on.
- you press [SP-PHONE] on the base unit while the cellular line only mode is turned on.
The following settings are available:
- "Manual" (handset only: default): You can select the desired cellular line when making a call.
- "Cellphone 1" *1 (base unit default): CELL 1 is selected.
- "Cellphone 2" *1: CELL 2 is selected.
Handset / Base unit
1 [MENU]#634
2 [◆]: Select the desired setting. → [SAVE]
3 Proceed with the operation for your unit.
Handset: [OFF]
Base unit: [EXIT]
*1 After the Bluetooth device is paired, the device name is displayed.
Storing your area code (for dialing only a 7-digit phone number to make a local call)
You need to add your area code when making cellular calls to a phone number in your area. Once you store your area code, it is automatically added to the beginning of the 7-digit phone number when making cellular calls.
Handset
1 [MENU]#633
2 Enter the 3-digit area code.
- To correct a digit, press [CLEAR].
3 [SAVE] → [OFF]
Changing the Bluetooth PIN (Personal Identification Number)
The PIN is used to pair cellular phones to the base unit. The default PIN is "0000". To prevent unauthorized access to this product, we recommend that you change the PIN, and keep it confidential.
Important:
- Please make note of your new PIN. The unit does not reveal the PIN to you. If you forget your PIN, see page 95.
Handset
1 [MENU]#619
- If the unit prompts you to enter the old PIN (when the default has been changed), enter the current 4-digit PIN.
2 Enter the new 4-digit PIN. → [OK]
3 Enter the new 4-digit PIN again. → [SAVE] → [OFF]
Making/Answering Calls Using the Handset
Making cellular calls
Important:
- The unit cannot be used to talk on 2 cellular lines at the same time.
- Only 1 Bluetooth device can be used with the unit at a time 4 .
- Before making calls, confirm that the corresponding Ⓧ on the handset is displayed (page 16). *1 You cannot use a Bluetooth headset to talk on a cellular line.
1 Lift the handset and then dial the phone number. • To correct a digit, press [CLEAR].
2 [CELL]
- The unit starts dialing immediately in the following situations.
- Only 1 cellular phone is paired. – A specific line is set to make cellular calls (page 23). Go to step 4.
4 When you finish talking, press [OFF] or place the handset on the base unit or charger.
Note:
- To switch to the speaker, press [◀]. To switch back to the receiver, press [◀]/[▶].
- In step 1, you can store the dialed phone number to the phonebook by pressing and holding [◀] □□ for a few seconds.
Adjusting the receiver or speaker volume
Press [▲] or [▼] repeatedly while talking.
Note:
- The receiver *1 or speaker volume you set is kept for each line (landline and cellular lines).
*1 If the receiver volume is set to level 5 (max.), it will be changed to level 4 in the next call.
Making a call using the redial list
The last 5 phone numbers dialed are stored in the redial list (48 digits max. each).
1 [▶] REDIAL
2 [▲]: Select the desired entry.
3 [CELL]
- The unit starts dialing immediately in the following situations.
- Only 1 cellular phone is paired. – A specific line is set to make cellular calls (page 23).
Erasing a number in the redial list
■ When a cellular phone is paired:
1 [▶] REDIAL
2 [◆]: Select the desired entry. → [MENU]
3 [▲]: "Erase" → [SELECT]
4 [▲]: "Yes" → [SELECT] → [OFF]
■ When a cellular phone is not paired:
1 [▶] REDIAL
2 [▲]: Select the desired entry. → [ERASE]
3 [▲]: "Yes" → [SELECT] → [OFF]
Making landline calls
1 Lift the handset and then dial the phone number.
• To correct a digit, press [CLEAR].
2 Press [ ] to make the call.
- To make the call using the speakerphone, press [◀].
3 When you finish talking, press [OFF] or place the handset on the base unit or charger.
Note:
- To switch to the speaker, press [✿]. To switch back to the receiver, press [✿]/[✿]
- In step 1, you can store the dialed phone number to the phonebook by pressing and holding [◀] □□ for a few seconds.
Making a call using the redial list
The last 5 phone numbers dialed are stored in the redial list (48 digits max. each).
1 [▶] REDIAL 2 [▲]: Select the desired entry. 3 Press [ ] or [].
Pause (for PBX/long distance service users)
A pause is sometimes required when making calls using a PBX or long distance service. When storing a calling card access number and/or PIN in the phonebook, a pause is also needed (page 50).
Example: If you need to dial the line access number "9" when making outside calls with a PBX:
1 9 → [▲] (Pause)
2 Dial the phone number. → [ ]
Note:
- A 3.5 second pause is inserted each time [▲] (Pause) is pressed.
Answering calls
1 Lift the handset and then press [【】 when the unit rings.

- To answer a cellular call, you can also press [CELL].
2 When you finish talking, press [OFF] or place the handset on the base unit or charger.
Any key answer: You can answer the call by pressing any dial key (except 0 key).
Auto talk: You can answer calls simply by lifting the handset (page 58).
Temporary handset ringer off: You can turn the ringer off temporarily by pressing [2] (left soft key).
Adjusting the handset ringer volume
Press [▲] or [▼] repeatedly to select the desired volume while ringing.
- To turn the ringer off, press [▼] repeatedly.
Note:
- You can adjust the ringer volume for cellular calls and landline calls by programming (page 54, 56).
- The ringer volume you set is kept for each line (landline and cellular lines).
One-touch ringer off for the handset
Press and hold 0 (2) until the unit beeps to turn the ringer off. While the ringer is turned off, the handset will not ring for cellular calls or for landline calls.
- You can turn the ringer on again by pressing and holding 0 (2) until the unit beeps.
Useful features during a call
Hold
1 Press [MENU] during an outside call. 2 [▲]: "Hold" → [SELECT]
3 To release hold on the cellular line: Press [CELL]:*1
- Another handset user can take the call by pressing [CELL]. 1
*1 If you press [CELL] and the selection list is displayed, select the desired cellular line and press [SELECT].
- The base unit user can take the call by pressing [CELL 1] or [CELL 2].
To release hold on the landline: Press [→]
- Another handset user can take the call by pressing [→]
- The base unit user can take the call by pressing [SP-PHONE].
Making/Answering Calls Using the Handset
Note:
- After holding for 10 minutes, the call is disconnected.
Mute
1 Press [MUTE] during a call.
2 To return to the call, press [MUTE].
Note:
- [MUTE] is a soft key visible on the display during a call.
Flash for landline calls
[FLASH] allows you to use the special features of your host PBX such as transferring an extension call, or accessing optional telephone services.
Note:
- To change the flash time, see page 58.
For call waiting or Call Waiting Caller ID service users
To use call waiting or Call Waiting Caller ID, you must first subscribe with your phone service provider.
This feature allows you to receive calls while you are already talking on the phone. If you receive a call while on the phone, you will hear a call waiting tone.
If you subscribe to both Caller ID and Call Waiting with Caller ID services, the 2nd caller's information is displayed on the unit that is in use after you hear the call waiting tone.
1 Press [FLASH] to answer the 2nd call.
2 To switch between calls, press [FLASH].
Note:
- Please contact your phone service provider for details and availability of this service in your area.
Temporary tone dialing for landline calls (for rotary/pulse service users)
Press ☒ before entering access numbers which require tone dialing.
Handset noise reduction
This feature allows you to hear the voice of the person you are talking to more clearly, by reducing the surrounding noise coming from the other party's telephone.
1 Press [MENU] while talking.
2 [▲]: "Noise reduction on" or "Noise reduction off" → [SELECT]
Note:
- The setting you made is kept for each line (landline and cellular lines). The default settings are as follows:
- for landline: "Noise reduction off"
- for cellular lines: "Noise reduction on"
- Depending on the environment where this handset is being used, this feature may not be effective.
- This feature is not available while using the speakerphone.
Handset equalizer
This feature clarifies the voice of the person you are talking to, producing a more natural-sounding voice that is easier to hear and understand.
1 Press [MENU] while talking. 2 [▲]: "Equalizer" → [SELECT] 3 [▲]: Select the desired setting. 4 Press [OK] to exit.
Note:
- The setting you made is kept for each line (landline and cellular lines).
- Depending on the condition and quality of your telephone line, this feature may emphasize existing line noise. If it becomes difficult to hear, select another setting.
Making/Answering Calls Using the Handset
- This feature is not available while using the speakerphone.
- When both the "Equalizer" setting and noise reduction are activated, NR shown on the display.
Recording a telephone conversation (2-way recording)
This unit can record a telephone conversations during landline calls.
1 Press [MENU] during a landline call.
2 [▲]: "2 way recording" → [SELECT]
● The total recordable time is displayed. - The unit announces to both parties that the recording will start. • The unit starts recording.
3 To stop recording, press [MENU] →
[◀]: "Stop recording" → [SELECT]
- You can continue the conversation with the outside caller.
Note:
- When recording is completed:
- The total number of recordings will be added to the number of messages in the answering system. -【▶】on the base unit flashes.
- "New message" is displayed. – Audible message alert sounds on base unit.
- To listen to the recorded conversation, refer "Listening to messages", page 77.
- 2 way recording is not available during conference calls.
- The recording will end in the following situations:
- When [FLASH] is pressed.
- When the hold or intercom feature is used.
- When memory is/becomes full:
- “Memory full” is shown on the display.
- An error tone sounds.
Call share
You can join an existing outside call.
■ While another unit is on a cellular call:
1 To join the conversation, press [CELL].
- You can join the conversation in the following situations: – Only 1 cellular phone is paired. – A specific line is set to make cellular calls (page 23).
2 [◆]: Select the corresponding cellular phone. → [SELECT]
■ While another unit is on a landline call: To join the conversation, press [→].
Note:
- When another user joins the conversation, the interrupt tone sounds.
- A maximum of 3 parties (including 1 outside party) can join a conversation using 2 extensions. (3-way conference)
- To prevent other users from joining your conversations with outside callers, turn call sharing mode off (page 58).
- A 2nd party cannot join an outside call that is being recorded (page 27).
Transferring calls, conference calls
Outside calls can be transferred or a conference call with an outside party can be made:
– between handsets - between a handset and the base unit
1 During an outside call, press [MENU]. 2 [▲]: "Intercom" → [SELECT] 3 [♦]: Select the desired unit. → [SELECT]
• If you select “Voice paging”, the call will be switched from the ear-receiver mode to the speakerphone mode. 4 Wait for the paged party to answer.
- If the paged party does not answer, press [BACK] to return to the outside call. 5 To complete the transfer:
Press [OFF].
To establish a conference call:
[MENU] → [♦]: "Conference" →
[SELECT]
Making/Answering Calls Using the Handset
- To leave the conference, press [OFF]. The other 2 parties can continue the conversation.
- To put the outside call on hold:
[MENU] → [▲]: "Hold" →
[SELECT]
To resume the conference: [MENU]
→ [▲]: "Conference" → [SELECT]
- To cancel the conference: [MENU] →
[◀]: "Stop conference" →
[SELECT]
You can continue the conversation with the outside caller.
Transferring a cellular call between the handset and a cellular phone
Transferring a cellular call from the handset to a cellular phone
1 Press [MENU] during a cellular call. 2 [▲]: "Transfer to cell" → [SELECT]
- The cellular call is transferred to the cellular phone.
Note:
- Depending on your cellular phone type, you may need to set the cellular phone to be ready to talk before transferring. For example, if your cellular phone has a top cover, open it beforehand.
Transferring a cellular call from a cellular phone to the handset
During a conversation using a cellular phone, the call cannot be transferred to the handset by the cellular phone. Perform the following with the handset.
1 During a conversation using a cellular phone, press [CELL].
- The call is transferred to the handset in the following situations. – Only 1 cellular phone is paired. – A specific line is set to make cellular calls (page 23).
2 [▲]: Select the corresponding cellular phone. → [SELECT]
● The call is transferred to the handset.
Answering a 2nd call
If you receive a call while talking on the phone, the interrupt tone sounds (page 56) and the 2nd caller's information is displayed if you subscribe to Caller ID service (page 67).
Answering a cellular call during a landline call
1 Press [MENU] during a landline call. 2 [▲]: "Hold" → [SELECT] 3 To answer the 2nd call:
Press [CELL] while the 2nd call is being received. 4 To hang up the 2nd call and return to the 1st call (landline call), press [OFF], then press [\~].
Answering a landline call during a cellular call
1 Press [MENU] during a cellular call. 2 [▲]: "Hold" → [SELECT] 3 To answer the 2nd call:
Press [\~] while the 2nd call is being received. 4 To hang up the 2nd call and return to the 1st call (cellular call), press [OFF], then press [CELL].*1 *1 If you press [CELL] and the selection list is displayed, select the desired cellular line and press [SELECT].
Making/Answering Calls Using the Handset
Power backup operation for landline
When a power failure occurs, the charged handset temporarily supplies power to the base unit (power backup mode). This allows you to make and receive landline calls using a handset during a power failure. The base unit will not perform any other functions. However, some functions such as Caller ID and phonebook are available only when using a handset other than the handset supplying power to the base unit. You can program "Power failure" and the default setting is "Auto" (page 59).
Important:
- If a handset is not placed on the base unit when a power failure occurs, "Power outage Press OFF" is displayed. After pressing [OFF] on the handset, place it on the base unit to start power backup mode.
- Power backup mode will not work if the battery level of the power supplying handset is ☐ or ☐
- Do not lift the power supplying handset from the base unit during power backup mode.
When the batteries are fully charged, operating time of the handset in power backup mode varies depending on usage.
- Continuous use of the handset in power backup mode: 1 hours max.
- Continuous use of the handset other than a handset in power backup mode: 1.5 hours max.
- Not in use in power backup mode: 1.5 hours max.
Making calls during a power failure
■ When only 1 handset is registered:
1 Lift the handset and dial the phone number.
2 Within 1 minute, place the handset on the base unit.
- Wait until speakerphone is turned on automatically and the call is made. 3 When the other party answers the call, keep the handset on the base unit and talk using the speakerphone. 4 When you finish talking, press [OFF]
■ When 2 or more handsets are registered: You should leave one handset on the base unit for supplying the power, and use another handset for making calls.
Note:
- The range of the base unit is limited during a power failure. Please use the handset close to the base unit.
Making a call using the redial list
■ When only 1 handset is registered:
1 Lift the handset. 2 [▶] REDIAL 3 [▲]: Select the desired entry. 4 Within 1 minute, place the handset on the base unit.
- Wait until speakerphone is turned on automatically and the call is made.
■ When 2 or more handsets are registered:
You should leave one handset on the base unit for supplying the power, and use another handset for making calls.
Making a call using the phonebook
There must be at least 2 handsets registered to the base unit in order for the phonebook feature to be used during a power failure.
You should leave one handset on the base unit for supplying the power, and use another handset for making calls.
Making/Answering Calls Using the Handset
Answering calls during a power failure
■ When only 1 handset is registered:
1 When the unit rings, keep the handset on the base unit and press [☐] or [☐].
- Speakerphone is turned on.
2 When you finish talking, press [OFF].
■ When 2 or more handsets are registered:
When the unit rings, use a handset which is not supplying power to the base unit.
- Do not use or lift the handset which is placed on the base unit during power backup mode.
Note:
- The range of the base unit is limited during a power failure. Please use the handset close to the base unit.
Making cellular calls
Important:
- The unit cannot be used to talk on 2 cellular lines at the same time.
- Only 1 Bluetooth device can be used with the unit at a time 4 .
- Before making calls, confirm that the corresponding CELL indicator on the base unit lights up (page 17). *1 You cannot use a Bluetooth headset to talk on a cellular line.
1 Dial the phone number.
• To correct a digit, press [CLEAR].
2 Press [CELL 1] or [CELL 2].
3 When the other party answers, speak into the microphone.
4 When you finish talking, press [SP-PHONE].
Note:
- While on a call, you can switch from the base unit to the handset:
- Press [INTERCOM] on the base unit. → Select the desired handset number on the base unit. → Press [→] on the handset. → Press [SP-PHONE] on the base unit.
- If the handset is on the base unit, simply lift it.
- With the call sharing mode on (page 58), press [CELL] 1 on the handset. → [◆]: Select the desired cellular phone. → [SELECT] → Press [SP-PHONE] on the base unit.
*1 The call is taken when:
- Only 1 cellular phone is paired.
- A specific line is set to make cellular calls (page 23).
Adjusting the speaker volume
Press [▲] or [▼] repeatedly while talking.
Note:
- The speaker volume you set is kept for each line (landline and cellular lines).
Making a call using the redial list
The last 10 phone numbers dialed are stored in the redial list (48 digits max. each).
1 [REDIAL] 2 [▲]: Select the desired entry. 3 Press [CELL 1] or [CELL 2].
Erasing a number in the redial list
1 [REDIAL] 2 [◆]: Select the desired entry. → [ERASE] 3 [▲]: "Yes" → [SELECT] → [EXIT]
Making landline calls
1 Dial the phone number. • To correct a digit, press [CLEAR].
2 [SP-PHONE]
3 When the other party answers, speak into the microphone.
4 When you finish talking, press [SP-PHONE].
Note:
- While on a call, you can switch from the base unit to the handset:
- Press [ ] on the handset, then press [SP-PHONE] on the base unit with the call sharing mode on (page 58).
- If the handset is on the base unit, simply lift it.
Making a call using the redial list
The last 10 phone numbers dialed are stored in the redial list (48 digits max. each).
1 [REDIAL] 2 [◆]: Select the desired entry. 3 [SP-PHONE]
Making/Answering Calls Using the Base Unit
Pause (for PBX/long distance service users)
A pause is sometimes required when making calls using a PBX or long distance service. When storing a calling card access number and/or PIN in the phonebook, a pause is also needed (page 50).
Example: If you need to dial the line access number "9" when making outside calls with a PBX:
1 9 → [PAUSE]
2 Dial the phone number. → [SP-PHONE]
Note:
- A 3.5 second pause is inserted each time [PAUSE] is pressed.
Answering calls
When a landline call is being received, the SP-PHONE indicator flashes rapidly. When a cellular call is being received, the CELL indicator and SP-PHONE indicator flash rapidly.
1 Press [SP-PHONE] when the unit rings.
- You can also answer the cellular call by pressing [CELL 1] or [CELL 2].
2 Speak into the microphone.
3 When you finish talking, press [SP-PHONE].
Adjusting the base unit ringer volume
Press [▲] or [▼] repeatedly to select the desired volume while ringing.
- To turn the ringer off, press and hold [▼] until the unit beeps.
Note:
- You can adjust the ringer volume for cellular call and landline call by programming (page 60).
- The ringer volume you set is kept for each line (landline and cellular lines).
Useful features during a call
Hold
1 Press [HOLD] during an outside call.
2 To release hold on the cellular line: Press [CELL 1] or [CELL 2].
- A handset user can take the call: [CELL] *1 → [▲] : Select the corresponding cellular phone. → [SELECT]
*1 The call is taken in the following situations.
- Only 1 cellular phone is paired.
- A specific line is set to make cellular calls (page 23).
To release hold on the landline: Press [SP-PHONE].
- A handset user can take the call by pressing [→]
Note:
- While a landline call is on hold, the SP-PHONE indicator flashes.
- After holding for 10 minutes, the call is disconnected.
Mute
1 Press [ERASE/MUTE] during a call.
• The SP-PHONE indicator flashes.
2 To return to the call, press [ERASE/MUTE].
Flash for landline calls
[FLASH] allows you to use the special features of your host PBX such as transferring an extension call, or accessing optional telephone services.
Note:
- To change the flash time, see page 58.
Making/Answering Calls Using the Base Unit
For call waiting or Call Waiting Caller ID service users
To use call waiting or Call Waiting Caller ID, you must first subscribe with your phone service provider.
This feature allows you to receive calls while you are already talking on the phone. If you receive a call while on the phone, you will hear a call waiting tone.
If you subscribe to both Caller ID and Call Waiting with Caller ID services, the 2nd caller's information is displayed on the unit that is in use after you hear the call waiting tone.
1 Press [CALL WAIT] to answer the 2nd call. 2 To switch between calls, press [CALL WAIT].
Note:
- Please contact your phone service provider for details and availability of this service in your area.
Temporary tone dialing for landline calls (for rotary/pulse service users)
Press ☒ before entering access numbers which require tone dialing.
Recording a telephone conversation (2-way recording)
This unit can record a telephone conversations during landline calls.
1 Press [RECORD] during a landline call.
- The total recordable time is displayed.
- The unit announces to both parties that the recording will start. • The unit starts recording.
2 To stop recording, press [STOP].
- You can continue the conversation with the outside caller.
Note:
- When recording is completed:
– The total number of recordings will be added to the number of messages in the answering system. -【▶】on the base unit flashes. - "New message" is displayed. – Audible message alert sounds on base unit (page 79).
- To listen to the recorded conversation, refer "Listening to messages", page 77.
- 2 way recording is not available during conference calls.
- The recording will end in the following situations:
- When [FLASH] is pressed.
- When the hold or intercom feature is used.
- When lifting the handset to switch to the receiver.
- When memory is/becomes full:
- "Memory full" is shown on the display.
- An error tone sounds.
Call share
You can join an existing outside call.
To select the line that is being used for the call:
- for a cellular line press [CELL 1] or [CELL 2].
- for the landline press [SP-PHONE].
Note:
- When another user joins the conversation, the interrupt tone sounds.
- A maximum of 3 parties (including 1 outside party) can join a conversation using 2 extensions. (3-way conference)
- To prevent other users from joining your conversations with outside callers, turn call sharing mode off (page 58).
- A 2nd party cannot join an outside call that is being recorded (page 27).
Transferring calls, conference calls
Outside calls can be transferred or a conference call with an outside party can be made between a handset and the base unit.
Making/Answering Calls Using the Base Unit
1 During an outside call, press [INTERCOM].
When 2 or more handsets are registered:
- To page a specific handset, enter the handset number.
- To page all handsets, press ☐ or wait for a few seconds.
2 Wait for the paged party to answer.
- If the paged party does not answer, press [INTERCOM] to return to the outside call.
3 To complete the transfer: Press [SP-PHONE].
- The outside call is being routed to the handset.
To establish a conference call: Press [CONF].
- To leave the conference, press [SP-PHONE]. The other two parties can continue the conversation.
- To put the outside call on hold, press [HOLD]. To resume the conference, press [CONF].
Transferring a cellular call between the base unit and a cellular phone
Transferring a cellular call from the base unit to a cellular phone
During a cellular call, press and hold [CELL 1] or [CELL 2] until the SP-PHONE indicator goes out.
- The cellular call is transferred to the cellular phone.
Transferring a cellular call from a cellular phone to the base unit
During a conversation using a cellular phone, press [CELL 1] or [CELL 2].
- The cellular call is transferred to the base unit.
Answering a second call
If you receive a call while talking on the phone, the interrupt tone sounds (page 60) and the
2nd caller's information is displayed if you subscribe to Caller ID service (page 67).
Answering a cellular call during a landline call
1 Press [HOLD] during a landline call. 2 To answer the 2nd call: Press [CELL 1] or [CELL 2]. 3 To hang up the 2nd call and return to the 1st call (landline call), press [SP-PHONE] 2 times.
Answering a landline call during a cellular call
1 Press [HOLD] during a cellular call. 2 To answer the 2nd call: [SP-PHONE] 3 To hang up the 2nd call and return to the 1st call (cellular call), press [SP-PHONE], then press [CELL 1] or [CELL 2].
Answer by voice command
This feature allows you to answer incoming calls automatically with your voice. When your voice is detected, answered calls will automatically be directed to the speakerphone mode. The default setting is "Off".
- When the handset is on the base unit:
- Only the handset performs voice detection. To avoid interfering with voice detection, the base unit will not ring.
- When the handset is not on the base unit:
- All registered handsets and base unit perform voice detection.
Important:
- Before using this feature, we recommend that you test it and adjust the voice command sensitivity as needed.
- For best performance, answer the call within a range of 50 cm (20 inches) to 1 m (40 inches).
- Once this feature is turned on, the Talking Caller ID will be activated automatically. To turn off the Talking Caller ID feature, see page 56, 60.
- Ambient noise (dog barking, TV sound, etc.) may cause the unit to answer an incoming call.
- When this feature is used, the unit disconnects the call automatically after 3 minutes. You may hear a warning tone and the unit may prompt you to press ✝ to continue talking 1 minute before disconnecting.
- Once you press any key operations during a call, the call is continued.
Note:
- When a call is manually answered using a unit, voice detection will end, and the answer by voice command feature stops operating.
- This feature is not available while baby monitor is set to "On" (page 59).
- The configured settings are common for all lines (landline and cellular lines).
Turning answer by voice command on/off
Handset / Base unit
1 Press and hold ☒ for about 2 seconds. 2 [◆]: Select the desired setting. →
[SAVE]
• If you selected "Off", go to step 4 to exit. 3 [YES] → The unit will display and announce the voice command guidance.
• We recommend answering calls as demonstrated.
• There must be a 1 second pause between the two phrases.
4 Proceed with the operation for your unit. Handset:
- To stop, press [STOP].
- To playback, press [YES].
- To exit, press [OFF].
Base unit:
- To stop, press [▶■].
- To playback, press [YES].
- To exit, press [EXIT].
Note for handset:
- When answer by voice command is set to "On", only use "Tone 1" to "Tone 5" as your ringer tone (page 54, 56). If another ringer tone is selected, the unit will automatically use the default ringer tones (Landline: "Tone 1", CELL 1: "Tone 2", CELL 2: "Tone 4").
Answer by voice command sensitivity
You can adjust the sensitivity of the answer by voice command. Increase or decrease the sensitivity to adjust the sound level needed to trigger the answer by voice command feature.
Handset / Base unit
1 [MENU]# 1 0 7 2 【◆】: Select the desired setting. →
【SAVE】 3 Proceed with the operation for your unit.
Handset: [OFF]
Base unit: [EXIT]
Answer by Voice Command
Answering calls
Handset / Base unit
1 When the unit rings, speak clearly as demonstrated by the voice guidance. Refer to step 3, "Turning answer by voice command on/off", page 35. 2 When you finish talking, press [OFF] on the handset or [SP-PHONE] on the base unit.
Note for base unit:
- In step 1, you need to answer a call while the base unit is not ringing or not announcing caller information.
Intercom calls can be made:
- between handsets
– between a handset and the base unit
Note:
- When paging unit(s), the paged unit(s) beeps for 1 minute.
- If you receive an outside call while talking on the intercom, the interrupt tone sounds (page 56, 60).
- Handset: To finish intercom, press [OFF]. To answer the call, press [ ] or [CELL].
- Base unit: To finish intercom, press [SP-PHONE]. To answer the call, press [SP-PHONE] again or the corresponding cellular line key ([CELL 1] or [CELL 2]).
- To change the handset ringer volume and ringer tone for intercom, see page 56.
Handset
1 [MENU] → [♦]: "Intercom" → [SELECT] 2 [▲]: Select the desired unit or "Voice paging". → [SELECT] - If you select "Voice paging", speak into the microphone after the beep. Your voice will be heard using the speakers of the base unit and all handsets, until a paged party answers your page or until you press [OFF]. After the other party answers, the speakerphone mode is turned on.
3 When you finish talking, press [OFF].
Note:
- You can also use the [INTERCOM] soft key, if displayed, to make intercom calls.
- You cannot use voice paging if other units are in use.
Base unit
1 Press [INTERCOM]
When 2 or more handsets are registered:
- To page a specific handset, enter the handset number.
- To page all handsets, press 0 or wait for a few seconds.
2 When you finish talking, press [SP-PHONE].
Handset
1 Press [ ] to answer the page. 2 When you finish talking, press [OFF].
Base unit
1 Press [SP-PHONE] to answer the page. 2 When you finish talking, press [SP-PHONE].
This feature allows the handset or base unit to answer intercom calls automatically when it is called. You do not need to press [ ] on the handset or [SP-PHONE] on the base unit. When this feature is set to "On", the monitoring handset or base unit for the baby monitor feature (page 65) will also answer baby monitor calls automatically. The default setting is "Off".
Handset / Base unit
1 [MENU]#273 2 [ ]: Select the desired setting. →
[SAVE] 3 Proceed with the operation for your unit
Handset: [OFF]
Base unit: [EXIT]
Note:
- This feature is not available for all handsets paging and voice paging even if it is turned on.
Call Block
Call block
■ Pre-installed block list:
The unit can block calls when receiving a call from a phone number in the pre-programmed call block list (14,000 items). The database is supplied by YouMail Inc.
■ Manual call block:
You can press the [CALL BLOCK] button in the following situations to disconnect the current call and add a phone number to the call block list:
– when an incoming call is being received
– when an incoming call is being recorded by the answering system
– when talking on an outside call
Once a phone number has been added to the call block list, the unit will block calls from that phone number in the future.
Handset / Base unit
1 Press [CALL BLOCK] in the situations shown above.
2 Confirm the call block number and press [YES].
– The call block number is stored in the call block list, a confirmation tone sounds*1 and "Call blocked" is displayed, and then the call is disconnected.
*1 Confirmation tones are used with permission of © 2018 Copyrights Vision Inc.
Note:
- If the call has no phone number, the call is blocked but it is not stored in the call block list.
• The call block feature is not available:
– for intercom calls or calls received by call waiting.
- when a landline call (or cellular call) is being received during a cellular call (or landline call).
- Blocked calls are logged in the caller list.
Storing unwanted callers
The unit can block calls by storing the desired items in the call block list beforehand (Caller ID subscribers only).
- "Single number" *1/"Single #"*2: The unit blocks calls from specific phone numbers stored in the call block list.
- “Range of numbers”*1/“Range of #”*2: The unit blocks calls that begin with a number stored in the call block list, such as a toll-free phone number prefix or certain area codes.
- "Block unknown CID" 1 /"Block unknown" 2 : The unit blocks calls that have no phone number.
*1 Handset
*2 Base unit
Single phone numbers and ranges of numbers can be stored in the call block list up to 2,000 items in total.
Blocking unwanted callers:
When a call is received, the unit will not ring while caller information is being received. If the caller's phone number matches an entry in the call block list, the unit emits no sound to the caller, and disconnects the call.
*1 If you want the first ring to sound, select "Yes" in "Turning the first ring on/off" (page 40).
Storing a single phone number
Important:
- We recommend storing 10 digits (including the area code). If only 7 digits are stored, all numbers that have the same last 7 digits will be blocked.
Adding call blocked numbers from the caller list
Handset
■ When a cellular phone is paired: 1 [▼] CID
2 [▲]: Select the desired entry to be blocked.
- To edit the number:
[SELECT] → Press ☒ (Edit) repeatedly until the phone number is shown in the 10-digit format. → [SAVE] → [◀]: "Call block/Unblock" → [SELECT] → Go to step 4. 3 [CALL BLOCK] 4 [▲]: "Yes" → [SELECT] 5 Edit the phone number if necessary (24 digits max.). → [SAVE] → [OFF]
■ When a cellular phone is not paired:
1 [▼] CID
2 [◆]: Select the desired entry to be blocked.
- To edit the number: [MENU] → [◀]: “Edit” → [SELECT]
Press [EDIT] repeatedly until the phone number is shown in the 10-digit format. → [SAVE] → [◀]: “Call block/Unblock” → [SELECT] → Go to step 4.
3 [CALL BLOCK] 4 [▲]: "Yes" → [SELECT] 5 Edit the phone number if necessary (24 digits max.). → [SAVE] → [OFF]
Base unit
1 [CID] 2 [▲]: Select the entry to be blocked.
- To edit the number: Press [EDIT] repeatedly until the phone number is shown in the 10-digit format.
3 [CALL BLOCK] 4 [▲]: "Yes" → [SELECT] 5 Edit the phone number if necessary (24 digits max.). → [SAVE] → [EXIT]
Adding call blocked numbers manually
Handset
1 [CALL BLOCK]
2 [▲]: "Single number" → [SELECT] 3 [MENU] → [▲]: "Add" → [SELECT] 4 Enter the phone number (24 digits max.). → [SAVE] → [OFF]
Base unit
1 [CALL BLOCK] 2 [▲]: "Single #" → [SELECT] 3 [ADD] 4 Enter the phone number (24 digits max.). → [SAVE] → [EXIT]
Storing a range of numbers
Handset
1 [CALL BLOCK] 2 [▲]: "Range of numbers" → [SELECT] 3 [MENU] → [▲]: "Add" → [SELECT] 4 Enter the desired number (2-8 digits). → [SAVE] → [OFF]
Base unit
1 [CALL BLOCK] 2 [▲]: "Range of #" → [SELECT] 3 [ADD] 4 Enter the desired number (2-8 digits). → [SAVE] → [EXIT]
Blocking incoming calls that have no phone number
You can block calls when no phone number is provided, such as private callers or out of area calls.
Handset
1 [CALL BLOCK] 2 [▲]: "Block unknown CID" → [SELECT] 3 [▲]: Select the desired setting. → [SAVE] → [OFF]
Call Block
Base unit
1 [CALL BLOCK]
2 [▲]: "Block unknown" → [SELECT]
3 [▲]: Select the desired setting. → [SAVE] → [EXIT]
Turning the first ring on/off
You can choose whether the first ring sounds when a call is received.
"Yes": The first ring for all calls will be heard, including calls from blocked phone numbers. "No" (default): The first ring is muted for all calls. If this setting is selected, the unit will never ring for calls from blocked phone numbers.
Handset
1 [CALL BLOCK]
2 [▲]: "One ring for blocked call"
→ [SELECT]
3 [▲]: Select the desired setting. → [SAVE] → [OFF]
Base unit
1 [CALL BLOCK]
2 [▲]: "Ring once" → [SELECT]
3 [◆]: Select the desired setting. → [SAVE] → [EXIT]
Viewing/editing/unblocking call block numbers
Handset
1 [CALL BLOCK]
2 [▲]: "Single number" or "Range of numbers" → [SELECT]
3 [▲]: Select the desired entry. - After viewing, press [OFF] to exit.
4 To edit a number: [EDIT] → Edit the number. → [SAVE] → [OFF]
To unblock a number:
[UNBLOCK] → [▲]: "Yes" → [SELECT] → [OFF]
Base unit
1 [CALL BLOCK]
2 [◆]: "Single #" or "Range of #" → [SELECT]
3 [◆]: Select the desired entry.
• After viewing, press [EXIT] to exit.
4 To edit a number:
[EDIT] → Edit the number. → [SAVE]
→ [EXIT]
To unblock a number:
[UNBLOCK] → [▲]: "Yes" → [SELECT] → [EXIT]
Note:
- When editing, press the desired dial key to add digits and press [CLEAR] to erase digits.
Unblocking all call block numbers
Handset
1 [CALL BLOCK]
2 [▲]: "Single number" or "Range of numbers" → [SELECT]
3 [MENU] → [◆]: "Unblock all" → [SELECT]
4 [▲]: "Yes" → [SELECT]
5 [▲]: "Yes" → [SELECT] → [OFF]
Base unit
1 [CALL BLOCK]
2 [◀]: "Single #" or "Range of #" → [SELECT]
3 [UNBLOCK]
4 [▲]: "Yes" → [SELECT]
5 [▲]: "Yes" → [SELECT] → [EXIT]
Displaying and clearing the blocked call count
Handset
1 [CALL BLOCK] 2 [▲]: "Blocked calls count" → [SELECT]
• To exit, press [OFF].
3 [CLEAR]
4 [▲]: "Yes" → [SELECT] → [OFF]
Base unit
1 [CALL BLOCK] 2 [▲]: "Blocked count" → [SELECT]
• To exit, press [EXIT]. 3 [CLEAR] 4 [▲]: "Yes" → [SELECT] → [EXIT]
Enhanced Call Block
Automated call block
With automated call block, the unit screens incoming calls before ringing for allowed calls, or ends the calls without ringing for calls identified as robocalls, telemarketing calls, or other undesirable calls (Caller ID subscribers only).
The unit will play the greeting message for automated call block and prompt the caller to enter an access code in order for the unit to identify whether the call is automated. You can set the unit to block or unblock mode. The default setting is "Unblock".
Note:
- The unit connects the call without prompting to enter the access code in the following situations:
– the caller's phone number matches an entry in the phonebook (page 47).
– the caller's name matches an entry in the allow name list (page 43).
– the caller's phone number is memorized in the allowed number database (page 42).
- If you have your cell phone connected via Link to Cell, even if automated call block is set to "Block", incoming cellular calls will still be connected automatically without requiring the access code.
- If the number is stored in the call block list (page 38), the unit disconnects the call without playing the greeting message for automated call block.
- The automated call block feature is not available:
- when a landline call is being received during a cellular call with base unit.
– during power backup operation (page 29).
- When the answering system answers a call from a caller who is not registered in the phonebook, allow name list, or allowed number database, the following operations are delayed:
- answering a call
- remote turn on
- toll saver
- When the unit receives a call from a caller who is not registered in the phonebook,
Allow name list, or allowed number database in the following situations, the unit shifts to standby mode:
- when searching the phonebook, caller list, call block list, or allow name list
- when programming (depending on settings)
- when using the answering system
- when paging all handsets or base unit
- Blocked calls are logged in the caller list. We recommend you to check the caller list periodically. If necessary, register the entry to the phonebook or allow name list to connect the call next time.
Allowed number database
Once the caller enters the access code, the caller's phone number is memorized in the allowed number database as an unblocked number. Callers from this database are allowed to connect without the access code from their next call.
100 entries can be stored to the database (22 digits max. each).
Note:
- When the database memory is full, the latest call received will replace the oldest number stored in the list.
- The numbers stored in the database will be erased when you change the access code (page 43).
- The numbers stored in the database cannot be displayed.
Setting the automated call block
Handset / Base unit
2 [MENU]: Select the desired setting. → [SAVE]
3 [▲]: "Yes" → [SELECT]
4 Proceed with the operation for your unit.
Handset: [OFF]
Base unit: [EXIT]
Note:
- We recommend you perform a test run of the automated call block procedure to
ensure that the automated call block feature is set correctly.
Changing the access code
If the unit answers undesirable calls such as robocalls even though the automated call block function is on, change the access code (3 digits max.). The default setting is "1".
Handset
1 [MENU]#789 2 [CLEAR] 3 Enter the new access code. → [SAVE] 4 [OFF]
Displaying and clearing the blocked call count
The total number of blocked calls (up to 65,000) will be displayed.
Handset
1 [MENU]#790 - To exit, press [OFF]. 2 [CLEAR] 3 [▲]: "Yes" → [SELECT] → [OFF]
Base unit
1 [MENU]#790 - To exit, press [EXIT]. 2 [CLEAR] 3 [▲]: "Yes" → [SELECT] → [EXIT]
Adding to the allow name list
You can allow specific callers to pass through by adding the caller's name to the allow name list even if you do not know the caller's number.
You can store up to 100 names (16 characters max.). If the name stored in the allow name list matches the incoming Caller ID, the unit rings. Callers listed in the allow name list are not required to enter the access code.
Adding allowed names from the caller list
Handset
■ When a cellular phone is paired: 1 [▼]CID 2 [◆]: Select the desired entry. →
[SELECT] 3 [SAVE] 4 [▲]: "Allow name" → [SELECT] → [OFF]
■ When a cellular phone is not paired:
1 [▼] CID
2 [▲]: Select the desired entry. → [MENU]
3 [▲]: "Save allow name" → [SELECT] → [OFF]
Base unit
1 [CID] 2 [▲]: Select the desired entry. → [SAVE] 3 [◆]: "Allow name" → [SELECT] → [EXIT]
Viewing/erasing an entry
Handset
1 [MENU]#794 2 [▲]: Select the desired entry. ● After viewing, press [OFF] to exit. 3 [ERASE] → [▲]: "Yes" → [SELECT]
→ [OFF]
Base unit
1 [MENU]#794 2 [▲]: Select the desired entry. - After viewing, press [EXIT] to exit. 3 [ERASE] → [▲]: "Yes" → [SELECT]
→ [EXIT]
Enhanced Call Block
Erasing all entries
Handset / Base unit
1 [MENU]#794 2 [ERASE] → [▲]: "Yes" → [SELECT] 3 [▲]: "Yes" → [SELECT] 4 Proceed with the operation for your unit.
Handset: [OFF]
Base unit: [EXIT]
Greeting message for automated call block
Handset
When the unit answers a call, a greeting message is played to the caller.
You can use either:
– your own greeting message and pre-recorded greeting message – pre-recorded greeting message
Recording a greeting message for automated call block
Using this feature, the unit can play your own greeting message and pre-recorded greeting message.
Example of your own greeting message: "Hi, you have reached xxxxxxx (Name)."
"Thank you for calling. You have reached xxxxxxx (Name)."
"Hi, you have reached the xxxx (Name) residence."
1 [MENU] #791
2 [▲]: "Yes" → [SELECT]
3 After a beep sounds, hold the handset about 20 cm (8 inches) away and speak clearly into the microphone (2 minutes max.).
4 Press [STOP] to stop recording.
5 The unit will play the recorded greeting message for automated call block. → [OFF]
Resetting to the pre-recorded greeting message for automated call block
This procedure will erase your greeting message for automated call block and reset to the pre-recorded one.
1 [MENU] #793
2 [YES] → [OFF]
Playing back the greeting message for automated call block
1 [MENU] #792
2 To exit, press [OFF].
Telemarketing call block
In addition to Automated call block (page 42), you can use Telemarketing call block to further screen calls to stop telemarketer calls from getting through.
Using this feature, you can ask callers to say their names, and after checking the names, you can decide whether to answer the calls or not.
Note:
- This feature is only available for landline calls.
- While screening calls, the call waiting feature is unavailable (page 26, page 33).
- Telemarketing call block guidance and caller name announcement cannot be heard using a Bluetooth headset.
Operating telemarketing call block
Handset
1 During a landline call, lift the handset and then press [TELE.BLK.]. - The unit prompts callers to say their names.
2 To answer the call:
Press [~] or [◀].
To block the call:
Enhanced Call Block
Press [CALL BLOCK]¹ → [YES].
- The unit announces that the call will be disconnected, and disconnects the call.
- The caller will be registered to call block list.
*1 The user can still answer the call after pressing [CALL BLOCK]. To answer the call, press [◀] or [◀].
Base unit
1 Press (TELE.BLK.) during a landline call.
- The unit prompts callers to say their names.
2 To answer the call:
Press [SP-PHONE].
To block the call:
Press [CALL BLOCK] 1 → [YES].
- The unit announces that the call will be disconnected, and disconnects the call.
- The caller will be registered to call block list.
*1 The user can still answer the call after pressing [CALL BLOCK]. To answer the call, press [SP-PHONE].
Note:
- If there is no response from the caller, and the user does not press any keys in step 2 within 10 seconds, the unit will announce that the call will be disconnected, and disconnects the call.
Note for handset:
- While on the charger, the [TELE.BLK.] key is not available. Lift the handset from the charger to use this feature.
- To use this feature, set the Auto talk feature to "Off".
One ring scam alert
The one ring scam alert feature notifies the user when calling back a number that is judged to be a scam call. This can help reduce the risk of calling back expense international numbers.
During an incoming call, if the caller disconnects the call after 1 or 2 rings, the call is judged to be a scam call. Depending on the number of rings made before a call is
disconnected, a non-malicious call may also be judged as a scam call. The default setting is "1 or 2 rings".
Note:
- The call will not be judged as a scam call in the following conditions:
- When a call is answered by pressing 【】 on the handset or [SP-PHONE] on the base unit (page 25, 32).
- When a call is screened by pressing [TELE.BLK.] (page 44).
- When a call is answered with Answer by voice Command (page 35).
- When a call is blocked with the call block feature (page 38).
- When automated call block is set to "Block" (page 42).
- When a call is answered by the answering system. To use this feature, set the ring count for the answering system to more than the number of rings of the one ring scam alert (page 81).
- When a call is answered by a voicemail service. To use this feature, set the ring count for the voicemail service to more than the number of rings of the one ring scam alert (call your service provider) (page 83).
- When the caller's phone number matches an entry in the phonebook (page 47).
- When you do not subscribe to the caller ID service.
- When the call is disconnected before receiving caller ID information.
- During call waiting, the unit cannot judge whether the 2nd caller is a scam call.
Enhanced Call Block
Setting the number of rings for one ring scam
Handset / Base unit
1 [MENU]#798
2 [▲]: Select the desired setting. →
[SAVE]
| “1 ring”Judge 1 ring as a scam call. |
| “1 or 2 rings”Judge 1 or 2 rings as a scam call. |
| “Off”Turns off the setting and does not judge as scam calls. |
Note:
- When a phone number is judged as a scam call, “!” will be displayed in the caller list unless:
– the number is identified as Automated call block.
– the number is stored in the call block list.
Phonebook
You can add 3,000 names (16 characters max.) and phone numbers (24 digits max.) to the phonebook, and assign each phonebook entry to the desired group (page 48). The following groups are available:
- Group 1: "Home" *1 (default)
- Group 2: "Cell 1" *1
- Group 3: "Cell 2" *1
- Group 4-9: You can change the group name for each group.
*1 For groups 1-3, the group names cannot be changed.
Important:
- All entries can be shared by the base unit and any registered handset.
- You can copy phonebook entries from a Bluetooth cellular phone to the unit's phonebook (page 70).
Adding phonebook entries
Handset
1 [◀] □□ → [MENU] 2 [▲]: "Add new entry" → [SELECT] 3 Enter the party's name. → [OK] 4 Enter the party's phone number. → [OK] 5 [▲]: Select the desired group. → [SELECT] 2 times → [OFF]
Note:
- In step 3, you can switch the language for entering characters.
→ [▲]: Select the desired language. → [OK]
Entering characters
Press the dial key that corresponds to the desired character. Press repeatedly to scroll through the available characters.
The following operations are also available.
| Key Operation |
| ※ Switch between the uppercase and lowercase (A ↔ a) |
| [◀] [▶] | Move the cursor |
| [CLEAR] | Erase the character or number● To erase all, press and hold it. |
- To enter another character that is located on the same dial key, first press [▶] to move the cursor to the next space.
- If you do not press any dial key within 2 seconds after entering a character, the character is fixed and the cursor moves to the next space.
Storing a redial list number to the phonebook
Phone numbers of up to 24 digits can be stored in the phonebook.
Handset
■ When a cellular phone is paired:
1 [▶] REDIAL 2 [◆]: Select the desired entry. → [MENU] 3 [▲]: "Save" → [SELECT] 4 To store the name, continue from step 3, "Editing entries", page 49.
■ When a cellular phone is not paired:
1 [▶] REDIAL 2 [◆]: Select the desired entry. → [SAVE] 3 To store the name, continue from step 3, "Editing entries", page 49.
Base unit
1 [REDIAL] 2 [▲]: Select the desired entry. → [SAVE] → [EXIT]
Note for handset and base unit:
- The name stored in the phonebook will be reflected in the redial list after you make a call using that phonebook entry.
Phonebook
Note for base unit:
- If you stored redial list number to the phonebook using the base unit, the entry is automatically assigned to "Home".
- If you want to edit the caller name or the group, you can do so using the handset (page 49).
Handset
■ When a cellular phone is paired:
1 [▼] CID 2 [▲]: Select the desired entry. → [SELECT] - To edit the number, press ☒ (Edit) repeatedly until the phone number is shown in the desired format. 3 [SAVE] 4 [▲]: "Phonebook" → [SELECT] 5 Continue from step 3, "Editing entries", page 49.
■ When a cellular phone is not paired:
1 [▼] CID
2 [▲]: Select the desired entry. → [MENU]
- To edit the number:
[◀]: “Edit” → [SELECT]
Press [EDIT] repeatedly until the phone number is shown in the desired format. → [SAVE] → [◀]: “Phonebook” → [SELECT] → Go to step 4. 3 [▲]: "Save phonebook" → [SELECT] 4 Continue from step 3, "Editing entries", page 49.
Base unit
1 [CID] 2 [▲]: Select the desired entry.
- To edit the number, press [EDIT] repeatedly until the phone number is shown in the desired format.
3 [SAVE]
4 [▲]: "Phonebook" → [SELECT]
5 [EXIT]
Note for base unit:
- If you stored caller information to the phonebook using the base unit, the entry is automatically assigned to "Home".
- If you want to edit the caller name or the group, you can do so using the handset (page 49).
Groups
Groups can help you find entries in the phonebook quickly and easily. You can change the group name for groups 4-9 ("Friends", "Family", etc.). By assigning different ringer tones for different groups of callers, you can identify who is calling (ringer ID), if you have subscribed to Caller ID service.
Changing group names/setting ringer ID
Handset
1 [◀] □□ → [MENU] 2 [▲]: "Group" → [SELECT] 3 【◆】: Select the desired group. →
【SELECT】
- If you selected "Home", "Cell 1", or "Cell 2", go to step 5.
4 To change group names
[◆]: “Group name” → [SELECT] → Edit the name (10 characters max.). → [SAVE]
5 To set group ringer tone
[▲]: Select the current setting of the group ringer tone. → [SELECT] → [▲]: Select the desired ringer tone. → [SAVE]
6 [OFF]
Finding and calling from a phonebook entry
Once you have found the desired entry using one of the following 4 methods, make a call with your unit.
Phonebook
■ Using a cellular line:
Handset
1 [CELL]
- The unit starts dialing immediately in the following situations.
- Only 1 cellular phone is paired.
- A specific line is set to make cellular calls (page 23).
Handset / Base unit
1 Proceed with the operation for your unit.
Handset: [◀] □□
Base unit: [□□]
2 [▲]: Select the desired entry.
Searching by first character
Handset / Base unit
1 Proceed with the operation for your unit.
Handset: [◀] □□
Base unit: [□□]
2 Press the dial key (0 - 9 or #) which contains the character you are searching for.
3 [◆]: Scroll through the phonebook if necessary.
Searching by query
You can narrow down the search to enter the first characters of a name.
Handset / Base unit
1 Proceed with the operation for your unit.
Handset: [◀] □□ → *
Base unit: [□□] → *
2 To search for the name, enter the first characters (up to 4) in uppercase.
3 [OK]
4 [◆]: Scroll through the phonebook if necessary.
Note:
- In step 2, you can switch the language for entering characters.
→ [▲]: Select the desired language. → [OK]
Searching by group
Handset / Base unit
1 Proceed with the operation for your unit.
Handset: [◀] □□
Base unit: [□□]
2 [GROUP]
3 【▲】: Select the group you want to search.
→ [SELECT] - If you select "All groups", the unit ends the group search.
4 [◆]: Select the desired entry.
Editing entries
Handset
1 Find the desired entry (page 48).
2 [MENU] → [▲]: "Edit" → [SELECT]
3 Edit the name if necessary. → [OK]
4 Edit the phone number if necessary. → [OK]
5 【◆】: Select the desired group (page 48). → [SELECT] 2 times → [OFF]
Phonebook
Erasing entries
Erasing an entry
Handset
1 Find the desired entry (page 48). 2 [MENU] → [▲]: "Erase" → [SELECT] 3 [▲]: "Yes" → [SELECT] → [OFF]
Base unit
1 Find the desired entry (page 48). 2 [ERASE] → [▲]: "Yes" → [SELECT]
→ [EXIT]
Erasing all entries
Handset
1 [◀] □□ → [MENU] 2 [▲]: "Erase all" → [SELECT] 3 【◆】: Select the desired group. → 【SELECT】 4 [▲]: "Yes" → [SELECT] 5 [▲]: "Yes" → [SELECT] → [OFF]
Base unit
1 [□] → [ERASE] 2 【◆】: Select the desired group. → 【SELECT】 3 [▲]: "Yes" → [SELECT] 4 [▲]: "Yes" → [SELECT]
Chain dial
This feature allows you to dial phone numbers in the phonebook while you are on a call. This feature can be used, for example, to dial a calling card access number or bank account PIN that you have stored in the phonebook, without having to dial manually.
Handset / Base unit
1 Proceed with the operation for your unit. Handset: During an outside call, press 【◀】□□.
Base unit: During an outside call, press [☐☐].
2 [▲]: Select the desired entry. 3 Press [CALL] to dial the number.
Note:
- When storing a calling card access number and your PIN in the phonebook as one phonebook entry, press [▲] (Pause) to add pauses after the number and PIN as necessary (page 25).
- If you have rotary/pulse service, you need to press ☒ before pressing [◀] □ on the handset or [□□] on the base unit in step 1 to change the dialing mode temporarily to tone. When adding entries to the phonebook, we recommend adding ☒ to the beginning of phone numbers you wish to chain dial (page 47).
Speed dial
You can assign 1 phone number to each of the dial keys (1 to 9) on the handset.
Adding phone numbers to speed dial keys
Handset
■ By entering phone numbers:
1 Press and hold the desired speed dial key (1 to 9). → [ADD] 2 [▲]: "Manual" → [SELECT] 3 Enter the party's name (16 characters max.). → [OK] 4 Enter the party's phone number (24 digits max.). → [OK] → [SELECT] → [OFF]
■ From the phonebook:
1 Press and hold the desired speed dial key (1 to 9). → [ADD] 2 [▲]: "Phonebook" → [SELECT] 3 [◆]: Select the desired entry. → [SAVE] → [OFF]
Note:
- If you edit a phonebook entry which is assigned to a speed dial key, the edited entry does not transfer to the speed dial key.
Editing an entry
Handset
1 Press and hold the desired speed dial key (☐ to ☐). → [MENU] 2 [◀]: "Edit" → [SELECT] 3 Edit the name if necessary. → [OK] 4 Edit the phone number if necessary. →
[OK] → [SELECT] → [OFF]
Erasing an entry
Handset
1 Press and hold the desired speed dial key (☐ to ☐). → [MENU] 2 [◀]: "Erase" → [SELECT] 3 [▲]: "Yes" → [SELECT] → [OFF]
Viewing an entry/Making a call
Handset
■ Using a cellular line:
1 Press and hold the desired speed dial key (1 to 9).
2 [CELL]
- The unit starts dialing immediately in the following situations.
- Only 1 cellular phone is paired. – A specific line is set to make cellular calls (page 23).
3 [▲]: Select the desired cellular phone.
→ [SELECT]
■ Using a landline:
1 Press and hold the desired speed dial key (1 to 9).
2 To make a call, press

Programming
To access the features, there are 2 methods.
Handset / Base unit
■ Scrolling through the display menus
1 [MENU] 2 Press [▼] or [▲] to select the desired main menu. → [SELECT] 3 Press [▼] or [▲] to select the desired item from the next sub-menus. → [SELECT] 4 Press [▼] or [▲] to select the desired setting. → [SAVE]
■ Using the direct command code
1 [MENU] → Enter the desired code.
Example: Press [MENU]#101.
For available code:
- Handset: see page 52.
- Base unit: see page 59.
2 Select the desired setting. → [SAVE]
Note:
- To exit the operation, press [OFF] on the handset or [EXIT] on the base unit.
- In the following table, < > indicates the default settings.
- In the following table indicates the reference page number.
- Display menu order and sub-menu may vary depending on your model.
Display menu tree and direct command code table
■ Handset
Main menu: ☐ "Phonebook"
| Operation | Code | |
| Viewing the phonebook entry. #280 48 | | |
Main menu: →Caller list"
| Operation | Code | |
| Viewing the caller list. #213 67 | | |
Main menu: "Answering device"
| Sub-menu 1 | Sub-menu 2 Settings Code | | | |
| Play new message | -- #323 77 | | | |
| Play all message | -- #324 77 | | | |
| Erase all message*1 | -- #325 78 | | | |
Programming
| Sub-menu 1 Sub-menu | 2 Settings Code | | | # |
| Greeting | Record greeting*1 | - #302 76 | | |
| Check greeting | - #303 77 | | |
| Pre-recorded*1 (Reset to pre-recorded greeting) | - #304 77 | | |
| New message alert*1 | Outgoing call - On/Off | On | #338 79 | |
| Outgoing call - Notification to | - |
| Outgoing call - Remote code | Activate |
| Base unit beep On | <Off> | #339 79 | |
| Settings | Ring count*1 | Toll saver 2-7 rings <4 rings> | #211 81 | |
| Recording time*1 | <3 min> 1 min Greeting only*2 | #305 82 | |
| Remote code*1 | <111> #306 80 | | |
| Screen call | <On> Off | #310 81 | |
| Answer on*1 | -- #327 76 | | | |
| Answer off*1 | -- #328 76 | | | |
Main menu: "Voicemail access" *3
| Operation | Code | |
| Listening to voicemail messages. #330 84 | | |
Main menu: ("Intercom")
| Operation | Code | |
| Paging the desired unit. #274 37 | | |
Programming
Main menu: Bluetooth"
| Sub-menu 1 Sub-menu | 2 Settings Code | | | |
| Link to cell-1:Add new device*4 (for CELL 1)-2:Add new device*4 (for CELL 2) | Connect*1/Disconnect*1 | - | #6251*5 | 22 |
| #6252*6 |
| Ringer volume Off-6 <6> | #6281*5 | 25 |
| #6282*6 |
| Ringer tone*7 | *5 | #6291*5 | - |
| #6292*6 |
| Select unit to ring*1 | Handset 1-6 | #6271*5 | 21 |
| #6272*6 |
| Ring as cell (limited)*1 | On (without Talking CID)Off | #6141*5 | 21 |
| #6142*6 |
| Alert settings*1-Alert On/Off | Off | #6101*5 | 72 |
| #6102*6 |
| Alert settings*1-Voice alert | Off | #6031*5 | 72 |
| #6032*6 |
| Alert settings*8-Alert tone | *5 | #6041*5 | 73 |
| #6042*6 |
| Pair | - | #6241*5 | 20 |
| #6242*6 |
| Unpair | - | #6111*5 | 20 |
| #6112*6 |
| Phonebook transfer | --#618 70 | | | |
| Headset | Add new device*4 | - #621 74 | | |
| Connect*1/Disconnect*1 | - #622 74 | | |
| Pair | - #621 74 | | |
| Unpair | - #612 74 | | |
Programming
| Sub-menu 1 Sub-menu | 2 Settings Code | | | |
| Settings | Auto connect*1 | Off<1 min>3 min5 min10 min | #632 22 | |
| Cell area code*1 | - #633 23 | | |
| Cell line only mode*1 | On<Off> | #157 22 | |
| Cell line select - Handset | | #634 23 | |
| Cell line select - Base unit *1 | | #*634 |
| Set PIN*1 | <0000> #619 23 | | |
| International code*1 | - #117 70 | | |
| Country code*1 | - #118 | |
| Trunk prefix*1 | - #119 | |
Main menu: ⏻Set date & time"
| Sub-menu 1 | Sub-menu 2 Settings | Code | | |
| Date and time*1 | --#101 18 | | | |
| Memo alarm Alarm1-3 | | #720 62 | |
| OnceDailyWeekly |
| Time adjustment*1,*9 | --ID auto>Manual#226-- | ID auto>Manual | #226 | - |
Main menu: "Speed dial"
| Operation | Code | |
| Viewing the speed dial entry. | #261 50 | |
Programming Main menu: Settings"
| Sub-menu 1 Sub-menu | 2 Settings Code | | | |
| Ring adjustments | Ringer volume (Incoming)*3 | Off-6 <6> #160 - | | |
| Intercom ringer volume | 1-6 <6> #175 - | | |
| Ringer tone (Incoming)*3, *7, *10 | | | |
| Intercom ringer tone*7, *10 | | | |
| Interrupt tone*11 | | #201 28 | |
| Silent mode - On/Off | On | #238 63 | |
| Silent mode - Start/End | <11:00 PM/06:00 AM> | #237 63 | |
| Silent mode - Select group | Home Cell 1 Cell 2 Group 4-9 | #241 63 | |
| Set date & time | Date and time*1 | - #101 18 | | |
| Memo alarm - Alarm1-3 | | #720 62 | |
| Time adjustment*1, *9 | | #226 - | |
| Talking caller ID | -Off#162 67 | | | |
| Low battery alert | - | OffEvery 3 hours Every 6 hours | #176 18 | |
Programming
| Sub-menu 1 Sub-menu | 2 Settings Code | | | |
| Key detector setting*12-1:Add new device (for Detector1)*13-2:Add new device (for Detector2)-3:Add new device (for Detector3)-4:Add new device (for Detector4) | Change name*1 | Detector1 | #6561- | |
| Detector2*14 | #6562*14 |
| Detector3*14 | #6563*14 |
| Detector4*14 | #6564*14 |
| Registration | - #6571- | | |
| #6572*14 |
| #6573*14 |
| #6574*14 |
| Deregistration | - #6581- | | |
| #6582*14 |
| #6583*14 |
| #6584*14 |
| One ring scam*1 | - | 1 ring<1 or 2 rings>Off | #798 45 | |
| Automated call block*1 | Block/Unblock Block | | #787 42 | |
| Allow name list | - #794 43 | | |
| Access code | <1> #789 43 | | |
| Automated call greeting | Record greeting | #791 44 | |
| Check greeting | #792 44 | |
| Pre-recorded | #793 44 | |
| Blocked calls count | - #790 43 | | |
| Call block/Unblock*1 | Single number | - #217 38 | | |
| Range of numbers | - | 39 |
| Block unknown CID (CID: Caller ID) | Block | #240 39 | |
| One ring for blocked call | Yes | #173 40 | |
| Blocked calls count | - #177 41 | | |
| Speed dial | -- #261 50 | | | |
| Record greeting*1 | -- #302 76 | | | |
Programming
| Sub-menu 1 Sub-menu | 2 Settings Code | | | |
| Voicemail*3 | Save VM access#*1(VM: Voicemail) | - #331 83 | | |
| VM tone detect*1 | Off | #332 83 | |
| LCD contrast(Display contrast) | -Level 1-4 <2> #145 - | | |
| Handset name | -- #104 65 | | | |
| Display name | - | On | #105 66 | |
| Answer by voice command*1 | On/Off On | | #106 35 | |
| Sensitivity level | LowHigh | #107 35 | |
| Auto intercom | - | On | #273 37 | |
| Key tone - | | Off | #165 - | |
| Caller ID edit(Caller ID number auto edit) | -Off | Off | #214 69 | |
| Auto talk*15 | - | On | #200 25 | |
| Set tel line*3 | Set dial mode*1 | Pulse | #120 18 | |
| Set flash time*1, *16 | 80 ms90 ms100 ms110 ms160 ms200 ms250 ms300 ms400 ms600 ms<700 ms>900 ms | #121 26 | |
| Set line mode*1, *17 | A | #122 - | |
| Call sharing*1 | -Off | Off | #194 27, | 33 |
Programming
| Sub-menu 1 Sub-menu | 2 Settings Code | | | |
| Registration Regis | ter handset | - #130 66 | | |
| Deregistration*2 | - #131 66 | | |
| Power failure | - | Off | #152 29 | |
| Change language Dis | splay | Español | #110 17 | |
| Announcement*1 | Español | #112 17 | |
Main menu: ?"customer support"
| Operation | Code | |
| Displaying customer support Web address. #680 – | | |
Main menu: Baby monitor"
| Sub-menu 1 | Sub-menu 2 Settings Code | | | # |
| On/Off | - | On<Off> | #268 64 | |
| Sensitivity level | - Low | <Middle>High | #269 65 | |
Main menu: ☑ "Key detector" *12
| Sub-menu 1 | Sub-menu 2 Settings Code | | | |
| Search | -- | #655- | | |
| Battery check | - | - |
■ Base unit
Main menu: ☐ "Phonebook"
| Operation | Code | |
| Viewing the phonebook entry. | #280 48 | |
Main menu: → "Caller list"
| Operation | Code | |
| Viewing the caller list. | #213 67 | |
Main menu: ☐ "Answer device"
| Sub-menu 1 | Sub-menu 2 Settings Code | | | |
| Screen call | -Off | Off | #310 81 | |
For assistance, please visit http://shop.panasonic.com/support
Programming
Main menu: "Bluetooth"
| Sub-menu 1 Sub-menu | 2 Settings Code | | | # |
| Link to cell*18- Cellular phone 1*4- Cellular phone 2*4 | Ringer volume Off-6 <1> | | #6281*5 | 32 |
| #6282*6 |
| Alert settings*1- Alert On/Off | Off | #6101*5 | 72 |
| #6102*6 |
| Alert settings*1-Voice alert | Off | #6031*5 | 72 |
| #6032*6 |
| Headset*19 | Connect*1/Disconnect*1 | - #622 - | | |
| Cell line | *4Cellphone 2*4 | - #634 23 | | |
Main menu: "Settings"
| Sub-menu 1 | Sub-menu 2 Settings Code | | | # |
| Ring adjustments | Ringer volume*3 | Off-6 <1> #160 - | | |
| Interrupt tone*11 | <On> Off | #201 28 | |
| Silent mode-On/Off | On<Off> | #238 63 | |
| Silent mode-Start/End | <11:00 PM/06:00 AM> | #237 63 | |
| Silent mode-Select group | HomeCell 1Cell 2Group 4-9 | #241 63 | |
| Talking CID | - | On<Off> | #162 67 | |
| One ring scam*1 | - | 1 ring<1 or 2 rings>Off | #798 45 | |
| Auto. call block*1 | Block/Unblock Block | | #787 42 | |
| Allow name list | - #794 43 | | |
| Blocked count | - #790 43 | | |
Programming
| Sub-menu 1 Sub-menu | 2 Settings Code | | | |
| Call blk/Unblock*1 | Single # | - #217 38 | | |
| Range of # | - | 39 |
| Block unknown Block | | #240 39 | |
| Ring once Yes | | #173 40 | |
| Blocked count | - #177 41 | | |
| LCD contrast(Display contrast) | -Level 1-6 <3> | #145 - | | |
| Answer by voice*1 | On/Off On | | #106 35 | |
| Sensitivity Low | | #107 35 | |
| Auto intercom | - | On | #273 37 | |
| Caller ID edit(Caller ID number auto edit) | - | Off | #214 69 | |
| Change language(Display) | - | | #110 17 | |
Main menu: "Cust. Support"
| Operation | Code | |
| Displaying customer support Web address. #680 – | | |
*1 If you program these settings using one of the units, you do not need to program the same item using another unit. *2 This menu is not displayed when scrolling through the display menus. It is only available in direct command code. *3 When the cellular line only mode is turned on, these menus are not displayed (page 22). *4 After the Bluetooth device is paired, the device name is displayed. *5 For CELL 1 *6 For CELL 2 *7 The preset melodies in this product ("Melody 1" - "Melody 10") are used with permission of © 2009 - 2012 Copyrights Vision Inc. *8 The preset melodies in this product ("Tone 1" and "Tone 2") are used with permission of © 2013 Copyrights Vision Inc. *9 This feature allows the unit to automatically adjust the date and time each time caller information including date and time is received. To turn this feature on, select "Caller ID auto". To turn this feature off, select "Manual". (Caller ID subscribers only) To use this feature, set the date and time first (page 18).
Programming
*10 If you subscribe to a distinctive ring service (such as IDENTA-RING), select a tone (tone 1 to 5). If you select a melody, you cannot distinguish lines by their ringers. *11 This tone lets you know when you receive an outside call while you are on another line or an intercom call. If you select "On", the tone sounds 2 times. *12 This setting is available when you have the key detector (KX-TGA20). Read the installation manual for more information on the key detector. *13 For models with supplied key detectors, the display shows "1: Detector1". *14 If you register 2 or more key detectors. *15 If you subscribe to a Caller ID service and want to view the caller's information after lifting up the handset to answer a call, turn off this feature. *16 The flash time depends on your telephone exchange or host PBX. Contact your PBX supplier if necessary. The setting should stay at "700 ms" unless pressing [FLASH] fails to pick up the waiting call. *17 Generally, the line mode setting should not be changed. This setting automatically maintains receiver volume at the proper level depending on the current telephone line condition. Set the line mode to "A" if telephone line condition is not good. *18 This setting is available when a cellular phone is paired. *19 This setting is available when a headset is paired.
Alarm
An alarm sounds at the set time for 1 minute and is repeated 5 times at 5 minute intervals (snooze function). A text memo can also be displayed for the alarm. A total of 3 separate alarm times can be programmed for each handset. You can set one of 3 different alarm options (once, daily, or weekly) for each alarm time.
Important:
- Make sure the unit's date and time setting is correct (page 18).
Handset
1 [MENU]#720
Turns alarm off. Go to step 10.
"Once"
An alarm sounds once at the set time.
"Daily"
An alarm sounds daily at the set time.
Go to step 5.
"Weekly"
Alarm sounds weekly at the set time(s).
4 Proceed with the operation according to your selection in step 3.
■ Once:
Enter the desired month and date. → [OK]
■ Weekly:
【▲】: Select the desired day of the week and press [SELECT]. → [OK]
5 Set the desired time.
6 ☒: Select "AM" or "PM". → [OK]
7 Enter a text memo (10 characters max.).
→ [OK]
- We recommend selecting a different ringer tone from the one used for outside calls.
9 [▲]: Select the desired snooze setting.
→ [SAVE]
10 [SELECT] → [OFF]
Note:
- Press [STOP] to stop the alarm completely.
- When the handset is in use, the alarm will not sound until the handset is in standby mode.
- Press any dial key or [SNOOZE] to stop the sound but keep the snooze function activated.
- If you want to make an outside call when the snooze function is activated, please stop the snooze function before making the call.
Silent mode
Silent mode allows you to select a period of time during which the handset and/or base unit will not ring for outside calls. This feature is useful for time periods when you do not want to be disturbed, for example, while sleeping. Silent mode can be set for each unit. Using the phonebook's group feature (page 48), you can also select groups of callers whose calls override silent mode and ring the unit (Caller ID subscribers only).
Important:
- Make sure the unit's date and time setting is correct (page 18).
- If you have set the alarm, the alarm sounds even if the silent mode is turned on.
Turning silent mode on/off
Handset
1 [MENU]#238 2 [◆]: Select the desired setting. → [SAVE] • If you select "Off", press [OFF] to exit. 3 Enter the desired hour and minute you wish to start this feature. 4 ☐: Select "AM" or "PM". → [OK] 5 Enter the desired hour and minute you wish to end this feature. 6 ☐: Select "AM" or "PM". 7 [SAVE] → [OFF]
Base unit
1 [MENU]#238 2 [♦]: Select the desired setting. → [SAVE] • If you select "Off", press [EXIT] to exit. 3 Enter the desired hour and minute you wish to start this feature. 4 [AM/PM]: Select "AM" or "PM". → [OK] 5 Enter the desired hour and minute you wish to end this feature. 6 [AM/PM]: Select "AM" or "PM". 7 [SAVE] → [EXIT]
Changing the start and end time
Handset / Base unit
1 [MENU]#237 2 Continue from step 3 for handset or step 3 for base unit, "Turning silent mode on/off", page 63.
Selecting groups to bypass silent mode
Handset / Base unit
1 [MENU]#241 2 [◆]: Select the desired groups. → [SELECT] - "√" is displayed next to the selected group numbers. - To cancel the selected group: [▲]: Select the group. → Press [SELECT] again. "√" disappears.
3 [SAVE]
4 Proceed with the operation for your unit.
Handset: [OFF]
Base unit: [EXIT]
Baby monitor
This feature allows you to listen in on a room where another handset is located, allowing
Programming
you to easily monitor from different areas of the house or even while away from home. The monitored handset (placed in a baby's room, for example) will automatically call the monitoring handset, base unit, or the phone number stored when it detects sound.
Important:
- Before using this feature, we recommend that you test it and adjust the baby monitor sensitivity as needed, especially if you plan to monitor from outside.
- This feature should not be used as a substitute for a medical or caregiver's supervision. It is the caregiver's responsibility to stay close enough to handle any eventuality.
Note:
- During the monitoring mode, battery consumption is faster than usual. We recommend leaving the monitored handset on the base unit or charger.
- The monitored handset never rings while it is being monitored. If the base unit is placed near the monitored handset, we recommend turning off the base unit ringer volume (page 60).
Setting the baby monitor
Perform the setting operation with the handset to be monitored (for example, the handset placed in a baby's room).
To monitor with a unit
The internal baby monitor feature is available: – between handsets - between a handset and the base unit
Handset
1 [MENU]#268 2 [▲]: "On" → [SELECT] 3 [▲]: Select the desired unit's number to monitor with. → [SAVE]
- "Baby monitor" will be displayed.
- The registered unit's name/number is displayed.
Note:
- When this feature is on, another handset or the base unit can hear the monitored handset by making an intercom call.
To monitor from outside
If you enable this feature, the unit will call a pre-programmed phone number when the handset detects sound. After you answer the call, you can listen in on the room where the handset is located.
This feature is only available for landline.
Handset
■ From the phonebook:
1 [MENU]#268 2 [▲]: "On" → [SELECT] 3 [▲]: Select "Outgoing call" to monitor from outside. → [ADD] 4 [▲]: "Phonebook" → [SELECT] 5 [▲]: Select the phonebook entry. → [SAVE] - "Baby monitor" will be displayed.
Note:
- If you edit a phonebook entry which is assigned for monitoring, the edited entry does not transfer to the monitor.
■ By entering phone numbers:
1 [MENU]#268 2 [▲]: "On" → [SELECT] 3 [◆]: Select "Outgoing call" to monitor from outside. → [ADD] 4 [▲]: "Manual" → [SELECT] 5 Enter the desired name. → [OK] 6 Enter the desired number. → [OK] → [SELECT] - "Baby monitor" will be displayed.
Note:
- The registered name/number is displayed.
Turning off the baby monitor
The monitored handset cannot be used while baby monitor is set to "On".
Programming
Handset
1 Press [MENU] on the handset being monitored. 2 [▲]: "On/Off" → [SELECT] 3 [▲]: "Off" → [SELECT] → [OFF]
Editing an outside monitoring number
Handset
1 Press [MENU] on the handset being monitored. 2 [◆]: "On/Off" → [SELECT] 3 [▲]: "On" → [SELECT] 4 [▲]: Select the outside line. 5 [MENU] → [▲]: "Edit" → [SELECT] 6 Edit the name if necessary. → [OK] 7 Edit the phone number if necessary. → [OK] → [SELECT]
Erasing an outside monitoring number
Handset
1 Press [MENU] on the handset being monitored. 2 [▲]: "On/Off" → [SELECT] 3 [▲]: "On" → [SELECT] 4 [▲]: Select the outside line. 5 [MENU] → [▲]: "Erase" → [SELECT] 6 [▲]: "Yes" → [SELECT] → [OFF]
Baby monitor sensitivity
You can adjust the sensitivity of the baby monitor. Increase or decrease the sensitivity to adjust the sound level needed to trigger the baby monitor feature.
- This feature cannot be set during a monitoring call.
Handset
1 Press [MENU] on the handset being monitored.
2 [▲]: "Sensitivity level" → [SELECT] 3 [▲]: Select the desired setting. → [SAVE] → [OFF]
Answering the baby monitor
■ When monitoring with a unit:
Handset: Press [icon] to answer a call.
Base unit: Press [SP-PHONE] to answer a call.
If you want to respond from the monitoring unit, press [MUTE].
- The monitoring unit will answer calls automatically when the auto intercom feature is set to "On" (page 37).
Note:
- If you receive an outside call when communicating with the monitored handset, the interrupt tone sounds.
- To answer the call with the handset, press [OFF], then press [\~].
- To answer the call with the base unit, press [SP-PHONE] 3 times.*1
*1 If [MUTE] is pressed, press [SP-PHONE] 2 times.
■ When monitoring from outside:
Answer the call.
If you want to respond from your monitoring phone, press #1 using tone dialing.
You can turn off the baby monitor feature by pressing #0.
Note:
- The unit disconnects the call automatically after 2 minutes.
Other programming
Changing the handset name
The default handset name is "Handset 1" to "Handset 6". You can customize the name of each handset ("Bob", "Kitchen", etc.). This is useful when you make intercom calls between handsets. To display the handset name in
Programming
standby mode, turn on the handset name display feature (page 66).
Handset
1 [MENU]# 1 0 4 2 Enter the desired name (10 characters max.). → [SAVE] → [OFF]
Displaying the handset name
You can select whether or not the handset name is displayed in standby mode. The default setting is "Off".
Handset
1 [MENU] # 1 0 5 2 [▲]: Select the desired setting. → [SAVE] → [OFF]
Registering a unit
Operating additional units
Additional handsets
Up to 6 handsets can be registered to the base unit.
Important:
- See page 5 for information on the available model.
Registering a handset to the base unit
The supplied handset and base unit are pre-registered. If for some reason the handset is not registered to the base unit, re-register the handset.
1 Handset: [MENU] #130
2 Base unit:
Press and hold [LOCATOR] for about 5 seconds.
- If all registered handsets start ringing, press [LOCATOR] again to stop, then repeat this step.
3 Handset: Press [OK], then wait until a long beep sounds.
Deregistering a handset
A handset can cancel its own registration to the base unit, or other handsets registered to the same base unit. This allows the handset to end its wireless connection with the system.
Handset
1 [MENU]# 1 3 1
- All handsets registered to the base unit are displayed.
2 [◆]: Select the handset you want to cancel. → [SELECT]
3 [▲]: "Yes" → [SELECT] → [OFF]
Using Caller ID service
Important:
- This unit is Caller ID compatible. To use Caller ID features, you must subscribe to a Caller ID service. Contact your phone service provider for details.
Caller ID features
Handset / Base unit
When an outside call is being received, the caller information is displayed.
Caller information for the last 50 callers is logged in the caller list from the most recent call to the oldest.
- If the unit cannot receive caller information, the following is displayed:
- "Out of area": The caller dials from an area which does not provide a Caller ID service.
- "Private caller" *1/"Private"*2: The caller requests not to send caller information.
- “Long distance” *1/“Long dist.”*2: The caller makes a long distance call.
- If the unit is connected to a PBX system, caller information may not be properly received. Contact your PBX supplier.
*1 Handset
*2 Base unit
Missed calls
Handset / Base unit
If a call is not answered, the unit treats it as a missed call. The display shows "Missed call".
Note:
- Even when there are unviewed missed calls, "Missed call" disappears from the standby display if the following operation is performed by one of the units:
- A handset is replaced on the base unit or charger.
- Pressing [OFF] on a handset.
- Pressing [EXIT] on the base unit.
Phonebook name display
When caller information is received and it matches a phone number stored in the phonebook, the stored name in the phonebook is displayed and logged in the caller list.
Talking Caller ID
Handset / Base unit
This feature lets you know who is calling without looking at the display.
To use this feature, you must:
– subscribe to a Caller ID service of your phone service provider.
- turn this feature on (page 56, 60).
When caller information is received, the handsets and/or base unit announce the caller's name or phone number received from your phone service provider following every ring.
- Name pronunciation may vary. This feature may not pronounce all names correctly.
- Caller ID service has a limit of how many characters can be displayed. If the caller's name is too long, the unit may not be able to display or announce the entire name.
Phonebook name announcement
When caller information is received and it matches a phone number stored in the phonebook, the stored name in the phonebook is announced.
Caller list
Important:
- Make sure the unit's date and time setting is correct (page 18).
Viewing the caller list and calling back
■ Using a cellular line
Handset
1 [▼] CID
Caller ID Service
2 Press [▼] to search from the most recent call, or [▲] to search from the oldest call.
3 To call back, press [SELECT]. To exit, press [OFF].
4 [CELL]
- If you select an entry with “#”, “#” or “△” displayed, an error tone sounds.
Wait for 2 seconds until a confirmation message is displayed. Press [YES] if you want to call back.
- The unit starts dialing immediately in the following situations.
- Only 1 cellular phone is paired.
- A specific line is set to make cellular calls (page 23).
5 【◆】: Select the desired cellular phone. → 【SELECT】
Base unit
1 [CID]
2 Press [▼] to search from the most recent call, or [▲] to search from the oldest call.
3 To call back, press [CELL 1] or [CELL 2].
- If you select an entry with “” or “” displayed, an error tone sounds.
Wait for 2 seconds until a confirmation message is displayed. Press [YES] if you want to call back.
To exit, press [EXIT].
■ Using a landline
Handset / Base unit
1 Proceed with the operation for your unit.
Handset: [▼] CID
Base unit: [CID]
2 Press [▼] to search from the most recent call, or [▲] to search from the oldest call.
3 Proceed with the operation for your unit. Handset:
- To call back, press [ ]
- If you select an entry with “” or “” or “” displayed, an error tone sounds.
Wait for 2 seconds until a confirmation message is displayed. Press [YES] if you want to call back.
- To exit, press [OFF].
Base unit:
- To call back, press [SP-PHONE].
- If you select an entry with “” or “” or “” displayed, an error tone sounds.
Wait for 2 seconds until a confirmation message is displayed. Press [YES] if you want to call back.
- To exit, press [EXIT].
Note for handset and base unit:
- If the entry has already been viewed or answered, "√" is displayed.
- C1r indicates the caller information was received from the cellular line.
- “# or “” indicates the caller information for blocked calls.
- “!” indicates the caller information for scam calls.
Editing a caller's phone number
You can edit a phone number in the caller list by removing its area code and/or the long distance code "1".
Handset
■ When a cellular phone is paired:
1 [▼] CID 2 [◆]: Select the desired entry. →
[SELECT] 3 Press ☒ (Edit) repeatedly until the phone number is shown in the desired format. 4 Using a cellular line:
To make a cellular call, continue from step 4, "Viewing the caller list and calling back", page 67.
Using a landline:
[\~]
■ When a cellular phone is not paired:
1 [▼] CID 2 【◆】: Select the desired entry. → 【MENU】
3 [▲]: "Edit" → [SELECT] 4 Press [EDIT] repeatedly until the phone number is shown in the desired format.
5 [ ]
Base unit
1 [CID] 2 [▲]: Select the desired entry. 3 Press [EDIT] repeatedly until the phone number is shown in the desired format. 4 Using a cellular line:
Press [CELL 1] or [CELL 2].
Using a landline:
[SP-PHONE]
Caller ID number auto edit feature
Handset / Base unit
Once you call back an edited number, the unit which was used to call back remembers the area code and format of the edited number. The next time someone calls from the same area code, caller information is customized by the unit as follows:
- When the call is being received, the Caller ID number is displayed in the same format as the edited number.
- After the call has ended, the caller's phone number is displayed in the same format as the edited number, when reviewed from the caller list.
For example, you can use this feature to set the unit to ignore the area code of callers in your area, so that you can call these local numbers using caller information without dialing the area code.
To activate this feature, you must edit an entry in the caller list, then call that number. After that, phone numbers from that caller's area code are edited automatically.
This feature can be set for each unit (page 58, 61). The default setting is "On".
Note:
- Phone numbers from the 4 most recently edited area codes are automatically edited.
Handset / Base unit
1 Proceed with the operation for your unit.
Handset: [▼] CID
Base unit: [CID] 2 [▲]: Select the desired entry. 3 [ERASE] → [▲]: "Yes" → [SELECT] 4 Proceed with the operation for your unit.
Handset: [OFF]
Base unit: [EXIT]
Handset / Base unit
1 Proceed with the operation for your unit.
Handset: [▼] CID
Base unit: [CID] 2 [ERASE] → [▲]: "Yes" → [SELECT] 3 Proceed with the operation for your unit.
Handset: [OFF]
Base unit: [EXIT]
Copying phonebook from a cellular phone (phonebook transfer)
You can copy phonebook entries from the paired cellular phones or other cellular phones (not paired) to the unit's phonebook. A cellular phone must be compatible with Bluetooth wireless technology.
Important:
- Your cellular phone must support Phone Book Access Profile (PBAP) or Object Push Profile (OPP) specification.
- If a copied entry has 2 or more phone numbers, each phone number (6 max.) is stored as a separate entry with the same name.
- If a phonebook entry includes additional data such as a picture, that entry may fail to copy to the base unit.
- If your cellular phone includes international call entries, set the conversion codes before copying (page 70).
1 Handset:
【MENU】#618
2 Handset:
To copy from paired cellular phones:
【◆】: Select the desired cellular phone. →
【SELECT】 - Copied items are stored to the group ("Cell 1" or "Cell 2") which the cellular phone is paired to.
To copy from other cellular phones (not paired):
[▲]: "Other cell" → [SELECT] → 【◆】: Select the group you want to copy to.
→ [SELECT]
3 Handset:
When "Use the cell to transfer phone book" is displayed: Go to step 4.
When "Select mode" menu is displayed:
[▲]: Select "Auto" or "Manual". →
[SELECT]
"Auto": Download all entries from the cellular phone automatically. Go to step 5.
"Manual": Copy entries you selected.
- "Select mode" menu is displayed only when the cellular phone supports Phone Book Access Profile (PBAP) for Bluetooth connection.
- Some cellular phones may require you to perform an operation on the cellular phone even if you select "Auto".
4 Cellular phone:
Follow the instructions of your cellular phone to copy phonebook entries.
- For other cellular phones (not paired), you need to search for and select the base unit. The Bluetooth PIN (default: "0000") may be required. If your cellular phone shows PassKey confirmation on its display, follow the directions to proceed.
- The entries being copied are displayed on the handset.
5 Handset:
Wait until "Completed" is displayed. - You can continue copying other entries if necessary.
6 Handset: [OFF]
Note:
- Some copied entries may have characters which are not available. These characters can be displayed but cannot be entered when editing an entry.
- The unit does not support some characters. If a copied entry includes those characters, they are replaced with other available characters or “*”.
- If you receive a call while copying phonebook entries, the copying procedure stops. Try again after finishing the call.
Setting conversion codes
You must first set the following 3 dialing codes before transferring the phonebook from your cellular phone (4 digits max. each).
- "International code": An international prefix used when you make an international call.
- "Country code": Your country code for international calls.
- "Trunk prefix": A trunk prefix; the initial digit(s) to be dialed in a domestic call, prior to the area code.
Handset
2 To store "International code": #117
To store "Country code": #118
To store "Trunk prefix": #119
3 Enter the desired number. → [SAVE] → [OFF]
Note:
- After you copy the entries, confirm that the numbers were transferred correctly.
Link to Cell app
For Android™ users
The free Link to Cell app helps you integrate your Android phone with your DECT phone for convenient use.
Important:
- Your cellular phone must support Serial Port Profile (SPP) specification.
■ Application (App) Alerts On/Off
This feature alerts your DECT phone when your paired Android phone receives the following alert information:
- [Google Calendar]™
- [Gmail]™
- [Text messages]
- [Facebook]
- [Twitter]
- [Instagram]
- [Low Battery] information
Please check the latest information for details on functions that can be alerted at the web page below.
https://panasonic.net/cns/pcc/support/tel/appalerts/
You can turn each type of alert on or off using the Link to Cell app. If you turn the alerting app on, your DECT phone alerts you with the corresponding information.
■ Phone Settings
Using your paired Android phone, you can program your Phone Settings for the following features:
- [Time adjustment] *1
- [Cell line only mode] (page 22)
- [International code], [Country code], and [Trunk prefix] (page 70)
*1 When your paired Android phone is within the base unit's range, the date and time information is updated on the handset and base unit's display, if time adjustment feature is activated on your Android phone.
Installing the Link to Cell app
Download links are also available at the web page below.

https://panasonic.net/cns/pcc/support/tel/appalerts/

Starting the app for the first time
1 Make sure that your Android device's Bluetooth feature is turned on and that your Android device is paired to the base unit. 2 Start the Link to Cell app by tapping its icon. 3 Follow the on-screen instructions.
Using Bluetooth® Devices
Important:
- For further information, refer to the instructions on the web page listed above.
- To use this feature, the following settings are required.
- Android phone: Bluetooth must be turned on.
- Android phone: [Application Alerts manager] must be turned on.
- Handset or base unit: "Alert On/Off" must be turned on (page 72).
- If this feature does not work, turn on your device's Bluetooth feature, unplug the base unit's AC adaptor, and then reconnect it.
- If this feature still does not work properly after performing the above operation, re-install the Link to Cell app.
Text message (SMS) alert
For iPhone® users
This feature alerts you on your DECT phone when your paired cellular phone receives SMS messages. The Link to Cell app is not required for iPhone users.
Important:
- Your cellular phone must support Message Access Profile (MAP) specification.
- For further information, refer to the instructions on the web page listed below: www.panasonic.net/pcc/support/tel/sms/
- To use this feature, the following settings are required:
- iPhone: Bluetooth must be turned on.
- Handset or base unit: "Alert On/Off" must be turned on (page 72).
- If this feature does not work, turn on your device's Bluetooth feature, unplug the base unit's AC adaptor, and then reconnect it.
Alert settings for your DECT phone
If your cellular phone is paired to the base unit and receives notifications, the handset and/or base unit can alert you:
– by briefly displaying a message – by announcement – by sounding alert tones
Important:
- For Android users: Use the Link to Cell app to enable the desired alerts (page 71).
Turning alert on/off
Once this feature is turned on, it will alert you on the handset and base unit when your cellular phone receives notifications.
- “On” (default): The handset and/or base unit alert you.
- “Off”: The handset and/or base unit do not alert you.
You can configure this setting using either the base unit or one of the handsets.
Handset / Base unit
1 For CELL 1: [MENU]#6101
For CELL 2: [MENU]#6102 2 【▲】: Select the desired setting. →
【SAVE】 3 Proceed with the operation for your unit.
Handset: [OFF]
Base unit: [EXIT]
Setting the voice alert
You can turn on/off the voice alert.
- “On” (default): The handset and/or base unit notify you by voice announcement.
- "Off": Voice announcement is not available as alert.
You can configure this setting using either the base unit or one of the handsets.
Handset / Base unit
1 For CELL 1: [MENU]#6031
For CELL 2: [MENU]#6032 2 【◆】: Select the desired setting. →
[SAVE] 3 Proceed with the operation for your unit.
Handset: [OFF]
Base unit: [EXIT]
Selecting the alert tone
Handset
1 For CELL 1: [MENU]#6041
For CELL 2: [MENU]#6042 2 【◆】: Select the desired setting. →
[SAVE] → [OFF]
Remote voice assist
For iPhone® and Android™ smartphone users
You can use the handset or base unit to operate the voice recognition feature of the paired cellular phone (Siri® or Google Assistant™). For example, you can speak into the handset or base unit and command your cellular phone to make a call.
Compatible voice recognition features
• Google Assistant (Android 4.0 or later) - Siri (iOS 8.0 or later)
Important:
- Your cellular phone must support the Hands Free Profile (HFP) specification.
- In order to use this feature, your cellular phone's voice recognition feature must be ready to use.
- iPhone: Make sure Siri is turned on.
- Android: In order to use Google
Assistant, make sure your cellular phone is registered to your Google account.
- If you have multiple voice recognition features available for your cellular phone, you may need to set the desired voice recognition feature as the default.
- For Android users: Depending on your cellular phone, you may need to set Google Assistant as your cellular phone's default voice recognition feature. For more information, refer to the operating instructions of your cellular phone.
Activating remote voice assist
Handset
1 [

- Go to step 3 in the following situations.
- Only 1 cellular phone is paired. – A specific line is set to make cellular calls (page 23).
2
[▲]: Select the desired cellular phone. →
[SELECT]
3
Wait until "Voice assist" is displayed.
• A confirmation tone sounds. - Speakerphone is turned on automatically. - To switch to the receiver, press [◀].
4 Speak your commands to your handset.
- When you have finished using remote voice assist, press [OFF].
Base unit
1
Press [CELL 1] or [CELL 2]
- Skip this step in the following situations.
- Only 1 cellular phone is paired. – A specific line is set to make cellular calls (page 23).
21

3
Wait until "Voice assist" is displayed. • A confirmation tone sounds.
4s
peak your commands to your base unit.
- When you have finished using remote voice assist, press [1] or [SP-PHONE].
Note:
- While using this feature, you cannot use another unit to make a cellular call using the same cellular line.
- If you receive a call on the landline while using this feature, the interrupt tone sounds.
- If you receive a call on the same cellular line while using this feature, voice recognition ends and the unit receives the incoming call.
- If your cellular phone is connected to the base unit, you may not be able to use your cellular phone's microphone to operate its voice recognition feature. In this case,
Using Bluetooth® Devices
disconnect your cellular phone from the base unit.
- The compatible voice commands depends on the cellular phone voice recognition feature.
Using a Bluetooth headset (optional)
By pairing a Bluetooth headset to the base unit, you can enjoy hands-free conversations when talking on landline calls.
Important:
- Your Bluetooth headset must support the HeadSet Profile (HSP) specification.
- Only 1 Bluetooth headset can be paired to the base unit.
- Only 1 Bluetooth device can be used with the unit at a time 4 .
- For best performance, we recommend using your Bluetooth headset within 1 m (3.3 feet) of the base unit. The base unit can communicate with Bluetooth headsets within an approximately 10 m (33 feet) range. *1 You cannot use a Bluetooth headset to talk on a cellular line.
Pairing a Bluetooth headset to the base unit
Important:
- Make sure that the Bluetooth headset is not connected to any other Bluetooth device.
1 Bluetooth headset:
Set your headset to pairing mode.
- Refer to the headset's operating instructions.
2 Handset:
【MENU】#621
3 If your headset PIN is "0000", go to step 4.
If your headset PIN is not "0000", press [CLEAR], then enter your headset's PIN.
- Typically, default PIN is "0000". Refer to the headset's operating instructions.
4 Press [OK], then wait until a long beep sounds.
5 [OFF]
- When BQ is displayed on the base unit, the headset is available for use.
Connecting/disconnecting a Bluetooth headset
If you cannot connect the headset and base unit using the headset, you can connect using the unit.
To use your headset with another Bluetooth device such as a cellular phone, you may need to disconnect it from the base unit.
Important:
• Make sure that the headset is turned on.
Handset / Base unit
1 To connect/disconnect: [MENU]#622
• A long beep sounds.
2 Proceed with the operation for your unit.
Handset: [OFF]
Base unit: [EXIT]
Unpairing a Bluetooth headset
You can cancel a pairing of the headset that is stored to the base unit.
Handset
1 [MENU]#612
2 [▲]: "Yes" → [SELECT]
- When the headset is unpaired, the disappears from the base unit display.
3 [OFF]
Operating a Bluetooth headset using a landline
Important:
- Refer to your headset's operating instructions for details.
- Some features described here may not be available depending on Bluetooth headset.
Making landline calls with your headset
Base unit
1 Press your headset's button referring to your headset's operating instructions. 2 Dial the phone number using the base unit after hearing the dial tone on your headset. 3 When you finish talking, press your headset's button referring to your headset's operating instructions.
Note:
- This function may not operate properly depending on specification of the headset.
Answering landline calls with your headset
To answer a landline call, press your headset's button. When you finish talking, press your headset's button.
Note:
- If you cannot hang up the call using your headset, press [SP-PHONE] on the base unit 2 times.
Call sharing between your headset and the handset
Important:
- To activate this feature, you should set call sharing mode to on beforehand (page 58). ■ While the handset is on a landline call: To join the conversation with your headset, press your headset's button. ■ While your headset is on a landline call: To join the conversation with the handset, press [icon].
Note:
- This function may not operate properly depending on specification of the headset.
Switching between the base unit and your headset
You can switch between the base unit and your headset:
– during a landline call with the base unit speakerphone. – during an intercom call between the base unit and handset. – while listening to messages recorded on the base unit answering system.
■ To switch to your headset: Press [C] on the base unit.
■ To switch to the base unit: Press [SP-PHONE] on the base unit.
Adjusting your headset receiver volume
Base unit
Press [▲] or [▼] repeatedly while using your headset.
Note:
- Depending on your headset, the receiver volume may not be adjustable.
Answering System for Landline
Answering system for landline
The answering system can answer and record calls for you when you are unavailable to answer the phone.
The unit can be set to play a greeting message but not to record caller messages by selecting "Greeting only" as the recording time setting (page 82).
You can also record phone conversations (page 27).
Important:
- Make sure the unit's date and time setting is correct (page 18).
Memory capacity (including your greeting message)
The total recording capacity is about 18 minutes. A maximum of 64 messages can be recorded.
Note:
- When message memory becomes full:
- "Messages full" is shown on the handset and base unit display.
- The ANSWER ON/OFF indicator on the base unit flashes rapidly if the answering system is turned on.
- If you use the pre-recorded greeting message, the unit automatically switches to another pre-recorded greeting message asking callers to call again later.
- If you recorded your own greeting message, the same message is still announced to callers even though their messages are not recorded.
Turning the answering system on/off
Base unit
Press [ANSWER ON/OFF] to turn on/off the answering system.
Handset
1 To turn on: [MENU]#327 To turn off: [MENU]#328
2 [OFF]
Note for base unit and handset:
- When the answering system is turned on, the ANSWER ON/OFF indicator on the base unit lights up.
Greeting message
When the unit answers a call, a greeting message is played to callers.
You can use either: - your own greeting message - a pre-recorded greeting message
Recording your greeting message
Handset
1 [MENU]#302 2 [▲]: "Yes" → [SELECT] 3 After a beep sounds, speak clearly about 20 cm (8 inches) away from the microphone (2 minutes max.). 4 Press [STOP] to stop recording. → [OFF]
Using a pre-recorded greeting message
The unit provides 2 pre-recorded greeting messages:
- If you reset to pre-recorded greeting or do not record your own greeting message, the unit plays a pre-recorded greeting asking callers to leave a message.
- If the message recording time (page 82) is set to "Greeting only", callers' messages are not recorded and the unit plays a different pre-recorded greeting message asking callers to call again.
Resetting to a pre-recorded greeting message
Use this procedure to erase your greeting message and use a pre-recorded one.
Handset
1 [MENU]#304 2 [YES] → [OFF]
Playing back the greeting message
Handset
1 [MENU]#303 2 To exit, press [OFF].
Listening to messages
Important:
- When using the base unit or handset to listen to messages, the noise reduction feature (page 26) is activated automatically in spite of the setting (NR is not displayed).
Using the base unit
When new messages have been recorded:
- The message indicator (▶ on the base unit flashes.
- "New message" is displayed.
Press (PLAY).
- During playback, the message indicator (▶) on the base unit lights.
- If new messages have been recorded, the base unit plays back new messages.
- If there are no new messages, the base unit plays back all messages.
Operating the answering system during playback
| Key Operation | |
| [▲] or [▼] | Adjust the speaker volume |
| [◄◄] | Repeat message1 |
| [►◄] Skip message |
| [►◄](STOP) Stop playback |
| [ERASE] Erase currently playing message |
*1 If pressed within the first 5 seconds of a message, the previous message is played.
Calling back (Caller ID subscribers only)
■ Using a landline:
Press [SP-PHONE] during playback.
- To edit the number before calling back, press [EDIT] repeatedly until the phone number is shown in the desired format (page 68). ■ Using a cellular line:
Press [CELL 1] or [CELL 2] during playback.
To edit the number before calling back, press [EDIT] repeatedly until the phone number is shown in the desired format (page 68).
Erasing all messages
Press [ERASE] 2 times while the unit is not in use.
Using the handset
When new messages have been recorded, "New message" is displayed.
1 To listen to new messages: [MENU]#323
To listen to all messages: [MENU]#324
2 When finished, press [OFF].
Note:
• To switch to the receiver, press [ ]
Answering System for Landline
- You can also use the [PLAY] soft key, if displayed, to play new messages.
Operating the answering system
[MENU] → [▲]: "Answering device" → [SELECT]
| Key Operation |
| 【▲】or【▼】 | Adjust the receiver/speaker volume (during playback) |
| 1 or【◀】 Repeat message (during playback)*1 |
| 2 or【▶】 Skip message (during playback) |
| 3 | Enter the “Settings” menu |
| 4 Play new messages |
| 5 Play all messages |
| 6 Play greeting message |
| 7 6 Record greeting message |
| 8 Turn answering system on |
| [PAUSE] | Pause message*2 |
| 9 or [STOP] | Stop recording Stop playback |
| 0 Turn answering system off |
| ※4*3 | Erase currently playing message |
| ※5 Erase | all messages |
| ※6 Reset to a pre-recorded greeting message |
*1 If pressed within the first 5 seconds of a message, the previous message is played.
*2 To resume playback:
[◀]: "Playback" → [SELECT]
*3 You can also erase as follows:
[PAUSE] → [▲]: "Erase" →
[SELECT] → [▲]: "Yes" → [SELECT]
Calling back (Caller ID subscribers only)
■ Using a landline:
1 Press [PAUSE] during playback.
2 [▲]: "Call back" → [SELECT]
■ Using a cellular line:
1 Press [PAUSE] during playback.
2 [▲]: "Call back (Cell)" → [SELECT]
- The unit starts dialing immediately in the following situations.
- Only 1 cellular phone is paired.
- A specific line is set to make cellular calls (page 23).
3 [♦]: Select the desired cellular phone.
→ [SELECT]
Editing the number before calling back
■ Using a landline:
1 Press [PAUSE] during playback.
2 [◀]: "Edit & Call" → [SELECT]
3 Press [EDIT] repeatedly until the phone number is shown in the desired format (page 68).
41
■ Using a cellular line:
1 Press [PAUSE] during playback.
2 [▲]: "Edit & Call" → [SELECT]
3 Press [EDIT] repeatedly until the phone number is shown in the desired format (page 68).
4 [CELL]
- The unit starts dialing immediately in the following situations.
- Only 1 cellular phone is paired.
- A specific line is set to make cellular calls (page 23).
Answering System for Landline
Advanced new message alerting features
Audible message alert
This feature allows the base unit to beep to inform you of a new message arrival when new messages are recorded. The base unit beeps 2 times every minute until you listen to the messages, if the "Base unit beep" setting is turned on. The default setting is "Off".
Handset
1 [MENU]#339
2 [▲]: Select the desired setting. →
[SAVE] → [OFF]
New message alert by a call
This feature allows you to receive a notification by phone when new messages are recorded. The base unit calls a phone number you specify. You can then operate the answering system remotely to listen to the new message.
To use this feature, you must:
– store a phone number to which the unit makes the call to.
– turn on the new message alert setting. After you answer the new message alert call, you can listen to messages from that call (page 80).
This feature is only available for landline.
Important:
- A new message alert is stopped 1 minute after the unit starts to call. The unit will not retry the call even if the call is not answered.
Storing a phone number to which the unit makes an alert call
Handset
■ From the phonebook: 1 [MENU]#338
2 [◆]: "Notification to" → [SELECT] → [ADD]
3 [▲]: "Phonebook" → [SELECT]
4 [◆]: Select the desired phonebook entry. → [SAVE] → [OFF]
■ By entering a phone number:
1 [MENU]#338
2 [◆]: "Notification to" → [SELECT] → [ADD]
3 [▲]: "Manual" → [SELECT]
4 Enter the desired name (16 characters max.). → [OK]
5 Enter the desired number (24 digits max.). → [OK] → [SELECT] → [OFF]
Turning on/off the new message alert setting
Handset
1 [MENU]#338 2 [▲]: "On/Off" → [SELECT] 3 [▲]: Select the desired setting. → [SAVE] → [OFF]
Editing the set phone number
Handset
1 [MENU]#338 2 [▲]: "Notification to" → [SELECT] 3 [MENU] → [▲]: "Edit" → [SELECT] 4 Edit the name if necessary (16 characters max.). → [OK] 5 Edit the phone number if necessary (24 digits max.). → [OK] → [SELECT] → [OFF]
Erasing the set phone number
Handset
1 [MENU]#338 2 [▲]: "Notification to" → [SELECT] 3 [MENU] → [♠]: "Erase" → [SELECT]
Answering System for Landline
4 [▲]: "Yes" → [SELECT] → [OFF]
- The new message alert setting is turned off.
Activating/inactivating the remote access code to play messages
If you activate this feature, you must enter the remote access code (page 80) to play the new message from the new message alert call. This is so that unauthorized parties cannot listen to your messages. The default setting is "Inactivate".
- "Inactivate": You can listen to the message by pressing ④ to play new messages (without entering the remote access code).
- "Activate": You must enter your remote access code and then press ④ to play new message.
Handset
1 [MENU]#338 2 [▲]: "Remote code" → [SELECT] 3 [▲]: Select the desired setting. → [SAVE] → [OFF]
Listening to messages
After you answer the new message alert, you can listen to the messages as follows.
■ When the remote access code is set to "Inactivate": Press ④ to play the new message during the announcement.
■ When the remote access code is set to "Activate":
1 Enter the remote access code (page 80) during the announcement.
2 Press 4 to play the new message.
Note:
- Within 10 seconds after listening to new messages, you can press #9 during the call to turn off the new message alert by a call feature.
- Even if the unit makes a new message alert call, the handset redial list does not show
the record. However, on the base unit redial list it is shown as "Message alert".
Remote operation
Using a touch-tone phone, you can call your phone number from outside and access the unit to listen to messages or change answering system settings. The unit's voice guidance prompts you to press certain dial keys to perform different operations.
Remote access code
A 3-digit remote access code must be entered when operating the answering system remotely. This code prevents unauthorized parties from listening to your messages remotely. The default setting is “111”.
Important:
- To prevent unauthorized access to this product, we recommend that you regularly change the remote code.
Handset
1 [MENU]#306 2 Enter the desired 3-digit remote access code. → [SAVE] → [OFF]
Deactivating remote operation
Press ☒ in step 2 on "Remote access code", page 80.
- The entered remote access code is deleted.
Using the answering system remotely
1 Dial your landline phone number from a touch-tone phone. 2 After the greeting message starts, enter your remote access code. 3 Follow the voice guidance prompts as necessary or control the unit using remote commands (page 81). 4 When finished, hang up.
Voice guidance
■ When the English voice guidance is selected
During remote operation, the unit's voice guidance starts and prompts you to press 1 to perform a specific operation, or press 2 to listen to more available operations.
■ When the Spanish voice guidance is selected
To start the voice guidance, press 9. The voice guidance announces the available remote commands (page 81).
Note:
- If you do not press any dial keys within 10 seconds after a voice guidance prompt, the unit disconnects your call.
Remote commands
You can press dial keys to access certain answering system functions without waiting for the voice guidance to prompt you.
| Key Operation |
| 1 Repeat message (during playback)*1 |
| 2 Skip message (during playback) |
| 4 Play new messages |
| 5 Play all messages |
| 9 Stop playback*2Start voice guidance*3 |
| 0 Turn answering system off |
| ※4 Erase currently playing message |
| ※5 Erase all messages |
| ※# End remote operation(or hang up) |
*1 If pressed within the first 5 seconds of a message, the previous message is played.
*2 For English voice guidance only *3 For Spanish voice guidance only
Turning on the answering system remotely
1 Dial your phone number from a touch-tone phone. 2 Let the phone ring 15 times.
- A long beep is heard.
3 Enter your remote access code within 10 seconds after the long beep.
- The greeting message is played back.
- You can either hang up, or enter your remote access code again and begin remote operation (page 80).
Answering system settings
Call screening
Handset / Base unit
While a caller is leaving a message, you can listen to the call through the unit's speaker.
To adjust the speaker volume, press [▲] or [▼] repeatedly.
You can answer the call by pressing [ ] on the handset or [SP-PHONE] on the base unit. Call screening can be set for each unit. The default setting is "On".
1 [MENU]#310 2 [◆]: Select the desired setting. →
[SAVE] 3 Proceed with the operation for your unit.
Handset: [OFF]
Base unit: [EXIT]
Number of rings before the unit answers a call
You can change the number of times the phone rings "Ring count" before the unit answers calls. You can select 2 to 7 rings, or "Toll saver".
The default setting is "4 rings".
"Toll saver": The unit's answering system answers at the end of the 2nd ring when new messages have been recorded, or at the end
Answering System for Landline
of the 5th ring when there are no new messages. If you call your phone from outside to listen to new messages (page 80), you know that there are no new messages when the phone rings for the 3rd time. You can then hang up without being charged for the call.
Handset
1 [MENU]#211 2 [◆]: Select the desired setting. →
[SAVE]→[OFF]
Caller's recording time
You can change the maximum message recording time allowed for each caller. The default setting is "3 min".
Handset
1 [MENU]#305 2 [◆]: Select the desired setting. → [SAVE]→[OFF]
Selecting "Greeting only"
You can select "Greeting only" which sets the unit to announce a greeting message to callers but not record messages. Select "Greeting only" in step 2 on "Caller's recording time", page 82.
Note:
- When you select "Greeting only":
- If you do not record your own message, the unit will play the pre-recorded greeting-only message asking callers to call again later.
- If you use your own message, record the greeting-only message asking callers to call again later (page 76).
Voicemail service for landline
In addition to your unit's answering system you may also have voicemail service from your phone service provider. Voicemail is an answering service that may be offered by your phone service provider. This service can also record calls when you are unavailable to answer the phone or when your line is busy. Messages are recorded on the phone company system and not on the unit's answering system.
- To use the voicemail service rather than the unit's answering system, turn off the answering system (page 76).
If you have unit's answering system set to on and also the voicemail enabled, the system with least amount of rings will record the message first.
Example:
If the unit's answering system is set to 4 rings (page 81) and the voicemail answering system provided by your phone company is set to 6 rings (call your service provider), the unit's answering system will record the incoming call first.
Storing the voicemail (VM) access number
In order to listen to your voicemail messages, you must dial your phone service provider's voicemail access number. Once you have stored your voicemail access number, you can dial it automatically (page 84).
Handset
1 [MENU]#331
2 Enter your access number (24 digits max.). → [SAVE] → [OFF]
Note:
- When storing your voicemail access number and your mailbox password, press [▲] (Pause) to add pauses (page 25) between the access number and the password as necessary. Contact your
phone service provider for the required pause time.
Example:
1-222-333-4444
VM access number
PPPP 8888
Pauses Password
To erase the voicemail access number
Handset
1 [MENU]#331
2 Press and hold [CLEAR] until all digits are erased. → [SAVE] → [OFF]
Voicemail (VM) tone detection
Handset / Base unit
Your phone service provider sends special signals (sometimes called "voicemail tones" or "stutter tones") to the unit to let you know you have new voicemail messages. If you hear a series of dial tones followed by a continuous dial tone after you press [ ] on the handset or press [SP-PHONE] on the base unit, you have new voicemail messages. Soon after you hang up a call or after the phone stops ringing, your unit checks the phone line to see if new voicemail messages have been recorded.
Turn this feature off when:
- You do not subscribe to voicemail service.
- Your phone service provider does not send voicemail tones.
- Your phone is connected to a PBX. If you are not sure which setting is required, contact your phone service provider.
Turning VM tone detection on/off
The default setting is "On".
Handset
1 [MENU]#332 2 [▲]: Select the desired setting. → [SAVE] → [OFF]
Listening to voicemail messages
When new messages have been recorded, "Voicemail msg. via phone co."1/ "Voicemail msg."2 are displayed if message indication service is available.
*1 Handset
*2 Base unit
Handset
• The speakerphone turns on.
2 Follow the pre-recorded instructions.
3 When finished, hang up.
Note:
- You can also use the [ACCESS] soft key, if displayed, to play new voicemail messages.
Base unit
To listen to voicemail messages, you have to dial your voicemail access number manually.
Note for handset and base unit:
- If the handset and base unit still indicate that there are new messages even after you have listened to all new messages, turn it off by pressing and holding # until the handset or base unit beeps.
Wall mounting
The base unit can be mounted on a wall by changing the wall mounting adaptor's position.
Note:
- Make sure that the wall and the fixing method are strong enough to support the weight of the unit.
Base unit
1 To remove the wall mounting adaptor, push down the release levers (①). Remove the adaptor (②).

2 ① Turn the adaptor so that the words "UP WALL" are facing up.
② Tuck the telephone line cord inside the wall mounting adaptor.
③ Connect the AC adaptor cord and telephone line cord.
A Hook


3 Insert the lower tabs of the adaptor into the unit's bottom slots (①), then insert by pushing down the levers of the adaptor into the upper slots (②).
- The words "UP WALL" should be facing up.

4 Mount the unit on a wall then slide down to secure in place.
- This product is compliant with the following wall phone plate sizes (2 types).
A 83 mm (3 1/4 inches) B 102 mm (4 inches)
Fit the slots of the unit onto the corresponding wall phone plate tabs for (C) and (D) respectively.

![graph TD A["A"] --> C["C"] B["B"] --> D["D"] C --> S["S"] D --> S style A fill:#f9f,stroke:#333 style B fill:#f9f,stroke:#333 style C fill:#ccf,stroke:#333 style D fill:#ccf,stroke:#333 style S fill:#cfc,stroke:#333](/content/2026/06/1370672/images/3bc87c03b8c0210dd02676099d24217786dc952fc1a2d800b4d0cf0ab4ca9ec4.jpg)
Charger
Drive the screws (A) (not supplied) into the wall.
B 27.2 mm (11/16 inches)

Error messages
| Display message Cause/solution | |
| Ask phone company for VM access # | You have not stored the voicemail access number. Store the number (page 83). |
| Main unit no power or No link. Re-connect base AC adaptor. or No link. | Confirm the base unit's AC adaptor is connected to the unit and the power outlet correctly.The handset has lost communication with the base unit. Move closer to the base unit and try again.Unplug the base unit's AC adaptor to reset the unit. Reconnect the adaptor and try again.The handset's registration may have been canceled. Re-register the handset (page 66).When “No link.” is displayed during a power failure, place a handset on the base unit to supply power to the base unit. |
| Busy | No cellular phone is paired to the base unit. Pair a cellular phone (page 20).The called unit is in use.Other units are in use and the system is busy. Try again later.The handset you are using is too far from the base unit. Move closer and try again.The automated call block function is in operation. Try again later.One of the units is screening for telemarketing calls. Try again later.One of the units is recording a conversation with an outside caller. Try again later.Only 1 Bluetooth device can be used with the unit at a time. Try again later.The voice recognition feature could not be activated. Try again later. |
| Check tel line | The supplied telephone line cord has not been connected yet or not connected properly. Check the connections (page 12).If you do not connect the telephone line cord and use only cellular lines, set the cellular line only mode (page 22). |
| Checking | The automated call block function is in operation. Try again later. |
Useful Information
| Display message Cause/solution | |
| Error!! | Recording was too short. Try again.Someone is using a cellular line or headset. Try again later.The phonebook copy is incomplete (page 70). The cellular phone is disconnected from the base unit. Make sure that other Bluetooth devices are not connected to the cellular phone, and try again. |
| Failed | Although the unit tried to connect to the cellular phone or headset, the connection has been failed.- Someone is using a cellular line or headset. Try again later.- Make sure that the cellular phone or headset is not connected to other Bluetooth devices. |
| Invalid | There is no handset registered to the base unit matching the handset number you entered.The handset is not registered to the base unit. Register the handset (page 66). |
| Requires subscription to Caller ID. | You must subscribe to a Caller ID service. Once you receive caller information after subscribing to a Caller ID service, this message will not be displayed. |
| Use rechargeable battery. | A wrong type of battery such as alkaline or manganese was inserted. Use only the rechargeable Ni-MH batteries noted on page 5, 9. |
Troubleshooting
If you still have difficulties after following the instructions in this section, disconnect the base unit's AC adaptor, then reconnect the base unit's AC adaptor. Remove the batteries from the handset, and then insert them into the handset again.
General use
| Problem Cause/solution | |
| The handset does not turn on even after installing charged batteries. | Place the handset on the base unit or charger to turn on the handset. |
| The unit does not work. Make sure the batteries are installed correctly (page 12).Fully charge the batteries (page 13).Check the connections (page 12).Unplug the base unit's AC adaptor to reset the unit.Reconnect the adaptor and try again.The handset has not been registered to the base unit.Register the handset (page 66). |
Useful Information
| Problem Cause/solution | |
| I cannot hear a dial tone. • The base unit's AC adaptor or telephone line cord is not connected. Check the connections.• Disconnect the base unit from the telephone line and connect the line to a known working telephone. If the working telephone operates properly, contact our service personnel to have the unit repaired. If the working telephone does not operate properly, contact your phone service provider. |
| I cannot pair a cellular phone to the base unit. | • Depending on the compatibility of the cellular phone, you may not be able to pair it to the base unit. Confirm that your cellular phone supports the hands-free profile (HFP) specification.• Confirm that the Bluetooth feature of your cellular phone is turned on. You may need to turn this feature on depending on your cellular phone.• The Bluetooth technology on your cellular phone may not be functioning normally. Turn off and on your cellular phone.• If your cellular phone is already connected to another Bluetooth device such as a Bluetooth headset, turn it off or disconnect it from your cellular phone.• Some cellular phones may require you to enter the Bluetooth PIN to pairing. Confirm that you entered the correct PIN. |
| I cannot connect a cellular phone to the base unit. | • Confirm that your cellular phone is turned on.• Confirm that your cellular phone is within base unit range (page 16).• Your cellular phone's Bluetooth feature is turned off. Turn it on.• Depending on the state of the wireless environment, such as the presence of any electrical interference, there may be a delay even if the auto connection feature is turned on. You can connect to the base unit manually (page 22).• The cellular phone has not been paired to the base unit. Pair the cellular phone (page 20).• If your cellular phone is already connected to another Bluetooth device such as a Bluetooth headset or other Panasonic DECT phone, disconnect the device, then perform the connecting procedure to the base unit.• If your cellular phone is already registered on another Panasonic DECT phone, this function will not work properly. We strongly recommend that you remove the registration of this phone on both your cellular phone and on the other Panasonic DECT phone. |
| The base unit beeps. • New messages have been recorded. Listen to the new messages (page 77). |
| Error sound is heard when I press some keys on base unit. | • Automated call block is being screened. Try again later. |
Useful Information
| Problem Cause/solution | |
| The unit does not emit the specified number of rings. | ● The number of rings decreases by 1 from the specified number of rings in below situations:– the first ring is turned off (“No”) (page 40).– answer by voice command is set to “On” (page 35). |
Menu list
| Problem Cause/solution | |
| The display is in a language I cannot read. | ● Change the display language (page 17). |
| I cannot register a handset to a base unit. | ● The maximum number of handsets (6) is already registered to the base unit. Cancel unused handset registrations from the base unit (page 66). |
Battery recharge
| Problem Cause/solution | |
| The handset beeps and/orflashes. | Battery charge is low. Fully charge the batteries (page 13) |
| I fully charged the batteries, but– still flashes,– is displayed, or– the operating time seems to be shorter. | Clean the battery ends⊕)and the charge contacts with a dry cloth and charge again.It is time to replace the batteries (page 12). |
Making/answering calls, intercom
| Problem Cause/solution | |
| Y is displayed. | The handset is too far from the base unit. Move closer.The base unit's AC adaptor is not properly connected.Reconnect AC adaptor to the base unit.The handset is not registered to the base unit. Register it (page 66). |
| Noise is heard, sound cuts in and out. | You are using the handset or base unit in an area with high electrical interference. Re-position the base unit and use the handset away from sources of interference.Move closer to the base unit.If you use a DSL/ADSL service, we recommend connecting a DSL/ADSL filter between the base unit and the telephone line jack. Contact your DSL/ADSL provider for details. |
Useful Information
| Problem Cause/solution | |
| The handset or base unit does not ring. | The ringer volume for landline is turned off. Adjust the ringer volume (page 25, 32, 56, 60).The ringer volume for cellular line is turned off. Adjust the ringer volume (page 25, 32, 54, 60).The unit which is not selected to ring for cellular calls does not ring. To change the selection, see page 21.Silent mode is turned on. Turn it off (page 63).The ringer volume is turned off by pressing and holding 0 (2) on the handset. Press and hold 0 (2) again to turn it on (page 25). |
| I cannot make local calls with the handset or base unit using a cellular line. | You need to add your area code when making cellular calls. Store your area code in order to automatically add it to the beginning of the 7-digit phone number when making cellular calls (page 23). |
| I cannot make or answer cellular calls with the handset or base unit. | Depending on the cellular phone's compatibility (page 6), you may not be able to make or answer cellular calls even if the cellular phone is connected to the base unit.Make sure that the CELL indicator lights up and the cellular phone is connected to the base unit (page 22).Only 1 Bluetooth device can be used with the unit at a time.The cellular phone is being used separately from your system. |
| I can make and answer cellular calls but cannot hear a sound. | The Bluetooth technology on your cellular phone may not be functioning normally. Turn off and on your cellular phone.Disconnect and reconnect the base unit AC adaptor and try again. |
| I cannot switch cellular calls from the unit to the cellular phone. | Your cellular phone may not support this feature. Refer to the operating instructions of your cellular phone. |
| I cannot make a call using a landline. | The dialing mode may be set incorrectly. Change the setting (page 18). |
| I cannot use a cellular line.● | The unit cannot be used to talk on 2 cellular lines at the same time. Try again later. |
| The handset or base unit does not ring using the cellular phone's ringer tone even when the ring as cell mode is turned on. | If answer by voice command is turned on, the units use the preset ringer tones (CELL 1: Tone 2, CELL 2: Tone 4) when receiving calls. To change the setting, see page 35. |
| When you receive a call for a cellular line, the ringer volume is very low. | Ringer volume in "Ring as cell mode" depends on the cellular phone Bluetooth output level specification. If ring as cell mode is set to "On (with Talking CID)" or "On (without Talking CID)", turn this feature off to use the ringer tones of the handset and base unit (page 21). |
Useful Information
| Problem Cause/solution | |
| I cannot answer an incoming call using voice commands. | The answer by voice command feature is turned off. To turn it on, see page 35.Baby monitor is set to “On”. Turn off the baby monitor feature (page 64). |
| The unit answers an incoming call on its own. | This situation might happen due to a false detection of ambient noise (dog barking, TV sound, etc.). Move the unit further away from the noise sources.If you are using other telephone that has Talking Caller ID feature turned on, it may also trigger false detection. Turn the Talking Caller ID feature off on the other telephone.To minimize false detection, decrease the sensitivity level of the answer by voice command (page 35, 58, 61). |
| I cannot make long distance calls. | Make sure that you have long distance service. |
| I cannot use voice paging. | You cannot use voice paging if other units are in use. |
Call block
| Problem Cause/solution | |
| The dedicated key for Telemarketing call block is not displayed. | While on the charger, the [TELE.BLK.] key is not available. Lift the handset from the charger.If the Auto talk feature is set to on, the call is answered automatically when the handset is lifted from the charger during an incoming call. Turn off the auto talk feature (page 58). |
Caller ID/Talking Caller ID
| Problem Cause/solution | |
| Caller information is not displayed. | You must subscribe to Caller ID service. Contact your phone service provider for details.If your unit is connected to any additional telephone equipment such as a Caller ID box or cordless telephone line jack, plug the unit directly into the wall jack.If you use a DSL/ADSL service, we recommend connecting a DSL/ADSL filter between the base unit and the telephone line jack. Contact your DSL/ADSL provider for details.The name display service for landline calls may not be available in some areas. Contact your phone service provider for details.Other telephone equipment may be interfering with this unit. Disconnect the other equipment and try again. |
| Caller information is displayed or announced late. | Depending on your phone service provider, the unit may display or announce the caller's information at the 2nd ring or later.Move closer to the base unit. |
Useful Information
| Problem Cause/solution | |
| Caller information is not announced. | The ringer volume for landline is turned off. Adjust the ringer volume (page 56, 60).The ringer volume for cellular line is turned off. Adjust the ringer volume (page 54, 60).The unit which is not selected to ring for cellular calls does not announce caller information. To change the selection, see page 21.The Talking Caller ID feature is turned off. Turn it on (page 56, 60).The ring as cell mode is set to “On (without Talking CID)”. To change the mode, see page 21.The number of rings for the answering system is set to “2 rings” or “Toll saver”. Select a different setting (page 81).Your unit does not announce caller information while the other devices such as headset or handsets are engaged in a call. |
| The caller list/incoming phone numbers are not edited automatically. | The Caller ID number auto edit feature is turned off. Turn it on and try again (page 58, 61).You need to call back the edited number to activate Caller ID number auto edit. |
| I cannot dial the phone number edited in the caller list. | The phone number you dialed might have been edited incorrectly (for example, the long distance “1” or the area code is missing). Edit the phone number with another pattern (page 68). |
| Time on the unit has shifted. | Incorrect time information from incoming Caller ID changes the time. Set the time adjustment to “Manual” (off) (page 56). |
| The 2nd caller’s information is not displayed during an outside call. | In order to use Caller ID, call waiting, or Call Waiting Caller ID (CWID), you must first contact your phone service provider and subscribe to the desired service. After subscribing, you may need to contact your phone service provider again to activate this specific service, even if you already subscribed to both Caller ID and Call Waiting with Caller ID services (CWID). |
Using Bluetooth devices
| Problem Cause/solution | |
| I cannot copy phonebook entries from a cellular phone. | Confirm that the cellular phone supports Bluetooth wireless technology.Confirm that the cellular phone supports the Phone Book Access Profile (PBAP) or Object Push Profile (OPP) specification.If the cellular phone is already connected to another Bluetooth device such as a Bluetooth headset, turn it off or disconnect it from the cellular phone.Someone is using a cellular line or headset. Try again later.Turn the cellular phone off, then turn it on and try again.If an entry is already stored in the unit's phonebook, the entry cannot be copied even by selecting another group.iPhone does not support individual phonebook copy. |
| I cannot have a conversation using the headset.orI cannot connect my headset to the base unit. | Confirm that the Bluetooth wireless headset supports the HeadSet Profile (HSP) specification.Your Bluetooth headset is not paired. Pair it (page 74).Turn your headset off, then turn it on and try again.If your headset is already connected to another Bluetooth device such as your cellular phone, disconnect the headset from your cellular phone, then perform the connecting procedure from the base unit.Only 1 Bluetooth device can be used with the unit at a time. |
| Noise is heard during a call on the headset. | A Bluetooth headset can communicate with the base unit within a range of approximately 10 m (33 feet). The connection may be subject to interference from obstructions such as walls or electronic devices. Move closer to the base unit. |
| Some headset enhanced features are not available. | The base unit does not support enhanced features such as Last number redial or Call reject. |
| An error tone is heard when I try to program the Bluetooth feature. | The Bluetooth feature cannot be accessed immediately after connecting the AC adaptor to the base unit. Wait a few seconds and try again.The headset has not connected to the base unit yet, even though you performed the connecting procedure setting. Wait a few seconds and try again. |
Useful Information
| Problem Cause/solution | |
| App alert is not displayed or announced.orText message alert is not displayed or announced. | Confirm that the cellular phone supports the Message Access Profile (MAP) specification to use text message alert feature.Confirm that the cellular phone supports the Serial Port Profile (SPP) specification to use App alert feature.Confirm that the [Application Alerts manager] setting of your Android phone is turned on."Alert On/Off" is set to "Off". Set it to "On"(page 72)."Voice alert" is set to "Off". Set it to "On" (page 72).The Bluetooth device's Bluetooth notifications setting is turned off.The handset selected to display and/or announce alerts is in use.The Bluetooth device or its corresponding cellular line is in use.Your cellular phone's Bluetooth feature is turned off. Turn it on.The unit which is not selected to ring for cellular calls does not ring. To change the selection, see page 21. |
| Your cellular phone's voice recognition feature does not start after pressing [IMAGE]. | This feature may not be available when your cellular phone is in use. Try again later.If you cannot use this feature while your cellular phone is locked, unlock your phone and try again.For some cellular phones, you may be able to set your phone to allow its voice recognition feature to be used even when the phone is locked. For more information, refer to the operating instructions of your cellular phone.You may not be able to use this feature if other features or applications on your cellular phone are using Bluetooth features. Turn off these features or exit these applications, and then try again. |
| The desired app does not start when you try to start the app using remote voice assist. | In order to use this feature, your cellular phone's voice recognition feature must be ready to use.iPhone: Make sure Siri is turned on.Android: In order to use Google Assistant, make sure your cellular phone is registered to your Google account.If you have multiple voice recognition features installed in your cellular phone, you may need to set the desired voice recognition feature as the default. If you cannot set the default, delete the other voice recognition features. |
Answering system
| Problem Cause/solution | |
| The unit does not record new messages. | The answering system is turned off. Turn it on (page 76).The answering system does not answer or record calls from cellular lines.The message memory is full. Erase unnecessary messages (page 77, 78).The recording time is set to “Greeting only”. Change the setting (page 82).Your phone service provider’s voicemail service may be answering your calls before the unit’s answering system can answer your calls. Change the unit’s number of rings setting (page 81) to a lower value, or contact your phone service provider.The answering system will not answer incoming calls while the other devices such as headset or handsets are engaged in a call. |
| I cannot operate the answering system remotely. | The remote access code is not set. Set the remote access code (page 80).You are entering the wrong remote access code. If you have forgotten your remote access code, enter the remote access code setting to check your current code (page 80).The answering system is turned off. Turn it on (page 81).You cannot operate the answering system when calling a cellular phone paired to the base unit. |
Bluetooth PIN
| Problem Cause/solution | |
| I cannot remember the PIN. ● | Change the PIN using the following method.Handset:1 [MENU]#6192 *70003 Enter the new 4-digit PIN. → [OK]4 Enter the new 4-digit PIN again. → [SAVE] → [OFF] |
Voicemail
| Problem Cause/solution | |
| “Voicemail msg. via phone co.” is shown on the handset display.or“Voicemail msg.” is shown on the base unit display.How do I remove this message from the display? | ● This notification is displayed when your phone service provider’s voicemail service (not the unit’s answering system) has recorded a message for you. Typically you can remove this notification from the display by listening to the message. To listen to the message, dial the voicemail number provided by your phone service provider (for most cases, this will be your own phone number), and follow the voice instructions. Depending on your phone service provider, you may need to remove all messages from your voice mailbox to remove the notification. You can also remove this notification by pressing and holding # until the unit beeps. |
Liquid damage
| Problem Cause/solution | |
| Liquid or other form of moisture has entered the handset/base unit. | ● Disconnect the AC adaptor and telephone line cord from the base unit. Remove the batteries from the handset and leave to dry for at least 3 days. After the handset/base unit are completely dry, reconnect the AC adaptor and telephone line cord. Insert the batteries and charge fully before use. If the unit does not work properly, contact an authorized service center. |
Caution:
- To avoid permanent damage, do not use a microwave oven to speed up the drying process.
This equipment complies with Part 68 of the FCC rules and the requirements adopted by the ACTA. On the bottom of this equipment is a label that contains, among other information, a product identifier in the format US:ACJ----.
If requested, this number must be provided to the telephone company.
- Registration No......(found on the bottom of the unit)
- Ringer Equivalence No. (REN)......0.1A
A plug and jack used to connect this equipment to the premises wiring and telephone network must comply with the applicable FCC Part 68 rules and requirements adopted by the ACTA. A compliant telephone cord and modular plug is provided with the product. It is designed to be connected to a compatible modular jack that is also compliant.
The REN is used to determine the number of devices that may be connected to a telephone line. Excessive RENs on a telephone line may result in the devices not ringing in response to an incoming call. In most but not all areas, the sum of RENs should not exceed five (5.0). To be certain of the number of devices that may be connected to a line, as determined by the total RENs, contact the local telephone company. For products approved after July 23, 2001, the REN for the product is part of the product identifier that has the format US:AAAEQ##TXXXX. The digits represented by ## are the REN without a decimal point (e.g., 03 is a REN of 0.3).
If this equipment causes harm to the telephone network, the telephone company will notify you in advance that temporary discontinuance of service may be required. But if advance notice isn't practical, the telephone company will notify the customer as soon as possible. Also, you will be
advised of your right to file a complaint with the FCC if you believe it is necessary.
The telephone company may make changes in its facilities, equipment, operations or procedures that could affect the operation of the equipment. If this happens the telephone company will provide advance notice in order for you to make necessary modifications to maintain uninterrupted service.
If trouble is experienced with this equipment, for repair or warranty information, please contact a Factory Service Center or other Authorized Servicer. If the equipment is causing harm to the telephone network, the telephone company may request that you disconnect the equipment until the problem is resolved.
Connection to party line service is subject to state tariffs. Contact the state public utility commission, public service commission or corporation commission for information.
If your home has specially wired alarm equipment connected to the telephone line, ensure the installation of this equipment does not disable your alarm equipment. If you have questions about what will disable alarm equipment, consult your telephone company or a qualified installer.
This equipment is hearing aid compatible as defined by the FCC in 47 CFR Section 68.316.
When you hold the phone to your ear, noise might be heard in your Hearing Aid. Some Hearing Aids are not adequately shielded from external RF (radio frequency) energy. If noise occurs, use an optional headset accessory or the speakerphone option (if applicable) when using this phone. Consult with your audiologist or Hearing Aid
manufacturer about the availability of Hearing Aids which provide adequate shielding to RF energy commonly emitted by digital devices.
WHEN PROGRAMMING EMERGENCY NUMBERS AND(OR) MAKING TEST CALLS TO EMERGENCY NUMBERS:
1) Remain on the line and briefly explain to the dispatcher the reason for the call. 2) Perform such activities in the off-peak hours, such as early morning or late evenings.
This device complies with Part 15 of the FCC Rules. Operation is subject to the following two conditions:
(1) This device may not cause harmful interference, and (2) this device must accept any interference received, including interference that may cause undesired operation. Privacy of communications may not be ensured when using this phone.
CAUTION:
Any changes or modifications not expressly approved by the party responsible for compliance could void the user's authority to operate this device.
NOTE:
This equipment has been tested and found to comply with the limits for a Class B digital device, pursuant to Part 15 of the FCC Rules. These limits are designed to provide reasonable protection against harmful interference in a residential installation. This equipment generates, uses, and can radiate radio frequency energy and, if not installed and used in accordance with the instructions, may cause harmful interference to radio communications. However, there is no guarantee that interference will not occur in a particular installation. If this equipment does cause harmful interference to radio or television reception, which can be determined by turning the equipment off and on, the user is encouraged to try to correct the interference by one or more of the following measures:
– Reorient or relocate the receiving antenna. – Increase the separation between the equipment and receiver. - Connect the equipment into an outlet on a circuit different from that to which the receiver is connected. - Consult the dealer or an experienced radio/TV technician for help.
Some cordless telephones operate at frequencies that may cause interference to nearby TVs and VCRs. To minimize or prevent such interference, the base of the cordless telephone should not be placed near or on top of a TV or VCR. If interference is experienced, move the cordless telephone further away from the TV or VCR. This will often reduce or eliminate interference.
FCC RF Exposure Warning:
- This product complies with FCC radiation exposure limits set forth for an uncontrolled environment.
- To comply with FCC RF exposure requirements, the base unit must be installed and operated 20 cm (8 inches) or more between the product and all person's body.
- This product may not be collocated or operated in conjunction with any other antenna or transmitter.
- The handset may be carried and operated with only the specific provided belt-clip. Other non-tested belt-clips or similar body-worn accessories may not comply and must be avoided.
Notice:
- FCC ID can be found inside the battery compartment or on the bottom of the units.
Compliance with TIA-1083 standard:
Telephone handsets identified with this logo have reduced noise and interference when used with T-Coil equipped hearing aids and cochlear implants.

Charger
Note:
Base unit
[△]
for all your Panasonic gear
Go to
http://shop.panasonic.com/support
Get everything you need to get the most out of your Panasonic products
Accessories & Parts for your Camera, Phone, A/V products, TV, Computers & Networking, Personal Care, Home Appliances, Headphones, Batteries, Backup Chargers & more...
Customer Services Directory
For Product Information, Operating Assistance, Parts, Owner's Manuals, Dealer and Service info go to http://shop.panasonic.com/support
For the hearing or speech impaired TTY: 1-877-833-8855
As of June 2015
Limited Warranty (ONLY FOR U.S.A.)
Panasonic Products Limited Warranty
Limited Warranty Coverage (For USA Only)
If your product does not work properly because of a defect in materials or workmanship, Panasonic Corporation of North America (referred to as “the warrantor”) will, for the length of the period indicated on the chart below, which starts with the date of original purchase (“warranty period”), at its option either (a) repair your product with new or refurbished parts, (b) replace it with a new or a refurbished equivalent value product, or (c) refund your purchase price. The decision to repair, replace or refund will be made by the warrantor.
| Product or Part Name | Parts | Labor |
| Telephone | One (1) Year | One (1) Year |
During the “Labor” warranty period there will be no charge for labor. During the “Parts” warranty period, there will be no charge for parts. This Limited Warranty excludes both parts and labor for non-rechargeable batteries, antennas, and cosmetic parts (cabinet). This warranty only applies to products purchased and serviced in the United States. This warranty is extended only to the original purchaser of a new product which was not sold “as is”.
Mail-In Service--Online Repair Request
Online Repair Request
To submit a new repair request and for quick repair status visit our Web Site at http://shop.panasonic.com/support
When shipping the unit, carefully pack, include all supplied accessories listed in the Owner's Manual, and send it prepaid, adequately insured and packed well in a carton box. When shipping Lithium Ion batteries please visit our Web Site at http://shop.panasonic.com/support as Panasonic is committed to providing the most up to date information. Include a letter detailing the complaint, a return address and provide a daytime phone number where you can be reached. A valid registered receipt is required under the Limited Warranty.
IF REPAIR IS NEEDED DURING THE WARRANTY PERIOD, THE PURCHASER WILL BE REQUIRED TO FURNISH A SALES RECEIPT/PROOF OF PURCHASE INDICATING DATE OF PURCHASE, AMOUNT PAID AND PLACE OF PURCHASE. CUSTOMER WILL BE CHARGED FOR THE REPAIR OF ANY UNIT RECEIVED WITHOUT SUCH PROOF OF PURCHASE.
Limited Warranty Limits and Exclusions
This warranty ONLY COVERS failures due to defects in materials or workmanship, and DOES NOT COVER normal wear and tear or cosmetic damage. The warranty ALSO DOES NOT COVER damages which occurred in shipment, or failures which are caused by products not supplied by the warrantor, or failures which result from accidents, misuse, abuse, neglect, mishandling, misapplication, alteration, faulty installation, set-up adjustments, misadjustment of consumer controls, improper maintenance, power line surge, lightning damage, modification, introduction of sand, humidity or liquids, commercial use such as hotel, office, restaurant, or other business or rental use of the product, or service by anyone other than a Factory Service Center or other Authorized Servicer, or damage that is attributable to acts of God.
THERE ARE NO EXPRESS WARRANTIES EXCEPT AS LISTED UNDER "LIMITED WARRANTY COVERAGE".
THE WARRANTOR IS NOT LIABLE FOR INCIDENTAL OR CONSEQUENTIAL DAMAGES RESULTING FROM THE USE OF THIS PRODUCT, OR ARISING OUT OF ANY BREACH OF THIS WARRANTY.
(As examples, this excludes damages for lost time, travel to and from the servicer, loss of or damage to media or images, data or other memory or recorded content. The items listed are not exclusive, but for illustration only.)
ALL EXPRESS AND IMPLIED WARRANTIES, INCLUDING THE WARRANTY OF MERCHANTABILITY, ARE LIMITED TO THE PERIOD OF THE LIMITED WARRANTY.
Some states do not allow the exclusion or limitation of incidental or consequential damages, or limitations on how long an implied warranty lasts, so the exclusions may not apply to you. This warranty gives you specific legal rights and you may also have other rights which vary from state to state. If a problem with this product develops during or after the warranty period, you may contact your dealer or Service Center. If the problem is not handled to your satisfaction, then write to:
Panasonic Corporation of North America
Consumer Affairs Department 8th Fl.
Two Riverfront Plaza
Newark NJ 07102-5490
PARTS AND SERVICE, WHICH ARE NOT COVERED BY THIS LIMITED WARRANTY, ARE YOUR RESPONSIBILITY.
As of January 2020
Index
Index
3-way conference: 27, 33
Additional handset: 66
Alarm: 62
Answer by voice command: 35
Answering calls: 25, 32
Answering system
Call screening: 81
Erasing messages: 77, 78, 81
Greeting message: 76
Greeting only: 82
Listening to messages: 77, 80
New message alerting: 79
Number of rings: 81
Recording time: 82
Remote access code: 80
Remote operation: 80
Ring count: 81
Toll saver: 81
Turning on/off: 76
Assist button: 15
Auto intercom: 37
Auto talk: 25, 58
Automated call block: 42
Baby monitor: 63
Battery: 12, 13
Bluetooth wireless technology
Cellular phone (Link to cell): 20
Headset: 74
Phonebook transfer: 70
Call block: 38
One ring for blocked call: 40
Call share: 27, 33, 58
Call waiting: 26, 33
Call Waiting Caller ID: 26, 33
Caller ID number auto edit: 58, 61, 69
Caller ID service: 67
Caller list: 67
Caller list edit: 68
Cellular calls: 24, 31
Cellular phone
Pairing: 20
Unpairing: 20
Chain dial: 50
CID (Caller ID): 67, 68, 69
Conference calls: 27, 33
Control type: 15
Customer support: 59, 61
Date and time: 18
Dialing mode: 18
Direct command code: 52
Display
Contrast: 58, 61
Language: 17
Eco mode: 14
Equalizer: 26
Error messages: 86
Flash: 26, 32, 58
Groups: 48
Handset
Deregistration: 66
Name: 65
Registration: 66
Hold: 25, 32
II Intercom: 37
KKey detector: 57, 59
Key tone: 58
LLandline calls: 24, 31
Line mode: 58
Link to cell
Alert settings for your DECT
phone: 72
Area code: 23
Auto connection: 22
Cellular line only mode: 22
Cellular line selection: 23
Connection: 22
Link to Cell app: 71
Ring as cell mode: 21
Select unit to ring: 21
Text message (SMS: Short Message Service) alert: 72
Low battery alert: 18
Making calls: 24, 31
Missed calls: 67
Mute: 26, 32
Noise reduction: 26
One ring scam alert: 45
Pause: 25, 32
Phonebook: 47
Phonebook: 47
PIN: 23
Power failure (Power backup operation): 29
RRecording telephone conversations: 27, 33
Redialing: 24, 25, 31
Remote voice assist: 73
Ringer ID: 48
Ringer tone: 54, 56
Index
Rotary/pulse service: 26, 33
SSilent mode: 63
Speed dial: 50
SP-PHONE (Speakerphone): 24
TTalking Caller ID: 67
SP-PHONE (Speakerphone): 24
Talking Caller ID: 67
Telemarketing call block: 44
Temporary tone dialing: 26, 33
Time adjustment: 56
Transferring calls: 27, 33
Troubleshooting: 87
TTY: 111
VVM (Voicemail): 83
Voice announcement language: 17
Voice paging: 37
Voicemail: 83
Volume
Receiver: 24
Ringer (Base unit): 32, 60
Ringer (Handset): 25, 54, 56
Ringer for intercom call (Handset): 56
Speaker: 24, 31
Wall mounting: 84
IMPORTANT!
If your product is not working properly...
① Reconnect AC adaptor to the base unit. ② Check if telephone line cord is connected. ③ Use rechargeable Ni-MH batteries. (Alkaline/Manganese/Ni-Cd batteries CANNOT be used.) ④ Read troubleshooting page in the Operating Instructions.

Visit our Web site: http://shop.panasonic.com/support
- FAQ and troubleshooting hints are available.
For your future reference
We recommend keeping a record of the following information to assist with any repair under warranty.
Serial No. Date of purchase
(found on the bottom of the base unit)
Name and address of dealer
Attach your purchase receipt here.
Panasonic Corporation of North America
Two Riverfront Plaza, Newark, NJ 07102-5490