
BRAVIA Theater Bar 9 - Soundbar SONY - Free user manual and instructions
Find the device manual for free BRAVIA Theater Bar 9 SONY in PDF.


| Product Type | Soundbar |
| Brand | Sony |
| Model | BRAVIA Theater Bar 9 |
| Dimensions (W x H x D) | Approx. 1100 x 64 x 120 mm |
| Weight | Approx. 3.5 kg |
| Power Consumption | 50 W (standby: 0.5 W) |
| Power Supply | AC 100-240 V, 50/60 Hz |
| Speaker Configuration | 4.1.2 channel |
| Surround Sound Technology | Dolby Atmos, DTS:X, Vertical Sound Engine |
| Wireless Connectivity | Wi-Fi, Bluetooth 5.0 |
| HDMI Input/Output | 1x HDMI eARC, 1x HDMI input |
| Audio Return Channel | eARC support |
| Remote Control | Included (IR) |
| Voice Assistant | Works with Google Assistant, Amazon Alexa |
| Wall Mountable | Yes (bracket included) |
| Maintenance Cleaning | Wipe with a soft dry cloth. Avoid liquids. |
| Safety Precautions | Do not expose to moisture. Place on stable surface. |
| Spare Parts Availability | Remote, power cord, wall mount kit available from Sony service centers. |
| Repairability Index | 7.5 / 10 (disassembly possible, some parts replaceable) |
| General Information | Designed to pair with Sony BRAVIA TVs for optimized sound. |
Frequently Asked Questions - BRAVIA Theater Bar 9 SONY
User questions about BRAVIA Theater Bar 9 SONY
0 question about this device. Answer the ones you know or ask your own.
Ask a new question about this device
Download the instructions for your Soundbar in PDF format for free! Find your manual BRAVIA Theater Bar 9 - SONY and take your electronic device back in hand. On this page are published all the documents necessary for the use of your device. BRAVIA Theater Bar 9 by SONY.
USER MANUAL BRAVIA Theater Bar 9 SONY
BRAVIA Theatre Bar 9/BRAVIA Theatre Bar 8

Model: YY2083C/YY2082C
In this Help Guide, BRAVIA Theatre Bar 9 images and illustrations are used for illustrative purposes unless noted.
Install the application on your smartphone and follow the directions on the application to set up the speaker system.

BRAVIA Connect
To use the speaker system with all the available functions and improved performances, update the software of the speaker system and the "Sony | BRAVIA Connect" app to the latest versions.
HT-A9000/HT-A8000
How to Use/Parts and Controls
About the App Required to Use the Speaker System
Devices That Are Connected to the Speaker System
About the Help Guide Description
Parts and Controls
Bar Speaker
About the Indicators
Supplied Remote Control
Remote Control Screen on the App
Initial Setup
Checking the Package Contents
Installing the Speaker System
Installing the Bar Speaker on a TV Stand and Shelves
Mounting the Bar Speaker on a Wall
Using the Bar Speaker with the Optional Speakers
When using the optional SA-RS5 rear speakers
Connecting to a TV
If Your TV Has the S-CENTER SPEAKER IN Jack
Connecting an AV Device
Connecting to an AC Outlet (Mains)
Performing Initial Setup with the "Sony | BRAVIA Connect" App
Listening to Music/Sound
Listening to TV Sound
Playing the Connected AV Device
Adjusting Sound Quality
Listening to Music/Sound with the BLUETOOTH® Function
Listening to Music by Pairing the BLUETOOTH Device that is Connected for the First Time
Listening to Music from the Paired BLUETOOTH Device
Setting the Wireless Function to On or Off
Enjoying 360 Reality Audio
About 360 Reality Audio
Playing 360 Reality Audio Content from the Connected AV Device
Enjoying Music on a Network
Using Spotify
Using AirPlay
Using the Speaker System by Interlocking with a TV
Operating the Speaker System by Interlocking with a TV (Control for HDMI Function)
Operating the Speaker System by Interlocking with a TV Compatible with the "BRAVIA Sync" Function
Changing the Settings with the App
[Wireless Speaker Settings]
[Sound Settings]
[HDMI Settings]
[Bluetooth Settings]
[System Settings]
[Network Settings]
[Easy Initial Setup]
[Software update]
Saving Power in Standby Mode
Troubleshooting
Troubleshooting
Resetting the Speaker System
Additional Information
Specifications
Supported audio formats
Supported HDMI Video Formats
Trademarks
Licenses
Notes on Use
Customer Support Website
Sound Bar
BRAVIA Theatre Bar 9/BRAVIA Theatre Bar 8
About the App Required to Use the Speaker System
Use a smartphone with the "Sony | BRAVIA Connect" app installed to perform initial setup and operations as well as configure the settings on the speaker system.
Install the "Sony | BRAVIA Connect" app on your smartphone.

An Internet connection is required to use the speaker system.
To use the speaker system, connect the smartphone on which the app is installed to the same network as the speaker system.
The app allows you to perform the following operations and setup.
- Initial setup of the speaker system, including network connection, surround sound optimization, etc.
- Operations such as volume adjustment, input selection, etc.
- Change the settings of the speaker system to the desired settings.
- Connect the optional rear speakers and/or subwoofer, and perform initial setup.
- Check the remaining capacity of the built-in rechargeable battery for the optional rear speakers.
- Update the software of the speaker system to the latest version.
- Check the support information and latest update information.
The supplied remote control can only be used to perform operations and change settings that are frequently used when you view content.
Note
- An account and sign-in are required to use the app.
- If you do not use the app or the speaker system for more than 30 days, you may need to re-register the speaker system on the app.
Related Topic
• Supplied Remote Control • Remote Control Screen on the App
Sound Bar
BRAVIA Theatre Bar 9/BRAVIA Theatre Bar 8
Devices That Are Connected to the Speaker System
The speaker system supports object-based audio formats such as Dolby Atmos and DTS:X.
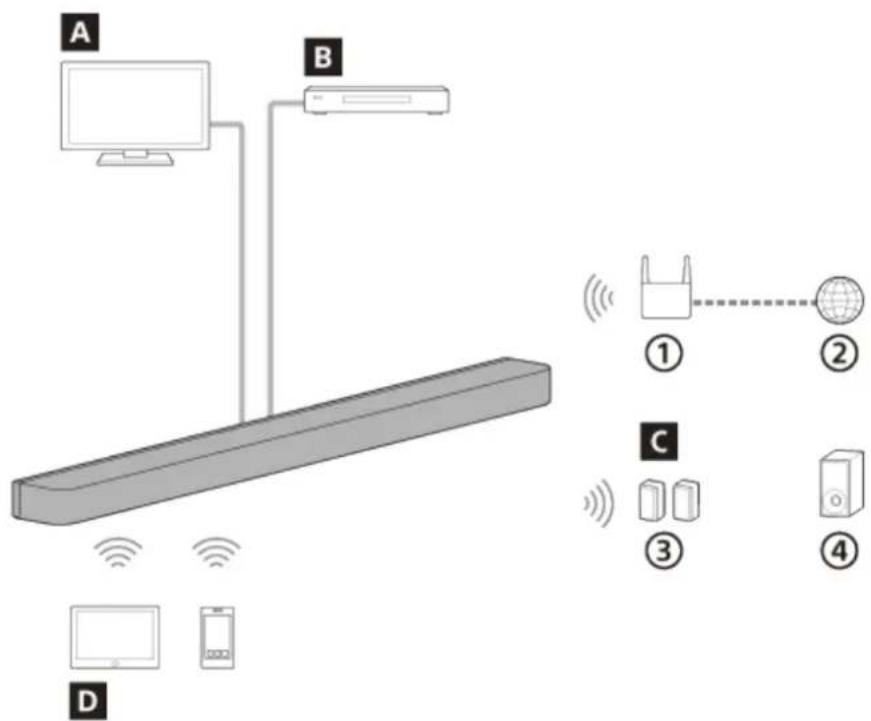
① Wireless LAN router ② Internet ③ Rear speakers ④ Subwoofer
A TV
The speaker system can be used to play TV sound by connecting the speaker system and TV that is compatible with eARC or ARC using an HDMI cable.
Listening to TV Sound
B AV device (Blu-ray Disc™ player, set-top box, cable box, satellite box, gaming console, etc.)
The speaker system can be used to play AV device sound by connecting the speaker system and AV device using an HDMI cable.
The speaker system can also play the sound of an AV device that is connected to the TV.
Playing the Connected AV Device
C Optional speakers
By using the app, optional rear speakers and subwoofers can be connected with the speaker system and configured. For the supported optional rear speakers and subwoofers, see the Sony website.
D Mobile device
The speaker system can be used to play mobile device sound by connecting the speaker system and mobile device using the BLUETOOTH function.
The speaker system can also be used to stream music by connecting a mobile device to the same network as the speaker system.
Listening to Music by Pairing the BLUETOOTH Device that is Connected for the First Time
5-056-360-11(1) Copyright 2024 Sony Corporation
Sound Bar
BRAVIA Theatre Bar 9/BRAVIA Theatre Bar 8
About the Help Guide Description
About the description of operations
This Help Guide explains operations based on the following assumptions.
- Both the speaker system and the "Sony | BRAVIA Connect" app have the latest version of software.
- The speaker system is connected to a TV that is compatible with eARC or ARC using an HDMI cable, and the Control for HDMI functions of the speaker system and TV are enabled.
- The setup of the speaker system and TV(*) has been completed on following the “Sony | BRAVIA Connect” app screen.
If you are using an app-compatible BRAVIA, both the speaker system and BRAVIA can be controlled with the remote control screen on the app. If you are using other TVs, only the speaker system can be controlled with the remote control screen on the app.
About the illustration of the speaker system and the wording displayed on the app
- BRAVIA Theatre Bar 9 images and illustrations are used unless otherwise indicated by the model name.
- The letters in [ ] (brackets) indicate the wording that appears on the "Sony | BRAVIA Connect" app screen.
TP1001494951
5-056-360-11(1) Copyright 2024 Sony Corporation
SONY
Help Guide
Sound Bar
BRAVIA Theatre Bar 9/BRAVIA Theatre Bar 8
Bar Speaker
Front

1. Remote control sensor
Point the remote control at the remote control sensor of the bar speaker to operate the speaker system.
2. Sub status indicator (white)
Indicates the speaker system status by lighting or flashing in white.
3. Main status indicator (colored)
Indicates the speaker system status by lighting or flashing in 5 colors (white/light blue/blue/green/red).
4. ⏻ (Power)
Turns on the speaker system. If you press this button when the speaker system is turned on, the speaker system is set to standby mode.
Press and hold for more than 10 seconds to reset the speaker system.
Rear

AC inlet1.
HDMI IN jack2.
3. HDMI OUT (TV (eARC/ARC)) jack
Use an HDMI cable to connect a TV that has an HDMI input jack. The speaker system is compatible with eARC and ARC. ARC is a feature that sends TV sound from the HDMI jack on the TV to an AV device such as the speaker system via an HDMI cable. eARC is an advanced version of ARC that enables transmission of object-based audio and multi-channel LPCM content that cannot be transmitted with ARC.
4. S-CENTER OUT jack
Outputs the center part of the speaker system sound from a TV if the speaker system is connected to the TV with the S-CENTER SPEAKER IN jack.
Hint
There are two tactile dots that are about 1 mm in size next to the S-CENTER OUT jack. There are three tactile dots that are about 1 mm in size next to the HDMI OUT (TV (eARC/ARC)) jack. Use them as a guide during connection.
Bottom
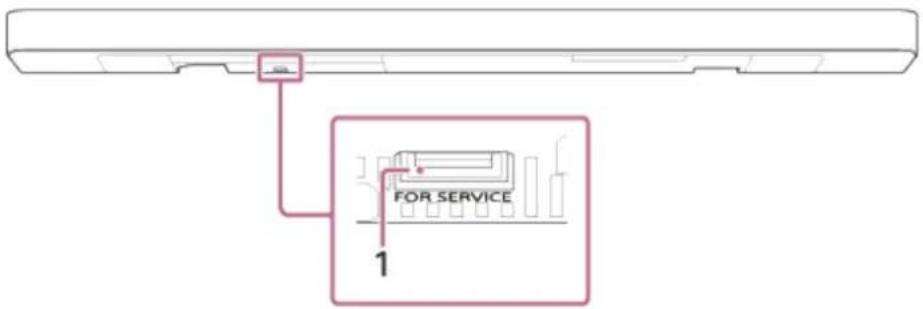
FOR SERVICE port1.
Related Topic
• About the Indicators • Connecting to a TV • If Your TV Has the S-CENTER SPEAKER IN Jack • Connecting an AV Device • Connecting to an AC Outlet (Mains)
5-056-360-11(1) Copyright 2024 Sony Corporation
SONY
Help Guide
Sound Bar
BRAVIA Theatre Bar 9/BRAVIA Theatre Bar 8
About the Indicators
There are two indicators that indicate the status of the bar speaker.
The sub status indicator (white) is on the left and the main status indicator (colored) is on the right.

A Sub status indicator (white) B Main status indicator (colored)
Turning on/off
B Main status indicator
- .... (Turned off) The speaker system is turned off. • Power on/off is processing. (Flashing slowly in white)
Audio input/muting
B Main status indicator
• (Lit up in white) TV (eARC/ARC) input is selected. (Lit up in green) HDMI input is selected. (Lit up in blue) BLUETOOTH input is selected. A BLUETOOTH device is connected to the speaker system. (Flashing twice repeatedly in blue) The speaker system is in BLUETOOTH pairing standby status. • ..... (Flashing in blue) The connection with the BLUETOOTH device is in progress. • (Lit up in light blue) Network service input is selected.
• □……□……(Flashing twice in white)
Switching to TV (eARC/ARC) input is in progress.
• ..... (Flashing twice in green)
Switching to HDMI input is in progress.
• ..... (Flashing twice in blue)
Switching to BLUETOOTH input is in progress.
• ..... (Flashing twice in light blue)
Switching to Spotify input is in progress.
• (Flashing slowly in white/blue alternately)
The speaker system is being set up. Audio playback is not available.
A Sub status indicator
• □……□……(Flashing slowly in white)
Initial setup is not complete on the app or the speaker system is not connected to a network.
- ○……○……(Flashing every 4 seconds in white)
The speaker system is muted.
Setup/operation feedback
A Sub status indicator
• .....(Lit up once for a longer time in white)
The setting is switched to on.
- ○·○…… (Flashing twice in white)
The setting is switched to off.
• ○……(Lit up once briefly in white)
The volume is going up and down.
• (Flashing once for a longer time in white)
An operation was performed in which a button on the remote control was pressed for a long time.
• □……(Flashing three times in white)
Operation is invalid. For example, setting cannot be changed, volume is at upper or lower limit, etc.
Special conditions
B Main status indicator
• ● · ● · ● · ● · ● · (Flashing quickly in blue)
The speaker system is being registered on the app.
• (Flashing in white/blue alternately)
Software updating/initialization, etc. is in progress.
• ..... (Flashing in red)
Abnormality or error has been detected. Follow the steps in "Troubleshooting."
Related Topic
Troubleshooting
SONY
Help Guide
Sound Bar
BRAVIA Theatre Bar 9/BRAVIA Theatre Bar 8
Supplied Remote Control

1. INPUT (Input)
Used to select the input for playback on the speaker system. The input is switched each time you press this button.
2. ⏻ (Power)
Switches between power on and standby on the speaker system.
3. SOUND FIELD (Sound field)
Turns on/off the surround sound effect on the speaker system.
4. VOICE (Voice mode)
Turns on/off the voice mode on the speaker system.
When a Sony TV compatible with the linkage function of the speaker system is connected, the voice zoom is turned on/off instead of the voice mode by selecting TV input on the speaker system.
5. (Volume) +(*)/-
Used to adjust the volume of the speaker system.
6. BASS (Bass level) +/-
Used to adjust the volume of the bass sound or optional subwoofer.
7. NIGHT (Night mode)
Turns on/off the night mode on the speaker system.
8. ☐ (Muting)
Temporarily turns off the sound on the speaker system.

(Volume) + has a tactile dot. Use it as a guide during operation.
About the replacement of batteries for the supplied remote control
If the speaker system does not respond when operating with the supplied remote control, replace the two batteries with new batteries.
Use R03 or LR03 (size AAA) batteries for replacement.
To remove the battery cover, slide it off while pressing the triangular mark on the back of the remote control.

If the remote control does not work properly
- Point the remote control at the remote control sensor on the bar speaker.
- Remove any obstructions between the remote control and the bar speaker.
- Check that the + and - of the battery are in the correct orientation.
- Replace both batteries in the remote control with new ones if they are older batteries.
- Check that the correct button on the remote control is being pressed.
Related Topic
• Adjusting Sound Quality • Using Spotify
Remote Control Screen on the App
There are two types of remote control screens on the app.
Remote control screen that can only operate the speaker system
This screen is displayed when a TV that is not compatible with the app is connected using the HDMI cable.
Remote control screen that can operate the speaker system and BRAVIA
This screen is displayed when an app-compatible BRAVIA is connected using the HDMI cable.
The following items that can be used to operate the speaker system are displayed in [Remote], [Picture & Sound], [Audio output], and [Settings]. If the TV is not turned on, a remote control screen that can only operate the speaker system will appear.
Items on the remote control screen on the app
- Remaining Battery Level: The remaining charge level of the built-in rechargeable battery for the optional rear speakers is displayed.
- Playback information/input switching area
The currently selected input, etc. appears on the upper part of the screen. The following information and operations are displayed by tapping this area.
- Playback meta information: Name, artist, album, length, etc. of the song that is currently playing. — Stream Info: Input signal frequency, etc. — Audio format: Audio format of input signal (Dolby Atmos, DTS, etc.), number of channels, etc. — Name of the BLUETOOTH device connected to the speaker system
- Playback controls for the BLUETOOTH device
- Input selection(*)
* When a TV compatible with the app is connected to the speaker system using an HDMI cable, TV input can also be selected.
• [Power]
Sets the speaker system to standby mode when this is tapped while the speaker system is turned on.
• [Night mode]
Turns on/off the night mode on the speaker system.
• [Sound field]
Turns on/off the surround sound effect on the speaker system.
• [Voice mode]
Turns on/off the voice mode on the speaker system.
• [Voice Zoom]
This function is enabled when a Sony TV compatible with the linkage function of the speaker system is connected. When TV input is selected on the speaker system, the voice zoom works instead of the voice mode.
• [Volume]
Used to adjust the volume of the speaker system.
• [Rear level]
Used to adjust the volume of the rear speakers.
[Bass level]
Used to adjust the volume of the bass sound or optional subwoofer.
• [Audio]
When a dual audio (dual mono) signal is input to the speaker system, the audio you want to hear can be selected.
Note
- This speaker system supports dual audio (dual mono) switching. When switching multiplex broadcasts other than dual audio, such as stereo duplex audio (dual stereo), switch the audio signal on the device with a digital tuner such as a TV. For details, refer to the operating instructions supplied with the device with a digital tuner.
• [Viewing Position]
The sound field can be optimized according to the viewing position. This function cannot be used if the viewing position is not measured accurately by the initial setup or [Sound Field Optimization] ** .
** Displayed when you tap [Settings] - [Sound Settings] - [Sound Field Optimization] on the remote control screen on the app.
[Settings]
Used to configure the settings of the speaker system.
Note
- If the control response is poor, check the Wi-Fi connection between the smartphone and the speaker system.
Related Topic
• Adjusting Sound Quality
5-056-360-11(1) Copyright 2024 Sony Corporation
SONY
Help Guide
Sound Bar
BRAVIA Theatre Bar 9/BRAVIA Theatre Bar 8
Checking the Package Contents
If any of the supplied items are missing, please consult your nearest Sony dealer. The numbers in ( ) indicate the supplied quantity.
The availability and quantity of the supplied items vary depending on the country/region of purchase. Refer to the Reference Guide included with your product to confirm the availability and quantity of the supplied items.
- Bar speaker (1)

- Remote control (1)

- Batteries (2)

• TV center speaker mode cable (1)

• HDMI cable (4K, 8K transmission supported) (1)
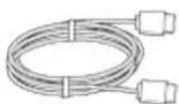
• AC power cord (mains lead) (1)

- Feet (2)
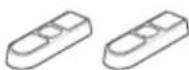
• Wall mounting brackets (2)

- Screws (2)
• Wall mount template (1) - Documents (1 set)
Parts included only in some countries/regions
• AC plug adaptor (1)
TP1001475416
5-056-360-11(1) Copyright 2024 Sony Corporation
SONY
Help Guide
Sound Bar
BRAVIA Theatre Bar 9/BRAVIA Theatre Bar 8
Installing the Bar Speaker on a TV Stand and Shelves
Install the bar speaker in an open space in front of the TV so that the top of the bar speaker overlaps the TV and does not hide the TV screen or the remote control sensor on the TV.
If the bar speaker can be installed without interfering with the TV legs
Example of installation with a TV with two TV legs on either side
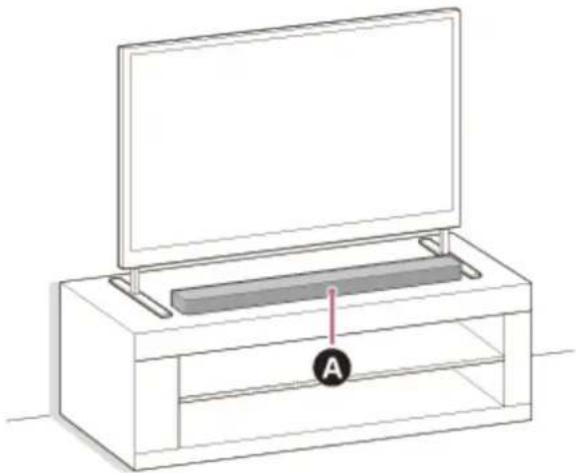
A Bar speaker
Example of installation with a TV with wide TV legs in the center

A Bar speaker
If the bar speaker cannot be installed due to interference with the TV legs
By attaching the supplied foot to the bar speaker, the bar speaker can be raised above the installation surface, thus avoiding interference with the TV legs.
Attaching the foot does not improve sound quality.
If the TV leg size corresponds to the following, the speaker system can be installed by attaching the foot.

(a) Spacing between TV legs: 800 mm (31 1/2 in) or less (b) TV leg height: 8.5 mm (11/32 in) or less
1. Prepare what is needed.
- Feet (2) (supplied)

- Screws (2) (supplied)

• Phillips screwdriver (not supplied)
2. Attach the foot to the bar speaker.
Install the foot according to the following procedure.
- Place the bar speaker with the bottom of the bar speaker facing up.
- Position the foot by fitting the projecting part on the inside of the foot into the hole for the foot projecting part next to the screw hole on the bar speaker.
- Secure the foot with the screw.

B Projecting part © Screw hole D Hole for the foot projecting part E Screw (supplied)
3. Install the bar speaker.
Be careful not to cover the remote control sensor on the TV with the bar speaker.
After installation, check that the TV can be turned on/off with the TV remote control.

4. Perform [Sound Field Optimization](*) on the app in the following cases.
- When changing the position and installation method of the speaker system as well as the optional rear speakers and subwoofer
- When changing the viewing environment, such as changing the layout of furniture
- When changing the position of daily viewing
* Displayed when you tap [Settings] - [Sound Settings] - [Sound Field Optimization] on the remote control screen on the app.
Note
- Do not place metal objects near the speaker system. Wireless functions may become unstable.
- Do not cover the top of the bar speaker. It may interrupt the sound output from the top of the bar speaker. There are ventilation holes at the rear of the bar speaker. Place the bar speaker away from a TV or a wall at a distance of 10 mm (13/32 in) or more.
5-056-360-11(1) Copyright 2024 Sony Corporation
Sound Bar
BRAVIA Theatre Bar 9/BRAVIA Theatre Bar 8
Mounting the Bar Speaker on a Wall
Mount the bar speaker under the TV mounted on the wall.

A Bar speaker
Note
- Make sure to use the supplied wall mounting brackets when mounting the bar speaker on a wall. Do not mount the bar speaker directly onto a wall. Doing so can cause the temperature inside the bar speaker to rise considerably, and this may cause damage to the bar speaker or malfunction.
- Attach the wall mounting brackets flat against the reinforced wall.
- Ask a Sony dealer or licensed contractor to install the bar speaker securely with full consideration of safety.
- Sony shall not be held responsible for accidents or damage caused by improper installation, lack of installation strength, misuse or natural disaster.
- Two or more persons are required to hang the bar speaker for safety.
1 Prepare two screws (not supplied) that are suitable for the holes on the wall mounting bracket (supplied).
The type and length of screws should be selected according to the wall to which they are to be installed.

(a) 6 mm to 9.5 mm (1/4 in to 3/8 in) (b) 4 mm (3/16 in) (c) Longer than 30 mm (1 3/16 in) (approx.)
Reference: Hole on the wall mounting bracket

- Prepare screws (not supplied) that are suitable for the wall material and stability. The screw may damage the wall depending on the wall material.
2
Measure the depth of the mounted TV (f) and find out the required space between the bottom of the TV and the top of the bar speaker (g).
Space is required to ensure that the TV does not interfere with the output surround sound from the bar speaker towards the ceiling.

B TV C Bar speaker
| Depth of the mounted TV (f) | Required space between the bottom of the TV and the top of the bar speaker (g) |
| Shorter than 85 mm (3 3/8 in) | 120 mm (4 3/4 in) or longer |
| 85 mm (3 3/8 in) or longer 200 | mm (7 7/8 in) or longer |
3
Align the vertical line above the “TV CENTER LINE” printed on the WALL MOUNT TEMPLATE (supplied) with the center of the width of your TV.

D Center of the TV E WALL MOUNT TEMPLATE
4
Align the “BAR SPEAKER TOP LINE” printed on the WALL MOUNT TEMPLATE with the bottom of the required space between the bottom of TV and the top of the bar speaker (g) measured in step 2, then adhere the WALL MOUNT TEMPLATE on the wall with a commercially available adhesive tape, etc.

E WALL MOUNT TEMPLATE F Adhesive tape, etc.
Note
- When adhering the WALL MOUNT TEMPLATE on the wall, smooth it out fully.
5
Fasten the screws prepared in step 1 securely into the screw marks on the “SCREW LINE” printed on the WALL MOUNT TEMPLATE.
BRAVIA Theatre Bar 9

G Screws
H Marks
(h) 1 056 mm (41 5/8 in)
(i) 528 mm (20 3/4 in) (j) 3.5 mm to 4.5 mm (5/32 in to 3/16 in) (k) 30 mm (1 3/16 in)
BRAVIA Theatre Bar 8
G Screws
H Marks
(h) 876 mm (34 1/2 in) (i) 438 mm (17 1/4 in) (j) 3.5 mm to 4.5 mm (5/32 in to 3/16 in)
(k) 30 mm (1 3/16 in)
Note
- Fasten the screws securely in the wall beam.
Remove the WALL MOUNT TEMPLATE.
Hang the wall mounting brackets (supplied) on the screws, then fasten the screws to fix the wall mount brackets to the wall.

1 Wall mounting bracket
Connect cables to the bar speaker.
- Connect the HDMI cable (supplied) to the HDMI OUT (TV (eARC/ARC)) jack on the bar speaker.
- Connect the AC power cord (mains lead) (supplied) to the AC inlet on the bar speaker.

J AC power cord (mains lead) K HDMI cable
Put the bar speaker on the wall mounting brackets.

10
Align the positions of the screw holes on the bottom of the bar speaker and holes of the wall mounting bracket, then fix the bar speaker to the wall mounting brackets by fastening the screws (supplied) securely.

L Wall mounting bracket M Screw N Bottom of the bar speaker
11
Connect the HDMI cable (supplied) connected to the bar speaker to the eARC/ARC HDMI input jack on the TV.
12
Connect the AC power cord connected to the bar speaker to the AC outlet (mains).
13
Perform Sound Field Optimization on the app in the following cases.
- When changing the position and installation method of the speaker system as well as the optional rear speakers and subwoofer
- When changing the viewing environment, such as changing the layout of furniture
- When changing the position of daily viewing
* Displayed when you tap [Settings] - [Sound Settings] - [Sound Field Optimization] on the remote control screen on the app.
Mounting the optional speakers on a wall
Refer to the operating instructions of the optional speakers.
Related Topic
- Connecting to a TV • Connecting to an AC Outlet (Mains)
TP1001324611
5-056-360-11(1) Copyright 2024 Sony Corporation
SONY
Help Guide
Sound Bar
BRAVIA Theatre Bar 9/BRAVIA Theatre Bar 8
Using the Bar Speaker with the Optional Speakers
Installing
Install the optional speakers while considering the position where the TV and bar speaker are installed.
Example of installing the bar speaker on a TV stand and shelves

Example of mounting the bar speaker on the wall

Setting up
If you have not yet started setting up the speaker system
Use the app to start the setup for the speaker system and optional speakers. During the setup process, the app will guide you to connect optional speakers.
If you have already completed the setup of the speaker system
Set up the optional speakers on the remote control screen on the app.
Check [Settings] - [Wireless Speaker Settings] - [Wireless Speaker Connection] on the remote control screen on the app.
Note
- No audio will be output unless the setup of the optional speakers completes on the app.
- A software update may be required when using the speaker system with the optional speakers. Perform the software update while the speaker system and the optional speakers are connected to a power source.
If changing the installation method or position of the speaker system or optional speakers
Perform [Sound Field Optimization] (*) on the app in the following cases.
- Changing the position and installation method of the speaker system as well as the optional rear speakers and subwoofer
- When changing your daily viewing position
- When changing the viewing environment, such as changing the layout of furniture
* Displayed when you tap [Settings] - [Sound Settings] - [Sound Field Optimization] on the remote control screen on the app.
Related Topic
- When using the optional SA-RS5 rear speakers • [Sound Settings]
Sound Bar
BRAVIA Theatre Bar 9/BRAVIA Theatre Bar 8
When using the optional SA-RS5 rear speakers
This section describes how to use the speaker system in combination with the optional SA-RS5 rear speakers.
Installing
Refer to the operating instructions supplied with SA-RS5 for installation.
Connect SA-RS5 to the speaker system.
Set up the speaker system by following the instructions in “Setting up” of “Using the Bar Speaker with the Optional Speakers.”
SA-RS5 has a built-in rechargeable battery. If the SA-RS5 is turned off while being used on battery power, the connection to the speaker system will be disconnected. Press the power button on SA-RS5 to reconnect to the speaker system and the power indicator on the SA-RS5 lights up in green.
Changing the location or viewing environment of the speaker system or SA-RS5
Perform Sound Field Optimization on the "Sony | BRAVIA Connect" app in the following cases.
- Changing the position and installation method of the speaker system as well as the optional rear speakers and subwoofer
- When changing your daily viewing position
- When changing the viewing environment, such as changing the layout of furniture
* Displayed when you tap [Settings] - [Sound Settings] - [Sound Field Optimization] on the remote control screen on the app.
Changing the position of SA-RS5 temporarily
Press the OPTIMIZE button when changing the position of SA-RS5 temporarily.
Press the OPTIMIZE button to easily perform position correction for SA-RS5.
When you have finished using the temporary position, return SA-RS5 to its original position and press the OPTIMIZE button again. When pressing the OPTIMIZE button, with both SA-RS5s turned on, press the OPTIMIZE button on either one of them.
Example of temporary SA-RS5 rear speaker position changes
![graph TD A["Printer"] --> B["Central Device"] B --> C["Device 1"] B --> D["Device 2"] style A fill:#f9f,stroke:#333 style B fill:#ccf,stroke:#333 style C fill:#cfc,stroke:#333 style D fill:#fcc,stroke:#333](/content/2026/06/1363580/images/cff20cb0173a9832b002821244a3e5a17a00dde69fcd9dea56152360c52f27e6.jpg)
A Position where SA-RS5s are normally placed B Position where SA-RS5s are temporarily moved
Sound Bar
BRAVIA Theatre Bar 9/BRAVIA Theatre Bar 8
Connecting to a TV

Connect an HDMI IN jack compatible with eARC/ARC on the TV and the HDMI OUT (TV (eARC/ARC)) jack on the speaker system using the HDMI cable (supplied).
![graph TD A["Monitor"] --> B["Device 1: HDMI OUT (NAM/ARC)"] B --> C["Switch"] C --> D["Switch"] D --> E["Switch"] E --> F["Switch"] F --> G["Computer"]](/content/2026/06/1363580/images/7ea69be51e4f4df048964fdb8e061f1114b2a35b6827aa6e4f16749856fa5060.jpg)

HDMI cable (supplied)

TV

Change the TV settings so that TV sound can be output from the speaker system.
Depending on your TV, this may be set automatically when the speaker system is connected. For details, refer to the operating instructions of your TV.

Enable eARC on both the speaker system and the TV.
If the TV that is connected to the speaker system is compatible with eARC/ARC, the eARC function is available.
To enjoy higher quality audio formats such as Dolby Atmos played on an external device connected to the TV, check that the eARC setting is enabled on the speaker system and TV.
• eARC setting for the TV: Refer to the operating instructions of your TV.
eARC setting for the speaker system: The setting is enabled by default.
- Check that the connectors are firmly inserted.
- If the speaker system is not connected to the eARC/ARC-compatible HDMI input of the TV, the TV sound cannot be output from the speaker system.
- Enable the Control for HDMI function on the TV. If the Control for HDMI function on the TV is not enabled, the speaker system does not output TV sound.
- By enabling the eARC function on the TV, some features on the TV may become limited. For instance, system sounds and voice response may not be output. For details, refer to the operating instructions of your TV.
Hint
- There are three tactile dots that are about 1 mm in size next to the HDMI OUT (TV (eARC/ARC)) jack. Use them as a guide during connection.
If Your TV Has the S-CENTER SPEAKER IN Jack
The TV can output the center part of the speaker system sound if the speaker system is connected to the TV using the following method.
1 Connect the speaker system and TV using the HDMI cable (supplied).
For details, refer to "Connecting to a TV."
2 Connect the S-CENTER SPEAKER IN jack on the TV and the S-CENTER OUT jack on the speaker system using the TV center speaker mode cable (supplied).
![graph TD A["Computer Monitor"] --> B["S-CENTER SPEAKER IN"] B --> C["Device with 3-CENTER OUT / N/A/AND"] C --> D["Port A"] D --> E["Port B"]](/content/2026/06/1363580/images/0e573f0b5383be178f3039e6d33a55a14549bcc0281f2fccf30ebdac54081e95.jpg)
A TV center speaker mode cable (supplied)
B TV
Note
- Check that the connectors are firmly inserted.
Some TVs may have another jack with the same shape as the S-CENTER SPEAKER jack. Be careful not to insert the wrong jack.
Hint
- If the TV center speaker mode cable is not long enough, use a commercially available stereo mini cable. There are two tactile dots that are about 1 mm in size next to the S-CENTER OUT jack. Use them as a guide during connection.
To output sound from the TV
Access [Settings] - [Sound Settings] and enable [Acoustic Center Sync] on the remote control screen on the app. Depending on the input, audio signal, or sound field settings, sound may not be output from the TV. For details, refer to the table below.
○ : Sound is output from both the speaker system and TV.
-: No sound is output from the TV. Sound is output from the speaker system only.
| Setting | TV, HDMI input: 2-channel content | TV, HDMI input: Multi-channel content | BLUETOOTH input, music service, AirPlay |
| [Sound field](*): On and [Sound Field Setting](**): [360 Spatial Sound Mapping] | ○ | ○ | - |
| [Sound field](*): On and [Sound Field Setting](**): [Dolby Speaker Virtualizer], [DTS Neural:X] | --- | ||
| [Sound field](*): Off -- | ○ |
* Displayed on the remote control screen on the app. ** Displayed when you tap [Settings] - [Sound Settings] - [Sound Field Setting] on the remote control screen on the app.
Related Topic
- Connecting to a TV
- Adjusting Sound Quality • [Sound Settings]
5-056-360-11(1) Copyright 2024 Sony Corporation
Sound Bar
BRAVIA Theatre Bar 9/BRAVIA Theatre Bar 8
Connecting an AV Device
8K video and high-quality audio such as Dolby Atmos, Dolby TrueHD, DTS:X, etc. can be played by connecting an AV device (Blu-ray Disc player, set-top box, cable box, satellite box, gaming console, etc.) in the following way.
1 Connect the HDMI OUT jack on the AV device and HDMI IN jack on the TV using an HDMI cable (not supplied).
2 Connect the speaker system and TV using the HDMI cable (supplied).
![graph TD A["TV Screen"] --> B["Home In"] B --> C["Switch"] C --> D["Switch"] D --> E["Home Out"] style A fill:#f9f,stroke:#333 style B fill:#ccf,stroke:#333 style C fill:#cfc,stroke:#333 style D fill:#fcc,stroke:#333](/content/2026/06/1363580/images/d46f77ce3c12d2c3b02fa6a7b56f99f9dfef741082a4004649aba3c63e6b8f25.jpg)
A TV B HDMI cable (supplied) C HDMI cable (not supplied) D AV device (Blu-ray Disc player, set-top box, cable box, satellite box, gaming console, etc.)
The AV device can be connected to the speaker system directly.
To play 360 Reality Audio content on an AV device, connect the AV device directly to the speaker system.
By connecting an AV device directly to the speaker system, higher quality audio formats such as Dolby Atmos that are played on the AV device can also be output from the speaker system, even if the TV is not compatible with eARC.
Connect the speaker system and TV using the HDMI cable (supplied). 1.
Remove the sticker from the HDMI IN jack on the speaker system. 2.
- Connect the HDMI IN jack on the speaker system and HDMI OUT jack on the AV device using an HDMI cable (not supplied).
![graph TD A["Device 1"] --> B["Device 2"] B --> C["Device 3"] C --> D["Device 4"] D --> E["Device 5"] style A fill:#f9f,stroke:#333 style B fill:#ccf,stroke:#333 style C fill:#cfc,stroke:#333 style D fill:#fcc,stroke:#333](/content/2026/06/1363580/images/2e01742687d1f443d3046ed66fe89e2f25ab52f58c5ff41b350081494e343bae.jpg)
A TV B HDMI cable (supplied) © HDMI cable (not supplied) D AV device (Blu-ray Disc player, set-top box, cable box, satellite box, gaming console, etc.)
Note
- Check that the connectors are firmly inserted.
- To view 8K content, the TV and HDMI cable need to be compatible with 8K. For details, refer to the operating instructions of the TV.
- Some TV controls may become limited. For instance, system sounds and voice response may not be output. For details, refer to the operating instructions of your TV.
- The types and number of devices that can be controlled by the Control for HDMI function are limited by the HDMI CEC standard as follows.
— Recording devices (Blu-ray Disc recorder, DVD recorder, etc.): Up to 3 devices — Playback devices (Blu-ray Disc player, DVD player, etc.): Up to 3 devices — Tuner-related devices: Up to 4 devices — Audio system (receiver/headphones): Up to 1 device (used by this speaker system)
Hint
- Use an HDMI cable that is compatible with the video format of the device being connected, and select the HDMI signal format by accessing [Settings] - [HDMI Settings] - [HDMI Signal Format] on the remote control screen on the app.
For the supported audio formats, refer to "Related Topic." There are three tactile dots that are about 1 mm in size next to the HDMI OUT (TV (eARC/ARC)) jack. Use them as a guide during connection.
Related Topic
- Connecting to a TV
- Playing 360 Reality Audio Content from the Connected AV Device • Supported audio formats • Supported HDMI Video Formats
Sound Bar
BRAVIA Theatre Bar 9/BRAVIA Theatre Bar 8
Connecting to an AC Outlet (Mains)

Connect the AC power cord (mains lead) (supplied) to the AC inlet on the bar speaker, then connect to the AC outlet (mains).


AC power cord (mains lead) (supplied)
Sound Bar
BRAVIA Theatre Bar 9/BRAVIA Theatre Bar 8
Performing Initial Setup with the "Sony | BRAVIA Connect" App
To set up the speaker system, use the "Sony | BRAVIA Connect" app.
1 Check that the bar speaker is connected to the TV and that the bar speaker is connected to the power source. 2 Download and install the "Sony | BRAVIA Connect" app on your smartphone.

3 Open the app and follow the instructions on the screen to complete the setup.
Related Topic
• Installing the Bar Speaker on a TV Stand and Shelves • Mounting the Bar Speaker on a Wall - Connecting to a TV • If Your TV Has the S-CENTER SPEAKER IN Jack • Connecting an AV Device • Connecting to an AC Outlet (Mains)
Listening to TV Sound
Operate the remote control screen on the app as follows.

Tap the playback information/input switching area on the upper part of the screen to switch the input to [TV].
If the remote control screen on the app that can operate the speaker system and BRAVIA is displayed, there is no need to operate the input switching of the speaker system. The audio input on the speaker system switches in conjunction with the content being viewed on the TV.

Adjust the volume.
To operate using the supplied remote control
Press INPUT (Input) to light the main status indicator on the bar speaker in white.1.
Adjust the volume.2.
Note
- If there is no picture when TV (eARC/ARC) input is selected, select the preferred TV channel by using the TV remote control.
- Depending on whether you turn on the TV or the speaker system first, the speaker system may be muted and the sub status indicator on the bar speaker may flash in white. In this case, turn on the TV before turning on the speaker system.
Playing the Connected AV Device
Operate the remote control screen on the app as follows.

Tap the playback information/input switching area on the upper part of the screen to switch the input to [HDMI].
If the remote control screen on the app that can operate the speaker system and BRAVIA is displayed, there is no need to operate the input switching of the speaker system. The audio input on the speaker system switches in conjunction with the content being viewed on the TV.

Adjust the volume.
To operate using the supplied remote control
Press INPUT (Input) to light the main status indicator on the bar speaker in green. 1.
Adjust the volume. 2.
Note
- If there is no picture from the device connected to the HDMI IN jack on the speaker system, press the playback button on the connected device.
- When there is no picture from the connected device or the picture from the connected device is not output correctly, access [Settings] - [HDMI Settings] and change the [HDMI Signal Format] settings on the remote control screen on the app.
- Check that the speaker system is connected to a device that is HDCP (High-bandwidth Digital Content Protection) compliant. For details, refer to the operating instructions supplied with the connected device.
- If HDR content cannot be shown in high dynamic range, check that the settings of the TV or device connected to the speaker system. For details, refer to the operating instructions supplied with the TV or connected device.
- Depending on the [HDMI Signal Format] setting, an AV device may not be able to output HDR content in the HDR format. Access [Settings] - [HDMI Settings] and change the [HDMI Signal Format] settings on the remote control screen on the app to accommodate the video format that is supported by the AV device.
- If the picture and sound of the device that is connected to the speaker system are not output from the TV while the speaker system is turned off, access [Settings] - [HDMI Settings] - [Standby Through] and set this to [Auto] or [On] on the remote control screen on the app.
Related Topic
[HDMI Settings]
Sound Bar
BRAVIA Theatre Bar 9/BRAVIA Theatre Bar 8
Adjusting Sound Quality
The following sound quality adjustments can be performed on the remote control screen on the app or on the supplied remote control.
Operating using the remote control screen on the app
When an app-compatible BRAVIA is connected to the speaker system using an HDMI cable, select [Picture & Sound].
• [Sound field]
Outputs sound with the surround sound effect. This setting can be used to experience surround sound with a sense of presence.
• [Voice mode]
Emphasizes dialog and makes it easier to hear.
• [Voice Zoom]
This function is enabled when a Sony TV compatible with the linkage function of the speaker system is connected. When TV input is selected on the speaker system, the voice zoom works instead of the voice mode.
The voice zoom can adjust only the volume of the human voice without changing the overall volume. The voice volume of the newscaster can be adjusted to be louder to make it easier to hear, and the voice volume can be adjusted to be quieter for live sports broadcasts or other situations where the commentary or play-by-play commentary is too loud.
• [Night mode]
Outputs clear sound even at a low volume for late night use and features clear dialog and minimum loss of fidelity.
Operating using the supplied remote control
Each time you press a button on the supplied remote control, the setting changes and the setting status can be checked on the sub status indicator on the speaker system.
When set to on: The sub status indicator lights up once for a longer time in white.
When set to off: The sub status indicator flashes twice in white.
• SOUND FIELD (Sound field)
Outputs sound with the surround sound effect. This setting can be used to experience surround sound with a sense of presence.
• VOICE (Voice mode)
Emphasizes dialog and makes it easier to hear.
The voice zoom works to adjust the volume of human voices when a TV compatible with the linkage function of the speaker system is connected. When voice zoom is turned on, the last adjusted value in the TV menu or remote control screen on the app will be applied.
• NIGHT (Night mode)
Outputs clear sound even at a low volume for late night use and features clear dialog and minimum loss of fidelity.
Note
The sound field is not available during test tone output. If [Sound Field Setting] is set to [Dolby Speaker Virtualizer] and the sound field is set to on, the voice mode is disabled. (*)
- Depending on the combination of the sound field setting(*) and content, the Sound Field Optimization effect may not be applied. The sense of presence that can be achieved by the surround sound processing may vary depending on the playback content.
- When playing multi-channel audio, check the digital audio output setting on the device that is connected to the speaker system. For details, refer to the operating instructions supplied with the connected device. Some speakers may not output sound depending on the content or sound field setting(*). The night mode automatically turns off when the speaker system is turned off.
- Check the URL below for TVs that are compatible with the linkage function of the speaker system. https://www.sony.net/hav_faq
- Depending on the TV setting or content, the voice zoom may not work. * On/off setting of the sound field and the setting displayed after you tap [Settings] - [Sound Settings] - [Sound Field Setting] on the remote control screen on the app. ** Displayed when you tap [Settings] - [Sound Settings] - [Sound Field Optimization] on the remote control screen on the app.
Related Topic
[Sound Settings]
Sound Bar
BRAVIA Theatre Bar 9/BRAVIA Theatre Bar 8
Listening to Music by Pairing the BLUETOOTH Device that is Connected for the First Time
To use the BLUETOOTH function, the speaker system and BLUETOOTH device needs to be paired in advance.
Pairing is the process of registering devices with each other in advance.
1 Turn on the BLUETOOTH device.
2 Switch the input to [Bluetooth] on the remote control screen on the app.
If another BLUETOOTH device is already connected to the speaker system, select [Connect to other devices].
The speaker system enters pairing mode, and the main status indicator on the bar speaker flashes twice repeatedly in blue when switching to the [Bluetooth] input without a paired device.
3 Look for the speaker system on the BLUETOOTH device by performing the pairing operation.
The list of BLUETOOTH devices detected by the BLUETOOTH device appears on the screen of the BLUETOOTH device.
For how to perform pairing with the BLUETOOTH device, refer to the operating instructions of the BLUETOOTH device.
4 Select the speaker system (*) from the list of devices displayed on the screen of the BLUETOOTH device and register the speaker system and BLUETOOTH device with each other.
If a passkey is requested, enter "0000."
* BRAVIA Theatre Bar 9, BRAVIA Theatre Bar 8, or the device name set in [Unit Name].
5 Confirm on the remote control screen on the app that the speaker system and the BLUETOOTH device are connected via the BLUETOOTH function.
The connected BLUETOOTH device name is displayed on the remote control screen on the app.
6 Start audio playback with the music app on the connected BLUETOOTH device.
Sound is output from the speaker system.
7 Adjust the volume.
Adjust the speaker system volume using the remote control screen on the app, music playback app, or (Volume) +/- on the supplied remote control.

Play or pause the content by tapping the playback operation icon on the remote control screen on the app.
Note
- If pairing fails, try performing the following on the BLUETOOTH device.
- Accept pairing request. - If the maximum number of paired devices on the BLUETOOTH device has been reached, remove any unneeded devices.
- If the speaker system has been reset, delete the pairing information for the speaker system from the BLUETOOTH device and perform pairing again.
Hint
- If there is no BLUETOOTH device paired (when using immediately after purchase, etc.), the speaker system enters the pairing mode when the input is simply changed to [Bluetooth].
- Perform pairing for a second or subsequent BLUETOOTH device.
Related Topic
- Setting the Wireless Function to On or Off
- Resetting the Speaker System
TP1001325290
5-056-360-11(1) Copyright 2024 Sony Corporation
Sound Bar
BRAVIA Theatre Bar 9/BRAVIA Theatre Bar 8
Listening to Music from the Paired BLUETOOTH Device
1 Turn on the BLUETOOTH function on the BLUETOOTH device.
2 Switch the input to [Bluetooth] on the remote control screen on the app.
The speaker system automatically reconnects to the BLUETOOTH device that was most recently connected to the speaker system.
If another BLUETOOTH device is already connected to the speaker system, select [Connect to other devices].
Then, use the BLUETOOTH device that you want to connect to the speaker system to select the speaker system as the device being connected to for the BLUETOOTH function.
3 Start audio playback with the music app on the connected BLUETOOTH device.
Sound is output from the speaker system.
4 Adjust the volume.
Adjust the speaker system volume from the remote control screen on the app or music playback app.
Play or pause the content by tapping the playback operation icon on the remote control screen on the app.
To operate using the supplied remote control
Turn on the BLUETOOTH function on the BLUETOOTH device.1.
- Press INPUT (Input) to light the main status indicator on the bar speaker in blue.
The speaker system automatically reconnects to the BLUETOOTH device that was most recently connected to the speaker system.
If you cannot connect to the BLUETOOTH device that you used in step 1, select [Connect to other devices] on the remote control screen on the app. Then, use the BLUETOOTH device that you used in step 1 to select the speaker system as the device being connected to for the BLUETOOTH function.
Start audio playback with the music app on the connected BLUETOOTH device.
Adjust the volume.
Hint
- If a BLUETOOTH connection is not established between the speaker system and BLUETOOTH device, select the speaker system on the BLUETOOTH device.
- If sound delay occurs, it may be improved by accessing [Settings] - [Bluetooth Settings] - [Bluetooth Connection Quality] and set this to [Priority on Stable Connection] on the remote control screen on the app.
To disconnect the BLUETOOTH device
Use one of the following methods to disconnect.
- Turn off the BLUETOOTH function on the BLUETOOTH device.
- Turn off the speaker system or BLUETOOTH device.
Related Topic
- Setting the Wireless Function to On or Off
Setting the Wireless Function to On or Off
The wireless function is set to on by default.
- Press INPUT (Input), (Volume) -, (Volume)+, and INPUT (Input) on the supplied remote control in this order to turn off the BLUETOOTH and Wireless LAN function. The sub status indicator on the bar speaker flashes twice in white.
- Press INPUT (Input), (Volume) –, (Volume)+, and INPUT (Input) on the supplied remote control in this order to turn on the BLUETOOTH and Wireless LAN function. The sub status indicator on the bar speaker lights up once for a longer time in white.
Note
The following operations cannot be performed when the wireless function is set to off:
- Pairing and/or connecting with a BLUETOOTH device. — Using "Sony | BRAVIA Connect."
- Playing music on the network via wireless LAN.
- Connecting the optional speakers to the speaker system.
About 360 Reality Audio
The speaker system is compatible with 360 Reality Audio.
360 Reality Audio is a new music experience that uses Sony's object-based spatial acoustic technology to create a highly realistic sound field that makes you feel as if you have entered the space where an artist is performing live.
For details, refer to the following URL.
https://www.sony.net/360RA/
Related Topic
- Playing 360 Reality Audio Content from the Connected AV Device
Sound Bar
BRAVIA Theatre Bar 9/BRAVIA Theatre Bar 8
Playing 360 Reality Audio Content from the Connected AV Device
360 Reality Audio content can be played on the speaker system by connecting an AV device that is compatible with 360 Reality Audio to the speaker system. 1 Connect an AV device that is compatible with 360 Reality Audio to the HDMI IN jack on the speaker system. 2 Tap the playback information/input switching area on the upper part of the remote control screen on the app to switch the input to [HDMI].
If the remote control screen on the app that can operate the speaker system and BRAVIA is displayed, there is no need to operate the input switching of the speaker system. The audio input on the speaker system switches in conjunction with the AV device selected on the TV.
3 Play 360 Reality Audio compatible content by operating the connected AV device.
To operate using the supplied remote control
- Connect an AV device that is compatible with 360 Reality Audio to the HDMI IN jack on the speaker system. Press INPUT (Input) to light the main status indicator on the bar speaker in green. 2. Play 360 Reality Audio compatible content by operating the connected AV device. 3.
Hint
For details about AV devices that are compatible with 360 Reality Audio, refer to the following URL: https://www.sony.net/360RA/#speakers
Related Topic
• Connecting an AV Device
TP1001325875
5-056-360-11(1) Copyright 2024 Sony Corporation
Using Spotify
Select music on the Spotify app and play it on the speaker system.
Playing music on the speaker system by using the "Spotify Connect" function
Use your phone, tablet or computer as a remote control for Spotify. Go to spotify.com/connect to learn how.
Hint
- If [Settings] - [System Settings] - [Network/Bluetooth Standby] is set to [Off] on the remote control screen on the app, playback cannot be started while the speaker system is in standby mode. If set to [On], the speaker system starts up from standby mode and plays music.
Resuming music that was being played on a mobile device
Press INPUT to light the main status indicator on the bar speaker in light blue.
If you were playing music on Spotify with the speaker system, the music that was being played on Spotify is resumed.
Note
The Spotify app may not be available in some countries/regions.
Using AirPlay
The speaker system is compatible with AirPlay. Music content can be selected on an iOS device such as an iPhone, iPad, or iPod touch and stream it to the speaker system. 1 Connect the iOS device via Wi-Fi to the same network as that of the speaker system. 2 Play the music that you want to stream on the iOS device. 3 Display the AirPlay icon on the iOS device and tap it. 4 Select the speaker system as the speaker to stream to on the iOS device.
The music is played on the speaker system.
Hint
- Music can be streamed to multiple speakers by selecting other speakers together with the speaker system.
- If [Settings] - [System Settings] - [Network/Bluetooth Standby] is set to [Off] on the remote control screen on the app, playback cannot be started while the speaker system is in standby mode. If set to [On], the speaker system starts up from standby mode and plays music.
Streaming music on the speaker system by talking to Siri
If you add the speaker system to the Home app on the iOS device, you can stream music to the speaker system by talking to Siri.
Note
Because the speaker system does not have a microphone, you cannot talk to the speaker system to operate it. - Not all Siri features are available on the speaker system.
Sound Bar
BRAVIA Theatre Bar 9/BRAVIA Theatre Bar 8
Operating the Speaker System by Interlocking with a TV (Control for HDMI Function)
Speaker system controls such as power on/off or volume adjustment can be interlocked with a TV's controls by using an HDMI cable to connect the speaker system with a TV that is compatible with the Control for HDMI function.
About the Control for HDMI function
The Control for HDMI function is a function that interlocks devices that are connected using an HDMI (High-Definition Multimedia Interface) cable so that these devices can be operated together.
Although this function is supported by devices that are compatible with the Control for HDMI function, it may not work if devices other than those manufactured by Sony are connected.
Preparing to operate the speaker system by interlocking it with a TV
Enable the Control for HDMI function settings on the TV that is connected to the speaker system using an HDMI cable.
The Control for HDMI function setting on the speaker system is enabled by default.
Note
The TV needs to be compatible with the Control for HDMI function. For details, refer to the operating instructions of the TV. - Check the speaker settings on the TV. The speaker system power becomes synced with the speaker settings on the TV. For details, refer to the operating instructions of the TV. - Depending on the TV, if sound was previously output from the speakers on the TV, the speaker system may not turn on through interlocking with the TV power controls even when the TV is turned on.
Hint
- If a device such as a Blu-ray Disc player is connected to a TV using an HDMI cable, enable the Control for HDMI function on the device.
- To enable the Control for HDMI function on a TV or Blu-ray Disc player, refer to its operating instructions.
- If the Control for HDMI (“BRAVIA Sync”) function is enabled on a TV manufactured by Sony, the Control for HDMI function on the speaker system is also automatically enabled. The Control for HDMI function setting on the speaker system can be changed by accessing [Settings] - [HDMI Settings] - [Control for HDMI] on the remote control screen on the app.
Performing power operation or volume adjustment by a TV remote control
When the TV is turned on/off or the volume is adjusted with the TV remote control, the speaker system power operation or volume adjustment is interlocked.

A TV
B TV remote control
Power interlocking
When the TV is turned on, the speaker system turns on automatically. When the TV is turned off, the speaker system turns off automatically.
Note
- If the speaker system is turned off before the TV is turned off, the speaker system may not turn on automatically even when the TV is turned on next. If this occurs, perform the following operation. — Select the speaker system as the sound output device in the TV menu. — If a Sony TV is being used, turn on the speaker system while the TV is turned on.
Volume adjustment
The sound of the TV that you are watching is output from the speaker system automatically. The speaker system volume can be adjusted with the TV remote control.
One-touch play function
The speaker system and TV automatically turn on when content is played on a Blu-ray Disc player connected to the speaker system or when an operation such as the pressing of the PS button on a PlayStation®5 controller is performed.
Note
- Depending on the TV, if [Settings] - [HDMI Settings] - [Standby Through] is set to [Auto] or [On] on the remote control screen on the app and the TV sound was last output from the speakers on the TV, the speaker system may not turn on and sound and picture may be output on the TV only even if device content is played.
Related Topic
• [HDMI Settings]
TP1001325286
SONY
Help Guide
Sound Bar
BRAVIA Theatre Bar 9/BRAVIA Theatre Bar 8
Operating the Speaker System by Interlocking with a TV Compatible with the “BRAVIA Sync” Function
"BRAVIA Sync" is an extended function that is developed by Sony based on the Control for HDMI function. By using an HDMI cable to connect "BRAVIA Sync"-compatible devices such as a TV or a Blu-ray Disc player, the devices can be interlocked with each other and controlled.
To use "BRAVIA Sync"
Enable the Control for HDMI function on the Sony device to enable "BRAVIA Sync."
What you can do with "BRAVIA Sync"
Control for HDMI function
• Power interlocking • Volume adjustment • One-touch play function
Related Topic
- Operating the Speaker System by Interlocking with a TV (Control for HDMI Function) [HDMI Settings]
TP1001325285
5-056-360-11(1) Copyright 2024 Sony Corporation
Sound Bar
BRAVIA Theatre Bar 9/BRAVIA Theatre Bar 8
[Wireless Speaker Settings]
These are the settings for the connection for an optional subwoofer or rear speakers.
The following setting items appear by tapping [Settings] - [Wireless Speaker Settings] on the remote control screen on the app.
Wireless speaker status check
Used to check the connection status of the speakers connected to the speaker system on the app screen.
[Wireless Speaker Connection]
Used to configure the connection settings for an optional subwoofer or rear speakers. This can also be used to replace a connected subwoofer or rear speakers with a new subwoofer or rear speakers.
[Wireless Channel]
Normally set to [Auto] (the best channel for wireless communication is automatically selected). If sound dropping occurs, this may be improved by fixing the channel.
[Wireless Playback Quality]
Used to set the wireless playback quality for an optional subwoofer and rear speakers.
[Sound Settings]
These are the settings for audio output.
The following setting items appear by tapping [Settings] - [Sound Settings] on the remote control screen on the app.
[Sound Field Optimization]
Optimizes the sound field effect. Follow the instructions on the screen.
After completing the initial setup of the speaker system and the optional speakers, if you change the location or position where they are installed, perform this setting again.
[Sound Field Setting]
Used to select the type of surround sound effect. To enjoy the effect of the selected sound field, turn on the sound field function on the supplied remote control or the remote control screen on the app.
[Height of Sound Field]
Adjusts the height of the entire sound field to improve the sense of unity between picture and sound.
[Acoustic Center Sync]
Outputs the center speaker portion of the speaker system sound from the TV by connecting the speaker system and TV using the supplied HDMI cable and the supplied TV center speaker mode cable. Set [Control for HDMI] to [On].
[Sound output check]
Used to check the sound output of the current settings and see whether sound is being output consistently from each speaker.
[DSEE Ultimate]
Plays compressed music accurately upscaled with AI technology.
[Audio DRC]
Compresses the dynamic range (range between the loudest and quietest parts) of the audio signal to make it easier to hear softer sounds.
[DTS Dialog Control]
The volume of dialog is adjusted while content that is compatible with the DTS:X dialog control function is being played.
[A/V Sync]
Adjusts the delay between the picture and sound.
[Automatically adjust volume]
Reduces volume changes caused by the input signal. This function is effective when the volume of a TV commercial is louder than that of the TV program.
Related Topic
• Supplied Remote Control • Remote Control Screen on the App • Installing the Bar Speaker on a TV Stand and Shelves • Mounting the Bar Speaker on a Wall • Using the Bar Speaker with the Optional Speakers - If Your TV Has the S-CENTER SPEAKER IN Jack [HDMI Settings]
TP1001325283
5-056-360-11(1) Copyright 2024 Sony Corporation
Sound Bar
BRAVIA Theatre Bar 9/BRAVIA Theatre Bar 8
[HDMI Settings]
These are the settings for HDMI.
The following setting items appear by tapping [Settings] - [HDMI Settings] on the remote control screen on the app.
[Control for HDMI]
When the Control for HDMI function is enabled, devices that are connected using an HDMI cable are operated with each other and receive ARC audio from the TV.
[TV Power Off Link]
When the TV is turned off, the speaker system is also turned off by interlocking with the TV power. Set [Control for HDMI] to [On].
[Standby Through]
Sends the HDMI signal to the TV even when the speaker system is turned off.
[eARC]
When a TV that is compatible with eARC is connected, enable this setting to enable the eARC function. When a TV that is compatible with ARC (but not compatible with eARC) is connected, the ARC function works regardless of how this function is set.
When eARC is enabled, check the eARC setting on the TV. For details, refer to the operating instructions of the TV.
[HDMI Signal Format]
Used to set the video format that can be received. If the picture and sound from a device that is connected to the speaker system are not being output correctly, change this setting.
Note
- If the video format selected for this setting is not output, the video signal specifications and settings of your TV may not match those of the speaker system. Check the video input specifications and settings of your TV. For TV specifications and settings, refer to the operating instructions of your TV. If the picture and sound are not output when [Enhanced format (4K120, 8K)] is set, set to [Enhanced format] or [Standard format].
- If the picture and sound are not output when [Enhanced format] is set, set to [Standard format].
- For details on the video formats that can be received and the type of HDMI cable that can be used, refer to "Supported HDMI Video Formats."
- The VRR/ALLM/SBTM function is linked to this setting and enabled when [Enhanced format (4K120, 8K)] (the default setting) is set.
Outputs the picture from the HDMI input on the speaker system to the TV when TV (eARC/ARC) input is selected on the speaker system. Turn this setting on when you want to display two windows on a TV, including the picture from the HDMI input on the speaker system.
5-056-360-11(1) Copyright 2024 Sony Corporation
SONY
Help Guide
Sound Bar
BRAVIA Theatre Bar 9/BRAVIA Theatre Bar 8
[Bluetooth Settings]
This is the advanced setting for the BLUETOOTH function.
The following setting item appears by tapping [Settings] - [Bluetooth Settings] on the remote control screen on the app.
[Bluetooth Connection Quality]
Used to set the BLUETOOTH connection quality when playing audio from a mobile device on the speaker system.
Related Topic
- Setting the Wireless Function to On or Off
TP1001325281
5-056-360-11(1) Copyright 2024 Sony Corporation
Sound Bar
BRAVIA Theatre Bar 9/BRAVIA Theatre Bar 8
[System Settings]
These are the settings for the speaker system.
The following setting items appear by tapping [Settings] - [System Settings] on the remote control screen on the app.
[Auto Standby]
When the speaker system is not being operated and there is no signal input for about 20 minutes, the speaker system automatically enters the standby mode.
When the [Auto Standby] function is deactivated, the energy consumption of the speaker system may increase because the speaker system does not automatically turn off even when it is not in use.
[Network/Bluetooth Standby]
The speaker system can be turned on via the network or BLUETOOTH function. The speaker system can also be turned on from the app.
Note
- When [Network/Bluetooth Standby] is set to [Off], it may take longer for audio to be output from the speaker system when the speaker system is turned on.
[Auto Update]
Used to set whether network updates are performed automatically.
[Dimmer]
Used to adjust the brightness of the indicators on the bar speaker. The brightness of the indicators for the optional subwoofer and rear speakers also changes.
[Unit Name]
Used to change the name of the speaker system that is displayed when a function such as the BLUETOOTH function is being used.
[System Information]
Displays speaker system information such as the software version.
[Software License Information]
Displays the software license information.
TP1001325280
SONY
Help Guide
Sound Bar
BRAVIA Theatre Bar 9/BRAVIA Theatre Bar 8
[Network Settings]
These are the settings for the network.
The following setting items appear by tapping [Settings] - [Network Settings] on the remote control screen on the app.
[Network Connect Status]
Used to check the network settings on the speaker system.
[Account Management]
Used to check the list of users currently using the speaker system or used to cancel user registration. Up to 20 user accounts can be registered.
[External Control]
Used to enable or disable the control of the speaker system from an external control device. This setting item is for custom installers only. Normally, disable this setting item.
[Privacy Setting]
The speaker system collects information on your device usage. Check the privacy policy that is displayed during setup, and set your approval or disapproval for the data collection.
Hint
- Once you have given your approval, you can stop the collection of information by withdrawing your consent or resetting the speaker system to its original settings.
Related Topic
- Resetting the Speaker System
[Easy Initial Setup]
The basic settings, speaker settings, and surround sound optimization for the speaker system can be easily performed. Tap [Settings] - [Easy Initial Setup] on the remote control screen on the app.
Help Guide
Sound Bar
BRAVIA Theatre Bar 9/BRAVIA Theatre Bar 8
[Software update]
Used to update the software of the speaker system, optional subwoofer, or optional rear speakers.
Tap [Settings] - [Software update] on the remote control screen on the app.
Sound Bar
BRAVIA Theatre Bar 9/BRAVIA Theatre Bar 8
Saving Power in Standby Mode
To reduce power consumption in standby mode, configure the settings as follows.
- Access [Settings] - [HDMI Settings] - [Standby Through] and set this to [Off] on the remote control screen on the app.
- Access [Settings] - [System Settings] - [Network/Bluetooth Standby] and set this to [Off] on the remote control screen on the app.
Note
- When [Network/Bluetooth Standby] is set to [Off], it may take longer for audio to be output from the speaker system when the speaker system is turned on.
Troubleshooting
If you have any problems, please follow the process below.
- Check that the other devices connected to the speaker system and TV are connected to the correct jacks with the correct cables, and that they are firmly inserted all the way to the back.

- Check that the ventilation holes on the rear of the speaker system are not blocked.

- Disconnect the AC power cord (mains lead) from the wall outlet (main) to turn off, and then wait several minutes before reconnecting it.

- Access the Sony support site from the menu of the "Sony | BRAVIA Connect" app to look up the cause and solution of the issue, or check the support website below.
• BRAVIA Theatre Bar 9 https://www.sony.net/support/HT-A9000/ • BRAVIA Theatre Bar 8 https://www.sony.net/support/HT-A8000/

- Reset the speaker system.
All the speaker system settings are returned to their initial state.

- If the speaker system still does not work properly, consult your nearest Sony dealer.
Related Topic
- Resetting the Speaker System
Sound Bar
BRAVIA Theatre Bar 9/BRAVIA Theatre Bar 8
Resetting the Speaker System
If the speaker system still does not operate properly with "Troubleshooting," reset the speaker system.
Press and hold (power) on the bar speaker for more than 10 seconds.
The main status indicator on the bar speaker flashes in white/blue alternately and the reset starts. When the flashing finishes, the reset is completed.
After the reset is completed, disconnect the AC power cord (mains lead) from the AC outlet (mains), then reconnect the AC power cord (mains lead) after the main status indicator on the bar speaker turns off.
Note
- When the speaker system is reset, delete the pairing information for the speaker system (name of the speaker system, LE_name of the speaker system) from the BLUETOOTH setting on the smartphone, etc. connected to the speaker system. Smartphones with the app installed, audio devices compatible with BLUETOOTH, etc. BRAVIA Theatre Bar 9, BRAVIA Theatre Bar 8, or the device name that is set in [Unit Name].
- If you reset the speaker system, perform the initial setup on the app.
- By resetting, the link with the optional subwoofer and rear speakers may be lost. In this case, perform [Wireless Speaker Settings] on the app.
- When [External Control] is enabled, this reset operation alone will not delete some of the setting information. Perform the following procedure before resetting. Procedure: Press and hold down NIGHT (Night mode) on the supplied remote control for 5 seconds, then press (Volume) +, (Volume) -, and (Muting) in this order.
Related Topic
- Performing Initial Setup with the "Sony | BRAVIA Connect" App • [Wireless Speaker Settings]
Sound Bar
BRAVIA Theatre Bar 9/BRAVIA Theatre Bar 8
Specifications
Sound Bar (YY2083C/ YY2082C)
Front speaker section
Speaker
45 mm × 90 mm (1 13/16 in × 3 5/8 in) cone type
Speaker system
YY2083C :
Passive Radiator
YY2082C :
Acoustic suspension
Center speaker section
Speaker
45 mm × 90 mm (1 13/16 in × 3 5/8 in) cone type
Speaker system
YY2083C :
Passive Radiator
YY2082C :
Acoustic suspension
Front tweeter section
Speaker
10 mm (13/32 in) soft dome type
Center tweeter section
Speaker
22 mm (7/8 in) soft dome type
Top speaker section
Speaker
46 mm × 54 mm (1 13/16 in × 2 1/4 in) cone type
Speaker system
Acoustic suspension
Side speaker section
Speaker
46 mm × 54 mm (1 13/16 in × 2 1/4 in) cone type
Speaker system
Acoustic suspension
Beam tweeter section (YY2083C only)
Speaker
16 mm (21/32 in) soft dome type
Speaker system
Acoustic Tube
Wireless LAN section
Communication system
IEEE 802.11 a/b/g/n/ac
Frequency band
2.4 GHz, 5 GHz
BLUETOOTH section
Communication system
BLUETOOTH Specification version 5.2
Output
BLUETOOTH Specification Power Class 2
Maximum communication range
Line of sight approx. 30 m (98.4 ft)*
* The actual range will vary depending on factors such as obstacles between devices, magnetic fields around a microwave oven, static electricity, cordless phone use, reception sensitivity, the operating system, software applications, etc.
Maximum number of devices to be registered
9 devices: BLUETOOTH Low Energy (Connection with Sony | BRAVIA Connect)
9 devices: BLUETOOTH Classic (A2DP)
Frequency band
2.4 GHz band (2.400 0 GHz - 2.483 5 GHz)
Modulation method
FHSS (Freq Hopping Spread Spectrum)
Compatible BLUETOOTH profile*
* A BLUETOOTH profile standardizes functions according to the characteristics of BLUETOOTH devices.
A2DP (Advanced Audio Distribution Profile)
AVRCP (Audio Video Remote Control Profile)
Supported codec*
* Codec is an audio signal compression and conversion format.
SBC (Subband Codec)
AAC (Advanced Audio Coding)
LDAC TM*
* LDAC is an audio coding technology developed by Sony that enables the transmission of High-Resolution (Hi-Res) Audio content, even over a BLUETOOTH connection.
Corresponding content protection
SCMS-T
Transmission range (A2DP)
20 Hz - 40 000 Hz (LDAC sampling frequency 96 kHz with 990 kbps transmission)
20 Hz - 20 000 Hz (Sampling frequency 44.1 kHz)
Note
- Depending on the network environment, there may be an interruption at the high bitrate transmission.
HDMI section
Connector
Type A (19pin)
General
Input
HDMI IN
Output
HDMI OUT (TV eARC/ARC)
S-CENTER OUT
Power consumption
YY2083C :
On: 62 W
[Network/Bluetooth Standby] is set to ON: 2.3 W or less
[Network/Bluetooth Standby] is set to OFF: 0.5 W or less*
YY2082C :
On: 60 W
[Network/Bluetooth Standby] is set to ON: 2.3 W or less
[Network/Bluetooth Standby] is set to OFF: 0.5 W or less*
* When [Standby Through] is set to OFF, or [Standby Through] is set to [Auto] while the connected TV is turned off.
Dimensions* (approx.) (w/h/d)
* Not including projection portion
YY2083C :
Sound Bar:
1 300 mm × 64 mm × 113 mm (51 1/4 in × 2 5/8 in × 4 1/2 in)
Sound Bar with the Wall mounting bracket:
1 300 mm × 65.4 mm × 123 mm (51 1/4 in × 2 5/8 in × 4 7/8 in)
Sound Bar with the Foot:
1 300 mm × 76.2 mm × 113 mm (51 1/4 in × 3 in × 4 1/2 in)
YY2082C :
Sound Bar:
1 100 mm × 64 mm × 113 mm (43 3/8 in × 2 5/8 in × 4 1/2 in)
Sound Bar with the Wall mounting bracket:
1 100 mm × 65.4 mm × 123 mm (43 3/8 in × 2 5/8 in × 4 7/8 in)
Sound Bar with the Foot:
1 100 mm × 76.2 mm × 113 mm (43 3/8 in × 3 in × 4 1/2 in)
Mass (approx.)
YY2083C :
Sound Bar:
5.5 kg (12 lb 3 oz)
Sound Bar with the Wall mounting bracket:
5.8 kg (12 lb 13 oz)
Sound Bar with the Foot:
5.5 kg (12 lb 3 oz)
YY2082C :
Sound Bar:
4.7 kg (10 lb 6 oz)
Sound Bar with the Wall mounting bracket:
5 kg (11 lb 1 oz)
Sound Bar with the Foot:
4.7 kg (10 lb 6 oz)
Wireless transmitter/receiver section
Communication system
Wireless Sound Specification version 4.0
Frequency band
5 GHz
Modulation method
OFDM
Note
- Design and specifications are subject to change without notice. Refer to the Reference Guide included with your product, which may contain specification information not listed above.
5-056-360-11(1) Copyright 2024 Sony Corporation
Sound Bar
BRAVIA Theatre Bar 9/BRAVIA Theatre Bar 8
Supported audio formats
Supported audio formats differ depending on the input. In the table below, “✓” indicates a supported audio format and “–” indicates an unsupported audio format.
| Format HDMI input TV input (eARC) TV input (ARC) | |||
| LPCM 2ch | ○ | ○ | ○ |
| LPCM 5.1ch – | ○ | ○ | |
| LPCM 7.1ch – | ○ | ○ | |
| Dolby Digital | ○ | ○ | ○ |
| Dolby TrueHD – | ○ | ○ | |
| Dolby Digital Plus | ○ | ○ | ○ |
| Dolby Atmos – | ○ | ○ | |
| Dolby Atmos - Dolby TrueHD | ○ | ○ | - |
| Dolby Atmos - Dolby Digital Plus | ○ | ○ | ○ |
| DTS | ○ | ○ | ○ |
| DTS-ES Discrete 6.1, DTS-ES Matrix 6.1 – | ○ | ○ | |
| DTS 96/24 | ○ | ○ | ○ |
| DTS-HD High Resolution Audio – | ○ | ○ | |
| DTS-HD Master Audio – | ○ | ○ | |
| DTS:X – | ○ | ○ | |
| 360 Reality Audio – – | ○ | ||
Note
HDMI IN does not support audio formats that contain copy protections, such as Super Audio CD or DVD-Audio.
Sound Bar
BRAVIA Theatre Bar 9/BRAVIA Theatre Bar 8
Supported HDMI Video Formats
The speaker system supports the following video formats.
8K 24/25/30/50/60 Hz
4K 24/25/30/50/60/100/120 Hz
1440p 120 Hz
1080p 24/30/50/60/100/120 Hz
1080i 50/60 Hz
720p 24/30/50/60 Hz
576p 50 Hz
480p 60 Hz
About the [HDMI Signal Format] setting
When [Settings] - [HDMI Settings] - [HDMI Signal Format] is set to [Enhanced format (4K120, 8K)] on the remote control screen of the app, all video formats that are supported by the speaker system can be input.
When [HDMI Signal Format] is set to [Enhanced format], the video formats are limited to 4K 60 Hz 4:4:4, 4:2:2, etc.
When [HDMI Signal Format] is set to [Standard format], the video formats are limited to 4K 60 Hz 4:2:0, 4K 24 Hz, etc.
About the HDMI cable to use
Use an HDMI-authorized cable.
Use the supplied HDMI cable to connect to a TV.
An Ultra High Speed HDMI Cable capable 48 Gbps supports all the video formats that are supported by the speaker system.
A Premium High Speed HDMI Cable with Ethernet capable 18 Gbps supports video formats up to 4K 60 Hz 4:4:4, 4:2:2, etc.
About the 3D signal
The following video format is compatible with a 3D signal in the Side-by-Side (Half) format.
1080i 50/60 Hz
The following video formats are compatible with a 3D signal in the Frame packing and Over-Under (Top-and Bottom) format.
1080p 24 Hz 720p 50/60 Hz
About HDMI connection
The HDMI jack on the speaker system supports video signals up to 4K 120p/8K, HDR (High Dynamic Range)(*1), VRR(*2), ALLM(*3), SBTM(*4), HDCP2.3(*5), and a wide color gamut in compliance with the ITU-R BT.2020 standard(*6).
Hint
- When the low latency mode is enabled by the ALLM function, some types of sound processing will not be performed to reduce audio delay.
*2 VRR (Variable Refresh Rate) is a method of video transmission that can reduce video stuttering and display images smoothly by adjusting the refresh rate on the display to match the frame rate in video games, etc. *3 ALLM (Auto Low Latency Mode) is a function that automatically switches to low latency mode in conjunction with the output of video games, etc. *4 SBTM (Source-Based Tone Mapping) is a function that allows an AV device to produce and display HDR images that are optimized for the characteristics of a TV. *5 HDCP2.3 is a copy protection technology that protects content such as 4K and 8K video content. *6 BT.2020 is a wide color gamut standard that is established for Super Hi-Vision TVs.
Sound Bar
BRAVIA Theatre Bar 9/BRAVIA Theatre Bar 8
Trademarks
Apple, AirPlay, iPad, iPhone, iPod touch and Siri are trademarks of Apple Inc., registered in the U.S. and other countries and regions.
Spotify and Spotify logos are registered trademarks of Spotify AB. * Spotify service may not be available in some countries/regions. Please visit support.spotify.com for more information.
The BLUETOOTH® word mark and logos are registered trademarks owned by Bluetooth SIG, Inc. and any use of such marks by Sony Group Corporation and its subsidiaries is under license.
Wi-Fi®, Wi-Fi Protected Access® and Wi-Fi Alliance® are registered trademarks of Wi-Fi Alliance. Wi-Fi CERTIFIED™, WPA™, WPA2™, and WPA3™ are trademarks of Wi-Fi Alliance.
The terms HDMI™, HDMI High-Definition Multimedia Interface, HDMI Trade dress and the HDMI Logos are trademarks or registered trademarks of HDMI Licensing Administrator, Inc.
"BRAVIA" and "BRAVIA Sync" are registered trademarks or trademarks of Sony Group Corporation or its affiliates.
"PlayStation" is a registered trademark or trademark of Sony Interactive Entertainment Inc.
LDAC and the LDAC logo are trademarks of Sony Group Corporation or its affiliates.
All other trademarks and registered trademarks are trademarks or registered trademarks of their respective holders. In this manual, the TM and ® marks are not specified.

HIGH-DEFINITION MULTIMEDIA INTERFACE
TP1001325273
5-056-360-11(1) Copyright 2024 Sony Corporation
Sound Bar
BRAVIA Theatre Bar 9/BRAVIA Theatre Bar 8
Licenses
This product contains software that Sony uses under a licensing agreement with the owner of its copyright. We are obligated to announce the contents of the agreement to customers under requirement by the owner of copyright for the software. Please access the following URL and read the contents of the license.
https://rd1.sony.net/help/ht/sl/24a/
The software included in this product contains copyrighted software that is licensed under the GPL/LGPL and other licenses which may require access to source code. You may find a copy of the relevant source code as required under the GPL/LGPL (and other licenses) at the following URL. You may obtain the source code as required by the GPL/LGPL on a physical medium from us for a period of three years after our last shipment of this product by applying through the form at the following URL. This offer is valid to anyone in receipt of this information.
https://oss.sony.net/Products/Linux/
Please note that Sony cannot answer or respond to any inquiries regarding the content of this source code.
Use of the Works with Apple AirPlay badge means that an accessory has been designed to work specifically with the technology identified in the badge and has been certified by the developer to meet Apple performance standards.
The Spotify Software is subject to third party licenses found here:
https://www.spotify.com/connect/third-party-licenses.
Dolby, Dolby Vision, Dolby Atmos, and the double-D symbol are registered trademarks of Dolby Laboratories Licensing Corporation. Manufactured under license from Dolby Laboratories. Confidential unpublished works. Copyright © 2012–2021 Dolby Laboratories. All rights reserved.
For DTS patents, see http://patents.dts.com. Manufactured under license from DTS, Inc. or DTS Licensing Limited. DTS, DTS:X, and the DTS:X logo are registered trademarks or trademarks of DTS, Inc. in the United States and other countries. © 2021 DTS, Inc. ALL RIGHTS RESERVED.
Services offered by third parties may be changed, suspended, or terminated without prior notice. Sony does not bear any responsibility in these sorts of situations.
Notes on Use
Precautions
- Before using the speaker system, check that the operating voltage matches your local supply voltage. The operating voltage is indicated on the nameplate attached to the bottom of the bar speaker.
- The supplied AC power cord (mains lead) is designed exclusively for this speaker system. It should not be used with any other device.
- Unplug the AC power cord (mains lead) from the AC outlet (mains) when the speaker system is not being used for long periods of time. When unplugging the AC power cord (mains lead) from the AC outlet (mains), always unplug it by holding the plug. Never pull the cord itself.
- AC power cord (mains lead) must only be changed at a qualified service shop.
On placement
- Do not place the speaker system near heat sources or in a location subject to direct sunlight, excessive dust, or mechanical shock. These conditions may cause malfunction.
- Placing the speaker system on a floor that is coated with special paint, wax, grease, or solvent, etc. may result in discoloration or stains on the floor.
- The speakers of the speaker system are not the magnetically shielded type. Do not place magnetic cards on the speaker system or near it.
- Do not place metal objects other than a TV around the speaker system. Wireless functions may become unstable.
- When the speaker system is used with a tuner, TV, or VCR, noise or distorted images may be produced. In this case, install the speaker system away from these devices.
- Do not place the speaker system near objects that emit a strong magnetic field, such as microwave ovens or large speakers.
How to care for the speaker system
- Dust and dirt on the fabric part should be removed with a soft cloth by applying light pressure.
- Scratching dirt with fingernails or applying excessive force may damage the fabric part. Do not use cleaning brushes, etc. as they may damage the fabric part depending on the material.
- If the fabric part is heavily soiled, wipe it with a soft cloth slightly moistened with neutral detergent, then wipe it with a soft dry cloth. Use of non-neutral detergents or cleaners may cause color fading or fabric damage.
- The cabinet should be wiped with a soft cloth slightly moistened with neutral detergent. Do not use abrasive pads, cleansers, or solvents such as alcohol or benzine.
On BLUETOOTH communications
- BLUETOOTH wireless technology is a short-range wireless technology that enables communication between digital devices, such as smartphones and computers. The maximum communication range may vary depending on the presence of obstacles (people, metal objects, walls, etc.) or the electromagnetic environment.
Microwaves that are generated by a BLUETOOTH device may affect the operation of electronic medical devices. Turn off the speaker system and other BLUETOOTH devices in the following locations, as it may cause an accident:
- In hospitals, near priority seating on trains, locations where inflammable gas is present, near automatic doors, or near fire alarms.
- The speaker system supports security functions that comply with the BLUETOOTH security standard during communication using BLUETOOTH wireless technology. However, depending on the configured settings and other factors, this security may be insufficient. Be careful when using BLUETOOTH communication.
- Sony shall assume no responsibility for any damages or loss resulting from data leaks that may occur when using BLUETOOTH communications.
- BLUETOOTH connection is not guaranteed to work with all BLUETOOTH devices.
- BLUETOOTH devices being connected with the speaker system must comply with the BLUETOOTH standard prescribed by Bluetooth SIG, Inc. and must be certified as compliant.
- Even when a connected device complies with the above BLUETOOTH standard, depending on the characteristics and specifications of the device, it may not be able to connect, or the operation method, display, or operation may differ.
- Noise may occur or the audio may cut out depending on the BLUETOOTH device that is connected with the speaker system, the communications environment, or surrounding conditions.
- Depending on the connected device, it may take some time for communications to start.
Other notes
- The temperature of the speaker system may rise during use. This is not a malfunction.
- If the ventilation holes on the speaker system are blocked, the temperature inside the speaker system will rise considerably. This may cause malfunction. Ensure that the ventilation holes are never blocked.
- If a foreign object or water gets into the speaker system, unplug the speaker system from the AC outlet (mains), and have it checked by qualified personnel before continuing use.
- When connecting the speaker system to the Internet, connect it via a router(*) with the appropriate security settings. If there is a security issue, the speaker system may be subject to malware (malicious software) attacks, etc. over the internet. Your information and digital assets may be exposed to threats such as extraction and falsification. The speaker system may also damage other network services without your knowledge.
* A router is a device that relays between the internet and a local network line.
There are the following types of routers:
Wired router - ADSL modem with router function ● Optical network unit (ONU) with router function ● Wi-Fi access point with router function (wireless LAN router) - Wall socket (wall outlet) device with network line (**)
A,B If you are uncertain whether a wall socket (wall outlet) device with a network line has a router function, check with the manager of the housing complex or the internet provider.
![graph LR A["Device A"] --> B["Device B"] B --> C["Router"] C --> D["Device D"] style A fill:#f9f,stroke:#333 style B fill:#f9f,stroke:#333 style C fill:#ccf,stroke:#333 style D fill:#cfc,stroke:#333](/content/2026/06/1363580/images/2d19895feb1f7a8d7faad3fbcb7e14fa492a15012c8ecdcb2d18ddf40242aa8d.jpg)
A LAN terminal in the wall B LAN cable C Router D Wireless LAN
Note
- Check that the router is turned on.
- Check the network connection and network settings.
- When a wireless LAN router is being used, the communication range may become shorter depending on the usage environment (including the wall material), radio wave reception conditions, or obstacles between the speaker system and wireless LAN router. Move the speaker system and wireless LAN router closer to each other.
- Devices that use a 2.4 GHz frequency band, such as microwaves, BLUETOOTH devices, or digital cordless devices, may interrupt communication. Move the speaker system away from such devices or turn them off.
- A wireless LAN connection may become unstable depending on the usage environment, especially while the BLUETOOTH function is being used on the speaker system. Try to improve your wireless LAN usage environment.
- If you have any questions or problems concerning this speaker system, please consult your nearest Sony dealer.
5-056-360-11(1) Copyright 2024 Sony Corporation
SONY
Help Guide
Sound Bar
BRAVIA Theatre Bar 9/BRAVIA Theatre Bar 8
Customer Support Website
Visit the customer support website in your country or region in the following situations.
- When you have a question about the speaker system.
- When you have an issue with the speaker system.
- When you want information on compatible items.
For customers in the USA, Canada and Latin America:
https://www.sony.com/am/support
For customers in Europe:
https://www.sony.eu/support/
For customers in Mainland China:
https://service.sony.com.cn/
For customers in Asia-Pacific, Oceania, the Middle East and Africa:
https://www.sony-asia.com/support
5-056-360-11(1) Copyright 2024 Sony Corporation


- BRAVIA CONNECT
- INITIAL SETUP
- CHECKING THE PACKAGE CONTENTS
- INSTALLING THE SPEAKER SYSTEM
- CONNECTING TO A TV
- LISTENING TO MUSIC/SOUND
- SETTING THE WIRELESS FUNCTION TO ON OR OFF
- ENJOYING 360 REALITY AUDIO
- ENJOYING MUSIC ON A NETWORK
- USING SPOTIFY
- ABOUT THE APP REQUIRED TO USE THE SPEAKER SYSTEM
- NOTE
- RELATED TOPIC
- DEVICES THAT ARE CONNECTED TO THE SPEAKER SYSTEM
- A TV
- B AV DEVICE (BLU-RAY DISC™ PLAYER, SET-TOP BOX, CABLE BOX, SATELLITE BOX, GAMING CONSOLE, ETC.)
- C OPTIONAL SPEAKERS
- D MOBILE DEVICE
- ABOUT THE HELP GUIDE DESCRIPTION
- ABOUT THE DESCRIPTION OF OPERATIONS
- ABOUT THE ILLUSTRATION OF THE SPEAKER SYSTEM AND THE WORDING DISPLAYED ON THE APP
- SONY
- HELP GUIDE
- BAR SPEAKER
- FRONT
- REMOTE CONTROL SENSOR
- SUB STATUS INDICATOR (WHITE)
- MAIN STATUS INDICATOR (COLORED)
- ⏻ (POWER)
- REAR
- HDMI OUT (TV (EARC/ARC)) JACK
- S-CENTER OUT JACK
- HINT
- BOTTOM
- ABOUT THE INDICATORS
- TURNING ON/OFF
- B MAIN STATUS INDICATOR
- AUDIO INPUT/MUTING
- A SUB STATUS INDICATOR
- SETUP/OPERATION FEEDBACK
- SPECIAL CONDITIONS
- SUPPLIED REMOTE CONTROL
- INPUT (INPUT)
- SOUND FIELD (SOUND FIELD)
- VOICE (VOICE MODE)
- (VOLUME) +(*)
- BASS (BASS LEVEL)
- NIGHT (NIGHT MODE)
- ☐ (MUTING)
- ABOUT THE REPLACEMENT OF BATTERIES FOR THE SUPPLIED REMOTE CONTROL
- IF THE REMOTE CONTROL DOES NOT WORK PROPERLY
- REMOTE CONTROL SCREEN ON THE APP
- REMOTE CONTROL SCREEN THAT CAN ONLY OPERATE THE SPEAKER SYSTEM
- REMOTE CONTROL SCREEN THAT CAN OPERATE THE SPEAKER SYSTEM AND BRAVIA
- ITEMS ON THE REMOTE CONTROL SCREEN ON THE APP
- [BASS LEVEL]
- [AUDIO]
- [VIEWING POSITION]
- [SETTINGS]
- PARTS INCLUDED ONLY IN SOME COUNTRIES/REGIONS
- INSTALLING THE BAR SPEAKER ON A TV STAND AND SHELVES
- IF THE BAR SPEAKER CANNOT BE INSTALLED DUE TO INTERFERENCE WITH THE TV LEGS
- PREPARE WHAT IS NEEDED
- ATTACH THE FOOT TO THE BAR SPEAKER
- INSTALL THE BAR SPEAKER
- PERFORM [SOUND FIELD OPTIMIZATION](*) ON THE APP IN THE FOLLOWING CASES
- MOUNTING THE BAR SPEAKER ON A WALL
- A BAR SPEAKER
- PREPARE TWO SCREWS (NOT SUPPLIED) THAT ARE SUITABLE FOR THE HOLES ON THE WALL MOUNTING BRACKET (SUPPLIED)
- REMOVE THE WALL MOUNT TEMPLATE
- CONNECT CABLES TO THE BAR SPEAKER
- MOUNTING THE OPTIONAL SPEAKERS ON A WALL
- USING THE BAR SPEAKER WITH THE OPTIONAL SPEAKERS
- INSTALLING
- EXAMPLE OF INSTALLING THE BAR SPEAKER ON A TV STAND AND SHELVES
- EXAMPLE OF MOUNTING THE BAR SPEAKER ON THE WALL
- SETTING UP
- IF YOU HAVE NOT YET STARTED SETTING UP THE SPEAKER SYSTEM
- IF YOU HAVE ALREADY COMPLETED THE SETUP OF THE SPEAKER SYSTEM
- IF CHANGING THE INSTALLATION METHOD OR POSITION OF THE SPEAKER SYSTEM OR OPTIONAL SPEAKERS
- WHEN USING THE OPTIONAL SA-RS5 REAR SPEAKERS
- CONNECT SA-RS5 TO THE SPEAKER SYSTEM
- CHANGING THE LOCATION OR VIEWING ENVIRONMENT OF THE SPEAKER SYSTEM OR SA-RS
- CHANGING THE POSITION OF SA-RS5 TEMPORARILY
- EXAMPLE OF TEMPORARY SA-RS5 REAR SPEAKER POSITION CHANGES
- TO OUTPUT SOUND FROM THE TV
- CONNECTING AN AV DEVICE
- CONNECTING TO AN AC OUTLET (MAINS)
- PERFORMING INITIAL SETUP WITH THE "SONY | BRAVIA CONNECT" APP
- LISTENING TO TV SOUND
- TO OPERATE USING THE SUPPLIED REMOTE CONTROL
- PLAYING THE CONNECTED AV DEVICE
- ADJUSTING SOUND QUALITY
- OPERATING USING THE REMOTE CONTROL SCREEN ON THE APP
- [SOUND FIELD]
- [VOICE MODE]
- [VOICE ZOOM]
- [NIGHT MODE]
- OPERATING USING THE SUPPLIED REMOTE CONTROL
- LISTENING TO MUSIC BY PAIRING THE BLUETOOTH DEVICE THAT IS CONNECTED FOR THE FIRST TIME
- TURN ON THE BLUETOOTH DEVICE
- SWITCH THE INPUT TO [BLUETOOTH] ON THE REMOTE CONTROL SCREEN ON THE APP
- LOOK FOR THE SPEAKER SYSTEM ON THE BLUETOOTH DEVICE BY PERFORMING THE PAIRING OPERATION
- SELECT THE SPEAKER SYSTEM (*) FROM THE LIST OF DEVICES DISPLAYED ON THE SCREEN OF THE BLUETOOTH DEVICE AND REGISTER THE SPEAKER SYSTEM AND BLUETOOTH DEVICE WITH EACH OTHER
- CONFIRM ON THE REMOTE CONTROL SCREEN ON THE APP THAT THE SPEAKER SYSTEM AND THE BLUETOOTH DEVICE ARE CONNECTED VIA THE BLUETOOTH FUNCTION
- START AUDIO PLAYBACK WITH THE MUSIC APP ON THE CONNECTED BLUETOOTH DEVICE
- ADJUST THE VOLUME
- LISTENING TO MUSIC FROM THE PAIRED BLUETOOTH DEVICE
- TURN ON THE BLUETOOTH FUNCTION ON THE BLUETOOTH DEVICE
- TO DISCONNECT THE BLUETOOTH DEVICE
- ABOUT 360 REALITY AUDIO
- PLAYING 360 REALITY AUDIO CONTENT FROM THE CONNECTED AV DEVICE
- PLAYING MUSIC ON THE SPEAKER SYSTEM BY USING THE "SPOTIFY CONNECT" FUNCTION
- RESUMING MUSIC THAT WAS BEING PLAYED ON A MOBILE DEVICE
- PRESS INPUT TO LIGHT THE MAIN STATUS INDICATOR ON THE BAR SPEAKER IN LIGHT BLUE
- USING AIRPLAY
- STREAMING MUSIC ON THE SPEAKER SYSTEM BY TALKING TO SIRI
- OPERATING THE SPEAKER SYSTEM BY INTERLOCKING WITH A TV (CONTROL FOR HDMI FUNCTION)
- ABOUT THE CONTROL FOR HDMI FUNCTION
- PREPARING TO OPERATE THE SPEAKER SYSTEM BY INTERLOCKING IT WITH A TV
- PERFORMING POWER OPERATION OR VOLUME ADJUSTMENT BY A TV REMOTE CONTROL
- POWER INTERLOCKING
- VOLUME ADJUSTMENT
- ONE-TOUCH PLAY FUNCTION
- OPERATING THE SPEAKER SYSTEM BY INTERLOCKING WITH A TV COMPATIBLE WITH THE “BRAVIA SYNC” FUNCTION
- TO USE "BRAVIA SYNC
- WHAT YOU CAN DO WITH "BRAVIA SYNC
- CONTROL FOR HDMI FUNCTION
- [WIRELESS SPEAKER SETTINGS]
- WIRELESS SPEAKER STATUS CHECK
- [WIRELESS SPEAKER CONNECTION]
- [WIRELESS CHANNEL]
- [WIRELESS PLAYBACK QUALITY]
- [SOUND SETTINGS]
- [SOUND FIELD OPTIMIZATION]
- [SOUND FIELD SETTING]
- [HEIGHT OF SOUND FIELD]
- [ACOUSTIC CENTER SYNC]
- [SOUND OUTPUT CHECK]
- [DSEE ULTIMATE]
- [AUDIO DRC]
- [DTS DIALOG CONTROL]
- [A/V SYNC]
- [AUTOMATICALLY ADJUST VOLUME]
- [HDMI SETTINGS]
- [CONTROL FOR HDMI]
- [TV POWER OFF LINK]
- [STANDBY THROUGH]
- [EARC]
- [HDMI SIGNAL FORMAT]
- [BLUETOOTH SETTINGS]
- [BLUETOOTH CONNECTION QUALITY]
- [SYSTEM SETTINGS]
- [AUTO STANDBY]
- [NETWORK/BLUETOOTH STANDBY]
- [AUTO UPDATE]
- [DIMMER]
- [UNIT NAME]
- [SYSTEM INFORMATION]
- [SOFTWARE LICENSE INFORMATION]
- [NETWORK SETTINGS]
- [NETWORK CONNECT STATUS]
- [ACCOUNT MANAGEMENT]
- [EXTERNAL CONTROL]
- [PRIVACY SETTING]
- [EASY INITIAL SETUP]
- [SOFTWARE UPDATE]
- SAVING POWER IN STANDBY MODE
- TROUBLESHOOTING
- RESETTING THE SPEAKER SYSTEM
- PRESS AND HOLD (POWER) ON THE BAR SPEAKER FOR MORE THAN 10 SECONDS
- SPECIFICATIONS
- SOUND BAR (YY2083C/ YY2082C)
- FRONT SPEAKER SECTION
- SPEAKER
- SPEAKER SYSTEM
- CENTER SPEAKER SECTION
- FRONT TWEETER SECTION
- CENTER TWEETER SECTION
- TOP SPEAKER SECTION
- SIDE SPEAKER SECTION
- BEAM TWEETER SECTION (YY2083C ONLY)
- WIRELESS LAN SECTION
- COMMUNICATION SYSTEM
- FREQUENCY BAND
- BLUETOOTH SECTION
- OUTPUT
- MAXIMUM COMMUNICATION RANGE
- MAXIMUM NUMBER OF DEVICES TO BE REGISTERED
- MODULATION METHOD
- COMPATIBLE BLUETOOTH PROFILE
- A2DP (ADVANCED AUDIO DISTRIBUTION PROFILE)
- SUPPORTED CODEC
- SBC (SUBBAND CODEC)
- CORRESPONDING CONTENT PROTECTION
- TRANSMISSION RANGE (A2DP)
- HDMI SECTION
- CONNECTOR
- GENERAL
- INPUT
- POWER CONSUMPTION
- YY2083C
- YY2082C
- DIMENSIONS* (APPROX.) (W/H/D)
- MASS (APPROX.)
- WIRELESS TRANSMITTER/RECEIVER SECTION
- SUPPORTED AUDIO FORMATS
- SUPPORTED HDMI VIDEO FORMATS
- ABOUT THE [HDMI SIGNAL FORMAT] SETTING
- ABOUT THE HDMI CABLE TO USE
- ABOUT THE 3D SIGNAL
- ABOUT HDMI CONNECTION
- TRADEMARKS
- LICENSES
- NOTES ON USE
- PRECAUTIONS
- ON PLACEMENT
- HOW TO CARE FOR THE SPEAKER SYSTEM
- ON BLUETOOTH COMMUNICATIONS
- OTHER NOTES
- CUSTOMER SUPPORT WEBSITE
- FOR CUSTOMERS IN THE USA, CANADA AND LATIN AMERICA
- FOR CUSTOMERS IN EUROPE
- FOR CUSTOMERS IN MAINLAND CHINA
- FOR CUSTOMERS IN ASIA-PACIFIC, OCEANIA, THE MIDDLE EAST AND AFRICA
Brand : SONY
Model : BRAVIA Theater Bar 9
Category : Soundbar