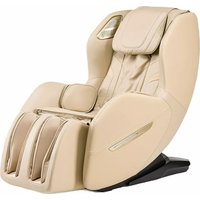
Easyq - Massage device iRest - Free user manual and instructions
Find the device manual for free Easyq iRest in PDF.


| Product Type | Shiatsu Massage Cushion |
| Brand | iRest |
| Model | Easyq |
| Dimensions (L x W x H) | Approx. 45 x 35 x 15 cm |
| Weight | Approx. 2.5 kg |
| Power Supply | AC 100-240V, 50/60Hz (adapter included) |
| Power Consumption | 30W |
| Massage Mechanisms | Shiatsu nodes, kneading, rolling, and vibration |
| Heat Function | Yes, soothing heat |
| Massage Zones | Neck, shoulders, back, lumbar, and thighs |
| Intensity Levels | Multiple speed and intensity settings |
| Timer | 15-minute auto shut-off |
| Remote Control | Wired remote controller included |
| Cover Material | Breathable mesh fabric with PU leather accents |
| Care Instructions | Wipe with a damp cloth and mild detergent; do not submerge |
| Safety Features | Auto shut-off, overheating protection |
| Spare Parts Availability | Replacement adapters and covers available from iRest |
| Warranty | 1-year limited warranty |
| What's in the Box | Massage cushion, power adapter, remote control, user manual |
Frequently Asked Questions - Easyq iRest
User questions about Easyq iRest
0 question about this device. Answer the ones you know or ask your own.
Ask a new question about this device
Download the instructions for your Massage device in PDF format for free! Find your manual Easyq - iRest and take your electronic device back in hand. On this page are published all the documents necessary for the use of your device. Easyq by iRest.
USER MANUAL Easyq iRest
User manual
Instruction manual
EN
PL
Thanks for purchasing this product. Please read this manual carefully in order to know how to use this product correctly before operation. Please pay special attention to some important safety warnings and keep this manual properly for future use.
Note: Our company reserves the right to change and explain the design of the product. If there is some difference between the product function in market circulation and the description in the manual, it is a normal update of the product, and our company will not inform you otherwise. The specific product function and color shall prevail in kind.
TABLE OF CONTENTS
Before use
Safety Precautions 02-04 Installation parts 05 Place massage chair 06-07 Before use 08-09 Product structure 10-13
Usage method
Operation Instructions 14-18 Massage close 18
Maintain
Cleaning and Maintenance 19
Important
Troubleshooting....20 Product Specifications 21
Safety Precautions (must be observed)
- Please read all relevant instructions carefully before use.
- The notes marked here will help you to use the product safely and correctly.
- In order to clearly indicate the extent of harm and damage, precautions are divided into "Warning" and "Caution" that may be caused by incorrect use. Both of them are important for safety and must be followed.
 Warning Warning | Indicates that serious injury or death may result from improper use. |
 Caution Caution | Indicates that misuse may cause minor injury or property damage. |
- Please pay attention to the symbol before each safety item.

Forbidden
Absolute prohibition
| The following populations should not use this product | |
 Forbidden Forbidden | The device is not intended for use by persons (including children) with physical disabilities, sensory or neurological impairments or who lack experience and common sense, unless they are supervised and instructed in the use of the device by those responsible for their safety. Children must be supervised to ensure they do not play with instruments.Patients with osteoporosis.Patients with heart disease or wearing electronic medical devices such as a pacemaker.People who have a fever.Pregnant women or women on their menstrual period.Patients who are injured or have a skin disease.When unsupervised, any children are under the age of 14 and those unconscious are not allowed to use this product.People who are told by their physicians to have rest or who feel unwell.People whose bodies are wet are forbidden to use this product.This product has a hot surface. Persons insensitive to heat must pay attention when using this product.If the supply cord is damaged, to avoid danger, it must be replaced by a professional from the manufacturer, its maintenance department or similar department |
EN
| Important safety warnings | |
 Warnings Warnings | Do not allow children to touch any movable part of this product.Use the well-grounded power supply unit suitable for this product.Pull out the plug after use or before cleaning to avoid any physical injury or damage to the product.Operate this product as instructed in this manual.Do not use any parts or accessories which are not recommended.Do not use this product outdoors.Please read the Operation Instructions carefully before operation.Never use this product for any other purpose not listed herein.20 minutes of usage each time is recommended.Do not use this product if the cover or leather is broken or damaged.Do not drop anything into this product.Never fall asleep while using this product.Do not use this product if you are drunk or feel unwell.Do not use this product within one hour after a meal.Do not use this product with excessive force to avoid any injury. |
| Safety precautions | |
 Caution Caution | Check whether voltage is consistent with the specification of this product.Never insert or pull out the plug with a wet hand.Do not let water flow into this product to avoid electric shock or cause damage to this product.Do not pull the power cord when plugging or unplugging it. Rough handling is forbidden.Do not damage the wire or modify the circuit of this product.Do not clean live parts of this product with a wet cloth such as a power switch and plug.Be away from this product in case of power failure to avoid any injury if power is restored suddenly.Stop using this product at once while it works abnormal, and consult your local supplier.Stop using this product if you feel unwell, and consult your health care practitioner. |
| Storage conditions | |
 Caution Caution | Storage room temperature: 5 °C to 40 °C.Relative humidity (RH) between 20% and 80%; free of corrosive gases, and a well-ventilated room. |
EN
| Product service and maintenance | |
| Caution | This product should be maintained by the service center designated by the manufacturer only. No user should disassemble or maintain it without permission.Do not forget to turn off the main power switch after usage.Do not use this product if the power socket becomes loose.If this product will be left unused for a long period of time, it is necessary to roll up the power cord of this product and store this product in a dry and dust-free environment.Do not store this product at a high temperature or near open flame.Avoid prolonged exposure to direct sunshine.Please clean this product with dry cloth. Never use thinner, benzene or alcohol.The mechanical components of this product are specially designed and manufactured, so no special maintenance is needed.Do not use a sharp object to stab at this product.Do not roll or pull this product on any uneven ground. Instead, it should be lifted before moving.Please use this product intermittently. Do not keep it working continuously for a long period of time. |
| Operating environment | |
| Caution | Do not use this product in a very moist environment such as the bathroom.Stop using this product immediately when the ambient temperature changes sharply.Do not use this product in any heavily-dusty or caustic environment.Do not use this product in a small space or a place without good ventilation. |
| Solutions to ordinary malfunctions | |
| Caution | If the motor sounds during operation of this product, this is the normal operation sound.If the controller cannot work normally, check whether the plug and the power socket are connected reliably, and whether the power switch is turned on.If the rated working time is over, this product will automatically activate the power -off button; If this product keeps operating for a long period of time, the temperature protector will stop this product automatically. The product can be used again after half an hour. |
EN
Calf installation instructions
- Insert the isolation parts into the lower leg hooks respectively (Figure 1).
- Lift the lower leg, insert the lower leg hook correspondingly, and then insert the pin shaft. Finally, insert the R-shaped pin into the pin shaft (Figure 2).
- After connecting the air pipe and harness in the lower leg to massage chair, check whether there is any abnormality in the up and down turning, and the installation of the lower leg is completed (Figure 3).

EN
Installation placement
Make sure there is enough space for the massage chair to be tilted at least 30 cm.
Do not expose the massage chair directly to high temperature environments due to sunlight (such as in front of heating equipment), and place it where it can avoid high temperature and direct sunlight. It is recommended to lay a soft cushion for long-term use in a designated location. When laying the cushion, the size of the cushion should be enough to cover the range where the machine touches the floor and the range where your feet touch the floor.
CAUTION

Product lift instruction
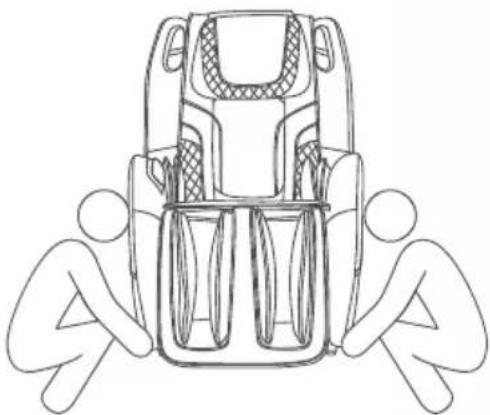
Require team work to lift and move the chair to avoid injury.
- Please lift the massage chair to move it on vulnerable ground such as wooden floor.
- When moving on a similar wooden floor, it is recommended to lift it. Avoid damage to the casters. When the floor is lifted and moved to the designated position, be careful to keep your hands out of the way to avoid injury, and be careful of your feet being crushed. Do not let go of the unit until the unit is completely flat, the floor may be damaged, therefore, it is recommended to place mats, etc. on the floor.
CAUTION
EN
Move method
Use the rear casters to move the massage chair. Move the chair by tilting it down and backward about 45 degrees as shown in the diagram.
NOTE: Excessive force to tilt will cause the chair to tip over completely and product damage.
- Before moving, please shut down the machine properly to reset the whole machine, and then cut off the power.
- Please keep the chair vacant when moving. (People, pets or clutter will not be able to stay on the chair.)
- When moving, do not cross a drop barrier higher than 2 mm or a gap greater than 5 mm.
- When using casters to move this product, continuous movement is not supported; if the distance exceeds 50 meters, please move this product slowly and evenly.
CAUTION

How to disassemble and use headrest cushion and backrest cushion
Using a headrest cushion can reduce the intensity of kneading massage on the neck and shoulders, and you can decide whether to use a headrest cushion according to your needs (recommended to use a headrest cushion). The backrest cushion and the backrest are connected by a zipper (1), and the headrest cushion and the backrest cushion are connected by a zipper (2).


CAUTION

EN
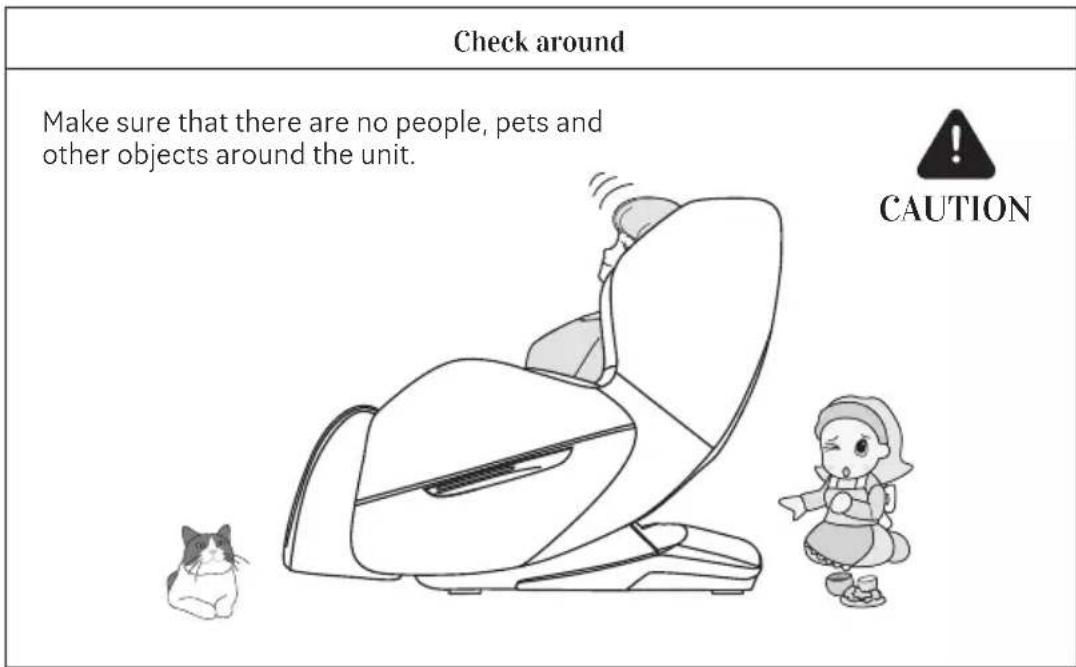
| Make sure there are no foreign objects in the gaps of the machine |
| Before massaging, make sure that no foreign objects are caught in the legs, feet, etc. Under no circumstances allow hands, feet, and head to penetrate into the area between the lower leg mechanism and main body, or the area between the armrest and the capsule. Under no circumstances should hands, feet, or head sink under the fabric or leather covering of the massage area. |
EN
| Turn on the power | |||
 | Caution | ||
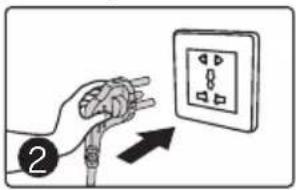
| Plug in power cord | Schematic diagram of power on | Turn on the power switch ("I" position) | |
 |  |  | |

Warn
- Please check the power cord and plug for damage before use.
- Please supply power to this product in accordance with the working power requirements of this product's calibration.
- It is strictly forbidden to use a power supply other than the nominal power supply of this product.
- It is strictly forbidden to connect various power conversion devices without authorization to supply power to this product.
Parts description

Function distribution
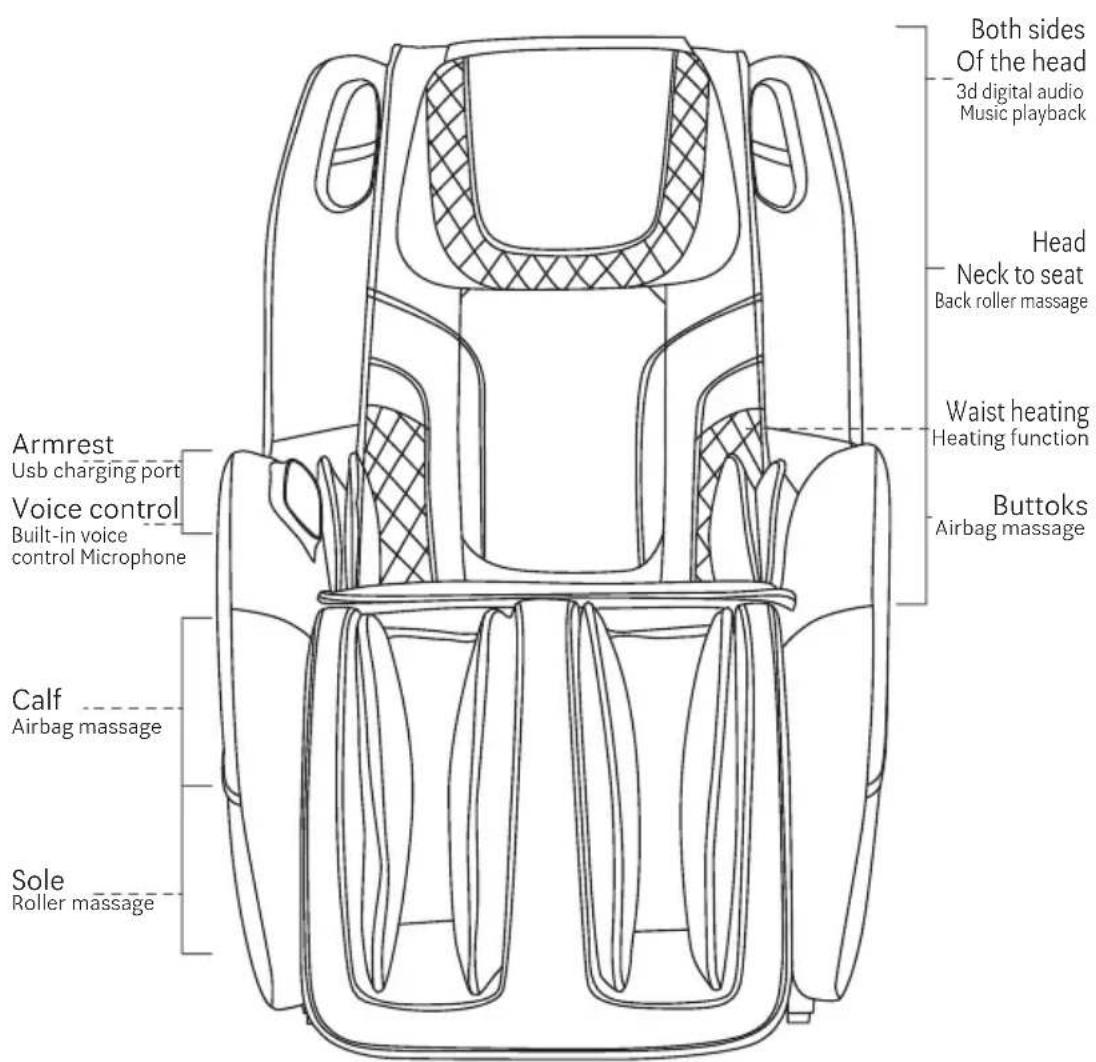
I. Introduction to the armrest controller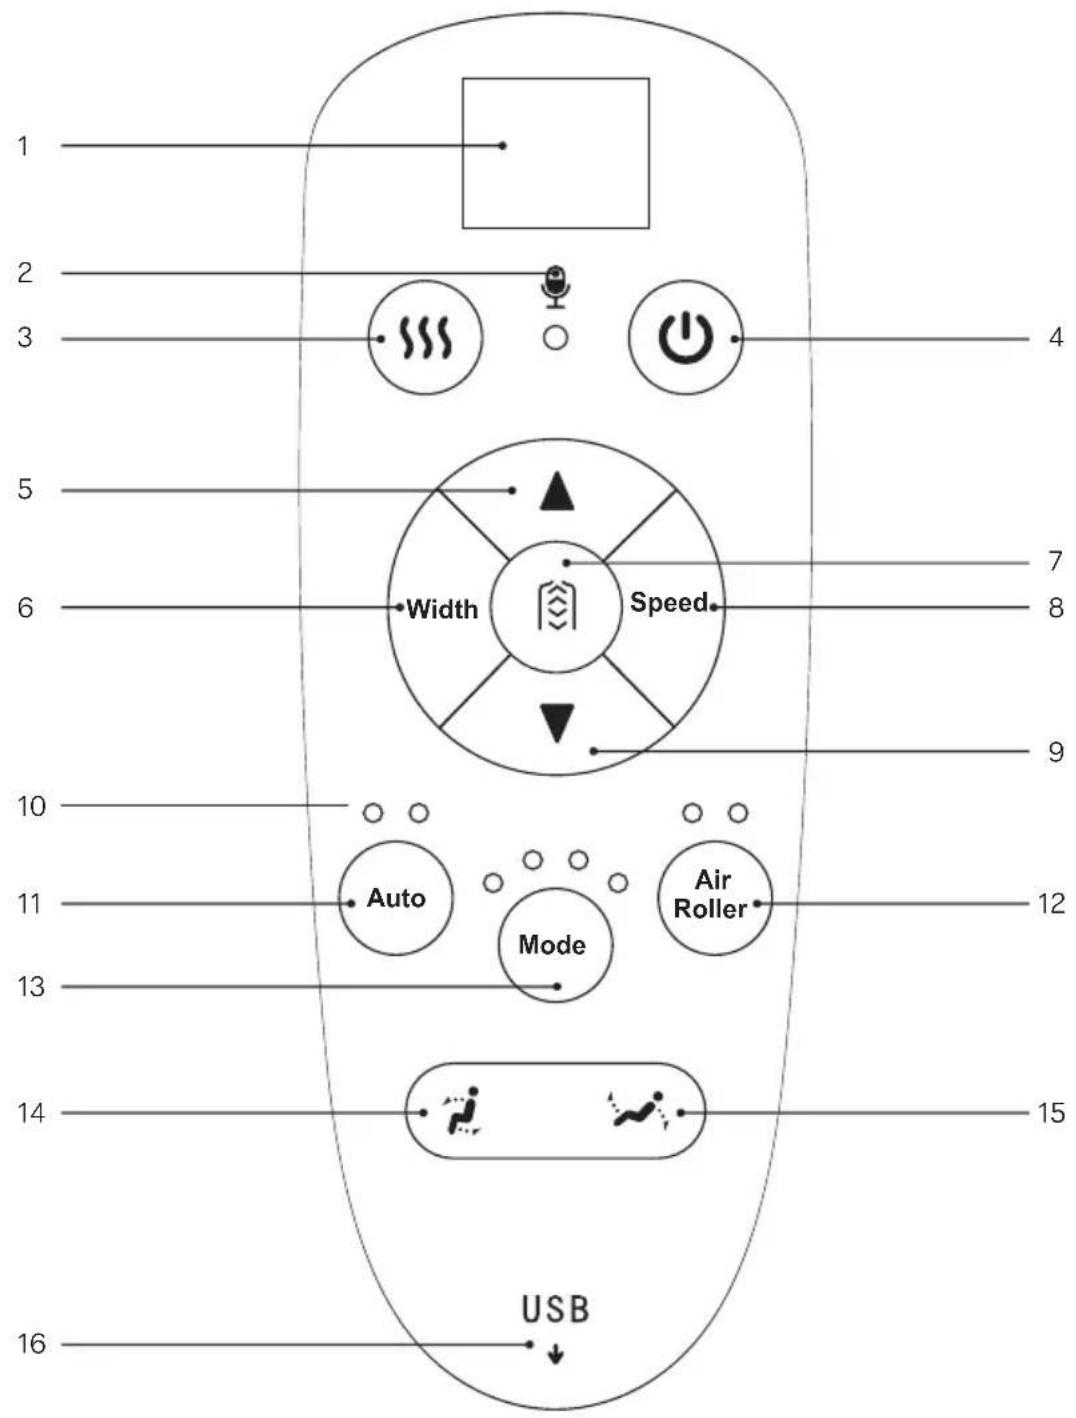
EN
- Display:
- Displays the massage mode and timing.
- Voice recognition hole:
- Activates the voice control recognition function.
- Heating function key:
- Turns the heating function on or off.
- Power:
- Turns all massage functions on or off.
- Massage area adjustment button:
- Adjusts the massage position upward.
- Width button:
- Adjusts the massage ball width.
- Massage area key:
- Massage area adjustment.
- Speedkey:
- Massage technique speed adjustment.
- Massage area adjustment button:
- Adjust the massage position downward.
- LED function display:
- Massage function display.
- Automatic massage button:
- Automatic massage function cycle switching.
- Air pressure:
- Short press this button to select the air pressure function: weak, strong, and closed.
- Long press: Turn on/off roller function.
- Massage technique key:
- Massage technique adjustment.
- Lifting button:
- Adjust the position where the back frame rises and the lower leg frame falls.
- Recline button:
- Adjust the position where the back frame falls and the lower leg frame rises.
- USB socket:
- USB phone charging socket.
II. Start massage
① Press the power button to start the massage and the massage chair will automatically recline. ② When you hear "Bi Bi" (display HH), you can adjust to the shoulder position by the up and down buttons. Without adjustment within 5 seconds, the massage automatically starts. ③ The default into the Auto Massage, you can also choose other massage modes for massage.
A) Automatic massage
| Name Button | Massage feature | Display State | |
| Automatic massage | Auto | Fast Massage: Quickly experience all massage effects. | A1 |
| Comfort Massage: The most comfortable massage experience. | A2 | ||
| Relax Massage: Gentle and comfortable deep massage, which can relieve body fatigue and relax the body. | A3 | ||
| Fullbody Massage: Deep massage, which can revive body vitality. | A4 | ||
| Neck&shoulder Massage: According to the unique neck and shoulder massage method, through effective massage of cervical spine and scapula, neck and shoulder pain can be relieved and neck and shoulder fatigue can be improved. | A5 | ||
| Back&Waist Massage: Focus on the back and waist to relieve back and waist soreness. | A6 | ||
| Stretch Massage: The lower leg frame and the backrest frame are lifted and lowered for stretching and traction of the leg and waist, effectively relieving tiredness, relieving joint soreness and restoring vitality. | A7 | ||
| Sport Recovery: Quick recovery of body fatigue after exercising. | A8 | ||
B) Manual Massage
| Name Button | Massage feature | Display State | |
| Mode |  | Rneading: The speed is adjustable; the indicator light I is on. | ● ○ ○ ○ |
| Tapping: speed and width are adjustable; indicator light II is on. | ○ ● ○ ○ | ||
| Rneading and tapping: The speed is adjustable; the indicator light III is on. | ○ ○ ● ○ | ||
| Shiatsu: speed and width are adjustable; indicator light IV is on. | ○ ○ ○ ● | ||
| Knocking: Speed and width are adjustable; indicator light I II is on. | ● ● ○ ○ | ||
| Width Button | [523H] | Three intensity adjusted | d1, d2, d3 |
| Speed Button | [7402] | Three speed adjusted | P1, P2, P3 |
C) Massage area adjustment
| Name Button | Massage feature | Display State | |
| Massage area |  | Fixed point: fixed position massage. | H0 |
| Partial: Small area partial massage. | H1 | ||
| Upper body: upper body massage. | H2 | ||
| Lower body: lower body massage. | H3 | ||
| Full Body :Full body massage. | H4 | ||
| Up Button |  | Massage position adjustment (in fixed point, partial mode, you can use the up and down buttons Key to adjust the massage position). | Massage hand upside |
| Down Button |  | Massage hand downside | |
D) Heating function
| Name Button | Massage feature | Display State | |
| Heat |  | Turn on the heating function. | h1 |
| Turn off the heating function. | h0 | ||
E) Air pressure massage
| Name Button | Massage feature | Display State | |
| Air pressur Mode |  | Short press this button to select the air pressure function: weak, strong, and closed. | weak strong ○ ○ |
| Long press: Turn on/off roller function. | L1, L0 | ||
F) The position of back frame adjustment
| Name Button | Massage feature | |
| Lifting Button | [06KK] | Press and hold this button, the backrest frame rises slowly, the calf frame slowly descends, and the release stops. If you sit up to the top, stop rising |
| Recline button |  | Press and hold this button, the backrest frame will slowly recline, the calf frame will rise slowly, if released the button will stop. |
III. Voice Control Mode
- When the massage chair is turned on or in standby mode, the sound "Hi Alice" or "Hey Alice" will be produced to enable the voice control function.
- After this function is enabled successfully, the massage chair will reply "I am here." At this moment, once a corresponding voice control entry to be implemented is given within six seconds, the corresponding voice control function can be performed after a reply is received from the massage chair; if no correct voice control entry is given within six seconds, the voice control function will automatically turn off and needs to be enabled again.
- Note: When waking up the voice control function, please use English, speak at a moderate pace, and follow the voice commands as per the voice entry.
| Voice Control Entry | ||
| Entry: "Hi Alice" or "Hey Alice". Answer: I am here. | ||
| No. | Voice control entry | Answer entry |
| 1 | Massage on | Answer: Ok, massage on |
| 2 | Massage close | Answer: Ok, massage close |
| 3 | Comfort massage | Answer: Ok, comfort massage |
| 4 | Relax massage | Answer: Ok, relax massage |
| 5 | Full body massage | Answer: Ok, full body massage |
| 6 | Neck and shoulder massage | Answer: Ok, neck and shoulder massage |
| 7 | Back and waist massage | Answer: Ok, back and waist massage |
| 8 | Stretch massage | Answer: Ok, stretch massage |
| 9 | Fixed massage | Answer: ok, fixed massage |
| 10 | Change the other mode | Answer: Ok, change the other mode |
| 11 | Go little down | Answer: Ok, go little down |
| 12 | Go little up | Answer: Ok, go little up |
| 13 | Open the air pressure | Answer: OK, Open the air pressure |
| 14 | Close the air pressure | Answer: OK, , Close the air pressure |
| 15 | Up the seat position | Answer: Ok, Up the seat position |
| 16 | Down the seat position | Answer: Ok, Down the seat position |
| 17 | Stop adjustment | Answer: Ok, stop adjustment |
IV. Operation Instructions for Bluetooth Speaker Play
- Enter the smart device main menu. Open "Settings" and select the "Bluetooth" option. Open "Bluetooth", and Bluetooth will automatically "Search for a New Bluetooth Device".
- The smart device will search for the corresponding Bluetooth model (e.g. IMCM-XXXX). Click the "Match" button. If you are asked whether to match with the device, just select "Match" to complete matching.
- Turn on "Music Player" in the smart device and select the song to play.
V. Massage close
During the massage, press the armrest switch key "⏻" to turn off. This will immediately turn off all massage functions and reset the backrest and leg, or when the massage time is up, the massage automatically turns off all massage functions, and the backrest mechanism and leg mechanism do not reset.
Cut off the power supply of the whole machine, as shown in the attached picture (the schematic diagram of the power cut off of the whole machine).
Turn off the power switch ("0" position)
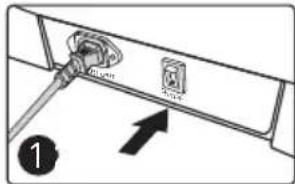
Schematic diagram of unplugging the power plug

Unplug the product from the power cord

Cleaning synthetic leather and plastic parts
Wipe the leather with a soft, dry cloth.
- Do not use chemicals such as thinner, gasoline, alcohol, etc. to clean the unit.
- When using commercially available leather care products (rags), please follow the instructions for use.
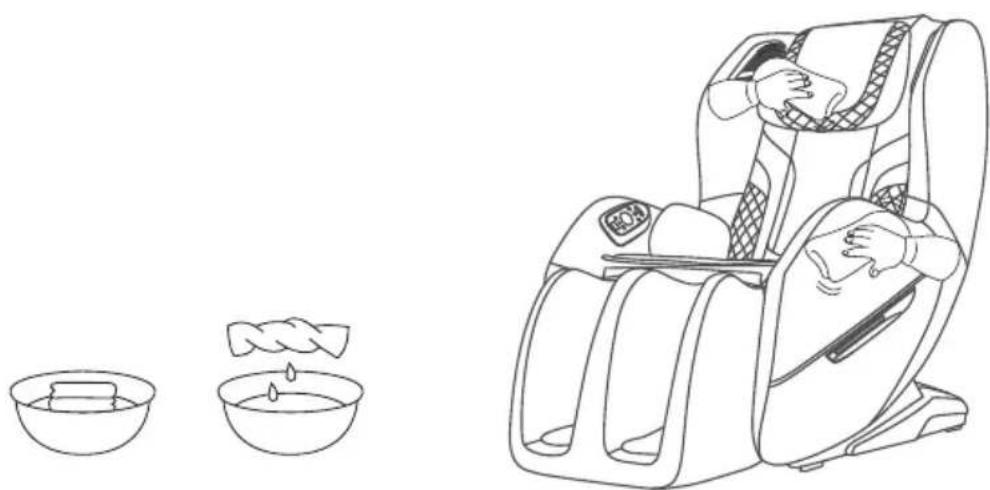
- If synthetic leather is particularly dirty, wipe it in the following way.
① Immerse a soft cloth in water or hot water containing 3% to 5% neutral detergent, then wring it out thoroughly. ② Use the above soft cloth to wipe the leather surface. ③ Wipe off the cleaning solution with a cloth soaked in clean water and thoroughly wrung out. ④ Wipe with a wrung soft cloth. ⑤ Let it air dry naturally.
- When it is difficult to remove stains, please immerse commercially available melamine foam in neutral detergent, and then wipe the machine with it.
- Do not use a hair dryer to dry the surface.
- Be careful when wiping the machine with denim and colored fabrics, as the color of the fabric will stain the surface of the synthetic leather.
- Do not keep these parts in contact with plastic for a long time, as this will cause discoloration.
- Synthetic leather may be discolored, so when using hair dye, please cover the touched part with a towel.
Troubleshooting
| Fault | When the calf mechanism or the backrest reaches a certain position, press the corresponding adjustment button and it will no longer change, and a continuous "beep, beep" sound will be emitted. |
| Solution | Due to product structure design and ergonomic requirements, this product has a limited protection design for the limit state of attitude adjustment. At the same time, a reminder sound will sound when the limit is reached. |
| Fault | The function does not work or some functions do not work after the machine is turned on. |
| Solution | After the machine is turned on by pressing the switch key, it is necessary to manually select an automatic massage program or other working state. If it is not operated, the machine will automatically shut down after 20 minutes. If the manual operation mode is selected, the functions that are not selected may be disabled, and the working mode needs to be manually set in the manual mode. |
| Fault | The machine makes a leather rubbing sound when adjusting its posture. |
| Solution | This product adopts high-grade anti-corrosion leather that meets environmental protection requirements. Due to the inherent characteristics of leather materials, there will be a normal slight noise when rubbing at the relative movement, which is a normal phenomenon. Note: If you hear fabric or leather tearing sound when the machine is running, please stop using it immediately and seek professional maintenance. |
| Fault | The massage wheel did not reach the shoulders or neck. |
| Solution | If the head does not touch the head cushion or the back does not touch the backrest, the shoulder position may be lower than the actual position during the body shape detection process. Sit in the deepest position of the seat, rest your head on the headrest, and start over from the beginning. |
| Fault | The unit is damaged.The power cord or power plug is abnormally hot. |
| Solution | To prevent accidents, be sure to contact an authorized service center. |
Please feel free to contact the designated service personnel for any questions or doubts about this product.
Model name: iREST EASYQ
Symbol: A166
Name: Massage Chair
Rated voltage: 220-240V~50Hz/60Hz
Rated power input: 90W
Rated time: 20Min
Safety structure: Class I
Material introduction: PVC, PA, steel parts and electric & electron parts
| MATERIAL | PU LEATHER | CLOTH | WOOD |
Bluetooth frequency range and power of 2.5 mW
Manufacturer's declaration: Product is compliant with Directive: 2014/53/EU.
Full text of declaration of conformity is available online
https://restlords.com/en/declaration
SAVE THESE INSTRUCTIONS
Dear user, you can contribute to environmental protection.
Be environmentally responsible and return your used equipment to the relevant collection point designated by your local administration. The materials used to manufacture the device may be valuable recyclable resources and, if disposed of incorrectly, can pose a risk to the natural environment.
Remember - do not dispose of the device together with your household waste.


EN
iREST
iREST EASYQ (A166)
MASSAGE CHAIR
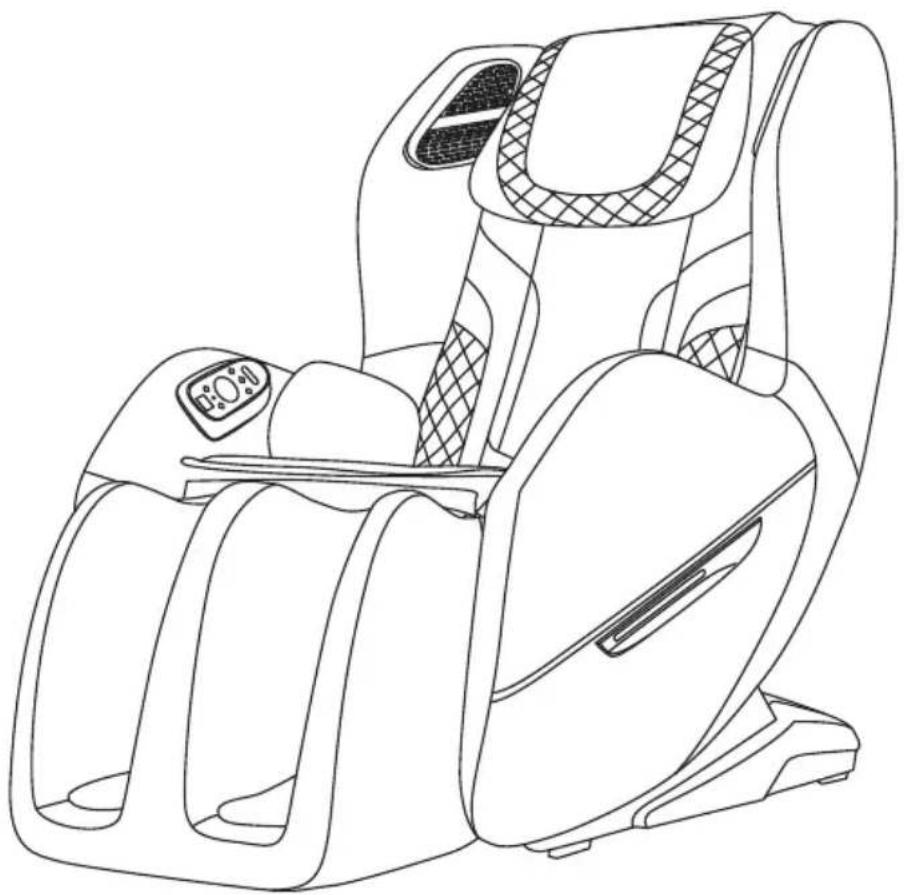
Instruction manual
PL
Installation location
WARNING

| Sterowanie głosem | ||
| Entry: "Hi Alice" or "Hey Alice". Answer: I am here. | ||
| No. | Komenda | Odpowiedź |
| 1 | Massage on | Answer: Ok, massage on |
| 2 | Massage close | Answer: Ok, massage close |
| 3 | Comfort massage | Answer: Ok, comfort massage |
| 4 | Relax massage | Answer: Ok, relax massage |
| 5 | Full body massage | Answer: Ok, full body massage |
| 6 | Neck and shoulder massage | Answer: Ok, neck and shoulder massage |
| 7 | Back and waist massage | Answer: Ok, back and waist massage |
| 8 | Stretch massage | Answer: Ok, stretch massage |
| 9 | Fixed massage | Answer: ok, fixed massage |
| 10 | Change the other mode | Answer: Ok, change the other mode |
| 11 | Go little down | Answer: Ok, go little down |
| 12 | Go little up | Answer: Ok, go little up |
| 13 | Open the air pressure | Answer: OK, Open the air pressure |
| 14 | Close the air pressure | Answer: OK, , Close the air pressure |
| 15 | Up the seat position | Answer: Ok, Up the seat position |
| 16 | Down the seat position | Answer: Ok, Down the seat position |
| 17 | Stop adjustment | Answer: Ok, stop adjustment |
- TABLE OF CONTENTS
- BEFORE USE
- USAGE METHOD
- MAINTAIN
- IMPORTANT
- SAFETY PRECAUTIONS (MUST BE OBSERVED)
- FORBIDDEN
- CALF INSTALLATION INSTRUCTIONS
- INSTALLATION PLACEMENT
- PRODUCT LIFT INSTRUCTION
- MOVE METHOD
- HOW TO DISASSEMBLE AND USE HEADREST CUSHION AND BACKREST CUSHION
- WARN
- FUNCTION DISTRIBUTION
- START MASSAGE
- VOICE CONTROL MODE
- OPERATION INSTRUCTIONS FOR BLUETOOTH SPEAKER PLAY
- MASSAGE CLOSE
- CLEANING SYNTHETIC LEATHER AND PLASTIC PARTS
- TROUBLESHOOTING
- SAVE THESE INSTRUCTIONS
- IREST
- IREST EASYQ (A166)
- MASSAGE CHAIR
- INSTALLATION LOCATION
Brand : iRest
Model : Easyq
Category : Massage device