
vp6111 - Projector HP - Free user manual and instructions
Find the device manual for free vp6111 HP in PDF.


| Product Type | Projector |
| Brand | HP |
| Model | vp6111 |
| Display Technology | DLP |
| Native Resolution | XGA (1024 x 768) |
| Brightness | 2000 ANSI Lumens |
| Contrast Ratio | 2000:1 |
| Lamp Type | P-VIP 200W |
| Lamp Life (Normal Mode) | 3000 hours |
| Projection Distance | 1.5 - 10 m |
| Screen Size | 30 - 300 inches |
| Input Connectivity | VGA, Composite, S-Video, Audio 3.5mm |
| Dimensions (W x D x H) | 286 x 205 x 98 mm |
| Weight | 2.4 kg |
| Power Consumption | 250 W (Normal), <1 W (Standby) |
| Power Supply | AC 100-240V, 50/60 Hz |
| Keystone Correction | Vertical ±20° |
| Zoom | Manual, 1.2x |
| Noise Level | 32 dB (Normal), 28 dB (Eco) |
| Cleaning Instructions | Wipe lens gently with a soft, dry cloth; clean air filter monthly |
| Safety Features | Auto-off after 30 min inactivity, overheat protection |
| Spare Parts Availability | Replacement lamps (HP part number: Q1597-60001) and filters available |
Frequently Asked Questions - vp6111 HP
User questions about vp6111 HP
0 question about this device. Answer the ones you know or ask your own.
Ask a new question about this device
Download the instructions for your Projector in PDF format for free! Find your manual vp6111 - HP and take your electronic device back in hand. On this page are published all the documents necessary for the use of your device. vp6111 by HP.
USER MANUAL vp6111 HP
HP VP6100 Series Digital Projector
User's Guide
Copyright © 2004 by Hewlett-Packard. All rights reserved. No part of this publication may be reproduced, transmitted, transcribed, stored in a retrieval system or translated into any language or computer language, in any form or by any means, electronic, mechanical, magnetic, optical, chemical, manual or otherwise, without the prior written permission of HP.
HP makes no representations or warranties, either expressed or implied, with respect to the contents hereof and specifically disclaims any warranties, merchantability or fitness for any particular purpose. Furthermore, HP reserves the right to revise this publication and to make changes from time to time in the contents hereof without obligation of HP to notify any person of such revision or changes.
Table of Contents
Introduction 5
Safety Instructions ....5
Shipping Contents 6
Projector Description ....7
Projector 7
External Control Panel 8
Adjuster....9
Projector Features 9
Remote Control Description 10
Remote Control Effective Range 10
Removing the Battery Protector 10
Replacing the Battery .... 11
Installation....12
Screen Size....12
Connecting to Various Equipment 13
Operation 16
Start Up 16
Digital Keystone Correction .....17
Auto Adjustment....17
Source Selection 18
Video and Audio Adjustments -- the Menu System .....18
Quick Tab 19
Adjust Tab 20
Audio Tab 21
Setup Tab 22
PIP Tab. 23
Shutdown 24
Maintenance 25
Lamp Information 25
Lamp LED Indicator 25
Lamp Replacement 25
Temperature Warning Indicator 27
Accessories 27
Troubleshooting 28
Common Problems & Solutions .....28
Status Messages 29
Specifications 30
Projector Specifications 30
Timing Chart 31
Dimensions 32
INTRODUCTION

Warning
TO PREVENT SHOCK, DO NOT OPEN THE CABINET. NO USER-SERVICEABLE PARTS INSIDE. REFER SERVICING TO QUALIFIED SERVICE PERSONNEL. PLEASE READ THIS USER'S GUIDE BEFORE YOU OPERATE YOUR PROJECTOR. SAVE THIS USER'S GUIDE FOR FUTURE REFERENCE.
Safety Instructions
1. Read this user's guide before you operate your projector and save it for future reference. 2. The lamp becomes extremely hot during operation. Allow the projector to cool for approximately 45 minutes prior to removing the lamp assembly for replacement. Do not operate lamps beyond the rated lamp life. Excessive operation of lamps beyond the rated life could cause them to explode on rare occasions. 3. Never replace the lamp assembly or any electronic components unless the projector is unplugged. 4. To reduce the risk of electric shock, do not disassemble this appliance. Take it to a qualified technician when service or repair is required. Incorrect reassembly can cause electric shock when the appliance is subsequently used. 5. Do not place this product on an unstable cart, stand, or table. The product may fall, sustaining serious damage. 6. This product is capable of displaying inverted images for ceiling mount installation. Please use suitable equipment for mounting the unit and ensure it is securely installed.

Caution
• Always remove the lens cap when the projector lamp is on. - Do not look straight at the projector lens during operation. The intense light beam may damage your eyes. - In some countries, the line voltage is NOT stable. This projector is designed to operate safely within a bandwidth of 110 to 230 volts, but could fail if power cuts or surges of more than 10 volts occur. In these high-risk areas, it is recommended that a power stabilizer unit be used in conjunction with this projector.
Save this user's guide: The information contained in this manual will assist you in operating and maintaining your personal projector.
Shipping Contents
The projector is shipped with the cables required for connection to standard PC or laptop computers. Carefully unpack and verify that you have all the items shown below. If any of these items are missing, please contact personnel at the place of purchase.

Projector
Warranty and Support
Quick Setup Guide
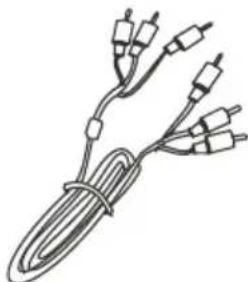

Audio Cable, Audio/Video Cable, Remote Control

Power Cord

VGA Cable
User's Guide CD
Projector Description
Projector

1 External control panel (see next page) 11 Audio/Video connector 2 Projection lens 12 Audio jack 3 Front adjuster 13 USB mouse connector 4 IR remote sensor 14 S-Video jack 5 Ventilation grill 15 RS 232 control port 6 Speaker 16 Rear adjuster feet 7 Focus and zoom adjusters 17 Kensington lock slot 8 VGA signal input (PC) 18 AC power cord inlet 9 VGA signal output 19 Main power switch 10 YPBPR connector 20 Lamp door

External Control Panel

1 Power
Turns the projector on or off.
② Auto Sync
Automatically determines the best picture settings for current received signals.
③ < ④ > ⑤ ∧ ⑥ v
⑦ Menu
Menu displays the menu system and closes the menu system. < and > navigate among menus and change settings. ^ and v select individual parameters for making changes.
⑧ Lamp Indicator
The Lamp Indicator will light up when the lamp needs service, cooling or replacement. See “Lamp Information” on page 25 for more detailed information.
9 Temp indicator
The Temp indicator will light up when the system temperature is too high, which may occur if the projector is operated improperly. See "Temperature Warning Indicator" on page 27 for more detailed information.
Adjuster
The projector is equipped with 2 quick-release adjuster feet. Push the buttons to adjust its tilt angle.
I. Lift the projector up and press the adjuster button to release the adjuster. 2. The adjuster will drop into position and be locked.

Projector Features
The projector integrates high-performance optical engine projection and a user-friendly design to deliver high reliability and ease of use.
The projector offers the following features:
- Small and light for portability
- Compact remote control • High quality manual zoom lens • One-key auto-adjustment to display the best picture quality • Digital keystone correction to correct distorted images
- Adjustable color balance control for data/video display • Ultra-high brightness projection lamp
- Ability to display 16.7 million colors • On-screen menus in 11 languages
- Switchable Presentation/ Video mode for data/ video display
- Powerful AV function to provide high quality AV picture • HDTV compatibility (YP BPR)
Note: The brightness of the projected image will vary depending on the ambient lighting conditions and contrast/brightness settings.
Remote Control Description
Remote Control Effective Range
The remote sensors are located on the front and the back of the projector. It can function in a range of 30 degrees horizontally and 30 degrees vertically relative to a line that is a right angle to the remote sensors. The distance between the remote control and the remote sensors must be shorter than 6 meters (19.5 feet).
Removing the Battery Protector
The remote control will not operate until you remove the battery protector. Pull the plastic tab until it comes out of the remote control.

Replacing the Battery
① Pull out the battery holder.
② Insert the new battery in the holder.
③ Push the holder into the remote control.


Caution
Avoid excessive heat and humidity. There may be danger of an explosion if batteries are incorrectly replaced. Replace only with the same or equivalent type recommended by the manufacturer. Dispose of used batteries according to the manufacturer's instructions.
INSTALLATION
Screen Size
Place the projector at the required distance from the screen according to the desired picture size (see the table below).

• VP6120, VP6121 (XGA) screen size chart
| Distance from screen | Diagonal measurement | ||||
| Minimum zoom | Maximum zoom | ||||
| feet | inches | feet | inches | feet | inches |
| 4 | 48 | 2.49 | 29.9 | 3.05 | 36.6 |
| 6 | 72 | 3.73 | 44.8 | 4.57 | 54.9 |
| 8 | 96 | 4.98 | 59.7 | 6.10 | 73.2 |
| 10 | 120 | 6.22 | 74.7 | 7.62 | 91.4 |
| 12 | 144 | 7.47 | 89.6 | 9.14 | 109.7 |
| 14 | 168 | 8.71 | 104.5 | 10.67 | 128.0 |
| 16 | 192 | 9.96 | 119.5 | 12.19 | 146.3 |
| 18 | 216 | 11.20 | 134.4 | 13.72 | 164.6 |
| 20 | 240 | 12.45 | 149.4 | 15.24 | 182.9 |
| 22 | 264 | 13.69 | 164.3 | 16.76 | 201.2 |
| 24 | 288 | 14.94 | 179.2 | 18.29 | 219.5 |
| 26 | 312 | 16.18 | 194.2 | 19.81 | 237.7 |
| 28 | 336 | 17.42 | 209.1 | 21.34 | 256.0 |
| 30 | 360 | 18.67 | 224.0 | 22.86 | 274.3 |
| 32 | 384 | 19.91 | 239.0 | 24.38 | 292.6 |
| Distance from screen | Diagonal measurement | ||||
| Minimum zoom | Maximum zoom | ||||
| meters | cm | meters | cm | meters | cm |
| 1 | 100 | 0.62 | 62.2 | 0.76 | 76.2 |
| 1.5 | 150 | 0.93 | 93.3 | 1.14 | 114.3 |
| 2 | 200 | 1.24 | 124.5 | 1.52 | 152.4 |
| 2.5 | 250 | 1.56 | 155.6 | 1.91 | 190.5 |
| 3 | 300 | 1.87 | 186.7 | 2.29 | 228.6 |
| 3.5 | 350 | 2.18 | 217.8 | 2.67 | 266.7 |
| 4 | 400 | 2.49 | 248.9 | 3.05 | 304.8 |
| 4.5 | 450 | 2.80 | 280.0 | 3.43 | 342.9 |
| 5 | 500 | 3.11 | 311.2 | 3.81 | 381.0 |
| 5.5 | 550 | 3.42 | 342.3 | 4.19 | 419.1 |
| 6 | 600 | 3.73 | 373.4 | 4.57 | 457.2 |
| 6.5 | 650 | 4.04 | 404.5 | 4.95 | 495.3 |
| 7 | 700 | 4.36 | 435.6 | 5.33 | 533.4 |
| 7.5 | 750 | 4.67 | 466.7 | 5.72 | 571.5 |
| 8 | 800 | 4.98 | 497.8 | 6.10 | 609.6 |
• VP6110, VP6111 (SVGA) screen size chart
| Distance from screen | Diagonal measurement | ||||
| Minimum zoom | Maximum zoom | ||||
| feet | inches | feet | inches | feet | inches |
| 4 | 48 | 1.96 | 23.5 | 2.40 | 28.7 |
| 6 | 72 | 2.93 | 35.2 | 3.59 | 43.1 |
| 8 | 96 | 3.91 | 47.0 | 4.79 | 57.5 |
| 10 | 120 | 4.89 | 58.7 | 5.99 | 71.9 |
| 12 | 144 | 5.87 | 70.4 | 7.19 | 86.2 |
| 14 | 168 | 6.85 | 82.2 | 8.39 | 100.6 |
| 16 | 192 | 7.83 | 93.9 | 9.58 | 115.0 |
| 18 | 216 | 8.80 | 105.7 | 10.78 | 129.4 |
| 20 | 240 | 9.78 | 117.4 | 11.98 | 143.7 |
| 22 | 264 | 10.76 | 129.1 | 13.18 | 158.1 |
| 24 | 288 | 11.74 | 140.9 | 14.37 | 172.5 |
| 26 | 312 | 12.72 | 152.6 | 15.57 | 186.9 |
| 28 | 336 | 13.70 | 164.3 | 16.77 | 201.2 |
| 30 | 360 | 14.67 | 176.1 | 17.97 | 215.6 |
| 32 | 384 | 15.65 | 187.8 | 19.17 | 230.0 |
| Distance from screen | Diagonal measurement | ||||
| Minimum zoom | Maximum zoom | ||||
| meters | cm | meters | cm | meters | cm |
| 1 | 100 | 0.49 | 48.9 | 0.60 | 59.9 |
| 1.5 | 150 | 0.73 | 73.4 | 0.90 | 89.8 |
| 2 | 200 | 0.98 | 97.8 | 1.20 | 119.8 |
| 2.5 | 250 | 1.22 | 122.3 | 1.50 | 149.7 |
| 3 | 300 | 1.47 | 146.7 | 1.80 | 179.7 |
| 3.5 | 350 | 1.71 | 171.2 | 2.10 | 209.6 |
| 4 | 400 | 1.96 | 195.7 | 2.40 | 239.6 |
| 4.5 | 450 | 2.20 | 220.1 | 2.70 | 269.5 |
| 5 | 500 | 2.45 | 244.6 | 2.99 | 299.5 |
| 5.5 | 550 | 2.69 | 269.0 | 3.29 | 329.4 |
| 6 | 600 | 2.93 | 293.5 | 3.59 | 359.4 |
| 6.5 | 650 | 3.18 | 317.9 | 3.89 | 389.3 |
| 7 | 700 | 3.42 | 342.4 | 4.19 | 419.3 |
| 7.5 | 750 | 3.67 | 366.8 | 4.49 | 449.2 |
| 8 | 800 | 3.91 | 391.3 | 4.79 | 479.1 |
Connecting to Various Equipment
The internal speaker is good for a small audience. If you have a larger audience, you may want to connect the audio source directly to a separate sound system instead of the projector.
HDTV Equipment
The projector is capable of displaying various High Definition TV display modes. Some of these sources are:
• Digital-VHS (D-VHS) player - DVD player - Satellite Dish HDTV receiver - DTV tuners
Most of these sources will provide an analog component video output, a standard VGA output, or a YPBPR (default) format.
The projector is capable of accepting HDTV data through a YPBPR connector. Use a standard HDTV cable to display HDTV images.
The following standards are supported in the HDTV function:
• 480i • 480p • 720p • 1080i
Please refer to "Video and Audio Adjustments -- the Menu System" on page 18 for information on the HDTV OSD selections.
Connecting to Various Equipment
It only takes a few seconds to connect your projector to your desktop or notebook computer, VCR, or other systems. However, a Mac adapter is needed for connection to Macintosh computers.
I. Computer
![graph TD A["Laptop"] --> B["Device 1"] A --> C["Device 2"] A --> D["Device 3"] A --> E["Device 4"] A --> F["Device 5"] A --> G["Device 6"] A --> H["Device 7"] A --> I["Device 8"] A --> J["Device 9"] A --> K["Device 10"] A --> L["Device 11"] A --> M["Device 12"] A --> N["Device 13"] A --> O["Device 1…](/content/2026/06/1355669/images/103bc32da0dcab63f44d04ca173a92c8df4e54ca095a11b39ab29355dbc72882.jpg)
The USB cable is not needed unless you have a remote control with mouse functions.
- DVD player or HDTV
![graph TD A["Device"] --> B["Microcontroller 1"] A --> C["Microcontroller 2"] B --> D["Control Panel"] C --> D D --> E["Output"] style A fill:#f9f,stroke:#333 style D fill:#ccf,stroke:#333](/content/2026/06/1355669/images/66cb1b45fe382f2a8dcb5c6532ed34df8d46d06c3d4e7dcec60cd89c83e0ca42.jpg)
- S-video device

- Video device or VCR

- Output monitor
![graph TD A["Computer monitor"] --> B["Switch"] B --> C["Device"] C --> D["Control Panel"] D --> E["Port 1"] D --> F["Port 2"] D --> G["Port 3"] D --> H["Port 4"] D --> I["Port 5"] D --> J["Port 6"] D --> K["Port 7"] D --> L["Port 8"]](/content/2026/06/1355669/images/9aec215c298837157f6f45e766fe9719aeaf3fc7a590bf886568954303c71a4f.jpg)
OPERATION
Start Up
I. Plug the power cord into the projector and into a wall socket.

- Turn on the main power switch.
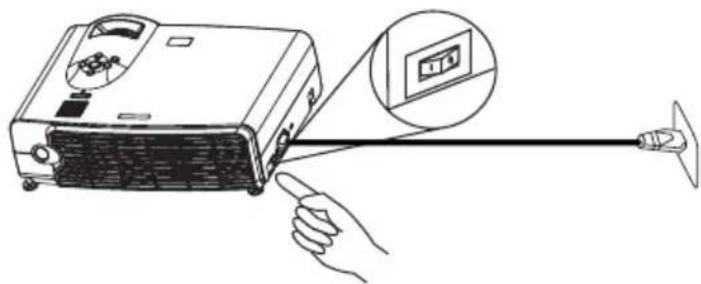
- Press and hold POWER to start the unit. The back-lit POWER key flashes blue and stays blue when the power is turned on.
Projector
Remote Control
(When the power is turned off, there is a 120-second cooling period before the projector can be re-started.)
- Switch on all connected equipment.
Digital Keystone Correction
Keystoning refers to the situation where the projected image is noticeably wider at either the top or bottom. To correct this, press KEYSTONE ▲ (hotkey) on the control panel of the projector or on the remote control, and then adjust the sliding bar labeled Keystone, as needed. Press ▲ if the top of the image is too wide. Press ▼ if the bottom of the image is too wide.
![graph TD A["Projector"] --> B["Remote control"] B --> C["Camera"] C --> D["Camera"] D --> E["Camera"] E --> F["Camera"] F --> G["Camera"] G --> H["Camera"] H --> I["Camera"] I --> J["Camera"] J --> K["Camera"] K --> L["Camera"] L --> M["Camera"] M --> N["Camera"] N --> O["Camera"] O --> P["Camera"]…](/content/2026/06/1355669/images/c5dc3a59c5ebb9d890d24f6ca304837fa5acac94455407bcfc281e90318bdcf9.jpg)
Auto Adjustment
In some cases, you may need to optimize the picture quality. To do this, press the AUTO key on the control panel of the projector or on the remote control. Within 3 seconds, the built-in Intelligent Auto Adjustment function will re-adjust settings to provide the best picture quality.


Source Selection
When several input sources are available, press the SOURCE key to make a selection from the remote control or from the menu system.

Video and Audio Adjustments -- the Menu System
- On the projector or remote control, press the Menu button.
- Press < or > to select the desired menu.
- Press v or ^ to select the desired parameter.
- Press < or > to change the setting or open a sub-menu.
- To change another parameter, press v or ^ to select the parameter.
- To go to another menu, press the Menu button, then press < or > to select the menu.
- To close the menu system, press the Menu button one or more times.

Quick Tab
| FUNCTION DESCRIPTION | |
| Source | Selects picture source.*The operation of this function depends on the Source Scan setting. |
| Keystone | Corrects slanted edges of the image. |
| Picture mode | Adjusts picture for type of input. |
| Auto-sync | Synchronizes with input signal. |
| Aspect ratio | Selects proportions of the image. |
Adjust Tab
| FUNCTION DESCRIPTION | |||
| Brightness | Brightens or darkens the image. | ||
 |  |  | |
| Contrast | Sets difference between light and dark areas. | ||
 |  |  | |
| Frequency | Adjusts timing relative to input signal.*This function is available only when the input source is PC. | ||
| Trading | Adjusts synchronization to input signal.*This function is available only when the input source is PC. | ||
| V position | Shifts image up or down. | ||
 |  | ||
| *This function is available only when the input source is PC. | |||
| Saturation | Adjusts intensity of colors.*This function is available only when the input source is Video. | ||
| Tint | Shifts colors toward red or toward green.*This function is available only when the input source is Video. | ||
| Sharpness | Sharpens or softens the image.*This function is available only when the input source is Video. | ||
| Color temp | Shifts colors toward red or toward blue. | ||
Audio Tab
| FUNCTION DESCRIPTION | |
| Mute | Stops audio output. |
| Volume | Changes loudness of audio |
| Treble | Changes loudness of higher frequencies. |
| Bass | Changes loudness of lower frequencies. |
Setup Tab
| FUNCTION DESCRIPTION | |
| Language | Selects language for menus. Use < / > key to select the desired language. |
| Position | Adjusts the image to match the projector placement.1. Default 2. Ceiling mounted projection  3. Rear screen projection 4. Ceiling mounted and rear-screen projection 3. Rear screen projection 4. Ceiling mounted and rear-screen projection  |
| Source scan | Sets whether projector searches for input signal. |
| OSD position | Selects position of on-screen menu. |
| OSD timeout | Sets how quickly on-screen menu closes. |
| Advanced... | Auto-offSets shutdown delay for no input signal. |
| Lamp saverSets lower light output for longer life. | |
| Lamp resetFor new lamp, resets hours of use. | |
| Reset menuReturns all settings to factory preset values. | |
PIP Tab
These functions are available only when the input source is PC and a video or S-video source is also connected.
| FUNCTION DESCRIPTION | |
| Source | Selects an input source for the picture-in-picture. |
| Size | Selects the size of the picture-in-picture. Use < / >key to select small, medium or large PIP size. |
| Position | Selects a desired position for the PIP. |
| PIP Adjust... | BrightnessBrightens or darkens the image. |
| ContrastSets difference between light and dark areas. | |
| SaturationAdjusts intensity of colors. | |
| TintShifts colors toward red or toward green. | |
| SharpnessSharpens or softens the image. | |
Shutdown
I. Press and hold POWER and a warning message will appear. To turn off the projector, press POWER again.
![graph TD A["Projector"] --> B["Confirm"] B --> C["Press <Power> again to power off"] D["Remote Control"] --> E["Projector"]](/content/2026/06/1355669/images/351b9439d580a6272fc1db15c8b3c4fbfe671ac58d6cfbfcb24213ecf90138da.jpg)
- The fan will continue to run for approximately two minutes.
- Turn off the main power switch.

- Disconnect the power cord from the wall socket.


Caution
Do not unplug the power cord before the projector is shut down or during the two-minute cooling process.
If the projector is not properly shut down, the system will detect this and cool the lamp for two minutes automatically before turning on again, to protect the lamp.
MAINTENANCE
Lamp Information
Lamp LED Indicator
| Lamp LED is off Lamp is operating normally. | |
| Lamp LED is on Lamp is burned out or not properly installed. Repace the lamp. |
Lamp Replacement
When the Lamp Indicator lights up red or a message appears suggesting the time for lamp replacement, please install a new lamp or consult your dealer. An old lamp could cause a malfunction in the projector and in rare instances may even break.

Warning
To reduce the risk of electrical shock, always turn off the projector and disconnect the power cord before changing the lamp.
To reduce the risk of severe burns, allow the projector to cool for at least 45 minutes before replacing the lamp.
To reduce the risk of injuries to fingers and damage to internal components, use caution when removing lamp glass that has shattered into sharp pieces.
To reduce the risk of injuries to fingers and/or compromising image quality by touching the lens, do not touch the empty lamp compartment when the lamp is removed.
This lamp contains mercury. Consult your local hazardous waste regulations to dispose of this lamp in a proper manner.
- Turn off the projector. Disconnect the power cord from the outlet and the projector.
- Loosen the screw and remove the lamp cover. If the lamp is hot, avoid burns by waiting 45 minutes until the lamp has cooled.
- Loosen the 3 screws. (It is strongly recommended that you use a magnetic-head screwdriver.) Pull the handle to remove the lamp housing. If the screws are not loosened completely, they could injure your fingers. Do not insert your hand into the box after the lamp is removed. If you touch the optical components inside, this could cause color unevenness in projected images.
- Replace the lamp with a new one. Insert it into the projector, and tighten the screws firmly. Loose screws may cause a bad connection, which may result in malfunction.
- Re-install the lamp cover and tighten the screw. Do not turn on the power with the lamp cover removed.
- After the lamp is replaced, turn on the projector and reset the total lamp operation time. To do this, use the on-screen menu system and go to Setup > Advanced > Lamp Reset. Do not reset if the lamp is not replaced as this could cause damage.
Step I
Step 2
Step 3
Step 4
Temperature Warning Indicator
| Status Description | |
| Temperature LED is off | Temperature is normal. |
| Temperature LED is blinking | Internal fan is not working properly. Turn off the projector and contact HP for assistance. |
| Temperature LED is on | Internal temperature is too high. Turn off the projector and check the vents for blockage. If this continues to occur, contact HP for assistance. |
Accessories
You can buy HP accessories for your projector, such as the following:
- Carrying case
- Premium remote control (plus USB cable)
- Ceiling mount
- 60-inch mobile screen
- Replacement lamp module • Video and power cables
TROUBLESHOOTING
Common Problems & Solutions
| PROBLEMS TRY THESE SOLUTIONS | |
| NO POWER | Make sure the power cord is inserted fully into the power cord socket.Make sure the power cord is inserted fully into the power outlet.Toggle the power switch to the position “I”.Wait two minutes after the projector is turned off before turning the projector back on. |
| NO PICTURE | Check for the proper input source.Ensure all cables are connected properly.Adjust the brightness and contrast.Remove the lens cap. |
| TRAPEZOID IMAGE ON THE SCREEN | Reposition the unit to improve its angle on the screen.Use the Keystone correction key on the control panel of the projector or the remote control unit. |
| POOR COLOR | In the menu system, set the picture mode according to the type of image you are displaying: computer data presentation or video image.Adjust brightness, contrast, or saturation. |
| BLURRED IMAGE | Press Auto Sync on the control panel of the projector or the remote control unit to get better picture quality.Adjust the focus.Reposition the unit to improve its projection angle.Ensure the distance between the unit and screen is within the adjustment range of the lens. |
| REMOTE CONTROL DOES NOT WORK | Replace the batteries with new ones.Make sure there is no obstacle between the remote control and the projector.Stand within 6 meters (19.5 feet) of the projector.Make sure nothing is blocking the front and rear receivers.If you are using a remote control with mouse and page up/ down functions, make sure you have a USB connection between the projector and computer. Certain computer models may not be compatible with the mouse and page up/ down functions of the projector -- try using a different computer. |
| USB CONNECTION DOES NOT WORK | The remote control shipped with the projector does not include any features that use a USB connection.A USB connection supports only certain remote control features.See the remote control section of this table. |
Status Messages
| On-Screen Messages | Description |
| SEARCHING | Projector is searching for input. |
| ACQUIRING SIGNAL | Projector has identified the input signal and is running the auto image adjustment function. |
| OUT OF RANGE | Input signal frequency exceeds the projector's range. |
| LAMP WARNING - CHANGE LAMP AND RESET LAMP TIMER! | The lamp has been in operation for 1900 hours. Install a new lamp for optimal performance. |
| END OF LAMP LIFE. YOU MUST CHANGE THE LAMP SOON. | The lamp has been in operation for 1980 hours. |
| END OF LAMP LIFE. YOU MUST CHANGE THE LAMP NOW. | The lamp has been in operation for over 2000 hours. The warning message will display for 15 seconds every time you turn on the projector. |
SPECIFICATIONS
Projector Specifications
Technical Specifications
Note: All specifications are subject to change without notice.
General
Model name VP6120, VP6121 (XGA)
VP6110, VP6111 (SVGA)
Optical
Display system I-CHIP DMD
Lens F/Number F/2.6
Lamp 200W \~ 250W lamp
Electrical
Power supply AC100 \~ 240V, 4.0A, 50/60 Hz (Automatic)
Power consumption 330W (Max)
Mechanical
Dimensions 308 mm (W) × 95 mm (H) × 238 mm (D)
Operating temperature 10°C to 35°C
range
Weight 6.9 lbs (3.1 Kg)
Input terminal
Computer input
VGA input D-sub 15-pin (female)
Video signal input
S-VIDEO Mini DIN 4-pin port x1
VIDEO RCA jack x1
HDTV signal input YPBPR RCA jack x3
Audio signal input
Audio I Mini jack stereo port
Audio 2 RCA jack L, R x2
Output
USB mouse connector A/B series x1
Speaker 2 watt x 1
Control
RS-232C 9-pin x1
Timing Chart
| Resolution H Sync (kHz) V Sync (Hz) Remark | |||
| 640x350 31.5 70.1 | |||
| 640x400 37.9 85.1 | VESA | ||
| 720x400 31.5 70.0 | |||
| 720x400 37.9 85.1 | VESA | ||
| 640x480 31.5 60.0 | VESA | ||
| 640x480 37.9 72.8 | VESA | ||
| 640x480 35 66.7 Macintosh | |||
| 640x480 43.3 85.0 | VESA | ||
| 800x600 35.2 56.3 | VESA | ||
| 800x600 37.9 60.3 | VESA | ||
| 800x600 46.9 75.0 | VESA | ||
| 800x600 48.1 72.2 | VESA | ||
| 800x600 53.7 85.1 | VESA | ||
| 832x624 49.7 74.5 | Macintosh | ||
| 1024x768 48.4 60.0 | VESA | ||
| 1024x768 56.5 70.1 | VESA | ||
| 1024x768 60.0 75.0 | VESA | ||
| 1024x768 68.7 85.0 | VESA | ||
| 1280x1024 64.0 60.0 | VESA | ||
DIMENSIONS
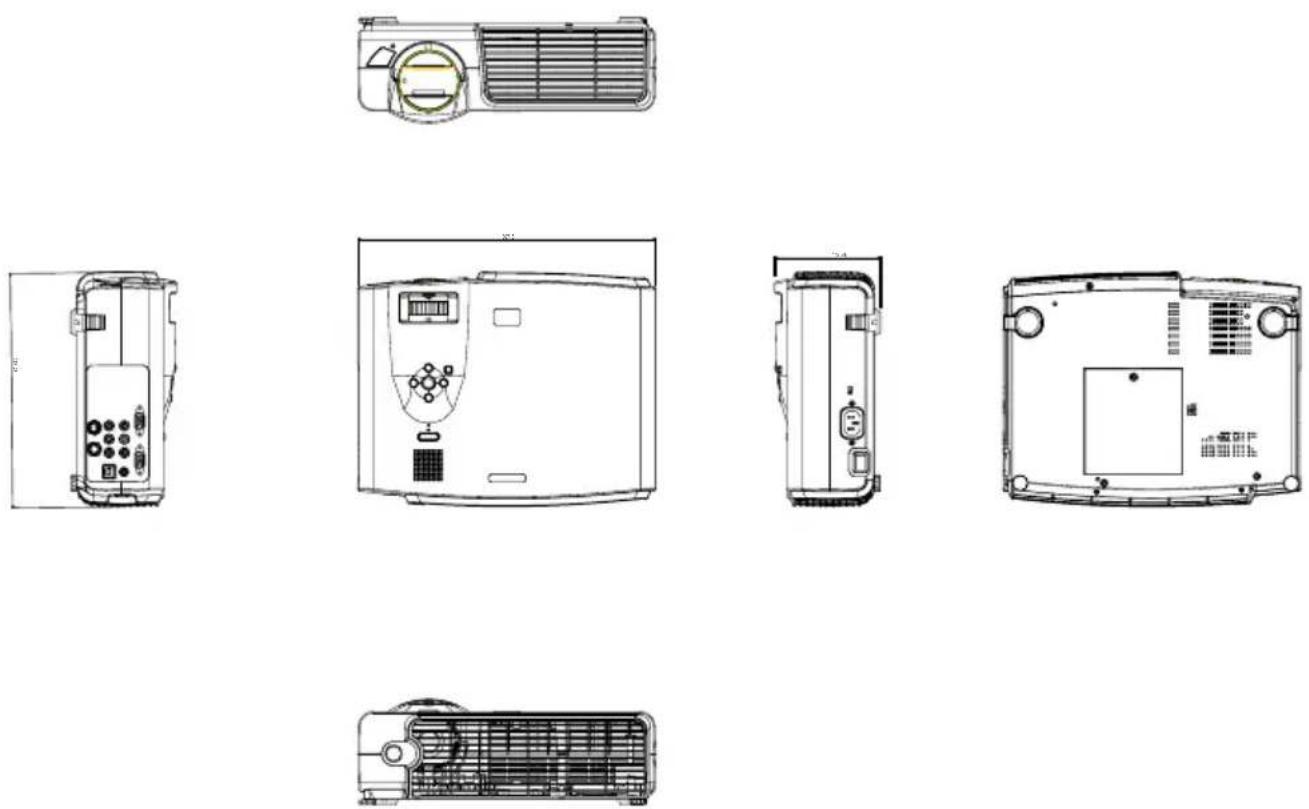
Unit: mm
REGULATORY AND SAFETY
This section presents information that shows how your digital projector complies with regulations in certain regions. Any modifications to your digital projector not expressly approved by Hewlett-Packard could void the authority to operate the digital projector in these regions.
LED Safety
The infrared ports located on the digital projector are classified as Class I LED (light-emitting diode) devices according to International Standard IEC 825-1 (En 60825-1). This device is not considered harmful, but the following precautions are recommended:
- If the unit requires service, contact an authorized HP service center.
- Do not attempt to make any adjustment to the unit.
- Avoid direct eye exposure to the infrared LED beam. Be aware that the beam is invisible light and cannot be seen.
- Do not attempt to view the infrared LED beam with any type of optical device.
Mercury Safety
Warning: This digital projector lamp contains a small amount of mercury. If the lamp breaks, adequately ventilate the area where the breakage occurred. Disposal of this lamp may be regulated due to environmental considerations. For disposal or recycling information, please contact your local authorities or the Electronic Industries Alliance (www.eiae.org)
U.S.A.
This digital projector has been tested and found to comply with the limits for a Class B digital device, pursuant to Part 15 of the FCC Rules. These limits are designed to provide reasonable protection against harmful interference in a residential installation. This digital projector generates, uses, and can radiate radio frequency energy. If not installed and used in accordance with the instructions, it may cause harmful interference to radio communications. However, there is no guarantee that interference will not occur in a particular installation. If this digital projector does cause harmful interference to radio or television reception (which can be determined by unplugging the unit), try the following:
- Reorienting or relocating the receiving antenna.
- Relocating the digital projector with respect to the receiver.
- Connecting the digital projector's power cord to another power outlet.
Connections to Peripheral Devices. To maintain compliance with FCC Rules and Regulations, use properly shielded cables with this device.
For more information, consult your dealer, an experienced radio/television technician, or the following booklet, prepared by the Federal Communications Commission: How
to Identify and Resolve Radio-TV Interference Problems. This booklet is available from the U.S. Government Printing Office, Washington, DC 20402, Stock Number 004-000-00345-4. At the first printing of this manual, the telephone number was (202) 512-1800.
Canada
This Class B digital apparatus complies with Canadian ICES-003.
Japan
NOTE: For regulatory identification purposes, your product is assigned a Regulatory Model Number. The Regulatory Model Number for your product is listed in the declaration below. This regulatory number is different from the marketing name and product number.
DECLARATION OF CONFORMITY
According to ISO/IEC Guide 22 and EN 45014
Manufacturer's Name:
Hewlett Packard Company
Manufacturer's Address:
Hewlett Packard Company
Digital Projection & Imaging
1000 NE Circle Blvd.
Corvallis, OR 97330-4239
Declares, that the product(s):
Product Name: HP Digital Projector
Model Number(s): VP6120, VP6121, VP6110, VP6111
Regulatory Model Number(s): CRVSB-03HE
Conforms to the following product specifications:
Safety: IEC 60950:1991 +A1,A2,A3,A4 / EN 60950:1992+A1,A2,A3,A4,A11
IEC 60825-1:1993 +A1 / EN 60825-1:1994 +A11 Class 1 LED
GB4943-1995
EMC: EN 55022: 1998 Class B [1]
CISPR 24:1997 / EN 55024: 1998
IEC 61000-3-2:1995 / EN 61000-3-2:1995 +A1:1998 +A2:1998 +A14:2000
IEC 61000-3-3:1994 / EN 61000-3-3:1995
GB9254-1998
FCC Title 47 CFR, Part 15 Class B/ANSI C63.4:1992
AS/NZS 3548:1995 Rules and Regulations of Class B
Supplementary information:
The product herewith complies with the requirements of the following Directives and carries the CE marking accordingly:
-Low Voltage Directive: 73/23/EEC
-EMC Directive: 89/336/EEC
[1] The product was tested in a typical configuration with Hewlett Packard Personal Computer peripherals.
This device complies with Part 15 of the FCC Rules. Operation is subject to the following two conditions: (1) this device may not cause harmful interference, and (2) this device must accept any interference received, including interference that may cause undesired operation.
Corvallis, Oregon, March 7, 2004

European Contact for regulatory topics only: Hewlett Packard GmbH, HQ-TRE, Herrenberger Straße 140, 71034 Boeblingen, Germany. (FAX:+49-7031-143143).
USA Contact: Hewlett Packard Co., Corporate Product Regulations Manager, 3000 Hanover
Street, Palo Alto, CA 94304. Phone: (650) 857-1501.

- HP VP6100 SERIES DIGITAL PROJECTOR
- USER'S GUIDE
- TABLE OF CONTENTS
- INTRODUCTION
- INSTALLATION
- OPERATION
- MAINTENANCE
- TROUBLESHOOTING
- SPECIFICATIONS
- DIMENSIONS
- WARNING
- SAFETY INSTRUCTIONS
- CAUTION
- SHIPPING CONTENTS
- PROJECTOR DESCRIPTION
- PROJECTOR
- EXTERNAL CONTROL PANEL
- POWER
- ② AUTO SYNC
- ⑦ MENU
- ⑧ LAMP INDICATOR
- TEMP INDICATOR
- ADJUSTER
- PROJECTOR FEATURES
- REMOTE CONTROL EFFECTIVE RANGE
- REMOVING THE BATTERY PROTECTOR
- REPLACING THE BATTERY
- SCREEN SIZE
- CONNECTING TO VARIOUS EQUIPMENT
- HDTV EQUIPMENT
- START UP
- DIGITAL KEYSTONE CORRECTION
- AUTO ADJUSTMENT
- SOURCE SELECTION
- VIDEO AND AUDIO ADJUSTMENTS -- THE MENU SYSTEM
- QUICK TAB
- PIP TAB
- SHUTDOWN
- LAMP INFORMATION
- LAMP REPLACEMENT
- ACCESSORIES
- PROJECTOR SPECIFICATIONS
- TECHNICAL SPECIFICATIONS
- GENERAL
- OPTICAL
- ELECTRICAL
- MECHANICAL
- INPUT TERMINAL
- OUTPUT
- CONTROL
- REGULATORY AND SAFETY
- LED SAFETY
- MERCURY SAFETY
- U.S.A
- CANADA
- JAPAN
- DECLARATION OF CONFORMITY
- MANUFACTURER'S NAME
- MANUFACTURER'S ADDRESS
- SUPPLEMENTARY INFORMATION
Brand : HP
Model : vp6111
Category : Projector