
039-8556-0 - Pressure washer Simoniz - Free user manual and instructions
Find the device manual for free 039-8556-0 Simoniz in PDF.
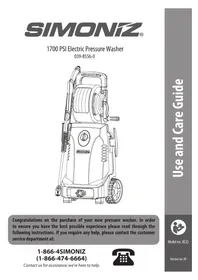


| Type of Product | Pressure Washer |
| Brand | Simoniz |
| Model | 039-8556-0 |
| Power Source | Electric 120V, 60Hz |
| Max Pressure | 2000 PSI |
| Flow Rate | 1.2 GPM |
| Water Supply | Cold water only |
| Motor Type | Induction, 13 Amps |
| Hose Length | 20 feet |
| Power Cord Length | 25 feet |
| Nozzles Included | 5 quick-connect (0°, 25°, 40°, soap, turbo) |
| Soap Tank | Integrated, 0.5 gallon |
| Weight | 15 lbs |
| Dimensions (L x W x H) | 15 x 12 x 18 inches |
| Wheel Type | Pneumatic tires |
| Handle | Folding handle with ergonomic grip |
| Safety Features | Trigger lock, thermal overload protection |
| Cleaning Applications | Driveways, decks, cars, patios |
| Hose Reel | Not included |
| Certifications | ETL, UL listed |
Frequently Asked Questions - 039-8556-0 Simoniz
User questions about 039-8556-0 Simoniz
0 question about this device. Answer the ones you know or ask your own.
Ask a new question about this device
Download the instructions for your Pressure washer in PDF format for free! Find your manual 039-8556-0 - Simoniz and take your electronic device back in hand. On this page are published all the documents necessary for the use of your device. 039-8556-0 by Simoniz.
USER MANUAL 039-8556-0 Simoniz
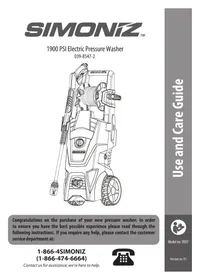
Congratulations on the purchase of your new pressure washer. In order to ensure you have the best possible experience, please read through the following instructions. If you require any help, please contact the customer service department at:
1-866-4SIMONIZ
(1-866-474-6664)
Contact us for assistance; we're here to help.

- Important precautions....3
1.1 Definitions....3 1.2 Safety Warnings....3 1.3 Intended Application 5
- Safety features and electrical Information ....5 2.1 Extension Cords 5
- Exploded View ....6
- Parts list 6
- Assembly Instructions 7
5.1 Surface preparation 7 5.2 Water Supply (Cold Water Only) 7 5.3 Safety Advice 7 5.4 Assembly Steps 7
- Operating Instructions 11
6.1 Working With Detergents 11 6.2 Shutting Down and Cleaning Up 12 6.3 Taking Breaks 12 6.4 Warnings 12
- Winterizing and Long-term Storage 13
7.1 Optimum Winterizing Procedure 13 7.2 Quick Winterizing Procedure 13
- Cleaning and Maintenance 14
8.1 Connections 14 8.2 Spray Tips 14 8.3 Water Filter Screen 14
- Technical Specifications 14
- Troubleshooting 15
- Limited Warranty 17
- ICONS DEFINITIONS 18
1. IMPORTANT PRECAUTIONS
IMPORTANT, RETAIN FOR FUTURE REFERENCE AND READ CAREFULLY!
Do not attempt to install or operate this device until you have read the safety instructions in this manual. Safety items throughout this manual are labelled with Danger, Warning, or Caution depending on the risk type.
1.1 Definitions
This is the safety alert symbol. It is used to alert you to potential personal injury hazards. Obey all safety messages that follow this symbol to avoid possible injury or death.

DANGER
Indicates an imminently hazardous situation which, if not avoided, will result in death or serious injury.

WARNING
Indicates a potentially hazardous situation which, if not avoided, could result in death or serious injury.

CAUTION
Indicates a potentially hazardous situation which, if not avoided, could result in minor or moderate injury.

IMPORTANT
Installation, operation, or maintenance information which is important but not hazard-related.
1.2 Safety Warnings

DANGER
To reduce the risk of fire, electric shock, explosion or injury to people, read the following:
- This product is intended for domestic outdoor use only. The water spray must never be directed towards any electric wiring, devices, or directly towards the pressure washer itself, or fatal electric shock may occur.

The pressure washer should not be used in areas where gas vapours may be present. An electric spark could cause an explosion or fire.
Risk of explosion. When a combustible liquid is sprayed, there can be danger of fire or explosion, especially in a closed area. Therefore, do not spray flammable liquids. Do not use acids and solvents with this product either. These products can cause physical injuries to the operator and irreversible damage to the device.
Risk of electric shock. Inspect the cord before using the device — do not use it if the cord is damaged.
Risk of injury. Do not direct the water flow at people. The high-pressure jet can be dangerous if misused, and therefore must not be directed at people, animals, electrical devices or the unit itself.

This device is capable of producing high pressure as rated in the Technical Specifications. To avoid rupture and injury, do not operate this machine with components rated less than the unit itself (including but not limited to spray guns, hose, and hose connections).
1. IMPORTANT PRECAUTIONS (CONT.)
1.2 Safety Warnings (cont.)

WARNING — INJECTION HAZARD
• Equipment can cause serious injury if the spray penetrates the skin. Do not point the gun at anyone or any part of the body. In case of penetration, seek medical aid immediately.

CAUTION — DETERGENTS
- This device has been designed for use with detergents that are specifically approved for pressure washer use. The use of other cleaning detergents may affect the operation of the device and void the warranty.

CAUTION — SPRAY GUN
- The spray gun kicks back, so hold it with both hands. The trigger gun safety lock prevents the trigger from being engaged accidentally. However, the safety feature DOES NOT lock the trigger in the ON position.

CAUTION — WATER CONNECTIONS
- For use with fresh and clean water only. Do not use this product with other liquids.
- The water supply system must be protected against backflow.
- Never use this product with water contaminated with solvents (e.g. paint thinners, gasoline, oil, etc.).
- Always prevent debris from being drawn into the product by using a clean water source and an additional water filter, if required.
- If this device is connected to a potable water system, the system must be protected against backflow.
- Suitable water temperature: from 5 to 40°C (41 to 104°F).

CAUTION — USE
- Learn how to stop the device and release the pressure quickly. Familiarize yourself with the controls.
- Keep all connections dry and off the ground.
- Avoid accidental starts. Shut power OFF before connecting or disconnecting the power cord.
- Never carry the pressure washer by the cord.
- Do not pull on the cord to disconnect from the outlet.
- To allow for free air circulation, the pressure washer should not be covered during operation.
- Do not operate the product when tired or under the influence of alcohol or drugs.
- Do not stand on unstable surfaces. Stand with both feet balanced at all times.
- Keep the operating area clear of people and pets.

IMPORTANT — MAINTENANCE
- Any assembly, use or maintenance of the product must be carried out by adults only.
- Follow the maintenance instructions specified in the manual.
- If replacement of the power plug or cord is needed, use only identical replacement parts.
- Repairing and replacing parts should be done by a certified technician.
- Before servicing, cleaning or removal of any parts, shut the power OFF and release the pressure.

IMPORTANT — GROUNDING
- In a double-insulated product, two systems of insulation are provided instead of grounding. No grounding is provided on a double-insulated product, nor should a means for grounding be added to the product. Servicing a double-insulated product requires extreme care and knowledge of the system, and should be done only by qualified service personnel. Replacement parts of a double-insulated product must be identical to the parts they replace. A double-insulated product is marked with the words "DOUBLE INSULATION" or "DOUBLE INSULATED". The symbol □ may also be marked on the product.
1. IMPORTANT PRECAUTIONS (CONT.)
1.3 Intended Application
This product is designed for specific residential applications. Do not modify or use this product for any application other than the one it was designed for. This equipment was not designed for industrial use. Please refer to the icons below for suggested applications. For questions regarding other uses, please refer to our website at www.simoniz.ca or call us at 1-866-4SIMONIZ (1-866-474-6664).

IMPORTANT — APPLICATIONS

STAIRS LAWN EQUIPMENT VEHICLE


FENCING DECK OR PATIO GARAGE FLOOR


DRIVEWAY SIDING

2. SAFETY FEATURES AND ELECTRICAL INFORMATION
The pressure washer is equipped with a stop device that senses when the trigger on the spray gun is released. It will open the power circuit to the motor and cause the pressure washer motor to stop. The motor will start again when the trigger is pulled.

WARNING
- The pressure washer is also equipped with a main power ON/OFF switch. It should always be moved to the OFF position when the pressure washer is not being used to prevent possible injury or damage.
2.1 Extension Cords
If possible, do not use extension cords with this product. However, if you must use one, observe all warnings and instructions listed below:

WARNING
- Extension cords are not recommended unless they are plugged into a ground fault circuit-interrupter (GFCI) found in circuit boxes or protected receptacles.

CAUTION — USE A SUFFICIENT GAUGE
- Maximum cable length: 50 ft (15 m). Only use 14 AWG rated extension cords.
- Only use extension cords that are intended for outdoor use. These extension cords are identified by a marking that reads "Acceptable for use with outdoor appliances; store indoors while not in use."
- Only use extension cords that have an electrical rating not less than the rating of the product (15 A).
- Do not use damaged extension cords. Examine the extension cord before using and replace it if damaged. Do not abuse extension cords and do not pull on any cord to disconnect the device.
- Keep cord away from heat and sharp edges.
- Always disconnect the extension cord from the power outlet before disconnecting the extension cord from the product.
- To reduce the risk of electric shock, keep all connections dry and off the ground. Do not touch the plug with wet hands.
3. EXPLODED VIEW
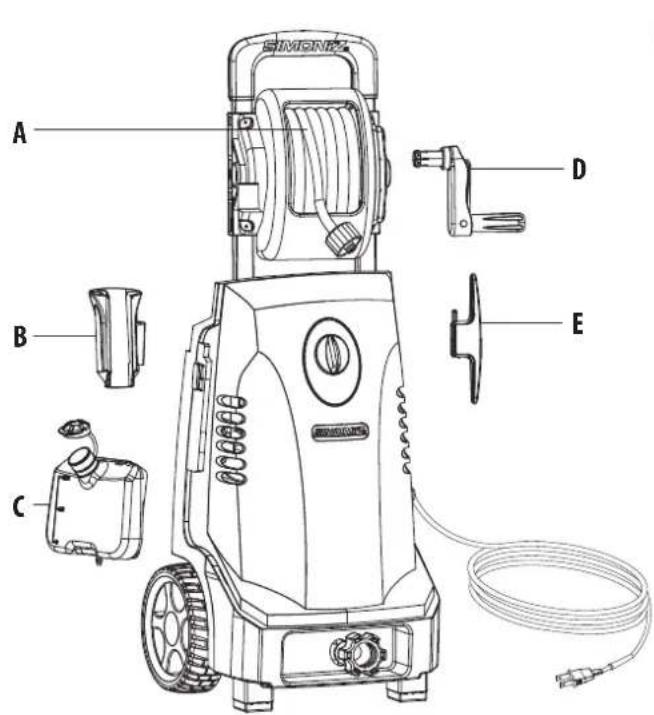

4. PARTS LIST
| Item # | Part Name Qty. | Part # | |
| *A | High-pressure hose | 1 | XE25-020-0004 |
| B Gun | holster 1 | XE09-020-0008 | |
| C | Detergent bottle and cap | 1 set | XE03-020-0006 |
| *D Hand crank 1 | XE01-020-0007 | ||
| E Cord | bracket 1 | XE09-020-0006 | |
| F Gun | assembly 1 | XE03-020-0090 | |
| Item # | Part Name Qty. | Part # | |
| G | 3in1 wand | 1 | XE17-020-0090 |
| H | Rotary brush | 1 | XE15-080-0001 |
| n/a Water filter 1 | pre-attached on the machine | ||
| n/a | Cleaning needle | 1 | pre-attached on the manual |
*Hand crank, high-pressure hose and water filter come pre-attached on the machine.
5. ASSEMBLY INSTRUCTIONS
5.1 Surface Preparation
Before beginning any cleaning task, it is important to inspect the area for objects that could create a hazard. Remove any objects from the work area that could be tripped over, such as toys or outdoor furniture. Ensure that all doors and windows are closed tightly.
5.2 Water Supply (Cold Water Only)
Only draw water through the unit. The device must be used with cold water supply only. The water hose must be at least 1/2" (13 mm) in diameter. The water flow rate must not fall below 2 GPM (9.1 LPM). The flow rate can be determined by running water for one minute into an empty container. The water supply temperature must not exceed 40°C (104°F).
5.3 Safety Advice

CAUTION
- Never use the pressure washer to draw in water contaminated with solvents (e.g. paint thinners, gasoline, oil, etc.).
- Dirt in the water inlet will damage the unit. To avoid this risk, we recommend checking the water filter (located inside the water inlet. To clean it out, refer to the Cleaning and Maintenance section).
- Always prevent debris from being drawn into the unit by using a clean water source and an additional accessory water filter, if required.
- To prolong the life of the unit, let it rest for 5 minutes after every 30 minutes of use.
- Check to make sure you have all the parts.
5.4 Assembly Steps
1
Insert upper handle frame into the lower handle and align the holes.
2
Attach high-pressure hose to the gun assembly (hand tighten only).
5. ASSEMBLY INSTRUCTIONS (CONT.)
5.4 Assembly Steps (cont.)
3
0°
15°
Detergent
Set the 3-in-1 wand spray nozzle to the desired spray pattern for the following purposes:
- 0°: Thin and powerful stream of water for difficult stains and debris removal.
- 15°: Thin-angled spray for detailed cleaning. • Detergent: Applies detergents in low pressure.
4
(When using detergent)
- Fill the detergent container with detergent.
- Firmly close the detergent bottle cap.
- Attach the container to the pressure washer's container storage area.
Connect garden hose to the inlet adaptor.
5. ASSEMBLY INSTRUCTIONS (cont.)
5.4 Assembly Steps (cont.)


Plug the unit into an outlet.

WARNING
Make sure the main switch is in the OFF position. Make sure your hands are dry. Plug the unit into an outlet.

5. ASSEMBLY INSTRUCTIONS (cont.)
5.4 Assembly Steps (cont.)
PURGING
Purge air by squeezing the trigger on the gun until there is a steady stream of water.

CAUTION
Drain unit after each use (for storage): remove water connection, turn ON the machine for a few seconds and press gun trigger to bleed remaining water in the pump. Turn OFF immediately.

Turn the main switch to ON position and the pressure washer is ready to operate.
6. OPERATING INSTRUCTIONS
6.1 Working with Detergents
Working with a detergent ensures quick soaking of the dirt, and allows the high-pressure water to penetrate and remove the dirt more effectively. Always spray detergent on a dry surface, do not pre-soak the area. Wetting the surface first dilutes the detergent and reduces its cleaning ability.
To apply detergents, you must be operating at a low pressure. This provides a gentle application of the detergent, with the pressure equivalent to the garden hose pressure. The high-pressure setting is used for cleaning; you cannot apply detergents when working at a high pressure. Always test the detergent in a concealed area before use.
1
Engage the safety lock on the spray gun.
2
Turning the collar to detergent setting for detergent application.
3
(When using detergent)
- Fill the detergent container with detergent.
- Firmly close the detergent bottle cap.
- Attach the container to the pressure washer's container storage area.
4
Turn on the pressure washer. Pull the trigger to operate the device. The liquid detergent will be mixed with water automatically and will be discharged through the nozzle at low pressure. Apply the detergent to a dry work surface from bottom to top.
5
Allow detergent to remain on the surface for a short time before rinsing. Do not allow detergent to dry on the surface.
6
Rinse with clean water under high pressure. On a vertical surface, rinse from the bottom up, then rinse from the top down to avoid streaking. Hold the nozzle 6 to 8" (15 to 20 cm) away from the work surface at a 45° angle.
7
When you have finished using the detergent injection system, fill the detergent container with clean water. Siphon water at low pressure for one minute so that all detergent is flushed through the system. Remove the detergent container and rinse it thoroughly.

CAUTION
Damage may occur to painted surfaces if chemicals are allowed to dry on them. Wash and rinse a small section at a time. Avoid working on hot surfaces or under direct sunlight.
12 Operating Instructions
6. OPERATING INSTRUCTIONS (cont.)
6.2 Shutting Down and Cleaning Up
| 1 | (Skip this step if you are not using detergent.)When you finish using the detergent injection system, fill the detergent container with clean water. Siphon water at a low pressure for one minute, so that all detergent is flushed through the system. Remove the detergent container and rinse it thoroughly. |
| 2 | Turn off water supply and disconnect the garden hose from the water inlet on the pressure washer. |
| 3 | Pull the trigger to release any remaining water pressure. |
| 4 | Set the ON/OFF switch to the OFF (0) position. |
| 5 | Unplug the power cord from the outlet. |
| 6 | Engage the safety lock on the spray gun. |

WARNING
Turn off the water supply and pull the trigger to depressurize the device. Failure to do so might result in personal injury due to discharge of high-pressure water.
6.3 Taking Breaks
If taking a break while using the pressure washer:
| 1 | Engage the safety lock on the the spray gun. |
| 2 | Set the ON/OFF switch to the OFF (0) position. |
| 3 | Unplug the power cord from the outlet. |
6.4 Warnings

CAUTION
Failure to clean this product properly will cause the detergent injection system to become clogged and inoperable.

WARNING
Never use:
- Bleach, chlorine products or other corrosive chemicals;
- Liquids containing solvents (i.e., paint thinners, gasoline, oils, etc.); • Tri-sodium phosphate products;
- Ammonia products; or
- Acid-based products.
These chemicals will harm the unit and will damage the surface being cleaned.
7. WINTERIZING AND LONG-TERM STORAGE
7.1 Optimum Winterizing Procedure
Winterizing your pressure washer will help protect and prolong its life. We strongly recommend you follow the below steps using Pressure Washer Antifreeze (039-8602-0). This will keep the internal parts lubricated, protected from rust, and prevents the pump from freezing.

- Connect the pump saver to the inlet adaptor.
- Depress button on top of the pump saver container.
- Continue until fluid exits the pressure hose.
- Remove the hose from pump inlet.
7.2 Quick Winterizing Procedure
If you are unable to perform the Optimum Winterizing Procedure, you can still protect your pressure washer from winter damage by doing the following:
- Disconnect all water connections.
- Turn on the device for a few seconds, until the remaining water flows out of the pump. Turn the device off immediately after that.
- Do not allow the high-pressure hose to become kinked.
- Store the device and its accessories in a room that does not reach freezing temperatures. Do not store them near furnaces or other sources of heat, as that might dry out the pump seals.

CAUTION
Drain any remaining water from the gun assembly. Aim the gun downwards and pull the trigger.
14 Cleaning and Maintenance / Technical Specifications
8. CLEANING AND MAINTENANCE
8.1 Connections
The connections on the pressure washer's hoses, gun, and spray wand should be cleaned and lubricated with non-water soluble grease regularly.
8.2 Spray Tips

Clogging of the nozzle causes the pump pressure to be too high, making it necessary to clean the nozzle immediately. You can clean the nozzle by carefully inserting the cleaning needle or a thin, sharp instrument (i.e., paperclip) into the tip to clean out any deposits.
8.3 Water Filter Screen

The pressure washer is equipped with a water inlet screen to protect the pump. If the screen is not kept clean, the flow of water to the pressure washer will be restricted, and the pump may become damaged.
To clean the water inlet screen:
- Remove the filter screen from inside the inlet adaptor (the inlet adaptor comes pre-assembled to the machine).
- Rinse the screen until it is free of debris and obstructions.
- Place the screen back to prevent foreign particles from entering the pump.
9. TECHNICAL SPECIFICATIONS
Peak pressure: 1700 PSI
Rated max pressure: 1140 PSI
Power source requirement: 120 V / 60 Hz
Electrical cord: 23' (7 m) 16 AWG
High-pressure hose: 23' (7 m)
Max flow: 1.4 U.S. GPM (5.3 LPM)
Current drawn: 13 A
Inlet water: Cold tap water
10. TROUBLESHOOTING
Disconnect the device from the power source before making any repairs.
| Problem Cause Solution | ||
| The motor does not start. | The On/Off switch is in the OFF position. | Turn the switch to the ON position. |
| The power cord is not plugged in. | Plug in the power cord. | |
| The extension cord is too long.The extension cord is not the proper gauge.The extension cord is damaged. | Replace the extension cord with either a 25' (7.6 m) 14/2 gauge cord or a 50' (15 m) 14/2 gauge cord. | |
| The power outlet does not supply adequate power. | Try a different outlet. | |
| Tripped pressure washer circuit breaker. | Allow the device to cool, and then restart it. | |
| The device does not reach high pressures. | The garden hose is too small. | Replace it with a 1" (25 mm) or 5/8" (13 mm) garden hose. |
| Water supply is restricted. | Check the garden hose for kinks, leaks or blockage. | |
| Not enough water supply. | Open water source fully. | |
| The water inlet filter is clogged. | Remove the filter and rinse it with warm water. | |
| The power nozzle is in the low-pressure position. | Turn collar to choose the high-pressure nozzle. | |
| The pump is sucking air. | Check if all hoses and fittings are airtight. Turn the device OFF, and purge the pump by pulling the trigger on the spray gun until a steady flow of water emerges through the nozzle. | |
| Problem Cause Solution | ||
| Output pressure fluctuates high and low. | Not enough inlet water supply. | Turn faucet on fully. Check garden hose for kinks, leaks or blockage. |
| The pump is sucking air. | Check if all hoses and fittings are airtight. Turn the device OFF, and purge the pump by pulling the trigger on the spray gun until a steady flow of water emerges through the nozzle. | |
| The water inlet filter is clogged. | Remove the filter and rinse it with warm water. | |
| The discharge nozzle is obstructed. | Blow out or remove debris with a fine needle. | |
| Calcified gun, hose, or power nozzle. | Run distilled vinegar through the detergent container. | |
| Detergent is not working. | Detergent container is empty. | Add more detergent. |
| Detergent bottle or suction tube not properly connected. | Check connections. | |
| Detergent is too thick. | Dilute detergent. | |
| The filter on the detergent suction tube is clogged. | Run warm water through the filter to remove build-up. | |
| Damaged or clogged detergent suction tube. | Remove obstruction or replace the detergent suction tube. | |
| Spray nozzle is not at detergent nozzle position. | Set nozzle at detergent position. | |
| The discharge nozzle is obstructed. | Blow out or remove debris with a fine needle. | |
10. TROUBLESHOOTING (cont.)
| Problem Cause Solution | ||
| The garden hose connection leaks. | Loose fittings. Tighten | fittings. |
| Missing/worn rubber washer. | Insert new washer. | |
| Spray wand, extension, or nozzle leaks. | The spray nozzle was not properly attached. | Ensure the quick-connect wand is attached securely.Ensure the spray tip is clicked in securely. |
| Broken O-ring or plastic insert. | Call the Toll-free Hotline. | |
| The pump is noisy. | The pump is sucking air. | Check if all hoses and fittings are airtight. Turn the device OFF and purge the pump by pulling the trigger on the spray gun until a steady flow of water emerges through the nozzle. |
| The water filter is clogged. | Remove the filter and rinse it with warm water. | |
| Water leaks from the pump (up to 10 drops per minute is permissible). | Loose fittings. Check if all fittings are tight. | |
| Water seals are damaged or worn. | Call the Toll-free Hotline. | |
| Oil is dripping. Oil seals are damaged or worn. | Call the Toll-free Hotline. | |
| Motor hums but fails to run. | Supply voltage below minimum. | Verify that only the pressure washer is running on this circuit. |
| Problem Cause Solution | ||
| Motor hums but fails to run (continued). | System has residual pressure. | Turn the device OFF, pull the trigger on the spray gun to release pressure, and then turn the device back ON. |
| Voltage loss due to the extension cord. | Unplug any extension cords attached and plug the unit directly into the outlet. | |
| Residual friction among components. The device might hum. | Disconnect water supply and power ON for 2 to 3 seconds. Repeat this procedure a few times, or until the motor starts. | |
| No water coming out of the nozzle. | Water supply is OFF. | Turn on the water supply. |
| Kink in the garden hose. | Remove the kink in the garden hose. | |
11. LIMITED WARRANTY
Always keep your receipt as proof of purchase.
We're here to help! If you have any questions or comments, call our toll-free hotline 1-866-4SIMONIZ (1-866-474-6664). Have your serial number ready. The serial number can be found on the back plate, located on the side of the unit.
This product has a Parts Replacement, Product Exchange and/or Repair Warranty only. NO REFUNDS will be provided. Please see stores for Product Exchange details.
Two (2) Year Warranty — Motor
This product is guaranteed to be free from defects in material and workmanship for two years from the date of its original purchase. If such a defect appears during the warranty period, upon presentation of proof of purchase, Trileaf Distribution will repair or replace the product (at its discretion). Shipping charges may apply.
Ninety (90) Day Warranty — Accessories
Trigger gun, hose, spray wands and other accessories are guaranteed for ninety (90) days from the date of purchase. You may purchase accessories directly through place of purchase, or by calling our toll-free hotline 1-866-4SIMONIZ (1-866-474-6664).
This warranty does not cover accidental damage, unreasonable use, normal wear and tear, use of improper detergents, freezing, neglect, or non-compliance with the Operating Instructions. The warranty does not cover loss of use or other consequential damages arising from any of the above, nor does it cover repairs made or attempted by unauthorized persons.
The warranty is void if the equipment is used for commercial, rental or industrial purposes.
If you have further questions, please visit our website (www.simoniz.ca) or call 1-866-4SIMONIZ (1-866-474-6664).
Imported by Trileaf Distribution Trifeuil, Toronto, Canada M4S 2B8
12. Icons Definitions

Hearing Protection
To protect hearing hazard by the device noise, wear hearing protector while operating the device.

This Way Up
When handling product, arrows must always point up.

Store Indoor
To avoid damage the device by cold weather, store indoor that does not reach freezing temperature.

Stacking Limitation
Shows maximum staking load, in units.

Risk of Electric Shock
Do not direct the water flow at the device itself.

Keep Dry
Protect from excessive humidity when handling and storing.

Risk of Injury
Do not use the device under rain to avoid fatal electric shock.

Risk of Injury
Do not direct the water flow at people to avoid serious injury.

Risk of Electric Shock
Never spray water towards any electric devices.
NOTE:
NOTE:
- IMPORTANT PRECAUTIONS
- IMPORTANT, RETAIN FOR FUTURE REFERENCE AND READ CAREFULLY
- DEFINITIONS
- DANGER
- WARNING
- CAUTION
- IMPORTANT
- SAFETY WARNINGS
- IMPORTANT PRECAUTIONS (CONT.)
- SAFETY WARNINGS (CONT.)
- WARNING — INJECTION HAZARD
- CAUTION — DETERGENTS
- CAUTION — SPRAY GUN
- CAUTION — WATER CONNECTIONS
- CAUTION — USE
- IMPORTANT — MAINTENANCE
- IMPORTANT — GROUNDING
- INTENDED APPLICATION
- IMPORTANT — APPLICATIONS
- SAFETY FEATURES AND ELECTRICAL INFORMATION
- EXTENSION CORDS
- CAUTION — USE A SUFFICIENT GAUGE
- EXPLODED VIEW
- PARTS LIST
- ASSEMBLY INSTRUCTIONS
- SURFACE PREPARATION
- WATER SUPPLY (COLD WATER ONLY)
- SAFETY ADVICE
- ASSEMBLY STEPS
- ASSEMBLY INSTRUCTIONS (CONT.)
- ASSEMBLY STEPS (CONT.)
- (WHEN USING DETERGENT)
- OPERATING INSTRUCTIONS
- WORKING WITH DETERGENTS
- OPERATING INSTRUCTIONS (CONT.)
- SHUTTING DOWN AND CLEANING UP
- TAKING BREAKS
- WARNINGS
- WINTERIZING AND LONG-TERM STORAGE
- OPTIMUM WINTERIZING PROCEDURE
- QUICK WINTERIZING PROCEDURE
- CLEANING AND MAINTENANCE / TECHNICAL SPECIFICATIONS
- CLEANING AND MAINTENANCE
- CONNECTIONS
- SPRAY TIPS
- WATER FILTER SCREEN
- TECHNICAL SPECIFICATIONS
- TROUBLESHOOTING
- TROUBLESHOOTING (CONT.)
- LIMITED WARRANTY
- TWO (2) YEAR WARRANTY — MOTOR
- NINETY (90) DAY WARRANTY — ACCESSORIES
- ICONS DEFINITIONS
Brand : Simoniz
Model : 039-8556-0
Category : Pressure washer