
CTS 100 SY - Washing machine CANDY - Free user manual and instructions
Find the device manual for free CTS 100 SY CANDY in PDF.
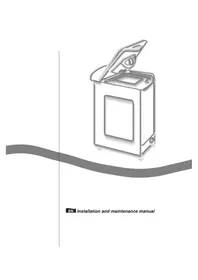


| Product Type | Freestanding Washing Machine |
| Loading Type | Front-load |
| Capacity (kg) | 7 |
| Maximum Spin Speed (rpm) | 1000 |
| Energy Efficiency Class | A+ |
| Annual Energy Consumption (kWh) | 195 |
| Water Consumption per Cycle (L) | 49 |
| Noise Level – Spin (dB(A)) | 74 |
| Noise Level – Wash (dB(A)) | 57 |
| Dimensions (H x W x D) mm | 850 x 600 x 600 |
| Weight (kg) | 65 |
| Power Supply (V/Hz) | 220-240 / 50 |
| Rated Power (W) | 2200 |
| Number of Programs | 15 |
| Key Programs | Cotton, Synthetics, Delicates, Wool, Quick 30 min, Eco, Baby Care, Rinse & Spin |
| Digital Display | LED |
| Delay Start | Yes (up to 24h) |
| Child Lock | Yes |
| Overflow Protection | Yes |
| Drum Material | Stainless Steel |
| Door Diameter (mm) | 310 |
| Adjustable Feet | Yes |
| Hose Length (m) | 1.5 |
| Power Cord Length (m) | 2.0 |
Frequently Asked Questions - CTS 100 SY CANDY
User questions about CTS 100 SY CANDY
0 question about this device. Answer the ones you know or ask your own.
Ask a new question about this device
Download the instructions for your Washing machine in PDF format for free! Find your manual CTS 100 SY - CANDY and take your electronic device back in hand. On this page are published all the documents necessary for the use of your device. CTS 100 SY by CANDY.
USER MANUAL CTS 100 SY CANDY
EN Installation and maintenance manual

DESCRIPTION OF THE MANUAL
This manual provides you with all the information you will need to install and set up your washing machine. It also provides information about cleaning and maintenance, suggestions for resolving small problems that could result from a malfunctioning of the appliance, advice about appropriate wash programmes, an explanation of the symbols found on clothes labels and hints on the best way to treat stubborn stains.

6.- FILTER
7.- WHEEL TROLLEY (Depending on model)
page
SAFETY MEASURES 4
SETTING UP AND INSTALLATION 6
CLEANING AND ROUTINE MAINTENANCE 8
CLEANING THE DETERGENT COMPARTMENTS 8
CLEANING THE FILTER 9
TROUBLESHOOTING 10
LOADING ADVICE 12
LABEL SYMBOLS 13
REMOVING STUBBORN STAINS 15

This appliance meets Directives 89/336 EEC, 73/23 EEC and subsequent modifications thereof.
IMPORTANT: FOR ALL CLEANING AND MAINTENANCE WORK

- Remove the plug.
● Turn off the water inlet tap after each wash.

● The manufacturer fits all the machines with an earth connection.
Ensure that the electrical installation has an earth connection and that it is connected; if not, call for service.
The earth connection is essential for user safety as it eliminates the risk of electrical discharge.
- If the electric cable is damaged replace with an original set (cable and plug) supplied by the manufacturer or official after-sales service.

The manufacturer accepts no responsibility for any damage to people or things resulting from the failure to comply with the appliance's installation and safety regulations.
- Do not touch the appliance with wet or damp hands or feet.
● Do not use the appliance when bare-footed.
● Extreme care should be taken if extension leads are used in bathrooms or shower rooms. Avoid this where possible.


- Do not use adapters or multiple plugs.
- Do not allow the appliance to be used by children without due supervision.
- Do not pull the mains lead or the appliance itself to remove the plug from the socket.
- Do not leave the appliance exposed to the atmospheric elements (rain, sun, etc.).
- Do not cover the appliance with cloth or plastic while it is working.
- Do not install the appliance in damp places or anywhere where it could be sprayed inadvertently by the shower.
- Do not install the appliance on a surface which obstructs the space between the floor and the base of the machine.
- Keep all packaging out of the reach of children as it could constitute a health hazard.


IMPORTANT: DURING A WASH CYCLE THE WATER CAN REACH TEMPERATURES OF 90° C.

- Unpack the appliance.

- Remove the 4 screws (A) from the clamp and the other four screws.

- Replace the 4 screws (A) and fit the trims provided (D).
If your model offers this function:
Position the protection sheets as shown in the diagram.
- Washing machine with trolley.

- Washing machine without trolley.


● IMPORTANT: DO NOT TURN THE TAP ON
- Connect the washing machine to the water mains via the new tube supplied inside the drum. Do not use the old tube.
- Connect one end of the water inlet pipe to the electrovalve (top rear part of the machine) and the other to a tap or a permanently plumbed-in threaded connection.
- Position the washing machine next to the wall. Hook the outlet pipe to the edge of the bathtub, ensuring that there are no bends along the tube. It is better to connect the outlet tube to a fixed outlet of a diameter greater than that of the outlet pipe and at a height of min. 50 cm and a maximum of 75 cm from the floor.
If necessary, use the curved accessory to attach and support the water drainage pipe more securely.
If your model offers this function:
- To move the washing machine easily, turn the lever to the right. Once you have finished moving the machine, return the lever to its original position.
● Level the machine by adjusting the front feet.
a) Turn the nut in a clockwise direction to release the foot's screw adjuster.
b) Raise or lower the foot by rotating it until it stands firmly on the floor.
c) Lock the foot in position by turning the nut in an anticlockwise direction until it comes up against the bottom of the machine.
Check that the appliance is properly levelled. To do so, try and move the washing machine by pushing on two diagonally opposite top corners at the same time to see if it rocks.
- If you move your washing machine from one place to another, you must level the feet again afterwards.
- Connect the machine.
● CLEANING AND ROUTINE MAINTENANCE
Do not use abrasives, spirits or solvents on the exterior of the washing machine. It is sufficient to use a damp cloth.
The washing machine requires very little maintenance.
- Cleaning the drawer compartments.
- Cleaning the filter. • After removals or long periods when the machine is left standing.
To ensure long life for your washing machine, dry the rubber door seal and leave the door open at the end of the cycle.
● CLEANING THE DRAWER COMPARTMENTS

- It is advisable to clean the four compartments of the detergent dispenser (prewash, wash, bleach and fabric conditioner) from time to time. To do this, remove the detergent dispenser from its slot.

- In the case of the prewash and wash compartments, it is advisable to remove any dried-in remains of detergent which obstruct the flow of the detergent to the drum.

- In the case of the bleach and fabric conditioner compartments, the two traps (M) should be removed by turning them 90° anticlockwise and pulling them out.
Remove any solid residue which could block the holes in the compartments.
● Put everything back into place.
● CLEANING THE FILTER
The washing machine comes with a special filter, located at the bottom of the machine's front panel, that collects larger objects (coins, buttons, etc.) which could block the pump.
It is advisable to clean the filter whenever the machine fails to rinse the clothes as well as it should or when it fails to drain properly.

When it is necessary to clean the filter, proceed as follows:
● Use a basin to collect the water coming out. - Move the trolley lever to a central position in order to remove the filter door more easily. ● A) Press the two catches to remove the filter door.


B) Slip your hand through the slot at the bottom, incline slightly and remove the base.

If your model offers this function:
- Use a screwdriver to loosen the screw which holds the filter in place. Turn the filter anticlockwise as far as it will go.
- Remove the filter and clean it.
- Once the filter is clean, replace it by following the above-mentioned procedure in reverse.

| FAULT CAUSE | SOLUTION | |
| 1.- No programme works | The appliance is not plugged in. | Plug it in. |
| The general switch is disconnected. | Activate the general switch. | |
| There is no electricity. | Check. | |
| The fuses in the electric installation are damaged or blown. | Check. | |
| The door is open. | Close the door. | |
| 2.- The appliance does not load water | See causes for 1. | Check. |
| The tap is turned off. | Turn on the tap. | |
| The programme selector is incorrectly connected. | Correctly connect the programme selector. | |
| 3.- The water does not drain | There are foreign bodies in the filter. | Check the filter. |
| The outlet hose is bent. | Straighten the hose. | |
| 4.- The spin programme does not work | The washing machine has not yet drained the water. | Wait a few minutes for the washing machine to drain. |
| The “Spin exclusion” option is activated (only on some models). | Deactivate the “Spin exclusion” option. | |
| 5.- Strong vibrations during spin cycle | The washing machine is not correctly levelled. | Adjust the feet. |
| The transport “anchorage” has not been removed. | Remove the transport support. | |
| The wash load is not evenly distributed. | Distribute it evenly. | |
| A lot of foam and water when spinning. | Inspect and clean the filter. | |
| 6.- The high-speed spin does not work | The wash load is not evenly distributed within the drum. | Distribute the wash load evenly in the drum. |
| IN THE FOLLOWING MODELS: ACTIVA, INTER@CT. | ||
| 7.- Display will show error n° 0, 1, 5, 7, 8, 9. | Contact technical service. | |
| 8.- Display will show error n° 2 | Machine does not fill with water | Check that water inlet tap is open. |
| 9.- Display will show error n° 3 | Water does not empty from machine | Check that outlet is not cloggedCheck for kinks in outlet tube. |
| 10.- Display will show error n° 4 | Too much water in machine. | Shut off water tap.Contact technical service |
If the problem or malfunctioning persists, disconnect the machine, turn off the tap and do not try to repair.
For all repairs contact an Official Technical Assistance service and always insist on the use of original parts. Failure to do so may compromise the safety of your machine.
When contacting a Technical Assistance Centre always refer to the model (see control panel) and the registration and series numbers which are indicated at the bottom of the machine under the lower panel or on the warranty certificate. That is to say, everything that appears in the box.
Providing this information will ensure a faster and more efficient service.

When loading a wash, we recommend that you:
- Sort your washing according to COLOUR, DIRTINESS, and DELICACY.
- For delicate items we recommend the use of a protective net.
- Empty all pockets and ensure that they do not contain metal objects (paperclips, safety pins, pins, coins, etc.).
- Fasten pillow slips and cushion coverings, close all zips and fastenings and tie any loose ribbons or belts.
- Remove all runners (metal and plastic) from curtains and net curtains. We recommend that the ribbon be gathered into a ball and tied with its own string.
- If you notice any stains, remove them with a special detergent or appropriate cleaning agent.
- Unfold all items to be washed.
- Place them in the drum one by one.
- Be careful not to exceed the recommended weight for each programme.
- When washing rugs, bedspreads and large, absorbent items, avoid spinning by pressing the spin exclusion button.
- In order to be able to wash woollens in the washing machine they must carry the “Pure New Wool” symbol as well as the information “does not shrink” or “machine washable”.
- If possible, do not wash towels all together. Mix them with your regular washing.
- Ensure that no item becomes trapped between the drum shutters.
Labels are usually sown into the collar or side seams. The symbols which appear on them indicate the following:
• Maximum WASH temperature. - Appropriate washing methods. • Appropriate products. • How to care for your garment. - Appropriate ironing methods and temperatures.
The symbols are as follows:
WASH
Washing instructions always appear as a basin with different indications:
- Do not wash.
- Can be washed both by hand or in the washing machine. The figures in the basin indicate the maximum wash temperature. 60
- Hand wash only.
When the hand is half submerged in the water, this means that the item should be handled gently during washing. If it is fully submerged in the water, this means that the garment should only be washed by hand.
- The line under the basin means that the item should be washed on a gentle cycle.
- Do not spin.
BLEACH
Bleach is widely used to whiten fabrics, although in some cases it can cause irreparable damage. There are various symbols which refer to its use.
- Bleach can be used.
- Do not bleach.
IRONING
- Iron at a high temperature. Max. 220°C. You can use steam or a damp cloth. Suitable for hard-wearing fabrics such as cotton or linen.
- Do not exceed 150°C. You can use steam or a damp cloth. This symbol appears on items made from wool or polyester.
- Iron at a low temperature. Approx. 110°C. This is usual for delicate fabrics such as rayon, silk and acrylic acetate, etc.
- Do not iron.
TUMBLE DRYING
- Can be tumble dried. Do not confuse this symbol with the simple circle which indicates that the item should be dry cleaned.
- Do not tumble dry.
- Hang to dry.
- Do not wring. Should be hung to dry immediately after washing.
- Spread over a horizontal surface to dry. Do not hang.
DRY CLEANING
- Dry clean only. The letters indicate the different solvents that can be used. An “A” indicates that normal solvents can be used. Other letters indicate professional solvents. Ⓐ
- Do not wash in any way.

REMOVING STAINS
On occasions, certain stains do not disappear after a simple wash cycle. The following is a list of special treatments which you can try before washing your clothes in the washing machine.
Pen and biro marks: rub with a cloth soaked in alcohol.
Candle wax: cover the stains with a piece of absorbent paper and iron at the highest temperature suitable for the fabric. Repeat if necessary.
Resin, fat and face cream: clean with a petrol-based stain remover and then wash as normal.
Tar: rub with butter and leave for a short period before washing as normal.
Blood, milk and egg: soak in cold water and then wash with an enzymatic detergent at a temperature of between 50° and 60°, always supposing that the item can be washed at these temperatures.
Fruit, coffee and wine: these stains usually come out after a few washes.
Fabric Conditioner: The improper or excessive use of conditioner can stain fabrics. Remove stains with concentrated detergent and bleach, providing the fabric and colour permit.
In the event of a particularly stubborn or critical stain, consult a professional. In any case, NEVER USE CHEMICAL PRODUCTS IN THIS MACHINE.
The manufacturer declines all responsibility in the event of any printing mistakes in this booklet. The manufacturer also reserves the right to make appropriate modifications to its products without changing the essential characteristics.
- DESCRIPTION OF THE MANUAL
- IMPORTANT: FOR ALL CLEANING AND MAINTENANCE WORK
- THE MANUFACTURER ACCEPTS NO RESPONSIBILITY FOR ANY DAMAGE TO PEOPLE OR THINGS RESULTING FROM THE FAILURE TO COMPLY WITH THE APPLIANCE'S INSTALLATION AND SAFETY REGULATIONS
- IF YOUR MODEL OFFERS THIS FUNCTION
- ● CLEANING AND ROUTINE MAINTENANCE
- ● CLEANING THE DRAWER COMPARTMENTS
- ● CLEANING THE FILTER
- WASH
- BLEACH
- IRONING
- TUMBLE DRYING
- DRY CLEANING
- REMOVING STAINS
Brand : CANDY
Model : CTS 100 SY
Category : Washing machine