
Yaro 2 - Receiver Kanto - Free user manual and instructions
Find the device manual for free Yaro 2 Kanto in PDF.


| Product Type | Receiver |
| Brand | Kanto |
| Model | Yaro 2 |
| Dimensions (W x H x D) | 430 x 70 x 250 mm |
| Weight | 4.5 kg |
| Power Supply | AC 100-240 V, 50/60 Hz |
| Power Consumption | 150 W (max) |
| Audio Inputs | 2x RCA, 1x Optical, 1x Coaxial, 1x Bluetooth |
| Audio Outputs | Subwoofer pre-out, Speaker terminals (binding posts) |
| Supported Audio Formats | MP3, AAC, WMA, FLAC, WAV |
| Bluetooth Version | 5.0 |
| Remote Control | Included (IR) |
| Frequency Response | 20 Hz - 20 kHz |
| Signal-to-Noise Ratio | > 90 dB |
| Total Harmonic Distortion | < 0.05% |
| Main Functions | Amplification, Bluetooth streaming, FM radio, source switching, volume control |
| Cleaning Instructions | Wipe with a soft dry cloth; avoid liquids and abrasives |
| Safety Warnings | Do not expose to moisture; ensure proper ventilation; disconnect during storms |
| Spare Parts Availability | Remote control, power cord, antenna available from Kanto support |
| Repairability | Modular design; user-replaceable fuse and speaker terminals; service by qualified technician |
| Warranty | 2 years limited |
| Certifications | CE, FCC, RoHS |
Frequently Asked Questions - Yaro 2 Kanto
User questions about Yaro 2 Kanto
0 question about this device. Answer the ones you know or ask your own.
Ask a new question about this device
Download the instructions for your Receiver in PDF format for free! Find your manual Yaro 2 - Kanto and take your electronic device back in hand. On this page are published all the documents necessary for the use of your device. Yaro 2 by Kanto.
USER MANUAL Yaro 2 Kanto
natural_image
Line drawing of a rectangular electronic device with a circular button and three ports (no text or symbols)YARO _2
Important Safety Precautions

ATTENTION
The exclamation point within an equilateral triangle is intended to alert the user of the presence of important operating and maintenance (servicing) instructions in the literature accompanying the apparatus.
CAUTION
RISK OF ELECTRIC SHOCK DO NOT OPEN
CAUTION: TO REDUCE THE RISK OF ELECTRIC SHOCK, DO NOT REMOVE BACK PANEL. NO USER SERVICEABLE PARTS INSIDE. REFER SERVICING TO QUALIFIED SERVICE PERSONNEL.

DANGEROUS VOLTAGE
The lightning flash with arrowhead, within an equilateral triangle, is intended to alert the user of the presence of non-insulated "dangerous voltage" within the product's enclosure that may be of sufficient magnitude to constitute a risk of electric shock to persons.
- Read these instructions.
- Keep these instructions.
- Heed all warnings.
- Follow all instructions.
- Do not use this apparatus near water.
- Clean only with a dry cloth.
- Do not block any ventilation openings. Install in accordance with the manufacturer's instructions.
- Do not install near any heat sources such as radiators, heat registers, stoves, or other apparatus (including amplifiers) that produce heat.
- Protect the power-supply cord from being walked on or pinched, particularly at plugs, convenience receptacles and the point where they exit from the apparatus.
- Only use attachments / accessories specified by the manufacturer.
- Use only with the cart, stand, tripod, bracket, or table specified by the manufacturer, or sold with the apparatus.
When a cart is used, use caution when moving the cart/ apparatus combination to avoid injury from tip-over.
- Unplug this apparatus during lightning storms or when unused for long periods of time.
- Refer all servicing to qualified service personnel. Servicing is required when the apparatus has been damaged in any way, such as power-supply cord or plug is damaged, liquid has been spilled or objects have fallen into the apparatus, the apparatus has been exposed to rain or moisture, the apparatus does not operate normally, or the apparatus has been dropped.
- Apparatus shall be connected to a MAINS socket outlet with a protective earthing connection.
- An appliance input coupler is used as the disconnect device - the disconnect device shall remain readily operable.
- Batteries or battery packs shall not be exposed to excessive heat such as sunshine, fire or the like.
FCC Notice:
This device complies with part 15 of the FCC Rules. Operation is subject to the following two conditions: (1) this device may not cause harmful interference, and (2) this device must accept any interference received, including interference that may cause undesired operation.
NOTE 1: This equipment has been tested and found to comply with the limits for a Class B digital device, pursuant to part 15 of the FCC rules. These limits are designed to provide reasonable protection against harmful interference in a residential installation. This equipment generates, uses and can radiate radio frequency energy and, if not installed and used in accordance with the instructions, may cause harmful interference to radio communications. However there is no guarantee that interference will not occur in a particular installation. If this equipment does cause harmful interference to radio or television reception, which can be determined by turning the equipment off and on, the user is encouraged to try to correct the interference by one or more of the following measures:
- Reorient or relocate the receiving antenna
- Increase the separation between the equipment and receiver
- Connect the equipment into an outlet on a circuit different from that to which the receiver is connected
- Consult the dealer or an experienced radio/TV technician for help
NOTE 2: Any changes or modifications to this unit not expressly approved by the party responsible for compliance could void the user's authority to operate the equipment.
Industry Canada Notice:
This device complies with Industry Canada's licence-exempt RSSs.
Operation is subject to the following two conditions: (1) this device may not cause interference, and (2) this device must accept any interference, including interference that may cause undesired operation of the device.
Under Industry Canada regulations, this radio transmitter may only operate using an antenna of a type and maximum (or lesser) gain approved for the transmitter by Industry Canada. To reduce potential radio interference to other users, the antenna type and its gain should be so chosen that the equivalent isotropically radiated power (e.i.r.p.) is not more than that necessary for successful communication.
This device complies with Canadian ICES-003 and RSS-210
Thank you for choosing YARO2, designed by Kanto in Canada. YARO2 outputs 35W RMS per channel into 4 Ohm speakers, for remarkably bold and clean sound. Excellent sensitivity and frequency response provide deep thumping lows and clear, scintillating highs. YARO2 is an amazingly flexible audio system that can accept three input sources and connect to a subwoofer for enhanced low frequency response. Additionally, it is equipped with a high-quality USB DAC for digital connection to your computer. YARO2 operates on a multi-voltage auto-switching power source from 110 V to 240 V and can be used worldwide.
We recommend you read all instructions carefully before using the system and keep them for future reference. Kanto cannot be liable for damage or injury caused by incorrect setup or use of this product.
This system was carefully tested and inspected during production, and before packaging and shipping. After unpacking, please check for any damage. It is rare that a unit is damaged during shipping, but if this happens contact your retailer immediately. You can also call Kanto directly at 1-888-848-2643 or email support@kantoliving.com.
What's In the Box?

natural_image
Simple line drawing of a rectangular device with a circular button and three circular ports (no text or symbols)YARO2 Amplifier
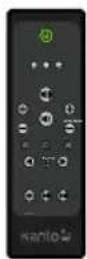
Remote Control
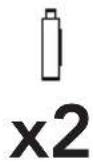
'AAA'
Batteries

User Manuals

Speaker Wire

natural_image
Black rectangular device with coiled cable and plug, no visible text or symbolsAC/DC Adapter
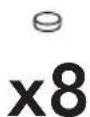
Self-Adhesive
Rubber Feet

natural_image
Line drawing of a coiled audio amplifier cable with two connectors (no text or symbols)3.5mm AUX Cable

natural_image
Line drawing of a coiled cable with two connectors (no text or symbols)Optical Cable

natural_image
Line drawing of a cable with connectors (no text or symbols)USB Cable
Setting Up Your Speakers
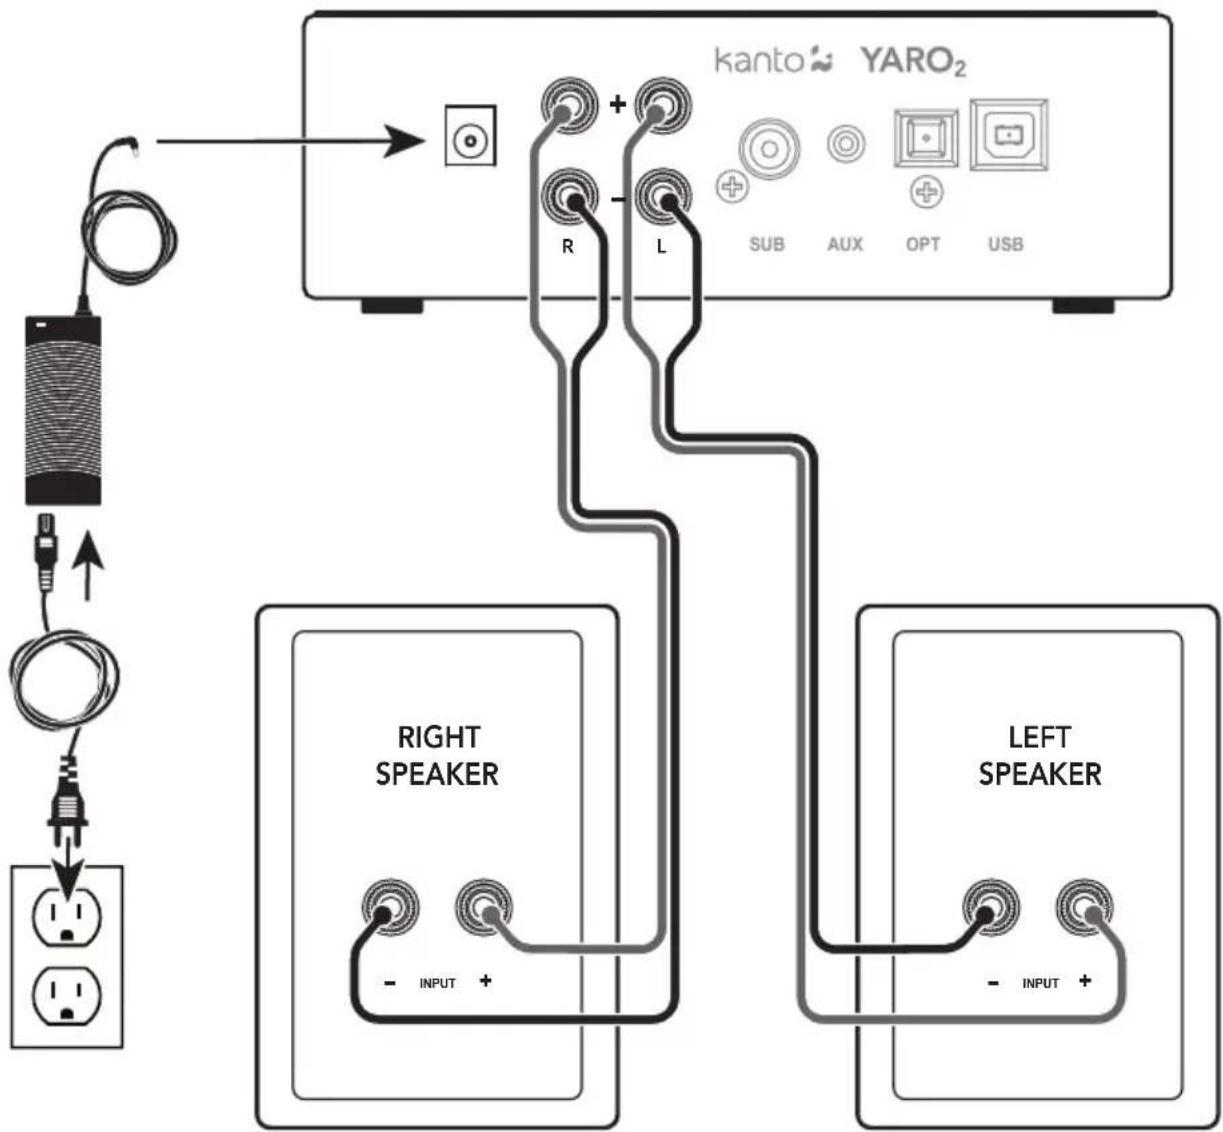
The YARO2 Amp is designed to power a pair of passive speakers. We recommend the Kanto YARO2 Passive Speakers.
1) Ensure that the YARO2 Amp is not plugged into power.
2) Connect the speakers to the amp as shown below using the supplied speaker cable. Connect the RED (+) and BLACK (−) terminals from the passive speaker to the corresponding terminals on the Amp, taking care not to reverse the wires. Simply unscrew the binding post until you see the hole and insert the bare wire, then tighten the binding post finger-tight. If you wish to place your speakers farther apart than the supplied cable will reach, we recommend that you purchase a heavier gauge of speaker cable to minimize signal loss.
3) Connect the power cord from YARO2 Amp to the wall outlet.
flowchart
graph TD
    A["Power Input"] --> B["Coiled Cable"]
    B --> C["Switch to Left Speaker"]
    C --> D["Right Speaker"]
    C --> E["Left Speaker"]
    D --> F["Switch to Right Speaker"]
    E --> G["Switch to Left Speaker"]
    H["kanto YARO2"] --> I["Switch to Left Speaker"]
    I --> J["Switch to Right Speaker"]
    K["R"] --> L["Switch to Left Speaker"]
    M["L"] --> N["Switch to Right Speaker"]
    O["SUB"] --> P["AUX"]
    Q["AUX"] --> R["OPT"]
    S["USB"] --> T["USB"]

ATTENTION
When the volume is high, this system can produce noise levels that could permanently damage your hearing. Do not connect the Amp inputs to the speaker outputs of a stereo amplifier. Damage may occur. Use only the power cord provided with the speakers.
Connecting Audio Sources
YARO2 features a high quality DAC (digital-to-analog converter) that supports data streams up to 24-bit/96 kHz resolution.
Use the appropriate audio cable to connect your audio source components to your speakers. Refer to the following diagram on connectivity options. The examples in the following pages are not meant to be exhaustive - just examples.

flowchart
graph TD
    A["Media Players"] -->|TOSLINK OPTICAL| B["Game Consoles"]
    C["Computer"] -->|USB A-B| D["USB Subnet"]
    B --> E["AUX"]
    D --> E
    E --> F["TOSLINK OPTICAL"]
    F --> G["Smart Phone Player"]
    H["TURNTABLE"] --> I["PHONO PRE-AMP"]
    I --> J["3.5MM - RCA"]
    J --> K["3.5MM - 3.5MM"]
    K --> L["3.5MM - RCA"]
    L --> M["4-16 Ω"]
    M --> N["20V = 3.3A INPUT"]
    N --> O["kanto"]
    O --> P["OPT USBSUB"]
    P --> Q["Computer"]
    R["T.V."] --> S["CD/DVD/BLURAY"]
    T["GAME CONsoles"] --> U["Computer"]

ATTENTION
Some models of turntables include a built-in Phono Pre-Amp.
Connecting a Subwoofer
YARO2 is equipped with an RCA connector to provide output signal to a powered subwoofer. Simply connect a single RCA subwoofer cable from the SUB OUT connection on the YARO2 to the AUDIO INPUT on your subwoofer. If your subwoofer has a stereo L/R RCA input, either left or right inputs will work.
We recommend the Kanto SUB6, SUB8, or YURI powered subwoofer with crossover and volume controls. Most quality subwoofers offer these controls, which allow you to customize the amount of bass you will experience.
Look for these products on the Kanto website at: www.kantoliving.com
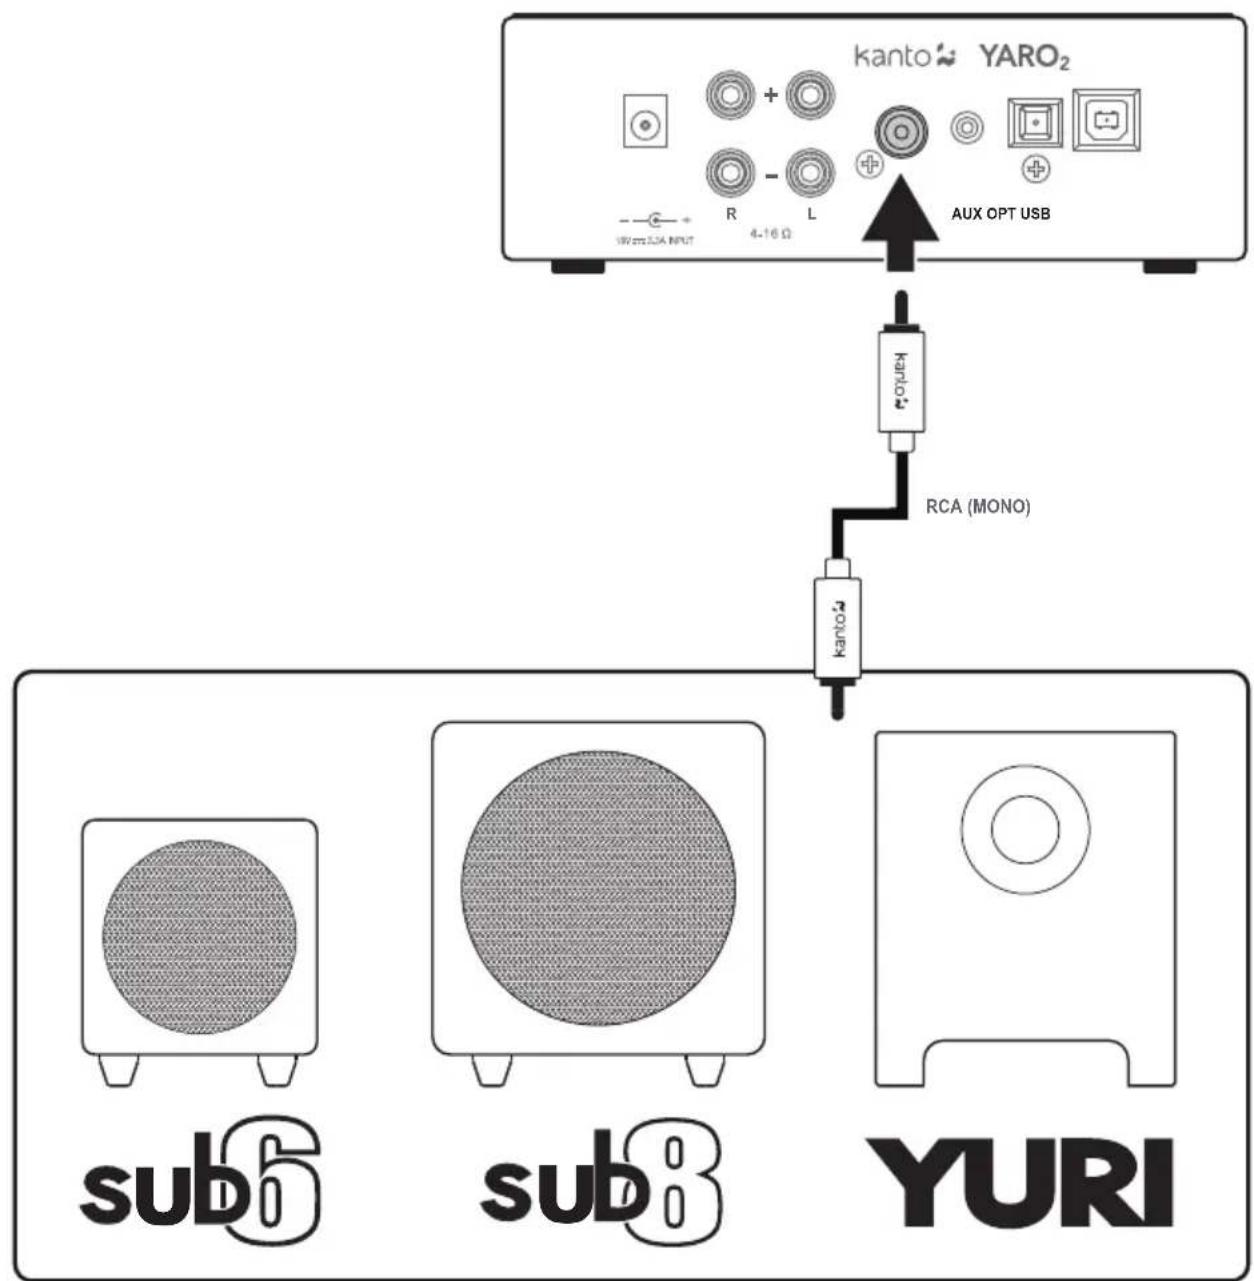
flowchart
graph TD
    A["User Interface"] --> B["Kanto 4.16 Ω"]
    B --> C["RCA (MONO)"]
    C --> D["YURI"]
    sub6["Sub6"] --> E["Microphone with circular pattern"]
    sub8["Sub8"] --> F["Microphone with circular pattern"]
    sub8 --> G["Microphone with circular pattern"]
    sub6 --> H["Power Supply: 1kW 5.0A INPUT"]
    sub8 --> I["Power Supply: 4-16 Ω"]
    sub8 --> J["AUX OPT USB"]
Using Your Speakers

Front Control Knob Functions
The control knob is used to turn on/off, select input and adjust volume. A short press turns the amplifier on while a long press switches the amplifier to standby. Once turned on, short presses will cycle between input selection as per the diagram below.

flowchart
graph LR
    A["Hand icon"] --> B["AUX"]
    B --> C["OPT USB DAC"]
    D["Hand icon"] --> E["STATUS LED WILL BLINK"]
Remote Control Functions
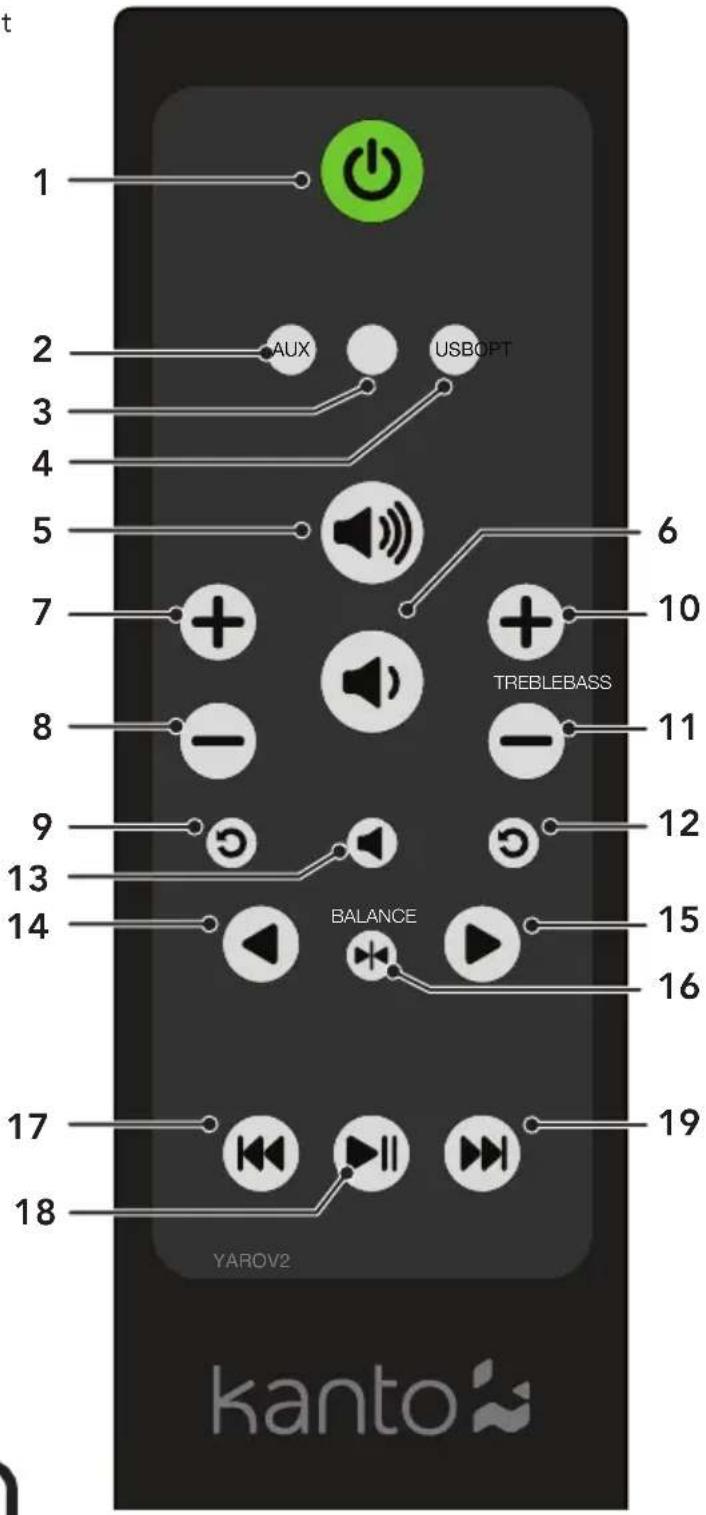
Install two supplied AAA batteries in the back of your YARO2 remote. Remote Control functions are listed below.
1 Standby Button - press to enter or exit
Standby Mode
2 3.5mm AUX Input Select
3 Optical Input Select
4 USB DAC Input Select
5 Increase Volume
6 Decrease Volume
7 Increase Bass Output
8 Decrease Bass Output
9 Reset Bass Output
10 Increase Treble Output
11 Decrease Treble Output
12 Reset Treble Output
13 Mute
14 Balance Control Left Channel
15 Balance Control Right Channel
16 Reset Balance (Left and Right Channels)
17 Previous Track (USB Operation)
18 Play / Pause (USB Operation)
19 Next Track (USB Operation)

natural_image
Hand cursor icon pointing at a circular button with radiating lines (no text or symbols)STATUS
LED WILL
BLINK
Auto Power-up / Auto Power-down
The YARO2 Amp is designed to save power when not in use. When no audio signal has been detected for 15 minutes, the YARO2 Amp will put itself into stand-by mode. If the audio signal returns via the same input that the YARO2 Amp was playing when it entered standby, the YARO2 Amp will wake up and resume playing. It can also be woken up manually by:
- Pressing the Standby Button on the Remote
- Pressing the Control knob on the Amp
If you do not find the Auto Power-up (APU) feature useful, you can disable it by pressing the Balance Reset button on the remote and holding it for 5 seconds. The Status LED will blink once to indicate that you have disabled the APU feature. To enable the APU if you have disabled it, simply press and hold the Balance Reset button again for 5 seconds. The Status LED will blink twice to indicate that you have enabled the APU.
Note that APU is always turned on when power is applied, but will only work after automatic power down. APU will not work if unit is manually switched to standby using the remote or control knob.
Specifications
YARO2 AMPLIFIER
Nominal Impedance 4 Ohm
Amplifier Type Class D
Power Output 70 Watts RMS (35 Watts RMS/channel)
Input Sensitivity 450 mV
Total Harmonic Distortion < 0.1%
Frequency Response 20 Hz - 20 kHz ± 1 dB
Inputs 1 x 3.5 mm stereo mini-jack AUX
1 x USB DAC
1 x Optical (Toslink)
Outputs 1 x Subwoofer
1 x 3.5 mm stereo mini-jack
Speaker Terminals Left and Right Binding Posts
Input Voltage / Frequency AC 100 V - 240 V 50/60 Hz (auto switching)
Standby Power Consumption < 0.5 W
Remote Included
Warranty
Limited Warranty to Original Purchaser
Kanto Distribution Inc. (Kanto) warrants the equipment it manufactures to be free from defects in material and workmanship for the following limited warranty period of:
24 months parts and labour
If equipment fails because of such defects and Kanto or an authorized dealer is notified within 24 months from the date of shipment with proof of original invoice, Kanto will, at its option, repair or replace the equipment, provided that the equipment has not been subjected to mechanical, electrical, or other abuse or modifications. Equipment that fails under conditions other than those covered will be repaired at the current price of parts and labor in effect at the repair. Such repairs are warranted for 90 days from the day of reshipment to the original purchaser. This warranty is in lieu of all other warranties expressed or implied, including without limitation, any implied warranty or merchantability or fitness for any particular purpose, all of which are expressly disclaimed.
Customers will be responsible for obtaining a Return Authorization as well as shipping costs to return product to a Kanto location or authorized depot listed on the website. If the equipment is covered under the warranty provisions above, Kanto will repair or replace, and be responsible for return shipping to the customer. Please keep the original packaging so products will not be damaged during shipping, and we recommend you insure your shipment. If equipment fails outside the warranty provisions, customers will be quoted repair and return shipping costs prior to work being performed.
The information in the owner's manual has been carefully checked and is believed to be accurate. However, Kanto assumes no responsibility for any inaccuracies that may be contained in the manual. In no event will Kanto, be liable for direct, indirect, special, incidental, or consequential damages resulting from any defect or omission in this manual, even if advised of the possibility of such damages.
Check out more great products from Kanto!
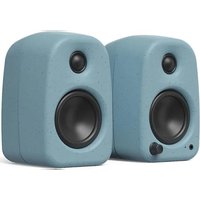
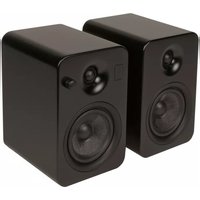
Kanto Speakers
- Check out our full line of bookshelf and desktop speaker systems
• Available in a stunning array of colors - Visit kantospeakers.com for more!




• Full line of Audio and Video Cables
- White or Black Cables available
• HDMI, Optical, Mini-jack, RCA, USB
- Switchers, Hubs, and Adapters
- Visit kantoliving.com
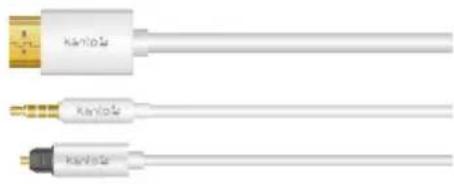
natural_image
Three white cables with metallic connectors, no visible text or symbolsTo learn more about all our products, visit www.kantoliving.com
f Kanto Living @kantoliving kantoliving



- YARO _2
- Important Safety Precautions
- ATTENTION
- CAUTION
- DANGEROUS VOLTAGE
- FCC Notice:
- Industry Canada Notice:
- What's In the Box?
- Setting Up Your Speakers
- Connecting Audio Sources
- Connecting a Subwoofer
- Using Your Speakers
- Front Control Knob Functions
- Remote Control Functions
- Auto Power-up / Auto Power-down
- Specifications
- YARO2 AMPLIFIER
- Warranty
- Check out more great products from Kanto!
- Kanto Speakers
Brand : Kanto
Model : Yaro 2
Category : Receiver