
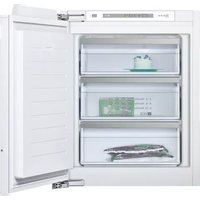
GI7815CE0G - Freezer NEFF - Free user manual and instructions
Find the device manual for free GI7815CE0G NEFF in PDF.


| Product Type | Freezer |
| Brand | Neff |
| Model | GI7815CE0G |
| Dimensions (H x W x D) | 186 cm x 60 cm x 66 cm |
| Weight | Approx. 75 kg |
| Energy Efficiency Class | E |
| Climate Class | SN-T |
| Noise Level | 40 dB(A) |
| Total Net Capacity | 250 L |
| Freezing Capacity | 10 kg in 24h |
| Storage Time in Power Failure | 14 h |
| Super Freeze Function | Yes |
| Frost Free (No Frost) | Yes |
| Cooling System | Static with fan |
| Control Type | Electronic with LED display |
| Temperature Alarm | Yes |
| Door Open Alarm | Yes |
| Number of Drawers | 6 |
| Power Supply | 220-240 V, 50 Hz, 1.2 A |
| Power Consumption | 250 kWh/year |
| Cleaning and Maintenance | Defrost periodically, clean interior with mild detergent |
| Safety Features | Child lock, high temperature alarm |
| Spare Parts Availability | Through Neff customer service or authorized dealers |
| Warranty | 2 years |
Frequently Asked Questions - GI7815CE0G NEFF
User questions about GI7815CE0G NEFF
0 question about this device. Answer the ones you know or ask your own.
Ask a new question about this device
Download the instructions for your Freezer in PDF format for free! Find your manual GI7815CE0G - NEFF and take your electronic device back in hand. On this page are published all the documents necessary for the use of your device. GI7815CE0G by NEFF.
USER MANUAL GI7815CE0G NEFF

Freezer
User manual


Table of contents
1 Safety 6
1.1 General information...... 6 1.2 Intended use...... 6 1.3 Restriction on user group...... 6 1.4 Safe transport...... 6 1.5 Safe installation 7 1.6 Safe use 8 1.7 Damaged appliance...... 9
2 Preventing material damage ..... 11
3 Environmental protection and saving energy.... 11
3.1 Disposing of packaging ..... 11 3.2 Saving energy...... 11
4 Installation and connection..... 11
4.1 Scope of delivery.... 11 4.2 Criteria for the installation location 12 4.3 Installing the appliance ..... 12 4.4 Preparing the appliance for the first time.... 13 4.5 Connecting the appliance to the electricity supply...... 13
5 Familiarising yourself with your appliance.... 13
5.1 Appliance 13 5.2 Control panel.... 13
6 Features.... 13
6.1 Freezer compartment flap ..... 13 6.2 Accessories.... 13
7 Basic operation 14
7.1 Switching on the appliance ..... 14 7.2 Operating tips.... 14 7.3 Switching off the appliance ..... 14 7.4 Setting the temperature...... 14
8 Additional functions ...... 14
8.1 Automatic Super freezing...... 14 8.2 Manual Super freezing 15
9 Alarm.... 15
9.1 Door alarm 15 9.2 Temperature alarm 15
10 Home Connect 16
10.1 Connecting the appliance to a WLAN home network (Wi-Fi) with WPS function ..... 16 10.2 Connecting the appliance to a WLAN home network (Wi-Fi) without WPS function.... 17 10.3 Connecting the appliance to the Home Connect app ..... 17 10.4 Installing updates for the Home Connect software ..... 18 10.5 Resetting Home Connect settings 18 10.6 Data protection.... 18
11 Freezer compartment...... 19
11.1 Freezing capacity 19 11.2 Fully utilising the freezer compartment volume 19 11.3 Tips for storing food in the freezer compartment 19 11.4 Freezing smaller amounts of food quickly 19 11.5 Tips for freezing fresh food 19 11.6 Shelf life of frozen food at -18 °C 20 11.7 Defrosting methods for frozen food 20
12 Defrosting 20
12.1 Defrosting in the freezer compartment 20
13 Cleaning and servicing 20
13.1 Preparing the appliance for cleaning 21 13.2 Cleaning the appliance 21 13.3 Removing the fittings 21
14 Troubleshooting 22 15 Storage and disposal 24 15.1 Switching off the appliance 24 15.2 Disposing of old appliance 24 16 Customer Service 25 16.1 Product number (E-Nr.) and production number (FD) 25 17 Technical data 25 18 Declaration of Conformity 26

1 Safety
Observe the following safety instructions.
1.1 General information
- Read this instruction manual carefully.
- Keep the instruction manual and the product information safe for future reference or for the next owner. Do not connect the appliance if it has been damaged in transit.
1.2 Intended use
This appliance is only intended to be fully fitted in a kitchen.
Only use this appliance:
for freezing food and making ice cubes. In private households and in enclosed spaces in a domestic environment. Up to an altitude of max. 2000 m above sea level.
1.3 Restriction on user group
This appliance may be used by children aged 8 or over and by people who have reduced physical, sensory or mental abilities or inadequate experience and/or knowledge, provided that they are supervised or have been instructed on how to use the appliance safely and have understood the resulting dangers.
Children must not play with the appliance.
Cleaning and user maintenance must not be performed by children unless they are being supervised.
Children above the age of three years old and younger than eight years old may load and unload the fridge-freezer.
1.4 Safe transport
⚠ WARNING – Risk of injury!
The high weight of the appliance may result in injury when lifted.
▶ Do not lift the appliance on your own.
1.5 Safe installation
⚠ WARNING – Risk of electric shock!
Improper installation is dangerous.
- Connect and operate the appliance only in accordance with the specifications on the rating plate.
- Connect the appliance to a power supply with alternating current only via a properly installed socket with earthing.
- The protective conductor system of the domestic electrical installation must be properly installed. ▶ Never equip the appliance with an external switching device, e.g. a timer or remote control.
- When the appliance is installed, the mains plug of the power cord must be freely accessible. If free access is not possible, an all-pole isolating switch must be installed in the permanent electrical installation according to the installation regulations.
- When installing the appliance, check that the power cable is not trapped or damaged. If the insulation of the power cord is damaged, this is dangerous. ▶ Never let the power cord come into contact with heat sources.
⚠ WARNING – Risk of explosion!
If the appliance's ventilation openings are sealed, a leak in the refrigeration circuit may result in a flammable mixture of gas and air.
- Keep ventilation openings, in the appliance enclosure or in the built-in structure, clear of obstruction.
⚠ WARNING – Risk of fire!
It is dangerous to use an extended power cord and non-approved adapters.
▶ Do not use extension cables or multiple socket strips. ▶ If the power cord is too short, contact Customer Service. ▶ Only use adapters approved by the manufacturer.
Portable multiple socket strips or portable power supply units may overheat and cause a fire.
- Do not place portable multiple socket strips or power supply units on the back of the appliance.
1.6 Safe use
⚠ WARNING – Risk of electric shock!
An ingress of moisture can cause an electric shock.
▶ Only use the appliance in enclosed spaces. ▶ Never expose the appliance to intense heat or humidity. - Do not use steam- or high-pressure cleaners to clean the appliance.
⚠ WARNING – Risk of suffocation!
Children may put packaging material over their heads or wrap themselves up in it and suffocate.
- Keep packaging material away from children. ▶ Do not let children play with packaging material. Children may breathe in or swallow small parts, causing them to suffocate.
- Keep small parts away from children. ▶ Do not let children play with small parts.
⚠ WARNING – Risk of explosion!
Mechanical devices or other devices may damage the refrigeration circuit; flammable refrigerant may escape and explode.
▶ To accelerate the defrosting process, do not use any other mechanical devices or devices other than those recommended by the manufacturer.
Products which contain flammable propellants and explosive substances may explode, e.g. spray cans.
- Do not store products which contain flammable propellants (e.g. spray cans) or explosive substances in the appliance.
⚠ WARNING – Risk of fire!
Electrical devices within the appliance may cause a fire, e.g. heaters or electric ice makers.
▶ Do not operate electrical devices within the appliance.
⚠ WARNING – Risk of injury!
Containers that contain carbonated drinks may burst.
- Do not store containers that contain carbonated drinks in the freezer compartment. Injury to the eyes caused by escaping flammable refrigerant and hazardous gases.
- Do not damage the tubes of the refrigerant circuit or the insulation.
⚠ WARNING – Risk of cold burns!
Contact with frozen food and cold surfaces may cause burns by refrigeration.
▶ Never put frozen food straight from the freezer compartment into your mouth. - Avoid prolonged contact of the skin with frozen food, ice and surfaces in the freezer compartment.
⚠️ CAUTION – Risk of harm to health!
To prevent food from being contaminated, you must observe the following instructions.
▶ If the door is open for an extended period of time, this may lead to a considerable temperature increase in the compartments of the appliance. ▶ Regularly clean the surfaces that may come into contact with food and accessible drain systems. ▶ If the fridge/freezer is empty for an extended period of time, switch off the appliance, defrost it, clean it and leave the door open to prevent the formation of mould.
1.7 Damaged appliance
⚠ WARNING – Risk of electric shock!
If the appliance or the power cord is damaged, this is dangerous.
▶ Never operate a damaged appliance. ▶ Never pull on the power cord to unplug the appliance. Always unplug the appliance at the mains. ▶ If the appliance or the power cord is damaged, immediately unplug the power cord or switch off the fuse in the fuse box.
en Safety
▶ Call customer services. → Page 25 Incorrect repairs are dangerous. ▶ Repairs to the appliance should only be carried out by trained specialist staff. ▶ Only use genuine spare parts when repairing the appliance. If the power cord of this appliance is damaged, it must be replaced by the manufacturer, the manufacturer's Customer Service or a similarly qualified person in order to prevent any risk.

WARNING – Risk of fire!

If the tubes are damaged, flammable refrigerant and harmful gases may escape and ignite.
- Keep naked flames and ignition sources away from the appliance. ▶ Ventilate the room. ▶ Switch off the appliance. → Page 14 ▶ Unplug the appliance from the mains or switch off the circuit breaker in the fuse box. ▶ Call after-sales service. → Page 25
2 Preventing material damage
ATTENTION!
Using the base, runners or appliance doors as a seat surface or climbing surface may damage the appliance.
- Do not stand or support yourself on the base, runners or doors. Contamination with oil or fat may cause plastic parts and door seals to become porous.
- Keep plastic parts and door seals free of oil and grease.
3 Environmental protection and saving energy
3.1 Disposing of packaging
The packaging materials are environmentally compatible and can be recycled.
- Sort the individual components by type and dispose of them separately.
3.2 Saving energy
If you follow these instructions, your appliance will use less power.
Selecting the installation location
- Keep the appliance out of direct sunlight. ■ Install the appliance as far away as possible from heating elements, cookers and other heat sources:
- Maintain a 30 mm clearance to electric or gas cookers.
- Maintain a 300 cm clearance to oil or solid-fuel cookers.
■ Use a niche depth of 560 mm. ■ Never cover or block the exterior ventilation grilles.
Saving energy during use
Note: The arrangement of the fittings does not affect the energy consumption of the appliance.
■ Open the appliance only briefly. ■ Never cover or block the interior ventilation openings or the exterior ventilation grilles. ■ Transport purchased food in a cool bag and place in the appliance quickly. ■ Allow warm food and drinks to cool down before storing them. ■ Always leave some space between the food and the back panel. ■ Pack the food airtight. ■ Open the freezer compartment door only briefly and then close it properly.
4 Installation and connection
You can find out where and how best to install your appliance here. You will also learn how to connect your appliance to the power supply.
4.1 Scope of delivery
After unpacking all parts, check for any transport damage and for completeness of delivery.
If you have any complaints, contact your dealer or our after-sales service → Page 25.
The delivery consists of the following:
■ Built-in appliance ■ Equipment and accessories 1 ■ Installation material
en Installation and connection
■ Installation instructions ■ User manual ■ Customer service directory ■ Warranty enclosure 1 ■ Energy label ■ Information on energy consumption and noises ■ Information about Home Connect
4.2 Criteria for the installation location
WARNING
Risk of explosion!
If the appliance is in a space that is too small, a leak in the refrigeration circuit may result in a flammable mixture of gas and air.
▶ Only install the appliance in a space with a volume of at least 1 m3 per 8 g refrigerant. The volume of refrigerant is indicated on the rating plate. → Fig. 1/4
The weight of the appliance ex works may be up to 70 kg depending on the model.
The subfloor must be sufficiently stable to bear the weight of the appliance.
Permitted room temperature
The permitted room temperature depends on the appliance's climate class.
The climate class can be found on the rating plate. → Fig. 1/4
| Climate class | Permitted room temperature |
| SN 10 °C to 32 °C | |
| N 16 °C to 32 °C | |
| ST 16 °C to 38 °C | |
| T 16 °C to 43 °C | |
The appliance is fully functional within the permitted room temperature.
If an appliance with climate class SN is operated at colder room temperatures, the appliance will not be damaged up to a room temperature of 5 °C.
Niche dimensions
Observe the niche dimensions if you install your appliance in the niche. If this is not the case, problems may occur when installing the appliance.
Niche depth
Install the appliance in the recommended niche depth of 560 mm. If the niche depth is smaller, the energy consumption increases slightly. The niche depth must be a minimum 550 mm.
Niche width
An inside niche width of at least 560 mm is required for the appliance.
Side-by-side installation
If, in addition to this appliance, you want to operate another appliance featuring a freezer compartment, you must maintain a distance of at least 150 mm between the appliances. If you do not observe the minimum distance, you can only set up this appliance next to 556 mm wide appliances without a freezer compartment.
4.3 Installing the appliance
- Install the appliance in accordance with the enclosed installation instructions.
4.4 Preparing the appliance for the first time
- Remove the informative material.
- Remove the protective foil and transit bolts, e.g. remove the adhesive strips and carton.
- Clean the appliance for the first time. → Page 21
4.5 Connecting the appliance to the electricity supply
- Insert the mains plug of the appliance's power cable in a socket nearby. The connection data of the appliance can be found on the rating plate. → Fig. 1/4
- Check the mains plug is inserted properly. √ The appliance is now ready for use.
5 Familiarising yourself with your appliance
5.1 Appliance
You can find an overview of the parts of your appliance here.
→ Fig. 1
| 1 | Control panel |
| 2 | Freezer compartment shelf |
| 3 | Freezer compartment flap |
| 4 | Rating plate |
Note: Deviations between your appliance and the diagrams may differ with regard to their features and size.
5.2 Control panel
You can use the control panel to configure all functions of your appliance and to obtain information about the operating status.
→ Fig. 2
| 1 | Alarm switches the warning signal off. |
| 2 | / sets the temperature of the freezer compartment. |
| 3 | Displays the set temperature for the freezer compartment in °C. |
| 4 | Super switches Super freezing on or off. |
| 5 | opens the menu for setting Home Connect. |
| 6 | ➌ switches the appliance on or off. |
6 Features
The features of your appliance depend on the model.
6.1 Freezer compartment flap
Store food that is used frequently or that only needs to be stored for a short time on the shelf behind the freezer-compartment flap.
6.2 Accessories
Use original accessories. These have been made especially for your appliance.
The accessories for your appliance depend on the model.
Ice pack
Use the ice pack for temporarily keeping food cool, e.g. in a cool bag.
en Basic operation
Tip: If a power failure or malfunction occurs, the ice pack can be used to slow down the thawing process for the stored frozen food.
Ice cube tray
Use the ice cube tray to make ice cubes.
Making ice cubes
- Fill the ice cube tray with water up to 3/4 and place in the freezer compartment. If the ice cube tray is stuck to the freezer compartment, loosen it with a blunt implement only (e.g. spoon handle).
- To loosen the ice cubes, twist the ice cube tray slightly or hold it briefly under flowing water.
7 Basic operation
7.1 Switching on the appliance
- Press ①
√ The appliance begins to cool. √ A warning signal sounds and alarm lights up because the freezer compartment is still too warm.
- Switch off the warning signal with Alarm.
√ The alarm goes out as soon as the set temperature has been reached.
- Set the required temperature. → Page 14
7.2 Operating tips
■ Once you have switched on the appliance, the set temperature is only reached after several hours. Do not put any food in the appliance until the temperature has been reached.
The front panels of the housing are temporarily heated slightly. This prevents condensation in the area of the door seal. When you close the door, a vacuum may be created. The door is then difficult to open again. Wait a moment until the vacuum is offset.
7.3 Switching off the appliance
Press ①
7.4 Setting the temperature
Setting the freezer compartment temperature
Press 〈〉 repeatedly until the temperature display shows the required temperature.
The recommended temperature in the freezer compartment is -18 °C.
8 Additional functions
8.1 Automatic Super freezing
The automatic Super freezing automatically switches on when warm food is placed in the compartment. With automatic Super freezing, the freezer compartment cools down to a much lower temperature than for normal mode. If the automatic Super freezing is switched on, lights up and increased noises may occur. After operation, the appliance switches from automatic Super freezing to normal operation.
Cancelling automatic Super freezing
Press Super √ The previously set temperature is displayed.
8.2 Manual Super freezing
With Super freezing, the freezer compartment cools so that it as cold as possible.
Switch on Super freezing four to six hours before placing food weighing 2 kg or more into the freezer compartment.
In order to utilize the freezer capacity, use Super freezing.
→ "Prerequisites for freezing capacity", Page 19
Note: When Super freezing is switched on, increased noise may occur.
Switching on manual Super freezing
▶ Press Super. The Super indicator lights up.
Note: After approx. 60 hours, the appliance switches to normal operation.
Switching off manual Super freezing
▶ Press Super. The previously set temperature is displayed.
9 Alarm
9.1 Door alarm
If the appliance door is open for a longer period, the door alarm switches on.
Switching off the door alarm
- Close the appliance door or press Alarm. The warning tone is switched off.
9.2 Temperature alarm
If the freezer compartment becomes too warm, the temperature alarm is switched on.
CAUTION
Risk of harm to health!
During the thawing process, bacteria may multiply and spoil the frozen food.
- Do not refreeze food after it has been defrosted or started to defrost. ▶ Refreeze food only after cooking.
- These items should no longer be stored for the maximum storage period.
The temperature alarm can be switched on in the following cases:
■ The appliance is switched on. Do not store any food until the appliance has reached the set temperature. ■ The freezer compartment door is open for too long. Check whether the frozen food has defrosted or thawed.
Switching off the temperature alarm
▶ Press Alarm √ The warning tone is switched off.
en Home Connect
√ From this time on, the warmest temperature is measured again and saved. √ Alights up until the set temperature is reached again.
10 Home Connect
This appliance is network-capable. Connect your appliance to a mobile device to control its functions via the Home Connect app.
The Home Connect services are not available in every country. The availability of the Home Connect function depends on the availability of Home Connect services in your country. You can find information about this at: www.home-connect.com. To be able to use Home Connect, you must first set up the connection to the WLAN home network (Wi-Fi 1 ) and to the Home Connect app. After switching on the appliance, wait at least 2 minutes until internal device initialisation is complete. Only then should you set up Home Connect.
■ Connecting appliance to WLAN home network (Wi-Fi) with WPS function → Page 16 ■ Connecting appliance to WLAN home network (Wi-Fi) without WPS function → Page 17
The Home Connect app guides you through the entire login process. Follow the instructions in the Home Connect app to configure the settings.
Tips
■ Please consult the documents supplied by Home Connect. ■ Please also follow the instructions in the Home Connect app.
Notes
■ Please note the safety precautions in this instruction manual and make sure that they are also observed when operating the appliance via the Home Connect app. → "Safety", Page 6 ■ Operating the appliance on the appliance itself always takes priority. During this time it is not possible to operate the appliance using the Home Connect app.
10.1 Connecting the appliance to a WLAN home network (Wi-Fi) with WPS function
If your router has a WPS function, you can connect the appliance to your WLAN home network (Wi-Fi) automatically.
- Press ☐
√ The temperature display shows.
- Press Super repeatedly until the temperature display shows AC
- Press >.
√ The temperature display shows an animation for two minutes. The appliance is ready for automatic connection to the WLAN home network (Wi-Fi). 4. Activate the WPS function on the router during this period.
To do this, take note of the information in the documents for your router.
Once successfully connected, flashes in the temperature display.
- If the temperature display shows OF, the appliance was unable to establish a connection to the WLAN home network (WiFi).
- Check whether the appliance is located within the range of the WLAN home network (Wi-Fi).
- Repeat the process or establish the connection manually → Page 17.
- Connect the appliance to the Home Connect app. → Page 17
10.2 Connecting the appliance to a WLAN home network (Wi-Fi) without WPS function
If your router does not have a WPS function, you can connect the appliance to your WLAN home network (Wi-Fi) manually. The appliance briefly sets up its own WLAN network. You can connect a mobile device to the WLAN network and transfer the network information for the WLAN home network (Wi-Fi) to your appliance.
Requirement: The Home Connect app has been installed on your mobile device.
- Press ☐ √ The temperature display shows n.
- Press Super repeatedly until the temperature display shows SA
- Press >.
The appliance now sets up its own WLAN network with the network name "HomeConnect". The temperature display shows an animation. The appliance is ready for manual connection to the WLAN home network (WiFi). 4. Follow the instructions in the Home Connect app on the mobile device. The network information for the WLAN home network (Wi-Fi) is transferred to the appliance.
Once successfully connected, flashes in the temperature display. 5. If the temperature display shows OF, the appliance was unable to establish a connection to the WLAN home network (WiFi).
Check whether the appliance is located within the range of the WLAN home network (Wi-Fi).
Repeat the process.
10.3 Connecting the appliance to the Home Connect app
If you have automatically connected your appliance to your WLAN home network (Wi-Fi), you can connect your appliance to the Home Connect app.
Requirements
The appliance is connected to the WLAN home network (Wi-Fi). → Page 16 The Home Connect app has been installed on your mobile device.
- Press ☐
The temperature display shows n. 2. Press S repeatedly until the temperature display shows PA. 3. Press >.
The temperature display shows an animation. 4. Follow the instructions in the Home Connect app until the process is complete. Once successfully connected, the temperature display shows On. 5. If the temperature display shows OF, the appliance was able to establish a connection to the Home Connect app.
en Home Connect
- In the Home Connect app, check whether the mobile device is connected to the WLAN home network (Wi-Fi).
- Repeat the process.
- If the temperature display shows Er, reset the Home Connect settings. → Page 18
10.4 Installing updates for the Home Connect software
The appliance searches for updates to the Home Connect software at regular intervals.
Note: If updates are available, the temperature display shows UP. To reset the update and the temperature display to the set temperature, press any touch field.
- Press ☐
√ The temperature display shows 2. Press Super repeatedly until the temperature display shows UP. 3. Press >.
√ The temperature display shows an animation. √ The update is installed. √ The control panel is locked during the installation. √ If the installation is successful, the temperature display shows On.
- If the temperature display shows Er, the appliance was unable to install the update.
- Repeat the process at a later point.
- If the update cannot be completed after several attempts, contact customer service → Page 25.
10.5 Resetting Home Connect settings
If your appliance experiences connection problems with the WLAN home network (Wi-Fi) or your appliance wants to log into a different WLAN home network (Wi-Fi), you can reset the Home Connect settings.
- Press ☐
√ The temperature display shows 2. Press S repeatedly until the temperature display shows r.E. 3. Press >.
The temperature display shows an animation for 15 seconds.
The temperature display then shows "On".
The Home Connect settings have been reset.
10.6 Data protection
Please see the information on data protection.
The first time your appliance is registered on a home network connected to the Internet, your appliance will transmit the following types of data to the Home Connect server (initial registration):
Unique appliance identification (consisting of appliance codes as well as the MAC address of the Wi-Fi communication module installed). Security certificate of the Wi-Fi communication module (to ensure a secure data connection). The current software and hardware version of your appliance. Status of any previous reset to factory settings.
This initial registration prepares the Home Connect functions for use and is only required when you want to use the Home Connect functions for the first time.
Note: Please note that the
Home Connect functions can only be utilised with the Home Connect app. Information on data protection can be retrieved in the Home Connect app.
11 Freezer compartment
You can store frozen food, freeze food and make ice cubes in the freezer compartment.
The temperature can be set from -16 °C to -24 °C.
Long-term storage of food should be at -18 °C or lower.
The freezer compartment can be used to store perishable food long-term. The low temperatures slow down or stop the spoilage.
11.1 Freezing capacity
The maximum freezing capacity indicates the quantity of food that can be frozen right through to the centre within a specific period of time. Information on the maximum freezing capacity can be found on the rating plate. → Fig. 1/4
Prerequisites for freezing capacity
- Approx. 24 hours before placing fresh food in the appliance, switch on Super freezing. → "Switching on manual Super freezing", Page 15
- Fill the upper compartment with food first. This is where the food freezes most quickly.
- If the top compartment does not have enough space, store the remaining quantity in the compartment underneath.
11.2 Fully utilising the freezer compartment volume
Learn how to store the maximum amount of frozen food in the freezer compartment.
- Remove all fittings. → Page 21
- Store food directly on the shelves and on the floor of the freezer compartment.
11.3 Tips for storing food in the freezer compartment
■ To quickly and gently freeze larger quantities of fresh food, place this in the top frozen food container. ■ Place the food over the whole area of the compartments or the frozen food containers. ■ Do not bring food which is to be frozen into contact with frozen food. ■ To ensure that the air can circulate freely in the appliance, push the frozen food containers in as far as they will go.
11.4 Freezing smaller amounts of food quickly
- Add the food to the second frozen food container from the bottom, starting from the right.
- Spread the food over a wide area in the freezer compartment.
11.5 Tips for freezing fresh food
■ Freeze fresh and undamaged food only. ■ Freeze food in portions.
Defrosting
■ Cooked food is more suitable than food that can be eaten raw. ■ Vegetables: Wash, chop up and blanch before freezing. ■ Fruit: Wash, pit and perhaps peel, possibly add sugar or ascorbic acid solution. ■ Food that is suitable for freezing includes baked items, fish and seafood, meat, game, poultry, eggs without shells, cheese, butter and quark, ready meals and leftovers. ■ Food that is unsuitable for freezing includes lettuce, radishes, eggs in shells, grapes, raw apples and pears, yoghurt, sour cream, crème fraîche and mayonnaise.
Packing frozen food
If you select suitable packaging material and the correct type of packaging, you can determine the product quality and prevent freezer burn.
- Place the food in the packaging.
- Squeeze out the air.
- Pack food airtight to prevent it from losing flavour and drying out.
- Label the packaging with the contents and the date of freezing.
11.6 Shelf life of frozen food at -18 °C
| Food Storage time | |
| Fish, sausages, pre-pared meals and baked goods | up to 6 months |
| Poultry, meat up to | 8 months |
| Vegetables, fruit up to | 12 months |
11.7 Defrosting methods for frozen food
CAUTION
Risk of harm to health!
During the thawing process, bacteria may multiply and spoil the frozen food.
- Do not refreeze food after it has been defrosted or started to defrost. ▶ Refreeze food only after cooking.
- These items should no longer be stored for the maximum storage period. ■ Defrost animal-based food, such as fish, meat, cheese, quark, in the refrigerator compartment. ■ Defrost bread at room temperature. ■ Prepare food for immediate consumption in the microwave, in the oven or on the hob.
12 Defrosting
12.1 Defrosting in the freezer compartment
The fully automatic NoFrost system ensures that the freezer compartment remains frost-free. Defrosting is not required.
13 Cleaning and servicing
To keep your appliance working efficiently for a long time, it is important to clean and maintain it carefully. Customer Service must clean inaccessible points. Cleaning by customer service can give rise to costs.
13.1 Preparing the appliance for cleaning
- Switch off the appliance. → Page 14
- Disconnect the appliance from the power supply. Unplug the appliance from the mains or switch off the circuit breaker in the fuse box.
- Take out all of the food and store it in a cool place. Place ice packs (if available) onto the food.
- Remove all fittings from the appliance. → Page 21
13.2 Cleaning the appliance
WARNING
Risk of electric shock!
An ingress of moisture can cause an electric shock.
- Do not use steam- or high-pressure cleaners to clean the appliance.
Liquid in the lighting or in the controls can be dangerous.
- The rinsing water must not drip into the lighting or controls.
ATTENTION!
Unsuitable cleaning products may damage the surfaces of the appliance.
- Do not use hard scouring pads or cleaning sponges.
- Do not use harsh or abrasive detergents.
- Do not use cleaning products with a high alcohol content.
If you clean fittings and accessories in the dishwasher, this may cause them to become deformed or discolored.
Never clean fittings and accessories in the dishwasher.
- Prepare the appliance for cleaning. → Page 21
- Clean the appliance, the fittings and the door seals with a dish cloth, lukewarm water and a little pH-neutral washing-up liquid.
- Dry thoroughly with a soft, dry cloth.
- Insert the fittings.
- Electrically connect the appliance.
- Switch on the appliance. → Page 14
- Putting the food into the appliance.
13.3 Removing the fittings
If you want to clean the fittings thoroughly, remove these from your appliance.
Removing the freezer flap
- Open the freezer compartment flap and release from the holder. → Fig. 3
Removing the freezer compartment shelf
▶ Pull out the freezer compartment shelf and remove it. → Fig. 4
Removing the frozen food container
- Take out the frozen food container as far as it will go.
- Lift the frozen food container at the front ① and remove it ② → Fig. 5
14 Troubleshooting
You can rectify minor faults on your appliance yourself. Read the troubleshooting information before contacting after-sales service. This will avoid unnecessary costs.

WARNING
Risk of electric shock!
Incorrect repairs are dangerous.
- Repairs to the appliance should only be carried out by trained specialist staff. ▶ Only use genuine spare parts when repairing the appliance. If the power cord of this appliance is damaged, it must be replaced by the manufacturer, the manufacturer's Customer Service or a similarly qualified person in order to prevent any risk.
Fault Cause and troubleshooting
| The appliance is not cooling, the displays and lighting light up. | Showroom mode is switched on.▸ Carry out the appliance self-test. → Page 24√ Once the appliance self-test has ended, the appliance switches to normal operation. |
| HomeConnect is not working correctly. | Different causes are possible.▸ Go to www.home-connect.com. |
| E or d appears in the temperature display. | The electronics have detected a fault.1. Switch off the appliance. → Page 142. Disconnect the appliance from the mains.Unplug the appliance from the mains or switch off the circuit breaker in the fuse box.3. Reconnect the appliance after five minutes.4. If the message still appears on the display, call customer service.The customer service number can be found in the enclosed customer service directory. |
| Temperature display flashes. | Different causes are possible.▸ Press Alarm√ The alarm is switched off. |
| The appliance door is open.▸ Close the appliance door. | |
| The exterior ventilation grilles are blocked.▸ Remove any obstructions from in front of the exterior ventilation grilles. | |
| Larger quantities of fresh food have been put in. | |
| Fault Cause and troubleshooting | |
| Temperature display flashes. | ▸ Do not exceed the max. freezing capacity.→ "Freezing capacity", Page 19 |
| The temperature display flashes, a warning signal sounds and Alarm lights up. | Different causes are possible.▸ Press Alarm√ The alarm is switched off. |
| The appliance door is open.▸ Close the appliance door. | |
| The exterior ventilation grilles are blocked.▸ Remove any obstructions from in front of the exterior ventilation grilles. | |
| Larger quantities of fresh food have been put in.▸ Do not exceed the max. freezing capacity.→ "Freezing capacity", Page 19 | |
| The temperature differs greatly from the setting. | Different causes are possible.1. Switch off the appliance. → Page 142. Switch the appliance back on after five minutes.→ Page 14– If the temperature is too warm, check the temperature again after a couple of hours.– If the temperature is too cold, check the temperature again on the following day. |
| The appliance hums, bubbles, buzzes, gargles, clicks or crackles. | Not a fault. A motor is running, e.g. refrigerating unit, fan. Refrigerant flows through the pipes. The motor, switches or solenoid valves are switching on or off. Automatic defrosting is running.No action required. |
| The appliance makes noises. | Fittings wobble or stick.▸ Check the removable fittings and, if required, replace these. |
| Containers are touching.▸ Move the containers apart. | |
| Super freezing is switched on.No action required. | |
14.1 Power failure
During a power failure, the temperature in the appliance rises; this reduces the storage time and the quality of the frozen food.
The stored frozen food is cooled to the temperature increase time specified on the rating plate. → Fig. 1 / 4
Notes
Open the appliance as little as possible during a power failure and do not place any other food in the appliance. Check the quality of the food immediately after a power failure.
Dispose of any frozen food that has defrosted and is hotter than 5 °C.
Cook or fry slightly thawed frozen food, and then either consume it or freeze it again.
14.2 Conducting an appliance self-test
- Switch off the appliance. → Page 14
- Switch the appliance back on after approx. five minutes. → Page 14
- Within the first 10 seconds after switching on, press and hold Super for 3 to 5 seconds until an audible signal sounds.
√ The appliance self-test starts. √ While the appliance self-test is running, a long audible signal sounds. √ If, at the end of the appliance self-test, two audible signals sound and the temperature display indicates the set temperature, your appliance is OK. The appliance switches to normal operation. √ If, at the end of the appliance self-test, five audible signals sound and flashes for 10 seconds, inform the after-sales service.
15 Storage and disposal
You can find out here how to prepare your appliance for storage. You will also find out how to dispose of old appliances.
15.1 Switching off the appliance
- Switch off the appliance. → Page 14
- Disconnect the appliance from the power supply. Unplug the appliance from the mains or switch off the circuit breaker in the fuse box.
- Remove all of the food.
- Clean the appliance. → Page 21
- To ensure ventilation inside the appliance, leave the appliance open.
15.2 Disposing of old appliance
Valuable raw materials can be re-used by recycling.
WARNING
Risk of harm to health!
Children can lock themselves in the appliance, thereby putting their lives at risk.
Leave shelves and containers inside the appliance to prevent children from climbing in. - Keep children away from the redundant appliance.
WARNING
Risk of fire!
If the tubes are damaged, flammable refrigerant and harmful gases may escape and ignite.
- Do not damage the tubes of the refrigerant circuit or the insulation.
- Unplug the appliance from the mains.
- Cut through the power cord.
- Dispose of the appliance in an environmentally friendly manner.
Information about current disposal methods are available from your specialist dealer or local authority.

This appliance is labelled in accordance with European Directive 2012/19/EU concerning used electrical and electronic appliances (waste electrical and electronic equipment - WEEE). The guideline determines the framework for the return and recycling of used appliances as applicable throughout the EU.
16 Customer Service
If you have any queries, are unable to rectify faults on the appliance yourself or if your appliance needs to be repaired, contact Customer Service. Function-relevant genuine spare parts according to the corresponding Eco-design Order can be obtained from Customer Service for a period of at least 10 years from the date on which your appliance was placed on the market within the European Economic Area.
Note: Under the terms of the manufacturer's warranty applicable to the location, the use of Customer Service is free of charge. The minimum duration of the warranty (manufacturer's warranty for private consumers) in the European Economic Area is 2 years according to the terms of warranty applicable to the location. The terms of warranty do not affect other rights or claims held by yourself under local legislation.
Detailed information on the warranty period and terms of warranty in your country is available from our after-sales service, your retailer or on our website.
If you contact Customer Service, you will require the product number (E-Nr.) and the production number (FD) of your appliance.
The contact details for Customer Service can be found in the enclosed Customer Service directory or on our website.
16.1 Product number (E-Nr.) and production number (FD)
You can find the product number (E-Nr.) and the production number (FD) on the appliance's rating plate.
→ Fig. 1 / 4
Make a note of your appliance's details and the Customer Service telephone number to find them again quickly.
17 Technical data
Refrigerant, cubic capacity and further technical specifications can be found on the rating plate.
→ Fig. 1 / 4
More information about your model can be found online at https://energylabel.bsh-group.com 1 . This web address is linked to the official EU EPREL product database. At the time
Declaration of Conformity
of printing its web address had not yet been published. Please then follow the instructions on searching for models. The model identifier is made up of the characters before the slash in the product number (E-Nr.) on the rating plate. Alternatively you can also find the model identifier in the first line of the EU energy label.
18 Declaration of Conformity
Constructa Neff Vertriebs-GmbH hereby declares that the appliance with Home Connect functionality
meets the essential requirements and other relevant provisions of the Directive 2014/53/EU.
A detailed RED Declaration of Conformity can be found online at www.neff-international.com among the additional documents on the product page for your appliance.

2.4 GHz band: 100 mW max.
5 GHz band: 100 mW max.

BE BG CZ DK DE EE IE EL
ES FR HR IT CY LV LT LU
HU MT NL AT PL PT RO SI
SK FI SE UK NO CH TR
5 GHz WLAN (Wi-Fi): For indoor use only.
Table of contents
1 Safety.... 29
⚠ WARNING – Risk of injury!
⚠ WARNING – Risk of explosion!
⚠ WARNING – Risk of fire!
⚠ WARNING – Risk of suffocation!
⚠ WARNING – Risk of explosion!
⚠ WARNING – Risk of fire!
⚠ WARNING – Risk of injury!
⚠ WARNING – Risk of fire!

⚠️ WARNING Risk of explosion!
Side-by-side installation
7 Operation in essence
7.1 Switching on the appliance
- press.

REGISTER YOUR PRODUCT ONLINE NEFF-HOME.COM


- TABLE OF CONTENTS
- SAFETY
- PREVENTING MATERIAL DAMAGE
- ENVIRONMENTAL PROTECTION AND SAVING ENERGY
- INSTALLATION AND CONNECTION
- FAMILIARISING YOURSELF WITH YOUR APPLIANCE
- FEATURES
- BASIC OPERATION
- ADDITIONAL FUNCTIONS
- ALARM
- HOME CONNECT
- FREEZER COMPARTMENT
- DEFROSTING
- CLEANING AND SERVICING
- GENERAL INFORMATION
- INTENDED USE
- RESTRICTION ON USER GROUP
- SAFE TRANSPORT
- ⚠ WARNING – RISK OF INJURY
- SAFE INSTALLATION
- ⚠ WARNING – RISK OF ELECTRIC SHOCK
- ⚠ WARNING – RISK OF EXPLOSION
- ⚠ WARNING – RISK OF FIRE
- SAFE USE
- ⚠ WARNING – RISK OF SUFFOCATION
- ⚠ WARNING – RISK OF COLD BURNS
- ⚠️ CAUTION – RISK OF HARM TO HEALTH
- DAMAGED APPLIANCE
- EN SAFETY
- WARNING – RISK OF FIRE
- ATTENTION
- DISPOSING OF PACKAGING
- SAVING ENERGY
- SELECTING THE INSTALLATION LOCATION
- SAVING ENERGY DURING USE
- SCOPE OF DELIVERY
- EN INSTALLATION AND CONNECTION
- CRITERIA FOR THE INSTALLATION LOCATION
- WARNING
- RISK OF EXPLOSION
- PERMITTED ROOM TEMPERATURE
- NICHE DIMENSIONS
- NICHE DEPTH
- NICHE WIDTH
- SIDE-BY-SIDE INSTALLATION
- INSTALLING THE APPLIANCE
- PREPARING THE APPLIANCE FOR THE FIRST TIME
- CONNECTING THE APPLIANCE TO THE ELECTRICITY SUPPLY
- APPLIANCE
- CONTROL PANEL
- FREEZER COMPARTMENT FLAP
- ACCESSORIES
- ICE PACK
- EN BASIC OPERATION
- ICE CUBE TRAY
- MAKING ICE CUBES
- SWITCHING ON THE APPLIANCE
- OPERATING TIPS
- SWITCHING OFF THE APPLIANCE
- SETTING THE TEMPERATURE
- SETTING THE FREEZER COMPARTMENT TEMPERATURE
- AUTOMATIC SUPER FREEZING
- CANCELLING AUTOMATIC SUPER FREEZING
- MANUAL SUPER FREEZING
- SWITCHING ON MANUAL SUPER FREEZING
- SWITCHING OFF MANUAL SUPER FREEZING
- DOOR ALARM
- SWITCHING OFF THE DOOR ALARM
- TEMPERATURE ALARM
- CAUTION
- RISK OF HARM TO HEALTH
- SWITCHING OFF THE TEMPERATURE ALARM
- EN HOME CONNECT
- TIPS
- NOTES
- CONNECTING THE APPLIANCE TO A WLAN HOME NETWORK (WI-FI) WITH WPS FUNCTION
- CONNECTING THE APPLIANCE TO A WLAN HOME NETWORK (WI-FI) WITHOUT WPS FUNCTION
- CONNECTING THE APPLIANCE TO THE HOME CONNECT APP
- REQUIREMENTS
- INSTALLING UPDATES FOR THE HOME CONNECT SOFTWARE
- RESETTING HOME CONNECT SETTINGS
- DATA PROTECTION
- FREEZING CAPACITY
- PREREQUISITES FOR FREEZING CAPACITY
- FULLY UTILISING THE FREEZER COMPARTMENT VOLUME
- TIPS FOR STORING FOOD IN THE FREEZER COMPARTMENT
- FREEZING SMALLER AMOUNTS OF FOOD QUICKLY
- TIPS FOR FREEZING FRESH FOOD
- PACKING FROZEN FOOD
- SHELF LIFE OF FROZEN FOOD AT -18 °C
- DEFROSTING METHODS FOR FROZEN FOOD
- DEFROSTING IN THE FREEZER COMPARTMENT
- PREPARING THE APPLIANCE FOR CLEANING
- CLEANING THE APPLIANCE
- RISK OF ELECTRIC SHOCK
- REMOVING THE FITTINGS
- REMOVING THE FREEZER FLAP
- REMOVING THE FREEZER COMPARTMENT SHELF
- REMOVING THE FROZEN FOOD CONTAINER
- TROUBLESHOOTING
- POWER FAILURE
- CONDUCTING AN APPLIANCE SELF-TEST
- STORAGE AND DISPOSAL
- DISPOSING OF OLD APPLIANCE
- RISK OF FIRE
- CUSTOMER SERVICE
- PRODUCT NUMBER (E-NR.) AND PRODUCTION NUMBER (FD)
- TECHNICAL DATA
- DECLARATION OF CONFORMITY
- ⚠️ WARNING RISK OF EXPLOSION
- OPERATION IN ESSENCE
Brand : NEFF
Model : GI7815CE0G
Category : Freezer