ASUS ZenEye - Surveillance Camera

ZenEye - Surveillance Camera ASUS - Free user manual and instructions

Find the device manual for free ZenEye ASUS in PDF.

📄 47 pages English EN Download 💬 AI Question 10 questions ⚙️ Specs
Notice ASUS ZenEye - page 4
View the manual : Dansk DA English EN Suomi FI Norsk NO Svenska SV
Pick your language and provide your email: we'll send you a specifically translated version.
Product Type Surveillance Camera
Brand ASUS
Model ZenEye
Category Security Camera
Resolution 1080p Full HD
Field of View 130°
Night Vision Yes, up to 10 meters
Connectivity Wi-Fi (2.4 GHz) and Ethernet
Power Supply DC 5V/2A via micro USB
Dimensions 70 x 70 x 120 mm
Weight 200 g
Storage MicroSD card up to 128 GB, cloud storage
Audio Two-way audio with built-in microphone and speaker
Motion Detection Yes, with alerts
Recording Continuous or motion-triggered
App Support ASUS ZenEye app (iOS/Android)
Weather Resistance Indoor use only
Operating Temperature 0°C to 40°C
Security Encrypted video transmission, password protection
Mounting Desk stand or wall mount
LED Indicator Status light
Certification CE, FCC
Package Includes Camera, USB cable, power adapter, mounting kit, manual
Maintenance Clean lens with soft dry cloth
Spare Parts Not available separately, contact support

Frequently Asked Questions - ZenEye ASUS

How do I reset the ZenEye camera to factory settings?
Press and hold the reset button on the camera for about 10 seconds until the LED indicator flashes. The camera will restart and restore default settings.
Can I view the camera feed remotely?
Yes, you can access the live feed from anywhere using the ASUS ZenEye app on your smartphone or tablet, provided the camera is connected to the internet.
What is the video resolution of the ZenEye camera?
The camera records in 1080p Full HD (1920x1080 pixels) for clear and detailed video.
Does the camera support night vision?
Yes, it features infrared night vision that allows clear visibility in complete darkness up to 10 meters.
How do I connect the camera to Wi-Fi?
Use the ASUS ZenEye app to scan the QR code on the camera. Follow the in-app instructions to select your Wi-Fi network and enter the password.
Is two-way audio available?
Yes, the camera has a built-in microphone and speaker for two-way communication. You can listen and speak through the app.
What storage options does the camera support?
You can insert a MicroSD card up to 128 GB for local recording, or subscribe to cloud storage for remote access and backup.
How do I mount the camera?
The camera comes with a desk stand for tabletop placement and a wall mount kit. For wall mounting, secure the bracket with screws and attach the camera.
Can I share camera access with family members?
Yes, through the ASUS ZenEye app, you can invite other users by email. They will need to create an account and accept the invitation.
What should I do if the camera is not detected by the app?
First, ensure the camera is powered on and the LED is solid (not blinking). Check that your phone is connected to the same Wi-Fi network. If issues persist, reset the camera and try again.

User questions about ZenEye ASUS

0 question about this device. Answer the ones you know or ask your own.

Ask a new question about this device

Your email remains private: it is only used to notify you if someone answers your question.

No questions yet. Be the first to ask one.

Download the instructions for your Surveillance Camera in PDF format for free! Find your manual ZenEye - ASUS and take your electronic device back in hand. On this page are published all the documents necessary for the use of your device. ZenEye by ASUS.

USER MANUAL ZenEye ASUS

ASUS ZenEye

Quick Start Guide

Table of contents Table of contents

English....3

Dansk....12

Suomi....21

Norsk....30

Svenska 39

What's in the box What's in the box

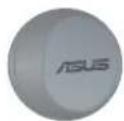
Camera
White USB flash drive with a circular lens and visible grille (no text or symbols)

Camera

ASUS ZenEye - What's in the box What's in the box - 2
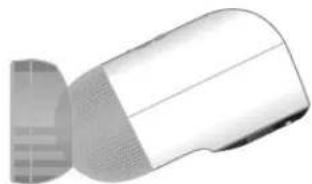
Magnetic stand

ASUS ZenEye - What's in the box What's in the box - 3
Camera charging cable

ASUS ZenEye - What's in the box What's in the box - 4
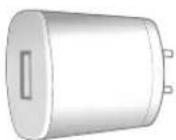
Camera power adapter

Mounting accessories
ASUS ZenEye - What's in the box What's in the box - 5
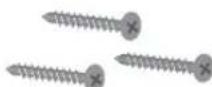
Round Head Drywall Screws (Φ3mm)

ASUS ZenEye - What's in the box What's in the box - 6
M.6 Plastic Anchors (Φ3mm)

ASUS ZenEye - What's in the box What's in the box - 7
CloudHub

ASUS ZenEye - What's in the box What's in the box - 8
CloudHub

ASUS ZenEye - What's in the box What's in the box - 9
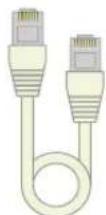
Ethernet cable

ASUS ZenEye - What's in the box What's in the box - 10
CloudHub power adapter

Optional (depends on package type)
ASUS ZenEye - What's in the box What's in the box - 11
Mount bracket

ASUS ZenEye - What's in the box What's in the box - 12
Round Head Drywall Screws (Φ3mm)

ASUS ZenEye - What's in the box What's in the box - 13
M.6 Plastic Anchors (Φ3mm)

LED and I/O LED and I/O
LED and I/O IR LEDs Status LED PIR motion sensor Camera lens Light sensor Microphone Threaded hole

Speaker Sync button Micro USB port Power supply LED

Sync button Camera LEDs Network LED Power LED

NOTE: When on, you can button on C deactivate i Siren Speaker Power button Reset button Power (DCIN) port Ethernet port USB ports for storage

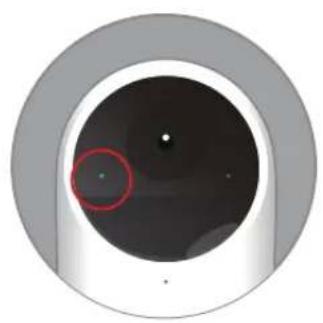
Camera LED Indication
Circular device with a red circle highlighting a small green dot, no visible text or symbols

ASUS ZenEye - What's in the box What's in the box - 19

Power off / Charging mode

ASUS ZenEye - What's in the box What's in the box - 20

Working normally (DC mode) / Pairing successfully

ASUS ZenEye - What's in the box What's in the box - 21

Working normally (Battery mode)

ASUS ZenEye - What's in the box What's in the box - 22

Pairing or connecting

SYNC USB

ASUS ZenEye - What's in the box What's in the box - 24

Camera is fully charged

ASUS ZenEye - What's in the box What's in the box - 25

Camera is charging

ASUS ZenEye - What's in the box What's in the box - 26

Reset Camera

ASUS ZenEye - What's in the box What's in the box - 27

Low battery level

ASUS ZenEye - What's in the box What's in the box - 28

Upgrading firmware

ASUS ZenEye - What's in the box What's in the box - 29

System abnormal

ASUS ZenEye - What's in the box What's in the box - 30

Solid light

ASUS ZenEye - What's in the box What's in the box - 31

Slow blinking light

ASUS ZenEye - What's in the box What's in the box - 32

Rapid blinking light

CloudHub LED Indication

ASUS ZenEye - CloudHub LED Indication - 1

ASUS ZenEye - CloudHub LED Indication - 2

Power off

ASUS ZenEye - CloudHub LED Indication - 3

Working normally

ASUS ZenEye - CloudHub LED Indication - 4

Camera has not been initialized (Not yet bound)

ASUS ZenEye - CloudHub LED Indication - 5

Upgrading firmware

ASUS ZenEye - CloudHub LED Indication - 6

System abnormal

ASUS ZenEye - CloudHub LED Indication - 7

ASUS ZenEye - CloudHub LED Indication - 8

The network cable is unplugged

ASUS ZenEye - CloudHub LED Indication - 9

Connected to the Wi-Fi router and ASUS cloud server

ASUS ZenEye - CloudHub LED Indication - 10

CloudHub has been disconnected from the ASUS cloud server

ASUS ZenEye - CloudHub LED Indication - 11

CloudHub is not connected to the Internet

ASUS ZenEye - CloudHub LED Indication - 12

ASUS ZenEye - CloudHub LED Indication - 13

No Camera paired or Camera connection lost

ASUS ZenEye - CloudHub LED Indication - 14

Camera successfully connected

ASUS ZenEye - CloudHub LED Indication - 15

Camera is pairing to the CloudHub

ASUS ZenEye - CloudHub LED Indication - 16

Solid light

ASUS ZenEye - CloudHub LED Indication - 17

Slow blinking light

ASUS ZenEye - CloudHub LED Indication - 18

Rapid blinking light

Download APPs Download APPs

Apple App Store

Google Play

QR code image containing encoded data, no visible human-readable text

QR code image containing encoded data, no visible human-readable text

Requirements before setup

  1. Internet connection and Wi-Fi Router/AP
  2. iOS or Android mobile device

2.1 Your Apple device must be running iOS 10 or newer
2.2 Your Android device must be running Android 4.3 or newer

  1. Indoor power outlet
  2. 100-240v power supply
  3. An ASUS VIP account
  4. USB storage for local event recording (Optional)

  5. Drill with drill bits (X/Y" for 6.5mm anchor holes)

  6. Phillips head screwdriver

Operating environments

• Find an appropriate spot to mount the security camera.
- Make sure the Camera operates in environments with ambient temperatures between -20°C (-4°F) 45°C (113°F).

Before installation Before installation

  1. It's recommended that you mount the Camera higher than 7 feet (2.1m) from the floor and tilt it downwards at an angle of 20, which provides the best field of view.

Close-up of a mechanical component with a 20-degree angle indicator (no text or symbols on the part itself)

ASUS ZenEye - Before installation Before installation - 2
Best Performance

3D rendered mechanical component with curved surfaces and a flat blade (no text or symbols)

ASUS ZenEye - Before installation Before installation - 4
Poor Performance

Camera's field of view Sensor's detection field Blind spot 20° 1.5 meters 7 meters 2.1 meters 68° 110° 120°

  1. The PIR motion sensor helps save battery power by waking up the Camera only when it is triggered by a motion event. Enable the PIR Visual Assistant on the ZenEye App and make sure all the desired areas are covered on the screen.

PIP

NOTES:

  • PIR sensor integrated lens detects moving heat sources with multiple cone-type beams. To get the best detection performance, face the Camera towards the area where moving heat sources cross the beams.
  • You can adjust the camera's angle to avoid unnecessary motion detection.

Poor Performance Better Performance

Mounting and Installation Mounting and Installation

Area you care

Step 1:

Find a spot on the wall where you want to place your Camera.

Diagram of a mechanical component with highlighted parts and dotted lines indicating alignment (no text or symbols)

Step 2:

Place the bracket over the spot to mark where the holes will go. Drill holes that are not wider than the anchors.

Diagram showing a hammer striking a surface with two black dots and dotted lines, no text or symbols present.

Step 3:

Hammer the anchors into the holes.

Diagram of a mechanical assembly with screws and a tool, no text or symbols present

Step 4:

Align the holes in the bracket to the anchors, then insert and tighten the screws into the anchors.
3D illustration of a medical or laboratory device with a pipette inserted into a housing (no text or symbols visible)

Step 5:

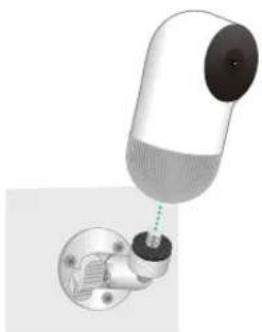
Tighten the Camera to the bracket.

Illustration of a robotic arm with rotating joints and motion arrows indicating rotation (no text or symbols)

Step 6:

Adjust the angle to cover your desired area, then fix the Camera using the hand screw.

Battery and Charging Battery and Charging

Charging your ZenEye camera:

  1. Connect the DC adapter to your Camera's Micro USB port with the charging cable, and then plug it into an indoor power outlet.
  2. The power supply LED on the rear of the Camera will start to blink green.
  3. Once your Camera's battery is fully charged, the LED turns into solid green.

Extreme Environment Protection:

  1. Charging your battery in an extreme climate may negatively impact battery's chemistry and capacity.
  2. When the environment temperature is between 0° C ( 32° F) and 45° C ( 113° F), the camera will hold its charge normally.

Charger Adapter

You must use the included power adapter and cable to charge your Camera.

FAQ

Go to the FAQ section on the App for help and relevant information.

Kamera

ASUS ZenEye - FAQ - 1
Magnetic stand

ASUS ZenEye - FAQ - 2

Download apps Download apps

Apple App Store

Google Play
QR code image containing encoded data, no visible human-readable text

QR code image containing encoded data, no visible human-readable text

ASUS ZenEye - FAQ - 5
God ydelse

3D rendered mechanical component with curved surfaces and a flat blade (no text or symbols)

ASUS ZenEye - FAQ - 7
Dårlig ydelse

Kameraets synsfelt Sensorens registreringsfelt Blind vinkel 1,5 meter 20° 7 meter 2,1 meter 68° 110° 120°

ASUS ZenEye - FAQ - 9

Dårlig ydelse

Trin 3:
Hamre rawplugsene i hullerne.

Illustration of a robotic arm with rotating joints and green motion arrows indicating rotation (no text or symbols)

Kamera

ASUS ZenEye - FAQ - 11
Magneettinen teline

ASUS ZenEye - FAQ - 12

Virta pois / Lataustila

QR code image containing encoded data, no visible human-readable text

QR code image containing encoded data, no visible human-readable text

ASUS ZenEye - FAQ - 15
Paras suorituskyky

3D rendered mechanical component with curved surfaces and a flat section (no text or symbols)

ASUS ZenEye - FAQ - 17
Heikko suorituskyky

Illustration of two people walking toward a striped field with a spotlight and directional arrows, no text or symbols present.

ASUS ZenEye - FAQ - 19

Heikko

suorituskyky

Vaihe 4:

Vaihe 2:

Vaihe 5:

Vaihe 3:

Vaihe 6:

Kamera
ASUS ZenEye - FAQ - 20
Magnetisk stativ

ASUS ZenEye - FAQ - 21
Kameraladekabel

ASUS ZenEye - FAQ - 22
Kamerastrømadapter

ASUS ZenEye - FAQ - 23

Last ned apper Last ned apper

Apple App Store

Google Play
QR code image containing encoded data, no visible human-readable text

QR code image containing encoded data, no visible human-readable text

Krav før oppsett

ASUS ZenEye - Krav før oppsett - 1
Best ytelse

3D rendered mechanical component with curved surfaces and a flat blade (no text or symbols)

ASUS ZenEye - Krav før oppsett - 3
Dårlig ytelse

Kameraets synsfelt Sensorens registreringsfelt Dødvinkel 20° 1.5 meter 7 meter 2.1 meter 68° 110° 120°

ASUS ZenEye - Krav før oppsett - 5

Dårlig ytelse

Trinn 2:

Trinn 3:

Hamre ankrene inn i hullene.

Diagram showing a screwdriver inserted into a circular component with a magnified view of the internal structure (no text or symbols present)

Trinn 4:

Trinn 5:

Trinn 6:

Kamera

ASUS ZenEye - Krav før oppsett - 7
Magnetiskt stativ

QR code image containing encoded data, no visible human-readable text

QR code image containing encoded data, no visible human-readable text

ASUS ZenEye - Krav før oppsett - 10
Bäst prestanda

3D rendered mechanical component with curved surfaces and a flat end (no text or symbols)

ASUS ZenEye - Krav før oppsett - 12
Dålig prestanda

Kamerans siktfält Sensors detekteringsfält Blind fläck 1,5 meter 2,1 meter 68° 7 meter 110° 120°

ASUS ZenEye - Krav før oppsett - 14

Dålig prestanda

Steg 4:

Steg 2:

Steg 5:

Steg 3:

Steg 6:

Manual assistant
Powered by Anthropic
Waiting for your message
Product information

Brand : ASUS

Model : ZenEye

Category : Surveillance Camera