
SNOT 20 A2 - Nose trimmer SILVERCREST - Free user manual and instructions
Find the device manual for free SNOT 20 A2 SILVERCREST in PDF.


| Product type | Nose trimmer |
| Brand | SilverCrest |
| Model | SNOT 20 A2 |
| Color | White / Silver |
| Material | Plastic housing, stainless steel blades |
| Dimensions (approx.) | 12 x 2.5 x 2.5 cm |
| Weight (including battery) | Approx. 50 g |
| Power source | 1 x AA battery (1.5V, not included) |
| Cutting system | Rotary blade with protective guard |
| Cutting head type | Single-sided oscillating blade |
| Water resistance | Not waterproof; wipe clean only |
| Cleaning method | Remove head and rinse with water, dry thoroughly |
| Safety lock | Not present; manual switch operation |
| Number of speeds | 1 fixed speed |
| Attachments included | Protective cap, cleaning brush |
| Battery type | AA (LR6) |
| Battery life | Approx. 60 minutes of continuous use |
| Usage | For nose and ear hair trimming |
| Certifications | CE, RoHS |
| Package contents | Trimmer, protective cap, cleaning brush, user manual |
Frequently Asked Questions - SNOT 20 A2 SILVERCREST
User questions about SNOT 20 A2 SILVERCREST
0 question about this device. Answer the ones you know or ask your own.
Ask a new question about this device
Download the instructions for your Nose trimmer in PDF format for free! Find your manual SNOT 20 A2 - SILVERCREST and take your electronic device back in hand. On this page are published all the documents necessary for the use of your device. SNOT 20 A2 by SILVERCREST.
USER MANUAL SNOT 20 A2 SILVERCREST
FACIAL HAIR TRIMMER SNOT 20 A2
GB CY
FACIAL HAIR TRIMMER
Operation and safety notes Translation of the original instructions
RS
MULTIFUNKCIONALNITRIMER
Uputstva o rukovanju i bezbednosti Prevod originalnog uputstva za upotrebu
BG
GB / CY Operation and safety notes Page 5
HR Upute za posluživanje i za Vašu sigurnost Stranica 28
List of pictograms used ......Page 6
Introduction Page 6
Intended use ......Page 7
Parts description......Page 7
Technical data Page 8
Scope of delivery......Page 8
Safety instructions......Page 9
Safety instructions for batteries / rechargeable batteries.Page 11
Before first use......Page 14
Inserting / replacing the battery......Page 14
Attaching/removing the attachment......Page 15
Operation......Page 16
Switch on/off......Page 16
Removing nose and ear hair......Page 17
Cutting eyebrows......Page 17
Shortening or shaping small beards and sideburns...Page 18
Cleaning, care and storage......Page 19
Troubleshooting......Page 21
Translation of the original declaration of conformity ......Page 23
Warranty Page 25
Warranty claim procedure ......Page 26
Service......Page 26
| List of pictograms used | |||
 | Direct current Battery +ry | ||
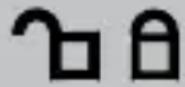 | Opened/ closed lock | ||
Facial hair trimmer SNOT 20 A2
- Introduction
We congratulate you on the purchase of your new product. You have chosen a high quality product. The instructions for use are part of the product. They contain important information concerning safety, use and disposal. Before using the product, please familiarise yourself with all of the safety information and instructions for use. Only use the product as described and for the specified applications. If you pass the product on to anyone else, please ensure that you also pass on all the documentation with it.
Intended use
This product is solely designed to remove human nose and ear hairs and also trim the eyebrow, sideburns, moustaches and small beards. This product is designed for private household use only. It must not be used in commercial areas. The manufacturer is not liable to damage caused by improper use.
Partsdescription
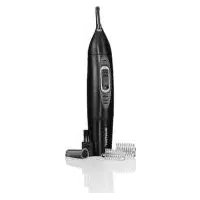
| 1 | Blade protector |
| 2 | Nose and ear hair trimmer attachment |
| 3 | Trimmer body |
| 4 | Protective cap (Eyebrow trimmer attachment) |
| 5 | Eyebrow trimmer attachment |
| 6 | Base |
| 7 | Cleaning brush |
| 8 | Dual comb attachment (3 mm/6 mm) |
| 9 | Beard contouring tool |
| 10 | Protective cap (Nose and ear hair trimmer attachment) |
| 11 | Blade (Nose and ear hair trimmer attachment) |
| 12 | Blade (Eyebrow trimmer attachment) |
| 13 | Blade (Beard contouring tool) |
| 14 | Battery compartment cap |
| 15 | Battery |
- Technical data
Battery: 1.5V battery (AA),

(LR6)
Degree of protection: IPX4 (splash-proof)
Emissions Sound pressure level: < 72 dB(A), K = 3 dB
- Scope of delivery
1 Facial hair trimmer
1 Nose and ear hair trimmer attachment
1 Eyebrow trimmer attachment
1 Beard contouring tool
1 Dual comb attachment (3 mm / 6 mm)
1 Base
1 Cleaning brush
1 Battery
1 Instructions for use
Safetyinstructions
KEEP ALL THE SAFETY ADVICE AND INSTRUCTIONS IN A SAFE PLACE FOR FUTURE REFERENCE!
■ CAUTION! This product is not a toy for children! Keep out of the reach of children. Children are not aware of the dangers associated with handling electrical products.
This product can be used by children aged from 8 years and above and persons with reduced physical, sensory or mental capabilities or lack of experience and knowledge if they have been given supervision or instruction concerning use of the product in a safe way and understand the
hazards involved. Children shall not play with the product. Cleaning and user maintenance shall not be made by children without supervision.
- Do not use the product if you notice any signs of damage, otherwise you may get hurt.
- Do not expose the product to high temperatures or moisture, otherwise the product may be damaged.
■ Prevent strong impact or stress on the product to avoid damages!
In the event of damage, repairs or other problems with the product, please contact an electrician.
WARNING!
Keep the product dry. Never immerse this product into water.

Safety instructions for batteries / rechargeable batteries
■ DANGER TO LIFE! Keep batteries / rechargeable batteries out of reach of children. If accidentally swallowed seek immediate medical attention.
D ANGER OF EXPLOSION!
Never recharge non-rechargeable batteries. Do not short-circuit batteries/rechargeable batteries and/or open them. Overheating, fire or bursting can be the result.
■ Never throw batteries / rechargeable batteries into fire or water.
Do not exert mechanical loads to batteries/rechargeable batteries.
Risk of leakage of batteries / rechargeable batteries
- Avoid extreme environmental conditions and temperatures, which could affect batteries / rechargeable batteries, e.g. radiators / direct sunlight.
If batteries / rechargeable batteries have leaked, avoid contact with skin, eyes and mucous membranes with the chemicals! Flush immediately the affected areas with fresh water and seek medical attention!
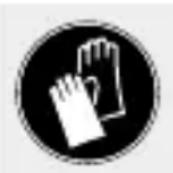
WEAR PROTECTIVE
GLOVES! Leaked or damaged batteries / rechargeable batteries can cause burns on contact with the skin. Wear suitable protective gloves at all times if such an event occurs.
In the event of a leakage of batteries / rechargeable batteries, immediately remove them from the product to prevent damage.
Only use the same type of batteries / rechargeable batteries. Do not mix used and new batteries / rechargeable batteries.
■ Remove batteries / rechargeable batteries if the product will not be used for a longer period.
Risk of damage of the product
Only use the specified type of battery/rechargeable battery!
- Insert batteries / rechargeable batteries according to polarity marks (+) and (-) on the battery / rechargeable battery and the product.
- Clean the contacts on the battery / rechargeable battery and in the battery compartment before inserting!
■ Remove exhausted batteries/rechargeable batteries from the product immediately.
- Before first use
Note: Remove all packaging materials from the product.
- Inserting / replacing the battery (see Fig. E + F)
☐ Hold the trimmer body 3 firmly and vertically and turn the battery compartment cap 14 clockwise until the ON mark (☐) on the battery compartment cap 14 is aligned with the inverted triangle mark (▽) (see Fig. E) on the bottom of the trimmer body 3.
☐ Then remove the battery compartment cap 14 from the trimmer body 3.
☐ Remove the used battery 15, if present.
☐ Insert a new battery type AA (LR6) in the trimmer body 3.
Indication: Pay attention to the right polarity. This is indicated on the back side of the trimmer body 3.
Put the battery compartment cap 14 back on the trimmer body 3.
☐ Hold the trimmer body 3 firmly and vertically and turn the battery compartment cap 14 counter-clockwise until the ON mark (☐) on the battery compartment cap 14 is aligned with the OFF mark (☐) on the back side of the trimmer body 3. The product is locked and in the position "OFF".
- Attaching/removing the attachment (see Fig. G)
☐ Switch off the product. Hold the trimmer body firmly and vertically.
☐ Remove the protective cap (Nose and ear hair trimmer attachment) 10 by pulling it away from the trimmer body 3, if currently attaching Nose and ear hair trimmer attachment 2.
Turn the attachment 2, 5, 9 counter-clockwise to release and remove.
Turn the attachment 2, 5, 9 clockwise to fasten.
Operation
Note: Do not use the product if the blade 11, 12, 13 is deformed or damaged.
- Switch on/off
Switch on:
☐ Hold the trimmer body 3 firmly and vertically. Turn the battery compartment cap 14 counter-clockwise until the ON mark (☐) on the battery compartment cap 14 is aligned with the ON mark (☐) on the bottom of the trimmer body 3. The product is locked and in the position "ON".
Switch off:
☐ Hold the trimmer body 3 firmly and vertically. Turn the battery compartment cap 14 clockwise until the ON mark (☐) on the battery compartment cap 14 is aligned with the OFF mark (○) on the bottom of the trimmer body 3. The product is locked and in the position "OFF".
- Removing nose and ear hair
Place the nose and ear hair trimmer attachment 2 onto the product as described in the chapter "Attaching / removing the attachment". Switch the product on as described in the chapter "Switch on / off".
■ CAUTION! DANGER OF INJURY! Be careful not to insert the product too deep into nose or ears. Carefully insert only the tip of the blade 11 into the front area of your nostril or ear. Remove the nose or ear hair with small circular movements.
After using switch the product off as described in the chapter "Switch on/off".
Cuttingeyebrows
Place the eyebrow trimmer attachment 5 onto the product as described in the chapter "Attaching / removing the attachment".
☐ Take off the protective cap 4.
☐ To achieve the desired length (3 mm / 6 mm), set the dual comb attachment 8 on the blade 12 with the desired length (see Fig. C). Marking of the length is marked on the dual comb attachment 8. Ensure that the dual comb attachment 8 fastens audibly and sits tightly.
Note: Desired trim length can only be achieved of the product is held perpendicularly to the skin's surface.
☐ Switch the product on as described in the chapter "Switch on/off".
☐ Position the product on the area at a right angle and slowly pull in / against the direction of hair growth. Repeat this step until satisfied trim is attained.
After using switch the product off as described in the chapter "Switch on/off".
☐ To trim hair just above the skin surface, remove the dual comb attachment 8 and guide the blade 12 directly over the skin in the desired area.
Note: To trim only individual hairs, adjust the angle of the blade 12 and guide this against the individual hairs.
- Shortening or shaping small beards and sideburns
Place the beard contouring tool 9 onto the product as described in the chapter "Attaching / removing the attachment".
☐ Switch the product on as described in the chapter "Switch on/off".
☐ Position the product on the area at a right angle and slowly pull in / against the direction of hair growth. Repeat this step until satisfied trim is attained.
After using switch the product off as described in the chapter "Switch on/off".
- Cleaning, care and storage
Note: Always switch off the product before cleaning it.
- Do not use any corrosive or abrasive cleaning agents. These might damage the surface of the product.
| For trimmer body 3: | For nose and ear hair trimmer attachment 2: |
| Remove any attachment 2, 5, 9. Then, clean with a dry cloth. | Remove the nose and ear hair trimmer attachment 2 (see Fig. G). Clean the nose and ear hair trimmer attachment 2 carefully under running water. Then fully dry the nose and ear hair trimmer attachment 2 before using the product. |
| For eyebrow trimmer attachment 5: | For beard contouring tool 9: |
| Take off the dual comb attachment 8, if present and remove the eyebrow trimmer attachment 5 (see Fig. H). Clean the blade 12 carefully under running water. Then fully dry the blade 12 before using the product. | Remove the beard contouring tool 9 (see Fig. I). Clean the blade 13 carefully under running water. Then fully dry the blade 13 before using the product. |
| For base 6: | For protective cap 4, 10: |
| Clean with a dry cloth. | Clean the protective cap 4, 10 carefully under running water. Then fully dry the protective cap 4, 10 before putting on the product. |
Attention: The product is only protected against splash water. Never immerse it in water. Otherwise, irreparable damage may result.
☐ If there are still hairs in the blade 11, 12, 13 clean it with the cleaning brush 7.
☐ To store the product, always put the product and all accessories on the base 6 (see Fig. A).
□ Keep the product in a cool, dry location.
●Troubleshooting
| Fault Cause Solution | ||
| The blades 11, 12, 13 moves slowly. | The battery 15 is empty. | Replace the battery 15 (see Fig. E + F). |
| The product will not turn on. | The battery 15 is empty. | Replace the battery 15 (see Fig. E + F). |
| The blades 11, 12, 13 moves slowly. | The blades 11, 12, 13 are blocked and should be cleaned. | Clean the blades 11, 12, 13 carefully under running water. Use the included cleaning brush 7, if you notice that some hairs are blocking the blade 11, 12, 13. |
●Disposal
The packaging is made entirely of recyclable materials, which you may dispose of at local recycling facilities.
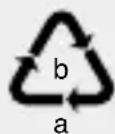
Observe the marking of the packaging materials for waste separation, which are marked with abbreviations (a) and numbers (b) with following meaning: 1–7: plastics / 20–22: paper and fibreboard / 80–98: composite materials.

The product and packaging materials are recyclable, dispose of it separately for better waste treatment. The Triman logo is valid in France only.

Contact your local refuse disposal authority for more details of how to dispose of your worn-out product.
To help protect the environment, please dispose of the product properly when it has reached the end of its useful life and not in the household waste. Information on collection points and their opening hours can be obtained from your local authority.
Faulty or used batteries / rechargeable batteries must be recycled in accordance with Directive 2006/66/EC and its amendments. Please return the batteries / rechargeable batteries and / or the product to the available collection points.
Environmental damage through incorrect disposal of the batteries / rechargeable batteries!
Batteries / rechargeable batteries may not be disposed of with the usual domestic waste. They may contain toxic heavy metals and are subject to hazardous waste treatment rules and regulations. The chemical symbols for heavy metals are as follows: Cd = cadmium, Hg = mercury, Pb = lead. That is why you should dispose of used batteries / rechargeable batteries at a local collection point.
• Translation of the original declaration of conformity
We, OWIM GmbH & Co. KG Stiftsbergstraße 1, DE-74167 Neckarsulm, GERMANY, hereby declare under our sole responsibility the product: Facial hair trimmer SNOT 20 A2 model no.: HG05458, Version: 06 / 2019, to which this declaration refers, complies with Directives 2006/42/EC, 2014/30/EU und 2011/65/EU.
Harmonised standard applied: EN 60335-1:2012/A11:2014 EN 60335-2-8:2015/A1:2016 EN 62233:2008
EN ISO 12100:2010
EN 50581:2012
EN 55014-1:2017
EN 55014-2:2015
Serial number: IAN 321952_1901
Tobias Koenig
Department Manager
The declaration of conformity is also available at:
www.owim.com
The object of the declaration described above satisfies the provisions of Directive 2011/65/EU of the European Parliament and the Council of 8 June 2011 on limiting the use of certain harmful substances in electrical and electronic appliances.
- Warranty
The product has been manufactured to strict quality guidelines and meticulously examined before delivery. In the event of product defects you have legal rights against the retailer of this product. Your legal rights are not limited in any way by our warranty detailed below.
The warranty for this product is 3 years from the date of purchase. Should this product show any fault in materials or manufacture within 3 years from the date of purchase, we will repair or replace it – at our choice – free of charge to you.
The warranty period begins on the date of purchase. Please keep the original sales receipt in a safe location. This document is required as your proof of purchase. This warranty becomes void if the product has been damaged, or used or maintained improperly.
The warranty applies to defects in material or manufacture. This warranty does not cover product parts subject to normal wear, thus possibly considered consumables (e.g. batteries) or for damage to fragile parts, e.g. switches, rechargeable batteries or glass parts.
- Warranty claim procedure
To ensure quick processing of your case, please observe the following instructions:
Please have the till receipt and the item number (e.g. IAN 123456_7890) available as proof of purchase.
You will find the item number on the type plate, an engraving on the front page of the instructions (bottom left), or as a sticker on the rear or bottom of the appliance.
If functional or other defects occur, please contact the service department listed either by telephone or by e-mail. You can return a defective product to us free of charge to the service address that will be provided to you. Ensure that you enclose the proof of purchase (till receipt) and information about what the defect is and when it occurred.
Service
Service Great Britain
Tel.: 0800 404 7657
E-Mail: owim@lidl.co.uk
CY ServiceCyprus
Tel.:80094409
E-Mail: owim@lidl.com.cy
CEIPX4
Serbian mark of conformity
OWIM GmbH & Co. KG
Stiftsbergstraße 1
DE-74167 Neckarsulm
GERMANY
Model-No.: HG05458
Version: 06/2019
Last Information Update · Stanje informacija
Stanje informacija · Versiunea informațiilor


- FACIAL HAIR TRIMMER SNOT 20 A2
- FACIAL HAIR TRIMMER
- MULTIFUNKCIONALNITRIMER
- LIST OF PICTOGRAMS USED ......PAGE 6
- INTRODUCTION PAGE 6
- SAFETY INSTRUCTIONS......PAGE 9
- BEFORE FIRST USE......PAGE 14
- OPERATION......PAGE 16
- CLEANING, CARE AND STORAGE......PAGE 19
- TROUBLESHOOTING......PAGE 21
- TRANSLATION OF THE ORIGINAL DECLARATION OF CONFORMITY ......PAGE 23
- WARRANTY PAGE 25
- INTRODUCTION
- INTENDED USE
- PARTSDESCRIPTION
- TECHNICAL DATA
- SCOPE OF DELIVERY
- SAFETYINSTRUCTIONS
- KEEP ALL THE SAFETY ADVICE AND INSTRUCTIONS IN A SAFE PLACE FOR FUTURE REFERENCE
- WARNING
- SAFETY INSTRUCTIONS FOR BATTERIES / RECHARGEABLE BATTERIES
- D ANGER OF EXPLOSION
- RISK OF LEAKAGE OF BATTERIES / RECHARGEABLE BATTERIES
- WEAR PROTECTIVE
- RISK OF DAMAGE OF THE PRODUCT
- BEFORE FIRST USE
- INSERTING / REPLACING THE BATTERY (SEE FIG. E + F)
- ATTACHING/REMOVING THE ATTACHMENT (SEE FIG. G)
- OPERATION
- SWITCH ON/OFF
- SWITCH ON
- SWITCH OFF
- REMOVING NOSE AND EAR HAIR
- CUTTINGEYEBROWS
- CLEANING, CARE AND STORAGE
- ●TROUBLESHOOTING
- ●DISPOSAL
- ENVIRONMENTAL DAMAGE THROUGH INCORRECT DISPOSAL OF THE BATTERIES / RECHARGEABLE BATTERIES
- TRANSLATION OF THE ORIGINAL DECLARATION OF CONFORMITY
- WARRANTY
- WARRANTY CLAIM PROCEDURE
- SERVICE
- SERVICE GREAT BRITAIN
- OWIM GMBH & CO. KG
Brand : SILVERCREST
Model : SNOT 20 A2
Category : Nose trimmer