
RX-D20 - Hi-Fi System PANASONIC - Free user manual and instructions
Find the device manual for free RX-D20 PANASONIC in PDF.
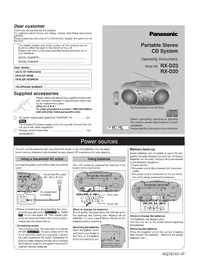


| Product Type | Hi-Fi System |
| Brand | Panasonic |
| Model | RX-D20 |
| Dimensions (W x H x D) | Approximately 200 x 130 x 280 mm |
| Weight | Approximately 3.5 kg |
| Power Supply | AC 120V/220V, 50/60 Hz |
| Power Consumption | 45 W (standby < 1 W) |
| Supported Media | CD, CD-R/RW, USB, FM/AM radio, Bluetooth |
| Output Power | 2 x 20 W RMS (6 ohms) |
| Inputs | USB Type A, AUX (3.5 mm), FM antenna, AM loop antenna |
| Outputs | Headphone (3.5 mm), speaker terminals |
| Speaker System | Full-range, 2-way bookshelf speakers (included) |
| Sound Features | Bass Boost, EQ presets (Rock, Jazz, Pop, Classic, Flat) |
| Radio Tuner | FM / AM, 30 presets, RDS |
| Bluetooth Version | Bluetooth 4.2, A2DP, AVRCP |
| Clock/Timer | Built-in clock with sleep timer and alarm |
| Display | LCD dot matrix with white backlight |
| Maintenance | Clean with soft dry cloth; avoid solvents |
| Safety | Do not expose to water, heat sources, or strong magnetic fields |
| Spare Parts Availability | Remote control, antenna, power cord available via authorized service |
| Repairability | Modular design; refer to service manual for professional repair |
Frequently Asked Questions - RX-D20 PANASONIC
User questions about RX-D20 PANASONIC
0 question about this device. Answer the ones you know or ask your own.
Ask a new question about this device
Download the instructions for your Hi-Fi System in PDF format for free! Find your manual RX-D20 - PANASONIC and take your electronic device back in hand. On this page are published all the documents necessary for the use of your device. RX-D20 by PANASONIC.
USER MANUAL RX-D20 PANASONIC
Thank you for purchasing this product.
For optimum performance and safety, please read these instructions carefully.
These operating instructions fundamentally explain the operation of RX-D23.
The model number and serial number of this product can be found on either the back or the bottom of the unit.
Please note them in the space provided below and keep for future reference.
MODEL NUMBER
SERIAL NUMBER
User memo:
DATE OF PURCHASE
DEALER NAME
DEALER ADDRESS
TELEPHONE NUMBER
Supplied accessories

Please check and identify the supplied accessories. Use numbers indicated in parentheses when asking for replacement parts.
(Only for U.S.A.)
To order accessories contact 1-800-332-5368 or web site (http://www.panasonic.com).
☐ AC power supply cord (polarized) (RJA0065-1D) .... 1pc.
Note
The included AC power supply cord is for use with this unit only. Do not use it with other equipment.
☐ Remote control transmitter .... 1pc.
(EUR648257)
Panasonic
Portable Stereo CD System
Operating Instructions
Model No.
RX-D23
RX-D20

The illustrations show RX-D23.


Before connecting, operating or adjusting this product, please read these instructions completely.
Please keep this manual for future reference.
Power sources
The unit can be powered with household AC power or dry cell batteries (not included). Insert memory batteries (not included) to save stored CD programs and radio stations.
Using a household AC outlet
Connect the power cord firmly to the unit and the outlet.

- Before connecting or disconnecting the cord, stop the tape and switch [SELECTOR] to "TAPE/CFF" to turn the power off. The memory batteries are worn out faster if the cord is disconnected with the power still on.
- Conserving power
The unit consumes 1W even when it is turned off with [SELECTOR]. To save power when the unit is not to be used for a long time, unplug it from the household AC outlet. Remember to reset the radio stations and any other memory items before using the unit again if you haven't inserted memory batteries.
Using batteries
The unit cannot be powered by batteries if the power cord is connected.

When to change the batteries
Sound quality and operations are affected when the batteries are running low. Replace all six batteries. It is also a good idea to replace all the batteries before recording.
Removing the batteries Open the battery cover and insert your finger in the hole on the bottom of the unit and push out.

Memory back-up
Insert batteries (not included) to save CD programs and radio stations you have set. If memory batteries are not used, memory items are erased in the following situations:
• Power failures, • The power cord is disconnected from the power outlet. - The power cord is connected to the unit while the unit is being powered by batteries.

When to change the batteries
The batteries last about a year.
Connect the unit to AC power before replacing the batteries.
Removing the batteries
Press the negative end of the number 4 battery and remove the batteries. (Remove the power batteries first.)
Controls
Main unit:

Note: These speakers do not have magnetic shielding. Do not place them near televisions, personal computers or other devices easily influenced by magnetism. Press to boost the bass sound. Press again to turn off.
XBS button (XBS)
Remote control:
The functions of the buttons without descriptions are the same as on the main unit.

Concerning the remote control
Battery installation
Insert the batteries (not included) observing the correct polarities (⊕,⊖).
R6, AA, UM-3

Correct method of use

Operation notes
- Do not place obstacles between the remote control signal sensor and the remote control unit.
- Do not expose the remote control signal sensor to direct sunlight or to the bright light of fluorescent light. • Take care to keep the remote control signal sensor and end of the remote control unit free from dust.
To prevent damage
- Never place heavy items on it.
- Do not disassemble or reconstruct it.
- Do not spill water or other liquids into it.
Listening to radio broadcasts
Normal tuning Preset tuning

1 Switch [SELECT ONER". (Power comes on.)
2 Press [BAND] to select "FM" or "AM".
3 (Omit this step if using the remote control) If "PCM" on the display, press [TUNE MODE] to clear it off.

4 Press [-/l◄◄] or [►►I/+ ] to tune to the desired station. The frequency changes one step each time a button is pressed.

Automatic tuning
Lights when an FM stereo broadcast is being received.
Keep [-/◄◄] or [►►I/+] depressed and release when the frequency display starts to change. A station with good reception is automatically selected and the process stops. To stop automatic tuning, press [-/◄◄] or [►►I/+] again.
Note
Automatic tuning may stop on a frequency where there is no station if there is interference. Press [-/◄◄] and [►►I/+] to tune if this occurs.
5 Adjust the volume.
To use auto scan
You can search for a station by listening to all tuned-in stations for 8 seconds each.
Preparation: Switch [SELECTOR] to "TUNER".
- Press [BAND] to select "FM" or "AM".
- Press [AUTO SCAN].
Auto scan starts.

- Press [AUTO SCAN] when you find the desired station.
Auto scan ends when it reaches the original frequency again.
To stop during the process, press [AUTO SCAN].
To improve reception
FM: Extend the whip antenna and adjust its direction.
AM: Adjust the orientation of the unit.
If noise is excessive in FM stereo mode, press [FM MODE]. ("MONO" lights up.)

Sound will be produced in monaural, but this also reduces noise. Press the button again to cancel. ("MONO" goes out.)
To receive FM broadcasts allocated in 0.1 MHz steps
(Only from the main unit)
First press [BAND] to select "AM". Now, press and hold [BAND]. The display changes in a few seconds to show the current lowest FM frequency. Continue to hold down the button.
The minimum frequency changes and the step is changed at the same time. Changing the step erases all preset stations.
Repeat the above to change the step back.
Preset the stations (12 FM and 12 AM) to make tuning simpler.

How to preset
1 Tune to the desired station. Do steps 1–4 on the left.
2 Press [MEMORY].
3 While "PG" and the frequency are flashing, press [MEMORY].
4 While "PGM" and the preset channel are flashing, press [-/◄◄] or [►►I/+] to select the desired channel. (Remote control: [V] or [∧])
5 Press [MEMORY]. (This completes presetting.)
6 Repeat steps 1–5 to preset other stations.
Note
If "PGM" goes off during presetting, return to step 2.
To listen to preset channels
1 Press [BAND] to select "FM" or "AM".
2 (Omit this step if using the remote control) Press [TUNE MODE] to display "PGM".
3 Press [-/◄◄] or [►►I/+] to select the desired channel (1–12). (Remote control: [V] or [∧])

Preset channel
To use preset scan
You can search for a station by listening to all preset channels for 8 seconds each.
- Do steps 1 to 2 above.
For remote control, replace [-A] or [▶▶I/+] described below with [V] or [A] .
- Press and hold [-I◄◄] or [►►I/+ ] until "PS" appears on the display.

- Press [-I◄◄] or [►►I/+] when you find the desired channel.
Preset scan ends after searching through each preset channel once.
To stop during the process, press [-I◄◄] or [►►I/+].
Listening to CDs
Normal play Program play
1 Switch [SELECTOR] to "CD". (Power comes on.)
2 Push [△ CD OPEN/CLOSE] to open the CD lid and insert the CD.
Label must face upward.

3 Push [▲ CD OPEN/CLOSE] to close the CD lid.

4 Press [▶/II] to start play. Play starts from the first track and continues to the last track.

5 Adjust the volume.
To stop play Press [■].
| To pause | Press [▶/■] during playback.To resume, press [▶/■]. |
| To search forward/backward | Hold down [−/I◀◀] (backward) or [▶▶/+] (forward) during playback or when paused. |
| To skip forward/backward | Press [−/I◀◀] (backward) or [▶▶/+] (forward) during playback or when paused. |
"NO DISC" is displayed if there is no disc in the unit.
Note
- If interference occurs to radios or televisions, place the unit as far as possible from this equipment.
- Do not press [▲ CD OPEN/CLOSE] during play, pause or immediately after you inserted the CD and closed the CD lid. CD may be scratched.
This unit can play CD-DA (digital audio) format audio CD-R that has been finalized (a process that enables CD-R players to play audio CD-R) upon completion of recording. It may not be able to play some CD-R due to the condition of the recording. It cannot play CD-RW.
You can program up to 24 tracks.

Ensure CD is stopped before programming.
1 Press [-/l◄◄] or [►►l/+] to select the desired track.

2 Press [MEMORY]. The track is programmed.

3 Repeat steps 1 and 2 until you have programmed all the tracks you want.

4 Press [▶/II]. Play starts in the programmed order.

To stop play
Press [■].
"P" is displayed indicating that the program is still active.
Press [■] again and "CLr" is displayed; the program is cleared, and the normal play mode is restored.
To check program contents
Press [-/I◄◄] or [►►I/+] when "P" is displayed.
Display
"——:——": Program equals, or exceeds, 100 minutes but programming and play are still possible.
"FULL": 24 tracks have already been programmed. The program is full.
CD play modes
You can repeat one track (1); all tracks () or stay the tracks in random order (RANDOM).
Press [CD PLAY MODE] before or during playback to select the desired mode.

These modes remain active until canceled.
You can use repeat mode with program play.
Note
Random and program play cannot be done at the same time.
Listening to tapes
This unit is suitable for playing normal tapes, but high and metal position tapes will not be played to their full potential.

1 Switch [SELECTURE/OFF ".
2 Press [☐/△ STOP/EJECT] to open the tape lid and load the tape. Close the tape lid by hand.
Exposed tape facing upward
Side to be played facing you
![PANASONIC RX-D20 - Press [☐/△ STOP/EJECT] to open the tape lid and load the tape. Close the tape lid by hand. - 1](/content/2026/06/1337649/images/4df90fc84b4d5017e3ef92198e5c555c5068b5e9a6dfaa6e97bddf2ab0bef451.jpg)
3 Press [◀ PLAY] to start play. Power comes on and play starts.
![PANASONIC RX-D20 - Press [◀ PLAY] to start play. Power comes on and play starts. - 1](/content/2026/06/1337649/images/edd87e77e2a4ecb3270b0ea49d03cac127d52e6d28b4ab494365935b15dccb53.jpg)
4 Adjust the volume.
To stop play
Press [■/▲ STOP/EJECT]. (Power is switched off.)
| To pause | Press [II PAUSE] during playback.To resume, press [II PAUSE]. |
| To rewind/fast-forward | Press [▶▶ REW/REV] (to rewind) or [◀◀ FF/CUE] (to fast-forward) in the stop mode. |
| To find a particular spot | Press [▶▶ REW/REV] (to search backward) or [◀◀ FF/CUE] (to search forward) during playback.Play is resumed when the button is released. |
Note
- The unit's power is on in the pause mode. Stop tape to turn the unit off by pressing [■/▲ STOP/EJECT] when leaving the unit.
- Do not press [◀ PLAY] when rewinding or fast-forwarding, as this may jam the tape.
Be sure to press [■/▲ STOP/EJECT] before the next operation.
- Tapes exceeding 100 minutes are thin and can break or get caught in the mechanism.
- Tape slack can get caught up in the mechanism and should be taken up before the tape is played.
- Endless tapes can get caught up in the deck's moving parts if used incorrectly.
Full auto-stop
The automatic stop system will release the buttons when the tape reaches the end during play, recording, fast forwarding or rewinding.
Recording
You can record radio broadcasts or CDs. Before recording
- This unit is suitable for recording normal tapes, but it cannot record onto high and metal position tapes to their full potential and prior recordings will not be erased correctly. • The recording level is set automatically. • Take up the leader tape before proceeding.

Leader tape (Recording cannot be made.)

1 Press [■/▲ STOP/EJECT] to open the tape lid and load the tape.
Close the tape lid by hand.
Side to be recorded facing you
![PANASONIC RX-D20 - Press [■/▲ STOP/EJECT] to open the tape lid and load the tape. - 1](/content/2026/06/1337649/images/55519b2449968860efd47a000a6a2b10a08ef896560a7a3fe9130cf0fcc7784a.jpg)
2 Select the source to be recorded. When recording radio broadcasts
Tune in the station.
(Do steps 1–4 of "Normal tuning" on page 3.)
When recording CDs
Insert the CD to be recorded.
(Do steps 1–3 of "Normal play" on page 4.)
If you want to record programmed tracks, program desired tracks before proceeding to step 3.
3 Press [●] REstart recording.
[◀ PLAY] is also depressed with [● REC]. Recording starts (one side only).
The CD also starts playing if in CD mode.
To stop recording
Press [■/▲ STOP/EJECT]. (The CD does not stop.)
To stop recording temporarily
Press [III PAUSE]. (The CD does not stop.)
Press once again to resume recording.
To record on the other side of the tape
Turn the tape over and press [●] REC.
If the CD finishes before the tape
Recording continues. Press [■/▲ STOP/EJECT] to stop it.
If the tape finishes before the CD
The CD continues playing. Press [■] to stop it.
Note
Noise may be recorded if this unit is near a TV. Keep the units at least 1.5 meters apart.
Erasure prevention
Use a screwdriver or similar object to break out the tab.
Side A

Tab for Side B
Tab for Side A
To re-record on a protected cassette
Cover the hole with adhesive tape.

Adhesive tape
To erase a tape
- Set [SELECTOR] to "TAPE/OFF"
- Insert the tape with the side to be erased facing towards you and the exposed tape facing up.
- Press [● REC]
[◀ PLAY] is depressed at the same time.
Reference
Changes to volume and sound quality do not affect recording.
To prevent interruptions to recording, supply AC power to the unit or replace the batteries.
Maintenance
Cleaning inside the deck
Clean the heads regularly to assure good quality playback and recording. Use a cleaning tape (not included).
Care of the CD lens
Clean the lens regularly to prevent malfunctions.
Use a blower to remove dust and a cotton swab
if it is extremely dirty.
Recommended product:
Lens cleaner kit (part no. SZZP1038C).
Lens
Product Service
- Damage requiring service —The unit should be serviced by qualified service personnel if:
(a) The AC power supply cord or AC adaptor has been damaged; or (b) Objects or liquids have gotten into the unit; or (c) The unit has been exposed to rain; or (d) The unit does not operate normally or exhibits a marked change in performance; or (e) The unit has been dropped or the cabinet damaged.
- Servicing—Do not attempt to service the unit beyond that described in these operating instructions. Refer all other servicing to authorized servicing personnel.
- Replacement parts—When parts need replacing ensure the servicer uses parts specified by the manufacturer or parts that have the same characteristics as the original parts. Unauthorized substitutes may result in fire, electric shock, or other hazards.
- Safety check—After repairs or service, ask the servicer to perform safety checks to confirm that the unit is in proper working condition.
Product information
For product information or assistance with product operation:
In the U.S.A., contact the Panasonic Customer Call Center at 1-800-211-7262, or e-mail consumerproducts@panasonic.com, or web site (http://www.panasonic.com).
For assistance in the continental U.S.A. in obtaining repairs please ship the product to:
Panasonic Services Company - Customer Servicenter Suite B 4900 George McVay Drive
McAllen, TX 78503
In Puerto Rico contact the Panasonic Sales Company.
Tel.(787) 750-4300 Fax.(787) 768-2910
When shipping the unit carefully pack and send it prepaid, adequately insured and preferably in the original carton. Include a letter detailing the complaint and provide a day time phone number where you can be reached.
IF REPAIR IS NEEDED DURING THE WARRANTY PERIOD THE PURCHASER WILL BE REQUIRED TO FURNISH A SALES RECEIPT/PROOF OF PURCHASE INDICATING DATE OF PURCHASE, AMOUNT PAID AND PLACE OF PURCHASE. CUSTOMER WILL BE CHARGED FOR THE REPAIR OF ANY UNIT RECEIVED WITHOUT SUCH PROOF OF PURCHASE.
Also, the purchaser will be responsible for shipping the unit to the above address.
In Canada, contact Panasonic Canada Inc. Customer Care Centre at 905-624-5505, web site (www.panasonic.ca), or an authorized Servicentre closest to you.
For Canada only
| CAUTION | INDBILE LASER PADRITION WHEN OPEN AND INTERLOCKS DEFERATED.AVOID EXPOSURE TO BEAM. (DECIMALS -1 Class 3b) |
| ATTENTION | RADNEMENT LASER INDBILE DANGERREUM EN CAS POUVERTURE ET, LORSQUE LA SECURETET EST NEUTRALD&E EXPERTION DANEBEUBE AU FRANCERAU |
| ADVARSEL | USYMLG LABESTRAULING WEI ABUNG NAR EIKHEN-EDGAFIRDEERE EN UDEAF FLUNION. UNDAI FUTIONAL FOR STRALING. |
| VAROI | AANTRESSA LA SUJALUNTUS OHMETTERSOULET ALTA FINA NAYMINTA LA LABESTRAULLE ELA AATO SATESBEN. |
| VARNING | OSNILIE LABESTRAULING NAR ONNA DEL AR OPNADO OCHSPAREN AR UKOPPUD, BETBHATC EL STRALEN. |
| VORSICHT | UNDSCHABE LABESTRAULUNG MENN ABSCIONG SECPINET UND SICHEN-VEGETHEBOLUNG (BRANCOCK) NORT DEM STRAL, ASSETZEN. |
| ADVARSEL | USYMLG LABESTRAULING NAR ORKSEL APNEO OG OKHERHES, ASRPTES, UNDAI ESPONERING FOR STRALEN. RQLXCS0056B |
Inside of product
Listening caution


Selecting fine audio equipment such as the unit you've just purchased is only the start of your musical enjoyment. Now it's time to consider how you can maximize the fun and excitement your equipment offers. This manufacturer and the Electronic Industries Association's Consumer Electronics Group want you to get the most out of your equipment by playing it at a safe level. One that lets the sound come through loud and clear without annoying blaring or distortion—and, most importantly, without affecting your sensitive hearing.
We recommend you to avoid prolonged exposure to excessive noise.
Sound can be deceiving. Over time your hearing “comfort level” adapts to higher volumes of sound. So what sounds “normal” can actually be loud and harmful to your hearing.
Guard against this by setting your equipment at a safe level BEFORE your hearing adapts.
To establish a safe level:
- Start your volume control at a low setting.
- Slowly increase the sound until you can hear it comfortably and clearly, and without distortion. Once you have established a comfortable sound level:
- Set the dial and leave it there.
Taking a minute to do this now will help to prevent hearing damage or loss in the future. After all, we want you listening for a lifetime.
CAUTION!
THIS PRODUCT UTILIZES A LASER.
USE OF CONTROLS OR ADJUSTMENTS OR PERFORMANCE OF PROCEDURES OTHER THAN THOSE SPECIFIED HEREIN MAY RESULT IN HAZARDOUS RADIATION EXPOSURE.
DO NOT OPEN COVERS AND DO NOT REPAIR YOURSELF. REFER SERVICING TO QUALIFIED PERSONNEL.
CAUTION:
TO PREVENT ELECTRIC SHOCK MATCH WIDE BLADE OF PLUG TO WIDE SLOT, FULLY INSERT.
WARNING:
TO REDUCE THE RISK OF FIRE, ELECTRIC SHOCK OR PRODUCT DAMAGE, DO NOT EXPOSE THIS APPARATUS TO RAIN, MOISTURE, DRIPPING OR SPLASHING AND THAT NO OBJECTS FILLED WITH LIQUIDS, SUCH AS VASES, SHALL BE PLACED ON THE APPARATUS.

CAUTION
RISK OF ELECTRIC SHOCK DO NOT OPEN

CAUTION: TO REDUCE THE RISK OF ELECTRIC SHOCK, DO NOT REMOVE SCREWS. NO USER-SERVICEABLE PARTS INSIDE.
REFER SERVICING TO QUALIFIED SERVICE PERSONNEL.

The lightning flash with arrowhead symbol, within an equilateral triangle, is intended to alert the user to the presence of uninsulated "dangerous voltage" within the product's enclosure that may be of sufficient magnitude to constitute a risk of electric shock to persons.

The exclamation point within an equilateral triangle is intended to alert the user to the presence of important operating and maintenance (servicing) instructions in the literature accompanying the appliance.
IMPORTANT SAFETY INSTRUCTIONS
Read these operating instructions carefully before using the unit. Follow the safety instructions on the unit and the safety precautions listed below. Keep these operating instructions handy for future reference.
Safety
- Power source—Connect the unit to a power source of the type described in these instructions or as marked on the unit.
- Polarization—The unit is equipped with a polarized power plug where one blade is wider than the other. This safety feature ensures that the plug fits into your household AC outlet only one way. If the plug doesn't fit one way, try reversing it. If the plug still doesn't fit, contact an electrician to replace the obsolete outlet. Do not attempt to defeat the safety purpose of the plug.
- Power cord protection—Route the AC power supply cord so that it will not be walked on or pinched by items placed on or against it. Never take hold of the plug or cord with wet hands. Always grasp the plug body firmly when connecting and disconnecting it.
- Overloading—When connecting the AC power supply cord, be careful not to overload the household AC outlet, extension cord, or outlet from any other device as this can result in fire or electric shock.
- Nonuse periods—Turn the unit off when it is not in use. Unplug the unit from the household AC outlet if it is not to be used for a long time. Unplug the unit during lightning storms.
- Attachments and accessories—Use only the attachments and accessories recommended in these operating instructions.
Installation
Placement
- Ventilation—Situate the unit so that it receives proper ventilation. Do not install in a confined space such as a bookcase or cabinet. Allow at least 10 cm (4 inches) clearance from the rear of the unit. To prevent the risk of electric shock or fire due to overheating ensure curtains and other materials do not obstruct the unit's ventilation.
- Foreign material—Ensure objects and liquids do not get into the unit. Avoid exposing the unit to excessive smoke, dust, mechanical vibration, and shock.
- Magnetism—Situate the unit away from equipment and devices that generate strong magnetic fields.
- Stacking—Do not place heavy objects on top of this unit.
- Surface—Place the unit on a flat, level surface.
- Carts and stands—Use the unit only with carts and stands recommended by the manufacturer. Move carts with care. Sudden stops, excessive force, and uneven surfaces can cause carts to overturn.
- Wall and ceiling mounting—Do not mount the unit on walls or ceilings unless specified in the instructions.

Environment
- Water and moisture—Do not use the unit near water, such as near a bathtub or swimming pool. Avoid damp basements.
- Heat—Situate the unit away from heat sources, such as radiators. Do not situate where temperatures fall below 5°C (41°F) or rise above 35°C (95°F).
CAUTION!
DO NOT INSTALL, OR PLACE THIS UNIT, IN A BOOKCASE, BUILT-IN CABINET OR IN ANOTHER CONFINED SPACE. ENSURE THE UNIT IS WELL VENTILATED. TO PREVENT RISK OF ELECTRIC SHOCK OR FIRE HAZARD DUE TO OVERHEATING, ENSURE THAT CURTAINS AND ANY OTHER MATERIALS DO NOT OBSTRUCT THE VENTILATION VENTS.
Maintenance
(See page 6 for details.)
Unplug the unit from the household AC outlet before cleaning. Clean with a damp cloth.
Do not use abrasive pads, scouring powders, or solvents.
Service
- Damage requiring service —The unit should be serviced by qualified service personnel if: (a) The AC power supply cord or the plug has been damaged; or (b) Objects or liquids have gotten into the unit; or (c) The unit has been exposed to rain; or (d) The unit does not operate normally or exhibits a marked change in performance; or (e) The unit has been dropped or the cabinet damaged.
- Servicing — Do not attempt to service the unit beyond that described in these operating instructions. Refer all other servicing to authorized servicing personnel.
- Replacement parts —When parts need replacing ensure the servicer uses parts specified by the manufacturer or parts that have the same characteristics as the original parts. Unauthorized substitutes may result in fire, electric shock, or other hazards.
- Safety check — After repairs or service, ask the servicer to perform safety checks to confirm that the unit is in proper working condition.
Use of batteries
- Align the poles (+ and -) properly when inserting the batteries.
- Do not mix old and new batteries or different types of batteries.
- Do not recharge ordinary dry cell batteries.
- Do not heat or disassemble the batteries. Do not allow them to contact flame or water.
- If the unit is not going to be used for a long time or if the unit is to be powered exclusively by AC power, remove the batteries and store them in a cool, dark place.
- Do not keep together with metallic objects such as necklaces.
- Do not use rechargeable type batteries.
- Do not use batteries if the covering has been peeled off.
Mishandling of batteries can damage other items, cause damage to the unit, and may cause a fire through short-circuiting or electrolyte leakage. If electrolyte leaks from the batteries, consult your dealer. Wash thoroughly with water if electrolyte comes in contact with any part of your body.
THE FOLLOWING APPLIES ONLY IN THE U.S.A.
CAUTION:
This equipment has been tested and found to comply with the limits for a Class B digital device, pursuant to Part 15 of the FCC Rules. These limits are designed to provide reasonable protection against harmful interference in a residential installation. This equipment generates, uses and can radiate radio frequency energy and, if not installed and used in accordance with the instructions, may cause harmful interference to radio communications. However, there is no guarantee that interference will not occur in a particular installation. If this equipment does cause harmful interference to radio or television reception, which can be determined by turning the equipment off and on, the user is encouraged to try to correct the interference by one or more of the following measures:
Reorient or relocate the receiving antenna.
Increase the separation between the equipment and receiver.
Connect the equipment into an outlet on a circuit different from that to which the receiver is connected.
Consult the dealer or an experienced radio/TV technician for help.
Any unauthorized changes or modifications to this equipment would void the user's authority to operate this device.
This device complies with Part 15 of the FCC Rules. Operation is subject to the following two conditions: (1) This device may not cause harmful interference, and (2) this device must accept any interference received, including interference that may cause undesired operation.
Audio software
Take note of the following points to extend the life of your equipment. Always read the instructions provided with the software.
Discs
Choose discs with this mark:

Continued use of irregular shaped CDs can damage the unit.


Do not:
- use discs that have extra labels or stickers attached. Carefully remove leftover adhesive before use.
- attach scratch-proof covers or any other kind of accessory. • write anything on the CD
- clean CDs with liquids. Wipe with a soft, dry cloth.
- use CDs printed with label printers available on the market.
- load a blank CD-R as it will cause abnormal malfunction and may damage the CD-R.
Using headphones (not included)
Turn down the volume and connect the headphones to the [PHONES] jack.
Plug type: 3.5 mm (1/8") stereo
Note
Avoid listening for prolonged periods of time to prevent hearing damage.

Specifications
Frequency range
FM 87.9–107.9 MHz (200 kHz steps)
87.5–108.0 MHz (100 kHz steps)
AM 520–1710 kHz (10 kHz steps)
Sampling frequency 44.1 kHz
Decoding 16 bit linear
Beam source Semiconductor laser (wavelength 780 nm)
No. of channels 2 channel, stereo
Wow and flutter Less than possible measurement data
D/A converter 1 bit DAC
Track system 4 track, 2 channel, stereo
Monitor system Variable sound monitor
Recording system AC bias
Erasing system Multi Pole magnet
Frequency range
Normal position 50–12000 Hz
Speakers
Full range 10 cm (3
15/16) 4Ω x 2
Center speaker (For RX-D23 only)
1.5 cm (19/32")
Jacks
Output
PHONES: 3.5 mm stereo (32 Ω)
Power requirement
AC
120 V, 60Hz
Power consumption: 14 W
Battery
9 V (Six R20/LR20, D, UM-1 batteries)
Memory back-up
- Do not use rechargeable type batteries.
6 V (Four R6/LR6, AA, UM-3 batteries)
- Do not use rechargeable type batteries.
Dimensions (WxHxD)
420 x 167 x 275 mm (16 17/32" x 6 31/32" x 10 13/16")
Mass
(RX-D23) 3.6 kg (7lb. 15 oz.) without batteries
(RX-D20) 3.4 kg (7 lb. 8 oz.) without batteries
Power consumption in standby mode: 1W
Note
Specifications are subject to change without notice.
Mass and dimensions are approximate.
Troubleshooting guide
Before requesting service, make the below checks. If you are in doubt about some of the check points, or if the remedies indicated in the chart do not solve the problem:
In the U.S.A., contact the Panasonic Customer Call Center at 1-800-211-7262, or e-mail consumerproducts@panasonic.com, or web site (http://www.panasonic.com).
In Canada, contact Panasonic Canada Inc. Customer Care Centre at 905-624-5505, web site (www.panasonic.ca), or an authorized Servicentre closest to you.
Common Problem
| The unit doesn’t work on batteries. | Is the AC power cord connected to the unit? Disconnect when using batteries.Have the batteries been inserted correctly? Check that the poles (+ and −) are correctly aligned. |
| “UO1” is displayed. | Replace the batteries or use household AC power. |
CD
| “E” is displayed. | Indicates an incorrect operation. Read the instructions. |
| Play doesn’t start or display is incorrect. | Clean the CD.Wait for an hour for condensation to dry, then try again.Make sure the label is facing up.Replace the CD if it is scratched, warped, or irregularly shaped. |
Cassette
| Recording not possible. | Has the cassette's tab been removed? Cover the hole with adhesive tape. |
| Poor sound quality. | Clean the heads. |
| The cassette cannot be ejected or the lid can't be closed when loading a cassette. | The batteries are flat. Replace the batteries or connect to household AC power. Press [◀ PLAY] then [■/▲ STOP/EJECT]. |
Radio
| A lot of noise. | Is another remote control being used? Use it further away from this unit.Is a TV on? Move the unit away from the TV or turn it off. |
Remote control
| The remote control doesn’t work. | Check the batteries are inserted correctly.Replace the batteries if they are worn. |
Panasonic Consumer Electronics Company, Division of Matsushita Electric Corporation of America
One Panasonic Way Secaucus,
New Jersey 07094
http://www.panasonic.com
Panasonic Sales Company,
Division of Matsushita Electric of
Puerto Rico, Inc. ("PSC")
San Gabriel Industrial Park, Carolina,
Puerto Rico 00985
Panasonic Canada Inc.
5770 Ambler Drive
Mississauga, Ontario
L4W 2T3
www.panasonic.ca
En
- SUPPLIED ACCESSORIES
- NOTE
- PANASONIC
- PORTABLE STEREO CD SYSTEM
- POWER SOURCES
- USING A HOUSEHOLD AC OUTLET
- CONSERVING POWER
- USING BATTERIES
- WHEN TO CHANGE THE BATTERIES
- MEMORY BACK-UP
- REMOVING THE BATTERIES
- CONTROLS
- MAIN UNIT
- REMOTE CONTROL
- CONCERNING THE REMOTE CONTROL
- OPERATION NOTES
- TO PREVENT DAMAGE
- LISTENING TO RADIO BROADCASTS
- NORMAL TUNING PRESET TUNING
- TO USE AUTO SCAN
- TO IMPROVE RECEPTION
- TO RECEIVE FM BROADCASTS ALLOCATED IN 0.1 MHZ STEPS
- HOW TO PRESET
- TO LISTEN TO PRESET CHANNELS
- TO USE PRESET SCAN
- LISTENING TO CDS
- TO STOP PLAY
- TO CHECK PROGRAM CONTENTS
- DISPLAY
- CD PLAY MODES
- LISTENING TO TAPES
- SWITCH [SELECTURE/OFF
- PRESS [☐/△ STOP/EJECT] TO OPEN THE TAPE LID AND LOAD THE TAPE. CLOSE THE TAPE LID BY HAND
- PRESS [◀ PLAY] TO START PLAY. POWER COMES ON AND PLAY STARTS
- ADJUST THE VOLUME
- FULL AUTO-STOP
- RECORDING
- YOU CAN RECORD RADIO BROADCASTS OR CDS. BEFORE RECORDING
- PRESS [■/▲ STOP/EJECT] TO OPEN THE TAPE LID AND LOAD THE TAPE
- SELECT THE SOURCE TO BE RECORDED. WHEN RECORDING RADIO BROADCASTS
- PRESS [●] RESTART RECORDING
- TO STOP RECORDING
- TO STOP RECORDING TEMPORARILY
- TO RECORD ON THE OTHER SIDE OF THE TAPE
- IF THE CD FINISHES BEFORE THE TAPE
- IF THE TAPE FINISHES BEFORE THE CD
- ERASURE PREVENTION
- TO RE-RECORD ON A PROTECTED CASSETTE
- TO ERASE A TAPE
- REFERENCE
- MAINTENANCE
- CLEANING INSIDE THE DECK
- CARE OF THE CD LENS
- PRODUCT SERVICE
- PRODUCT INFORMATION
- LISTENING CAUTION
- CAUTION
- WARNING
- IMPORTANT SAFETY INSTRUCTIONS
- SAFETY
- INSTALLATION
- PLACEMENT
- ENVIRONMENT
- SERVICE
- USE OF BATTERIES
- THE FOLLOWING APPLIES ONLY IN THE U.S.A
- AUDIO SOFTWARE
- DISCS
- DO NOT
- USING HEADPHONES (NOT INCLUDED)
- SPECIFICATIONS
- FREQUENCY RANGE
- SPEAKERS
- JACKS
- POWER REQUIREMENT
- DIMENSIONS (WXHXD)
- MASS
- TROUBLESHOOTING GUIDE
Brand : PANASONIC
Model : RX-D20
Category : Hi-Fi System