
SR-SAT102 - Rice cooker PANASONIC - Free user manual and instructions
Find the device manual for free SR-SAT102 PANASONIC in PDF.


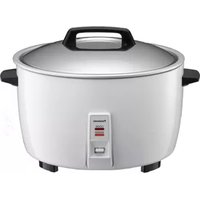
| Product Type | Rice Cooker |
| Brand | Panasonic |
| Model | SR-SAT102 |
| Dimensions (Approx.) | 250 x 300 x 300 mm |
| Weight (Approx.) | 3.0 kg |
| Power Consumption | 600 W |
| Capacity | 1.0 L (approx. 5.5 cups uncooked rice) |
| Inner Pan Material | Non-stick coated aluminum |
| Cooking Functions | Cook, Keep Warm, Reheat |
| Control Type | Microcomputer with digital display |
| Timer | 24-hour programmable timer |
| Keep Warm Duration | Up to 12 hours |
| Automatic Shut-Off | Yes, after cooking cycle |
| Safety Features | Overheat protection, lid lock |
| Cleaning | Removable inner pan, steam vent, and lid are dishwasher safe |
| Maintenance | Wipe exterior with damp cloth; descale periodically |
| Accessories Included | Measuring cup, rice paddle, steamer basket |
| Spare Parts Availability | Inner pan, lid, sealing ring, steam vent cap available from Panasonic service centers |
| Warranty | 1 year limited |
| Certifications | ETL, DOE, Energy Star |
| Color | White with silver accents |
| Country of Origin | China |
| Manual Language | English, French, Spanish |
Frequently Asked Questions - SR-SAT102 PANASONIC
User questions about SR-SAT102 PANASONIC
0 question about this device. Answer the ones you know or ask your own.
Ask a new question about this device
Download the instructions for your Rice cooker in PDF format for free! Find your manual SR-SAT102 - PANASONIC and take your electronic device back in hand. On this page are published all the documents necessary for the use of your device. SR-SAT102 by PANASONIC.
USER MANUAL SR-SAT102 PANASONIC
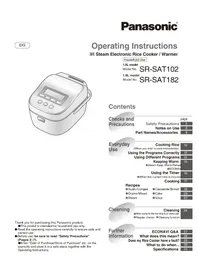
Operating Instructions
IH Steam Electronic Rice Cooker / Warmer
Household Use
1.0L model
Model No.
SR-SAT102
1.8L model
Model No.
SR-SAT182

Thank you for purchasing this Panasonic product.
●This product is intended for household use only.
● Read the operating instructions carefully to ensure safe and correct use.
● Before use, be sure to read "Safety Precautions" (Pages 2–7).
●Enter "Date of Purchase/Store of Purchase" etc. on the warranty and store it in a safe place together with the Operating Instructions.
Contents
Checks and Precautions
Safety Precautions
Notes on Use
Part Names/Accessories
Everyday Use
Cooking Rice
(When you wish to cook immediately)
Using the Timer
●When the current time is incorrect
Cooking
16
17
Recipes
Sushi/Congee
Casserole/Brown
18
Grains/Mixed
Cake
20
Steam
Soup
22
Cleaning
Cleaning
- When using for the first time & on every use
●Regular checks ●Cleaning function
24
Further Information
ECONAVI Q&A
27
What does this mean?
28
Does my Rice Cooker have a fault?
29
What to do when...
30
Specifications
34
Safety Precautions
Please make sure to follow these instructions
In order to prevent accidents or injuries to the user, other people, and damage to property, please follow the instructions below.
■The following charts indicate the degree of damage caused by wrong operation.

WARNING: Indicates serious injury or death.

CAUTION: Indicates risk of injury or property damage.
■The symbols are classified and explained as follows.

This symbol indicates prohibition.

This symbol indicates requirement that must be followed.
WARNING

●Do not use the appliance if the power cord or power plug is damaged or the power plug is loosely connected to the power outlet.
(It may cause an electric shock, or fire caused by short circuit.)
→ If the supply cord is damaged, it must be replaced by a special cord or assembly available from the manufacturer or its service agent.
●Do not damage the power cord or power plug.
- The following actions are strictly prohibited: modifying, touching, or placing near heating elements; bending, twisting, pulling, or pulling over sharp edges; placing heavy objects on top; bundling the power cord; and carrying the appliance by the power cord. (This may cause an electric shock or fire caused by a short circuit.)
● Do not plug or unplug the power plug with wet hands.
- Always ensure that hands are dry before handling the power plug or switching on the appliance. (This may cause an electric shock.)
● Do not insert any object into the vent or the gap.
- Especially metal objects such as pins or wires. (This may cause an electric shock or malfunction.)

- Exhaust vent - Intake vent
WARNING

- Do not immerse the appliance in water or splash it with water. (This may cause an electric shock or fire caused by a short circuit.) → Please contact an authorized service center (as described in the Warranty) if water gets inside the appliance.

● Do not modify, disassemble, or repair the appliance.
(This may cause a fire, electric shock, or injury.)
→ Please contact an authorized service center (as described in the Warranty).
● Do not use the appliance for any purpose other than those described in these instructions.
(This may cause a fire, burn, injury, or electric shock.)
- Panasonic will not accept any liability if the appliance is subject to improper use or failure to comply with these instructions.
● Do not get your face close to the Exhaust Unit or touch it with your hand.
- Keep the Exhaust Unit out of reach of small children. (It may cause a burn.)

●Do not put anything in the Inner Pan to block the hole in the Inner Lid.
(Steam or cooking contents may jet out from) the hole, causing a burn or injury.

Hole in the Inner Lid
- Apply heat with the ingredients or seasoning in a polyethylene bag. - Use cooking sheet etc. instead of the lid.
●Do not let anyone lick the Instrument Plug.
- Pay extra attention to infants.
(It may cause an electric shock or injury.)
●Do not block the Intake Filter or Exhaust Unit. (Steam emitted from the Exhaust Unit may be heated to a high temperature, causing a burn.)

Safety Precautions
Please make sure to follow these instructions
WARNING
This appliance is not intended for use by persons (including children) with reduced physical, sensory or mental capabilities, or lack of experience and knowledge, unless they have been given supervision or instruction concerning use of the appliance by a person responsible for their safety. Children should be supervised to ensure that they do not play with the appliance.
(It may cause a burn, injury or electric shock.)
●Use only a power outlet rated at 10 amperes and alternating electric current at 220 volts.
(Plugging other devices into the same outlet may cause electric) overheating, which may cause a fire.
- Use only an extended cord rated at least 10 amperes.
● Insert the power plug firmly.
(Otherwise it may cause an electric shock or fire caused by the heat generated around the power plug.)
● Clean the power plug regularly.
(A soiled power plug may cause insufficient insulation due to moisture and lint build-up, which may cause a fire. → Unplug the power plug, and wipe with a dry cloth.)
- Keep the power cord out of reach of children.
- Do not let the power cord hang over the edge of the table or worktop. (Pulling on the power cord may result in the product falling from the table or worktop, causing an injury.)
● Always keep children away from the appliance. (It may cause a burn, injury, or electric shock.)
• Children do not realize dangers that are likely to occur because of improper use of electrical appliances.
● Beware not to trip over or catch in the power cord while in use. (Otherwise it may result in an injury, or the damaged power cord causing a fire or electric shock.)
WARNING
● Discontinue using the appliance immediately and unplug when abnormality or breakdown occurs.
(It may cause smoking, a fire, or electric shock.)
e.g. for abnormality or breakdown:
• The power plug and the power cord become abnormally hot. • The power cord is damaged or power failure when touched. • The main body is deformed or abnormally hot. • Smoke exudes from the main body or a burning odor is detected. • The main body is cracked, loose, or rattles. • The fan in the bottom is not rotating during cooking. → Please contact an authorized service center (as described in the Warranty) for a check or repair.
- Close the Outer Lid firmly until it clicks.
(To prevent a burn or injury caused by steam leaking) or the opening of the Outer Lid.
- To ensure that the Outer Lid can be closed, remove rice grains or any other foreign object on the Clear Frame, Packing, and between the main unit and Outer Lid.

● Use a power outlet which you are sure includes an earth.
- The power plug of the appliance is designed for a power outlet with an earth.
(Use of a power outlet without an earth may result in a malfunction or electric shock due to electrical leakage.)
CAUTION
Do not expose the power plug to steam.
- Do not expose the power plug to steam when it is plugged in. (It may cause an electric shock, or fire caused by short circuit.)
→ When using a cabinet with sliding table, use the appliance where the power plug cannot be exposed to steam.

Safety Precautions
Please make sure to follow these instructions
CAUTION

● Do not open the Outer Lid or carry the appliance while cooking.
(It may cause a burn.)
●Do not turn on the appliance without rice and water inside. (It may cause a burn.)
●Do not use another Inner Pan other than the one specified. (It may cause a burn or injury due to overheat or malfunction.)
- Do not use the cord set (for an instrument plug and power plug) that is not specified for use with this appliance. Also do not transfer it. (It may cause an electric shock, electrical leakage or fire.)
- Do not touch heating elements while the appliance is in use or after cooking.
- Especially the Inner Lid and metal parts, such as the Clear Frame, near the Inner Pan. (It may cause a burn.)

●Do not touch the Hook Button while moving the appliance. (It may cause the Outer Lid to open, resulting in a burn.)
●Do not use the appliance on following places.
• The place where it may be splashed with water or near a heat source. (It may cause an electric shock, electrical leakage or fire.) - On an uneven surface or on non-heat-resistant carpet (It may cause an injury, burn or fire.) • Near a wall or furniture. (It may cause discolouration or deformation.) - On Aluminum sheet or electronic carpet. (Aluminium materials may generate heat and cause smoking or a fire.

- Be sure to hold the power plug or the Instrument Plug when unplugging the power plug or the Instrument Plug. (Otherwise it may cause an electric shock, or fire caused by short circuit.)
CAUTION

●Always switch off and unplug the appliance from the power outlet when it is not in use.
(Otherwise it may cause an electric shock or fire caused by short circuit due to the insulation deterioration.)
●Unplug and allow the appliance to cool down fully before cleaning and storing it.
- Do not move the appliance while it is hot. (Touching hot elements may cause a burn.)
- If using the appliance on a kitchen shelf etc., ensure that the steam is not confined within a closed space.
(It may cause discolouration or deformation.)
- If using a slide-out shelf, pull the shelf out fully to ensure that the shelf above is not exposed to steam.
●Please consult a doctor if you are using an implanted pacemaker.
• The operation of this appliance may affect your pacemaker.
Notes on Use Part Names/Accessories
To keep the product in good condition over the long term, please observe the following.
About the Rice Cooker
■When using in a kitchen storage unit, ensure that the shelf above is not exposed to steam.
(This may result in an error message being displayed, and the rice being cooked in an unsatisfactory way.
→ If a slide-out shelf is used, it should be pulled out fully.
■If placing the Rice Cooker on a slide-out shelf,
be sure to check that it is strong enough to hear the load.
(If it is not, the Rice Cooker may fall.)
- When adding water and rice to
the Rice Cooker
For 1.0L model, approx. 9 kg.
For 1.8L model, approx. 12 kg.
■ Do not use the Rice Cooker on an IH hob.
(Doing so may damage the Rice Cooker or the hob.)
■ Do not use in a location subject to direct sunlight. (Doing so may result in discolouration.)
(Doing so may result in discolouration.)
■ Do not use in a location (on a carpet, plastic bag, aluminium foil, fabric, etc.) where the bottom of the Rice Cooker (the intake and exhaust vents) is restricted.
aluminium foil, fabric, etc., where the bottom of the Rice Cooker (the intake and exhaust vents) is restricted
■ Periodically check the intake and exhaust vents at the bottom of the Rice Cooker and the Intake Filter and Exhaust Unit in the Outer Lid and then remove any dust etc. (P.26)
■Periodically check the intake and exhaust vents at the
bottom of the Rice Cooker and the Intake Filter and
develop a fault.

■Do not use the Rice Cooker with foreign objects such as rice grains or other dirt stuck to it.
(Doing so may result in an error message being displayed, and the rice being burnt or otherwise cooked in an unsatisfactory way.)
Brim part or Bottom
(Inner Pan)

■Do not place the Rice Cooker near devices vulnerable to magnetic fields.
●Radios, televisions, hearing aids etc.
(Noise may be heard or volume levels reduced.)
●IC cards/bank cards etc.
(Records held on the card may be lost or damaged.)
■Do not bring magnets close to the Rice Cooker. (Doing so may result in faulty operation.)
■Do not cover the top of the Rice Cooker when it is in
use.
●Dishcloths etc.
(Steam may be confined near the Rice)
Cooker, causing discolouration of the
Outer Lid or faults in the display

About the Inner Pan
■Do not use the Inner Pan except in the Rice Cooker.

●Do not use on a gas hob or IH hob, or in a microwave.

■ Observe the following to prevent peeling or scratching of the inner coating.
During preparation

●Do not use a whisk or other tool when washing the rice.
●Do not allow a metal strainer etc. to contact the internal coating.

When rice is cooked

●Do not mix vinegar with the rice while it is in the Inner Pan (for sushi etc.).
- Do not use a metal ladle (for congee etc.). - Do not tap or hit the Inner Pan (when serving etc.).

Notes
●The following do not affect performance or human health.
[Outer surface] Shallow scratches, small dents or bumps. [Inner surface] Peeling of inner coating.
→ A new Inner Pan can be purchased if the Inner Pan has changed shape or you are concerned about the condition of the Inner Pan.
When cleaning (P.24)
●Do not use as a washing up bowl.
Do not put spoons or other cutlery into the Inner Pan.
●After cooking with seasoning, do not leave the food in the Inner Pan.
→ After cooking mixed rice etc., remove it from the Inner Pan as soon as possible and wash the Inner Pan.
●Do not use a dish dryer or dishwasher/dryer.
●After washing, do not leave
on other crockery to dry.
●Do not wash or scrub with an abrasive, a metal scourer, a nylon scourer impregnated with polish etc..
→ Wash using a soft sponge. Do not wash using the scouring pad.


, remove it s possible


■ Before using the Rice Cooker for the first time, please remove the accessories in the Inner Pan and plastic bag from the Inner Pan, and then wash the accessories, Inner Pan, Inner Lid, and Taste Catcher. (P.24–25)

Hook Button ●Press the Hook Button to open the Outer Lid.
Instrument Plug Cord Set

Intake Filter
Accessories
Measuring Cup (Approx. 160mL)
Steaming Basket


Rice Scoop and Rice Scoop Holder


Attaching the Rice Scoop Holder
① Attach the Rice Scoop Holder to the indented section of the Handle.

●It can be attached to the left or right side.
② Insert the Rice Scoop.

Cooking Rice When you wish to cook immediately
| Washing the rice and adding water Setting up |  |  |  | |
| 1 Measure the riceMeasure by levelling off in the supplied measuring cup. (Approx. 180 mL/cup)2 Wash the rice1 First, add plenty of water, str, and quickly throw away the water.2 Repeat this process 2 to 5 times, stirring gently to wash the rice each time.(The water for cooking can be stayed a little while.)3 Put the washed rice in the Inner Pan.(The rice can be washed in the Inner Pan.)NoteDo not leave the rice in a strainer for any length of time.(The rice grains may break, causing the rice to stick or burn when cooked.[IMAGE]4 Place the Inner Pan in the Rice Cookerpe away any water etc. on the outside of the Inner Pan. | 3 Add waterAdd water up to the mark (Water Level) for the desired cooking program. (P.12)(Ensure that the Inner Pan is on a level surface) and check the marks on both sides.Add the correct amount of water for the number of cups of rice.When adjusting the amount of water to suit your taste etc., be aware that the Rice Cooker allows for a 1-5 mm adjustment for the "Eco" program and a 1-2 mm adjustment for other programs.(Adding too much water may prevent rice) (cooking properly.Use a little less water than indicated for new-crop rice.Use a little less water than indicated for firmer rice and a little more than indicated for softer rice.Ensure the rice is level.Soaking the rice is not required.(When the "Start" button is pressed, the water) will be absorbed automatically.Using the "Delicious" program with 3 cups of riceThe Inner Pan In the illustration is the 1.0L model. | 5 Attach the Taste CatcherHold by the finger grip as shown on the rightInsert the tip and push to the bottom.6 Attach the Inner LidFit into the groovePress into the Outer Lid until you hear a "click".7 Check that the Intake Filter and Exhaust Unit are attached(Refer to "Attaching" on P.26.)Exhaust UnitIntake Filter | 8 Insert the Power PlugPlease connect the Instrument Plug to the body first and then connect the Power Plug.Make sure that both plugs are firmly connected.9 Check the program and press the "Start" buttonPress開始Cooking starts.When the buzzer sounds after cooking, the steaming stage has finished.Mix the rice immediately.(This is to allow excess moisture to evaporate.) | |

Measure out the water and rice correctly.
Wash the rice gently.
Heavy-handed washing of the rice can result in the grains splitting, causing the rice to stick or burn. Use suitable water.
We recommend the use of tap water or filtered tap water. - Use of alkaline water (with a pH higher than 9) may result in sticky or yellow-coloured rice.
- Use of hard mineral water (with hardness of 100 or above) may result in dry or hard rice.

Things to look out! ●Where possible, choose recently processed rice. ●After opening a bag of rice, use it promptly. - Keep rice in the fridge.
Using the Programs Correctly
| Program | Water Level | Cooking time (approx.) | ||
| Best flavour | White Rice | DeliciousRegularStickyHard | White Rice | Regular/Sticky56 minsHard52 mins |
| Quick cooking | QuickRice will be slightly firmer.You can soften the rice by soaking it before cooking. | White Rice 20–32 mins | ||
| Balance cooking time and power consumption | EcoCook with reduced power consumption | Eco 35 mins | ||
| Cook small amount | 1-2 person1.0L Model (0.5 to 1.5 cups)1.8L Model (1 to 2.5 cups) | White Rice 55 mins | ||
| Cook sushi rice | Sushi | Sushi 46 mins | ||
| Cook congee | Congee1.0L Model (0.5 to 0.75 cups)1.8L Model (0.5 to 1.5 cups) | Congee | Setting time60–240 mins | |
| Cook casserole | Casserole | White Rice 42 mins | ||
| Cook brown rice | Other Rice | Brown | Brown Rice 125–135 mins | |
| Cook rice of various grains | GrainsWhen there are instructions about adding water etc, on the packaging containing the rice, follow those instructions. Adjust the amount of water to suit your taste. | White Rice 42–48 mins | ||
| Cook mixed rice | Mixed | White Rice 48–58 mins | ||
| Bake a cake | Cook | Cake | — | Setting time40–60 mins |
| Steam | Steam | — | Setting time1–60 mins | |
| Make soup | Soup | — | Setting time60–240 mins | |
- Do not mix brown and white rice. (The two kinds of rice will not cook properly.)
- From the point that the cooking starts, the Rice Cooker displays the time until the rice is ready. Note that for the "Quick", "Brown", "Grains" and "Mixed" settings, the Rice Cooker will display the current time until 10 minutes before the rice is ready. It will then switch to show the time until the rice is ready.

This is the default setting.
You can take a little more time to make sure the texture suits your taste.
- First we recommend that you try "Regular". You can then match the texture with your taste or the dish you are cooking.
Texture preferences
I like fluffy rice which is sweet and a little bit sticky! "Regular
I like a chewy texture! "Sticky"
I like a mild flavour with no stickiness (suitable for donburi-type dishes)!
"
→
"Hard"
Eco
■ Balance cooking time and power consumption.
① After mixing the cooked rice, leave it in the Rice Cooker for a few minutes before serving. ② Upon your next cooking, increase the amount of water (increase the Water Level by 1 to 5 mm). ③ Soak the rice for a certain time before cooking it.
| Comparison of power consumption | ||
| Eco | Delicious (Regular) | |
| 1.0L model (cooking 3 cups) | 173 Wh | 230 Wh |
| 1.8L model (cooking 4 cups) | 232 Wh | 299 Wh |
*Measurement conditions: Room temperature 23 ± 2°C, water temperature 23 ± 1°C.
Using Different Programs: Keeping Warm

1. Check the program. ● To change the program.


The flashing location indicates the program that is currently selected.
● To cook "Congee"
● To set the timer. (P.16) ● To select the "Cook" program. (P.17) Press the "Start" button.
Do I have to select a program every time?
● The "Delicious" and "Eco" programs under "White Rice" are stored.
For other programs, the following operation allows you to call up the most recently used program.
For better programs, the following operation allows you to call up the most recently used program.

Press and hold down

(for approximately 2 seconds)
- You will hear a "beep" as soon as you press the button, but continue to hold it down. You will hear a second "beep" and the most recently used program will appear.
2. Press
Flashing
Notes
● As an aid for the visually impaired, the "Start" and "Cancel/Off" buttons have raised parts "●" and "■"
- To make it easier to distinguish between decision points (for instance, the "Menu Select" button being at "White Rice"), the beeping sound has been changed to "beep-beep".
Steam Keep Warm (Automatic)
● Once the rice is cooked, all programs switch automatically
(Please mix the rice immediately after cooking ends.)
| ●Delicious●1-2 person | ●Quick●Sushi | ●Eco | |
| The Rice Cooker will switch automatically to the keep warm function,but we do not recommend this. | ●CongceIf congee is kept warm, it may become very sticky | ||
| ●Casserote | ●MixedUse of the keep warm function can also cause the Inner Lid to rust, adversely affect the flavour of the rice. | ||
| ●BrownFlavour can be adversely affected. | |||
●The Rice Cooker automatically injects steam to reduce dryness and prevent odours.
- The timing of the steam injection changes according to the amount of rice, the cooking program etc. - When steam is injected, you will hear the sound of the pump. (P.29)
→ If you find the sound of the pump distracting during the keep warm state. (P.32)
Precautions ● Do not use the keep warm function for more than 12 hours.
- If you live in a region of high temperature and humidity, increase the keep warm temperature from 50 to 74.
Increase the keep warm temperature from 60 to 74. (P.32) /Odour can be a problem.)
● If the odour is a problem
Use the cleaning function (P.26) and increase the keep warm temperature from 60 to
74(P.32)
● To prevent odours and condensation during the keep warm state:
Do not cancel the keep warm function or remove the power plug while leaving the rice in the rice cooker.
● To prevent odours: Do not use the keep warm function with the rice scoop still in the rice cooker.
Notes ● The keep warm time of up to 23 hours is displayed in 1-hour units ("0" is displayed for times of less than 1 hour).
● After 24 hours, the display returns to the current time.
ECONAVI When the keep warm function is in use, the rice cooker applies an amount of heat corresponding to the amount of rice.
● ECONAVI works after rice is cooked using the following programs.
"Delicious", "Quick", "Eco", "1-2 person", "Sushi"
→ For further details, see ECONAVI Q&A. (P.27)
Reheat (manual)
● Rice to be heated to high temperature from the keep warm state

In the keep warm state Mix the rice

Press the "Steam Keep Warm (Reheat)" button

Reheat starts.
Flashing (Approx. 5–7 mins)
When the buzzer sounds, mix the rice immediately. The rice is now ready to be eaten.

● Reheat cannot be used in the following situations: - When the rice is cold (buzzer beeps 4 times) - When the keep warm function is not in use. ● Reheating two or more times will adversely affect the flavour of the rice. ● After the buzzer has sounded, you will continue to hear the sound of the fan for a moment and air will be vented from the Exhaust Unit. This is normal and does not indicate a fault. (P.29)
Using the Timer
Timer
● Two timers can be set. (These are stored until changed.) You may find it convenient to store often used times, using, for example, "Timer 1" for breakfast and "Timer 2" for your evening meal.
For example: Setting to 7:30 am
1. Check that the current time is correct. - If the time is incorrect, set it by following the procedure on the right.
2. Check the program (Set to desired program, P.14)
3. Select "Timer 1" or "Timer 2". Press Timer 2. ● Each press of the button changes the selection. Timer 1 ← Timer 2 5:00 Flashing
4. Set the time at which the rice is to be ready. Press ←1 → Forward (units of 10 mins) -Back (units of 10 mins) 7:30 Flashing
● Hold down to cycle through time faster.
5. Press the "Start" button. Flashing Press Start 開始 Setting ends. Lighting Start-1-2 前的1-2
- You will hear the sound of the fan for a moment and air will be vented from the Exhaust Unit. This is normal and does not indicate a fault. - When the buzzer sounds after cooking, the steaming stage has finished. Mix the rice immediately. (This is to allow excess moisture to evaporate.)
Notes
- If there is insufficient time for the timer setting, the timer will not allow the setting, and cooking will start immediately. (See "Timer Setting Restrictions" on P.34.) ● The timer cannot be used with the "Quick" or "Mixed" programs. We do not recommend using it for the "Casseroic" program.
- If the timer setting is 13 hours or longer (8 hours when the water temperature is high), the rice may ferment, generating undesirable odours.
- When cooking with the timer, the time until the rice is ready is not displayed.
- When cooking with the timer, the rice may absorb excess water. This can result in the rice becoming soft or burnt.

● To redo an operation ● To cancel a setting
When the current time is incorrect
● The time is displayed in 24-hour clock format. Insert the power plug.


● Hold down to cycle through time faster.
● The time cannot be set during use, such as cooking, the keep-warm state, or the timer setting.
- When the lithium battery runs down, removing the power plug will result in the loss of stored data such as the current time and time settings (P<00).
● The battery is fixed inside the main body and cannot be replaced by the user.
For a replacement of battery, please consult an authorized service center (as described in the Warranty).
■ To see the current time after setting the timer.
Lighting

Cooking
Cook
● The Rice Cooker can be used to cook nutritious food such as cakes, or soups with beans or vegetables.
1 Set "4" to "Cook" and select a program


| Program | Allowable timer settings | Units |
| Cake 40–60 mins | 1 min | |
| Steam | 1–60 mins | 1 min |
| Soup | 1–4 h | 30 mins |
*Countdown of the steam setting time begins when the Rice Cooker starts releasing steam.
Press the "Start" button

Cooking starts.
- When cooking finishes, the Rice Cooker automatically switches to the keep warm function, so please


Available capacity
| Program | Model | |
| 1.0L | 1.8L | |
| Cake | DoughMax 600 g | DoughMax 900 g |
| Steam | Quantity of water500 mL | Quantity of water600 mL |
| Soup | Up to “White Rice”Water Level 4 | Up to “White Rice”Water Level 6 |
Precautions
Do not use for the following recipes.
- Recipes in which a thickening roux is used, such as curry or stew. - Recipes in which baking soda is used to produce fast-forming bubbles.
- Recipes in which a lot of oil is used. - Recipes in which paste or other products that expand when heated is used.
During cooking...
- Do not place a lid or cover directly on the food. - The results are affected by the size, quantity and temperature of the ingredients.
(If the sizes of the various ingredients are too large or the quantity is too large, the contents may boil over or be undercooked.
→ If the resulting food is undercooked, reselect a program and cook it for longer.
After cooking..
●Do not use the keep warm function
(It may cause odours, rot or rusting the Inner Lid.) ●Always wash the Inner Lid and the Taste Catcher. Wipe the inner surface of the Outer Lid, the attaching portion of the Taste Catcher, and the Packing. When cooking recipes with a high meat content, the fats and proteins of the meat can contaminate the Inner Lid and internal surfaces of the Outer Lid. (It may cause odours, rot or rusting the Inner Lid.) ●When the Outer Lid is opened after cooking, water droplets may drop from the Inner Lid onto the Clear Frame.
→ Wipe these away with a well-wrung cloth.
Sushi/Congee Casserole/Brown
Inari-Sushi
To cook sushi rice...
- To ensure that the flavour is fully absorbed, transfer the rice to the sushi rice bowl while it is still warm and mix in the sushi vinegar. (Do not mix in the sushi vinegar with the rice still in the Inner Pan.) - To preserve the sheen of the rice, cool quickly using a fan.
To prevent stickiness, set the rice scoop at a shallow angle and mix quickly with a chopping motion.
Method:
White rice....3 cups ① Wash the white rice and add water up to "Water Level: Sushi 3", lay konbu....5×5 cm
Fried tofu....10 pieces on the rice and close the Outer Lid. (cut in half and opened out to form pouches) Select the program "White Rice/
Sushi
② Press the "Start" button.
Sugar 60 g Boil the fried tofu in water for 2 to Sake 2 tbsp 3 minutes to remove excessive oil. Dark soy 6 tbsp. Put the fried tofu and instant dashi in a
Put the fried tofu and instant dashi in a pan, add 400 mL of water, and simmer on a low heat for around 10 minutes. Add A and simmer until all the soupy liquid has evaporated.
For garnish: red ginger. To last: Put B in the pan and warm gently to make the sushi vinegar. Moisten the
inside of the sushi rice bowl with water. When the buzzer sounds, remove the konbu and transfer the cooked rice to the sushi rice bowl. Pour the sushi vinegar evenly over the rice, then mix with a chopping motion, adding the white sesame as you mix. Next, cool with a fan. To ensure that the sushi rice does not dry out, cover it with a well-wrung cloth.
Fill the fried tofu with the sushi rice. Arrange the sushi on a plate and garnish with red ginger.

Pork and Century Egg Congee
Ingredients (Serves 2 to 3): White rice ....... 5 cups Meat broth (cooled) ...... Century egg ....... 1 pc
Cooked lean pork......
Seasoning: Salt. 5 g Pepper. to taste Sesame oil. to taste
Method:
① Marinate the cooked lean pork with the salt for 1 hour and then cut into thin strips. Dice the century egg and put aside for later use.
② Wash the white rice and then pour into the Inner Pan together with the meat broth and close the Outer Lid.
③ Select the program "White Rice/ Congee" and set cooking time to
2 hours and 30 minutes
Press the "Start" button
When the buzzer sounds, press the "Cancel/Off" button, open the Outer
Lid, add the lean pork and century egg to the Inner Pan and close the Outer Lid.
When opening the outer lid, please note that the cooked food is hot.
① Select the program "White Rice/Congee" and set the cooking time to 1 hour.
② Press the "Start" button.
⑧ After the buzzer sounds, the congee may be served after it has been seasoned.
Mung Beans and Lily Bulb Congee
Ingredients (Serves 4 to 6): Green beans: 70 g Glutinous rice: 70 g Lily: 10 g Seasoning: Sugar: to taste Method: Wash the green beans, glutinous rice, and lily before adding them all to the inner pan. Add water up to the "Water Level: Congee 0.5" mark and close the outer lid. Select the program "White Rice/Congee" and set the cooking time to
1 hour.
- Press the "Start" button. - Season to taste with sugar after cooking is completed, and serve.
Chicken and Taro Casserole Rice
| Ingredients (Serves 4 to 6): | |
| White rice.... | 3 pc |
| Chicken meat (diced).... | |
| Dried muscrops (soaked & diced)....5 pcs | |
| Taro root (riced).... | 100 g |
| Dried shrimps (soaked).... | |
| Chinese black fungus(soaked & chopped).... | |
| Marinade: | |
| A | Light soy....1Dark soy....% tspSugar....1Salt....% tspStarch....% tsp |
Sauce:
| Model | Amount of rice (Cup*) |
| 1.0L | 1-3 |
| 1.9L | 2-6 |
Measuring cup provided as an accessory.
Method:
● Season diced chicken meat with A. ● Deep-fry diced taro root until golden
brown, drain, and set aside.
① Wash the white rice and place it in the inner pan with water up to the 'Water
Level: White Rice 3'. Then place ①, ② and other ingredients on the rice and close the Outer Lid. Do not mix.
① Select the program 'White Rice/Casserole'.
Press the "Start" button.
① After the buzzer sounds, add B and stir the rice immediately to loosen it.
Important Information:
1b ● When placing ingredients, they cannot go above the maximum water level.
11P
- Do not open the Outer Lid while cooking. (Cooking result may not be satisfactory.)
Note:
- Cook straight away without using the timer.
Brown Rice
| Ingredients (Serves 4 to 8). | |
| Brown rice | Bcf |
| White sesame | Small a |
| Black sesame | Small a |
Method:
Gently wash the brown rice and
to remove debris and loose husk.
① Add water up to "Water Level: Brown Rice 3" and close the Outer Lid.
③ Select the program "Other Rice/Brown".
① Press the "Start" button.
② When the rice is cooked, turn it over and mix to fluff.
⑥ Put on a plate and sprinkle with some white and black sesame.

Key to cooking delicious brown rice
| Model | Amount of rice (Cup*) |
| 1.0L | 1-3 (1-2) |
| 1.8L | 1-7 (1-5) |
*Measuring cup provided as an accessory. ( ) is for when other ingredients are added.
When cooking with other ingredients (meat, vegetables, etc.)
● Measure the water level before adding the other ingredients. ● The rice takes a long time to cook, so we recommend that you add firm ingredients such as beans, etc. If you wish to add dried ingredients, be sure to rehydrate them first. ● The quantity of other ingredients should not exceed 75 g per cup of rice. (Brown rice 1 cup = approx. 148 g) - Cut the ingredients into small pieces and lay them on the rice without mixing. If you mix the ingredients with the rice, the rice will not be cooked properly.
Grains/Mixed Cake
Multigrain Rice
Ingredients (Serves 4 to 6):
White rice....3 cups
Multigrain (See sales displays)
Method:
- Wash the white rice.
Gently wash the multigrain and place
20
Add water up to "Water Level: White Rice 3" and close the Outer Lid
Select the program "Other Rice"
Grains
Press the "Start" button
When the rice is cooked, turn it over
When the rice and mix to fluff
Arrange in a dish.
Chicken Rice
Ingredients (Serves 4 to 6):
Seasoning:
| White rice | 3 cups |
| Water | 4 cups |
| Chicken meal | 80 g |
| Burdock root | 35 g |
| Mushroom | 2 pcs |
| Fried tofu | 2 pcs |
| Carrot | 40 g |
Cooking wine, Soy sauce .... 20 mL each
B 11
B 11
Method:
- Wash the white rice and place it in the
Inner Pan along with 4 cups of water.
Add seasonings and the chicken
meat, burdock root, mushroom, fried
tofu, and carrot, and close the Outer
Lid.
Select the program "Other Rice/
Mixed"
Press the "Start" button.
When the rice is cooked, turn it over
and mix to fluff.
Preparation:
Chop the chicken into bite-sized
●Chop the chicken into bite-sized
pieces and slice the burdock root
thinly. Scald both items briefly in hot
water and drain.
●Soak the mushroom in water, drain
and remove the stem before cutting
into thin strips. Pour hot water over the
fried tofu to remove excess oil before
cutting into thin strips.
●Cut the carrot into thin strips.
Pound Cake
Ingredients (Serves 4 to 6)
Butter or salad oil..... Small amount
Pancake mix: 200 g
Eggs: 2
Soy milk: 100 ml
Salad oil 3 lbs
Ba 5105 70 g
(May be substituted for other dry fruit)
from reclassified answers to 21-31
Method:
Lightly smear the inside of the Inner Pan with butter or salad oil.
Mix the ingredients until texture is smooth. (Do not mix in the Inner Pan.)
● Pour into the Inner Pan and close the Outer Lid
② Select the program "Cook/Color" and set the working line by 40 minutes.
Select the program "Co" Press the "Start" button.
When the buffer swirls, remove the Inner Pan from the Rire Cooker and turn it upside down to remove the rake.
When the buzzor sounds, remove it. Then allow to cool on plate or mesh.
Steam Soup
Dim Sum
Ingredients
Small Dim Sum:
Shrimp dumpling
Dim Sum
Poached pork bun
Steamed bun Glutinous rice with chicken
Method:
① Humidify the surface of the Dim Sum by spraying water on it. (There is no need to defrost them.)
Pour 3 cups of water into the Inner Pot.
Pot.
⑧ Set the attached Steaming Basket, place the Dim Sum on it, and close the Outer Lid.
Select the program 'Cook/Steam'
and set the cooking time between
5–10 minutes
⑤ Press the "Start" button.
Salted Meat, Winter Melon and Old Duck Soup
Ingredients (Serves 4 to 6)
Old duck....½ (approx. 400 g)
Winter melon
Guaner
Water 4.5
Seasoning:
Cooking wine .50 ml.
Salt....9
Method:
① Wash the duck and cut into large
a pieces. Clean the winter melon and
... Cubinto cubes, and slice the Chinese
e sham
- Scald the duck in boiling water to
remove blood, then drain and place
aside for later use.
① Place the duck, winter melon, ham,
ginger slices, salt and cooking wine
into the Inner Pan together with 4.5
cups of water and close the Outer Lid. Select the program "Cook/Room" and
Select the program Cook/Soup and set the cooking time to 2 hours
Set the cooking time to 2 hours. Press the "Start" button
Press the Start button.
Salted Meat Steamed with Baby Cabbage
Ingredients (Serves 4 to 6):
Baby cabbage
Salted meat (Chinese ham).
Method:
① Break the baby cabbage into
individual pieces and wash these
Slice the salted meat and
place aside.
Arrange the individual pieces of
cabbage in layers on the plate and
layer the sliced salted meat at the very
top (try to use
meat).
Pour 2.5 cups of water in the inner
Set the attached Steaming Basket, put
0 "on it and close the Outer Lid.
Select the program 'Cook/Steam'
and set the cooking time to
13 minutes.
Press the "Start" button.
Note:
When baby cabbage is unavailable, the
heart of the bok choy may be used
instead.
Corn and Pork Ribs Soup
Ingredients (Serves 4 to 6)
Short ribs (cut into 5 cm sections) . . . 500 g
Corn (cut into 5 cm sections)
2 ears of approx. 450 g
Water
Seasoning:
Salt....6.
Method:
- Scald the short ribs in boiling water to
remove any blood, then drain and
place aside for later use.
Place all ingredients into the Inner Pan
together with the salt and close the
Outer Lid.
① Select the program "Cook/Soup" and
set the cooking time to 1 hour and
30 minutes
① Press the "Start" button.
(Other flavourings such as chicken)
powder may be added to taste.
Preserved Vegetables (Mui Choy) Steamed with Pork
Ingredients (Serves 4 to 6):
Pork belly 160 g
Preserved vegetables (mui choy) ... 100 g
Seasoning:
Cooking oil
Sugar....3
Dark soy
Method:
① Cut the pork into pieces sized 1 cm by
3 cm each and place aside for later
USA
© Wash the preserved vegetables under
running water and squeeze dry. This
will help remove any sand grains
lodged in the vegetable.
③ Place a layer of pork in a bowl and
then continue with a layer of the
preserved vegetable. Sprinkle a layer
of sugar on top. Continue in this
sequence until the ingredients ha
run out.
- Add cooking oil and dark soy to "8".
⑥ Pour 2.5 cups of water in the Inner Pan.
Pan.
⑧ Set the attached Steaming Basket, put "①" on it and close the Outer Lid.
"①" on it and close the Outer Lid.
7 Select the program 'Cook/Steam' and set the cooking time to 60 minutes.
and set the cooking time to 60 minutes.
60 minutes.
Press the "Start" button.
Mix the pork and preserved vegetables before serving.
vegetables before serving.
* Amounts of the sugar and cooking oil to be added may be adjusted according to taste.
be added may be adjusted according to taste.
taste.
Ginseng Chicken Soup
Ingredients (Serves 4 to 6)
Chicken ....½ (approx. 375 g)
Ginseng
Red date (or prune) ....
Ginger
Pine nuts
Seasoning
Salt
Cooking wine
Method:
● Clean the chicken and scald the inside
cavity of the chicken twice to remove
any excess blood, then drain and
place aside for later use.
Place the chicken, ginseng, red dates,
water, and ginger slices into the Inner
Pan together with salt and cooking
wine, and close the Outer Lid.
① Select the program "Cook/Soup" and
set the cooking time to 2 hours.
① Press the "Start" button.
Once cooking has been completed,
place chicken in a large bowl before
pouring out the soup. Sprinkle with
deep fried pine nuts before serving.
Cleaning
● For cleaning, remove the Power Plug and ensure that the main body has cooled down.
● Be careful not to pull on the Packing attached to the main body (since this could result
in the Packing coming off or tearing).
●After washing, wipe with a dry cloth.

Cleaning
- For cleaning, remove the Power Plug and ensure that the main body has cooled down. - Be careful not to pull on the Packing attached to the main body (since this could result in the Packing coming off or tearing). - After washing, wipe with a dry cloth.
Regular checks
●Check around once a month and clean if dirty!
Intake Filter
Remove and wash.
- If the dirt is hard to remove, brush gently with a toothbrush or similar and a mild washing up liquid, and rinse well. (Strong brushing or use of a sharp object may result in damage to the mesh part.)
■Removing
Insert your finger and pull towards you.

■Attaching
After inserting the Protrusion of
the Intake Filter, push in fully

Exhaust Unit
Remove and wash.

- If the dirt is hard to remove, brush gently with a toothbrush or similar. - Strong brushing or use of a sharp object may result in damage to the mesh part.
■Removing
Pull horizontally towards the back of the body.

■Attaching
Follow the reverse procedure to removing, insert until you hear a "click".
Bottom of main body (intake/exhaust vents)

Remove dust and foreign objects using a vacuum cleaner etc..

Cleaning function
(when the cleanliness of the Rice Cooker is a concern)
If odour is hard to remove or the dirt does not come off the Inner Lid....
Preparation ○ Fill the Inner Pan with water up to around 80% of capacity.
② Put the Inner Pan in the main body and close the Outer Lid.
1 Set "4" to "Clean" Press 4 times.

Press the "Start" button

Cleaning function starts.
3 When the buzzer sounds after approximately 60 minutes

● After the water has cooled, pour it away.
- It may be effective to cut a lemon into slices and add them to the water.
- It may not be possible to completely remove odour or dirt.
ECONAVI Q&A
Questions Answers
What is ECONAVI?
Is ECONAVI available for all programs?
Why doesn't the ECONAVI lamp light up during the keep warm state?
Why does the ECONAVI lamp switch off during operation?
Can I switch the ECONAVI lamp off?
- When the keep warm function is in use, the Rice Cooker applies an amount of heat corresponding to the amount of rice. ● ECONAVI will work after cooking using the "Delicious", "Quick", "Eco", "1-2 person" or "Sushi" programs. ECONAVI will not work with the following programs which are not recommended to use the keep warm function. ("Congee", "Casserole", "Brown", "Grains", "Mixed", "Cake", "Steam", "Soup".)
- Are you using the high-temperature keep warm setting? (P.32) ECONAVI is not available when the keep warm temperature is increased.
- ECONAVI may not work if the Rice Cooker is cooking a large quantity (7 cups or more in the 1.0L model, or 5 cups or more in the 1.0L model) when the room temperature at the start of cooking is 10°C or less.
- Have you switched off the keep warm function after cooking? When the keep warm function is switched off, ECONAVI is also switched off. ECONAVI will not operate, even if keep warm is restarted.
- Is the ECONAVI lamp set to off? The ECONAVI lamp can be switched off. (See below) ● Has the keep warm function been in operation for 12 hours or more? After 12 hours, the keep warm function continues to operate but ECONAVI ends. ● The ECONAVI lamp can be switched off using the following procedure. Note that ECONAVI continues even with the light switched off.
1 Set to "Congee"


(for approximately 5 seconds)


Notes
- After the setting is completed, the display returns to the current time. - To restore the setting (allow the ECONAVI lamp to switch on again), perform the same operation again.
[When restoring the setting...]
Goes on for 10 seconds

[Energy-saving effect of ECONAVI]
Comparison of when ECONAVI is used/not used during the keep warm state. (Researched by Panasonic) Savings of 2.8 to 9.5% are made with the SR-SAT102 and 3.9 to 13.6% are made with the SR-SAT182. The precise saving depends on how long the keep warm function is used. Note also that these figures are approximate and may differ in actual usage.
At room temperature of 23°C
● 1.0L model: 300 g rice was removed immediately after the Rice Cooker completed the cooking of 3 cups of rice. Further, 200 g rice was removed after the grain oven (vuction has been worked in 5 haver). - 1.8L model: 300g rice was removed immediately after the Rice Cooker completed the cooking of 5 cups of rice. Further 600g rice was removed after the keep warm function has been worked for 5 hours.
What does this mean?
| Error message Check | There! |
| U 10 | ●Is the Inner Pan set properly?→ Place the dedicated Inner Pan in the Rice Cooker, close the Outer Lid, and retry the operation. * If the message does not disappear, press the "Cancel/Off" button, wait for the message to disappear and retry the operation. |
| U 12 | ●Is the foreign object or dirt attached to the bottom part of the Inner Pan, the Inner Lid, the Lid Sensor or the Pan Sensor? (P.8)→ Remove the foreign object or dirt and press the "Cancel/Off" button. ●Is there too much water in the Inner Pan?→ Press the "Cancel/Off" button. (Upon next cooking, reduce the amount of water slightly.) * When this error message appears, the keep warm function may not be switched on automatically. To use the keep warm function, perform the above-described procedure and then press the "Steam Keep Warm" button. |
| U 14 | ●Has the keep warm function been in use for more than 96 hours?→ Press the "Cancel/Off" button. |
| U 15 | ●Is the Outer Lid open?●Is the Taste Catcher filled?→ If the Taste Catcher has been lost, please purchase another one from an authorized service center (as described in the Warranty). ●Is there foreign object or dirt in the Taste Catcher?→ Clean it before attaching. |
| U 17 | ●The Rice Cooker is being affected by power supply noise.→ Press the "Cancel/Off" button and connect to another power outlet. |
| U 23 | ●Is the Exhaust Unit in place?→ Attach the Exhaust Unit on the Outer Lid. |
| U 24 | ●Is the Intake Filter or Exhaust Unit blocked by dust etc.?→ Remove the dust etc. and press the "Cancel/Off" button. ●Was the Intake Filter blocked during cooking?→ Remove the impediment and press the "Cancel/Off" button. ●Is there something over the Exhaust Unit?→ Remove the impediment on the Exhaust Unit and press the "Cancel/Off" button. |
| U 25 | ●Is the intake or exhaust vent on the bottom of the Rice Cooker blocked by dust etc.?→ Remove the dust using the following procedure. 1:Press the "Cancel/Off" button and then remove the Power Plug. 2:Once the body has cooled down, remove the Inner Pan. 3:Remove the dual from the intake/exhaust vents on the bottom of the main body. (P.28) ●Is the Rice Cooker being used on a carpet etc.?→ Please use the Rice Cooker in a well-ventilated location (on a table etc.). |
If none of the methods described above brings an improvement, please consult an authorized service center (as described in the Warranty) for a repair.
| H01~H 132829 | Consult an authorized service center (as described in the Warranty) for a repair. |
Does my Rice Cooker have a fault?
Check the following before asking for a service.
| Symptoms | Check here! | Page |
| Cooking begins Immediately despite use of timer. | ● Is the current time correct? (time displayed in 24 hour clock format)● Has the timer been set to a time outside the "Timer Setting Restrictions"? | 1634 |
| I have set the timer but cooking doesn't start. | ● When using the timer, the rice is soaked before cooking starts, and so the soaking time after cooking starts is shorter.Consequently, cooking starts slightly later than might be expected.(With other programs, the cooking may start around 40 minutes) before the rice is due to be ready. | — |
| The rice is not ready at the time set on the timer. | ● Is the current time correct? (time displayed in 24 hour clock format)● Have you pressed the "Start" button? | 1616 |
| The cooking time is longer than expected. | ● If rice is cooked one after the other, the cooking time may lengthen (by up to around 30 minutes).● The Rice Cooker may stop the countdown of time remaining to make an adjustment. | — |
| The Rice Cooker Is making a noise. | ● Whirring noise → Sound of the fans rotating in the bottom of the main body and the Outer Lid.● High-pitched noise → Sound of IH (induction heating).● Low-pitched noise → Sound of pump injecting steam into the Inner Pan. | — |
| Steam Is leaking from somewhere other than the Exhaust Unit. | ● Is there rice stuck to the Packing or the edge of the Inner Pan, or is the Inner Pan deformed in some way?● Are you washing and correctly attaching the Inner Lid after every use? | —25 |
| A button operation Is not working. | ● Is the button lamp on?Button operations will not work in use such as cooking/the keep warm state/the timer setting.→ Press the "Cancel/Off" button. | — |
| Reheat Is not working. | ● Is the keep warm function switched off?● Is the rice cold? (Buzzer will sound 4 times)Reheating is not possible if the temperature is 50°C or less. | — |
| Display is blank. | ● Does "8:30" appear when you plug the Power Plug?[Displayed] The lithium battery has run down.With the Power Plug plugged In, you can cook rice or use the keep warm function, but the current time must be set on each occasion that you use the timer.The battery is fixed inside the main body and cannot be replaced by the user.[Not displayed] There is a fault in the electronic circuitry.→ For a replacement of battery or repair, consult an authorized service center (as described in the Warranty). | 16 |
| Sparks were visible at the Power Plug. | ● Sometimes small sparks can be seen when inserting or removing the Power Plug. This is a phenomenon particular to IH (induction heating) techniques and not indicative of a fault. | — |
■ If you mistakenly add water or rice to the main body, please unplug and contact an authorized service center (as described in the Warranty).
What to do when...
●The Rice Cooker does not have a fault. Check the following before asking for a repair.
Too sticky (soft)
● Have you measured the quantities of rice and water correctly? (P.10)
●Are there many broken grains in the rice?
●Have you been soaking the rice for long periods? When using the timer, for example.)
When using the timer, try reducing the amount of water slightly. (Reduce water by approximately 1 to 2 mm from the Water Level.)
Are you using hot water to wash the rice?
Are you using more than the specified amount of rice with the "1-2 person" program for small amounts (1.0 kg model, 2.5 kg, 4.5 kg, 1.0 kg, 1.7 kg, 3.5 kg).
amounts. (1.0L model: 0.5–1.5 cups, 1.6L model: 1–2.5 cups) When the rice is cooked, are you mixing it immediately?
When cooking new-crop rice, are you using less water than normal? (Reduce water by
approximately 1 to 2 mm from the Water Level.
- Are you leaving the rice in the strainer after washing? (This can result in cracking of the rice grains.)
- Do you prefer inner ice? → Reduce the amount of water slightly. (Reduce water by approximately 1 to 2 mm from the Water Level.)
If you are using the "Eco" program, try using the "Delicious (Hard)" program.

Too hard (dry)
● Have you measured the quantities of rice and water correctly? (P.10)
● Are you using the "Quick" program?
● Do you prefer softer rice?
① Increase the amount of water slightly.
Increase water by approximately 1 to 5 mm from the Water Level for the "Eco" program
and 1 to 2 mm for other programs.
② Try soaking the rice (for 30 minutes to 2 hours) before cooking. ③ If you are using the "Foo" program, fluff the rice after cooking.
③ If you are using the "Eco" program, fluff the rice after cooking and then leave it for a few minutes. Alternatively, try using the "Delicious (Sticky)" program.

Rice is burnt
● Has the rice been processed and washed properly?
● Is there dirt or foreign object stuck to the Lid Sensor, Pan Sensor, bottom of the Inner Pan or inside the main body?
● Are you using the timer? (Have you been soaking the rice for long periods?)
Are there many broken grains in the rice?
Were the rice grains split as they were left in the strainer after washing? (P.10)
Cooking rice with seasoning such as mixed rice may easily burn.
A golden brown colour on the rice at the bottom of the Inner Pan is not indicative of a fault.
If there is no improvement after following the above-described steps, see "If burning is a concern". (P.32)

Symptoms
Condensation appears.
Rice smells odour.
Rice has a yellow colour.
- When the rice is cooked, are you mixing it immediately? - Did you remove the Power Plug during the keep warm state with rice still in the Rice Cooker?
- When the rice is cooked, are you mixing it immediately? - Did you remove the power plug during the keep warm state with rice still in the rice cooker?
● Has the keep warm function been in operation for 12 hours or more?
Did you add cold rice during the keep warm state? Has the rice been processed and washed properly?
●Has the rice been processed and washed properly? ●Are you using the keep warm function with the Rice Scoop still in the Rice Cooker?
● After cooking mixed rice with seasoning, an odour may remain
→ Carefully wash the Inner Pan, Inner Lid and Taste Catcher.
If this does not remove the odour, use the Cleaning function. (P.26)
With certain types of rice, a yellow colour will be left on the rice after cooking.
Rice is dry.

Has the keep warm function been in operation for 12 hours or more?
Have you reheated repeatedly?
Is there rice stuck to the Packing of the Outer Lid or the edge of the Inner Pan, or is the Inner Pan deformed in some way?
Congee is sticky.

Have you been soaking the rice for long periods? (When using the timer, for example.) Have you used the keep warm function on the congee?
A thin film is

Are you washing the rice too much, causing the rice grains to break?
Is the husk still on the rice? (Starch in the rice dissolves and reforms as a thin film on the surface. It is not harmful.)
The surface of the cooked rice has a concave shape.

This is a result of high level of heat applied to the Inner Pan. The taste of the rice is not affected.
If none of the above suggestions brings an improvement, try changing the settings using the procedures on P.32 to 33.
What to do when...
- If the suggestions on P.30 to 31 do not bring about any improvement, you can change the settings. ● After the setting is completed, the display returns to the current time.
- Steps 2, 3 and 4 must each be completed within 16 seconds. When no operation is performed for 16 seconds, the display returns to the current time. (Setting cannot be made.) → Please restart the procedure. ● To go back to the previous setting, follow the procedure again.

To increase the keep warm temperature. (60 to 74)

- Select "Quick" under "White Rice".
2 Press Reheat: 再煎熬 Keep Warm 蒸煮锅道 You will not hear a beep.


Pressing the button cycles through the temperatures (order of 74, 76, 72, 60, 74).
●Do not use the keep warm function more than 12 hours. - If an odour is generated after the change, set to '76'. If the rice is discoloured or dry, set to '72'.
- The default setting is '90' ●ECONAVI will not operate after the change.
If burning is a concern.

- Select "Quick" under "White Rice".
2 Press Dear: 王维斯 Have Keep Warm 清新保暖 You will not hear a beep.


After 4 seconds (Setting ends automatically.) SoLo
If you find the sound of the pump distracting during the keep warm state. (P.15)

- Select "Quick" under "White Rice".
2 Press You will not hear a beep.


●After the change, no steam will be used during the keep warm state. ● The sound of the pump will still be heard during cooking and reheating.
If sound of the fan (in the Outer Lid) is a concern.


- Select "Quick" under "White Rice".
2 Press You will not hear a beep.


●After the change, the temperature of steam exiting from the Exhaust Unit will increase.
To stop the buzzer sounding (end sound) during cooking, reheating and cleaning.


- Select "Quick" under "White Rice".


●This change does not switch off the button sounds.
Specifications
| Menu | Approximate cooking times (minutes) | Keep Warm Function* | Timer Setting Restrictions** | Cooking Capacity (Cup)( ) is for when other ingredients are added. | ||
| SR-SAT102 SR-SAT182 | ||||||
| White Rice | Delicious | Regular 56 | 70 mins before 60 mins before | From 70 mins before done | 0.5–5.5 1–10 | |
| Sticky 56 From | re done | |||||
| Hard 52 From 60 | re done | |||||
| Quick 20–32 | ○ | — | ||||
| Eco 35 | ○ | From 50 mins before done | ||||
| 1-2 person 55 | ○ | From 60 mins before done 0.5–1.5 1–2.5 | ||||
| Sushi 46 | ○ | From 60 mins before done 1–5.5 | 2–10 | |||
| Congee | Setting time 60–240 | × | Cooking time + 1 min or more before done | 0.5–0.75 | 0.5–1.5 | |
| Casserole | 42 | × | × | 1–3 | 2–6 | |
| Other Rice | Brown | 125–135 | × | From 160 mins before done | 1–3 (1–2) | 1–7 (1–5) |
| Grains | 42–48 | × | From 60 mins before done | 0.5–4 | 1–8 | |
| Mixed | 48–58 | × | — | 1–4 | 2–8 | |
| Cook | Cake | Setting time 40–60 | × | Cooking time + 1 min or more before done | Dough Max 600 g | Dough Max 900 g |
| Steam | Setting time 1–60 | Quantity of water 500 mL | Quantity of water 600 mL | |||
| Soup | Setting time 60–240 | Up to “White Rice” Water Level 4 | Up to “White Rice” Water Level 6 | |||
*: With "×", the Rice Cooker will switch automatically to the keep warm function, but we do not recommend this. (P.15) **: With "×", we do not recommend using the timer because it may cause the food to spoil.
| SR-SAT102 | SR-SAT182 | ||
| Power source | 220 V ~50 Hz | ||
| Power consumption (Approx.) | When cooking | 1210 W | 1400 W |
| When warming | 900 W (30.0 Wh*1) | 1100 W (36.0 Wh*1) | |
| Length of the Power Cord | 1.5 m | ||
| Weight (Approx.) | 6.8 kg | 8.0 kg | |
| Size (Width × Depth × Height) | 26.5 cm × 37.1 cm × 23.9 cm (48.3 cm*2) | 29.1 cm × 39.9 cm × 27.1 cm (53.9 cm*2) | |
●Power consumption is the maximum instantaneous electric capacity. - When the power is "Off", the Rice Cooker consumes approximately 3.5 W (plugged in state). ●This product is not suitable for use in countries or regions of differing mains frequency or voltage. Moreover, after sales service is not available. ●(*1) is the power consumed per hour during the keep warm state. (Room temperature 20°C, maximum amount of rice.) ●(*2) is the height with the Outer Lid open.
| Checks | Check your well-used IH Steam Electronic Rice Cooker / Warmer! | |
 | Have you noticed any of the following?The power plug and the power cord become abnormally hot.The power cord is damaged or power failure when is touched.The main body is deformed or abnormally hot.Smoke exudes from the main body or a burning odor is detected.The main body is cracked, is loose or rattles.The fan in the bottom is not rotating during cooking. | Stop using the Rice CookerTo prevent accidents, stop using the Rice Cooker, remove the power plug, and ask an authorized service center (as described in the Warranty) to perform a check. |
Panasonic Corporation
Web Site: http://panasonic.net/
© Panasonic Corporation 2012
Printed in Japan
RZ19YF66C

Panasonic®
Instruction Manual
IH Steam Microcomputer Rice Cooker
Household Use
1.0L Model SR-SAT102
1.8L Model SR-SAT182
Table of Contents
Inspection and
Preventive Measures
Page
Safety Precautions
2
Usage Precautions
8
Part names / accessories
9
Daily use
Cooking rice
10
(When you want to cook immediately)
12
Correct usage procedure
14
Using different programs
15
Keep warm
● Steam keep warm / reheating
ECONAVI
Using the reservation function
16
● When the current time is incorrect
Cooking
17
Recipes
● Sushi rice / Porridge
- Baked rice / Brown rice
18
● Mixed grains / Mixed rice
- Cake
20
Steam
● Soup
22
Cleaning
Every
Cleaning
24
● Clean before first use and after each use
● Regular inspection ● Cleaning function
Thank you for purchasing a Panasonic product.
Cooking rice
When you want to cook immediately
● Program note: White Rice/Casserole
② Press the "Start" button
① If the warning appears, add ingredients up to the maximum rice level, then start immediately
Step
Important information
- Do not add ingredients beyond the maximum water level mark

© Panasonic Corporation 2012


- OPERATING INSTRUCTIONS
- CONTENTS
- RECIPES
- CLEANING
- SAFETY PRECAUTIONS
- WARNING
- CAUTION
- NOTES ON USE PART NAMES/ACCESSORIES
- ABOUT THE RICE COOKER
- ABOUT THE INNER PAN
- ACCESSORIES
- ATTACHING THE RICE SCOOP HOLDER
- COOKING RICE WHEN YOU WISH TO COOK IMMEDIATELY
- USING THE PROGRAMS CORRECTLY
- THIS IS THE DEFAULT SETTING
- TEXTURE PREFERENCES
- ECO
- BALANCE COOKING TIME AND POWER CONSUMPTION
- USING DIFFERENT PROGRAMS: KEEPING WARM
- DO I HAVE TO SELECT A PROGRAM EVERY TIME
- NOTES
- STEAM KEEP WARM (AUTOMATIC)
- REHEAT (MANUAL)
- USING THE TIMER
- TIMER
- WHEN THE CURRENT TIME IS INCORRECT
- TO SEE THE CURRENT TIME AFTER SETTING THE TIMER
- LIGHTING
- COOKING
- COOK
- PRESS THE "START" BUTTON
- PRECAUTIONS
- DURING COOKING
- AFTER COOKING
- SUSHI/CONGEE CASSEROLE/BROWN
- GRAINS/MIXED CAKE
- STEAM SOUP
- REGULAR CHECKS
- INTAKE FILTER
- REMOVE AND WASH
- REMOVING
- ATTACHING
- EXHAUST UNIT
- BOTTOM OF MAIN BODY (INTAKE/EXHAUST VENTS)
- CLEANING FUNCTION
- SET "4" TO "CLEAN" PRESS 4 TIMES
- WHEN THE BUZZER SOUNDS AFTER APPROXIMATELY 60 MINUTES
- ECONAVI Q&A
- QUESTIONS ANSWERS
- SET TO "CONGEE
- WHAT DOES THIS MEAN
- DOES MY RICE COOKER HAVE A FAULT
- WHAT TO DO WHEN
- TOO STICKY (SOFT)
- TOO HARD (DRY)
- RICE IS BURNT
- SYMPTOMS
- TO INCREASE THE KEEP WARM TEMPERATURE. (60 TO 74)
- IF BURNING IS A CONCERN
- IF YOU FIND THE SOUND OF THE PUMP DISTRACTING DURING THE KEEP WARM STATE. (P.15)
- IF SOUND OF THE FAN (IN THE OUTER LID) IS A CONCERN
- TO STOP THE BUZZER SOUNDING (END SOUND) DURING COOKING, REHEATING AND CLEANING
- SPECIFICATIONS
- PANASONIC CORPORATION
- PANASONIC®
- INSTRUCTION MANUAL
- TABLE OF CONTENTS
- DAILY USE
- COOKING RICE
- IMPORTANT INFORMATION
Brand : PANASONIC
Model : SR-SAT102
Category : Rice cooker