
Vixia HF R700 - Camcorder CANON - Free user manual and instructions
Find the device manual for free Vixia HF R700 CANON in PDF.


| Product Type | Camcorder |
| Model | Canon Vixia HF R700 |
| Dimensions (approx.) | 53 x 58 x 116 mm (without protruding parts) |
| Weight (approx.) | 310 g (including battery and memory card) |
| Power Source | Rechargeable lithium-ion battery pack BP-718 |
| Optical Zoom | 32x |
| Digital Zoom | Approx. 1140x (with Advanced Zoom) |
| Image Stabilization | Optical (Intelligent IS) with Dynamic IS modes |
| Recording Media | SD, SDHC, SDXC memory cards |
| Video Resolution | Full HD 1920x1080 at up to 60p |
| Sensor | 1/4.85-inch CMOS sensor |
| Lens Aperture | f/1.8–4.5 |
| LCD Screen | 3.0-inch touchscreen (approx. 230,000 dots) |
| Wi-Fi Connectivity | Built-in IEEE 802.11b/g/n |
| Highlight Features | Advanced Zoom, Baby Mode, Story Creator, SuperRange OIS |
| Cleaning | Use a soft, dry cloth to clean the body; avoid solvents. |
| Safety Precautions | Do not expose to moisture; use specified charger only. |
| Spare Parts & Repairability | Contact Canon service centers for replacement parts; battery and AC adapter are consumables. |
| General Information | Part number: 1139C001; compatible with Canon NB-718, CB-718 charger. |
Frequently Asked Questions - Vixia HF R700 CANON
User questions about Vixia HF R700 CANON
0 question about this device. Answer the ones you know or ask your own.
Ask a new question about this device
Download the instructions for your Camcorder in PDF format for free! Find your manual Vixia HF R700 - CANON and take your electronic device back in hand. On this page are published all the documents necessary for the use of your device. Vixia HF R700 by CANON.
USER MANUAL Vixia HF R700 CANON
HD Camcorder Instruction Manual

NTSC

VIXIA
HFR70
VIXIA
HFR72

VIXIA
HFR700
AVCHD
Progressive
MP4
HDMI
WiFi
CERTIFIED
HFR72/R70
Important Usage Instructions
WARNING
TO REDUCE THE RISK OF ELECTRIC SHOCK AND TO REDUCE ANNOYING INTERFERENCE, USE THE RECOMMENDED ACCESSORIES ONLY.
COPYRIGHT WARNING:
Unauthorized recording of copyrighted materials may infringe on the rights of copyright owners and be contrary to copyright laws.
Trademark Acknowledgements
• SD, SDHC and SDXC Logos are trademarks of SD-3C, LLC. - Microsoft and Windows are trademarks or registered trademarks of Microsoft Corporation in the United States and/or other countries. - App Store, iPad, iPhone, iTunes and Mac OS are trademarks of Apple Inc., registered in the U.S. and other countries.
- HDMI, the HDMI logo and High-Definition Multimedia Interface are trademarks or registered trademarks of HDMI Licensing LLC in the United States and other countries.
- "AVCHD", "AVCHD Progressive" and the "AVCHD Progressive" logo are trademarks of Panasonic Corporation and Sony Corporation.
- Google, Android, Google Play, YouTube are trademarks of Google Inc.
- Manufactured under license from Dolby Laboratories. “Dolby” and the double-D symbol are trademarks of Dolby Laboratories.
• Facebook is a registered trademark of Facebook, Inc.
- IOS is a trademark or registered trademark of Cisco in the U.S. and other countries and is used under license.
• The Twitter name and marks are trademarks of Twitter, Inc.
• Wi-Fi is a registered trademark of the Wi-Fi Alliance.
• Wi-Fi Certified, WPA, WPA2, and the Wi-Fi Certified logo are trademarks of the Wi-Fi Alliance.
- WPS as used on the camcorder's settings, onscreen displays and in this manual signifies Wi-Fi Protected Setup.
- The Wi-Fi Protected Setup Identifier Mark is a mark of the Wi-Fi Alliance.
- The N-Mark is a trademark or registered trademark of NFC Forum, Inc. in the United States and in other countries.
- FlashAir is a trademark of Toshiba Corporation.
- Other names and products not mentioned above may be trademarks or registered trademarks of their respective companies.


- This device incorporates exFAT technology licensed from Microsoft.
- "Full HD 1080" refers to Canon camcorders compliant with high-definition video composed of 1,080 vertical pixels (scanning lines).
- This product is licensed under AT&T patents for the MPEG-4 standard and may be used for encoding MPEG-4 compliant video and/or decoding MPEG-4 compliant

video that was encoded only (1) for a personal and non-commercial purpose or (2) by a video provider licensed under the AT&T patents to provide MPEG-4 compliant video. No license is granted or implied for any other use for MPEG-4 standard.
About this Manual and Camcorder
Thank you for purchasing the Canon VIXIA HF R72 / VIXIA HF R70 / VIXIA HF R700. Please read this manual carefully before you use the camcorder and retain it for future reference. Should your camcorder fail to operate correctly, refer to Troubleshooting (250).
Conventions Used in this Manual

Important precautions related to the camcorder's operation.

Additional notes and topics that complement the basic operating procedures.

Restrictions, requirements or preconditions regarding the function described.

Reference page number within this manual.
HFR72/R70
Text that applies only to the model(s) shown in the icon.

This arrow is used to abbreviate menu selections. For a detailed explanation on how to use the menus, refer to Using the Menus (41).
- The following terms are used in this manual:
HFR72/R70 When not specified as "memory card" or "built-in memory", the term "memory" by itself refers to both.
"Scene" refers to one movie unit recorded with a single recording operation.


- Brackets [ ] are used to refer to onscreen controls you need to touch (menus, buttons, etc.) and to messages as they are displayed on the screen.
- The photos included in this manual are simulated pictures taken with a still camera. Unless indicated otherwise, illustrations and menu icons refer to the HFR72.
- Illustrations of the camcorder's screen or a computer's screen included in this manual may show only relevant parts of the screen.
- Navigation buttons: The navigation bar at the bottom of the page offers up to four buttons to let you get quickly to the information you want to find.

Jump to the general table of contents.

Go to a list of select functions grouped by their uses in real-life situations. This alternative index can be very useful for beginners who encounter a particular challenge but are not sure of what function to use.

Jump to the alphabetical index.

The button with a number in it will take you to the beginning of the current chapter, where you will find an overview of the information and related functions covered in that chapter. Note that the icon itself will change depending on the chapter you are currently reading.

- Observe the following precautions while the camcorder's ACCESS indicator is on or flashing. Failing to do so may result in permanent data loss or damage to the memory.
- Do not open the memory card slot cover.
- Do not disconnect the power source or turn off the camcorder.
- Do not change the camcorder's shooting mode.
- Do not press the ^ button.
- When a USB cable is connected to the camcorder, do not disconnect the USB cable.

Table of Contents
Important Usage Instructions ....2
About this Manual and Camcorder ....4
The Camcorder's Functions in Real-Life Situations ......12
Unique functions for special cases....12
Getting the look you want....13
Challenging subjects and shooting conditions....14
Playback, editing and others....15
HFR72/R70 Wireless functions 16
Getting to Know the Camcorder....18
Supplied Accessories 18
Names of Parts....19
Preparations 24
Charging the Battery Pack....25
Using a Memory Card....29
Memory Cards Compatible for Use with the Camcorder .....29
Inserting and Removing a Memory Card....30
First Time Settings....33
Basic Setup....33
Changing the Time Zone....37
Initializing the Memory....38
Basic Operation of the Camcorder....40
Using the Touch Screen 40
Using the Menus....41
Operating Modes....47
Basic Recording and Playback 49
Basic Recording ....50
Recording Video....50
Taking Photos 54
AUTO Mode ....56
Zooming....59
Basic Playback 64
Playing Back Video....64
Viewing Photos....70
Deleting Scenes and Photos....73
Advanced Recording Functions.... 77
Recording Settings and Shooting Modes....78
Selecting the Movie Recording Format (AVCHD/MP4) .....78
Selecting the Video Quality ....78
HFR72/R70 Selecting the Memory (Built-in Memory/
Memory Card) for Recordings....80
HFR72/R70 Dual Recording and Relay Recording....81
Selecting the Shooting Mode....82
Baby Mode....84
Highlight Priority Mode....85
Cinema Mode and Cinema-Look Filters 86
Special Scene Modes 88
Programmed AE Mode: Adjusting Settings to Match
Your Needs 91
Convenient Functions....92
Slow & Fast Motion Recording....92
Decoration: Adding a Personal Touch....95
Video Snapshot....105
Face Detection and Tracking 106
Faders 109
When You Want More Control....111
Exposure 111
Focus....113
White Balance 115
Frame Rate....117
Tele Macro 118
Recording Audio 120
Audio Scenes....120
Using Headphones....121
Using an External Microphone 123
Advanced Playback and Editing Functions ...... 125
Advanced Playback Functions ....126
Capturing Video Snapshot Scenes and Grabbing
Still Frames from a Movie....126
Playback with Background Music....129
Selecting the Playback Starting Point....132
Photo Slideshow ....134
Editing Functions ....136
Dividing Scenes....136
Trimming Scenes....137
Changing the Thumbnail Image of a Scene......139
HFR72/R70 Copying Recordings to a Memory Card .....140
Converting Movies to MP4 Format....143
HFR72/R70 Converting Movies into Fast Motion Scenes ..... 147
External Connections.... 149
Terminals on the Camcorder 150
Connection Diagrams 151
Playback on a TV Screen....154
Saving and Sharing Your Recordings....156
Saving Recordings on a Computer 157
Saving Recordings on the Optional CS100 Connect Station (USB)....163
HFR72/R70 Memory Save: Saving an Entire Memory onto an External Hard Drive ....164
Copying Recordings to an External Video Recorder......169
HFR72/R70 Wi-Fi Functions.... 171
Overview of the Camcorder's Wi-Fi Functions....172
The Camcorder's Wi-Fi Functions....177
Using an iOS or Android Device as a Remote Control......177
Playback via Browser: Viewing Recordings Using a Web Browser on an iOS or Android Device....189
Saving Recordings and Uploading Movies to the Web Using an iOS Device....192
Saving Recordings on the Optional CS100 Connect Station (NFC+Wi-Fi)....194
Sharing Recordings with CANON iMAGE GATEWAY......196
Wireless Playback on a Computer 203
Wi-Fi Connection and Settings....206
Wi-Fi Connection Using an Access Point 206
Viewing and Changing Wi-Fi Settings......212
Additional Information...... 216
Appendix: Menu Options Lists ......217
Appendix: Onscreen Icons and Displays....241
Trouble?......250
Troubleshooting....250
List of Messages....262
Do's and Don'ts....280
Handling Precautions....280
Maintenance/Others 286
Cleaning 286
Condensation....286
Using the Camcorder Abroad 287
General Information ....289
Optional Accessories....289
Specifications 293
Reference Tables....298
Index 303

The Camcorder's Functions in Real-Life Situations
Unique functions for special cases
Keep beautiful memories of baby's most precious moments and use the especially designed stamps to keep track of baby's growth.
▶ Baby Mode (☐ 84)

Shoot a cool time-lapse video or use slow motion to check your golf swing.
▶ Slow & Fast Motion Recording (92)
Decorate movies with graphics and stamps.
▶ Decoration (95)

Create a dynamic montage sequence with short cuts.
▶ Video Snapshot (105)

Record the best sound possible according to your shooting situation, such as when attending a speech or musical performance.
▶ Audio Scenes (120)
Audio Scene
SELECT
Choose whether to record in AVCHD or MP4 format.
▶ Movie Format (78)
Progressive

Getting the look you want
Let the camcorder select the best settings according to the shooting scene to get beautiful video and photos.
AUTO mode (56)
Make the image brighter or darker than the exposure set by the camcorder.
▶ Exposure (111)

Get more life-like detail when shooting a scene with very bright areas.
▶ Highlight Priority Mode (☐ 85)

[Highlight Priority] shooting mode
Change how smooth or natural movement looks in your videos.
Frame Rate (117)
Give your recordings a professional cinematic look.
▶ Cinema Mode and Cinema-Look Filters (86)

Cinema-look filter [FILTER 2] (Vivid)
Challenging subjects and shooting conditions
Shoot great video of special scene situations with minimal settings.
▶ Shooting Modes (82)
Obtain natural-looking colors even under special lighting conditions.
▶ White Balance (115)
Optimize the exposure for the desired subject just by touching the screen.
▶ Touch AE (112)
Keep the subject in focus and the exposure optimized while shooting a moving subject.
▶ Face Detection and Tracking (106)
Playback, editing and others
Save parts of your video as image files or short video snapshot scenes.
▶ Grabbing Still Frames/Capturing Video Snapshot Scenes (126)
Convert scenes into a smaller file size to upload to the Web.
▶ Converting Movies to MP4 Format (143)
HFR72/R70 Convert scenes into interesting time-lapse scenes.
▶ Converting Movies into Fast Motion Scenes (147)
HFR72/R70 Save all the recordings in a memory directly onto an external hard disk, even without a computer.
▶ Memory Save (164)
Lock your files to avoid inadvertently deleting or changing them.
▶ Locking Files from Editing (68)
Play back scenes or a slideshow of photos with background music.
▶ Playback with Background Music (129)
Enjoy your recordings on a TV.
HDMI Connection (151)
▶ Playback (154)
Save recordings on your computer and upload them to the Web.
▶ Saving Recordings (157)
Save your recordings effortlessly on the optional CS100 Connect Station.
▶ CS100 Connect Station (163, 194)

HFR72/R70 Wireless functions
Use your smartphone or tablet as a remote control while recording.
▶ CameraAccess plus (177)
Use a Web browser on your smartphone or tablet to access and play back the recordings in the camcorder.
▶ Playback via Browser (189)
Use an iOS app to wirelessly transfer recordings to your iPhone/iPad and upload them to the Web.
▶ Movie Uploader (192)

Share your recordings with Web albums using CANON iIMAGE GATEWAY.
▶ CANON iIMAGE GATEWAY (196)
Use the NFC function to effortlessly connect your camcorder to your NFC-enabled Android device.
▶ NFC (178, 184, 189)

Connect the camcorder to your home network and wirelessly stream your recordings.
▶ Media Server (203) ▶ Wi-Fi Connection to an Access Point (206)
Review and change Wi-Fi settings (for advanced users).
Wi-Fi Settings (212)
Supplied Accessories
The following accessories are supplied with the camcorder:

▶ CA-110 Compact Power Adapter*
BP-727 Battery Pack


IFC-300PCU/S USB Cable
HTC-100/S High Speed HDMI Cable


Getting Started Leaflet
Transfer Utility LE Startup Guide**

* CA-110E, including power cord, in Asia.
** This guide explains how to download PIXELA's Transfer Utility LE software, which allows you to save AVCHD movies to a computer and to transfer music files to the camcorder or a memory card. For details on using the software, refer to the 'Transfer Utility LE Software Guide' included with the downloaded software.

- The camcorder may make a rattling sound if it is shaken (256).


Names of Parts
Left side view

1 ▶ (playback mode) button (48) 2 ON/OFF button 3 Memory card slot cover (30) 4 Memory card slot (30) 5 MIC (microphone) terminal (123) 6 AV OUT terminal (150, 152)/Ω (headphones) terminal (121) 7 HDMI OUT terminal (150, 151) 8 USB terminal (150, 153)
Right side view

1 START/STOP button (50) 2 DC IN terminal (25) 3 Grip belt
Adjust the grip belt so that you can reach the zoom lever with your index finger, and the START/STOP button with your thumb.

4 Lens cover switch
Move the lens cover switch down to Ⓑ to open the lens cover.


Front view Top view


1 Stereo microphone (120, 239) 2 HFR72/R70 NFC (near field communication) touchpoint (180, 194) 3 Speaker (67) 4 Zoom lever (59)
Back view Bottom view

1 LCD touch screen (23, 40) 2 ACCESS indicator (6, 50, 54) 3 HFR72/R70 Wi-Fi antenna (176) 4 POWER/CHG (charge) indicator: Green - On; Red - Charging (25) 5 Battery attachment unit (25) 6 Serial number

7 Tripod socket (282) 8 BATTERY RELEASE switch (26)


LCD touch screen
Open the LCD panel 90 degrees. By default, this will turn on the camcorder. The first time you open the LCD panel, the initial setup screens will appear and guide you through the basic settings (33).
Adjust the position of the LCD panel according to the recording conditions.

- The screen is produced using extremely high-precision manufacturing techniques, with more than 99.99% of the pixels operating to specification. Less than 0.01% of the pixels may occasionally misfire or appear as black, red, blue or green dots. This has no effect on the recorded image and does not constitute a malfunction.
- For details about how to take care of the touch screen, refer to Handling Precautions (280), Cleaning (286).

Preparations
25
Charging the Battery Pack
The first step for using your camcorder is to prepare the power supply. This section explains how to charge a battery pack.
29
Using a Memory Card
This section explains the types of memory cards that can be used and how to insert one into the camcorder.
33
First Time Settings
When you turn on the camcorder for the first time, you will need to complete the basic setup and set the camcorder's language, date and time, movie format (AVCHD or MP4), and recording memory (HFR72/R70 only).
40
Basic Operation of the Camcorder
In this section you can learn more about basic operations, such as using the touch screen, changing operating modes and using the menus.
Charging the Battery Pack
The camcorder can be powered with a battery pack or directly using the compact power adapter.
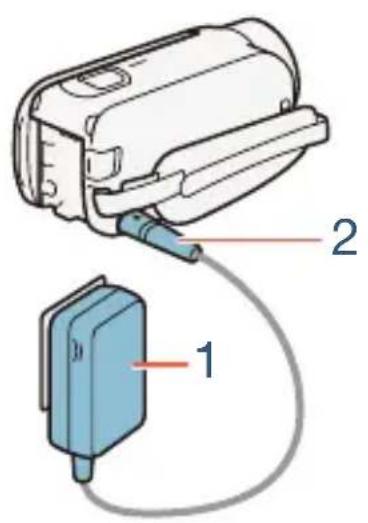

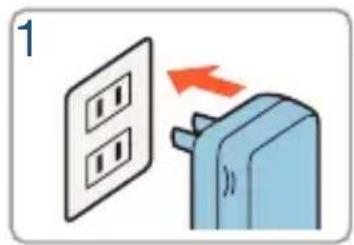

1 Plug the compact power adapter into a power outlet.
- For Asia only: Connect the power cord to the compact power adapter before plugging the power cord into the power outlet.
2 Connect the compact power adapter to the camcorder's DC IN terminal.


Charging the Battery Pack

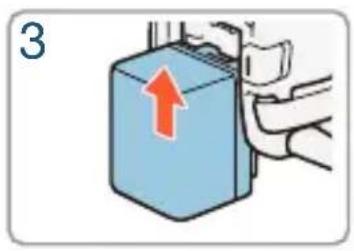

3 Attach the battery pack to the camcorder.
- Press the battery pack softly into the battery attachment unit and slide it up until it clicks in place.
4 Charging will start when the camcorder is turned off.
- If the camcorder was on, the green POWER/CHG indicator will go out when you turn off the camcorder. After a moment, the POWER/CHG indicator will turn on in red (battery pack charging). The red POWER/CHG indicator will go out when the battery pack is fully charged.
- If the indicator flashes, refer to Troubleshooting (☐ 255).
- Fully charging the supplied battery pack will take approximately 7 hours and 45 minutes.
To remove the battery pack
1 Slide BATTERY RELEASE in the direction of the arrow and hold it pressed down. 2 Slide the battery pack and then pull it out.


Charging the Battery Pack


- Turn off the camcorder before connecting or disconnecting the compact power adapter. After turning off the camcorder, important data is updated in the memory. Be sure to wait until the green POWER/CHG indicator goes out.
- Do not connect to the camcorder's DC IN terminal or to the compact power adapter any electrical equipment that is not expressly recommended for use with this camcorder.
- To prevent equipment breakdowns and excessive heating, do not connect the supplied compact power adapter to voltage converters for overseas travels or special power sources such as those on aircraft and ships, DC-AC inverters, etc.

- We recommend charging the battery pack in temperatures between 10°C and 30°C (50°F and 86°F). If either the ambient temperature or the battery pack's temperature is outside the range of approx. 0°C to 40°C (32°F to 104°F), charging will not start.


Charging the Battery Pack
- If the ambient temperature or the battery pack's temperature is low, charging may take longer than usual.
- The battery pack will be charged only when the camcorder is off.
- If the power supply was disconnected while charging a battery pack, make sure the POWER/CHG indicator has gone out before restoring the power supply.
- If remaining battery time is an issue, you can power the camcorder using the compact power adapter so the battery pack will not be consumed.
- Charged battery packs continue to discharge naturally. Therefore, charge them on the day of use, or the day before, to ensure a full charge.
- Battery packs for this camcorder can display the remaining battery time. The first time you use a battery pack, fully charge it and then use the camcorder until the battery pack is completely exhausted. Doing so will ensure that the remaining recording time will be displayed accurately.
- For details about how to take care of the battery pack, refer to Battery Pack (283). For charging times and approximate usage times, refer to the Reference Tables (298).
- You can verify the battery charge status of the battery pack with the [Battery Info] setting.
- We recommend that you prepare battery packs to last 2 to 3 times longer than you think you might need.
Using a Memory Card
Memory Cards Compatible for Use with the Camcorder
You can use the following types of commercially available Secure Digital (SD) cards with this camcorder. We recommend using memory cards rated CLASS 4, 6 or 10*.
As of December 2015, the movie recording function has been tested using SD/SDHC/SDXC cards made by Panasonic, Toshiba and SanDisk.
Memory card type:

SD card

SDHC card

SDXC card
SD Speed Class**:
CLASS 4
CLASS 6
CLASS 10
* To record movies with a video quality of 60P or 35 Mbps, or to use slow & fast motion recording, we recommend using memory cards rated CLASS 6 or 10. ** When using an SD memory card without a Speed Class rating or one rated CLASS 2, you may not be able to record movies.

- After repeatedly recording and deleting scenes (fragmented memory), it will take longer to write data on the memory card and recording may stop. Back up your recordings and initialize the memory card using the [Complete Initialization] option (38).


- About the Speed Class: Speed Class is a standard that indicates the minimum guaranteed data transfer speed of memory cards. When you buy a new memory card, look for the Speed Class logo on the package.
SDXC Cards
You can use SDXC cards with this camcorder. When using SDXC cards with other devices, such as digital recorders, computers and card readers, make sure that the external device is compatible with SDXC cards. For more information on compatibility, contact the computer, operating system or memory card manufacturer.

- If you use an SDXC card with a computer OS that is not SDXC-compatible, you may be prompted to format the memory card. In such case, cancel the operation to prevent data loss.
Inserting and Removing a Memory Card
When you turn on the camcorder for the first time, the first screen of the basic setup will appear. To use a memory card for recording, turn off the camcorder and insert the memory card before performing the basic setup. After completing the basic setup (☐ 33), be sure to initialize the memory card with the camcorder before using it for the first time (☐ 38).




1 Open the LCD panel.
- The camcorder will turn on automatically. If this is the first time you turn on the camcorder, the language selection screen of the basic setup will appear.
2 Press ON/OFF to turn off the camcorder.
- Make sure the POWER/CHG indicator is off.
3 Open the memory card slot cover.
4 Insert the memory card at a slight angle, with the label facing toward the lens, all the way into the memory card slot until it clicks.
- The memory card slot is at a slight angle toward the lens so be careful not to damage the memory card when inserting it.
5 Close the memory card slot cover.
- Do not force the cover closed if the memory card is not correctly inserted.


To remove the memory card
Push the memory card once to release it. When the memory card springs out, pull it all the way out.

- SD cards have front and back sides that are not interchangeable. Inserting an SD card facing the wrong direction can cause a malfunction of the camcorder. Be sure to insert the memory card as described in step 4.

- SD cards have a physical switch to prevent writing on the card so as to avoid the accidental erasure of the card's content. To write-protect the memory card set the switch to the LOCK position.
First Time Settings
Basic Setup
The first time you turn on the camcorder, you will be guided by the camcorder's basic setup screens to select the camcorder's language, set the date and time, and select the movie format (AVCHD or MP4) and recording memory (HFR72/R70 only). For details on how to use the touch screen, refer to Using the Touch Screen (40).
1 Open the LCD panel.
- If this is the first time you turn on the camcorder, the language selection screen will appear.
- You can also press ON/OFF to turn on the camcorder.
2 Touch the language that you want to be used for onscreen displays and then touch [▷].
- You can select one of 27 languages. You may need to scroll down to find your language.
- After you select a language, the [Date Format] screen will appear.

Touch [▷] after selecting a language
3 Touch [Y.M.D], [M.D,Y] or [D.M.Y] to select the date format you prefer and then touch [▷].
![CANON Vixia HF R700 - Touch [Y.M.D], [M.D,Y] or [D.M.Y] to select the date format you prefer and then touch [▷]. - 1](/content/2026/06/1327524/images/ec72d009e1dab5b1113725a5f910a31115dd13bb9a5f4bd6daeae5c79b2bc0f3.jpg)
![CANON Vixia HF R700 - Touch [Y.M.D], [M.D,Y] or [D.M.Y] to select the date format you prefer and then touch [▷]. - 2](/content/2026/06/1327524/images/6c453d7e6d304b84c8bbfd4a3e25ed702f2b70c5d8d7333fe1d09605045510d1.jpg)
![CANON Vixia HF R700 - Touch [Y.M.D], [M.D,Y] or [D.M.Y] to select the date format you prefer and then touch [▷]. - 3](/content/2026/06/1327524/images/2445b8edd0864250e286a1973428e97f27b129f287ed98b1c99484b3bdf75a80.jpg)
![CANON Vixia HF R700 - Touch [Y.M.D], [M.D,Y] or [D.M.Y] to select the date format you prefer and then touch [▷]. - 4](/content/2026/06/1327524/images/9ab2a33496262ebcab22d3183a90c1a7c78b9c4da489ea3c2cc6091ac9a76dd7.jpg)
First Time Settings
- After you select the date format, the Date/Time screen will appear with the first field selected.
4 Touch a field you want to change (year, month, day, hours or minutes).
5 Touch [▲] or [▼] to change the field as necessary.

6 Set the correct date and time by changing all the fields in the same way.
- Touch [24H] to use 24-hour clock or leave it unselected to use 12-hour clock (AM/PM).
7 Touch [OK] and then touch [▷].
- After you set the date and time, the [Movie Format] screen will appear.
8 Touch [AVCHD] or [MP4] to select the movie format and then touch [▷].
- HFR72/R70 After you select the movie format, the [■ Rec Media for Movies] screen will appear, where you can select the memory where movies will be recorded.
• HFR700 Skip to step 11.


9 Touch [☐] (built-in memory) or [SD] (memory card) and then touch [▷].
- When selecting the memory, you can check the available recording time based on the default video quality setting.
- After you select the memory where you want to record movies, the [Rec Media for Photos] screen will appear.
10 Touch [☐] (built-in memory) or [SD] (memory card) and then touch [▷].
- When selecting the memory, you can check the number of photos that can be recorded, based on a photo size of 1920x1080.
11 Touch [OK].
- The basic setup is complete. The settings you selected will appear briefly and then the camcorder will be ready to record.
- After completing the basic setup, you can close the LCD panel or press ON/OFF to turn off the camcorder.

- Some buttons, such as [ON] or [OFF] in some screens, will appear in English regardless of the language selected.
- You can change the basic setup settings also later on, using the camcorder's menus.
- Language: 🎨 ➕ [Language 📋]
- Date and time: Date/Time
- Movie format: 📋 ➤ [Movie Format]
- HFR72/R70 Memory used for recording: 📄 [Recording Media] ➤ [Rec Media for Movies] or [Rec Media for Photos]


First Time Settings
- When you do not use the camcorder for about 3 months, the built-in rechargeable lithium battery may discharge completely and the date and time setting may be lost. In such case, recharge the built-in lithium battery (285). The next time you turn on the camcorder, you will have to perform the basic setup again.
- You can change the [Power On Using LCD Panel] setting so that you can turn the camcorder on and off only by pressing ON/OFF.
First Time Settings
Changing the Time Zone
Change the time zone to match your location. The default setting is New York. In addition, the camcorder is able to retain the date and time of another location. This is convenient when you travel so that you can set the camcorder to match the time of your home location or that of your destination.
This section requires using the camcorder's menus. For details about how to use the menus, refer to Using the Menus (☐ 41).

1 Open the [Time Zone/DST] screen.


Other Settings


[Time Zone/DST]
2 Touch [♠] to set the home time zone, or [♦] to set the time zone of your destination when you are traveling. 3 Touch [▲] or [▼] to set the desired time zone. If necessary, touch [★] to adjust for daylight saving time. 4 Touch [×] to close the menu.


Initializing the Memory
Initialize memory cards when you use them with this camcorder for the first time. You can also initialize a memory card or the built-in memory (HFR72/R70 only) to permanently delete all the recordings it contains. HFR72/R70 At the time of purchase, the built-in memory comes pre-initialized and contains music files for use as background music and image files for use with the image mix function (image mix frames).

1 Power the camcorder using the compact power adapter.
- Do not disconnect the power source or turn off the camcorder until the initialization is completed.
2 Initialize the memory.
HFR72/R70
![[Other Settings] [Initialize / SD] [Built-in Mem.] or [SD Mem. Card] [Initialize] [Complete Initialization]¹ [Yes]² [OK] [×]](/content/2026/06/1327524/images/f81dc74ef834d27ef46a8ebbd1ae0ede65663efeff84d2b9da34cdeebb7a9952.jpg)
HFR700
![[Other Settings] [Initialize SD] [Initialize] [Complete Initialization]¹ [Yes]² [OK] [×]](/content/2026/06/1327524/images/5ebf80e5d0e24d7fe7a98cb4766dc8aeb29684f1dd856489fc9cb7db6a739e5c.jpg)
1 Touch this option if you want to physically erase all the data rather than just clear the file allocation table of the memory.
![graph LR A["Menu"] --> B["Target Icon"] B --> C["A Number"] C --> D["B Number"] D --> E["1 Arrow Icon"]](/content/2026/06/1327524/images/d8eb783baa574b5cadf9e9c17d3b7c75af617e83f823c2ae0186cbeb16f7b512.jpg)
First Time Settings
2 If you selected the [Complete Initialization] option, you can touch [Cancel] to cancel the initialization while it is in progress. All recordings will be erased and the memory can be used without any problem.

- Initializing a memory will permanently erase all recordings. Lost original recordings cannot be recovered. Save important recordings in advance using an external device (156).
- Initializing a memory card will permanently erase any music files and images you may have transferred to the memory card. (HFR72/R70 The music files and image mix frames that come pre-installed in the built-in memory will be restored after it is initialized.)
- HFR700 About FlashAir cards: Initializing a FlashAir card with this camcorder will reset the card's wireless settings (network names, SSID, passwords, etc.) to factory settings. We recommend formatting FlashAir cards on a computer, using the FlashAir configuration tools.



Basic Operation of the Camcorder
Using the Touch Screen
The buttons and menu items that appear on the touch screen change dynamically depending on the operating mode and the task you are performing. With the intuitive touch screen interface you have all the controls at your fingertips.
1

2

1 Touch
Touch on an element displayed on the touch screen.
Used to start playing back a scene in an index screen, to select a setting from the menus, etc.
2 Swipe
While touching the screen, swipe your finger up and down or left and right across the screen.
Used to scroll menus, to browse through index screen pages or to adjust slider controls like the volume.
![graph LR A["Menu"] --> B["Target"] B --> C["A"] B --> D["B"] B --> E["C"] C --> F["1 Arrow Icon"]](/content/2026/06/1327524/images/df1db79d7507474b8d9ff2db480a81c24a64101c8ac0b6ba4ced1db88cc2ae9d.jpg)
Basic Operation of the Camcorder

- In the following cases, you may not be able to perform touch operations correctly.
- Using your fingernails or hard-tipped objects, such as ball-point pens.
- Operating the touch screen with wet or gloved hands.
- Applying excessive force with your finger.
Using the Menus
The ⚙ (Home) menu is the gateway to most of the camcorder’s functions and settings. In recording mode, the ⚙ (Home) menu offers immediate access to some frequently used functions. In playback mode, it is from the ⚙ (Home) menu that you will switch between the movies’ and photos’ index screens. In both modes, from the ⚙ (Home) menu you can open the [💡 Other Settings] menus for more detailed settings, and also to access the camcorder’s various Wi-Fi functions (HFR72/R70 only).
Shooting nFoderat
Playback
AVCHD
MP4

AUTO


SCN
P


Basic Operation of the Camcorder
(Home) Menu

Recording mode Playback mode

1 Touch [icon] to open the 📄 (Home) menu. 2 Swipe left/right to bring the desired menu to the center.
- You can also touch [◀] or [▶] to bring the icon of the desired menu to the center.
3Touch the icon of the desired menu to open it.
• See the following table for a description of each menu.
Menu item
Description
[IT Other Settings]
(45, 218)
Opens the [IT Other Settings] menus, which give you access to various camcorder settings.
[Recording Setup] (recording mode only)
(78 - 81)
In this menu you can select, among others, the movie format, video quality or memory used for recording*.



Menu item
Description
[Shooting Mode]** (recording mode only)

The camcorder features a number of shooting modes that offer the most appropriate settings for a variety of special scenes.
[● Main Functions] (recording mode only)

This menu contains functions commonly used while recording, such as focus and exposure. The [▶] button on the right side of the recording mode screen allows you to open this menu directly, without going through the ⏻ (Home) menu.
[Remote Control+Streaming]* (recording mode only)

Use your smartphone or tablet as a remote control to record with the camcorder. You can also stream video from the camcorder and record it on the smartphone or tablet.
[Photo Playback] (playback mode only)

Opens the [▶] (photo playback) index screen.
[Movie Playback] (playback mode only)

Opens the [▶] (all scenes) index screen.
[😊 Baby Album] (playback mode only)

Opens the [😊] index screen, which displays only the scenes you recorded in 😊 (Baby) mode.


Basic Operation of the Camcorder
Menu item
Description

Video Snapshot] (playback mode only)

64)
Opens the [DH] index screen, which displays only video snapshot scenes recorded in AVCHD format.

Wi-Fi]* (playback mode only)

171)
Allows you to access the various Wi-Fi functions, such as uploading recordings to the Web or playing back recordings using a smartphone.
* HFR72/R70 only.
**The icon shown in the (Home) menu indicates the shooting mode currently selected.
Using the Menus
Changing the camcorder's various settings using the menus is very easy. You make your selection simply by touching the button of the desired option. When they appear on the screen, you can touch [→] to return to the previous screen or [×] to close the menu. In some screens, you will need to scroll to find the desired option.
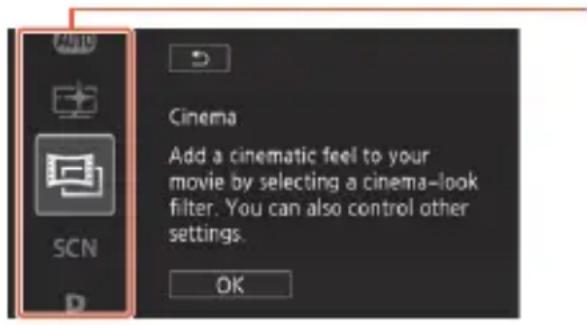
Some screens provide additional information about the options. In that case, simply swipe up and down along the column of icons.
The [↑ Other Settings] Menu
The [Other Settings] menus offer many options to control various aspects of the camcorder's operation. For details, refer to the complete list of settings in the appendix [Other Settings] Menus (218).
In the [¶ Other Settings] menus, settings are organized under sub-menus (tabs). For brevity's sake, these settings are referenced throughout the manual like this: “¶ ➤ [Language ☐]”. In this example (to change the language), you will need to do the following:
1 Touch [icon] to open the icon (Home) menu. 2 Swipe left/right to bring [IT Other Settings] to the center. Then, touch the icon to open the [IT Other Settings] menus.
![CANON Vixia HF R700 - The [↑ Other Settings] Menu - 1](/content/2026/06/1327524/images/faa3396cd9b1a48df39a17d5791a506531eedc4d3945c628a8db818b34d1f47b.jpg)
![CANON Vixia HF R700 - The [↑ Other Settings] Menu - 2](/content/2026/06/1327524/images/e9eef88f244441a2dd9f7ff29c6bd575c610baceb3061ea0b3b11b443b3e566d.jpg)
![CANON Vixia HF R700 - The [↑ Other Settings] Menu - 3](/content/2026/06/1327524/images/ff37ae046212941bbd57b3da600356b71708643e41262086b3529407825bb04a.jpg)
![CANON Vixia HF R700 - The [↑ Other Settings] Menu - 4](/content/2026/06/1327524/images/2740b126f40fd04b54817b2e100d21cf8dd2d6c0152850fe1a62498bfc9dfde8.jpg)
Basic Operation of the Camcorder
- You can also touch [◀] or [▶] to bring the icon of the desired menu to the center.


3 Touch the tab of the desired menu. 4 Swipe up/down to bring the setting you want to change into the orange selection bar.
- You can also touch [▲] or [▼] to scroll up/down the menu.
- Menu items not available appear grayed out.
- You can touch any menu item on the screen to bring it directly into the selection bar.
5 When the desired menu item is inside the selection bar, touch [▷].
6 Touch the desired option and touch [X].
- You can touch [×] to close the menu at any time.
![graph LR A["Menu"] --> B["Target Icon"] B --> C["A Number"] C --> D["Label B"] D --> E["Label C"] E --> F["1 Arrow Icon"]](/content/2026/06/1327524/images/a3d414ef13cbce0b28d1147876cbe91fc6a7fc06e96d86ad0211bf1dc6e32050.jpg)
Operating Modes
In this manual, the camcorder's operating modes are indicated with a bar of icons. A full icon in blue (AUTO) indicates that the function described can be used in that particular operating mode; a grayed-out icon (▶) indicates the function is not available in that operating mode. Icons are divided into movie format, shooting modes and playback modes.

Movie Format
Refers to AVCHD or MP4 recordings. While recording, you can change the movie format from the [Recording Setup] menu (235). During playback, use the index screen button (66) to switch between playback of AVCHD scenes and MP4 scenes.
Recording
When you open the LCD panel or press ON/OFF, the camcorder will turn on in recording mode. The shooting mode icons in the operating modes bar are the same icons used in the shooting mode selection screen (☐ 82).
![graph LR A["Menu"] --> B["Input Icon"] B --> C["Text Box"] C --> D["1-Box Icon"] style A fill:#f9f,stroke:#333 style B fill:#ccf,stroke:#333 style C fill:#cfc,stroke:#333 style D fill:#fcc,stroke:#333](/content/2026/06/1327524/images/c944878e6c36a820200e528c763f42b23b39a63e90a56c77f8b343304fcab356.jpg)
Basic Operation of the Camcorder
Playback
Press ▶ to switch the camcorder between recording mode and playback mode.
In the Playback area of the operating modes bar, the ▶ icon refers to playing back movies (64), whether from the [▶] index screen (all scenes), the [💡] index screen (only scenes recorded in 😊 (Baby) mode) or the [♪] index screen (only video snapshot scenes recorded in AVCHD format). The ▶ icon refers to viewing photos from the [▶] index screen (70).

- HFR72/R70 When switching to a playback mode, the memory selected for playback will be the same one currently used for recording.


Basic Recording and Playback
50
Basic Recording
This section covers how to easily record video and photos and explains the convenient AUTO mode. To record using other shooting modes, use more advanced functions and enjoy full access to all menu settings, refer to Advanced Recording Functions (77).
64
Basic Playback
This section covers how to play back and delete movies and photos. For more advanced options, such as playback with background music, dividing scenes and more, refer to Advanced Playback and Editing Functions (125).
Basic Recording
Recording Video
You are now ready to record movies.


- Before you begin recording, make a test recording first to check that the camcorder is operating correctly.
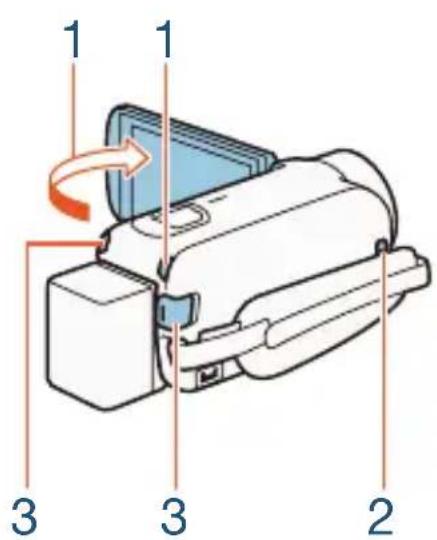


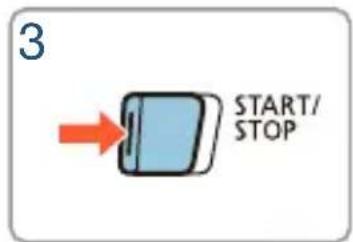

1 Open the LCD panel to turn on the camcorder.
- You can also press ON/OFF.
- HFR72/R70 By default, movies are recorded in the built-in memory. You can select the memory that will be used to record movies (80).


Basic Recording
- By default, the camcorder's shooting mode is set to AUTO (56). You can select a different shooting mode according to the shooting conditions (82).
2 Slide the lens cover switch down.
3 Press START/STOP to begin recording.
- Press START/STOP again to stop recording. The scene will be recorded to the memory.
- The ACCESS indicator will flash from time to time while the scene is being recorded.
When you have finished recording
1 Make sure that the ACCESS indicator is off. 2 Close the LCD panel or press ON/OFF to turn off the camcorder. 3 Slide the lens cover switch up.

- To protect the lens, keep the lens cover closed when you are not recording.
- Be sure to save your recordings regularly (156), especially after making important recordings. Canon shall not be liable for any loss or corruption of data.


- If [Auto Power Off] is set to [ON On], the camcorder will shut off automatically to save power when it is powered by a battery pack and is left without any operation for 3 minutes. Should this happen, turn the camcorder off and then on again.
- When recording in bright places, it may be difficult to use the LCD screen. In such cases, you can adjust the LCD backlight with the [LCD Backlight] setting or adjust the brightness of the LCD screen with the [LCD Brightness] setting.
- If you plan on making a long recording while the camcorder is in a fixed position, such as mounted on a tripod, you can record with the LCD panel closed in order to conserve the battery's power. To use this function, set [Power On Using LCD Panel] to [Off].


Basic Recording
The Info Panel
In the info panel you can check some recording settings, such as the memory used for recording (HFR72/R70 only), the remaining recording time available on the memory or the currently selected movie format.
Touch [i] (in record standby mode or while recording) to open the info panel
Touch to close the info panel
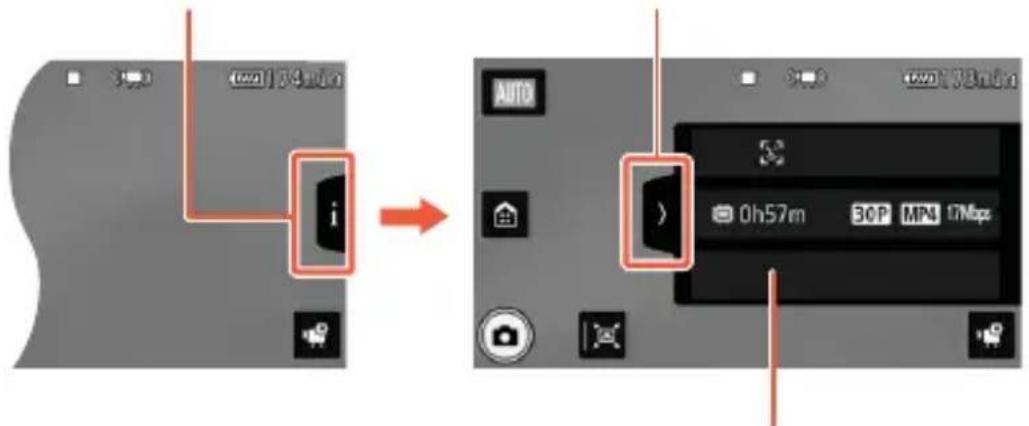
For details about the onscreen icons, refer to the appendix Onscreen Icons and Displays (244)


Basic Recording
Taking Photos
You can easily take photos with the camcorder. You can even take photos simultaneously while recording movies.


1 Open the LCD panel to turn on the camcorder.
- You can also press ON/OFF.
- HFR72/R70 By default, photos are recorded in the built-in memory. You can select the memory that will be used to record photos (80).
- By default, the camcorder's shooting mode is set to AUTO (☐ 56). You can select a different shooting mode according to the shooting conditions (☐ 82).


2 Slide the lens cover switch down.
3 Touch [icon] to take a photo.
- A green icon (●) and ▶ (HFR72/R70 only) or ▶ SD will appear momentarily on the screen and the ACCESS indicator will flash as the photo is recorded. However, if you record a photo while recording a movie, ● will not appear.
When you have finished taking photos
Turn off the camcorder and close the lens cover (☐ 51).

The information in the ⚠ (important precautions) and ⓘ (additional notes) sections in the previous pages (☐ 51 - 52) apply also to photo shooting.

- For details about the approximate number of photos that can be recorded on a memory card, refer to Reference Tables (299).
- Photos cannot be recorded while fading in or fading out a scene.


AUTO Mode
When the shooting mode is set to AUTO, the following automatic functions will be activated so you can enjoy shooting video and photos letting the camcorder take care of choosing the optimal settings.
- Smart AUTO (☐ 56): The camcorder will automatically detect the scene and subject and apply the most appropriate settings.
- Intelligent IS (☐ 58): The camcorder will select the best image stabilization (IS) mode for the shooting conditions.
- Face detection (106): The camcorder will keep the subject in focus and correctly exposed and track it as it moves.
- Automatic tele macro (118): Just bring the camcorder close to a small subject at full telephoto and you will be able to focus a subject as close as 50 cm (1.6 ft.).

Smart AUTO
In AUTO mode, the camcorder will automatically detect certain characteristics of the subject, background, lighting conditions, etc. It will then adjust various settings (focus, exposure, color, image stabilization, image quality, among others), selecting the best settings for the scene you want to shoot. The icon in the shooting mode button will automatically change to one of the following Smart AUTO icons.
![graph LR A["Menu"] --> B["Target Icon"] B --> C["A Number"] C --> D["B Number"] D --> E["C Number"] E --> F["Camera Icon"]](/content/2026/06/1327524/images/986800972d07b10477e4fdf7bfad96dd81696c3ecb2675c15e49f9808546abaa.jpg)
Basic Recording

- Under certain conditions, the Smart AUTO icon that appears on the screen may not match the actual scene. Especially when shooting against orange or blue backgrounds, the Sunset or one of the Blue Skies icons may appear and the colors may not look natural. In such case, we recommend recording in P mode (91).
- There are times when the Smart AUTO function cannot detect the scene, for example when you touch a subject on the screen (tracking). In such case, AUTO will be displayed as the Smart AUTO icon.
Smart AUTO icons
| Subject | Background | ||
| Bright* | Blue skies* | Vivid colors* | |
| People (stationary) | ( ) ) | ( ) | ( ) |
| People (moving) | ( ) ) | ( ) | ( ) |
| Subjects other than people, such as landscapes | ( ) ) | ( ) | ( ) |
| Close objects | (  ) ) | (  ) ) | (  ) ) |
* The icon in parentheses appears under backlight conditions.
Basic Recording
| Subject | Background | |||
| Sunset Dark | Dark + Spotlight | Dark + Night Scene | ||
| People (stationary) — — |  | |||
| People (moving) | — |  | — | |
| Subjects other than people, such as landscapes |  |  |  |  |
| Close objects | —/— | — | — | |
Intelligent IS
Intelligent IS allows the camcorder to select the best image stabilization option based on your shooting method. When the shooting mode is set to AUTO or 😊, the Intelligent IS icon will change to one of the following icons. In other shooting modes, you can set the image stabilization manually (222).
| Icon Shooting conditions | |
| (Dynamic IS) | Most general situations / When the zoom is closer to the W end / While following subjects at a distance moving left or right |
| (Powered IS)* | When zooming in on subjects at a distance (zoom closer to the T end), while remaining stationary |


Basic Recording
| Icon Shooting conditions | |
| ((*) (Macro IS) | Close-up of a subject |
| ((*) (tripod mode) | When using a tripod |
* You can use the ⚪ ➕ [Intelligent IS] setting to change whether Powered IS is available when Intelligent IS is activated.
Zooming
Use the zoom lever on the camcorder to zoom in and out. You can change the zoom speed with the 🔊 ➤ [Zoom Speed] setting (☐ 220). Additionally, when the shooting mode is set to a mode other than ⚠️ AUTO or 😊, you can select the zoom type (optical, advanced or digital) with the 🔊 ➤ [Zoom Type] setting (☐ 237).


Move the zoom lever toward W (wide angle) to zoom out. Move it toward T (telephoto) to zoom in.
![graph LR A["Menu"] --> B["Target Icon"] B --> C["A Number"] C --> D["B Number"] D --> E["C Number"] E --> F["Camera Icon"]](/content/2026/06/1327524/images/3c7820271e0b7dfbbfecd18c3e9052988a9361d7573ea286a6d8746fec0d4bdb.jpg)

- Keep at least 1 m (3.3 ft.) away from the subject. At full wide angle, you can focus on a subject as close as 1 cm (0.39 in.). Using tele macro (118), you can focus on a subject as close as 50 cm (1.6 ft.) at full telephoto.
- When [Zoom Speed] is set to [VAR Variable], the zoom speed will be faster in recording standby mode than when actually recording, except when pre-recording (238) is activated.
- With the [Zoom Position at Startup] setting, you can have the camcorder save the zoom position before it turns off, so the zoom position will be the same the next time you turn on the camcorder.


Framing Assistance
Sometimes, while zooming in on a very far subject (large zoom ratio), you might momentarily “lose” the subject as it moves out of the frame. In this case, you can use the framing assistance function to temporarily zoom out a little and make it easier to find the subject. You can select either automatic or manual framing assistance.
Automatic Framing Assistance
1 Select the automatic mode in advance.


Other Settings]


[Framing Assistance]


Automatic]


2 Zoom in on the desired subject and touch [].
- The orange bar in the button indicates that automatic framing assistance is active. Touch the button again to turn off the function.
3 If you lose the subject, move the camcorder to reframe the shot.
- The camcorder will zoom out temporarily. The original zoom position is indicated by a white frame.
- If the camcorder does not zoom out automatically, try moving the camcorder faster.
4 When the desired subject is correctly framed, keep the camcorder still.



Basic Recording
- When you stop moving the camcorder, it will zoom in on the area indicated by the white frame.
1
2
3

- Operating the zoom lever while the camcorder is zooming in or out during automatic framing assistance will stop the automatic zoom operation.
Manual Framing Assistance
1 Select the manual mode in advance.


Other Settings]


[Framing Assistance]


Manual]


2Zoom in on the desired subject.
3If you lose the subject, touch and hold [] to zoom out momentarily.
- The original zoom position is indicated by a white frame.


Basic Recording
4Reframe the shot so the desired subject is within the white frame.
- You can use the zoom lever to change the size of the frame.
5When the desired subject is correctly framed, release [].
- The camcorder will zoom in on the area indicated by the white frame.
1
2
3

- You can select the initial size of the framing assistance white frame with the [Framing Assistance Area] setting.


Basic Playback
Playing Back Video

Index screen button (☐ 66)

1 Press ▶ to display the playback index screen.
- You can press ▶ repeatedly to switch back and forth between recording mode and playback mode.
- You can press ▶ when the camcorder is off to turn it on directly in playback mode.
- The index screen that appears will depend on the recording mode that was used previously.
2 In the index screen, look for the scene you want to play back. If necessary, change the index screen displayed.


Basic Playback
- To open the [musical] index screen (only video snapshot scenes recorded in AVCHD format) or the [😊] index screen (Baby album with only scenes recorded in 😊 mode):


Video Snapshot] or [😊 Baby Album]
- When the index screen button appears on the screen, you can also select the memory selected for playback (HFR72/R70 only) and the format of the scenes displayed (66).
- Swipe left/right (2a) or touch [◀] or [▶] (2b) to display the previous/next index screen.
MP4 movies:
Visual bar shows the relative location of the current index screen.
Folder name. The last 4 digits represent the recording date (1103 = November 3)
AVCHD movies:
[Edit] button (240): To delete recordings, divide scenes, etc. You can also lock it (68) to protect your recordings.
Scene recorded in mode (85)

Scene information (69)

3 Touch the desired scene to play it back.
- The camcorder will play back the scene selected and continue until the end of the last scene in the index screen.
- Touch the screen to display the playback controls. During playback, the playback controls will disappear automatically after a few seconds without operation.
To change the memory (HFR72/R70 only) or movie format to play back
With the index screen button (64), you can select the memory used for playback (HFR72/R70 only) and the format of the scenes displayed. The icons shown in the index screen button may differ, or the button may not appear on the screen, depending on the camcorder model and the index screen currently displayed.
HFR72/R70 From the [▶] index screen:
Touch the index screen button ➤ Memory to play back (☐ or ☐) ➤ Movie format (AVCHD or MP4) ➤ [OK]
HFR72/R70 From the [ 😊 ], [播放] or [播放] index screen:
Touch the index screen button ➤ Memory to play back (☐ or ☐) ▶ [OK]
HFR700 From the [▶] index screen:
Touch the index screen button ➤ Movie format (AVCHD or MP4) ➤ [OK]
To adjust the volume
1 During playback, touch the screen to display the playback controls. 2 Touch [ musical ], touch [播放] or [播放] to adjust the volume, and touch [播放].
Playback controls
Playback
Playback pause
1 Stop the playback. 2 Jump to the beginning of the scene. Double-tap to jump to the previous scene. 3 Pause the playback.
![graph LR A["Menu"] --> B["Input Icon"] B --> C["Text Block"] C --> D["Text Document"] D --> E["Video Camera Icon"] style A fill:#f9f,stroke:#333 style B fill:#ccf,stroke:#333 style C fill:#cfc,stroke:#333 style D fill:#fcc,stroke:#333 style E fill:#cff,stroke:#333](/content/2026/06/1327524/images/0108b328702c8cc87c6dc1a3683b5ea67eb9eca45d311a64c69466e381d8f834.jpg)
Basic Playback
4 Display the volume (67) and background music mix balance (129) controls. 5 Decoration (95). 6 AVCHD scenes only: Capture a video snapshot scene (126). 7 Fast playback* backward/forward. 8 AVCHD scenes: Recording date and time. MP4 scenes: Recording date. 9 Jump to the beginning of the next scene. 10 Resume the playback. 11 Grab the displayed frame and save it as an image file (☐ 128). 12 Slow playback** backward/forward.
* Touch several times to increase the playback speed to 5x → 15x → 60x normal speed.
** Touch several times to increase the playback speed to 1/8x → 1/4x normal speed.
Locking files
In playback mode, you can use the lock files function to disable the [Edit] button and prevent inadvertently deleting or changing your recordings.
Set 📄 ➤ [Lock Files] to [On].
- The [Edit] button will change to [🔒] and will be grayed out.


- You can use the [Display Date/Time] setting to choose whether to display the recording date (MP4 scenes) or date and time (AVCHD scenes) when you play back scenes.
- In the index screen for MP4 scenes you can touch [i] and then touch a scene to display details about the scene, such as the scene's video quality, length and recording date and time. Touch [→] twice to return to the index screen.
- Video snapshot scenes recorded in MP4 format can be played back only from the [▶] index screen.
- Depending on the recording conditions, you may notice brief stops in video or sound playback between scenes.
- Sound will not be output from the built-in speaker while headphones or the supplied High Speed HDMI cable is connected to the camcorder.
- You may not be able to play back with this camcorder movies recorded on or copied onto a memory card using another device.
- About fast/slow playback:
- You may notice some anomalies (blocky video artifacts, banding, etc.) in the playback picture. Also, sound will not be output.
- The speed indicated on the screen is approximate.
- Slow reverse playback will look the same as continuous frame reverse.


Basic Playback
- When playing back scenes recorded in mode on the camcorder, we recommend setting [View Assistance] to [ON].
Viewing Photos

Index screen button (66)

1 Press ▶. 2 Open the [▶] index screen.


Photo Playback]
- HFR72/R70 If necessary, change the memory selected for playback (☐ 66).


Basic Playback
Visual bar shows the relative location of the current index screen.
[Edit] button (240): To delete photos, etc. You can also lock it (68) to protect your recordings.

Folder name. The last four digits represent the recording date (1103 = November 3).
3 Look for the photo you want to view.
- Swipe left/right (3a) or touch [◀] or [▶] (3b) to display the previous/next index screen.
4 Touch the photo you want to view.
- The photo is displayed in single photo view.
- Swipe left/right to browse through the photos one by one.


Basic Playback
Playback controls

1 Slideshow (134). 2 Return to the [▶] index screen. 3 Photo jump
Touch [◀] or [▶], or swipe left/right along the scroll bar to find the desired photo. Touch [→] to return to single photo view.

- The following image files may not be displayed correctly.
- Images not recorded with this camcorder.
- Images edited on a computer.
- Images whose file names have been changed.



Deleting Scenes and Photos
You can delete recordings that you are not interested in keeping. Deleting recordings allows you also to free up space on the memory. You can use the lock files function to disable the editing functions and prevent inadvertently deleting your recordings (☐ 68).
■ Deleting Scenes or Photos from the Index Screen

1 Open the index screen that contains the scene or photo you want to delete (64, 70).
- To delete all the scenes or photos recorded on the same date (saved in the same folder), swipe left/right until a scene or photo you want to delete appears.
2 Delete the recordings.
[Edit] ➤ [Delete] ➤ Desired option* ➤ [Yes]** ➤ [OK]
* When you select [Select], perform the following procedure to select the individual recordings you want to delete before touching [Yes]. ** Touch [Stop] to interrupt the operation while it is in progress. Some recordings may be deleted nevertheless.




To select individual scenes or photos
1 Touch on the individual scenes or photos you want to delete.
- A checkmark √ will appear on the scenes or photos you touch. The total number of selected scenes or photos will appear next to the ✅ icon.
- Touch a selected scene or photo to remove the checkmark. To remove all checkmarks at once, touch [Remove All] ▶ [Yes].
2 After selecting all the desired recordings, touch [OK].
Options
[ ] or [ ]
Delete all the scenes/photos recorded on a particular date. For AVCHD scenes, a date will appear in the button. For MP4 scenes and photos, a folder name will appear. The last 4 digits of the folder name indicate the date of the recordings (ex. 1103 = November 3).
[Select]:
Select individual scenes or photos to delete.
[All Scenes] or [All Photos]:
Delete all the scenes or photos.
■ Deleting a Single Scene

1 Play back the scene you want to delete (64).
2 Delete the scene.
■ Deleting a Single Photo

1 In single photo view, select the photo you want to delete (70).
2 Delete the photo.
3 Swipe left/right to select another photo to delete or touch [✗].

Basic Playback

- Be careful when deleting recordings. Once deleted, they cannot be recovered.
- Save copies of important recordings before deleting them (156).

- Photos that were protected with other devices cannot be deleted with this camcorder.
- To delete all recordings and make all recordable space available again you may prefer to initialize the memory (📖 38).

Advanced Recording Functions
78
Recording Settings and Shooting Modes
This section explains how to change the camcorder's recording settings (movie format, video quality, etc.) and how to use the various shooting modes to obtain great looking recordings.
92
Convenient Functions
This section introduces some of the camcorder's functions that you may find convenient in special situations. For example, slow & fast motion recording to create unique time-lapse scenes, fun decorations and faders for your scenes, and more.
111
When You Want More Control
This section explains functions you can use when you want more control over how your recordings look. It is more oriented for advanced users and covers functions such as white balance, exposure compensation and frame rate.
120
Recording Audio
This section explains various functions related to recording audio, such as audio scene selection, and using headphones or an external microphone.
Recording Settings and Shooting Modes
Selecting the Movie Recording Format (AVCHD/MP4)
You can choose to record movies in AVCHD or MP4 format. AVCHD movies offer fantastic picture quality during playback. They can also be easily copied to external devices, such as a Blu-Ray Disc recorder. MP4 movies are versatile and can be easily played back on smartphones or uploaded to the Web.

![Recording Setup] [Movie Format] Desired movie format [→] [×]](/content/2026/06/1327524/images/f351c04a977fb085428dae5adfccce23945716e9dfb166d349987f27d3134337.jpg)
Selecting the Video Quality
The camcorder offers several video quality options (bit rates) for recording movies. For AVCHD movies, select 60P or MXP for higher quality or LP for longer recording times. Similarly, for MP4 movies, select 35 Mbps or 24 Mbps for higher quality or 4 Mbps for longer recording times.


Recording Settings and Shooting Modes
Recording Setup [Video Quality] Desired video quality* [→] [→][×]
* You can view details about the video quality with the following procedure.
To view information on the video quality
1. Touch [i].
- A screen with the resolution, bit rate and frame rate will appear.
2. Touch [→].
![CANON Vixia HF R700 - Touch [→]. - 1](/content/2026/06/1327524/images/737d8fa1bb6490a491494c216d170a76ee818e3cb15679f664b517a5e21ba158.jpg)
- For details on approximate recording times, refer to the Reference Tables (298).
- If you select 60P or 35 Mbps, movies will be recorded at 60 frames per second, progressive.
- Bit rate (measured in Mbps) indicates how much video data is recorded in 1 second.
- Depending on the device used, you may not be able to play back your recordings on other devices.
- Movies recorded in 60P or MXP mode cannot be saved on AVCHD discs. You can copy such movies from the memory card onto Blu-ray discs using a Blu-ray Disc recorder that has an SD card slot and is compatible with AVCHD ver. 2.0.
- The camcorder uses a variable bit rate (VBR) to encode video so the actual recording times will vary depending on the content of the scenes.
![CANON Vixia HF R700 - Touch [→]. - 2](/content/2026/06/1327524/images/e4991648c623b0865b7b4dfceecb3e411923b406dcfd18f3e738b0d07a6a97f2.jpg)
![CANON Vixia HF R700 - Touch [→]. - 3](/content/2026/06/1327524/images/df9d3c9105c26e35403c7307f3e396b7429582ad388949fc2624cce17562f0a3.jpg)
![CANON Vixia HF R700 - Touch [→]. - 4](/content/2026/06/1327524/images/08772650434fc86801ffa9a6bb9f361815681dd3ae2f4816c135d4a3f881fbe3.jpg)
![CANON Vixia HF R700 - Touch [→]. - 5](/content/2026/06/1327524/images/bb723830fc8b19bc26e9bc8383656673eedb4cff305f6b2cd31b849375affff5.jpg)
Recording Settings and Shooting Modes
- The following types of MP4 scenes will be recognized as multiple files on other devices.
- Scenes exceeding 4 GB.
- Scenes recorded at 35 Mbps exceeding 30 minutes.
- Scenes recorded at a video quality other than 35 Mbps exceeding 1 hour.
- Depending on the TV, you may not be able to play back movies recorded in 60P or at 35 Mbps.
- When the shooting mode is set to 📄, recording in 60P or 35 Mbps is not available. When the shooting mode is set to 😊, recording in 60P is not available.
HFR72/R70 Selecting the Memory (Built-in Memory/Memory Card) for Recordings
You can select to record your movies and photos in the built-in memory or on a memory card. The default memory for recording both is the built-in memory.
Shooting nFoderat
Playback
AVCHD
MP4

AUTO


SCN
P


Recording Setup]

[Recording Media]

[Rec Media
for Movies] or [Rec Media for Photos]

Desired memory


HFR72/R70 Dual Recording and Relay Recording
When you record movies, you can use dual recording to simultaneously record one more scene (in MP4 format, at 4 Mbps video quality) in addition to the main scene being recorded. This additional MP4 scene is saved on the memory not currently selected for recording. Because the resulting scene is in MP4 format, it is ideal for transferring to another device or uploading to the Web.
Alternatively, you can activate relay recording so if the assigned memory becomes full while recording movies, recording will continue automatically on the other memory.

* Only relay recording.
Activate the desired function


Recording Setup]

[Dual/Relay Recording]

Desired function

[←]

[×]

- Dual recording is not available in the following cases.
- When the shooting mode is set to 😊.
- When the video quality is set to 60P or 35 Mbps.
- During slow & fast motion recording.


Selecting the Shooting Mode
In addition to AUTO mode, the camcorder features a number of shooting modes that offer the most appropriate settings for a variety of special scenes. You can also use the P shooting mode when you want the camcorder to set the exposure automatically but control manually some advanced settings.

* Except for 😊 mode.
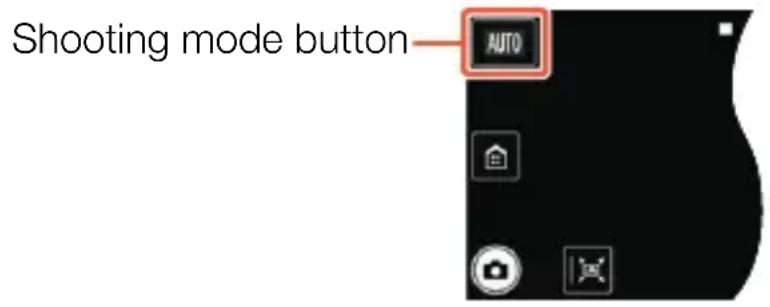
1 Touch the shooting mode button on the top left corner of the screen.
- The button will show the icon of the shooting mode currently selected. If the camcorder is set to AUTO mode, the button will show one of the Smart AUTO icons (☐ 57).
- Alternatively, you can open the shooting mode selection screen from the ⏻ (Home) menu: ⏻ ➤ [Shooting Mode].
2 Swipe up/down to bring the desired shooting mode to the center and then touch [OK].
![graph LR A["Menu"] --> B["Input Icon"] B --> C["Text Block"] C --> D["Video Camera Icon"] D --> E["82"]](/content/2026/06/1327524/images/34f69c2f923b19224cc5529b33fb9a688e6945c115d6843d65b63eaa9a607cf8.jpg)
Recording Settings and Shooting Modes
- If you selected [☐ Cinema] or [SCN Scene], continue the procedure to select the cinema-look filter (☐ 86) or Special Scene mode (☐ 88).
Options (♦ Default value)
[😊 Baby]
Use 😊 mode to record all your little one's precious moments (84).
[ AUTO Auto]
Let the camcorder take care of most of the settings while you concentrate on recording. Great for beginners or if you just prefer not to bother with detailed camcorder settings.
[Highlight Priority]
Record bright scenes with a more natural gradation and more life-like detail in the brightest areas of the picture (☐ 85).
[Cinema]
Give your recordings a cinematic look and use cinema-look filters to create unique movies (☐ 86).
[SCN Scene]
From nightscapes to beaches, have the camcorder select the best settings that match the situation you are in (88).
[P Programmed AE]
Enjoy full access to menus, settings and advanced functions (☐ 91).
![CANON Vixia HF R700 - [ AUTO Auto] - 1](/content/2026/06/1327524/images/8d586a52e2e29af042ce764d7315cc689ee1d4fe4ecdbfccb0f967e85a3db52d.jpg)
![CANON Vixia HF R700 - [ AUTO Auto] - 2](/content/2026/06/1327524/images/8888ba3866b8d51642ce9bdcd0ac066fcdfbb2e7dc73720b8377fc90d74d94df.jpg)
![CANON Vixia HF R700 - [ AUTO Auto] - 3](/content/2026/06/1327524/images/d6f4eacc399615e6460669538fe796db7d66f4ddcdc49ca9b950757cbadfca92.jpg)
![CANON Vixia HF R700 - [ AUTO Auto] - 4](/content/2026/06/1327524/images/9bdc5ea7aaf085f9f4e329691b81fd9a620677f5cabad0a3f0162086ec168d79.jpg)
Recording Settings and Shooting Modes
Baby Mode
With the optimized settings in 😊 mode, baby’s skin will appear with vibrant clarity. In addition, you can add a stamp to the video to show how much time has passed since baby was born.

* Even if the video format was set to MP4, when you change the shooting mode to 😊, the video format will automatically change to AVCHD.
Touch the shooting mode button (☐ 82) ➤ [😊 Baby] ➤ [OK]

- When the shooting mode is set to 😊, pre-recording (📖 238) will be activated and cannot be turned off. That way, you will not miss memorable moments.
- You can play back recordings made in 😊 mode from the [ 😊 ] or [▶] index screen. The Baby album ([ 😊 ] index screen) is particularly convenient because it contains, in chronological order, only the scenes recorded in 😊 mode.
- When the shooting mode is set to 😊, dual recording (HFR72/R70 only) and recording in 60P are not available.
- When the shooting mode is set to 😊, most advanced settings will not be available but you can use the decoration function (☐ 95).


Recording Settings and Shooting Modes
Highlight Priority Mode
You can use ➕ mode to capture the colors and gradation in the brightest areas of the picture in more detail, closely approximating what you remember seeing with your own eyes. This is particularly effective when recording bright blue skies, skin tones, shimmering water surfaces, shiny metal or glass structures and similar bright scenes.
Using brighter settings on a connected TV during playback of scenes recorded in ➕ mode, you will be able to enjoy a smoother gradation and more life-like, detailed picture.

1 Set the shooting mode to .
Touch the shooting mode button (82) [Highlight Priority] [OK]
2 Turn on the view assistance function.
![[Other Settings] [View Assistance] [ON] [X]](/content/2026/06/1327524/images/892fbac193f1b4d0fde3ef308836f37febec6b52048f9102070a6d129b120b6a.jpg)


Recording Settings and Shooting Modes

- When playing back scenes recorded in ☐ mode, the following adjustments are recommended.
- Playback on the camcorder: Set 🎨 ➕ [View Assistance] to [ON On].
- Playback on a TV or external monitor: Increase the brightness of the TV, computer monitor, etc.
Cinema Mode and Cinema-Look Filters
In Cinema Mode, the camcorder will adjust the frame rate and several other picture-related settings to give your recordings a cinematic look. In this mode you can also use a variety of professional cinema-look filters to create unique movies with a distinctive appearance.
HFR72/R70: You can also add cinema-look filters when you convert movies to MP4 (143).
Shooting Mode
Playback
AVCHD
MP4

AUTO


SCN


Touch the shooting mode button (82) [Cinema] [OK] Desired cinema-look filter [OK]
- The selected cinema-look filter will be applied and its number will appear in the [FILTER] button.




Recording Settings and Shooting Modes
To change the cinema-look filter
1 Touch the [FILTER] button on the bottom left corner of the screen. 2 Select the desired cinema-look filter and then touch [OK].
Options (♦ Default value)
The camcorder offers 5 cinema-look filters. Select the desired filter while previewing the effect on the screen.
[1. Cinema Standard]
[4. Sepia]
[2. Vivid] [5. Old Movies] [3. Cool]
Filter number (will appear in the [FILTER] button)
Filter name


Recording Settings and Shooting Modes
Special Scene Modes
Recording in a very bright ski resort or capturing the full colors of a sunset or a fireworks display becomes as easy as selecting a Special Scene mode.
Shooting nFoderat
Playback
AVCHD
MP4

AUTO


SCN


Touch the shooting mode button (82) [SCN Scene] [OK]

Desired Special Scene mode ➤ [OK]
Options (

Default value)

Portrait]
![CANON Vixia HF R700 - Portrait] - 1](/content/2026/06/1327524/images/868d72f106d47359e41cbc456e28b1d381eae02bde008a6ce3dfde89796ed128.jpg)
The camcorder uses a large aperture to achieve a sharp focus on the subject while blurring the background.
![CANON Vixia HF R700 - Portrait] - 2](/content/2026/06/1327524/images/bdcaf14f354bb8f15582656ae2a1d6b8badaa400839e6f6a0137ea1def95adec.jpg)
Sports]
To record scenes with lots of movement, such as sport events and dance scenes.
![CANON Vixia HF R700 - Sports] - 1](/content/2026/06/1327524/images/abb14a42b26a90e7ae74874035c23cc98cc429b098ad6a1c2ea4161e1578e1b3.jpg)
Night Scene]
To record nightscapes with lower noise.


![CANON Vixia HF R700 - Night Scene] - 4](/content/2026/06/1327524/images/d452d62913b7f25e0c94654549f1bd090c11df2084361c7eb32d092ac57714e4.jpg)
![CANON Vixia HF R700 - Night Scene] - 5](/content/2026/06/1327524/images/b77f82d9615fc3c034ec5e7ce0c54825374a78b3a0f26f7877ba8b448211cc48.jpg)
![CANON Vixia HF R700 - Night Scene] - 6](/content/2026/06/1327524/images/a283d9772e33807c3c432e5dc5ca9c3ea3a86bdb220a97251e8b663f563e1c79.jpg)
![CANON Vixia HF R700 - Night Scene] - 7](/content/2026/06/1327524/images/bebce196e2894bdc54ad2095b2b783cd7c56e40be7c77122486b2b21339b4890.jpg)
Recording Settings and Shooting Modes
[8 Snow]
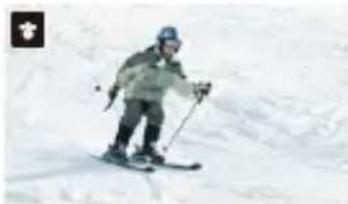
To record in bright ski resorts without the subject being underexposed.
[Beach]
To record on a sunny beach without the subject being underexposed.
[Sunset]
To record sunsets in vibrant colors.
[Low Light]
To record in low-light situations.
[A Spotlight]
To record spotlit scenes.
[Fireworks]
To record fireworks.





![CANON Vixia HF R700 - [Fireworks] - 7](/content/2026/06/1327524/images/83d05e0b7a58c9cb9fa88b96deca64027f356acf7345e84b51f9944f218998a9.jpg)
![CANON Vixia HF R700 - [Fireworks] - 8](/content/2026/06/1327524/images/08f68f31fa6c8c22a54537be9a8fd452af866035c683c39940b5ac04801bde63.jpg)
![CANON Vixia HF R700 - [Fireworks] - 9](/content/2026/06/1327524/images/b5ad045d880a9af53ff0a3e1eee16a4d9af73a449347ae607aae738d0a8e2398.jpg)
![CANON Vixia HF R700 - [Fireworks] - 10](/content/2026/06/1327524/images/60b04b682b4e95940eaa65d18921feb4b5ae1f87136459c5ce121a6842df7103.jpg)
Recording Settings and Shooting Modes

• [Portrait]/[Sports]/[Snow]/[Beach]: The picture may not appear smooth during playback. • [Portrait]: The blur effect of the background increases the more you zoom in (T). - [Snow]/[Beach]: The subject may become overexposed on cloudy days or in shaded places. Check the image on the screen. - [Low Light]: - Moving subjects may leave a trailing afterimage. - Picture quality may not be as good as in other modes. - White points may appear on the screen. - Autofocus may not work as well as in other modes. In such case, adjust the focus manually. - [Fireworks]: To avoid camcorder blur (blur due to the camcorder moving) we recommend using a tripod.
Recording Settings and Shooting Modes
Programmed AE Mode: Adjusting Settings to Match Your Needs
Give yourself the most control while shooting by using the Programmed AE (AE: auto exposure) shooting mode. As with other shooting modes, the camcorder automatically adjusts the shutter speed and aperture. However, this mode offers you the most versatility by allowing you to adjust other settings to achieve the results you are looking for.
Playback
AVCHD
MP4

AUTO


SCN P


Touch the shooting mode button (☐ 82) ➤ [P Programmed AE] ➤ [OK]




Convenient Functions
Slow & Fast Motion Recording
When the movie format is set to MP4, you can use slow motion to capture scenes with lots of movement so they are played back at half the normal speed, or fast motion to compress the passage of time into unique time-lapse scenes. You can select one of 8 slow & fast motion rates between 1/2x and 1200x the normal playback speed to record movies with a unique look. Additionally, for some fast motion rates you can choose to record a single frame or a short bit of video (about 0.5 seconds) at every interval. Sound is not recorded during slow & fast motion recording.
HFR72/R70 You can also convert previously recorded MP4 scenes into fast motion (time-lapse) scenes (147).
Shooting nFoderat
Playback
AVCHD
MP4

AUTO


1 Make sure the camcorder has sufficient power to complete the operation.
- Insert a fully charged battery pack or use the supplied compact power adapter.
2 Select the slow or fast motion rate.


Slow & Fast Motion]

Desired slow/fast motion
rate*

[X]


Convenient Functions
* When you select a fast motion rate between [x10] and [x1200], you can select the desired recording time with the following procedure before touching [✗]. - and the selected slow/fast motion rate will appear on the screen. - To turn off the slow & fast motion recording mode, repeat the procedure selecting [Off] instead.
3 Press START/STOP to start recording.
- While recording, a scene counter will appear and its dividers ( : ) will flash. Note that the higher the fast motion rate used, the more slowly the scene counter will advance.
4 Press START/STOP again to stop recording the time-lapse or slow motion scene.
To set the recording time
Recording one frame at each interval results in a smoother time-lapse video. Recording about 0.5 seconds of video at each interval may be better for recording fast-moving subjects.


Select [1 Frame] or [0.5 sec] ➤ [◀]


Convenient Functions
Options
| Slow & fast motion rate | Recording time and interval* | Real time elapsed in a 1-minute scene | |
| [1 Frame] [0.5 sec] | |||
| Slow motion: [x1/2] | Every 0.02 (1/60) sec. | — | 30 sec. |
| Fast motion: [x2] | Every 0.07 (1/15) sec. | — | 2 min. |
| [x4] | Every 0.13 sec. — | 4 min. | |
| [x10] | Every 0.33 sec. | Every 5 sec. | 10 min. |
| [x20] | Every 0.67 sec. | Every 10 sec. | 20 min. |
| [x60] | Every 2 sec. | Every 30 sec. | 1 hr. |
| [x120] | Every 4 sec. Every 1 min. | 2 hr. | |
| [x1200] | Every 40 sec. | Every 10 min. | 20 hr. |
* Some of the times given are approximate rounded values.

- Slow & fast motion recording cannot be used in the following cases.
- When the video quality is set to 35 Mbps or 4 Mbps. Slow motion [x1/2] is available only when the video quality is set to 17 Mbps.
- When the frame rate is set to 24P.
- HFR72/R70 While the camcorder is controlled remotely from an iOS/Android device.


Decoration: Adding a Personal Touch
Add a new level of enjoyment to your scenes by decorating them. You can add animated graphics, stamps and even your own freehand drawings easily just by simply using your fingertip.
You can also add decorations when you convert movies to MP4 (143).

- Decorating Scenes while Recording

1 Open the decoration screen.
[▶] [◀ Decoration]
- In 😊 mode only: Touch [💡] on the bottom right corner of the screen.
2 Use a tool from the toolbar as explained in the following procedures.
3 Press START/STOP to record movies with your decorations.
- You can add decorations even while recording a scene.
![graph LR A["Menu"] --> B["Target Icon"] B --> C["A Number"] C --> D["B Number"] D --> E["C Number"] E --> F["Camera Icon"]](/content/2026/06/1327524/images/523b795f495d738bd618f0b40a95c12fcf4436c8765830b197664485c975657a.jpg)
4 Touch [✗] to exit the decoration screen.
![CANON Vixia HF R700 - Touch [✗] to exit the decoration screen. - 1](/content/2026/06/1327524/images/4006e8d1a0934e632c01f33108e9bcb9128c4caa184eb23901841a984fee1661.jpg)
- [Animated Stamps] and the Date/Time or [💡] stamps cannot be used at the same time.
- Decoration is not available when dual recording is activated (HFR72/R70 only) or the video quality is set to 60P or 35 Mbps.

1 Canvas - The area where you will draw and see your decorations in action. 2 Toolbar. 3 [◆ Pens and Stamps] Select the type of pen or stamp and its color. 4 [Animated Stamps] Select animated stamps to add to your decoration. 5 [✅ Date/Time] or [💡] (in 😊 mode) Add the date and/or time as a caption that will be included in the recording. In 😊 mode, add stamps to track baby’s age, height and weight. 6 [☐] (Image Mix) Choose one of 26 different frames to add onto the canvas.
![CANON Vixia HF R700 - Touch [✗] to exit the decoration screen. - 3](/content/2026/06/1327524/images/b5cb41bcd26a0cbfceb459b6e13159dfdef131ab592875b9b9960841fa65330d.jpg)
![CANON Vixia HF R700 - Touch [✗] to exit the decoration screen. - 4](/content/2026/06/1327524/images/51ca24862991d4adb5168e1133cd7708e8b86621ddce90dbd759712f7797c4d2.jpg)
![CANON Vixia HF R700 - Touch [✗] to exit the decoration screen. - 5](/content/2026/06/1327524/images/02b6c1d893cbacaae0b17b99894f88681e30304902b8a62eb70262b4b51a3a57.jpg)
![CANON Vixia HF R700 - Touch [✗] to exit the decoration screen. - 6](/content/2026/06/1327524/images/3b8363d43e6172470674bab3649077365891750c214ee2bcc9fcb04ec4655273.jpg)
Convenient Functions
7 [III] In recording mode: Pause the live video. Touch [▶▶▶▶] again to restore the live video. You can add decorations to the frozen image and even record it.
In playback mode: Pause the playback. Touch [▶] to resume playing back the scene.
8 [◀] Minimize the toolbar to the top of the screen to view almost all of the canvas. Touch [◀] to restore the toolbar.
■ To Use [Pens and Stamps]
1 Touch [◆].
- The [Pens and Stamps] screen will appear.
2 Touch the desired pen or stamp from the 6 icons on the left and then touch [OK].
- The main decoration screen will appear again.
3 Draw freely on the canvas with your fingertip.
- To select a different pen or stamp: Repeat steps 1 and 2.
- To change color: Touch [◆] ➤ [♥] ➤ select a color from the color palette ➤ [OK].
- To clear your freehand drawings and stamps: Touch [◀] ▶ [Clear] ▶ [Yes] ▶ [OK].
- To save your freehand drawings and stamps on the memory: Touch [◆] ➤ [Save]* or [SD Save]* ➤ [Yes] ➤ [OK].
- To load a previously saved canvas (freehand drawings and stamps only) from the memory: Touch [◀] ➤ [□ Load]** or [SD Load]** ➤ [Yes] ➤ [OK].
![CANON Vixia HF R700 - ■ To Use [Pens and Stamps] - 1](/content/2026/06/1327524/images/5dd38404e19bb07cbadbbe88cc16f0e68cdad36c8bc4c81a826890f8d9618771.jpg)
![CANON Vixia HF R700 - ■ To Use [Pens and Stamps] - 2](/content/2026/06/1327524/images/1effae6704299598636c0f4046e293b75d837e1f45b86e37ea93c4ffe9d6d589.jpg)
![CANON Vixia HF R700 - ■ To Use [Pens and Stamps] - 3](/content/2026/06/1327524/images/c6593866870bcd3b3fe2aa58c2d6c0ce234dd63b53248b2bddacd6a3bf6e7354.jpg)
![CANON Vixia HF R700 - ■ To Use [Pens and Stamps] - 4](/content/2026/06/1327524/images/b32c01c1b26c6afbb1da6942f4132c3ff33a763f792a7a5b77093d98d3c54a5d.jpg)
Convenient Functions
- A canvas can only be saved or loaded in recording standby mode or during playback pause. * HFR72/R70 The canvas file will be saved in the built-in memory. HFR700 The canvas file will be saved on the memory card. ** The camcorder will apply the freehand drawings and stamps that were most recently saved in the built-in memory (HFR72/R70 only) or on the memory card (HFR700 only).

- Initializing a memory will erase any [Pens and Stamps] canvas files and image files you may have saved. (HFR72/R70 The image mix frames that come pre-installed in the built-in memory will be restored after it is initialized.)
■ To Use [Animated Stamps]
When the shooting mode is set to 😊, you can use especially designed, baby-themed animated stamps.
1 Touch [★].
- The [Animated Stamps] screen will appear.
2 Touch one of the buttons and then touch [OK].
3 Touch anywhere on the canvas to place the selected animated stamp.
- You can also drag some animated stamps to a different location.
![CANON Vixia HF R700 - ■ To Use [Animated Stamps] - 1](/content/2026/06/1327524/images/8e4cc1e3bcc71ef9297a1ee42600541bf0f0bfa62605c714e712915e87ecfc80.jpg)
![CANON Vixia HF R700 - ■ To Use [Animated Stamps] - 2](/content/2026/06/1327524/images/c829a35abf3fbe50e454d9270e14e39422c53cc62e8ff699b417720bb5c07a79.jpg)
![CANON Vixia HF R700 - ■ To Use [Animated Stamps] - 3](/content/2026/06/1327524/images/c65b4767a7571d9edff329666a823850592bc0118bfc5b45f5a453b8b029d801.jpg)
![CANON Vixia HF R700 - ■ To Use [Animated Stamps] - 4](/content/2026/06/1327524/images/d586c7d388833688fddc96078a2b5587a1c2160f486c225c8309561e918f384a.jpg)
To use [Date/Time]

* Except when playing back from the [ 😊 ] index screen (Baby album).
1 Touch [√].
- The Date/Time screen will appear.
2 Touch [Date] or [Time].
- To remove a selected stamp, touch it again.
3 Touch [OK].
- The selected stamp(s) will appear.
4 You can touch any stamp and drag it to the desired location.
To use stamps from the [ 😊 ] menu
When the shooting mode is set to 😊 in recording mode, or during playback from the Baby album, you can add stamps to the video to track baby's height, weight and age. You can track the information of up to 3 babies.

* Only when playing back from the [ 😊 ] index screen (Baby album).
![graph LR A["Menu"] --> B["Target Icon"] B --> C["A Number"] C --> D["B Number"] D --> E["C Number"] E --> F["Camera Icon"]](/content/2026/06/1327524/images/5efb5fc913cb8e327f11c5a7cee1ec3603df26ccfbbc8acbc7d2589e24fe675a.jpg)
1 Touch [ 😊 ].
- The screen with stamps for 😊 mode will appear.
2 Touch [💡 1], [💡 2] or [💡 3] to select the desired baby.
- The design of the stamps is slightly different for each baby.
3 Register baby's information as necessary.
- To register baby's birth date: Touch [◀] next to the baby's age button. Touch the year*/month/day, touch [▲]/[▼] to change it, and then touch [OK]. Baby's current age will be calculated and displayed inside the age button. - To register baby's height or weight: Touch [◀] next to the button of the information you want to change. Touch [▲]/[▼] to set the height/weight, and then touch [OK].
* The year of birth can only be set to 2014 and later.
4 Touch any of the buttons to add the corresponding stamp: [Date] (the current date), [Time] (the current time), baby's age, height or weight.
- To remove a selected stamp, touch it again.
5 Touch [OK].
- The selected stamp(s) will appear.
6 You can touch any stamp and drag it to the desired location.

- For the age stamp, the display will change as follows:
- Before 1 week: d a
- 1 week – less than 1 month old: weeks
- 1 month - less than 1 year old: months
- 1 year – less than 2 years old: years and months
- 2 years old and older: only years
- For the height stamp, only inches will be displayed until 35 inches and feet and inches will be displayed from 3 feet.
- For the weight stamp, pounds and ounces will be displayed until 19 pounds 15 ounces and only pounds will be displayed from 20 pounds.
To use image mix
Image mix frames can be combined with the live video for fun special effects. You can use the image mix function along with additional [Pens and Stamps] or [Animated Stamps] decorations.
The image mix frames are stored in the built-in memory (HF R72/R70 only). To use the image mix function while recording on a memory card, you will need to download the image mix files in advance and use, for example, a card reader to copy them to the memory card (301).
Format
AVCHD
MP4
Shooting mode

AUTO


SCN
P
Playback



- HFR72/R70 Before performing this procedure, make sure that the memory selected for recording (☐ 80) or playback (☐ 66) contains the image mix frames.
1 Touch [☐] to open the [Select Image] screen. 2 Touch [+] or [-] to select a different image mix frame.
- You can select from 26 image mix frames (or 20 especially designed image mix frames, in 😊 mode).
- HFR72/R70 Only when recording on or playing back scenes from a memory card: You can also touch [☐] to read image mix frames saved in the built-in memory.
3 Touch [OK] to mix the selected frame with the live video.


Mixing Your Own Images with Live Video
When recording on a memory card, you can use image files you create on your computer for the image mix (Chroma Key) function. Make sure that the image you want to use has a blue or green area, which will be replaced by the live video using Chroma Key mixing. For details, refer to About the image files for the Image Mix function (☐ 302).
Example of an image used for Chroma Key

Green area that will be replaced by the live video
■ To use the Chroma Key function
1 Touch [☐] to open the [Select Image] screen. 2 Touch [SD] and then touch [+] or [-] to select the image you created. 3 Touch [▶] to open the [Chroma Key] screen. 4 Touch [Green] or [Blue] depending on the characteristics of the image you want to use and touch [◀] or [▶] or swipe left/right along the bottom bar to adjust the chroma key setting as necessary.




5 Touch [OK] to mix your image with live video.
![CANON Vixia HF R700 - Touch [OK] to mix your image with live video. - 1](/content/2026/06/1327524/images/db27cc3b182651641d390cdea8d24d1169c065b58642650be6e39ca2696b9aea.jpg)
- The image mix frame cannot be selected while recording or during playback.
- Decorating Scenes during Playback
You can decorate scenes while playing them back. Decorations added during playback are not recorded with the scene. You can also load and apply a canvas with previously saved decorations.

1 Play back the scene you want to decorate (64). - To use the various decorations especially designed for 😊 mode, play back a scene from the Baby album ([ 😊 ] index screen). 2 Touch the screen to display the playback controls. 3 Touch [💡] to display the decoration toolbar. 4 Decorate the scene using the tools from the toolbar as explained in the previous sections. 5 Touch [×] to exit the decoration screen.




Convenient Functions
Video Snapshot
You can record a series of short scenes, each a few seconds long.
When you play the video snapshot scenes one after the other, this will result in fast-paced, dynamic video. You can even play back the video snapshot scenes set to background music (129).

1 Activate video snapshot.
[Play] [Play] Video Snapshot] [ON] [OK]
- Touch [OFF] instead to deactivate video snapshot.
- A blue border appears on the screen.
2 Press START/STOP.
- The camcorder records for about 4 seconds (the blue frame serves as a visual progress bar) and then automatically returns to record standby mode.

- You can change the length of the video snapshot scenes recorded with the [Video Snapshot Length] setting.


Convenient Functions
- Any of the following actions will deactivate the video snapshot function.
- Turning off the camcorder, pressing ▶, changing the shooting mode, etc.
- Changing the movie format (AVCHD/MP4), video quality or frame rate.
- Activating the slow & fast recording mode.
Face Detection and Tracking
The camcorder automatically detects people's faces and keeps the subject in focus and correctly exposed. To focus on a person other than the one the camcorder selected, touch the desired face on the screen (tracking). You can also use tracking to always keep in focus other moving subjects, such as pets or moving vehicles.

* Face detection is always activated in AUTO and 😊 mode.
1 Activate face detection.
![[Other Settings] [Face Detection & Tracking] [ON] [×]](/content/2026/06/1327524/images/fbdeae0aa9860c3b5d8c24b17d494d91e5d7fedf907a66d54ef516c5d7f8fa15.jpg)
- To turn off face detection, repeat the procedure selecting [OFF Off] instead.


Convenient Functions
2 Point the camcorder at a person.
- If there is more than one person in the picture, the camcorder will automatically select one person it determines is the main subject. The main subject is indicated by a white frame and the camcorder will optimize the settings for that person. Other faces will have gray frames.

Main subject
3 Touch a different face on the touch screen to optimize the exposure for another person.
- You can also touch other moving subjects, such as a pet.
- A white double frame will appear around the selected subject and track it as it moves.
- Touch [] to remove the tracking frame.

- The camcorder may mistakenly detect the faces of non-human subjects. In such case, turn face detection off.
- Touching somewhere with a color or pattern unique to the subject will make it easier to track. However, if there is another subject in the vicinity that shares similar characteristics to the selected subject, the camcorder may start tracking the incorrect subject. Touch the screen again to select the desired subject.


- In certain cases, faces may not be detected correctly. Typical examples include:
- Faces extremely small, large, dark or bright in relation to the overall picture.
- Faces turned to the side, at a diagonal, upside-down, or partially hidden.
- Face detection is not available in the following cases.
- When the shooting mode is set to SCN and the Special Scene mode is set to [Night Scene], [Low Light] or [Fireworks].
- During slow & fast recording mode.
- When the digital zoom is activated and the zoom ratio is larger than 228x.
- HFR72/R70 While the camcorder is controlled remotely from an iOS/Android device.
- In certain cases, tracking may not be able to track the subject. Typical examples include:
- Subjects extremely small or large in relation to the overall picture.
- Subjects too similar to the background.
- Subjects lacking sufficient contrast.
- Fast moving subjects.
- When shooting indoors with insufficient lighting.
Faders
The camcorder offers two professional looking transition effects to fade-in or fade-out scenes.

[2] ➤ [Faders] ➤ Desired fader* ➤ Desired fade screen color* ➤ [×]
* You can preview the transition effect on the screen. - The icon of the selected fader appears. - To turn off faders, repeat the procedure selecting [OFF Off] instead. - You can also change the fader settings while recording (for example, to apply only a fade out).
To fade in/out
Press START/STOP in record standby mode to start recording with a fade in. Press START/STOP while recording to fade out and then stop recording.


- When you apply a fader, not only the picture but also the sound will fade in or out.
- Faders cannot be used in the following cases:
- When the shooting mode is set to 📄 and the cinema-look filter is set to [Old Movies].
- During slow & fast recording mode.
- When recording scenes with decorations.
- When recording video snapshot scenes.
- While pre-recording is activated.
- When the video quality is set to 60P or 35 Mbps.
- HFR72/R70 While the camcorder is controlled remotely from an iOS/Android device.
- Turning off the camcorder will deactivate the selected fader.
When You Want More Control
Exposure
When you want to record a subject that is much brighter or darker than its surroundings, the automatic exposure obtained by the camcorder may not be best for that specific subject.
To correct this, you can compensate the exposure to make the whole picture brighter or darker, you can use Touch AE to have the camcorder optimize the exposure for the subject you indicate, or you can use a combination of both.

Open the exposure adjustment screen.


Exposure]
■ Exposure Compensation
1 Touch [M].
- The exposure is locked and the exposure compensation dial appears with the compensation value set at ±0.
- Touch [M] again to return the camcorder to automatic exposure.
2 Touch [◀] or [▶], or swipe left/right along the dial to compensate the exposure.
![CANON Vixia HF R700 - Touch [◀] or [▶], or swipe left/right along the dial to compensate the exposure. - 1](/content/2026/06/1327524/images/a49c2c5b9560370aae554fc44cea56b80b0028590912a90ede901b62e8fc26d9.jpg)
![CANON Vixia HF R700 - Touch [◀] or [▶], or swipe left/right along the dial to compensate the exposure. - 2](/content/2026/06/1327524/images/c46c6e25e3e4aefe61f9db555e6512eef90298f0c0afcb4bd1bf9aed5dd6c687.jpg)
![CANON Vixia HF R700 - Touch [◀] or [▶], or swipe left/right along the dial to compensate the exposure. - 3](/content/2026/06/1327524/images/1f2ac1c3498f89860be9fbbc33cbb9b4dda5379ce09b6dc58458380b47f6be6d.jpg)
![CANON Vixia HF R700 - Touch [◀] or [▶], or swipe left/right along the dial to compensate the exposure. - 4](/content/2026/06/1327524/images/68d7321310a8a14e07d53886dae099f6651fa0fbf8e71c951da6e63374af014e.jpg)
- The compensation range may vary depending on the initial brightness of the image, and some values may be grayed out.
3 Touch [✗] to apply and lock the exposure compensation value.
- During exposure lock, ⚠ and the exposure compensation value will appear on the screen.
Touch AE
1 Touch a subject that appears inside the ☐ frame.
- The Touch AE mark (▶) will flash and the exposure will be optimized automatically for the subject you selected.
- Touch [M] to return the camcorder to automatic exposure.
2 Touch [✗] to apply the adjusted exposure.
- Using Touch AE also locks the exposure (the exposure compensation dial appears with the compensation value set at ±0). Before touching [✗], you can compensate the exposure further (steps 2 and 3 in the previous procedure).
- During exposure lock, ⚠ and the exposure compensation value will appear on the screen.
![CANON Vixia HF R700 - Touch [✗] to apply the adjusted exposure. - 1](/content/2026/06/1327524/images/c818c84536d36d6d7589b4221ec9c9b1c887671b044a0e509e84566f3db95428.jpg)
- If the shooting mode is changed during exposure compensation, the camcorder will return to automatic exposure.
- By default, the camcorder corrects for backlight conditions.
You can turn off the automatic correction with the
![CANON Vixia HF R700 - Touch [✗] to apply the adjusted exposure. - 2](/content/2026/06/1327524/images/800e699d08b3b1e0d965c02425823539258f0d180ce7412d6a09fdd67cf2fca9.jpg)
![CANON Vixia HF R700 - Touch [✗] to apply the adjusted exposure. - 3](/content/2026/06/1327524/images/7da94b1f1b350d852593feefb69e864f1cf83f556e75a221f017f297d66d8d07.jpg)
[Auto Backlight Correction] setting.
![CANON Vixia HF R700 - Touch [✗] to apply the adjusted exposure. - 4](/content/2026/06/1327524/images/d084b8d7f7dd852bdf8a6efebc6a1d7ecca6512270c564c50094c5813f56c665.jpg)
![CANON Vixia HF R700 - Touch [✗] to apply the adjusted exposure. - 5](/content/2026/06/1327524/images/0f04ec0640e70370fd638053cc22cb0b605821c073cd4eb85417a91cfa422f85.jpg)
![CANON Vixia HF R700 - Touch [✗] to apply the adjusted exposure. - 6](/content/2026/06/1327524/images/09dc083015dd2924afe3ca35e6787467cd74ffc5e3f0b64ac937ff463d65b372.jpg)
![CANON Vixia HF R700 - Touch [✗] to apply the adjusted exposure. - 7](/content/2026/06/1327524/images/dd54b028ac68fdd7e4385da52dd764c3abbe1fd947ae404882cc2aed6f7869cb.jpg)
When You Want More Control
- Exposure adjustment is not available when the shooting mode is set to SCN and the Special Scene mode is set to [Fireworks].
Focus
Autofocus may not work well on the following subjects. In such case, focus manually.
- Reflective surfaces
- Subjects with low contrast or without vertical lines
- Fast moving subjects
- Through wet windows
- Night scenes

1 Adjust the zoom before adjusting the focus. 2 Open the manual focus screen.


Focus]
Manual Focus
1 Touch [MF].
- Touch [MF] again to return the camcorder to autofocus.
2 Touch and hold [▲] or [●] to adjust the focus.


- The focusing distance displayed will change as you adjust the focus. The focusing distance will be displayed for about 2 seconds. You can change the units used for the distance display with the [Displayed Units] setting.
- When [Focus Assistance] is set to [ON], the center of the screen will be magnified to help you focus more easily.
- If you wish to focus on faraway subjects such as mountains or fireworks, touch and hold [▲] until the focusing distance changes to ∞.
3 Touch [✗] to lock the focus at the selected distance.
- During manual focus, [MF] will appear on the screen.
Touch AF
1 Touch a subject that appears inside the Ⓞ frame.
- The Touch AF mark (▶◀) will flash and the camcorder will focus automatically on the subject or spot you touched on the screen.
- Touch [MF] again to return the camcorder to autofocus.
- If necessary, you can further adjust the focus manually (step 2 in the previous procedure).
2 Touch [✗] to lock the focus at the selected distance.
- During manual focus, [MF] will appear on the screen.
![CANON Vixia HF R700 - Touch [✗] to lock the focus at the selected distance. - 1](/content/2026/06/1327524/images/ba4b68c345dbcfa842edb4b45d979d60b1ea8c281a2544a01b0223ce8141d4bc.jpg)
- When you use [■] and [▲] to adjust the focus manually, you can touch inside the frame to automatically focus on that spot.
![CANON Vixia HF R700 - Touch [✗] to lock the focus at the selected distance. - 2](/content/2026/06/1327524/images/9e97213b932fb4941102c6636e3992f7f78b983b5051760b12a97c0084f9e718.jpg)
![CANON Vixia HF R700 - Touch [✗] to lock the focus at the selected distance. - 3](/content/2026/06/1327524/images/bde2b4916ba4081432af98d2e2e4e142c02433ca911069cefd479b68a35b5fd0.jpg)
![CANON Vixia HF R700 - Touch [✗] to lock the focus at the selected distance. - 4](/content/2026/06/1327524/images/c8e0e23154741ec0ff7f4b9bda694b476a3c260736879e108a1a06388e26b517.jpg)
![CANON Vixia HF R700 - Touch [✗] to lock the focus at the selected distance. - 5](/content/2026/06/1327524/images/b41e397c907582ae6c37050b0d92a3ac86d26a84d12cc5aa5664bf3bb9684558.jpg)
White Balance
The white balance function helps you to accurately reproduce colors under different lighting conditions so that white objects will always look truly white in your recordings.

[◀] ➤ [WB White Balance] ➤ Desired option* ➤ [✗]
* When you select [■ Custom WB], set the custom white balance with the following procedure before touching [✗]. - The icon of the selected white balance setting will appear on the screen.
To set the custom white balance
1 Point the camcorder at a white object, so it fills the screen.
2 Touch [Set WB].
- When the adjustment is completed, ▶ stops flashing and disappears. The camcorder will retain the custom white balance even if you turn it off.


Options (♦ Default value)
[AWB Automatic]
The camcorder automatically sets the white balance for natural looking colors.
[☀️ Daylight]
To record outdoors.
[Tungsten]
To record under tungsten and tungsten-type 3-wavelength fluorescent lighting.
[■ Custom WB]
Use the custom white balance setting to make white subjects appear white under colored lighting.
![CANON Vixia HF R700 - [■ Custom WB] - 1](/content/2026/06/1327524/images/67bb719151ed10e84af1a25c3acb7ded7874eea21a70f164d34bec1feaeca12e.jpg)
- When you select the custom white balance:
- Set 📋 [Zoom Type] to [32x Optical].
- Reset the white balance when you change locations or the lighting or other conditions change.
- Depending on the light source, ▶ may keep flashing. The result will still be better than with [AWB Automatic].
- Custom white balance may provide better results in the following cases.
- Changing lighting conditions.
- Close-ups.
- Subjects in a single color (sky, sea or forest).
- Under mercury lamps, certain types of fluorescent lights and LED lights.
![CANON Vixia HF R700 - [■ Custom WB] - 2](/content/2026/06/1327524/images/4eda93a118bb9d3d34b39e4a4c7dd433971edd423fd6e4aa8d56545dbe45dea5.jpg)
![CANON Vixia HF R700 - [■ Custom WB] - 3](/content/2026/06/1327524/images/eb782d49852c5db4b70bb98fb4951ad37ee67a56fabc2ca1901c48c4348f6ecf.jpg)
![CANON Vixia HF R700 - [■ Custom WB] - 4](/content/2026/06/1327524/images/4c814e748d95920d33e1b13ecd7a0865a40fbd4b37e3bcf43ce82b98f8cca30b.jpg)
![CANON Vixia HF R700 - [■ Custom WB] - 5](/content/2026/06/1327524/images/b602e8035bb6994c9e3c8b8989a3933d93c05ebca79bf335e611ba30e8f326cd.jpg)
Frame Rate
You can change the frame rate (the number of frames recorded per second) to change the look of your movies.

![[Recording Setup] [Video Quality] [i] Desired frame rate [→] [→] [→] [×]](/content/2026/06/1327524/images/bf2ee39ba756ae2723d8c3db2244bc1482c0afc1048a49714845e8d271803c6b.jpg)
Options for AVCHD movies (♦ Default value)
[60i]
60 fields per second, interlaced. Standard frame rate of analog NTSC TV signals.
[PF30]
Shooting at 30 frames per second, progressive*. Use this frame rate to easily edit your AVCHD movies, for example, to post them on the Web.
* Recorded as 60i.
Options for MP4 movies (♦ Default value)
[30P]
30 frames per second, progressive.
[24P]
24 frames per second, progressive.
![CANON Vixia HF R700 - [24P] - 1](/content/2026/06/1327524/images/1874584592a13cbcb6c0a2fcdacea7638a7cf426b890677d68b496a83d20ef46.jpg)
![CANON Vixia HF R700 - [24P] - 2](/content/2026/06/1327524/images/e442ac274fb58cd057c67fd4ea9c2f92c5023a80c8e8831cb2455473c744d982.jpg)
![CANON Vixia HF R700 - [24P] - 3](/content/2026/06/1327524/images/e084d13b701dcb7beebe4a79b8831eb20c310b107ceddc0f5017438ac5580db2.jpg)
![CANON Vixia HF R700 - [24P] - 4](/content/2026/06/1327524/images/7568d1b663ef90dcfc9c22b6a64ce92d551c8817d8952d930b1268da6ff8a317.jpg)
![CANON Vixia HF R700 - [24P] - 5](/content/2026/06/1327524/images/6f35fdaae9e243d089c91e5e989172147d13dd65fcb49adf9665c217660d05f5.jpg)
- When the video quality is set to [60P Recording] (60P or 35 Mbps), the frame rate is automatically set to 60P and cannot be changed.
Tele Macro
Using tele macro, the camcorder can focus at a shorter distance (up to 50 cm (1.6 ft.) from the subject at full telephoto), allowing you to get closer shots of small subjects like flowers and insects. This function also adds a soft focus to the background, so the subject not only looks larger but it also stands out more.

* When the shooting mode is set to AUTO, tele macro will be activated automatically when you zoom in to full telephoto and bring the camcorder up close to the subject.


[Zoom Type]

[ ] (tele macro)

[X]
- To turn off tele macro, touch [⚡T] again.
- The camcorder will automatically adjust the zoom to the telephoto end.


- Any of the following actions will deactivate the tele macro function.
- Turning off the camcorder.
- Pressing ▶.
- Setting the shooting mode to AUTO, 😊 or the [✿ Fireworks] Special Scene mode in SCN mode.
- Zooming out toward W (wide angle).
- Tele macro cannot be turned on/off while recording.
Recording Audio
Audio Scenes
You can have the camcorder optimize the audio settings of the built-in microphone by selecting the audio scene that matches your surroundings. This will greatly enhance the sense of “being there”.
Shooting Mode
AVCHD
MP4

AUTO


SCN
P
Playback


* When the shooting mode is set to 😊, the audio scene is automatically set to [♪STD Standard].


[ AUDIO Audio Scene]

Desired audio scene ➤ [X]
Options (♦ Default value)
[Standard]
![CANON Vixia HF R700 - [Standard] - 1](/content/2026/06/1327524/images/546d025ad5178ab8c1333f0cfe8cfb81cdab55aef3a2933819cd483e72da5849.jpg)
To record most general situations. The camcorder records with standard settings.
[Music]
To vibrantly record music performances and singing indoors.
[Speech]
Best for recording human voices and dialog.
[Forest and Birds]
To record birds and scenes in forests. The camcorder clearly captures sound as it spreads.
![CANON Vixia HF R700 - [Forest and Birds] - 1](/content/2026/06/1327524/images/805fa9de55003cc92d434a39677d14e310e5e67874e1cd7eeb59aaaa2c77a7d6.jpg)
![CANON Vixia HF R700 - [Forest and Birds] - 2](/content/2026/06/1327524/images/7927e544921a25e7a001763719f940c4c82f8f9227a8271612797f069ac93c7d.jpg)
![CANON Vixia HF R700 - [Forest and Birds] - 3](/content/2026/06/1327524/images/859066f6718159bfe2aaf8550dd12a564fc1f2c19e70282a05b0296896a45861.jpg)
![CANON Vixia HF R700 - [Forest and Birds] - 4](/content/2026/06/1327524/images/1a2d335a109abecba1f516bfa2588f2e0b43b5accac5b6eeb369cb82bcdf204d.jpg)
Recording Audio

[Noise Suppression]
To record scenes while reducing noise from wind, passing vehicles and similar ambient sound. Ideal for recording at the beach or in places with a lot of noise.
Using Headphones
Use headphones for playback or to check the audio level while recording. Connect the headphones to the AV OUT/Ω terminal. This terminal is used for both headphones and analog audio/video output so be sure to change the function of the terminal in advance.

1 Change the function of the terminal to headphones output.
![[ ] Other Settings] [AV/Headphones] [ ] Headphones] [ ]](/content/2026/06/1327524/images/acee26de204b3b2dd46d2c35ac1ba8a5cee8dd114e70114371efeb824a9857fb.jpg)
2 Connect the headphones to the AV OUT/Ω terminal. 3 Adjust the volume as necessary.
[Volume] ➤ [Ω>] or [Ω]*)* to adjust the volume ➤ [X]
* You can also swipe left/right along the Headphones bar. - will appear in the info panel (241).



Recording Audio

■ Adjusting the Volume during Playback

* Only during the playback of a slideshow of photos. For that procedure refer to Photo Slideshow (134).
After changing the function of the AV OUT/Ω terminal and connecting the headphones, you can adjust the headphone volume also during playback. While playing back movies, adjust the volume the same way you would adjust the speaker's volume (67), only using the headphone icons [Ω], [Ω] instead.

- When using headphones, make sure to lower the volume to an appropriate level.
- Do not connect the headphones to the AV OUT/Ω terminal while [AV/Headphones] is set to [AV AV]. The noise produced may be harmful to your hearing.


Recording Audio

- Use commercially available headphones with a ∅ 3.5 mm minijack.
- Even if [AV/Headphones] was set to [Ω Headphones] in a playback mode, the function of the AV OUT/Ω terminal will return automatically to AV output when you turn off the camcorder.
- HFR72/R70 Audio will not be output from the Ω (headphones) terminal while Wi-Fi functions are in use.
Using an External Microphone
When recording in very quiet surroundings, the built-in microphone may pick up the sound of the camcorder's internal machinery. In such case, we recommend using an external microphone.


■ Using the WM-V1 Wireless Microphone
Using the optional WM-V1 Wireless Microphone, you can reliably record sound even when recording subjects at a distance exceeding the practical range of the built-in microphone. For details on connecting and using the WM-V1, refer to the instruction manual supplied with the microphone.
■ Using Commercially Available Microphones
You can also connect to the camcorder's MIC terminal commercially available condenser microphones with their own power supply. You can connect almost any stereo microphone with a ∅ 3.5 mm plug, but audio recording levels may vary.

- When referring to the instruction manual of the WM-V1, note that the procedure written for manually adjusting the audio recording level does not apply to this camcorder. Refer to [◀ Mic. Level] (📖 239) for this camcorder's correct procedure.
- When an external microphone is connected to the camcorder's MIC terminal, the audio level indicator (☐ 239) will be displayed automatically.




Advanced Playback and Editing Functions
Advanced Playback Functions
This section explains how to grab still frames or capture video snapshot scenes from an existing scene, how to play back recordings set to background music, how to play back a slide-show of your photos and more.
Editing Functions
This section explains how to trim or divide scenes, how to convert scenes to smaller MP4 scenes and how to change the image used as the thumbnail of a scene in the Baby album. HFR72/R70 only: In this section you will also find the procedure for copying recordings and for converting scenes into time-lapse scenes.
Advanced Playback Functions
Capturing Video Snapshot Scenes and Grabbing Still Frames from a Movie
You can capture video snapshot scenes or grab still frames from a previously recorded scene. For example, you may want to print photos from video recorded at a party or create a small video clip using video snapshot scenes from the highlights of an event.
Capturing a Video Snapshot Scene

1 Play back the AVCHD scene from which you want to capture the video snapshot scene (64). 2 At the point where you want the video snapshot scene to start, press START/STOP.
- The camcorder captures the video snapshot scene for about 4 seconds (the blue frame serves as a visual progress bar), and then enters playback pause mode.
- Alternatively, you can touch the screen and then touch [♪:] to capture the video snapshot scene.
3 Touch [■] to stop the playback.
- The new video snapshot scene will be added at the end of the index screen of the same recording date as the original scene.


- You can change the length of the video snapshot scenes you capture with the [Video Snapshot Length] setting.
- A video snapshot scene can be captured only during playback; it cannot be captured during playback pause mode.
- Video snapshot scenes cannot be captured from scenes shorter than 1 second.
- When the source scene is itself a video snapshot scene, you may not be able to capture a video snapshot scene depending on the length of the source scene and the length currently selected for video snapshot scenes.
- When you start capturing a video snapshot scene less than 1 second from the end of the scene, the video snapshot scene will be captured starting from the beginning of the following scene.
- During the playback of video snapshot scenes captured from a previously recorded scene, you may notice some anomalies in the picture/sound at the point where the playback switches to a new scene.
- Grabbing Still Frames

1 Play back the scene from which you want to grab frames (64). 2 Pause the playback at the desired point and grab the frame to save it as an image file.
Touch the screen to display the playback controls ➤ [Ⅱ] ➤ [图标]
3 Touch [■] to stop the playback.

- The size of frame grabs from a scene is 1920x1080 (1280x720 when frames are grabbed from an MP4 scene recorded at 4 Mbps video quality).
- The recording date/time of the frame grabs will reflect the date and time of recording of the original scene.
- Still frames grabbed from a scene with a lot of fast movement may be blurred.
- HFR72/R70 Frame grabs will be saved on the memory selected for recording photos.


Playback with Background Music
Canon offers for download 3 music tracks that can be used as background music when playing back your movies or a slideshow of your photos. You can also mix the original audio and the background music and adjust the mix balance to your preference.

* Only during the playback of a slideshow of photos. For that procedure refer to Photo Slideshow (134).
1 Open the desired index screen (64). 2 Select the music track.
![[Other Settings] [Select Music] [ON On] [▲] or [▼] to select the desired music track](/content/2026/06/1327524/images/d97176ce2132d4ad5214b3223a47b01acbbd27bf5e130ae616068f75b934a180.jpg)

1 Select the desired music track. 2 Adjust the background music balance. 3 Play back the original sound (no background music).
![graph LR A["Menu"] --> B["Target Icon"] B --> C["A Number"] C --> D["B Number"] D --> E["C Number"] E --> F["Play Button"]](/content/2026/06/1327524/images/12a697f5fe2c2c85866e5dc94fab70d3dd742a5fa38b28d19517fb7c8de7c117.jpg)
Advanced Playback Functions
4 Delete the music track selected. 5 Listen to the music track selected. Touch again (■) to stop the playback.
3 Adjust the mix balance between the original sound and the background music.
- Touch [▶] (more of the original sound) or [♪] (more of the background music) or swipe left/right along the [Music Balance] bar to adjust the background music balance as desired.
4 Touch [✗] and then touch a scene to start the playback with the selected background music.
To adjust the background music balance during playback
During playback:
Touch the screen to display the playback controls ➤ [♪] ➤ [▶] or [♪] to adjust the background music balance as desired ➤ [◀]
To delete a music track
In the [Select Music] screen, touch [▲] or [▼] to select the track you want to delete.
[No] [Yes]
![graph LR A["Menu"] --> B["Target Icon"] B --> C["A Number"] C --> D["B Number"] D --> E["C Number"] E --> F["4 Number"]](/content/2026/06/1327524/images/be7013036c1ec309a40920c01b896bf0266284e80c7b6c0398862fd0602b2ca0.jpg)
Advanced Playback Functions

- If you use copyrighted songs and music tracks in your video creations, remember that music under copyright may not be used without permission from the copyright holder, except for cases permitted under applicable laws, such as for personal use. Make sure to follow applicable laws when using music files.

- The music files used for background music are stored in the built-in memory (HFR72/R70 only). To play back recordings from a memory card with background music, you will need to download the music files in advance (301).
- After downloading the music files to your computer, use Transfer Utility LE to transfer them to the memory that contains the recordings you want to play back with background music. For details, refer to the ‘Transfer Utility LE Software Guide’ (PDF file).
- Initializing a memory card will permanently erase any music files you may have transferred to the memory card. (HFR72/R70 The music files that come pre-installed in the built-in memory will be restored after it is initialized.)
Selecting the Playback Starting Point
If you have a very long scene, you may want to start playing back the scene from a certain point. You can use the movie timeline to break down an AVCHD scene into segments at fixed time intervals ranging from 6 seconds to 6 minutes.

1 Open the desired index screen for AVCHD movies (☐ 64). 2 Open the scene's [Timeline] screen.


Desired scene
- The [Timeline] screen appears. The large thumbnail will show the first frame of the scene. Below it, the timeline ruler shows frames taken from the scene at fixed intervals.
- To return to the index screen, touch [→] twice.
3 Touch the desired frame in the timeline ruler to start playing back the scene from that point.




Advanced Playback Functions

1 Touch twice to return to the index screen. 2 Previous/next scene. 3 Swipe left along the ruler to display the next 5 frames. 4 Scene's video quality and length. 5 Recording date and time. 6 Swipe right along the ruler to display the previous 5 frames. 7 Current scene / Total number of scenes. 8 Currently selected interval between frames.
To change the interval between frames
[6 sec]

Desired interval




Photo Slideshow
You can play a slideshow of all the photos and even set it to music.

1 Open the [▶] index screen (☐ 70). 2 Select the music track.
![[Other Settings] [Select Music] [ON On] [▲] or [▼] to select the desired music track (129) [×]](/content/2026/06/1327524/images/6cc30de15d974a309513aef483152879c8d3efc65daa9678f6146aae2f52d38c.jpg)
3 Touch the photo that will open the slideshow to display it in single photo view. 4 Touch the screen to display the playback controls, then touch [▶] to play back the slideshow set to the selected music track.
During the photo slideshow
- Touch the screen and touch [播放] or [播放] to adjust the volume.
- Touch the screen and touch [III] to stop the slideshow.


- The music files used for background music are stored in the built-in memory (HFR72/R70 only). To play back with background music a slideshow of photos recorded on a memory card, you will need to download the music files in advance (301).
- After downloading the music files to your computer, use Transfer Utility LE to transfer them to the memory that contains the recordings you want to play back with background music. For details, refer to the ‘Transfer Utility LE Software Guide’ (PDF file).
- Initializing a memory card will permanently erase any music files you may have transferred to the memory card. (HFR72/R70 The music files that come pre-installed in the built-in memory will be restored after it is initialized.)
Editing Functions
Dividing Scenes
You can divide AVCHD scenes in order to leave out the best parts and later cut out the rest.

1 Play back the desired scene (64). 2 At the point where you want to divide the scene, open the screen for dividing scenes.
Touch the screen to display the playback controls ➤ [Ⅲ] ➤ [Edit] ➤ [Divide]
3 Bring the scene to a precise point, if necessary.
- Playback controls will appear on the screen (67). Use any special playback modes (fast playback, frame reverse/advance) as necessary to locate the desired point.
4 Divide the scene.
[Divide] [Yes]
- The video from the division point to the end of the scene will appear as a new scene in the index screen.


- When advancing/reversing frames while dividing the scenes, the interval between frames is about 0.5 seconds.
- If the scene cannot be divided at the point where you paused the playback, advance/reverse a frame and then divide the scene.
- During the playback of a scene that was divided, you may notice some anomalies in the picture/sound at the point where the scene was cut.
- Scenes that are too short (less than 3 seconds) cannot be divided.
- Scenes cannot be divided within 1 second from the beginning or the end of the scene.
Trimming Scenes
You can trim MP4 scenes by removing all the video recorded before or after a certain point. By doing so, you leave only memorable moments to keep for posterity.

1 Play back the scene you want to trim (📖 64). 2 At the point where you want to trim the scene, open the scene trimming screen.


Touch the screen to display the playback controls ➤ [Ⅲ] ➤ [Edit] ➤ [Trim]
3 Bring the scene to a precise point, if necessary.
- The point where the scene will be trimmed is indicated by the Y marker.
- Playback controls will appear on the screen (67). Use any special playback modes (fast playback, frame reverse/advance) as necessary to locate the desired point.
4 Trim the scene.
[Trim] ▶ [Trim Before Marker] or [Trim After Marker] ▶ [Save as New] or [Overwrite]
- You can select whether to trim the part before or after the marker and whether to save the remaining part of the video as a new scene (keeping the original scene) or to overwrite the original scene.
- Touch [Stop] to interrupt the operation while it is in progress.

- You may not be able to correctly trim the following types of MP4 scenes.
- HFR72/R70 Scenes copied from the built-in memory to an SDXC memory card.
- Scenes recorded or copied onto a memory card using another device.


Editing Functions
- Scenes cannot be trimmed within about 0.5 seconds from the beginning or the end of the scene.
Changing the Thumbnail Image of a Scene
For scenes recorded in 😊 mode, you can change the thumbnail image that will appear in the Baby album ([ 😊 ] index screen).

1 Open the [ 😊 ] index screen (📖 64). 2 Play back the desired scene. 3 When the image you want to use as the thumbnail image of the scene appears, pause the playback and open the [Set Thumbnail] screen.
Touch the screen to display the playback controls ➤ [Ⅱ] ➤ [Edit] ➤ [Set Thumbnail]
4 Bring the scene to a precise point if necessary.
- Playback controls will appear on the screen (67). Use any special playback modes (fast playback, frame reverse/advance) as necessary to locate the desired point.


5 Set the displayed frame as the scene's thumbnail image.
[Set] ▶ [Yes]

- Only the thumbnail of the scene displayed in the Baby album ([ 😊] index screen) will change.
- Dividing a scene whose thumbnail image was changed will reset the scene's thumbnail image.
HFR72/R70 Copying Recordings to a Memory Card
You can copy your recordings from the built-in memory to a memory card.

- Insert the memory card to which you want to copy the recordings into the memory card slot and make sure it has sufficient available space.


■ Copying Recordings from the Index Screen

1 Open the desired index screen in the built-in memory (64, 70).
- To copy all the scenes/photos recorded on a specific date, swipe left/right until a scene or photo you want to copy appears.
2Copy the recordings.
[Edit] ➤ [Copy (☐→SD)] ➤ Desired option* ➤ [Yes]** ➤ [OK]
* When you select [Select], perform the following procedure to select the individual recordings you want to copy before touching [Yes]. ** Touch [Stop] to interrupt the operation while it is in progress.
To select individual recordings
1 Touch the individual scenes/photos you want to copy.
- A checkmark √ will appear on the recordings you touch. The total number of selected recordings will appear next to the √ icon.
- Touch a selected scene or photo to remove the checkmark. To remove all checkmarks at once, touch [Remove All] ▶ [Yes].
2 After selecting all the desired recordings, touch [OK].
![graph LR A["Menu"] --> B["Input"] B --> C["Output"] C --> D["Action"] D --> E["Next Step"]](/content/2026/06/1327524/images/b5e913592eca288f7fe67860efa40565af84f3d4685c73eba74339e6a21f3512.jpg)
Editing Functions
Options
[ ] or [ ]
Copy all the scenes/photos recorded on a particular date. For AVCHD scenes, a date will appear in the button. For MP4 scenes and photos, a folder name will appear. The last 4 digits of the folder name indicate the date of the recordings (ex. 1103 = November 3).
[Select]
Select individual recordings to copy.
[All Scenes] or [All Photos]
Copy all the scenes or photos.
■ Copying a Single Photo

1 In single photo view, select the photo you want to copy (70). 2 Copy the photo.
Touch the screen to display the playback controls ➤ [Edit] ➤
[Copy (☐→SD)] ➤ [☐ Proceed] ➤ [Yes]
3 Swipe left/right to select another photo to copy or touch [✗].




- In the following cases, you will not be able to copy recordings to the memory card:
- If the memory card slot cover is open.
- If the LOCK switch on the memory card is set to prevent writing.
- If the folder and file numbers have reached their maximum value (☐ 232).
Converting Movies to MP4 Format
You can convert previously recorded scenes to MP4 format, which is widely used on the Web and on other devices. Depending on the size of the original scene you may also be able to select a lower video quality to obtain a smaller file size. This is convenient, for example, when you want to upload videos to the Web, as smaller video files will upload more quickly. Additionally, when you convert a scene, you can apply unique cinema-look filters, background music and decorations to the converted scene.
HFR72/R70 only: The original scene must be saved in the built-in memory, whereas the converted MP4 scene will be saved on the memory card.

1 Open the index screen that contains the scenes you want to convert (64).
- HFR72/R70 Select an index screen in the built-in memory.


Editing Functions
- If you want to add background music to the converted scene, select a music track (step 2, 129).
2. Open the screen for selecting scenes to convert.
[Edit] ➤ [Convert to MP4 (☐ → SD)] (HFR72/R70) or [Convert to MP4] (HFR700) ➤ [OK] ➤ [Join Scenes]* ➤ Desired video quality of converted movies
* Only necessary if you want to join all the selected scenes into a single converted movie.
3. Touch the individual scenes you want to convert.
- A checkmark √ will appear on the scenes you touch. The total number of selected scenes will appear next to the √ icon.
- Touch a selected scene to remove the checkmark. To remove all checkmarks at once, touch [Remove All] ➤ [Yes].
4. After selecting all the desired scenes, touch [OK] and then touch [Next].
- If a copyright notice appears, read it carefully and touch [OK] if you agree.
- To add a cinema-look filter*:
[FILTER 1] ➤ Select the desired filter (☐ 87) ➤ [OK]
To deactivate the cinema-look filter, touch [FILTER] again.
![CANON Vixia HF R700 - After selecting all the desired scenes, touch [OK] and then touch [Next]. - 1](/content/2026/06/1327524/images/2e1515b7d2fe20ead2168501a0c62a12aae864df9be2224bbbbb0f4d3c614fbb.jpg)
![CANON Vixia HF R700 - After selecting all the desired scenes, touch [OK] and then touch [Next]. - 2](/content/2026/06/1327524/images/477a21698e714707e7c315641e38a1efe9f053832b0450031c17ca6cc71fae1a.jpg)
![CANON Vixia HF R700 - After selecting all the desired scenes, touch [OK] and then touch [Next]. - 3](/content/2026/06/1327524/images/77aaf081bd718789db7ca04a11b3a3492f0dd43c886e4dc370b3b35cc2dd1a4b.jpg)
![CANON Vixia HF R700 - After selecting all the desired scenes, touch [OK] and then touch [Next]. - 4](/content/2026/06/1327524/images/127c1906725212341806fb6c5d7094c80dea274779449f9438748ff63658f52f.jpg)
Editing Functions
- To change audio settings: You can change the volume of the converted scene or the balance between original sound and background music if you had selected a music track.
[musical] or [musical] to adjust the volume, [musical] or [musical] to adjust the background music balance.
[Ω] or [Ω] when using headphones.
To add decorations:
[💡] ➤ Decorate the scene (📖 95)
Cinema-look filters and decorations cannot be applied at the same time.
Touch [START] to convert the scene(s).
Touch [STOP] to interrupt the operation while it is in progress.
Touch [OK].
AVCHD movies:
Video quality and size of scenes before and after conversion
| Original AVCHD scene | Converted MP4 scene | ||
| 24 Mbps (1920x1080) | 17 Mbps (1920x1080) | 4 Mbps (1280x720) | |
| 60P (1920x1080) | - | - | - |
Editing Functions
| Original AVCHD scene | Converted MP4 scene | ||
| 24 Mbps (1920x1080) | 17 Mbps (1920x1080) | 4 Mbps (1280x720) | |
| MXP (1920x1080) | ● | ● | ● |
| FXP (1920x1080) | ● | ● | ● |
| LP (1280x720) | ● | ● | ● |
MP4 movies:
Video quality and size of scenes before and after conversion
| Original scene | Converted scene | ||
| 24 Mbps(1920x1080) | 17 Mbps(1920x1080) | 4 Mbps(1280x720) | |
| 35 Mbps(1920x1080) | - | - | - |
| 24 Mbps(1920x1080) | ● | ● | ● |
| 17 Mbps(1920x1080) | ● | ● | ● |
| 4 Mbps(1280x720) | - | - | ● |




- If you convert AVCHD movies with a frame rate of 60i, the frame rate of the resulting MP4 movie will be 30P.
- After repeatedly recording and deleting scenes (fragmented memory), MP4 conversion may stop working correctly.
- Scenes recorded using different frame rates cannot be joined into a single scene during MP4 conversion.
HFR72/R70 Converting Movies into Fast Motion Scenes
You can convert MP4 scenes recorded in the built-in memory into fast motion scenes on the memory card to give them a time-lapse quality. The fast motion rates you can select for the conversion are the same as those available during fast motion recording (☐ 92).
Shooting nFoderat
Playback
AVCHD
MP4

AUTO


SCN
P


1 Open the index screen that contains the scenes you want to convert (📖 64).
2 Select the video quality of the converted fast motion scenes.
[Edit] ➤ [Conv. Fast Motion (SD)] ➤ [Join Scenes]* ➤ Desired video quality of the converted movies
* Only necessary if you want to join all the selected scenes into a single fast motion scene.


Editing Functions
3 Select the playback rate of the converted fast motion scenes and then touch [OK].
- When you select a fast motion rate between [x10] and [x1200], before touching [OK], you can also select whether to keep a single frame or 0.5 seconds of video. Keeping one frame at each interval results in smoother time-lapse scenes, but keeping 0.5 seconds of video may be better for fast-moving subjects.
[◀] ➤ [1 Frame] or [0.5 sec] ➤ [◀]
4 Touch the individual scenes you want to convert.
- A checkmark √ will appear on the scenes you touch. The total number of selected scenes will appear next to the √ icon.
- Touch a selected scene to remove the checkmark. To remove all checkmarks at once, touch [Remove All] ➤ [Yes].
5 After selecting all the desired scenes, touch [OK] and then touch [Next].
- If a copyright notice appears, read it carefully and touch [OK] if you agree.
6 Touch [START] to convert the scene(s).
- Touch [STOP] to interrupt the operation while it is in progress.
7 Touch [OK].
![CANON Vixia HF R700 - Touch [OK]. - 1](/content/2026/06/1327524/images/06827e61fdee9a9f088e0328e22461cef0e5784a72153a3bbccf5dd74cdf8fc5.jpg)
- After repeatedly recording and deleting scenes (fragmented memory), the conversion to fast motion scenes may stop working correctly.
![graph LR A["Menu"] --> B["Target"] B --> C["A"] C --> D["B"] D --> E["C"] E --> F["4"]](/content/2026/06/1327524/images/b51e2757f57e0aa25562cb59deb8b0d3ab26dffb2edc803b855619d5fa57ca8e.jpg)

External Connections
150
Terminals on the Camcorder
This section gives more details about the camcorder's output terminals and presents connection diagrams for connecting your camcorder to other devices.
Playback on a TV Screen
This section explains how to connect the camcorder to an HDTV to play back your recordings.
Saving and Sharing Your Recordings
This section explains how to save your recordings to various external devices: a computer, video recorders, the optional CS100 Connect Station or an external hard drive without using a computer (HFR72/R70 only).
Terminals on the Camcorder
Open the LCD panel to access the terminals on the camcorder.
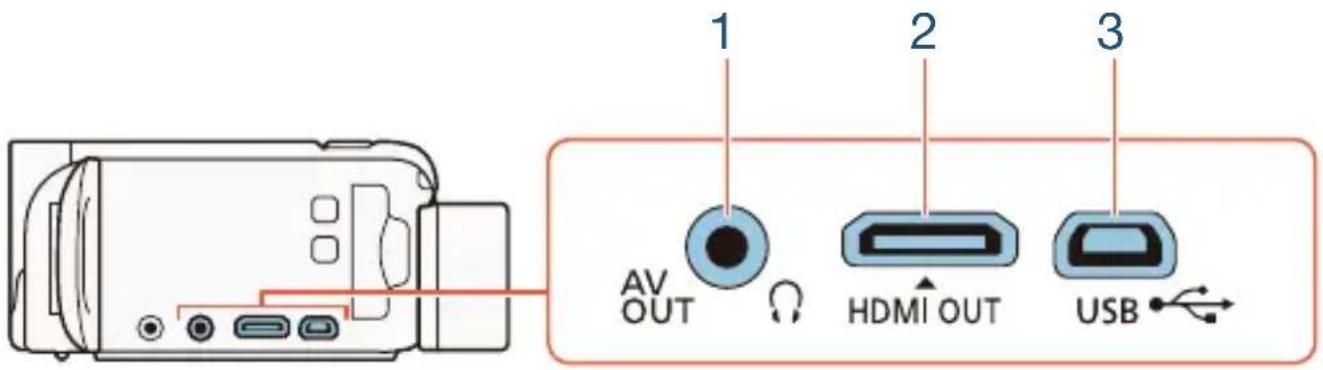
1 AV OUT/Terminal
2 HDMI OUT Terminal
The HDMI OUT terminal offers a high-quality digital connection that combines audio and video in a single convenient cable. This terminal is an HDMI mini receptacle. When using a commercially available HDMI cable, make sure the HDMI cable is Type A to Type C.
3 USB Terminal
This terminal is a mini-AB receptacle. You can use the supplied USB cable to connect to a computer or other digital devices with standard-A receptacles. HFR72/R70 only: You can also use the optional UA-100 USB Adapter to connect the camcorder to an external hard drive or other storage device with a standard-A cable.
Connection Diagrams
In the following connection diagrams, the left side shows the terminals on the camcorder and the right side shows (for reference only) an example of terminals on a connected device.
Connection 1
HDMI
Type: Digital • Quality: High definition • Output only
Connect to a high-definition TV (HDTV) with an HDMI input terminal.

HDMI mini connector

HTC-100/S High Speed HDMI Cable (supplied)


HDMI connector (standard)
About the HDMI connection
The HDMI (High-Definition Multimedia Interface) connection (1) is a convenient all-digital connection using a single cable for both video and audio. When you connect the camcorder to an HDTV equipped with an HDMI terminal, you can enjoy video and audio playback at the highest quality. The camcorder adjusts the output resolution based on the capability of the HDTV.

- The HDMI OUT terminal on the camcorder is for output only. Do not connect it to an HDMI output terminal on an external device, as this may damage the camcorder.


Terminals on the Camcorder

- While a cable is connected to the HDMI OUT terminal, there will be no video output from the AV OUT/Ω terminal.
- Correct operation cannot be guaranteed when connecting the camcorder to DVI monitors.
- Depending on the HDTV, correct playback of personal video content may not be possible using connection 1. Try using connection 2.
Connection 2
Composite Video
Type: Analog • Quality: Standard definition • Output only
Connect to a standard TV or a VCR with audio/video input terminals. Change the following settings on the camcorder:
- [TV Type] according to the TV set (widescreen or 4:3), if the TV cannot automatically detect and change the aspect ratio
- Set [AV/Headphones] to [AV AV]


Connection 3
USB
Type: Digital data connection
Connect the camcorder to a computer to save your recordings or to the optional CS100 Connect Station to automatically back up your recordings. HFR72/R70 only: You can also connect to an external hard drive to save a perfect copy of an entire memory.
①
② HFR72/R70 only
Standard-A (computer, optional CS100 Connect Station)
![graph LR A["USB Mini-AB"] --> B["UA-100 USB Adapter (optional)"] B --> C["Standard-A"] C --> D["External hard drive"] style A fill:#f9f,stroke:#333 style B fill:#ccf,stroke:#333 style C fill:#cfc,stroke:#333 style D fill:#fcc,stroke:#333](/content/2026/06/1327524/images/c4f5738b6509b2eef6ca910c678f2a83645c1f1e700544d5f80db7d4a2c8b1fb.jpg)


Playback on a TV Screen
Connect the camcorder to a TV to enjoy your recordings with family and friends.

1. Turn off the camcorder and the TV. 2. Connect the camcorder to the TV.
- Refer to Connection Diagrams (151) and select the most appropriate connection for the TV used.
3. Turn on the connected TV.
- On the TV, select as the video input the same terminal to which you connected the camcorder. Refer to the instruction manual of the connected TV.
4. Turn on the camcorder and set it to playback mode. 5. Open the desired index screen (64, 70).
- Play back the desired movies or photos.

- If remaining battery time is an issue, you can power the camcorder using the compact power adapter so the battery pack will not be consumed.
- Sound from the built-in speaker will be muted while a cable is connected to the HDMI OUT terminal or AV OUT/Ω terminal.


- HFR72/R70: Audio and video will not be output from the HDMI OUT terminal or AV OUT/Ω terminal while using Wi-Fi functions.
- Connection 2: When you play back your 16:9 movies on standard TV sets with a 4:3 aspect ratio, the TV set will switch automatically to widescreen mode if it is compatible with the Video ID-1 system. Otherwise, change the aspect ratio of the TV manually.
- AVCHD-compatible TVs and digital recorders with a compatible memory card slot can play back AVCHD movies you record with this camcorder directly from the memory card. Refer to the instruction manual of the device used. Depending on the device used, correct playback may not be possible even if the device is AVCHD-compatible. In such case, play back the recordings on the memory card using the camcorder.
- When playing back scenes recorded in ☐ mode on a TV or external monitor, increasing the brightness of the TV, computer monitor or other screen is recommended.
- Depending on the TV used, the outer edges of the camcorder's picture may not be displayed fully.
Saving and Sharing Your Recordings
Save your recordings regularly. You have several options for saving your recordings. As each method offers different advantages, select how you want to save your recordings depending on how you intend to use them.
![graph TD A["Canon"] --> B["USB connection"] A --> C["Directly from the memory card¹"] A --> D["HFR72/R70 NFC+Wi-Fi connection"] A --> E["Computer (157) Play back on the computer, edit movies, share recordings on the Web, etc.²"] A --> F["Blu-ray Disc recorder and other video recorders³ (169) Play ba…](/content/2026/06/1327524/images/662ba8d63dad346c94c08dc0491a821a251a9ed82fc506ad211eee93bdfdf73c.jpg)


Saving and Sharing Your Recordings
1 HFR72/R70 To save recordings from the built-in memory, copy them to the memory card in advance (140). 2 The editing/playback functions that can be used after saving your recordings depend on the specifications of the computer and the software installed. 3 The editing/playback functions that can be used depend on the specifications of the recorder used. Also, you may not be able to save MP4 movies. 4 Between CS100 Connect Stations or using CANON iMAGE GATEWAY services.
Saving Recordings on a Computer
This section explains how to save your recordings on a computer using a USB connection. Use the software Transfer Utility LE 1 for AVCHD movies and the software CameraWindow 2 for MP4 movies and photos.
1 Software for AVCHD movies, available as a free download from PIXELA's Web site. 2 Software for photos and MP4 movies, available as a free download from your local Canon Web site.
Saving AVCHD Movies (Windows/Mac OS)
With the software Transfer Utility LE, you can save to your computer the AVCHD scenes you have recorded. Download the software and install it before you connect the camcorder to the computer for the first time. An Internet connection is required to download the software. Perform the following procedures while referring to the supplied ‘Transfer Utility LE Startup Guide’.

- Before installing the software, make sure your computer is connected to the Internet.




Installation
1 Download the compressed file from PIXELA's Web site.
- Visit the following Web site to download the compressed installation file.
http://pixela.jp/cetule_dl
2 Uncompress the file.
- The compressed file contains the installer (setup.exe) and the Software Guide (PDF file).
3 Install the software as explained in the PDF Software Guide.
Connecting the Camcorder to a Computer

1 Camcorder: Power the camcorder using the compact power adapter. 2 Camcorder: Open the desired index screen for AVCHD movies (64). 3 Connect the camcorder to the computer using the supplied USB cable.
- Connection 3-①. Refer to Connection Diagrams (153).
- If a device selection screen appears, select [Computer].


Saving and Sharing Your Recordings
- When the connection is correctly established, [USB Connection] will appear on the screen.
4 Computer: Double-click the icon shown on the right.
- Windows computers: If the AutoPlay dialog box appears, close it.

5 Computer: Save your recordings as explained in the PDF Software Guide.
Saving MP4 Movies and Photos (Windows/Mac OS)
With the software CameraWindow you can save MP4 movies and photos to your computer and easily organize them. For the latest information on compatibility and system requirements, please visit your local Canon Web site.
Installation
Install the software before you connect the camcorder to the computer for the first time. Make sure to install the software even if you have a different version of CameraWindow on your computer. The auto-update function of the software may make available to you features optimized for this camcorder.

- Before installing the software, make sure your computer is connected to the Internet.




1 Download the software from your local Canon Web site.
- Visit the following Web site to download the CAMCORDER Software package.
www.canon.com/icpd
(Click on your country/region, search for your camcorder model and then proceed to the download page.)
2. Follow the onscreen instructions to install CameraWindow.
- For details about opening the software package and running the installer, refer to the instructions on the download Web site.
- For Windows users, if a User Account Control dialog box appears, follow the instructions.
- When the screen of the last step (Finish) is displayed, the software is correctly installed. Click Finish to close the installer.
Connecting the Camcorder to a Computer

1. Power the camcorder using the compact power adapter. 2. Open the [▶] index screen for MP4 movies (📖 64) or [▶] index screen (📖 70). 3. Connect the camcorder to the computer using the supplied USB cable.
- Connection 3-①. Refer to Connection Diagrams (153).
- If a device selection screen appears, select [Computer].




Saving and Sharing Your Recordings
- When the connection is correctly established, [USB Connection] will appear on the screen.
4. Computer: CameraWindow will start automatically and the main screen will appear.
- Windows: If the AutoPlay dialog box appears instead, click Downloads Images From Canon Camera to start the CameraWindow program.
- Mac OS: If a device selection window appears, select your camcorder's model name from the list and click OK.
5 Computer: In the CameraWindow's main screen, click Import Images from Camera > Import Untransferred Images.
- MP4 movies and photos you have not yet transferred to the computer will be saved.
- Click Cancel to interrupt the transfer while it is in progress.
- When the transfer is completed, click OK and close CameraWindow.

- When the camcorder is connected to a computer:
- Do not open the memory card slot cover.
- Do not change or delete any of the camcorder's folders or files directly from the computer as this may result in permanent data loss. When saving recordings on a computer, we recommend using the software described in this section (Transfer Utility LE for AVCHD movies; CameraWindow for MP4 movies and photos).
- Do not set the computer in Sleep or Hibernate mode (Windows) and do not activate the Sleep function (Mac OS).


Saving and Sharing Your Recordings
- If you wish to use the recordings on your computer, make copies of them first. Use the copied files, retaining the originals.
- To uninstall CameraWindow:
- Windows: In the Control Panel, click on Uninstall a program (under Programs) or Programs and Features.
Select Canon Utilities CameraWindow DC 8, click on Uninstall/Change and then click OK.
- Mac OS: Drag and drop the following folder onto the Trash icon.
/Applications/Canon Utilities/CameraWindow
The following types of MP4 scenes will be recognized as multiple files on a computer.
- Scenes exceeding 4 GB.
- Scenes recorded at 35 Mbps exceeding 30 minutes.
- Scenes recorded at a video quality other than 35 Mbps exceeding 1 hour.
- Depending on the computer, the software may not work correctly or you may not be able to play back movies.
- When the camcorder is powered only using the battery pack, the battery charge information in the camcorder's details area of the CameraWindow screen (Battery Capacity) will always appear as Full, regardless of the actual remaining battery charge.


Saving Recordings on the Optional CS100 Connect Station (USB)
You can easily save all the movies and photos you recorded onto the optional CS100 Connect Station. You can organize your recordings in albums, play them back on a connected HDTV or share them on the Web. For details, refer to the instruction manual of the CS100.
This section explains how to connect the camcorder to the CS100 using the supplied USB cable. HFR72/R70 only: You can also use the convenient NFC/Wi-Fi connection method (☐ 194).

1 Power the camcorder using the compact power adapter.
2 Press ▶ to set the camcorder to playback mode. 3 Select the USB connection type.


Other Settings]


[USB Connection Type]


Connect Station] or

Connect and Set]


4 Connect the camcorder to the connect station using the supplied USB cable.
- Connection 3-①. Refer to Connection Diagrams (153).
- If a device selection screen appears, select [Connect Station].
- When the connection is correctly established, the transfer of files will start automatically.


Saving and Sharing Your Recordings
- You can check on the connect station when all the files have been saved. Refer to the instruction manual of the CS100.
5 Disconnect the USB cable.
- The index screen will appear again on the camcorder's screen.
HFR72/R70 Memory Save: Saving an Entire Memory onto an External Hard Drive
You can easily save all the movies and photos you recorded onto a commercially available external hard drive connected directly to the camcorder. You can also use the camcorder to play back your recordings directly from the hard drive.
Initialize the hard drive (168) when you use it with this camcorder for the first time.

Saving a Memory onto an External Hard Drive
1 Power the camcorder using the compact power adapter. 2 Press ▶ to set the camcorder to playback mode. 3 Connect the camcorder to the external hard drive.
- Connection 3. Refer to Connection Diagrams (153).



Saving and Sharing Your Recordings
- If the USB cable supplied with the external hard drive has a standard-A connector, you will need to use the optional UA-100 USB Adapter.
4 Save the entire contents of the desired memory.
[Save to Hard Drive]
Desired memory
[Yes]* [OK]
* Touch [Stop] ➤ [Yes] to interrupt the operation while it is in progress. - After selecting the memory, you can check the name of the folder that will be created on the hard drive. Every memory save operation will create a separate memory save folder with the date (in numerical form) used as the folder name.
Before disconnecting the external hard drive
Before turning off or physically disconnecting the external hard drive, be sure to safely end the connection to the camcorder to avoid damage to your files. From the [External Hard Drive] screen:
[Safely Remove Hard Drive]
[Yes]


Saving and Sharing Your Recordings

- Make sure you power the camcorder with the compact power adapter before you save a memory to the external hard drive. If the compact power adapter gets disconnected, the connection between the camcorder and the hard drive will end, which may lead to the corruption of data in the hard drive.

- About memory save folders:
- If you performed multiple memory save operations on the same day (for example, if you saved the built-in memory and then a memory card), the folder name of memory save folders following the first one will end in a numerical suffix (for example, “-1”, “-2”). - Up to 10 memory save folders can be created for any given date and up to 300 memory save folders can be saved on a single hard drive.
- You cannot use the following types of external hard drives.
- USB-powered portable hard drives.
- Hard drives with a capacity over 2 TB.
- USB flash drives or media connected to card readers.
- If the external hard drive is partitioned, only the first partition will be recognized.


Saving and Sharing Your Recordings
Playing Back Previously Saved Recordings from the External Hard Drive
1 Connect the external hard drive to the camcorder.
- Steps 1 to 3 in the previous procedure (164).
2 Touch [Play Back from Hard Drive] and select the memory save folder you want to play back.
• The index screen will appear.
3 Touch a recording to play it back.
- To switch to another memory save folder, touch [icon] and select the memory save folder of the date you want to play back.
4 When you have finished playing back, be sure to safely end the connection to the external hard drive before physically disconnecting it.


[Safely Remove Hard Drive]

[Yes]
To delete the memory save folder currently displayed
1 Delete the memory save folder.


Other Settings]


[Delete Memory Save
Folder]

[Yes]

[OK]
2 Safely end the connection to the external hard drive before physically disconnecting it (165).




- Be careful when deleting recordings. Once deleted, recordings cannot be recovered.
■ Initializing the External Hard Drive
1 Connect the external hard drive to the camcorder.
- Steps 1 to 3 in the previous procedure (☐ 164).
2 Initialize the external hard drive.
![[Other Settings] [Initialize HDD] [Initialize] [Complete Initialization]¹ [Yes]² [OK]](/content/2026/06/1327524/images/3ab89a032fef39eea8115f021a252a23a8b03c7498a4d1e2201ae2cc2de7531c.jpg)
1 Touch this option if you want to physically erase all the data rather than just clear the file allocation table of the hard drive. For large-capacity hard drives this operation can take several hours. 2 If you selected the [Complete Initialization] option, you can touch [Cancel] ➤ [OK] to cancel the initialization while it is in progress. All recordings will be erased and the hard drive can be used without any problem.
3 Safely end the connection to the external hard drive before physically disconnecting it (165).

- Initializing the external hard drive will permanently erase all the data on the hard drive (including your recordings, previous data not saved with the camcorder, and partitioned drives). Make sure to copy in advance important data to a computer or other device.


Copying Recordings to an External Video Recorder
In High Definition
If the external digital video recorder has an SD card slot compatible with the type of memory card used, you can copy your recordings in high definition directly from the memory card. HFR72/R70 only: To copy the recordings in the built-in memory, copy them to the memory card in advance (140).
The detailed procedure depends on the device used so be sure to refer to the instruction manual of the digital video recorder.

- The camcorder cannot be connected directly to an external Blu-ray Disc recorder using a USB cable in order to copy recordings.
In Standard Definition
You can copy your movies by connecting the camcorder to a VCR or a digital video recorder with analog audio/video inputs. Video output will be in standard definition, although the original scenes are in high definition.

1 Power the camcorder using the compact power adapter. 2 Connect the camcorder to the VCR using the optional STV-250N Stereo Video Cable.


Saving and Sharing Your Recordings
- Connection 2. Refer to Connection Diagrams (152). 3 Open the index screen that contains the scenes you want to copy (64).
- Verify that [AV/Headphones] is set to [AV AV]. 4 External recorder: Load a blank cassette or disc and set the recorder to record pause mode. 5 Camcorder: Locate the scene you want to copy and pause the playback just before the desired scene. 6 Camcorder: Resume playback.
- By default, the date and time will be embedded in the output video signal. You can change this using the [Display Date/Time] setting. 7 External recorder: Start recording when the scene you want to copy appears; stop recording when it ends. 8 Camcorder: Stop playback.

Use an external Blu-Ray Disc recorder compliant with AVCHD ver. 2.0 specifications to copy onto Blu-Ray discs movies recorded in 60P or MXP mode.


HFR72/R70 Wi-Fi Functions
172
Overview of the Camcorder's Wi-Fi Functions
This is an introduction to the Wi-Fi functions offered by the camcorder and contains also important information about the supported Wi-Fi standards.
177
The Camcorder's Wi-Fi Functions
Refer to this section for details on how to use the camcorder's useful Wi-Fi functions such as controlling the camcorder remotely with an iOS or Android device, playing back the camcorder's recordings from a Web browser on a Wi-Fi-equipped device or using the optional CS100 Connect Station to easily save your recordings.
206
Wi-Fi Connection and Settings
This section explains how to connect your camcorder to an access point (wireless router) on an existing Wi-Fi network as well as how to check the Wi-Fi settings and, if necessary, change them.
Overview of the Camcorder's Wi-Fi Functions
You can use the camcorder's Wi-Fi functions to connect wirelessly to Wi-Fi enabled devices* like smartphones or tablets and save, play back and upload your recordings. Refer to Glossary (215) for a definition of some of the frequently used terms in this text.
* “iOS device” is used in this text to refer to Wi-Fi-enabled iPhones and iPads, while “Android device” refers to Wi-Fi-enabled Android smartphones and tablets.
iOS Devices
- Install the CameraAccess plus app and use your iPhone or iPad as a remote control to record with the camcorder (177). You can even stream video from the camcorder and record it directly on your iOS device.
- Install the Movie Uploader app to save recordings on your iOS device and even upload them to YouTube or Facebook (192).
- Use a Web browser to access the camcorder and play back recordings on your iOS device (189).

CameraAccess plus
Movie Uploader


Overview of the Camcorder's Wi-Fi Functions
Android Devices
- Install the CameraAccess plus app and use your smartphone or tablet as a remote control to record with the camcorder (177). You can even stream video from the camcorder and record it directly on your Android device.
- Use a Web browser to access the camcorder and play back recordings on your Android device. You can also save a local copy on your Android device (189).

CameraAccess plus
CS100 Connect Station (optional)
- Convenient option to save, play back and share your recordings. You can use NFC technology to easily initiate the file transfer over a Wi-Fi connection (194).


Computers and Other Wi-Fi Devices
- On computers with a Wi-Fi receiver, use a Web browser to access the camcorder and play back recordings on the device. You can also save a local copy on the computer (189).
- Connect the camcorder to an access point as a media server and play back your recordings on computers and other devices connected to the same home network (203).

CANON iMAGE GATEWAY
By connecting the camcorder to an access point (home network) connected to the Internet, you can also share recordings on CANON iMAGE GATEWAY and enjoy a number of Web services, including uploading recordings to Facebook and YouTube (196).



Before Using Wi-Fi Functions
Depending on the Wi-Fi function used, the camcorder will connect wirelessly directly to a Wi-Fi-enabled device, such as a smartphone, or to a Wi-Fi network via an access point (wireless router)*. After selecting the function you want to use, follow the onscreen directions to connect the camcorder.
This camcorder is also compatible with NFC (near field communication) international standards. When using an NFC-compatible Android device**, you can easily pair the camcorder and the device simply by touching the NFC touchpoints on both devices together.
* Depending on the manufacturer, the access point may be referred to using a different name, such as wireless LAN router or wireless network router. ** Only NFC-compatible devices running Android 4.0 to 4.4, 5.0 or 5.1.

- Using an unprotected Wi-Fi network can expose your files and data to monitoring by unauthorized third parties. Be aware of the risks involved.

- We recommend using a fully charged battery pack or the supplied compact power adapter when using Wi-Fi functions.



Overview of the Camcorder's Wi-Fi Functions
- When using the camcorder's Wi-Fi functions, do not cover the top back area of the camcorder with your hand or other object. The Wi-Fi antenna is located there and covering it may interfere with wireless signals.

Wi-Fi antenna
- Do not open the memory card slot cover during the wireless connection.
- While using Wi-Fi functions, the camcorder's automatic power off function will be disabled.
- The camcorder's Wi-Fi functions cannot be used while the optional WM-V1 Wireless Microphone is connected to the camcorder.
The Camcorder's Wi-Fi Functions
Using an iOS or Android Device as a Remote Control
Using the CameraAccess plus app*, you can view the image streamed from the camcorder on your iOS/Android device even when the camcorder is somewhere else. You can use your iOS/Android device as a remote control to start recording on the camcorder and, while using the Monitor from Home function, you can even record the streamed image locally on your iOS/Android device.
When using an NFC-compatible Android device (175), you can connect the camcorder and the device with a simple operation.
* The CameraAccess plus app, provided by PIXELA, is available as a free download from the App Store (iOS devices) and Google Play™ (Android devices).
Shooting Mode
Playback
AVCHD
MP4

AUTO


SCN
P


- Before you perform these procedures for the first time, download and install the latest version of the CameraAccess plus app on your iOS/Android device. The app can be downloaded for free from the following Web sites.
- iOS devices (App Store): http://appstore.com/cameraaccessplus
- Android devices* (Google Play™): http://play.google.com/store/apps/details?id=jp.co.pixel.cameraaccessplus * Android devices compatible with NFC: When the app is not installed, you can touch the Android device to the camcorder (180) to automatically open the Google Play download page.
■Streaming via Wi-Fi (Monitor from Home)
With this function, you can monitor the image streamed from the camcorder when it is in another location within Wi-Fi connection range, for example, in another room in the house. You can use your iOS/Android device to control the camcorder.
1 Camcorder: Activate the [Monitor from Home] function.
Home [Remote Control+Streaming] [Monitor from Home] [OK]
- The camcorder's network name and password will appear.
- The camcorder will be ready to connect with the iOS or Android device.


2 Android devices compatible with NFC: Connect the camcorder and the device as described in Pairing an NFC-compatible Android device (180).
- When the Wi-Fi connection is correctly established, [Connected] will appear on the camcorder's screen and the live view image will appear on the CameraAccess plus app's screen on the Android device.
- Use the app's onscreen controls to operate the camcorder while viewing the live image on the device. The rest of this procedure is not necessary.
iOS/Android devices not compatible with NFC: In the Wi-Fi settings screen, turn on Wi-Fi and select the network name that appears on the camcorder's screen (step 1). If necessary, enter the password that appears on the camcorder's screen.
- The camcorder's network name should appear in the list of networks/access points detected by the device.
- As long as you do not reset the camcorder's Wi-Fi password, you only need to enter the password the first time you connect the device.
- When the Wi-Fi connection is correctly established, [Connected] will appear on the camcorder's screen.
3 iOS/Android device: Start the CameraAccess plus app.
- Use the app's onscreen controls to operate the camcorder while viewing the live image on the device.




The Camcorder's Wi-Fi Functions
When you have finished recording
1 Camcorder: Touch [End] to end the wireless connection and turn off the camcorder.
2 iOS/Android device: Close the CameraAccess plus app.
Pairing an NFC-compatible Android device


Touch → Beep!** NFC touchpoint
1 Touch the NFC touchpoint on the Android device to the NFC touchpoint on the camcorder.
- Align the center of the NFC touchpoints on both devices. If there is no reaction, try changing the position of the Android device slightly while it is touching the camcorder.
- When the device is recognized, the Android device will emit a beep sound** and the CameraAccess plus app will start automatically.
2 Android device: Touch OK.


The Camcorder's Wi-Fi Functions
* For illustration purposes only. For details about the device's NFC function and the location/marking of the NFC touchpoint, refer to the instruction manual of the Android device used. ** Depending on the settings and specifications of the Android device used, no sound may be emitted.

- When using NFC-compatible devices.
- When touching an NFC-compatible device to the camcorder, be careful not to forcibly hit the device against the camcorder. Using excessive force may damage the camcorder or NFC-compatible device.
- If the NFC-compatible device or the camcorder is covered by a protective case, the devices might not be able to connect wirelessly.
- If the camcorder unintentionally comes into contact with an NFC-compatible device (for example, inside a carrying bag), the camcorder may turn on on its own. You can set it



■Streaming via Wi-Fi and Internet (Monitor while Out)
With this function, you can leave the camcorder home and monitor the streamed image while you are away. You can even use your iOS/Android device to start recording on the camcorder.
Using the Remote Monitoring Checker utility (for Windows only), you can check whether your home network's access point and Internet connection meet the requirements for using the Monitor while Out function*. For details about this program and links to the download page, visit PIXELA's Web site.
The Camcorder's Wi-Fi Functions
* To use the Monitor while Out Function, an access point compatible with UPnP (Universal Plug and Play) and an Internet connection that can acquire global IP addresses are required.
1 Activate the [Monitor while Out] function.
[Remote Control+Streaming] [Monitor while Out] [OK]
- The first time you activate the function, you will need to set a password and the port to be used by this function (steps 2 to 4). If you have already completed the settings for the Monitor while Out function, skip to step 5.
2 Touch [OK] to open the settings screen.
3 To enter the [Password] field, touch [Not configured]. Enter a unique password for the Monitor while Out function and touch [OK].
- The password is required for this function and must be between 4 and 8 characters long. We recommend using an 8-character password using a mix of numbers and uppercase/lowercase letters.
- To enter the password (and the port number in the next step), use the virtual keyboard (186).
4 To change the port number to be used, touch [80]. Enter a different port number and touch [OK] twice.
- By default, the port number is set to 80 but you can change it if necessary.




5 If necessary, set up a connection to an access point.
- If you have previously configured and saved only one connection to an access point, the camcorder will automatically connect to that access point. Continue to step 6.
- If you have saved more than one connection to an access point, touch [OK] to use the access point displayed on the screen, and then continue to step 6. To use a different access point instead, touch [Change Connection Point] ➤ desired access point ➤ [OK], and then continue to step 6.
- If no connections to access points have been saved in the camcorder, the message [Save the access point] will appear on the screen. Touch [OK] to configure and save a new access point connection (step 2 in Wi-Fi Connection Using an Access Point (206)) before continuing with this procedure.
6 When the wireless connection is successfully established, the camcorder's ID will be displayed on the screen.
- The camcorder will be ready to connect with the iOS/Android device.
- If this is the first time you are using this function or if you reset the camcorder's settings, you need to register the camcorder's ID with the following procedure. Otherwise, continue as described in To use the Monitor while Out function (185).
To register the camcorder's ID in the CameraAccess plus app
1 Android devices compatible with NFC: Connect the camcorder and the device.
- Perform only step 1 in Pairing an NFC-compatible Android device (180).
- Android device: When the camcorder's ID is correctly registered, a message will prompt you to turn off Wi-Fi on the device. Select Turn off Wi-Fi or Do not turn off Wi-Fi (to keep using Wi-Fi on the device) and then touch Set.
- Camcorder: After the Wi-Fi connection to the Android device is terminated, the camcorder will reconnect automatically to the previously selected access point.
- The rest of this procedure is not necessary. Continue as described in To use the Monitor while Out function (185).
iOS/Android devices not compatible with NFC: On the device, turn on Wi-Fi and select the same access point as that to which the camcorder is connected (step 5 in the previous procedure).
2 Start the CameraAccess plus app and touch Setting and then Start.
- The camcorder's ID is registered and displayed in the CameraAccess plus app.
3 Touch Finish and close the CameraAccess plus app.
- Disconnect the iOS/Android device from the access point.


The Camcorder's Wi-Fi Functions
To use the Monitor while Out function
1 While you are out, start the CameraAccess plus app. 2 Touch Start under Monitor while Out. 3 Enter the password for the Monitor while Out function that you set in the camcorder (step 3, 📄 182) and then touch Connect.
- Use the app's onscreen controls to operate the camcorder while viewing the live image on the device.
When you have finished recording
1 Camcorder: Touch [End] to end the wireless connection and turn off the camcorder. 2 iOS/Android device: Close the CameraAccess plus app.
Using the virtual keyboard
When you need to enter text for various settings, touch the text field and a virtual keyboard will appear on the screen. The illustration below explains the various keys you can use.
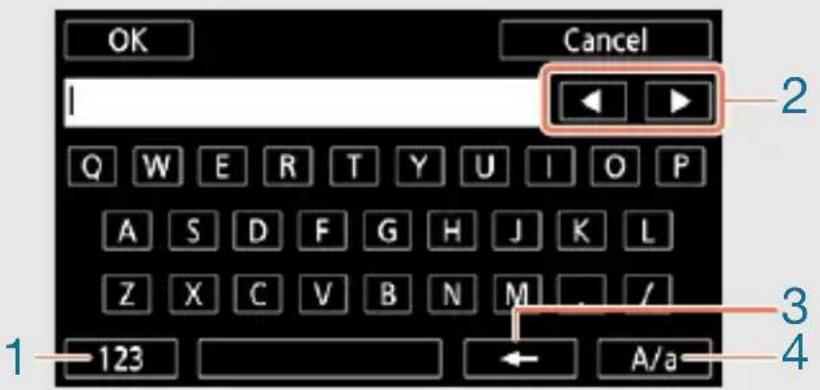
1 Switch between letters and numbers/special characters. 2 Change the position of the cursor. 3 Delete the character to the cursor's left (backspace). 4 Caps Lock. When the numerical keyboard is displayed, [ % ?] switches between set 1 and set 2 of special characters.

- For details about the CameraAccess plus app, visit PIXELA's Web site.
http://pixela.jp/cecap
- When the camcorder is in Monitor from Home or Monitor while Out mode, the shooting mode will be set automatically to AUTO.
- Even if the frame rate was set to 24P, video recorded in Monitor from Home or Monitor while Out mode will be recorded at 30P.
- This function is not available in the following cases.
- When the video quality is 60P or 35 Mbps.
- When dual recording or relay recording is activated.
- Depending on the connection and the strength of the wireless signal, there may be interruptions in the live video image or the response may be slow.
- About the optional CT-V1 Camera Pan Table
- If you mount the camcorder on the optional CT-V1 Camera Pan Table, you can use the CameraAccess plus app on your iOS/Android device as a remote control to move the camcorder sideways (panning) in addition to starting/stopping recording.


The Camcorder's Wi-Fi Functions
- Notice that there are two possible directions for mounting a camcorder on the CT-V1. This camcorder should be mounted so that the lens is aligned with the B mark on the underside of the CT-V1's camcorder base plate. For details, refer to the instruction manual of the CT-V1.

The Camcorder's Wi-Fi Functions
Playback via Browser: Viewing Recordings Using a Web Browser on an iOS or Android Device
With the Playback via Browser function, you can use the Web browser on any device equipped with a Wi-Fi receiver (iOS/Android devices, computers, etc.) to access the camcorder. You can then play back your recordings using the Web browser and even save local copies of them on your device*.
When using an NFC-compatible Android device (175), you can connect the camcorder and the device with a simple operation.
* Depending on the device, OS, browser and video quality, you may not be able to play back or save recordings.


- Android devices compatible with NFC: Download and install the CameraAccess plus app in advance (178).
1 Camcorder: From any movie index screen, activate the Playback via Browser mode.
[ Wi-Fi ] [ Playback via Browser] [OK]
- The camcorder's network name and password will appear.
- The camcorder will be ready to connect with the wireless device.
![graph LR A["Menu"] --> B["Target Icon"] B --> C["A Number"] C --> D["B Number"] D --> E["C Number"] E --> F["6 Signal"]](/content/2026/06/1327524/images/0043b6acf0f7f71cfba12a54b47db5f3550759e89804a6fa538e0cdda632133e.jpg)
2 Android devices compatible with NFC: Connect the camcorder and the device as described in Pairing an NFC-compatible Android device (180).
- Android device: When the Wi-Fi connection is correctly established, the default browser app will open and the Playback via Browser screen will be displayed automatically. Skip to step 4.
- Camcorder: [Connected] will appear on the camcorder's screen.
iOS/Android devices not compatible with NFC: In the Wi-Fi settings screen, turn on Wi-Fi and select the network name that appears on the camcorder's screen (step 1). If necessary, enter the password that appears on the camcorder's screen.
- The camcorder's network name should appear in the list of networks/access points detected by the device.
- As long as you do not reset the camcorder's Wi-Fi password, you only need to enter the password the first time you connect the device.
- When the Wi-Fi connection is correctly established, [Connected] will appear on the camcorder's screen.
3 iOS/Android device: Start the Web browser and enter the URL that appears on the camcorder's screen into the Web browser's address bar.
- The Playback via Browser screen will appear.
- The URL is always the same so you may find it convenient to bookmark the URL.
4 iOS/Android device: Touch the desired recording from the list.
- Touch the button on the top left of the screen to change the index screen displayed. Touch AVCHD (AVCHD movies), MP4 (MP4 movies) or ▶ (photos) of the desired memory (☐ built-in memory or SD memory card).
- Touch a thumbnail to display a photo (or the first frame of a movie). MP4 movies only: Touch again to play back the movie.
- AVCHD movies cannot be played back.
- Touch 📄 to return to the index screen.
- Devices other than iOS devices: Touch ⬇ to save a local copy of the movie/photo on the device.
When you have finished
Camcorder: Touch [End] ➤ [OK] to end the wireless connection and turn off the camcorder.

- The following types of MP4 scenes will be recognized as multiple files on other devices.
- Scenes exceeding 4 GB.
- Scenes recorded at 35 Mbps exceeding 30 minutes.
- Scenes recorded at a video quality other than 35 Mbps exceeding 1 hour.
- For details about Wi-Fi connections on computers and other devices, refer to the instruction manual of the OS, computer or device used.



- When playing back scenes recorded in ☐ mode, increasing the brightness of the iOS/Android device's screen is recommended.
Saving Recordings and Uploading Movies to the Web Using an iOS Device
Using the Movie Uploader app*, you can play back and save** your movies and photos on an iOS device. You can also upload your movies to YouTube and Facebook even when you are away from your home network.
* The Movie Uploader app, provided by PIXELA, is available as a free download from the App Store. ** Depending on the iOS version used, this feature is not available for MP4 movies recorded at 35 Mbps.


- Before you perform this procedure for the first time, install the Movie Uploader app on your iOS device. The app can be downloaded for free from the following Web site. http://appstore.com/movieuploader
1 Camcorder: From any movie index screen, activate the Movie Uploader function.


Wi-Fi]


Movie Uploader]

[OK]
- The camcorder's network name and password will appear.
- The camcorder will be ready to connect with the iOS device.
2 iOS device: In the Wi-Fi settings screen, turn on Wi-Fi and select the network name that appears on the camcorder's screen (step 1). If necessary, enter the password that appears on the camcorder's screen.
- The camcorder's network name should appear in the list of networks/access points detected by the device.
- As long as you do not reset the camcorder's Wi-Fi password, you only need to enter the password the first time you connect the device.
- When the Wi-Fi connection is correctly established, [Connected] will appear on the camcorder's screen.
3 iOS device: Start the Movie Uploader app and select your camcorder's model name from the list on the screen. 4 iOS device: Use the Movie Uploader app to upload the camcorder's movies and photos.
- You can also play back or save movies and photos on the iOS device.
When you have finished
Camcorder: Touch [End] ➤ [OK] to end the wireless connection and turn off the camcorder.


- Depending on factors such as the wireless network conditions, it can take some time to upload video files.
- The procedure above may differ depending on the version of iOS you are using.
- For details about the Movie Uploader app, visit PIXELA's Web site. http://www.pixela.co.jp/oem/canon/e/movieuploader/
- The following types of MP4 scenes will be recognized as multiple files on other devices.
- Scenes exceeding 4 GB.
- Scenes recorded at 35 Mbps exceeding 30 minutes.
- Scenes recorded at a video quality other than 35 Mbps exceeding 1 hour.
- When playing back scenes recorded in ➕ mode, increasing the brightness of the iOS device's screen is recommended.
Saving Recordings on the Optional CS100 Connect Station (NFC+Wi-Fi)
You can easily save all the movies and photos you recorded onto the optional CS100 Connect Station. You can organize your recordings in albums, play them back on a connected HDTV or share them on the Web. For details, refer to the instruction manual of the CS100.
This section explains how to connect the camcorder to the CS100 using NFC (near field communication) and Wi-Fi functions for a simple and effortless operation. You can also connect the camcorder to the connect station using the supplied USB cable (163).




The Camcorder's Wi-Fi Functions


1 Power the camcorder using the compact power adapter. 2 With the camcorder turned off or displaying an index screen in playback mode, carefully hold the NFC touchpoint on the camcorder close to the NFC connect point on the connect station.
- Align the camcorder's N mark with the center of the connect point on the connect station.
- If there is no reaction, try adjusting slightly the position/angle of the camcorder while carefully holding it close to the connect point on the connect station, or very gently touching the camcorder to the connect station.
- If the camcorder was turned off, it will turn on in playback mode.


The Camcorder's Wi-Fi Functions
- The connect station will emit a beep sound. When the Wi-Fi connection is correctly established, the transfer of files will start automatically.
3 Camcorder: When the file transfer is completed, touch [OK].
![CANON Vixia HF R700 - Camcorder: When the file transfer is completed, touch [OK]. - 1](/content/2026/06/1327524/images/402ce7af749ecc69b0bc2e6f6a91549341d38fb059f0dda2e09e47e841236bbf.jpg)
- Saving a scene that is about 4 minutes long will take approximately 5 minutes. When saving a large number of files, the operation may take some time.
- Be sure to always use the latest version of the connect station's firmware. Updating the firmware to the latest version may correct known issues and add new functionality to the connect station. For details about updating the firmware, refer to the instruction manual of the CS100.
Sharing Recordings with CANON iMAGE GATEWAY
After you register for CANON iMAGE GATEWAY*, you will be able to access various Web services**. You will be able to upload movies and photos to online albums, upload movies to Facebook and YouTube, send links to your online albums by e-mail to friends and family, and more! To use this function, you will need an access point connected to the Internet.
* Availability differs from area to area. ** "Web services" is used in this text to refer to various Internet services supported by CANON iMAGE GATEWAY.




CANON iMAGE GATEWAY
CANON iMAGE GATEWAY is a Web site that provides various photo-related services for owners of qualified Canon products. After you complete the free registration online, you can use the Web services, create online photo albums, and more. Visit Canon's Web site (also available in a version for mobile devices) for information on registration and countries/regions where you can use this service.
www.canon.com/cig


- Make sure you have completed the following general requirements.
- Install CameraWindow on your computer (159).
- Complete the free registration online for CANON iIMAGE GATEWAY.
- Have ready relevant account settings (user name, password, etc.) for all the services you plan to use (YouTube, Facebook, etc.). Available services may differ by country/region.


Setting the Desired Web Services in the Camcorder
Log in to CANON iIMAGE GATEWAY and set the Web services you want to use.

1 Camcorder: Open the [▶] index screen for MP4 movies (📖 64) or the [▶] index screen (📖 70). 2 Connect the camcorder to the computer using the supplied USB cable.
- Connection 3-①. Refer to Connection Diagrams (153).
3 Computer: CameraWindow will start automatically and the main screen will appear.
- Windows: If the AutoPlay dialog box appears instead, click Downloads Images From Canon Camera to start the CameraWindow program.
- Mac OS: If a device selection window appears, select your camcorder's model name and click OK.
4 Computer: In the CameraWindow's main screen, click Camera Settings > Set Up Web Services. 5 Computer: Log in to CANON iMAGE GATEWAY and complete the setup process.


The Camcorder's Wi-Fi Functions
- Follow the onscreen instructions to register the services you want to use. You will need the account information (user name, password, etc.) to register some services.
- CANON iIMAGE GATEWAY and all other selected Web services will be set in the camcorder and the CameraWindow menu screen will appear.
6 Computer: Exit CameraWindow and then end the connection between the camcorder and computer.

- Available Web services differ depending on the country/region of use and may be updated from time to time. For the latest details about available services and terms of use, visit your local CANON iMAGE GATEWAY Web site.
- If the date set in the camcorder is not correct, the camcorder cannot connect to CANON iMAGE GATEWAY. Make sure the date is correct before trying to establish a connection.
- Once you have set the maximum number of Web services in the camcorder, you will not be able to set any additional services. Delete unnecessary Web services and then set the desired Web service.
- You cannot set multiple accounts for Web services other than e-mail.




Sharing Your Recordings Using Web Services
Conveniently share your recordings with family and friends using Web services.

1 From any movie index screen, activate the Web service function.


- If you have previously configured and saved a connection to an access point, the camcorder will automatically connect to the first access point registered. Continue to step 2.
- If no connections to access points have been saved in the camcorder, the message [Save the access point] will appear on the screen. Touch [OK] to configure and save a new access point connection (step 2 in Wi-Fi Connection Using an Access Point (206)) before continuing with this procedure.
2 Select the desired Web service.
- When you select 📋 (e-mail), the list of registered e-mail addresses will appear. Select the e-mail addresses to which you want to send an e-mail notification.
3 Select the type of recordings you want to share and the memory to read.


The Camcorder's Wi-Fi Functions
- The types of recordings that can be uploaded depend on the Web service.
Touch the scene or photo(s) to upload.
- When uploading photos, you can touch up to 10 photos to upload at one time. To cancel a selection, touch the selected photo again. To cancel all selections at once, touch [Remove All] ➤ [Yes].
- When you have finished selecting the desired photos, touch [OK].
- If you are uploading to YouTube, read the YouTube agreement carefully and touch [I Agree] if you agree.
- The upload will begin automatically.
- You can touch [Stop] to cancel the wireless transfer while it is in progress.
Touch [OK].
Checking your uploads using CANON iIMAGE GATEWAY Library
You can use the CANON iIMAGE GATEWAY Library or Album screen to see the movies and photos you uploaded. You can also check what files you have sent and the various settings for the Web services. For details on CANON iIMAGE GATEWAY, refer to the Help module (in the upper right of the screen).




The Camcorder's Wi-Fi Functions

- You can upload only one scene, or up to 10 photos, at a time. The maximum scene length/file size that can be uploaded depends on the Web service.
- Depending on the access point's (wireless router's) settings and capabilities, it can take some time to upload files.
- E-mail addresses must consist of single-byte characters. Only e-mail addresses with 16 or fewer characters before the @ mark can be set in the camcorder.
The Camcorder's Wi-Fi Functions
Wireless Playback on a Computer
Using the Media Server function, you can wirelessly view your movies and photos on your computer or similar device. You will need an access point connected to your home network and software installed on your computer that can play back movies and photos from a media server. We recommend that you connect the computer to the access point using a LAN cable. Refer also to the instruction manuals for the computer, software and access point.


1 Camcorder: From any movie index screen, activate the media server function.


- If you have previously configured and saved a connection to an access point, the camcorder will connect automatically to the first access point registered.




The Camcorder's Wi-Fi Functions
- If no connections to access points have been saved in the camcorder, the message [Save the access point] will appear on the screen. Touch [OK] to configure and save a new access point connection (step 2 in Wi-Fi Connection Using an Access Point (206)) before continuing with this procedure.
2 Camcorder: When the wireless connection is successfully established, [Connected] will appear on the camcorder's screen.
- You can touch [View Information] to view the access point's network name (SSID), connection protocol, and the camcorder's IP address and MAC address.
- After touching [View Information], you can touch [Change Connection Point] to configure and save a new connection to an access point or to select a different access point already saved in the camcorder. 3 Computer: Start your preferred media player software and select your camcorder's model name from the list of media servers.
- On standalone media players and other devices, connect the device to the home network and select your camcorder's model name from the list of media servers. 4 Computer: Select the folder for the camcorder's built-in memory or memory card and play back the movies and photos. 5 Camcorder: Touch [End] ➤ [OK] when finished.
The Camcorder's Wi-Fi Functions

- Depending on the access point's (wireless router's) settings and capabilities, playback may take time to start or may not appear smooth. For details, refer to Troubleshooting (260).
Wi-Fi Connection and Settings
Wi-Fi Connection Using an Access Point
The camcorder can connect to a Wi-Fi network using an access point (wireless router). You can save settings for up to 4 different access points.
General requirements
- Correctly configured router that complies with the 802.11b/g/n protocol and is Wi-Fi certified (bears the logo shown to the right) and a home network.


1 Open the [(☐) Network Setup] screen.
![[Remote Control+Streaming] (from record standby mode) or [Wi-Fi] (from any movie index screen in playback mode) [Check/Edit Settings] [OK] [Access Point Connection Settings] [Not configured]](/content/2026/06/1327524/images/18971fedad16b563e770e2934d56ff45e69ad94110259a66aae97111aebd7f52.jpg)
2 Touch the desired setup method.
- Depending on the setup method chosen, the procedure will be different. Read the descriptions below and continue with the procedure described in the relevant page.


Options
[WPS: Button]*
Simply press and hold the WPS button on your wireless router and then touch the camcorder's screen. This is the easiest connection method if you are using a WPS-compatible access point. Continue the procedure as described in Wi-Fi Protected Setup (WPS) (208).
[WPS: PIN Code]*
Access the access point's configuration screen using your Web browser. The camcorder will generate a PIN code, which you will enter into the browser. You will need a WPS-compatible access point and a computer or other device connected to it. Continue the procedure as described in Wi-Fi Protected Setup (WPS) (208).
[Search for Access Points]
Following the camcorder's onscreen instructions, you select the desired access point from a list and then enter the password. Continue the procedure as described in Searching for Access Points (209).
[Manual Setup]
You manually enter the access point's name, password and other network settings. This method is recommended only for advanced users of Wi-Fi networks. Continue the procedure as described in Manual Setup (210).
* WPS (Wi-Fi Protected Setup) is a standard that makes connecting to an access point easier.


■ Wi-Fi Protected Setup (WPS)
If your access point is WPS-compatible (bears the logo shown below), connecting the camcorder to it can be very easy. If you cannot successfully connect the camcorder using WPS, try using the [Search for Access Points] method. Refer also to the access point's (wireless router's) instruction manual.

1 [WPS: Button] method
- Press and hold the WPS button on the wireless router.
- Depending on the router, the amount of time required may differ.
- Make sure the router's WPS function is activated.
[WPS: PIN Code] method
- From a computer or similar device connected to the access point, use the Web browser to open the router's WPS settings screen. After the 8-digit PIN code appears on the camcorder's screen, enter it into your router's WPS settings screen.
2 Within 2 minutes, touch [OK] on the camcorder's screen.
- The camcorder will connect to the access point.
- You can touch [Stop] and then [OK] to interrupt the Wi-Fi Protected Setup while it is in progress.
- When the Wi-Fi Protected Setup is finished, [Configuration completed] will appear on the screen.
![CANON Vixia HF R700 - Within 2 minutes, touch [OK] on the camcorder's screen. - 1](/content/2026/06/1327524/images/12c09f41158ebdb78a5e014666458236bd8244582e9e11358e822d96c6ab9dce.jpg)
![CANON Vixia HF R700 - Within 2 minutes, touch [OK] on the camcorder's screen. - 2](/content/2026/06/1327524/images/47e9b44455adb8a5a0d073b9802c5993cb35f2e8549e09422c1553ab1fe7fb87.jpg)
![CANON Vixia HF R700 - Within 2 minutes, touch [OK] on the camcorder's screen. - 3](/content/2026/06/1327524/images/1195b9959c358c510964e0a62562f7fd1749ae0862237fe171d3520945c0fc16.jpg)
![CANON Vixia HF R700 - Within 2 minutes, touch [OK] on the camcorder's screen. - 4](/content/2026/06/1327524/images/00a4ffeb28573844ffd800ad5f20ff1952c9efad48c3e8ebae6db23ee53ad3f2.jpg)
3 Touch [OK] to save the configuration.
- If you were in the process of performing another procedure, the camcorder will automatically connect to the access point. Return to the procedure of the function you were previously using:
Step 6 in Streaming via Wi-Fi and Internet (Monitor while Out) (183)
Step 2 in Sharing Your Recordings Using Web Services (200)
Step 2 in Wireless Playback on a Computer (☐ 204)
- Otherwise, touch [→] ➤ [×] to close the menu.
■ Searching for Access Points
After you touch [Search for Access Points], the camcorder will take a few seconds to detect access points available in the vicinity and will display the first one. Make a note in advance of the network name (SSID) and password (encryption key) of the access point you want to use. (This will usually be the wireless router on your home network.)
To enter text for the various settings, use the virtual keyboard (☐ 186).
1 Select the desired access point.
- If the desired access point is not displayed, you can touch [▲] or [▼] to go through the list of detected access points. You can also touch [Search Again] to have the camcorder search for access points again.
- When the network name (SSID) of the desired access point appears, touch [OK].



2 To enter the [Password] field, touch [Not configured]. Enter the access point's password (encryption key) and touch [OK].
- If the access point selected in step 1 did not have a [💡] icon, this step is not necessary.
3 Touch [OK] to save the configuration.
- If you were in the process of performing another procedure, the camcorder will automatically connect to the access point. Return to the procedure of the function you were previously using:
Step 6 in Streaming via Wi-Fi and Internet (Monitor while Out) (183)
Step 2 in Sharing Your Recordings Using Web Services (200)
Step 2 in Wireless Playback on a Computer (☐ 204)
- Otherwise, touch [→] ➤ [×] to close the menu.
Manual Setup
Perform this procedure to manually configure the wireless connection settings. This may be necessary, for example, if your access point's network name (SSID) cannot be detected due to the stealth function being enabled. Manual setup is for advanced users of Wi-Fi networks.
To enter text for the various settings, use the virtual keyboard (☐ 186).
1. In the [SSID] field, touch [Not configured] and enter the network name (SSID). Touch [OK] and then touch [Next].
2. In the [Authentication/Encryption Method] field, touch [OPEN NONE] and then touch the desired method.
- If you selected [OPEN WEP], the WEP index is 1.


3. In the [Password] field, enter the password (encryption key). Touch [OK] and then touch [Next]. - If you selected [OPEN NONE] in step 2, this step is not necessary. 4. Touch [Automatic] or [Manual] to select how to obtain the IP address. - If you selected [Automatic], proceed to step 9. 5. To enter the [IP Address] field, touch [0.0.0.0]. Touch the first field and touch [▲]/[▼] to change the value. Change the rest of the fields in the same way and touch [OK]. 6. Enter the [Subnet Mask] field in the same way and touch [Next]. 7. Enter the [Default Gateway] field in the same way and touch [Next]. 8. Enter the [Primary DNS Server] and [Secondary DNS Server] fields in the same way and touch [Next]. 9. Touch [OK] to save the configuration.
- If you were in the process of performing another procedure, the camcorder will automatically connect to the access point. Return to the procedure of the function you were previously using:
Step 6 in Streaming via Wi-Fi and Internet (Monitor while Out) (183)
Step 2 in Sharing Your Recordings Using Web Services (200)
Step 2 in Wireless Playback on a Computer (204)



Wi-Fi Connection and Settings
- Otherwise, touch [→] ➤ [×] to close the menu.

- The Wi-Fi functions available and the setup method will vary depending on the specifications and characteristics of the Wi-Fi network you want to use.
Viewing and Changing Wi-Fi Settings
You can review and change, if necessary, the settings used for the various Wi-Fi connections and for the Monitor while Out function.
AVCHD
MP4
Shooting Mode

AUTO


SCN
P
Playback


1 Open the [((☐)) Check Current Configuration] screen.
[ Remote Control+Streaming] (from record standby mode) or [(Wi-Fi] (from any movie index screen in playback mode) [Check/Edit Settings] [OK]
To view the connection settings for iOS/Android devices
2 Touch [Smartphone Connection Settings].
- The camcorder's network name and password will appear.


Wi-Fi Connection and Settings
3 If necessary, change the camcorder's network name and password.
[Edit] ➤ [OK] ➤ [OK]
- The next time you make a wireless connection, you will need to change the Wi-Fi settings on the iOS/Android device.
4 Touch [→] repeatedly to return to the ⏻ (Home) menu, and then touch [×] to close the menu.
To view the access point's connection settings
2 Touch [Access Point Connection Settings].
- The network names of up to 4 access points saved in the camcorder will appear.
- If fewer than 4 access point connections have been registered, you can touch [Not configured] to set up a new access point (206).
3 Touch the network name of the access point whose settings you want to view.
- The access point's settings will appear.
- Touch [▲] and [▼] to view additional information screens.
- To delete the access point connection displayed, touch [Edit] ▶ [Delete] ▶ [Yes].
- To manually change the settings of the access point connection displayed, touch [Edit] ➤ [Manual Setup] and then perform the procedure in Manual Setup (210).




Wi-Fi Connection and Settings
- Touch [→] to return to the access point selection screen.
4 Touch [→] repeatedly to return to the ⏻ (Home) menu, and then touch [×] to close the menu.
To view the settings for the Monitor while Out function (recording mode only)
2 Touch [Monitor while Out Settings].
- The password and port number to be used for the Monitor while Out function will appear.
3 If necessary, change the settings.
- Steps 3 and 4 in Streaming via Wi-Fi and Internet (Monitor while Out) (182).
4 Touch [→] repeatedly to return to the ⏻ (Home) menu, and then touch [×] to close the menu.
Glossary
This is a glossary of some of the basic terms used frequently in this chapter. The documentation for your access point may also contain a glossary you can refer to.
Access Point
A wireless access point (WAP) is a device that allows wireless devices, like your camcorder, to connect to a wired network (including to the Internet) using the Wi-Fi standard. In most cases, this will be your wireless router.
IP Address
Exclusive number assigned to each device connected to the network.
NFC
Near field communication. Standard for smartphones and other devices that allows a device to establish a communication protocol with another device just by bringing the devices to close proximity (touching them together).
SSID
Service Set Identifier. This is simply the public name of a Wi-Fi network.
WPS
Wi-Fi Protected Setup. Standard for easy and secure setup of Wi-Fi networks created by the Wi-Fi Alliance.

Additional Information
217
Appendix: Menu Options Lists
This section contains tables of all the camcorder's menu settings and setting options for your reference.
241
Appendix: Onscreen Icons and Displays
This section explains the icons and displays that appear on the camcorder's various screens, with reference pages to the relevant functions.
250
Trouble?
Consult the troubleshooting advice and list of messages when you are experiencing some trouble with your camcorder.
280
Do's and Don'ts
This section contains important handling precautions and maintenance instructions.
General Information
This section contains information about optional accessories that can be used with the camcorder and ends with the comprehensive list of technical specifications.
Appendix: Menu Options Lists
The functions that are available depend on the camcorder's operating mode. On the camcorder's screen, menu items not available appear grayed out. For details about how to select an item, refer to Using the Menus (☐ 41). For details about each function, see the reference page. Menu options in blue and bold type, like this, indicate default values.

(Home) Menu
Menu item Setting options
| [IT Other Settings] | (45, 218) |
| [ recording Setup] | (235) |
| [Shooting Mode] | (82) |
| [ 😊 Baby], [ AUTO Auto], [ Highlight Priority], [ Cinema],[SCN Scene], [P Programmed AE] | |
Main Functions]
| (236) |

Remote Control+Streaming]
177, 212)
| [Monitor from Home], [ Monitor while Out], [Check/Edit Settings] |
Photo Playback]
| (70) |
Movie Playback]
| (64) |




Appendix: Menu Options Lists
Menu item
Setting options

Baby Album]

64)

Video Snapshot]

64)
HFR72/R70
[(¶) Wi-Fi]

171)

Movie Uploader], [Playback] Playback via Browser],

To Web Service], [☐ Media Server], [◀ Check/Edit Settings]


Other Settings] Menus
![CANON Vixia HF R700 - Other Settings] Menus - 1](/content/2026/06/1327524/images/fbfaf1c9596f39fcf17c462be8b7bbda70e92d04f7d728e96e55b98eec1f33e0.jpg)
Camera Setup (recording mode only)
Menu item
Setting options
[Self Timer]

220)

On ⚙],

Off]
[Zoom Speed]

220)

Variable]

Speed 3],

Speed 2],

Speed 1]
[Zoom Position at Startup]

220)
[Full Wide Angle], [Last Used Position]
[Framing Assistance]
![CANON Vixia HF R700 - [Full Wide Angle], [Last Used Position] - 1](/content/2026/06/1327524/images/77cc54b23f2e87a08506fb17c9dd3c032f15c24b63d805faf10223e2df59376a.jpg)
61)
![CANON Vixia HF R700 - [Full Wide Angle], [Last Used Position] - 2](/content/2026/06/1327524/images/af3b04632ae092e49c5dad7e5ccb78e26871cf0e481871aeb1ee6acbc2f06561.jpg)
Automatic],
![CANON Vixia HF R700 - [Full Wide Angle], [Last Used Position] - 3](/content/2026/06/1327524/images/9ac07dabeb5e94e6298ea6a2aeb1040764301114e0058311f7870f236115a0e9.jpg)
Manual]
[Framing Assistance Area]
![CANON Vixia HF R700 - [Full Wide Angle], [Last Used Position] - 4](/content/2026/06/1327524/images/23571be5aa6531ed796dd28c50654815961d1cd4e6888e015fd9ad9b6a032be8.jpg)
61)
![CANON Vixia HF R700 - [Full Wide Angle], [Last Used Position] - 5](/content/2026/06/1327524/images/42bd7bf5d1b5ff5f55d0d2ef4d0373615bec1822cd612bb9fbcdc0554f05c00b.jpg)
Wide],
![CANON Vixia HF R700 - [Full Wide Angle], [Last Used Position] - 6](/content/2026/06/1327524/images/c40779cc59edba08b743efd3589bffd0ca5137a7ec1d05f4ebf437d249db6426.jpg)
Normal],
![CANON Vixia HF R700 - [Full Wide Angle], [Last Used Position] - 7](/content/2026/06/1327524/images/a831f6921c17603af75d652c63ca5a2eec709d1c52b9516f007616f5df3b59a1.jpg)
Narrow]
![CANON Vixia HF R700 - [Full Wide Angle], [Last Used Position] - 8](/content/2026/06/1327524/images/6d8128e8fac019b8ef2892766cac8fd4a61ac55992ff1f2e88f620783f6e1e30.jpg)
![CANON Vixia HF R700 - [Full Wide Angle], [Last Used Position] - 9](/content/2026/06/1327524/images/106577362488e77fff16012f9b73df29ff231fe5ddc589e34d015d035603239b.jpg)
![CANON Vixia HF R700 - [Full Wide Angle], [Last Used Position] - 10](/content/2026/06/1327524/images/142ec09baa865471d2bc8f5f7d923f38ba47c149219763f02620b5e0f81c8838.jpg)
![CANON Vixia HF R700 - [Full Wide Angle], [Last Used Position] - 11](/content/2026/06/1327524/images/91a6afc492eb87c3b9662fc7819b5d402f6ff87ca432428606ecfcc0dc3e22dd.jpg)
Camera Setup (recording mode only) (cont.)![CANON Vixia HF R700 - [Full Wide Angle], [Last Used Position] - 12](/content/2026/06/1327524/images/19d68c6f25ceb4e1692ca95e02a303e3c4afa503e8d8bd0d47b9e996246f984e.jpg)
| Menu itemSetting options | |
| [Focus Assistance] | (220) |
| [ON On], [OFF Off] | |
| [Face Detection & Tracking] | (106) |
| [ON On], [OFF Off] | |
| [Auto Backlight Correction] | (221) |
| [ON On], [OFF Off] | |
| [Auto Slow Shutter] | (221) |
| [ON On], [OFF Off] | |
| [Flicker Reduction] | (221) |
| [OFF Off], [50Hz 50 Hz], [60Hz 60 Hz] | |
| [Image Stabilizer] | (222) |
| [Dynamic], [Standard], [OFF Off] | |
| [Intelligent IS] | (58) |
| [With (p)], [OFF Without (p)] | |
| [Video Snapshot Length] | (105) |
| [2sec 2 sec], [4sec 4 sec], [8sec 8 sec] | |
![CANON Vixia HF R700 - [Full Wide Angle], [Last Used Position] - 13](/content/2026/06/1327524/images/b1061d8c89ed9c16d3b65e0ad76631aa707b25ae5bf9935a5caffb4c27e852e5.jpg)
![CANON Vixia HF R700 - [Full Wide Angle], [Last Used Position] - 14](/content/2026/06/1327524/images/11efd4746bdf587304541d306a4927b1faf819ee5cdb08e25ba57a5c2e051848.jpg)
![CANON Vixia HF R700 - [Full Wide Angle], [Last Used Position] - 15](/content/2026/06/1327524/images/33cf364f76a18b513e4d20eb9e367290ab575fe822663b96548cc59c7bd2d5e2.jpg)
![CANON Vixia HF R700 - [Full Wide Angle], [Last Used Position] - 16](/content/2026/06/1327524/images/3ee861c610459e55e8ac00935243b52d605ee55fb5b5ddff09a7b3840c47868e.jpg)
[Self Timer]: You can have the camcorder start recording after a 10-second countdown. After setting [Self Timer] to [ON On 😊], press START/STOP to start the countdown and record video or touch [☐] to start the countdown and take a photo.
- This function is not available when the shooting mode is set to 😊.
- Once the countdown has begun, any of the following actions will cancel the self timer.
- Pressing START/STOP when recording movies; touching [☐] when recording photos.
- Turning off the camcorder.
- Changing the camcorder's operating mode.
[Zoom Speed]: Determines the zoom speed of the zoom lever.
[VAR Variable]: The zoom lever operates at a variable speed. Press gently for a slow zoom; press harder for faster zooms.
[▶ Speed 1] to [▶▶ Speed 3]: The zoom lever operates at a constant speed. Speed 1 is the slowest and speed 3 the fastest.
[Zoom Position at Startup]: Allows you to choose the position of the zoom when you turn on the camcorder.
[Full Wide Angle]: The zoom position will be at full wide angle.
[Last Used Position]: The zoom position will be at the same position it was the last time you used zoom.
- When this function is set to [Full Wide Angle] and you manually adjust the focus, the focus will be lost and autofocus will be activated the next time you turn on the camcorder.
[Focus Assistance]: When focus assistance is activated, the image at the center of the screen is magnified to help you focus manually (113).
![CANON Vixia HF R700 - [Full Wide Angle], [Last Used Position] - 17](/content/2026/06/1327524/images/f3c8843160d484a9871415fb0bd1235e1aa9191f63350f0d1ccfdfbd6858cb3d.jpg)
![CANON Vixia HF R700 - [Full Wide Angle], [Last Used Position] - 18](/content/2026/06/1327524/images/5f9a8a6385e859968fd1314e8761c16e930a82ca9d5fc1dba364a32b0b420015.jpg)
![CANON Vixia HF R700 - [Full Wide Angle], [Last Used Position] - 19](/content/2026/06/1327524/images/60c6c5cd5f42618d06fb4a0e15b4a687508e648a7b3a6792abd06cd0bf00c20e.jpg)
![CANON Vixia HF R700 - [Full Wide Angle], [Last Used Position] - 20](/content/2026/06/1327524/images/6723e64eb60dd07c0c72cb775570002d103eaa44c9cc755869543bc8cdca746e.jpg)
Appendix: Menu Options Lists
- Using focus assistance will not affect the recordings. It will be cancelled automatically after 4 seconds or when you start recording.
- This function is available only when the shooting mode is set to 📄, 📋, SCN or P.
- This function is available only for recording movies.
[Auto Backlight Correction]: When this setting is set to [ON On], the camcorder automatically corrects for backlight conditions when shooting subjects with a strong light source behind them.
- This function is available only when the shooting mode is set to 📄, SCN or P. However, it is not available in the following cases.
- When the shooting mode is set to 📄 and a cinema-look filter other than [Cinema Standard] is selected.
- When the shooting mode is set to SCN and the Special Scene mode is set to [Night Scene], [Snow], [Beach], [Sunset] or [Spotlight].
[Auto Slow Shutter]: The camcorder automatically uses slow shutter speeds to obtain brighter recordings in places with insufficient lighting.
- Fastest shutter speed used: 1/30; 1/12 when the frame rate is set to 24P; 1/15 when it is set to PF30 or 30P.
- This function is not available when the shooting mode is set to SCN.
- When you are recording moving subjects, if a trailing afterimage appears, set the slow shutter to [OFF Off].
[Flicker Reduction]: If the screen starts to flicker when recording movies under fluorescent lights, change the setting to reduce the effect.
- This function is only available when the shooting mode is set to 📄, 📋 or P.




Appendix: Menu Options Lists
[Image Stabilizer]: The image stabilizer reduces camcorder blur (blur due to the camcorder moving) so you can get nice, stable shots. Select the image stabilization mode according to the shooting conditions.
[ Dynamic]: Compensates for a higher degree of camcorder shake, such as when shooting while walking, and is more effective as the zoom approaches full wide angle. Available only when [Zoom Type] is set to [32ptical].
[Standard]: Compensates for a lower degree of camcorder shake, such as when shooting while remaining stationary, and is suitable for shooting natural-looking scenes.
[OFF Off]: Use this setting when the camcorder is mounted on a tripod.
- This function is available only when the shooting mode is set to 📄, 📋, SCN or P.
- If the degree of camcorder shake is too high, the image stabilizer may not be able to fully compensate.
- You can activate the Powered IS function (☐ 238) when more powerful image stabilization is required.


Playback Setup (playback mode only)
Menu item
Setting options
[Select Music]
(129, 134)
[OFF Off], [ON On]
When [ON On] - list of music tracks,
[Music Balance] [ˈmɪzəl] [ˌmɪzəl] (Original sound/Background music)




Playback Setup (playback mode only) (cont.)
Menu item
Setting options
[Slideshow Transition]
(223)
[OFF Off], [Dissolve], [Slide Image]
[Video Snapshot Length]
(126)
[2sec 2 sec], [4sec 4 sec], [8sec 8 sec]
[Slideshow Transition]: You can select the transition effect between photos in a slideshow.
[☐ Dissolve]: The currently displayed photo fades away while the next photo fades in.
[☐ Slide Image]: Photos slide to the left as the slideshow advances.

Display Setup
Menu item
Setting options
[Onscreen Markers]
(224)
[OFF Off], [W Level (White)], [G Level (Gray)], [W Grid (White)], [G Grid (Gray)]
[Display Date/Time]
(224)
[ON On], [OFF Off]
[Output Onscreen Displays]
(225)
[ON On], [OFF Off]


Appendix: Menu Options Lists

Display Setup (cont.)
Menu item
Setting options
[LCD Brightness]
(225)

[LCD Backlight]
(225)
[H Bright], [M Normal], [L Dim]
[LCD Mirror Image] (☐ 225)
[ON On], [OFF Off]
[HDMI Status]
(225)
[Demo Mode] (225)
[ON On], [OFF Off]
[TV Type] (☐ 226)
[4:3 4:3 TV], [16:9 Wide TV]
[Onscreen Markers] (recording mode only): While recording, you can display a grid or a horizontal line at the center of the screen. Use the markers as a reference to make sure your subject is framed correctly (vertically and/or horizontally).
- Using the onscreen markers will not affect the recordings.
[Display Date/Time] (playback mode only): Select whether to display the date and time during playback.
- For MP4 movies, only the date will be displayed.


Appendix: Menu Options Lists
[Output Onscreen Displays]: When this setting is set to [ON On], the camcorder's onscreen displays will appear also on the screen of a TV or monitor connected to the camcorder.
[LCD Brightness]: Adjusts the brightness of the LCD screen.
- Changing the brightness of the LCD screen does not affect the brightness of your recordings or the brightness of the playback image on a TV.
[LCD Backlight]: Sets the screen to one of three brightness levels.
- Changing the brightness of the LCD screen does not affect the brightness of your recordings or the brightness of the playback image on a TV.
- Using the [H Bright] setting will shorten the effective usage time of the battery pack.
- When the compact power adapter is connected, [LCD Backlight] will automatically change to [H Bright].
[LCD Mirror Image] (recording mode only): When this setting is set to [ON], this function reverses the image on the screen horizontally when you rotate the LCD panel 180 degrees toward the subject. In other words, the screen will show a mirror image of the subject.
- While the LCD panel is rotated toward the subject, you will not be able to decorate the scene.
[HDMI Status]: Displays a screen where you can verify the standard of the output signal from the HDMI OUT terminal.
[Demo Mode] (recording mode only): The demonstration mode displays the camcorder's main features. It starts automatically when the camcorder is powered with the compact power adapter if you leave it in record standby mode without a memory card for more than 5 minutes.


Appendix: Menu Options Lists
- To cancel the demo mode once it has started, press any button or turn off the camcorder.
[TV Type] (playback mode only): When you connect the camcorder to a TV using the optional STV-250N Stereo Video Cable, select the setting according to the type of TV in order to display the picture in full and in the correct aspect ratio.
[4:3 TV]: TV sets with 4:3 aspect ratio.
[16:9 Wide TV]: TV sets with 16:9 aspect ratio.
- When the TV type is set to [4:3 TV], during the playback of video originally recorded with an aspect ratio of 16:9, the picture will not be displayed fullscreen.
- This setting is not available when the camcorder is connected to an HDTV using the supplied High Speed HDMI cable.

System Setup
Menu item
Setting options
[Language

(□ 33)
[Česky], [Dansk], [Deutsch], [Ελληνικά], [English], [Español],
[Français], [Italiano], [Magyar], [Melayu], [Nederlands], [Norsk],
[Polski], [Português], [Română], [Suomi], [Svenska], [Türkçe],
[Русский], [Українська], [العربية], [فارسی], [ภาษาไทย], [简体中文]
[♠] (home time zone) or [✗] (travel time zone):
[New York], list of world time zones
[★] (DST adjustment): Toggle on or off
[Date/Time]
(33)
[Date Format]: [Y.M.D], [M.D,Y], [D.M.Y] (Y-year, M-month, D-day)
[24H]: Toggle on (24-hour clock) or off (12-hour clock)
[View Assistance]
(85, 230)
[On], [Off]
[Lock Files]
(68)
[On], [Off]
![CANON Vixia HF R700 - [On], [Off] - 1](/content/2026/06/1327524/images/461588044f2fc3d686748a0f9eeafe1d91e7e1c2ed2bcd049576584405e415f3.jpg)
![CANON Vixia HF R700 - [On], [Off] - 2](/content/2026/06/1327524/images/c1146a83eae6fadfd2ba1220c41feab5b19bca78d9289b083a6eda1eb0f932d4.jpg)
![CANON Vixia HF R700 - [On], [Off] - 3](/content/2026/06/1327524/images/6ce6b802d2f20bca9f5aafa0d996526f4756af13478cf635bdeb1eec668155b4.jpg)
![CANON Vixia HF R700 - [On], [Off] - 4](/content/2026/06/1327524/images/599b023ef061d38343757ecbaf8fa06bf731564c96659fe4805bc9811a216a31.jpg)
![CANON Vixia HF R700 - [On], [Off] - 5](/content/2026/06/1327524/images/e4f24a4b5daf3fcaef8281a6420ada799273175e0c885a7065816b109ff9065a.jpg)
![CANON Vixia HF R700 - [On], [Off] - 6](/content/2026/06/1327524/images/c6677753185948297afc7184a580882b46ee5f81f22f803ee22d0eb7b348af38.jpg)
System Setup (cont.)
Menu item
Setting options
[Available Space in Memory]
(230)
HFR72/R70 [☐] (built-in memory), [SD] (memory card)
HFR700 -
[Used Space in Memory]
(230)
HFR72/R70 [☐] (built-in memory), [SD] (memory card)
HFR700 -
HFR72/R70 [External Hard Drive Info]*
(231)
[AV/Headphones]
(121, 152)
[AV AV], [headphones]
[Volume] (67, 121)
[Speaker]: Blue, OFF
OFF
[Notification Sounds]
(231)
['F] High Volume, ['F] Low Volume, [OFF Off]
[Custom Control Button]
(231)
Functions in the [Main Functions] menu (see 236)
Default: [☐ Framing Assistance]
[Battery Info]
(231)



Appendix: Menu Options Lists

System Setup (cont.)
Menu item
Setting options
[Displayed Units]
(232)
[ m Meters/Grams], [ ft Feet/Pounds]
[File Numbering] (☐ 232)
[Reset], [Continuous]
[Auto Power Off] (☐ 233)
[ON On], [OFF Off]
[Power On Using LCD Panel]
(233)
[Enable], [Off]
[USB Connection Type]
(233)
[Computer], [Connect Station], [Connect and Set]
[NFC] (181)
[ON On], [OFF Off]
HFR700 [FlashAir]**
(234)
[ON On], [OFF Off]
HFR72/R70 [Initialize / SD]
(38)
HFR700 [Initialize SD]
[Built-in Mem.], [SD Mem. Card] (HFR72/R70 only) [Complete Initialization]: Toggle on or off





System Setup (cont.)
Menu item
Setting options
HFR72/R70 [Initialize HDD]* (168)
[Firmware] (234)
HFR72/R70 [Delete Memory Save Folder]* (167)
HFR72/R70 [MAC Address] (☐ 234)
[Certification Logo Display] (234)
[Reset All] (☐ 234)
[No], [Yes]
* Option available only after connecting an external hard drive to the camcorder. ** Option available only when a FlashAir card is inserted in the camcorder.
[View Assistance]: When this setting is set to [ON On], the image displayed on the screen while the shooting mode is set to will be closer to the actual brightness of the scene. In playback mode, set [View Assistance] to [ON On] during the playback of scenes recorded in mode to enjoy a more life-like image, richer in detail.
[Available Space in Memory] (recording mode only)/[Used Space in Memory] (playback mode only): Displays a screen where you can verify how much of the memory is currently available for recording or how much of it is in use (indicates photos).
- Estimated figures about available movie recording time and available number of photos are approximate and based on the currently selected video quality and photo size.


Appendix: Menu Options Lists
- The information screen displays also the Speed Class rating of the memory card.
- HFR72/R70 The [Total space] shown for the built-in memory indicates actually usable space. It may be slightly smaller than the nominal built-in memory capacity listed in the specifications.
HFR72/R70 [External Hard Drive Info] (playback mode only): When the camcorder is connected to an external hard drive, this setting displays information about the hard drive.
[Notification Sounds]: A beep will accompany some operations like turning on the camcorder, the self-timer countdown, etc.
- Set to [OFF Off] to turn off notification sounds.
- While pre-recording (☐ 238) is activated, the camcorder will not emit some notification sounds.
[Custom Control Button] (recording mode only): The [icon] button displayed on the lower left of the screen is a customizable button. By default, the button's function is assigned to framing assistance but you can change its function to use it as a shortcut to one of the functions in the [icon] Main Functions] menu. This will allow you to access one of your frequently used functions quickly and conveniently.
- When the shooting mode is set to 😊, the button's function is automatically set to framing assistance (☐ or ☒) and it cannot be changed.
[Battery Info]: When you are using a battery pack that is compatible with Intelligent System, this option displays a screen where you can verify the battery charge (as a percentage) and the remaining recording time (during recording mode) or playback time (during playback mode).


Appendix: Menu Options Lists
- If the battery pack is exhausted, the battery information may not be displayed.
[Displayed Units]: In recording mode, this setting selects the units to use for the focusing distance display during manual focus. It also affects the units used in the stamps for height and weight in 😊 mode.
[File Numbering]: MP4 movies and photos are saved on the memory as files in folders, which are assigned consecutive file numbers. This setting determines how files are numbered.
[Reset]: File numbers will restart from 100-0001 every time you record on a memory that has been initialized.
Continuous]: File numbers will continue from the number following that of the last file recorded with the camcorder.
- If a memory card you insert already contains a file with a larger number, a new file will be assigned a number one higher than that of the last file on the memory card.
- We recommend using the [→ Continuous] setting.
- Folders can contain up to 500 files (MP4 movies and photos combined).
- File numbers consist of 7 digits, for example “101-0107”. The 3 digits before the hyphen indicate the folder where the file is saved and can range from 100 to 999. The 4 digits after the hyphen are a unique identifier for each file and can range from 0001 to 9900.
- The last four digits of the folder name indicate the date when the folder was created.


Appendix: Menu Options Lists
- The file number and folder name also indicate the location of the file on the memory. A recording with the file number “101-0107”, made on November 3 will be found in the folder DCIM\101_1103. If it is an MP4 movie, its file name will be MVI_0107.MP4; if it is a photo, its file name will be IMG_0107.JPG.
[Auto Power Off]: In order to save power when the camcorder is powered by a battery pack, it will automatically shut off if left without any operation for 3 minutes.
- Approximately 30 seconds before the camcorder shuts off, [Auto Power Off] will appear. Operating any of the camcorder's controls while the message is displayed will prevent the camcorder from shutting off.
[Power On Using LCD Panel]: When this setting is set to [Enable], opening the LCD panel turns the camcorder on, while closing the LCD panel turns it off. Set to [Off] to deactivate this feature. In either case, you can still use ON/OFF.
[USB Connection Type] (playback mode only): Selects the type of connection used by default when the camcorder is connected to an external device using a USB connection.
[Computer] or [Connect Station]: Select one of these settings if you plan to connect the camcorder to only one type of device (a computer or the optional CS100 Connect Station, respectively).
[Connect and Set]: This setting is more convenient if you do not plan to use the camcorder with only one type of device and will connect it sometimes to a computer and sometimes to the optional CS100 Connect Station.




Appendix: Menu Options Lists
HFR700 [FlashAir]: Determines the operation mode of the wireless communication of the FlashAir card in the camcorder.
[Firmware] (recording mode only): You can verify the current version of the camcorder's firmware, which is the software that controls the camcorder. This menu option is usually unavailable.
HFR72/R70 [MAC Address]: Displays the camcorder's unique MAC (media access control) address.
[Certification Logo Display]: You can verify part of the certification logos that apply to this camcorder.
[Reset All]: Resets all of the camcorder's settings, including any stored access point connections, passwords and other Wi-Fi settings (HFR72/R70 only).
[Recording Setup] Menu (recording mode only)
Menu item
Setting options
[Movie Format] (78)
[AVCHD AVCHD], [MP4 MP4]
[Video Quality] (78)
When [Movie Format] is set to [AVCHD AVCHD]:
[60P 60P Recording], [MXP High Quality]*,
[FXP Standard (Full HD)]*, [LP Long Play]*
When [Movie Format] is set to [MP4 MP4]:
[350P Recording], [HighQuality]**,
[17Mbps Standard (Full HD)]**, [4Mbps Long Play]**
* For these settings also [i] ([Frame Rate]): [60i], [PF30]
** For these settings also [i] ([Frame Rate]): [30P], [24P]
HFR72/R70 [Recording Media]
(80)
[Rec Media for Movies]:
[Built-in Memory], [SD Memory Card]
[Rec Media for Photos]:
[Built-in Memory], [SD Memory Card]
HFR72/R70 [Dual/Relay Recording]
(81)
[OFF Standard Recording], [+MP4 Dual Recording],
[Relay Recording] 1
1 The icon shown (☐→SD or □→□) depends on the current selection for [Recording Media].




[▶ Main Functions] Menu (recording mode only)
Button
Setting options/Function
[♪] Video Snapshot]
(105)
[ON], [OFF]
[ AUDIO Audio Scene]
(120)
[♪ STD Standard], [♪ Music], [◀ Speech], [◀ Forest and Birds], [◀ Noise Suppression]
[Decoration]
(95)
[Pens and Stamps], [Animated Stamps], Date/Time or [😊] (Baby mode stamps), [image mix), [ll] (pause live video), [◀] (minimize toolbar)
[ Slow & Fast Motion]
(92)
[Off], [x1/2], [x2], [x4], [x10], [x20], [x60], [x120], [x1200] (recording time): [1 Frame], [0.5 sec]
[Faders]
(109)
[Off Off], [F1 Fade Trigger], [F2 Wipe] [Black Screen], [White Screen]
[Zoom Type] (☐ 237)
[32x Optical], [57x Advanced], [1140x Digital] [T] (tele macro): Toggle on or off


| ButtonSetting options/Function | |
| [Powered IS] | (238) |
| [ON], [OFF] | |
| [Pre REC] | (238) |
| [ON], [OFF] | |
| [Focus] | (113) |
| [MF] (manual focus): Toggle on or off, Touch AF frame | |
| [Exposure] | (111) |
| [M] (manual exposure): Toggle on or off, Touch AE frame | |
| [Mic. Level] | (239) |
| [A] (automatic), [M] (manual) | |
| [Audio Level Indicator]: Toggle on or off | |
| [White Balance] | (115) |
| [AWB Automatic], [Daylight], [Tungsten], [Custom WB] | |
[Zoom Type]: The camcorder offers three types of zoom.
[32x Optical]: For optical zoom, the camcorder uses the optical magnification ratio of the lens. [57x Advanced]: With advanced zoom the maximum magnification ratio is 57x. At full wide angle, the angle of view with advanced zoom is wider than the angle of view with optical zoom. [1140x Digital]: With digital zoom (light blue area on the zoom bar), the image is processed digitally so image quality will deteriorate the more you zoom in.


Appendix: Menu Options Lists
- This function is available only when the shooting mode is set to 📄, 📋, SCN or P.
- When the shooting mode is set to AUTO or 😊, [Zoom Type] will automatically be set to [●, optical].
[Powered IS]: With Powered IS you can make the image stabilization even more powerful. Powered IS is most effective for shooting far-away non-moving subjects from a stationary position.
- This function is available only when the shooting mode is set to 📄, 📋, SCN or P.
- Turning off the camcorder will deactivate the Powered IS function.
[③ Pre REC]: When this function is activated, the camcorder automatically starts recording 3 seconds before you press START/STOP so you do not miss important shooting opportunities.
- When the shooting mode is set to 😊, [③ Pre REC] will automatically be set to [ON] and pre-recording cannot be deactivated.
- The camcorder will not record the full 3 seconds prior to pressing START/STOP if the button was pressed within 3 seconds of having turned on pre-recording or having finished the previous recording.
- Any of the following actions will deactivate the pre-recording function.
- Leaving the camcorder without any operation for 5 minutes.
- Turning off the camcorder, pressing ▶, changing the shooting mode, etc.
- Activating video snapshot or the slow & fast recording mode.
- Opening the ➕ [Recording Setup] ➕ [Movie Format], [Video Quality] or [Recording Media] screen.
- Opening the 🎨 (or 📋 [→ Main Functions]) ➞ [AUDIO Audio Scene], [💡 Faders] or [WB White Balance] screen.




Appendix: Menu Options Lists
- When the camcorder cannot keep recording, for example when the memory is full or the memory card slot cover was open.
[¶ Mic. Level]: You can adjust the audio recording level of the built-in or an external microphone.
[◀] [Ψ Mic. Level] [M] (manual) [◀]/[▶] to adjust the audio level [X]
- Touch [A] to return to automatic audio level adjustment. Touch [Audio Level Indicator] to display the audio level indicator even during automatic audio level adjustment.
- Adjust the audio recording level so the audio level meter goes to the right of the -12 dB mark (yellow area) only occasionally.
- When you are using a microphone connected to the MIC terminal, including the optional WM-V1 Wireless Microphone, the audio level indicator will be displayed automatically.
- When the audio level meter reaches the red point (0 dB), the sound may be distorted.
- We recommend using headphones (☐ 121) to check the sound level while adjusting the audio recording level.
- This function is available only when the shooting mode is set to 📄, 📋, SCN or P.
[Edit] Menu (playback mode only)
Button
Setting options
HFR72/R70 [Copy (☐→SD)]
(140)
Depending on the index screen: or , [Select], [All Scenes] or [All Photos]
In single photo view: [☐ Proceed] (copies the current photo)
HFR72/R70 [Convert to MP4 (☐→SD)]
(143)
HFR700 [Convert to MP4]
[Delete] (73)
Depending on the index screen: or , [Select], [All Scenes] or [All Photos]
During playback pause: [This Scene]
In single photo view: [Proceed] (deletes the current photo)
HFR72/R70 [Conv. Fast Motion (☐→SD)]
(147)
[Divide] (136)
[Trim] (137)


Appendix: Onscreen Icons and Displays
The following tables show the icons that appear in the various modes. For easy reference, the icons in the table are grouped according to the area in which they appear on the screen. Please note that what icons appear depends on the movie format, shooting mode, and other functions.
For details about each function, see the reference page.
Recording mode![P 5 228min -0.5 MF i Touch to open the info panel Onscreen markers (□ 224, [Ew Level (White)] shown) Face detection frame (106) User-selected tracking frame (106)](/content/2026/06/1327524/images/4b723df8e7e1078b5a5a89ce3ff89746a6bfcd78d2bf2546a96d689267c15b28.jpg)


Top of the screen
| Icon | Description/Function | |
| SCN, P | Shooting mode button(in AUTO mode: one of the Smart AUTO icons, in SCN mode: one of the Special Scene mode icons) | 825788 |
| 0:00:00 | Scene counter (hours : minutes : seconds). Advances only while recording. | - |
| x0000:00:00 | Slow & fast motion recording and selected slow/fast motion rate, scene counter (only while recording) | 92 |
| 00 | Self timer and countdown | 220 |
| , ■, 3 | Memory card operation | 249 |
| (( ), ( ) | Image stabilization | 222 |
| Powered IS238 | ||
| ( ) , ( ), ( ) , ( ) | Intelligent IS (only in AUTO mode) | 58 |
| 000 min | Remaining battery charge | 249 |
| Zoom bar (momentarily, only when operating the zoom). | 59 |


Top of the screen (cont.)
| Icon | Description/Function | |
  , [ZWOW] , [ZWOW]  | Photo shooting and memory selected for recording photos (momentarily after taking a photo).In case of a card error, SI will be displayed (in red) and the photo will not be recorded. | 54 |
* HFR72/R70 only.
Left side of the screen
| Icon | Description/Function | |
| ±0.00 | Exposure compensation | 111 |
| MF Manual focus113 | ||
| Tele macro 118 | ||
| [Button] button: Open the Button (Home) menu | 42 | |
| F1, F2 | Faders | 109 |
| White balance | 115 | |
| HFR700 FlashAir card.In case of a FlashAir card error, will be displayed. Check the FlashAir card. | 234 |



Info panel
| Icon | Description/Function | |
| Face detection 106 | ||
| Headphone output | 121 | |
| Audio scene | 120 | |
| 50Hz, 60Hz | Flicker reduction | 221 |
Memory selected for recording movies and remaining recording time on the memory.
| ☐0h00m*,SD0h00m | As the remaining recording time decreases, the icon will change from green to yellow and then red.When the remaining recording time is 30 minutes or less, this indicator will keep being displayed on the main screen even when you close the info panel.When the memory is full, [End] will appear next to the red icon and recording will stop. | 298 |
| ☐→0h00m,SD→0h00m | Relay recording* | 81 |
| Icon | Description/Function | |
| SD 0h00m +MP4,□ 0h00m +MP4 | Dual recording*When dual recording is activated, the memory where the additional MP4 scenes will be recorded and the remaining recording time on that memory will be displayed as well. | 81 |
| PF30, 30P, 24P Frame rate 117 | ||
| AVCHD, MP4 Movie format 78 | ||
| 60P, MXP, FXP, LP, 24Mbps, 17Mbps, 4Mbps | Video quality 78 |
* HFR72/R70 only.
Bottom of the screen
| Icon | Description/Function | |
| [ ] button: Take a photo | 54 | |
| FILTER 1 to FILTER 5 | [FILTER] button: Change the cinema-look filter | 86 |
| (default) | Custom button: The icon in the button will change depending on the currently assigned function/setting. | 231 |



Appendix: Onscreen Icons and Displays
Bottom of the screen (cont.)
| Icon | Description/Function | |
 | Focus and exposure locked (momentarily while taking a photo) | 54 |
 | [button: Cancel the tracking function 106 | |
 | Audio level indicator 239 | |
| [8SHC] | [button: Open the [Main Functions] menu.When the shooting mode is set to 😊, the button's function is automatically set to [Decoration] and it cannot be changed. | 236 |
■Playback mode (during playback)


| Icon | Description/Function | |
| Edit, 🔒 | [Edit] button: Open the [Edit] menu.Lock files function activated. | 24068 |
| ▶, □, ◀, ▶, ◀◀, ▶▶, ◀□□, □□▶ | Memory card operation 249 | |
| ○, ○FF | HFR700 FlashAir card.In case of a FlashAir card error, 📞 will be displayed. Check the FlashAir card. | 234 |
| □0:00:00*,SD0:00:00 | Memory selected for playback and scene playback time (hours : minutes : seconds) | - |
| □00/00*, SD00/00 | Memory selected for playback and current photo/total number of photos | - |
| AVCHD, MP4 Movie format 78 | ||
| 60P, MXP, FXP, LP, 24Mbps, 17Mbps, 4Mbps | Video quality 78 | |
| 000 Scene number | - | |
| 000-0000 | File number | 232 |
* HFR72/R70 only.
Bottom of the screen
| Icon | Description/Function | |
| For movies: ◀◀, ▶▶, ||, ▶, ■, ◀◀, ▶▶, ◀, ▶ | Playback control buttons | 67 |
| For photos: ▶ | [▶] button: Slideshow | 134 |
| [■] button: Return to the [▶] index screen | 70 | |
| ⇨[⇨] button: Photo jump 72 | ||
| [♪▶] button: Volume and background music balance adjustment | 129 | |
| [▶] button: Grab the current frame and save it as an image file | 128 | |
| ⇨[⇨] button: Decoration 104 | ||
| [♪▶] button: Capture a video snapshot scene | 126 | |
| 00:00 AM Jan. 1,2016 | Recording date and time 224 | |


Memory card operation
● Recording, ■ Record standby, ③ Pre-recording (238), ▶ Playback, || Playback pause, ▶▶ Fast playback, ◀◀ Fast reverse playback, ▶▶ Slow playback, ◀◀ Slow reverse playback, ||▶ Frame advance, ◀◀ Frame reverse.
Remaining battery charge
- The icon shows a rough estimate of the remaining charge of the battery pack. An estimate of the remaining recording/playback time (in minutes) will be displayed next to the icon.
- When 📋 appears (in red), the battery pack is exhausted. Replace the battery pack with a fully charged one.
- Depending on the condition of the camcorder or battery, the actual battery charge may not match what is displayed on the screen.
Trouble?
Troubleshooting
If you have a problem with your camcorder, refer to this section. Sometimes what you think is a malfunction of the camcorder may have the simplest of solutions - please read the “CHECK THIS FIRST” box before going on to the more detailed problems and solutions. Consult a Canon Service Center if the problem persists.
CHECK THIS FIRST
Power supply
- Is the battery charged? Is the compact power adapter correctly connected to the camcorder? (☐ 25)
Recording
- Did you turn the camcorder on and correctly set it to recording mode? (☐ 50, 54) If you want to record on a memory card, is a compatible card correctly inserted into the camcorder? (☐ 30)
Playback
- Did you turn the camcorder on and correctly set it to playback mode? (64, 70) If you want to play back recordings from a memory card, is a compatible card correctly inserted into the camcorder? (30) Does it contain any recordings?
Trouble?
Power Source
The camcorder will not turn on or it turns off by itself.
- The battery pack is exhausted. Replace or charge the battery pack.
- Remove the battery pack and insert it correctly.
Cannot charge the battery pack.
- Make sure the camcorder is off so charging can start.
- The temperature of the battery pack is outside its operating range (approximately 0 – 40 °C (32 – 104 °F)). Remove the battery pack, warm it or let it cool down, as necessary, and try charging it again.
- Charge the battery pack in temperatures between approximately 0°C and 40°C (32°F and 104°F).
- The battery pack is faulty. Replace the battery pack.
- The camcorder cannot communicate with the attached battery pack. Battery packs not recommended by Canon for use with this camcorder cannot be charged using this camcorder.
- If you are using a battery pack recommended by Canon for use with this camcorder, there may be a problem with the battery pack. Consult a Canon Service Center.
A noise can be heard from the compact power adapter.
- A faint sound can be heard while the compact power adapter is connected to a power outlet. This is not a malfunction.
The battery pack is exhausted extremely quickly even at normal temperatures.
- The battery may have reached the end of its battery life. Buy a new battery pack.
Trouble?
Recording
Pressing START/STOP will not start recording.
- You cannot record while the camcorder is writing previous recordings in the memory (while the ACCESS indicator is on or flashing). Wait until the camcorder has finished.
- The memory is full or it already contains the maximum number of AVCHD scenes (3,999 scenes). Delete some recordings (☐ 73) or initialize the memory (☐ 38) to free some space.
- The file numbers for MP4 movies and photos have reached their maximum value. Save your recordings (156), set [File Numbering] to [Reset] and initialize the memory (38).
The point where START/STOP was pressed does not match the beginning/end of the recording.
- There is a slight interval between pressing the button and the actual start/end of recording. This is not a malfunction.
The camcorder will not focus.
- Autofocus does not work on the subject. Focus manually (113).
- The lens is dirty. Clean the lens (☐ 286).
When a subject flits across in front of the lens, the image appears slightly bent.
- This is a phenomenon typical of CMOS image sensors. When a subject crosses very quickly in front of the camcorder, the image may seem slightly warped. This is not a malfunction.
Changing the operating mode between recording (●)/recording standby (■)/ playback (▶) takes longer than usual.
- When the memory contains a large number of scenes, some operations may take longer than usual. Save your recordings (156) and initialize the memory (38).


Trouble?
Movies or photos cannot be recorded properly.
- This may occur as movies and photos are recorded/deleted over time. Save your recordings (156) and initialize the memory using the [Complete Initialization] option (38).
Cannot record a photo while recording movies.
- You cannot take photos when the shooting mode is set to 📄 or while fading in or fading out a scene (109).
After using the camcorder for a long time, it becomes hot.
- The camcorder may become hot after using it continuously for long periods of time; this is not a malfunction. If the camcorder becomes unusually hot or it becomes hot after using it only for a short while, it may indicate a problem with the camcorder. Consult a Canon Service Center.
Playback
Deleting scenes takes longer than usual.
- When the memory contains a large number of scenes, some operations may take longer than usual. Save your recordings (156) and initialize the memory (38).
Cannot capture a video snapshot scene from a movie.
- You cannot capture video snapshot scenes from MP4 scenes or from scenes recorded or edited using another device.
- The memory is full. Delete some recordings (☐ 73) to free some space.
Trouble?
When playing back scenes/slideshow with background music, the music track is not played back correctly.
- This can occur when you transfer the music files to a memory after repeatedly recording and deleting scenes (fragmented memory). Recordings in the built-in memory (HFR72/R70 only): Initialize a memory card with the camcorder using the [Complete Initialization] option (38). Transfer the music files to the memory card (301) and then copy the recordings you want to play back to the memory card you prepared (140). Play back the recordings with background music from the memory card. To avoid the same problem, save the recordings in the built-in memory (156) and initialize it using the [Complete Initialization] option (38).
Recordings on a memory card: Save your recordings on a computer (157). Initialize the memory card using the [Complete Initialization] option (38). Transfer the music files to the memory card (301) and then copy back all your recordings from the computer to the memory card.
- Music tracks will not play back correctly if the connection was interrupted while transferring the music files. Delete the music tracks and transfer the music files again.
- The transfer rate of the memory card used is too slow. Use a recommended memory card (☐ 29).
Cannot divide scenes.
- The memory is full. Delete some recordings (☐ 73) to free some space.


Trouble?
Cannot mark individual scenes/photos in the index screen with a checkmark √.
- You cannot select more than 100 scenes/photos individually. Select the [All Scenes] or [All Photos] option instead of [Select].
Indicators and Onscreen Displays

appears (in red) on the screen.
- Battery pack is exhausted. Replace the battery pack with a fully charged one.

appears (in red) on the screen.
- The camcorder cannot communicate with the battery pack attached so the remaining battery charge cannot be displayed.

appears (in red) on the screen.
- A memory card error occurred. Turn off the camcorder. Remove and reinsert the memory card. Initialize the memory card if the display does not change back to normal.

(in red) and [End] appear on the screen.
- The memory card is full. Replace the memory card or delete some recordings (☐ 73) to free some space on the memory card.
Even after stopping recording, the ACCESS indicator does not go off.
- The scene is being recorded in the memory. This is not a malfunction.
The red POWER/CHG indicator flashes rapidly (one flash at 0.5-second intervals).
- The temperature of the battery pack is outside its operating range (approximately 0 – 40 °C (32 – 104 °F)). Remove the battery pack, warm it or let it cool down, as necessary, and try charging it again.


Trouble?
- Charge the battery pack in temperatures between approximately 0°C and 40°C (32°F and 104°F).
- The battery pack is damaged. Use a different battery pack.
- Charging has stopped because the compact power adapter or the battery pack is faulty. Consult a Canon Service Center.
Picture and Sound
A rattling can be heard from the camcorder.
- If it cannot be heard while the camcorder is set to recording mode, then the rattling is due to the movement of the internal lens fixture. This is not a malfunction.
The screen appears too dark.
- The LCD screen was dimmed. Change the [LCD Backlight] setting to [Normal] or [Bright].
The image on the screen appears too dark.
- You set the shooting mode to 📄 or played back a scene recorded in 📄 mode with the view assistance function turned off. Set 🌐 [View Assistance] to [On].
Screen displays turn on and off repeatedly.
- The battery pack is exhausted. Replace or charge the battery pack.
- Remove the battery pack and attach it correctly.
Abnormal characters appear on the screen and the camcorder does not operate properly.
- Remove the battery pack and attach it after a few moments.
Video noise appears on screen.
- Keep a distance between the camcorder and devices that emit strong electromagnetic fields (plasma TVs, cellular phones, etc.).


Trouble?
Horizontal bands appear on the screen.
- This is a phenomenon typical of CMOS image sensors when recording under some types of fluorescent, mercury or sodium lamps. This is not a malfunction. To reduce the symptoms, change the [Flicker Reduction] setting.
Sound is distorted or is recorded at lower levels.
- When recording near loud sounds (such as fireworks, shows or concerts), sound may become distorted or it may not be recorded at the actual levels. This is not a malfunction. Adjust the audio recording level manually (239).
The picture is displayed correctly but there is no sound from the built-in speaker.
- Speaker volume is turned off. Adjust the volume (☐ 67).
- If the supplied High Speed HDMI cable or optional STV-250N Stereo Video Cable is connected to the camcorder, disconnect it.
- The AV OUT/Ω terminal is set to headphone output. Set [AV/Headphones] to [AV].
There is no sound from the AV OUT/☐ (headphones) terminal.
- HFR72/R70 Audio will not be output from the AV OUT/Ω terminal while Wi-Fi functions are in use.
Memory Card and Accessories
Cannot insert the memory card.
- The memory card was not facing the correct direction. Turn the memory card over and insert it.
Cannot record on the memory card.
- The memory card is full. Delete some recordings (73) to free some space or replace the memory card.


Trouble?
- Initialize the memory card using the [Complete Initialization] option (☐ 38) when you use it with the camcorder for the first time.
- The LOCK switch on the memory card is set to prevent accidental erasure. Change the position of the LOCK switch.
- A compatible memory card must be used to be able to record movies on a memory card (☐ 29).
- The folder and file numbers for MP4 movies and photos have reached their maximum value. Insert a new memory card and set [File Numbering] to [Reset].
Connections with External Devices
Video noise appears on the TV screen.
- When using the camcorder in a room where a TV is located, keep a distance between the compact power adapter and the power or antenna cables of the TV.
There is no image on the TV screen and there is no sound.
- The video input on the TV is not set to the video terminal to which you connected the camcorder. Select the correct video input.
- Disconnect the supplied High Speed HDMI cable and then restore the connection or turn the camcorder off and then on again.
- Video will not be output from the AV OUT/Ω terminal while an HDMI cable is connected to the camcorder. Disconnect the supplied High Speed HDMI cable.
- HFR72/R70: Video and audio will not be output from the camcorder while Wi-Fi functions are in use.


Trouble?
The image on the TV screen appears too dark.
You may be playing back scenes recorded in ☐ mode. Turn up the brightness of the TV, computer screen, or device used, or use one of the TV's picture modes with brighter settings.
The computer does not recognize the camcorder even though the camcorder is connected correctly.
- Disconnect the USB cable and turn off the camcorder. After a short while, turn it on again and restore the connection.
- Connect the camcorder to a different USB port on the computer.
CameraWindow does not start automatically.
CameraWindow does not start automatically on some versions of Mac OS X. In such case, click the CameraWindow icon in the dock to launch the software.

Cannot save recordings on my computer.
When the memory contains too many recordings (Windows – 2,500 or more photos/MP4 scenes, Mac OS – 1,000 or more photos/MP4 scenes), you may not be able to transfer recordings to a computer. Try using a card reader to transfer recordings from the memory card.
HFR72/R70 only: To transfer the recordings in the built-in memory, copy them to the memory card in advance (140).
HFR72/R70: After touching the camcorder's NFC touchpoint to the touchpoint of an NFC-compatible device, the device is not correctly recognized.
- Align the center of the touchpoints on the camcorder and the other device. If there is no reaction, try slightly moving the devices while they are touching.
- The NFC function may be turned off. Set 📄 ➕ [NFC] to [On].



HFR72/R70 Wi-Fi Functions
Refer also to the instruction manual of the access point and other devices you will use.
Cannot connect with the access point.
- Check that the access point is working correctly.
- The effective communication range between the camcorder and access point may vary depending on the strength of the wireless signal. Try using the camcorder closer to the access point.
- To avoid interference, use the camcorder at some distance from devices that emit electromagnetic waves (cordless phones, microwave ovens, etc.).
- Wi-Fi networks with a stealth function that do not broadcast their network name (SSID) will not be detected by the camcorder during the Wi-Fi network setup. Perform the setup manually (☐ 210) or turn off the stealth function of the access point.
Wireless playback on a computer or similar device is not smooth.
- Playback may not be smooth depending on the access point's settings and capabilities. Try using the camcorder closer to the access point and remove any obstructing objects or obstacles between them.
- Connect the computer to the access point using a LAN cable.
- Turn off the wireless functions of nearby wireless devices (Wi-Fi, Bluetooth) other than the computer or similar device being used for playback.
- Switch the wireless access point to IEEE 802.11n. Refer to its instruction manual for details.
Trouble?
- If these do not solve the issue, the cause may be due the device or conditions unique to the surrounding area. Use the supplied High Speed HDMI cable to connect the camcorder to a TV (154).
The wireless connection was interrupted while transferring files.
- Incomplete files may remain at the transfer destination. If incomplete files remain at the transfer destination, check the content and make sure they are safe to delete before deleting them.
- Select [New Files] and perform the file transfer again.
Cannot complete a wireless connection to the camcorder.
- Resetting the camcorder's settings using [Reset All] will reset the camcorder's network name and passwords. Erase the camcorder's previous network settings from the iOS or Android device and connect the device to the camcorder again.
The Playback via Browser screen does not appear correctly on the Web browser.
- The device, operating system or Web browser used may not be supported. Try using a different Web browser or a device with a different OS.
- Enable JavaScript and cookies in your Web browser's settings. For details, refer to the help modules or online documentation of the Web browser used.
Trouble?
List of Messages (in alphabetical order)
HFR72/R70 In the following pages you can find subsections dedicated to messages that appear when using an external hard drive (☐ 272), Wi-Fi functions (☐ 273) or Web services (☐ 278).
Back up recordings regularly
- This message may appear when you turn on the camcorder. In the event of a malfunction, recordings may be lost so save your recordings regularly (☐ 156).
HFR72/R70 Built-in memory error
- The built-in memory could not be read. Contact a Canon Service Center.
HFR72/R70 Built-in memory is full
- The built-in memory is full (☐ in red and [End] appear on the screen). Delete some recordings (☐ 73) to free some space. Alternatively, save your recordings (☐ 156) and initialize the built-in memory (☐ 38).
HFR72/R70 Built-in memory writing error Attempt to recover the data?
- This message will appear the next time you turn on the camcorder if power supply was accidentally interrupted while the camcorder was writing to the built-in memory. Select [Yes] to try to recover the recordings.
HFR72/R70 Cannot access the built-in memory
- There is a problem with the built-in memory. Contact a Canon Service Center.


Trouble?
Cannot communicate with the battery pack. Continue using this battery pack?
- You attached a battery pack that is not recommended by Canon for use with this camcorder.
- If you are using a battery pack recommended by Canon for use with this camcorder, there may be a problem with the camcorder or battery pack. Consult a Canon Service Center.
Cannot convert scenes recorded at 60P
- Scenes that were recorded at 60P cannot be converted to MP4 format or to fast motion scenes (HFR72/R70 only).
Cannot convert the scene
- MP4 scenes whose resolution is smaller than the resolution selected for [Conversion Quality] cannot be converted.
- HFR72/R70 Scenes whose video quality is 4 Mbps or whose frame rate is 24P and scenes recorded using slow & fast motion recording cannot be converted to fast motion scenes.
- Scenes that were recorded with other devices cannot be converted to MP4 format.
HFR72/R70 Cannot copy
- The total size of the scenes you selected to copy exceeds the available space on the memory card. Delete some recordings on the memory card (73) or reduce the number of scenes to copy.
- The memory card already contains the maximum number of AVCHD scenes (3,999 scenes). Delete some scenes (☐ 73) to free some space.
Trouble?
Cannot divide the scene
- The scene could not be divided because the camcorder's internal scene management data log is full. Delete some scenes and photos (73) and try dividing the scene again.
HFR72/R70 Cannot join 24P and 30P scenes to convert them
- Scenes that were recorded using different frame rates cannot be joined to a single scene when converted to MP4 format.
Cannot load canvas
- The canvas file that was saved in the memory is corrupted.
- Canvas data cannot be read from canvas files created using other devices.
Cannot play back
- You may not be able to play back scenes that were recorded with other devices or created or edited on a computer.
- There is a problem with the memory. If this message appears often without apparent reason, contact a Canon Service Center.
HFR72/R70 Cannot play back Cannot access the built-in memory
- There is a problem with the built-in memory. Initialize the built-in memory using the [Complete Initialization] option (☐ 38). If the problem persists, contact a Canon Service Center.
Cannot play back Check the memory card
- There is a problem with the memory card. Initialize the memory card using the [Complete Initialization] option (☐ 38). If the problem persists, use a different memory card.


Trouble?
HFR72/R70 Cannot play the movies in the built-in memory Initialize only using the camcorder
- The camcorder's built-in memory cannot be correctly recognized. Initialize the built-in memory with this camcorder (38).
Cannot play the movies on this memory card
- Movies cannot be played back from a 64 MB or smaller memory card. Use a recommended memory card (☐ 29).
Cannot play the movies on this memory card Initialize only using the camcorder
- The memory card in the camcorder was initialized using a computer. Initialize the memory card with this camcorder (☐ 38).
Cannot record
- You cannot capture video snapshot scenes from scenes recorded or edited using another device.
- There is a problem with the memory. If this message appears often without apparent reason, contact a Canon Service Center.
HFR72/R70 Cannot record Cannot access the built-in memory
- There is a problem with the built-in memory. Save your recordings (156) and initialize the built-in memory using the [Complete Initialization] option (38). If the problem persists, contact a Canon Service Center.
Cannot record Check the memory card
- There is a problem with the memory card. Save your recordings (156) and initialize the memory card using the [Complete Initialization] option (38). If the problem persists, use a different memory card.


Trouble?
HFR72/R70 Cannot record movies in the built-in memory Initialize only using the camcorder
- The camcorder's built-in memory cannot be correctly recognized. Initialize the built-in memory with this camcorder (38).
Cannot record movies on this memory card
- Movies cannot be recorded on a 64 MB or smaller memory card. Use a recommended memory card (☐ 29).
Cannot record movies on this memory card Initialize only using the camcorder
- The memory card in the camcorder was initialized using a computer. Initialize the memory card with this camcorder (☐ 38).
Cannot save the canvas
- Cannot save your [Pens and Stamps] drawings in the memory. Save your recordings (156) and initialize the memory (38).
Cannot trim the scene
- Scenes that were copied to an SDXC card (HFR72/R70 only) and scenes that were recorded or edited with other devices cannot be trimmed with this camcorder.
Charge the battery pack
- Battery pack is exhausted. Charge the battery pack.
Check the connected device.
- The camcorder was connected to a device different from the one selected in the [USB Connection Type] setting. Change the setting according to the device you want to use and connect the camcorder and the device again.


Trouble?
Check the memory card
- Cannot access the memory card. Check the memory card and make sure it is inserted correctly.
- A memory card error occurred. The camcorder cannot record on or read from the memory card. Try removing and reinserting the memory card, or use a different memory card.
- You inserted a MultiMedia Card (MMC) into the camcorder. Use a recommended memory card (see page 29).
- If after the message disappears, SD appears in red, perform the following: Turn off the camcorder and remove and reinsert the memory card. If SD turns back to green you can resume recording/playback. If the problem persists, save your recordings (see page 156) and initialize the memory card (see page 38).
Check whether the lens cover is open
- Slide the lens cover switch down.
Close the memory card slot cover.
- The camcorder's memory card slot cover was opened while the camcorder was connected to the optional CS100 Connect Station. Close the cover.
File name error
- The folder and file numbers have reached their maximum value. Save your recordings and set [File Numbering] to [Reset]. Then, initialize the memory (see page 38) or delete all MP4 movies and photos (see page 73).
Initialize only using the camcorder
- There is a problem with the file system that prevents accessing the memory. Initialize the memory with this camcorder (☐ 38).


Trouble?
LCD Screen has been dimmed. Use the [LCD Backlight] setting to change the brightness.
- Change the ⚪ ➕ [■] ➕ [LCD Backlight] setting to [Normal] or [Bright].
May not be possible to record movies on this memory card.
- You may not be able to record movies on a memory card without a CLASS rating or with one rated CLASS 2. Replace the memory card with one rated CLASS 4, 6 or 10.
HFR72/R70 Mem. Card Number of scenes already at maximum.
- The memory card already contains the maximum number of AVCHD scenes (3,999 scenes); no further scenes can be copied onto the memory card. Delete some scenes (73) to free some space.
Mem. Card Unable to recognize the data.
- The memory card contains scenes recorded using a video configuration that is not supported (PAL or SECAM). Play back the recordings in the memory card with the device originally used to record them.
Memory card cover is open.
- After inserting a memory card, close the memory card slot cover.
Memory card is full.
- Delete some recordings (☐ 73) to free some space or replace the memory card.
Memory card is write-protected.
- The LOCK switch on the memory card is set to prevent accidental erasure. Change the position of the LOCK switch.


Trouble?
Memory card writing error. Attempt to recover the data?
- This message will appear the next time you turn on the camcorder if power supply was accidentally interrupted while the camcorder was writing to the memory card. Select [Yes] to try to recover the recordings. If you inserted a memory card that contains scenes recorded using another device, we recommend that you select [No].
Need to recover files from the memory card. Change the position of the LOCK switch on the memory card.
- This message will appear the next time you turn on the camcorder if power supply was accidentally interrupted while the camcorder was writing on the memory card and later the position of the card's LOCK switch was changed to prevent erasure. Change the position of the LOCK switch.
No memory card
- Insert a compatible memory card into the camcorder (☐ 30).
- The memory card may not be inserted correctly. Insert the memory card all the way into the memory card slot until it clicks.
Not enough available space
- Delete some recordings on the memory card (☐ 73).
- Set the video quality to [Long Play] (LP or 4 Mbps) (78).
Number of scenes already at maximum
- The maximum number of AVCHD scenes (3,999 scenes) has been reached. Delete some scenes (73) to free some space.


Trouble?
Recording was stopped due to insufficient write speed of the memory card.
- The data transfer rate was too high for the memory card in use and recording was stopped. Replace the memory card with one rated CLASS 4, 6 or 10 (CLASS 6 or 10 when recording movies with a video quality of 60P or 35 Mbps).
- After repeatedly recording and deleting scenes (fragmented memory), it will take longer to write data on the memory card and recording may stop. Save your recordings (156) and initialize the memory card using the [Complete Initialization] option (38).
Scene recorded using another device. Cannot divide the scene.
- Scenes that were not recorded with this camcorder cannot be divided with this camcorder.
- Scenes that were edited using software cannot be divided.
Scene recorded using another device. Cannot play back the scene.
- Scenes that were not recorded with this camcorder cannot be played back with this camcorder.
Select the desired scene number.
- A number of scenes have the same recording date but different file control information. This can occur for example when you record movies in the area of the international date line. Select a number to display the corresponding group of scenes.
Some scenes could not be deleted.
- Movies that were protected/edited with other devices cannot be deleted with this camcorder.


Trouble?
Task in progress. Do not disconnect the power source.
- The camcorder is updating the memory. Wait until the operation ends and do not remove the battery pack.
- You may not be able to display photos taken with other devices or image files created or edited on a computer.
To record video on this memory card, it is recommended to use a video quality setting other than [60P Recording].
- When using a memory card rated CLASS 4, you may not be able to record movies using the 60P or 35 Mbps video quality option.
To record video on this memory card, it is recommended to use [Long Play] video quality.
- When using a memory card rated CLASS 2, you may not be able to record movies using a video quality option other than LP or 4 Mbps.
Too many photos and MP4 movies. Disconnect the USB cable.
- Disconnect the USB cable. Try using a memory card reader or decrease the number of photos and movies on the memory card to fewer than 2,500 (Windows), or 1,000 (Mac OS) and then restore the connection.
- HFR72/R70 Copy the photos and MP4 movies to a memory card and try using a card reader.
- If a dialog box appeared on the computer screen, close it. Disconnect the USB cable, and restore the connection after a short while.
Trouble?
Unable to recognize the data
- The camcorder cannot play back scenes recorded using a video configuration that is not supported (PAL or SECAM). Play back the recordings with the device originally used to record them.
Unable to recover data
- Could not recover a corrupted file. Save your recordings (156) and initialize the memory (38).
Using brighter settings on the TV during playback is recommended.
- When playing back scenes recorded in ☐ mode on a TV or external monitor, using a bright picture mode or increasing the brightness of the TV, computer monitor or other screen is recommended.
HFR72/R70 List of Messages for Connecting to an External Hard Drive
Error writing to external hard drive
- This message will appear the next time you turn on the camcorder if power supply was accidentally interrupted while the camcorder was writing to the external hard drive. Select [Yes] to try to recover the recordings.
Quickly erases all files and deletes partitions from the external hard drive. Initialize?
- If you initialize the hard drive, all data it contains will be lost, including any partitioned drives. If necessary, back up data and then initialize the hard drive with the camcorder.


HFR72/R70 List of Messages for Wi-Fi Functions
Refer also to the instruction manual of the access point and other devices you will use.
Another user is already controlling the camcorder. Try again later.
- This message appears on the screen of the Wi-Fi device. Multiple Wi-Fi devices are trying to connect with the camcorder. Make sure only one Wi-Fi device is trying to connect and then touch Retry.
Cannot transfer files.
- There was a problem when transferring files to the optional CS100 Connect Station. Check if any errors have occurred with the connect station. For details, refer to the instruction manual of the CS100.
- Try turning off the camcorder and connect station. After a moment, turn them on again and restore the connection. If the problem persists, contact a Canon Service Center.
Closing the LCD panel turns off the camcorder. File transfers in progress will be interrupted.
- Keep the camcorder's LCD panel open while a wireless file transfer to the optional CS100 Connect Station is in progress.
Incorrect Wi-Fi password.
- The password (encryption key) is case sensitive so make sure to enter it correctly.
Invalid port number. Perform the setting again.
- The port number entered cannot be used. In the settings for the Monitor while Out function (☐ 182) change the port number to a port that does not conflict with other devices.




Trouble?
IP address conflict
- Change the IP address of the camcorder or of any conflicting device to avoid the same IP address being assigned to multiple devices on the same network.
Memory card cover is open
- The memory card slot cover was opened while the memory card was being accessed. Stop the Wi-Fi function in use and end the Wi-Fi connection.
Multiple access points detected. Try the operation again.
- There are multiple access points sending out a WPS signal at the same time. Try the operation again later or perform setup using the [WPS: PIN Code] or [Search for Access Points] option (☐ 206).
No access points found
- The access point set in the camcorder could not be found.
- To avoid interference, use the camcorder at some distance from devices that emit electromagnetic waves (cordless phones, microwave ovens, etc.).
- Make sure that you use the correct access point's network name (SSID) in the camcorder's Wi-Fi settings (209).
- If the access point is using MAC address filtering, enter the camcorder's MAC address in the access point's configuration screen.
The access point is not compatible with UPnP.
- An access point compatible with UPnP (Universal Plug and Play) was not found in the connected network. You must use an access point compatible with UPnP. If your access point is compatible, make sure UPnP is activated.


Trouble?
Unable to access configuration files.
- Turn off the camcorder. After a short while, turn it on again. If the problem persists, contact a Canon Service Center.
Unable to complete WPS.
- Turn off the camcorder and access point. After a short while, turn them on again and try again. If the problem persists, perform setup using the [Search for Access Points] option (☐ 206).
Unable to complete WPS. Try the operation again.
- Some access points require pressing and holding the Wi-Fi Protected Setup (WPS) button. For details, refer to the instruction manual of your access point.
- Make sure to touch [OK] on the camcorder's screen within 2 minutes of activating the Wi-Fi Protected Setup signal on the access point, whether by pressing the button or by entering the PIN code.
Unable to connect.
- To avoid interference, use the camcorder at some distance from devices that emit electromagnetic waves (cordless phones, microwave ovens, etc.).
Unable to connect to the Connect Station.
- An error occurred while trying to pair the camcorder with the CS100 Connect Station. Check that the connect station is ready to establish a connection and carefully hold the camcorder close to the connect point on the connect station again (☐ 194).
Trouble?
Unable to connect to the server
- The camcorder could not access the external server used for the Monitor while Out function. Make sure the access point is correctly connected to the Internet.
- Check that ⚫ ➕ Date/Time is set to the correct date and time.
Unable to obtain a global IP address.
- The access point to which the camcorder is connected has not been assigned a global IP address. Check the WAN settings of the broadband router to see if a global IP address has been assigned.
- Several wireless routers are connected to the same home network. Leave only one wireless router to serve as the access point.
Unable to obtain an IP address
- If you are not using a DHCP server, connect using the [Manual Setup] option and enter the IP address using the [Manual] option (☐ 210).
- Turn on the DHCP server. If it is already on, make sure it is functioning properly.
- Make sure the address range for the DHCP server is sufficient.
- If you are not using a DNS server, set the DNS address to [0.0.0.0].
- Set the DNS server's IP address in the camcorder.
- Turn on the DNS server. If it is already on, make sure it is functioning properly.
- Make sure that the DNS server's IP address and the name for that address are correctly configured.
- If you are using a wireless gateway router, make sure all of the devices in the network, including the camcorder, are configured with the correct gateway address.


Trouble?
Wi-Fi authentication unsuccessful
- Make sure the camcorder and access point are using the same authentication/encryption method and password (encryption key).
- If the access point is using MAC address filtering, enter the camcorder's MAC address in the access point's configuration screen.
Wi-Fi cannot be used while the wireless microphone is attached
- The camcorder's Wi-Fi functions cannot be used while the optional WM-V1 Wireless Microphone is connected to the camcorder. Disconnect the microphone from the MIC terminal and turn it off.
Wi-Fi connection terminated
- To avoid interference, use the camcorder at some distance from devices that emit electromagnetic waves (cordless phones, microwave ovens, etc.). - The camcorder may not be able to connect to the access point if too many devices are accessing it. Wait awhile and try again to establish the connection.
Wi-Fi error. Incorrect authentication method.
- Make sure the camcorder and access point are using the same authentication/encryption method and password (encryption key).
- If the access point is using MAC address filtering, enter the camcorder's MAC address in the access point's configuration screen.
Wi-Fi error. Incorrect encryption method.
- Make sure the camcorder and access point are using the same authentication/encryption method.
- If the access point is using MAC address filtering, enter the camcorder's MAC address in the access point's configuration screen.


Trouble?
Wireless communication is not working correctly
- To avoid interference, use the camcorder at some distance from devices that emit electromagnetic waves (cordless phones, microwave ovens, etc.).
- Turn off the camcorder and access point. After a short while, turn them on again and perform the Wi-Fi network setup again. If the problem persists, contact a Canon Service Center.
HFR72/R70 List of Messages for Web Services
Check network settings
- The network settings in the camcorder are not correctly configured. Check the connection point, network name (SSID), and other network settings.
Connect to a computer and use the dedicated software to set again
- An error occurred when connecting to the CANON iIMAGE GATEWAY server. Check the settings saved on CANON iIMAGE GATEWAY and set them again in the camcorder.
Connect to a computer and use the dedicated software to set up. This service may not be available in your region.
- To use Web services, set in the camcorder the settings saved on CANON iIMAGE GATEWAY. Install CameraWindow in your computer and configure the settings using CANON iIMAGE GATEWAY.
Insufficient space on server
- You have exceeded the amount of data you can save on the CANON iIMAGE GATEWAY server. Delete some data to free up space.


Trouble?
Movie must be less than X min.
- You attempted to upload a movie whose length exceeds the maximum length allowed by the Web service (the maximum length differs according to the Web service). Shorten the movie and try sending it again.
Server busy. Try again later.
- The CANON iMAGE GATEWAY server is busy due to a high number of users trying to connect to the server. End the Wi-Fi connection and try again later.
This image cannot be sent.
- You attempted to upload a recording whose file type or file size is not supported by the selected Web service. Check the recording before sending.
Try again.
- There was a problem in the communication with the CANON iMAGE GATEWAY server or the server is temporarily down. Try connecting the camcorder to the server again. If the same error occurs, wait awhile and try again.
Unable to connect to the server.
- The camcorder was not able to connect to the CANON iMAGE GATEWAY server. Connect the access point to which the camcorder is connected to the Internet.
Handling Precautions
Camcorder
Be sure to observe the following precautions to ensure maximum performance.
- Save your recordings periodically. Make sure to transfer your recordings to an external device, such as a computer, digital video recorder or the optional CS100 Connect Station (156), and save them on a regular basis. This will protect your important recordings in case of damage and create more free space on the memory. Canon shall not be liable for any data loss.
- Do not carry the camcorder by the LCD panel. Be careful when closing the LCD panel.
- Handle the touch screen with care. Do not apply excessive force and do not use ballpoint pens or other hard-tipped tools to operate the touch screen. This may damage the touch screen's surface.
- Do not allow contact with metallic objects. If metallic objects come in contact with the touch screen, this may inadvertently cause incorrect operation of the camcorder.
- Do not hold the camcorder in the same posture for long periods of time as this may cause low-temperature contact burns. Even if the camcorder does not feel too hot, prolonged contact with the same body part may cause skin redness or blistering. The use of a tripod is recommended for people with circulation problems or very sensitive skin, or when using the camcorder in very hot places.
Do's and Don'ts
- Do not leave the camcorder in places subject to high temperatures, such as the inside of a car parked under direct sunlight, or high humidity.
- Do not use the camcorder near strong electromagnetic fields such as above TVs or near plasma TVs.
- HFR72/R70 Do not use the camcorder's Wi-Fi functions inside hospitals or medical clinics. In addition, do not use them near medical equipment or sensitive electronic devices as it may affect their performance. In the case of pacemakers, keep the camcorder at least 22 cm (8.7 in.) away from the device.
Regarding the use of Wi-Fi functions aboard aircraft, be sure to follow the instructions of the flight crew/cabin attendants.
- HFR72/R70 The camcorder's Wi-Fi functions may be subject to interference from devices such as cordless phones and microwave ovens. Keeping as much distance as possible from these devices or using the camcorder's Wi-Fi functions at a different time of day may reduce such interference.
- Do not point the camcorder toward an intense light source, such as the sun on a sunny day or an intense artificial light source. Doing so may damage the image sensor or the camcorder's internal components. When not using the camcorder, keep the lens cover closed.
- Do not use or store the camcorder in dusty or sandy places. The camcorder is not waterproof – avoid also water, mud or salt. If any of the above should get into the camcorder it may damage the cam-corder and/or the lens.
- Be careful of heat generated by lighting equipment.
- Do not disassemble the camcorder. If the camcorder does not function properly, consult qualified service personnel.
Do's and Don'ts
- Handle the camcorder with care. Do not subject the camcorder to shocks or vibration as this may cause damage.
- When mounting the camcorder on a tripod, make sure that the tripod's fastening screw is shorter than 5.5 mm (0.2 in.). Using other tripods may damage the camcorder.

- When recording movies, try to get a calm, stable picture. Excessive camcorder movement while shooting and extensive use of fast zooms and panning can result in jittery scenes. In extreme cases, the playback of such scenes may result in visually induced motion sickness. If you experience such a reaction, stop the playback immediately and take a rest break as necessary.
Long-Term Storage
If you do not intend to use the camcorder for a long time, store it in a place free of dust, in low humidity, and at temperatures not higher than 30 °C (86 °F).




Battery Pack
DANGER!
Treat the battery pack with care.
- Keep it away from fire (or it might explode).
- Do not expose the battery pack to temperature higher than 60 °C (140 °F). Do not leave it near a heater or inside a car in hot weather.
- Do not try to disassemble or modify it.
- Do not drop it or subject it to shocks.
- Do not get it wet.
- Dirty terminals may cause a poor contact between the battery pack and the camcorder or battery charger. Wipe the terminals with a soft cloth.
Long-Term Storage
- Store battery packs in a dry place at temperatures no higher than 30 °C (86 °F).
- To extend the battery life of the battery pack, discharge it completely before storing it.
- Charge and discharge all your battery packs fully at least once a year.
■Remaining battery time
When you are using a battery pack that is compatible with Intelligent System, if the remaining battery time displayed is not correct, charge the battery pack fully. Still, the correct time may not be displayed after a large number of repeated uses, if a fully charged battery pack is left unused, or if a battery pack is used for long periods of time in high temperatures. Use the time shown on the screen as an approximation.
Memory Card
- We recommend backing up the recordings on the memory card onto your computer. Data may be corrupted or lost due to memory card defects or exposure to static electricity. Canon shall not be liable for lost or corrupted data.
- Do not touch or expose the terminals to dust or dirt.
- Do not use memory cards in places subject to strong magnetic fields.
- Do not leave memory cards in places subject to high humidity and high temperature.
- Do not disassemble, bend, drop, or subject memory cards to shocks and do not expose them to water.
- Check the direction before inserting the memory card. Forcing a memory card into the slot if it is not correctly oriented may damage the memory card or the camcorder.
- Do not attach any labels or stickers on the memory card.
Built-in Rechargeable Lithium Battery
The camcorder has a built-in rechargeable lithium battery to keep the date/time and other settings. The built-in lithium battery is recharged while you use the camcorder; however, it will discharge completely if you do not use the camcorder for about 3 months.
To recharge the built-in lithium battery: Connect the compact power adapter to the camcorder and leave it connected with the camcorder off. The built-in lithium battery will be fully charged after about 24 hours.
Disposal
When you delete movies or initialize the memory, only the file allocation table is altered and stored data is not physically erased. When you dispose of the camcorder or memory card or give either to another person, initialize the camcorder's built-in memory (HFR72/R70 only) or memory card using the [Complete Initialization] option (38). Fill it up with unimportant recordings, and then initialize it again using the same option. This makes recovering the original recordings very difficult.
Maintenance/Others
Cleaning
Camcorder Body
- Use a soft, dry cloth to clean the camcorder body. Never use chemically treated cloths or volatile solvents such as paint thinner.
Lens
- If the lens surface is dirty, autofocus may not work properly.
- Remove any dust or dirt particles using a non-aerosol type blower brush. Then, use a clean, soft lens-cleaning cloth to gently wipe the lens. Never use tissue paper.
LCD Touch Screen
- Clean the LCD touch screen using a clean, soft lens-cleaning cloth.
- Condensation may form on the surface of the screen when the temperature changes suddenly. Wipe it with a soft dry cloth.
Condensation
Moving the camcorder rapidly between hot and cold temperatures may cause condensation (water droplets) to form on its internal surfaces. Stop using the camcorder if condensation is detected. Continued use may damage the camcorder.
Condensation may form in the following cases:
- When the camcorder is moved quickly from cold to warm places
- When the camcorder is left in a humid room



- When a cold room is heated rapidly
To avoid condensation
- Do not expose the camcorder to sudden or extreme changes in temperature.
- Remove the memory card and battery pack. Then, place the camcorder in an airtight plastic bag and let it adjust gradually to temperature changes before removing it from the bag.
When condensation is detected
The precise time required for water droplets to evaporate will vary depending on the location and weather conditions. As a general rule, wait for 2 hours before resuming use of the camcorder.
Using the Camcorder Abroad
Power Sources
You can use the compact power adapter to operate the camcorder and to charge battery packs in any country with power supply between 100 and 240 V AC, 50/60 Hz. Consult a Canon Service Center for information on plug adapters for overseas use.
Playback on a TV Screen
You can only play back your recordings on TVs compatible with the NTSC system or 60-Hz digital TV broadcasts. These are used in the following regions/countries:
Maintenance/Others
Americas: All of North America and Central America; most Caribbean islands (except in French territories like Guadeloupe and Martinique); most of South America (except in Argentina, Brazil and Uruguay). Asia: Only in Japan, the Philippines, South Korea, Taiwan and Myanmar. Oceania: US territories (Guam, American Samoa, etc.) and some Pacific islands like Micronesia, Samoa and Tonga.
Optional Accessories
The following optional accessories are compatible with this camcorder, but their availability may differ from area to area. Select accessories are described in more detail in the following pages. For the latest information, please visit your local Canon Web site.

BP-718, BP-727 Battery Pack
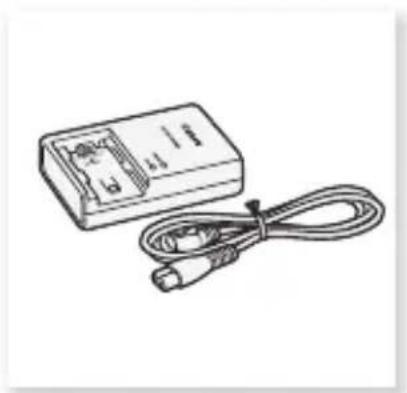
CG-700 Battery Charger, CA-110

Compact Power Adapter*

HTC-100 High Speed HDMI Cable

STV-250N Stereo Video Cable

IFC-400PCU USB Cable


General Information

UA-100 USB Adapter** WM-V1

Wireless Microphone

CT-V1 Camera Pan Table**

CS100 Connect Station

SC-2000 Soft Carrying Case
* CA-110E (including power cord) in Asia. ** This accessory is used with a function available only on the HFR72/R70.
Call or visit your local retailer/dealer for genuine Canon video accessories. You can also obtain genuine accessories for your Canon camcorder by calling: 1-800-828-4040, Canon U.S.A. Information Center.


Use of genuine Canon accessories is recommended.
This product is designed to achieve excellent performance when used with genuine Canon accessories. Canon shall not be liable for any damage to this product and/or accidents such as fire, etc., caused by the malfunction of non-genuine Canon accessories (e.g., a leakage and/or explosion of a battery pack). Please note that this warranty does not apply to repairs arising out of the malfunction of non-genuine Canon accessories, although you may request such repairs on a chargeable basis.
Battery Packs
When you need extra battery packs, select one of the following models: BP-718 or BP-727.
When you use battery packs bearing the Intelligent System mark, the camcorder
will communicate with the battery and display the remaining usage time (accurate to 1 minute). You can only use and charge these battery packs with camcorders and chargers compatible with Intelligent System.
WM-V1 Wireless Microphone
Reliably record rich sound even when shooting subjects at a distance. The transmitter is conveniently equipped with a clothing clip and the receiver can be attached to the camcorder's grip belt.


General Information
UA-100 USB Adapter
HFR72/R70 Allows you to connect to the camcorder an external hard drive or similar storage device with a standard-A cable. After doing so, you can save an entire memory onto the device. Check in advance the USB cable supplied with your

SC-2000 Soft Carrying Case
A handy camcorder bag with padded compartments and plenty of space for accessories.
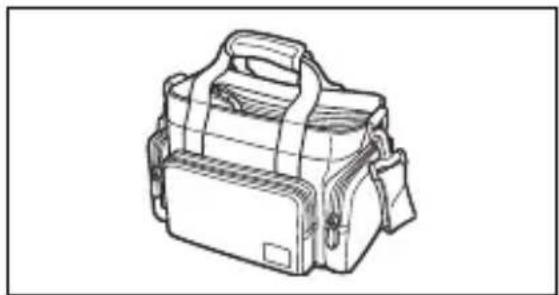
This mark identifies genuine Canon video accessories. When you use Canon video equipment, we recommend Canon-brand accessories or products bearing the same mark.


Specifications
VIXIA HF R72 / VIXIA HF R70 / VIXIA HF R700
◆ — Values given are approximate figures.
System
- Recording System
Movies:
- AVCHD format, compatible with AVCHD Ver. 2.0 Video: MPEG-4 AVC/H.264, Audio: Dolby Digital 2ch
- MP4 format Video: MPEG-4 AVC/H.264, Audio: MPEG-4 AAC-LC (2ch)
Photos:
DCF (Design rule for Camera File system), compatible with Exif* Ver. 2.3
Image compression: JPEG
* This camcorder supports Exif 2.3 (also called “Exif Print”). Exif Print is a standard for enhancing the communication between camcorders and printers. By connecting to an Exif Print-compliant printer, the camcorder’s image data at the time of shooting is used and optimized, yielding extremely high quality prints.
- Recording Media
- HFR72/R70 Built-in memory: HFR72 32 GB, HFR70 16 GB
- SD, SDHC (SD High Capacity) or SDXC (SD eXtended Capacity) memory card (not included)
For approximate recording times, refer to the Reference Tables (298).


- Image Sensor
1/4.85-in. CMOS, 3,280,000 pixels
Effective pixels:
2,070,000 pixels (1920 x 1080)
When advanced zoom is on:
1920 x 1080 (wide angle), 1280 x 720 (full telephoto)
- LCD Touch Screen
3 in., TFT color, 230,000 dots, capacitive touch screen operation
- Microphone: Stereo electret condenser microphone
- Lens
f=2.8-89.6 mm, F/1.8-4.5, 32x optical zoom, 57x advanced zoom 35 mm equivalent:
38.5 - 1,232 mm
32.5 - 1,853 mm (when advanced zoom is on)
- Lens Configuration
10 elements in 7 groups, 1 aspheric element
• Filter Diameter: 43 mm
• AF System: Autofocus (TTL) or manual focus
• Minimum Focusing Distance
1 cm (0.39 in.) at full wide angle, 1 m (3.3 ft.) throughout the zoom range
When tele macro is on: 50 cm (1.6 ft.) at full telephoto
- White Balance
Auto white balance, custom white balance or preset white balance settings: [Daylight], [Tungsten]


General Information
• Minimum Illumination
0.4 lx ([Low Light] Special Scene mode, shutter speed at 1/2) 5 lx ([Programmed AE] shooting mode, auto slow shutter [On], shutter speed at 1/30)
- Recommended Illumination: 100 lx or more
- Image Stabilization
Optical system (lens shift) with electronic compensation
• Size of Video Recordings
AVCHD movies:
60P, MXP, FXP: 1920 x 1080 pixels; LP: 1440 x 1080 pixels
MP4 movies:
35 Mbps, 24 Mbps, 17 Mbps: 1920 x 1080 pixels;
4 Mbps: 1280 x 720 pixels
- Size of Photos
1920 x 1080 pixels
1280 x 720 pixels (only when recording MP4 movies at 4 Mbps)
Terminals
- AV OUT/Terminal
∅ 3.5 mm 4-pole minijack, output only (dual purpose terminal also for headphones stereo output)
Video: 1 Vp-p / 75 Ω unbalanced
Audio: -10 dBV (47 kΩ load) / 3 kΩ or less
- USB Terminal: mini-AB, Hi-Speed USB
- HDMI OUT Terminal: HDMI Mini Connector, output only




- MIC Terminal
∅ 3.5 mm stereo minijack
-64 dBV (with 600 Ω microphone) / 5 kΩ or more
HFR72/R70 Wi-Fi
- Wireless Standard
Complies with the IEEE 802.11b/g/n protocol
- Connection Methods
Wi-Fi Protected Setup (WPS), search for access points, manual, NFC pairing (with compatible devices)
• Wireless Frequency: 2.4 GHz
• Supported Channels: 1 - 11
- Encryption Methods: WEP-64/WEP-128, TKIP/AES
Power/Others
• Power Supply (rated)
3.6 V DC (battery pack), 5.3 V DC (compact power adapter)
- Power Consumption (MP4 movies at 17 Mbps with autofocus, normal brightness)
2.9 W
- Operating Temperature♦: 0 – 40 °C (32 – 104 °F)
- Dimensions [H x W x D] (excluding the grip belt)
53 × 58 × 116 mm (2.1 × 2.3 × 4.6 in.)
- Weight (camcorder body only)
HFR72/R70 240 g (8.5 oz.), HFR700 235 g (8.3 oz.)



CA-110 Compact Power Adapter
• Power Supply: 100 - 240 V AC, 50/60 Hz - Rated Output / Consumption 5.3 V DC, 1.5 A / 17 VA (100 V) - 23 VA (240 V) - Operating Temperature♦: 0 - 40 °C (32 - 104 °F) - Dimensions ♦: 49 x 27 x 79 mm (1.9 x 1.1 x 3.1 in.) - Weight ♦: 110 g (3.9 oz.)
BP-727 Battery Pack
- Battery Type: Rechargeable lithium ion battery
- Rated Voltage: 3.6 V DC
- Operating Temperature♦: 0 – 40 °C (32 – 104 °F)
- Battery Capacity 2,760 mAh (typical); 9.7 Wh / 2,685 mAh (minimum)
- Dimensions ♦: 30.3 x 34.2 x 40.1 mm (1.2 x 1.3 x 1.6 in.)
- Weight ♦: 60 g (2.1 oz)
Weight and dimensions are approximate. Errors and omissions excepted.
The information in this manual is verified as of January 2016. Specifications and outer appearance are subject to change without previous notice.
Reference Tables
Approximate recording times
| Movie format, quality and resolution | Memory capacity1 | |||
| 8 GB 16 | GB 32 GB 64 | GB | ||
| AVCHD 60P(1920 x 1080) | 35 min. 1 hr. | 15 min. 2 hr. | 30 min. 5 hr. | 5min. |
| MP4 35 Mbps(1920 x 1080) | 30 min. 1 hr. | 2 hr. 4 hr. | ||
| AVCHD MXP,MP4 24 Mbps(1920 x 1080) | 40 min. 1 hr. | 25 min. 2 hr. | 55 min. 5 hr. | 55 min. |
| AVCHD FXP,MP4 17 Mbps(1920 x 1080) | 1 hr. 2 hr. | 5 min. 4 hr. | 10 min. 8 hr. | 20 min. |
| AVCHD LP(1440 x 1080) | 3 hr. 6 hr. | 5 min. | 12 hr.15 min. 2 | 24 hr.30 min. 2 |
| MP4 4 Mbps(1280 x 720) | 4 hr. 20 min. | 8 hr. 40 min. | 17 hr.20 min. 2 | 34 hr.45 min. 2 |
1 Can refer to a memory card or the built-in memory (HFR72/R70 only). However, the built-in memory contains music files and image files (image mix frames), so actual recording times may be shorter than the listed nominal values. 2 A single scene can be recorded continuously for 12 hours; at that point, the camcorder will stop for about 3 seconds. After that, recording will continue as a separate scene.
Reference Tables
Approximate number of photos available on a 4 GB memory card
The numbers given in the following table are approximate and vary according to recording conditions and the subject.
| Photo size | Number of photos |
| 1920 x 1080 2,700 | |
| 1280 x 720* 6,100 |
* Photos recorded when the video format is set to MP4 and the video quality is set to 4 Mbps.
Charging times
The charging times given in the following table are approximate and vary according to charging conditions and initial charge of the battery pack.
| Charging conditions | Battery pack | |
| BP-718 BP-727 | ||
| Using the camcorder 5 hr. 35 min. | 7 hr. 45 min. | |
| Using the optional CG-700 Battery Charger | 3 hr. 40 min. 5 hr. | 15 min. |
Approximate usage times
Recording and playback times given in the following table are approximate and were measured under the following conditions:
- A fully charged battery pack was used.
- Recording in FXP mode (AVCHD format) or at 17 Mbps (MP4 format) in the built-in memory (HFR72/R70 only). For operations on the memory card, usage times may be up to approx. 5 minutes shorter.
- LCD at normal brightness.
- Typical recording times measure recording with repeated operations such as start/stop recording and power on/off.
Actual times will vary according to the recording configuration used and charging, recording or playback conditions. The effective usage time of the battery pack may decrease when recording in cold surroundings, when using the brighter screen settings, etc.
| Battery pack | Movie format (Video quality) | Recording (maximum) | Recording (typical) | Playback |
| BP-718 | AVCHD (FXP) 1 | 10 min. 65 min. | 175 min. | |
| MP4 (17 Mbps) | 120 min. 65 min. | 175 min. | ||
| BP-727 | AVCHD (FXP) 1 | 65 min. 95 min. | 260 min. | |
| MP4 (17 Mbps) | 180 min. 100 min. | 265 min. |
Downloading Music Files and Image Files (Image Mix Frames)
Canon offers for download music files for use as background music and image files (image mix frames) for the image mix function. Access the following Web site, click on your country/region and follow the onscreen instructions to download the files.
www.canon.com/icpd
About the music files
The specifications of the music files compatible with the camcorder are as follows.
Audio encoding: Linear PCM
Audio sampling: 48 kHz, 16 bits, 2 channels
Minimum length: 1 second
File type: WAV
- HFR72/R70 3 music files come pre-installed in the built-in memory under the following folder.
CANON\MY_MUSIC\
- To play back recordings from a memory card with background music, use Transfer Utility LE to transfer the music files from your computer to the following folder on the memory card that contains the recordings.
CANON\PRIVATE\MY_MUSIC\
- The camcorder can recognize music files named MUSIC_01.WAV to MUSIC_99.WAV.


About the image files for the Image Mix function
The specifications of image files that can be used with the image mix function are as follows.
Image size: 1920 x 1080 pixels
File type: Baseline JPEG
Color sampling: 4:2:2 or 4:2:0
- To use the image mix function while recording on a memory card, use a card reader to copy the image files from your computer to the following folders on the memory card, depending on the shooting mode you want to use.
Image mix frames that can be used only in 😊 mode:
CANON\PRIVATE\MY_PICT\BABY\
Image mix frames that can be used only in other modes:
CANON\PRIVATE\MY_PICT\
- The camcorder can recognize image files named MIX_01.JPG to MIX_99.JPG.

Index
60P recording.... 78
A
Abroad, using the camcorder 287
Aspect ratio of a connected TV (TV type).... 226
Audio recording level...... 239
Audio scenes....120
AUTO mode 56
Auto slow shutter 221
Automatic backlight correction 221
AV OUT/Ω terminal ...150, 152
B
Baby (shooting mode)...... 84
Baby album.... 64
Background music.....129, 134
Battery pack Battery information ......231
Charging 25
Remaining charge indicator....249
Beach (Special Scene mode)....88
Built-in backup battery .....285
C
Camera pan table* ......187
CameraAccess plus*......177
CameraWindow ( download )....159
CANON iMAGE GATEWAY * 196
Changing a scene's thumbnail image ....139
Chroma key 103
Cinema (shooting mode)......86
* HFR72/R70 only.
Cinema-look filters .....86, 143
Condensation 286
Connect Station* ......163, 194
Connections to external devices...... 151
Converting scenes to fast motion (time-lapse) scenes* 147 to MP4/smaller MP4 scenes 143
Copying recordings to a memory card* 140
D
Date and time 33
Decoration 95
Deleting recordings.... 73
Dividing scenes 136
Dual recording* 81
E
Edit menu 240
Error messages 262
Exposure 111
Exposure compensation....111
External hard disk* ..... 164
External microphone ..... 123
F
Face detection .....106
Facebook 192, 196
Faders....109
File numbering......232
Fireworks (Special Scene mode)....88
FlashAir cards .....234
Flicker reduction .....221
Focus....113
Folder name......232
Frame rate....117
Framing assistance......61
G
Grabbing frames/Capturing snapshot scenes from a movie ....126
Grip belt....20
H
HDMI OUT terminal ... 150, 151
Headphones....121
Highlight Priority (shooting mode)......85
Home menu...... 42, 217
* HFR72/R70 only. ** HFR700 only.
I
Image mix 101
Image mix frames ( download) ...... 301
Image stabilizer ...... 222
Index screen button 66
Info panel....53, 244
Initializing the memory ..... 38
Intelligent IS...... 58
L
Language 33
LCD screen brightness ..... 225
LCD touch screen...... 40
Locking files 68
Low light (Special Scene mode) 88
M
MAC address.... 234
Main Functions menu ...... 236
Maintenance.... 286
Markers 224
Media Server * 203
Memory card ......29, 284
Memory save * 164
MIC terminal 123
Monitor from Home*...... 178
Monitor while Out*......181
Movie format (AVCHD/MP4)....78
Movie Uploader* ......192
Music files (download) ......301
N
NFC (near field communication)* ..... 180, 194
Night Scene (Special Scene mode)....88
Notification sounds......231
0
Onscreen icons ......241
Other Settings menus 45, 218
P
P (Programmed AE shooting mode)....91
Playback Movies....64 Photos....70
Playback via Browser*......189
Portrait (Special Scene mode)....88
Power saving ....52
Powered IS.... 238
Pre-recording 238
R
Recording
Movies.... 50
Photos.... 54
Recording time.... 298
Reference tables (charging, usage and recording times, etc.) 298
Relay recording * 81
Remote Control+ Streaming* 177
Resetting all camcorder settings 234
S
Saving recordings...... 156
Scene (shooting mode) ...... 88
SCN (Special Scene shooting mode) 88
Selecting the memory* for playback.... 66 for recording.... 80
Self timer 220
Serial number 22
Shooting mode 82
Shooting mode button...... 82
Slideshow....134
Slow & fast motion recording....92
Smart AUTO 56
Snow (Special Scene mode)....88
Sports (Special Scene mode)....88
Spotlight (Special Scene mode)....88
Sunset (Special Scene mode)....88
T
Tele macro 118
Telephoto....59
Time zone/DST......37
Timeline 132
Touch AE 112
Touch AF 114
Touch screen operations ....40
Transfer Utility LE (download)......158
Trimming scenes......137
Tripod....282
Troubleshooting......250
Turning off notification sounds....231
* HFR72/R70 only.
U
Uploading recordings to the Web* ......192, 196
USB terminal .....150, 153
V
Video quality.... 78
Video snapshot ....105, 126
View assistance (for mode) ....
Volume...... 67
W
Web services* ......198
White balance .....115
Wide angle ....59
Wi-Fi functions* ......171
Y
YouTube* 192, 196
Z
230om
Framing assistance......61
Zoom speed ......220
Zoom type....237
USA
CANON CONSUMER DIGITAL VIDEO EQUIPMENT LIMITED WARRANTY FOR THE UNITED STATES
The limited warranty set forth below is given by Canon U.S.A., Inc. (“Canon USA”) with respect to Canon Consumer Digital Video Equipment (the “Equipment”) purchased in the United States. This limited warranty is only effective upon presentation of your Bill of Sale or other proof of purchase.
The Equipment is warranted under normal, non-commercial, personal use, against defective materials or workmanship as follows:
Parts: Defective parts will be exchanged for new parts or comparable rebuilt parts for a period of ONE YEAR from the date of original purchase, except for a defective Video Head, which will be exchanged for a period of three months from the date of purchase.
Labor: For a period of ONE YEAR from the date of original purchase, labor will be provided free of charge by our factory service centers or designated service facilities located in the United States.
When returning Equipment under this warranty, you must pre-pay the shipping charges, and you must enclose the Bill of Sale or other proof of purchase with a complete explanation of the problem. During the ONE-YEAR warranty period, repairs will be made and the Equipment will be return-shipped to you free of charge. For repairs after the warranty period is over, you will be given an estimate of the cost of repair and an opportunity to approve or disapprove of the repair expense before it is incurred. If you approve, repairs will be made and the Equipment will be return-shipped to you. (shipping charges apply). If you disapprove, we will return-ship the equipment at no charge to you.
Non-Canon brand peripheral equipment and software which may be distributed with, or factory loaded on, the Equipment, are sold “AS IS” without warranty of any kind by Canon USA, including any implied warranty regarding merchantability or fitness for a particular purpose. The sole warranty with respect to such non-Canon brand items is given by the manufacturer or producer thereof. If the Equipment contains a hard disk drive, Canon USA recommends that data stored on that drive be duplicated or backed up to prevent its loss in the event of failure or other malfunction of such drive.
Canon USA shall have no responsibility under this limited warranty for use of the Equipment in conjunction with incompatible peripheral equipment and incompatible software.
In order to obtain warranty service, contact the authorized Canon retail dealer from whom you purchased the Equipment or call the CANON INFORMATION CENTER AT 1-800-OK-CANON). You will be directed to the nearest service facility for your Equipment.
This Limited Warranty covers all defects encountered in normal use of the Equipment and does not apply in the following cases:
A) Loss or damage to the Equipment due to abuse, mishandling, accident, improper maintenance, or failure to follow operating instructions; B) If the Equipment is defective as a result of leaking batteries, sand, dirt, or water damage; C) If defects or damages are caused by the use of unauthorized parts or by service other than by Canon USA's factory service centers or authorized service facilities;


D) If the Equipment is used for commercial or industrial use.
This Limited Warranty does not cover cabinet (exterior finish), video cassette tape, head cleanings, nor does it apply to Equipment purchased outside the United States. This warranty does not cover units sold to rental firms, military operations, hotels, schools, hospitals, or for other commercial, industrial, or institutional applications. These uses are covered only by such specific warranty as Canon may issue with such sales.
This Limited Warranty does not apply to accessories or consumables for the Equipment, which are sold "AS IS", without warranty of any kind by Canon USA.
Please retain this warranty card and your Bill of Sale as a permanent record of your purchase. This card is most important in order to be sure you are contacted right away should there be a safety inspection, modification, or product recall under applicable laws or regulations.
NO IMPLIED WARRANTY, INCLUDING MERCHANTABILITY AND FITNESS FOR A PARTICULAR PURPOSE, APPLIES TO THIS EQUIPMENT AFTER THE APPLICABLE PERIOD OF EXPRESS WARRANTY OR GUARANTY, EXCEPT AS MENTIONED ABOVE. ANY WARRANTY OR GUARANTY GIVEN BY ANY PERSON, FIRM, OR CORPORATION WITH RESPECT TO THIS EQUIPMENT SHALL NOT BIND THE UNDERSIGNED (SOME STATES DO NOT ALLOW LIMITATIONS ON HOW LONG AN IMPLIED WARRANTY LASTS, SO THE ABOVE LIMITATION OR EXCLUSION MAY NOT APPLY TO YOU). CANON USA SHALL NOT BE LIABLE FOR LOSS OF REVENUES OR PROFITS, EXPENSE FOR SUBSTITUTE EQUIPMENT OR SERVICE, STORAGE CHARGES, LOSS OR CORRUPTION OF DATA, INCLUDING WITHOUT LIMITATION, LOSS OR CORRUPTION OF DATA STORED ON THE EQUIPMENT'S HARD DRIVE, OR ANY OTHER SPECIAL, INCIDENTAL, OR CONSEQUENTIAL DAMAGES CAUSED BY THE USE, MISUSE, OR INABILITY TO USE THE EQUIPMENT, REGARDLESS OF THE LEGAL THEORY ON WHICH THE CLAIM IS BASED, AND EVEN IF CANON USA HAS BEEN ADVISED OF THE POSSIBILITY OF SUCH DAMAGES. NOR SHALL RECOVERY OF ANY KIND AGAINST CANON USA BE GREATER THAN THE PURCHASE PRICE OF THE EQUIPMENT SOLD BY CANON USA AND CAUSING THE ALLEGED DAMAGE. WITHOUT LIMITING THE FOREGOING, YOU ASSUME ALL RISK AND LIABILITY FOR LOSS, DAMAGE, OR INJURY TO YOU AND YOUR PROPERTY AND TO OTHERS AND THEIR PROPERTY ARISING OUT OF USE, MISUSE, OR INABILITY TO USE THE EQUIPMENT NOT CAUSED DIRECTLY BY THE NEGLIGENCE OF CANON USA. (SOME STATES DO NOT ALLOW THE EXCLUSION OR LIMITATION OF INCIDENTAL OR CONSEQUENTIAL DAMAGES, SO THE ABOVE LIMITATION MAY NOT APPLY TO YOU). THIS WARRANTY SHALL NOT EXTEND TO ANYONE OTHER THAN THE ORIGINAL PURCHASER OF THIS EQUIPMENT OR THE PERSON FOR WHOM IT WAS PURCHASED AS A GIFT.
This warranty gives you specific legal rights, and you may also have other rights which vary from state to state.
CANON U.S.A., INC.
CANADA
CANON CONSUMER DIGITAL VIDEO EQUIPMENT LIMITED WARRANTY
The limited warranty set forth below is given by Canon Canada Inc. (“Canon Canada”) with respect to Canon Consumer Digital Video Equipment (the “Equipment”) purchased in Canada. This limited warranty is only effective upon presentation of a bill of sale or other proof of purchase for this Equipment to a Canon Service Facility when repairs are required.
The Equipment is warranted under normal, non-commercial, personal use, against defective materials or workmanship as follows:
Parts: Defective parts will be exchanged for new parts or, at Canon Canada's option, comparable rebuilt parts for a period of one year from the date of original purchase, except Video Heads which will be exchanged for a period of 3 months from the date of purchase.
Labour: For a period of one year from the date of original purchase, labour will be provided free of charge by our Canon Service Facilities in Canada.
This limited warranty covers all defects except where:
(a) The loss or damage to the product results from:
i) accident, natural disaster, mishandling, abuse, neglect, unauthorized product modification or failure to follow instructions contained in the instruction manual; ii) the use of accessories, attachments, products, supplies, parts or devices with the Equipment that do not conform to Canon specifications or that cause abnormally frequent service problems; iii) repairs or services performed by any party other than a Canon Service Facility; iv) defective batteries or any exposure to water, sand or dirt; v) shipping (claim must be presented to the shipper);
(b) Any serial number on the video equipment is altered or removed. (c) The Equipment is used for commercial, professional or industrial purposes.
This limited warranty does not cover the cabinet (exterior finish) of the Equipment, media, nor does it apply to Equipment purchased outside Canada.
If the Equipment contains a hard disk drive, Canon Canada recommends that data stored on that drive be duplicated or backed up to prevent its loss in the event of a failure or other malfunction of such drive.
TO OBTAIN WARRANTY SERVICE
Ship your Equipment in its original carton, box or equivalent, properly packed, fully insured with shipping charges prepaid, together with a copy of your bill of sale or other proof of purchase and a description of the problem to any of the Canon Service Facilities in Canada.
LIMITATIONS
Except as otherwise required by applicable legislation, this warranty is in lieu of all other warranties, conditions, guarantees or representations, express or implied, statutory or otherwise, relative to the Equipment, including implied warranties or conditions of merchantability or fitness for a particular purpose.


Canon Canada assumes no liability for special, consequential or incidental damages, loss or corruption of data including, without limitation, data stored on the hard disk drive of the Equipment or loss that may arise, whether on account of negligence or otherwise, from the use, misuse or inability to use the Equipment (including loss of profit, revenue, media or enjoyment) or from failure to conform to any express or implied warranties, conditions, guarantees or representations. Any recovery under this limited warranty shall not exceed the purchase price of the equipment. Canon Canada does not assume or authorize any other person to assume for Canon Canada any other liability with respect to this equipment.
This warranty does not extend to any person other than the original purchaser of the Equipment or the person for whom it was purchased as a gift and states your exclusive remedy.
NOTICE TO CONSUMER
If you plan to take important videos or if the product has not been used for some time, please check all functions with the instruction book before using it.
Canon
ASIA
19/F, The Metropolis Tower, 10 Metropolis Drive, Hunghom, Kowloon, Hong Kong
Tel: +852 3191 2333, Fax: +852 2428 3963
CANADA
CANON CANADA INC.
6390 Dixie Road, Mississauga, ON L5T 1P7
If you have any questions, call the Canon Canada Information Center toll free (in Canada only) at 1-800-OK-CANON (1-800-652-2666). If you have any questions, please call 1-800-OK-CANON (1-800-652-2666, toll free in Canada only).
CENTRAL AND SOUTH AMERICA
CANON LATIN AMERICA, INC.
One Canon Park, Melville, NY 11747 USA
MEXICO
CANON MEXICANA, S DE RL DE CV
Blvd. Manuel Ávila Camacho No. 138, Piso 17
Col. Lomas de Chapultepec, C.P. 11000 México, D.F., México
CANON U.S.A., INC. NEW JERSEY OFFICE
100 Jamesburg Road, Jamesburg, NJ 08831 USA
USA
CANON U.S.A., INC. NEW JERSEY OFFICE
100 Jamesburg Road, Jamesburg, NJ 08831 USA
CANON U.S.A., INC. CHICAGO OFFICE
100 Park Blvd., Itasca, IL 60143 USA
15955 Alton Parkway, Irvine, CA 92618 USA
CANON U.S.A., INC. HONOLULU OFFICE
210 Ward Avenue, Suite 200, Honolulu, HI 96814 USA
◆ If you have any questions, call the Canon U.S.A.
Information Center toll-free at 1-800-828-4040 (USA only).
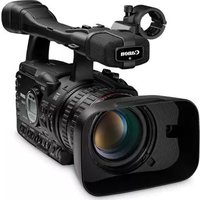
- HD CAMCORDER INSTRUCTION MANUAL
- IMPORTANT USAGE INSTRUCTIONS
- WARNING
- COPYRIGHT WARNING
- TRADEMARK ACKNOWLEDGEMENTS
- ABOUT THIS MANUAL AND CAMCORDER
- CONVENTIONS USED IN THIS MANUAL
- TABLE OF CONTENTS
- THE CAMCORDER'S FUNCTIONS IN REAL-LIFE SITUATIONS
- GETTING TO KNOW THE CAMCORDER
- PREPARATIONS
- CHARGING THE BATTERY PACK
- USING A MEMORY CARD
- FIRST TIME SETTINGS
- BASIC OPERATION OF THE CAMCORDER
- BASIC RECORDING AND PLAYBACK
- BASIC RECORDING
- BASIC PLAYBACK
- ADVANCED RECORDING FUNCTIONS
- RECORDING SETTINGS AND SHOOTING MODES
- CONVENIENT FUNCTIONS
- WHEN YOU WANT MORE CONTROL
- RECORDING AUDIO
- ADVANCED PLAYBACK AND EDITING FUNCTIONS
- ADVANCED PLAYBACK FUNCTIONS
- EDITING FUNCTIONS
- EXTERNAL CONNECTIONS
- HFR72/R70 WI-FI FUNCTIONS
- ADDITIONAL INFORMATION
- UNIQUE FUNCTIONS FOR SPECIAL CASES
- GETTING THE LOOK YOU WANT
- CHALLENGING SUBJECTS AND SHOOTING CONDITIONS
- PLAYBACK, EDITING AND OTHERS
- HFR72/R70 WIRELESS FUNCTIONS
- SUPPLIED ACCESSORIES
- NAMES OF PARTS
- RIGHT SIDE VIEW
- FRONT VIEW TOP VIEW
- LCD TOUCH SCREEN
- ATTACH THE BATTERY PACK TO THE CAMCORDER
- CHARGING WILL START WHEN THE CAMCORDER IS TURNED OFF
- TO REMOVE THE BATTERY PACK
- MEMORY CARDS COMPATIBLE FOR USE WITH THE CAMCORDER
- SDXC CARDS
- INSERTING AND REMOVING A MEMORY CARD
- TO REMOVE THE MEMORY CARD
- BASIC SETUP
- OPEN THE LCD PANEL
- TOUCH THE LANGUAGE THAT YOU WANT TO BE USED FOR ONSCREEN DISPLAYS AND THEN TOUCH [▷]
- TOUCH [Y.M.D], [M.D,Y] OR [D.M.Y] TO SELECT THE DATE FORMAT YOU PREFER AND THEN TOUCH [▷]
- CHANGING THE TIME ZONE
- INITIALIZING THE MEMORY
- HFR72/R
- HFR
- USING THE TOUCH SCREEN
- TOUCH
- SWIPE
- USING THE MENUS
- (HOME) MENU
- MENU ITEM
- DESCRIPTION
- THE [↑ OTHER SETTINGS] MENU
- OPERATING MODES
- MOVIE FORMAT
- RECORDING
- PLAYBACK
- RECORDING VIDEO
- WHEN YOU HAVE FINISHED RECORDING
- THE INFO PANEL
- TAKING PHOTOS
- WHEN YOU HAVE FINISHED TAKING PHOTOS
- AUTO MODE
- SMART AUTO
- INTELLIGENT IS
- ZOOMING
- FRAMING ASSISTANCE
- AUTOMATIC FRAMING ASSISTANCE
- MANUAL FRAMING ASSISTANCE
- PLAYING BACK VIDEO
- TOUCH THE DESIRED SCENE TO PLAY IT BACK
- TO CHANGE THE MEMORY (HFR72/R70 ONLY) OR MOVIE FORMAT TO PLAY BACK
- TO ADJUST THE VOLUME
- PLAYBACK CONTROLS
- LOCKING FILES
- VIEWING PHOTOS
- LOOK FOR THE PHOTO YOU WANT TO VIEW
- TOUCH THE PHOTO YOU WANT TO VIEW
- DELETING SCENES AND PHOTOS
- DELETING SCENES OR PHOTOS FROM THE INDEX SCREEN
- OPEN THE INDEX SCREEN THAT CONTAINS THE SCENE OR PHOTO YOU WANT TO DELETE (64, 70)
- DELETE THE RECORDINGS
- TO SELECT INDIVIDUAL SCENES OR PHOTOS
- TOUCH ON THE INDIVIDUAL SCENES OR PHOTOS YOU WANT TO DELETE
- AFTER SELECTING ALL THE DESIRED RECORDINGS, TOUCH [OK]
- OPTIONS
- DELETING A SINGLE SCENE
- DELETING A SINGLE PHOTO
- SELECTING THE MOVIE RECORDING FORMAT (AVCHD/MP4)
- SELECTING THE VIDEO QUALITY
- TO VIEW INFORMATION ON THE VIDEO QUALITY
- TOUCH [I]
- TOUCH [→]
- HFR72/R70 SELECTING THE MEMORY (BUILT-IN MEMORY/MEMORY CARD) FOR RECORDINGS
- HFR72/R70 DUAL RECORDING AND RELAY RECORDING
- ACTIVATE THE DESIRED FUNCTION
- SELECTING THE SHOOTING MODE
- OPTIONS (♦ DEFAULT VALUE)
- [ AUTO AUTO]
- BABY MODE
- HIGHLIGHT PRIORITY MODE
- SET THE SHOOTING MODE TO
- TURN ON THE VIEW ASSISTANCE FUNCTION
- CINEMA MODE AND CINEMA-LOOK FILTERS
- TO CHANGE THE CINEMA-LOOK FILTER
- SPECIAL SCENE MODES
- OPTIONS (
- PORTRAIT]
- SPORTS]
- NIGHT SCENE]
- [8 SNOW]
- [BEACH]
- [SUNSET]
- [LOW LIGHT]
- [A SPOTLIGHT]
- [FIREWORKS]
- PROGRAMMED AE MODE: ADJUSTING SETTINGS TO MATCH YOUR NEEDS
- SLOW & FAST MOTION RECORDING
- PRESS START/STOP TO START RECORDING
- PRESS START/STOP AGAIN TO STOP RECORDING THE TIME-LAPSE OR SLOW MOTION SCENE
- TO SET THE RECORDING TIME
- DECORATION: ADDING A PERSONAL TOUCH
- DECORATING SCENES WHILE RECORDING
- TOUCH [✗] TO EXIT THE DECORATION SCREEN
- TO USE [PENS AND STAMPS]
- TO USE [ANIMATED STAMPS]
- TO USE [DATE/TIME]
- TOUCH [√]
- TOUCH [DATE] OR [TIME]
- TOUCH [OK]
- YOU CAN TOUCH ANY STAMP AND DRAG IT TO THE DESIRED LOCATION
- TO USE STAMPS FROM THE [ 😊 ] MENU
- TOUCH [ 😊 ]
- TOUCH [💡 1], [💡 2] OR [💡 3] TO SELECT THE DESIRED BABY
- REGISTER BABY'S INFORMATION AS NECESSARY
- TOUCH ANY OF THE BUTTONS TO ADD THE CORRESPONDING STAMP: [DATE] (THE CURRENT DATE), [TIME] (THE CURRENT TIME), BABY'S AGE, HEIGHT OR WEIGHT
- TO USE IMAGE MIX
- MIXING YOUR OWN IMAGES WITH LIVE VIDEO
- TO USE THE CHROMA KEY FUNCTION
- TOUCH [OK] TO MIX YOUR IMAGE WITH LIVE VIDEO
- DECORATING SCENES DURING PLAYBACK
- VIDEO SNAPSHOT
- ACTIVATE VIDEO SNAPSHOT
- PRESS START/STOP
- FACE DETECTION AND TRACKING
- ACTIVATE FACE DETECTION
- POINT THE CAMCORDER AT A PERSON
- TOUCH A DIFFERENT FACE ON THE TOUCH SCREEN TO OPTIMIZE THE EXPOSURE FOR ANOTHER PERSON
- FADERS
- TO FADE IN/OUT
- EXPOSURE
- EXPOSURE COMPENSATION
- TOUCH [M]
- TOUCH [◀] OR [▶], OR SWIPE LEFT/RIGHT ALONG THE DIAL TO COMPENSATE THE EXPOSURE
- TOUCH [✗] TO APPLY AND LOCK THE EXPOSURE COMPENSATION VALUE
- TOUCH AE
- TOUCH A SUBJECT THAT APPEARS INSIDE THE ☐ FRAME
- TOUCH [✗] TO APPLY THE ADJUSTED EXPOSURE
- FOCUS
- MANUAL FOCUS
- TOUCH [✗] TO LOCK THE FOCUS AT THE SELECTED DISTANCE
- TOUCH AF
- TOUCH A SUBJECT THAT APPEARS INSIDE THE Ⓞ FRAME
- WHITE BALANCE
- TO SET THE CUSTOM WHITE BALANCE
- [AWB AUTOMATIC]
- [☀️ DAYLIGHT]
- [TUNGSTEN]
- [■ CUSTOM WB]
- FRAME RATE
- OPTIONS FOR AVCHD MOVIES (♦ DEFAULT VALUE)
- [60I]
- [PF30]
- OPTIONS FOR MP4 MOVIES (♦ DEFAULT VALUE)
- [30P]
- [24P]
- TELE MACRO
- AUDIO SCENES
- [STANDARD]
- [MUSIC]
- [SPEECH]
- [FOREST AND BIRDS]
- [NOISE SUPPRESSION]
- USING HEADPHONES
- ADJUSTING THE VOLUME DURING PLAYBACK
- USING AN EXTERNAL MICROPHONE
- USING THE WM-V1 WIRELESS MICROPHONE
- USING COMMERCIALLY AVAILABLE MICROPHONES
- CAPTURING VIDEO SNAPSHOT SCENES AND GRABBING STILL FRAMES FROM A MOVIE
- CAPTURING A VIDEO SNAPSHOT SCENE
- GRABBING STILL FRAMES
- PLAYBACK WITH BACKGROUND MUSIC
- TO DELETE A MUSIC TRACK
- SELECTING THE PLAYBACK STARTING POINT
- TO CHANGE THE INTERVAL BETWEEN FRAMES
- PHOTO SLIDESHOW
- DURING THE PHOTO SLIDESHOW
- DIVIDING SCENES
- TRIMMING SCENES
- BRING THE SCENE TO A PRECISE POINT, IF NECESSARY
- TRIM THE SCENE
- CHANGING THE THUMBNAIL IMAGE OF A SCENE
- SET THE DISPLAYED FRAME AS THE SCENE'S THUMBNAIL IMAGE
- HFR72/R70 COPYING RECORDINGS TO A MEMORY CARD
- COPYING RECORDINGS FROM THE INDEX SCREEN
- TO SELECT INDIVIDUAL RECORDINGS
- COPYING A SINGLE PHOTO
- CONVERTING MOVIES TO MP4 FORMAT
- OPEN THE SCREEN FOR SELECTING SCENES TO CONVERT
- TOUCH THE INDIVIDUAL SCENES YOU WANT TO CONVERT
- AFTER SELECTING ALL THE DESIRED SCENES, TOUCH [OK] AND THEN TOUCH [NEXT]
- AVCHD MOVIES
- MP4 MOVIES
- HFR72/R70 CONVERTING MOVIES INTO FAST MOTION SCENES
- SELECT THE PLAYBACK RATE OF THE CONVERTED FAST MOTION SCENES AND THEN TOUCH [OK]
- TOUCH [START] TO CONVERT THE SCENE(S)
- TERMINALS ON THE CAMCORDER
- PLAYBACK ON A TV SCREEN
- SAVING AND SHARING YOUR RECORDINGS
- AV OUT/TERMINAL
- HDMI OUT TERMINAL
- USB TERMINAL
- CONNECTION DIAGRAMS
- CONNECTION
- TYPE: DIGITAL • QUALITY: HIGH DEFINITION • OUTPUT ONLY
- ABOUT THE HDMI CONNECTION
- TYPE: ANALOG • QUALITY: STANDARD DEFINITION • OUTPUT ONLY
- TYPE: DIGITAL DATA CONNECTION
- SAVING RECORDINGS ON A COMPUTER
- SAVING AVCHD MOVIES (WINDOWS/MAC OS)
- INSTALLATION
- CONNECTING THE CAMCORDER TO A COMPUTER
- SAVING RECORDINGS ON THE OPTIONAL CS100 CONNECT STATION (USB)
- DISCONNECT THE USB CABLE
- HFR72/R70 MEMORY SAVE: SAVING AN ENTIRE MEMORY ONTO AN EXTERNAL HARD DRIVE
- SAVING A MEMORY ONTO AN EXTERNAL HARD DRIVE
- SAVE THE ENTIRE CONTENTS OF THE DESIRED MEMORY
- BEFORE DISCONNECTING THE EXTERNAL HARD DRIVE
- PLAYING BACK PREVIOUSLY SAVED RECORDINGS FROM THE EXTERNAL HARD DRIVE
- TO DELETE THE MEMORY SAVE FOLDER CURRENTLY DISPLAYED
- INITIALIZING THE EXTERNAL HARD DRIVE
- CONNECT THE EXTERNAL HARD DRIVE TO THE CAMCORDER
- INITIALIZE THE EXTERNAL HARD DRIVE
- SAFELY END THE CONNECTION TO THE EXTERNAL HARD DRIVE BEFORE PHYSICALLY DISCONNECTING IT (165)
- COPYING RECORDINGS TO AN EXTERNAL VIDEO RECORDER
- IN HIGH DEFINITION
- IN STANDARD DEFINITION
- OVERVIEW OF THE CAMCORDER'S WI-FI FUNCTIONS
- THE CAMCORDER'S WI-FI FUNCTIONS
- WI-FI CONNECTION AND SETTINGS
- IOS DEVICES
- ANDROID DEVICES
- CS100 CONNECT STATION (OPTIONAL)
- COMPUTERS AND OTHER WI-FI DEVICES
- CANON IMAGE GATEWAY
- BEFORE USING WI-FI FUNCTIONS
- USING AN IOS OR ANDROID DEVICE AS A REMOTE CONTROL
- STREAMING VIA WI-FI (MONITOR FROM HOME)
- ANDROID DEVICES COMPATIBLE WITH NFC: CONNECT THE CAMCORDER AND THE DEVICE AS DESCRIBED IN PAIRING AN NFC-COMPATIBLE ANDROID DEVICE (180)
- IOS/ANDROID DEVICE: START THE CAMERAACCESS PLUS APP
- PAIRING AN NFC-COMPATIBLE ANDROID DEVICE
- ANDROID DEVICE: TOUCH OK
- STREAMING VIA WI-FI AND INTERNET (MONITOR WHILE OUT)
- IF NECESSARY, SET UP A CONNECTION TO AN ACCESS POINT
- WHEN THE WIRELESS CONNECTION IS SUCCESSFULLY ESTABLISHED, THE CAMCORDER'S ID WILL BE DISPLAYED ON THE SCREEN
- TO REGISTER THE CAMCORDER'S ID IN THE CAMERAACCESS PLUS APP
- ANDROID DEVICES COMPATIBLE WITH NFC: CONNECT THE CAMCORDER AND THE DEVICE
- START THE CAMERAACCESS PLUS APP AND TOUCH SETTING AND THEN START
- TOUCH FINISH AND CLOSE THE CAMERAACCESS PLUS APP
- TO USE THE MONITOR WHILE OUT FUNCTION
- USING THE VIRTUAL KEYBOARD
- HTTP://PIXELA.JP/CECAP
- PLAYBACK VIA BROWSER: VIEWING RECORDINGS USING A WEB BROWSER ON AN IOS OR ANDROID DEVICE
- IOS/ANDROID DEVICE: START THE WEB BROWSER AND ENTER THE URL THAT APPEARS ON THE CAMCORDER'S SCREEN INTO THE WEB BROWSER'S ADDRESS BAR
- IOS/ANDROID DEVICE: TOUCH THE DESIRED RECORDING FROM THE LIST
- WHEN YOU HAVE FINISHED
- SAVING RECORDINGS AND UPLOADING MOVIES TO THE WEB USING AN IOS DEVICE
- SAVING RECORDINGS ON THE OPTIONAL CS100 CONNECT STATION (NFC+WI-FI)
- CAMCORDER: WHEN THE FILE TRANSFER IS COMPLETED, TOUCH [OK]
- SHARING RECORDINGS WITH CANON IMAGE GATEWAY
- SETTING THE DESIRED WEB SERVICES IN THE CAMCORDER
- COMPUTER: EXIT CAMERAWINDOW AND THEN END THE CONNECTION BETWEEN THE CAMCORDER AND COMPUTER
- SHARING YOUR RECORDINGS USING WEB SERVICES
- TOUCH THE SCENE OR PHOTO(S) TO UPLOAD
- CHECKING YOUR UPLOADS USING CANON IIMAGE GATEWAY LIBRARY
- WIRELESS PLAYBACK ON A COMPUTER
- WI-FI CONNECTION USING AN ACCESS POINT
- GENERAL REQUIREMENTS
- OPEN THE [(☐) NETWORK SETUP] SCREEN
- TOUCH THE DESIRED SETUP METHOD
- WI-FI PROTECTED SETUP (WPS)
- [WPS: BUTTON] METHOD
- [WPS: PIN CODE] METHOD
- WITHIN 2 MINUTES, TOUCH [OK] ON THE CAMCORDER'S SCREEN
- TOUCH [OK] TO SAVE THE CONFIGURATION
- SEARCHING FOR ACCESS POINTS
- SELECT THE DESIRED ACCESS POINT
- MANUAL SETUP
- VIEWING AND CHANGING WI-FI SETTINGS
- TO VIEW THE CONNECTION SETTINGS FOR IOS/ANDROID DEVICES
- TO VIEW THE ACCESS POINT'S CONNECTION SETTINGS
- GLOSSARY
- ACCESS POINT
- IP ADDRESS
- NFC
- SSID
- WPS
- APPENDIX: MENU OPTIONS LISTS
- APPENDIX: ONSCREEN ICONS AND DISPLAYS
- TROUBLE
- DO'S AND DON'TS
- GENERAL INFORMATION
- SETTING OPTIONS
- OTHER SETTINGS] MENUS
- CAMERA SETUP (RECORDING MODE ONLY)
- [FULL WIDE ANGLE], [LAST USED POSITION]
- PLAYBACK SETUP (PLAYBACK MODE ONLY)
- PLAYBACK SETUP (PLAYBACK MODE ONLY) (CONT.)
- DISPLAY SETUP
- DISPLAY SETUP (CONT.)
- SYSTEM SETUP
- [LANGUAGE
- [DATE/TIME]
- [VIEW ASSISTANCE]
- [ON], [OFF]
- [LOCK FILES]
- SYSTEM SETUP (CONT.)
- [RECORDING SETUP] MENU (RECORDING MODE ONLY)
- [▶ MAIN FUNCTIONS] MENU (RECORDING MODE ONLY)
- BUTTON
- SETTING OPTIONS/FUNCTION
- [EDIT] MENU (PLAYBACK MODE ONLY)
- PLAYBACK MODE (DURING PLAYBACK)
- MEMORY CARD OPERATION
- REMAINING BATTERY CHARGE
- TROUBLESHOOTING
- CHECK THIS FIRST
- POWER SUPPLY
- POWER SOURCE
- PRESSING START/STOP WILL NOT START RECORDING
- THE POINT WHERE START/STOP WAS PRESSED DOES NOT MATCH THE BEGINNING/END OF THE RECORDING
- THE CAMCORDER WILL NOT FOCUS
- WHEN A SUBJECT FLITS ACROSS IN FRONT OF THE LENS, THE IMAGE APPEARS SLIGHTLY BENT
- CHANGING THE OPERATING MODE BETWEEN RECORDING (●)/RECORDING STANDBY (■)/ PLAYBACK (▶) TAKES LONGER THAN USUAL
- MOVIES OR PHOTOS CANNOT BE RECORDED PROPERLY
- CANNOT RECORD A PHOTO WHILE RECORDING MOVIES
- AFTER USING THE CAMCORDER FOR A LONG TIME, IT BECOMES HOT
- DELETING SCENES TAKES LONGER THAN USUAL
- CANNOT CAPTURE A VIDEO SNAPSHOT SCENE FROM A MOVIE
- CANNOT DIVIDE SCENES
- INDICATORS AND ONSCREEN DISPLAYS
- PICTURE AND SOUND
- A RATTLING CAN BE HEARD FROM THE CAMCORDER
- THE SCREEN APPEARS TOO DARK
- THE IMAGE ON THE SCREEN APPEARS TOO DARK
- SCREEN DISPLAYS TURN ON AND OFF REPEATEDLY
- ABNORMAL CHARACTERS APPEAR ON THE SCREEN AND THE CAMCORDER DOES NOT OPERATE PROPERLY
- VIDEO NOISE APPEARS ON SCREEN
- HORIZONTAL BANDS APPEAR ON THE SCREEN
- SOUND IS DISTORTED OR IS RECORDED AT LOWER LEVELS
- THE PICTURE IS DISPLAYED CORRECTLY BUT THERE IS NO SOUND FROM THE BUILT-IN SPEAKER
- THERE IS NO SOUND FROM THE AV OUT/☐ (HEADPHONES) TERMINAL
- MEMORY CARD AND ACCESSORIES
- CANNOT INSERT THE MEMORY CARD
- CANNOT RECORD ON THE MEMORY CARD
- CONNECTIONS WITH EXTERNAL DEVICES
- VIDEO NOISE APPEARS ON THE TV SCREEN
- THERE IS NO IMAGE ON THE TV SCREEN AND THERE IS NO SOUND
- CANNOT CONNECT WITH THE ACCESS POINT
- WIRELESS PLAYBACK ON A COMPUTER OR SIMILAR DEVICE IS NOT SMOOTH
- LIST OF MESSAGES (IN ALPHABETICAL ORDER)
- BACK UP RECORDINGS REGULARLY
- HFR72/R70 BUILT-IN MEMORY ERROR
- HFR72/R70 BUILT-IN MEMORY IS FULL
- HFR72/R70 BUILT-IN MEMORY WRITING ERROR ATTEMPT TO RECOVER THE DATA
- HFR72/R70 CANNOT ACCESS THE BUILT-IN MEMORY
- CANNOT COMMUNICATE WITH THE BATTERY PACK. CONTINUE USING THIS BATTERY PACK
- CANNOT CONVERT SCENES RECORDED AT 60P
- CANNOT CONVERT THE SCENE
- HFR72/R70 CANNOT COPY
- CANNOT DIVIDE THE SCENE
- HFR72/R70 CANNOT JOIN 24P AND 30P SCENES TO CONVERT THEM
- CANNOT LOAD CANVAS
- CANNOT PLAY BACK
- HFR72/R70 CANNOT PLAY BACK CANNOT ACCESS THE BUILT-IN MEMORY
- CANNOT PLAY BACK CHECK THE MEMORY CARD
- HFR72/R70 CANNOT PLAY THE MOVIES IN THE BUILT-IN MEMORY INITIALIZE ONLY USING THE CAMCORDER
- CANNOT PLAY THE MOVIES ON THIS MEMORY CARD
- CANNOT PLAY THE MOVIES ON THIS MEMORY CARD INITIALIZE ONLY USING THE CAMCORDER
- CANNOT RECORD
- HFR72/R70 CANNOT RECORD CANNOT ACCESS THE BUILT-IN MEMORY
- CANNOT RECORD CHECK THE MEMORY CARD
- HFR72/R70 CANNOT RECORD MOVIES IN THE BUILT-IN MEMORY INITIALIZE ONLY USING THE CAMCORDER
- CANNOT RECORD MOVIES ON THIS MEMORY CARD
- CANNOT RECORD MOVIES ON THIS MEMORY CARD INITIALIZE ONLY USING THE CAMCORDER
- CANNOT SAVE THE CANVAS
- CANNOT TRIM THE SCENE
- CHARGE THE BATTERY PACK
- CHECK THE CONNECTED DEVICE
- CHECK THE MEMORY CARD
- CHECK WHETHER THE LENS COVER IS OPEN
- CLOSE THE MEMORY CARD SLOT COVER
- FILE NAME ERROR
- INITIALIZE ONLY USING THE CAMCORDER
- MEMORY CARD WRITING ERROR. ATTEMPT TO RECOVER THE DATA
- NEED TO RECOVER FILES FROM THE MEMORY CARD. CHANGE THE POSITION OF THE LOCK SWITCH ON THE MEMORY CARD
- NO MEMORY CARD
- NOT ENOUGH AVAILABLE SPACE
- NUMBER OF SCENES ALREADY AT MAXIMUM
- RECORDING WAS STOPPED DUE TO INSUFFICIENT WRITE SPEED OF THE MEMORY CARD
- SCENE RECORDED USING ANOTHER DEVICE. CANNOT DIVIDE THE SCENE
- SCENE RECORDED USING ANOTHER DEVICE. CANNOT PLAY BACK THE SCENE
- SELECT THE DESIRED SCENE NUMBER
- SOME SCENES COULD NOT BE DELETED
- UNABLE TO RECOGNIZE THE DATA
- UNABLE TO RECOVER DATA
- HFR72/R70 LIST OF MESSAGES FOR CONNECTING TO AN EXTERNAL HARD DRIVE
- ERROR WRITING TO EXTERNAL HARD DRIVE
- HFR72/R70 LIST OF MESSAGES FOR WI-FI FUNCTIONS
- CANNOT TRANSFER FILES
- INCORRECT WI-FI PASSWORD
- IP ADDRESS CONFLICT
- MEMORY CARD COVER IS OPEN
- MULTIPLE ACCESS POINTS DETECTED. TRY THE OPERATION AGAIN
- NO ACCESS POINTS FOUND
- THE ACCESS POINT IS NOT COMPATIBLE WITH UPNP
- UNABLE TO ACCESS CONFIGURATION FILES
- UNABLE TO COMPLETE WPS
- UNABLE TO COMPLETE WPS. TRY THE OPERATION AGAIN
- UNABLE TO CONNECT
- UNABLE TO CONNECT TO THE CONNECT STATION
- UNABLE TO CONNECT TO THE SERVER
- UNABLE TO OBTAIN A GLOBAL IP ADDRESS
- UNABLE TO OBTAIN AN IP ADDRESS
- WI-FI AUTHENTICATION UNSUCCESSFUL
- WI-FI CANNOT BE USED WHILE THE WIRELESS MICROPHONE IS ATTACHED
- WI-FI CONNECTION TERMINATED
- WI-FI ERROR. INCORRECT AUTHENTICATION METHOD
- WI-FI ERROR. INCORRECT ENCRYPTION METHOD
- WIRELESS COMMUNICATION IS NOT WORKING CORRECTLY
- HFR72/R70 LIST OF MESSAGES FOR WEB SERVICES
- CHECK NETWORK SETTINGS
- CONNECT TO A COMPUTER AND USE THE DEDICATED SOFTWARE TO SET AGAIN
- CONNECT TO A COMPUTER AND USE THE DEDICATED SOFTWARE TO SET UP. THIS SERVICE MAY NOT BE AVAILABLE IN YOUR REGION
- INSUFFICIENT SPACE ON SERVER
- MOVIE MUST BE LESS THAN X MIN
- SERVER BUSY. TRY AGAIN LATER
- THIS IMAGE CANNOT BE SENT
- TRY AGAIN
- HANDLING PRECAUTIONS
- CAMCORDER
- LONG-TERM STORAGE
- BATTERY PACK
- DANGER
- TREAT THE BATTERY PACK WITH CARE
- REMAINING BATTERY TIME
- MEMORY CARD
- BUILT-IN RECHARGEABLE LITHIUM BATTERY
- DISPOSAL
- MAINTENANCE/OTHERS
- CLEANING
- CAMCORDER BODY
- LENS
- CONDENSATION
- CONDENSATION MAY FORM IN THE FOLLOWING CASES
- TO AVOID CONDENSATION
- WHEN CONDENSATION IS DETECTED
- USING THE CAMCORDER ABROAD
- POWER SOURCES
- OPTIONAL ACCESSORIES
- USE OF GENUINE CANON ACCESSORIES IS RECOMMENDED
- BATTERY PACKS
- WM-V1 WIRELESS MICROPHONE
- UA-100 USB ADAPTER
- SC-2000 SOFT CARRYING CASE
- SPECIFICATIONS
- VIXIA HF R72 / VIXIA HF R70 / VIXIA HF R
- SYSTEM
- IMAGE SENSOR
- LENS CONFIGURATION
- MINIMUM FOCUSING DISTANCE
- MINIMUM ILLUMINATION
- IMAGE STABILIZATION
- SIZE OF VIDEO RECORDINGS
- SIZE OF PHOTOS
- TERMINALS
- HFR72/R70 WI-FI
- POWER/OTHERS
- CA-110 COMPACT POWER ADAPTER
- BP-727 BATTERY PACK
- REFERENCE TABLES
- APPROXIMATE NUMBER OF PHOTOS AVAILABLE ON A 4 GB MEMORY CARD
- CHARGING TIMES
- APPROXIMATE USAGE TIMES
- DOWNLOADING MUSIC FILES AND IMAGE FILES (IMAGE MIX FRAMES)
- ABOUT THE MUSIC FILES
- CANON\MY_MUSIC
- CANON\PRIVATE\MY_MUSIC
- ABOUT THE IMAGE FILES FOR THE IMAGE MIX FUNCTION
- CANON\PRIVATE\MY_PICT\BABY
- CANON\PRIVATE\MY_PICT
- INDEX
- A
- B
- C
- D
- E
- F
- G
- H
- I
- L
- M
- N
- P
- R
- S
- T
- U
- V
- W
- Y
- Z
- USA
- CANON CONSUMER DIGITAL VIDEO EQUIPMENT LIMITED WARRANTY FOR THE UNITED STATES
- CANADA
- CANON CONSUMER DIGITAL VIDEO EQUIPMENT LIMITED WARRANTY
- TO OBTAIN WARRANTY SERVICE
- LIMITATIONS
- NOTICE TO CONSUMER
- CANON
- ASIA
- CENTRAL AND SOUTH AMERICA
- MEXICO
Brand : CANON
Model : Vixia HF R700
Category : Camcorder