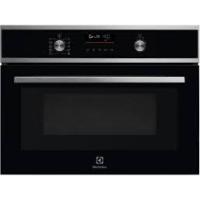
EMS30400OX - Microwaves ELECTROLUX - Free user manual and instructions
Find the device manual for free EMS30400OX ELECTROLUX in PDF.
Download the instructions for your Microwaves in PDF format for free! Find your manual EMS30400OX - ELECTROLUX and take your electronic device back in hand. On this page are published all the documents necessary for the use of your device. EMS30400OX by ELECTROLUX.
USER MANUAL EMS30400OX ELECTROLUX
WE’RE THINKING OF YOU
Thank you for purchasing an Electrolux appliance. You’ve chosen a product that brings with it decades of professional experience and innovation. Ingenious and stylish, it has been designed with you in mind. So whenever you use it, you can be safe in the knowledge that you’ll get great results every time. Welcome to Electrolux. Visit our website for: Get usage advice, brochures, trouble shooter, service information: www.electrolux.com Register your product for better service: www.electrolux.com/productregistration Webshop Accessories and consumables: www.electrolux.com/shop
CUSTOMER CARE AND SERVICE
We recommend the use of original spare parts. When contacting Service, ensure that you have the following data available. The information can be found on the rating plate. Model, PNC, Serial Number. Warning / Caution-Safety information General information and tips Environmental information Subject to change without notice. ENGLISH
BEFORE USING YOUR MICROWAVE OVEN
Read the operating instructions thoroughly. The following guidance has been prepared to help you get the best out of your new Electrolux microwave oven. Make sure you read it through thoroughly. It is important that these operating instructions are retained for future use as a source of reference. If the appliance should change owner or be transferred to someone else, or if you sell the property and the appliance remains in situ, the instructions must always accompany the appliance, so that the new owner can familiarise themselves with how it works and the associated warnings. Make sure you read the entire operating instructions before using the appliance and that you follow the recommendations given. SAFETY INFORMATION
READ THE MANUAL CAREFULLY AND
RETAIN IT FOR FUTURE USE
- The built-in safety switch prevents the microwave oven from being used while the door is open.
- Do not tamper with it or attempt to use the oven while the door is open, as this could result in you being exposed to microwave energy.
- Do not allow spilt food or residual detergent to accumulate on the door seals. Regarding cleaning: see the section entitled "Cleaning and maintenance".
- It is particularly important that the oven door seals tightly and that there is no damage to: (1) door (not straight), (2) hinges and lock (broken or loose), (3) the door frame and seals. WARNING! If the door, hinges, locking arm or seals are defective, the microwave oven must not be started until it has been repaired by an authorised service technician. WARNING! It is dangerous for anyone other than a service technician trained by the factory to carry out services or adjust the oven. Contact your local service agent for servicing if necessary.
- Never remove the external cabinet, door or control panel. This could result in you being exposed to an extremely high voltage.
- The oven must only be installed or set up as described under "Installation guidance" in these operating instructions.
- The oven must only be used for the intended purpose, as described in the operating instructions. Do not use corrosive chemicals in the oven. This type of oven is intended for heating, cooking or defrosting food products. It is not designed for industrial, laboratory or commercial use, which will invalidate the guarantee.
- Never start an empty oven. The magnetron may be damaged if there is no food or water inside the oven to absorb the microwave energy.
- The oven must not be kept outdoors. This product must not be used near water.
- Do not attempt to dry clothing or newspapers in the microwave oven. These types of material can self-ignite.
- Do not use the oven for storage purposes. Do not leave paper products, kitchen implements or food in the oven while the oven is not in use.
www.electrolux.com the container is full of food which can
- The temperature of the exterior surfaces absorb the energy, so that there is no can be very high when the oven is in risk of overheating or self-ignition. use. WARNING!
- Many plastic trays, cups, freezer If fumes are visible, switch off the boxes and plastic films can be used oven or remove the plug, and keep in the microwave oven. Follow the the door closed in order to suffocate manufacturer's instructions when using any flames. Never use water. plastic materials in the oven. Avoid using plastic containers for food with a WARNING! high fat or sugar content, as they reach Children and infirm people must such high temperatures that they can only use the microwave oven cause some types of plastic to melt. unsupervised if they have already been given the necessary guidance, • Never leave the oven unattended so that they are able to use the and check it regularly when heating microwave oven safely and are or cooking food in containers made aware of the risks associated with from plastic, paper or other flammable incorrect use. materials.
- Metal containers and containers with Safe kitchen implements metal edges should not be used in
- Only use kitchen implements which are the microwave oven unless they are suitable for use in a microwave oven. expressly recommended for use in microwave ovens.
- Most containers made from glass, glass ceramics and oven-proof glass
- Containers with narrow openings, are ideal for use in a microwave oven. such as bottles, should not be used in Even though objects made from glass microwave ovens. and ceramics are not normally heated
- Take care when removing the lid of a by microwaves, they can become hot bowl or container. Risk of scalding because the heat is transferred from the food to the container. Oven gloves Foil trays should be used. It is safe to use flat foil trays for heating in the microwave oven if the following rules Testing the suitability of are followed: cooking implements
1. Foil trays must be no more than 3cm
- Kitchen implements must be checked (1¼") deep. to ensure they are suitable for use in
2. Foil lids must not be used.
3. The foil trays must be at least two• Place the container in the microwave
thirds full with food. Empty foil trays oven together with a glass that is halfmust never be placed in the oven. full of water. Heat at (900W) (100%) for one minute. If the container feels very
4. Only one foil tray must be placed in the
hot, it should not be used. If it is only microwave oven at a time and it must slightly hot, it can be used for heating, not touch the sides of the oven. If the but not for cooking. If the container is at oven has a metal turntable or rack, the room temperature, it is suitable for use foil tray must be placed on an upturned in microwave ovens. oven-proof plate.
- Paper serviettes, greaseproof paper,
5. Foil containers must never be reused in
kitchen roll, plates, cups, cartons, the microwave oven. freezer film and cardboard can be used
6. If the microwave oven has been in
without any risk. Always make sure use for 15 minutes or more, it must ENGLISH be allowed to cool before being used again.
7. Containers and the turntable can get
hot during use. Be very careful when taking them out of the oven. It is recommended that you use a potholder or oven gloves.
8. Remember that when using an
aluminium tray, the cooking or heating time can be longer than it would otherwise be. Always check that the food is piping hot before serving. Safe cooking
- Do not heat the food in a tin in the microwave oven. Always pour the food into a suitable container.
- The microwave oven must not be used for deepfrying, because the temperature of the fat cannot be controlled, causing dangerous situations to arise.
- Popcorn can be made in the microwave oven, but only in special packets or containers which are suitable for the purpose. Never leave the microwave oven unattended while making popcorn.
- Prick food products that have an impermeable skin, peel or membrane in order to prevent steam from building up and causing them to burst. Apples, potatoes, chicken liver and egg yokes are examples of foods which should be pricked.
- The contents of feeding bottles and jars of baby food must be stirred or shaken. To avoid burning, the temperature should be checked before the food is given to the child. WARNING! Liquids and other food products must not be heated in tightly sealed containers, which can explode. WARNING! When drinks are heated in a microwave oven, strong afterboiling can occur. You should therefore be very careful when taking the container out of the oven.
WARNING! When liquids such as soups, sauces and drinks are heated in a microwave oven, they can reach boiling point without any bubbles being visible. This means that the hot liquid could suddenly boil over. This can be avoided as follows:
1. Avoid using containers with
straight sides and a narrow neck.
2. Do not overheat the liquid.
3. Stir the liquid before placing the
container in the oven and again when half the time has elapsed.
4. Allow the container to stand in
the oven for a while after heating and stir again before carefully taking the container out. WARNING! Some products, e.g. whole egg and tightly sealed containers such as sealed jam jars, can explode and must not be heated in the oven. A broken egg can also explode during cooking. Always prick the yoke. Place a lid over the egg and leave it to stand for one minute before removing the lid. It is quite normal for steam to seep out around the door seal, for the door to mist up and even for water droplets to form on the underside of the door while the oven is in use. This is simply condensed water from the food being heated and does not make the oven any less safe to use. The door is not designed to seal completely tight against the oven.
- Do not use rotate the turntable forcefully by hand. This can cause an operating fault.
- The occurrence of an electric arc in the microwave oven is generally due to metal containers being used. However, over a long period of time, electric arcs can damage the oven. Stop the program and check the container.
- Make sure there are no obstructions covering the vents on the top, bottom, sides and back of the oven. WARNING! The oven must not used be used for commercial purposes. The oven is intended for household use only. Safety instructions concerning cooking with the grill, convection and combination functions.
1. The window in the glass door could
break if water is spilt on it during cooking with the grill or convection functions.
2. Use oven gloves when placing
anything in or taking anything out of the oven. Containers get very hot, so make sure you do not burn yourself. The turntable and wire rack can also get very hot, so use oven gloves when handling these.
3. Do not touch the internal or external
window in the microwave with metal components when placing anything in or taking anything out of the microwave oven. The internal side of the door and the microwave oven get very hot, so take care when cooking food in the oven.
4. Do not place the turnable or
containers in cold water or cool them rapidly after use, as this can cause them to shatter.
5. Do not place objects on top of
the cabinet. The upper part of the cabinet gets very hot, so anything placed on this part of the oven could be damaged by the heat.
6. Only preheat the microwave oven
if you are using the convection function, never when using the microwave or combination functions (microwave and grill or microwave and convection). WARNING! When the combination function is used, children should only use the oven under the supervision of an adult due to the high temperatures that are generated. Keep these instructions in a safe place! ENGLISH
1. Remove any labels on the door.
2. The oven must be installed on a flat,
horizontal surface. The surface must be strong enough to withstand the weight of the oven (25kg) and its contents at all times. The oven must be stable so that it cannot vibrate or generate noise.
3. The oven must not be placed close
to heat and water. Exposing the oven to heat sources and water can reduce its efficiency and result in functional faults. You should therefore make sure that the oven is installed at a good distance from heat sources and water.
4. Do not block the vents on the top
and sides of the cabinet, and do not place objects on top of the oven. If the vents are blocked while the oven is in use, the oven can overheat, causing functional faults. A lot of hot air comes out of the vents, so make sure you do not block them. You should for example make sure that curtains do not hang down between the back of the oven and the wall.
5. Place the oven as far as possible
away from radios and televisions. The oven complies with the EU's requirements for the suppression of radio noise, but interference can still occur if it is placed close to a radio or television. The oven should therefore be placed at the maximum possible distance away from such appliances.
6. If the oven is placed in a corner,
it must be at least 10cm from the walls, and there must be 30cm free headroom above the oven. IMPORTANT! The oven can be placed anywhere in the kitchen. Make sure you place the oven on a flat, horizontal surface, and make sure you do not block the vents and the oven base (to ensure adequate ventilation). Connecting to the mains power supply The oven is supplied with a mains cable and a plug for a 230V 50Hz earthed socket. The earth connection reduces the risk in the event of a short-circuit. Check that the specified voltage of the oven corresponds to the power supply voltage. NB: If an extension cable is used when plugging the oven in, the extension cable must also be earthed. The oven must not be used with an unearthed power supply. Contact an electrician if you are unsure about the electrical connection of the oven, or whether the wiring system in your house is earthed. The appliance must be connected to earth. If the oven has a moulded plug which is unsuitable for the socket, for safety reasons it must be replaced by the manufacturer, the manufacturer's service agent or another suitably qualified installation technician. If the mains cable is damaged, for safety reasons it must be replaced by the manufacturer, the manufacturer's service agent or another suitably qualified technician.
Many implements, containers and materials can be used for cooking purposes in a microwave oven. Choose implements, containers and materials that are suitable for the method of cooking Materials Kitchen implements Ceramics & Pyrex glass Oven-proof glass Glass with metal decoration Porcelain Paper Yes Yes Yes Yes Yes1) Yes Yes1) Yes1)
Without metal decoration Yes Yes
Stoneware Metal Mode of operation Microwave Combioven Grill Convection nation Lead crystal glass
Plastic you are using, both for safety reasons and to avoid damaging the implements. The following list is intended for guidance only. Yes Yes Yes Yes Oven-proof in microwave oven Yes
Aluminium foil Yes Yes Yes Yes Cups, plates, kitchen rolls Yes
Greaseproof paper Yes
Wood Accessories Wire rack
Yes Yes Yes Turntable Yes Yes Yes Yes Turntable ring Yes Yes Yes Yes YES: Kitchen implements and accessories that can be used. NO: Kitchen implements and accessories that must be avoided.
1) Only if they do not have metal parts.
2) Only unglazed or with non-metallic glazing.
3) NOTE: Only use aluminium foil for covering. If too much foil is used, it can cause electric arcs
inside the oven. Unpacking NB: When unpacking the oven, check that it is free from damage. Notify the retailer immediately if there is any damage or parts missing. The oven, oven components and accessories may be packed in protective film. If so, this film must be removed before the oven is used. Do not leave the packaging lying around so that young children can play with it. It can be dangerous. ENGLISH
Using your microwave oven
Control panel Turntable spindle 3 Turntable ring and wheels. Fitted to the base of the oven in order to support the turntable 4 Glass turntable. Food products in suitable containers are placed on this tray for cooking. Do not use the oven without the turntable
Window. The food products can be seen through this window during cooking 6 Oven door and seal. The oven door must always be closed during cooking and the sides must be kept free from dirt and food remains. 7 Locking hook
Stand Grill Fitting the turntable NB:
1. Make sure the turntable spindle is
placed in the hole on the bottom of the oven and interlocks with the "D" motor drive shaft.
2. Fit the turntable ring and the wheels,
so that they are concentric with the drive shaft.
3. Place the glass turntable on the
turntable ring and the wheel, and rotate carefully until it interlocks with the drive shaft.
- Never place the turntable upside down.
- The turntable, ring and drive shaft must be used during cooking.
- Food and containers containing food must always be placed on the turntable.
- The turntable can rotate both clockwise and anticlockwise. This is normal. 10 www.electrolux.com Control panel
1 Cooking function: select microwave power, grill, convection or combination cooking. 2 Power level: select the required microwave power level 3 Auto reheating: select the required reheating function 4 Defrosting: select defrosting according to weight or time 5 Window display: shows the cooking time, power level, cooking function and the time of day 6 Clock: set the time of day and delayed start 7 Stop/cancel: Stop or set the microwave program to pause, or cancel the setting for the cooking program 8 Start/continue: start the microwave oven 9 Function selector: select the cooking function and time
Display views In display views, you can see the cooking function, convection cooking and auto cooking. Setting the clock When the mains power supply is connected, the display will show "0.00" and the beep sound will start. Follow these steps to set the clock.
1. Press the clock button to select the
12- or 24-hour clock.
2. Rotate the function selector to adjust
3. Press the clock button to confirm the
hour setting. The minute indicator will flash.
4. Rotate the function selector to adjust
5. Press the clock button to confirm
the minute setting and complete the clock setting.
Cooking in the microwave oven
1. Open the door and place the food on
the turntable. Close the door.
2. Press the power level button the
required number of times, as described in Microwave power.
3. Rotate the function selector to adjust
4. Press the Start/continue button to
start the oven. Microwave power Press the power level button Microwave oven power level Watts Recommended use Once 100%
Boiling or heating liquids. Cooking vegetables. Preheating roasting pans. Twice 80%
Reheating meals in pans, casserole and precooked dishes. Roasting of cuts of meat on the bone and poultry. Three times 50%
Faster defrosting of meals in bowls. Baking of muffins and sponges. Four times 30%
Simmering. Heating of cream-cakes and cheesecakes. Five times 10%
Keeping food hot. Grilling
1. Open the door and place the wire
rack on the turntable and the food on the wire rack. Place a nonmetallic plate beneath the wire rack to catch any spillages or meat juices in order to minimise cleaning. Close the door.
2. Press the function selector once.
The display will flash "140".
3. Rotate the function selector in order
to select the grill function "G-1".
4. Press the Start/continue button to
confirm that "G-1" is displayed.
5. Rotate the function selector to
adjust the cooking time.
6. Press the Start/continue button to
start the oven. Note: For better results with the grill function, you can turn the meat half-way through the grilling time. The oven will beep twice to indicate it is half-way through the grilling time. Open the door and turn the food. Close the door and press the Start/continue button. If you do not open the door to turn the food, the microwave oven will continue to grill the food. Convection cooking The oven has a convection function, which enables you to cook food in the same way as in an ordinary oven. No microwave power is used. We recommend that you preheat the oven to the appropriate temperature 12 www.electrolux.com before placing the food in the oven. When the oven is at the correct temperature, it will stay at that temperature for five minutes. If the oven door is not opened during this time, the microwave oven will switch itself off. Preheating the oven for convection cooking
1. Press the function selector once.
The display will flash "140".
2. Rotate the function selector to select
the convection function.
3. Select the temperature of the
convection oven by continuing to rotate the function selector. Temperature range: 140 – 230°C.
4. Press the Start/continue button to
confirm the temperature.
5. Press the Start/continue button to
start preheating. When the appropriate temperature has been reached, the beep will sound twice to remind you that you have placed food in the oven. The relevant temperature will flash.
6. Place the food in the oven and close
7. Rotate the function selector to adjust
8. Press the Start/continue button to start
the oven. Note: To use preheating instead of pressing the Start/continue button, as in point 4 of Convection cooking, you must rotate the function selector to adjust the cooking time. Note: The fan will continue to run for a few minutes after the end of the convection program in order to cool the oven. Combination cooking With this oven, you can combine microwaving, grilling and convection cooking. There are four preset combinations. Using combination cooking
1. Open the door and place the food on
the turntable. Close the door.
one of the combinations "C-1", "C-2", "C-3" or "”C-4"; see the table below
4. Press the Start/continue button to
confirm the combination.
5. Rotate the function selector to adjust
6. Press the Start/continue button to start
the oven. Combination cooking Display Microwave oven Grill Convection C-1 165°C C-2 C-3 200°C C-4 200°C Cooking in stages Up to three phases of cooking can be set with this oven. If one of the phases is defrosting, this phase must be set as the first phase. The beep will sound after each phase, and the next phase will then start automatically. Example: If you want to cook at 100% microwave power for 10 minutes and then at 80% microwave power for 5 minutes, you should follow these steps.
1. Open the door and place the food on
the turntable. Close the door.
2. Press the microwave power button
once to select 100% power.
3. Rotate the function selector to adjust
the cooking time to 10 minutes.
4. Press the microwave power button
twice to select 80% microwave power.
5. Rotate the function selector to adjust
the cooking time to 5 minutes.
6. Press the Start/continue button to start
the oven. ENGLISH Delayed start Up to three phases can be programmed for a delayed start. Example: If you wish to cook the food at 80% microwave power for 15 minutes with a delayed start, you should follow these steps.
1. Open the door and place the food on
the turntable. Close the door.
2. Press the microwave power button
twice to select 80% microwave power. "P80" will be displayed.
3. Rotate the function selector to adjust
the cooking time to 15 minutes.
4. Press the clock button. The hour digits
5. Rotate the function selector to adjust
8. Press the Start/continue button to
end the setting. The display will show ":". When the set time is reached, the beep will sound twice and the cooking will start automatically. Defrosting according to weight
1. Open the door and place the food on
the turntable. Close the door.
2. Press the defrosting button once. "d-1"
3. Rotate the function selector to adjust
the weight in grams.
4. Press the Start/continue button to start
defrosting. Defrosting according to time
1. Open the door and place the food on
the turntable. Close the door.
2. Press the defrosting button twice.
"d-2" will be displayed.
3. Rotate the function selector to adjust
the defrosting time.
4. Press the Start/continue button to start
- If you are unsure, it is better to underestimate the defrosting time. The food will continue defrosting during the standing period.
- Separate the food as soon as possible.
- Turn large portions such as steaks halfway through the defrosting time.
- Open and/or remove the packaging for defrosting.
- Place the food in a container which is large enough to enable it to be easily stirred.
- Start defrosting poultry with the breast side down, and turn it halfway through the defrosting time. Delicate areas such as wingtips can be covered with small pieces of smooth foil.
- The standing time is very important, particularly for large dense foods which cannot be stirred. This ensures that the middle of the food is completely defrosted before cooking. Auto cooking The microwave oven has a number of preset recipes for automatic cooking, which enable you to cook the food perfectly every time.
1. Open the door and place the food on
the turntable. Close the door.
2. Rotate the function selector to select
the recipe for auto cooking.
3. Press the Start/continue button to
confirm the recipe for auto cooking.
4. Rotate the function selector to adjust
the weight of the food.
5. Press the Start/continue button to
confirm the weight. See the table for auto cooking recipes. 14 www.electrolux.com Preset recipes for auto cooking Menu Fish Soups Meat Bread Pizza Cakes Pasta Weight (g)
100 with water 800g 100 Function and booster Microwave oven 80% power Microwave oven 100% power C-2 G-1 Grill C-4 30% microwave oven 70% grill and convection 200°C Convection 180°C *See note Microwave oven 80% power 150 with water 1,200g 150
Chicken Potatoes Note: The cake recipes which are based on convection cooking at 180°C require the oven to be preheated. When the oven has been preheated and reached C-4 30% microwave oven 70% grill and convection 200°C Microwave oven 100% power Microwave oven 100% power 180°C, the beep will sound to remind you to open the door to place the cake in the oven. Then press the Start/ continue button to start the baking. ENGLISH
Auto reheating Quick start This function enables you to heat food easily using microwave power. The time and microwave power are preset. The table below shows the differences between the auto reheating functions.
1. Open the door and place the food on
the turntable. Close the door.
2. Press the button for auto reheating to
select "h-1", "h-2", "h-3" or "h-4".
3. Rotate the function selector to select
4. Press the Start/continue button to
start the reheating. Press the Start/continue button to cook at 100% microwave power for 30 seconds. Every time you press the Start/continue button, the time will increase by 30 seconds. Auto reheating functions Menu h-1 Auto reheating h-2 Dinner plate h-3 Drinks/Coffee h-4 Muffins/Rolls Weight (g) Display
- During the cooking process, you can press the microwave power button to see the current power level.
- When you press the clock button, the current time will be displayed.
- When delayed start has been set, you can press the clock button to see the time at which the oven will start. Childlock Press the Stop/clear button for 3 seconds. A long beep will sound, and the lock indicator will be shown, which indicates that the microwave oven's buttons have been locked. Press the Stop/clear buttons for 3 seconds to unlock the oven. A long beep will sound and the lock indicator light will go out, which indicates that the microwave oven's buttons have been unlocked. Stopping the oven There are two ways of stopping the oven while it is in use.
1. Press the Stop/clear button.
You can restart the oven by pressing the Start/continue button. Pressing the Stop/clear button again will cancel the current program.
You can restart the oven by closing the door and pressing the Start/ continue button. Pressing the Stop/clear button again will cancel the current program. 16 www.electrolux.com
The oven must always be kept clean. Waste food from overboiling or splashes attract microwave energy, causing the food to burn onto the inside of the oven. Do not tamper with the oven or adjust or repair any of the oven's parts yourself. Repairs must only be carried out by an authorised service technician. Always make sure you remove the plug before cleaning the oven. WARNING! If you do not keep the oven clean, it may cause the interior surface of the oven to deteriorate, which can reduce the lifetime of the oven and possibly result in a dangerous situation. Cleaning the accessories (turntable and ring) Before cleaning, remove the accessories from the oven and clean them with a mild detergent. Take care when handling the turntable ring. CAUTION! The internal sides of the turntable and oven can get very hot, so do not touch them immediately after use. Internal cleaning Always keep the oven clean internally. Wipe off spills and splashes immediately. If waste food is allowed to remain on the inside walls of the oven, door seal and door, it can reduce the effectiveness of the oven and damage the internal components. Remove deposits with mild liquid detergent, warm water and a soft, clean cloth.
NEVER USE ABRASIVE CLEANING
AGENTS, ORDINARY OVEN
CLEANER OR WIRE WOOL
SPONGES ON ANY PART OF THE
MICROWAVE OVEN. Stubborn food waste can be loosened by boiling a cup of water in the oven for 2-3 minutes.
IMPLEMENT TO REMOVE WASTE
Odours inside the oven can be removed by boiling a cup of water with 2 teaspoons of lemon juice for 5 minutes The turntable motor is sealed. Nevertheless, you should be careful to avoid water seeping in below the turntable spindle when cleaning the bottom of the oven. Cleaning the grill The element may become splattered with grease or oil while the oven is in use. Wait until the oven has cooled down and wipe off the oil before using the oven again. Spots on the grill can cause unpleasant odours and fumes. External cleaning Open the oven door while cleaning the control panel. This will ensure that you cannot start the oven. Clean the external surfaces of the oven using a mild liquid detergent and water. Then remove any surplus soap with a clean damp cloth. Then wipe with a soft cloth. Glass cleaner spray or universal kitchen spray can also be used. Never use abrasive cleaning agents, scouring sponges or strong chemicals on the external surfaces of the oven. Make sure water does not seep into the oven vents, as this can damage the working components of the oven. ENGLISH
Power consumption 1,450W Microwave power 900W Grill power (quartz) 1,100W Convection power 2,300W Combined maximum power 2,350W Turntable diameter 315mm Product dimensions (h x w x d) 335mm x 520mm x 510mm Oven capacity 30 litres Weight 19.3kg ENVIRONMENTAL CONCERNS The symbol on the product or packaging indicates that this product must not be disposed of as household waste. It should be taken to a recycling centre for the processing of electrical and electronic equipment instead. By ensuring that this product is disposed of correctly, you are helping to prevent any negative impact on the environment or people's health which could otherwise be caused by the incorrect disposal of this product. Contact your local authority, waste company or the company you purchased the product from for more information on recycling this product. 18 www.electrolux.com