
XC15 - Camcorder CANON - Free user manual and instructions
Find the device manual for free XC15 CANON in PDF.


| Product Type | Professional Camcorder |
| Model | XC15 |
| Brand | Canon |
| Sensor | 1-inch CMOS |
| Maximum Video Resolution | 4K UHD (3840 x 2160) |
| Frame Rates | Up to 60 fps (4K), 120 fps (HD) |
| Lens Mount | Fixed zoom lens with 15x optical zoom |
| Focus System | Dual Pixel CMOS AF |
| Audio Inputs | 2 x XLR, 3.5mm mic, 3.5mm headphone |
| Display | 3.5-inch LCD touchscreen (approx. 1.23M dots) |
| Viewfinder | 0.24-inch EVF (approx. 1.56M dots) |
| Recording Media | SD/SDHC/SDXC (UHS-I/II) |
| Dimensions (W x H x D) | 149 x 191 x 186 mm (without protrusions) |
| Weight | Approx. 1.7 kg (body only) |
| Power Supply | 7.4V DC, BP-970G battery (included) |
| Battery Life | Approx. 170 min (with viewfinder) |
| Connectivity | USB 2.0, HDMI mini, Wi-Fi (built-in), Ethernet (via adapter) |
| Main Functions | 4K recording, slow motion, dual pixel AF, XLR audio, streaming |
| Maintenance & Cleaning | Use dry soft cloth; avoid solvents; keep vents dust-free |
| Safety | Avoid moisture; use genuine batteries; do not disassemble |
| Spare Parts & Repairability | Canon service centers; spare batteries, chargers, cables available |
| General Information | Professional camcorder ideal for documentaries, events, and journalism |
Frequently Asked Questions - XC15 CANON
User questions about XC15 CANON
0 question about this device. Answer the ones you know or ask your own.
Ask a new question about this device
Download the instructions for your Camcorder in PDF format for free! Find your manual XC15 - CANON and take your electronic device back in hand. On this page are published all the documents necessary for the use of your device. XC15 by CANON.
USER MANUAL XC15 CANON
Important Usage Instructions
WARNING
TO REDUCE THE RISK OF ELECTRIC SHOCK AND TO REDUCE ANNOYING INTERFERENCE, USE THE RECOMMENDED ACCESSORIES ONLY.
COPYRIGHT WARNING:
Unauthorized recording of copyrighted materials may infringe on the rights of copyright owners and be contrary to copyright laws.
Trademark Acknowledgements
- SD, SDHC and SDXC Logos are trademarks of SD-3C, LLC.
- Canon is an authorized licensee of the CFast 2.0™ trademark, which may be registered in various jurisdictions.
- Microsoft and Windows are trademarks or registered trademarks of Microsoft Corporation in the United States and/or other countries.
- Apple, App Store, Mac OS, Final Cut Pro are trademarks of Apple Inc., registered in the U.S. and other countries.
- IOS is a trademark or registered trademark of Cisco in the U.S. and other countries and is used under license.
- Avid and Media Composer are trademarks or registered trademarks of Avid Technology, Inc. or its subsidiaries in the United States and/or other countries.
- Wi-Fi is a registered trademark of the Wi-Fi Alliance.
- Wi-Fi Certified, WPA, WPA2, and the Wi-Fi Certified logo are trademarks of the Wi-Fi Alliance.
- WPS as used on the camcorder's settings, onscreen displays and in this manual signifies Wi-Fi Protected Setup.
- The Wi-Fi Protected Setup Identifier Mark is a mark of the Wi-Fi Alliance.
- JavaScript is a trademark or registered trademark of Oracle Corporation, its affiliates or subsidiaries in the United States and other countries.
- HDMI, the HDMI logo and High-Definition Multimedia Interface are trademarks or registered trademarks of HDMI Licensing LLC in the United States and other countries.
- Other names and products not mentioned above may be trademarks or registered trademarks of their respective companies.
- This device incorporates exFAT technology licensed from Microsoft.
- This product is licensed under AT&T patents for the MPEG-4 standard and may be used for encoding MPEG-4 compliant video and/or decoding MPEG-4 compliant video that was encoded only (1) for a personal and noncommercial purpose or (2) by a video provider licensed under the AT&T patents to provide MPEG-4 compliant video. No license is granted or implied for any other use for MPEG-4 standard.
Highlights of the XC15
The Canon 4K Camcorder XC15 embodies many elements the discerning cinematographer looks for in a camera, with its ability to record video at either 4K (3840x2160) or HD (1920x1080) quality, extended audio recording options thanks to the supplied MA-400 Microphone Adapter and a multitude of camera functions to help put your artistic vision to screen.
Exceptional Video and Photos
1.0-in. CMOS sensor and DIGIC DV 5 image processor
The XC15 excels at shooting spectacular video and photos with reduced noise even in low-light conditions due to the combination of the CMOS sensor and DIGIC DV 5 image processor. The video is of such remarkable quality that you can even use the camcorder to shoot B-roll for projects that use Cinema EOS cameras.
4K/HD recording and the XF-AVC video format You have the versatility to record in 4K (to a CFast card at a maximum of 305 Mbps) or HD (to an SD card at a maximum of 50 Mbps). The XC15 uses XF-AVC intra-frame compression* to record 4K video while it uses XF-AVC Long GOP to record HD video, both of which will easily integrate into your post-production workflow. The jaw-dropping picture quality that you are able to produce with the XC15 will no doubt impress your audience and help your project leave a lasting impression.
* This indicates the compression method used for the video. Intra-frame is also suitable for grabbing frames from video and for editing.
Excellent photo quality
There will be times when you will want to take high-quality photos and the XC15 has you covered. Not only does the camcorder allow you to take photos of up to approximately 12 megapixels (effective pixel count) but it also allows you to take photos while you shoot video (☐ 43) and grab a frame from 4K video playback (☐ 114).
Operability and Adaptability
Intuitive design
The XC15's intuitive design lets a single cameraperson readily operate all of the camera functions. The easily accessible shooting mode dial (☐ 55) at the top of the camcorder allows you to choose a mode that gives you as much control over camera functions as you need. While shooting, you can use the separate lens rings for zoom (☐ 73) and focus (☐ 74) to help compose your shots. In “run and gun” situations, the articulated touch-screen LCD panel will aid your maneuverability by giving you the freedom to get low- or high-angle shots.
Depending on your shooting style, you may even want to attach the supplied viewfinder unit to the camcorder (☐ 22) or use the optional RC-6 Remote Controller (☐ 40).
Software to help manage recordings
After you finish shooting, you can easily save, manage and play back your video clips using the Canon XF Utility software (122). To help your post-production workflow, you can import your video clips into select non-linear editing (NLE) software using the Canon XF plugins. Both the software and plugins are available as a free download.
Versatile Artistic Expression
Creative recording modes
The camcorder offers the following recording modes to widen the scope of shooting styles. The slow and fast motion recording mode (☐ 96) can go from slow motion at x1/4 speed up to fast motion at x1200 speed. Pre-recording mode (☐ 97), catches the 5 seconds of video prior to the actual start of recording, which helps ensure that you do not miss the action. You can use interval recording mode (☐ 98) to take a series of photos at a set interval.
Creating a professional look
You can add a professional feel to your shots by using looks (71) to affect image-related settings, such as sharpness and color depth. Use the pre-installed looks, which can be set separately for video clips and photos, or customize them to your preference. There are even looks that approximate the color matrix settings of Cinema EOS cameras.
Diverse audio options
The camcorder can record sound as 2-channel linear PCM audio (16-bit/48 kHz) using the camcorder's built-in microphone or an optional external microphone with a ∅ 3.5 mm stereo mini-plug (MIC terminal). By attaching the supplied MA-400 Microphone Adapter, you will be able to use external audio sources with an XLR plug (INPUT 1/INPUT 2 terminals with +48 V phantom power supply).
Advanced Professional Features and Flexibility
Wi-Fi network functions
When you use the Wi-Fi functions (123), you can remotely record and play back using a connected Wi-Fi device, such as your smartphone or tablet. You can also use the media server function to view photos on your camcorder's SD card.
Time code and user bit output
The camcorder generates a time code and adds it to your recordings. In addition, it can output that time code and user bit from the HDMI OUT terminal (☐ 84). This is useful for situations such as referencing or shooting in a multi-camera setup.
Customization
The camcorder features 3 assignable buttons to which you can assign often-used functions (☐ 105). The main camera function menu can also be customized so that you can quickly access and adjust functions you find necessary (☐ 104).
Other Functions
• Assistance functions
Peaking and magnification (77) can be helpful when you use manual focus, onscreen markers (82) can be very useful to help you frame your video, and zebra patterns (82) can give you a reference point to avoid overexposures. You can also have the camcorder display a simplified waveform monitor (83).
- ND filter
When activated, the built-in ND filter reduces the amount of light by 3 stops, allowing you to better capture your subject in the desired depth of field (140).
- Push AF
While the camcorder is in manual focus mode, you can use Push AF to switch the camcorder temporarily to autofocus mode (79).
• HD playback from 4K video
When you play back a 4K clip, you can play back an HD-sized area of your choosing (114).
• Image stabilization (IS)
In addition to the standard IS function, you can use Dynamic IS, which compensates for camcorder shake while walking and shooting, or Powered IS, which is most effective when you are stationary and zoom in on subjects far away (81).
• Support for geotagging
You can use the optional GP-E2 GPS Receiver to add GPS information to your recordings (☐ 100).
1. Introduction 9
About this Manual 9
Conventions Used in this Manual 9
Supplied Accessories 11
Names of Parts 12
MA-400 Microphone Adapter 17
Viewfinder unit 18
2. Preparations 19
Charging the Battery Pack 19
Preparing the Camcorder 22
Attaching the Lens Hood 22
Using the Viewfinder Unit 22
Attaching the MA-400 Microphone Adapter 24
Using the LCD Panel 26
Adjusting the Grip 27
Attaching the Shoulder Strap 27
Using a Tripod 27
Basic Operation of the Camcorder 28
Switching Between Movies and Photos 28
Switching Between Recording and Playback 28
Using the Touch Screen 29
Using the MENU Button and Joystick 30
Using the FUNC. Menu and Setup Menus 30
Date, Time and Language Settings 33
Setting the Date and Time 33
Changing the Language 34
Changing the Time Zone 34
Preparing Recording Media 35
Inserting a CFast Card 36
Removing a CFast card 37
Inserting and Removing an SD Card 37
Initializing the Recording Media 38
Recovering Data on a Recording Media 38
Using the Optional RC-6 Remote Controller 40
Activating the Remote Sensor 40
Using the Remote Controller to Operate the Camcorder 40
3. Recording 41
Recording Video and Taking Photos 41
Preparing to Record 41
Basic Recording 42
Selecting the Photo Size and Aspect Ratio 44
Shooting Continuous Photos (Drive Mode) 44
Remote Operation Using Browser Remote 44
Setting the Clip File Name 45
Onscreen Icons and Displays 47
Using the Fan 52
Video Configuration: Resolution (4K/HD), System Frequency, Frame Rate and Bit Rate 53
Selecting the Resolution (Recording in 4K or HD) 53
Selecting the System Frequency 53
Selecting the Frame Rate and Bit Rate 53
Shooting Modes 55
Manual Exposure (M) 55
Aperture Priority AE (Av) 58
Shutter Priority AE (Tv) 58
Program AE (P) 59
Auto (AUTO) 59
Special Scene (SCN) 59
Using the FUNC. Menu or Browser Remote to Adjust Settings 61
Automatic Gain and ISO Limits 63
Exposure 65
Exposure Lock 65
Touch Exposure 66
AE Shift 67
Light Metering Mode 68
White Balance 69
Using Looks 71
Selecting a Pre-installed Look 71
Creating a User-defined Look 72
Zooming 73
Adjusting the Focus 74
Autofocus (AF) Mode 74
Manual Focus (MF) 76
Push AF 79
Detecting and Focusing On Faces (Face Detection & Tracking) 79
Image Stabilizer 81
Onscreen Markers and Zebra Patterns 82
Displaying Onscreen Markers 82
Displaying Zebra Patterns 82
Using the Waveform Monitor 83
Setting the Time Code 84
Selecting the Time Code Mode 84
Selecting Drop or Non-Drop Frame 85
Setting the User Bit 86
Recording Audio 87
Connecting an External Microphone or External Audio Input Source to the Camera 87
Using the MIC Terminal/Built-in Microphone while the Microphone Adapter is Attached 88
Using the INPUT 1/INPUT 2 Terminals 88
Recording a Single Audio Input to Two Audio Channels (INPUT Terminals) 89
Audio Recording Level (INPUT Terminals) 89
Adjusting the Microphone's Sensitivity (INPUT Terminals) 90
Activating the Microphone's Attenuator (INPUT Terminals) 91
Audio Recording Level (MIC Terminal/Built-in Microphone) 91
Microphone Attenuator (MIC Terminal) 92
Low-Cut Filter (MIC Terminal) 92
Microphone Attenuator (Built-in Microphone) 92
Low-Cut Filter (Built-in Microphone) 93
Adjusting the Microphone's Sensitivity (Built-in Microphone) 93
Monitoring the Audio with Headphones 93
Colors Bars/Audio Reference Signal 95
Recording Color Bars 95
Recording an Audio Reference Signal 95
Slow & Fast Motion Mode 96
Pre-recording Mode 97
Interval Recording Mode 98
Self Timer 99
Recording GPS Information (Geotagging) 100
Orientation Detection 102
- Customization 104
Customizing the FUNC. Menu 104
Assignable Buttons 105
Using an Assignable Button 106
Saving and Loading Menu Settings 107
Saving Menu Settings to an SD Card 107
Loading Menu Settings from an SD Card 107
- Playback 108
Playback 108
Playing Back Recordings 108
Changing the Index Screen 109
Onscreen Icons and Displays during Playback 110
Playback Controls during Clip Playback 112
Playback Controls during Photo Playback 113
Adjusting the Volume 113
Displaying Clip Information 113
Playing an HD-sized Clip from a 4K Clip 114
Capturing Photos from 4K Clips (4K Frame Grab) and HD Clips 114
Magnifying Photos during Playback 115
Deleting Recordings 116
Deleting Clips and Photos from the Index Screen 116
Deleting a Clip During Playback Pause 116
Deleting a Photo during Playback 117
- External Connections 118
Video Output Configuration 118
Recording Video Signal Configuration and Video Output Configuration 118
Playback Video Configuration and Video Output Configuration 119
Selecting the Audio Output Channel 120
Connecting to an External Monitor 121
Connection Diagram 121
Saving Clips to a Computer 122
Installation 122
- Wi-Fi Functions 123
About the Wi-Fi Functions 123
Wireless Connections Using Wi-Fi 125
Wi-Fi Protected Setup (WPS) 125
Searching for Access Points 126
Manual Setup 128
Viewing and Changing Wi-Fi Settings 129
Browser Remote: Controlling the Camcorder from a Network Device 131
Setting Up Browser Remote 131
Starting Browser Remote 131
Playback via Browser 135
Media Server 136
8. Additional Information 137
Menu Options 137
FUNC. Menu 137
Setup Menus 139
Troubleshooting 146
List of Messages 151
Handling Precautions 155
Maintenance/Others 158
Optional Accessories 159
Specifications 161
Reference Tables 165
Introduction
About this Manual
Thank you for purchasing the Canon XC15. Please read this manual carefully before you use the camcorder and retain it for future reference. Should the camcorder fail to operate correctly, refer to Troubleshooting (☐ 146).
Conventions Used in this Manual
- IMPORTANT: Precautions related to the camcorder's operation. • NOTES: Additional topics that complement the basic operating procedures. • ☐: Reference page number. • The following terms are used in this manual.
"Screen" refers to the LCD screen.
"SD card" refers to an SD, SDHC or SDXC memory card.
"Recording media" refers to CFast cards and SD cards.
- Photographs in the manual are simulated pictures taken with a still camera. Some screenshots have been altered to make them easier to read.
- This camcorder uses the same button to record video clips and take photos. In this manual, when you are recording video clips, this button is referred to as the START/STOP button; when you are shooting photos, it is referred to as the PHOTO button.

The arrow ➤ is used to abbreviate menu selections. For a detailed explanation on how to use the menus, refer to Using the MENU Button and Joystick (☐ 30). For a concise summary of all available menu options and settings, refer to the appendix Menu Options (☐ 137).
Operating modes
A dark icon (like) indicates the function can be used in the operating mode shown; a light icon (like) means the function cannot be used.
For details, refer to the following.
Basic Operation of the Camcorder (☐ 28)
Selecting the Resolution (Recording in 4K or HD) (53)
![Using the Fan: The camcorder uses an internal cooling fan to reduce the camcorder's internal heat. Operating modes: 1. Press the MENU button. 2. Open the [Fan] submenu: [✓ System Setup] ➤ [3] ➤ [Fan]. 3. Select the desired option and then touch [✗]. Options: [✓ Automatic]: The fan runs while the cam…](/content/2026/06/1325421/images/6b4b6264dc4d70b9a4269d613b0c96483a2c20281f396e8c81c8cc2fd604999a.jpg)
When a procedure requires selecting an option, the available options are listed within or after the procedure. Brackets [] are used to refer to menu options as they are displayed on screen.
When a function requires the use of the menu, the quick reference shows the submenus and, when applicable, the default setting for the menu item. The example illustration indicates that you can find the function by selecting the [System Setup] menu, the third submenu "page", and then the [Fan] menu item.
The navigation bar at the bottom of the page offers buttons to let you jump quickly to the information you want to find.

Takes you to the table of contents.

Takes you to the summary of menu options and settings.

Takes you to the alphabetical index.
Supplied Accessories
The following accessories are supplied with the camcorder.

CA-946 AC Adapter (incl. power cord)
LP-E6N Battery Pack (incl. protective cover)
Lens Hood Viewfinder Unit
(incl. viewfinder unit cover)
Lens Cap
MA-400 Microphone Adapter
UN-5 Unit Cable
Cable Clamp

Shoulder Strap IFC-300PCU/S USB Cable HTC-100/S High Speed HDMI Cable Quick Guide


Names of Parts

1 Focus ring (74)
2 Zoom ring (73)
3 FOCUS (focus mode) switch (☐ 74)
4 AUDIO terminal (☐ 24)
5 Shoulder strap mount (☐ 27)
6 MIC (microphone) terminal (☐ 87)
11 PUSH AF (momentary autofocus) button (79)/
Assignable button 2 (105)
12 Exhaust ventilation outlet (☐ 52)

1 Air intake vent (☐ 52) 2 Shoulder strap mount (☐ 27)
3 ☉ (headphone) terminal (☐ 93)

4 Tally lamp (☐ 42)
5 Remote sensor (☐ 40): For operating the camcorder with the optional RC-6 Remote Controller.

1 LCD touch screen (☐ 26) 2 MAGN. (magnification) button (77)/ Assignable button 3 (105) 3 MENU button (☐ 30) 4 Joystick (☐ 30) 5 ACCESS indicator (☐ 35)
6 CARD OPEN (open recording media slot cover) lever (☐ 35) 7 Recording media slot cover 8 CFast card slot (☐ 35) 9 SD card slot (☐ 35) 10 CFast card release button (☐ 35)

1 Built-in microphone (87) 2 Accessory shoe (☐ 24, 87): For attaching the supplied MA-400 Microphone Adapter. 3 ON/OFF button (☐ 33) 4 START/STOP button (☐ 41)/PHOTO button (☐ 41): When you are recording video clips, this button is referred to in this manual as the START/STOP button; when you are shooting photos, it is referred to as the PHOTO button.
5 Movie/photo switch (☐ 28) 6 Control dial (☐ 55) 7 ▶ (playback) button (108) 8 POWER/CHG (power/battery charging) indicator (19) 9 Shooting mode dial (☐ 55) 10 Shooting mode dial button (☐ 55) 11 Built-in speaker (113)

1 Battery compartment 2 Battery release latch (19) 3 BATT. OPEN (open battery compartment) switch (19)
4 Battery compartment cover (☐ 19) 5 Tripod socket (27)
MA-400 Microphone Adapter
1 Audio recording level switches for CH1 (top) and CH2 (bottom) (☐ 90) 2 INPUT 1 (top)/ INPUT 2 (bottom) switches (audio source selection) (88) 3 Attachment base 4 Socket for 0.64 cm (1/4") screws 5 AUDIO (audio level) dials for CH1 (top) and CH2 (bottom) (☐ 90)
6 Microphone lock screw (☐ 24) 7 Microphone holder: For microphones with a diameter of ∅19 mm to 20 mm (0.75" to 0.79"). 8 Microphone cable clamp 9 AUDIO terminal (☐ 24) 10 INPUT 1 (right) and INPUT 2 (left) terminals (☐ 88): For microphones and external audio sources with an XLR connector.
Names of Parts
Viewfinder unit
18

1 Viewfinder unit latch (☐ 22)
2 Eye cup
3 Dioptric adjustment lever (☐ 23)
2
Preparations
Charging the Battery Pack
The camcorder can be powered with a battery pack or directly using the CA-946 AC adapter. The first time you use the camcorder, charge the battery pack.
For approximate charging times and recording/playback times with a fully charged battery pack, refer to Recording and Playback Times (166).
1 Connect the power cord to the AC adapter. 2 Plug the power cord into a power outlet. 3 Connect the AC adapter to the camcorder's DC IN terminal.

4 Slide the BATT. OPEN switch in the direction of the arrow and open the battery compartment cover. 5 Insert the battery pack all the way into the compartment as shown in the illustration.
- Push it all the way in until the battery release latch secures it in place.
6 Close the battery compartment cover.
- Push the cover until you hear a click. Do not force the cover closed if the battery pack is not correctly inserted.

7 Charging will start when the camcorder is turned off.
- If the camcorder was on, the green POWER/CHG indicator will go out when you turn off the camcorder. After a moment, the POWER/CHG indicator will illuminate in red (battery pack charging). The red POWER/CHG indicator will go out when the battery pack is fully charged.
- If the indicator flashes, refer to Troubleshooting (146).
POWER/CHG (battery pack charging) indicator
8 Disconnect the AC adapter in the order shown in the illustration.

To remove the battery pack
Open the battery compartment cover and slide the battery release latch in the direction of the arrow so the battery pack springs out. Remove the battery pack and close the cover.


IMPORTANT
- Turn off the camcorder before connecting or disconnecting the AC adapter. After you turn off the camcorder, important data is updated on the recording media. Be sure to wait until the green POWER/CHG indicator goes out.
- When using the AC adapter, do not fix it permanently to one place as this may cause a malfunction.
- Do not connect to the camcorder's DC IN terminal or to the AC adapter any electrical equipment that is not expressly recommended for use with this camcorder.
- To prevent equipment breakdowns and excessive heating, do not connect the supplied AC adapter to voltage converters for overseas travels or special power sources such as those on aircraft and ships, DC-AC inverters, etc.

NOTES
- You cannot charge the optional LP-E6 Battery Pack with the camcorder. Check the bottom label of the battery pack and make sure it is an LP-E6N Battery Pack.
- We recommend charging the battery pack in temperatures between 10 °C and 30 °C (50 °F and 86 °F). If either the ambient temperature or the battery pack's temperature is outside the range of approx. 0 °C to 40 °C (32 °F to 104 °F), charging may take longer than usual or charging may not start.

- The battery pack will be charged only when the camcorder is off.
- If the power supply was disconnected while charging a battery pack, make sure the POWER/CHG indicator has gone out before restoring the power supply.
- If remaining battery time is an issue, use the AC adapter to power the camcorder from a power outlet so the battery pack will not be consumed.
- Charged battery packs continue to discharge naturally. Therefore, charge them on the day of use, or the day before, to ensure a full charge. We recommend that you prepare battery packs to last 2 to 3 times longer than you think you might need.
Preparing the Camcorder
This section outlines the basic preparations of the camcorder, such as attaching the viewfinder unit and supplied MA-400 Microphone Adapter, and adjusting the screen and grip.
Attaching the Lens Hood
Attach the lens hood to protect the lens and reduce the amount of stray light that may hit the lens.
Place the lens hood on the front of the lens so that the hood's lens mount index covers the index on the lens (①) and turn it 90 degrees clockwise until it clicks (②).
- Be careful not to deform the lens hood.
- Make sure that the lens hood is aligned with the thread.

Using the Viewfinder Unit
Attaching the Viewfinder Unit
1. Open the viewfinder unit latch and remove the viewfinder unit cover.

2. Turn the LCD panel upward. 3. Hook the protrusion on the right side of the viewfinder unit into the groove under the right side of the LCD panel. Then, lower the viewfinder unit.

4. Hook the viewfinder unit latch under the left side of the LCD panel and then fasten the latch. Then, return the LCD panel to its original position.

Adjusting the Viewfinder Unit
1 Press the ON/OFF button to turn on the camcorder.
• The POWER/CHG indicator will illuminate. - If necessary, perform the initial setup (☐ 33).
2 Adjust the dioptric adjustment lever until the viewfinder unit's image is sharp.

Removing the Viewfinder Unit
1 Turn the LCD panel upward. 2 Open the viewfinder unit latch and remove the viewfinder unit from the camcorder.
- Make sure to open the latch all the way before removing the unit.

Preparing the Camcorder
3 Attach the viewfinder unit cover, hook the viewfinder unit latch to the left side of the cover and then fasten the latch.

i NOTES
- When you are not using the viewfinder unit, make sure to attach the viewfinder unit cover to the unit.
Attaching the MA-400 Microphone Adapter
By attaching the microphone adapter to the camcorder, you can use the INPUT terminals to record audio from commercially available microphones or analog line in sources with an XLR connector. The microphone adapter is powered by the camcorder's power supply.
1 Attach the supplied cable clamp to the attachment base at the back of the microphone adapter (①) and tighten the lock screw (②).

2 Insert the attachment base at the bottom of the microphone adapter (③) to the camcorder's accessory shoe and tighten the lock screw (④).

3 Using the supplied unit cable, connect the microphone adapter's AUDIO terminal to the camcorder's AUDIO terminal (⑤).
- Align the ▲ marks on the unit cable's plugs and terminals.
- The unit cable's connectors are interchangeable and either end can be plugged into either terminal.

4 Put the unit cable through the cable clamp (⑥).

Removing the Microphone Adapter
1 Remove the unit cable from the cable clamp. 2 Disconnect the unit cable from the camcorder's and the microphone adapter's AUDIO terminals (①). - Pull back the metallic tip of the plug and then disconnect the cable from the terminal. 3 Unscrew the lock screw at the bottom of the microphone adapter (②) and then gently slide out the microphone adapter from the camcorder's accessory shoe (③).

Preparing the Camcorder
4 Unscrew the lock screw at the back of the microphone adapter (④) and then remove the cable clamp (⑤).

Using the LCD Panel
Pull out the LCD panel and adjust it to a comfortable viewing angle.

- You can adjust the angle also for high- and low-angle shooting.


i NOTES
- About the LCD screen: The screen is produced using extremely high-precision manufacturing techniques, with more than 99.99% of the pixels operating to specification. Less than 0.01% of the pixels may occasionally misfire or appear as black, red, blue or green dots. This has no effect on the recorded image and does not constitute a malfunction.
- If the screen appears dim, you can adjust the brightness using the [System Setup] [1] [LCD Brightness] and [LCD Backlight] settings.
Adjusting the Grip
The grip can be rotated 90 degrees toward or away from the lens to give you a convenient grip angle.
While firmly holding the camcorder, rotate the grip to the desired position.

Attaching the Shoulder Strap
Pass the ends through the strap mounts and adjust the length of the shoulder strap.

IMPORTANT
- Be careful not to drop the camcorder when attaching or adjusting the shoulder strap.

Using a Tripod
You can mount the camcorder on a tripod with a mounting screw of 6.5 mm (0.26 in.) or smaller. Using tripods with longer mounting screws may cause damage to the camcorder.

Basic Operation of the Camcorder
Depending on how you plan to shoot, you may need to switch between shooting video clips and shooting photos. Before you shoot, you can also select a shooting mode, which can give you the freedom of adjusting the camcorder's camera-related settings or allow you to entrust the settings to the camcorder to varying degrees, depending on the mode. After you finish recording, you can check your recordings by switching the camcorder to playback mode.
Switching Between Movies and Photos
Operating modes:


To shoot video clips, set the movie/photo switch to 🎨; to shoot photos, set it to 🔒.

Setting the Shooting Mode
You can select a shooting mode to match your shooting style.
Operating modes:


While pressing down the shooting mode dial button, turn the shooting mode dial to the desired mode.
For details on the various shooting modes, refer to Shooting Modes (☐ 55).

Switching Between Recording and Playback
With a single press of a button, the camcorder can easily switch between recording mode and playback mode. For details on playing back your recordings, refer to Playback (☐ 108).
Operating modes:


Hold the ▶ button pressed down.

Operating Mode Icons Used in This Manual This instruction manual uses icons to indicate the recording and playback modes for video clips and photos.
| Icon Description | |
| Video clip shooting mode. | |
| Photo shooting mode. | |
| Video clip playback mode | |
| Photo playback mode. | |
Using the Touch Screen
The buttons and menu items that appear on the touch screen change dynamically depending on the operating mode and the task you are performing. With the intuitive touch screen interface you have all the controls at your fingertips.
Touch Drag Pinch in Pinch out
Touch
Press on an element displayed on the touch screen.
Used to start playing back a recording in an index screen, to select a setting from the menus, etc.
Drag
Swipe your finger up and down or left and right across the screen. Used to scroll menus, to browse through index screen pages or to adjust slider controls like the volume.
Pinch In
Place two fingers on the screen and bring them together.
Used when playing back clips and photos. Pinch your fingers in to return to the index screen. Also used during photo playback to zoom out from a photo that has been zoomed in.
Pinch Out
Place two fingers on the screen and move them apart.
Used on an index screen during playback. Pinch your fingers out to start playing back the clip. Also used during photo playback to zoom in on the photo.

IMPORTANT
- The camcorder features a capacitive touch screen. In the following cases, you may not be able to perform touch operations correctly.
- Using your fingernails or hard-tipped objects, such as ballpoint pens.
- Operating the touch screen with wet or gloved hands.
- Applying excessive force or forcefully scratching the touch screen.
- Attaching commercially available screen protectors or adhesive film onto the touch screen's surface.
Using the MENU Button and Joystick
You can navigate some of the camcorder's menus and screens using the MENU button and joystick instead of using the touch panel. This is convenient, for example, when the viewfinder unit is attached to the camcorder and you cannot touch the screen.

Joystick
When making a menu selection, push the joystick (▲▼/▲▶) to move the orange selection frame in the menu. Then, press the joystick itself to select the menu item indicated by the orange selection frame.
MENU button
Press the button to open the setup menus and then press again to close the menu after adjusting desired settings.
Using the FUNC. Menu and Setup Menus
The camcorder's functions and settings can be adjusted using the FUNC. menu and setup menus. For details about the available menu options and settings, refer to the appendix Menu Options (☐ 137). In this manual, navigating the menus is explained using mainly the touch panel controls but they can also be navigated using the joystick and other buttons. The procedure below explains how to use both methods. If necessary, refer back to this section for details on using the joystick.
FUNC. Menu
The FUNC. menu contains camera-related functions, such as shutter speed and aperture, used while shooting. The icons of each function's current setting appear on both sides of the menu. The left side contains functions used prior to shooting while the right side contains functions that can be used while shooting. You can even change what functions appear on the right side of the FUNC. menu (104).
Although you can access the various functions using the joystick, some functions will still require touch operations.
Operating modes:


To use the touch panel controls
1 Touch [FUNC].
- The FUNC. menu appears. You can drag your finger up/down to see more functions.
2 Touch the icon of the desired function.
- Menu items not available appear grayed out.
3 Adjust the function and then touch [✗].
- Check the function's description for details.

To use the joystick
1 Push the joystick (▲▼/◀▶) to select [FUNC.] and then press the joystick.
• The FUNC. menu appears.
2 Push the joystick (▲▼/◀▶) to select the icon of the desired function and then press the joystick.
- Menu items not available appear grayed out.
3 Adjust the function.
- Check the function's description for details.
4 Push the joystick (▲▼/◄►) to select [×] and then press the joystick.
i NOTES
- An adjustment dial will appear when adjusting some functions. To use touch panel controls, drag your finger left/right to move the adjustment dial to the desired setting. To use the joystick, first press the joystick itself so that the position of the current setting is highlighted in orange and then push left/right to adjust the setting.
Setup Menus
Operating modes:


To use the touch panel controls
1 and modes only: Touch [FUNC].
2 Touch [MENU].
- Alternatively, you can press the MENU button to open the setup menus directly.
- The setup menus appear. Settings are divided into groups, which can be accessed through the tabs at the top of the screen.


Menus

3 Touch the tab of the desired menu.
- Depending on the operating mode, some tabs may be divided into multiple “pages”. Touch the numbers under the tab icons or drag your finger left/right to switch to other pages in the currently selected tab.
4 Touch the desired setting.
- Menu items not available appear grayed out.
5 Touch the desired option and then touch [✗].
- You can touch [✗] to close the menu at any time.
- You can touch [→] to return to the previous screen. If you changed a setting, it will be applied.
To use the joystick
1 and modes only: Push the joystick (▲▼/◄►) to select [FUNC.] and then press the joystick.
2 Press the MENU button.
- Alternatively, you can push the joystick (▲▼/◄►) to select [MENU] and then press the joystick.
- The setup menus appear. Settings are divided into groups, which can be accessed through the tabs at the top of the screen.
3 Push the joystick (◀▶) to select the desired tab and page number.
- Depending on the operating mode, some tabs may be divided into multiple "pages".
4 Push the joystick (▲▼) to move the selection bar to the desired setting and then press the joystick.
- Menu items not available appear grayed out.
5 Push the joystick (▲▼/◄►) to select the desired option and then press the joystick.
6 Push the joystick (▲▼/◀▶) to select [×] and then press the joystick.
- You can press the MENU button to close the menu at any time.
- You can select [→] to return to the previous screen. If you changed a setting, it will be applied.
i NOTES
- For brevity's sake, references in the text to settings in the setup menus will include only the tab of the desired menu and the setting name. For example, "You can adjust the date and time later on with the [ System Setup] ▶ [1] ▶ [Date/Time] setting."
- Depending on the operating mode, you may need to switch pages under the tab to access the function.
Date, Time and Language Settings
Setting the Date and Time
You will need to set the date and time of the camcorder before you can start using it. When the camcorder's clock is not set, the [Date/Time] screen will appear automatically with the month selected.
Operating modes:


1 Press the ON/OFF button to turn on the camcorder.
- The POWER/CHG indicator will illuminate and the [Date/Time] screen will appear.
2 Touch a field you want to change (year, month, day, hours or minutes).
- You can also push the joystick (◀▶) to move between the fields and then press the joystick to make your selection.
3 Touch [▲] or [▼] to change the field as necessary.
- You can also push the joystick (▲▼) to change the field.
4 Set the correct date and time by changing all the fields in the same way.
5 Touch [Y.M.D], [M.D,Y] or [D.M.Y] to select the date format you prefer.
- You can also push the joystick (◀▶) to move between the fields and then press the joystick to make your selection.
- In some screens, the date will be displayed in short form (numbers instead of month names or only the day and month), but it will still follow the order you selected.
6 Touch [24H] to use 24-hour clock or leave it unselected to use 12-hour clock (AM/PM).
- You can also push the joystick (◀▶) to move between the fields and then press the joystick to make your selection.
7 Touch [OK] to start the clock and close the setup screen.
- You can also push the joystick (◀▶) to move between the fields and then press the joystick to make your selection.
i NOTES
- You can adjust the date and time later on with the [ System Setup] ➤ [1] ➤ [Date/Time] setting.
- When you do not use the camcorder for about 3 months, the built-in rechargeable lithium battery may discharge completely and the date and time setting may be lost. In such case, recharge the built-in lithium battery (157) and set the time zone, date and time again.
- Using the optional GP-E2 GPS Receiver, you can have the camcorder adjust settings automatically according to the UTC date/time information received from the GPS signal (100).

Changing the Language
The default language of the camcorder is English. You can set it to one of 27 languages.
Operating modes:


System Setup]
[1]
[Language

[English]
1 Press the MENU button. 2 Open the [Language] screen.
[System Setup] [1] [Language]
3 Touch the desired language and then touch [OK]. 4 Touch [✗] to close the menu.

NOTES
- Some buttons, such as [FUNC.] and [MENU], will appear in English regardless of the language selected.
Changing the Time Zone
Change the time zone to match your location. The default setting is New York. In addition, the camcorder is able to retain the date and time of an additional location. This is convenient when you travel so that you can set the camcorder to match the time of your home location or that of your travel destination.
Operating modes:


System Setup]
[1]
[Time Zone/DST]
[New York]
1 Press the MENU button. 2 Open the [Time Zone/DST] screen.
[ System Setup] ➤ [1] ➤ [Time Zone/DST]
3 Touch [▲] to set the home time zone, or [✗] to set the time zone of your destination when you are traveling. 4 Touch [◀] or [▶] to set the desired time zone. If necessary, touch [★] to adjust for daylight saving time. 5 Touch [✗] to close the menu.
Preparing Recording Media
The camcorder records 4K clips to CFast cards, and HD clips and photos to SD. SD, SDHC and SDXC memory cards. Initialize recording media (38) when you use them with this camcorder for the first time. In the case of SD cards, initialize using the [Complete Initialization] option.
Compatible Recording Media
For the latest information about recording media tested for use with this camcorder, visit your local Canon Web site.
CFast cards
CFast 2.0-compliant cards.
SD cards
As of June 2016, the recording function has been tested using memory cards made by Panasonic, Toshiba and SanDisk. For details about SD cards tested for use with this camcorder, visit your local Canon Web site.
Memory card type: SD SD card, SDHC card, SDXC card SD Speed Class*: CLASS® CLASS®
To record HD clips with a frame rate/bit rate of [59.94P / 50 Mbps] or clips using slow & fast motion recording mode, we recommend using SD cards rated CLASS 10.

IMPORTANT
- Turn off the camcorder before inserting or removing recording media. Inserting or removing the recording media with the camcorder on may result in permanent data loss.
- After repeatedly recording, deleting and editing recordings (fragmented memory), it will take longer to write data on recording media and recording may stop. Save your recordings and initialize the recording media with the camcorder.
- About CFast and SDXC cards: You can use CFast cards and SDXC cards with this camcorder but such recording media are initialized using the exFAT file system.
- When using exFAT-formatted recording media with other devices (digital recorders, card readers, etc.), make sure that the external device is compatible with exFAT. For more information on compatibility, contact the computer, operating system or memory card manufacturer.
- If you use exFAT-formatted recording media with a computer OS that is not exFAT-compatible, you may be prompted to format the memory card. In such case, cancel the operation to prevent data loss.

NOTES
- Proper operation cannot be guaranteed for all recording media.
Inserting a CFast Card
1. Turn off the camcorder. - Wait until the ACCESS indicator is off. 2. Slide the CARD OPEN switch in the direction of the arrow and open the recording media slot cover.

3. Insert the CFast card straight, with the label facing up, all the way into the slot ①. - Make sure that you insert the CFast card into the slot so that the connectors in the card match the orientation shown on the illustration to the left of the CFast card slot. 4. Close the recording media slot cover ②. - Do not force the cover closed if the CFast card is not correctly inserted.
| ACCESS indicator | Recording media status |
| On or flashing | Accessing the recording media. |
| Off | A recording media is not inserted or it is not being accessed. |


IMPORTANT
- CFast cards have front and back sides that are not interchangeable. Inserting a CFast card facing the wrong direction can cause a malfunction of the camcorder. Be sure to insert the CFast card as described in the procedure above.
Removing a CFast card
1. Turn off the camcorder.
- Wait until the ACCESS indicator is off.
2. Slide the CARD OPEN switch in the direction of the arrow and open the recording media slot cover ①.
3. Push in the CFast card release button to release the CFast card.
4. Pull the CFast card all the way out and close the recording media slot cover ②.

IMPORTANT

- Observe the following precautions while the ACCESS indicator is on or flashing in red. Failure to do so may result in permanent data loss.
- Do not disconnect the power source or turn off the camcorder.
- Do not open the recording media slot cover.
Inserting and Removing an SD Card
1 Turn off the camcorder.
- Wait until the ACCESS indicator is off.
2 Slide the CARD OPEN switch in the direction of the arrow and open the recording media slot cover ①.
3 Insert the SD card, with the label facing up, all the way into the SD card slot until it clicks ②.
- To remove the SD card, push the SD card once to release it. When the SD card springs out, pull it all the way out.
4 Close the recording media slot cover ③.
- Do not force the cover closed if the SD card is not correctly inserted.
| ACCESS indicator | Recording media status |
| On or flashing | Accessing the recording media. |
| Off | A recording media is not inserted or it is not being accessed. |


IMPORTANT
- Observe the following precautions while the ACCESS indicator is on or flashing in red. Failure to do so may result in permanent data loss.
- Do not disconnect the power source or turn off the camcorder.
- Do not open the recording media slot cover.
- SD cards have front and back sides that are not interchangeable. Inserting an SD card facing the wrong direction can cause a malfunction of the camcorder. Be sure to insert the SD card as described in the procedure above.

NOTES
- SD cards have a physical switch to prevent writing on the card so as to avoid the accidental erasure of the card's content. To write-protect the SD card, set the switch to the LOCK position.
Initializing the Recording Media
The first time you use any recording media with this camcorder, initialize it first. You can also initialize a recording media to permanently delete all the data it contains.
When initializing an SD card, you can select quick initialization, which clears the file allocation table but does not physically erase the stored data, or complete initialization, which deletes all data completely.
Operating modes:


1 Press the MENU button.
2 Open the [Initialize CFast/SD] submenu.
[Recording Setup] ➤ [1] ➤ [Initialize CFast/SD]
3 Touch [CR Memory Card] or [SD Memory Card] and then touch [Initialize].
- If you are initializing a CFast card, skip to step 5.
4 Touch [Complete Initialization] to delete all data completely.
5 Touch [Yes].
[Recording Setup]
[1]
[Initialize CFast/SD]
- If you are using the [Complete Initialization] option, you can touch [Cancel] to cancel the operation while it is in progress. You can use the SD card but all data will be erased.
6 When the confirmation screen appears, touch [OK].
- The selected recording media is initialized and all the data it contains is erased.

IMPORTANT
- Initializing a recording media will permanently erase all data. Lost data cannot be recovered. Make sure you save important recordings in advance.
- Depending on the SD card, the complete initialization may take up to a few minutes.
Recovering Data on a Recording Media
Some actions, such as suddenly turning off the camcorder or removing the recording media while data is being recorded, can cause data errors on the recording media. In such case, you may be able to recover the data if a message is displayed indicating that a clip needs recovering. You can recover the clips from a playback index screen.
Operating modes:


1 Open the index screen with the clip you want to recover (☐ 108). 2 Select the clip to recover.
- The clip is indicated by a [?] in the thumbnail.
3 When the camcorder prompts you to recover the clip, touch [Yes]. 4 After the clip has been recovered, touch [OK].
i NOTES
- This procedure may delete clips shorter than 0.5 seconds in length. Additionally, up to 0.5 seconds may be deleted from the end of the clips.
- In some cases, it may not be possible to recover the data. This is more likely when the file system is corrupted or the recording media is physically damaged.
- Only clips recorded with this camcorder can be recovered.
Using the Optional RC-6 Remote Controller
The camcorder can be operated remotely. You can use the optional RC-6 Remote Controller as described in this section. You can also use the camcorder's network functions and wirelessly connect a compatible device to control the camcorder. For details about wirelessly controlling the camcorder, refer to Browser Remote: Controlling the Camcorder from a Network Device (☐ 131).
Operating modes:


Activating the Remote Sensor
1 Press the MENU button. 2 Open the [Wireless Remote Control] submenu.
[System Setup] [3] (in mode) or [2] (in mode) [Wireless Remote Control]
3 Select [ON On] and then touch [X].
- To deactivate the remote sensor, select [OFF Off Off] instead.
![graph TD A["[ System Setup"]] --> B["[3"] (in mode) or["2"] (in mode)] B --> C["[Wireless Remote Control"]] C --> D["[ OFF Off "]]](/content/2026/06/1325421/images/227f74506845f61ab923e7dc1378f0874619ded9ec6bc2cedb3e41d0ce4effc8.jpg)
Using the Remote Controller to Operate the Camcorder
When using the remote controller, point it at the camcorder's remote sensor.
- The position of the delay switch on the remote controller determines how the remote controller operates. Refer to the following table.
| Delay switch position | mode mode | |
| 2 | Starts and stops recording a video clip. | Takes a photo after a 2-second delay. |
| ● | Takes a photo, even while recording a video clip. | Takes a photo immediately. |

i NOTES
- The camcorder may not operate correctly when used under fluorescent or LED lights. Make sure to use the camcorder away from such light sources as much as possible.
- The camcorder may not operate correctly when a remote controller for another device is pointed at the camcorder and operated.
- The remote controller may not operate correctly when the remote sensor is located under strong light sources or direct sunlight.
- The camcorder may not operate correctly when a flash fires. If a flash is being used in the vicinity, deactivate the remote sensor as described in the previous procedure.
- When the camcorder cannot be operated with the remote controller under normal circumstances, or when it can only be operated at very close range, replace the battery.
3
Recording
Recording Video and Taking Photos
This section explains the recording basics. Before you begin recording clips*, make a test recording first to check if the camcorder operates correctly. Record a 4K clip (on the CFast card) at 305 Mbps (frame rate of 29.97P or 23.98P) for approximately 5 minutes and an HD clip (on the SD card) at 50 Mbps (frame rate of 59.94P) for approximately 15 minutes. Should the camcorder fail to operate correctly, refer to Troubleshooting (☐ 146). For details on recording audio, refer to Recording Audio (☐ 87).
* "Clip" refers to a single movie unit recorded with a single recording operation.
Preparing to Record
1. Remove the lens cap. 2. Attach the lens hood (☐ 22) and, if necessary, attach the viewfinder unit (☐ 22) and MA-400 Microphone Adapter (☐ 24). 3. Insert a charged battery pack into the camcorder (19). 4. Insert recording media as necessary (☐ 36, 37). - Insert a CFast card to record 4K clips; insert an SD card to record HD clips and photos. 5. Adjust the viewfinder unit, if necessary (☐ 23).

Basic Recording
This camcorder uses the same button to record video clips and take photos. In this manual, when you are recording video clips, this button is referred to as the START/STOP button; when you are shooting photos, it is referred to as the PHOTO button.
Operating modes: 4K HD

1. Set the movie/photo switch to 📄 to record clips or 🔒 to take photos.
2. Set the shooting mode dial to the desired shooting mode (☐ 55).
3 Press the ON/OFF button to turn on the camcorder.
• The POWER/CHG indicator will illuminate in green. - You can change the setting that determines the file name of recorded clips (☐ 45).
To shoot clips
4 Press the START/STOP button.
- Recording starts. The tally lamp illuminates and the ■ icon at the top of the screen changes to ●.
- The ACCESS indicator flashes in red intermittently as the camcorder records to the recording media.
- You can also take a photo while recording a clip (☐ 43).
5 Press the START/STOP button to stop the recording.
- The clip is recorded on the recording media and the camcorder enters record standby mode. The tally lamp will also go out.
6 Press and hold the ON/OFF button until the POWER/CHG indicator goes out.
- Make sure the ACCESS indicator has also gone out.
To take photos
4 Press the PHOTO button halfway.
- When the FOCUS switch is set to A (autofocus): If the subject is not in focus, ⬤ will flash in yellow. Once the focus is automatically adjusted, ⬤ will turn green and one or more AF (autofocus) frames will appear. You can also change the autofocus method (☐ 74).
5 Press the PHOTO button fully.
- The ACCESS indicator flashes in red intermittently as the camcorder records to the recording media.
6 Press and hold the ON/OFF button until the POWER/CHG indicator goes out.
- Make sure the ACCESS indicator has also gone out.

IMPORTANT
- Observe the following precautions while the ACCESS indicator is on or flashing in red. Failure to do so may result in permanent data loss.
- Do not open the recording media slot cover and do not remove the recording media.
- Do not disconnect the power source or turn off the camcorder.
- Be sure to save your recordings regularly (122), especially after making important recordings. Canon shall not be liable for any loss or corruption of data.

NOTES
- The built-in microphone may pick up operation noise from the camcorder while recording. Using a commercially-available external microphone (☐ 87) may reduce this noise.
- You can also press the transmit button on the optional RC-6 Remote Controller to record clips and take photos (☐ 40).
- You can select the length of time to review a photo after it is recorded (142).
Taking Photos During Mode
If you set an assignable button to [PHOTO Photo] (105), you can take a photo while recording a clip or while the camcorder is in record standby mode. When you press the button, ▶ 50 will appear on the upper right of the screen.
The size of the photo depends on whether the resolution is set to 4K or HD. When the resolution is set to 4K, the photo size will be 3840x2160; when set to HD, 1920x1080.
Operating modes:


NOTES
- You can even capture a photo in mode while a clip is being played back (114).
- You cannot take a photo in the following cases:
- When an external device is connected to the HDMI OUT terminal.
- When [Slow & Fast Motion] (☐ 96) is set to [x1/4] or [x1/2].
- When [Looks] (71) is set to [ Highlight Priority].
- When the [Camera Setup] ➤ [3] ➤ [Rolling Shutter Reduction] setting is set to [ON On ☑].
Selecting the Photo Size and Aspect Ratio
You can select the size and aspect ratio of recorded photos.
Operating modes:


Recording Setup]
[1]
[Photo Aspect Ratio]
[L4:3 4000x3000]
1 Press the MENU button.
2 Open the [Photo Aspect Ratio] submenu.
[Recording Setup] ➤ [1] ➤ [Photo Aspect Ratio]
3 Select the desired size and aspect ratio, and then touch [X].
- The displayed available number of photos is approximate and based on the currently selected photo size.
Shooting Continuous Photos (Drive Mode)
Using drive mode, you can take a burst of photos of your subject.
Operating modes:


1 Touch [FUNC.] and then touch [Drive Mode].
2 Select the desired option and then touch [X].
Options
[Single Shot]:
Takes a single photo when you press the PHOTO button.
Continuous:
Takes a burst of photos as long as you hold the PHOTO button pressed down. The same focus applied to the first photo will also be applied to the entire series. The camcorder will shoot at a rate of approx. 3.8 shots/second.
[AF] AF Continuous]:
Takes a burst of photos as long as you hold the PHOTO button down. The focus will be adjusted throughout the series. Release your finger from the PHOTO button to stop shooting.
NOTES
- About the [AF] AF Continuous] option: Depending on the Special Scene mode when the shooting mode is set to SCN, the zoom position and other camera settings, the interval between shots may not be the same or the shooting speed may decrease.
Remote Operation Using Browser Remote
After completing the necessary preparations (☐ 131), you can start and stop recording from a connected device using the Browser Remote application.
Operating modes:


1 Touch [LIVE VIEW ON/OFF] to show the camcorder's live view image on the Browser Remote screen.
- The position of the camcorder's movie/photo switch will determine whether the Browser Remote screen displays controls for recording clips or taking photos.
- In this procedure, depending on the network device, you may need to click the Browser Remote onscreen button instead of touching it.
To shoot clips
2 Touch [START/STOP].
- The recording operation indicator changes to [●REC] and the center of the START/STOP button lights up in red.
- The time code displayed on the Browser Remote screen is the same as on the camcorder.
- Touch [START/STOP] again to stop the recording.
To take photos
2 Touch [PHOTO].

Screenshot for recording clips
NOTES
- The Browser Remote application has a key lock function that is limited only to the controls on the application's screens (you will still be able to use the controls on the camcorder). Press [💡] to lock the application's controls; press [💡] to reactivate them.
Setting the Clip File Name
The camcorder allows you to change several settings that determine the file name of the recorded clips. Personalize the clip file name according to your preferences or organizational conventions to create files that are easier to identify and organize.
Operating modes:

The basic file name structure is as follows.

1 Camera index: One character (A to Z) that identifies the camcorder used. 2 Reel number: 3 characters (001 to 999) that identify the recording media used. 3 Clip number: 4 characters (C001 to D999). The clip number advances automatically with each clip recorded (switching to D001 after C999), but you can set the initial clip number. 4 Recording date (set automatically by the camcorder). 5 Random component: 2 characters (numbers 0 to 9 and capital letters A to Z) that change randomly with each clip.
6 User defined field: 5 characters (numbers 0 to 9 and capital letters A to Z) for any other identification purposes. 7 The camcorder will automatically add “_” and a stream number (01 to 99) to the file name of HD clips when an SD or SDHC card is used. The stream number will advance every time the video (stream) file within the clip is split and recording continues on a separate stream file.
Setting the components of the clip file name
To set the camera ID
1 Press the MENU button. 2 Open the [Camera Index] screen.
[Recording Setup] ➤ [2] or [3] (depending on the system frequency)
▶ [Camera Index]
3 Touch [▲] or [▼] to select the desired camera ID. 4 Touch [OK] and then touch [X].
To set the reel number or initial clip number
1 Press the MENU button. 2 Open the [Reel Number] or [Clip Number] screen.
[Recording Setup] ➤ [2] or [3] (depending on the system frequency) ➤ [Reel Number] or [Clip Number]
3 Touch [▲] or [▼] to select the first digit of the reel/clip number and then touch the next field to select the next digit.
- Change the rest of the digits in the same way.
- To reset the reel/clip number, touch [Reset] instead. You will return to the previous screen and will not have to perform the rest of the procedure.
- Touch [Cancel] to close the screen without setting the reel/clip number.
4 Touch [OK] and then touch [✗].
5 If you changed the reel number, initialize all the recording media being used for recording (CFast and SD cards, 38).
i NOTES
- If you set an initial clip number that is smaller than the clip number of a clip on the recording media used, the clip number will continue from the number following that of the last clip on the recording media.

Recording Setup]
[2] or [3] (depending on the system frequency)
[Camera Index] ..... [A]
[Reel Number] ..... [001]
[Clip Number] ..... [001]
[User Defined] ..... [CANON]
To set the user-defined field
1 Press the MENU button.
2 Open the [User Defined] screen.
[Recording Setup] ➤ [3] ➤ [User Defined]
3 Touch [▲] or [▼] to select the first character and then touch the next character.
- Change the rest of the characters in the same way.
- Touch [Cancel] to close the screen without setting the user-defined field.
4 Touch [OK] and then touch [✗].
Onscreen Icons and Displays
Refer to this section for an explanation of the various icons and screen displays that appear in 📋 and 🏠 modes. They may differ depending on the shooting mode and settings in the FUNC. menu and setup menus. Some icons that appear in 📋 mode also appear in 🏠 mode. If the camcorder is in 🏠 mode and you do not find an icon in these tables for 🏠 mode, refer to Icons that appear during 🏠 mode (50).
Operating modes:


Icons that appear during mode
![M 0:04:03:25 FUNC. F2.8 1/75 ISO160 MF *2 PEAK ND □ □ 20 STBY Remote - [********+] HZI 70min SO 0h11m 59.94P 50Mbps MXF LIMIT INPUTOFF CH1/1 -dB 40 30 20 10 0 INPUT1 INPUT2 HD FAN](/content/2026/06/1325421/images/440e00720ef9c1e7b742416dbf980be65febe48f1edbb80f846e2724f2520d66.jpg)
Icons on the top of the screen
| Icon/Display | Description | |
| M, Av, Tv, P, AUTO, , , , , , , , , , , , , , , , , , , , , , , , , , , , , , , , , , , , , , , , , , , , , , , , , , , , , , , , , , , , , , , , , , , , , , , , , , , , , , , , , , , , , , , , , , , , , , , , , , , , , | Shooting mode | 55 |
| 0:00:00.00, 0:00:00:00 | Time code | 84 |
| ●, ■ | Recording operation●: recording, ■: record standby | 41 |
| ⊗2, ⊗0, 0, '■ | Self timer | 99 |
| Appears when recording a photo in record standby mode. | 43 | |
| Pre-recording mode | 97 | |
| ( ) , ( ) , ( ) | Image stabilizer | 81 |
| [FUNC.] | Button to open the FUNC. menu. | 30, 137 |
Icons on the left side of the screen
| Icon/Display | Description | |
| F0.0 Aperture value 55, 58 | ||
| 1/0000, 000.00° | Shutter speed, shutter angle | 55, 58 |
| ±0 0/0, | ±0 0/0: AE shift, : exposure locked | 65 |
| ISO00000, 00.0dB | ISO00000: ISO speed, 00.0dB: gain | 55 |
| , | : auto ISO limit, : AGC limit | 63 |
| AF, MF 0.0ft | Focus mode | 74 |
| • While focusing in manual focus mode, the estimated distance to the subject will be displayed as well. | ||
| Face detection and tracking | 79 | |
| White balance | 69 | |
| Highlight priority look | 71 | |
| Looks | 71 | |
| PEAK, | Peaking | 77 |
| ND | ND filter | 140 |
| [] , , | Light metering mode | 68 |
| ZZ70, Z100 | Zebra patterns | 82 |
| Digital tele-converter | 73 | |
| Rolling shutter distortion reduction | 140 | |
| STBY→, REC→ | HDMI recording command | 145 |
| GPS signal: continuously on - satellite signal acquired; flashing - satellite signal not acquired. | 100 | |
| • Displayed only when an optional GP-E2 GPS Receiver is connected to the camcorder. | ||
| Browser Remote: in white – preparations for connections completed; in yellow – connecting to or disconnecting from the control device. | 131 | |
| Exposure bar | 58 | |
Icons in the center of the screen
| Icon/Display | Description | |
| Remote sensor disabled | 40 | |
| + | Onscreen markers | 82 |
| Face detection. When a face is detected, a white frame will appear around the main subject's face. | 79 | |
| User-selected tracking frame | 79 |
Icons on the right side of the screen
| Icon/Display | Description | ||
| 000 min | Remaining battery chargeThe icon shows an estimate of the remaining charge. The remaining recording time is displayed, in minutes, next to the icon.Whenis displayed, replace the battery pack with a fully charged one.Depending on the conditions of use, the actual battery charge may not be indicated accurately. | - | |
| Recording a photo. If an SD card error occurs,will appear instead. | 43 | ||
| 0h00m, 0h00m | Recording media status and available recording time estimateThe remaining available space is displayed, in minutes, next to the icon.When the icon appears in red followed by [END], there is no more available space and recording will stop. | - | |
 | Zoom indicator | 73 | |
| 59.94P, 59.94i, 29.97P, 23.98P, 24.00P000Mbps | Frame rateBit rate | 53 | |
| MXF | Movie format | - | |
| INPUT | INPUT terminals deactivated | 88 | |
| LIMIT | Audio peak limiter | 90 | |
| CH1/1, CH2/2, CH1+2/1+2 | Audio output channel | 120 | |
 | Audio recording level | 91 | |
Icons on the bottom of the screen
| Icon/Display | Description | |
| [4K], [HD] | Button to open the [4K/HD] submenu and currently selected recording resolution (4K/HD). | 53 |
| When the camcorder's internal temperature has risen to a predetermined level, will appear in yellow. If it continues to rise, will appear in red. | 148 | |
| FAN | Cooling fan operation | 52 |
| MAGN | Magnification (focus assistance function) | 77 |
| Button to open the [Slow & Fast Motion] submenu. Currently selected slow motion rate. Currently selected fast motion rate. | 96 |
Recording Video and Taking Photos
Icons that appear during mode

Icons on the top of the screen
| Icon/Display | Description | |
| 2, 10, 0,Self timer 99 |
Icons on the left side of the screen
| Icon/Display | Description | |
| Looks71 | ||
| Light metering mode | 68 | |
| Drive mode | 44 | |
| Orientation detection | 102 |
Icons on the right side of the screen
| Icon/Display | Description | |
| SD 000 | Recording media and available number of photos. | - |
| Camcorder shake warningIf this icon appears, we recommend stabilizing the camcorder, for example, by mounting it on a tripod. | - |
Icons on the bottom of the screen
| Icon/Display | Description | |
| Button to open the [Photo Aspect Ratio] submenu and currently selected photo size (Lor )S | 44 | |
| Indicates whether the focus and/or exposure is locked while the PHOTO button is pressed halfway.In green – focus and exposure are locked (during auto focus mode); exposure is locked (manual focus mode).In yellow (flashing) – focus is not locked. If the zoom is operated while the icon is green in autofocus mode, it will start flashing in yellow.In white (flashing) – the camcorder is attempting to focus on the subject. | - | |
| Button to open the [Interval Recording] submenu and currently selected interval length. | 98 |
NOTES
- You can press the DISP. button to switch the onscreen displays in the following sequence: show all onscreen displays → show only onscreen markers* and the recording operation display → hide all onscreen displays except the recording operation display. * Only when an onscreen marker is selected (☐ 82).
Using the Fan
The camcorder uses an internal cooling fan to reduce the camcorder's internal heat.
Operating modes:


1 Press the MENU button.
2 Open the [Fan] submenu.
[System Setup] [3] [Fan]
3 Select the desired option and then touch [✗].
Options
[Automatic]: The fan runs while the camcorder is not recording and it is automatically turned off while the camcorder is recording video (while the ● icon appears at the top of the screen).
[System Setup]
[3]
[Fan]
[ON] On
[ON] On: The fan runs at all times. Use this default setting in most cases.
IMPORTANT
- While the fan is running, the exhaust vent will emit warm air.
NOTES
- Be careful not to cover with tape or otherwise obstruct the cooling fan's air intake and exhaust vents (marked as AIR INTAKE/EXHAUST VENT).

Video Configuration: Resolution (4K/HD), System Frequency, Frame Rate and Bit Rate
Before you record, select the resolution (4K or HD), system frequency, frame rate and bit rate that best match your project's needs. Available frame rate and bit rate options will depend on the resolution and system frequency selected.
Operating modes:


Selecting the Resolution (Recording in 4K or HD)
This camcorder allows you to record clips in 4K or HD. The resolution (frame size) of 4K clips is 3840x2160 while that of HD clips is 1920x1080. Note that 4K clips are saved to the CFast card and HD clips are saved to the SD card.
1 Touch [4K] or [HD] on the bottom left of the screen.
- The icon will show the currently selected option.
- Alternatively, you can press the MENU button and select [☐ Recording Setup] ➤ [1] ➤ [4K / HD].
2 Select the desired option and then touch [⊃] or [✗].

Selecting the System Frequency
You can set the camcorder's system frequency to 59.94 Hz or 24.00 Hz.
1 Press the MENU button. 2 Open the [System Frequency] submenu. [◀ System Setup] ➤ [4] ➤ [System Frequency]
3 Select the desired option and then touch [OK].
- The resolution, frame rate and bit rate will be reset and then the camcorder will restart in the selected mode.
[System Setup]
[4]
[System Frequency]
[59.94 Hz 59.94 Hz]
Selecting the Frame Rate and Bit Rate
Follow the procedure below to select the frame rate and bit rate. Choose the combination of frame rate and bit rate that best suits your needs. This procedure is not available for HD clips when the system frequency is set to 24.00 Hz because the frame rate and bit rate will be set to 24.00P and 35 Mbps, respectively, and cannot be changed.
1 Press the MENU button. 2 Open the [4K Recording] or [HD Recording] submenu. [Recording Setup] ➤ [1] ➤ [4K Recording] or [HD Recording]
3 Select the desired option and then touch [✗].
- Icons of the selected option will appear on the right side of the screen.
i NOTES
- The [P] after the frame rate indicates progressive scan while [i] indicates interlaced scan.
[Recording Setup]
[1]
[4K Recording] ..... [29.97P 29.97P / 305 Mbps] [HD Recording] ..... [59.94P 59.94P / 50 Mbps]
Available resolution, system frequency, frame rate and bit rate settings
| Resolution System frequency Frame rate / Bit rate | ||
| 4K(3840x2160) | 59.94 Hz | 29.97P / 305 Mbps |
| 29.97P / 205 Mbps | ||
| 23.98P / 305 Mbps | ||
| 23.98P / 205 Mbps | ||
| 24.00 HZ | 24.00P / 305 Mbps | |
| 24.00P / 205 Mbps | ||
| HD(1920x1080) | 59.94 Hz | 59.94P / 50 Mbps |
| 59.94i / 35 Mbps | ||
| 29.97P / 35 Mbps | ||
| 23.98P / 35 Mbps | ||
| 24.00 HZ 24.00P / 35 Mbps | ||
i NOTES
- A single recording media cannot be used to record clips using different system frequencies.
- For details on the signal output from the HDMI OUT terminal, refer to Video Output Configuration (118).
- When the resolution is set to 4K, you can use the [Camera Setup] [3] [Rolling Shutter Reduction] setting to reduce rolling shutter distortion.
Shooting Modes
This camcorder offers various shooting modes to help bring your creative intent to life. After you select a mode, you can adjust related settings, such as the shutter speed, using the control dial. You can also use the FUNC. menu or Browser Remote application (☐ 61).
Manual Exposure (M)
This mode gives you the most freedom over shooting settings as you can adjust the aperture, shutter speed (in terms of either fractions of a second or shutter angle) or ISO speed/gain*. You can adjust settings using the control dial by following the procedure below. You can also adjust settings using the FUNC. menu or Browser Remote application (61).
* The gain can be adjusted only for clips, not photos.
Operating modes:


1 Set the shooting mode dial to M.
- The aperture, shutter speed/angle or ISO speed/gain value will be highlighted in orange. To change which value is highlighted, continue to step 2. To adjust the highlighted value, skip to step 6.
2 Press the MENU button.
3 Open the [Control Dial] submenu.
[◀ System Setup] ▶ [2] ▶ [Control Dial]
4 Select the desired function to assign to the control dial.
5 Touch [X].
- The current value will be highlighted in orange.
- During mode, when you select [Shutter], you can select the shutter speed mode with the procedure below (☐ 56).
- During mode, when you select [ISO/Gain], you can select whether to have control over the ISO speed or gain with the procedure below (56).
6 Turn the control dial to select the desired value.

[System Setup]
[2]
[Control Dial]
[Aperture]
Shooting Modes
To select the shutter speed mode
The following procedure allows you to set the shutter speed in terms of fractions of a second or the shutter angle. You can select the shutter speed mode also using the Browser Remote application (☐ 61). This function is available when the shooting mode is set to TV or M.
Operating modes:


1 Open the [Shutter Speed Mode] submenu.
['■ Camera Setup] ➤ [3] ➤ [Shutter Speed Mode]
2 Select the desired option and then touch [✗].
Options
[Speed]: Allows you to set the shutter speed (in fractions of a second).
[Angle]: You can set the shutter angle to determine the shutter speed.
To select the ISO speed or gain
Operating modes:


1 Open the [ISO/Gain] submenu.
['■ Camera Setup] ➤ [2] ➤ [ISO/Gain]
2 Select the desired option and then touch [✗].

Camera Setup]
[3]
[Shutter Speed Mode]

Speed]

Camera Setup]
[2]
[ISO/Gain]
[ISO]
so]
Available aperture settings
| Aperture | |
| Clips(1/4-stop increments) | F2.8, F3.2, F3.4, F3.7, F4.0, F4.4, F4.8, F5.2, F5.6, F6.2, F6.7, F7.3, F8.0, F8.7, F9.5, F10, F11 |
| Photos(1/3-stop increments) | F2.8, F3.2, F3.5, F4.0, F4.5, F5.0, F5.6, F6.3, F7.1, F8.0, F9.0, F10, F11 |
Available shutter speed settings
| Shutter speed mode | Frame rate | Shutter speed | |
| Clips | Speed*(1/4-stop increments) | All available frame rates | 1/2, 1/3, 1/4, 1/5, 1/6, 1/8, 1/9, 1/10, 1/12, 1/15, 1/17, 1/20, 1/24, 1/25, 1/30, 1/34, 1/40, 1/48, 1/50, 1/60, 1/75, 1/90, 1/100, 1/120, 1/150, 1/180, 1/210, 1/250, 1/300, 1/360, 1/420, 1/500, 1/600, 1/720, 1/840, 1/1000, 1/1200, 1/1400, 1/1700, 1/2000 |
| Angle** | 59.94P, 59.94i | 360.00°, 240.00°, 216.00°, 180.00°, 120.00°, 90.00°, 60.00°, 45.00°, 30.00°, 22.50°, 15.00°, 11.25° | |
| 29.97P | 360.00°, 324.00°, 270.00°, 240.00°, 216.00°, 180.00°, 120.00°, 108.00°, 90.00°, 60.00°, 45.00°, 30.00°, 22.50°, 15.00°, 11.25° | ||
| 23.98P, 24.00P | 360.00°, 345.60°, 288.00°, 259.20°, 240.00°, 216.00°, 180.00°, 172.80°, 144.00°, 120.00°, 90.00°, 86.40°, 72.00°, 60.00°, 45.00°, 30.00°, 22.50°, 15.00°, 11.25° | ||
| Photos(1/3-stop increments) | 0"5***, 0"4***, 0"3***, 1/4, 1/5, 1/6, 1/8, 1/10, 1/13, 1/15, 1/20, 1/25, 1/30, 1/40, 1/50, 1/60, 1/80, 1/100, 1/125, 1/160, 1/200, 1/250, 1/320, 1/400, 1/500, 1/640, 1/800, 1/1000, 1/1250, 1/1600, 1/2000 | ||
* When [Slow & Fast Motion] (☐ 96) is set to [x1/2], shutter speeds slower than 1/60 are not available. When it is set to [x1/4], shutter speeds slower than 1/120 are not available. ** When [Slow & Fast Motion] (☐ 96) is set to [x1/4], available shutter angles are as follows: 360.00°, 240.00°, 180.00°, 120.00°, 90.00°, 60.00°, 45.00°, 30.00°, 22.50° *** These values represent 0.5 seconds, 0.4 seconds and 0.3 seconds, respectively.
Available ISO speed settings
| ISO speed | |
| Clips/Photos(1/3-stop increments) | 160, 200, 250, 320, 400, 500, 640, 800, 1000, 1250, 1600, 2000, 2500, 3200, 4000, 5000, 6400, 8000, 10000, 12800, 16000, 20000 |
Available gain settings
| Gain | |
| Clips(1.5-dB increments*) | 0.0 dB to 42.0 dB |
* If you set [Camera Setup] ▶ [3] ▶ [Gain Increment] to [FINE Fine], the increment will be 0.5 dB.

NOTES
- The lowest available ISO speed and gain settings are 500 and 9.0 dB, respectively, when [Slow & Fast Motion] (☐ 96) is set to [x1/4] or [Looks] (☐ 71) is set to [✿4 Production Camera], [✿6 Canon Log] or [✿8 Wide DR] (☐ 71).
- However, the lowest available settings will be 1250 and 18.0 dB when [Slow & Fast Motion] is set to [x1/4] and [Looks] is set to [Production Camera], [CanLog] or [Wide DP]
The Exposure Bar
When the shooting mode is set to M, the exposure bar will appear, giving you an indication of the current exposure. The ▼ on top of the exposure bar indicates optimal exposure without any shift (AE±0) and the indicator inside the exposure bar represents the current exposure.
When the difference between current and optimal exposure is larger than ±2 EV, the indicator will flash at the edge of the exposure bar.

Aperture Priority AE (Av)
In this mode, after you adjust the aperture value with the control dial, the camcorder automatically sets the appropriate shutter speed to obtain the optimal exposure for the subject. Adjusting the aperture is useful in changing the depth of field, which can allow you to blur the background and make the subject stand out more.
Operating modes:


1 Set the shooting mode dial to Av.
- The aperture value will be highlighted in orange.
2 Turn the control dial to adjust the aperture value.
- You can also adjust the aperture value using the FUNC. menu or Browser Remote application (☐ 61).
- For available settings, refer to Available aperture settings (☐ 56).


NOTES
- Depending on the brightness of the subject, the camcorder will not be able to control the exposure and the aperture value will flash. In such case, select a different aperture value.
Shutter Priority AE (Tv)
In this mode, after you adjust the shutter speed, the camcorder automatically sets the appropriate aperture to obtain the optimal exposure for the subject. The shutter speed affects how moving objects are captured – you can make fast-moving subjects, such as a waterfall, appear to be motionless or impart a sense of movement to them.
Operating modes:


1 Set the shooting mode dial to Tv.
• The shutter speed will be highlighted in orange.
2 Turn the control dial to adjust the shutter speed.
- You can also adjust the shutter speed using the FUNC. menu or Browser Remote application (61).
- For available settings, refer to Available shutter speed settings (☐ 57).
i NOTES
- Depending on the brightness of the subject, the camcorder will not be able to control the exposure and the shutter speed value will flash. In such case, select a different shutter speed.

Program AE (P)
The camcorder automatically sets the aperture, shutter speed, gain (for clips) and ISO speed to obtain the optimal exposure for the subject.
Operating modes:


Set the shooting mode dial to P.

Auto (AUTO)
Use this mode to let the camcorder select various settings. This is the perfect mode for those times when you do not want to take the time to adjust settings.
Operating modes:


Set the shooting mode dial to AUTO.

Special Scene (SCN)
You can select the Special Scene mode that best matches your shooting situation. Some shooting situations can be tricky, such as when the subject is lit with just a spotlight, so you may find setting the appropriate Special Scene mode to be convenient.
Operating modes:


1 Set the shooting mode dial to SCN. 2 Touch [FUNC.] and then touch [Scene]. 3 Select the desired option and then touch [X].
Shooting Modes
Options
[Portrait]: The camcorder uses a large aperture, to achieve a sharp focus on the subject while blurring the background.
[Sports]: To record scenes with lots of movement, such as sports events.
[Night Scene]: To record nightscapes with lower noise.
[Snow]: To record in bright ski resorts without the subject being underexposed.
[Beach]: To record on a sunny beach without the subject being underexposed.
[Sunset]: To record sunsets in vibrant colors.
[Low Light]: To record in low-light situations.
[Spotlight]: To record spotlit scenes.
[Fireworks]: To record fireworks.

Notes
• [Portrait]/[Sports]/[Snow]/[Beach]: The picture may not appear smooth during playback. - [Snow]/[Beach]: The subject may become overexposed on cloudy days or in shaded places. Check the image on the screen.
- [Low Light]:
- Moving subjects may leave a trailing afterimage.
- Picture quality may not be as good as in other modes.
- White points may appear on the screen.
- Autofocus may not work as well as in other modes. In such case, adjust the focus manually.
- [Low Light]/[Fireworks]: To avoid camcorder blur (blur due to the camcorder moving) we recommend using a tripod.
Using the FUNC. Menu or Browser Remote to Adjust Settings
You can adjust the settings related to the various shooting modes using the FUNC. menu or remotely using the Browser Remote application.
Operating modes:

Using the FUNC. Menu
To change the aperture value when the shooting mode is M or Av
1 Touch [FUNC.] and then touch [Aperture].
- The aperture adjustment dial will appear at the bottom of the screen.
- Continue to step 2 below.
To change the shutter speed when the shooting mode is M or Tv
1 Touch [FUNC.] and then touch [Shutter].
- The shutter speed adjustment dial will appear at the bottom of the screen.
- You can use the [Camera Setup] ➤ [3] ➤ [Shutter Speed Mode] setting to switch between shutter speed and shutter angle.
- Continue to step 2 below.
To change the ISO speed or gain when the shooting mode is M
1 Touch [FUNC.] and then touch [ISO] or [Gain].
- The ISO speed or gain adjustment dial will appear at the bottom of the screen.
- You can use the [Camera Setup] [2] [ISO/Gain] setting to switch between ISO speed and gain.
- Note that during mode, you cannot adjust the gain.
2 Drag your finger left/right along the dial to select the desired value.
- Touching [WFM] will display the waveform monitor (☐ 83).
3 Touch [X].
- The selected setting's value will appear on the upper left of the screen.
Using the Browser Remote Application
After completing the necessary preparations (☐ 131), you can change the shutter speed, aperture, ISO speed or gain from a connected device using the Browser Remote application. In this procedure, depending on the network device, you may need to click the Browser Remote onscreen button instead of touching it.
To change the aperture value when the shooting mode is M or Av
1 Touch the current aperture value on the Browser Remote screen. 2 Select the desired aperture value from the list.
- The selected value will be displayed on the Browser Remote screen and applied on the camcorder.
- Alternatively, you can press [IRIS +] to open the aperture or [IRIS -] to close the aperture in approximately 1/4-stop increments for clips or 1/3-stop increments for photos.
To change the shutter speed when the shooting mode is M or Tv
1 Touch the current shutter speed value on the Browser Remote screen. - During mode, you can touch [Speed] and then the desired shutter speed mode ([Speed] or [Angle]). 2 Select the desired shutter speed value from the list. - The selected value will be displayed on the Browser Remote screen and applied on the camcorder.
To change the ISO speed or gain when the shooting mode is M
1 Touch the current ISO speed or gain value on the Browser Remote screen.
- During mode, you can touch [ISO] and then the desired setting ([ISO] or [Gain]) to switch between the two.
- Note that during mode, you cannot adjust the gain.
2 Select the desired ISO speed or gain value from the list.
- The selected value will be displayed on the Browser Remote screen and applied on the camcorder.


Automatic Gain and ISO Limits
Depending on the brightness of the surroundings, the camcorder will automatically raise the gain or ISO speed to try to get a brighter picture. Because doing so can lead to video noise, you can select a maximum limit for how high levels are raised. These limits are referred to as the automatic gain control (AGC) limit and auto ISO limit. Shooting with a smaller limit is useful as it results in a darker picture but less noise. This function is available when the shooting mode is set to Av, Tv, or P.
Operating modes:


1 Press the MENU button.
- mode: If you set [Camera Setup] [2] [ISO/Gain] to [Gain], you will be able to set the AGC limit; if you set [ISO/Gain] to [ISO], you will be able to set the auto ISO limit.
- mode: Because only the ISO speed can be adjusted for photos, you will be able to set only the auto ISO limit.
2 Open the submenu to set the AGC limit or auto ISO limit.

mode:

Camera Setup]

[AG

mit] or [Auto ISO
Limit]

mode:

Camera Setup]

[Au
to ISO Limit]
3 Touch [1507[]. GAIN
- The AGC limit or auto ISO limit dial will appear at the bottom of the screen.
- Touch [A] to remove the limit.
4 Drag your finger left/right along the dial to select the desired value.
- You can also push the joystick up/down until the position of the current value is highlighted in orange and then push left/right to adjust the value.
5 Touch [X].
- The AGC limit or auto ISO limit icon will appear on the left side of the screen.
Available ISO limit settings
| ISO speed | |
| Clips(1/3-stop increments) | 160, 200, 250, 320, 400, 500, 640, 800, 1000, 1250, 1600, 2000, 2500*, 3200*, 4000* |
| Photos(1/3-stop increments) | 160, 200, 250, 320, 400, 500, 640, 800, 1000, 1250, 1600, 2000 |
* When this value is selected in mode and the camcorder is switched to mode, the auto ISO limit will be set to ISO2000.
Available AGC limit settings
| Gain | |
| Clips(1.5-dB increments) | 0 dB to 28.5 dB |
![CANON XC15 - Touch [X]. - 1](/content/2026/06/1325421/images/799a0d009545307b229a2b8168bc4f2c5bef9140a80b53da7ed76eb82b3cdff6.jpg)
NOTES
- The lowest available auto ISO limit and AGC limit settings are 500 and 9.0 dB, respectively, when [Slow & Fast Motion] (☐ 96) is set to [x1/4] or [Looks] (☐ 71) is set to [✿4 Production Camera], [✿6 Canon Log] or [✿de DR] (☐ 71).
- However, the lowest available settings will be 1250 and 18.0 dB when [Slow & Fast Motion] is set to [x1/4] and [Looks] is set to [Production Camera], [Canalog] or [Wide DP8
Exposure
In some shooting modes, the camcorder features the following exposure-related functions to help you achieve the desired brightness for the image.
Exposure lock: You can lock the exposure when the camcorder is set to automatically adjust the exposure. This function is available when the shooting mode is set to Av, Tv, P or SCN (all Special Scene modes except for [Fireworks]).
Touch exposure: You can have the camcorder adjust the exposure simply by touching the screen. This function is available when the shooting mode is set to Av, Tv, P or SCN (all Special Scene modes except for [Fireworks]).
AE shift: You can use AE shift to darken or lighten the image that was set during automatic exposure. This function is available when the shooting mode is set to Av, Tv, or P.
Operating modes:

Exposure Lock
1 Touch [FUNC.] and then touch * [Exposure Lock].
- The exposure adjustment screen will appear.
2 Touch [M] (manual).
- An adjustment dial will appear on the bottom of the screen. The exposure is locked but you can adjust it using the adjustment dial.
3 Drag your finger left/right along the dial to select the desired value.
- You can also push the joystick up/down until the position of the current value is highlighted in orange and then push left/right to adjust the value.
- Depending on the exposure, some values may not be available, which will affect the adjustment range.
- Touch [M] again to return the camcorder to automatic exposure.
- Touching [WFM] will display the waveform monitor (☐ 83).
4 Touch [X] to lock the exposure at the selected value.
- ✕ will appear on the left side of the screen. If the exposure was also adjusted, ☑ and the selected adjustment value will also appear.
Using the Browser Remote Application
After completing the necessary preparations (131), you can manually change the exposure from a connected device using the Browser Remote application. In this procedure, depending on the network device, you may need to click the Browser Remote onscreen button instead of touching it.
1 Press [★
- The gray line in the button will turn orange and the camcorder will change to manual exposure.
2 Press the exposure value button and then select the desired exposure adjustment level.
- The selected value will be displayed on the Browser Remote screen and applied on the camcorder.

Touch Exposure
When you use touch exposure, you can additionally use the highlights setting to make sure that an area with highlights you touch is not too bright. Using the highlights setting are the first two steps of the procedure below. If you do not plan to use the setting, start from step 3.
1 Open the [AE Lock (Touch)] submenu.
['■ Camera Setup] ➤ [1] ➤ [AE Lock (Touch)]
2 Touch [H Highlights] and then touch [X].
3 Touch [FUNC.] and then touch ✗ [Exposure Lock].
- The exposure adjustment screen will appear.
4 Touch a subject that appears inside the frame.
- The ✗ mark will flash and the exposure will be adjusted automatically so the area you touched will be correctly exposed.
- An adjustment dial will appear on the bottom of the screen. The exposure is locked but you can adjust it using the adjustment dial.
Camera Setup
[1]
AE Lock (Touch)
Normal
5 Drag your finger left/right along the dial to select the desired value.
- You can also push the joystick up/down until the position of the current value is highlighted in orange and then push left/right to adjust the value.
- Touching [WFM] will display the waveform monitor (☐ 83).
6 Touch [X] to lock the exposure at the selected value.
- ✗ will appear on the left side of the screen. If the exposure was also adjusted, ☑ and the selected adjustment value will also appear.
NOTES
- Touch exposure is not available while the waveform monitor is displayed.
- The highlights setting is not available when [Looks] is set to [💡9 📋 Highlight Priority].
AE Shift
1 Touch [FUNC.] and then touch ☑ [AE Shift].
- An adjustment dial will appear on the bottom of the screen.
2 Drag your finger left/right to move the adjustment dial to the desired setting.
- You can also press the joystick itself so that the position of the current setting is highlighted in orange and then push left/right to adjust the setting.
- Touching [WFM] will display the waveform monitor (☐ 83).
3 Touch [X].
- and the selected AE shift level will appear on the left side of the screen.
Available AE shift levels for clips
| -2 | -1 3/4 | -1 1/2 | -1 1/4 | -1 | -3/4 | -1/2 | -1/4 | ±0 |
| +1/4 +1/2 +3/4 +1 | +1 1/4 +1 | 1/2 +1 3/4 | +2 | |||||
Available AE shift levels for photos
| -2 | -1 2/3 | -1 1/3 | -1 | -2/3 | -1/3 | ±0 |
| +1/3 +2/3 +1 +1 | 1/3 +1 | 2/3 +2 |
i NOTES
- AE shift is not available if exposure lock or touch exposure have been enabled.
Light Metering Mode
The camcorder measures light in the scene in order to set the optimal exposure settings. Depending on the scene, you may want to change the measurement method. This function is available when the shooting mode is set to Av, Tv, or P.
Operating modes:


1 Touch [FUNC.] and then touch [] [Metering Mode] (in ☐ mode) or ☑ [Metering Mode] (in ☐ mode). 2 Select the desired option and then touch [✗].
Options (for clips)
[Standard]: Averages the light metered from the entire screen, giving more weight to the subject in the center. [Spotlight]: Use this option when recording a scene in which only a certain part of the picture is lit, for example, when the subject is lit by a spotlight. [Backlight]: Suitable when recording backlit scenes.
Options (for photos)
[Evaluative]: Appropriate for standard shooting conditions.
[Center-weighted Average]: The camcorder suitably exposes a subject at the center of the scene.
[Spot]: The camcorder suitably exposes a subject at the center of the scene but within a narrower area.
White Balance
The white balance function helps you to accurately reproduce colors under different lighting conditions. This function is available when the shooting mode is set to M, Av, Tv, or P.
Operating modes:


1 Touch [FUNC.] and then touch [White Balance]. 2 Select the desired option and then touch [X].
- When you select [K Color Temperature], [Set 1] or [Set 2], set the color temperature or a custom white balance with the appropriate procedure below before touching [X].
To set the color temperature ([K Color Temperature])
1 Touch [ ] .
- The color temperature adjustment dial will appear on the bottom of the screen.
2 Drag your finger left/right along the dial to select the desired value.
- You can also push the joystick left/right to adjust the setting.
3 Touch [↩].
To set a custom white balance ([Set 1] or [Set 2])
1 Point the camcorder at a gray card or white object so it fills the whole screen. 2 Touch [→] and then touch [Set WB].
- During the procedure, 📋 will flash quickly. When it stops flashing, the procedure is completed and the setting will be applied on the camcorder.
3 Touch [↹].
Options
[AWB Automatic]: The camcorder automatically sets the white balance for natural looking colors.
[Daylight]*: To record outdoors on a bright day.
[Share]: To record in shaded places.
[Cloudy]*: To record on a cloudy day.
[Fluorescent]*: To record under warm white, cool white or warm-white-type (3-wavelength) fluorescent lighting.
[Fluorescent H]*: To record under daylight or daylight-type (3-wavelength) fluorescent lighting.
[★ Tungsten]*: To record under tungsten and tungsten-type (3-wavelength) fluorescent lighting.
[K Color Temperature]*: Allows you to set the color temperature between 2,000 K and 15,000 K.
[Set 1], [Set 2]: Use the custom white balance settings to make white subjects appear white under colored lighting.
* Indicates a preset white balance option.
i NOTES
- You can use the [Camera Setup] [2] [Shockless WB] setting to make the transition look smoother when you change the white balance settings while recording a clip.
- When you select a custom white balance:
- Readjust the custom white balance if the light source or ND filter setting changes.
- Depending on the light source, ▼ may keep flashing. The result will still be better than with [AWB Automatic].
• Using a custom white balance may provide better results in the following cases:
- Changing lighting conditions
- Close-ups
- Subjects in a single color (sky, sea or forest)
- Under mercury lamps, certain types of fluorescent lights and LED lights
- Depending on the type of fluorescent light, optimal color balance may not be obtained with [Fluorescent] or [Fluorescent H]. If the color looks unnatural, select [AWB Automatic] or a custom white balance setting.
Remote Operation Using Browser Remote
After completing the necessary preparations (131), you can change the white balance option remotely from a connected device using the Browser Remote application. In this procedure, depending on the network device, you may need to click the Browser Remote onscreen button instead of touching it.
1 Touch the white balance button on the Browser Remote screen.
To set automatic white balance (AWB)
2 Touch [AWB].
- The selected option will be displayed on the Browser Remote screen and applied on the camcorder.
To set a preset white balance option
2 Touch the desired option.
- If you selected [K], continue to the next step to set the color temperature. Otherwise, the selected option will be displayed on the Browser Remote screen and applied to the camcorder; you do not need to perform the rest of the procedure.
3 Touch [5500K] and then select the desired value from the list.
- The selected value will be displayed on the Browser Remote screen and applied on the camcorder.
To set custom white balance ([△] and [△2])
2 Point the camcorder at a gray card or white object so it fills the whole screen.
3 Touch [△1] or [△2].
4 Touch [▶▶].
- During the procedure, [●1] or [●2] will flash quickly. When it stops flashing, the procedure is completed and the setting will be applied on the camcorder.

Using Looks
The camcorder can shoot using looks—settings that affect the image-related characteristics of the picture. The camcorder has several pre-installed looks available and you can even create your own user-defined look based on one of the pre-installed looks. This function is available when the shooting mode is set to M, Av, Tv, or P.
Operating modes:


Selecting a Pre-installed Look
1 Touch [FUNC.] and then touch ⚙1 [Looks] (in 📄 mode) or ⚙s [Looks] (in 📋 mode). 2 Select the desired option and then touch [✗].
- The selected icon will appear on the left side of the screen.
- For settings other than [◆6 Canon Log], you can adjust the settings with the procedure below before touching [×].
- Touching [WFM] will display the waveform monitor (☐ 83).
Options (for clips)
[Standard]: Standard profile for general video shooting situations. [Theta EOS Std.]: Reproduces the look of an EOS digital cinema camera when [Color Matrix] is set to [Video]. [Neutral]: Reproduces the look of an EOS digital cinema camera when [Color Matrix] is set to [Neutral]. [4 Production Camera]: Reproduces the look of an EOS digital cinema camera when [Color Matrix] is set to [Production Camera]. Uses the same gamma curve as that of [Title DR]. [5] Color Matrix Off: Reproduces the look of an EOS digital cinema camera when [Color Matrix] is set to [Off]. [6 Canon Log]: Creates a picture with wide dynamic range that is suitable for processing in post-production. [7] EOS Std.]: Approximates the look of an EOS digital SLR camera when the picture style is set to [Standard]. [8] Wide DR]: Applies a gamma curve with a wide latitude and colors appropriate for the gamma curve. [★9 Highlight Priority]: Creates a picture with a natural gradation in tones and reduces overexposure in bright areas by not compressing highlights. When playing back a clip recorded with this setting, we recommend increasing the monitor's overall brightness. [User Setting 1], [User Setting 2]: Allows you to create a customized look. Start with one of the pre-installed looks and adjust the settings as necessary.
Options (for photos)
| [♣S Standard]: | Standard profile for general photo shooting situations. |
| [♣P Portrait]: | Appropriate for taking photos of people, as this look brings out a sense of vitality in skin tones. |
| [♣L Landscape]: | Makes colors in the landscape appear more vivid. |
| [♣N Neutral]: | The details of the subject are emphasized, which helps create an image that is suitable for editing later. |
| [♣F Faithful]: | Faithfully reproduces the colors of the subject. |
| [♣M Monochrome]: | Allows you to take a black & white photo. |
| [♣Se Sepia]: | Allows you to take a sepia-toned photo. |
| [♣CI Clear]: | The contrast in the image is emphasized, making the subject clearer and stand out more. |
| [♣Au Autumn Hues]: | Brings out the beauty of colors found in, for example, autumn foliage. |
| [♣User Setting 1], | |
| [♣User Setting 2]: | Allows you to create a customized look. Start with one of the pre-installed looks and adjust the settings as necessary. |
Adjusting the Settings of a Pre-installed Look
1 Touch [ ].
2 Adjust the desired setting by touching [-] or [+].
- [Sharpness]: 0 (low sharpness) to 7 (high sharpness) [Contrast] 1 : -4 (low contrast) to +4 (high contrast) [Color Depth] 2 : -4 (shallower colors) to +4 (richer colors)
1 Not available for [♦4 Production Camera], [♦8 Wide DR] or [♦9 Highlight Priority]. 2 Not available for [♦3 Neutral], [Monochrome] and [Sepia].
NOTES
- When using the [Highlight Priority] look, you can set [System Setup] > [1] > [View Assistance] to [ON] to display a more accurate looking image on the screen.
- When using the [Highlight Priority] look, taking photos during mode is not available.
Creating a User-defined Look
You can create your user-defined looks based on one of the pre-installed looks. The camcorder can store two user-defined looks for clips and two for photos.
1 Touch [FUNC.] and then touch [Looks] (in mode) or [Looks] (in mode).
2 Select which user-defined setting icon to use.
- Select [User Setting 1] or [User Setting 2] for clips and [User Setting 1] or [User Setting 2] for photos.
3 Touch and then touch [Standard].
4 Select the look that will be the basis of the user-defined look.
5 Touch [Yes] and then touch [OK].
6 Adjust the settings as described in the previous section.
- The settings for [Canon Log] cannot be adjusted.
7 Touch [X].
Zooming
You can operate the zoom (10x optical zoom) using the zoom ring on the lens.
Operating modes:


Turn the zoom ring to zoom in and out.

i NOTES
- If you turn the zoom ring too quickly, the camcorder may not be able to focus immediately. In such case, the camcorder will focus after you finish turning the ring.
- If you set an assignable button to [20] Digital Tele-conv.] (105), you can press the button to activate the digital tele-converter. Alternatively, if you customize the FUNC. menu to include [20] Digital Tele-conv.] (104), you can activate the digital tele-converter from the FUNC. menu. The digital tele-converter allows you to digitally increase the focal length of the camcorder by a factor of approx. 2. Note that the image is digitally processed so the image will deteriorate throughout the zoom range.
Adjusting the Focus
The camcorder offers 3 ways to focus. When you use manual focus, you can use the focus assistance functions, peaking and magnification, to help you focus more accurately.
Autofocus (AF): The camcorder continuously adjusts the focus automatically. You can also use the focus ring (with no physical stops).
Manual focus (MF): Adjust the focus manually using the focus ring, the FUNC. menu or remotely, using the Browser Remote application.
Push AF: While using MF, you can have the camcorder switch temporarily to AF mode as long as you hold the PUSH AF button pressed down.
Autofocus (AF) Mode
The camcorder uses the TTL autofocus system and continuously adjusts the focus on the subject in the center of the screen. The focusing range is 8cm (3.1 in.; at full wide-angle, measured from the front of the lens barrel) to ∞ .
Even during autofocus mode, you can turn the focus ring to focus manually. When you stop turning the ring, the camcorder returns to autofocus mode. This is useful in situations such as when focusing on a subject on the other side of a window.
Operating modes:


Set the FOCUS switch to A.
• AF appears on the left side of the screen.
Using Focus Priority
You can select the autofocus method used by the camcorder when taking a photo. This will also determine what AF frames are displayed when taking a photo.
Operating modes:


1 Touch [FUNC.] and then touch ☐ [Focus Priority].
2 Select the desired option and then touch [✗].
Options
[OFF] : No AF frame will appear and the photo will be recorded immediately.
[AiAF] : One or more AF frames out of the nine available frames are automatically selected and the focus is fixed on them.
[☐ Center]: A single focusing frame appears in the center of the screen and the focus is automatically fixed on the subject in the frame. While keeping the focus on the subject, you can recompose the shot.
Remote Operation Using Browser Remote
After completing the necessary preparations (131), you can change the focus mode remotely from a connected device using the Browser Remote application. You can use the application to change the focus mode regardless of the position of the camcorder's FOCUS switch. In this procedure, depending on the network device, you may need to click the Browser Remote onscreen button instead of touching it.
Operating modes:


If the camcorder is set to manual focus mode, touch [MF] on the Browser Remote screen.
- The orange line in the button will turn gray and the camcorder will change to autofocus mode.
- Press [MF] again to return the camcorder to manual focus mode.
![CANON XC15 - If the camcorder is set to manual focus mode, touch [MF] on the Browser Remote screen. - 1](/content/2026/06/1325421/images/37f6776f7e76d6136c4e73b89f5a1fd36e1b7eeaf0aff85a3f408c05a5d2a5df.jpg)
NOTES
- When recording in bright surroundings, the camcorder closes down the aperture. This may cause the picture to appear blurred and is more noticeable toward the wide-angle end of the zoom range. In such case, turn on the ND filter (☐ 140).
- Autofocus takes longer to focus for frame rates other than 59.94P or 59.94i.
- When recording under dark conditions, the focusing range narrows and the picture may appear blurred.
- You can use the [Camera Setup] [2] [AF Speed] setting to select the speed at which the focus is adjusted during autofocus. However, the effect on the adjustment speed lessens for slower shutter speeds.
- When [Drive Mode] (44) is set to [AF AF Continuous], focus priority will automatically be set to [Center] and cannot be changed.
- When the shooting mode is set to SCN and [Fireworks] is selected, focus priority will automatically be set to [Off] and cannot be changed.
- When the shooting mode is set to AUTO, focus priority will automatically be set to [AiAF AiAF] and cannot be changed.
- When you are using face detection & tracking with focus priority, the camcorder will focus on a face that has been detected.
- When the shutter speed is slower than 1/8 in autofocus mode, the camcorder will not focus on the subject even when you press the PHOTO button halfway. In such case, the AF frame and ● icon will appear in yellow.
- Autofocus (including Push AF) may not work well on the following subjects or in the following cases. In such case, focus manually.
- Reflective surfaces
- Subjects with low contrast or without vertical lines
- Fast moving subjects
- Through dirty or wet windows
- Night scenes
Manual Focus (MF)
You can adjust the focus using the focus ring on the lens, through the FUNC. menu, or remotely with the Browser Remote application.
Operating modes:


Using the Focus Ring
1 Set the FOCUS switch to M. • MF appears on the left side of the screen. 2 Turn the focus ring on the lens to adjust the focus. - The focusing speed will depend on how fast you turn the ring.
NOTES
- You can change the direction of the adjustment and the sensitivity of the response of the focus ring using the [Camera Setup] [2] [Focus Ring Direction] and [Focus Ring Response] settings.
Using the FUNC. Menu
When the camcorder is in ☐ mode, you must first add [☐ Focus] to the right side of the FUNC. menu before adjusting the focus. If you have already done so or the camcorder is in ☐ mode, start from the second procedure, To Adjust the Focus
Preparation
Operating modes:


1 Set the FOCUS switch to M. - MF appears on the left side of the screen. 2 Press the MENU button. 3 Open the [☐ Customize FUNC. Menu] screen.
[System Setup]


4 From the right side of the screen, select the function to remove from the right side of the FUNC. menu. 5 From the bottom of the screen, select [◎ Focus]. 6 Touch [X].
To adjust the focus
Operating modes:


1 Touch [FUNC.] and then touch Ⓞ [Focus]. 2 Touch a subject that appears inside the white frame.
- The ✗ mark will flash on the selected subject or area and the camcorder will automatically focus where the mark is. After that, the camcorder will return to MF mode.
![graph TD A["System Setup"] --> B["Step 2"] B --> C["Customize FUNC. Menu"]](/content/2026/06/1325421/images/d9b0ee15a3d9fff1bb37813d1de8e373d9a6a0c72089c718089d646900a2eb29.jpg)

Remote Operation Using Browser Remote
After completing the necessary preparations (☐ 131), you can adjust the focus remotely from a connected device using the Browser Remote application. In this procedure, depending on the network device, you may need to click the Browser Remote onscreen button instead of touching it.
Operating modes:

1 If the camcorder is set to AF mode, touch [MF] on the Browser Remote screen.
- The gray line in the button will turn orange and the camcorder will change to manual focus mode.
2 Touch one of the [FOCUS] controls to adjust the focus as necessary.
- Touch one of the controls on the [NEAR] side to focus closer or one of the controls on the [FAR] side to focus farther away.
- There are three levels of adjustment - [ ]/[ ] is the smallest and [ ]/[ ] the largest.

i NOTES
• Using the subject distance display on the screen:
- When you use the focus ring, the approximate subject distance is displayed for a few seconds.
- Use the subject distance display as an estimate.
- [ ∞] indicates infinity focus.
- You can change the units of distance between meters and feet using the [√ System Setup] ➤ [4] (in mode) or [3] (in mode) ➤ [Distance Units] setting.
- If you operate the zoom after focusing, the focus on the subject may be lost.
- If you focus manually and then leave the camcorder with the power turned on, the focus on the subject may be lost after a while. This possible slight shift in focus is a result of the internal temperature rising in the camcorder and lens. Check the focus before resuming shooting.
Using the Focus Assistance Functions
In order to focus more accurately, you can use two focus assistance functions – peaking, which creates a clearer contrast by emphasizing the outlines of the subject, and magnification, which enlarges the image on the screen. You can use both functions simultaneously for greater effect.
Operating modes:

Peaking
When peaking is activated, the edges of objects in focus will be highlighted in red, blue or yellow on the screen. In addition, you can choose to switch the screen to black & white, further emphasizing the edges.
1 Touch [FUNC.] and then touch PEAK [Peaking].


2 Touch [PEAK On].
- Peaking is activated and edges are highlighted.
- Touch [RE] to turn off the peaking effect.
3 To change the peaking settings, touch [F].
For the black & white setting: Touch [Off] or [On].
For the peaking color: Touch [Red], [Blue] or [Yellow].
4 Touch [X].
Magnification
1 Press the MAGN. button.
- Alternatively, you can use the [FUNC.] ➤ MAGN. [Magnification] ➤ [OK] setting after you add the function to the FUNC. menu (☐ 104).
- MAGN. will appear on the bottom right of the screen and the center of the screen is magnified approximately 2 times*.
- A white frame representing the whole screen area is displayed on the bottom right of the screen. The white rectangle within it represents the approximate part of the image shown magnified.
2 If necessary, use the joystick (▲▼ ◀▶) or drag your finger across the screen to move the white rectangle around and check other parts of the image.
3 Press the MAGN. button again or touch [✗] to cancel the magnification.
* The magnification that appears on the screen differs based on the video configuration.

NOTES
- Peaking/Magnification appears only on the camcorder screen. It will not appear on an external monitor connected to the camcorder and will not affect your recordings.
- You cannot use magnification while color bars are displayed on the screen.
- Activating magnification while the waveform monitor is on the screen will deactivate the waveform monitor.
Push AF
Operating modes:


While using manual focus (☐ 76), press the PUSH AF button and hold it pressed down.
- Autofocus is temporarily activated as long as you hold the PUSH AF button pressed down.
NOTES
- All the NOTES for the autofocus section (☐ 75), apply also to Push AF.

Detecting and Focusing On Faces (Face Detection & Tracking)
The camcorder can detect a person's face during autofocus mode, automatically focus on it, and even track it if the person moves. When there are a number of people in the picture, one person (with the white face detection frame) will be determined to be the main subject and the camcorder will focus on that person's face. You can also change the person selected as main subject. You must use the touch screen to select the subject.
Operating modes:


Camera Setup]

mode) or

Camera Setup]

mode)
[1]
[Face Detection & Tracking]

On [icon]
1 Press the MENU button.
2 Open the [Face Detection & Tracking] submenu.
Camera Setup] (in mode) or [Camera Setup] (in mode) [1] [Face Detection & Tracking]
3 Touch [ON On 📋] and then touch [✗].
- Touch [OFF Off] to turn face detection off.
4 Point the camcorder at the subject.
- If there is more than one person in the picture, the camcorder will automatically select one person it determines is the main subject. The camcorder will indicate the main subject with a white face detection frame and other faces with gray frames.
- If necessary, touch a different face on the touch screen to optimize the camcorder's settings for that person. A white double frame will appear around the subject and track it as it moves. Touch [Cancel ☐] to remove the frame and cancel the tracking.
- Touching somewhere with a color or pattern unique to the subject will make it easier to track. However, if there is another subject in the vicinity that shares similar characteristics to the selected subject, the camcorder may start tracking the incorrect subject. Touch the screen again to select the desired subject.

NOTES
- The camcorder may mistakenly detect the faces of non-human subjects. In such case, turn face detection off.
- When the shooting mode is set to AUTO, face detection & tracking will automatically be set to [ON] and cannot be changed.
- In certain cases, faces may not be detected correctly. Typical examples include:
- Faces extremely small, large, dark or bright in relation to the overall picture.
- Faces that are turned to the side, upside-down, at a diagonal or partially hidden.
- Face detection cannot be used in the following cases:
- When the shutter speed used is slower than 1/30 (1/24 if the frame rate is set to 23.98P or 24.00P).
- When the shooting mode is set to SCN and [Night Scene], [Low Light] or [Fireworks] is selected.
- When [Slow & Fast Motion] (☐ 96) is set to [x1/4].
- In mode, when [Drive Mode] (44) is set to [AF Continuous].
- When the [Camera Setup] ➤ [3] ➤ [Rolling Shutter Reduction] setting is set to [ON].
Image Stabilizer
Use the image stabilizer to compensate for camcorder shake in order to achieve steadier shots. When taking photos, you can turn image stabilization on and off. When recording clips, there are 3 methods of image stabilization; select the method that best suits your needs.
Standard IS: Standard IS compensates for a lower degree of camcorder shake, such as when shooting while remaining stationary, and is suitable for shooting natural-looking scenes.
Dynamic IS: Dynamic IS compensates for a higher degree of camcorder shake, such as when shooting while walking, and is more effective as the zoom approaches full wide angle.
* Not available when recording 4K clips, using slow & fast motion recording mode or taking photos.
Powered IS (●): Powered IS is most effective when you are stationary and zooming in on far subjects using high zoom ratios (the more you approach the telephoto end). This mode is not suitable for tilting and panning shots.
To activate Standard IS or Dynamic IS
Operating modes:


1 Touch [FUNC.] and then touch 🎨 [Image Stabilizer]. 2 Select the desired option and then touch [✗].
- In mode, select [On] to turn on image stabilization.
- Select [Off] to turn off image stabilization, for example, when recording with the camcorder mounted on a tripod.
- The icon of the selected mode will appear on the upper right of the screen.
To activate Powered IS
Operating modes:


1 Touch [FUNC.] and then touch [Powered IS]. 2 Select [On] and then touch [X].
- The Powered IS icon will appear on the upper right of the screen.
- Select [Off] to return image stabilization to its previous setting.
NOTES
- If you set an assignable button to [Powered IS] (105), you can press the button to turn Powered IS on or off.
- If the degree of camcorder shake is too high, the image stabilizer may not be able to compensate fully.
- When using Dynamic IS, the edges of the picture may be adversely affected (ghosting, artifacts and/or dark areas may appear) when compensating for a high degree of camcorder shake.
- The angle of view when using Dynamic IS differs from the angle of view when using Standard IS or no image stabilization.
Onscreen Markers and Zebra Patterns
Using onscreen markers allows you to make sure your subject is correctly framed. The zebra patterns help you identify areas that are overexposed. The onscreen markers and zebra pattern will not affect your recordings.
Operating modes:


Displaying Onscreen Markers
You can display a grid or a horizontal line at the center of the screen. Use the markers, which can be displayed in white or gray, to make sure your subject is framed correctly.

or


1 Press the MENU button. 2 Open the [Onscreen Markers] submenu.
![[Camera Setup] (in mode) or [Camera Setup] (in mode) [2] (in mode) or [1] (in mode) [Onscreen Markers]](/content/2026/06/1325421/images/d3732751cc6a355ecd57c976636f3c54cf7d866632c2a0534790fd1d9a780a16.jpg)
3 Select the desired option and then touch [X].
NOTES
- You can turn off most other onscreen displays, leaving only the onscreen markers (☐ 51).
Displaying Zebra Patterns
The camcorder has a zebra pattern feature that shows black and white diagonal stripes over areas that are overexposed. The camcorder offers two levels of zebra pattern: With 100%, only areas that will lose detail in the highlight areas will be identified, while 70% will identify also areas that are dangerously close to losing detail.
1 Touch [FUNC.] and then touch [zebra]. 2 Touch [70 70%] or [100 100%] and then touch [×].
- The zebra pattern will appear on the overexposed areas of the picture.
- Touch [Off] to turn off the zebra pattern.
i NOTES
- The zebra pattern will not be output to an external device connected to the HDMI OUT terminal.
Using the Waveform Monitor
The camcorder can display a simplified waveform monitor. You must first add [WFM Waveform Monitor] to the right side of the FUNC. menu before displaying the waveform monitor. If you have already done so, start from the second procedure, To activate the waveform monitor
Operating modes:


Preparation
1 Press the MENU button.
2 Open the [Custom Function] Menu] screen.
[System Setup] [2] [Customize FUNC. Menu]
3 From the right side of the screen, select the function to remove from the right side of the FUNC. menu. 4 From the bottom of the screen, select [WFM Waveform Monitor]. 5 Touch [ X ].
[ System
[2]
Customize FUNC. Menu
To activate the waveform monitor
1 Touch [FUNC.] and then touch WFM [Waveform Monitor]. 2 Touch [OK].
- The waveform monitor window will appear on the bottom right of the screen.
- Depending on the shooting mode, you will be able to adjust the aperture, shutter speed or ISO speed/gain using the control dial (55).
- Touch [X] to deactivate the waveform monitor.
NOTES
- If you set an assignable button to [Waveform Monitor] (105), you can press the button to display the waveform monitor.
- You can display the waveform monitor as part of the following functions in the FUNC. menu: [Aperture], [Shutter], [ISO]/[Gain], [Exposure Lock] and [AE Shift]. When you do so, you can see in real time how adjusting the settings affects the waveform monitor.
- Activating magnification while the waveform monitor is on the screen will deactivate the waveform monitor.
- The waveform monitor will not be output to an external device connected to the HDMI OUT terminal.
Setting the Time Code
In mode, the camcorder can generate a time code signal and embed it in clips. Additionally, you can superimpose the time code on video output from the HDMI OUT terminal. When the frame rate is not set to 23.98P or 24.00P, you can also select between a drop frame and non-drop frame time code.
Operating modes:


Selecting the Time Code Mode
You can select the camcorder's time code mode.
1 Press the MENU button. 2 Open the [Time Code Mode] submenu.
[Recording Setup] ▶ [2] or [1] (depending on the system frequency)
[Time Code Mode]
3 Select the desired option and then touch [✗].

Recording Setup]
[2] or [1] (depending on the system frequency)
[Time Code Mode]
[ PRESET P
r e
Options
[PRESET Preset]: The time code starts from an initial value you can select in advance. The default initial time code is 00:00:00.00. When you select this option, select the time code's initial value and the time code running mode by following the procedures below.
[REGEN Regen.]: The camcorder will read the selected recording media and the time code will continue from the last recorded time code on the recording media. The time code runs only while recording so clips recorded consecutively on the same recording media will have continuous time codes.
Setting the Time Code Running Mode
If you set the time code mode to [PRESET Preset], you can set the time code's running mode.
1 Press the MENU button. 2 Open the [Time Code Running Mode] submenu.
[Recording Setup] ➤ [2] ➤ [Time Code Running Mode]
3 Select the desired option and then touch [✗].

Recording Setup]
[2]
[Time Code Running Mode]
[RE:rec Run]
Options
[REC RUN Rec Run]: The time code runs only while recording so clips recorded consecutively on the same recording media will have continuous time codes. [FREE RUN Free Run]: The time code starts running the moment you touch [✗] and keeps running regardless of the camcorder's operation.
Setting the Time Code's Initial Value
If you set the time code mode to [IRset], you can set the initial value of the time code.
[Recording Setup]
[2]
1 Press the MENU button.
2 Open the [Initial Time Code] screen.
[Recording Setup] ➤ [2] ➤ [Initial Time Code]
[Initial Time Code]
- The time code setting screen appears with an orange selection frame indicating the hours.
3 Touch [▲] or [▼] to set the hours and then touch the next field to set the minutes.
4 Change the rest of the fields (seconds, frame) in the same way.
- Touch [Cancel] to close the screen without setting the time code.
- Touch [Reset] to reset the time code. If the running mode is set to [FREE RUN Free Run], the time code will start running immediately after the time code is reset.
5 Touch [OK] and then touch [X].
- If the running mode is set to [FREE RUN Free Run], the time code will start running from the selected time code the moment you touch [OK].
Selecting Drop or Non-Drop Frame
You can select between a drop frame (DF) or non-drop frame (NDF) time code, depending on how you plan to use your recordings. When the frame rate is set to 23.98P or 24.00P, the time code is set to non-drop frame (NDF) and cannot be changed and the [DF/NDF] setting below will appear grayed out in the menu.
[Recording Setup]
[2]
[DF/NDF]
[DF DF]
1 Open the [DF/NDF] submenu.
[Recording Setup] ➤ [2] ➤ [DF/NDF]
2 Select [DF] or [NDF] and then touch [X].
- The time code display will differ depending on the setting. When you select [DF], the time code will appear as [00:00:00:00]; when you select [NDF], it will appear as [00:00:00:00].
i NOTES
- The frames value of the time code runs from 0 to 23 (frame rate set to 23.98P or 24.00P) or from 0 to 29 (all other frame rates).
- However, when the video output from the HDMI OUT terminal is 59.94i/59.94P/60.00P, the frames value of the time code output from the terminal will be 0 to 29, regardless of the camcorder's frame rate setting.
- When you are using slow & fast motion recording mode, you cannot select the [FREE RUN] running mode. Conversely, when you are using pre-recording mode, [FREE RUN] is set automatically and cannot be changed.
- When you mix drop frame and non-drop frame time codes, there might be a discontinuity in the time code at the point where the recording starts.
- When you are using the [REC RUN] running mode, the time code will continue running as long as the built-in rechargeable lithium battery is charged, even if you disconnect all other power sources. However, this is less accurate than when the camcorder is on.
Setting the User Bit
The user bit display can be selected from the date or the time of recording, or an identification code consisting of 8 characters in the hexadecimal system. There are sixteen possible characters: the numbers 0 to 9 and the letters A to F.
In addition to being recorded with clips, the user bit information can be output along with the video signal output from the HDMI OUT terminal.
Operating modes:


K
1 Press the MENU button. 2 Open the [User Bit Type] submenu.
[Recording Setup] ➤ [2] ➤ [User Bit Type]
3 Select the desired option.
- Select [SETTING] to set your own identification code, [TIME] to use the time as user bit, or [DATE] to use the date as the user bit.
- If you selected [TIME] or [DATE], touch [X]. You do not need to perform the rest of the procedure. If you selected [SETTING], continue the procedure to set the identification code.

Recording Setup]
[2]
[User Bit Type]
[Setting]
4 Touch [▲] or [▼] to set the first character and then touch the next field to set the next character.
- Change the rest of the characters in the same way.
- Touch [Cancel] to close the screen without setting the user bit.
5 Touch [OK] and then touch [X].
- The user bit is output from the HDMI OUT terminal in the selected type.
- When the frame rate is set to 23.98P or 24.00P and [Recording Setup] [2] [User Bit Output Mode] is set to [PULLDOWN Pulldown], the user bit will contain 2:3 pulldown data.
Recording Audio
This camcorder features 2-channel linear PCM audio recording and playback with a sampling frequency of 48 kHz. You can record audio using a commercially available external microphone (INPUT terminals, MIC terminal), analog line input (INPUT terminals) or the built-in stereo microphone. Audio is not recorded during slow & fast motion recording mode.
Operating modes:


Connecting an External Microphone or External Audio Input Source to the Camera
To each of the INPUT terminals you can attach commercially available microphones or analog line in sources with an XLR connector. To the MIC terminal you can attach commercially available condenser microphones with their own power supply, and a 3.5 mm stereo mini plug.
In order to use the INPUT terminals, the supplied MA-400 Microphone Adapter must be correctly attached to the camcorder. It has a microphone holder where you can fix external microphones with a diameter of 19 mm to 20 mm (0.75" to 0.79").
Follow the procedure below to attach a microphone (refer also to the following illustration). To connect an external device to the camcorder, plug the device's cable into the desired INPUT terminal (④).
1 Loosen the microphone lock screw (①), open the microphone holder and insert the microphone (②). 2 Tighten the lock screw and put the microphone cable through the cable clamp under the microphone holder (③). 3 Plug the microphone cable into the desired INPUT terminal (④) or the MIC terminal (⑤).


Using the MIC Terminal/Built-in Microphone while the Microphone Adapter is Attached
To use an external microphone connected to the MIC terminal or use the built-in microphone while the supplied microphone adapter is attached to the camcorder, follow the procedure below to deactivate the INPUT terminals.
1 Press the MENU button.
2 Open the [INPUT 1/2] submenu.
[♪) Audio Setup] ➤ [1] ➤ [INPUT 1/2]
3 Select [INPLOFF Off] and then touch [X].
• wll appear on the bottom right of the screen. - Select [INPUT1/2] reactivate the INPUT terminals.
![graph TD A["[Audio Setup"]] --> B["[1"]] B --> C["[INPUT 1/2"]] C --> D["[INPUT 1/2"]]](/content/2026/06/1325421/images/3455e5eb07861f859b5faef7fa985f12e20d54385a617edb0212802879016d2e.jpg)
Using the INPUT 1/INPUT 2 Terminals
When the supplied microphone adapter is attached to the camcorder, you can use the INPUT terminals to record audio independently to two audio channels from a microphone or analog audio input source.
To select the audio source, set the INPUT 1 or INPUT 2 switch to LINE or MIC as necessary.
- To supply a microphone with phantom power, set the switch to MIC+48V instead. Make sure to connect the microphone first, before turning the phantom power on. Keep the microphone connected when turning off the phantom power.
- When using the INPUT terminals to record to only one channel, use the INPUT 1 terminal.
IMPORTANT
- When connecting a microphone or device that does not support phantom power, make sure to set the corresponding INPUT switch to MIC or LINE, respectively. If you set the switch to MIC+48V, the microphone or device may be damaged.

Recording a Single Audio Input to Two Audio Channels (INPUT Terminals)
By default, each audio input is recorded to a separate audio channel (INPUT 1 to CH1 and INPUT 2 to CH2). If necessary (for example, as an audio backup recording), you can record the audio input into the INPUT 1 terminal to both audio channels, CH1 and CH2. In that case, you can adjust the audio recording levels of each channel independently of each other.
[♪) Audio Setup]
[1]
[CH2 Input]
[INPUT 2]
1 Press the MENU button.
2 Open the [CH2 Input] submenu.
[♪ Audio Setup] ➤ [1] ➤ [CH2 Input]
3 Select the desired option and then touch [✗].
Options
[INPUT2 INPUT 2]:
Records audio to each channel separately. Audio input into INPUT 1 is recorded to CH1, while audio input into INPUT 2 is recorded to CH2.
[INPUT1 INPUT 1]:
Audio input into INPUT 1 is recorded to both channels. Audio input into INPUT 2 will not be recorded.
Audio Recording Level (INPUT Terminals)
You can set the audio recording level for audio input from the INPUT terminals to automatic or manual level, independently for each channel.
Automatic Audio Level Adjustment
Set the audio level switch of the desired channel to A (automatic) to let the camcorder automatically adjust that channel's audio level.
i NOTES
- When both CH1 and CH2 are set to the same audio source (external microphone or external line input), if the audio level is set to automatic, you can use the [♪ Audio Setup] ➤ [2] ➤ [INPUT 1/2 ALC Link] setting to link the audio level adjustment of both channels.

Manual Audio Level Adjustment
You can set the audio level for each channel manually from -∞ to +18 dB.
1. Set the audio level switch of the desired channel to M (manual).
2. Turn the corresponding AUDIO dial to adjust the audio level.
- For reference, the 0 corresponds to -∞, 5 corresponds to 0 dB, and 10 corresponds to +18 dB.
- As a guideline, adjust the audio recording level so that the audio level meter on the screen will go to the right of the -18 dB mark (one mark right of the -20 dB mark) only occasionally.
i NOTES
- If at least one of the channels is set to manual audio level adjustment, you can also activate the audio peak limiter to prevent audio distortions. When activated, the audio peak limiter will limit the amplitude of audio input signals when they exceed approximately -6 dBFS. Use the [♪] Audio Setup] ➤ [2] ➤ [INPUT 1/2 Limiter] setting.
- We recommend using headphones when adjusting the audio level. If the input level is too high, audio may become distorted even if the audio level indicator shows an appropriate level.
- If the sound is distorted even though the audio level indicator shows an appropriate level, activate the microphone attenuator (☐ 91).
- We recommend using headphones to check the sound level while adjusting the audio recording level or when the microphone attenuator is activated.

Adjusting the Microphone's Sensitivity (INPUT Terminals)
When the INPUT 1 or INPUT 2 switch is set to MIC or MIC+48V, you can select the external microphone's sensitivity.
1. Press the MENU button. 2. Open the desired INPUT terminal's sensitivity submenu.
[♪] Audio Setup] ➤ [1] ➤ [INPUT 1 Mic Trimming] or [INPUT 2 Mic Trimming]
3 Select the desired option and then touch [✗].
- You can select one of 5 sensitivity levels from -12 dB to +12 dB.
| [♪] Audio Setup |
| [1] |
| [INPUT 1 Mic Trimming] |
| [INPUT 2 Mic Trimming] |
| [0dB 0 dB] |
Activating the Microphone's Attenuator (INPUT Terminals)
When the INPUT 1 or INPUT 2 switch is set to MIC or MIC+48V, you can activate the external microphone's attenuator (20 dB).
1 Press the MENU button. 2 Open the desired INPUT terminal's microphone attenuator submenu.
[♪) Audio Setup] ➤ [1] ➤ [INPUT 1 Mic Att.] or [INPUT 2 Mic Att.]
3 Select the desired option and then touch [✗].
[♪) Audio Setup]
[1]
[INPUT 1 Mic Att.]
[INPUT 2 Mic Att.]
[OFF Off]
Audio Recording Level (MIC Terminal/Built-in Microphone)
You can adjust the audio recording level of the built-in microphone or an external microphone connected to the MIC terminal.
1 Touch [FUNC.] and then touch [Mic Level].
2 Touch [M Manual] to set the audio recording level to manual.
- Touch [Automatic] instead to return the camcorder to automatic audio recording level.

3 Touch [◀]/[▶] to adjust the audio recording level as necessary and then touch [✗].
- As a guideline, adjust the audio recording level so that the audio level meter will go to the right of the -10 dB mark only occasionally.
i NOTES
- When the audio level meter reaches the red point (0 dB), the sound may be distorted.
- We recommend using headphones to check the sound level while adjusting the audio recording level or when the microphone attenuator is activated.
Microphone Attenuator (MIC Terminal)
You can activate the microphone attenuator (20 dB) for a microphone connected to the MIC terminal to prevent audio from being distorted if the audio level is too high.
[♪) Audio Setup]
[2]
[MIC Att.]
[OFF Off]
1 Press the MENU button.
2 Open the [MIC Att.] submenu.
[Audio Setup] ➤ [2] ➤ [MIC Att.]
3 Select the desired option and then touch [✗].
Options
[ON] On: The microphone attenuator will be activated at all times to reproduce more faithfully the sound dynamics.
[OFF] Off: The microphone attenuator will be deactivated at all times.
Low-Cut Filter (MIC Terminal)
When you are recording using a microphone connected to the MIC terminal, you can activate the low-cut filter to reduce the sound of blowing wind, a car's engine and similar ambient sounds.
[Audio Setup]
[2]
[MIC Low Cut]
[OFF] Off
1 Press the MENU button.
2 Open the [MIC Low Cut] submenu.
[Audio Setup] ➤ [2] ➤ [MIC Low Cut]
3 Select the desired option and then touch [✗].
Microphone Attenuator (Built-in Microphone)
You can activate the microphone attenuator (20 dB) for the built-in microphone to prevent audio from being distorted if the audio level is too high.
[♪) Audio Setup]
[2]
[Built-in Mic Att.]
[OFF Off]
1 Press the MENU button.
2 Open the [Built-in Mic Att.] submenu.
[♪) Audio Setup] ➤ [2] ➤ [Built-in Mic Att.]
3 Select the desired option and then touch [✗].
Options
[ON] On: The built-in microphone attenuator will be activated at all times to reproduce more faithfully the sound dynamics.
[OFF Off]: The built-in microphone attenuator will be deactivated at all times.
Low-Cut Filter (Built-in Microphone)
Perform the procedure below to activate the low-cut filter for the built-in microphone.
1 Press the MENU button.
2 Open the [Built-in Mic Low Cut] submenu.
[♪] Audio Setup] ➤ [2] ➤ [Built-in Mic Low Cut]
3 Select the desired option and then touch [✗].
[♪) Audio Setup]
[2]
[Built-in Mic Low Cut]
[OFF Off]
Options
[LC2 Low Cut 2]: For reducing the background sound of wind when recording outdoors in windy surroundings (for example, on a beach or close to buildings). Note that when you use this setting some low-frequency sounds may be suppressed along with the sound of wind.
[LC1v Cut 1]: For recording mainly people's voices.
[OFF Off]: For recording audio under usual conditions.
Adjusting the Microphone's Sensitivity (Built-in Microphone)
1 Press the MENU button.
2 Open the [Built-in Mic Sensitivity] submenu.
[Audio Setup] ➤ [3] ➤ [Built-in Mic Sensitivity]
3 Select the desired option and then touch [✗].
Options
[NORM Normal]: For recording audio under usual conditions.
[HIGH]: For recording audio at a higher volume.
[Audio Setup]
[3]
[Built-in Mic Sensitivity]
[NORM Normal]
Monitoring the Audio with Headphones
You can connect to the Ⓞ (headphone) terminal any pair of headphones with a ∅ 3.5 mm stereo mini plug to monitor the recorded audio.

Ω (headphone) terminal
Recording Audio
94
1 Press the MENU button. 2 Open the [Headphone Volume] screen. [Audio Setup] ➤ [3] ➤ [Headphone Volume] 3 Touch [Ω] to adjust the volume and then touch [X]. • Alternatively, you can drag your finger left/right to move the adjustment bar to the desired setting.
![graph TD A["[AUDIO Setup"]] --> B["[3"]] B --> C["[Headphone Volume"]] C --> D["[8"]]](/content/2026/06/1325421/images/cecabe8a1354f787b89aaffdd6c9ae4e05fa977a815582abcdfe0d9da40de41a.jpg)
Color Bars/Audio Reference Signal
You can have the camcorder generate and record color bars and a 1 kHz audio reference signal. The color bars can be output from the HDMI OUT terminal while the audio reference signal can be output from the HDMI OUT and ⚙ (headphone) terminals.
Operating modes:


Recording Color Bars
The camcorder offers 3 types of color bars. For 4K clips, the color bars will be recorded in 4K (3840x2160) but will be output from the HDMI OUT terminal in HD (1920x1080).
1 Press the MENU button. 2 Open the [Color Bars] submenu. [Recording Setup] ➤ [3] ➤ [Color Bars] 3 Select the type of color bars and then touch [✗].
- The selected color bars appear on the screen and will be recorded when you press the START/STOP button.
- Select [OFF Off] to turn off the color bars.
- Turning the camcorder off or changing the operating mode to playback mode will deactivate the color bars.
[Recording Setup]
[3]
[Color Bars]
[OFF Off]
Recording an Audio Reference Signal
The camcorder can output a 1 kHz audio reference signal with the color bars.
1 Press the MENU button. 2 Open the [1 kHz Tone] submenu.
[Recording Setup] ➤ [3] ➤ [1 kHz Tone]
3 Select the desired level and then touch [X].
• Available levels are -12 dB, -18 dB and -20 dB. - Select [OFF] to turn off the signal. - The signal is output at the selected level and will be recorded when you press the START/STOP button.
[Recording Setup]
[3]
[1 kHz Tone]
[OFF]
Slow & Fast Motion Mode
This mode allows you to change the shooting frame rate to achieve a slow motion or fast motion effect during playback. Sound is not recorded in this special recording mode.
Operating modes:


1 Touch the slow & fast motion button at the bottom right of the screen.
- Alternatively, you can use the [Recording Setup] ▶ [1] ▶ [Slow & Fast Motion] setting.
2 Select the desired slow/fast motion rate and then touch [→] or [×].
- Select [OFF Normal Recording] to turn off slow & fast motion recording.
- The slow/fast motion rate appears in the slow & fast motion button.
3 Press the START/STOP button to begin recording.
4 Press the START/STOP button again to stop recording.

Available slow/fast motion rates
| x1/41,2 | x1/21 | x2 | x4 | x10 | x20 | x60 | x120 | x1200 |
1 Not available when recording 4K clips.
2 Clips recorded with this option will have a resolution of 1280x720 and a bit rate of 18 Mbps. Also, face detection & tracking will not be available.
NOTES
- Slow & fast motion recording cannot be used together with pre-recording mode.
- The slow/fast motion rate cannot be changed while recording.
- Clips will have a frame rate of 29.97P.
- This function is not available when the system frequency is set to 24.00 Hz.
- Slow & fast motion recording will be deactivated if you change the video configuration.
- During slow & fast motion recording mode, the time code's running mode (☐ 84) can be set to [Rec Run] or [Regen.] and the time code advances by the number of frames recorded. If the time code's running mode is set to [Free Run], the running mode will switch to [Rec Run] during slow & fast motion recording mode. When slow & fast motion recording mode is deactivated, the running mode will return to its previous setting.
Pre-recording Mode
When pre-recording mode is activated, the camcorder starts recording continuously into a temporary memory of approximately 5 seconds so when you press the START/STOP button, the clip will contain also approximately 5 seconds of video and audio recorded before you pressed the button. Pre-recording is available only for HD clips.
Operating modes:


1 Touch [FUNC.] and then touch [Pre REC]. 2 Touch [On] to turn on pre-recording mode and then touch [X].
• appears on the upper right of the screen. - Touch [Off] to turn off pre-recording mode.
3 Press the START/STOP button to begin recording.
• The tally lamp illuminates.
4 Press the START/STOP button again to stop recording.
- The camcorder records the clip, including approximately 5 seconds of video and audio recorded before the START/STOP button was pressed.
- The tally lamp goes out.
NOTES
- During pre-recording mode, the time code's running mode (84) will be set to [Free Run], regardless of the previous setting. When the time code is recorded, it will include the 5 seconds before the START/STOP button was pressed. When pre-recording mode is deactivated, the running mode will return to its previous setting.
- Pre-recording cannot be used together with slow & fast motion recording.
- Pre-recording will be deactivated if you open the setup menus or change the look setting (☐ 65).
Interval Recording Mode
The camcorder will automatically record photos at a selected interval. This mode is suitable for recording subjects with little movement, such as natural surroundings or plants. Set the interval in advance.
Operating modes:


1 Touch the interval recording button at the bottom right of the screen.
- Alternatively, you can use the [Recording Setup] ▶ [1] ▶ [Interval Recording] setting.

2 Select the desired interval and then touch [→] or [×].
• Available intervals are 5 seconds, 10 seconds, 30 seconds, 1 minute and 10 minutes. - Select [OFF Off] to turn off interval recording.
3 Press the PHOTO button to begin recording.
- Photos are taken at the selected interval. The number of photos taken so far and the time remaining until the next shot are displayed at the top of the screen.
4 Press the PHOTO button again to stop recording.

NOTES
- Interval recording cannot be used together with face detection & tracking, touch focus, exposure lock, touch exposure or AE shift.
- The focus will be locked when interval recording starts. Autofocus will be deactivated while recording.
- Depending on the SD card, it may take some time to save the photos, thereby causing the actual interval between shots to be longer than the selected one.
Self Timer
You can have the camcorder record after a 2-second or 10-second countdown.
Operating modes:


1 Touch [FUNC.] and then touch [Self Timer]. 2 Select the desired countdown duration and then touch [X].
- The countdown icon (or) appears at the top of the screen.
3 Press the START/STOP (PHOTO) button to start the countdown and record. - You can press the START/STOP (PHOTO) button again to cancel the countdown.
i NOTES
- When using the optional RC-6 Remote Controller, the countdown duration will be determined by the [Self Timer] setting, regardless of the position of the remote controller's delay switch.
- Once the countdown has begun, any of the following actions will cancel the self timer.
- Turning off the camcorder.
- Pressing the ▶ button or changing the shooting mode.
Recording GPS Information (Geotagging)
When the optional GP-E2 GPS Receiver is connected to the camcorder's USB terminal, the camcorder will automatically record the GPS information (time in the UTC standard*, longitude, latitude and altitude) to every recording you make. The GPS information is recorded as part of the clip's metadata and can be used to organize and search recordings using Canon XF Utility (122).
* The time in the UTC standard is recorded for photos only.
Connecting the GPS Receiver
Turn off the camcorder and the receiver. Connect the receiver to the camcorder's USB terminal using the USB cable*. When connecting the GPS receiver, we recommend putting it in the carrying case supplied with the GPS receiver and carrying it on your waist. For details about using the receiver, refer to the GP-E2 Instruction Manual. * Supplied with the optional GP-E2 GPS Receiver.

Activating the GPS Receiver
After connecting the GPS receiver, turn on the camcorder and receiver.
- The icon appears on the right of the screen and will flash as the receiver tries to acquire satellite signals.
- When satellite signals are correctly acquired, the icon will stay continuously on. GPS functions will be activated and clips and photos recorded thereafter will be geotagged.
Operating modes:


Displaying GPS Information
You can display GPS information for clips and photos.
Operating modes:


1 Press the MENU button. 2 Open the [GPS Information Display] screen.
[System Setup] ▶ [4] (in mode) or [3] (in mode) ▶ [GPS Information Display]
3 Touch [X].
- The GPS information will be displayed.

System Setup]
[4] (in mode) or [3] (in mode)
[GPS Information Display]
Adjusting the Date/Time Automatically According to GPS Position
Setting [System Setup] ▶ [4] (in mode) or [3] (in mode) ▶ [GPS Auto Time Setting] to [Auto Update], you can have the camcorder automatically adjust its date and time settings according to the information received from the GPS signal while an optional GP-E2 GPS Receiver is connected to the camcorder.
- When [System Setup] ▶ [4] (in mode) or [3] (in mode) ▶ [GPS Auto Time Setting] is set to [Auto Update], settings in the [System Setup] ▶ [1] ▶ [Date/Time] submenu will not be available.
- While the Browser Remote application is in use, the automatic adjustment of the date/time will be deactivated.

IMPORTANT
- In certain countries/regions, the use of GPS may be restricted. Be sure to use the GPS receiver in accordance with local laws and regulations of the country/region where the receiver is used. Be particularly careful when traveling outside of your home country.
- Be careful about using the GPS receiver in places where the use of electronic devices is restricted.
- The GPS information recorded with clips and photos may contain data that can lead others to locate or identify you. Be careful when sharing geotagged recordings with others or when uploading them to the Web.
- Do not leave the GPS receiver near strong electromagnetic fields such as near powerful magnets and motors.

NOTES
- GPS signal reception may take some time after replacing the battery pack or when first turning on the camcorder after a long period without use.
- The camcorder is not compatible with the GPS receiver's digital compass and positioning interval functions. Also, the [Set now] option is not available for the [System Setup] ▶ [4] (in mode) or [3] (in mode) ▶ [GPS Auto Time Setting] setting. • GPS information will not be recorded with photos captured from a clip.
Orientation Detection
When orientation detection is turned on, the camcorder will detect if it is turned sideways or upside-down while recording and add that information to the photo's Exif data. Furthermore, when you play back those photos, the camcorder can automatically rotate them so that they are displayed in the correct orientation.
Operating modes:


1 Press the MENU button. 2 Open the [Detect Orientation] submenu.
[Recording Setup] [1] [Detect Orientation]
3 Touch [ON] and then touch [X].
- The orientation icon (see the following table) appears on the bottom left of the screen.

[Recording Setup]
[1]
[Detect Orientation]

[ON]
Examples of image rotation when [Detect Orientation] is set to [ON]
| Recording | Playback | |
| Camcorder's orientation* | Onscreen icon | |
 |  |  |
 | [504A] |  |
 |  |  |
 |  |  |
* As seen from the back of the camcorder, with the lens pointing forward.

Table of Contents Index
MENU
Menus

Correcting Orientation during Playback
You can have the camcorder display in the correct orientation photos that were recorded using orientation detection.
Operating modes:


1 Press the MENU button. 2 Open the [Auto Rotate] submenu.
[▶ Playback Setup] ➤ [1] ➤ [Auto Rotate]
3 Touch [ON On] and then touch [X].
- If you turn this function off, photos that were recorded with orientation detection will not be displayed in the correct orientation.
[▶Playback Setup]
[1]
[Auto Rotate]
[ON On]
4
Customization
Customizing the FUNC. Menu
You can change what functions appear on the right side of the FUNC. menu, making frequently used functions easier to access. To replace an icon, follow the procedure below.
Operating modes:

1 Press the MENU button. 2 Open the [Customize FUNC. Menu] screen for the current recording mode.
![[System Setup] [2] [' Customize FUNC. Menu] (in mode) or [Customize FUNC. Menu] (in mode)](/content/2026/06/1325421/images/e83654bcbfc91b3c08cf3c1f7b3f6642a0796b5d6e010d8281b96bb97f1d6d9d.jpg)
- The right side of the FUNC. menu can be customized separately for and modes.
3 From the right side of the screen, select the function to remove from the right side of the FUNC. menu. 4 From the bottom of the screen, select the function to add to the right side of the FUNC. menu. 5 Touch [X].
Default functions by mode
By default, the following functions appear on the right side of the FUNC. menu.
| IRIS [Aperture] | IRIS [Aperture] |
| SHTR [Shutter] | SHTR [Shutter] |
| ISO [ISO] | ISO [ISO] |
| AWB [White Balance] | AWB [White Balance] |
| A [Mic Level] | * [Exposure Lock] |
| * [Exposure Lock] | * [AE Shift] |
| [AE Shift] | [Zebra] |
| [Zebra] | [Peaking] |
| [Peaking] | [Focus] |
| [Powered IS] | [Magnification] |
| [System Setup] |
| [2] |
| [Customize FUNC. Menu](in mode) or[Customize FUNC. Menu](in mode) |
Assignable Buttons
The camcorder conveniently features assignable buttons to which you can assign various functions. By assigning often-used functions, you can quickly access them with a single press of a button.
Operating modes:


1 Open the submenu of the desired assignable button.
[ System Setup] ▶ [2] ▶ [Assign Button 1], [Assign Button 2] or [Assign Button 3]
- A list of available functions appears.
- The quick reference shows the default settings for each assignable button. The label on the button also indicates the button's default setting.
2 Select the desired function and then touch [✗].
[System Setup]
[2]
[Assign Button 1]
[Assign Button 2]
[Assign Button 3]
1: [CISSP.]
2: [PLSHFsh AF]
3: [MAGN. Magnification]
Using an Assignable Button
After you assign a function to one of the assignable buttons, press the button to activate the function.
Assignable Functions
Functions can be set separately depending on the operating mode. Refer to the following table for assignable functions and available modes.
| Function name | Description | |||||
| [ DISP D I S | Switches what onscreen displays are shown.Holding the button pressed down switches the LCDBacklight between bright and normal settings. If theLCD backlight is set to dim when you press the button,it will first change to the normal setting. | ● ● | ● ● 144 | |||
| [ PUSH AF Push AF] | Activates Push AF. | ● | ● | - | - | 79 |
| [ MAGN Magnification] | Turns magnification on/off. | ● | ● | - | - | 77 |
| [ 🎨 Zebra] | Activates zebra patterns in the following sequence:70% → 100% → Off | ● | ● | - | - | 82 |
| [ PEAK Peaking] | Turns peaking on/off. | ● | ● | - | - | 77 |
| [ [IMAGE] Digital Tele-conv.] | Turns the digital tele-converter on/off. | ● | - | - | - | 73 |
| [ 🎨 Powered IS] | Turns Powered IS on/off. | ● | - | - | - | 81 |
| [ ND ND Filter] | Turns the ND filter on/off. | ● | ● | - | - | 140 |
| [ START STOCK Start / Stop] | Starts and stops recording a clip. | ● | - | - | - | 41 |
| [ PHOTO Photo] | Takes a photo. | ● | - | - | - | 41 |
| [ WFM Waveform Monitor] | Turns the waveform monitor on/off. | ● | - | - | - | 83 |
Saving and Loading Menu Settings
After you adjust settings in the FUNC. menu and setup menus, you can save those settings on an SD card. You can load those settings at a later date or on another XC15 camcorder so that you can use that camcorder in the same exact way.
Operating modes:

Saving Menu Settings to an SD Card
1 Press the MENU button. 2 Open the [Backup Menu Settings SD] submenu.
[System Setup] [4] (in mode) or [3] (in other modes)
[Backup Menu Settings SD]
3 Touch [Save] and then touch [Yes]. - The current settings are saved to the SD card. 4 When the confirmation screen appears, touch [OK] and then touch [✗].
[System Setup]
[4] (in mode) or
[3] (in other modes)
[Backup Menu Settings SD]
Loading Menu Settings from an SD Card
1 Press the MENU button. 2 Open the [Backup Menu Settings SD] submenu.
[System Setup] [4] (in mode) or [3] (in other modes)
[Backup Menu Settings SD]
3 Touch [Load] and then touch [Yes].
- After the camcorder's current settings are replaced with the settings saved on the SD card, the screen will turn black momentarily and the camcorder will restart.
[System Setup]
[4] (in mode) or
[3] (in other modes)
[Backup Menu Settings SD]
i NOTES
- Menu settings files are exclusively compatible for use only with XC15 camcorders.
- The following settings in the FUNC. menu and setup menus will not be saved.
- FUNC menu: ⚫OFF [Pre REC], ⚫OFF [Self Timer], the automatic/manual setting for * [Exposure Lock],
MAGN. [Magnification], [Powered IS]
- Setup menus:
[Recording Setup] [1] [Interval Recording] [Recording Setup] ➤ [3] ➤ [Color Bars] [Wi-Fi Setup] ➤ [1] ➤ [Smartphone Connection] [System Setup] [1] [Date/Time]
5
Playback
This section explains how to play back recordings with the camcorder. For details on playing back recordings using an external monitor, refer to Connecting to an External Monitor (121).
Playing Back Recordings
In playback mode, the thumbnails of clips and photos you have recorded are shown in index screens sorted by the type of recording.
Operating modes:

1 While the camcorder is turned off, hold the ▶ button pressed down.
- An index screen will appear. To change the index screen, refer to Changing the Index Screen (109).
- If you hold the button pressed down again, the camcorder will switch to or mode depending on the position of the movie/photo switch.

2 Touch the thumbnail of the desired recording to start playback.
- You can also use the joystick to select a recording.
- During playback, you can touch the screen or press the DISP. button to display the playback controls. You can use the touch panel or joystick to operate the playback controls.
To play back clips
- Playback will start from the selected clip until the end of the last clip in the index screen.
- From the playback controls, touch [■] to pause playback or touch [■] to stop playback and return to the index screen.
To play back photos
• After the photo appears, drag your finger left/right to browse through the photos one by one. - You can also use the joystick to browse through the photos. - From the playback controls, touch [☐] to return to the index screen.
Changing the Index Screen
Clips and photos are sorted into different index screens depending on the type of recording. You can easily switch between the index screens to play back a desired recording.
Operating modes:

1 Touch the index screen button.
2 Select the desired index screen.
Summary of index screens
| Index screen button | Type of recording and recording media |
| [ [ [ [ ] ] ] MXF ] | 4K clips recorded on the CFast card. |
| [ [ [ [ ] ] MXF ] ] | HD clips recorded on the SD card. |
| [ [ [ [ ] ] ] | Photos recorded on the SD card. |

1 Index screen button. Touch to change the index screen.
2 Drag your finger left/right for the next/previous index page.
3 Display the next/previous index page.
4 Icon indicating a clip recorded using the [★9 Highlight Priority] look (☐ 71).
5 Delete recordings (☐ 116).
6 Folder number (for photos; 142).
7 Clip information (for clips; 113).
Switching to Playback Mode from 📄 or 📅 Mode
When you hold the ▶ button pressed down during 📋 or 🔒 mode, the camcorder will switch to playback mode and display the last clip or photo recorded, depending on the position of the movie/photo switch. For clips, touch [▶] to start playback. The playback controls are the same as when playing back a recording from the index screen.
Playing Back Clips Recorded Using the [Highlight Priority] Look
When playing back a clip recorded using the [★9 □ Highlight Priority] look, you can set [▼ System Setup] ➤ [1] ➤ [□ View Assistance] to [ON On] to display a more accurate looking image on the screen. When playing back such a clip on an external monitor, we recommend increasing the monitor's overall brightness.
![CANON XC15 - Playing Back Clips Recorded Using the [Highlight Priority] Look - 1](/content/2026/06/1325421/images/0b9ffa2d6d8a861914d48ea60837f0c0b9c8938eb3a5eef8a8e06a9e3f3471cc.jpg)
IMPORTANT
- Observe the following precautions while the ACCESS indicator is on or flashing in red. Failure to do so may result in permanent data loss.
- Do not disconnect the power source or turn off the camcorder.
- Do not open the recording media slot cover.

NOTES
- You may notice brief stops in video or audio playback between clips.
- The following photos may not be displayed correctly.
- Photos not recorded with this camcorder.
- Photos created or edited on a computer.
- Photos whose file names have been changed.
Onscreen Icons and Displays during Playback
Icons that appear during mode
Operating modes:


Icons on the top of the screen
| Icon/Display | Description | |
| [MENU] | Button to open the setup menus. | 139 |
| Delete recording. 116 | ||
| ▶, ▪, ◀/▶, ◀◀/▶▶, ◀◀/▶▶ | Playback operation▶: playback, ▪: playback pause, ◀/▶: reverse/normal slow playback, ◀◀/▶▶: reverse/normal fast playback, ◀◀/▶▶: frame reverse/advance | 112 |
| [Fast, SD] | Recording media that contains the current recording. | 35 |
| 0:00:00.00, 0:00:00:00 | Time code | 84 |
| MXF | Movie format | 53 |
| 000Mbps | Bit rate | 53 |
| 000 | Clip number | - |
| CH1/1, CH2/2, CH1+2/1+2 | Audio output channel | 120 |
| x1/4, x1/2x2, x4, x10, x20, x60, x120, x1200 | Slow motion rate of the current clip.Fast motion rate of the current clip. | 96 |
| [★9 Highlight Priority] look | [★9 Highlight Priority] look | 71 |
| ★2, ★3, ★4, ★5, ★6, ★7, ★8, ★9, ★10, ★11 | Looks | 71 |
Icons on the bottom of the screen
| Icon/Display | Description | |
| |◀◀/▶▶|, □, ■, ◀◀/▶▶, ▶, ◀/▶, ◀/▶/▶▶ | Playback controls during clip playback. | 112 |
| Button to capture a photo from a 4K clip (4K frame grab) or HD clip. | 114 | |
| Button to open the volume controls. | 113 | |
| Button to play back an HD-sized clip from a 4K clip. | 114 | |
| F0.00/000Oct. 25,2016 | Data code 141 |
Icons that appear during mode
Operating modes:


Icons on the left side of the screen
| Icon/Display | Description | |
| Histogram - | ||
| M, Av, Tv, P, AUTO, 📋, 📋, 📋, 📋, 📋, 📋, 📋, 📋, 📋, 📋, 📋, 📋, 📋, 📋, 📋, 📋, 📋, 📋, 📋, 📋, 📋, 📋, 📋, 📋, 📋, 📅, 📅, 📅, 📅, 📅, 📅, 📅, 📅, 📅, 📅, 📅, 📅, 📅, 📅, 📅, 📅, 📅, 📅, 📅, 📅, 📅, 📅, 📅, 📅, 📅, 📄, 📄, 📄, 📄, 📄, 📄, 📄, 📄, 📄, 📄, 📄, 📄, 📄, 📄, 📄, 📄, 📄, 📄, 📄, 📄, 📄, 📄, 📄, 📄, 📄, 📅, 📅, 📅, 📅, 📅, 📅, 📅, 📅, 📅, 📅, 📅, 📅, 📅, 📅, 📅, 📅, 📅, 📅, 📅, 📅, 📅, 📅, 📅, 📅, 📃, 📃, 📃, 📃, 📃, 📃, 📃, 📃, 📃, 📃, 📃, 📃, 📃, 📃, 📃, 📃, 📃, 📃, 📃, 📃, 📃, 📃, 📃, 📃, 📃, 📅, 📅, 📅, 📅, 📅, 📅, 📅, 📅, 📅, 📅, 📅, 📅, 📅, 📅, 📅, 📅, 📅, 📅, 📅, 📅, 📅, 📅, 📅, 📅, 📉, 📉, 📉, 📉, 📉, 📉, 📉, 📉, 📉, 📉, 📉, 📉, 📉, 📉, 📉, 📉, 📉, 📉, 📉, 📉, 📉, 📉, 📉, 📉, 📉, 📅, 📅, 📅, 📅, 📅, 📅, 📅, 📅, 📅, 📅, 📅, 📅, 📅, 📅, 📅, 📅, 📅, 📅, 📅, 📅, 📅, 📅, 📅, 📅, 📁, 📁, 📁, 📁, 📁, 📁, 📁, 📁, 📁, 📁, 📁, 📁, 📁, 📁, 📁, 📁, 📁, 📁, 📁, 📁, 📁, 📁, 📁, 📁, 📁, 📅, 📅, 📅, 📅, 📅, 📅, 📅, 📅, 📅, 📅, 📅, 📅, 📅, 📅, 📅, 📅, 📅, 📅, 📅, 📅, 📅, 📅, 📅, 📅, 📆, 📆, 📆, 📆, 📆, 📆, 📆, 📆, 📆, 📆, 📆, 📆, 📆, 📆, 📆, 📆, 📆, 📆, 📅, 📅, 📅, 📅, 📅, 📅, 📅, 📅, 📅, 📅, 📅, 📅, 📅, 📅, 📅, 📅, 📅, 📅, 📅, 📅, 📅, 📅, 📅, 📅, 📎, 📎, 📎, 📎, 📎, 📎, 📎, 📎, 📎, 📎, 📎, 📎, 📎, 📎, 📎, 📎, 📎, 📎, 📎, 📎, 📎, 📎, 📎, 📎, 📎, 📅, 📅, 📅, 📅, 📅, 📅, 📅, 📅, 📅, 📅, 📅, 📅, 📅, 📅, 📅, 📅, 📅, 📅, 📅, 📅, 📅, 📅, 📅, 📅, 📂, 📅, 📅, 📅, 📅, 📅, 📅, 📅, 📅, 📅, 📅, 📅, 📅, 📅, 📅, 📅, 📅, 📅, 📅, 📅, 📅, 📅, 📅, 📅, 📅, 📈, 📈, 📈, 📈, 📈, 📈, 📈, 📈, 📈, 📈, 📈, 📈, 📈, 📈, 📈, 📈, 📈, 📈, 📈, 📈, 📈, 📈, 📈, 📈, 📈, 📉, 📉, 📉, 📉, 📉, 📉, 📉, 📉, 📉, 📉, 📉, 📉, 📉, 📉, 📉, 📉, 📉, 📉, 📉, 📉, 📉, 📉, 📉, 📉, 📎, 📎, 📎, 📎, 📎, 📎, 📎, 📎, 📎, 📎, 📎, 📎, 📎, 📎, 📎, 📎, 📎, 📎, 📎, 📎, 📎, 📎, 📎, 📎, 📉, 📉, 📉, 📉, 📉, 📉, 📉, 📉, 📉, 📉, 📉, 📉, 📉, 📉, 📉, 📉, 📉, 📉, 📉, 📉, 📉, 📉, 📉, 📉, 📞, 📉, 📉, 📉, 📉, 📉, 📉, 📉, 📉, 📉, 📉, 📉, 📉, 📉, 📉, 📉, 📉, 📉, 📉, 📉, 📉, 📉, 📉, 📉, 📉, 📊, 📉, 📉, 📉, 📉, 📉, 📉, 📉, 📉, 📉, 📉, 📉, 📉, 📉, 📉, 📉, 📉, 📉, 📉, 📉, 📉, 📉, 📉, 📉, 📉, 📄, 📉, 📉, 📉, 📉, 📉, 📉, 📉, 📉, 📉, 📉, 📉, 📉, 📉, 📉, 📉, 📉, 📉, 📉, 📉, 📉, 📉, 📉, 📉, 📉, 📌, 📉, 📉, 📉, 📉, 📉, 📉, 📉, 📉, 📉, 📉, 📉, 📉, 📉, 📉, 📉, 📉, 📉, 📉, 📉, 📉, 📉, 📉, 📉, 📉, 📝, 📉, 📉, 📉, 📉, 📉, 📉, 📉, 📉, 📉, 📉, 📉, 📉, 📉, 📉, 📉, 📉, 📉, 📉, 📉, 📉, 📉, 📉, 📉, 📉, 📀, 📉, 📉, 📉, 📉, 📉, 📉, 📉, 📉, 📉, 📉, 📉, 📉, 📉, 📉, 📉, 📉, 📉, 📉, 📉, 📉, 📉, 📉, 📉, 📉, 📏, 📉, 📉, 📉, 📉, 📉, 📉, 📉, 📉, 📉, 📉, 📉, 📉, 📉, 📉, 📉, 📉, 📉, 📉, 📉, 📉, 📉, 📉, 📉, 📉, 📁, 📉, 📉, 📉, 📉, 📉, 📉, 📉, 📉, 📉, 📉, 📉, 📉, 📉, 📉, 📉, 📉, 📉, 📉, 📉, 📉, 📉, 📉, 📉, 📉, 📋, 📉, 📉, 📉, 📉, 📉, 📉, 📉, 📉, 📉, 📉, 📉, 📉, 📉, 📉, 📉, 📉, 📉, 📉, 📉, 📉, 📉, 📉, 📉, 📉, 📇, 📉, 📉, 📉, 📉, 📉, 📉, 📉, 📉, 📉, 📉, 📉, 📉, 📉, 📉, 📉, 📉, 📉, 📉, 📉, 📉, 📉, 📉, 📉, 📉, 📈, 📉, 📉, 📉, 📉, 📉, 📉, 📉, 📉, 📉, 📉, 📉, 📉, 📉, 📉, 📉, 📉, 📉, 📉, 📉, 📉, 📉, 📉, 📉, 📄, 📄, 📄, 📄, 📄, 📄, 📄, 📄, 📄, 📄, 📄, 📄, 📄, 📄, 📄, 📄, 📄, 📄, 📄, 📄, 📄, 📄, 📄, 📄, 📴, 📄, 📄, 📄, 📄, 📄, 📄, 📄, 📄, 📄, 📄, 📄, 📄, 📄, 📄, 📄, 📄, 📄, 📄, 📄, 📄, 📄, 📄, 📄, 📄, 📃, 📄, 📄, 📄, 📄, 📄, 📄, 📄, 📄, 📄, 📄, 📄, 📄, 📄, 📄, 📄, 📄, 📄, 📄, 📄, 📄, 📄, 📄, 📄, 📄, 📁, 📄, 📄, 📄, 📄, 📄, 📄, 📄, 📄, 📄, 📄, 📄, 📄, 📄, 📄, 📄, 📄, 📄, 📄, 📄, 📄, 📄, 📄, 📄, 📄, 📔, 📄, 📄, 📄, 📄, 📄, 📄, 📄, 📄, 📄, 📄, 📄, 📄, 📄, 📄, 📄, 📄, 📄, 📄, 📄, 📄, 📄, 📄, 📄, 📄, 📉, 📄, 📄, 📄, 📄, 📄, 📄, 📄, 📄, 📄, 📄, 📄, 📄, 📄, 📄, 📄, 📄, 📄, 📄, 📄, 📄, 📄, 📄, 📄, 📅, 📄, 📄, 📄, 📄, 📄, 📄, 📄, 📄, 📄, 📄, 📄, 📄, 📄, 📄, 📄, 📄, 📄, 📄, 📄, 📄, 📄, 📄, 📄, 📅, 📃, 📄, 📄, 📄, 📄, 📄, 📄, 📄, 📄, 📄, 📄, 📄, 📄, 📄, 📄, 📄, 📄, 📄, 📄, 📄, 📄, 📄, 📄, 📄, 📅, 📁, 📄, 📄, 📄, 📄, 📄, 📄, 📄, 📄, 📄, 📄, 📄, 📄, 📄, 📄, 📄, 📄, 📄, 📄, 📄, 📄, 📄, 📄, 📄, 📅, ⚠️ ⚠️ ⚠️ ⚠️ ⚠️ ⚠️ ⚠️ ⚠️ ⚠️ ⚠️ ⚠️ ⚠️ ⚠️ ⚠️ ⚠️ ⚠️ ⚠️ ⚠️ ⚠️ ⚠️ ⚠️ ⚠️ ⚠️ ⚠️ ⚠️ ⚠> ⚠> ⚠> ⚠> ⚠> ⚠> ⚠> ⚠> ⚠> ⚠> ⚠> ⚠> ⚠> ⚠> ⚠> ⚠> ⚠> ⚠> ⚠> ⚠> ⚠> ⚠> ⚠> ⚠> ⚠> ⚠ > ⚠> ⚠> ⚠> ⚠> ⚠> ⚠> ⚠> ⚠> ⚠> ⚠> ⚠> ⚠> ⚠> ⚠> ⚠> ⚠> ⚠> ⚠> ⚠> ⚠> ⚠> ⚠> ⚠> ⚠> ⚠><|txt_contd_src|> <|txt_contd_src|> <|txt_contd_src|> <|txt_contd_src|> <|txt_contd_src|> <|txt_contd_src|> <|txt_contd_src|> <|txt_contd_src|> <|txt_contd_src|> <|txt_contd_src|> <|txt_contd_src|> <|txt_contd_src|> <|txt_contd_src|> <|txt_cont d|> <|txt_contd_src|> <|txt_contd_src|> <|txt_contd_src|> <|txt_contd_src|> <|txt_contd_src|> <|txt_contd_src|> <|txt_contd_src|> <|txt_contd_src|> <|txt_contd_src|> <|txt_contd_src|> <|txt_contd_src|> <|txt_contd_src|> < |txt_contd_src|> <|txt_contd_src|> <|txt_contd_src|> <|txt_contd_src|> <|txt_contd_src|> <|txt_contd_src|> <|txt_contd_src|> <|txt_contd_src|> <|txt_contd_src|> <|txt_contd_src|> <|txt_contd_src|> <|txt_contd_src|> <|txt_contd Let|> <|txt_contd Let|> <|txt_contd Let|> <|txt_contd Let|> <|txt_contd Let|> <|txt_contd Let|> <|txt_contd Let|> <|txt_contd Let|> <|txt_contd Let|> <|txt_contd Let|> <|txt_contd Let|> <|txt_contd Let|> <|txt_contd Let|> < |txt_contd Let|> <|txt_contd Let|> <|txt_contd Let|> <|txt_contd Let|> <|txt_contd Let|> <|txt_contd Let|> <|txt_contd Let|> <|txt_contd Let|> <|txt_contd Let|> <|txt_contd Let|> <|txt_contd Let|> <|txt_contd Let|> <|txt_contd Ret|> <|txt_contd Ret|> <|txt_contd Ret|> <|txt_contd Ret|> <|txt_contd Ret|> <|txt_contd Ret|> <|txt_contd Ret|> <|txt_contd Ret|> <|txt_contd Ret|> <|txt_contd Ret|> <|txt_contd Ret|> <|txt_contd Ret|> <|txt_contd Ret|> < |txt_contd Ret|> <|txt_contd Ret|> <|txt_contd Ret|> <|txt_contd Ret|> <|txt_contd Ret|> <|txt_contd Ret|> <|txt_contd Ret|> <|txt_contd Ret|> <|txt_contd Ret|> <|txt_contd Ret|> <|txt_contd Ret|> <|txt_contd Ret|> <|txt_contd Ref|> <|txt_contd Ret|> <|txt_contd Ret|> <|txt_contd Ret|> <|txt_contd Ret|> <|txt_contd Ret|> <|txt_contd Ret|> <|txt_contd Ret|> <|txt_contd Ret|> <|txt_contd Ret|> <|txt_contd Ret|> <|txt_contd Ret|> <|txt_contd Ret|> <|^2_10^2_10^2_10^2_10^2_10^2_10^2_10^2_10^2_10^2_10^2_10^2_10^2_10^2_10^2_10^2_10^2_10^2_10^2_10^2_10^2_10^-10^2_10^2_10^2_10^2_10^2_10^2_10^2_10^2_10^2_10^2_10^2_10^2_10^2_10^2_10^2_10^2_10^2_10^2_10^2_10^2 10^2_10^2_10^2_10^2_10^2_10^2_10^2_10^2_10^2_10^2_10^2_10^2_10^2_10^2_10^2_10^2_10^2_10^2_10^2_10^2<|txt_contd_src|> <|txt_contd_src|> <|txt_contd Let|> <|txt_contd Let|> <|txt_contd Let|> <|txt_contd Let|> <|txt_contd Let|> <|txt_contd Let|> <|txt_contd Let|> <|txt_contd Let|> <|txt_contd Let|> <|txt_contd Let|> <|txt-contd Let|> <|txt_contd Let|> <|txt_contd Let|> <|txt_contd Let|> <|txt_contd Let|> <|txt_contd Let|> <|txt_contd Let|> <|txt_contd Let|> <|txt_contd Let|> <|txt_contd Let|> <|txt_contd Let|> <|txt_contd Let|> <|txt_contd Let|><|txt_contd_src|> <|txt_contd Let|> <|txt_contd Let|> <|txt_contd Let|> <|txt_contd Let|> <|txt_contd Let|> <|txt_contd Let|> <|txt_contd Let|> <|txt_contd Let|> <|txt_contd Let|> <|txt_contd Let|> <|txt_contd Let|> <|txt_contb|> <|txt_contd Let|> <|txt_contd Let|> <|txt_contd Let|> <|txt_contd Let|> <|txt_contd Let|> <|txt_contd Let|> <|txt_contd Let|> <|txt_contd Let|> <|txt_contd Let|> <|txt_contd Let|> <|txt_contd Let|> <|txt_contd Let|> <)|txt_contd Let|> <|txt_contd Let|> <|txt_contd Let|> <|txt_contd Let|> <|txt_contd Let|> <|txt_contd Let|> <|txt_contd Let|> <|txt_contd Let|> <|txt_contd Let|> <|txt_contd Let|> <|txt_contd Let|> <|txt_contd Let|> <|txt_contd L|> <|txt_contd Let|> <|txt_contd Let|> <|txt_contd Let|> <|txt_contd Let|> <|txt_contd Let|> <|txt_contd Let|> <|txt_contd Let|> <|txt_contd Let|> <|txt_contd Let|> <|txt_contd Let|> <|txt_contd Let|> <|txt_contd Let|> <|^2_10^2_10^2_10^2_10^2_10^2_10^2_10^2_10^2_10^2_10^2_10^2_10^2_10^2_10^2_10^2_10^2_10^2_10^2_10^4_10^4_10^4_10^4_10^4_10^4_10^4_10^4_10^4_10^4_10^4_10^4_10^4_10^4_10^4_10^4_10^4_10^4_10^4_10^4_10^2_10^2_10^2_10^2_10^2_10^2_10^2_10^2_10^2_10^2_10^2_10^2_10^2_10^2_10^2_10^2_10^2_10^2_10^2_10^4_10_10^4_10^4_10^4_10^4_10^4_10^4_10^4_10^4_10^4_10^4_10^4_10^4_10^4_10^4_10^4_10^4_10^4_10^4_10^4_10^3_10^3_10^3_10^3_10^3_10^3_10^3_10^3_10^3_10^3_10^3_10^3_10^3_10^3_10^3_10^3_10^3_10^3_10^3_10^3_10^2_10^2_10^2_10^2_10^2_10^2_10^2_10^2_10^2_10^2_10^2_10^2_10^2_10^2_10^2_10^2_10^2_10^2_10^2_10^3_10^3_10^3_10^3_10^3_10^3_10^3_10^3_10^3_10^3_10^3_10^3_10^3_10^3_10^3_10^3_10^3_10^3_10^3_10^4_10^4_10^4_10^4_10^4_10^4_10^4_10^4_10^4_10^4_10^4_10^4_10^4_10^4_10^4_10^4_10^4_10^4_10^4_10^5_10^5_10^5_10^5_10^5_10^5_10^5_10^5_10^5_10^5_10^5_10^5_10^5_10^5_10^5_10^5_10^5_10^5_10^5_10^5_10^6_10^6_10^6_10^6_10^6_10^6_10^6_10^6_10^6_10^6_10^6_10^6_10^6_10^6_10^6_10^6_10^6_10^6_10^6_10^6_10^7_10^7_10^7_10^7_10^7_10^7_10^7_10^7_10^7_10^7_10^7_10^7_10^7_10^7_10^7_10^7_10^7_10^7_10^7_10^7_10^8_10^8_10^8_10^8_10^8_10^8_10^8_10^8_10^8_10^8_10^8_10^8_10^8_10^8_10^8_10^8_10^8_10^8_10^8_10 |
Playback
Icons on the right side of the screen
| Icon/Display | Description | |
| SD 00/00 | Current photo / Total number of photos | - |
| 000-0000 File number 142 |
Icons on the bottom of the screen
| Icon/Display | Description | |
| Button to magnify the photo. 115 | ||
| ▶, □, ☑, ☑ | Playback controls during photo playback. | 113 |
| 9:00 AMOct. 25,2016 | Data code | 141 |
Playback Controls during Clip Playback
When you play back a clip, touch the screen to display the playback controls to operate the various types of playback. Refer to the following table.
Operating modes:


Available playback types
You can perform the following during playback, unless stated otherwise.
| Playback type | Operation |
| Fast playback | Touch [◀◀] or [▶▶].Repeat to increase the playback speed to approximately 5x → 15x → 60x the normal speed. |
| Frame advance/reverse | During playback pause, touch [◀◀] or [▶▶]. |
| Skip to the beginning of the next clip | Touch [▶▶]. |
| Skip to the beginning of the current clip | Touch [▶◀◀]. |
| Skip to the previous clip | Touch [▶◀◀] twice. |
| Return to playback mode | Touch [▶]. |
| Normal/reverse slow playback | Touch [◀◀] or [▶▶].Repeat to decrease the speed to approximately 1/4x → 1/8x. |

NOTES
- There is no audio during any of the playback types listed in the previous table. Also, there is no audio when playing back clips recorded in slow & fast recording.
- During fast/slow playback, you may notice some anomalies (blocky video artifacts, banding, etc.) in the playback picture.
- The speed indicated on the screen is approximate.
- During frame reverse, the interval between frames depends on the video configuration used: 1 frame (for 4K clips), approx. 0.2 seconds (for HD clips with a frame rate of 59.94P) or approx. 0.5 seconds (for other video configurations).
- During reverse slow playback, the interval between frames will be an interval of approx. 0.2 seconds (for clips with a frame rate of 59.94P) or approx. 0.5 seconds (for other video configurations).
Playback Controls during Photo Playback
When you play back a photo, touch the screen to display the playback controls to access playback functions.
Operating modes:

| Button Function | |
| [▶]/[■] | Start/stop slideshow playback. |
| [■] | Return to the index screen. |
| [◇] | Photo jump. Touch [◀] or [▶], or drag your finger along the scroll bar to find the desired photo. Touch [→] to return to single photo view. |
| [⊕]/[●] | Photo magnification (□ 115). |
Adjusting the Volume
During playback, audio will be output from the monaural built-in speaker, the stereo ⏻ (headphone) terminal and HDMI OUT terminal. When you connect headphones to the ⏻ (headphone) terminal or connect an external device to the HDMI OUT terminal, the built-in speaker will be muted.

Operating modes:

1 During playback, touch the screen to display the playback controls.
2 Touch [∅/
3 Drag your finger along the [Headphone Volume] or [Speaker Volume] bar, or repeatedly touch the headphone or speaker icon on either end of it to adjust the volume and touch [→].
Displaying Clip Information
From the index screen, you can display details about clips, such as the bit rate, frame rate and length.
Operating modes:

1 Touch [i] and then touch the thumbnail of the desired clip.
• The [Clip Info] screen will appear.
- You can touch [◀]/[▶] to switch to the previous/next clip.
2 Touch [→] twice.
Playing an HD-sized Clip from a 4K Clip
When playing back a 4K clip, you can select an HD-sized portion of the frame to play back.
Output from the HDMI OUT terminal will be a maximum of 1920x1080, depending on the capability of the external monitor.
Operating modes:


1 Play back the desired 4K clip.
2 During playback or playback pause, touch the screen to display the playback controls and then touch [Φ].
- The screen will be magnified and a white frame representing the whole screen area is displayed on the top left of the screen. The white rectangle within it represents the approximate part of the image being displayed.
- Drag your finger across the screen to move the white rectangle around and select the portion of the image to play back.
- Touch [To switch back to normal playback mode.
Capturing Photos from 4K Clips (4K Frame Grab) and HD Clips
You can capture a photo from a clip during playback pause. Captured photos are saved on the SD card. The size of the photo will depend on the type of clip it was captured from.
Operating modes:


1 Play back the clip from which you want to capture the photo. 2 Pause the playback at the point you want to capture (108).
- If you press the PHOTO button halfway during playback, the playback speed will slow to 1/8 normal, allowing you to find the desired point more easily.
Press the PHOTO button or touch to capture a photo.
• SD appears on the bottom right of the screen. - The ACCESS indicator will flash as the photo is being recorded.
Touch [■] to stop playback.
Photo size by clip type
| Clip Photo size | |
| 4K clip (4K Frame Grab) 3840x2160 | |
| HD clip | 1920x1080 |
| HD clip recorded in slow motion at x1/4 | 1280x720 |

IMPORTANT
- Observe the following precautions while the ACCESS indicator is on or flashing in red. Failure to do so may result in permanent data loss.
- Do not disconnect the power source or turn off the camcorder.
- Do not open the recording media slot cover.

Table of Contents Index

Menus

Magnifying Photos during Playback
You can magnify photos when you play them back.
Operating modes:

1 Play back the photo you want to magnify (108). 2 Touch the screen to display the playback controls. 3 Touch [∅]
- The center of the photo is magnified approximately 2 times. Touch [⊕] to magnify the image further. Touch [⊖] to reduce the magnification.
- Alternatively, you can pinch your fingers out on the screen to magnify a photo.
- Drag your finger along the magnified area to check other parts of the photo. The white rectangle within the frame represents the approximate location of the portion of the photo that is shown magnified.
4 Touch [→] to turn off magnification.
- You can also turn off magnification by touching [Repeatedly.
Deleting Recordings
You can delete those clips and photos that you are not interested in keeping. Deleting recordings allows you also to free up space on the recording media.
Deleting Clips and Photos from the Index Screen
Operating modes:


1 Open the index screen with the clip or photo you want to delete (☐ 109).
- To delete all the photos recorded on the same date (saved in the same folder), drag your finger left/right until a photo you want to delete appears.
2 Touch [囗].
3 Select the desired option.
- When you select [Select], touch on the individual recordings to delete. A checkmark √ will appear on the recordings you touch. The total number of selected recordings will appear next to the ☑ icon. You can select up to 100 recordings.
- Touch a selected recording to remove the checkmark. To remove all the checkmarks at once, touch [Remove All] ▶ [Yes]. • After selecting all the desired recordings, touch [OK].
4 Touch [Yes].
- Touch [Stop] to interrupt the operation while it is in progress. Some recordings may be deleted nevertheless.
5 Touch [OK].
Options
[folder name]: Deletes all the photos recorded on a particular date. The last 4 digits of the folder name indicate the recording date (ex. 1025 = October 25).
[Select]: Selects individual clips or photos to delete.
[All Clips] or
[All Photos]: Deletes all the clips or photos.
Deleting a Clip During Playback Pause
Operating modes:


1 Play back the clip you want to delete (☐ 108). 2 Touch the screen to display the playback controls. 3 Delete the clip.
[Ⅱ] ➤ [衞] ➤ [Yes]
- The clip is deleted.
4 Touch [OK].


Deleting a Photo during Playback
Operating modes:

1 Play back the photo you want to delete (☐ 108). 2 Touch the screen to display the playback controls. 3 Delete the photo.
[☑] ➤ [☑ Proceed] ➤ [Yes]
- The photo is deleted and the next photo is displayed. You can drag your finger left/right to select another photo to delete and then touch [Proceed] again.
4 Touch [X].
5 In the playback controls, touch [☐].
IMPORTANT
- Be careful when deleting recordings. Once deleted, they cannot be recovered.
- Save copies of important recordings before deleting them (122).
NOTES
- Photos that were protected with other devices cannot be deleted with this camcorder.
- To delete all recordings and make all recordable space available again you may prefer to initialize the recording media (☐ 38).
Video Output Configuration
The video signal output from the HDMI OUT terminal depends on the clip's video configuration and the capability of the external monitor.
Recording Video Signal Configuration and Video Output Configuration
Refer to the following table for the video output configuration, depending on the recording video configuration used.
Operating modes:


| Recording configuration | HDMI OUT terminal output | |
| Resolution Frame rate / Bit rate | ||
| 4K(3840x2160) | 29.97P / 305 Mbps29.97P / 205 Mbps | 3840x2160 / 29.97P1920x1080 / 59.94P1920x1080 / 59.94i720x480 / 59.94P |
| 23.98P / 305 Mbps23.98P / 205 Mbps | 3840x2160 / 23.98P1920x1080 / 59.94P1920x1080 / 59.94i720x480 / 59.94P | |
| 24.00P / 305 Mbps24.00P / 205 Mbps | 3840x2160 / 24.00P1920x1080 / 60.00P | |
| HD(1920x1080) | 59.94P / 50 Mbps59.94i / 35 Mbps29.97P / 35 Mbps23.98P / 35 Mbps | 1920x1080 / 59.94P1920x1080 / 59.94i720x480 / 59.94P |
| 24.00P / 35 Mbps | 1920x1080 / 60.00P | |
Playback Video Configuration and Video Output Configuration
Refer to the following tables for the video output configuration, depending on the video configuration of the clip being played back. For playback of an HD-sized clip from a 4K clip, refer to the entry for HD.
Operating modes:

| Playback configuration | HDMI OUT terminal output | |
| Frame rate | ||
| 4K clips(3840x2160) | 29.97P | 3840x2160 / 29.97P1920x1080 / 59.94P1920x1080 / 59.94i720x480 / 59.94P |
| 23.98P | 3840x2160 / 23.98P1920x1080 / 59.94P1920x1080 / 59.94i720x480 / 59.94P | |
| 24.00P | 3840x2160 / 24.00P1920x1080 / 60.00P | |
| HD clips(1920x1080) | 59.94P29.97P23.98P | 1920x1080 / 59.94P1920x1080 / 59.94i720x480 / 59.94P |
| 24.00P 1920x1080 / 60.00P | ||
| Playback configuration | HDMI OUT terminal output | |
| System frequency | ||
| Photos | 59.94 Hz | 3840x2160 / 29.97P1920x1080 / 59.94P1920x1080 / 59.94i720x480 / 59.94P |
| 24.00 Hz | 3840x2160 / 24.00P1920x1080 / 60.00P | |
Selecting the Audio Output Channel
The camcorder can output audio from the ⏻ (headphone) terminal and you can select the output channel. When performing the following procedure in ☐ mode, the MA-400 Microphone Adapter must be connected to the camcorder and make sure to set [♪] Audio Setup] ➤ [1] ➤ [INPUT 1/2] to [INPUT1/2 On] in advance.
Operating modes:


1 Press the MENU button. 2 Open the [Monitor Channels] submenu.
[♪) Audio Setup]

[3] (in

mode) or [1] (in

mode)
[Monitor Channels]
3 Select the desired option and then touch [X].
[Audio Setup]
[3] (in mode) or
[1] (in mode)
[Monitor Channels]
[CH1/2 CH1/CH2]
Options
[CH1/2 CH1/CH2]:
Audio from CH1 is output from the left audio channel and audio from CH2 is output from the right audio channel.
[CH1/1 CH1/CH1]:
Audio from CH1 is output from both the left and right audio channels.
[CH2/2 CH2/CH2]:
Audio from CH2 is output from both the left and right audio channels.
[CH1+2/1+2 C]
H
Audio from CH4 and CH2 is mixed and output from both the left and right audio channels.
CH1+2]:
Connecting to an External Monitor
When you connect the camcorder to an external monitor for recording or playback, connect the camcorder's HDMI™ OUT terminal to the monitor's HDMI input terminal using the supplied HTC-100/S High Speed HDMI Cable.
Connection Diagram
We recommend that you power the camcorder from a power outlet using the AC adapter.

NOTES
- The HDMI OUT terminal is for output only. Do not connect the camcorder to another device's output terminal using the HDMI OUT terminal as this will cause a malfunction.
- When using a commercially available HDMI cable, make sure the HDMI cable is Type A to Type C. Audio and video will not be output from the HDMI OUT terminal while Wi-Fi functions are in use.
- Correct operation cannot be guaranteed when connecting the camcorder to DVI monitors. Video may not be output correctly depending on the monitor.
- When [Camera Setup] ▶ [3] ▶ [Rolling Shutter Reduction] is set to [ON] On Band recording starts, HDMI output will stop.
Saving Clips to a Computer
Use Canon XF Utility to save clips or one of the Canon XF plugins* to import clips into non-linear editing (NLE) software. When using the software to transfer clips to a computer, make sure to use a compatible card reader.
* Plugins are available for NLE software by Avid and Apple.
Installation
Canon XF Utility and the Canon XF plugins are available as a free download from the following Canon Web site. Refer to the Web site for the system requirements and the latest information about the software and plugins. To download, click on your country/region and follow the onscreen instructions.
www.canon.com/icpd
Canon XF Utility: Browser for transferring clips to a computer and playing back, checking and managing clips. The software also allows you to capture photos from clips.
Plugins for non-linear editing (NLE) software: The plugins allow you to transfer clips from a computer or the recording media (connected via USB reader to a computer) to the NLE software. The following plugins are available.
- Canon XF Plugin for Avid Media Access (Windows or Mac OS)
- Canon XF Plugin for Final Cut Pro X (Mac OS)
About the Wi-Fi Functions
This camcorder's Wi-Fi functions use either an infrastructure or camera access point connection, depending on the function. Refer to the following table for a brief summary of the Wi-Fi functions.
Wi-Fi functions and connection types
| Function | Description | Wi-Fi connection | ||
| Infrastructure 1 | Camera Access Point 2 | |||
| Browser Remote | Control the camcorder remotely from the Web browser of a connected device. | - | ● | 131 |
| Playback via Browser | Access the photos on the SD card in the camcorder from the Web browser of a connected device to play back or save locally. | - | ● | 135 |
| Media Server | Wirelessly view on a computer the photos on the camcorder's SD card. | ● | - | 136 |
1 Connection to a Wi-Fi network via an external access point (wireless router, etc.) 2 Direct connection to one Wi-Fi-enabled device, such as a smartphone, where the camcorder serves as the Wi-Fi access point.
Before using the Wi-Fi functions
- The instructions in this chapter assume you already have a correctly configured and working network, network device(s) and/or Wi-Fi access point. If necessary, refer to the documentation provided with the network devices you want to use.
- Configuring the network settings requires adequate knowledge about configuring and using wireless (Wi-Fi) networks. Canon cannot provide support regarding network configurations.

IMPORTANT
- Canon shall not be liable for any loss of data or damage resulting from incorrect network configuration or settings. Additionally, Canon shall not be liable for any loss or damage caused by the use of Wi-Fi functions.
- Using an unprotected Wi-Fi network can expose your files and data to monitoring by unauthorized third parties. Be aware of the risks involved.
About the Wi-Fi Functions

NOTES
- About the Wi-Fi antenna: When using the camcorder's Wi-Fi functions, do not cover the Wi-Fi antenna with your hand or other object. Covering it may interfere with wireless signals.
- Do not open the recording media slot cover while using Wi-Fi functions.

Wireless Connections Using Wi-Fi
The camcorder is Wi-Fi certified and can connect to a Wi-Fi network using an external access point (wireless router) or can itself serve as a Wi-Fi access point. The camcorder can connect to wireless routers (access points) compliant with the 802.11a/b/g/n protocol and are Wi-Fi certified (bear the logo shown on the right).

The camcorder offers 5 ways to connect to a Wi-Fi network and the method you use will depend on the type and specifications of the access point and network you want to use. Note that using an unprotected Wi-Fi network can expose your data to monitoring by unauthorized third parties. Be aware of the risks involved.
Operating modes:

WPS (button): If your wireless router supports Wi-Fi Protected Setup (WPS), setup will be easy and require minimal configuring and no passwords. To check if your wireless router has a WPS button and for details about how to activate the Wi-Fi protected setup, refer to the instruction manual of your wireless router.

WPS (PIN code): Even if your wireless router does not have a dedicated WPS button, it may support WPS using a PIN code instead. For setup using a PIN code, you will need to know in advance how to activate the wireless router's WPS function. For details refer to the instruction manual of your wireless router.
Searching for Access Points: If your access point does not support the WPS function or you cannot activate it, you can have the camcorder search for access points in the area.
Manual Setup: If the access point you want to use has stealth mode activated and it cannot be automatically detected by the camcorder, you can enter all the necessary settings manually. This requires more advanced knowledge of Wi-Fi and network settings.
Camera Access Point: When shooting in a location where there are no access points available, the camcorder can serve as a wireless access point*. Wi-Fi enabled devices will be able to connect to the camcorder directly.
* Limited only to the connection between the camcorder and supported Wi-Fi enabled devices. The functionality is not the same as that of commercially available access points.
Wi-Fi Protected Setup (WPS)
Wi-Fi Protected Setup (WPS) is the easiest way to connect to a Wi-Fi access point. You can do this simply by pushing a button (if the access point (wireless router) you want to connect to has a WPS button) or using a PIN code issued by the camcorder.
Wireless Routers with a WPS Button
1 Press the MENU button.
2 Open the [Access Point Connection] screen.
[Wi-Fi Setup] [1] [Access Point Connection]
3 Touch [Not Configured] and then touch [WPS: Button].
4 Press and hold the WPS button on the wireless router.
- The length of time required to hold down the WPS button depends
on the wireless router. Refer to the instruction manual of your wireless router and make sure the wireless router's WPS function is activated.
[Wi-Fi Setup]
[1]
[Access Point Connection]
5 Within 2 minutes, touch [OK] on the camcorder's screen.
- While the camcorder is attempting to connect to the access point, you can touch [Stop] and then [OK] to interrupt the operation. 6 When the confirmation screen appears, touch [OK] and then touch [✗].

NOTES
- The [WPS: Button] method may not work correctly if there are several active access points in the area. In such case try using [WPS: PIN Code] or [Search for Access Points] (126) instead.
WPS using a PIN code
1 Press the MENU button.
2 Open the [Access Point Connection] screen.
[Wi-Fi Setup] [1] [Access Point Connection]
3 Touch [Not Configured] and then touch [WPS: PIN Code].
- After approximately 7 or 8 seconds, the camcorder will generate and display a PIN code.
[(1) Wi-Fi Setup]
[1]
[Access Point Connection]
4 Enter the PIN code from step 3 into the wireless router's WPS (PIN code) setup screen.
- For most wireless routers, you must use a Web browser to access the setup screen.
- For details about how to access your wireless router's settings and activate the Wi-Fi Protected Setup (WPS) using a PIN code, refer to the instruction manual of your wireless router.
5 Within 2 minutes, touch [OK] on the camcorder's screen.
- While the camcorder is attempting to connect to the access point, you can touch [Stop] and then [OK] to interrupt the operation.
6 When the confirmation screen appears, touch [OK] and then touch [✗].
Searching for Access Points
The camcorder will automatically detect access points in the vicinity. After you select the desired access point, you only need to enter the selected network's encryption key (password) to connect the camcorder.
1 Press the MENU button.
2 Open the [(↑) Access Point Connection] screen.
[Wi-Fi Setup] [1] [Access Point Connection]
3 Touch [Not Configured] and then touch [Search for Access Points].
- The camcorder will search for active access points in your area and display a list of available options.
[(1) Wi-Fi Setup]
[1]
[Access Point Connection]
4 Select the desired access point.
- If the desired access point is not displayed, you can touch [▲] or [▼] to go through the list of detected access points. You can also touch [Search Again] to have the camcorder search for access points again.
- When the network name (SSID) of the desired access point appears, touch [OK].
- If the access point is encrypted (☑), enter the encryption key (password) with the following procedure. Otherwise, go to step 7 of Manual Setup (☐ 128) and perform the rest of that procedure.

Encrypted Access Points
1 If necessary, select the WEP index key.
- This step is only necessary if the Wi-Fi network's authentication method is set to [WPA] or if the encryption method is set to [WEP].
2 To enter the [Encryption Key] (password), touch [Not configured].
- Enter the password of the selected Wi-Fi network using the keyboard screen (☐ 127).
3 When the confirmation screen appears, touch [OK].
i NOTES
- Valid encryption keys vary depending on the encryption method.
64-bit WEP encryption: 5 ASCII characters or 10 hexadecimal characters.
128-bit WEP encryption: 13 ASCII characters or 26 hexadecimal characters.
AES / TKIP encryption: 8 to 63 ASCII characters or 64 hexadecimal characters.
* Note: ASCII characters include the numbers 0 to 9, the letters a to z and A to Z and some punctuation marks and special symbols. Hexadecimal characters comprise the numbers 0 to 9 and the letters a to f and A to F.
Using the Virtual Keyboard Screen
The virtual keyboard is displayed on the screen. The illustration below explains the various keys you can use.


1 Touch the desired keys to type the corresponding character.
- Touch [◀]/[▶] to change the position of the cursor.
- Touch [123]/[ABC] to switch between letters and numbers/special characters.
- Touch [←] to delete the character to the cursor's left.
- Touch [A/a] for caps lock. When the numerical keyboard is displayed, [%?]/[*&+] switches between set 1 and set 2 of special characters.
2 After entering the desired text, touch [OK].
3 Back in the original screen, touch [Next] or [OK] to continue.
Manual Setup
If you prefer, you can enter manually the details of the Wi-Fi network you want to connect to. Follow the instructions on the screen to complete the procedure.
To enter text for the various settings, use the virtual keyboard (☐ 127).
1 Press the MENU button.
2 Open the [(q) Access Point Connection] screen.
[Wi-Fi Setup] [1] [Access Point Connection]
3 In the access point selection screen, touch [Not configured] and then touch [Manual Setup].
4 In the [SSID] (network name) field, touch [Not configured].
- Enter the SSID (network name) of the selected Wi-Fi network.
[(¶) Wi-Fi Setup]
[1]
[Access Point Connection]
5 In the [Authentication/Encryption Method] field, touch [OPEN NONE] and then touch the desired method.
- If you selected [OPEN WEP], the WEP index is 1.
- If you selected [OPEN NONE], skip to step 7.
6 In the [Encryption Key] field, touch [Not configured].
- Enter the encryption key.
7 Touch [Automatic] or [Manual] to select how to obtain the IP address.
- If you selected [Automatic], skip to step 12.
8 In the [IP Address] field, touch [0.0.0.0]. Touch the first field and touch [▲]/[▼] to change the value. Change the rest of the fields in the same way and then touch [OK].
9 Enter the [Subnet Mask] field in the same way and then touch [Next].
10 Enter the [Default Gateway] field in the same way and then touch [Next].
11 Enter the [Primary DNS Server] and [Secondary DNS Server] fields in the same way and then touch [Next].
12 When the confirmation screen appears, touch [OK] and then touch [X].
IMPORTANT
- The Wi-Fi functions available and the setup method will vary depending on the specifications and characteristics of the Wi-Fi network you want to use.
Viewing and Changing Wi-Fi Settings
You can view and change Wi-Fi connection settings saved in the camcorder. Because the settings must be changed manually, adequate knowledge about configuring and using Wi-Fi networks is required. If Browser Remote has been activated, deactivate it before performing the following settings (131). To enter text for the various settings, use the virtual keyboard (127).
Operating modes:

Viewing the smartphone's connection settings
1 Press the MENU button. 2 Open the [ (↑) Smartphone Connection] screen.
[Wi-Fi Setup] ➤ [1] ➤ [Smartphone Connection]
- The camcorder's SSID (network name), password and operating frequency will appear.
To change the SSID and password
3 Touch [next to [Camcorder's Password] and then touch [OK]. - The camcorder will randomly choose a new SSID and password. 4 Touch [OK] and then touch [✗].
To change the operating frequency
3 Touch[] next to [Frequency]. 4 Select [2.4 GHz] or [5 GHz]. 5 Touch [→] twice and then touch [×].
Viewing the access point's connection settings
1 Press the MENU button. 2 Open the [(↑) Access Point Connection] screen.
[Wi-Fi Setup] [1] [Access Point Connection]
- The SSID (network name) of access points saved in the camcorder's memory will appear.
- To add an access point, touch [Not configured] and then perform the procedure in Wireless Connections Using Wi-Fi (125). After doing so, the [(p)Wi-Fi Setup] menu will appear.
3 Touch the SSID of the access point whose settings you want to view or change.
- The access point's settings will appear. You cannot change the MAC address.
- Touch [▲] and [▼] to view more information.
- To delete the settings, touch [Edit] ➤ [Delete] ➤ [Yes].
- To change the settings, touch [Edit] ➤ [Manual Setup] and then perform the procedure in Manual Setup (128).
4 Touch [→] twice and then touch [×].
[(¶) Wi-Fi Setup]
[1]
[Smartphone Connection]
[(¶) Wi-Fi Setup]
[1]
[Access Point Connection]
Viewing and Changing Wi-Fi Settings
Viewing the camcorder's MAC address
1 Press the MENU button.
2 Open the [ (↑) Display MAC Address] screen.
[Wi-Fi Setup] ➤ [1] ➤ [Display MAC Address]
- The camcorder's MAC address will appear.
3 Touch [→] and then touch [×].
[(1) Wi-Fi Setup]
[1]
[Display MAC Address]
Browser Remote: Controlling the Camcorder from a Network Device
Using a camera access point connection, in which the camcorder itself acts as an access point, you can connect a device such as a smartphone (such connected devices are hereafter referred to as “network devices”). You can then control the camcorder remotely from the network device’s Web browser using the Browser Remote application. Browser Remote lets you monitor the image through live view, record clips and photos, and remotely control the shutter speed, gain and other settings. You can also check the recording media, remaining recording time, time code, etc.
* For details about compatible devices, operating systems, Web browsers, etc., please visit your local Canon Web site.
Operating modes:


Setting Up Browser Remote
You can set a unique camcorder identification code and designate the port that the Browser Remote application should use when accessing the camcorder through a network. The port number (HTTP protocol) used by Browser Remote is usually set to port 80, but you can change it if necessary. The camcorder ID will appear on the Browser Remote screen, making it easy to identify which camcorder the application is controlling in case of a multi-camera shooting setup.
To enter information for various settings, use the virtual keyboard (☐ 127).
1 Press the MENU button. 2 Open the [(↑) Browser Connection Settings] screen.
[Wi-Fi Setup] ➤ [1] ➤ [Browser Connection Settings]
3 To change the camcorder ID, touch [Camcorder ID]. Enter the desired ID and then touch [OK]. 4 To change the port number, touch [80]. Enter a different port number and then touch [OK]. 5 Touch [OK] twice and then touch [✗].
i NOTES
- During a Wi-Fi connection, it is not possible to change the camcorder's Wi-Fi settings.
[(¶) Wi-Fi Setup]
[1]
[Browser Connection Settings]
Starting Browser Remote
After connecting the network device to the camcorder, you can start the Browser Remote application on the Web browser* of the network device.
* A Web browser that supports JavaScript and is enabled to accept cookies is required.
Preparations on the Camcorder
1 Press the MENU button. 2 Open the [ (↑) Browser Remote] screen.
[(↑) Wi-Fi Setup] ➤ [1] ➤ [Browser Remote]
3 Touch [On].
- The URL to enter into the connected network device's Web browser as well as the camcorder's SSID (network name) and password will appear. Before launching the device's Web browser, configure the network device by following the next procedure while referring to the camcorder's screen.
[(¶) Wi-Fi Setup]
[1]
[Browser Remote]
[Off]
Connecting the Network Device
1 Network device: Activate Wi-Fi in the settings screen. • Detected networks appear on the screen. 2 Network device: Touch the SSID (network name) that matches the one displayed on the camcorder's screen. 3 Network device: Enter the password displayed on the camcorder's screen to establish a connection. - Entering the password is necessary only the first time you use this function. 4 Network device: Start the Web browser and enter the URL displayed on the camcorder's screen. • The Browser Remote screen will appear. - While Browser Remote is correctly connected to the camcorder, the ••••• above the time code will turn on one by one and then turn off in an endless loop. - If a camcorder ID has been set, it will appear on the Browser Remote screen while live view is not activated. It will not appear if the camcorder's ID has not been set. - As long as you do not change the port setting, the URL is always the same so you may find it convenient to bookmark the URL.
5 Camcorder: Touch [X].
- When the connection has been established, Remote will appear on the screen in white. It will appear in yellow when a network device is not connected.

6 Network device: Select the language for Browser Remote.
- Press the [▼] next to the language button and select the desired language from the list. Most buttons and controls emulate physical controls on the camcorder and are labeled in English only, regardless of the language selected.
7 Network device: Use the Browser Remote controls to operate the camcorder.
Descriptions of the controls are given in the following pages. Detailed operation is given in each function's reference page.
8 Camcorder: When you have finished using Browser Remote, on the camcorder set [Wi-Fi Setup] ➤ [1] ➤ [Browser Remote] to [Off] and then touch [✗].
- Rechte turn yellow and then disappear from the camcorder's screen and the connection with the application will be terminated.


NOTES
- Depending on the network used and the strength of the Wi-Fi signal, you may notice delays in the refreshing of the live view image and other settings.
- While color bars are displayed on the camcorder, the live view image will not be displayed.
The [Advanced Control] Screen
When using a computer, tablet and other devices with larger screens, the [Advanced Control] screen offers all the controls available for operating the camcorder remotely via Browser Remote. For details, refer to each function's explanation.


1 Live view screen 2 Focus controls (75) 3 IRIS -/+ buttons (☐ 61) 4 Browser Remote screen selection tabs 5 Language selection (132) 6 Focus mode button (75, 77) 7 Recording operation (☐ 47) 8 Network connection indicator* 9 Time code* (☐ 84) 10 [⚙️9 Highlight Priority] look* (📖 71) 11 Key lock button (Browser Remote controls only) 12 Approximate remaining battery charge* 13 CFast card status and approximate remaining recording time
14 SD card status and approximate remaining recording time 15 Shooting mode* 16 Exposure lock (☐ 66) 17 Aperture controls (☐ 61) 18 Shutter speed controls (☐ 61) 19 ISO speed/Gain controls (☐ 66) 20 White balance controls (☐ 70) 21 LIVE VIEW ON/OFF button (☐ 44) 22 START/STOP button (☐ 44) 23 SD card status and available number of photos 24 PHOTO button (☐ 44)
The [Basic Control] Screen
When using a smartphone or other device with a smaller screen, you can use the [Basic Control] screen that offers only the most important shooting controls (START/STOP, PHOTO, live view and focus) but will fit in the screen without scrolling. For details, refer to each function's explanation.
1 Open the [Basic Control] screen.
From the [Advanced Control] screen press the [Basic Control] tab.
![CANON XC15 - The [Basic Control] Screen - 1](/content/2026/06/1325421/images/ff36c56c6b41588afc749494936bac73f17225eccf409c645ee900de7863a2e6.jpg)


You can use the Playback via Browser function to access the photos in the camcorder from the Web browser of a connected network device*. You can then play back your photos using the Web browser and even save local copies of them on the device.
* For details about compatible devices, operating systems, Web browsers, etc., please visit your local Canon Web site.
Operating modes:
![CANON XC15 - The [Basic Control] Screen - 4](/content/2026/06/1325421/images/02bb4eee5b63294a0edb50675cd633d174fc96880ef6f361357a875af60db0ef.jpg)
1 Camcorder: Open the [▶] index screen (☐ 108). 2 Camcorder: Press the MENU button. 3 Camcorder: Open the [(1) Playback via Browser] screen.
[¶ Wi-Fi Setup] ➤ [1] ➤ [Playback via Browser]
- The camcorder's SSID (network name) and password will appear. The camcorder is ready to connect with the network device.
4 Network device: Activate Wi-Fi in the settings screen. • Detected networks appear on the screen. 5 Network device: Touch the SSID (network name) that matches the one displayed on the camcorder's screen. 6 Network device: Enter the password displayed on the camcorder's screen to establish a connection.
- Entering the password is necessary only the first time you use this function.
- The camcorder's screen will change and show a URL.
7 Network device: Start the Web browser and enter the URL displayed on the camcorder's screen.
- The Playback via Browser screen will appear.
- The URL is always the same so you may find it convenient to bookmark the URL.
8 Network device: Play back your photos.
- Touch the desired photo from the list of photos. The selected photo will be displayed.
- Touch/click ■ to return to the list of recordings.
- Devices other than iOS devices: Touch/click 🔒 to save a local copy of the photo on the device.
9 Camcorder: When you have finished playing back, touch [End] and then touch [OK] to end the wireless connection.
![CANON XC15 - The [Basic Control] Screen - 5](/content/2026/06/1325421/images/2232f8cc84232633b32024afa94c8e89e9a274205af2378207d2a4a450d3bc9c.jpg)
- Only one device may be connected to the camcorder at a time.
Media Server
Using the media server function, you can wirelessly view your photos from a connected network device. You will need an access point connected to your network and the software installed on your computer that can play photos on the media server.
Operating modes:


1 Camcorder: Open the [▶] index screen (☐ 108). 2 Camcorder: Press the MENU button. 3 Camcorder: Open the [(p) Media Server] screen.
[Wi-Fi Setup] ➤ [1] ➤ [Media Server]
- If the camcorder has an access point connection saved, [Connected] appears on the screen and the connection is automatically established.
[ (()) Wi-Fi Setup]
[1]
[Media Server]
- If the camcorder does not have an access point connection saved, you will be prompted to do so. Perform the procedure in Wireless Connections Using Wi-Fi (☐ 125).
- Touch [View Information] to see the access point's SSID (network name), connection protocol, camcorder's IP address and camcorder's MAC address.
- From the information screen above, touch [Change Connection Point] to connect to a different access point.
4 Computer: Start the media playback software and select [Canon XC15] from the list of servers. 5 Computer: Select the desired recording to play back from the displayed folder. 6 Camcorder: To end the media server function, touch [End] and then touch [OK].
Menu Options
For details about how to select an item, refer to Using the FUNC. Menu and Setup Menus (☐ 30). For details about each function, see the reference page. Menu items without a reference page are explained after the tables. Setting options in boldface indicate default values.
Depending on the camcorder's operating mode and the current selection of other settings, some menu items may not appear at all or may appear grayed out in the menu screens.
To skip directly to the page of a specific menu:
FUNC. menu
| Available functions by shooting mode | 137 |
| FUNC. menu options 138 |
Setup menus
| [ˈʃn/ʃn] Camera Setup] menu | 139 |
| [▶] Playback Setup] menu | 141 |
| [☐] Recording Setup] menu | 141 |
| [♪]) Audio Setup] menu | 142 |
| [◀] Wi-Fi Setup] menu | 143 |
| [◀ System Setup] menu | 143 |
FUNC. Menu
Available functions by shooting mode (☐ and ☐ modes; left side of FUNC. menu)
| Menu item | Shooting mode | ||||||||||||
| M | Av | Tv | P | AUTO | SCN | ||||||||
| [Scene] | - | - | - | - | - | ● | ● | ● | ● | ● | ● | ● | ● |
| [Looks] | ● | ● | ● | ● | - | - | - | - | - | - | - | - | - |
| [Drive Mode]1 | ● | ● | ● | ● | ● | ● | ● | ● | ● | ● | ● | ● | ● |
| [Metering Mode] | - | ● | ● | ● | - | - | - | - | - | - | - | - | - |
| [Focus Priority]1 | ● | ● | ● | ● | - | ● | ● | ● | ● | ● | ● | ● | - |
| [Self Timer] | ● | ● | ● | ● | ● | ● | ● | ● | ● | ● | ● | ● | ● |
| [Image Stabilizer] | ● | ● | ● | ● | ● | ● | ● | ● | ● | ● | ● | ● | ● |
| [Pre REC]2 | ● | ● | ● | ● | ● | ● | ● | ● | ● | ● | ● | ● | ● |
1 Available for photos only.
2 Available for HD clips only.
Available functions by shooting mode (☐ and ☐ modes; right side of FUNC. menu)
| Menu item | Shooting mode | |||||||||||||
| M | Av | Tv | P | AUTO | SCN | |||||||||
| [Aperture] ● ● --- | ---- | ---- | ||||||||||||
| [Shutter] | ● | - | ● | - | - | - | - | - | - | - | - | - | - | - |
| [ISO] | ● | ---- | ---- | ---- | ||||||||||
| [Gain]1 | ● | ---- | ---- | ---- | ||||||||||
| [White Balance] | ● | ● | ● | ● | ● | - | - | - | - | - | - | - | - | - |
| [Mic Level]1 | ● ● | ● ● | ● | ● ● | ● | ● | ● ● | ● | ● ● | |||||
| [Exposure Lock] | - | ● | ● | ● | ● | - | ● | ● | ● | ● | ● | ● | ● | - |
| [AE Shift] | - | ● | ● | ● | ● | - | - | - | - | - | - | - | - | - |
| [Zebra] | ● | ● | ● | ● | ● | ● | ● | ● | ● | ● | ● | ● | ● | ● |
| [Peaking] | ● | ● | ● | ● | ● | ● | ● | ● | ● | ● | ● | ● | ● | ● |
| [Powered IS]1 | ● ● | ● ● | ● | ● ● | ● | ● | ● ● | ● | ● ● | |||||
| [Digital Tele-conv.]1,2 | ● | ● | ● | ● | ● | - | ● | ● | ● | ● | ● | ● | ● | ● |
| [Focus]2 | ● | ● | ● | ● | ● | ● | ● | ● | ● | ● | ● | ● | ● | - |
| [Magnification]2 | ● ● | ● ● | ● | ● ● | ● | ● | ● ● | ● | ● ● | |||||
| [Waveform Monitor]1,2 | ● ● | ● ● | ● | ● ● | ● | ● | ● ● | ● | ● ● | |||||
1 Available for clips only. 2 In mode, does not appear in the menu by default. Available through customizing the menu (☐ 104).
FUNC. menu (☐ and ☐ modes; left side of FUNC. menu)
| Menu item | Setting options | |
| [Scene] | [ Portrait], [ Sports], [ Night Scene], [ Snow], [ Beach], [ Sunset], [ Low Light], [ Spotlight], [ Fireworks] | 59 |
| [Looks] | For clips:[1 Standard], [2 Cinema EOS Std.], [3 Neutral], [4 Production Camera], [5 Color Matrix Off], [6 Canon Log], [7 EOS Std.], [8 Wide DR], [9 Highlight Priority][User Setting 1], [User Setting 2], [WFM] 1 (waveform monitor) on or offFor photos:[Standard], [Portrait], [L Landscape], [N Neutral], [Faithful], [Monochrome], [Sepia], [Clear], [Au Autumn Hues], [User Setting 1], [User Setting 2] | 71 |
| [Drive Mode] 2 | [Single Shot], [Continuous], [AF Continuous] | 44 |
| [Metering Mode] | For clips:[Standard], [Spotlight], [Backlight]For photos:[Evaluative], [Center-weighted Average], [Spot] | 68 |
| [Focus Priority] 2 | [Off Off], [AIAF AiAF], [Center] | 74 |
| [Self Timer] | [Off], [2 sec], [10 sec] | 99 |
| [Image Stabilizer] | For clips:[Off Off], [Standard], [Dynamic] 3 For photos:[On], [Off] | 81 |
| [Pre REC] 3 | [On], [Off] | 97 |
1 Available for clips only. 2 Available for photos only. 3 Available for HD clips only.
FUNC. menu (☐ and ☐ modes; right side of FUNC. menu)
| Menu item Setting options | ||
| [Aperture] [F2.8] to [F1 1], [WFM] 1 (waveform monitor) on or off 55, 58 | ||
| [Shutter] For clips: | Shutter speed: [1/2] to [1/2000] ([1/60]), shutter angle: [360.00°] to [11.25°] (180.00°), [WFM] 1 (waveform monitor) on or offFor photos:[0”5] to [1/2000] ([1/125]) | 55, 58 |
| [ISO] | [ISO160] to [ISO20000] ([ISO160]), [WFM] 1 (waveform monitor) on or off 55 | |
| [Gain] 1 | [0.0dB] to [42.0dB] ([0.0dB]), [WFM] 1 (waveform monitor) on or off 55 | |
| [White Balance] | [AVB Automatic], [Daylight], [Shade], [Cloudy], [Fluorescent], [Fluorescent H], [Tungsten], [Color Temperature], [Set 1], [Set 2] | 69 |
| [Mic Level] 1 | [A Automatic], [M Manual]When set to [M Manual]: 0 to 100 | 91 |
| [Exposure Lock] | [M] (manual) on or off, [WFM] 1 (waveform monitor) on or offWhen set to [M]: [-3] to [3] (for clips: 1/4-stop increments, for photos: 1/3-stop increments) | 65 |
| [AE Shift] | [-2] to [+2] ( ± 0) (for clips: 1/4-stop increments, for photos: 1/3-stop increments), [WFM] 1 (waveform monitor) on or off | 67 |
| [Zebra] | [Off], [70%], [100%] | 82 |
| [Peaking] | [PEAK On], [PEAK Off] | 77 |
| [Powered IS] 1 | [On], [Off] | 81 |
| [Digital Tele-conv. 1,2 | [On], [Off] | 73 |
| [Focus] 2 | Touch a spot to focus on. | 74 |
| [Magnification] 2 | [OK] (on)When set to on: select area to magnify | 77 |
| [Waveform Monitor] 1,2 | [OK] (on) | 83 |
1 Available for clips only. 2 In mode, does not appear in the menu by default. Available through customizing the menu (104).
Setup Menus
Camera Setup] menu (mode)/ [Camera Setup] menu (mode)
| Menu item | Setting options | |||
| [Face Detection & Tracking] | [ON On ☑], [OFF Off] | ● | ● | 79 |
| [Auto Slow Shutter] | [ON On], [OFF Off] | ● | - | - |
| [ND Filter] | [ON On], [OFF Off] | ● | ● | - |
| [Flicker Reduction] | [AC Automatic], [OFF Off] | ● | - | - |
| [AE Lock (Touch)] | [N Normal], [H Highlights] | ● | ● | 66 |
| [Auto ISO Limit] | [AC] (automatic), [ISO]When set to [ISO]: [ISO160] to [ISO4000] | ● | ● | 63 |
| [AGC Limit] | [AC] (automatic), [GAIN]When set to [GAIN]: [0.0dB] to [28.5dB] | ● | - | 63 |
| [Shockless WB] | [ON On], [OFF Off] | ● | - | - |
| [Onscreen Markers] | [OFF Off], [Level (White)], [Level (Gray)], [Grid (White)], [Grid (Gray)] | ● | ● | 82 |
| [Focus Ring Direction] | [NORM Normal], [REV Reverse] | ● | ● | - |
| [Focus Ring Response] | [ Fast], [ Normal], [ Slow] | ● | ● | - |
| [AF Speed] | [ Fast], [ Normal], [ Slow] | ● | - | - |
| [ISO/Gain] | [ ISO ISO], [ GAIN Gain] | ● | - | - |
| [Gain Increment] | [ NORM Normal], [ FINE Fine] | ● | - | - |
| [Shutter Speed Mode] | [ Speed Speed], [ Angle Angle] | ● | - | 56 |
| [Rolling Shutter Reduction] | [ ON On □□], [ OFF Off] | ● | - | - |
[Auto Slow Shutter]: The camcorder automatically uses slow shutter speeds to obtain brighter recordings in places with insufficient lighting.
- Fastest shutter speed used: 1/30; 1/12 when the frame rate is set to 23.98P or 24.00P; 1/15 when it is set to 29.97P.
- When you are recording moving subjects, if a trailing afterimage appears, set the slow shutter to [OFF Off].
- This function is available when the shooting mode is set to P or AUTO.
- This function cannot be used when [★ Exposure Lock] is set to [M].
[ND Filter]: Turning this function on activates the ND filter so that the amount of light is reduced 3 stops (1/8 of the light).
- When an ND filter onscreen display flashes on the screen, it indicates the following. [ND]: The picture is overexposed. Set the ND filter to [ON On]. [ND CLR]: The picture is underexposed. Set the ND filter to [OFF Off].
[Flicker Reduction]: When set to [A Automatic], flicker reduction will automatically detect and reduce flicker.
- When recording under light sources such as fluorescent, mercury or halogen lamps, the screen may flicker depending on the shutter speed. You may be able to avoid flicker by setting the shutter speed mode to a value matching the frequency of the local electrical system: 1/25, 1/50 or 1/100 for 50 Hz systems; 1/30, 1/60 or 1/120 for 60 Hz systems.
[Shockless WB]: Creates a softer transition when the white balance is changed.
[Focus Ring Direction]: Changes the direction the focus ring needs to be turned.
[Focus Ring Response]: Selects the sensitivity of the response when operating the focus ring.
[AF Speed]: Selects the speed at which the focus is adjusted during autofocus.
[ISO/Gain]: Selects whether you can adjust settings related to ISO speed or gain.
[Gain Increment]: Selects the increment when adjusting the gain.
[Rolling Shutter Reduction]: Reduces rolling shutter distortion in your recordings.
- This function is available only when the resolution is set to 4K.
- When this function is set to [ON], the following occur:
- When recording starts, HDMI output will stop.
- Photos cannot be taken while recording a clip.
- [Camera Setup] ▶ [1] ▶ [Face Detection & Tracking] and [Flicker Reduction] will not be available.
[Playback Setup] menu
| Menu item Setting options | ||||
| [MXF Data Code] | [OFF Off], [Date], [Time], [Date and Time], [Camera Data] | ● | - | - |
| [Data Code] | [OFF Off], [Date], [Time], [Date and Time] | - | ● | - |
| [Auto Rotate] | [ON On], [OFF Off] | - | ● | 103 |
[MXF Data Code]/[Data Code]: In and modes, you can select the appropriate option to display the date and/or the time. In mode, you can also choose to select [Camera Data] to display the aperture and shutter speed.
[Recording Setup] menu
| Menu item | Setting options | |||||
| [4K / HD] | [4K 4K Clips], [HD HD Clips] | ● | - | - | - | 53 |
| [4K\ Recording]1 | [29.97P 29.97P / 305 Mbps], [29.97P 29.97P / 205 Mbps],[23.98P 23.98P / 305 Mbps], [23.98P 23.98P / 205 Mbps],[24.00P 24.00P / 305 Mbps], [24.00P 24.00P / 205 Mbps] | ● | -- | 53 | ||
| [HD Recording] | [59.94P 59.94P / 50 Mbps], [59.94i 59.94i / 35 Mbps],[29.97P 29.97P / 35 Mbps], [23.98P 23.98P / 35 Mbps] | ● | -- | 53 | ||
| [Slow & Fast Motion] | [OFF Normal Recording], [x1/4], [x1/2], [x2], [x4], [x10], [x20], [x60],[x120], [x1200] | ● | -- | 96 | ||
| [Photo Aspect Ratio] | [L 4:3 4000x3000], [L 3:2 4000x2664], [L 16:9 3840x2160],[S 4:3 640x480] | - | ● | 44 | ||
| [Interval Recording] | [OFF Off], [5sec 5 sec], [10sec 10 sec], [80sec 30 sec], [1min 1 min],[10min 10 min] | - | ● | 98 | ||
| [Photo Review Time] | [OFF Off], [2sec 2 sec], [4sec 4 sec], [6sec 6 sec], [8sec 8 sec],[10sec 10 sec] | - | ● | -- | ||
| [Detect Orientation] | [ON On], [OFF Off] | - | ● | - | - | 102 |
| [Available Space in Memory] | [[Frel]], [SD] | ● | ● | -- | ||
| [Used Space in Memory] | [[Frel]], [SD] | -- | ● | ● | - | |
| [Initialize [Frel]/ [SD] ] | [[Frel] Memory Card], [SD Memory Card] | ● | ● | ● | ● | 38 |
| [Time Code Mode] | [PRESET Preset], [REGEN Regen.] | ● | - | - | - | 84 |
| [Time Code Running Mode] | [RECRUN Rec Run], [FREE RUN Free Run] | ● | -- | 84 | ||
| [DF/NDF] | [DF DF], [NDF NDF] | ● | - | - | - | 85 |
| [Initial Time Code] | [00:00:00.00] to [23:59:59.29] ([00:00:00.00]), [Reset] | ● | - | - | - | 85 |
| [User Bit Output Mode] | [FIXED Fixed], [PULLDOWN Pulldown] | ● | - | - | - | 86 |
| [User Bit Type] | [SET Setting], [TIME Time], [DATE Date] | ● | - | - | - | 86 |
| [Camera Index] | [A] to [Z] | ● | - | - | - | 45 |
| [Reel Number] | [001] to [999], [Reset] | ● | - | - | - | 45 |
| [Clip Number] | [001] to [999], [Reset] | ● | - | - | - | 45 |
| [User Defined] | Five characters, each: [A] to [Z], [O] to [9] ([CANON]) | ● | - | - | - | 45 |
| [Color Bars] | [OFF Off], [SMPTE SMPTE], [EBU EBU], [ARIB ARIB] | ● | - | - | - | 95 |
| [1 kHz Tone] | [-12dB -12 dB], [-18dB -18 dB], [-20dB -20 dB], [OFF Off] | ● | - | - | - | 95 |
| [File Numbering] | [Reset], [Continuous] | ● | ● | ● | ● | - |
Available options depend on the system frequency.
[Photo Review Time]: Selects the time to display a photo after it is recorded.
[Available Space in Memory]/[Used Space in Memory]: Displays a screen where you can verify how much of the recording media is currently available for recording or how much is in use (the recording media icon shows the total recording time and the photo icon shows the total number of photos).
- Estimated figures about available clip recording time and available number of photos are approximate and based on the bit rate and photo size currently in use.
- You can also check the SD card's speed class.
[File Numbering]: Photos are automatically assigned consecutive numbers and stored on the SD card in folders. You can select the file numbering method to be used. We recommend using the [Continuous] setting.
[Reset]: File numbers will restart from 100-0001 every time you insert a new SD card. If an SD card already contains previous recordings, file numbers will continue from the number following that of the last file on the SD card. [Continuous]: File numbers will continue from the number following that of the last photo recorded with the camcorder. This setting is the most convenient for managing files on a computer.
- About folder names: An example folder name is "101_1025". The first 3 digits indicate the folder number (from 100 to 999) and the last 4 digits indicate the month and day when the folder was created. In the example, the folder numbered 101 was created on October 25.
- About folders: Each folder can contain up to 500 recordings. When that number is exceeded, a new folder is created automatically. However, when the drive mode is set to [Continuous] or [AF Continuous], if the number of photos taken would cause a folder to exceed 500 recordings, a new folder will not be created and the photos will be saved in the same folder.
- About file numbers: An example file number is "101-0107". The first 3 digits indicate the number of the folder where the recording is stored and the last 4 digits indicate the consecutive number assigned to the recording (from 0001 to 9999).
- About file names: The file name also indicates the name and location of the file on the SD card. For example, a photo numbered 101-0107 that was recorded on October 25, is located in the "DCIM\101_1025" folder as the file "IMG_0107.JPG".
[Audio Setup] menu
| Menu item | Setting options | |||||
| [INPUT 1/2] | [ INPUT1/2 On], [ INPUT3+ Off] | ● | - | - | - | 88 |
| [CH2 Input] | [ INPUT2 INPUT 2], [ INPUT1 INPUT 1] | ● | - | - | - | 89 |
| [INPUT 1 Mic Trimming] | [ +12dB +12 dB], [ +6dB +6 dB], [0dB 0 dB], [-6dB -6 dB], [-12dB -12 dB] | ● | - | - | - | 90 |
| [INPUT 1 Mic Att.] | [ ON On], [OFF Off] | ● | - | - | - | 91 |
| [INPUT 2 Mic Trimming] | [ +12dB +12 dB], [ +6dB +6 dB], [0dB 0 dB], [-6dB -6 dB], [-12dB -12 dB] | ● | - | - | - | 90 |
| [INPUT 2 Mic Att.] | [ ON On], [OFF Off] | ● | - | - | - | 91 |
| [INPUT 1/2 ALC Link] | [ LINK Linked], [ SEP, Separated] | ● | - | - | - | 89 |
| [INPUT 1/2 Limiter] | [ ON On], [OFF Off] | ● | - | - | - | 90 |
| [MIC Att.] | [ ON On], [OFF Off] | ● | - | - | - | 92 |
| [MIC Low Cut] | [ ON On], [OFF Off] | ● | - | - | - | 92 |
| [Built-in Mic Att.] | [ ON On], [OFF Off] | ● | - | - | - | 92 |
| [Built-in Mic Low Cut] | [ LC2 Low Cut 2], [ LC1 Low Cut 1], [ OFF Off] | ● | - | - | - | 93 |
| [Built-in Mic Sensitivity] | [ NORM Normal], [ HIGH High] | ● | - | - | - | 93 |
| [Monitor Channels] | [CH1/2 CH1/CH2], [CH1/1 CH1/CH1], [CH2/2 CH2/CH2], [CH2/2 CH1+2] | ● - | ● | ● 120 | ||
| [Headphone Volume], | 0-15 (8) | ● - | ● | ● 113 | ||
| [Speaker Volume], | 0-15 (8) | -- | ● | ● 113 | ||
| [Notification Sounds] | [OFF] ) High Volume], [OFF] Low Volume], [OFF Off] | ● | ● | ● | ● | - |
[Notification Sounds]: A beep will accompany some operations like turning on the camcorder, the self timer countdown, etc.
- Set to [Off] to turn off notification sounds.
- While pre-recording (☐ 97) is activated, the camcorder will not emit some notification sounds.
[Wi-Fi Setup] menu
| Menu item | Setting options | |||||
| [Browser Remote] | [Off], [On] | ● | ● | - | - | 131 |
| [Playback via Browser] | - | - | - | - | ● | 135 |
| [Media Server] | - | - | - | - | ● | 136 |
| [Browser Connection Settings] | - | ● ● | ● ● 131 | |||
| [Smartphone Connection] | - | ● ● | ● ● 129 | |||
| [Access Point Connection] | - | ● ● | ● ● | 125, 129 | ||
| [Display MAC Address] | - | ● | ● | ● | ● | 130 |
[System Setup] menu
| Menu item | Setting options | |||||
| [Language ☑] | [Česky], [Dansk], [Deutsch], [Ελληνικό], [English], [Español], [Français], [Italiano], [Magyar], [Melayu], [Nederlands], [Norsk], [Polski], [Português], [Română], [Suomi], [Svenska], [Türkçe], [Русский], [Українська], [العربية], [ˌʃɔːˌʃɔːˌʃɔːˌʃɔːˌʃɔːˌʃɔːˌʃɔːˌʃɔːˌʃɔːˌʃɔːˌʃɔːˌʃɔːˌʃɔːˌʃɔːˌʃɔːˌʃɔːˌʃɔːˌʃɔːˌʃɔːˌʃɔːˌʃɔːˌʃɔːˌʃɔːˌʃɔːˌʃɔːˌʃɔɪˌʃɔːˌʃɔːˌʃɔːˌʃɔːˌʃɔːˌʃɔːˌʃɔːˌʃɔːˌʃɔːˌʃɔːˌʃɔːˌʃɔːˌʃɔːˌʃɔːˌʃɔːˌʃɔːˌʃɔːˌʃɔːˌʃɔːˌʃɔːˌʃɔːˌʃɔːˌʃɔːˌʃɔːˌʃɔʊˌʃɔːˌʃɔːˌʃɔːˌʃɔːˌʃɔːˌʃɔːˌʃɔːˌʃɔːˌʃɔːˌʃɔːˌʃɔːˌʃɔːˌʃɔːˌʃɔːˌʃɔːˌʃɔːˌʃɔːˌʃɔːˌʃɔːˌʃɔːˌʃɔːˌʃɔːˌʃɔːˌʃɔːˌʃɔɒˌʃɔːˌʃɔːˌʃɔːˌʃɔːˌʃɔːˌʃɔːˌʃɔːˌʃɔːˌʃɔːˌʃɔːˌʃɔːˌʃɔːˌʃɔːˌʃɔːˌʃɔːˌʃɔːˌʃɔːˌʃɔːˌʃɔːˌʃɔːˌʃɔːˌʃɔːˌʃɔːˌʃɔːˌʃɔəˌʃɔːˌʃɔːˌʃɔːˌʃɔːˌʃɔːˌʃɔːˌʃɔːˌʃɔːˌʃɔːˌʃɔːˌʃɔːˌʃɔːˌʃɔːˌʃɔːˌʃɔːˌʃɔːˌʃɔːˌʃɔːˌʃɔːˌʃɔːˌʃɔːˌʃɔːˌʃɔːˌʃɔːˌʃɔ}: (home time zone) or [★] (travel time zone): [New York], list of world time zones [★] (DST adjustment): Toggle on or off | ● ● | ● ● | 34 | ||
| [Time Zone/DST] | [★] (home time zone) or [★] (travel time zone): [New York], list of world time zones [★] (DST adjustment): Toggle on or off | ● ● | ● ● | 34 | ||
| [Date/Time] | [Date/Time]: - [Date Format]: [Y.M.D], [M.D,Y], [D.M.Y] (Y-year, M-month, D-day) [24H]: Toggle on (24-hour clock) or off (12-hour clock) | ● ● | ● ● | 33 | ||
| [LCD Brightness] | * [IMAGE] | ● ● | ● ● | - | ||
| [LCD Backlight] | [H Bright], [M Normal], [L Dim] | ● | ● | ● | ● | - |
| [View Assistance] | [ON On], [OFF Off] | ● | - | ● | - | 109 |
| [Auto Power Off] | [ON On], [OFF Off] | ● | ● | ● | ● | - |
| [Assign Button 1], [Assign Button 2], [Assign Button 3]* | [ DISP, DISP.], [ PUSH AF Push AF], [ MAGN Magnification], [ WZZ Zebra], [ PEAK Peaking], [ 20 Digital Tele-conv.], [ 📋 Powered IS], [ ND ND Filter], [ START Start / Stop], [ PHOTO Photo], [ WFM Waveform Monitor] | ● | ● | ● | ● | 105 |
| [Control Dial] | [ IRIS Aperture], [ SHTR Shutter], [ ISO ISO/Gain] ([ GAIN ISO/Gain]) | ● | ● | - | - | 55 |
| [Customize FUNC Menu] | [ IRIS Aperture], [ SHTR Shutter], [ ISO ISO], [ GAIN Gain], [ AWB White Balance], [ M Mic Level], [ ✕ Exposure Lock], [ ☑ AE Shift], [ ZZ76 Zebra], [ PEAK Peaking], [ 📋 Powered IS], [ 20 Digital Tele-conv.], [ 🔒 Focus], [ MAGN Magnification], [ WFM Waveform Monitor] | ● | - | - | - | 104 |
| [Customize FUNC Menu] | [ IRIS Aperture], [ SHTR Shutter], [ ISO ISO], [ AWB White Balance], [ ✕ Exposure Lock], [ ☑ AE Shift], [ ZZ76 Zebra], [ PEAK Peaking], [ 🔒 Focus], [ MAGN Magnification] | - | ● | - | - | 104 |
| [Fan] | [ A Automatic], [ ON On] | ● | - | - | - | 52 |
| [Wireless Remote Control] | [ ON On], [ OFF Off 🎯 Off ] | ● | ● | - | - | 40 |
| [Tally Lamp] | [ ON On], [ OFF Off] | ● | ● | ● | ● | - |
| [Battery Info] | - | ● | ● | ● | ● | - |
| [HDMI Time Code] | [ ON On], [ OFF Off] | ● | - | - | - | - |
| [HDMI Rec Command] | [ ON On], [ OFF Off] | ● | - | - | - | - |
| [HDMI Status] | - | ● | - | ● | ● | - |
| [Distance Units] | [ m meters], [ ft feet] | ● | ● | - | - | - |
| [Backup Menu Settings SD] | [Save], [Load] | ● | ● | ● | ● | 107 |
| [System Frequency] | [ 59.94 Hz 59.94 Hz], [ 24.00Hz 24.00 Hz] | ● | - | ● | - | 53 |
| [GPS Auto Time Setting] | [ OFF Off], [ A Auto Update] | ● | ● | - | - | 101 |
| [GPS Information Display] | - | ● | ● | - | - | 101 |
| [Rec Touch Operations] | [ ON On], [ OFF Off] | ● | ● | - | - | - |
| [Output Onscreen Displays] | [ ON On], [ OFF Off] | ● | - | - | - | - |
| [Certification Logo Display] | - | ● | ● | ● | ● | - |
| [Firmware] | - | ● | - | - | - | - |
| [Reset All] | [No], [Yes] | ● | ● | ● | ● | - |
* The default settings are as follows. [Assign Button 1]: [DISP.], [Assign Button 2]: [Push AF], [Assign Button 3]: [Magnification].
[LCD Brightness]: Adjusts the brightness of the LCD screen.
- Changing the brightness of the LCD screen does not affect the brightness of your recordings or the brightness of the playback image on a TV.
[LCD Backlight]: Sets the screen to one of three brightness levels.
- Changing the brightness of the LCD screen does not affect the brightness of your recordings or the brightness of the playback image on a TV.
- Using the [H Bright] setting will shorten the effective usage time of the battery pack.
[Auto Power Off]: In order to save power when the camcorder is powered by a battery pack, it will automatically shut off if left without any operation for 5 minutes.
- Approximately 30 seconds before the camcorder shuts off, [Auto Power Off] will appear. Operating any of the camcorder's controls while the message is displayed will prevent the camcorder from shutting off.
[Tally Lamp]: When this function is set to [ON On], the tally lamp illuminates when the camcorder is recording a clip; it flashes when the self timer is counting down and flashes at a faster rate when under 2 seconds remain.
[Battery Info]: This option displays a screen where you can verify the battery charge (as a percentage) and the remaining recording time (and modes) or playback time (and modes).
- If the battery pack is exhausted, the battery information may not be displayed.
- The ■■ indicates the battery life of the battery pack. If ■■ appears in green, battery life has not diminished. If ■■ appears in green, the battery life has partly diminished. If ■■ appears in red, we recommend that you buy a new battery pack.
[HDMI Time Code]: Allows you to output a time code signal from the HDMI OUT terminal.
[HDMI Rec Command]: When this function is set to [ON On] and you use the HDMI OUT terminal to connect the camcorder to a device compatible with HDMI recording commands, when you start or stop recording with the camcorder, the other device will also start or stop recording. This function is not available when [HDMI Time Code] is set to [OFF Off].
[HDMI Status]: Displays a screen where you can verify the standard of the output signal from the HDMI OUT terminal.
[Distance Units]: Selects the units to use for the focusing distance display while focusing manually. This setting also affects units for GPS information when using the optional GP-E2 GPS Receiver.
[Rec Touch Operations]: Select [OFF Off] and then touch [OK] to lock the touch screen in order to prevent settings from being changed inadvertently while you record. To cancel, use the joystick to select [ON On] and then select [OK].
[Output Onscreen Displays]: When set to [ON On], the camcorder's onscreen displays will appear also on the screen of a TV or monitor connected to the camcorder. Not available for 4K clips.
[Certification Logo Display]: This displays select certification logos that apply to this camcorder.
- This setting may not be available depending on the country/region of purchase.
[Firmware]: You can verify the current version of the camcorder's firmware. This menu option is usually unavailable.
[Reset All]: Resets all of the camcorder's settings.
Troubleshooting
If you have a problem with your camcorder, refer to this section. Consult your dealer or a Canon Service Center if the problem persists.
Power source
The camcorder will not turn on or it turns off by itself.
- The battery pack is exhausted. Replace or charge the battery pack.
- Remove the battery pack and reattach it correctly.
Cannot charge the battery pack.
- Make sure the camcorder is off so charging can start.
- The temperature of the battery pack is outside its operating range (approximately 0 – 40 °C (32 °F – 104 °F)). Remove the battery pack, warm it or let it cool down, as necessary, and try charging it again.
- Charge the battery pack in temperatures between approximately 0 °C and 40 °C (32 °F and 104 °F).
- The battery pack is faulty. Replace the battery pack.
- The camcorder cannot communicate with the battery pack attached. Non-genuine Canon battery packs cannot be charged using this camcorder.
- If you are using a genuine Canon battery pack, there may be a problem with the camcorder or battery pack. Consult a Canon Service Center.
- Canon's LP-E6 Battery Pack cannot be charged. Check the bottom label of the battery pack and make sure it is an LP-E6N Battery Pack.

A noise can be heard from the AC adapter.
- A faint sound can be heard while the AC adapter is connected to a power outlet. This is not a malfunction.
The battery pack is exhausted extremely quickly even at normal temperatures.
- The battery may have reached the end of its battery life. Buy a new battery pack.
Recording
Pressing the START/STOP button will not start recording.
- You cannot record while the camcorder is writing previous recordings onto a recording media (while the ACCESS indicator is on or flashing). Wait until the camcorder has finished.
- The recording media is full or it already contains 999 clips (the maximum number of clips). Delete some recordings (116) or initialize the recording media (38) to free some space.
The point where the START/STOP button was pressed does not match the beginning/end of the recording.
- There is a slight interval between pressing the button and the actual start/end of recording. This is not a malfunction.
The camcorder will not focus.
- The camcorder may not be able to focus on certain subjects using autofocus. Focus manually (76).
- The viewfinder unit is not adjusted. Use the dioptric adjustment lever to make the proper adjustment (☐ 23).
- The lens is dirty. Clean the lens (☐ 158).
When a subject flits across in front of the lens, the image appears slightly bent.
- This is a phenomenon typical of CMOS image sensors. When a subject crosses very quickly in front of the camcorder, the image may seem slightly warped. This is not a malfunction.
Changing between recording (●), record standby (■) and playback (▶) takes longer than usual.
- When the recording media contains a large number of clips, some operations may take longer than usual. Save your recordings (☐ 122) and initialize the recording media (☐ 38). Alternatively, replace the recording media.
The camcorder cannot record to the recording media properly.
- This may occur as recordings are made and deleted over time. Save your recordings (☐ 122) and initialize the recording media (☐ 38). In the case of SD cards, initialize using the [Complete Initialization] option.
After using the camcorder for a long time, it becomes hot.
- The camcorder may become hot after using it continuously for long periods of time; this is not a malfunction. If the camcorder becomes unusually hot or it becomes hot after using it only for a short while, it may indicate a problem with the camcorder. Consult a Canon Service Center.
Playback
Deleting clips takes longer than usual.
- When the recording media contains a large number of clips, some operations may take longer than usual. Save your recordings (☐ 122) and initialize the recording media (☐ 38).
Cannot delete clips/photos.
- The LOCK switch on the SD card is set to prevent accidental erasure. Change the position of the LOCK switch. - Photos that were protected using other devices cannot be deleted with the camcorder.
Cannot mark individual clips/photos in the index screen with a checkmark √
- You cannot select more than 100 clips/photos individually. Select the [All Clips] or [All Photos] option instead of [Select].
Indicators and Onscreen Displays
appears in red on the screen.
- Battery pack is exhausted. Replace or charge the battery pack.
appears on the screen.
- The camcorder cannot communicate with the battery pack attached so the remaining battery time cannot be displayed.
The tally lamp does not illuminate.
- Set [System Setup] ➤ [3] (in and modes) or [2] (in and modes) ➤ [Tally Lamp] to [On].
or SD appears in red on the screen.
- There is not enough available space on the recording media. Delete some recordings (116) to free some space or replace the recording media.
- The folder and file numbers have reached their maximum value. After saving your recordings (☐ 122), set [Recording Setup] ➤ [4] (in ☐ mode), [2] (in ☐ mode) or [1] (in ☐ and ☐ modes) ➤ [File Numbering] to [Reset]. Then, initialize the recording media (☐ 38) or delete all the recordings (☐ 116).
or SP appears in red on the screen.
- An error has occurred with the indicated recording media. Remove it and then reinsert it. If the display does not change back to normal, save your recordings (☐ 122) and initialize the recording media (☐ 38).
Even after stopping recording, the ACCESS indicator flashes in red.
- The clip is being recorded. This is not a malfunction.
The red POWER/CHG indicator flashes rapidly (one flash at 0.5-second intervals).
- The temperature of the battery pack is outside its operating range (approximately 0 – 40 °C (32 – 104 °F)). Remove the battery pack, warm it or let it cool down, as necessary, and try charging it again.
- Charge the battery pack in temperatures between approximately 0 °C and 40 °C (32 °F and 104 °F).
- The battery pack is damaged. Use a different battery pack.
- Canon's LP-E6 Battery Pack cannot be charged. Check the bottom label of the battery pack and make sure it is an LP-E6N Battery Pack.
- Charging has stopped because the AC adapter or the battery pack is faulty. Consult a Canon Service Center.

- keeps flashing on the screen.
- You connected the optional GP-E2 GPS Receiver to the camcorder's USB terminal in 📋 or 📝 mode. Disconnect the GP-E2 and connect in again after setting the camcorder in 📋 or 📝 mode.
appears on the screen.
- When it appears in yellow, the camcorder's internal temperature has risen to a predetermined level. When it changes to red, the camcorder's internal temperature has risen even higher. In either case, the camcorder can continue to be used without issue.
Picture and Sound
The screen appears too dark.
- The LCD screen was dimmed. Change the [System Setup] ➤ [1] ➤ [LCD Backlight] setting to [Normal] or [Bright].
Screen displays turn on and off repeatedly.
- The battery pack is exhausted. Replace or charge the battery pack.
- Remove the battery pack and reattach it correctly.
Abnormal characters appear on the screen and the camcorder does not operate properly.
- Disconnect the power source and reconnect it after a short time.
Video noise appears on screen.
- Keep a distance between the camcorder and devices that emit strong electromagnetic fields such as near powerful magnets and motors, MRI machines or high-voltage power lines.
Horizontal bands appear on the screen.
- This is a phenomenon typical of CMOS image sensors when recording under some types of fluorescent, mercury or sodium lamps. This is not a malfunction. In [icon] mode, you may be able to reduce the symptoms by setting [Camera Setup] ➤ [1] ➤ [Flicker Reduction] to [Automatic]. Alternatively, or in [icon] mode, set the shutter speed to a value matching the frequency of the local electrical system (1/25, 1/50 or 1/100 for 50 Hz systems; 1/30, 1/60 or 1/120 for 60 Hz systems).
The viewfinder unit picture is blurred.
- Adjust the viewfinder unit with the dioptric adjustment lever (☐ 23).
Audio cannot be recorded.
- The external audio source connected to the MIC terminal is not turned on or its battery is empty.
- When using the INPUT 1/INPUT 2 terminals: Make sure the unit cable connecting the camcorder's AUDIO terminal and the AUDIO terminal on the supplied MA-400 Microphone Adapter is correctly connected on both sides.
- The external microphone connected to the INPUT 1/INPUT 2 terminal requires phantom power. Set the corresponding INPUT 1/INPUT 2 (audio source selection) switch to MIC+48V (☐ 88).
Sound is distorted or is recorded at lower levels.
- When recording near loud sounds (such as fireworks, shows or concerts), sound may become distorted or it may not be recorded at the actual levels. Adjust the audio recording level manually (91).
The picture is displayed correctly but there is no sound from the built-in speaker.
- Speaker volume is turned off. Adjust the volume (113).
- Sound will not be output from the built-in speaker while headphones or the supplied HTC-100/S High Speed HDMI cable is connected to the camcorder. Disconnect the headphones or HDMI cable.
Recording Media and Accessories
Cannot insert the recording media.
- The CFast card or SD card you are trying to insert is not facing the correct direction. Make sure it is facing the correct direction when you insert it (☐ 35).
Cannot record 4K clips on the CFast card.
- A compatible CFast card must be used (☐ 35).
- Initialize the CFast card (☐ 38) when you use it with the camcorder for the first time.
- The CFast card is full or it already contains the maximum number of clips (999 clips). Delete some clips (☐ 116) to free some space or replace the CFast card.
Cannot record HD clips or photos on the SD card.
- A compatible SD card must be used (☐ 35).
- Initialize the SD card using the [Complete Initialization] option (38) when you use it with the camcorder for the first time.
- The LOCK switch on the SD card is set to prevent accidental erasure. Change the position of the LOCK switch.
- The SD card is full or it already contains the maximum number of clips (999 clips). Delete some recordings (116) to free some space or replace the recording media.
- The folder and file numbers have reached their maximum value. Set [Recording Setup] ➤ [4] (in mode), [2] (in mode) or [1] (in and modes) ➤ [File Numbering] to [Reset] (142) and insert a new SD card.
You cannot take a photo in the following cases:
- When an external device is connected to the HDMI OUT terminal.
- When [Slow & Fast Motion] (96) is set to [x1/4] or [x1/2] .
- When [Looks] (☐ 71) is set to [Highlight Priority].
- When the [Camera Setup] ➤ [3] ➤ [Rolling Shutter Reduction] setting is set to [On].
The optional RC-6 Remote Controller will not work.
- Set [System Setup] ➤ [3] (in mode) or [2] (in mode) ➤ [Wireless Remote Control] to [On].
- Replace the battery of the remote controller.
Connections with External Devices
Video noise appears on a nearby TV screen.
- When using the camcorder in a room where a TV is located, keep a distance between the AC adapter and the power or antenna cables of the TV.
Playback looks fine on the camcorder but there is no image on the external monitor.
- The camcorder is not connected correctly to the external monitor. Check the High Speed HDMI cable's connection.
- The video input on the external monitor is not set to the video terminal to which you connected the camcorder. Select the correct video input.
The camcorder is connected using the supplied High Speed HDMI cable, but there is no picture or sound from the HDTV.
- Disconnect the High Speed HDMI cable and then restore the connection or turn the camcorder off and then on again.
- When [Camera Setup] ➤ [3] ➤ [Rolling Shutter Reduction] is set to [On] and recording starts, HDMI output will stop.
Wi-Fi Functions
Cannot connect with an access point.
- Wi-Fi networks with a stealth function that do not broadcast their network name (SSID) will not be detected by the camcorder during the Wi-Fi network setup. Perform the setup manually (☐ 128) or turn off the stealth function of the access point.
- Password information is not saved with the camera settings. When you load onto the camcorder menu settings from an SD card, all the encryption keys and passwords in the Wi-Fi settings are reset. Edit the Wi-Fi settings as necessary (129).
- The wireless signal is not strong enough or there are other devices in the vicinity interfering with the wireless signal. Refer to Precautions Regarding Wi-Fi Networks (150).
Cannot connect the camcorder to a network device using Wi-Fi.
- When you reset all the camcorder's settings, all network settings are lost as well. In the Wi-Fi settings of network device, delete the camcorder's network profile and then connect the camcorder again.
- The wireless signal is not strong enough or there are other devices in the vicinity interfering with the wireless signal. Refer to Precautions Regarding Wi-Fi Networks (150).
The Playback via Browser application will not start on the Web browser.
- Make sure to activate the function on the camcorder with the [Wi-Fi Setup] ➤ [1] ➤ [Playback via Browser] setting.
- The URL entered into the Web browser's address bar is incorrect. Enter the URL exactly as it appears on the camcorder's screen.
- The recording media slot cover is open or there is no SD card in the camcorder. Check that an SD card that contains photos is correctly inserted into the camcorder and the recording media slot cover is closed.
The Browser Remote application will not start on the Web browser.
- Make sure to activate the function on the camcorder with the [Wi-Fi Setup] ➤ [1] ➤ [Browser Remote] setting.
- The URL entered into the Web browser's address bar is incorrect. Enter the URL exactly as it appears on the camcorder's screen.
- Browser Remote cannot start while you are shooting with the camcorder. Start Browser Remote before shooting.
The Browser Remote or Playback via Browser screen is not displayed correctly on the Web browser.
- The device, operating system or Web browser used may not be supported. For the latest information about supported systems, visit your local Canon Web site.
- Enable JavaScript and cookies in your Web browser's settings. For details, refer to the help modules or online documentation of the Web browser used.
Precautions Regarding Wi-Fi Networks
When using a Wi-Fi network, try the following corrective actions if the transmission rate drops, the connection is lost, or other problems occur.
Location of the access point (wireless router)
- When using a Wi-Fi network indoors, place the access point in the same room where you are using the camcorder.
- Place the access point in an open, unobstructed location, where people or objects do not come between it and the camcorder.
- Place the access point as close as possible to the camcorder. In particular, note that during outdoor use in poor weather, rain may absorb radio waves and disrupt the connection.
Nearby electronic devices
- If the transmission rate over a Wi-Fi network drops because of interference from the following electronic devices, switching to the 5 GHz band or to a different channel may solve the problem.
- Wi-Fi networks using the IEEE 802.11b/g/n protocol operate in the 2.4 GHz band. For this reason, the transmission rate may drop if there are nearby microwave ovens, cordless telephones, microphones, or similar devices operating on the same frequency band.
- If another access point operating on the same frequency band as the transmitter is used nearby, the transmission rate may drop.
Using multiple camcorders/access points
- Check that there are no IP address conflicts among the devices connected to the same network.
- If multiple XC15 camcorders are connected to a single access point, connection speeds may be reduced.
- To reduce radio wave interference when there are multiple access points using IEEE 802.11b/g or IEEE 802.11n (in the 2.4 GHz band), leave a gap of four channels between each wireless access point. For example, use channels 1, 6, and 11, channels 2, 7, and 12, or channels 3, 8, and 13. If you can use IEEE 802.11a/n (in the 5 GHz band), switch to IEEE 802.11a/n and specify a different channel.
List of Messages
Refer to this section if a message appears on the screen. The messages in this section appear in alphabetical order. Note that for some messages, an indication of the recording media involved (Fast or SD) may appear above the message itself.
For error messages related to network connections, refer to Wi-Fi Functions (149).
Back up recordings regularly
- This message may appear when you turn on the camcorder. In the event of a malfunction, recordings may be lost so back up your recordings regularly.
Battery communication error. Does this battery display the Canon logo?
- This may be due to using a non-genuine Canon battery pack.
- If you are using a genuine Canon battery pack, there may be a problem with the battery pack or camcorder. Consult a Canon Service Center.
Cannot play back
- You may not be able to play back clips that were recorded with other devices or created or edited on a computer.
- There is a problem with the recording media. If this message appears often without apparent reason, contact a Canon Service Center.
Cannot play back Check the memory card
- There is a problem with the SD card. Save your recordings (122) and initialize the SD card using the [Complete Initialization] option (38). If the problem persists, use a different SD card.
Cannot record on this memory card.
- An SD card with a nominal capacity of less than 256 MB was inserted into the camcorder. Make sure to use an SD card with a nominal capacity of at least 256 MB.
- A CFast card with a nominal capacity of less than 1 GB was inserted into the camcorder. Make sure to use a CFast card with a nominal capacity of at least 1 GB.
- A recording media initialized using another device was inserted into the camcorder. Save your recordings (☐ 122) and initialize the recording media (☐ 38).
- The recording media was initialized using a camcorder with different firmware. Save the recordings on the recording media (☐ 122), and initialize the recording media with this camcorder (☐ 38).
Charge the battery pack
- Battery pack is exhausted. Charge the battery pack.
Check the memory card
- Cannot access the recording media. Check the recording media and make sure it is inserted correctly.
- A recording media error occurred. The camcorder cannot record or display the image. Try removing and reinserting the recording media, or use a different recording media.
- You inserted a MultiMedia Card (MMC) into the camcorder. Use a recommended SD card (☐ 35).
- If after the message disappears, or appears in red, perform the following: Turn off the camcorder and remove and reinsert the recording media. If or turns back to green you can resume recording/playback. If the problem persists, save your recordings (122) and initialize the recording media (38).
File name error
- The folder and file numbers have reached their maximum value. Set [Recording Setup] ➤ [4] (in mode), [2] (in mode) or [1] (in and modes) ➤ [File Numbering] to [Reset] (142) and delete all the photos (116) on the recording media or initialize it (38).
Initialize only using the camcorder
- There is a problem with the file system that prevents accessing the recording media. Initialize the recording media with this camcorder (☐ 38).
- Save your recordings (☐ 122) and initialize the recording media (☐ 38).
LCD Screen has been dimmed Use the [LCD Backlight] setting to change the brightness
- Change the [System Setup] ➤ [1] ➤ [LCD Backlight] setting to [Normal] or [Bright].
May not be possible to record movies on this memory card
- You may not be able to record clips on an SD card without a CLASS rating or with one rated CLASS 2 or 4. Replace the SD card with one rated CLASS 6 or 10.
Memory card is full
- The recording media is full. Delete some recordings (116) to free some space or replace the recording media.
Memory card is write-protected
- The LOCK switch on the SD card is set to prevent accidental erasure. Change the position of the LOCK switch.
No memory card
- Insert a compatible recording media into the camcorder (☐ 35).
- The recording media may not be inserted correctly. Insert the recording media all the way into the recording media slot until it clicks.
Number of clips already at maximum
- The recording media is full or it already contains the maximum number of clips (999 clips). Delete some clips (☐ 116) or replace the CFast card.
Process terminated with error
- The recording media slot cover was opened while initializing the SD card using the [Complete Initialization] option.
- An error occurred while initializing the recording media. Try to initialize the recording media again. If the problem persists, replace the recording media.
Recorded at 24.00 Hz/59.94 Hz
Check the data on the card. Initializing the card is also recommended.
- The recording media contains clips that were recorded using a system frequency different from the one currently used by the camcorder. To record on this card, save your clips (122) and initialize the recording media with the camcorder (38). To play back the clips on the card, change the [System Setup] [4] (in mode) or [3] (in mode)] [System Frequency] setting to match the recordings on the recording media.
Recording was stopped due to insufficient write speed of the memory card
- The data transfer rate was too high for the recording media in use and the recording was stopped. If trying to record on an SD card, replace it with one rated CLASS 10.
- After repeatedly recording, deleting and editing recordings (fragmented memory), it will take longer to write data on the recording media and recording may stop. Save your recordings (☐ 122) and initialize the recording media (☐ 38). In the case of SD cards, initialize using the [Complete Initialization] option.
Recording was stopped
- The file control information is corrupted or there was an encoder error. As such, clips cannot be recorded. Turn off the camcorder and back on again. Then, remove the recording media being used and reinsert it. Alternatively, replace the recording media. If this does not solve the problem, consult a Canon Service Center.
- Corrupted file control information cannot be recovered. Recording media or clips with corrupt file control information cannot be read by Canon XF Utility.
Some clips require data recovery.
- A data error has occurred while recording a clip and the data needs to be recovered. Open an index screen in playback mode to recover the data (☐ 38).
Task in progress. Do not disconnect the power source.
- The camcorder is updating the recording media. Wait until the operation ends and do not remove the battery pack.
Too many photos. Disconnect the USB cable.
- Disconnect the USB cable. Try using a memory card reader or decrease the number of photos on the recording media to fewer than 2,500 (Windows) or 1,000 (Mac OS). Restore the connection after a short while.
- If the dialog box appeared on the computer screen, close it. Disconnect the USB cable and then restore the connection after a short while.
Unable to recover data
- The selected clip could not be recovered. Save your recordings (122), and initialize the recording media (38).
- Clips may not be recovered if the recording media is full. Delete some clips (☐ 116) to free some space.
List of Messages for Wi-Fi Functions
Refer also to the instruction manual of your access point and other devices you will use.
A user is already accessing the server. Try again later.
- This message appears on the screen of the Wi-Fi device. Multiple Wi-Fi devices are trying to connect with the camcorder. Make sure only one Wi-Fi device is trying to connect and then touch Retry.
Cannot change setting.
- Wi-Fi settings cannot be changed while [Wi-Fi Setup] ▶ [1] ▶ [Browser Remote] is set to [On]. Set it to [Off] and try changing the Wi-Fi settings again.
IP address conflict
- Change the camcorder's IP address to avoid any conflict with devices connected to the same network. Alternatively, change the IP address of the conflicting device.
Memory card cover is open
- The recording media slot cover was opened while the recording media was being accessed. Stop the Wi-Fi function in use and end the Wi-Fi connection.
Multiple access points detected. Try the operation again.
- There are multiple access points sending out a WPS signal at the same time. Try the operation again later or perform setup using the [WPS: PIN Code] or [Search for Access Points] option (☐ 125).
No access points found
- The access point set in the camcorder could not be found.
- Cordless phones, microwave ovens, refrigerators and other appliances may interfere with the wireless signal. Try using the camcorder in a location farther away from such appliances.
- Make sure that you use the access point's SSID (network name) for the camcorder's Wi-Fi settings (☐ 125).
- If the access point is using MAC address filtering, enter the camcorder's MAC address in the access point's configuration screen.
Unable to access configuration files
- Turn off the camcorder. After a short while, turn it on again. If the problem persists, contact a Canon Service Center.
Unable to complete WPS.
- Turn off the camcorder and access point (wireless router). After a short while, turn them on again and try again. If the problem persists, perform setup using the [Search for Access Points] option (☐ 126).
Unable to complete WPS. Try the operation again.
- Some access points require pressing and holding the Wi-Fi Protected Setup (WPS) button. For details, refer to the instruction manual of your access point.
- Make sure to touch [OK] on the camcorder's screen within 2 minutes of activating the Wi-Fi Protected Setup signal on the access point, whether by pressing the button or by entering the PIN code.
Unable to connect
- Could not connect to the access point or network device selected.
- Cordless phones, microwave ovens, refrigerators and other appliances may interfere with the wireless signal. Try using the camcorder in a location farther away from such appliances.
Unable to obtain an IP address
- If you are not using a DHCP server, connect using the [Manual Setup] option and enter the IP address using the [Manual] option (☐ 128).
- Turn on the DHCP server. If it is already on, make sure it is functioning properly.
- Turn on the DNS server. If it is already on, make sure it is functioning properly.
- Make sure the address range for the DHCP server is sufficient.
- If you are not using a DNS server, set the DNS address to [0.0.0.0].
- Set the DNS server's IP address in the camcorder.
- Turn on the DNS server. If it is already on, make sure it is functioning properly.
- Make sure that the DNS server's IP address and the name for that address are correctly configured.
- If you are using a wireless gateway router, make sure all of the devices in the network, including the camcorder, are configured with the correct gateway address.
Wi-Fi authentication unsuccessful
- Make sure the camcorder and access point are using the same authentication/encryption method and encryption key.
- If the access point is using MAC address filtering, enter the camcorder's MAC address in the access point's configuration screen.
Troubleshooting
Wi-Fi connection terminated
- Cordless phones, microwave ovens, refrigerators and other appliances may interfere with the wireless signal. Try using the camcorder in a location farther away from such appliances.
- The camcorder may not be able to connect to the access point if too many devices are accessing it. After a short while, establish the connection again.
Wi-Fi error. Incorrect authentication method.
- Make sure the camcorder and access point are correctly configured.
- Make sure the camcorder and access point are using the same authentication/encryption method and encryption key.
- If the access point is using MAC address filtering, enter the camcorder's MAC address in the access point's configuration screen.
Wi-Fi error. Incorrect encryption key.
- The encryption key (password) is case sensitive so make sure to enter it correctly.
Wi-Fi error. Incorrect encryption method.
- Make sure the camcorder and access point are using the same authentication/encryption method.
- If the access point is using MAC address filtering, enter the camcorder's MAC address in the access point's configuration screen.
Wi-Fi functions are not available in this index screen.
- The Wi-Fi function cannot be activated from the [4K] or [HD] index screen. Activate the function from the [5] index screen.
Wireless communication is not working correctly
- Cordless phones, microwave ovens, refrigerators and other appliances may interfere with the wireless signal. Try using the camcorder in a location farther away from such appliances.
- Turn off the camcorder and access point (wireless router). After a short while, turn them on again and perform the Wi-Fi network setup again. If the problem persists contact a Canon Service Center.
Handling Precautions
Camcorder
Be sure to observe the following precautions to ensure maximum performance.
- Do not carry the camcorder by the LCD panel. Be careful when closing the LCD panel.
- Do not leave the camcorder in places subject to high temperatures (like the inside of a car parked under direct sunlight), or high humidity.
- Do not use the camcorder near strong electromagnetic fields such as near powerful magnets and motors, MRI machines or high-voltage power lines. Using the camcorder in such places may cause anomalies in the video or audio or video noise to appear.
- Do not use the camcorder's Wi-Fi functions inside hospitals or medical clinics. In addition, do not use them near medical equipment or sensitive electronic devices as it may affect their performance. In the case of pacemakers, keep the camcorder at least 22 cm (8.7 in.) away from the device. Regarding the use of Wi-Fi functions aboard aircraft, be sure to follow the instructions of the flight crew/cabin attendants.
- The camcorder's Wi-Fi functions may be subject to interference from devices such as cordless phones and microwave ovens. Keeping as much distance as possible from these devices or using the camcorder's Wi-Fi functions at a different time of day may reduce such interference.
- Do not use or store the camcorder in dusty or sandy places. The camcorder is not waterproof – avoid also water, mud or salt. If any of the above should get into the camcorder it may damage the camcorder and/or the lens. Consult a Canon Service Center as soon as possible.
- Be careful to avoid dust and dirt particles accumulating on the lens or entering the camcorder. When you finish using the camcorder, make sure to remove the lens hood and attach the lens cap to the camcorder.
- Do not point the camcorder or viewfinder unit toward an intense light source, such as the sun on a sunny day or an intense artificial light source. Doing so may cause blindness.
- Do not point the camcorder or viewfinder unit toward an intense light source, such as the sun on a sunny day or an intense artificial light source. Doing so may damage the image sensor or the camcorder's internal components. Be careful especially when using a tripod or shoulder strap. When you are not using the camcorder, make sure to attach the lens cap to the camcorder.
- When you are not using the viewfinder unit, make sure to attach the viewfinder unit cover to the unit.
- Be careful of heat generated by lighting equipment.
- Do not disassemble the camcorder. If the camcorder does not function properly, consult qualified service personnel.
- Handle the camcorder with care. Do not subject the camcorder to shocks or vibration as this may cause damage. When using the shoulder strap, do not allow the camcorder to swing and hit an object.
Long-term storage
If you do not intend to use the camcorder for a long time, store it in a place free of dust, in low humidity, and at temperatures not higher than 30 °C (86 °F).
Battery Pack
DANGER!
Treat the battery pack with care.
- Keep it away from fire (or it might explode).
- Do not expose the battery pack to temperature higher than 60 °C (140 °F). Do not leave it near a heater or inside a car in hot weather.
- Do not try to disassemble or modify it.
- Do not drop it or subject it to shocks.
- Do not get it wet.
- Dirty terminals may cause a poor contact between the battery pack and the camcorder. Wipe the terminals with a soft cloth.
Long-term storage
- Store battery packs in a dry place at temperatures no higher than 30 °C (86 °F).
- To extend the battery life of the battery pack, discharge it completely before storing it.
- Charge and discharge all your battery packs fully at least once a year.
Always attach the battery pack's protective cover.
Do not allow any metal objects to touch the terminals, as this can cause a short circuit and damage the battery pack. Attach the protective cover whenever the battery pack is not being used (figure 1).
The battery terminal cover has a □-shaped hole. This is useful when you wish to differentiate between charged and uncharged battery packs. For example, with charged battery packs, attach the terminal cover so that the □-shaped hole shows the blue-colored label.
Remaining battery time
If the remaining battery time displayed is not correct, charge the battery pack fully. Still, the correct time may not be displayed if a fully charged battery pack is used continuously in high temperatures or it is left unused for long periods of time. Also, the correct remaining time may not be displayed, depending on the battery life. Use the time shown on the screen as an approximation.
Recording Media
- We recommend backing up the recordings on the recording media onto your computer. Data may be corrupted or lost due to defects or exposure to static electricity. Canon shall not be liable for lost or corrupted data.
- Do not touch or expose the terminals to dust or dirt.
- Do not use recording media in places subject to strong magnetic fields.
- Do not leave recording media in places subject to high humidity and high temperature.
- Do not disassemble, bend, drop, or subject recording media to shocks and do not expose them to water.
- Check the direction before inserting the recording media. Forcing recording media into the slot if it is not correctly oriented may damage the recording media or the camcorder.
- Do not attach any labels or stickers on the recording media.
Disposal
When you delete data on the recording media, only the file allocation table is altered and stored data is not physically erased. Take the necessary precautions when you dispose of the recording media, for example by physically damaging it to prevent the leakage of private data.
If giving the recording media to another person, initialize it (using the [Complete Initialization] initialization option for SD cards) (☐ 38). Fill it up with unimportant recordings, and then initialize it again. This makes recovering the original recordings very difficult.
Built-in Rechargeable Lithium Battery
The camcorder has a built-in rechargeable lithium battery to keep the date/time and other settings. The built-in lithium battery is recharged while you use the camcorder; however, it will discharge completely if you do not use the camcorder for about 3 months.
To recharge the built-in lithium battery: Connect the AC adapter to the camcorder and use a household power outlet to power the camcorder for 24 hours while it is turned off.
Lithium Button Battery
WARNING!
- The battery used in this device may present a fire or chemical burn hazard if mishandled.
- Do not disassemble, modify, immerse in water, heat above 100°C (212 °F) or incinerate the battery.
- Do not insert the battery into the mouth. If swallowed, seek medical assistance immediately. The battery case may break and the battery fluids may cause internal injuries.
- Keep the battery out of the reach of children.
- Do not recharge, short-circuit or insert the battery in the wrong direction.
- Dispose of the used battery according to applicable recycling regulations.
- Do not pick up the battery using tweezers or other metal tools, as this will cause a short circuit.
- Wipe the battery with a clean dry cloth to ensure proper contact.
Maintenance/Others
Cleaning
Camcorder Body
- Use a soft, dry cloth to clean the camcorder body. Never use chemically treated cloths or volatile solvents such as paint thinner.
Lens
- If the lens surface is dirty, autofocus may not work properly.
- Remove any dust or dirt particles using a non-aerosol type blower.
- Use a clean, soft lens-cleaning cloth to gently wipe the lens. Never tissue paper.
LCD Screen
- Clean the LCD screen using a clean, soft lens-cleaning cloth using commercially available cleaning fluid for eyeglasses.
- Condensation may form on the surface of the screen when the temperature changes suddenly. Wipe it with a soft dry cloth.
Viewfinder Unit
- To remove dust or dirt particles, use a clean, soft lens-cleaning cloth to gently wipe the viewfinder unit using commercially available cleaning fluid for eyeglasses.
Condensation
Moving the camcorder rapidly between hot and cold temperatures may cause condensation (water droplets) to form on its internal surfaces. Stop using the camcorder if condensation is detected. Continued use may damage the camcorder.
Condensation may form in the following cases:
- When the camcorder is moved quickly from cold to warm places
- When the camcorder is left in a humid room
- When a cold room is heated rapidly
To avoid condensation
- Do not expose the camcorder to sudden or extreme changes in temperature.
- Remove the recording media and battery pack. Then, place the camcorder in an airtight plastic bag and let it adjust gradually to temperature changes before removing it from the bag.
When condensation is detected
The precise time required for water droplets to evaporate will vary depending on the location and weather conditions. As a general rule, wait for 2 hours before resuming use of the camcorder.
Using the Camcorder Abroad
Power Sources
You can use the AC adapter to operate the camcorder and to charge battery packs in any country with power supply between 100 and 240 V AC, 50/60 Hz. Consult a Canon Service Center for information on plug adapters for overseas use.
Optional Accessories
The following optional accessories are compatible with this camcorder. The availability differs from area to area.

For our customers in the USA: Call or visit your local retailer/dealer for genuine Canon video accessories. You can also obtain genuine accessories for your Canon camcorder by calling: 1-800-828-4040, Canon U.S.A. Information Center.
Use of genuine Canon accessories is recommended.
The message [Battery communication error] is displayed if you use a non-genuine Canon battery pack, and user response is required. Note that Canon shall not be liable for any damages resulting from accidents, such as malfunction or fire, that occur due to use of non-genuine Canon battery packs.

Battery Packs
When you need extra battery packs, make sure to select the LP-E6N.

This mark identifies genuine Canon video accessories. When you use Canon video equipment, we recommend Canon-brand accessories or products bearing the same mark.
Specifications
XC15
System
- Recording System
Movies: Video compression: MPEG-4 AVC/H.264 Audio compression: Linear PCM, 16 bits, 48 kHz, 2 channels Movie format: MXF
Photos: DCF (Design rule for Camera File system), compatible with Exif Ver. 2.3, JPEG compression
• Video Configuration (recording/playback)
4K clips: 3840x2160: 305 Mbps (29.97P, 23.98P, 24.00P), 205 Mbps (29.97P, 23.98P, 24.00P) HD clips: 1920x1080: 50 Mbps (59.94P), 35 Mbps (59.94i, 29.97P, 23.98P, 24.00P)
• Recording Media (not included)
4K clips: CFast card HD clips and photos: SD, SDHC (SD High Capacity) or SDXC (SD eXtended Capacity) memory card* * Menu settings can be saved on and read from the SD card as well.
• Maximum Recording Time (approximate, continuous recording)
4K clips: 64 GB CFast card 305 Mbps: 25 min., 205 Mbps: 40 min. 128 GB CFast card 305 Mbps: 55 min., 205 Mbps: 80 min.
HD clips: 16 GB SD card 50 Mbps: 40 min., 35 Mbps: 60 min. 32 GB SD card 50 Mbps: 80 min., 35 Mbps: 120 min.
- Image Sensor
1.0-in. CMOS sensor Effective pixels (approximate): Clips: 8,290,000 pixels (3840x2160) Photos: 12,000,000 pixels (4000x3000), 10,660,000 pixels (4000x2664), 8,290,000 pixels (3840x2160)
• LCD Touch Screen
3.0 in., approx. 1,030,000 dots, 100% coverage, capacitive touch screen operation
- Lens
F/2.8-5.6, 10x optical zoom, 8-bladed iris aperture 35 mm equivalent: 27.3 – 273 mm (clips), 24.1 – 241 mm (4:3 photos)
- Lens Configuration: 14 elements in 12 groups (3 aspheric elements on 2 lenses)
• Filter Diameter: 58 mm
• Minimum Focusing Distance
50 cm (1.6 ft.) from the front of the lens; 8 cm (3.1 in.) at full wide angle
- Focusing System
Autofocus (TTL) or manual focus
• Image Stabilization
Optical-Shift Image Stabilizer + digital compensation (Standard IS, Dynamic IS, Powered IS)
- Subject Illumination* (manual exposure, gain at 42.0 dB, shutter speed at 1/2)
Minimum Illumination: 0.05 lux
Illumination Range: 0.05 lux to 100,000 lux
* All figures are approximate.
- ND Filter: Built-in
- Iris: Automatic or manual
• ISO Speed: 160 to 20000; auto ISO speed limit
• Gain: 0.0 dB to 42.0 dB; AGC limit
- Exposure: Automatic, manual, other
- White Balance
Auto white balance (AWB); preset settings (daylight, shade, cloudy, fluorescent, fluorescent H, tungsten); color temperature setting; custom white balance (two sets, 1 and 2)
- Microphone: Stereo electret condenser microphone
- Size of Photos
4000x3000, 4000x2664, 3840x2160, 640x480 pixels
When taking photos in mode: 3840x2160 (4K clips), 1920x1080 (HD clips)
When capturing photos in mode: 3840x2160 (4K clips/4K Frame Grab), 1920x1080 (HD clips),
1280x720 (HD clips recorded in slow motion at x1/4)
Wi-Fi
- Wireless Standard: IEEE802.11b/g/n (2.4 GHz band), IEEE802.11a/n (5 GHz band)
- Connection Methods: Wi-Fi Protected Setup (WPS), search for access points, manual, camera access point • Supported Channels: See the following sidebar.
- Authentication Methods: Open, WPA-PSK, WPA2-PSK • Encryption Methods: WEP-64, WEP-128, TKIP, AES
Available frequencies and channels
The camcorder's Wi-Fi functions operate in a predetermined range of frequencies and channels. Note that not all channels may be available for a direct Camera Access Point connection with Wi-Fi-enabled devices.
| Frequency Channels | Available for Camera Access Point connections | |
| 2412 MHz to 2462 MHz 1 to 11 Yes | ||
| 5280 MHz to 5320 MHz 56 to 64 No | ||
| 5745 MHz to 5805 MHz | 149 to 161 | Yes |
Terminals
- HDMI OUT Terminal: HDMI Mini connector, output only; 1080/59.94P, 2160/29.97P output available
- MIC Terminal
∅ 3.5 mm stereo mini-jack, -65 dBV (manual volume center, full scale -12 dB) / 5k Ω or more Microphone attenuator: 20 dB
• Ⓞ (Headphone) Terminal
∅ 3.5 mm stereo mini-jack, -29 dBV (16 Ω load, volume max) / 100 Ω
- USB Terminal: mini-B, Hi-Speed USB, output only
- AUDIO Terminal
Proprietary connector for the supplied MA-400 Microphone Adapter; input only
Power/Others
• Power Supply (rated): 7.2 V DC (battery pack), 8.4 V DC (DC IN) • Power Consumption (screen at normal brightness)
When shooting 4K clips (305 Mbps, 29.97P): 6.2 W When shooting HD clips (50 Mbps, 59.94P): 5.7 W
- Operating Temperature: 0 – 40 °C (32 – 104 °F)
- Dimensions (W x H x D)*
Camcorder only: 128 x 106 x 122 mm (5.0 x 4.2 x 4.8 in.)
Camcorder with viewfinder unit and lens hood: 131 x 115 x 238 mm (5.2 x 4.5 x 9.4 in.)
Camcorder with lens hood, viewfinder unit, MA-400 Microphone Adapter, LP-E6N battery pack, SD card, CFast card: 132 x 221 x 238 mm (5.2 x 8.7 x 9.4 in.)
* All dimensions are approximate.
- Weight **
Camcorder unit only: 955 g (2.1 lb.)
Camcorder with lens hood, viewfinder unit, MA-400 Microphone Adapter (with cable clamp and unit cable), LP-E6N battery pack, SD card, CFast card: 1590 g (3.5 lb.)
**All weights are approximate.
MA-400 Microphone Adapter
- INPUT 1/INPUT 2 Terminals: XLR jack (pin1: shield, pin2: hot, pin3: cold), 2 sets
Sensitivity (manual volume center, full scale -18 dB)
MIC: -60 dBu / 600 Ω LINE: 4 dBu / 10 kΩ
• AUDIO Terminal: Proprietary connector for connection to the camcorder; output only - Operating temperature: 0 – 40 °C (32 – 104 °F) - Dimensions (W × H × D): 128 × 117 × 115 mm (5.0 × 4.6 × 4.5 in.) • Weight: 340 g (12.0 oz.)
CA-946 AC Adapter
• Power supply: 100 – 240 V AC, 50/60 Hz - Rated output / consumption: 8.4 V DC, 3.7 A / 65 VA (100 V) – 85 VA (240 V) - Operating temperature: 0 – 40 °C (32 – 104 °F) - Dimensions (W × H × D): 73 × 40 × 139 mm (2.9 × 1.6 × 5.5 in.) • Weight: 465 g (16.4 oz.)
LP-E6N Battery Pack
- Battery Type: Rechargeable lithium ion battery • Rated Voltage: 7.2 V DC • Battery Capacity: 1,865 mAh
- Operating Temperature: 0 – 40 °C (32 – 104 °F)
- Dimensions (W x H x D): 38.4 x 21.0 x 56.8 mm (1.5 x 0.8 x 2.2 in.)
- Weight (excluding protective cover): 80 g (2.8 oz.)
Reference Tables
Number of Photos Available on an SD Card
The numbers given in the following table are approximate and vary according to shooting conditions and the subject.

mode
| Photo aspect ratio/size | Number of photos | |
| 16 GB 32 GB | ||
| 4:3, 4000x3000 2,150 4,300 | ||
| 3:2, 4000x2664 2,450 4,900 | ||
| 16:9, 3840x2160 3,150 6,300 | ||
| 4:3, 640x480 75,000 150,000 | ||

mode
| Photo size | Number of photos | |
| 16 GB 32 GB | ||
| 3840x2160 3,150 6,300 | ||
| 1920x1080 12,000 | 24,000 | |

mode
| Photo size | Number of photos | |
| 16 GB 32 GB | ||
| 3840x2160(4K Frame Grab) | 3,150 6,300 | |
| 1920x1080 12,000 | 24,000 | |
| 1280x720 25,000 | 50,000 | |
Charging Times
Use the supplied CA-946 AC Adapter to charge battery packs. The charging times given in the following table are approximate and vary according to charging conditions and initial charge of the battery pack.
| Charging conditions | |
| Using the camcorder | 240 min. |
| Using the LC-E6 Battery Charger | 150 min. |
Recording and Playback Times
Recording and playback times given in the following tables are approximate and vary according to operating mode, bit rate, and charging, recording or playback conditions. The effective usage time of the battery pack may decrease when recording in cold surroundings, when using the brighter screen settings, etc. Typical recording times measure recording with repeated operations such as start/stop recording and power on/off.
4K frame grab .....114 4K recording ....53
A
Abroad, using the camcorder .....158 AC adapter .....19 Accessories....159 AF speed....140 AGC limit 63 Air intake vents 52 Aperture .....55, 58 Assignable buttons 105 Audio limiter .....90 Audio output channel .....120 Audio recording .....87 Audio recording level .....89, 91 Audio reference signal .....95 AUTO (shooting mode) .....59 Auto ISO limit .63 Av (aperture priority AE) .....58
B
Battery pack, charging .....19 Beach (Special Scene mode) .....60 Bit rate....53 Browser Remote ....131 Built-in backup battery .....157
C
Canon XF Utility (download) .....122 CFast card Compatible CFast cards .....35 Initializing .....38 Inserting/Removing .....36 Clips Deleting .....116 Playback .....108 Recording .....41 Saving to a computer .....122
Color bars 95 Condensation 158 Connection to an external monitor .....121 Cooling fan 52 Customizing the FUNC. menu .....104
D
Date and time ....33 Deleting recordings ....116 Digital tele-converter 73 Drive mode 44 Drop frame (time code) .....85
E
Exposure 65 AE shift....67 Exposure lock 65
F
Face detection & tracking .....79 File numbering .....142 Fireworks (Special Scene mode) .....60 Focus ....74 Face AF ....79 Focus assistance functions ....77 PUSH AF (momentary autofocus) ....79 Focus priority .....74 Folder number .....142 Frame rate .....53 Free-run (time code) .....84
G
Gain....55 GPS information ....100 Grip 27
H
HDMI OUT terminal .....121 Headphone terminal .....93
|
Image stabilizer ....81 Initializing recording media .....38 INPUT 1/INPUT 2 terminals .....88 Interval recording mode .....98 ISO speed .....55, 61
L
Language 34
Lens hood 22
Looks 71
Low cut filter .....92, 93
Low light (Special Scene mode) .....60
M
M (Manual Exposure) .....55
Magnification (while recording) .....78
Media server 136
Menu settings 137
Message list 151
Metering mode 68
MIC terminal 87
Microphone adapter .....17, 24
Microphone attenuator .....92
Microphone sensitivity .....90, 93
Monitoring audio .....93
N
ND filter 140
Night scene (Special Scene mode) .....60
Non-drop frame (time code) .....85
0
Onscreen displays 47,110
Onscreen markers 82
Orientation detection .....102
P
P (Program AE) .....59
Peaking 77
Phantom power (microphone) .....88
Photos
Deleting 116
Playback 108
Recording 41
Playback 108
Playback via Browser 135
Portrait (Special Scene mode) 60
Powered IS 81
Pre-recording mode 97
R
Rec run (time code) 84
Recording 41
Remote controller 40
Remote operation 40
Resolution (frame size) 53
Rolling shutter distortion reduction 140
Running mode (time code) 84
S
Saving recordings to a computer .....122
SCN (Special Scene) .....59
SD card
Compatible SD cards . . . . . . . . . . . . . . . . . . . . . 35
Initializing .38
Inserting/Removing . . . . . . . . . . . . . . . . . . . . . . . . . . . . . . . . . . . . . . . . . . . . 37
Self timer 99
Setup menus 31
Shooting modes .....28
Shoulder strap 27
Shutter speed .....55, 61
Shutter speed mode .....55
Slow & fast motion recording mode .....96
Snow (Special Scene mode) 60
Specifications 161
Sports (Special Scene mode) .....60
Spotlight (Special Scene mode) .....60
Sunset (Special Scene mode) 60
System frequency .....53
T
Tally lamp 42
Time code 84
Time zone/DST 34
Touch screen operations .....29
Tripod 27
Troubleshooting....146
Tv (Shutter Priority AE) .....58
U
User bit 86
V
Video configuration .....53
Video output configuration .....118
Viewfinder unit 22
Volume 113
W
Waveform monitor .....55, 83
White balance 69
Wi-Fi functions .....123
X
XF Utility 122
Z
Zebra pattern....82
Zoom....73
CANON PROFESSIONAL DIGITAL VIDEO EQUIPMENT LIMITED WARRANTY FOR PRODUCTS PURCHASED IN THE UNITED STATES
The limited warranty set forth below is given by Canon U.S.A., Inc. ('Canon USA') with respect to Canon Professional Digital Video Equipment (the 'Equipment') packaged with this limited warranty and purchased in the United States. This limited warranty is only effective upon presentation of your Bill of Sale or other proof of purchase. The Equipment is warranted to the original end-user purchaser, when delivered in new condition in its original container, under normal use against defective materials or workmanship as follows:
Parts: Defective parts will be exchanged for new parts or comparable rebuilt parts for a period of ONE YEAR from the date of original purchase.
Labor: For a period of ONE YEAR from the date of original purchase, labor will be provided free of charge by Canon USA's factory service centers or designated service facilities located in the United States.
When returning Equipment under this warranty, you must pre-pay the shipping charges, and you must enclose a copy of the Bill of Sale or other proof of purchase with a complete explanation of the problem. During the ONE-YEAR warranty period, repairs will be made and the Equipment will be return-shipped to you free of charge. For repairs after the warranty period is over, you will be given an estimate of the cost of repair and an opportunity to approve or disapprove of the repair expense before it is incurred. If you approve, repairs will be made and the Equipment will be returned to you at your risk and expense. If you disapprove, we will return-ship the Equipment to you at no charge to you to an address within the United States.
This limited warranty only applies if the Equipment is used in conjunction with compatible computer equipment and compatible software, as to which items Canon USA will have no responsibility. Canon USA shall have no responsibility under this limited warranty for use of the Equipment in conjunction with incompatible peripheral equipment and/or incompatible software. Non-Canon brand peripheral equipment and software which may be distributed with, or factory loaded on, the Equipment, are sold 'AS IS' without warranty of any kind by Canon USA, including any implied warranty regarding merchantability or fitness for a particular purpose. The sole warranty with respect to such non-Canon brand items is given by the manufacturer or producer thereof. If the Equipment contains a hard disk drive, Canon USA recommends that data stored on that drive be duplicated or backed up to prevent its loss in the event of failure or other malfunction of such drive.
In order to obtain warranty service, please contact the authorized Canon retail dealer from whom you purchased the Equipment or contact the CANON INFORMATION CENTER AT 855-CINE-EOS (855-246-3367) or on the Internet at pro.usa.canon.com/support. You will be directed to the nearest service facility for your Equipment.
This Limited Warranty covers all defects encountered in normal use of the Equipment and does not apply in the following cases:
A. Loss or damage to the Equipment due to abuse, mishandling, accident, improper maintenance, use of non-Canon accessories, or failure to follow operating, maintenance, or environmental instructions prescribed in Canon USA's user's manual; B. If the Equipment is defective as a result of leaking batteries, sand, dirt, or water damage; C. If defects or damages are caused by the use of parts or supplies (other than those sold by Canon USA) that cause damage to the Equipment or that cause abnormally frequent service calls or service problems; D. If defects or damages are caused by service other than Canon USA's factory service centers or authorized service facilities; E. Any internal modification to product hardware or firmware; F. Any applicable fee for Maintenance of the Equipment; G. If the Equipment has had its serial number or dating altered or removed.
This Limited Warranty does not apply to Equipment purchased outside the United States. This Limited Warranty does not apply to accessories or consumables for the Equipment, which are sold "AS IS", without warranty of any kind by Canon USA. Please retain this warranty card and your Bill of Sale as a permanent record of your purchase. This card ensures that you are contacted promptly should there be a safety inspection, modification, or product recall under applicable laws or regulations.
NO IMPLIED WARRANTY, INCLUDING MERCHANTABILITY AND FITNESS FOR A PARTICULAR PURPOSE, APPLIES TO THIS EQUIPMENT AFTER THE APPLICABLE PERIOD OF EXPRESS WARRANTY OR GUARANTY (EXCEPT AS MENTIONED ABOVE). ANY WARRANTY OR GUARANTY GIVEN BY ANY PERSON, FIRM, OR CORPORATION WITH RESPECT TO THIS EQUIPMENT SHALL NOT BIND THE UNDERSIGNED (SOME STATES DO NOT ALLOW LIMITATIONS ON HOW LONG AN IMPLIED WARRANTY LASTS, SO THE ABOVE LIMITATION OR EXCLUSION MAY NOT APPLY TO YOU). CANON USA SHALL NOT BE LIABLE FOR LOSS OF REVENUES OR PROFITS, EXPENSE FOR SUBSTITUTE EQUIPMENT OR SERVICE, STORAGE CHARGES, LOSS OR CORRUPTION OF DATA, INCLUDING WITHOUT LIMITATION, LOSS OR CORRUPTION OF DATA STORED ON THE EQUIPMENT'S HARD DRIVE, OR ANY OTHER SPECIAL, INCIDENTAL, OR CONSEQUENTIAL DAMAGES CAUSED BY THE USE, MISUSE, OR INABILITY TO USE THE EQUIPMENT, REGARDLESS OF THE LEGAL THEORY ON WHICH THE CLAIM IS BASED, AND EVEN IF CANON USA HAS BEEN ADVISED OF THE POSSIBILITY OF SUCH DAMAGES. NOR SHALL RECOVERY OF ANY KIND AGAINST CANON USA BE GREATER THAN THE PURCHASE PRICE OF THE EQUIPMENT SOLD BY CANON USA AND CAUSING THE ALLEGED DAMAGE. WITHOUT LIMITING THE FOREGOING, YOU ASSUME ALL RISK AND LIABILITY FOR LOSS, DAMAGE, OR INJURY TO YOU AND YOUR PROPERTY AND TO OTHERS AND THEIR PROPERTY ARISING OUT OF USE, MISUSE, OR INABILITY TO USE THE EQUIPMENT NOT CAUSED DIRECTLY BY THE NEGLIGENCE OF CANON USA (SOME STATES DO NOT ALLOW THE EXCLUSION OR LIMITATION OF INCIDENTAL OR CONSEQUENTIAL DAMAGES, SO THE ABOVE LIMITATION MAY NOT APPLY TO YOU). THIS WARRANTY SHALL NOT EXTEND TO ANYONE OTHER THAN THE ORIGINAL PURCHASER OF THIS EQUIPMENT OR THE PERSON FOR WHOM IT WAS PURCHASED AS A GIFT.
This warranty gives you specific legal rights, and you may also have other rights which vary from state to state.
CANON U.S.A., INC.
CANADA
CANON PROFESSIONAL DIGITAL VIDEO EQUIPMENT LIMITED WARRANTY FOR PRODUCTS PURCHASED IN CANADA
The limited warranty set forth below is given by Canon Canada Inc. ('Canon Canada') with respect to Canon Professional Digital Video Equipment (the 'Equipment') packaged with this limited warranty and purchased in Canada. This limited warranty is only effective upon presentation of your Bill of Sale or other proof of purchase. The Equipment is warranted to the original end-user purchaser, when delivered in new condition in its original container, under normal use against defective materials or workmanship as follows:
Parts: Defective parts will be exchanged for new parts or comparable rebuilt parts for a period of ONE YEAR from the date of original purchase.
Labor: For a period of ONE YEAR from the date of original purchase, labor will be provided free of charge by Canon Canada's factory service center or designated service facilities located in Canada.
When returning Equipment under this warranty, you must pre-pay the shipping charges, and you must enclose a copy of the Bill of Sale or other proof of purchase with a complete explanation of the problem. During the ONE-YEAR warranty period, repairs will be made and the Equipment will be return-shipped to you free of charge. For repairs after the warranty period is over, you will be given an estimate of the cost of repair and an opportunity to approve or disapprove of the repair expense before it is incurred. If you approve, repairs will be made and the Equipment will be returned to you at your risk and expense. If you disapprove, we will return-ship the Equipment to you at no charge to you to an address within Canada.
This limited warranty only applies if the Equipment is used in conjunction with compatible computer equipment and compatible software, as to which items Canon Canada will have no responsibility. Canon Canada shall have no responsibility under this limited warranty for use of the Equipment in conjunction with incompatible peripheral equipment and/or incompatible software. Non-Canon brand peripheral equipment and software which may be distributed with, or factory loaded on, the Equipment, are sold 'AS IS' without warranty of any kind by Canon Canada, including any implied warranty or condition regarding merchantability or fitness for a particular purpose. The sole warranty with respect to such non-Canon brand items is given by the manufacturer or producer thereof. If the Equipment contains a hard disk drive, Canon Canada recommends that data stored on that drive be duplicated or backed up to prevent its loss in the event of failure or other malfunction of such drive.
In order to obtain warranty service, please contact the authorized Canon retail dealer from whom you purchased the Equipment or contact the CANON PROFESSIONAL SERVICE CENTRE at 1-800-667-2666 or on the Internet at www.canon.ca/pro. You will be directed to the nearest service facility for your Equipment.
This Limited Warranty covers all defects encountered in normal use of the Equipment and does not apply in the following cases:
A. Loss or damage to the Equipment due to abuse, mishandling, accident, improper maintenance, use of non-Canon accessories or failure to follow operating, maintenance or environmental instructions prescribed in Canon Canada's user's manual; B. If the Equipment is defective as a result of leaking batteries, sand, dirt or water damage; C. If defects or damages are caused by the use of parts or supplies (other than those sold by Canon Canada) that cause damage to the Equipment or that cause abnormally frequent service calls or service problems; D. If defects or damages are caused by service other than Canon Canada's factory service centers or authorized service facilities; E. Any internal modification to product hardware or firmware; F. Any applicable fee for Maintenance of the Equipment; G. If the Equipment has had its serial number or dating altered or removed.
This Limited Warranty does not apply to Equipment purchased outside Canada. This Limited Warranty does not apply to accessories or consumables for the Equipment, which are sold "AS IS", without warranty of any kind by Canon Canada. Please retain this warranty card and your Bill of Sale as a permanent record of your purchase. This card ensures that you are contacted promptly should there be a safety inspection, modification or product recall under applicable laws or regulations.
NO IMPLIED WARRANTY OR CONDITION, INCLUDING MERCHANTABILITY AND FITNESS FOR A PARTICULAR PURPOSE APPLIES TO THIS EQUIPMENT AFTER THE APPLICABLE PERIOD OF EXPRESS WARRANTY OR GUARANTY (EXCEPT AS MENTIONED ABOVE) GIVEN BY ANY PERSON, FIRM OR CORPORATION WITH RESPECT TO THIS EQUIPMENT SHALL BIND THE UNDERSIGNED (SOME PROVINCES DO NOT ALLOW LIMITATIONS ON HOW LONG AN IMPLIED WARRANTY OR CONDITION LASTS, SO THE ABOVE LIMITATION OR EXCLUSION MAY NOT APPLY TO YOU). CANON CANADA SHALL NOT BE LIABLE FOR LOSS OF REVENUES OR PROFITS, EXPENSE FOR SUBSTITUTE EQUIPMENT OR SERVICE, STORAGE CHARGES, LOSS OR CORRUPTION OF DATA, INCLUDING WITHOUT LIMITATION, LOSS OR CORRUPTION OF DATA STORED ON THE EQUIPMENT'S HARD DRIVE, OR ANY OTHER SPECIAL, INCIDENTAL OR CONSEQUENTIAL DAMAGES CAUSED BY THE USE, MISUSE OR INABILITY TO USE THE EQUIPMENT, REGARDLESS OF THE LEGAL THEORY ON WHICH THE CLAIM IS BASED, AND EVEN IF CANON CANADA HAS BEEN ADVISED OF THE POSSIBILITY OF SUCH DAMAGES. NOR SHALL RECOVERY OF ANY KIND AGAINST CANON CANADA BE GREATER THAN THE PURCHASE PRICE OF THE EQUIPMENT SOLD BY CANON CANADA AND CAUSING THE ALLEGED DAMAGE. WITHOUT LIMITING THE FOREGOING, YOU ASSUME ALL RISK AND LIABILITY FOR LOSS, DAMAGE OR INJURY TO YOU AND YOUR PROPERTY AND TO OTHERS AND THEIR PROPERTY ARISING OUT OF USE, MISUSE OR INABILITY TO USE THE EQUIPMENT NOT CAUSED DIRECTLY BY THE NEGLIGENCE OF CANON CANADA (SOME PROVINCES DO NOT ALLOW THE EXCLUSION OR LIMITATION OF INCIDENTAL OR CONSEQUENTIAL DAMAGES, SO THE ABOVE LIMITATION MAY NOT APPLY TO YOU). THIS WARRANTY SHALL NOT EXTEND TO ANYONE OTHER THAN THE ORIGINAL PURCHASER OF THIS EQUIPMENT OR THE PERSON FOR WHOM IT WAS PURCHASED AS A GIFT.
This warranty gives you specific legal rights, and you may also have other rights which vary from province to province.
CANON CANADA INC.
ASIA and HONG KONG, S.A.R.
Canon Hongkong Company Ltd
19/F, The Metropolis Tower, 10 Metropolis Drive, Hunghom, Kowloon, Hong Kong
+852 3191 2333, +852 2428 3963
CANADA http://www.canon.ca/pro
CANON CANADA INC.
C (855) CINE-EOS (855-246-3367) (USA only)
Visit your local Canon Web site to download the latest version of this Instruction Manual.
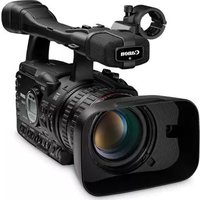
- IMPORTANT USAGE INSTRUCTIONS
- WARNING
- COPYRIGHT WARNING
- TRADEMARK ACKNOWLEDGEMENTS
- HIGHLIGHTS OF THE XC
- EXCEPTIONAL VIDEO AND PHOTOS
- IN. CMOS SENSOR AND DIGIC DV 5 IMAGE PROCESSOR
- EXCELLENT PHOTO QUALITY
- OPERABILITY AND ADAPTABILITY
- INTUITIVE DESIGN
- SOFTWARE TO HELP MANAGE RECORDINGS
- VERSATILE ARTISTIC EXPRESSION
- CREATIVE RECORDING MODES
- CREATING A PROFESSIONAL LOOK
- DIVERSE AUDIO OPTIONS
- ADVANCED PROFESSIONAL FEATURES AND FLEXIBILITY
- WI-FI NETWORK FUNCTIONS
- TIME CODE AND USER BIT OUTPUT
- CUSTOMIZATION
- OTHER FUNCTIONS
- ASSISTANCE FUNCTIONS
- ND FILTER
- PUSH AF
- HD PLAYBACK FROM 4K VIDEO
- IMAGE STABILIZATION (IS)
- SUPPORT FOR GEOTAGGING
- INTRODUCTION
- PREPARATIONS
- RECORDING
- ADDITIONAL INFORMATION
- ABOUT THIS MANUAL
- CONVENTIONS USED IN THIS MANUAL
- SUPPLIED ACCESSORIES
- NAMES OF PARTS
- VIEWFINDER UNIT
- CHARGING THE BATTERY PACK
- TO REMOVE THE BATTERY PACK
- IMPORTANT
- NOTES
- PREPARING THE CAMCORDER
- ATTACHING THE LENS HOOD
- USING THE VIEWFINDER UNIT
- ADJUSTING THE VIEWFINDER UNIT
- REMOVING THE VIEWFINDER UNIT
- I NOTES
- ATTACHING THE MA-400 MICROPHONE ADAPTER
- REMOVING THE MICROPHONE ADAPTER
- USING THE LCD PANEL
- ADJUSTING THE GRIP
- ATTACHING THE SHOULDER STRAP
- USING A TRIPOD
- BASIC OPERATION OF THE CAMCORDER
- SWITCHING BETWEEN MOVIES AND PHOTOS
- SETTING THE SHOOTING MODE
- SWITCHING BETWEEN RECORDING AND PLAYBACK
- USING THE TOUCH SCREEN
- TOUCH
- DRAG
- PINCH IN
- PINCH OUT
- USING THE MENU BUTTON AND JOYSTICK
- JOYSTICK
- MENU BUTTON
- USING THE FUNC. MENU AND SETUP MENUS
- FUNC. MENU
- TO USE THE TOUCH PANEL CONTROLS
- TO USE THE JOYSTICK
- SETUP MENUS
- DATE, TIME AND LANGUAGE SETTINGS
- SETTING THE DATE AND TIME
- CHANGING THE LANGUAGE
- CHANGING THE TIME ZONE
- PREPARING RECORDING MEDIA
- COMPATIBLE RECORDING MEDIA
- CFAST CARDS
- SD CARDS
- INSERTING A CFAST CARD
- REMOVING A CFAST CARD
- INSERTING AND REMOVING AN SD CARD
- INITIALIZING THE RECORDING MEDIA
- RECOVERING DATA ON A RECORDING MEDIA
- USING THE OPTIONAL RC-6 REMOTE CONTROLLER
- ACTIVATING THE REMOTE SENSOR
- USING THE REMOTE CONTROLLER TO OPERATE THE CAMCORDER
- RECORDING VIDEO AND TAKING PHOTOS
- PREPARING TO RECORD
- BASIC RECORDING
- TO SHOOT CLIPS
- TO TAKE PHOTOS
- TAKING PHOTOS DURING MODE
- SELECTING THE PHOTO SIZE AND ASPECT RATIO
- SHOOTING CONTINUOUS PHOTOS (DRIVE MODE)
- OPTIONS
- REMOTE OPERATION USING BROWSER REMOTE
- TOUCH [START/STOP]
- TOUCH [PHOTO]
- SETTING THE CLIP FILE NAME
- SETTING THE COMPONENTS OF THE CLIP FILE NAME
- TO SET THE CAMERA ID
- TO SET THE REEL NUMBER OR INITIAL CLIP NUMBER
- TO SET THE USER-DEFINED FIELD
- ONSCREEN ICONS AND DISPLAYS
- USING THE FAN
- VIDEO CONFIGURATION: RESOLUTION (4K/HD), SYSTEM FREQUENCY, FRAME RATE AND BIT RATE
- SELECTING THE RESOLUTION (RECORDING IN 4K OR HD)
- SELECTING THE SYSTEM FREQUENCY
- SELECTING THE FRAME RATE AND BIT RATE
- SHOOTING MODES
- MANUAL EXPOSURE (M)
- TO SELECT THE SHUTTER SPEED MODE
- TO SELECT THE ISO SPEED OR GAIN
- THE EXPOSURE BAR
- APERTURE PRIORITY AE (AV)
- OPERATING MODES
- SHUTTER PRIORITY AE (TV)
- PROGRAM AE (P)
- AUTO (AUTO)
- SPECIAL SCENE (SCN)
- USING THE FUNC. MENU OR BROWSER REMOTE TO ADJUST SETTINGS
- USING THE FUNC. MENU
- TO CHANGE THE APERTURE VALUE WHEN THE SHOOTING MODE IS M OR AV
- TO CHANGE THE SHUTTER SPEED WHEN THE SHOOTING MODE IS M OR TV
- TO CHANGE THE ISO SPEED OR GAIN WHEN THE SHOOTING MODE IS M
- USING THE BROWSER REMOTE APPLICATION
- AUTOMATIC GAIN AND ISO LIMITS
- PRESS THE MENU BUTTON
- OPEN THE SUBMENU TO SET THE AGC LIMIT OR AUTO ISO LIMIT
- TOUCH [1507[]. GAIN
- DRAG YOUR FINGER LEFT/RIGHT ALONG THE DIAL TO SELECT THE DESIRED VALUE
- TOUCH [X]
- EXPOSURE
- EXPOSURE LOCK
- PRESS [★
- TOUCH EXPOSURE
- AE SHIFT
- LIGHT METERING MODE
- OPTIONS (FOR CLIPS)
- OPTIONS (FOR PHOTOS)
- WHITE BALANCE
- TO SET THE COLOR TEMPERATURE ([K COLOR TEMPERATURE])
- TO SET A CUSTOM WHITE BALANCE ([SET 1] OR [SET 2])
- TO SET AUTOMATIC WHITE BALANCE (AWB)
- TO SET A PRESET WHITE BALANCE OPTION
- TO SET CUSTOM WHITE BALANCE ([△] AND [△2])
- USING LOOKS
- SELECTING A PRE-INSTALLED LOOK
- ADJUSTING THE SETTINGS OF A PRE-INSTALLED LOOK
- CREATING A USER-DEFINED LOOK
- ZOOMING
- ADJUSTING THE FOCUS
- AUTOFOCUS (AF) MODE
- SET THE FOCUS SWITCH TO A
- USING FOCUS PRIORITY
- IF THE CAMCORDER IS SET TO MANUAL FOCUS MODE, TOUCH [MF] ON THE BROWSER REMOTE SCREEN
- MANUAL FOCUS (MF)
- USING THE FOCUS RING
- PREPARATION
- TO ADJUST THE FOCUS
- USING THE FOCUS ASSISTANCE FUNCTIONS
- PEAKING
- MAGNIFICATION
- DETECTING AND FOCUSING ON FACES (FACE DETECTION & TRACKING)
- IMAGE STABILIZER
- TO ACTIVATE STANDARD IS OR DYNAMIC IS
- TO ACTIVATE POWERED IS
- ONSCREEN MARKERS AND ZEBRA PATTERNS
- DISPLAYING ONSCREEN MARKERS
- DISPLAYING ZEBRA PATTERNS
- USING THE WAVEFORM MONITOR
- TO ACTIVATE THE WAVEFORM MONITOR
- SETTING THE TIME CODE
- SELECTING THE TIME CODE MODE
- SETTING THE TIME CODE RUNNING MODE
- SETTING THE TIME CODE'S INITIAL VALUE
- SELECTING DROP OR NON-DROP FRAME
- SETTING THE USER BIT
- RECORDING AUDIO
- CONNECTING AN EXTERNAL MICROPHONE OR EXTERNAL AUDIO INPUT SOURCE TO THE CAMERA
- USING THE MIC TERMINAL/BUILT-IN MICROPHONE WHILE THE MICROPHONE ADAPTER IS ATTACHED
- USING THE INPUT 1/INPUT 2 TERMINALS
- RECORDING A SINGLE AUDIO INPUT TO TWO AUDIO CHANNELS (INPUT TERMINALS)
- AUDIO RECORDING LEVEL (INPUT TERMINALS)
- AUTOMATIC AUDIO LEVEL ADJUSTMENT
- MANUAL AUDIO LEVEL ADJUSTMENT
- ADJUSTING THE MICROPHONE'S SENSITIVITY (INPUT TERMINALS)
- ACTIVATING THE MICROPHONE'S ATTENUATOR (INPUT TERMINALS)
- AUDIO RECORDING LEVEL (MIC TERMINAL/BUILT-IN MICROPHONE)
- MICROPHONE ATTENUATOR (MIC TERMINAL)
- LOW-CUT FILTER (MIC TERMINAL)
- MICROPHONE ATTENUATOR (BUILT-IN MICROPHONE)
- LOW-CUT FILTER (BUILT-IN MICROPHONE)
- ADJUSTING THE MICROPHONE'S SENSITIVITY (BUILT-IN MICROPHONE)
- MONITORING THE AUDIO WITH HEADPHONES
- COLOR BARS/AUDIO REFERENCE SIGNAL
- RECORDING COLOR BARS
- RECORDING AN AUDIO REFERENCE SIGNAL
- SLOW & FAST MOTION MODE
- PRE-RECORDING MODE
- INTERVAL RECORDING MODE
- SELF TIMER
- RECORDING GPS INFORMATION (GEOTAGGING)
- CONNECTING THE GPS RECEIVER
- ACTIVATING THE GPS RECEIVER
- DISPLAYING GPS INFORMATION
- ADJUSTING THE DATE/TIME AUTOMATICALLY ACCORDING TO GPS POSITION
- ORIENTATION DETECTION
- CORRECTING ORIENTATION DURING PLAYBACK
- CUSTOMIZING THE FUNC. MENU
- DEFAULT FUNCTIONS BY MODE
- ASSIGNABLE BUTTONS
- USING AN ASSIGNABLE BUTTON
- ASSIGNABLE FUNCTIONS
- SAVING AND LOADING MENU SETTINGS
- SAVING MENU SETTINGS TO AN SD CARD
- LOADING MENU SETTINGS FROM AN SD CARD
- PLAYBACK
- PLAYING BACK RECORDINGS
- CHANGING THE INDEX SCREEN
- SWITCHING TO PLAYBACK MODE FROM 📄 OR 📅 MODE
- PLAYING BACK CLIPS RECORDED USING THE [HIGHLIGHT PRIORITY] LOOK
- ONSCREEN ICONS AND DISPLAYS DURING PLAYBACK
- PLAYBACK CONTROLS DURING CLIP PLAYBACK
- AVAILABLE PLAYBACK TYPES
- PLAYBACK CONTROLS DURING PHOTO PLAYBACK
- ADJUSTING THE VOLUME
- DISPLAYING CLIP INFORMATION
- PLAYING AN HD-SIZED CLIP FROM A 4K CLIP
- CAPTURING PHOTOS FROM 4K CLIPS (4K FRAME GRAB) AND HD CLIPS
- MAGNIFYING PHOTOS DURING PLAYBACK
- DELETING RECORDINGS
- DELETING CLIPS AND PHOTOS FROM THE INDEX SCREEN
- DELETING A CLIP DURING PLAYBACK PAUSE
- DELETING A PHOTO DURING PLAYBACK
- VIDEO OUTPUT CONFIGURATION
- RECORDING VIDEO SIGNAL CONFIGURATION AND VIDEO OUTPUT CONFIGURATION
- PLAYBACK VIDEO CONFIGURATION AND VIDEO OUTPUT CONFIGURATION
- SELECTING THE AUDIO OUTPUT CHANNEL
- CONNECTING TO AN EXTERNAL MONITOR
- CONNECTION DIAGRAM
- SAVING CLIPS TO A COMPUTER
- INSTALLATION
- WWW.CANON.COM/ICPD
- ABOUT THE WI-FI FUNCTIONS
- BEFORE USING THE WI-FI FUNCTIONS
- WIRELESS CONNECTIONS USING WI-FI
- WI-FI PROTECTED SETUP (WPS)
- WIRELESS ROUTERS WITH A WPS BUTTON
- WPS USING A PIN CODE
- SEARCHING FOR ACCESS POINTS
- SELECT THE DESIRED ACCESS POINT
- ENCRYPTED ACCESS POINTS
- USING THE VIRTUAL KEYBOARD SCREEN
- MANUAL SETUP
- VIEWING AND CHANGING WI-FI SETTINGS
- VIEWING THE SMARTPHONE'S CONNECTION SETTINGS
- TO CHANGE THE SSID AND PASSWORD
- TO CHANGE THE OPERATING FREQUENCY
- VIEWING THE ACCESS POINT'S CONNECTION SETTINGS
- VIEWING THE CAMCORDER'S MAC ADDRESS
- BROWSER REMOTE: CONTROLLING THE CAMCORDER FROM A NETWORK DEVICE
- SETTING UP BROWSER REMOTE
- STARTING BROWSER REMOTE
- PREPARATIONS ON THE CAMCORDER
- CONNECTING THE NETWORK DEVICE
- THE [ADVANCED CONTROL] SCREEN
- THE [BASIC CONTROL] SCREEN
- MEDIA SERVER
- MENU OPTIONS
- TROUBLESHOOTING
- POWER SOURCE
- INDICATORS AND ONSCREEN DISPLAYS
- PICTURE AND SOUND
- RECORDING MEDIA AND ACCESSORIES
- CANNOT INSERT THE RECORDING MEDIA
- CANNOT RECORD 4K CLIPS ON THE CFAST CARD
- CANNOT RECORD HD CLIPS OR PHOTOS ON THE SD CARD
- THE OPTIONAL RC-6 REMOTE CONTROLLER WILL NOT WORK
- CONNECTIONS WITH EXTERNAL DEVICES
- VIDEO NOISE APPEARS ON A NEARBY TV SCREEN
- PLAYBACK LOOKS FINE ON THE CAMCORDER BUT THERE IS NO IMAGE ON THE EXTERNAL MONITOR
- THE CAMCORDER IS CONNECTED USING THE SUPPLIED HIGH SPEED HDMI CABLE, BUT THERE IS NO PICTURE OR SOUND FROM THE HDTV
- WI-FI FUNCTIONS
- CANNOT CONNECT WITH AN ACCESS POINT
- PRECAUTIONS REGARDING WI-FI NETWORKS
- LIST OF MESSAGES
- BACK UP RECORDINGS REGULARLY
- BATTERY COMMUNICATION ERROR. DOES THIS BATTERY DISPLAY THE CANON LOGO
- CANNOT PLAY BACK
- CANNOT PLAY BACK CHECK THE MEMORY CARD
- CANNOT RECORD ON THIS MEMORY CARD
- CHARGE THE BATTERY PACK
- CHECK THE MEMORY CARD
- FILE NAME ERROR
- INITIALIZE ONLY USING THE CAMCORDER
- LCD SCREEN HAS BEEN DIMMED USE THE [LCD BACKLIGHT] SETTING TO CHANGE THE BRIGHTNESS
- MAY NOT BE POSSIBLE TO RECORD MOVIES ON THIS MEMORY CARD
- MEMORY CARD IS FULL
- MEMORY CARD IS WRITE-PROTECTED
- NO MEMORY CARD
- NUMBER OF CLIPS ALREADY AT MAXIMUM
- PROCESS TERMINATED WITH ERROR
- RECORDED AT 24.00 HZ/59.94 HZ
- RECORDING WAS STOPPED DUE TO INSUFFICIENT WRITE SPEED OF THE MEMORY CARD
- RECORDING WAS STOPPED
- SOME CLIPS REQUIRE DATA RECOVERY
- TASK IN PROGRESS. DO NOT DISCONNECT THE POWER SOURCE
- TOO MANY PHOTOS. DISCONNECT THE USB CABLE
- UNABLE TO RECOVER DATA
- LIST OF MESSAGES FOR WI-FI FUNCTIONS
- A USER IS ALREADY ACCESSING THE SERVER. TRY AGAIN LATER
- CANNOT CHANGE SETTING
- IP ADDRESS CONFLICT
- MEMORY CARD COVER IS OPEN
- MULTIPLE ACCESS POINTS DETECTED. TRY THE OPERATION AGAIN
- NO ACCESS POINTS FOUND
- UNABLE TO ACCESS CONFIGURATION FILES
- UNABLE TO COMPLETE WPS
- UNABLE TO COMPLETE WPS. TRY THE OPERATION AGAIN
- UNABLE TO CONNECT
- UNABLE TO OBTAIN AN IP ADDRESS
- WI-FI AUTHENTICATION UNSUCCESSFUL
- WI-FI CONNECTION TERMINATED
- WI-FI ERROR. INCORRECT AUTHENTICATION METHOD
- WI-FI ERROR. INCORRECT ENCRYPTION KEY
- WI-FI ERROR. INCORRECT ENCRYPTION METHOD
- WI-FI FUNCTIONS ARE NOT AVAILABLE IN THIS INDEX SCREEN
- WIRELESS COMMUNICATION IS NOT WORKING CORRECTLY
- HANDLING PRECAUTIONS
- CAMCORDER
- LONG-TERM STORAGE
- BATTERY PACK
- DANGER
- TREAT THE BATTERY PACK WITH CARE
- ALWAYS ATTACH THE BATTERY PACK'S PROTECTIVE COVER
- REMAINING BATTERY TIME
- RECORDING MEDIA
- DISPOSAL
- BUILT-IN RECHARGEABLE LITHIUM BATTERY
- LITHIUM BUTTON BATTERY
- MAINTENANCE/OTHERS
- CLEANING
- CAMCORDER BODY
- LENS
- LCD SCREEN
- CONDENSATION
- CONDENSATION MAY FORM IN THE FOLLOWING CASES
- TO AVOID CONDENSATION
- WHEN CONDENSATION IS DETECTED
- USING THE CAMCORDER ABROAD
- POWER SOURCES
- OPTIONAL ACCESSORIES
- USE OF GENUINE CANON ACCESSORIES IS RECOMMENDED
- SPECIFICATIONS
- XC
- SYSTEM
- WI-FI
- AVAILABLE FREQUENCIES AND CHANNELS
- TERMINALS
- POWER/OTHERS
- MA-400 MICROPHONE ADAPTER
- CA-946 AC ADAPTER
- LP-E6N BATTERY PACK
- REFERENCE TABLES
- CHARGING TIMES
- RECORDING AND PLAYBACK TIMES
- A
- B
- C
- D
- E
- F
- G
- H
- L
- M
- N
- P
- R
- S
- T
- U
- V
- W
- X
- Z
- CANON PROFESSIONAL DIGITAL VIDEO EQUIPMENT LIMITED WARRANTY FOR PRODUCTS PURCHASED IN THE UNITED STATES
- CANADA
- CANON PROFESSIONAL DIGITAL VIDEO EQUIPMENT LIMITED WARRANTY FOR PRODUCTS PURCHASED IN CANADA
Brand : CANON
Model : XC15
Category : Camcorder