FTX20K2V1B - Air Conditioning DAIKIN - Free user manual and instructions
Find the device manual for free FTX20K2V1B DAIKIN in PDF.


| Product type | Wall-mounted split air conditioner |
| Brand | Daikin |
| Model | FTX20K2V1B |
| Cooling capacity | 2.0 kW (6800 BTU/h) |
| Heating capacity | 2.5 kW (8500 BTU/h) |
| Power supply | 230 V ~ 50 Hz |
| Indoor unit dimensions (W x H x D) | 700 x 250 x 180 mm |
| Indoor unit weight | 8.5 kg |
| Refrigerant type | R32 |
| Main functions | Cooling, heating, dehumidification, ventilation, night mode, timer |
| Remote control included | Yes, infrared |
| Maintenance | Clean air filters every month |
| Cleaning | Dust the unit with a soft, dry cloth |
| Safety | Unplug the appliance before any maintenance; do not insert objects into the grilles |
| Spare parts | Available from authorized after-sales service |
| Repairability | Repairability index: 8.2/10 (according to energy label) |
| Energy class | A+++ (cooling) / A+ (heating) |
| Warranty | 2 years parts and labor |
Frequently Asked Questions - FTX20K2V1B DAIKIN
User questions about FTX20K2V1B DAIKIN
0 question about this device. Answer the ones you know or ask your own.
Ask a new question about this device
Download the instructions for your Air Conditioning in PDF format for free! Find your manual FTX20K2V1B - DAIKIN and take your electronic device back in hand. On this page are published all the documents necessary for the use of your device. FTX20K2V1B by DAIKIN.
USER MANUAL FTX20K2V1B DAIKIN
DAIKIN ROOM AIR CONDITIONER
OPERATION MANUAL


'Enjoy year-round comfort.
MODELS
R410A
FTX20K2V1B
FTX25K2V1B
FTX35K2V1B
FTX50K2V1B
FTX60K2V1B
FTX71K2V1B
FTX20K5V1B
FTX25K5V1B
FTX35K5V1B

FTXP20K2V1B
FTXP25K2V1B
FTXP35K2V1B
FTXP20K3V1B
FTXP25K3V1B
FTXP35K3V1B
FTXP50K3V1B
FTXP60K3V1B
FTXP71K3V1B
Features
Enhanced comfort and energy savings savings
E
COMFORT AIRFLOW
The airflow direction is upward while in COOL operation, and downward while in HEAT operation. This function prevents cold or warm air from blowing directly on your body. ▶ Page 14

ECONO
This function enables efficient operation by limiting the maximum power consumption. It is useful when using the air conditioner and other electrical devices simultaneously on a shared electrical circuit. ▶ Page 15

Contents
Read Before Operation
Safety Precautions ...... 3
Names of Parts 5
Preparation Before Operation....9
Basic Operation

AUTO · COOL · DRY · HEAT · FAN ONLY Operation ....10

Adjusting the Airflow Rate......12

Adjusting the Airflow Direction ..... 13
Useful Functions

COMFORT AIRFLOW Operation .....14

POWERFUL Operation ....14

ECONO Operation 15
TIMER Operation

ON/OFF TIMER Operation ....16
Multi Connection
Note for Multi System 18
Care
Care and Cleaning......20
When the Need Arises
FAQ 27
Troubleshooting 28
The English text is the original instruction. Other languages are translations of the original instructions.
Safety Precautions

Read the precautions in this manual carefully before operating the unit.

FTXP models are filled with R32 refrigerant.
- Keep this manual where the operator can easily find it.
- Read the precautions in this manual carefully before operating the unit.
- This appliance is intended to be used by expert or trained users in shops, in light industry and on farms, or for commercial and household use by lay persons.
• Sound pressure level is less than 70 dB (A). - The precautions described herein are classified as WARNING and CAUTION. They both contain important information regarding safety. Be sure to observe all precautions without fail.

WARNING
Failure to follow these instructions properly may result in personal injury or loss of life.

CAUTION
Failure to observe these instructions properly may result in property damage or personal injury, which may be serious depending on the circumstances.

Never attempt.

Be sure to follow the instructions.

Be sure to establish an earth connection.
- After reading, keep this manual in a convenient place so that you can refer to it whenever necessary. If the equipment is transferred to a new user, be sure also to hand over the manual.

WARNING

- The appliance must be stored in a room without continuously operating ignition sources (for example: open flames, an operating gas appliance or an operating electric heater).
- In order to avoid fire, explosion or injury, do not operate the unit when harmful gases (e.g. flammable or corrosive) are detected near the unit.
- Be aware that prolonged, direct exposure to cool or warm air from the air conditioner, or to air that is too cool or too warm can be harmful to your physical condition and health.
- Do not place objects, including rods, your fingers, etc., in the air inlet or outlet. Product damage or personal injury may result due to contact with the air conditioner's high-speed fan blades.
- Do not attempt to repair, dismantle, reinstall or modify the air conditioner yourself as this may result in water leakage, electric shocks or fire hazards.
- Do not use flammable spray near the air conditioner, or otherwise fire may result.
- Do not use refrigerant other than the one indicated on the outdoor unit (R410A/R32) when installing, moving or repairing. Using other refrigerants may cause trouble or damage to the unit, and personal injury.
- To avoid electric shocks, do not operate with wet hands.
- Do not wash the air conditioner with water, as this may result in electric shocks or fire.
- Do not place water containers (vases etc.) above the unit, as this may result in electric shocks or fire hazards.

- Beware of fire in case of refrigerant leakage. If the air conditioner is not operating correctly, i.e. not generating cool or warm air, refrigerant leakage could be the cause. Consult your dealer for assistance. The refrigerant within the air conditioner is safe and normally does not leak. However, in the event of a leakage, contact with a naked burner, heater or cooker may result in generation of noxious gas. Do not longer use the air conditioner until a qualified service person confirms that the leakage has been repaired.
- Do not attempt to install or repair the air conditioner yourself. Improper workmanship may result in water leakage, electric shocks or fire hazards. Please contact your local dealer or qualified personnel for installation and maintenance work.
- When the air conditioner is malfunctioning (giving off a burning odour, etc.) turn off power to the unit and contact your local dealer. Continued operation under such circumstances may result in a failure, electric shocks or fire hazards.
- Be sure to install an earth leakage breaker. Failure to install the earth leakage breaker may result in electric shocks or fire.
- Be sure to earth the unit. Do not earth the unit to a utility pipe, lightning conductor or telephone earth lead. Imperfect earthing may result in electric shocks.


CAUTION
- Do not use the air conditioner for purposes other than those for which it is intended. Do not use the air conditioner for cooling precision instruments, food, plants, animals or works of art as this may adversely affect the performance, quality and/or longevity of the object concerned.
Safety Precautions

- Do not expose plants or animals directly to airflow from the unit as this may cause adverse effects.
- Do not place appliances that produce naked flames in places exposed to the airflow from the unit as this may impair combustion of the burner.
- Do not block air inlets nor outlets. Impaired airflow may result in insufficient performance or trouble.
- Do not sit on the outdoor unit, put things on the unit, or pull the unit. Doing so may cause accidents, such as falling or toppling down, thus resulting in injury, product malfunctioning, or product damage.
- Do not place objects that are susceptible to moisture directly beneath the indoor or outdoor units. Under certain conditions, condensation on the main unit or refrigerant pipes, air filter dirt or drain blockage may cause dripping, resulting in fouling or failure of the object concerned.
- After prolonged use, check the unit stand and its mounts for damage. If they are left in a damaged condition, the unit may fall and cause injury.
- To avoid injury, do not touch the air inlet or aluminium fins of the indoor or outdoor units.
- The appliance is not intended for use by unattended young children or infirm persons. Impairment of bodily functions and harm to health may result.
- This appliance can be used by children aged from 8 years and above and persons with reduced physical, sensory or mental capabilities or lack of experience and knowledge if they have been given supervision or instruction concerning use of the appliance in a safe way and understand the hazards involved.
• Children shall not play with the appliance. - Cleaning and user maintenance shall not be made by children without supervision.
- Avoid impacts to the indoor and outdoor units, or otherwise product damage may result.
- Do not place flammable items, such as spray cans, within 1m of the air outlet.
The spray cans may explode as a result of hot air from the indoor or outdoor units. - Be careful not to let pets urinate on the air conditioner. Urination on the air conditioner may result in electric shocks or fire.
- Do not wash the air conditioner with water, as this may result in electric shocks or fire.
- Do not place water containers (vases etc.) above the unit, as this may result in electric shocks or fire hazards.

- To avoid oxygen depletion, ensure that the room is adequately ventilated if equipment such as a burner is used together with the air conditioner.
- Before cleaning, be sure to stop unit operation, turn off the circuit breaker or remove the power cord. Otherwise, an electric shock and injury may result.
- Only connect the air conditioner to the specified power supply circuit. Power supplies other than the one specified may result in electric shocks, overheating and fires.
- Arrange the drain hose to ensure smooth drainage. Imperfect drainage may cause wetting of the building, furniture etc.
- Do not place objects in direct proximity of the outdoor unit and do not let leaves and other debris accumulate around the unit. Leaves are a hotbed for small animals which can enter the unit. Once in the unit, such animals can cause malfunctions, smoke or fire when making contact with electrical parts.
- Do not place objects around the indoor unit.
Doing so may have an adverse influence on the performance, product quality, and life of the air conditioner. - Keep out of children's reach to ensure that they do not play with the appliance.
Installation site.
■ To install the air conditioner in the following types of environments, consult the dealer.
- Places with an oily environment or where steam or soot occurs.
- Salty environment such as coastal areas.
- Places where sulfi de gas occurs such as hot springs.
- Places where snow may block the outdoor unit.
■ Be sure to follow the instructions below.
- The indoor unit is at least 1m away from any television or radio set (unit may cause interference with the picture or sound).
- The drain from the outdoor unit must be discharged to a place of good drainage.
Consider nuisance to your neighbours from noises.
■ For installation, choose a place as described below.
- A place solid enough to bear the weight of the unit which does not amplify the operation noise or vibration.
- A place from where the air discharged from the outdoor unit or the operation noise will not annoy your neighbours.
Electrical work.
- For power supply, be sure to use a separate power circuit dedicated to the air conditioner.
System relocation.
- Relocating the air conditioner requires specialized knowledge and skills. Please consult the dealer if relocation is necessary for moving or remodeling.
Names of Parts
Indoor Unit
- The appearance of the indoor unit may differ between different models.
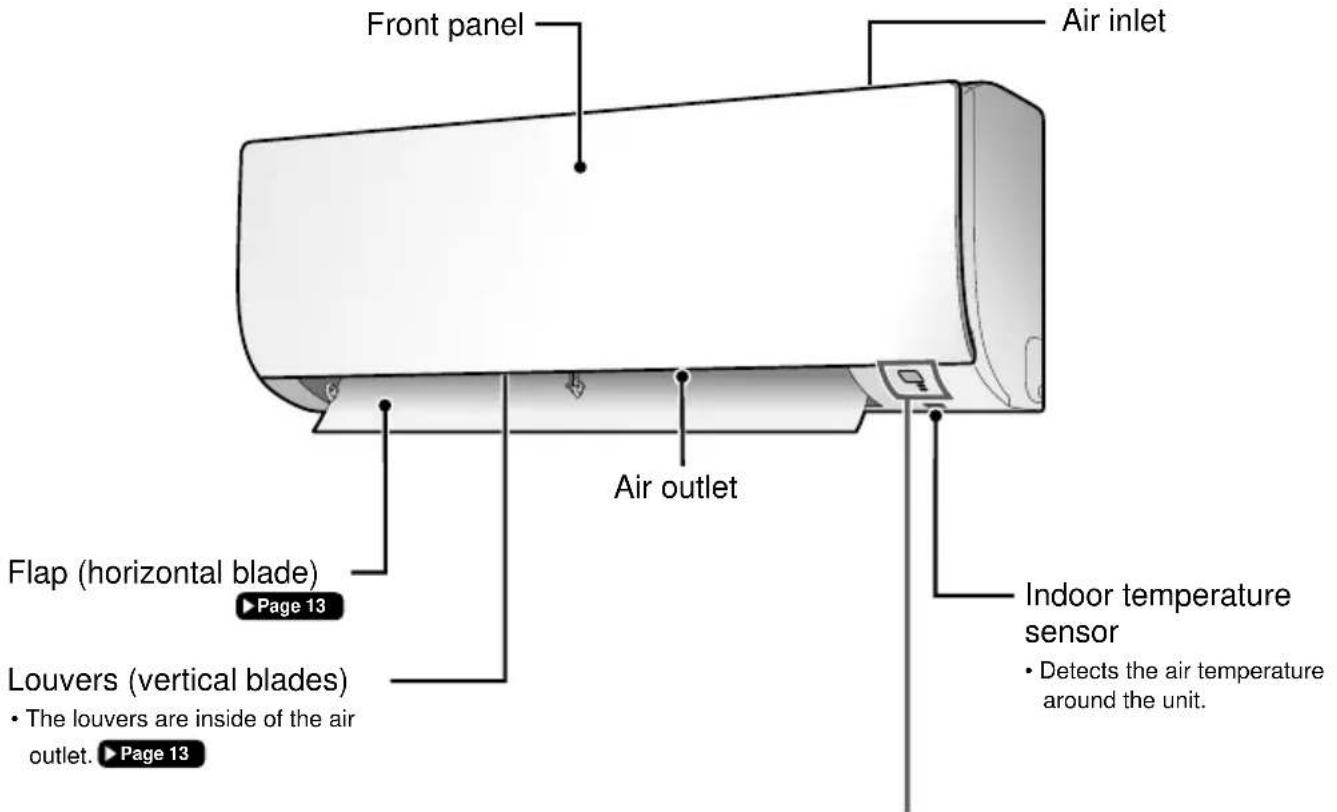
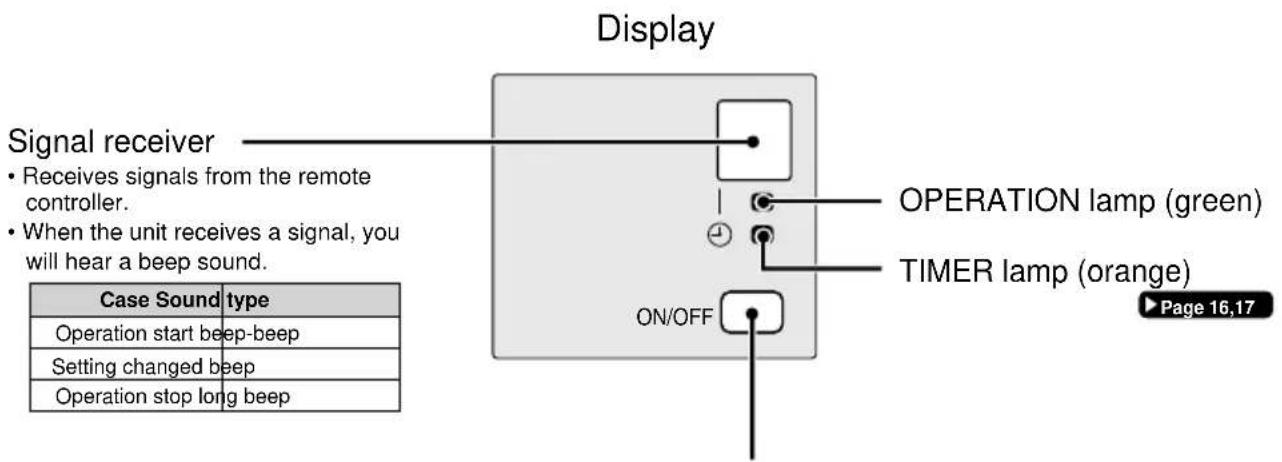
Indoor unit ON/OFF switch
- Press this switch once to start operation. Press once again to stop it.
- For the operation mode setting, refer to the following table.
| Mode Temperature setting Airfl ow rate | |
| AUTO 25°C AUTO | |
- This switch can be used when the remote controller is missing.
Names of Parts
■ FTX20K2V1B / FTX25K2V1B / FTX35K2V1B / FTX20K5V1B / FTX25K5V1B / FTX35K5V1B
■ FTXP20K2V1B / FTXP25K2V1B / FTXP35K2V1B
■ FTXP20K3V1B / FTXP25K3V1B / FTXP35K3V1B
■ Open the front panel
Outdoor Unit
- The appearance of the outdoor unit may differ between different models.

Names of Parts
■ FTX50K2V1B / FTX60K2V1B / FTX71K2V1B
■ FTXP50K3V1B / FTXP60K3V1B / FTXP71K3V1B
■ Open the front panel

Outdoor Unit
- The appearance of the outdoor unit may differ between different models.

Names of Parts
Remote Controller
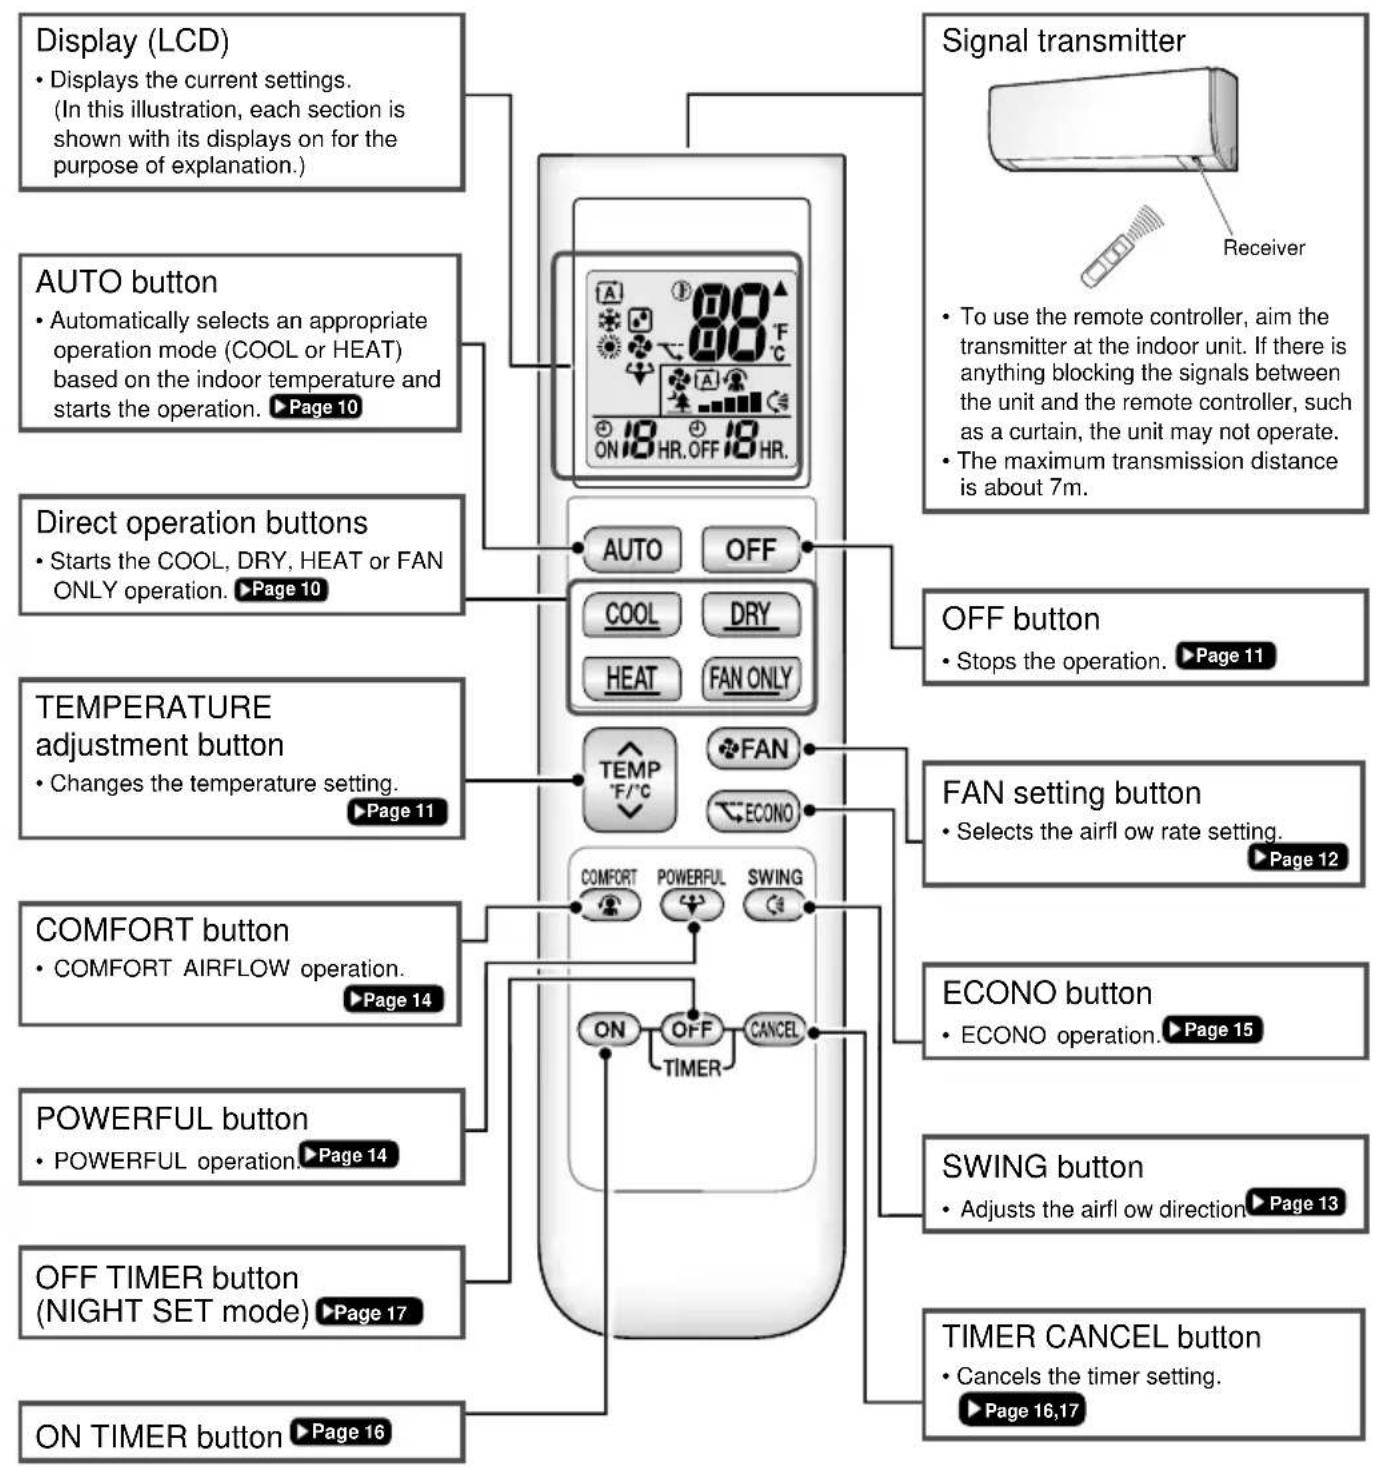
Preparation Before Operation


To insert the batteries
- Remove the back cover by sliding and then slightly lifting it.
- Insert 2 dry batteries AAA.LR03 (alkaline).
- Replace the back cover.
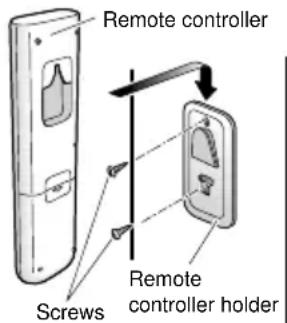
Tofi x the remote controller holder to a wall
- Choose a place where the signals reach the unit.
- Attach the holder to a wall, a pillar, or similar location with the screws supplied with the holder.
- Hang the remote controller on the remote controller holder.
Fahrenheit/Celsius display switch
Press and (TIMER button)
simultaneously for about 5 seconds.
- The temperature will be displayed in Celsius when it is presently displayed in Fahrenheit, and vice versa.
- The switch operation is only possible when the temperature is being displayed.
Turn on the circuit breaker
- After the power is turned on, the flap of the indoor unit opens and closes once to set the reference position.
NOTE
Notes on batteries
- When replacing the batteries, use batteries of the same type, and replace both old batteries together.
- The batteries will last for about 1 year. If the remote controller display begins to fade and the possible transmission range becomes shorter within a year, however, replace both batteries with new, size AAA.LR03 (alkaline).
- The batteries supplied with the remote controller are for initial operation. The batteries may run out in less than 1 year.
Note on remote controller
- Do not drop the remote controller. Do not get it wet.

The air conditioner operates with the operation mode of your choice.
To start operation
AUTO operation
• To automatically select an appropriate temperature and operation mode.
Press AUTO

COOL operation
• To lower the temperature.
Press COOL
DRY operation
• To lower the humidity.
Press .DRY
HEAT operation
• To raise the temperature.
Press HEAT

FAN ONLY operation
• To circulate air in the room.
Press FAN ONLY
• The OPERATION lamp lights green.

Display
NOTE
Notes on AUTO operation
- In AUTO operation, the system selects an appropriate operation mode (COOL or HEAT) based on the indoor temperature and starts the operation.
- The system automatically reselects setting at a regular interval to bring the indoor temperature to the user-setting level.
Note on DRY operation
- Eliminates humidity while maintaining the indoor temperature as much as possible. It automatically controls temperature and airflow rate, so manual adjustment of these functions is unavailable.
• The OPERATION lamp goes off.
To change the temperature setting

Press

- Press to raise the temperature and press to lower the temperature.
| COOL operation H | EAT operation AUTO | O operation DRY or | FAN ONLY operation |
| 18 – 32°C 10 – 30°C | 18 – 30°C | The temperature setting cannot be changed. |
Tips for saving energy
Keeping the temperature setting at a moderate level helps save energy.
- Recommended temperature setting
- For cooling: 26 - 28°C
- For heating: 20 - 24°C
Cover windows with a blind or a curtain.
- Blocking sunlight and air from outdoors increases the cooling (heating) effect.
Keep the air fi Iters clean.
If you are not going to use the air conditioner for a long period, for example in spring or autumn, turn off the circuit breaker.
- Clogged air filters cause inefficient operation and waste energy. Clean them once every 2 weeks.
• The air conditioner always consumes a small amount of electricity even while it is not operating.

Page 21

Adjusting the Airflow Rate

You can adjust the airflow rate to increase your comfort.
To adjust the airflow rate setting
Press FAN
• Each pressing of changes the airflow rate setting in sequence.
![graph LR A["AUTO Indoor unit quiet"] --> B["..."] B --> C["Airflow rate 1-5 (Low to High)"]](/content/2026/06/1325285/images/eadca95d1e4bd4c210c776847acff49bdbf3d4852e818f0952d4e334a0b84fc0.jpg)
- When the airflow is set to “▲”, quiet operation starts and noise from the indoor unit will become quieter.
- In the quiet operation mode, the airflow rate is set to a weak level.

NOTE
Note on airflow rate setting
- At smaller airflow rates, the cooling (heating) effect is also smaller.

Adjusting the Airflow Direction

You can adjust the airflow direction to increase your comfort.

CAUTION
• Always use a remote controller to adjust the angles of the flap. Moving the flap forcibly by hand may cause a malfunction.
- Be careful when adjusting the louvers. Inside the air outlet, a fan is rotating at a high speed.
To start auto swing
Up and down airflow direction
- “C” is displayed on the LCD.
- The flap (horizontal blade) will begin to swing.
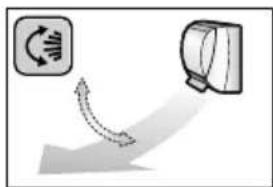
To set the flap at the desired position
- This function is effective while the flap is in auto swing mode.
- Press SWING when the flap reaches the desired position.
- “C disappears from the LCD.
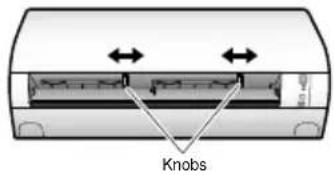
To adjust the louvers at desired position
Hold the knobs and move the louvers (vertical blades).
There is a knob in 2 places.
NOTE
Notes on airflow direction setting
- The movable range of the flap varies according to the operation mode.
- The flap will stop at the upper position when the airflow rate is changed to low during the up and down swing setting.
Movable range of the flap


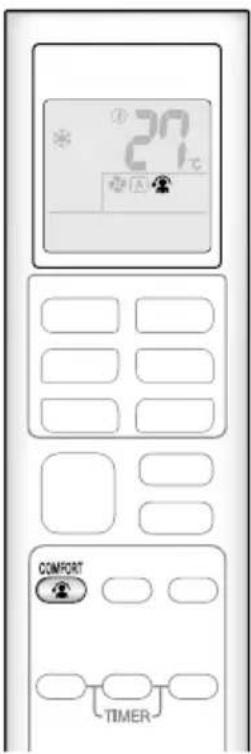
COMFORT AIRFLOW Operation
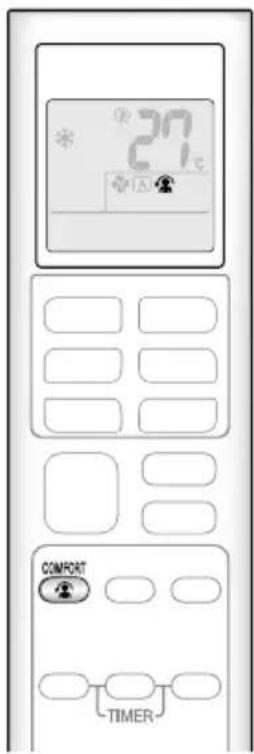
The air direction and flow rate are adjusted so that the air will not blow directly at people in the room.
To start COMFORT AIRFLOW operation

Press

- “ 🎨 ” is displayed on the LCD.
| COOL and DRY operation HEAT operation | |
| Flap direction | Goes up Goes down |
| Airfl ow rate | AUTO |
- Not available in FAN ONLY mode.
To cancel COMFORT AIRFLOW operation

Press

• “💡” disappears from the LCD.
- The flap will return to the memory position from before COMFORT AIRFLOW operation.

POWERFUL Operation
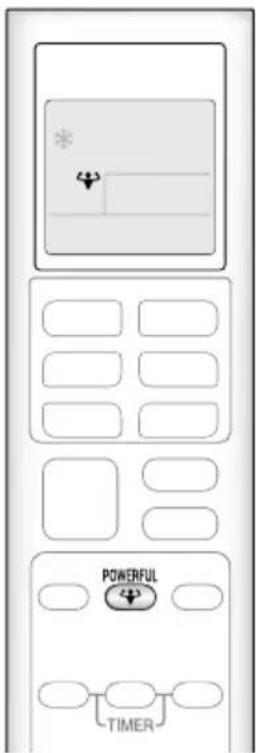
POWERFUL operation quickly maximizes the cooling (heating) effect in any operation mode. In this mode, the air conditioner operates at maximum capacity.
To start POWERFUL operation

Press

• “♥” is displayed on the LCD.
- POWERFUL operation ends in 20 minutes. Then the system automatically operates again with the previous settings which were used before POWERFUL operation.
To cancel POWERFUL operation

Press

- “disappears from the LCD.

ECONO Operation

ECONO operation enables efficient operation by limiting the maximum power consumption.
This function is useful to prevent the circuit breaker from tripping when the unit operates alongside other appliances on the same circuit.
To start ECONO operation
Press

- “▼” is displayed on the LCD.
- Not available in FAN ONLY mode.
To cancel ECONO operation
Press

- “” disappears from the LCD.
NOTE
Note on COMFORT AIRFLOW operation
- If the up and down airflow direction is selected, the COMFORT AIRFLOW operation will be cancelled.
Notes on POWERFUL operation
- Pressing causes the settings to be cancelled, and " " disappears from the LCD.
- POWERFUL operation will not increase the capacity of the air conditioner if the air conditioner is already in operation with its maximum capacity demonstrated.
- In COOL, HEAT and AUTO operation
To maximize the cooling (heating) effect, the capacity of outdoor unit increases and the airflow rate becomes fixed at the maximum setting. The temperature setting cannot be changed.
- In DRY operation
The temperature setting is lowered by 2.5° C and the airflow rate is slightly increased.
- In FAN ONLY operation
The airflow rate is fixed at the maximum setting.
Notes on ECONO operation
- Pressing causes the settings to be cancelled, and " " disappears from the LCD.
- If the power consumption level is already low, switching to ECONO operation will not reduce the power consumption.
Some useful functions can be used together.
| COMFORT AIRFLOW + ECONO Available | |
| POWERFUL + COMFORT AIRFLOW | Not available* |
| POWERFUL + ECONO Not available* | |
*Priority is given to the function of whichever button is pressed last.

ON/OFF TIMER Operation

Timer functions are useful for automatically switching the air conditioner on or off at night or in the morning. You can also use the ON TIMER and OFF TIMER together.
To use ON TIMER operation

Press

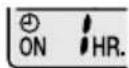

s displayed on the LCD.
• Each pressing of ON advances the time setting by 1 hour. The time can be set between 1 and 12 hours.
• The TIMER lamp lights orange.

Display
To cancel ON TIMER operation

Press

- “ON” disappears from the LCD.
• The TIMER lamp goes off.
NOTE
In the following cases, set the timer again.
• After the circuit breaker has turned off.
• After a power failure.
• After replacing the batteries in the remote controller.
ON/OFF TIMER Operation

To use OFF TIMER operation

Press

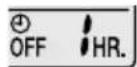
"OFF" is displayed on the LCD.
• Each pressing of OFF advances the time setting by 1 hour. The time can be set between 1 and 12 hours.
• The TIMER lamp lights orange.
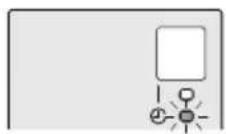
Display
To cancel OFF TIMER operation

Press

- “OFF” disappears from the LCD.
• The TIMER lamp goes off.
To combine ON TIMER and OFF TIMER operation
• A sample setting for combining the 2 timers is shown below.
- “ON” and “OFF” are displayed on the LCD.
[Example]
![DAIKIN FTX20K2V1B - [Example] - 1](/content/2026/06/1325285/images/78a6cd66add6032dc3b4a14bec9ffa9ac14d92e7f578108f69c8ec871e07226e.jpg)
When setting while the unit is operating
- Stops the unit 1 hour later and starts it 7 hours after that.

When setting while the unit is stopped
- Starts the unit 2 hours later and stops it 3 hours after that.
NOTE
NIGHT SET mode
- When the OFF TIMER is set, the air conditioner automatically adjusts the temperature setting (0.5°C up in COOL, 2.0°C down in HEAT) to prevent excessive cooling (heating) during sleeping hours.
Note for Multi System
Multi system has one outdoor unit connected to multiple indoor units.
■ Selecting the operation mode
With the priority room setting present but inactive or not present.
When more than one indoor unit is operating, priority is given to the first unit that was turned on.
In this case, set the units that are turned on later to the same operation mode as the first unit.
Otherwise, they will enter the standby state, and the OPERATION lamp will flash: this does not indicate malfunction.

Outdoor unit
NOTE
■ Notes on operation mode for multi system
• COOL, DRY and FAN operation may be used at the same time.
- AUTO operation automatically selects COOL operation or HEAT operation based on the room temperature.
Therefore, AUTO operation is available when selecting the same operation mode as that of the room with the first unit to be turned on.

CAUTION
- Normally, the operation mode in the room where the unit is first run is given priority, but the following situations are exceptions, so please keep this in mind.
If the operation mode of the first room is FAN operation, then using HEAT operation in any room after this will give priority to HEAT operation. In this situation, the air conditioner running in FAN operation will go on standby, and the OPERATION lamp will flash.
With the priority room setting active.
Refer to priority room setting on the next page.
NIGHT QUIET mode (Available only for COOL operation)
NIGHT QUIET mode requires initial programming during installation. Please consult your retailer or dealer for assistance. NIGHT QUIET mode reduces the operation noise of the outdoor unit during the nighttime hours to prevent annoyance to neighbors.
- The NIGHT QUIET mode is activated when the temperature drops 5°C or more below the highest temperature recorded that day. Therefore, when the temperature difference is less than 5°C , this function will not be activated.
- NIGHT QUIET mode reduces slightly the cooling efficiency of the unit.
Note for Multi System
COOL/HEAT mode lock
The COOL/HEAT mode lock requires initial programming during installation. Please consult your authorized dealer for assistance. The COOL/HEAT mode lock sets the unit forcibly to either COOL or HEAT operation. This function is convenient when you wish to set all indoor units connected to the multi system to the same operation mode.
NOTE
- The COOL/HEAT mode lock cannot be activated together with the priority room setting.
■ Priority room setting
The priority room setting requires initial programming during installation. Please consult your authorized dealer for assistance. The room designated as the priority room takes priority in the following situations.
Operation mode priority
- As the operation mode of the priority room takes precedence, the user can select a different operation mode from other rooms.
[Example]
- Room A is the priority room in the examples.
When COOL operation is selected in room A while operating the following modes in room B, C and D :
| Operation mode in room B, C and D | Status of room B, C and D when the unit in room A is in COOL operation |
| COOL or DRY or FAN | Current operation mode maintained |
| HEAT | The unit enters standby mode. Operation resumes when the room A unit stops operating. |
| AUTO | If the unit is set to COOL operation, it continues. If the unit is set to HEAT operation, it enters standby mode. Operation resumes when the room A unit stops operating. |
Priority when POWERFUL operation is used
[Example]
- Room A is the priority room in the examples.
The indoor units in rooms A, B, C and D are all operating. If the unit in room A enters POWERFUL operation, operation capacity will be concentrated in room A. In such a case, the cooling (heating) efficiency of the units in room B, C and D may be slightly reduced.
Care and Cleaning
■ FTX20K2V1B / FTX25K2V1B / FTX35K2V1B / FTX20K5V1B / FTX25K5V1B / FTX35K5V1B
■ FTXP20K2V1B / FTXP25K2V1B / FTXP35K2V1B
■ FTXP20K3V1B / FTXP25K3V1B / FTXP35K3V1B

CAUTION
- Before cleaning, be sure to stop the operation and turn off the circuit breaker.
- Do not touch the aluminium fins of the indoor unit. If you touch those parts, this may cause an injury.
■ Quick reference
Cleaning parts
Front panel
- Wipe it with a soft damp cloth.
- Only neutral detergent may be used.
If dirty

Air fi Iter
• Vacuum dust or wash the filter.
Once every 2 weeks
Page 21

Indoor unit, outdoor unit and remote controller
- Wipe them with a soft cloth.
If dirty
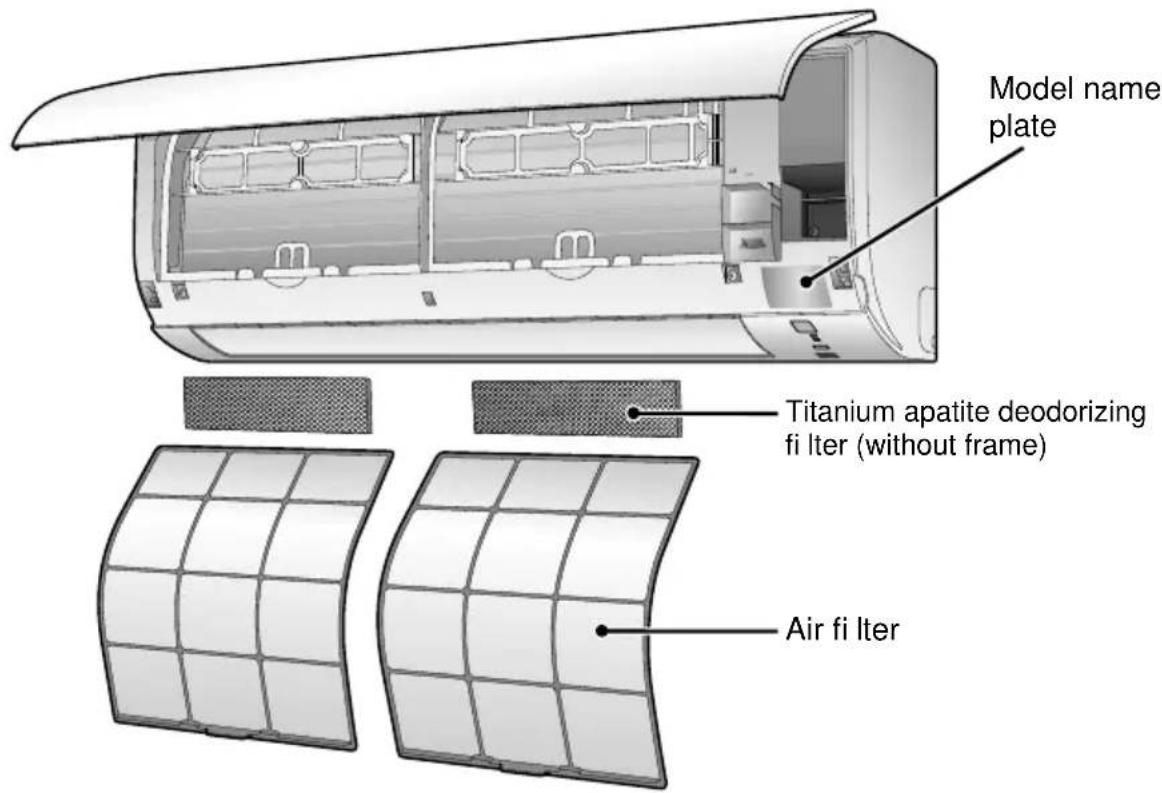
Titanium apatite deodorizing fi Iter (without frame)
• Vacuum dust or replace the filter.
[Cleaning] [Replacement]
Once every 6 months Once every 3 years
Page 22

NOTE
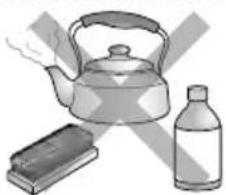
For cleaning, do not use any of the following:
• Water hotter than 40°C
• Volatile liquid such as benzene, petrol and thinner
- Polishing compounds
- Rough materials such as a scrubbing brush
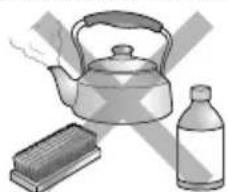
Care and Cleaning
■ FTX20K2V1B / FTX25K2V1B / FTX35K2V1B / FTX20K5V1B / FTX25K5V1B / FTX35K5V1B
■ FTXP20K2V1B / FTXP25K2V1B / FTXP35K2V1B
■ FTXP20K3V1B / FTXP25K3V1B / FTXP35K3V1B
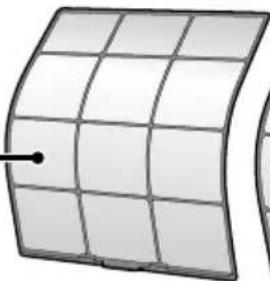
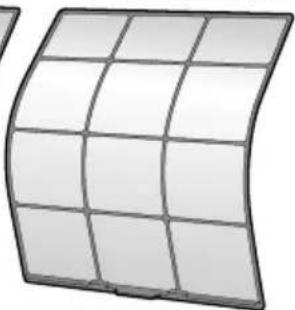
Air fi Iter
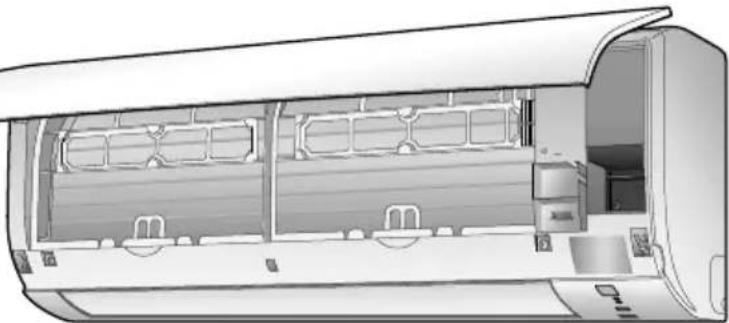
1. Open the front panel.
- Hold the front panel by the sides and open it.
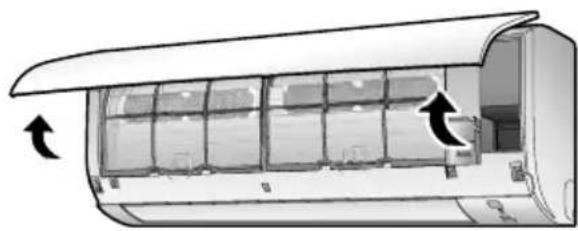
2. Pull out the air fi Iters.
- Push the filter tab at the center of each air filter a little upwards, then pull it down.
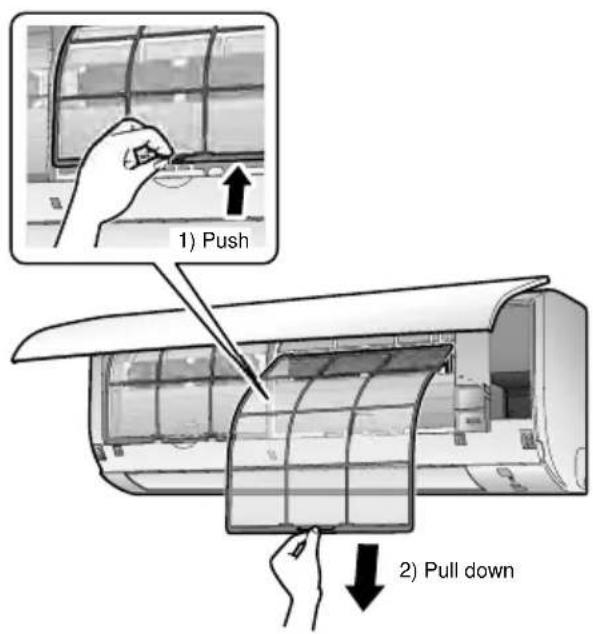
3. Wash the air fi Iters with water or clean them with vacuum cleaner.
- It is recommended to clean the air filters every 2 weeks.
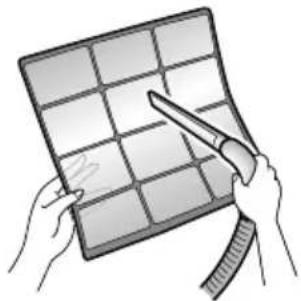
If the dust does not come off easily
- Wash the air filters with neutral detergent thinned with lukewarm water, then dry them up in the shade.

4. Reattach the fi Iters.
5. Close the front panel slowly.
- Press the panel at both sides and the center.
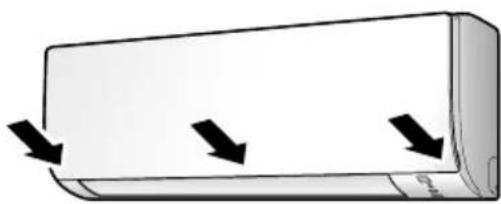
- Make sure that the front panel is securely fixed.
Care and Cleaning
■ FTX20K2V1B / FTX25K2V1B / FTX35K2V1B / FTX20K5V1B / FTX25K5V1B / FTX35K5V1B
■ FTXP20K2V1B / FTXP25K2V1B / FTXP35K2V1B
■ FTXP20K3V1B / FTXP25K3V1B / FTXP35K3V1B
■ Titanium apatite deodorizing fi Iter
-
Open the front panel and pull out the air fi Iters. ▶ Page 21
-
Take off the titanium apatite deodorizing fi Iters.
- Remove the filters from the tabs.

- Clean or replace the titanium apatite deodorizing fi Iters.
[Cleaning]
3-1 Vacuum dust, and soak in lukewarm water or water for about 10 to 15 minutes if very dirty.
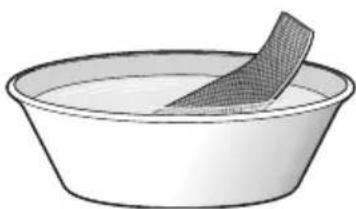
3-2 After washing, shake off remaining water and let them dry in the shade.
- Do not wring out the filter to remove water from it.
[Replacement]
Remove the fi Iter from the tabs and prepare a new one.

- Dispose of the old filter as non-flammable waste.
- Insert the titanium apatite deodorizing fi Iters as they were.
- When attaching the filter, check that the filter is properly set in the tabs.
- Reattach the fi Iters ▶ Page 21
- Close the front panel slowly.
Page 21
NOTE
• Operation with dirty filters:
- cannot deodorize the air,
- cannot clean the air,
- results in poor heating or cooling,
-
may cause odor.
-
Dispose of old filters as non-flammable waste.
• To order a titanium apatite deodorizing filter, contact the dealer where you bought the air conditioner.
| Item | Titanium apatite deodorizing filter 1 set |
| Part No. KAF970A46 | |
Care and Cleaning
■ FTX50K2V1B / FTX60K2V1B / FTX71K2V1B
■ FTXP50K3V1B / FTXP60K3V1B / FTXP71K3V1B

CAUTION
- Before cleaning, be sure to stop the operation and turn off the circuit breaker.
- Do not touch the aluminium fins of the indoor unit. If you touch those parts, this may cause an injury.
■ Quick reference
Cleaning parts

NOTE
For cleaning, do not use any of the following:
• Water hotter than 40°C
• Volatile liquid such as benzene, petrol and thinner
- Polishing compounds
- Rough materials such as a scrubbing brush
Care and Cleaning
■ FTX50K2V1B / FTX60K2V1B / FTX71K2V1B
■ FTXP50K3V1B / FTXP60K3V1B/ FTXP71K3V1B
Air fi Iter
1. Open the front panel.
- Hold the front panel by the sides and open it.

2. Pull out the air fi Iters.
- Push the filter tab at the center of each air filter a little upwards, then pull it down.
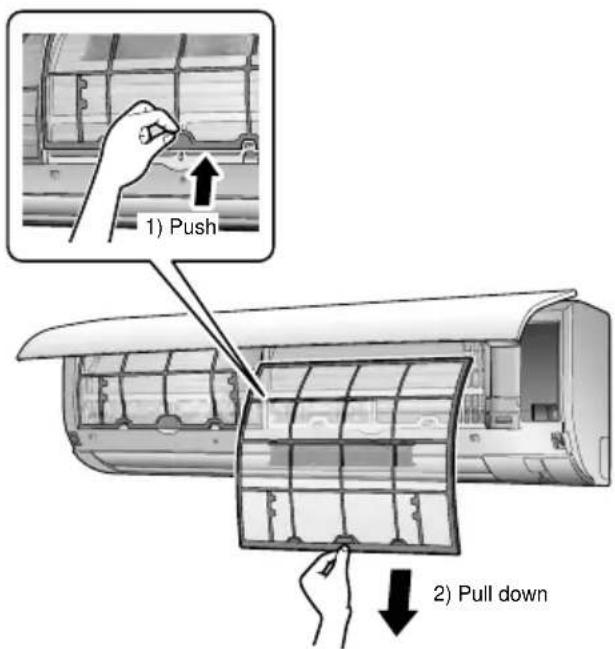
3. Wash the air fi Iters with water or clean them with vacuum cleaner.
- It is recommended to clean the air filters every 2 weeks.

If the dust does not come off easily
- Wash the air fi lters with neutral detergent thinned with lukewarm water, then dry them up in the shade.
- Be sure to remove the titanium apatite deodorizing filter. Refer to "Titanium apatite deodorizing filter" on the next page.

4. Reattach the fi Iters.
5. Close the front panel slowly.
- Press the front panel at both sides and in the central area.

- Make sure that the front panel is securely fixed.
Care and Cleaning
■ FTX50K2V1B / FTX60K2V1B / FTX71K2V1B
■ FTXP50K3V1B / FTXP60K3V1B/ FTXP71K3V1B
■ Titanium apatite deodorizing filter
- Open the front panel and pull out the air fi Iters. ▶ Page 24
- Take off the titanium apatite deodorizing fi Iters.
- Hold the recessed parts of the frame and unhook the 4 claws.
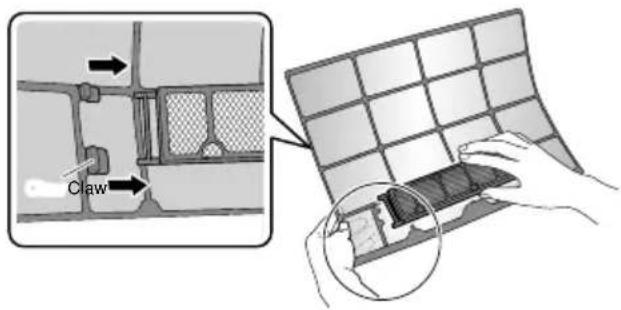
- Clean or replace the titanium apatite deodorizing fi Iters.
[Cleaning]
3-1 Vacuum dust, and soak in lukewarm water or water for about 10 to 15 minutes if very dirty.
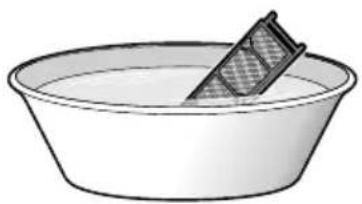
3-2 After washing, shake off remaining water and let them dry in the shade.
- Do not wring out the filter to remove water from it.
[Replacement]
Remove the filter from the filter frame and prepare a new one.
- Do not throw away the filter frame. Reuse the filter frame when replacing the titanium apatite deodorizing filter.

- Dispose of the old filter as non-flammable waste.
-
Insert the titanium apatite deodorizing fi Iters as they were.
-
When attaching the filter, check that the filter is properly set in the tabs.
- Reattach the fi Iters ▶ Page 24
- Close the front panel slowly.
NOTE
• Operation with dirty filters:
- cannot deodorize the air,
- cannot clean the air,
- results in poor heating or cooling,
-
may cause odor.
-
Dispose of old filters as non-flammable waste.
- To order a titanium apatite deodorizing fi lter, contact the dealer where you bought the air conditioner.
| Item | Titanium apatite deodorizing filter 1 set |
| Part No. KAF9 | 70A46 |
Care and Cleaning
■ Prior to a long period of non-use
- Operate the FAN ONLY mode for several hours to dry out the inside.
- Press FAN ONLY
- After operation stops, turn off the circuit breaker for the room air conditioner.
- Take out the batteries from the remote controller.
■ We recommend periodical maintenance
- In certain operating conditions, the inside of the air conditioner may get foul after several seasons of use, resulting in poor performance. It is recommended to have periodical maintenance by a qualified contractor in addition to regular cleaning by the user.
- For qualified contractor maintenance, please contact the dealer where you bought the air conditioner.
Important information regarding the refrigerant used
This product contains fluorinated greenhouse gases. Do not vent gases into the atmosphere.
| FTXP20/25/35K2V1BFTXP20/25/35/50/60/71K3V1B | |
| Refrigerant type | R32 |
| GWP (1) value: | 675 |
| FTX20/25/35/50/60/71K2V1B | |
| Refrigerant type: | R410A |
| GWP (1) value: | 2087.5 |
(1) GWP = global warming potential
Periodical inspections for refrigerant leaks may be required depending on European or local legislation.
Please contact your local dealer for more information.

NOTICE regarding tCO 2 eq
In Europe, the greenhouse gas emissions of the total refrigerant charge in the system (expressed as tonnes CO2 -equivalent) is used to determine the maintenance intervals. Follow the applicable legislation.
Formula to calculate the greenhouse gas emissions:
GWP value of the refrigerant × Total refrigerant charge [in kg] / 1000
FAQ
Indoor unit
The fl ap does not start swinging immediately.
- The air conditioner is adjusting the position of the flap. The flap will start moving soon.
The air conditioner stops generating airflow during operation.
- Once the set temperature is reached, the airflow rate is reduced and operation stopped in order to avoid generating cool airflow (during heating) or in order to keep the humidity from rising (during cooling). Operation will resume automatically when the indoor temperature rises or falls.
HEAT operation stops suddenly and a flowing sound is heard.
- The outdoor unit is defrosting. HEAT operation starts after the frost on the outdoor unit has been removed. This can take about 4 to 12 minutes.
Operation does not start soon.
■ When AUTO or any direct operation button was pressed soon after operation was stopped.
■ When the mode was reselected.
• This is to protect the air conditioner. You should wait for about 3 minutes.
Different sounds are heard.
■ A sound like flowing water
- This sound is generated because the refrigerant in the air conditioner is flowing.
- This is a pumping sound of the water in the air conditioner and can be heard when the water is pumped out from the air conditioner during COOL or DRY operation.
■ Blowing sound
- This sound is generated when the flow of the refrigerant in the air conditioner is switched over.
■ Ticking sound
- This sound is generated when the cabinet and frame of the air conditioner slightly expand or shrink as a result of temperature changes.
■ Whistling sound
- This sound is generated when refrigerant flows during defrosting operation.
■ Clicking sound during operation or idle time
- This sound is generated when the refrigerant control valves or the electrical parts operate.
■ Clopping sound
- This sound is heard from the inside of the air conditioner when the exhaust fan is activated while the room doors are closed. Open the window or turn off the exhaust fan.
Outdoor unit
The outdoor unit emits water or steam.
In HEAT operation
- The frost on the outdoor unit melts into water or steam when the air conditioner is in defrosting operation.
■ In COOL or DRY operation
- Moisture in the air condenses into water on the cool surface of the outdoor unit piping and drips.

Troubleshooting
Before making an inquiry or a request for repair, please check the following. If the problem persists, consult your dealer.

Not a problem
This case is not a problem.

Check
Please check again before requesting repairs.
The air conditioner does not operate
| Case Description / what to check | |
| OPERATION lamp is off. | Has the circuit breaker been tripped or the fuse blown?Is there a power failure?Are batteries set in the remote controller? |
| OPERATION lamp is blinking. | Turn off the power with the circuit breaker and restart operation with the remote controller.If the OPERATION lamp is still blinking, check the error code and consult your dealer. |
The air conditioner suddenly stops operating
| Case Description / what to check | |
| OPERATION lamp is on. | To protect the system, the air conditioner may stop operating after sudden large voltage fluctuations. It automatically resumes operation in about 3 minutes. |
| OPERATION lamp is blinking. | Is there anything blocking the air inlet or air outlet of the indoor unit or outdoor unit? Stop operation and after turning off the circuit breaker, remove the obstruction. Then restart operation with the remote controller. If the OPERATION lamp is still blinking, check the error code and consult your dealer. ▶ Page 31 |
The air conditioner does not stop operating
| Case Description / what to check | |
| The air conditioner continues operating even after operation is stopped. | ☑ Immediately after the air conditioner is stopped• The outdoor unit fan continues rotating for about another 1 minute to protect the system.• While the air conditioner is not in operation• When the outdoor temperature is high, the outdoor unit fan may start rotating to protect the system. |
The room does not cool down / warm up
| Case Description / what to check | |
| Air does not come out. | ☑ In HEAT operationThe air conditioner is warming up. Wait for about 1 to 4 minutes.During defrosting operation, hot air does not flow out of the indoor unit. |
| Air does not come out / Air comes out. | ? Is the airflow rate setting appropriate?Is the airflow rate setting low, such as “Indoor unit quiet” or “Airflow rate 1”? Increase the airflow rate setting.Is the set temperature appropriate?Is the adjustment of the airflow direction appropriate? |
| Air comes out. | ? Is there any furniture directly under or beside the indoor unit?Is the air conditioner in ECONO operation? ▶Page 15Are the air fi Iters dirty?Is there anything blocking the air inlet or air outlet of the indoor unit or outdoor unit?Is a window or door open?Is an exhaust fan turning? |
Troubleshooting
Mist comes out
| Case Description / w | what to check |
| Mist comes out of the indoor unit. | [3ADS] • This happens when the air in the room is cooled into mist by the cold airflow during COOL or other operation. |
Remote controller
| Case Description / what to check | |
| The unit does not receive signals from the remote controller or has a limited operating range. |  · The batteries may be exhausted.Replace both batteries with new dry batteries AAA.LR03 (alkaline).For details, refer to “Preparation Before Operation”. ▶Page 9Signal communication may be disabled if an electronic-starter-type fluorescent lamp (such as inverter-type lamps) is in the room. Consult your dealer if that is the case.The remote controller may not function correctly if the transmitter is exposed to direct sunlight. · The batteries may be exhausted.Replace both batteries with new dry batteries AAA.LR03 (alkaline).For details, refer to “Preparation Before Operation”. ▶Page 9Signal communication may be disabled if an electronic-starter-type fluorescent lamp (such as inverter-type lamps) is in the room. Consult your dealer if that is the case.The remote controller may not function correctly if the transmitter is exposed to direct sunlight. |
| LCD is faint, is not working, or the display is erratic. |  · The batteries may be exhausted.Replace both batteries with new dry batteries AAA.LR03 (alkaline).For details, refer to “Preparation Before Operation”. ▶Page 9 · The batteries may be exhausted.Replace both batteries with new dry batteries AAA.LR03 (alkaline).For details, refer to “Preparation Before Operation”. ▶Page 9 |
| Other electric devices start operating. | [3C4Y] · If the remote controller activates other electric devices, move them away or consult your dealer. |
Air has an odor
| Case Description / what to check | |
| The air conditioner gives off an odor. | The room odor absorbed in the unit is discharged with the airflow.We recommend you to have the indoor unit cleaned. Please consult your dealer. |
Others
| Case Description / what to check | |
| The air conditioner suddenly starts behaving strangely during operation. | ? The air conditioner may malfunction due to lightning or radio.If the air conditioner malfunctions, turn off the power with the circuit breaker and restart the operation with the remote controller. |
Notes on the operating conditions
- If operation continues under any conditions other than those listed in the table,
- A safety device may activate to stop the operation.
- Dew may form on the indoor unit and drip from it when COOL or DRY operation is selected.
| Mode Operating conditions | |
| COOL / DRY | Outdoor temperature: -10 – 46°CIndoor temperature: 18 – 32°CIndoor humidity: 80% max. |
| HEAT | Outdoor temperature: -15 – 24°CIndoor temperature: 10 – 30°C |
Troubleshooting
■ Call the service shop immediately

WARNING
When an abnormality (such as a burning smell) occurs, stop operation and turn off the circuit breaker.
- Continued operation in an abnormal condition may result in troubles, electric shocks or fire.
- Consult the service shop where you bought the air conditioner.
Do not attempt to repair or modify the air conditioner by yourself.
- Incorrect work may result in electric shocks or fire.
- Consult the service shop where you bought the air conditioner.
If one of the following symptoms takes place, call the service shop immediately.
- The power cord is abnormally hot or damaged.
- An abnormal sound is heard during operation.
- The safety breaker, a fuse, or the earth leakage breaker cuts off the operation frequently.
- A switch or a button often fails to work properly.
• There is a burning smell.
• Water leaks from the indoor unit.
Turn the breaker off and call the service shop.

■ After a power failure
- The air conditioner automatically resumes operation in about 3 minutes. You should just wait for a while.
Lightning
- If lightning may strike the neighbouring area, stop operation and turn the breaker off for system protection.
■ Disposal requirements

Your product and the batteries supplied with the controller are marked with this symbol. This symbol means that electrical and electronic products and batteries shall not be mixed with unsorted household waste.
For batteries, a chemical symbol can be printed beneath the symbol. This chemical symbol means that the battery contains a heavy metal above a certain concentration. Possible chemical symbols are:
■Pb: lead (>0.004%)
Do not try to dismantle the system yourself: the dismantling of the product, treatment of the refrigerant, of oil and of other parts must be done by a qualified installer in accordance with relevant local and national legislation.
Units and waste batteries must be treated at a specialized treatment facility for re-use, recycling and recovery.
By ensuring correct disposal, you will help to prevent potential negative consequences for the environment and human health.
Please contact the installer or local authority for more information. Dismantling of the unit, handling of the refrigerant, oil and other parts, should be done in accordance with the relevant local and national regulations.
Troubleshooting
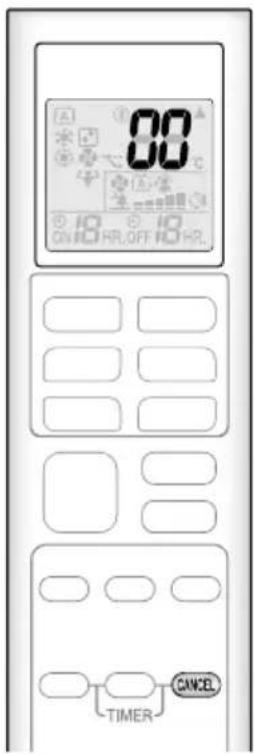
■ Fault diagnosis by remote controller
- The remote controller can receive relevant error codes from the indoor unit.
-
When CANCE is held down for about 5 seconds, “00” blinks in the temperature display section.
-
Press repeatedly until a continuous beep is produced.
- The code indication changes as shown below, and notifies you with a long beep.
| CODE | MEANING | |
| SYSTEM | 00 | NORMAL |
| UA | INDOOR-OUTDOOR UNIT COMBINATION FAULT | |
| U0 | REFRIGERANT SHORTAGE | |
| U2 | DROP VOLTAGE OR MAIN CIRCUIT OVERVOLTAGE | |
| U4 | FAILURE OF TRANSMISSION (BETWEEN INDOOR UNIT AND OUTDOOR UNIT) | |
| INDOOR UNIT | A1 | INDOOR PCB DEFECTIVENESS |
| A5 | HIGH PRESSURE CONTROL OR FREEZE-UP PROTECTOR | |
| A6 | FAN MOTOR FAULT | |
| C4 | FAULTY HEAT EXCHANGER TEMPERATURE SENSOR | |
| C9 | FAULTY SUCTION AIR TEMPERATURE SENSOR | |
| OUTDOOR UNIT | EA | COOLING-HEATING SWITCHING ERROR |
| E1 | CIRCUIT BOARD FAULT | |
| E5 | OL STARTED | |
| E6 | FAULTY COMPRESSOR START UP | |
| E7 | DC FAN MOTOR FAULT | |
| E8 | OVERCURRENT INPUT | |
| F3 | HIGH TEMPERATURE DISCHARGE PIPE CONTROL | |
| F6 | HIGH PRESSURE CONTROL (IN COOLING) | |
| H0 | SENSOR FAULT | |
| H6 | OPERATION HALT DUE TO FAULTY POSITION DETECTION SENSOR | |
| H8 | DC CURRENT SENSOR FAULT | |
| H9 | FAULTY SUCTION AIR TEMPERATURE SENSOR | |
| J3 | FAULTY DISCHARGE PIPE TEMPERATURE SENSOR | |
| J6 | FAULTY HEAT EXCHANGER TEMPERATURE SENSOR | |
| L3 | ELECTRICAL PARTS HEAT FAULT | |
| L4 | HIGH TEMPERATURE AT INVERTER CIRCUIT HEATSINK | |
| L5 | OUTPUT OVERCURRENT | |
| P4 | FAULTY INVERTER CIRCUIT HEATSINK TEMPERATURE SENSOR |
NOTE
• A short beep indicates non-corresponding codes.
• To cancel the code display, hold (CANCEL) down for about 5 seconds. The code display also clears if no button is pressed for 1 minute.
Troubleshooting
■ LED ON OUTDOOR UNIT PCB
2MXM series
| GREEN | |
| MICROCOMPUTER NORMAL | |
| LED-A DIAGNOSIS | |
| ☀️ | NORMAL→CHECK INDOOR UNIT |
| ❄️ | [NOTE 1] |
| ● | POWER SUPPLY FAULT OR [NOTE 2] |
| GREEN | NORMALLY FLASHING |
| ☀️ | ON |
| ☀️ | FLASHING |
| ● | OFF |
NOTE
- Turn the power off and then on again. If the LED display recurs, the outdoor unit PCB is faulty.
- Diagnosis marked
Do not apply to some cases. For details, refer to the service guide.
Funktionen

Seite 21


COURANT D'AIR CONFORTABLE
Mode COURANT D'AIR CONFORTABLE ....14

Mode PUISSANT 14

Mode ÉCONO 15
Mode MINUTERIE

Raccordement multiple
Page 21
Mode COURANT D'AIR CONFORTABLE


Inhoud

De klep in de gewenste stand instellen
- Zuig de filter schoon of was hem.


Zorg en reiniging
■ FTX20K2V1B / FTX25K2V1B / FTX35K2V1B / FTX20K5V1B / FTX25K5V1B / FTX35K5V1B
■ FTXP20K2V1B / FTXP25K2V1B / FTXP35K2V1B
■ FTXP20K3V1B / FTXP25K3V1B / FTXP35K3V1B
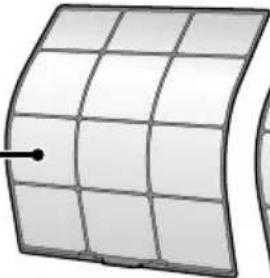
■ Luchtfi Iter
2. Neem de luchtfi Iters eruit.
Zorg en reiniging
■ FTX50K2V1B / FTX60K2V1B / FTX71K2V1B
■ FTXP50K3V1B / FTXP60K3V1B / FTXP71K3V1B
Luchtfi Iter
2. Neem de luchtfi Iters eruit.
■ In standen KOELEN of DROGEN
Storingen opsporen en oplossen
Contenidos
Leer antes de utilizar
Unidad exterior
NOTA


Filtro de aire
Cuidados y limpieza
■ FTX20K2V1B / FTX25K2V1B / FTX35K2V1B / FTX20K5V1B / FTX25K5V1B / FTX35K5V1B
■ FTXP20K2V1B / FTXP25K2V1B / FTXP35K2V1B
■ FTXP20K3V1B / FTXP25K3V1B / FTXP35K3V1B
■ Filtro de aire
2. Extraiga los fi Itros de aire.
Cuidados y limpieza
■ FTX50K2V1B / FTX60K2V1B / FTX71K2V1B
■ FTXP50K3V1B / FTXP60K3V1B / FTXP71K3V1B
■ Filtro de aire
2. Extraiga los fi Itros de aire.
▶ Pagina 21
Unità esterna
NOTA


Filtro aria
Cura e pulizia
■ FTX20K2V1B / FTX25K2V1B / FTX35K2V1B / FTX20K5V1B / FTX25K5V1B / FTX35K5V1B
■ FTXP20K2V1B / FTXP25K2V1B / FTXP35K2V1B
■ FTXP20K3V1B / FTXP25K3V1B / FTXP35K3V1B
■ Filtro aria
2. Estrarre i fi ltri aria.
4. Rimontare i fi ltri.
Cura e pulizia
■ FTX50K2V1B / FTX60K2V1B / FTX71K2V1B
■ FTXP50K3V1B / FTXP60K3V1B / FTXP71K3V1B
■ Filtro aria
2. Estrarre i fi ltri aria.
4. Rimontare i fi ltri.
Περιεχόμενα



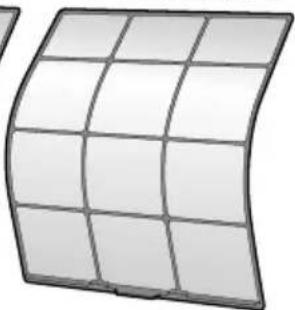
Φίλτρο αέρα
Ler Antes de Utilizar
Mantenha os fi Itros de ar limpos.
Unidade de exterior
NOTA


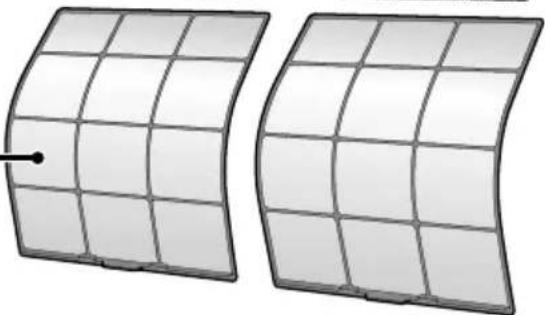
Filtro de ar
- Aspire o pó ou lave o fi itro.
A cada 2 semanas
Página 21
Cuidados e limpeza
■ FTX20K2V1B / FTX25K2V1B / FTX35K2V1B / FTX20K5V1B / FTX25K5V1B / FTX35K5V1B
■ FTXP20K2V1B / FTXP25K2V1B / FTXP35K2V1B
■ FTXP20K3V1B / FTXP25K3V1B / FTXP35K3V1B
■ Filtro de ar
1. Abra o painel frontal.
2. Extraia os fi Itros de ar.
- Limpe ou substitua os fi Itros desodorizantes de apatite de titânio.
[Limpeza]
Cuidados e limpeza
■ FTX50K2V1B / FTX60K2V1B / FTX71K2V1B
■ FTXP50K3V1B / FTXP60K3V1B / FTXP71K3V1B
■ Filtro de ar
1. Abra o painel frontal.
2. Extraia os fi Itros de ar.
4. Volte a colocar os fi ltros.
5. Feche lentamente o painel frontal.
Наружный агрегат
ПРИМЕЧАНИЕ


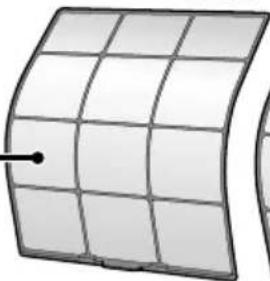
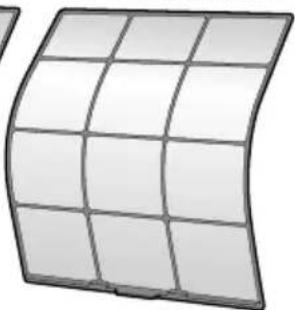
Воздушный фильтр
Уход и очистка
■ FTX20K2V1B / FTX25K2V1B / FTX35K2V1B / FTX20K5V1B / FTX25K5V1B / FTX35K5V1B
■ FTXP20K2V1B / FTXP25K2V1B / FTXP35K2V1B
■ FTXP20K3V1B / FTXP25K3V1B / FTXP35K3V1B
■ Воздушный фильтр
Уход и очистка
■ FTX50K2V1B / FTX60K2V1B / FTX71K2V1B
■ FTXP50K3V1B / FTXP60K3V1B / FTXP71K3V1B
■ Воздушный фильтр
içindekiler


Hava fi ltresi
Bakım ve Temizlik
■ FTX20K2V1B / FTX25K2V1B / FTX35K2V1B / FTX20K5V1B / FTX25K5V1B / FTX35K5V1B
■ FTXP20K2V1B / FTXP25K2V1B / FTXP35K2V1B
■ FTXP20K3V1B / FTXP25K3V1B / FTXP35K3V1B
■ Hava fi ltresi
1. Ön paneli açın.

Bakım ve Temizlik
■ FTX50K2V1B / FTX60K2V1B / FTX71K2V1B
■ FTXP50K3V1B / FTXP60K3V1B / FTXP71K3V1B
■ Hava fi ltresi
1. Ön paneli açın.
Sorun Giderme


- DAIKIN ROOM AIR CONDITIONER
- OPERATION MANUAL
- MODELS
- FEATURES
- ENHANCED COMFORT AND ENERGY SAVINGS SAVINGS
- COMFORT AIRFLOW
- ECONO
- CONTENTS
- READ BEFORE OPERATION
- BASIC OPERATION
- USEFUL FUNCTIONS
- TIMER OPERATION
- MULTI CONNECTION
- CARE
- WHEN THE NEED ARISES
- SAFETY PRECAUTIONS
- WARNING
- CAUTION
- INSTALLATION SITE
- CONSIDER NUISANCE TO YOUR NEIGHBOURS FROM NOISES
- ELECTRICAL WORK
- SYSTEM RELOCATION
- NAMES OF PARTS
- INDOOR UNIT
- INDOOR UNIT ON/OFF SWITCH
- OUTDOOR UNIT
- REMOTE CONTROLLER
- PREPARATION BEFORE OPERATION
- TO INSERT THE BATTERIES
- TOFI X THE REMOTE CONTROLLER HOLDER TO A WALL
- FAHRENHEIT/CELSIUS DISPLAY SWITCH
- TURN ON THE CIRCUIT BREAKER
- NOTE
- NOTES ON BATTERIES
- NOTE ON REMOTE CONTROLLER
- TO START OPERATION
- AUTO OPERATION
- COOL OPERATION
- DRY OPERATION
- HEAT OPERATION
- FAN ONLY OPERATION
- NOTES ON AUTO OPERATION
- NOTE ON DRY OPERATION
- TO CHANGE THE TEMPERATURE SETTING
- TIPS FOR SAVING ENERGY
- ADJUSTING THE AIRFLOW RATE
- TO ADJUST THE AIRFLOW RATE SETTING
- PRESS FAN
- NOTE ON AIRFLOW RATE SETTING
- ADJUSTING THE AIRFLOW DIRECTION
- TO START AUTO SWING
- TO SET THE FLAP AT THE DESIRED POSITION
- TO ADJUST THE LOUVERS AT DESIRED POSITION
- HOLD THE KNOBS AND MOVE THE LOUVERS (VERTICAL BLADES)
- NOTES ON AIRFLOW DIRECTION SETTING
- COMFORT AIRFLOW OPERATION
- TO START COMFORT AIRFLOW OPERATION
- PRESS
- TO CANCEL COMFORT AIRFLOW OPERATION
- POWERFUL OPERATION
- TO START POWERFUL OPERATION
- TO CANCEL POWERFUL OPERATION
- ECONO OPERATION
- TO START ECONO OPERATION
- TO CANCEL ECONO OPERATION
- NOTE ON COMFORT AIRFLOW OPERATION
- NOTES ON POWERFUL OPERATION
- NOTES ON ECONO OPERATION
- SOME USEFUL FUNCTIONS CAN BE USED TOGETHER
- ON/OFF TIMER OPERATION
- TO USE ON TIMER OPERATION
- TO CANCEL ON TIMER OPERATION
- TO USE OFF TIMER OPERATION
- TO CANCEL OFF TIMER OPERATION
- TO COMBINE ON TIMER AND OFF TIMER OPERATION
- [EXAMPLE]
- WHEN SETTING WHILE THE UNIT IS OPERATING
- WHEN SETTING WHILE THE UNIT IS STOPPED
- NIGHT SET MODE
- NOTE FOR MULTI SYSTEM
- SELECTING THE OPERATION MODE
- NIGHT QUIET MODE (AVAILABLE ONLY FOR COOL OPERATION)
- COOL/HEAT MODE LOCK
- PRIORITY ROOM SETTING
- OPERATION MODE PRIORITY
- PRIORITY WHEN POWERFUL OPERATION IS USED
- CARE AND CLEANING
- QUICK REFERENCE
- CLEANING PARTS
- FRONT PANEL
- AIR FI ITER
- INDOOR UNIT, OUTDOOR UNIT AND REMOTE CONTROLLER
- TITANIUM APATITE DEODORIZING FI ITER (WITHOUT FRAME)
- OPEN THE FRONT PANEL
- PULL OUT THE AIR FI ITERS
- WASH THE AIR FI ITERS WITH WATER OR CLEAN THEM WITH VACUUM CLEANER
- IF THE DUST DOES NOT COME OFF EASILY
- REATTACH THE FI ITERS
- CLOSE THE FRONT PANEL SLOWLY
- IMPORTANT INFORMATION REGARDING THE REFRIGERANT USED
- FAQ
- THE FL AP DOES NOT START SWINGING IMMEDIATELY
- THE AIR CONDITIONER STOPS GENERATING AIRFLOW DURING OPERATION
- HEAT OPERATION STOPS SUDDENLY AND A FLOWING SOUND IS HEARD
- OPERATION DOES NOT START SOON
- DIFFERENT SOUNDS ARE HEARD
- A SOUND LIKE FLOWING WATER
- BLOWING SOUND
- TICKING SOUND
- WHISTLING SOUND
- CLICKING SOUND DURING OPERATION OR IDLE TIME
- CLOPPING SOUND
- THE OUTDOOR UNIT EMITS WATER OR STEAM
- IN HEAT OPERATION
- IN COOL OR DRY OPERATION
- TROUBLESHOOTING
- NOT A PROBLEM
- CHECK
- NOTES ON THE OPERATING CONDITIONS
- LED ON OUTDOOR UNIT PCB
- 2MXM SERIES
- FUNKTIONEN
- COURANT D'AIR CONFORTABLE
- MODE MINUTERIE
- RACCORDEMENT MULTIPLE
- MODE COURANT D'AIR CONFORTABLE
- INHOUD
- DE KLEP IN DE GEWENSTE STAND INSTELLEN
- ZORG EN REINIGING
- NEEM DE LUCHTFI ITERS ERUIT
- LUCHTFI ITER
- STORINGEN OPSPOREN EN OPLOSSEN
- CONTENIDOS
- LEER ANTES DE UTILIZAR
- NOTA
- FILTRO DE AIRE
- CUIDADOS Y LIMPIEZA
- EXTRAIGA LOS FI ITROS DE AIRE
- FILTRO ARIA
- CURA E PULIZIA
- ESTRARRE I FI LTRI ARIA
- RIMONTARE I FI LTRI
- ΠΕΡΙΕΧΌΜΕΝΑ
- ΦΊΛΤΡΟ ΑΈΡΑ
- LER ANTES DE UTILIZAR
- FILTRO DE AR
- CUIDADOS E LIMPEZA
- ABRA O PAINEL FRONTAL
- EXTRAIA OS FI ITROS DE AR
- VOLTE A COLOCAR OS FI LTROS
- FECHE LENTAMENTE O PAINEL FRONTAL
- ПРИМЕЧАНИЕ
- ВОЗДУШНЫЙ ФИЛЬТР
- УХОД И ОЧИСТКА
- IÇINDEKILER
- HAVA FI LTRESI
- BAKIM VE TEMIZLIK
- ÖN PANELI AÇIN
- SORUN GIDERME
Brand : DAIKIN
Model : FTX20K2V1B
Category : Air Conditioning