
KWT 6722 IGS - Wine cellar MIELE - Free user manual and instructions
Find the device manual for free KWT 6722 IGS MIELE in PDF.


| Product Type | Built-in Wine Cellar |
| Model | KWT 6722 IGS |
| Brand | Miele |
| Total Bottle Capacity | 46 bottles (standard 0.75 L) |
| Number of Temperature Zones | 2 |
| Temperature Range (Top Zone) | +5 °C to +12 °C |
| Temperature Range (Bottom Zone) | +5 °C to +12 °C |
| Dimensions (H x W x D) | 177.8 cm x 59.2 cm x 57.5 cm |
| Weight (Unpacked) | 48 kg |
| Energy Consumption (Annual) | 145 kWh |
| Noise Level | 35 dB(A) |
| Power Supply | 220–240 V, 50 Hz, 10 A |
| Installation Type | Built-in (under counter or column) |
| Door Type | Solid door, reversible hinge |
| Interior Light | LED, dynamic with motion sensor |
| Active Carbon Filter | Yes, for odor adsorption |
| UV Protection | Tinted glass door (optional) |
| Vibration Reduction | Compressor with anti-vibration mount |
| Shelves | 5 wooden shelves, slide-out |
| Child Lock | Yes, via control panel |
| Automatic Defrost | Yes |
| Maintenance | Clean condenser annually; interior with mild soap |
| Warranty | 2 years (extendable) |
| Spare Parts Availability | Original Miele parts via authorized dealers |
Frequently Asked Questions - KWT 6722 IGS MIELE
User questions about KWT 6722 IGS MIELE
0 question about this device. Answer the ones you know or ask your own.
Ask a new question about this device
Download the instructions for your Wine cellar in PDF format for free! Find your manual KWT 6722 IGS - MIELE and take your electronic device back in hand. On this page are published all the documents necessary for the use of your device. KWT 6722 IGS by MIELE.
USER MANUAL KWT 6722 IGS MIELE
Operating and installation instructions Wine conditioning unit

To avoid the risk of accidents or damage to the appliance it is essential to read these instructions before it is installed and used for the first time.
Warning and Safety instructions.... 5
Caring for the environment 13
How to save energy.... 14
Guide to the appliance.... 15
Symbols.... 16
Door opening mechanism 18
Accessories 19
Accessories supplied 19
Optional accessories.... 19
Switching on and off 20
Before using for the first time.... 20
Operating the wine conditioning unit 20
Switching on.... 20
Switching off.... 21
Switching off for longer periods of time 22
Selecting further settings 23
Safety lock 🔒 23
Audible tones ♪...... 24
Display brightness ⚙ 25
The optimum temperature and air quality.... 26
The optimum temperature.... 26
Setting the temperature.... 27
Temperature range 28
Temperature display 28
Air quality and humidity.... 29
DynaCool (constant humidity) ⚠ 29
Air filtration with the Active AirClean filter 30
Temperature and door alarm.... 31
Feature lighting.... 33
Switching the feature lighting on and off.... 33
Setting the brightness of the feature lighting 33
Lighting duration of the feature lighting 34
Storing wine bottles 36
Wooden shelves.... 36
Moving the wooden shelves.... 37
Adjusting the wooden shelves 38
Annotating wooden shelves 38
3D bottle presenter.... 39
Maximum capacity 40
SommelierSet 43
Setting up the SommelierSet 43
Fitting the runner covers 43
Inserting the glassware holder 44
Inserting the bottle holder 44
Automatic defrosting 45
Cleaning and care 46
Cleaning agents.... 46
Before cleaning 47
Interior, appliance door and accessories 47
Cleaning the ventilation gaps 48
Cleaning the door seal 48
Active AirClean filters 49
Replacing the Active AirClean filter.... 49
Problem solving guide 51
Noises....56
After sales service.... 57
Contact in case of malfunction 57
Warranty 57
Information for dealers 58
Demo mode 58
Electrical connection 60
Installation.... 61
Location.... 62
Load-bearing capacity of the niche floor 62
Climate range 63
Side-by-side 64
Ventilation 64
Before installing the wine conditioning unit.... 66
Contents
Door opening angle limiter 66
Building-in dimensions 66
Adjusting the door hinges 67
Changing the door hinging.... 68
Installing the wine conditioning unit.... 75
Preparing the wine unit.... 76
Installing the wine unit.... 80
This wine conditioning unit complies with all statutory safety requirements. Please note that inappropriate use can lead to personal injury and damage to property.
To avoid the risk of accidents and damage to the appliance, please read these instructions carefully before using it for the first time. They contain important notes on installation, safety, use and maintenance.
Miele cannot be held liable for non-compliance with these instructions.
Keep these instructions in a safe place and ensure that new users are familiar with the contents. Pass them on to any future owner.

Danger from broken glass!
If installed at altitudes above 1500 m there is a risk of the glass in the door breaking because of changes in air pressure.
Shards of glass can cause severe injury.
Correct application
This wine conditioning unit is intended for use in the home and in similar environments, for example
– in shops, offices and similar work settings
– by the guests in hotels, motels, bed & breakfasts and other typical home settings.
This wine conditioning unit is not intended for outdoor use.
The wine conditioning unit is intended for domestic use only for storing wine.
It must not be used for any other purpose.
The wine conditioning unit is not suitable for storing and keeping cool medicines, blood plasma, laboratory preparations or other such materials or products. Incorrect use of the wine conditioning unit for such purposes can cause deterioration of the items stored. The wine conditioning unit is not suitable for use in areas where there is a risk of explosion.
Miele cannot be held liable for damage resulting from improper or incorrect use of the appliance.
The wine conditioning unit can only be used by people with reduced physical, sensory or mental capabilities, or lack of experience and knowledge, if they are supervised whilst using it, or have been shown how to use it in a safe way and recognise and understand the consequences of incorrect operation.
Safety with children
Children under 8 years of age must be kept away from the wine conditioning unit unless they are constantly supervised.
Children 8 years and older may only use the wine conditioning unit unsupervised if they have been shown how to use it safely and recognise and understand the consequences of incorrect operation.
Children must not be allowed to clean or maintain the wine conditioning unit unsupervised.
Please supervise children in the vicinity of the wine conditioning unit and do not let them play with it.
Danger of suffocation! Whilst playing, children could become entangled in packaging (such as plastic wrapping) or pull it over their head and suffocate. Keep packaging material away from children.
Technical safety
The coolant system is tested for leaks. The wine conditioning unit complies with statutory safety requirements and the appropriate EU guidelines.

R600a
This wine conditioning unit contains the coolant Isobutane (R600a), a natural gas which is environmentally friendly. Although it is flammable, it does not damage the ozone layer and does not increase the greenhouse effect.
The use of this coolant has, however, led to a slight increase in the noise level of the appliance. In addition to the noise of the compressor, you might be able to hear the coolant flowing around the system. This is unavoidable, and does not have any adverse effect on the performance of the appliance.
Care must be taken during the transportation and setting up of the wine conditioning unit that no parts of the cooling system are damaged. Leaking coolant can damage the eyes.
In the event of any damage:
- avoid naked flames or anything which creates a spark, – disconnect the appliance from the mains electricity supply,
- ventilate the room where the wine conditioning unit is located for several minutes, and
- contact the Miele Service Department.
The more coolant there is in a wine conditioning unit, the larger the room it should be installed in. In the event of a leakage, if the appliance is in a small room, there is the danger of combustible gases building up. For every 11 g of coolant at least 1 m³ of room space is required. The amount of coolant in the appliance is stated on the data plate inside the wine conditioning unit. To avoid the risk of damage to the wine conditioning unit, make sure that the connection data (fuse rating, frequency and voltage) on the data plate corresponds to the household supply.
Check that this is the case before connecting the wine conditioning unit. Consult a qualified electrician if in any doubt.
The electrical safety of the wine conditioning unit can only be guaranteed when correctly earthed. It is essential that this standard safety requirement is met. If in any doubt please have the electrical installation tested by a qualified electrician.
▶ Reliable and safe operation of the wine conditioning unit can only be assured if it has been connected to the mains electricity supply.
If the electrical connection cable is faulty it must only be replaced by a Miele authorised service technician to protect the user from danger.
Do not connect the wine conditioning unit to the mains electrical supply by a multi-socket adapter or extension lead. These are a fire hazard and do not guarantee the required safety of the appliance.
If moisture gets into electrical components, it could cause a short circuit. Therefore, do not operate this wine conditioning unit in areas which are exposed to moisture (e.g in a garage or utility room).
This wine conditioning unit must not be used in a non-stationary location (e.g. on a ship). Do not use a damaged wine conditioning unit. It could be dangerous. Check the wine conditioning unit for visible signs of damage. For safety reasons, this wine conditioning unit may only be used after it has been built in. The wine conditioning unit must be isolated from the electricity supply during installation, maintenance and repair work. ▶ Unauthorised installation, maintenance and repairs can cause considerable danger for the user.
Installation, maintenance, and repairs must only be carried out by a Miele authorized technician.
While the wine conditioning unit is under warranty, repairs should only be undertaken by a Miele authorized service technician. Otherwise, the warranty is invalidated.
Miele can only guarantee the safety of the appliance when genuine original Miele replacement parts are used. Faulty components must only be replaced with Miele spare parts.
Correct use
The wine conditioning unit is designed for use within a certain climate range (ambient temperatures) and should not be used outside this range. The climate range for your wine conditioning unit is stated on the data plate inside the appliance. Installing it in a room with too low an ambient temperature, e.g., a garage, will lead to the wine conditioning unit switching off for longer periods so that it cannot maintain the required temperature. Do not cover or block the air vents as this could impair the efficiency of the appliance, increase electricity consumption, and could cause damage to the components.
If the wine conditioning unit is used for storing food which contains fat or oil, make sure that it does not come into contact with plastic components as any spillages of oil or fat could cause stress cracks to the plastic and cause it to break or split.
Do not store explosive materials in the wine conditioning unit or any products containing propellants (e.g., spray cans). Electrical components could cause flammable vapors to ignite. Danger of fire and explosion.
Do not operate any electrical equipment inside the wine conditioning unit. Danger of sparking and explosion.
Only use genuine original Miele accessories and spare parts with this appliance. Using accessories or spare parts from other manufacturers will invalidate the warranty, and Miele cannot accept liability.
Cleaning and care
Do not use any oils or grease on the door seals, as these will cause the seals to deteriorate and become porous with time. Do not use a steam cleaning appliance to clean this wine conditioning unit.
The steam could reach electrical components and cause a short circuit.
Sharp-edged or pointed objects will damage the evaporator, causing irreversible damage to the wine conditioning unit. Do not use sharp-edged or pointed objects to
- remove frost and ice,
- remove labels, stickers, etc.
Transporting the appliance
▶ Always transport the wine conditioning unit in an upright position and in its original transport packaging to avoid damage in transit. ▶ Danger of injury and damage. The wine conditioning unit is very heavy and must be transported by two people.
Disposing of your old appliance
Before disposing of an old appliance, first make the door latch or lock unusable. This way you will prevent children from accidentally locking themselves in and endangering their lives. ▶ Splashes of coolant can damage the eyes. Be careful not to damage any part of the pipework whilst awaiting disposal, e.g. by
- puncturing the coolant channels in the condenser,
- bending any pipework, or
- scratching the surface coating.
Symbol on the compressor (depending on model)
This information is only relevant for recycling. In normal operation there is no risk.

The oil in the compressor can be fatal if swallowed or if it penetrates the airways.
Disposal of the packing material
The packaging is designed to protect the wine conditioning unit from damage during transportation. The packaging materials used are selected from materials which are environmentally friendly for disposal and should be recycled.
Recycling the packaging reduces the use of raw materials in the manufacturing process and also reduces the amount of waste in landfill sites.
Disposal of your old appliance
Electrical and electronic appliances often contain valuable materials. They also contain specific materials, compounds and components, which were essential for their correct function and safety. These could be hazardous to human health and to the environment if disposed of with your domestic waste or if handled incorrectly. Please do not, therefore, dispose of your old appliance with your household waste.

Please dispose of it at your local community waste collection / recycling centre for electrical and electronic appliances, or contact your dealer or Miele for advice. You are also responsible (by law, depending on country) for deleting any personal data that may be stored on the appliance being disposed of.
Take care not to damage the pipework at the back of your wine conditioning unit before or during transportation to an authorised collection depot. In this way, coolant in the pipework and oil in the compressor will be contained, and will not leak into the environment.
Please ensure that your old appliance presents no danger to children while being stored awaiting disposal. See "Warning and Safety instructions" for more information.
How to save energy
| Normal energy consumption | Increased energy consumption | |
| Installation / Maintenance | In a ventilated room. In an enclosed, unventilated room. | |
| Protected from direct sunlight. | In direct sunlight. | |
| Not near to a heat source (radiator, oven). | Near to a heat source (radiator, oven). | |
| Where the ideal ambient room temperature is approx. 20 °C. | Where the ambient room temperature is above 25 °C. | |
| Ventilation gaps uncovered and dusted regularly. | Ventilation gaps covered or dusty. | |
| Temperature setting | 10 to 12 °C The lower the temperature, the higher the energy consumption. | |
| Use Wooden shelves arranged as they were when the appliance was delivered. | ||
| Only open the door when necessary and for as short a time as possible. Store wine bottles in an organised way. | ||
| Do not over-fill the appliance to allow air to circulate. | ||
Control panel

① For switching the whole wine conditioning unit on and off ② Optical interface (for Service technicians only) ③ For selecting the upper or lower wine conditioning zone ④ For switching the DynaCool function (constant humidity) on and off ⑤ For switching the feature lighting on and off
⑥ For setting the temperature (V for colder) ⑦ OK sensor for confirming a selection ⑧ For setting the temperature (∧ for warmer) ⑨ For accessing or leaving settings mode ⑩ For switching off the temperature or door alarm ⑪ Display with temperature and symbols (symbols only visible in settings mode; see chart for an explanation of the symbols)
Symbols
| Symbol Meaning Function | ||
| Safety lock To prevent inadvertent switching off and altering of settings | ||
| Audible tones Choice of sensor tone and door alarm tone | ||
| Miele@home Only visible when a communication module or communication stick is fitted and signed on | ||
| Demo mode (only visible when Demo mode is switched on) | For switching off Demo mode | |
| Display brightness set- tings | For adjusting the brightness of the display | |
| Active AirClean filters Lights up when the active charcoal filter needs changing | ||
| Mains connection Confirms that the wine conditioning unit is connected to the electricity supply when it is not switched on; flashes in the event of a power cut | ||
| Alarm Lights up when there is a door alarm; flashes when there is a temperature alarm, power cut or a fault | ||

① Push2open door catch ② Lighting strip (in both wine conditioning zones) ③ Wooden shelves with labels (FlexiFrames with Notebook) ④ Glass holder* ⑤ Bottle holder* (ConvinoBox) ⑥ Control panel for the upper and lower wine conditioning zones / isolation plate for thermal separation of the zones ⑦ Active AirClean filter ⑧ Isolation strips for thermal separation of the zones ⑨ Safety glass door with UV filter ⑩ 3D bottle presenter
* The SommelierSet consists of:
A glass holder, a bottle holder, and two covers for the runners.
Guide to the appliance
Door opening mechanism
The Push2open system on your wine conditioning unit makes it easy to open the door. The appliance door is sensitive to pressure.
The Push2open system is deactivated at the factory. The system has to be activated by touching the On/Off sensor once the appliance has been installed in the niche (see "Switching on and off").
To open the door

Risk of damage!
To avoid damage to the door opening mechanism:
Do not obstruct the appliance door while it is opening.
Do not push in or hold onto the door catch while the door is closing.
To bring the door catch into its original position if necessary, remove the plug and reconnect it again after approx. five seconds.

Press briefly against the top left hand side of the appliance door and then release it. The door will then open a little way automatically.
Then pull the door fully open.
To protect against inadvertent opening: if you do not pull the door open, it will close again by itself after approx. 3 seconds.
To close the door
Please be aware that using magnets in front of the wine conditioning unit door can cause it to open by mistake. This is caused by the door closing mechanism on the wine conditioning unit.
Accessories supplied
Chalk
Use the chalk to annotate the magnetic strips on the wooden shelves to identify your wines quickly and easily.
Optional accessories
A range of useful Miele accessories and care products are available for your wine conditioning unit.
Multi-purpose microfibre cloth
The microfibre cloth is suitable for removing fingerprints and light soiling from surfaces such as stainless steel, glass, plastic and chrome without the use of chemicals.
MicroCloth Kit
The MicroCloth Kit contains a universal cloth, a glass cloth and a polishing cloth.
These cloths are extremely rip-proof and hard-wearing. Thanks to very fine microfibres these cloths achieve excellent cleaning results.
Active AirClean filter
The Active AirClean filter ensures optimum air quality in the wine conditioning unit by filtering the incoming air.
Accessories are available to order via the Miele Webshop, from Miele directly (see back cover for contact details) or from your Miele dealer.
Before using for the first time
Packaging material
Remove all packaging material from the inside of the appliance.
Cleaning the wine unit
Please refer to the relevant instructions in "Cleaning and care".
Clean the inside of the appliance and the accessories.
Operating the wine conditioning unit
A light touch of the finger on the sensors is all that is required to operate this wine conditioning unit.
A tone will sound each time a sensor is touched. You can deactivate this, if you wish (see "Selecting further settings - Audible tones").
Switching on
When the wine conditioning unit is connected to the electrical supply, the mains connection symbol -C= will appear in the display after a short while.

Touch the On/Off sensor.
The mains connection symbol -C= will go out and the wine conditioning unit will start to cool.
The selected wine conditioning zone will be highlighted yellow and the temperature of the selected zone will show in the display.
The first time the appliance is turned on, the sensors for the wine conditioning zones and the alarm symbol ⚠️ will flash until the selected temperature has been reached in the zones.
As soon as the set temperature has been reached, the sensor for the respective wine conditioning zone will light up constantly and the alarm symbol ⚠️ will go out.
The interior lighting will come on when the door is opened.
A different setting can be set for each wine conditioning zone.
Touch the sensor for the wine conditioning zone you want to adjust the settings for.
The sensor control that has been selected is highlighted in yellow. Now you can
- Set the temperature, and
- Switch on the DynaCool function.
Please refer to the relevant sections for more information.
If you then select a different wine conditioning zone, the settings for the previously selected zone will remain unchanged.
Switching off

Touch the On/Off sensor. If this does not work, the safety lock is still activated.
The sensors for the two wine conditioning zones will then go out.
The temperature display will go out and the mains connection symbol will appear.
The interior lighting will go out and the cooling process will be switched off.
Switching off for longer periods of time
If the wine conditioning unit is not going to be used for a longer period of time, e.g. whilst on holiday:
Switch it off, disconnect it from the mains, clean it out, and leave the door ajar to air the wine conditioning unit and avoid odours building up inside it.
If, during a long absence, the wine conditioning unit is switched off but not cleaned and the door left shut, there is a danger of mould building up inside the appliance.
Certain settings on the wine conditioning unit can only be selected in settings mode.
The door alarm is automatically disabled when the appliance is in settings mode.
Safety lock
The safety lock can be activated to prevent:
– the appliance being switched off by mistake, – the temperature being changed by mistake, – DynaCool being switched on by mistake, – the feature lighting being switched on by mistake.
Activating or deactivating the safety lock

■ Touch the settings sensor.
All symbols available for selection will appear in the display and the 🔒 symbol flashes.

■ Touch the OK sensor to confirm your selection.
The last selected setting flashes and the 🔒 symbol lights up in the display.

■ By touching the ∧ or ∨ sensor, you can now select whether the safety lock is activated or deactivated: 0: the safety lock is deactivated 1: the safety lock is activated

■ Touch the OK sensor to confirm your selection.
The selected setting is applied, the 🔒 symbol flashes.

■ Touch the settings sensor to leave settings mode. Otherwise the appliance exits settings mode automatically after approximately one minute.
The 🔒 symbol will appear in the display when the lock is activated.
Audible tones ♪♪
The wine conditioning unit has audible tones such as the sensor tone and the door and temperature alarms.
You can switch the sensor tone or the door alarm tone on or off but you cannot deactivate the temperature alarm.
There are four settings to choose from. Option 3 is set at the factory, i.e. the sensor tone and the door alarm are switched on.
Switching audible tones on/off

■ Touch the settings sensor.
All symbols available for selection will appear in the display and the 🔒 symbol flashes.

■ Touch the sensors for setting the temperature (∧ or ∨) repeatedly until the ♪ symbol flashes.

■ Touch the OK sensor to confirm your selection.
The last selected setting flashes and the ♪ symbol lights up in the display.

■ By touching the ∧ or ∨ sensor you can now select:
☐: sensor tone off; door alarm off 1: sensor tone off; door alarm on (after 4 minutes) 2: sensor tone off; door alarm on (after 2 minutes) 3: sensor tone on; door alarm on (after 2 minutes)

■ Touch the OK sensor to confirm your selection.
The selected setting is applied, the musical symbol flashes.

■ Touch the settings sensor to leave settings mode.
Otherwise the appliance exits settings mode automatically after approximately one minute.
Display brightness
The display brightness can be adjusted to suit lighting conditions in the room.
The display brightness can be adjusted in steps from 1 to 3. The factory default setting is 3 (maximum brightness).
Altering the display brightness

■ Touch the settings sensor.
All symbols available for selection will appear in the display and the 🔒 symbol flashes.

■ Touch the sensors for setting the temperature (∧ or ∨) repeatedly until the ⚙ symbol flashes.

■ Touch the OK sensor to confirm your selection.
The last selected setting flashes and the ⚙ symbol lights up in the display.

■ By touching the ∧ or ∨ sensor you can now alter the brightness of the display:
1: dimmest setting 2: medium setting 3: brightest setting.

■ Touch the OK sensor to confirm your selection.
The selected setting is applied, the ⚙ symbol flashes.

■ Touch the settings sensor to leave settings mode.
Otherwise the appliance exits settings mode automatically after approximately one minute.
The optimum temperature and air quality
Wine keeps on maturing depending on the surrounding conditions. The length of time for which wine can be kept in good condition will therefore depend not only on the temperature but also on the air quality.
The wine conditioning unit with its constant ideal temperature, increased air humidity and odour free atmosphere offers the perfect conditions for storing your wine.
It also guarantees a vibration-free environment (in contrast to a refrigerator) so that the maturing process is not disturbed.
The optimum temperature
Wine can be stored at a temperature between 6 and 18 °C. If you are storing white and red wines together, select a temperature between 12 and 14 °C. This is suitable for both white and red wines. Red wine should be taken out of the wine conditioning unit and opened at least two hours before drinking to allow it to breathe and develop its aroma.
At too high a temperature (over 22 °C) wine matures too quickly, which prevents the aromas from developing further. Wine cannot mature fully at too low a temperature (below 5 °C).
Fluctuations in temperature put wine under stress and interrupt the maturing process. It is therefore very important to maintain a constant temperature.
| Type of wine Recommended drinking temperature* | |
| Light, fruity reds: +14 °C to +16 °C | |
| Full-bodied reds: | +18 °C |
| Rosé wines: +8 °C to +10 °C | |
| Delicate, aromatic whites: | +8 °C to +12 °C |
| Full-bodied or sweet whites: | +12 °C to +14 °C |
| Champagne, sparkling white wines, Prosecco: | +6 °C to +10 °C |
* Store the wine 1 or 2 °C cooler than the recommended drinking temperature as it warms up a little when poured into the glass.
Tip: Full-bodied reds should be opened for 2-3 hours before drinking to allow the wine to breathe and develop its aroma.
Safety device in case of low ambient temperatures
The appliance is equipped with a safety thermostat to protect your wine against a sharp drop in temperature. If the external temperature should fall, a heater element switches on automatically to keep the temperature inside as constant as possible. If the ambient temperature continues to fall, the appliance switches itself off automatically.
Isolator plate for thermal separation
The unit comes with a fixed isolation panel that partitions the interior of the wine conditioning unit into two separate temperature zones. This enables you to store different types of wine at the same time, e.g., red wine and Champagne. The isolation strips inside the glass door prevent the exchange of heat between the individual zones.
Setting the temperature
The temperature in the wine conditioning zones can be set independently of one another.
■ Touch the sensor for the zone for which you wish to change the temperature, so that it is highlighted in yellow.
The current temperature for the selected zone appears in the display.
Use the two sensors underneath the display to set the temperature.
By touching the sensor

– the temperature will get colder

– the temperature will get warmer.

Touch the OK sensor to confirm your selection or wait approximately 5 seconds after the last touch of a sensor.
The temperature being set will flash in the display.
The following information shows in the display while the sensors are being touched:
- Touching a sensor once: the last temperature selected flashes. – Each subsequent touch of the sensor: adjusts the temperature shown in 1 °C steps. – Leaving a finger on the sensor changes the temperature continuously.
A tone will sound (if the sensor tone is switched on) when the lowest or highest possible temperature is reached.
Approximately 5 seconds after the last time a sensor has been touched, the actual temperature inside the appliance is automatically shown.
When the temperature is altered, there is a short delay until the temperature selected is set.
The temperature display on the control panel always shows the actual temperature.
Temperature range
In both zones it is possible to set temperatures between 5 and 20 °C.
Temperature display
In normal operation, the temperature display shows the actual temperature in the zone.
If the temperature in one of the zones is not within the range that the appliance is able to display, dashes will light up in the temperature display.
Depending on the ambient temperature and the temperature setting, it can take the appliance a few hours to reach the required temperature and for this temperature to then be shown as a constant temperature in the display.
Air quality and humidity
In most refrigerators, the humidity is too low for wine, and therefore a refrigerator is not suitable for wine storage. High humidity levels are necessary when storing wine to moisturize corks from the outside. When the humidity is too low, the corks dry out and the bottle is no longer tightly sealed. For this reason, wine bottles should always be stored horizontally to ensure that corks are also moisturized from the inside. If air gets into the bottle, this will have a negative impact on the wine!
Risk of damage!
Do not introduce additional moisture to the air in the cabinet, e.g., by placing a dish of water in the wine unit. This will lead to condensation on the interior walls. Condensate can cause damage such as corrosion to the wine unit.
DynaCool (constant humidity)
DynaCool raises the relative humidity inside the appliance. DynaCool also distributes the humidity and the temperature evenly around the interior so that you can store all your wine under exactly the same excellent conditions. This will create a stable climate in the cabinet that imitates that of a wine cellar.
Switching on DynaCool
If you would like to use the wine conditioning unit to store wine long term, we recommend that you keep the DynaCool function switched on.

■ Touch the sensor for switching the DynaCool function on and off so that it is highlighted in yellow.
Even if the DynaCool function has not been switched on, the fans in the appliance will come on automatically when the cooling system switches on to ensure your wine is kept in the optimum climate.
The fans automatically switch off when the door is open.
Switching off DynaCool
The appliance uses slightly more energy and is a little noisier when the DynaCool function is switched on. You can switch it off now and then if you wish.

Touch the sensor for switching the DynaCool function on and off so that it is no longer highlighted in yellow.
Air filtration with the Active AirClean filter
The Active AirClean filter achieves optimum air quality by filtering the incoming air.
Fresh air from the room enters the appliance via the Active AirClean filter.
The fans (DynaCool function) then distribute the air evenly throughout the cabinet.
Filtering the incoming air through the Active AirClean filter ensures that all the air entering the appliance is fresh and free from dust and odours.
This also ensures your wine does not absorb any unwanted odours through the corks.
Replace the Active AirClean filter regularly. The ⚙ symbol will appear in the display to remind you (see "Active AirClean filter").
This wine conditioning unit is equipped with an alarm system so that the temperature cannot rise or fall unnoticed, thus possibly damaging the wine.
Temperature alarm
If the temperature in one of the wine conditioning zones rises or falls by a certain amount, the sensor for that zone will flash in the control panel and at the same time the alarm symbol ⚠️ will flash in the display. An audible alarm will also sound.
Audible and visual signals will be activated, for example,
- when the wine unit is switched on and the temperature in one of the temperature zones differs greatly from the set temperature,
- when too much warm ambient air enters the cabinet when bottles are being rearranged or taken out,
- when a large number of bottles are stored for the first time, – in the event of a power cut,
- if there is a fault with the wine unit.
The alarm will stop and the alarm symbol ⚠️ goes out as soon as the reason for the alarm has been resolved. The sensor for the relevant zone will light up constantly again.
Switching the temperature alarm off early
If the noise disturbs you, you can switch the alarm off if you wish.

■ Touch the sensor for switching off the temperature alarm.
The alarm will stop.
The relevant wine conditioning zone will continue to flash in the control panel and the alarm symbol ⚠️ will continue to flash in the display until the cause of the alarm has been rectified.
Door alarm
An alarm will sound if the appliance door has been left open for longer than approx. two minutes. The sensors for the wine conditioning zones will flash in the control panel. The alarm symbol ⚠ lights up in the display.
As soon as the door is closed, the alarm sound will stop. The sensors for the wine conditioning zones and the alarm symbol ⚠️ will go out in the control panel.
If the audible tone does not sound in the event of a door alarm, then the audible tone has been turned off in Setting mode (see "Selecting additional settings - Audible tones ♪♪").
Switching the door alarm off early
If the noise disturbs you, you can switch the alarm off if you wish.

Touch the sensor to switch off the door alarm.
The alarm will stop.
The sensors for the wine conditioning zones will continue to flash and the alarm symbol ⚠️ will remain lit up until you close the door.
The interior lighting can be set to remain on when the door is closed so your wines can be on display at all times.
Each wine conditioning zone has its own lighting strip so that all zones are illuminated.
Thanks to the use of LED lighting, the wine will not be adversely affected by heat or UV light.
Switching the feature lighting on and off

Touch the On/Off sensor for the feature lighting so that it is highlighted in yellow.
The interior lighting is now switched on, even when the door is closed.
To switch the feature lighting off again:
Touch the On/Off sensor for the feature lighting so that it is no longer highlighted in yellow.
The interior lighting is now switched off when the appliance door is closed.
Setting the brightness of the feature lighting
The brightness of the feature lighting can be adjusted.

Touch the On/Off sensor for the feature lighting so that it is highlighted in yellow. Touch the sensor for the feature lighting again for approx. four seconds until l flashes in the display (after two seconds h will flash). Use the sensors for altering the temperature to set the feature lighting brightness ( and ). To do this touch and hold the sensors. The brightness is adjusted directly and is infinitely variable.
By touching the sensor

– the lighting becomes dimmer

– the lighting becomes brighter.

■ Touch the OK sensor to confirm your choice.
The set brightness is saved to memory. The temperature display then appears again.
As soon as the appliance door is closed, the set brightness for the feature lighting takes effect. When the appliance door is opened, the interior lighting returns to its normal level.
Lighting duration of the feature lighting
The lighting duration for the feature lighting is set to 30 minutes as standard.
The lighting duration can be set to 30, 60, 90 minutes up to 00 (unlimited). The feature lighting will have the brightness setting you have selected previously.
■ Open the appliance door.

■ Touch the On/Off sensor for the feature lighting so that it is highlighted in yellow. ■ Touch the sensor for the feature lighting again for approx. two seconds until h flashes in the display. ■ Use the ∨ and ∧ sensors for altering the temperature to set the feature lighting duration. The duration (in minutes) will flash in the display.
By touching the sensor

– lighting duration is reduced by 30 minutes

– lighting duration is increased by 30 minutes.

■ Touch the OK sensor to confirm your choice.
The selected lighting duration is saved and the temperature reappears in the display.
The lighting duration set starts anew whenever the appliance door is opened and closed.
Caution. Laser beam class 1M
Do not remove the lighting covers. Should the covers be damaged or need to be removed due to damage, do not use optical instruments (magnifying glass or similar) to look at the lighting.
Storing wine bottles
Vibration and movement have a negative effect on the maturing process which can affect the taste of the wine.
To avoid disturbing other bottles when removing a bottle of wine, store bottles of the same type beside each other on the same shelf. Avoid stacking bottles on top of one another on the wooden shelves.
Always place the bottles lying down so that the corks can be kept moist on the inside and air is prevented from getting into the bottles.

Danger of injury.
Take care that wine bottles do not fall out of the appliance when you pull out a wooden shelf. Wine bottles could also become wedged in the shelf above.
Wooden shelves
The wooden shelves are on telescopic runners which can be pulled out to make it easier to store and remove bottles.
Moving the wooden shelves
The wooden shelves can be removed and replaced again if required.

■ Pull the wooden shelf out until it stops ①. ■ Release the wooden shelf at the back, lifting the shelf on the left and right at the same time ②. ■ Lift the wooden shelf forwards to remove it.

If you require more room, cover the runners at the top on both sides which are now not needed with the covers supplied. The thicker side of the cover should point forwards. The covers are held in position with magnets.

■ To replace the wooden shelf, position it on the extended runners. The notches in the wooden shelf fit over the retaining pins. The magnetic strip should be pointing forwards.

■ Slide the wooden shelf back into the appliance as far as it will go ③. ■ Push the wooden shelf right back so that it clicks into place at the front. ■ Press down on the back of the wooden shelf until it clicks into place at the back ④.
Adjusting the wooden shelves
The slats in the wooden shelves can be individually adjusted to suit, so that every bottle is stored in perfect safety regardless of shape or size.

■ Simply lift individual slats to move or remove them from the wooden shelves.
Annotating wooden shelves
For quick and easy identification of the wines stored, you can write on the blackboard-painted surface on the magnetic strips on the wooden shelves.
Use the chalk supplied. You can write directly on the magnetic strip or remove it from the wooden shelf. To do so:

■ Hold the magnetic strip by the sides and pull it forwards. The magnetic strip is held on the wooden shelf by magnets.
■ The magnetic strip can be wiped clean with a damp cloth.
Risk of damage!
Use clean water only to wipe the magnetic strips. Do not use a cleaning agent. Doing so would damage the blackboard surface.
■ Annotate the magnetic strip with the chalk supplied and replace it on the front of the wooden shelf.
3D bottle presenter
Set up the 3D bottle presenter in the bottom of the wine unit:

■ Fold out the rear struts ① of the 3D bottle presenter. ■ Simply lift individual slats ② on the shelf forwards to move or remove them from the wooden shelves. This will adapt the 3D bottle presenter perfectly to the size of the wine bottles. ■ Carefully place the wine bottles on the 3D bottle presenter.
Tip: You can place your chalk in the chalk rest ③ on the 3D bottle presenter to prevent it from getting lost.

If you do not wish to use the 3D bottle presenter for presentation purposes or would like to make use of the maximum storage capacity of your wine conditioning unit, simply fold down the rear struts. ■ Place the 3D bottle presenter flat on the floor of the wine unit and push it back until it touches the back wall of the appliance. ■ When placing wine bottles on the 3D bottle presenter, make sure that you push them carefully back as far as they will go.
Risk of damage!
If wooden shelves and bottles protrude too far forwards, they will damage the glass door when it is closed. Please ensure that the wooden shelves and wine bottles do not protrude.
The 3D bottle presenter can only take bottles up to a maximum bottle height of 300 mm when laid flat in the cabinet.
If you wish to stack taller bottles, please use one of the other shelves.
Maximum capacity

Risk of damage!
Do not exceed the maximum load-bearing capacity of 25 kg for each wooden shelf.
Do not stack bottles on the wooden shelves.
Except when the 3D bottle presenter is folded down in the bottom of the appliance, in which case you can easily stack wine bottles on this.
Without SommelierSet
- With
3D bottle presenter folded down

Up to 83 Bordeaux-type bottles (0.75 l) can be stored in the wine unit, with 33 in the upper zone and 50 in the lower zone.
The total of 83 bottles can only be achieved by using all wooden shelves and with the 3D bottle presenter folded.
- With
3D bottle presenter set up
With the 3D bottle presenter set up, up to 70 Bordeaux-type bottles (0.75 l) can be stored in the wine unit, with 33 in the upper zone and 37 bottles in the lower zone.
With SommelierSet
- With
3D bottle presenter folded down
Up to 65 Bordeaux-type bottles (0.75 l) can be stored in the wine unit, with 15 in the upper zone and 50 in the lower zone.
- With
3D bottle presenter set up

With the 3D wine presenter set up, up to 52 Bordeaux-type bottles (0.75 l) can be stored in the wine unit, with 15 in the upper zone and 37 bottles in the lower zone.
Setting up the SommelierSet

The SommelierSet can be used to have your wine ready for drinking. You can store wine glasses and accessories in the appliance, decant your wine and store open bottles in the appliance.
You can place the SommelierSet in the upper or lower wine conditioning zone.
Fitting the runner covers
Remove both wooden shelves above the SommelierSet by pulling them out as far as they will go and lifting them off the runners. To do this, hold them by the frame.

Place the four covers supplied ① over the runners which are now visible. The thicker side of the cover should be pointing forwards.
Inserting the glassware holder
This can be used for storing and chilling wine glasses.

To fit glassware holder ② remove the necessary number of slats and place the holder ② on the wooden shelf.
Tip: The wine decanter can be placed in the middle of the shelf, and stored there if you wish.
Inserting the bottle holder
You can store opened wine bottles in bottle holder ③.

Remove the necessary number of slats and place bottle holder ③ on the wooden shelf.
Position dividers ④ in the bottle holder to suit the size of bottles being held. They should be held securely and not rattle against each other.
Tip: For wine which has been opened we recommend removing the oxygen from the bottle as otherwise the wine will lose its aroma and taste and spoil more quickly. Special devices (e.g. a wine pump with bottle stopper) create a vacuum by extracting the air.
The wine conditioning unit defrosts automatically.
Do not let water get into the electronic unit or the lighting.
⚠️ Steam from a steam cleaning appliance could reach the electrical components in the wine unit and cause a short circuit. Do not use a steam cleaner!
The data plate located inside the wine unit must not be removed. It contains information which is required in the event of a service call.
Cleaning agents
To avoid damaging the surfaces of your appliance, do not use:
- cleaning agents containing soda, ammonia, acids or chlorides
- cleaning agents containing descaling agents
- abrasive cleaning agents, e.g. powder cleaners and cream cleaners
- solvent-based cleaning agents – stainless steel cleaning agents
- dishwasher cleaner
- oven sprays
- glass cleaner (except on the glass in the appliance door)
- hard, abrasive sponges and brushes, e.g. pot scourers
- melamine eraser blocks
- sharp metal scrapers
Cleaning and conditioning agents used inside the wine conditioning unit must be food safe.
We recommend using lukewarm water with a little washing-up liquid to clean surfaces of the appliance.
The following pages contain important information on cleaning.
Before cleaning
■ Switch off the wine conditioning unit. ■ Disconnect it from the mains. ■ Take any wine bottles out of the wine conditioning unit and store them in a cool place. ■ Take out all other removable parts for cleaning. ■ Remove the magnetic strips from the wooden shelves before cleaning them (see "Annotating wooden shelves").
Interior, appliance door and accessories
Clean the wine conditioning unit at least once a month. Remove soiling immediately to prevent it from drying on.
■ Clean the interior with a solution of lukewarm water and a little washing-up liquid. ■ The wooden shelves should only be wiped with a well wrung-out damp cloth. They must not be allowed to get wet. ■ Use clean water only to wipe the magnetic strips at the front of the wooden shelves. Do not use a cleaning agent as this would damage the blackboard surface on the magnetic strips. ■ After cleaning, wipe the interior and accessories with a damp cloth, and dry with a soft cloth. Leave the door open to air the appliance for a short while. ■ Clean the appliance door with a proprietary glass cleaner.
Cleaning the ventilation gaps
A build-up of dust will increase the energy consumption of the appliance.
■ The ventilation gaps should be cleaned on a regular basis with a brush or vacuum cleaner (e.g. use the dusting brush for Miele vacuum cleaners)
Cleaning the door seal
Do not use any grease or oil on the door seal as these will cause the seal to deteriorate and become porous over time.
■ The door seal should be cleaned regularly with clean water, and then wiped dry with a soft cloth.
After cleaning
■ Replace all shelves and accessories in the wine conditioning unit. ■ Reconnect to the mains and switch the wine conditioning unit back on. ■ Place the wine bottles back in the wine conditioning unit and close the door.
Fresh air from the room enters the wine conditioning unit through the Active AirClean filter. Filtering the incoming air through the Active AirClean filter ensures that all the air entering the appliance is fresh and free from dust and odours.
The reminder to change the Active AirClean filter will appear every 12 months at the latest.
When the Change Active AirClean filter symbol ☑ lights up in the display, the Active AirClean filter needs to be changed.
Replacing the Active AirClean filter

Press the top right-hand cover in until you hear it click and then release it.

Remove the filter.

Insert the new filter.

Replace the cover.
Press the top right-hand cover into position until you hear it click and then release it.
Active AirClean filters can be obtained from your Miele dealer, Miele or from the Miele website.
To confirm the filters have been changed

Touch the settings sensor.
All symbols available for selection will appear in the display and the 🔒 symbol flashes.

Touch the sensors for setting the temperature (∨ or ∧) repeatedly until the ⚙ symbol flashes.

Touch the OK sensor to confirm your selection.
The 7 will flash in the display (meaning: Active AirClean filter is fitted in the appliance), and the ⚙ symbol lights up.

Touch the symbols for setting the temperature (∨ or ∧) repeatedly until the 2 symbol is displayed (meaning: the counter has been reset).

Touch the OK sensor to confirm your selection.
The selected setting is applied, and the symbol flashes.

Touch the settings sensor to leave settings mode.
Otherwise, the appliance exits settings mode automatically after approximately one minute.
The Ⓧ in the display goes out.
Many malfunctions and faults that can occur in daily operation can be easily remedied. Time and money will be saved because a service call will not be needed.
The following guide may help you to find the reason for a malfunction or a fault, and to correct it.
| To prevent cold from escaping, open the appliance as little as possible until the fault has been corrected. |
| Problem Cause and remedy | |
| The wine conditioning unit is not getting cold, the interior lighting does not come on when the door is opened, and the display is not lit up. | The wine conditioning unit is not switched on and the mains connection symbol -CF is lit up in the display.■ Switch on the wine conditioning unit. |
| The plug is not inserted in the socket correctly.■ Insert the plug correctly into the socket. The mains connection symbol -CF appears in the display when the wine conditioning unit is switched off. | |
| Check whether the mains fuse has tripped. If it has there could be a fault with the appliance, the house-hold electrical wiring or another electrical appliance.■ Contact a qualified electrician or Miele. | |
| The I symbol is dis-played, the wine condi-tioning unit is not get-ting cold. However, the appliance and the in-terior lighting are work-ing fine. | Demo mode is turned on and the I symbol is illumin-ated in the display.■ Switch off Demo mode (see "Information for deal-ers - Demo mode"). |
| The compressor is switching on more frequently and for longer periods of time, the temperature in the wine conditioning unit is falling. | The temperature in the wine conditioning unit is set too low.■ Adjust the temperature. |
| The appliance door is not properly closed.■ Check that the appliance door closes properly. | |
| The appliance door has been opened too frequently.■ Only open the door when necessary and for as short a time as possible. | |
| The ventilation gaps have been covered over or become dusty.■ Do not cover the ventilation gaps and dust them regularly. | |
| The ambient temperature is too warm.■ Decrease the ambient temperature. | |
| The compressor comes on less and less often and for shorter periods of time. The temperature in the wine conditioning unit rises. | Not a fault. The temperature setting is too high.■ Adjust the temperature.■ Check the temperature again after 24 hours. |
| The fan runs continuously although the DynaCool function is not turned on. | This is not a fault. The fan turns itself on automatically from time to time depending on the set temperature and ambient temperature. |
Display warnings
| Message Cause and remedy | |
| The alarm symbol ⚠ is lit in the display and both sensors for the wine conditioning zones are flashing in the control field. Furthermore, an audible alarm is also sounding. | The door alarm has been activated.■ Close the appliance door. Both sensors for the wine conditioning zones and the alarm symbol ⚠ will go out and the audible alarm will stop. |
| The alarm symbol ⚠ is flashing in the display, and the sensor for one of the wine conditioning zones is also flashing.An audible alarm is also sounding. | The temperature in the zone concerned has risen higher or fallen lower than the temperature set.This could be due to:- the appliance door being opened too often,- blocked ventilation gaps,- a lengthy interruption to the power supply.■ Rectify the cause of the alarm. The alarm symbol ⚠ will go out and the sensor for the zone concerned will light up constantly again. The audible alarm stops. |
| The Change Active AirClean filter symbol ⚡ is lit up. | This is the reminder to change the Active AirClean filter.■ Replace the Active AirClean filter and then confirm the filter change in settings mode (see "Active AirClean Filter"). |
| A dash is lit up up/flash-ing in the display. | Only temperatures within the range the wine condi-tioning unit can display will be shown. |
| "F0", "F1", "F8", "E1", "E2", "E7" or "E8" ap-pears in the display. | There is a fault.■ Call Service. |
The interior lighting is not working.
| Problem Cause and remedy | |
| The LED interior lighting is not working. | The wine unit is not switched on.■ Switch the wine unit on. |
| To avoid overheating, the LED lighting switches itself off automatically after approx. 15 minutes if the door is left open.If this is not the cause, then there is a fault.⚠ Danger of electric shock.There are live electrical components under the lighting cover.The LED lighting may only be repaired or replaced by a Miele authorised service technician. | |
| ⚠ Danger of injury from LED lighting. Light intensity corresponds to laser beam class 1/1M.The lighting covers must not be removed or damaged, or be removed due to damage. This could cause injury to your eyes.Do not look into the LED lighting (laser beam class 1/1M) with optical instruments (e.g. magnifying glass or similar). | |
| ■ Call Service. | |
| The LED interior lighting is on even when the door is closed. | The feature lighting is switched on.■ Switch the feature lighting off (see "Feature lighting"). |
General problems with the wine conditioning unit
| Problem Cause and remedy | |
| The door seal is damaged and needs to be replaced. | No tools are required to change the door seal.■ Change the door seal. These are available from Miele. |
| There is no audible alarm although the door has been open for a long time. | This is not a fault. The alarm tone has been switched off in settings mode (see "Selecting further settings - Audible tones"). |
| You cannot switch the wine conditioning unit off. | The safety lock is activated. The 🔒 symbol is lit up in the display.■ Deactivate the lock (see "Selecting further settings - Activating or deactivating the lock"). |
| The slats on the wooden shelves are warping. | Volume change due to moisture absorption or drying out is a typical characteristic of wood. An increase in humidity will cause wooden components to warp, which can lead to cracking. Knots and grain patina are part of the natural character of wood. |
| Mildew has begun to form on the wine bottle labels. | Mildew can begin to form on the labels, depending on the type of label adhesive used.■ Clean the wine bottles and remove any adhesive residue. |
| A white deposit has formed on the wine bottle corks. | The corks have oxidised due to contact with the air.■ Use a dry cloth to wipe off the deposit. The deposit will not affect the quality of the wine. |
| Normal noises What causes them | |
| Brrrrr ... A humming noise is made by the motor (compressor). This noise can get louder for brief periods when the motor switches on. | |
| Blubb, blubb ... A gurgling noise can be heard when coolant is circulating through the pipes. | |
| Click ... Clicking sounds are made when the thermostat switches the motor on and off. | |
| Sssrrrrr ... On multi-zone wine conditioning units you can sometimes just hear the sound of the fan inside the appliance. | |
| Crack ... A cracking sound can be heard when material inside the wine conditioning unit expands. | |
| Remember that the noise of the compressor and the coolant circulating in the system is unavoidable. | |
| Noises that you can easily rectify | Possible cause Remedy | |
| Rattling, vibrating | The wine conditioning unit is uneven. | Realign the wine conditioning unit using a spirit level, by raising or lowering the screw feet underneath the appliance. |
| Shelves are unstable or sticking. | Check all removable items and refit them correctly. | |
| Bottles or containers are touching each other. | Separate them. | |
| The transport cable clips are hanging loose at the back of the appliance. | Remove the cable clips. |
Contact in case of malfunction
In the event of any faults which you cannot remedy yourself, please contact your Miele Dealer or Miele Service.
Contact information for Miele Service can be found at the end of this document.
Please note that telephone calls may be monitored and recorded for training purposes and that a call-out charge will be applied to service visits where the problem could have been resolved as described in this booklet.
Please quote the model and serial number of your appliance when contacting Miele. This information can be found on the data plate.
The data plate is located inside the wine unit.
Warranty
The appliance warranty is valid for 2 years from date of purchase. In the UK, you must activate your cover by calling 0330 160 6640 or registering online at www.miele.co.uk.
For more information on country-specific warranty terms and conditions, please contact Miele Customer Service.
Demo mode
The wine conditioning unit can be demonstrated in the showroom or at exhibitions in "Demo mode". In this mode the control panel and interior lighting are active but the compressor remains switched off, so that the appliance does not cool down.
Switching on demo mode

Switch the wine conditioning unit off by touching the On/Off sensor.
The temperature display will go out and the mains connection symbol -C= will appear.

Place your finger on the ∨ sensor, and leave it there.

At the same time, briefly touch the On/Off sensor (without letting go of the ∨ sensor).

Leave your finger on the ∨ sensor until the I symbol appears in the display. Then release the ∨ sensor.
Demo mode is activated and the symbol appears in the display.
Switching off Demo mode
The | symbol is lit up in the display.

■ Touch the settings sensor.
All symbols available for selection will appear in the display and the 🔒 symbol flashes.

■ Touch the sensors for setting the temperature (√ or ∧) repeatedly until the ▪ symbol flashes.

■ Touch the OK sensor to confirm your selection.
1 flashes in the display (means: Demo mode is switched on) and the ▪ symbol lights up.

■ Touch the ∨ or ∧ sensor until ∅ appears (means: Demo mode is switched off).

■ Touch the OK sensor to confirm your selection.
The selected setting is applied, the symbol flashes.

■ Touch the settings sensor to leave settings mode.
Otherwise the appliance exits settings mode automatically after approximately one minute.
Demo mode is switched off, the symbol goes out.
The appliance is supplied with a mains cable with moulded plug for connection to a 50 Hz 220–240 V supply.
The fuse rating must be at least 10 A (13 A in the UK).
All electrical work should be carried out by a suitably qualified and competent person in strict accordance with current local and national safety regulations (BS 7671 in the UK). Please ensure that the connection data quoted on the data plate match the household mains supply.
Connection should be made via a suitable switched socket which is easily accessible. It must not be located behind the appliance.
If the mains socket is not accessible after the appliance has been installed, a separator for each terminal must be present. There must be an all-pole contact gap of at least 3 mm in the switch (including switch, fuses and relays according to EN 60335).
The plug and mains connection cable must not come into contact with the back of the appliance as vibrations can cause damage to these components. This, in turn, could result in a short circuit.
Do not plug in other appliances behind this wine conditioning unit.
Do not connect the appliance to the mains electricity supply by an extension lead. Extension leads do not guarantee the required safety of the appliance (e.g. danger of overheating).
Do not connect the appliance to an inverter such as those used with an autonomous energy source e.g. solar power. When switched on, peak loads in the system can cause the safety switch-off mechanism to be triggered. This can damage the electronic unit. The appliance must not be used with so-called energy-saving devices either. These reduce the amount of energy supplied to the appliance, causing it to overheat.
If the mains cable needs to be replaced this must be done by a suitably qualified person.
Danger of injury and damage to the appliance.
A wine unit that has not been installed in its niche can tip up.
Keep the appliance door shut until the wine unit has been built in and secured in its housing in accordance with these operating and installation instructions.
⚠️ Fire risk and danger of damage! This wine unit must not be installed underneath a hob.
Risk of damage!
The wine unit has an elongated glass door and must not be set down vertically at any time!

Location
This appliance should be installed in a dry, well-ventilated room.
When deciding where to install your wine unit, please bear in mind that it will use more energy if installed near a heater, a cooker, or other appliance that gives off heat. Direct sunlight should also be avoided.
The higher the room temperature, the longer the compressor runs and the higher the energy consumption.
When installing the wine unit, please note:
- The socket must be easily accessible in an emergency, not concealed behind the appliance.
- The plug and cable must not touch the back of the wine unit as they could be damaged by vibrations from the appliance.
- Do not plug in other appliances behind this wine unit.
Load-bearing capacity of the niche floor
To ensure the safe installation of the appliance and to guarantee its correct functioning, the floor of the niche where the appliance is to be installed must be smooth and even.
It must be made from strong, rigid material.
Because the appliance is extremely heavy when fully loaded, it is essential that the floor it stands on is able to bear its weight.
When fully loaded, the weight of the appliance is approximately 191 kg.
Danger from broken glass! Danger of injury from broken glass. If installed at altitudes above 1500 m, there is a risk of the glass in the door breaking because of changes in air pressure. Shards of glass can cause severe injury if not handled with care.
IMPORTANT: In environments with high humidity, condensation may appear on the external surfaces of the wine conditioning unit.
Condensate can cause corrosion on external appliance walls.
For prevention, it is advisable to install the wine conditioning unit with sufficient ventilation in a dry and/or air conditioned room.
After installation make sure that the appliance door closes properly, the ventilation gaps are not covered and that the wine conditioning unit has been installed in accordance with these installation instructions.
Climate range
The wine conditioning unit is designed for use within a certain climate range (ambient temperatures) and should not be used outside this range. The climate range of the wine conditioning unit is stated on the data plate inside it.
| Climate range Ambient room temperature | |
| SN +10 °C to +32 °C | |
| N +16 °C to +32 °C | |
| ST +16 °C to +38 °C | |
| T +16 °C to +43 °C |
Operating in a room which is too cold will cause the compressor to switch off for too long, causing the internal temperature in the wine conditioning unit to rise which could lead to damage.
Side-by-side
This wine unit can be installed side-by-side with another wine unit or a refrigeration appliance.
Your dealer will be able to advise you which combination of models is possible.
Ventilation
⚠️ If the ventilation gaps given are not observed, the compressor will run more frequently and for longer periods.
This will result in increased energy consumption and a higher operating temperature for the compressor. This may, in turn, cause damage to the compressor.
It is essential to observe the ventilation gaps given.
Air at the back of the wine conditioning unit gets warm. The appliance housing unit must therefore be constructed to allow sufficient space for ventilation (see "Building-in dimensions").

Air intake ① occurs via the plinth at the bottom of the appliance and the air escapes at the top ② at the back of the housing unit.
- A ventilation gap of at least 40 mm depth must be allowed for behind the wine unit for air to circulate.
- The ventilation cross-sections in the plinth, housing unit and above the appliance must each provide an unobstructed airflow of at least 200 cm2 to ensure that air can circulate without hindrance.
If ventilation grilles are to be inserted into the ventilation gaps, the ventilation gaps must be larger than 200 cm2 . The unobstructed airflow of 200 cm2 is calculated by adding up the total area of ventilation openings in the grille.
- Important! The appliance uses less energy, the larger the ventilation cross-section.
The ventilation gap at the top of the appliance can be constructed in different ways:

- ①: Directly above the wine unit
- ②: Above a top box
- ③: In a top box through a ventilation grille at the front
⚠️ To ensure effective ventilation the ventilation gaps must not be covered or blocked.
They must also be regularly cleaned of dust.
Before installing the wine conditioning unit
■ Take any accessories out of the appliance.

■ Remove the cable clip from the back of the appliance (depending on model).
Door opening angle limiter
The door opening angle limiter restricts the opening angle of the appliance door to 90°. This may be necessary if the appliance door hits an adjacent wall when opened, for example (see "Adjusting the door hinges").
Building-in dimensions![≥200 cm² ≥500 (40) 1772⁺¹⁶ ≥500 (40) 560⁺¹⁰ [mm] 1816 595 ≥200 cm²](/content/2026/06/1322405/images/c44d47899f1d8dbc54ea10fdbbb1193d2ebde80722a0e9ee431f4daac45f1272.jpg)
The mains connection cable is 2800 mm long.
The socket must be easily accessible in an emergency, not concealed behind the appliance.
The door hinges on the wine unit are set ex-works to enable the appliance door to be opened wide.
However, if the opening angle of the door needs to be limited for any reason, the hinge can be adjusted to accommodate this.
If the appliance door hits an adjacent wall when opened, for example, the opening angle can be limited to approx. 90°.
The locking pins for limiting the door opening must be fitted before the wine unit is installed (see "Installing the wine unit").

■ Insert the locking pins supplied for limiting the door opening into the hinges from above.
The door opening angle is now limited to approx. 90°.
Changing the door hinging
The wine unit is supplied right-hand hinged. If left-hand hinging is required, the hinges must be changed.
To change the door hinging, you will need the following tools:

Danger of injury and damage to the appliance.
The glass door is breakable!
The glass door is heavy. Two people are needed for changing the door hinging.
Risk of damage!
The wine unit has an elongated glass door and must not be set down vertically at any time!
Danger of injury and damage to the appliance.
The glass door can drop!
When changing the door hinging make sure that all fixing parts are securely screwed into position.
Place a suitable cover on the floor in front of the wine unit to protect the glass door and your floor from damage when changing the hinging.
Be careful not to damage the door seal. If the door seal is damaged, the appliance door may not close properly and cooling will be insufficient.

Open the appliance door and remove covers ① and ② on the left and right of the wine unit.

Remove cover ③ from the bottom of the wine unit.

Unscrew transport safety device ④.
Tip: Keep this device in a safe place for refitting should the appliance need to be moved in the future.
Danger of injury and damage to the appliance.
The appliance door is not secure once the screws in the hinges have been removed.
The second person must support the appliance door.
Changing the door hinging

Danger of injury!
If the hinges close there is a danger of injury.
Leave them open.

■ Slightly unscrew the bottom and top screws from the hinges ⑤. The appliance door must be held by a second person whilst you do this. ■ Remove the appliance door.

Risk of damage!
The wine unit has an elongated glass door and must not be set down vertically at any time!
■ Carefully place the dismantled appliance door on a soft surface. ■ Now undo the screws completely.

Danger of injury!
Do not close the hinges.

■ Pull the door seal back a little from the top corner of the door and remove cover ⑥.

Tip: Take care not to let the screws that you have loosened fall through the slits in the appliance door!
■ Unscrew cover ⑦.
Changing the door hinging

■ Pull the door seal back a little from the bottom corner of the door and remove cover ⑧.

Tip: Take care not to let the screws that you have loosened fall through the slits in the appliance door!
■ Unscrew transport safety device ⑨ from the bottom of the appliance.
■ Place the screws to one side. They will be needed later on.

■ Take off upper retaining bracket ⑩ and refit it on the opposite side.

■ Remove stopper ⑪ from the appliance door. ■ Remove spacer ⑫ from the appliance door, rotate it 180° and fit it on the opposite side. ■ Refit stopper ⑪ on the opposite side of the door.

■ Pull the door seal back a little from the top and bottom corners of the door and remove covers ⑬.

■ Unscrew hinges ⑭ from the appliance door.

■ Refit hinges ⑭ on their diagonally opposite positions.
■ Important! Tighten the screws on the top hinge in the top row ("TOP") and on the lower hinge also in the top row ("Bottom").
Changing the door hinging

■ Screw on cover ⑦ and cover ⑮ supplied. To do so use the screws that you put to one side that were previously used for the transport safety device ⑨.

■ Refit covers ⑬.

- Secure seal ⑯. ■ Make sure that the seal is properly seated.

■ Refit covers ⑥ and ⑧.

■ Fit screws loosely through hinges ⑱ at the top and bottom.

- Secure seal ⑰.
■ Refit the appliance door and then tighten the screws, first at the bottom, then at the top.
- Replace top covers ① and ② and click them into place.
Danger of injury!
The second person must support the appliance door during the following steps.

- Replace bottom cover ③ and click it into place.
Changing the door hinging
- Check that the wine unit is standing securely in the niche and that the door closes properly.
⚠ Warning! Do not drop the appliance. Risk of injury and damage. Two people are required for installing this wine conditioning unit.
■ Install the wine conditioning unit in a stable, solid housing unit, positioned on an even and level floor. ■ The niche must be horizontally and vertically aligned. ■ The required ventilation cross-sections must be ensured (see "Installation - Ventilation" and "Building-in dimensions").
The following parts are supplied with the wine unit:
All installation parts are number coded. This coding is also used in the installation instructions.

Installing the wine conditioning unit
All fitting instructions given are for a right hand hinged appliance. If you have converted the appliance to left hand hinging you will need to adapt these instructions accordingly.
Preparing the wine unit

■ Unscrew the transport safety devices ① from both sides on the back of the wine unit and remove them upwards. ■ Feed the mains cable through to the socket.

Risk of damage!
The wine unit has an elongated glass door and must not be set down vertically at any time!

Fire hazard due to short circuit!
When pushing the wine unit into its niche make sure that the mains cable does not get trapped. Never operate a wine unit with a faulty mains cable!

■ Push the appliance two thirds of the way into the building-in niche.

■ Turn the front adjustable feet all the way in using the spanner ② supplied.

■ Slide the cover strip ③ supplied from the front into the holders on the wine unit as shown.

■ If the wine unit is left-hinged, allow for the position of the lug (see illustration above).

■ If the wine unit is right-hinged, allow for the position of the lug (see illustration above).

■ Unscrew the transport safety device ④ from the front of the wine unit, if you have not already done so.
Tip: Keep this device in a safe place for refitting should the appliance need to be moved in the future.
With 16 mm thick unit walls:
■ Clip spacers ⑤ and ⑥ supplied on the right-hand side of the hinges.
■ Open the appliance door.
Installing the wine conditioning unit

■ Remove top cover ⑦.

■ Fit stopper ⑩ supplied onto fixing bracket ⑪ also supplied.

■ Screw supplied fixing bracket ⑧ loosely with screws ⑨ supplied into the top left of the wine unit (1st and 3rd hole from the left). Do not tighten the screws so that you can adjust the position of bracket ⑧ later on.
■ Screw supplied fixing bracket ⑪ loosely with screws ⑫ supplied into the bottom of the wine unit. Do not tighten the screws ⑫ so that you can adjust the position of the bracket later on.

■ Remove the edge protection from all sides of the door.
■ Push the appliance two thirds of the way into the building-in niche.

■ Carefully remove the protective foil from sealing strip ⑬. ■ Fix sealing strip ⑬ flush with the front of the appliance on the door opening side. 1. Position the sealing strip ⑬ flush with the lower edge of the top fixing bracket. 2. Stick it down along its entire length. If necessary, insert the locking pins supplied for limiting the door opening into the hinges from above (see "Adjusting the hinges").
Installing the wine conditioning unit
Installing the wine unit
If the wine unit is pushed too far into the niche, the door will not close properly. This can cause ice to build up, condensate to accumulate and lead to faults in the appliance. These can all lead to increased energy consumption.
Push the wine unit into the building-in niche making sure a gap of 42 mm is maintained all round between the appliance carcase and the front of the housing unit side walls.
■ Push the wine unit into the niche until the fixing brackets touch the front edge of the side walls of the housing unit. - With 16 mm thick unit walls:
The spacers should touch the front edge of the housing unit side walls at the top and bottom.
- With 19 mm thick unit walls:
The front edges of the top and bottom hinges should be flush with the front edge of the housing unit side wall.
■ Check the position of the fixing bracket at the top and bottom front edge of the housing unit side wall again.

This will create a gap all round of 42 mm to the front edges of the housing unit side walls.
Close the appliance door and align the wine unit flush to the surrounding cabinetry, pulling the wine unit forwards if necessary.

Align the height of the wine unit as necessary on both sides with adjacent cabinetry by altering the adjustable feet using the spanner supplied.
Installing the wine conditioning unit

Push the hinged side of the appliance to the housing unit wall. To secure the wine unit to the housing unit, screw the chipboard screws (supplied) through the hinge plates at the top and bottom (1. + 2.).

Push the fixing brackets ⑧ and ⑪ against the housing unit wall.
Installing the wine conditioning unit

Now secure the wine unit to the other side of the housing unit by screwing chipboard screws (supplied) through the hinge plates at the top and bottom (3. + 4.).

Now tighten screws ⑨ and ⑫.

Snap off any protruding ends from securing brackets ⑧ and ⑪. They are no longer required and can be disposed of.

Fit cover ⑦ to the top fixing bracket.
Fit cover (supplied) to the bottom fixing bracket.
Installing the wine conditioning unit
For additional stability of the wine unit in the housing unit, push the stabilising rods supplied underneath the appliance between it and the floor of the housing unit:

Then secure handle ⑰ to one of the stabilising rods ⑱.

Push the stabilising rod 18 into the guide hole as far as it will go. Remove the handle 17 and fit it to the other rod supplied and push this into its guide as far as it will go.
Tip: Important! Keep the handle 17 somewhere safe in case you ever need to fit the wine unit into new cabinetry.
Check that the wine unit is standing securely in the niche and that the door closes properly.
If not already done, remove the transport safety device as follows:

Pull the door seal back a little from the bottom corner of the door and remove cover 19.

Unscrew the transport safety device 20 from the bottom of the wine unit, if you have not already done so.
Installing the wine conditioning unit

Screw cover 2 supplied into position.

Refit cover 19 and secure the seal. Check that the wine unit is standing securely in the housing unit and that the door closes properly.
Adjusting the appliance door
Align the appliance door by width (X) with neighbouring cabinetry fronts.
Risk of damage!
When adjusting the appliance door take care not to damage furniture fronts of units adjacent to the hinged side.
After adjusting the appliance door, carefully open the door and if necessary readjust it.

Remove the seal from the appliance door and remove the covers.

■ Loosen screw ① and move it to position ②. ■ Loosen screw ③. - Carry out these steps for the lower door as well. ■ Adjust the width of the door (X) so that the gap on both sides of the door is the same. ■ Now tighten screws ② and ③.

■ Refit covers ④.
Installing the wine conditioning unit

■ Secure the seal back on the door.
The following confirms that the wine unit is correctly installed:
- The appliance door closes properly.
- The appliance door does not touch the housing unit.
- The seal on the top corner of the handle side is firmly seated.
■ To double check place a torch in the wine unit and close the door. Turn the lights out in the room and check whether you can see any light shining out from the sides of the wine unit. If you can, double check each stage of the installation.
United Kingdom
Miele Co. Ltd.
Fairacres, Marcham Road
Abingdon, Oxon, OX14 1TW
Customer Contact Centre Tel: 0330 160 6600
E-mail: mielecare@miele.co.uk
Internet: www.miele.co.uk
Australia
Miele Australia Pty. Ltd.
ACN 005 635 398
ABN 96 005 635 398
1 Gilbert Park Drive
Knoxfield, VIC 3180
Tel: 1300 464 353
Internet: www.miele.com.au
China
Miele (Shanghai) Trading Ltd.
1-3 Floor, No. 82 Shi Men Yi Road
Jing' an District
200040 Shanghai, PRC
Tel: +86 21 6157 3500
Fax: +86 21 6157 3511
E-mail: info@miele.cn,
Miele (Hong Kong) Limited
41/F - 4101, Manhattan Place
23 Wang Tai Road
Kowloon Bay, Hong Kong
Tel: (852) 2610 1025
Fax: (852) 3579 1404
Email:
customerservices@miele.com.hk
Website: www.miele.hk
India
Miele India Pvt. Ltd.
Ground Floor
Copia Corporate Suites
Plot No. 9, Jasola
New Delhi - 110025
Tel: 011-46 900 000
Fax: 011-46 900 001
E-mail: customercare@miele.in
Internet: www.miele.in
Ireland
Miele Ireland Ltd.
2024 Bianconi Avenue
Citywest Business Campus
Dublin 24
Tel: (01) 461 07 10
Fax: (01) 461 07 97
E-Mail: info@miele.ie
Internet: www.miele.ie
Malaysia
Miele Sdn Bhd
Suite 12-2, Level 12
Menara Sapura Kencana
Petroleum
Solaris Dutamas No. 1
Jalan Dutamas 1
50480 Kuala Lumpur, Malaysia
Phone: +603-6209-0288
Fax: +603-6205-3768
New Zealand
Miele New Zealand Limited
IRD 98 463 631
Level 2, 10 College Hill
Freemans Bay, Auckland 1011
New Zealand
Tel: 0800 464 353
Internet: www.miele.co.nz
Singapore
Miele Pte. Ltd.
163 Penang Road
# 04 - 03 Winsland House II
Singapore 238463
Tel: +65 6735 1191
Fax: +65 6735 1161
E-Mail: info@miele.com.sg
Internet: www.miele.sg

South Africa
Miele (Pty) Ltd
63 Peter Place, Bryanston 2194
P.O. Box 69434, Bryanston 2021
Tel: (011) 875 9000
Fax: (011) 875 9035
E-mail: info@miele.co.za
Internet: www.miele.co.za
Taiwan
K.E. & Kingstone Co., Ltd.
6th Fl., No. 120, Sec. 2
Jianguo N. Rd.
Taipei, Taiwan
TEL: +886 2 2502-7256
FAX: +886 2 2502-3077
BHIRAJ TOWER at EmQuartier
43rd Floor Unit 4301-4303
689 Sukhumvit Road
North Klongton Sub-District
Vadhana District
Bangkok 10110, Thailand
United Arab Emirates
Miele Appliances Ltd.
Gold & Diamond Park
Office No. 6-217
Sheikh Zayed Road
P.O. Box 11 47 82 - Dubai
Tel. +971 4 3044 999
Fax. +971 4 3418 852
800-MIELE (64353)
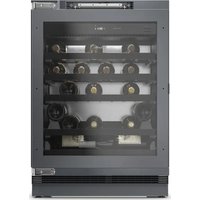

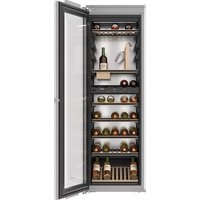
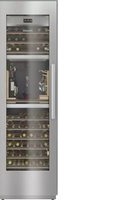
- OPERATING AND INSTALLATION INSTRUCTIONS WINE CONDITIONING UNIT
- WARNING AND SAFETY INSTRUCTIONS
- CARING FOR THE ENVIRONMENT
- HOW TO SAVE ENERGY
- GUIDE TO THE APPLIANCE
- ACCESSORIES
- SWITCHING ON AND OFF
- SELECTING FURTHER SETTINGS
- THE OPTIMUM TEMPERATURE AND AIR QUALITY
- TEMPERATURE AND DOOR ALARM
- FEATURE LIGHTING
- STORING WINE BOTTLES
- SOMMELIERSET
- AUTOMATIC DEFROSTING
- ACTIVE AIRCLEAN FILTERS
- PROBLEM SOLVING GUIDE
- INFORMATION FOR DEALERS
- ELECTRICAL CONNECTION
- CONTENTS
- CORRECT APPLICATION
- SAFETY WITH CHILDREN
- TECHNICAL SAFETY
- CORRECT USE
- CLEANING AND CARE
- TRANSPORTING THE APPLIANCE
- DISPOSING OF YOUR OLD APPLIANCE
- SYMBOL ON THE COMPRESSOR (DEPENDING ON MODEL)
- DISPOSAL OF THE PACKING MATERIAL
- DISPOSAL OF YOUR OLD APPLIANCE
- CONTROL PANEL
- DOOR OPENING MECHANISM
- TO OPEN THE DOOR
- TO CLOSE THE DOOR
- ACCESSORIES SUPPLIED
- CHALK
- OPTIONAL ACCESSORIES
- MULTI-PURPOSE MICROFIBRE CLOTH
- MICROCLOTH KIT
- ACTIVE AIRCLEAN FILTER
- BEFORE USING FOR THE FIRST TIME
- PACKAGING MATERIAL
- CLEANING THE WINE UNIT
- OPERATING THE WINE CONDITIONING UNIT
- SWITCHING ON
- SWITCHING OFF
- SWITCHING OFF FOR LONGER PERIODS OF TIME
- SAFETY LOCK
- ACTIVATING OR DEACTIVATING THE SAFETY LOCK
- AUDIBLE TONES ♪♪
- SWITCHING AUDIBLE TONES ON/OFF
- DISPLAY BRIGHTNESS
- ALTERING THE DISPLAY BRIGHTNESS
- THE OPTIMUM TEMPERATURE
- SAFETY DEVICE IN CASE OF LOW AMBIENT TEMPERATURES
- ISOLATOR PLATE FOR THERMAL SEPARATION
- SETTING THE TEMPERATURE
- TEMPERATURE RANGE
- TEMPERATURE DISPLAY
- AIR QUALITY AND HUMIDITY
- DYNACOOL (CONSTANT HUMIDITY)
- SWITCHING ON DYNACOOL
- SWITCHING OFF DYNACOOL
- AIR FILTRATION WITH THE ACTIVE AIRCLEAN FILTER
- TEMPERATURE ALARM
- SWITCHING THE TEMPERATURE ALARM OFF EARLY
- DOOR ALARM
- SWITCHING THE DOOR ALARM OFF EARLY
- SWITCHING THE FEATURE LIGHTING ON AND OFF
- SETTING THE BRIGHTNESS OF THE FEATURE LIGHTING
- LIGHTING DURATION OF THE FEATURE LIGHTING
- CAUTION. LASER BEAM CLASS 1M
- MOVING THE WOODEN SHELVES
- ADJUSTING THE WOODEN SHELVES
- ANNOTATING WOODEN SHELVES
- D BOTTLE PRESENTER
- RISK OF DAMAGE
- MAXIMUM CAPACITY
- WITHOUT SOMMELIERSET
- WITH
- WITH SOMMELIERSET
- D BOTTLE PRESENTER SET UP
- SETTING UP THE SOMMELIERSET
- FITTING THE RUNNER COVERS
- INSERTING THE GLASSWARE HOLDER
- INSERTING THE BOTTLE HOLDER
- CLEANING AGENTS
- BEFORE CLEANING
- INTERIOR, APPLIANCE DOOR AND ACCESSORIES
- CLEANING THE VENTILATION GAPS
- CLEANING THE DOOR SEAL
- AFTER CLEANING
- REPLACING THE ACTIVE AIRCLEAN FILTER
- CONTACT IN CASE OF MALFUNCTION
- WARRANTY
- DEMO MODE
- SWITCHING ON DEMO MODE
- SWITCHING OFF DEMO MODE
- LOCATION
- LOAD-BEARING CAPACITY OF THE NICHE FLOOR
- IMPORTANT: IN ENVIRONMENTS WITH HIGH HUMIDITY, CONDENSATION MAY APPEAR ON THE EXTERNAL SURFACES OF THE WINE CONDITIONING UNIT
- CLIMATE RANGE
- SIDE-BY-SIDE
- VENTILATION
- BEFORE INSTALLING THE WINE CONDITIONING UNIT
- DOOR OPENING ANGLE LIMITER
- CHANGING THE DOOR HINGING
- TO CHANGE THE DOOR HINGING, YOU WILL NEED THE FOLLOWING TOOLS
- DANGER OF INJURY
- THE FOLLOWING PARTS ARE SUPPLIED WITH THE WINE UNIT
- INSTALLING THE WINE CONDITIONING UNIT
- PREPARING THE WINE UNIT
- INSTALLING THE WINE UNIT
- THE FOLLOWING CONFIRMS THAT THE WINE UNIT IS CORRECTLY INSTALLED
- UNITED KINGDOM
- AUSTRALIA
- CHINA
- MIELE (HONG KONG) LIMITED
- INDIA
- IRELAND
- MALAYSIA
- NEW ZEALAND
- SINGAPORE
- SOUTH AFRICA
- TAIWAN
- UNITED ARAB EMIRATES
Brand : MIELE
Model : KWT 6722 IGS
Category : Wine cellar