
Multigroom series 3000 QG3352 - Beard trimmer PHILIPS - Free user manual and instructions
Find the device manual for free Multigroom series 3000 QG3352 PHILIPS in PDF.


| Product Type | Beard Trimmer |
| Brand | Philips |
| Model | Multigroom Series 3000 QG3352 |
| Power Source | Rechargeable Ni-MH Battery |
| Charging Time | 8 hours |
| Runtime (Cordless) | 30 minutes |
| Voltage | 100-240 V (Auto-Voltage) |
| Length Settings | 13 settings (1-23 mm) |
| Blade Material | Stainless Steel |
| Included Attachments | Adjustable Beard Comb (1-23 mm), Detail Trimmer Head |
| Washable | Yes, detachable head washable under running water |
| Cordless Use | Yes, up to 30 minutes |
| Charging Indicator | LED |
| Weight | 0.31 kg (approx. 300 g) |
| Dimensions (L x W x H) | 16.5 x 4.5 x 4.5 cm |
| Color | Black / Chrome |
| Warranty | 2 years |
Frequently Asked Questions - Multigroom series 3000 QG3352 PHILIPS
User questions about Multigroom series 3000 QG3352 PHILIPS
0 question about this device. Answer the ones you know or ask your own.
Ask a new question about this device
Download the instructions for your Beard trimmer in PDF format for free! Find your manual Multigroom series 3000 QG3352 - PHILIPS and take your electronic device back in hand. On this page are published all the documents necessary for the use of your device. Multigroom series 3000 QG3352 by PHILIPS.
USER MANUAL Multigroom series 3000 QG3352 PHILIPS
フィリップスマルチグルーミングキット
品番
QG3352
取 扱 說 明 書
保証書付
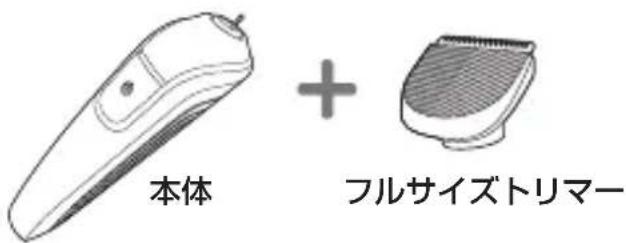
フルサイズトリマー
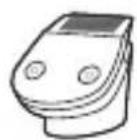
フルメタル
細部トリマー

ミニ網刃 シェーバー
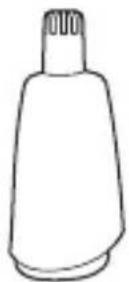
鼻・耳毛
トリマー

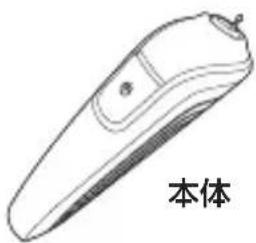
本体

ヒゲトリミング用 コーム
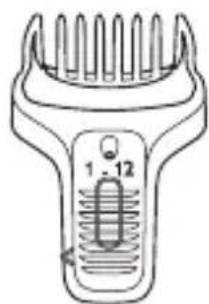
スタブル用 コーム
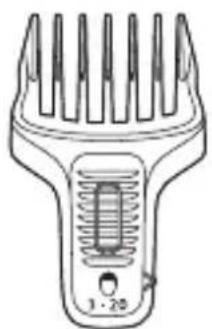
ヘアートリミング用 コーム

くし

クリーニング
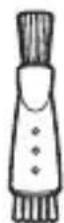
ブラシ
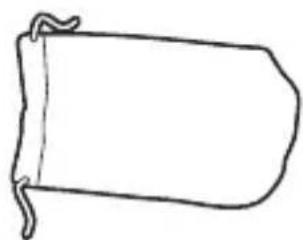
ソフトポーチ
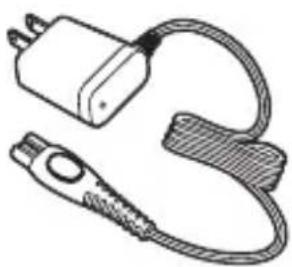
充電アダプタ (A00390)
Guidance in English 21\~37
●困ったとき
故障かな?と思ったら……39
●保 証
保証とアフターサービス……40
仕様/お客様情報センター 41
無料修理規定 42
保証書 ...... 最終ページ
必ずお守り ください
安全上のご注意
用途/アタッチメントの組合せ
●無精ヒゲを作る
●ヒゲの長さを整える

●鼻毛や耳毛をカットする

鼻・耳毛トリマー
●本体、アタッチメント、コームの収納
充電の仕方
お客様による充電池の交換はできません。
この商品は通常約10時間充電です。
アタッチメントの使い方
アタッチメントの取り付け

コームの取り付け、取り外し方
コームの取り付け
フルサイズトリマー

コーム
フルサイズトリマー

コーム
ポイント
ヒゲの輪郭を整える
[使用するもの]
![PHILIPS Multigroom series 3000 QG3352 - [使用するもの] - 2](/content/2026/06/1317406/images/50f694248c689d6766c421ae413f912781d1e231c59bab3f5ed19a5f74f51760.jpg)
![PHILIPS Multigroom series 3000 QG3352 - [使用するもの] - 3](/content/2026/06/1317406/images/41738ed7853703aa1f37fc80bf535a7664f8a1fba8ab7451f69fe5995f32e146.jpg)
ミニ網刃シェーバー

注意

注意
耳まわりのラインを整える
[使用するもの]
鼻毛/耳毛 カットの仕方
鼻毛/耳毛をカットする
[使用するもの]

+
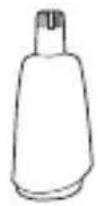
鼻・耳毛トリマー
鼻毛耳毛

注意
ニッケル水素電池のリサイクルについて
Congratulations on your purchase and welcome to Philips! To fully benefit from the support that Philips offers, register your product at www.philips.com/welcome.
General description (Fig. 1)
1 Beard trimmer
2 Handle
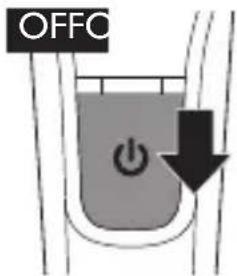
3 On/off slide
4 Pouch
5 Cleaning brush
6 Nose/ear trimmer
7 Mini-foil shaver
8 Full metal precision trimmer
9 Stubble comb
10 Beard comb
11 Hair clipper comb
12 Guiding grooves
13 Setting indicator
14 Adapter
15 Styling comb
Important
Read this user manual carefully before you use the appliance and save it for future reference.
Danger
- Keep the adapter dry.
Warning
Check if the voltage indicated on the adapter - corresponds to the local mains voltage before you connect the appliance.
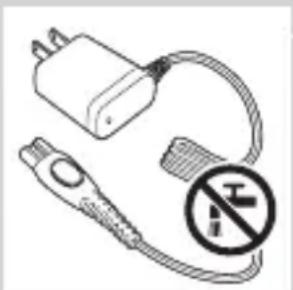
The adapter contains a transformer. Do not cut - off the adapter to replace it with another plug, as this causes a hazardous situation.
This appliance is not intended for use by persons - (including children) with reduced physical, sensory or mental capabilities, or lack of experience and knowledge, unless they have been given supervision or instruction concerning use of the appliance by a person responsible for their safety. This appliance is not intended for use by children. - Children should be supervised to ensure that they do not play with the appliance.
Always check the appliance before you use it. Do - not use the appliance if it is damaged, as this may cause injury.
Do not use the appliance in the bath or in the - shower.
Caution
Only use the adapter supplied. -
Use, charge and store the appliance at a - temperature between 5°C and 35°C.
Make sure the appliance is switched off and - disconnected from the mains before you clean it under the tap.
If the adapter is damaged, always have it replaced - with one of the original type in order to avoid a hazard.
If the appliance is subjected to a major change - in temperature, pressure or humidity, let the appliance acclimatise for 30 minutes before you use it.
Do not use the appliance if any of its parts is - damaged or broken, as this may cause injury.
Never use compressed air, scouring pads, abrasive cleaning agents or aggressive liquids such as petrol or acetone to clean the appliance.

Maximum noise level: Lc = 75dB(A) -
Compliance with standards
- This appliance complies with the internationally approved IEC Safety regulations and can be safely cleaned under the tap.
This Philips appliance complies with all standards - regarding electromagnetic fields (EMF). If handled properly and according to the instructions in this user manual, the appliance is safe to use based on scientific evidence available today.
Charging
Standard charging takes approximately 10 hours. When the appliance is fully charged, it has an operating time of up to 35 minutes.
Note: You can get 45 minutes of cordless operating time when the appliance is charged overnight for 16 hours.
1 Switch off the appliance before you charge it.
2 Insert the appliance plug into the appliance.
3 Put the adapter in the wall socket.
The charging light on the adapter goes on to indicate that the appliance is charging.
Note: The charging light does not change colour and does not go out when the appliance is fully charged.

Using the appliance
Hair clipping
Preparing for hair clipping
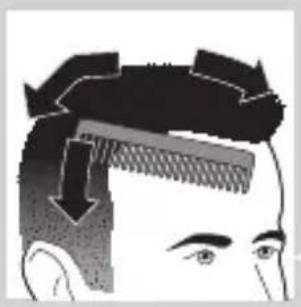
1 Make sure that the head of the person whose hair you intend to cut is at the same level as your chest. This ensures that all parts of the head are clearly visible and within easy reach.
2 Comb the hair in the growth direction.
Hair clipping with hair clipping comb

1 Place the trimmer on the handle (1) and turn it clockwise to fix it (2).
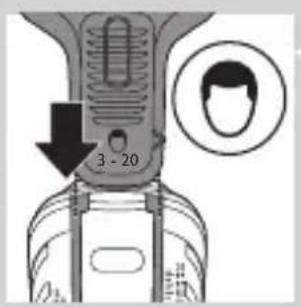
2 Slide the hair clipping comb into the guiding grooves on both sides of the handle.

3 Press the setting selector (1) and slide the comb to the desired hair length setting (2).
You can choose any setting between 3 and 20mm in steps of 1mm.
Tip: Write down the hair length settings you selected to create a certain hairstyle as a reminder for future clipping sessions.
4 Switch on the appliance.

ENGLISH
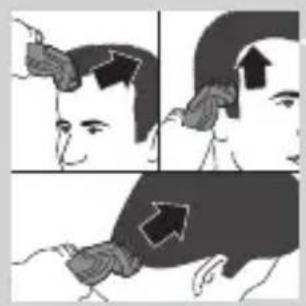

5 Move the appliance slowly and against the direction of hair growth. Press lightly.
Note: Since hair grows in different directions, you need to move the appliance in different directions as well (upward, downward or across).
6 Always make sure that the flat part of the comb is in full contact with the scalp to obtain an even result.
Make overlapping passes over the head to ensure that you cut all the hair that needs to be cut.
Note: When you trim for the first time, start at the highest setting (20mm) to familiarise yourself with the appliance.
Hair clipping without hair clipping comb
You can use the trimmer without comb to clip hair very close to the skin (to a length of 1mm) or to create contours.
Caution: Be careful when you clip without the comb because the trimmer removes every hair it comes in contact with.
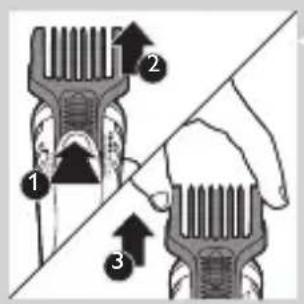
1 Press the setting selector (1) and slide the comb upwards (2). Then pull the comb off the appliance (3).
2 Before you start to contour the hairline around the ears, comb the hair ends over the ears.

3 Tilt the appliance in such a way that only one edge of the trimmer touches the hair. Only cut the hair ends. The hairline should be close to the ear.

4 To contour the neckline and sideburns, turn the appliance and make downward strokes. 5 Move the appliance slowly and smoothly. Follow the natural hairline.
Beard and stubble trimming
When you trim your beard for the first time, be careful. Do not move the trimmer too fast. Make smooth and gentle movements.
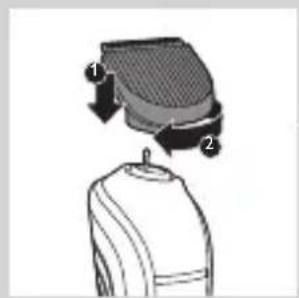
Beard trimming with beard comb
1 Place the trimmer onto the handle (1). Turn the trimmer clockwise to fix it (2).
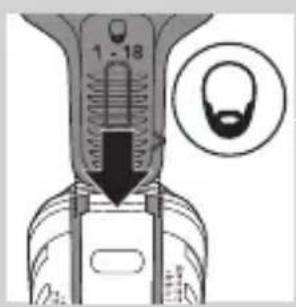
2 Slide the beard comb into the guiding grooves on both sides of the handle.
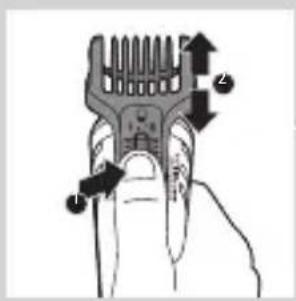
3 Press the setting selector (1) and slide the comb to the desired hair length setting (2). You can choose any setting between 1 and 18mm.
ENGLISH
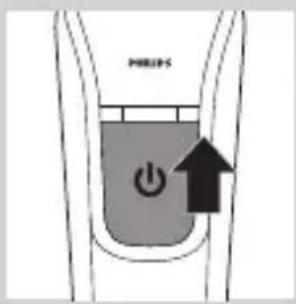
4 Switch on the appliance.
5 Slowly move the trimmer against the hair growth direction. Press lightly and always make sure the surface of the comb is in full contact with the skin.
Note: When you trim for the first time, start at the highest setting (18mm) to familiarise yourself with the appliance.
Trimming your stubbles
You can use the stubble comb to trim your stubbles.

1 Place the trimmer onto the handle (1). Turn the trimmer clockwise to fix it (2).
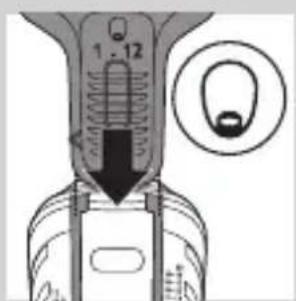
2 Slide the stubble comb into the guiding grooves on both sides of the handle.

3 Press the setting selector (1) and slide the comb to the desired hair length setting (2).
You can choose any setting between 1 and 12mm.

4 Switch on the appliance.
5 Slowly move the trimmer against the hair growth direction. Press lightly and always make
sure the surface of the comb is in full contact with the skin.
Styling/contouring your beard
You can use the precision trimmer to contour or cut shapes in beard hair. It cuts hair very close to the skin, at a length of 1mm.
Caution: Be careful when you use the precision trimmer because it removes every hair it comes in contact with.
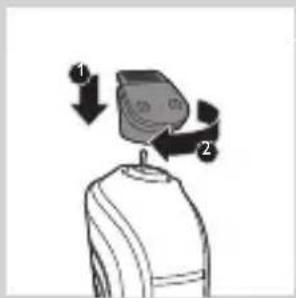
1 Place the precision trimmer onto the handle (1). Turn the precision trimmer clockwise to fix it (2).
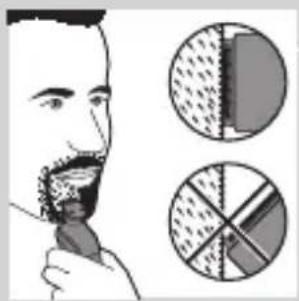
2 To achieve a good cutting result, move the precision trimmer against the direction of hair growth. Always make sure the precision trimmer is in full contact with the skin.
3 Make careful and controlled movements with the precision trimmer.
Tip: For the perfect finish, you can use the mini-foil shaver to make the edges and lines of your beard style even smoother.

Trimming nose and ear hair


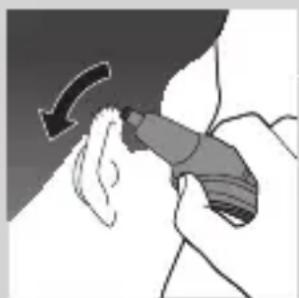

Trimming nose hair
1 Place the nose/ear trimmer onto the handle (1). Turn the nose/ear trimmer clockwise to fix it (2).
2 Make sure your nostrils are clean.
3 Switch on the appliance and insert the tip of the trimmer into one of your nostrils.
Do not insert the tip more than 0.5cm into your nostril.
4 Slowly move the tip in and out while turning it round at the same time to remove unwanted hair.
To reduce the tickling effect, make sure that you press the side of the tip firmly against the skin.
Trimming ear hair
1 Attach the nose/ear trimmer onto the handle.
2 Clean the outer ear channel. Make sure it is free from wax.
3 Switch on the appliance and move the tip softly round the ear to remove hairs that stick out beyond the rim of the ear.
4 Carefully insert the tip into the outer ear channel.
Do not insert the tip more than 0.5cm into the ear channel as this could damage the eardrum.
Cleaning
Never use compressed air, scouring pads, abrasive cleaning agents or aggressive liquids such as petrol or acetone to clean the appliance.
Always keep the adapter dry.
Clean the appliance after each use. The appliance is waterproof therefore the handle, combs and attachments are easily cleaned under the tap.
1 Make sure the appliance is switched off and disconnected from the mains.
2 Remove any comb and/or attachment from the appliance.
3 Blow and/or shake out any hair that has accumulated in the attachments and/or combs or use the cleaning brush.
4 Clean the attachments and the combs under a lukewarm tap and/or with the cleaning brush.
5 Clean the handle under a lukewarm tap and/or with the cleaning brush.
Cleaning the mini-foil shaver
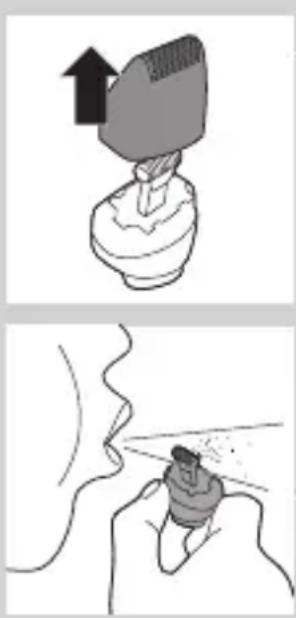
1 After each use, pull the top part of the mini-foil shaver off the bottom part.
The shaving foil is very delicate. Handle it carefully. If the shaving foil is damaged, do not use the mini-foil shaver anymore.
Do not clean the shaving foil with the cleaning brush, as this may cause damage.
2 Blow and/or shake out any hair that has accumulated inside the mini-foil shaver.
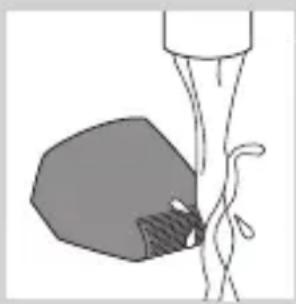
3 Clean the top part of the mini-foil shaver under a lukewarm.
Storage
Store the handle, combs, attachments and adapter in the storage pouch supplied to prevent damage.
Ordering accessories
To purchase accessories for this appliance, please visit our online shop at www.shop.philips.
com/service. If the online shop is not available in your country, go to your Philips dealer or a Philips service centre. If you have any difficulties obtaining accessories for your appliance, please contact the Philips Consumer Care Centre in your country. You find its contact details in the worldwide guarantee leaflet.
If the adapter is damaged, always have it replaced with one of the original type in order to avoid a hazard.
Only replace damaged or worn attachments or combs with original Philips replacement attachments or combs.
Environment

- Do not throw away the appliance with the normal household waste at the end of its life, but hand it in at an official collection point for recycling. By doing this, you help to preserve the environment.
- The built-in rechargeable battery contains substances that may pollute the environment. Always remove the battery before you discard and hand in the appliance at an official collection point. Dispose of the battery at an official collection point for batteries. If you have trouble removing the battery, you can also take the appliance to a Philips service centre. The staff of this centre will remove the battery for you and will dispose of it in an environmentally safe way.
Removing the rechargeable battery
Only remove the rechargeable battery when you discard the appliance. Make sure the battery is completely empty when you remove it.
Be careful, the battery strips and housing parts are very sharp.
1 Make sure the appliance is disconnected from the mains.
2 Remove the attachment.
3 Remove the on/off button of the appliance with a flathead screwdriver.
4 Remove the front panel of the appliance with a flathead screwdriver.
5 To pull out the inner, apply a tilting force in the indicated hole with a flathead screwdriver. Pull upward on the top cover.
6 Separate the inner and the tube.
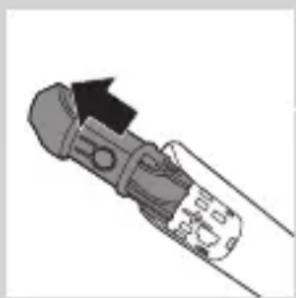
7 Remove the on/off contact.

ENGLISH

8 Unhook and remove the rest of the cover to expose the rechargeable battery.
9 Cut the wires to separate the rechargeable battery from the appliance.
Guarantee and service
If you need service or information or if you have a problem, please visit the Philips website at www.
philips.com/support or contact the Philips
Consumer Care Centre in your country. You find its phone number in the worldwide guarantee leaflet. If there is no Consumer Care Centre in your country, go to your local Philips dealer.
Guarantee restrictions
Cutting units are not covered by the terms of the international guarantee because they are subject to wear.
Troubleshooting
This chapter summarises the most common problems you could encounter with the appliance. If you are unable to solve the problem with the information below, visit www.philips.com/
support for a list of frequently asked questions or contact the Consumer Care Centre in your country.
| Problem Possible cause | Solution | |
| The beard comb does not stay attached to the handle. | You do not attach the beard comb correctly. | Slide the beard comb into the guiding grooves on both sides of the handle until you hear a click. |
| The guiding grooves are dirty. | Clean the appliance and the guiding grooves thoroughly. | |
| The comb is broken. | Go to your Philips dealer or contact a Philips service centre to purchase a new comb. | |
| The appliance does not work anymore. | The rechargeable battery is empty. | Charge the appliance (see chapter ‘Charging’). Make sure you switch off the appliance before you charge it. During charging, the charging light on the adapter flashes. If the charging light does not flash, check whether there is a power failure or if the wall socket is live. If there is no power failure and the wall socket is live but the charging light still does not flash, take the appliance to your dealer or a Philips service centre. |
| The appliance does not work when it is connected to the mains. | The appliance is not designed to work from the mains. | Switch off the appliance and charge it for 10 hours (see chapter ‘Charging’). |
| The appliance does not charge when it is connected to the mains. | The appliance has to be switched off when you charge it. | Switch off the appliance. |
| The appliance does not trim as well as it used to. | The cutting element of the attachment you are using is dirty. | Remove the attachment from the appliance. Clean the attachment under a lukewarm tap. |
| The appliance becomes hot. | The cutting element of the attachment you are using is dirty. | Remove the attachment from the appliance. Clean the attachment under a lukewarm tap. |
故障かな? と思ったら
故障かな?と思ったら、お調べください。
充電しても使用時間が極端に短い
- 取 扱 說 明 書
- 必ずお守り ください
- 安全上のご注意
- 用途/アタッチメントの組合せ
- 充電の仕方
- アタッチメントの使い方
- アタッチメントの取り付け
- コームの取り付け、取り外し方
- コームの取り付け
- ポイント
- ヒゲの輪郭を整える
- [使用するもの]
- ミニ網刃シェーバー
- 注意
- 耳まわりのラインを整える
- 鼻毛/耳毛 カットの仕方
- 鼻毛/耳毛をカットする
- 鼻毛耳毛
- ニッケル水素電池のリサイクルについて
- GENERAL DESCRIPTION (FIG. 1)
- IMPORTANT
- DANGER
- WARNING
- CAUTION
- COMPLIANCE WITH STANDARDS
- CHARGING
- USING THE APPLIANCE
- HAIR CLIPPING
- PREPARING FOR HAIR CLIPPING
- HAIR CLIPPING WITH HAIR CLIPPING COMB
- ENGLISH
- HAIR CLIPPING WITHOUT HAIR CLIPPING COMB
- BEARD AND STUBBLE TRIMMING
- BEARD TRIMMING WITH BEARD COMB
- TRIMMING YOUR STUBBLES
- STYLING/CONTOURING YOUR BEARD
- TRIMMING NOSE AND EAR HAIR
- TRIMMING NOSE HAIR
- TRIMMING EAR HAIR
- CLEANING
- ALWAYS KEEP THE ADAPTER DRY
- CLEANING THE MINI-FOIL SHAVER
- STORAGE
- ORDERING ACCESSORIES
- ENVIRONMENT
- REMOVING THE RECHARGEABLE BATTERY
- GUARANTEE AND SERVICE
- GUARANTEE RESTRICTIONS
- TROUBLESHOOTING
- 故障かな? と思ったら
- 充電しても使用時間が極端に短い
Brand : PHILIPS
Model : Multigroom series 3000 QG3352
Category : Beard trimmer