
FN6192OW - Freezer GORENJE - Free user manual and instructions
Find the device manual for free FN6192OW GORENJE in PDF.


| Product Type | Freezer |
| Brand | Gorenje |
| Model | FN6192OW |
| Energy Class | E (estimate) |
| Annual Energy Consumption | Approx. 250 kWh/year |
| Total Net Capacity | 200 L (estimate) |
| Dimensions (H x W x D) | 85 x 60 x 60 cm (estimate) |
| Weight | 35 kg (estimate) |
| Noise Level | 42 dB (estimate) |
| Climate Class | SN-T (estimate) |
| Freezing Capacity | 10 kg/24h (estimate) |
| Storage Time During Power Failure | 12 h (estimate) |
| Defrost Type | Manual |
| Temperature Control | Mechanical dial (estimate) |
| Door Type | Solid door (estimate) |
| Door Hinge | Right (reversible) (estimate) |
| Shelves | 3 wire shelves (estimate) |
| Drawers | 1 large drawer (estimate) |
| Cooling Agent | R600a |
| Power Supply | 220-240 V, 50 Hz (estimate) |
| Power Cord Length | 1.5 m (estimate) |
| Installation Type | Freestanding |
| Color | White (estimate) |
| Warranty | 2 years (Europe) (estimate) |
Frequently Asked Questions - FN6192OW GORENJE
User questions about FN6192OW GORENJE
0 question about this device. Answer the ones you know or ask your own.
Ask a new question about this device
Download the instructions for your Freezer in PDF format for free! Find your manual FN6192OW - GORENJE and take your electronic device back in hand. On this page are published all the documents necessary for the use of your device. FN6192OW by GORENJE.
USER MANUAL FN6192OW GORENJE
EN Instruction manual

Upright Freezer
We thank you for the confidence you have shown by purchasing our appliance. We wish you find a lot of pleasure in its use.
The appliance is intended solely for household use.
The freezer is intended for freezing fresh food and for long-term storage of frozen food (up to one year, depending on the type of food).
Important notes and warnings .... 3
Advice for saving power with refrigeration appliances....5
Appliance description 6
Installation and connection 7
Changing the direction of door opening 9
Operating the appliance with electronic controls .. 11
Appliance interior equipment 14
Freezing and storing frozen food 15
Defrosting the appliance 17
Cleaning the appliance 17
Troubleshooting 18
Information about appliance noise 19
Important notes and warnings

- This appliance can be used by children aged from 8 years and above and persons with reduced physical, sensory or mental capabilities or lack of experience and knowledge if they have been given supervision or instruction concerning use of the appliance in a safe way and understand the hazards involved. Children shall not play with the appliance. Cleaning and user maintenance shall not be made by children without supervision.
- Before connecting the appliance to the power mains, please read carefully the instructions for use which describe the appliance and its correct and safe use. The instructions apply for several appliance types/models; thus, settings or equipment may be described herein which is not available in your appliance. The instruction manual includes the NO FROST version/model of the freezer which is fitted with a fan and in which the defrosting process is automatic.
- Remove the packaging intended for protecting the appliance or particular parts during transport.
- Spacers are fitted on the corners of the doors. Remove them and insert the supplied plugs into their slots (only in some models).
- Before connecting the appliance to the power mains, let the appliance rest in a vertical position for approximately 2 hours. This will reduce the possibility of operation faults due to the effect of transport on the cooling system.
- The appliance must be connected to the power mains and grounded in compliance with the effective standards and regulations.
- The appliance may not be used outdoors and it may not be exposed to rain.
- Before cleaning the appliance, unplug the appliance from the power mains (unplug the power cord from the wall outlet).
- If the power cord is damaged, it must be replaced by a service technician or other adequately trained person.
- If the appliance will be out of use for a prolonged period of time, switch it off using the relevant button, and unplug the appliance from the power
mains. Empty the appliance, defrost it, clean it, and leave the door ajar.
- If LED lighting does not work, call a service technician. Do not attempt a repair of the LED lighting yourself, as there is danger of contact with high voltage!
- To protect the environment, take the obsolete appliance to an authorized home appliance collection center.
- Packaging is made of environmentally friendly materials that can be recycled, disposed of, or destroyed without any hazard to the environment.
- Do not let children play with the appliance.
- Cleaning and user maintenance shall not be made by children without supervision.
- The rating plate can be found in the appliance interior. If the language on the rating plate is not the language of your choice or the language of your country, replace it with the one supplied.
- WARNING! Ventilation openings on the appliance or built-in cupboard must be kept clean and unobstructed at all times.
- WARNING! Do not use any mechanical accessories or other methods to defrost the appliance, except for those expressly recommended by the manufacturer.
- WARNING! During installation, cleaning, and removal of the appliance, be careful not to damage the insulation of the parts of the cooling system. This will also prevent pollution.
- WARNING! Do not use any electric devices inside the appliance, except for those allowed by the manufacturer of this refrigeration appliance.
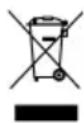
The symbol on the product or its packaging indicates that the product should not be treated as normal household waste. The product should be taken to an authorized collection center for waste electric and electronic equipment processing. Correct disposal of the product will help prevent any negative effects on the environment and health of people which could occur in case of incorrect product removal. For detailed information on removal and processing of the product, please contact the relevant municipal body in charge of waste management, your waste disposal service, or the store where you bought the product.
Advice for saving power with refrigeration appliances
• Install the appliance as specified in the instruction manual. • Do not open the door more often than necessary. • Occasionally make sure air circulation underneath the appliance is unobstructed. • Condenser unit on the rear wall should be kept clean (see chapter Cleaning the appliance). • If the gasket is damaged or does not provide a perfect seal for other reasons, have it replaced as soon as possible. • Store the food in tightly sealed containers or appropriate packaging. • Before placing the food in the appliance, cool it to room temperature. • Defrost frozen food in the refrigerator compartment. • Remove the drawers from the freezer compartment as described in the instruction manual, in order to make use of the entire interior. • Defrost your conventional freezer when an approximately 3-5 millimeter layer of frost or ice has built up on the refrigerated surfaces. • Make sure the layout of shelves in the compartment is uniform and that the food is placed so that the air can freely circulate in the appliance interior (observe the recommended placement of food as described in the instructions). • In appliances with a fan, do not block the fan slots. • If you do not need the fan or the ionizer, switch them off to reduce power consumption.
Appliance description
NO FROST FREEZER

1 Control unit 2 LED lighting of freezer interior 3 NO FROST freezing unit (cooler, fan ...) 4 Freezing and storage compartment 5 Foot 6 Caster*
- Appliance interior equipment may change according to the appliance model.
- The drawers are protected against pulling out. To remove a drawer from the appliance, open it, then lift the front part and pull it out.
- Fan (hidden within the freezer unit) provides better distribution of temperature. It is off when the freezer door is open, or during idle compressor periods.
* Only in some models
Installation and connection
Selecting the room
- Install the appliance in a dry and well ventilated room. The appliance will operate correctly if the environment temperature is in the interval specified in the table. The appliance class is indicated on the rating plate / label with the basic information on the appliance.
| Class Temperature | |
| SN (subnormal) from | +10°C to +32°C |
| N (normal) from +16°C | C to +32°C |
| ST (subtropical) from | +16°C to +38°C |
| T (tropical) from +16°C | C to +43°C |
Warning: Make sure the room where the appliance is installed is large enough. There should be at least 1 m³ of space per 8 grams of refrigerant. Amount of refrigerant is stated on the rating plate in the appliance interior.
Installing the appliance
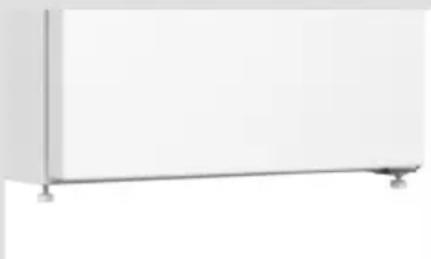

Appliance installation should be carried out by at least two persons to avoid any physical injury or damage to the appliance.
- The appliance must stand level or tilted slightly to the back, stable on a solid base. At the front, the appliance is fitted with two adjustable legs that can be used to level the appliance. At the rear side, casters allow for easier installation of the appliance (only with some models).
- There should be a clearance of at least 5 cm between the appliance and any cupboard installed above it, in order to allow adequate cooling of the condenser unit.
- The appliance is supplied with two spacers which should be installed on the lower part of the housing to prevent from pushing the appliance too close to the wall. Appliance may also be installed without the spacers; however, this may increase power consumption.
- Do not expose the appliance to direct sunlight and do not place it near any source of heat. If this cannot be avoided, install an insulation panel.
- The appliance may stand alone or it may be placed next to a cupboard or a wall. Consider the clearance required to fully open the door in order to allow pulling out the drawers and shelves (see installation diagram).

Note: When placing the appliances side by side, the anti-dew (anti-condensation) set has to be purchased and installed!
Code for ordering the set:
- appliances with a height of 1850 mm: 461944.
- Connect the appliance to the power mains using a connection cable. The wall outlet should be fitted with a ground contact (safety socket). Nominal voltage and frequency are indicated on the rating plate/label with basic information on the appliance.
- The appliance must be connected to the power mains and grounded in compliance with the effective standards and regulations. The appliance will withstand short-term deviations from the nominal voltage, but not more than +/- 6%.
Connecting the appliance
Changing the direction of door opening
Version I – controls in the appliance interior
Tools required: socket wrench No. 8, Phillips screwdriver, torx 25, flat screwdriver. The procedure to change the direction of door opening should be carried out by at least two persons.
- Remove the upper hinge cover (A) and the covering cap (G).
- Undo the upper hinge (B) and remove the door (C) from the lower hinge (D).
- Tilt the appliance backwards (make sure you do not press against the condenser unit on the rear wall of the appliance as this may damage the cooling system), unscrew the lower hinge (D) and the foot (E), and move them to the opposite side. Make sure the washer is installed like it was before disassembly.
- Move the door hinges (F) to the opposite side and replace the door (C) back on the lower hinge (D).
- Use the screws to attach the upper hinge (B) on the opposite side.
- Replace the upper hinge cover (A) and the covering cap (G) on the opposite side.
- Replacing the handle (H): remove the handle covering caps, undo the screws, and remove the handle. Remove the hole plugs on the opposite side of the door and attach the handle. Replace the covering caps on the handle. Insert the new hole plugs supplied in the bag with the instruction manual into the holes where the handle was initially attached.
Replacing the hinged handle:


- Push a small screwdriver into the handle slot as indicated in Figure 1 and remove the cover.
- Remove the caps on the opposite side of the door.
- Undo the three screws, making sure not to disassemble the handle.
- Rotate the handle by 180° as indicated in Figure 3 and attach it to the opposite side of the door.
- Replace the cover and the caps.

Operating the appliance with electronic controls
CONTROL UNIT 1

Electronic Control
A Knob for temperature settings, switching the appliance on/off, and activating the super freeze function
Switching the appliance on/off

To switch on: rotate the thermostat knob A clockwise towards the thicker end of the sign.
To switch off: rotate the A dial so that the arrow is aligned with the sign (caution: appliance will remain powered, i.e. there will still be electric current in the appliance).
Adjusting the temperature
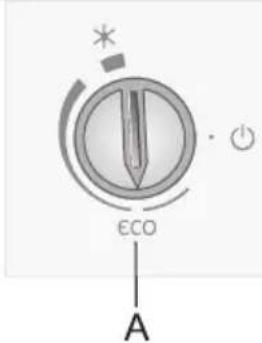
- To set the desired temperature, rotate the A dial in clockwise direction, i.e. to the right.
- Recommended setting of the A knob is on the eco position.
- A change in the environment temperature will affect the temperature in the appliance. Adjust the setting with the A dial accordingly. Positions towards the thicker part of the sign mean a lower temperature in the appliance (cooler). Settings towards the thinner part of the sign mean a higher temperature (warmer).
Freezer boost (super freeze) function

- Use this setting after switching on the appliance for the first time, before cleaning, or 24 hours before inserting a large amount of food.
Switching on the freezer boost (super freeze) function:
Rotate the A dial to position *.
After the end of the freezer boost cycle, rotate the A knob back to the desired setting.
If the freezer boost is not deactivated manually, it will be automatically switched off after approximately 2 days. Then the temperature of the freezer compartment returns to the most recently set value (knob position remains at *).
CONTROL UNIT 2

A On/off switch B Temperature adjustment and freezer boost key C Freezer temperature display D Freezer boost function indicator
Switching the appliance on/off

Adjusting the temperature in the appliance
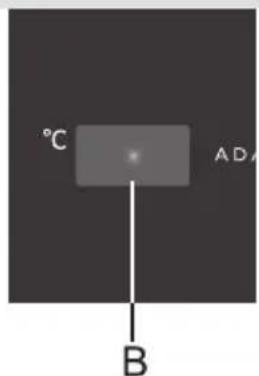
Press the A key to switch the appliance on/off.
- Adjust the temperature as desired with the B key.
- Set the desired temperature, indicated on the display, by successively pressing the B key.

Freezer boost (super freeze) function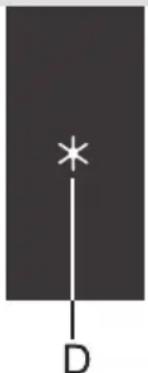
- Recommended temperature setting is -18°C.
To activate the freezer boost function, press the B key until the symbol D lights up.
- Use this setting after switching on the appliance for the first time, before cleaning, or 24 hours before inserting a large amount of food. If the function is not deactivated manually, it will be deactivated automatically after approximately 2 days. Then the temperature of the freezer compartment returns to the most recently set value.
Appliance interior equipment
MultiBox storage bin/ice tray*
(*only in some models)
- The MultiBox bin is convenient for storing food with a strong or pungent smell.
- The silicone lid provides an air-tight seal that prevents the food from drying out and the odour to spread throughout the refrigerator compartment.
- The flexible lid can also be used as an ice tray.
Freezing and storing frozen food
Freezing process


Important warnings on freezing fresh food

The maximum amount of fresh food that may be inserted at once is specified on the appliance rating plate. If the amount of food to be frozen exceeds the indicated amount, the quality of freezing will be inferior; in addition, the quality of the food already frozen will deteriorate.
• To make use of the entire freezer volume, remove all drawers.
Place the food directly on the shelves and on the freezer bottom.
- Activate the super freeze function 24 hours before freezing fresh food:
- Control unit 1: rotate the A dial to position *;
- Control unit 2: press the B key repeatedly until the symbol D lights up.
After this time, insert the fresh food into the freezing compartment.
Make sure the fresh food is not in contact with the food that is already frozen!
The most suitable place for freezing a large amount of fresh food is the upper section of the freezer.
- When freezing smaller quantities of food (1-2 kilograms), activating the super freeze function is not required.
• After 24 hours, the food can be moved to other freezer compartments and the freezing process can be repeated as necessary.
• After the freezing process is completed, rotate the A dial back to the desired setting (only with control unit 1).
- If the freezer boost is not deactivated manually, it will be automatically switched off after approximately 2 days. Then the temperature of the freezer compartment returns to the most recently set value (knob position remains at ).
- Freezer models NO FROST allow freezing in all drawers, but not more than 7 kg in any particular drawer, and 4 kg in the bottom drawer.

Only freeze the food that is suitable for freezing in the freezer. Make sure the food you freeze is of high quality and fresh.

Choose appropriate packaging and use the packaging correctly.
Storage of industrially frozen food
Frozen food storage time
Defrosting frozen food
Packaging should not be permeable to humidity; it should be airtight to prevent the food from drying out and loss of vitamins. ⚠️ Label the food; indicate the type of food, amount, and date of freezing. It is important that the food is frozen as quickly as possible. Therefore, keep the packages small. Refrigerate the food before freezing.
- When storing and using frozen food, observe the manufacturer's instructions. Temperature and expiry date are indicated on the packaging.
- Only choose food with undamaged packaging, stored in freezers at temperatures of -18°C or lower.
- Do not purchase food covered in frost as this indicates they have been partly defrosted several times and that they are of inferior quality.
- Protect the food from thawing during transport. In case of an increase in temperature, storage time will be shorter and quality will deteriorate.
Recommended storage time in the freezer
| Type of food Time | |
| fruit, beef from 10 to 12 months | |
| vegetables, veal, poultry from 8 to 10 months | |
| Venison from 6 to 8 months | |
| Pork from 4 to 6 months | |
| minced meat 4 months | |
| bread, pastry, ready-to-eat meals, lean 3 months | |
| entrails 2 months | |
| smoked sausage, fatty fi sh 1 month |
Freezing the food does not kill the microorganisms. After the food is defrosted or thawed, bacteria is re-activated and the food spoils quickly. Use the partially or completely defrosted food as soon as possible.
Partial thawing decreases the nutritive value of the food, particularly fruit, vegetables, and ready-to-eat food.
Defrosting the appliance
Defrosting a NO FROST freezer
- The NO FROST freezer will defrost automatically. Occasional frost that may appear on the walls will disappear automatically. - Build-up of ice or frost in the freezer compartment can be a result of abnormal use of the appliance (door opened too frequently and/or too long, door not properly closed, etc.). In this case, unplug the appliance, remove the food from the freezer, and protect it from defrosting.
Clean and dry the freezer interior. Before returning the frozen food into the freezer, switch on the appliance and select the desired setting.
Cleaning the appliance
Before cleaning, unplug the appliance from the power mains – switch off the appliance (see chapter Switching the Appliance On/Off) and unplug the power cord from the wall outlet.
- Use a soft cloth to clean all surfaces. Cleaners that contain abrasive substances, acids, or solvents are not suitable for cleaning as they may damage the surface.
Clean the appliance exterior with water or a mild solution of suds. Lacquer-coated and aluminium surfaces may be cleaned with lukewarm water to which you have added a mild detergent. Use of cleaners with low alcohol content is allowed (e.g., window cleaners).
Do not use cleaners containing alcohol for cleaning plastic materials.
The appliance interior can be cleaned with lukewarm water to which you can add some vinegar.

- The condenser unit mounted on the (exterior) back wall should always be kept clean, free of dust or deposits resulting from kitchen smoke or fumes. Occasionally clean the dust using a soft non-metal brush or a vacuum cleaner.

- Also clean the tray above the refrigerator compressor. If you remove it, replace it after cleaning. Make sure it is placed horizontally. • After cleaning, switch the appliance back on and insert the food.
Troubleshooting
| Problem: Cause or remedy: | |
| Appliance is connected to the power mains but it does not work. | Make sure there is voltage in the power outlet and that the appliance is switched on. |
| Cooling system operates continuously for a long period of time: | Too high environment temperature. |
| Door opened too frequently or too long. | |
| Door not closed correctly (possible impurities on the seal, misaligned door, damaged seal etc.). | |
| Too much fresh food inserted at once. | |
| Insuffi cient compressor and condenser cooling. Check the air circulation behind the appliance and clean the condenser unit. | |
| Build-up of ice or frost in the freezer interior may be a result of the following: | Door opened too frequently or too long. |
| Door not properly closed. | |
| Poor door sealing. | |
| If the seal is dirty or damaged, clean or replace it. | |
| Door is difficult to open: | If you are trying to open the appliance door after just having closed it, this could be diffi cult to do.As you open the door, some cool air escapes from the appliance and it is replaced by warm air from the environment. When this air is cooled, negative pressure is generated which results in problems as you try to open the door. After a few minutes, the condition is normalized and the door can be easily opened again. |
| LED lighting does not work: • If LED | lighting does not work, call a service technician.Do not attempt a repair of the LED lighting yourself, as there is danger of contact with high voltage! |
If none of the instructions above fixes your problem, call the nearest authorized service center and state the type, model, and serial number found on the rating plate/label which is located in the appliance interior.
Information about appliance noise
Cooling in refrigerator freezers is made possible by a cooling system that also includes a compressor (and a fan with some appliances), which generates some noise. The level of noise depends on installation, proper use, and age of the appliance.
- After connecting the appliance to the power mains, compressor operation, or the sound of flowing liquid, may be somewhat louder. This is not a sign of malfunction and it will not affect the useful life of the appliance. In time, appliance operation and this noise will become quieter.
- Sometimes, unusual or loud noise may appear during appliance operation; these are mostly the result of improper installation:
- The appliance must stand level and stable on a solid base.
- The appliance may not be in contact with a wall or adjacent furniture.
- Make sure the interior equipment sits firmly in its place and that the noise is not caused by cans, bottles or other containers placed next to each other.
- Due to the higher workload on the cooling system when the door is opened more frequently or for a longer time, when a large amount of fresh food is introduced, or when intensive freezing or cooling functions are activated, the appliance can temporarily generate more noise.
WE RESERVE THE RIGHT TO MAKE CHANGES THAT DO NOT AFFECT THE FUNCTIONALITY OF THE APPLIANCE.
Instructions for use of the appliance can also be found on our website at www.gorenje.com / http://www.gorenje.com /

- EN INSTRUCTION MANUAL
- THE APPLIANCE IS INTENDED SOLELY FOR HOUSEHOLD USE
- IMPORTANT NOTES AND WARNINGS
- ADVICE FOR SAVING POWER WITH REFRIGERATION APPLIANCES
- APPLIANCE DESCRIPTION
- NO FROST FREEZER
- INSTALLATION AND CONNECTION
- SELECTING THE ROOM
- INSTALLING THE APPLIANCE
- CONNECTING THE APPLIANCE
- CHANGING THE DIRECTION OF DOOR OPENING
- VERSION I – CONTROLS IN THE APPLIANCE INTERIOR
- TOOLS REQUIRED: SOCKET WRENCH NO. 8, PHILLIPS SCREWDRIVER, TORX 25, FLAT SCREWDRIVER. THE PROCEDURE TO CHANGE THE DIRECTION OF DOOR OPENING SHOULD BE CARRIED OUT BY AT LEAST TWO PERSONS
- REPLACING THE HINGED HANDLE
- OPERATING THE APPLIANCE WITH ELECTRONIC CONTROLS
- CONTROL UNIT
- SWITCHING THE APPLIANCE ON/OFF
- ADJUSTING THE TEMPERATURE
- FREEZER BOOST (SUPER FREEZE) FUNCTION
- SWITCHING ON THE FREEZER BOOST (SUPER FREEZE) FUNCTION
- ADJUSTING THE TEMPERATURE IN THE APPLIANCE
- APPLIANCE INTERIOR EQUIPMENT
- (*ONLY IN SOME MODELS)
- FREEZING AND STORING FROZEN FOOD
- FREEZING PROCESS
- STORAGE OF INDUSTRIALLY FROZEN FOOD
- FROZEN FOOD STORAGE TIME
- DEFROSTING FROZEN FOOD
- DEFROSTING THE APPLIANCE
- DEFROSTING A NO FROST FREEZER
- CLEANING THE APPLIANCE
- INFORMATION ABOUT APPLIANCE NOISE
Brand : GORENJE
Model : FN6192OW
Category : Freezer