
Walkman NW-E407 - Mp3 player SONY - Free user manual and instructions
Find the device manual for free Walkman NW-E407 SONY in PDF.
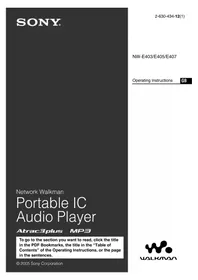


| Product Type | MP3 Player |
| Model | Walkman NW-E407 |
| Brand | Sony |
| Internal Memory | 512 MB |
| Playback Formats | MP3, WMA, ATRAC3 |
| Battery Type | Built-in rechargeable lithium-ion battery |
| Battery Life (approx.) | 70 hours (MP3 playback) |
| Charging Time | Approx. 2 hours (USB) |
| Dimensions (W x H x D) | 27.5 x 92.0 x 12.8 mm |
| Weight | 39 g (including battery) |
| Display | Backlit LCD, 3-line display |
| Audio Output | Headphone jack (stereo mini-jack) |
| USB Interface | USB 2.0 (mini-B) |
| Supported Operating Systems | Windows 98 SE/Me/2000/XP, Mac OS 9.x/X |
| Playback Controls | Play/Pause, Stop, Next/Previous, Volume, Hold |
| Additional Features | FM tuner, voice recording, repeat/shuffle modes |
| Cleaning | Wipe with a soft dry cloth; do not use solvents |
| Safety | Keep away from moisture and extreme temperatures |
| Spare Parts/Accessories | Headphones, USB cable, carrying pouch (included) |
| Repair | Refer to authorized service center; no user-serviceable parts inside |
Frequently Asked Questions - Walkman NW-E407 SONY
User questions about Walkman NW-E407 SONY
0 question about this device. Answer the ones you know or ask your own.
Ask a new question about this device
Download the instructions for your Mp3 player in PDF format for free! Find your manual Walkman NW-E407 - SONY and take your electronic device back in hand. On this page are published all the documents necessary for the use of your device. Walkman NW-E407 by SONY.
USER MANUAL Walkman NW-E407 SONY
Operating Instructions
Network Walkman
Portable IC Audio Player
Atrac3plus MP3
To go to the section you want to read, click the title in the PDF Bookmarks, the title in the “Table of Contents” of the Operating Instructions, or the page in the sentences.
WARNING
To prevent fire or shock hazard, do not expose the unit to rain or moisture.
Do not install the appliance in a confined space, such as a bookcase or built-in cabinet.
To prevent fire, do not cover the ventilation of the apparatus with newspapers, table cloths, curtains, etc. And don't place lighted candles on the apparatus.
To prevent fire or shock hazard, do not place objects filled with liquids, such as vases, on the apparatus.
Note on installation
If you use the unit at a place subject to static or electrical noise, the track's transferring information may be corrupted. This would prevent successful transferring authorization on your computer.
Disposal of Old Electrical & Electronic Equipment (Applicable in the European Union and other European countries with separate collection systems)

This symbol on the product or on its packaging indicates that this product shall not be treated as household waste. Instead it shall be handed over to the applicable collection point for the recycling of electrical and electronic equipment. By ensuring this product is disposed of correctly, you will help prevent potential negative consequences for the environment and human health, which could otherwise be caused by inappropriate waste handling of this product. The recycling of materials will help to conserve natural resources. For more detailed information about recycling of this product, please contact your local city office, your household waste disposal service or the shop where you purchased the product. Applicable accessories: Headphones
For the customers in the United States
Owner's Record
The model number and the serial number are located on the rear of the player (see page 8).
Record the serial number in the space provided below.
Refer to them whenever you call your Sony dealer regarding this product.
Model No.
Serial No. ____
INFORMATION:
This equipment has been tested and found to comply with the limits for a Class B digital device, pursuant to Part 15 of the FCC Rules. These limits are designed to provide reasonable protection against harmful interference in a residential installation. This equipment generates, uses, and can radiate radio frequency energy and, if not installed and used in accordance with the instructions, may cause harmful interference to radio communications.
However, there is no guarantee that interference will not occur in a particular installation. If this equipment does cause harmful interference to radio or television reception, which can be determined by turning the equipment off and on, the user is encouraged to try to correct the interference using one or more of the following measures:
– Reorient or relocate the receiving antenna. - Increase the separation between the equipment and receiver. - Connect the equipment into an outlet on a circuit different from that to which the receiver is connected. - Consult the dealer or an experienced radio/TV technician for help.
You are cautioned that any changes or modifications not expressly approved in this manual could void your authority to operate this equipment.
If you have any questions about this product:
Visit: www.sony.com/walkmansupport
Contact: Sony Customer Information Services
Center at 1-(866)-456-7669
Write: Sony Customer Information Services Center 12451 Gateway Blvd.,
Fort Myers, FL 33913
Model NW-E405 and NW-E407 only
Declaration of Conformity
Trade Name: SONY
Model No.: NW-E405
NW-E407
Responsible Party: Sony Electronics Inc.
Address: 16450 W. Bernardo Dr,
San Diego, CA 92127
USA
Telephone Number: 858-942-2230
This device complies with Part 15 of the FCC Rules. Operation is subject to the following two conditions: (1) This device may not cause harmful interference, and (2) this device must accept any interference received, including interference that may cause undesired operation.
For the customers in the Netherlands
On the supplied software
• Copyright laws prohibit reproducing the software or the manual accompanying it in whole or in part, or renting the software without the permission of the copyright holder. - In no event will SONY be liable for any financial damage, or loss of profits, including claims made by third parties, arising out of the use of the software supplied with this player. - In the event a problem occurs with this software as a result of defective manufacturing, SONY will replace it. However, SONY bears no other responsibility. - The software provided with this player cannot be used with equipment other than that which is so designated. - Please note that, due to continued efforts to improve quality, the software specifications may be changed without notice. - Operation of this player with software other than that provided is not covered by the warranty.
Program ©2001, 2002, 2003, 2004, 2005 Sony Corporation
Documentation ©2005 Sony Corporation
"WALKMAN" is a registered trademark of Sony Corporation to represent Headphone Stereo products.
W. WALKMAN is a trademark of Sony
Corporation.
OpenMG and its logo are trademarks of Sony Corporation.
SonicStage and SonicStage logo are trademarks or registered trademarks of Sony Corporation.
ATRAC, ATRAC3, ATRAC3plus and their logos are trademarks of Sony Corporation.
Microsoft, Windows and Windows Media are trademarks or registered trademarks of Microsoft Corporation in the United States and/or other countries.
All other trademarks and registered trademarks are trademarks or registered trademarks of their respective holders.
In this manual, TM and ® marks are not specified.
This manual explains how to operate your Network Walkman. For details on how to use the SonicStage (supplied software), refer to the SonicStage operating instructions.
The SonicStage operating instructions are installed with the SonicStage software.
Table of Contents
Overview 6
What you can do with your Network Walkman 6
Other features 7
Checking the package contents 8
Locating controls 9
Front side 9
Rear side 9
Display 10
Basic Operations
Transferring audio files from the computer to your Network Walkman/Charging 11
Listening to music with your Network Walkman 14
Searching for a song you want to listen to (SEARCH) 15
Example of searching 16
Searching by artist name and playing back the song 17
Searching by album name and playing back the song 18
Searching by Group and playing back the song 19
On other operations 20
On the Group Control Mode 20
Advanced Operations
Repeat mode 21
Selecting the repeat mode 21
Playing tracks repeatedly (Track Repeat) 22
Playing a specified section repeatedly (A-B Repeat) 23
Playing specified sentences repeatedly (Sentence Repeat) 24
Setting the repeat count 25
Changing the display mode 26
Changing the display mode 27
Selecting the display types (Display Screen) 27
Adjusting the treble and bass (Digital sound preset) 28
Selecting the Sound quality 28
Adjusting the Sound quality 29
Locking the controls (HOLD) 30
Storing non-audio data 30
Adjusting the settings of your Network Walkman
Adjusting the current time setting (Date-Time) 31
Limiting the volume (AVLS) 32
Setting the volume using the preset volume function (Volume Mode) ..... 33
Setting a volume level for preset mode (Preset Volume) 33
Switching to manual mode (Manual Volume) 34
Saving power consumption (Power Save Mode) 35
Turning off the beep sound (Beep) ...... 36
Other functions
Formatting memory (Format) 37
Changing the USB connection setting (USB Bus Powered) 38
Displaying the player information (Information) 39
Other Information
Precautions 40
When disposing of your Network Walkman 41
Troubleshooting 42
To reset the player 42
What happened? 42
Messages 46
Specifications 48
Glossary 50
Menu list 52
Index 53
Overview
What you can do with your Network Walkman
First, you need to install the “SonicStage” software into your computer. You can easily transfer digital audio files from your computer to the built-in flash memory and carry it anywhere to enjoy.
1 Store digital audio files on your computer.
![graph TD A["Download the latest audio files! Store favorite songs!"] --> B["EMD (Electric Music Distribution) Services"] A --> C["Audio CDs"] A --> D["MP3, WAV and Windows® Media Format Audio Files"]](/content/2026/06/1314776/images/6c093e434d764c65a0bde02b5b953bab716c8b2f1caebe355c9c37af9999e35e.jpg)
2 Transfer files to your Network Walkman.

3 Enjoy music with your Network Walkman.

Other features
- Compact size, light weight, skip-proof operation and high portability.
- Continuous playback time with the rechargeable Lithium-Ion battery Approximately 50*1 hours
- Recording time *2
NW-E403: 256MB built-in flash memory, more than 11 hours 40 minutes.
NW-E405: 512MB built-in flash memory, more than 23 hours 30 minutes.
NW-E407: 1GB built-in flash memory, more than 47 hours 00 minutes.
- The supplied SonicStage software enables you to record songs from audio CDs to the hard disk of your computer using the ATRAC3plus format (high sound quality, high compression).
- MP3 audio files can be easily transferred to the Network Walkman using the SonicStage software.
- Sentence Repeat: Useful function for learning a foreign language. • High-speed data transfer using the dedicated USB cable.
- Organic EL display: song titles and artist names can be displayed.
- Search function: you can search songs to be played by artist, album, or group.
- Storage function: you can store a variety of data as well as audio files.
NOTES:
- The recorded music is limited to private use only. Use of the music beyond this limit requires permission of the copyright holders.
- Sony is not responsible for incomplete recording/downloading or damaged data due to problems of the Network Walkman or computer.
- Depending on the type of the text and characters, the text shown on the Network Walkman may not be displayed properly on device. This is due to:
– The capability of the connected player.
– The player is not functioning normally.
- The ID3 TAG information for the track is written in the language or the character that is not supported by the player.
Checking the package contents
Please check the accessories in the package.
• Network Walkman (1)

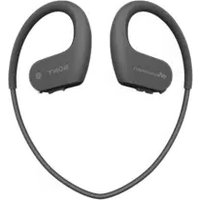
• Headphones (1) NW-E403/E405

NW-E407

• Dedicated USB cable (1)

- Extension headphone cord (NW-E407 only) (1)
- Carrying pouch (NW-E407 only) (1)
- Clip (1)
- CD-ROM for the SonicStage software, PDF file Operating Instructions, and PDF file SonicStage Operating Instructions (1)
- Quick Start Guide
About the Serial Number
The serial number provided for your device is required for customer registration. The number is on the rear side of your Network Walkman.

Record the serial number. Refer to it whenever you call upon your Sony dealer regarding this product.
The serial number can also be shown in the menu screen (page 39).
Locating controls
For details about each part, refer to the pages in parentheses.

1 Shuttle switch (pages 17 to 22, 25, 27 to 39) 2 ▶■ button (pages 14 to 25, 27 to 29, 31 to 39) 3 SEARCH/MENU button (pages 15, 17 to 25, 27 to 29, 31 to 39) 4 Display (pages 10, 15, 22, 26) For details on the display and icons, refer to page 10. 5 VOL (Volume) +/- button (pages 14, 33) 6 DISPLAY button (pages 26 to 27)
Rear side Front side
7 REPEAT/SOUND button (pages 22 to 24, 28) 8 Strap hole 9 Headphone jack (page 14) 10 Reset button (page 42) 11 USB jack (page 12)
Display

1 Text/graphic information display (pages 15, 22) Displays album title, artist name, track number, track name, current date and time (pages 26 to 28, 31), MESSAGE (page 46) and menu. Press the DISPLAY button to switch the display mode (pages 26 to 28). Switch the display to Power Save or Display OFF mode when you do not operate the unit for a while (page 35). 2 Current track number/total track number of the Play Range The track number currently selected or being played back and the total track number of the current Play Range is displayed.
3 Playing status indicator Display current playback mode (▶: playback, ■: stop) and elapsed time.
4 Repeat mode indication (page 22)
The current repeat mode icon is displayed.
5 Digital sound preset indication (pages 28 to 29)
The current digital sound preset is displayed if set.
6 Remaining battery indication (pages 12 to 13)
The remaining battery power is displayed.
Transferring audio files from the computer to your Network Walkman/Charging
Note
Before connecting your Network Walkman to the computer for the first time, be sure to install the “SonicStage” software from the supplied CD-ROM in your computer. Even if the SonicStage software is already installed, you need to install the SonicStage software supplied with this Network Walkman before connecting your Network Walkman to the computer (update programs may be available).
1 Install the SonicStage software in your computer using the supplied CD-ROM.
Follow step 1 only for the first time when you connect your Network Walkman to the computer.
Refer to the Quick Start Guide.
Refer to the SonicStage operating instructions for details.

Tip
The SonicStage operating instructions are installed with the SonicStage software in your computer.
2 Import audio files into the SonicStage software.
For details, refer to the SonicStage operating instructions.
Transferring audio files from the computer to your Network Walkman/Charging
3 Connect your Network Walkman to your computer and charge it.
Connect the small connector of the dedicated USB cable to the USB jack on the Network Walkman, then the large connector to a USB port on your computer.
"USB Connect" appears in the display.

The Network Walkman is rechargeable when connected to a computer with the dedicated USB cable.
When the remaining battery indication of the display shows: ☐ full, charging is complete (charging time is approx. 120 minutes *1 ).
Fully charge the Network Walkman (to ☐ FULL in the remaining battery indication of the display) before using it for the first time.
*1 This is the approximate charging time when the battery power is low and the “USB Bus Powered” setting (page 38) is “High-power 500mA” under room temperature. The charging time will vary depending on remaining battery power and battery condition. If the battery is charged in a low-temperature environment, the charging time will be longer. It will also be longer if you transfer audio file(s) to your Network Walkman while charging.
Battery duration *2
ATRAC3 format: Approximately 50 hours
ATRAC3plus format: Approximately 45 hours
MP3 format: Approximately 40 hours
*2 This is when the power save setting is normal (page 35). The battery duration will vary depending on temperature and usage.
On the remaining battery indication
The battery icon in the display changes as shown below.
![graph LR A[" "] --> B[" "] B --> C[" "] C --> D[" "] D --> E[" Light Bulb"]](/content/2026/06/1314776/images/2c94c6bdbc55fe4c4939f7d712ae3384c995ca2acd8c2bf7d9b45c786671b22b.jpg)
The battery power gets low as shown in the battery icon. If “LOW BATTERY” is displayed, you cannot play back with the Network Walkman. In this case, charge the battery by connecting to your computer.
Notes
- Charge the battery in an ambient temperature of between 5 to 35°C (67 to 95°F).
- The icon above “USB Connect” in the display is animated while your Network Walkman accesses the computer. Do not disconnect the USB cable when the icon is moving or the data being transferred may be destroyed.
- Use of your Network Walkman with a USB hub or a USB extension cable is not guaranteed. Always connect your Network Walkman to the computer directly using the dedicated USB cable.
- Some USB devices connected to the computer may interfere with the proper operation of your Network Walkman.
- The control buttons on your Network Walkman are all disabled while it is connected to a computer.
- You can display the data stored in the built-in flash memory using Windows Explorer when your Network Walkman is connected to the computer.
4 Transfer audio files to your Network Walkman.
For information on transferring audio files to the built-in flash memory, refer to the SonicStage operating instructions.
Tip
For information on transferring audio files back to the computer, refer to the SonicStage operating instructions or online Help for the SonicStage software.
Note
If the USB cable is disconnected while data is being transferred, unnecessary data may be left in the Network Walkman. In this case, transfer usable audio files (including non-audio data) back to your computer and format (page 37) the Network Walkman.
Listening to music with your Network Walkman
Charge the built-in rechargeable battery before use (page 12) and transfer audio files to your Network Walkman.
Note
When using Network Walkman, be sure to disconnect it from the computer.
1 Connect the headphones.

To use the headphones extension cord (NW-E407 only)
Connect until it clicks into place.

2 Start playback.
① Press the ▶■ button.

② Press the VOL +/- button to adjust the volume.
Shuttle switch
If the repeat mode (page 21) is not set, playback stops automatically after the last song is played.
If playback does not start
Make sure that the Shuttle switch is not set to HOLD (page 30).

To stop playback
Press the ▶■ button.
To adjust the volume
The volume can be set in the Preset and Manual (pages 33 to 34).
Tip
You can switch the display to Power Save or Display OFF mode when you do not operate the unit for a while (page 35).
Searching for a song you want to listen to (SEARCH)
You can search for desired tracks to playback by the following 3 ways.
• Search by artist name (Artist) • Search by album name (Album) - Search by group* transferred from your computer with the SonicStage software (□Group)
* The audio files transferred from your computer with the SonicStage software are always grouped when transferred to the built-in flash memory.
On the search flow and Play Range
Press the SEARCH/MENU button to display the search menu screen.
Proceed to the next stage by pressing the ▶■ button, and return to the previous stage by pressing the SEARCH/MENU button on the search menu screen.
The searched songs (as shown in the illustration below) become a Play Range (coverage of playback). If you do not set the repeat mode (page 21), playback will stop automatically at the end of the Play Range.
![graph TD A["Search menu screen"] --> B["All Track* Artist Artist Album Group"] B --> C["Artist list All Artist Artist1 Artist2"] C --> D["Album list of searched artist All Album Album1 Album2"] D --> E["All tracks (play Range) All tracks (artist order) Track1 Track2 Track3"] D --> F["All tracks of t…](/content/2026/06/1314776/images/917e890c85903b6143188a6e7cede83fc5a77277a656d0c3330f4f200bd3a458.jpg)
* When you select "All Track", all track lists are displayed and the Play Range will be "All".
Listening to music with your Network Walkman
Example of searching
① Display the search menu screen to select "Artist". ② Select "Artist B" from the artist list. ③ Select "Album5" from the album list of Artist B.
The track list of Album5 is displayed.
In this case, the track list becomes the Play Range.
④ Select "Track15" from the track list. ⑤ Press the ▶■ button.
Playback starts from Track15.
Playback will stop automatically at the end of Track16 (in this case, the end of the Play Range).
All tracks in the built-in flash memory
| Album Artist ...1 Track | |
| Album 1 Artist A Track01 | |
| Album 1 Artist A Track02 | |
| Album 1 Artist A Track03 | |
| Album 2 Artist A Track04 | |
| Album 2 Artist A Track05 | |
| Album 2 Artist A Track06 | |
| Album 3 Artist B Track07 | |
| Album 3 Artist B Track08 | |
| Album 3 Artist B Track09 | |
| Album 4 Artist C Track10 | |
| Album 4 Artist C Track11 | |
| Album 4 Artist D Track12 | |
| Album 5 Artist A Track13 | |
| Album 5 Artist B Track14 | |
| Album 5 Artist B Track15 | |
| Album 5 Artist B Track16 |
Searching by artist name and playing back the song

1 Press the SEARCH/MENU button.
The search menu screen is displayed.

2 Rotate the Shuttle switch to select "Artist" and press the ▶■ button to confirm.
The artist lists are displayed.

3 Rotate the Shuttle switch to select the desired artist and press the ▶■ button to confirm.
The album lists for the selected artist are displayed.


Tip
When you select "All Artist" at the top of the artist list and confirm it by pressing the ▶■ button, all track lists are displayed in order of artist name (the tracks of the same artist are displayed in the album order). The list displayed will be the Play Range. Proceed to step 5 and start playback.
4 Rotate the Shuttle switch to select the desired album and press the ▶■ button to confirm.
The track lists of the selected artist's album are displayed. The list displayed will be the Play Range.


Tip
When you select "All Album" at the top of the album list and confirm it by pressing the ▶■ button, all track lists of the artist selected in step 3 are displayed in album order. The list displayed will be the Play Range.
5 Rotate the Shuttle switch to select the desired track and press the ▶■ button to confirm.
The selected track will be played back. If you do not set the repeat mode (page 21), the playback will stop automatically at the end of the Play Range.
To return to the previous stage
Press the SEARCH/MENU button. The screen returns to the playback screen by pressing the SEARCH/MENU button while the first stage of the search menu screen (the screen of step 1) is displayed.
continued
Listening to music with your Network Walkman
Searching by album name and playing back the song

1 Press the SEARCH/MENU button.
The search menu screen is displayed.

2 Rotate the Shuttle switch to select "Album" and press the ▶■ button to confirm.
The album lists are displayed.

3 Rotate the Shuttle switch to select the desired album and press the ▶■ button to confirm.
The track lists of the selected album are displayed. The list displayed will be the Play Range.

Tip
When you select "All Album" at the top of the album list and confirm it by pressing the ▶■ button, all track lists are displayed in the album order. The list displayed will be the Play Range.
4 Rotate the Shuttle switch to select desired track and press the ▶■ button to confirm.
The selected track will be played back. If you do not set the repeat mode (page 21), the playback will stop automatically at the end of the Play Range.
To return to the previous stage
Press the SEARCH/MENU button. The screen returns to the playback screen by pressing the SEARCH/MENU button while the first stage of the search menu screen (the screen of step 1) is displayed.
Searching by Group and playing back the song

1 Press the SEARCH/MENU button.
The search menu screen is displayed.

2 Rotate the Shuttle switch to select "☐Group" and press the ▶■ button to confirm.
The Group lists are displayed.

3 Rotate the Shuttle switch to select the desired Group and press the ▶■ button to confirm.
The track lists of the selected Group are displayed. The list displayed will be the Play Range.

Tip
When you select "All Group" at the top of the group list and confirm it by pressing the ▶■ button, all track lists are displayed in the group order (the group of transferred from your computer). The list displayed will be the Play Range.
4 Rotate the Shuttle switch to select desired track and press the ▶■ button to confirm.
The selected track will be played back. If you do not set the repeat mode (page 21), the playback will stop automatically at the end of the Play Range.
To return to the previous stage
Press the SEARCH/MENU button. The screen returns to the playback screen by pressing the SEARCH/MENU button while the first stage of the search menu screen (the screen of step 1) is displayed.
Listening to music with your Network Walkman
On other operations

| To | Shuttle switch operation |
| Skip to the beginning of the next track*1 | Rotate the Shuttle switch to ▶▶. |
| Skip to the beginning of the current track*1 | Rotate the Shuttle switch to ◀◀. |
| Fast-forward*2 | Rotate the Shuttle switch to ▶▶ and hold it. |
| Fast-rewind*2 | Rotate the Shuttle switch to ◀◀ and hold it. |
*1 Rotating and holding the Shuttle switch to ▶▶▶▶▶▶▶▶▶▶▶▶▶▶▶▶▶▶▶▶▶▶▶▶▶▶▶▶▶▶▶▶▶▶▶▶▶▶▶▶▶▶▶▶▶▶▶▶▶▶▶▶▶▶▶▶▶▶▶▶▶▶▶▶▶▶▶▶▶▶▶▶▶▶▶▶▶▶▶▶▶▶▶▶▶▶▶▶▶▶▶▶▶▶▶▶▶▶▶▶▶>
*2 The Fast-forward and fast-rewind speed becomes gradually faster.
On the Group Control Mode
You can use the Group Control Mode by setting the Shuttle switch to the GROUP position.

You can skip to the beginning of the album or group within the Play Range in the Group Control Mode.
| To | Shuttle switch operation |
| Skip to the beginning of the next album/ group*1 *2 | Set the Shuttle switch to the GROUP position and rotate it to ▶▶▶. |
| Skip to the beginning of the current album/ group*1 *2 | Set the Shuttle switch to the GROUP position and rotate it to ▶◀◀. |
*1 Skips to the beginning of the next (or the current) album's first track when the current Play Range is the result of an album name or artist name search. Skips to the beginning of the next (or the current) group's first track when the current Play Range is the track list result of a "searching by group" search. *2 Rotating and holding the Shuttle switch to ▶▶▶▶▶▶▶▶▶▶▶▶▶▶▶▶▶▶▶▶▶▶▶▶▶▶▶▶▶▶▶▶▶▶▶▶▶▶▶▶▶▶▶▶▶▶▶▶▶▶▶▶▶▶▶▶▶▶▶▶▶▶▶▶▶▶▶▶▶▶▶▶▶▶▶▶▶▶▶▶▶▶▶▶▶▶▶▶▶▶▶▶▶▶▶▶▶▶▶▶▶>
Repeat mode
There are 3 types of repeat mode: Track Repeat, A-B Repeat, and Sentence Repeat.
- Track Repeat (Track Rep)
This mode plays back tracks repeatedly in the following 3 ways.
| Track Repeat mode | Operation |
| Repeat | All the songs in the Play Range (coverage of playback) are played back repeatedly. |
| Single Repeat | The current song is played back repeatedly. |
| Shuffle Repeat | All the songs in the Play Range (coverage of playback) are played back repeatedly in random order. |
• A-B Repeat (A-B Rep)
This mode plays back the specified section in a track repeatedly.
- Sentence Repeat (Sentence Rep)
This mode plays back voice data within a specified section in a track repeatedly.
Selecting the repeat mode
button
1 Press and hold the SEARCH/MENU button for half a second in stop mode.
The menu screen is displayed.

2 Rotate the Shuttle switch to select "Repeat Mode>" and press the
Press the ▶■ button to confirm.
Repeat mode
3 Rotate the Shuttle switch to select a desired repeat mode and press the ▶■ button to confirm.

You can choose one mode among "Track Rep", "A-B Rep", and "Sentence Rep".
You can operate each repeat mode you selected, as refer to the below.
- Track Rep: see "Playing tracks repeatedly (Track Repeat)".
- A-B Rep: see "Playing a specified section repeatedly (A-B Repeat)".
- Sentence Rep: see "Playing specified sentences repeatedly (Sentence Repeat)".
4 Press the SEARCH/MENU button repeatedly to exit menu mode.
Notes
- The display automatically returns to the playback screen if you do not operate any button for 60 seconds.
- When there are no audio files in the built-in flash memory, you cannot set any repeat mode.
- When you connect the Network Walkman to your computer, the selected repeat mode will be canceled.
- When you change the Play Range, the selected repeat mode will be canceled.
- You can only select repeat mode from stop mode.
Playing tracks repeatedly (Track Repeat)
The Track Repeat mode is changed by pressing the REPEAT/SOUND button. You can check the current Track Repeat mode with the icon on the display.


Track Repeat icon
Select the Track Repeat mode (Track Rep) first (page 21). Then, press the REPEAT/SOUND button repeatedly to select the repeat mode you want.
Each press changes the Track Repeat icon as follows:
![graph TD A["none (Normal play)"] --> B["(Repeat)"] B --> C["1 (Single Repeat)"] C --> D["SHUF (Shuffle Repeat)"]](/content/2026/06/1314776/images/44657c393a44d2f425359e4e5d250c8337f54f72df40dd99581bc436c67d1761.jpg)
Playing a specified section repeatedly (A-B Repeat)
While playing a track, you can set the start point (A) and end point (B) for a section you wish to play repeatedly.
button
1 Select the A-B Repeat mode (A-B Rep) (page 21).
2 Press the ▶■ button to start playback.
“A →” blinks.
3 Press the REPEAT/SOUND button to set the start point (A) while playing back.
“A →” is displayed and “B” blinks.

4 Press the REPEAT/SOUND button to set the end point (B).
“A→B” is displayed and the specified section is played back repeatedly.

Notes
- You cannot set A-B Repeat for a section that overlaps two or more tracks.
- If you do not set the end point (B), it is automatically set at the end of the track.
- Rotating the Shuttle switch releases the already set start point (A).
To clear the start point (A) and end point (B)
- Press the REPEAT/SOUND button during A-B Repeat playback.
- Press the SEARCH/MENU button during A-B Repeat playback.
- Set the Shuttle switch to the GROUP position to select the Group Control Mode during A-B Repeat playback.
- Select the previous or next track by rotating the Shuttle switch during A-B Repeat playback. (The A-B Repeat mode is not canceled.)
To cancel the A-B Repeat mode
Change the Repeat mode in the menu screen (page 21).
Repeat mode
Playing specified sentences repeatedly (Sentence Repeat)
This function automatically detects voice data between blank spaces (silent spaces) and repeats the voice data for a set number of counts. This is useful for language-learning material which has no background music.

Tip
The default repeat count setting is 2 times for one sentence. But you can change the repeat count setting. Refer to “Setting the repeat count” on page 25.

button


Select the Sentence Repeat mode (Sentence Rep) (page 21).

Press the ▶■ button to start playback.

Press the REPEAT/SOUND button to place the setting point during playback.
The Network Walkman detects the speech up to the next blank space (silent section) and repeats the spoken section according to the repeat count you set (page 25). For example, if you set the repeat count to 3, you will hear each spoken section 4 times- the first time plus 3 repeats.

Notes
- A spoken or silent section of less than 1 second will not be detected.
- If a spoken section continues up to the very end of a track (with no blank), then that point (end of track) is regarded as the end of that spoken section and it is repeated.
To clear the setting point
- Press the REPEAT/SOUND button during Sentence Repeat playback.
- Press the SEARCH/MENU button during Sentence Repeat playback.
- Set the Shuttle switch to the GROUP position to select the Group Control Mode during Sentence Repeat playback.
- Select the previous or next track by rotating the Shuttle switch during Sentence Repeat playback. (The Sentence Repeat mode is not canceled.)
To cancel the Sentence Repeat mode
Change the Repeat mode in the menu screen (page 21).
Setting the repeat count
You can set the repeat counts (1-9) for each sentence in Sentence Repeat mode (Sentence Rep).
button

1 Press and hold the SEARCH/MENU button for half a second in stop mode.
The menu screen is displayed.
▶ Repeat Mode > Sound > Volume Mode >
2 Rotate the Shuttle switch to select "Repeat Mode>" and press the ▶ button to confirm.
3 Rotate the Shuttle switch to select "Sentence Rep" and press the ▶■ button to confirm.
The value of "Repeat Count" is displayed in [ ].
Repeat Count [2]
4 Rotate the Shuttle switch to select the desired repeat count and press the ▶■ button to confirm.
To cancel the Menu mode
Press the SEARCH/MENU button to return the screen to the previous stage. Press repeatedly to exit menu mode.
Changing the display mode
You can view various information in the display while music is played or stopped. Change the display mode by pressing the DISPLAY button. There are 4 types of display, and you can set the desired display in the Menu mode (page 27).
- Property: Displays the current Play Range, the current album number/total album number within the Play Range, the current track number/total track number within the Play Range, the CODEC (compression type), and bit rate.

- Lap Meter: Displays the current track position within the Play Range, the elapsed time, and the current volume level.

- Clock: Displays the current time and date.

- Bubble: Displays animated bubbles.

Changing the display mode

Press the DISPLAY button while music is played or stopped.
![graph TD A["(normal display)"] --> B["Property"] B --> C["Lap Meter"] D["Bubble"] <--_E["Clock"]](/content/2026/06/1314776/images/3fb27a042d9442edef667bbc29eb65017d3eb41d6b858e7ceb8ded8792fac7ea.jpg)
Note
The diagram above shows the order when all the display types are set to on (has check mark) in the Display Screen of the Menu mode. If some display types are set to off (no check mark), they will not be displayed.
Selecting the display types (Display Screen)
You can select whether or not to use each of the 4 display types: "Property", "Lap Meter", "Clock", and "Bubble" by pressing the DISPLAY button.
The display types can be displayed by placing a check mark next to the setting.

1 Press and hold the SEARCH/MENU button for half a second in stop mode.
The menu screen is displayed.

Changing the display mode
2 Rotate the Shuttle switch to select "Display Screen>", and press the ▶ button to confirm.

3 Set the check marks for "Property", "Lap Meter", "Clock", and "Bubble" screen.
① Rotate the Shuttle switch to select "Property" and press the ▶■ button to confirm. ② Rotate the Shuttle switch to select "Lap Meter" and press the ▶■ button to confirm. ③ Rotate the Shuttle switch to select "Clock" and press the ▶■ button to confirm. ④ Rotate the Shuttle switch to select "Bubble" and press the ▶■ button to confirm.
If a check is already marked, the above steps will uncheck it.
To cancel the Menu mode
Press the SEARCH/MENU button to return the screen to the previous stage. Press repeatedly to exit menu mode.
Adjusting the treble and bass (Digital sound preset)
You can adjust the treble and bass. You can preset two settings, which can be selected during playback.
Selecting the Sound quality
Default settings
| Sound Quality | Sound 1 (1) (2) | Sound 2 (2) | Sound OFF (NORMAL SOUND) |
| Bass +1 | +3 ±0 | ||
| Treble ±0 | ±0 ±0 |

Press and hold the REPEAT/ SOUND button for half a second.
The Sound quality setting is changed as follows:

To return to the normal Sound quality
Select "Sound OFF (none)".
Adjusting the Sound quality
You can adjust the bass and treble.
Sound quality Emphasis level
Bass -4 to +3
Treble -4 to +3
You can preset the desired sound quality settings as “Sound 1” and “Sound 2” and select either one while playing music.
button

1 Press and hold the SEARCH/MENU button for half a second.
The menu screen is displayed.
▶ Repeat Mode > Sound Volume Mode >
2 Rotate the Shuttle switch to select "Sound>" and press the ▶■ button to confirm.
3 Set the tone for "Sound 1".
①Rotate the Shuttle switch to select "Sound 1>" and press the ▶■ button to confirm. ②Rotate the Shuttle switch to adjust "Bass" and press the ▶■ button to confirm. ③Rotate the Shuttle switch to adjust "Treble" and press the ▶■ button to confirm.
To adjust the "Sound 2" setting
Select "Sound 2>" in step 3.
To cancel the Menu mode
Press the SEARCH/MENU button to return the screen to the previous stage. Press repeatedly to exit menu mode.
Locking the controls (HOLD)
You can protect your Network Walkman against accidental operation by using the HOLD function when carrying it.

Push the Shuttle switch to the HOLD position.
All operation buttons are disabled.
If you press buttons while the HOLD function is activated, "HOLD" blinks in the display.
To release the HOLD function
Set the Shuttle switch to the center (normal) position.
Storing non-audio data
You can transfer data from the hard disk of your computer to the built-in flash memory using Windows Explorer.
The built-in flash memory is displayed in Windows Explorer as an external drive (for example: as the D drive).
Notes
- If you store a lot of non-audio data into the built-in flash memory, the space for audio data is reduced by the same amount.
- Do not edit any file in the [OMGAUDIO] folder of the built-in flash memory on Windows Explorer, as audio files will not play back.
▶ Adjusting the settings of your Network Walkman
Adjusting the current time setting (Date-Time)
You can set and display the current time.

1 Press and hold the SEARCH/MENU button for half a second in stop mode.
The menu screen is displayed.
| Repeat Mode | > |
| Sound | > |
| Volume Mode | > |
2 Rotate the Shuttle switch to select "Date-Time>" and press the ▶ button to confirm.
The year digit is displayed in [ ].
![Y M D h m [2005] 01 / 01 15 : 00](/content/2026/06/1314776/images/f354e5e6bcdd0c77e3b7cdc2c64de80da74e3b2cd3a1db45d92c8dda876497cc.jpg)
3 Rotate the Shuttle switch to adjust the "year" setting and press the ▶■ button to confirm.
The month digit is displayed in [ ].
![Y M D h m 2005 [01] / 01 15 : 00](/content/2026/06/1314776/images/088462c8a3ba0371a4020bd0b4f084be1f2ad1ff5ba39409733d2522776597a5.jpg)
4 As you did in step 3, adjust the settings for “month”, “date”, “hour”, and “minute”.
After rotating the Shuttle switch to adjust the time and date setting, pressing the ▶■ button to confirm.
Adjusting the current time setting (Date-Time)
To cancel the Menu mode
Press the SEARCH/MENU button to return the screen to the previous stage. Press repeatedly to exit menu mode.
To display the current time
Press the DISPLAY button repeatedly until the "Clock" is displayed (page 26).
Note, however, when the “Clock” is set to off in the Display Screen menu (page 27), you cannot display the current time by the procedure above.
Notes
- If the unit is not used for a long time, your settings for date and time may need to be reset.
- If the current time is not set, the display for the date and time will show “—”.
Limiting the volume (AVLS)
You can set AVLS (Automatic Volume Limiter System) to limit the maximum volume to prevent auditory disturbance or distraction. With AVLS, you can listen to music at a comfortable volume level.

1 Press and hold the SEARCH/MENU button for half a second.
The menu screen is displayed.

2 Rotate the Shuttle switch to select "AVLS>" and press the ▶■ button to confirm.
AVLS ON AVLS OFF
3 Rotate the Shuttle switch to select "AVLS ON" and press the ▶■ button to confirm.
The volume is kept at a moderate level.
To change the setting to "OFF"
Select "AVLS OFF" in step 3.
To cancel the Menu mode
Press the SEARCH/MENU button to return the screen to the previous stage. Press repeatedly to exit menu mode.

“AVLS” is displayed by pressing the VOL +/- button if the AVLS is set to “ON”.
Setting the volume using the preset volume function (Volume Mode)
There are two modes to adjust the volume level.
Manual Volume:
Press the VOL +/- button to adjust the volume level from 0 to 31.
Preset Volume:
Press the VOL +/- button to set the volume level to any of 3 preset levels: Low, Mid, or High.

Setting a volume level for preset mode (Preset Volume)
1 Press and hold the SEARCH/MENU button for half a second.
The menu screen is displayed.
▶ Repeat Mode > Sound > Volume Mode >
continued
Setting the volume using the preset volume function (Volume Mode)
2 Rotate the Shuttle switch to select "Volume Mode>" and press the ▶ button to confirm.
▶ √ Manual Volume Preset Volume >
3 Rotate the Shuttle switch to select "Preset Volume>" and press the ▶ button to confirm.
The value of “Low” is displayed in [ ].
Low Mid High [ 5] 10 20
4 Set the volume levels for the 3 preset levels: Low, Mid, or High.
①Rotate the Shuttle switch to select the volume level for “Low” and press the ▶ button to confirm.
②Rotate the Shuttle switch to select the volume level for “Mid” and press the ▶ button to confirm.
③Rotate the Shuttle switch to select the volume level for “High” and press the ▶■ button to confirm.
To cancel the Menu mode
Press the SEARCH/MENU button to return the screen to the previous stage. Press repeatedly to exit menu mode.
Note
If AVLS (page 32) is set, the actual volume may be lower than the settings.
Releasing AVLS returns the volume to the preset level.
Switching to manual mode (Manual Volume)
1 Press and hold the SEARCH/MENU button for half a second. The menu screen is displayed.
▶ Repeat Mode > Sound > Volume Mode >
2 Rotate the Shuttle switch to select "Volume Mode>" and press the ▶ button to confirm.
▶ √ Manual Volume Preset Volume >
3 Rotate the Shuttle switch to select "Manual Volume" and press the ▶■ button to confirm.
With this setting, you can adjust the volume level by pressing the VOL +/- button.
To cancel the Menu mode
Press the SEARCH/MENU button to return the screen to the previous stage. Press repeatedly to exit menu mode.
Saving power consumption (Power Save Mode)
You can set the Network Walkman to Power Save mode to turn off the display automatically when you do not operate the unit for a while (15 seconds).
- Normal: (is animated while playing back music (Power Save display).

- Super (Disp OFF): nothing in the display. This setting uses the least battery consumption.

1 Press and hold the SEARCH/MENU button for half a second.
The menu screen is displayed.
| Repeat Mode | > |
| Sound | > |
| Volume Mode | > |
2 Rotate the Shuttle switch to select "Power Save Mode>", and press the ▶■ button to confirm.

3 Rotate the Shuttle switch to select "Save ON>", and press the ▶■ button to confirm.
4 Rotate the Shuttle switch to select the setting you want, and press the ▶■ button to confirm.

To set the Power Save mode to "OFF", select "Save OFF" in Step 3.
To cancel the Menu mode
Press the SEARCH/MENU button to return the screen to the previous stage. Press repeatedly to exit menu mode.

Tip
The playback screen is always displayed when the Power Save mode is set to "OFF".
Turning off the beep sound (Beep)
You can turn off the beep sounds of your Network Walkman.

1 Press and hold the SEARCH/MENU button for half a second.
The menu screen is displayed.
▶ Repeat Mode > Sound Volume Mode >
2 Rotate the Shuttle switch to select "Beep>" and press the ▶■ button to confirm.
▶ √ Beep ON Beep OFF
3 Rotate the Shuttle switch to select "Beep OFF", and press the ▶■ button to confirm.
To change the setting to "ON"
Select "Beep ON" in step 3.
To cancel the Menu mode
Press the SEARCH/MENU button to return the screen to the previous stage. Press repeatedly to exit menu mode.
Formatting memory (Format)
You can use your Network Walkman to format the built-in flash memory.
If memory is formatted, all data previously stored in the memory will be erased. Be sure to verify the data stored in the memory prior to formatting.

1 Press and hold the SEARCH/MENU button for half a second in stop mode.
The menu screen is displayed.
▶ Repeat Mode > Sound > Volume Mode >
2 Rotate the Shuttle switch to select "Advanced Menu>", and press the ▶■ button to confirm.
3 Rotate the Shuttle switch to select "Format>" and press the ▶■ button to confirm.
Format OK? ▶ OK Cancel
4 Rotate the Shuttle switch to select "OK" and press the ▶■ button to confirm.
"Formatting..." blinks and start formatting.
When formatting is complete, "Complete" is displayed.
To cancel the Menu mode
Press the SEARCH/MENU button to return the screen to the previous stage. Press repeatedly to exit menu mode.
To cancel formatting
Rotate the Shuttle switch to select "Cancel" and press the ▶■ button to confirm in step 4.
Note
You cannot format memory while playing music.
Changing the USB connection setting (USB Bus Powered)
Depending on the computer you are using, if the power supply is insufficient, incomplete data transfer may occur from the computer to your Network Walkman. In this case, setting the USB connection (USB Bus Powered) to "Low-power 100mA" may improve data transfer.

1 Press and hold the SEARCH/MENU button for half a second in stop mode.
The menu screen is displayed.
▶ Repeat Mode > Sound > Volume Mode >
2 Rotate the Shuttle switch to select "Advanced Menu>", and press the ▶■ button to confirm.
3 Rotate the Shuttle switch to select "USB Bus Powered>", and press the ▶■ button to confirm.
4 Rotate the Shuttle switch to select the setting you want and press the ▶■ button to confirm.
USB Bus Powered ▶ √ High-Power500mA Low-Power 100mA
To cancel the Menu mode
Press the SEARCH/MENU button to return the screen to the previous stage. Press repeatedly to exit menu mode.
Tips
- When you connect the Network Walkman to a notebook computer, connect the notebook computer to a power supply.
- The charging time will be longer if the “USB Bus Powered” is set to “Low-power 100mA”.
Displaying the player information (Information)
Information such as product name, built-in flash memory capacity, serial number and software version can be displayed.

1 Press and hold the SEARCH/MENU button for half a second in stop mode.
The menu screen is displayed.
▶ Repeat Mode > Sound Volume Mode
2 Rotate the Shuttle switch to select "Advanced Menu>", and press the ▶■ button to confirm.
3 Rotate the Shuttle switch to select "Information>", and press the ▶■ button to confirm.
Rotate the Shuttle switch to show the following information.
1: product name 2: built-in flash memory capacity 3: serial number 4: software version
To cancel the Menu mode
Press the SEARCH/MENU button to return the screen to the previous stage. Press repeatedly until the normal screen is displayed.
Precautions
On installation
- Never use your Network Walkman where it will be subjected to extremes of light, temperature, moisture, or vibration.
- Never leave the Network Walkman exposed to high temperature, such as in a car parked in the sun or under direct sunlight.
On heat build-up
Heat may build up in your Network Walkman while charging if it was used for an extended period of time.
On the headphones
Road Safety
Do not use headphones while driving, cycling, or operating any motorized vehicle. It may create a traffic hazard and is illegal in many areas. It can also be potentially dangerous to play your Network Walkman at a high volume while walking, especially at pedestrian crossings. You should exercise extreme caution or discontinue use in potentially hazardous situations.
Preventing hearing damage
Avoid using the headphones at a high volume. Hearing experts advise against continuous, loud and extended play. If you experience a ringing in your ears, reduce the volume or discontinue use.
Caring for others
Keep the volume at a moderate level. This will allow you to hear outside sounds and to be considerate to the people around you.
Warning
If there is lightning when you are using your Network Walkman, take off the headphones immediately.
On the use
- When using a strap, be careful to avoid hooking it on objects you pass by.
- Do not use the Network Walkman on an aircraft.
On cleaning
- Clean your Network Walkman casing with a soft cloth slightly moistened with water or a mild detergent solution.
- Clean the headphone plug periodically.
Note
Do not use any type of abrasive pad, scouring powder, or solvent such as alcohol or benzene as it may mar the finish of the casing.
If you have any questions or problems concerning your Network Walkman, please consult your nearest Sony dealer.
When disposing of your Network Walkman
This Network Walkman has a built-in Lithium-Ion battery. When you dispose of the Network Walkman, be sure to dispose of it properly.
Certain countries may regulate disposal of the battery used to power this product. Please consult with your local authority.
Note
Never disassemble your Network Walkman except when disposing of it.
To remove the Lithium-Ion battery
①Remove the screws using a Phillips screwdriver.

②Remove the cover Ⓐ.

③Remove the cover Ⓑ.

④Remove the connector.

⑤Remove the board.

⑥Remove the battery.

For the customers in the USA and Canada
RECYCLING LITHIUM-ION BATTERIES
Lithium-Ion batteries are recyclable. You can help preserve our environment by returning your used rechargeable batteries to the collection and recycling location nearest you.
For more information regarding recycling of rechargeable batteries, call toll free 1-800-822-8837, or visit http://www.rbrc.org/
Caution: Do not handle damaged or leaking Lithium-Ion batteries.

Troubleshooting
If you experience any of the following difficulties while using your Network Walkman, use this troubleshooting guide to help to remedy the problem prior to consulting a Sony dealer. Should any problem persist, consult your nearest Sony dealer. If a problem occurs while connected to your computer, also refer to “Troubleshooting” in the online help of the supplied software.
To reset the player
If your Network Walkman does not operate normally, or if there is no sound, even after checking the troubleshooting guide below, press the reset button for more than one second with a pointed tool.

Reset button

Tip
Any audio files stored in the memory will not be erased by pressing the reset button.
What happened?
On operating
| Symptom | Cause/Remedy |
| There is no sound. Noise is generated. | The volume level is set to zero.Turn the volume up (page 14).The headphone jack is not connected properly.Connect the headphone jack properly (page 14).The headphone plug is dirty.Clean the headphone plug with a soft dry cloth.No audio files are stored in the memory.If “NO DATA” is displayed, transfer audio file(s) from the computer. |
| Buttons do not work. | The Shuttle switch is set to the HOLD position.Set the Shuttle switch to the center (normal) position (page 30).Your Network Walkman contains moisture condensation.Wait a few hours to let your Network Walkman dry.The remaining battery power is insufficient.Charge the battery (page 12). |
| The transferred songs cannot be found. | The Play Range is shortened.Select “All Track” in the search menu screen (page 15). |
| The volume is not loud enough. | The AVLS is enabled.→Disable the AVLS (page 32). |
| There is no sound from the right channel of the headphones. | ·The headphone jack is not fully inserted.→Connect the headphone jack fully (page 14).·The extension headphone cord is not properly connected to the headphone jack of your Network Walkman or the headphone cord (NW-E407 only).→Connect them properly (page 14). |
| Playback has stopped suddenly. | The remaining battery power is insufficient.→Charge the battery (page 12). |
On the display window
| Symptom | Cause/Remedy |
| “□” is displayed for a title. | Characters that cannot be displayed on your Network Walkman are involved.→Use the supplied SonicStage software to rename the title with appropriate characters. |
On charging the battery
| Symptom | Cause/Remedy |
| Battery life is short. | The operating temperature is below 5°C (67°F).→Battery life becomes shorter due to the battery characteristics.This is not malfunction.The battery is required to be replaced.→Consult your near Sony dealer.Battery charging time is not enough.→Charge the battery longer if the USB connection (USB Bus Powered) is set to “Low-power 100mA” (page 38). |
Troubleshooting
On the connection with the computer or supplied software
| Symptom | Cause/Remedy |
| The software cannot be installed. | An operating system not compatible with the software is used.→For details, refer to the SonicStage operating instructions. |
| “USB Connect” is not displayed when connected to the computer with the dedicated USB cable. | ·Please wait for authentication of the SonicStage software.·Another application is running on the computer.→Wait for a while and reconnect the USB cable. If the problem persists, disconnect the USB cable, restart the computer, and then reconnect the USB cable.·The dedicated USB cable has disconnected.→Connect the dedicated USB cable.·A USB hub is used.→Connecting via a USB hub is not guaranteed. Connect the dedicated USB cable directly to the computer.·The Network Walkman USB connection (USB Bus Powered) is set to “High-power 500mA”.→Set the “USB Bus Powered” to “Low-power 100mA” (page 38). |
| Your Network Walkman is not recognized by the computer when it is connected to the computer. | ·The dedicate USB cable is disconnected.→Connect the dedicated USB cable.·The driver for the Network Walkman is not installed.→Install the driver for the Network Walkman by installing the SonicStage software on the supplied CD-ROM. The driver will be installed together with SonicStage. |
| A song(s) cannot be transferred to your Network Walkman. | ·The dedicated USB cable is not connected properly.→Connect the USB cable properly.·The free space of the built-in flash memory where you want to transfer audio files to is insufficient.→Transfer any unnecessary songs back to your computer to increase free space.·You have already transferred to 65,535 songs or 4,096 groups to the built-in flash memory using the SonicStage software.→You can transfer up to 65,535 songs, and 4,096 groups to the built-in flash memory using SonicStage software. One group can contain up to 999 songs.·Audio files with a limited playing period or playing count may not be transferred due to restrictions set by copyright holders. For details on the settings of each audio file, contact the distributor. |
| The number of audio files that can be transferred is limited. (Available recording time is short.) | ·The free space of the built-in flash memory where you want to transfer to is not enough for the size of audio files you wish to transfer.→Transfer any unnecessary audio files back to the computer to increase free space.·Non-audio data is stored in the built-in flash memory where you want to transfer audio files to.→Move non-audio data to the computer to increase free space. |
| Operation of the Network Walkman becomes unstable while it is connected to the computer. | USB hub or USB extension cable is used.→Connecting via a USB hub or USB extension cable is not guaranteed. Connect the dedicated USB cable directly to the computer. |
| “Failed to authenticate Device/Media” is displayed on the computer screen while connecting the Network Walkman to the computer. | Your Network Walkman is not connected to the computer properly.→Quit the SonicStage software and verify the connection of the dedicated USB cable. Restart the SonicStage software. |
Other
| Symptom | Cause/Remedy |
| There is no beep sound when your Network Walkman is operated. | Beep is set to “Beep OFF”.→In the menu mode, set “Beep” to “Beep ON” (page 36). |
| Your Network Walkman gets warm. | While charging, your Network Walkman may become slightly warm. |
Troubleshooting
Messages
Follow the instructions below if an error message appears in the display.
| Message | Meaning | Remedy |
| AVLS (blinks) | The volume level exceeds the rated value while the AVLS is enabled. | Turn the volume down or disable the AVLS (page 32). |
| CANNOT PLAY | ·Your Network Walkman cannot play certain files because of incompatible formats.·Transferring has been interrupted forcefully. | If the file cannot be played, you can erase it from the built-in flash memory.For details, refer to “To delete abnormal data from the built-in flash memory” (page 47). |
| CHARGE ERROR | The power supply is abnormal. | Try using another computer. |
| DATA ACCESS | Accessing the built-in flash memory. | Please wait for access to complete. This message appears while the built-in flash memory is initiating. |
| ERROR | A malfunction is detected. | Please consult your nearest Sony dealer. |
| EXPIRED | The song is playback restricted by the copyright holder. | If song cannot be played, you can erase it from the built-in flash memory.For details, refer to “To delete abnormal data from the built-in flash memory” (page 47). |
| FILE ERROR | ·The file cannot be read.·The file is not normal. | Transfer the normal audio file back to the computer and then format your Network Walkman. For details, refer to “To delete abnormal data from the built-in flash memory” on page 47. |
| HOLD | Your Network Walkman cannot be operated because the Shuttle switch is set to the HOLD position. | To operate Network Walkman, set the Shuttle switch to the center (normal) position (page 30). |
| LOW BATTERY | The battery is low. | You must charge the battery (page 12). |
| MG ERROR | An unauthorized distribution file is detected for copyright protection. | Transfer the normal audio file back to the computer and then format your Network Walkman. For details, refer to “To delete abnormal data from the built-in flash memory” on page 47. |
| NO DATA | There are no audio files in the built-in flash memory. | If there are no audio files in the built-in flash memory, use the SonicStage software to transfer audio files. |
| USB Connect | Your Network Walkman is connected to a computer. | This is not a malfunction. You can operate your Network Walkman using the SonicStage, but you cannot operate the controls on your Network Walkman. |
| Icon animates from left to right: Accesses to the built-in flash memory is in progress. | Your Network Walkman is accessing to the built-in flash memory. Wait until the access completes. This message is displayed when transferring data to the built-in flash memory or formatting the Network Walkman. |
To delete abnormal data from the built-in flash memory
If “CANNOT PLAY”, “EXPIRED”, “FILE ERROR”, or “MG ERROR” is displayed, there is a problem with all or part of the data stored in the built-in flash memory.
Please follow the procedures below to erase data you cannot play.
1 Connect your Network Walkman to the computer, and start the SonicStage software. 2 If you have already specified the data with problems, erase the data from the Portable Player window of the SonicStage software. 3 If the problem persists, transfer all data without problems back to the computer using the SonicStage software while your Network Walkman is connected to the computer. 4 Disconnect your Network Walkman from the computer and then format the built-in flash memory using the Format menu (page 37).
Specifications
Maximum recording time (Approx.)
NW-E403
| ATRAC3 | ATRAC3plus |
| 4 hr. 10 min. (132 kbps) | 2 hr. 10 min. (256 kbps) |
| 5 hr. 20 min. (105 kbps) | 8 hr. 40 min. (64 kbps) |
| 8 hr. 30 min. (66 kbps) | 11 hr. 40 min. (48 kbps) |
MP3
| 2 hr. 10 min. (256 kbps) |
| 4 hr. 20 min. (128 kbps) |
NW-E405
| ATRAC3 | ATRAC3plus |
| 8 hr. 30 min. (132 kbps) | 4 hr. 20 min. (256 kbps) |
| 10 hr. 40 min. (105 kbps) | 17 hr. 30 min. (64 kbps) |
| 17 hr. 00 min. (66 kbps) | 23 hr. 30 min. (48 kbps) |
| MP3 | |
| 4 hr. 20 min. (256 kbps) | |
| 8 hr. 50 min. (128 kbps) |
NW-E407
| ATRAC3 | ATRAC3plus |
| 17 hr. 00 min. (132 kbps) | 8 hr. 50 min. (256 kbps) |
| 21 hr. 40 min. (105 kbps) | 35 hr. 00 min. (64 kbps) |
| 34 hr. 10 min. (66 kbps) | 47 hr. 00 min. (48 kbps) |
| MP3 | |
| 8 hr. 50 min. (256 kbps) | |
| 17 hr. 40 min. (128 kbps) |
Sampling frequency
ATRAC3, ATRAC3plus, MP3: 44.1 kHz
Audio compression technology
Adaptive Transform Acoustic Coding3 (ATRAC3) Adaptive Transform Acoustic Coding3plus (ATRAC3plus) MPEG1 Audio Layer-3 (MP3): 32 to 320 kbps, variable bit rate-compliant
Frequency response
20 to 20,000 Hz (single signal measurement)
Interface
Headphone: Stereo mini USB
Signal-to-noise ratio (S/N)
80 dB or more (excluding ATRAC3 66 kbps)
Dynamic range
85 dB or more (excluding ATRAC3 66 kbps)
Operating temperature
5°C to 35°C (67°F to 95°F)
Power source
• Built-in rechargeable lithium-ion battery - USB power (from a computer through supplied USB cable)
Battery life (continuous playback)*
ATRAC3 format: Approximately 50 hours (Playback at 105 kbps) ATRAC3plus format: Approximately 45 hours (Playback at 48 kbps) MP3 format: Approximately 40 hours (Playback at 128 kbps)
* This is when the power save setting is normal (page 35). The battery duration will vary depending on temperature and usage.
Dimension
84.9 × 28.8 × 13.9 mm (3 3/8 × 1 3/16 × 9/16 inches)
(w/h/d, projecting parts not included)
Mass
Approx. 47 g (1.7 oz)
Supplied accessories
Headphones (1)
Dedicated USB cable (1)
Extension headphone cord (NW-E407 only) (1)
Carrying pouch (NW-E407 only) (1)
Clip (1)
CD-ROM for the SonicStage software, PDF file
Operating Instructions, and PDF file SonicStage
Operating Instructions (1)
Quick Start Guide
Design and specifications are subject to change without notice.
US and foreign patents licensed from Dolby Laboratories.
Glossary
MagicGate
Copyright protection technology that consists of authentication and encryption technology. Authentication ensures that protected content is transferred only between compliant devices and media, and that protected content is recorded and transferred in an encrypted format to prevent unauthorized copying or playback.
Note
MAGICGATE is terminology denoting the copyright protection system developed by Sony. It does not guarantee conversion among other media.
OpenMG
Copyright protection technology that securely manages music content from the EMD/Audio CD on a personal computer. Application software that is installed on the computer encrypts the digital music content when recording on the hard drive. This allows you to enjoy music content on the computer, but prevents unauthorized transmission of this content across a network (or elsewhere). This PC copyright protection complies with “MagicGate”, and allows you to transfer digital music content from a PC’s hard drive to a compliant device.
ATRAC3
ATRAC3, which stands for Adaptive Transform Acoustic Coding3, is audio compression technology that satisfies the demand for high sound quality and high compression rates. The ATRAC3 compression rate is approximately 10 times higher than that of the Audio CD, resulting in an increased data capacity for the media.
ATRAC3plus
ATRAC3plus, which stands for Adaptive Transform Acoustic Coding3plus, is audio compression technology that compresses data higher than ATRAC3. The ATRAC3plus is new audio compression technology that enables equal or higher quality sound comparing to ATRAC3.
Bit rate
Indicates the data amount per second. The rate is reflected in bps (bit per second). 64 kbps means 64,000 bits of information per second. If the bit rate is large, that means a large amount of information is used to play music. Comparing music of the same format (e.g., ATRAC3plus), 64 kbps data offers better sound quality than 48 kbps data. However, audio files in formats such as MP3 have different encoding methods, and thus sound quality cannot be determined by simply comparing the bit rate.
MP3
MP3, which stands for MPEG-1 Audio Layer-3, is a format standard for music file compression. It was codified by the Motion Picture Experts Group, a working group of ISO (International Organization for Standardization).
It compresses audio CD data to approximately one tenth its original size. Because the MP3 encoding algorithm has been made publicly available, there are various encoders and decoders that are compliant with this standard.
Menu list
Press the SEARCH/MENU button for half a second to display the menu mode and use the Shuttle switch (rotate to select) and the ▶■ button (to confirm) to change the settings of your Network Walkman.
For details about each menu, refer to the pages in parentheses. The menu with a “>” mark will be followed by a detailed-setting screen when you press the ▶■ button to confirm.
| Display (Menu mode) | Purpose |
| Repeat Mode> | You can select your favorite repeat mode (page 21). |
| Sound>(digital sound preset) | You can preset your desired sound quality (page 28). |
| Volume Mode>(preset volume) | You can preset your desired volume (page 33). |
| AVLS>(Automatic Volume Limiter System) | You can limit the volume level for comfortable listening (page 32). |
| Beep>(Operation sounds setting) | You can set to “ON” or “OFF” (page 36). |
| Power Save Mode>(Power save setting) | You can select your desired power save mode (page 35). |
| Display Screen>(Display type) | You can select your desired display types (page 27). |
| Date-Time>(Current time setting) | You can set and display year/month/day and current time (page 31). |
| Display (Menu mode) | Purpose |
| Advanced Menu> | Format> (Formatting memory) You can format the built-in flash memory (page 37). |
| USB Bus Powered> (USB connection setting) You can select your desired USB connection setting (page 38). | |
| Information> You can display information such as product name, built-in flash memory capacity, and serial number (page 39). |
Index
A
A-B Repeat 23
Accessories 8
ATRAC3 50
ATRAC3plus 50
Audio CDs 6
AVLS (Limiting the volume) 32
B
Beep sound 36
Bit rate 50
C
CD (Audio CDs) 6
CD-ROM 8, 11
Charging 12
Clock 26, 31
Computer 6, 11, 12
D
Date-Time 31
Display 10, 15, 22, 26
Display mode 26
Download 6
E
EMD service 6
Explorer (Windows Explorer)
13, 30
F
Fast-forward 20
Fast-rewind 20
Formatting 37
G
Group 15, 19, 20
H
Headphones 8, 14, 40
HOLD function (Locking the controls) 30
I
Information 39
L
Limiting the volume (AVLS)
32
Listening 14
Locking the controls (HOLD function)
30
M
Menu list 52
MP3 6,51
Index
0
OpenMG 50
P
Play Range 15-21
Playback 14
Power Save Mode 35
R
Remaining battery indication 13
Repeat 21
Repeat count 25
Reset 42
S
Search 15-19
SEARCH/MENU button 15-25, 27-29, 31-39
Sentence Repeat 24
Serial Number 8
Shuffle Repeat 21
Skip to the beginning of a track 20
SonicStage 11
Sound preset (Digital sound preset) 28
T
Time Setting 31
Track Repeat 22
Transferring 6, 11
Troubleshooting 42
U
USB cable 12
USB connection setting (USB Bus Powered) 38
V
Volume 14,33
W
WAV format 6
Windows Explorer 13,30
http://www.sony.net/


- PORTABLE IC AUDIO PLAYER
- WARNING
- NOTE ON INSTALLATION
- DISPOSAL OF OLD ELECTRICAL & ELECTRONIC EQUIPMENT (APPLICABLE IN THE EUROPEAN UNION AND OTHER EUROPEAN COUNTRIES WITH SEPARATE COLLECTION SYSTEMS)
- FOR THE CUSTOMERS IN THE UNITED STATES
- OWNER'S RECORD
- INFORMATION
- MODEL NW-E405 AND NW-E407 ONLY
- DECLARATION OF CONFORMITY
- FOR THE CUSTOMERS IN THE NETHERLANDS
- ON THE SUPPLIED SOFTWARE
- TABLE OF CONTENTS
- BASIC OPERATIONS
- ADVANCED OPERATIONS
- ADJUSTING THE SETTINGS OF YOUR NETWORK WALKMAN
- OTHER FUNCTIONS
- OTHER INFORMATION
- OVERVIEW
- WHAT YOU CAN DO WITH YOUR NETWORK WALKMAN
- OTHER FEATURES
- NOTES
- CHECKING THE PACKAGE CONTENTS
- ABOUT THE SERIAL NUMBER
- LOCATING CONTROLS
- DISPLAY
- TRANSFERRING AUDIO FILES FROM THE COMPUTER TO YOUR NETWORK WALKMAN/CHARGING
- NOTE
- INSTALL THE SONICSTAGE SOFTWARE IN YOUR COMPUTER USING THE SUPPLIED CD-ROM
- TIP
- IMPORT AUDIO FILES INTO THE SONICSTAGE SOFTWARE
- CONNECT YOUR NETWORK WALKMAN TO YOUR COMPUTER AND CHARGE IT
- THE NETWORK WALKMAN IS RECHARGEABLE WHEN CONNECTED TO A COMPUTER WITH THE DEDICATED USB CABLE
- BATTERY DURATION
- ON THE REMAINING BATTERY INDICATION
- TRANSFER AUDIO FILES TO YOUR NETWORK WALKMAN
- LISTENING TO MUSIC WITH YOUR NETWORK WALKMAN
- CONNECT THE HEADPHONES
- TO USE THE HEADPHONES EXTENSION CORD (NW-E407 ONLY)
- START PLAYBACK
- IF PLAYBACK DOES NOT START
- TO STOP PLAYBACK
- TO ADJUST THE VOLUME
- SEARCHING FOR A SONG YOU WANT TO LISTEN TO (SEARCH)
- ON THE SEARCH FLOW AND PLAY RANGE
- EXAMPLE OF SEARCHING
- SEARCHING BY ARTIST NAME AND PLAYING BACK THE SONG
- PRESS THE SEARCH/MENU BUTTON
- ROTATE THE SHUTTLE SWITCH TO SELECT "ARTIST" AND PRESS THE ▶■ BUTTON TO CONFIRM
- ROTATE THE SHUTTLE SWITCH TO SELECT THE DESIRED ARTIST AND PRESS THE ▶■ BUTTON TO CONFIRM
- ROTATE THE SHUTTLE SWITCH TO SELECT THE DESIRED ALBUM AND PRESS THE ▶■ BUTTON TO CONFIRM
- ROTATE THE SHUTTLE SWITCH TO SELECT THE DESIRED TRACK AND PRESS THE ▶■ BUTTON TO CONFIRM
- TO RETURN TO THE PREVIOUS STAGE
- SEARCHING BY ALBUM NAME AND PLAYING BACK THE SONG
- ROTATE THE SHUTTLE SWITCH TO SELECT "ALBUM" AND PRESS THE ▶■ BUTTON TO CONFIRM
- ROTATE THE SHUTTLE SWITCH TO SELECT DESIRED TRACK AND PRESS THE ▶■ BUTTON TO CONFIRM
- SEARCHING BY GROUP AND PLAYING BACK THE SONG
- ROTATE THE SHUTTLE SWITCH TO SELECT "☐GROUP" AND PRESS THE ▶■ BUTTON TO CONFIRM
- ROTATE THE SHUTTLE SWITCH TO SELECT THE DESIRED GROUP AND PRESS THE ▶■ BUTTON TO CONFIRM
- ON OTHER OPERATIONS
- ON THE GROUP CONTROL MODE
- REPEAT MODE
- TRACK REPEAT (TRACK REP)
- A-B REPEAT (A-B REP)
- SENTENCE REPEAT (SENTENCE REP)
- SELECTING THE REPEAT MODE
- PRESS AND HOLD THE SEARCH/MENU BUTTON FOR HALF A SECOND IN STOP MODE
- ROTATE THE SHUTTLE SWITCH TO SELECT "REPEAT MODE>" AND PRESS THE
- ROTATE THE SHUTTLE SWITCH TO SELECT A DESIRED REPEAT MODE AND PRESS THE ▶■ BUTTON TO CONFIRM
- PRESS THE SEARCH/MENU BUTTON REPEATEDLY TO EXIT MENU MODE
- PLAYING TRACKS REPEATEDLY (TRACK REPEAT)
- SELECT THE TRACK REPEAT MODE (TRACK REP) FIRST (PAGE 21). THEN, PRESS THE REPEAT/SOUND BUTTON REPEATEDLY TO SELECT THE REPEAT MODE YOU WANT
- PLAYING A SPECIFIED SECTION REPEATEDLY (A-B REPEAT)
- TO CLEAR THE START POINT (A) AND END POINT (B)
- TO CANCEL THE A-B REPEAT MODE
- PLAYING SPECIFIED SENTENCES REPEATEDLY (SENTENCE REPEAT)
- PRESS THE REPEAT/SOUND BUTTON TO PLACE THE SETTING POINT DURING PLAYBACK
- TO CLEAR THE SETTING POINT
- TO CANCEL THE SENTENCE REPEAT MODE
- SETTING THE REPEAT COUNT
- TO CANCEL THE MENU MODE
- CHANGING THE DISPLAY MODE
- PRESS THE DISPLAY BUTTON WHILE MUSIC IS PLAYED OR STOPPED
- SELECTING THE DISPLAY TYPES (DISPLAY SCREEN)
- ADJUSTING THE TREBLE AND BASS (DIGITAL SOUND PRESET)
- SELECTING THE SOUND QUALITY
- PRESS AND HOLD THE REPEAT/ SOUND BUTTON FOR HALF A SECOND
- ADJUSTING THE SOUND QUALITY
- SOUND QUALITY EMPHASIS LEVEL
- PRESS AND HOLD THE SEARCH/MENU BUTTON FOR HALF A SECOND
- ROTATE THE SHUTTLE SWITCH TO SELECT "SOUND>" AND PRESS THE ▶■ BUTTON TO CONFIRM
- SET THE TONE FOR "SOUND
- TO ADJUST THE "SOUND 2" SETTING
- LOCKING THE CONTROLS (HOLD)
- PUSH THE SHUTTLE SWITCH TO THE HOLD POSITION
- TO RELEASE THE HOLD FUNCTION
- STORING NON-AUDIO DATA
- ADJUSTING THE CURRENT TIME SETTING (DATE-TIME)
- ROTATE THE SHUTTLE SWITCH TO SELECT "DATE-TIME>" AND PRESS THE ▶ BUTTON TO CONFIRM
- ROTATE THE SHUTTLE SWITCH TO ADJUST THE "YEAR" SETTING AND PRESS THE ▶■ BUTTON TO CONFIRM
- AS YOU DID IN STEP 3, ADJUST THE SETTINGS FOR “MONTH”, “DATE”, “HOUR”, AND “MINUTE
- TO DISPLAY THE CURRENT TIME
- LIMITING THE VOLUME (AVLS)
- TO CHANGE THE SETTING TO "OFF
- SETTING THE VOLUME USING THE PRESET VOLUME FUNCTION (VOLUME MODE)
- SETTING A VOLUME LEVEL FOR PRESET MODE (PRESET VOLUME)
- SWITCHING TO MANUAL MODE (MANUAL VOLUME)
- SAVING POWER CONSUMPTION (POWER SAVE MODE)
- TURNING OFF THE BEEP SOUND (BEEP)
- FORMATTING MEMORY (FORMAT)
- TO CANCEL FORMATTING
- CHANGING THE USB CONNECTION SETTING (USB BUS POWERED)
- TIPS
- DISPLAYING THE PLAYER INFORMATION (INFORMATION)
- PRECAUTIONS
- ON INSTALLATION
- ON HEAT BUILD-UP
- ON THE HEADPHONES
- ROAD SAFETY
- PREVENTING HEARING DAMAGE
- CARING FOR OTHERS
- ON THE USE
- ON CLEANING
- WHEN DISPOSING OF YOUR NETWORK WALKMAN
- TO REMOVE THE LITHIUM-ION BATTERY
- FOR THE CUSTOMERS IN THE USA AND CANADA
- RECYCLING LITHIUM-ION BATTERIES
- TROUBLESHOOTING
- TO RESET THE PLAYER
- WHAT HAPPENED
- MESSAGES
- TO DELETE ABNORMAL DATA FROM THE BUILT-IN FLASH MEMORY
- SPECIFICATIONS
- MAXIMUM RECORDING TIME (APPROX.)
- SAMPLING FREQUENCY
- AUDIO COMPRESSION TECHNOLOGY
- FREQUENCY RESPONSE
- INTERFACE
- SIGNAL-TO-NOISE RATIO (S/N)
- DYNAMIC RANGE
- OPERATING TEMPERATURE
- POWER SOURCE
- BATTERY LIFE (CONTINUOUS PLAYBACK)
- DIMENSION
- MASS
- SUPPLIED ACCESSORIES
- GLOSSARY
- MAGICGATE
- OPENMG
- ATRAC
- ATRAC3PLUS
- BIT RATE
- MP
- MENU LIST
- INDEX
- A
- B
- C
- D
- E
- F
- G
- H
- I
- L
- M
- P
- R
- S
- T
- U
- V
- W
Brand : SONY
Model : Walkman NW-E407
Category : Mp3 player