
XL-UR230H - Hi-Fi System SHARP - Free user manual and instructions
Find the device manual for free XL-UR230H SHARP in PDF.
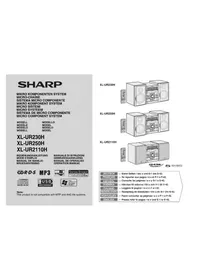


| Product Type | Hi-Fi System |
| Model | XL-UR230H |
| Brand | Sharp |
| Dimensions (W x H x D) | 200 mm x 300 mm x 250 mm |
| Weight | 3.5 kg |
| Power Supply | AC 230V, 50Hz |
| Power Consumption | 60 W (standby: 1 W) |
| Disc Playback | CD, CD-R/RW, MP3-CD |
| Radio Tuner | FM/AM (with RDS) |
| Audio Power Output | 2 x 30 W RMS |
| Speaker Impedance | 4 ohms |
| Connectivity | USB, AUX-in, Bluetooth |
| Equalizer Presets | Rock, Pop, Jazz, Classic, Flat |
| Display | LCD with backlight |
| Remote Control | Included |
| Maintenance | Clean with dry cloth; avoid liquids |
| Safety Features | Automatic shutdown after 30 min idle |
| Spare Parts Availability | Contact Sharp support or authorized service centers |
Frequently Asked Questions - XL-UR230H SHARP
User questions about XL-UR230H SHARP
0 question about this device. Answer the ones you know or ask your own.
Ask a new question about this device
Download the instructions for your Hi-Fi System in PDF format for free! Find your manual XL-UR230H - SHARP and take your electronic device back in hand. On this page are published all the documents necessary for the use of your device. XL-UR230H by SHARP.
USER MANUAL XL-UR230H SHARP
This product is not compatible with MTP and AAC file systems.
XL-UR230H

XL-UR250H

XL-UR2110H

CD-R/RW Playable
DISC CHANGER
| DEUTSCH | ... Siehe Selten I bis x und D-1 bis D-42. |
| FRANÇAIS | ... Se reporter aux pages i à x et F-1 à F-42. |
| ESPAÑOL | ... Consulte las páginas I a x y S-1 a S-42. |
| SVENSKA | ... Hänvisa till sidorna i till x och V-1 till V-42. |
| ITALIANO | ... Leggere le pagine I a x e I-1 a I-42. |
| NEDERLANDS | ... Raadpleeg de bladzijden i t/m x en N-1 t/m N-42. |
| PORTUGUÊS | ... Favor consultar as páginas i a x e P-1 a P-42. |
| ENGLISH | ... Please refer to pages i to x and E-1 to E-42. |
XL-UR230H
XL-UR250H
XL-UR2110H
- When the ON/STAND-BY button is set at STAND-BY position, mains voltage is still present inside the unit.
When the ON/STAND-BY button is set at STAND-BY position, the unit may be brought into operation by the timer mode or remote control.
Warning:
This unit contains no user serviceable parts. Never remove covers unless qualified to do so. This unit contains dangerous voltages, always remove mains plug from the socket before any service operation and when not in use for a long period.
XL-UR230H
XL-UR250H
XL-UR2110H
XL-UR230H
XL-UR250H
XL-UR2110H
- When the ON/STAND-BY button is set to the STAND-BY position, mains voltage is still present in the apparatus. - When the ON/STAND-BY button is set to the STAND-BY position, the apparatus can be started using the timer function or the remote control.
Warning:
To prevent fire or shock hazard, do not expose this appliance to dripping or splashing. No objects filled with liquids, such as vases, shall be placed on the apparatus.
● Warning:
Use of controls, adjustments or performance of procedures other than those specified herein may result in hazardous radiation exposure.
As the laser beam used in this compact disc player is harmful to the eyes, do not attempt to disassemble the cabinet. Refer servicing to qualified personnel only.
WARNING: THIS PRODUCT CONTAINS A LASER. IMPROPER USE OF THIS DEVICE, CONTRARY TO THIS MANUAL, MAY RESULT IN HAZARDOUS RADIATION EXPOSURE. DO NOT OPEN OR REMOVE ANY COVERS AND DO NOT REPAIR THE DEVICE. ENTRUST REPAIR AND SERVICING TO QUALIFIED SERVICE PERSONNEL.
WARNING: THIS PRODUCT CONTAINS A LASER. IMPROPER USE OF THIS DEVICE, CONTRARY TO THIS MANUAL, MAY RESULT IN HAZARDOUS RADIATION EXPOSURE. DO NOT OPEN ANY COVERS AND DO NOT REPAIR THE DEVICE. ENTRUST REPAIR AND SERVICING TO QUALIFIED SERVICE PERSONNEL.
Emission Duration: continuous
Laser Output: max. 0.4 mW


CAUTION: VISIBLE AND INVISIBLE LASER RADIATION WHEN OPEN. DO NOT LOOK INTO THE BEAM, EVEN WITH OPTICAL INSTRUMENTS. WARNING! WHEN OPEN, YOU ARE EXPOSED TO VISIBLE AND INVISIBLE LASER RADIATION. DO NOT STARE INTO THE BEAM OR VIEW IT WITH OPTICAL INSTRUMENTS.
WARNING: VISIBLE AND INVISIBLE LASER RADIATION WHEN THIS PART IS OPEN. DO NOT STARE INTO THE BEAM OR VIEW THE BEAM WITH OPTICAL INSTRUMENTS.
WARNING! USING THE DEVICE IN A WAY OTHER THAN SPECIFIED IN THIS USER MANUAL MAY EXPOSE THE USER TO INVISIBLE LASER RADIATION EXCEEDING CLASS 1 SAFETY LIMITS.
WARNING - IF THE DEVICE IS USED IN A WAY OTHER THAN SPECIFIED IN THIS USER MANUAL, THE USER MAY BE EXPOSED TO INVISIBLE LASER RADIATION EXCEEDING THE LIMITS FOR LASER CLASS 1.
XL-UR230H
XL-UR250H
XL-UR2110H
XL-UR230H
XI-UB250H
XL-UR2110H
Information on Proper Disposal

Attention: Your product is marked with this symbol. It means that used electrical and electronic products should not be mixed with general household waste. There is a separate collection system for these products.
A. Information on Disposal for Users (private households)
1. In the European Union
Attention: If you want to dispose of this equipment, please do not use the ordinary dust bin!
Used electrical and electronic equipment must be treated separately and in accordance with legislation that requires proper treatment, recovery and recycling of used electrical and electronic equipment.
Following the implementation by member states, private households within the EU states may return their used electrical and electronic equipment to designated collection facilities free of charge*. In some countries* your local retailer may also take back your old product free of charge if you purchase a similar new one.
*) Please contact your local authority for further details.
If your used electrical or electronic equipment has batteries or accumulators, please dispose of these separately beforehand according to local requirements.
By disposing of this product correctly you will help ensure that the waste undergoes the necessary treatment, recovery and recycling and thus prevent potential negative effects on the environment and human health which could otherwise arise due to inappropriate waste handling.
2. In other Countries outside the EU
If you wish to discard this product, please contact your local authorities and ask for the correct method of disposal.
For Switzerland: Used electrical or electronic equipment can be returned free of charge to the dealer, even if you don't purchase a new product. Further collection facilities are listed on the homepage of www.swico.ch or www.sens.ch.
B. Information on Disposal for Business Users 1. In the European Union
If the product is used for business purposes and you want to discard it:
Please contact your SHARP dealer who will inform you about the take-back of the product. You might be charged for the costs arising from take-back and recycling. Small products (and small amounts) might be taken back by your local collection facilities.
For Spain: Please contact the established collection system or your local authority for take-back of your used products.
2. In other Countries outside the EU
If you wish to discard of this product, please contact your local authorities and ask for the correct method of disposal.
XL-UR230H XL-UR250H XL-UR2110H
ENGLISH
Introduction
Thank you for purchasing this SHARP product. To obtain the best performance from this product, please read this manual carefully. It will guide you in operating your SHARP product.
- XL-UR230H Micro Component System consisting of XL-UR230H (main unit) and CP-UR230H (speaker system).
- XL-UR250H Micro Component System consisting of XL-UR250H (main unit) and CP-UR250H (speaker system).
- XL-UR2110H Micro Component System consisting of XL-UR2110H (main unit) and CP-UR2110H (speaker system).
The illustrations printed in this operation manual are for the model XL-UR250H.
Special Note
Supply of this product does not convey a license nor imply any right to distribute content created with this product in revenue-generating broadcast systems (terrestrial, satellite, cable and/or other distribution channels), revenue-generating streaming applications (via Internet, intranets and/or other networks), other revenue-generating content distribution systems (pay-audio or audio-on-demand applications and the like) or on revenue-generating physical media (compact discs, digital versatile discs, semiconductor chips, hard drives, memory cards and the like). An independent license for such use is required. For details, please visit http://mp3licensing.com MPEG Layer-3 audio coding technology licensed from Fraunhofer IIS and Thomson.
Accessories
Please confirm that the following accessories are included.

Note:
Only the above accessories are included.
Contents
Page
■ General Information
Precautions 2 - 3
Controls and indicators ....3 - 5
■ Preparation for Use
System connections 6-8
Remote control 9
■ Basic Operation
General control 10
Setting the clock (Remote Control only) ..... 11
■ CD or MP3/WMA disc Playback
Listening to a CD or MP3/WMA disc .....12 - 14
Advanced CD or MP3/WMA disc playback .....15 - 16
Advanced CD playback 17
MP3/WMA folder mode (only for MP3/WMA files) .....18 - 19
■ USB Memory Playback
Listening to USB mass storage device / MP3 Player . . . .20 - 21
To remove USB memory device 21
Advanced USB playback 22
Recording on USB Memory device 23 - 24
Radio
Listening to the radio .....25 - 26
■ Advanced Features
Using the Radio Data System (RDS) .....27 - 31
Timer and sleep operation (Remote Control only) .....32 - 35
Enhancing your system 36 - 37
■ References
Troubleshooting chart ....37 - 39
Maintenance 39
Specifications 40 - 42
Precautions
■ General
- Please ensure that the equipment is positioned in a well-ventilated area and ensure that there is at least 10 cm (4") of free space along the sides, top and back of the equipment.

- Use the unit on a firm, level surface free from vibration.

- Keep the unit away from direct sunlight, strong magnetic fields, excessive dust, humidity and electronic/electrical equipment (home computers, facsimiles, etc.) which generate electrical noise.

- Do not place anything on top of the unit.
- Do not expose the unit to moisture, to temperatures higher than 60°C (140°F) or to extremely low temperatures.
- If your system does not work properly, disconnect the AC power lead from the wall socket. Plug the AC power lead back in, and then turn on your system.
- In case of an electrical storm, unplug the unit for safety.

XL-UR230H
XL-UR250H
XL-UR2110H
Precautions (continued)
- Hold the AC power plug by the head when removing it from the wall socket, as pulling the lead can damage internal wires.
- The AC power plug is used as disconnect device and shall always remain readily operable.
- Do not remove the outer cover, as this may result in electric shock. Refer internal service to your local SHARP service facility.
- The ventilation should not be impeded by covering the ventilation openings with items, such as newspapers, tablecloths, curtains, etc.
- No naked flame sources, such as lighted candles, should be placed on the apparatus.
- Attention should be drawn to the environmental aspects of battery disposal.
- This unit should only be used within the range of 5°C - 35°C (41°F - 95°F).
- The apparatus is designed for use in moderate climate.
Warning:
The voltage used must be the same as that specified on this unit. Using this product with a higher voltage other than that which is specified is dangerous and may result in a fire or other type of accident causing damage. SHARP will not be held responsible for any damage resulting from use of this unit with a voltage other than that which is specified.
Volume control
The sound level at a given volume setting depends on speaker efficiency, location, and various other factors. It is advisable to avoid exposure to high volume levels. Do not turn the volume on to full at switch on and listen to music at moderate levels. Excessive sound pressure from earphones and headphones can cause hearing loss.
Controls and indicators


■ Front panel
Reference page
- Disc Trays ...... 13
- Timer Indicator 33
- Remote Sensor 9
- Disc or USB Stop Button....14
- Disc or USB Play or Repeat Button ..... 12, 16
- ON/STAND-BY Button 10
- CD Button 12
- Tuner (Band) Button 25, 27
- Video/Auxiliary/USB Button 20
- USB Terminal 20
- Headphone Socket 36
- Volume Control....10
- Disc Number Select Buttons ..... 12
- Disc Tray Open/Close Button 12


■ Display
Reference page
- Disc Number Indicators ..... 13
- MP3/WMA Folder Indicator 20
- MP3/WMA Title Indicators 19, 21
- MP3 Indicator 13, 20
- WMA Indicator 13, 20
- RDS Indicator 27
- Traffic Announcement Indicator 27
- Dynamic PTY Indicator 27
- Traffic Programme Indicator 27
- Sleep Indicator 35
- Timer Play Indicator 34
- USB Record Indicator 23, 24
- MP3/WMA Total Indicator 13, 20
- Daily Timer Indicator 34
- FM Stereo Mode Indicator 25
- FM Stereo Receiving Indicator 25
- Extra Bass Indicator 10
- Memory Indicator 17, 26
- Disc or USB Repeat Play Indicator ..... 16, 22
- Disc or USB Pause Indicator 14
- Disc or USB Play Indicator 13, 21
■ Rear panel
Reference page
- Speaker Terminals ....7
- AC Power Lead 8
- FM 75 Ohms Aerial Socket ....7
- AM Aerial Earth Terminal 7
- AM Loop Aerial Terminal 7
- Video/Auxiliary (Audio Signal) Input Sockets ..... 36
- Cooling Fan 8
- Subwoofer Pre-output Socket 37
Speaker system
- Tweeter
- Woofer
- Bass Reflex Duct
- Speaker Wire

Controls and indicators (continued)

Remote control
Reference page
- Remote Control Transmitter 9
- Disc Number Select Buttons ..... 12
- USB Recording Enter Button 23, 24
- USB Recording Mode Button 23, 24
- Clock/Timer Button 11, 32, 35
- Disc Direct Search Buttons ..... 15
- Equaliser Mode Select Button 10
- Extra Bass/Demo Button 8,10
- On/Stand-by Button 10
- CD Button 12
- Tuner (Band) Button 25, 27
- Video/AUX/USB Button 20,36
- MP3/WMA Folder Button 18
- MP3/WMA Display Button....20
- Volume Up and Down Buttons 10
- Clear/Dimmer Button 10, 17
- Disc or USB Random Button 16, 22
- Disc Stop Button 14
- USB Recording Button 25, 26
- USB Stop Button 20
- Memory Button 11, 17, 26, 32, 35
- Disc Pause Button 14
- Disc Play and Repeat Button 14, 16
- USB Pause Button 21
- USB Play and Repeat Button 21, 22
- Tuning Up Button 20, 25
- Disc Track Up or Fast Forward, Tuner Preset Up, Time Up Button....11, 14, 20, 26, 32
- Disc Track Down or Fast Reverse, Tuner Preset Down, Time Down Button ..... 11, 14, 20, 26, 32
- Tuning Down Button 20, 25
- RDS ASPM Button 27
- RDS PTY Button 27
- RDS Display Button 27
System connections

XL-UR230H XL-UR250H XL-UR2110H
ENGLISH
System connections (continued)
■ Aerial connection
Supplied FM aerial:
Connect the FM aerial wire to the FM 75 OHMS socket and position the FM aerial wire in the direction where the strongest signal can be received.
Supplied AM loop aerial:
Connect the AM loop aerial to the AM and Earth (GND) terminals. Position the AM loop aerial for optimum reception. Place the AM loop aerial on a shelf, etc., or attach it to a stand or a wall with screws (not supplied).

Note:
Placing the aerial on the unit or near the AC power lead may cause noise pickup. Place the aerial away from the unit for better reception.
Installing the AM loop aerial:
< Assembling > < Attaching to the wall >
Wall Screws (not supplied)

■ Speaker connection
Connect the black wire to the minus (-) terminal, and the red wire to the plus (+) terminal.

Caution:
XL-UR230H/XL-UR250H
- Use speakers with an impedance of 6 ohms or more, as lower impedance speakers can damage the unit.
- Use speakers with an impedance of 4 ohms or more, as lower impedance speakers can damage the unit.
XL-UR230H/XL-UR250H/XL-UR2110H
- Do not mistake the right and the left channels. The right speaker is the one on the right side when you face the unit.
- Do not let the bare speaker wires touch each other.
- Do not allow any objects to fall into or to be placed in the bass reflex ducts.
- Do not stand or sit on the speakers. You may be injured.
■ Speaker grilles are removable
Make sure nothing comes into contact with the speaker diaphragm when you remove the speaker grilles.
Incorrect

■ AC power connection
After checking all the connections have been made correctly, plug the AC power lead of this unit into the wall socket. If you plug in the unit first, the unit will enter the demonstration mode.

Note:
- Unplug the AC power lead from the wall socket if the unit will not be in use for a prolonged period of time.
Cooling fan:
The main unit is built with a cooling fan at the rear of the unit for improved cooling. Please do not cover the opening of the fan with any obstacles, as this will block proper ventilation.

■ Demonstration mode
The first time the unit is plugged in, the unit will enter the demonstration mode. You will see words scroll.

To cancel the demonstration mode:
When the unit is in the power stand-by mode (demonstration mode), press the X-BASS/DEMO button on the remote control. The unit will enter the low power consumption mode.

To return to the demonstration mode:
When the unit is in the power stand-by mode, press the X-BASS/DEMO button on the remote control again.
Note:
When the power is on, the X-BASS/DEMO button can be used to select the extra bass mode.
■ External FM aerial
Use an external FM aerial if you require better reception. Consult your dealer.

Note:
When an external FM aerial is used, disconnect the supplied FM aerial wire.
Remote control
■ Battery installation
1 Open the battery cover. 2 Insert the supplied batteries according to the direction indicated in the battery compartment.
When inserting or removing the batteries, push them towards the ⊖ battery terminals.
3 Close the cover.

Precautions for battery use:
- Replace all old batteries with new ones at the same time.
- Do not mix old and new batteries.
- Remove the batteries if the unit will not be used for long periods of time. This will prevent potential damage due to battery leakage.
Caution:
- Do not use rechargeable batteries (nickel-cadmium battery, etc.).
- Installing the batteries incorrectly may cause the unit to malfunction.
Battery removal:
Open the battery cover and pull up the battery to take out.
Notes concerning use:
- Replace the batteries if the operating distance is reduced or if the operation becomes erratic. Purchase 2 "AA" size batteries (UM/ SUM-3, R6, HP-7 or similar).
- Periodically clean the transmitter on the remote control and the sensor on the unit with a soft cloth.
- Exposing the sensor on the unit to strong light may interfere with operation. Change the lighting or the direction of the unit if this occurs.
- Keep the remote control away from moisture, heat, shock, and vibrations.
■ Test of the remote control
Check the remote control after checking all the connections (see pages 6 - 8).
Point the remote control directly at the remote sensor on the unit.
The remote control can be used within the range shown below: Press the ON/STAND-BY button. Does the power turn on? Now, you can enjoy music.

General control

■ To turn the power on
Press the ON/STAND-BY button to turn the power on.
After use:
Press the ON/STAND-BY button to enter the power stand-by mode.
■ Illumination light control
When the power is turned on, the ring around the volume control lights up. To turn on/off the light, hold down the CLEAR/DIMMER button on the remote control for more than 2 seconds.
■ Volume auto fade-in
If you turn off and on the main unit with the volume set to 27 or higher, the volume starts at 16 and fades in to the last set level.
XL-UR230H XL-UR250H XL-UR2110H
Volume control
Main unit operation:
When the VOLUME control is turned clockwise, the volume will increase. When it is turned anti-clockwise, the volume will decrease.
Remote control operation:
Press the VOLUME (+ or -) button to increase or decrease the volume.

■ Bass control
When the power is first turned on, the unit will enter the extra bass mode which emphasises the bass frequencies, and "X-BASS" will appear. To cancel the extra bass mode, press the X-BASS/DEMO button on the remote control.

Equaliser
When the EQUALIZER MODE button on the remote control is pressed, the current mode setting will be displayed. To change to a different mode, press the EQUALIZER MODE button repeatedly until the desired sound mode appears.
![graph TD A["FLAT No equalisation."] --> B["ROCK For rock music."] B --> C["CLASSIC For classical music."] C --> D["POPS For pop music."] D --> E["VOCAL Vocals are enhanced."] E --> F["JAZZ For jazz."]](/content/2026/06/1307294/images/e35beb4e43637aa7c9de2f30ba91f1175bbfba2b44982f1f630a24fb161b50a1.jpg)
Setting the clock (Remote Control only)

In this example, the clock is set for the 24-hour (0:00) display.
1 Press the ON/STAND-BY button to turn the power on. 2 Press the CLOCK/TIMER button. 3 Within 10 seconds, press the lock button to select "CLOCK", and then press the MEMORY button.

4 Press the or button to select 24-hour or 12-hour display and then press the MEMORY button.

![graph TD A["0:00"] --> B["AM 12:00"] B --> C["AM 0:00"] D["The 24-hour display will appear. (0:00 - 23:59)"] --> E["The 12-hour display will appear. (AM 12:00 - PM 11:59)"] F["The 12-hour display will appear. (AM 0:00 - PM 11:59)"] --> G["The 12-hour display will appear. (AM 0:00 - PM 11:59)"]](/content/2026/06/1307294/images/c6cb7434c8799a4be776019ee05b7b7e867f192ad099d107c8aa4d8e5b2b8590.jpg)
5 Press the button to adjust the hour and then press the MEMORY button.

Press the button once to advance the time by 1 hour. Hold it down to advance continuously.
6 Press the button to adjust the minutes and then press the MEMORY button.

Press the button once to advance the time by 1 minute. Hold it down to change the time in 5-minute intervals.
To confirm the time display:
[When the unit is in the stand-by mode]
Press the CLOCK/TIMER button.
The time display will appear for about 10 seconds.
[When the power is on]
Press the CLOCK/TIMER button.
Within 10 seconds, press the left button to display the time.
The time display will appear for about 10 seconds.
Note:
The "CLOCK" will appear or time will flash to confirm the time display when the AC power supply is restored after a power failure or unplugging the unit. If incorrect, readjust the clock as follows.
To readjust the clock:
Perform "Setting the clock" from step 1. If the "CLOCK" does not appear in step 3, step 4 (for selecting the 24-hour or 12-hour display) will be skipped.
To change the 24-hour or 12-hour display:
1 Clear all the programmed contents. [Refer to "Factory Reset, Clearing All Memory" on page 38 for details.] 2 Perform "Setting the clock" from step 1 onwards.
Listening to a CD or MP3/WMA disc
This system can play back a standard CD, CD-R/RW in the CD format and CD-R/RW with MP3 or WMA files, but cannot record on them. Some audio CD-R and CD-RW discs may not be playable due to the state of the disc or the device that was used for recording.
MP3:
MP3 is a form of compression. It is an acronym which stands for MPEG Audio Layer 3.
MP3 is a type of audio code which is processed by significant compression from the original audio source with very little loss in sound quality.
- This system supports MPEG 1 Layer 3, MPEG 2 Layer 3, and VBR files.
- During VBR file playback, time counter in the display may differ from its actual playback time.
- Bitrate which is supported by MP3 is 32 ~ 320 kbps.
WMA:
WMA files are Advanced System Format files that include audio files which are compressed with Windows Media Audio codec. WMA is developed by Microsoft as an audio format file for Windows Media Player.
- "MP3" and "WMA" indicator will light up after the unit reads information on an MP3 or WMA disc.
- Bitrate which is supported by WMA is 64 ~ 160 kbps.
Auto power on function:
When you press any of the following buttons, the unit turns on.
- CD button (main unit and remote control): The unit turns on and the "CD" function is activated.
- CD / button on the remote control: The unit turns on and CD playback starts (regardless of the last function).
- ▶/ button on the main unit: The unit turns on and playback of the last function starts (CD, TUNER, VIDEO/AUX, USB).
Auto power off function:
In the stop mode of CD, MP3 or WMA operation, the main unit enters the stand-by mode after 15 minutes of inactivity.


Listening to a CD or MP3/WMA disc (continued)
1 Press the ON/STAND-BY button to turn the power on. 2 Press the CD button. 3 Press the Ⓞ button and within 5 seconds, press the OPEN/CLOSE button to open the disc tray 1. 4 Place the disc on the disc tray 1, label side up. Be sure to place 8 cm (3") disc in the middle of the disc trays.


5 Press the OPEN/CLOSE button to close the disc tray 1.
Total number of tracks on the disc Total playing time of the disc
Total number of files
- Due to the structure of the disc information, it takes longer to read an MP3/WMA disc than a normal CD (approximately 20 to 90 seconds).
6 You can place discs on the trays 2 - 5 by following steps 3 - 5.
7 Press the ▶ button to start playback.

- Playback will begin from track 1 on DISC 1. After that disc finishes playing, the next disc will be automatically played.
- After the last track on the fifth disc is played, the unit will stop automatically.
- When there is no disc in one of the disc trays (1 - 5), the empty tray will be skipped to the next tray with a disc.
To exchange other discs whilst playing a disc:
Press one of the Ⓞ1 - 5 buttons for the stopped disc and within 5 seconds, press the ▲OPEN/CLOSE button and exchange discs.
To remove the discs:
In the stop mode, press the ⏻1 - ⏻ buttons and within 5 seconds, press the ▲OPEN/CLOSE button.
To skip to a desired disc:
Press one of the ⓞ1 - Ⓞ buttons and within 5 seconds, press the ■ (CD ■) button.
Caution:
- Do not place two discs in the same tray.
- Do not play discs of special shapes (heart, octagon, etc). It may cause malfunctions.
- Do not push the disc tray whilst it is moving.
- If the power fails whilst the tray is open, wait until the power is restored.
- If the disc tray is stopped with force, "ER-CD21" will appear on the display for 3 seconds and the unit will not function. If this occurs, press the ON/STAND-BY button to enter the power stand-by mode and then turn the power on again.
- If TV or radio interference occurs during CD operation, move the unit away from the TV or radio.
- If a disc is damaged, dirty, or loaded upside down, the disc will be skipped.
■ Various disc functions
| Function M | Main unit Remote control | Operation |
Play Press in  | the stop  | mode. |
Stop Press in  | the playback  | mode. |
| Pause Press [SAWH] | in the playback _ | mode. Press the ▶ button to resume play-back from the paused point. |
| Track up/ Track down | _ | Press in the playback or stop mode. If you press the button in the stop mode, press the ▶ button to start the desired track. |
| Fast forward/Fast reverse | _ | Press and hold down in the playback mode. Release the button to resume playback. |
Notes for CD or MP3/WMA disc:
● Track up/track down is possible only within individual disc. ● Fast forward/fast reverse is possible only within individual disc. - When the end of the last track is reached during fast forward, "END" will appear on the display and CD operation will be paused. When the beginning of the first track is reached during fast reverse, the unit will enter the playback mode. - Rewritable multi-session discs which writing is not finished, can still be played.
XL-UR230H
XL-UR250H
XL-UR2110H
ENGLISH
Advanced CD or MP3/WMA disc playback
■ To specify a disc to play
You can play a disc by specifying the disc number.
1 Press one of the ⓣ- 5buttons to select the desired disc.
Selected disc number
2 Within 5 seconds, press the ▶ button on the main unit.

● Playback will begin from track 1 on the chosen disc.
- After the last track on the last disc is played, the unit stops automatically.
Note:
If a disc tray with no disc is selected, playback will not start and the disc indicator will disappear.
To stop playback:
Press the ■(CD) button.
■ Direct track search
By using the direct search buttons, the desired tracks on the current disc can be played.
Use the direct search buttons on the remote control to select the desired track whilst playing the selected disc.
Selected track number
● The direct search buttons allow you to select up to number 9. - When selecting number 10 or higher, use the "+10" button.
A. For example, to choose 13
1 Press the "+10" button once. 2 Press the "1" button. 3 Press the "3" button.


B. For example, to choose 130
1 Press the "+10" button twice. 2 Press the "1" button. 3 Press the "3" button. 4 Press the "0" button.
Notes:
- A track number higher than the number of tracks on the disc cannot be selected. ● During random play, direct search is not possible.
To stop playback:
Press the ■(CD) button.
■ Repeat play
Repeat play can play one disc, all 5 discs or a programmed sequence continuously.
To repeat one disc:
Press the ▶ button twice.
To repeat all tracks on up to 5 discs:
Press the ▶ button three times.
To repeat desired tracks (CD only):
Perform steps 1 - 6 in "Programmed play" section on page 17 and then press the ▶/ button twice.

To cancel repeat play:
Press the ▶ button again until " " will disappear.
■ Random play
The tracks on the disc(s) can be played in random order automatically.
To random play all tracks on up to 5 discs:
Press the RANDOM button on the remote control.

To cancel random play:
Press the ▶/ button.
“R” will disappear.
Notes:
- If you press the button during random play, you can move to the track selected next by the random operation. However, the button does not allow you to move to the previous track. It will go to the beginning of the current track instead.
- In random play, the unit will select and play tracks automatically. (You cannot select the order of the tracks.)
Caution:
After performing repeat or random play, be sure to press the ■(CD
■) button. Otherwise, the disc(s) will play continuously.
XL-UR2110H
Advanced CD playback
■ Programmed play
You can choose up to 32 selections for playback in the order you like.
1 Whilst in the stop mode, press the MEMORY button on the remote control to enter the programming save mode.


2 Press one of the ⏻- 5buttons to select the desired disc.

Selected disc number
3 Press the direct search buttons on the remote control to select the desired track.

You can also select a track by pressing the button.
Selected track number ng the or button.
4 Press the MEMORY button to save the track number.

5 Repeat steps 2 - 4 for other tracks. Up to 32 tracks can be programmed. If you make a mistake, the programmed tracks can be cleared by pressing the CLEAR/DIMMER button.
The total number in memory will appear.

7 Press the ▶ button to start playback.
To clear the programmed selections:
Press the CLEAR/DIMMER button on the remote control whilst the "MEMORY" indicator is flashing.
Each time the button is pressed, one track will be cleared, beginning with the last track programmed.

To cancel the programmed play mode:
Whilst in the stop mode and the "MEMORY" indicator is lit, press the CLEAR/DIMMER button on the remote control. The "MEMORY" indicator will disappear and all the programmed contents will be cleared.
Adding tracks to the programme:
If a programme has been previously stored, the "MEMORY" indicator will be displayed. Then follow steps 1 - 6 to add tracks. The new tracks will be stored after the last track of the original programme.
To check which tracks are programmed:
Whilst the unit is stopped in the programmed play mode, press the ◀◀ or ▶ button.
Notes:
- When a disc with programmed tracks is ejected, the programme is automatically cancelled.
- Even if you press the ON/STAND-BY button to enter the stand-by mode or change the function from CD to another, the programmed selections will not be cleared. ● During the programme operation, random play is not possible.
MP3/WMA folder mode (only for MP3/WMA files)
To playback MP3/WMA (Windows Media Audio) file
There are many music sites on the internet that you can download MP3/WMA (Windows Media Audio) music files. Follow the instructions from the website on how to download the music files. You can then playback these downloaded music files by burning them to a CD-R/RW disc or by connecting a USB Memory Player device.
- Your downloaded song/files are for personal use only. Any other usage of the song without owner's permission, is against the law.
■ About folder playback order
If MP3/WMA files are recorded in several folders, a folder number will be set to each folder automatically.
These folders can be selected by the FOLDER button on the remote control. If there is no supported file formats inside the selected folder, the folder is skipped and the next folder will be selected.
Example: How to set folder number if MP3/WMA format files are recorded as below figure.
- ROOT folder is set as folder 1.
- As for folders inside ROOT folder (Folder A and Folder B), the folder which is recorded earlier on the disc will be set as folder 2 and folder 3.
- As for folder inside Folder A (Folder C and Folder D), the folder which is recorded earlier on the disc will be set as folder 4 and folder 5.
- Folder E that is inside Folder D will be set as folder 6.
- The folder and file order information which is recorded on the disc depends on the writing software. There may be possibilities that this unit will playback the files not according to our expected playback order.
- For CD MP3/WMA, 512 numbers of folders and files inclusives of the folders which have non playable files can be read.

Folder mode on/off can be operated by the FOLDER button on the remote control. Files that are played when folder mode is set to the on position, may differ from those played back when folder mode is turned off.
Folder Mode Off case:
All the files starting from the selected file will be played back. If file 3 inside Folder C is selected, all the files starting from file 3 will be played back until file 10 of Folder E.
Folder Mode On case:
All the files inside the selected folder will be played back. In case Folder D is selected, file 6, 7 and 8 will be played back. File 9 and 10 in Folder E will not be played back.
![graph TD A["ROOT (FOLDER 1)"] --> B["FOLDER A (FOLDER 2)"] A --> C["FOLDER B (FOLDER 3)"] B --> D["FOLDER C (FOLDER 4)"] B --> E["FOLDER D (FOLDER 5)"] C --> F["FOLDER E (FOLDER 6)"] C --> G["FOLDER F (FOLDER 7)"] C --> H["FOLDER G (FOLDER 8)"] C --> I["FOLDER H (FOLDER 9)"] C --> J["FOLDER I (FOLDE…](/content/2026/06/1307294/images/930deb7dc9ca8243887ce091369b14d62473f711a96e089da509ea3a33739310.jpg)
MP3/WMA folder mode (only for MP3/WMA files) (continued)
■ Procedure to play back MP3/WMA disc with folder mode on
To play back CD-R/RW.
1 Press the CD button, and load an MP3/WMA disc. ● After disc is loaded, the disc info will be displayed.

2 Press the FOLDER button, and press the TUNING (or) ^ button to select desired playback folder. (Folder mode on)

3 Select desired file to be played back by pressing the ◀◀ or ▶▶ button.

4 Press the ▶/⊂ (CD ▶/⊂ ) button.
Playback will start and file name will be displayed.
● Title, Artist & Album name are displayed if they are recorded on the disc. ● Display content can be changed by pressing the DISPLAY button.
![graph TD A["File Name Display"] --> B["Title Display"] B --> C["TITLE-1 Indicator"] C --> D["Function Display"] D --> E["(×) Clock Display"] E --> F["Album Display"] F --> G["Title-2 Indicator"] G --> H["Artist Display"] H --> I["TITLE-3 Indicator"]](/content/2026/06/1307294/images/daf6c9b90ef4140fe6cbea5ed520cf75503b89192f47b4d6b3a8dfda3b60872a.jpg)
In folder mode on, pressing the TUNING (√ or ∧) button enable the folder to be selected even though it is in playback/pause mode.
It will continue playback/pause mode in the first track of the selected folder.
(✗Only appears when clock is already set.
Note:
- If "NO SUPPORT" is displayed, it means "Copyright protected WMA file" or "Not supported playback file" is selected.
Listening to USB mass storage device / MP3 Player
XL-UR230H XL-UR250H XL-UR2110H
RE-OFIETION

Note: This product is not compatible with MTP and AAC file systems.
■ To play back USB/MP3 Player with Folder mode off: 1. Press the VIDEO/AUX/USB (USB/AUX) button, and push up the USB door. Connect the USB Memory device that has MP3/WMA format files on the unit.
When the USB memory is connected to the main unit, the device information will be displayed.

2. Select desired file to be played back by pressing the ▶ button. 3. Press the ▶ / ⊆ (USB ▶ / ⊆) button. Playback will start and the file name will be displayed. - Title, Artist & Album name are displayed if they are recorded in the USB memory device. - Display content can be changed by pressing the DISPLAY button.

( ) Only appears when clock is already set. Note: To pause playback: Press the USB II button. Auto power off function: In the stop mode of USB operation, the main unit enters the stand-by mode after 15 minutes of inactivity. When the USB memory is connected to the main unit, the device information will be displayed.
■ To play back USB/MP3 Player with Folder mode on
1. Press the VIDEO/AUX/USB (USB/AUX) button, and push up the USB door. Connect the USB Memory device that has MP3/WMA format files on the unit.

continued to the next page.
Listening to USB mass storage device / MP3 Player (continued)
2. Press the FOLDER button, and press the TUNING (or) ^ button to select desired playback folder.
FOLDER indicator

FOLDER number Total files in Folder 2
● To start playback with folder mode on, go to step 4. - To change the playback folder, press the TUNING or ↑ button to select another folder.
3 Select desired file to be played back by pressing the ▶ button.
4 Press the ▶/ ⊆ (USB ▶/ ⊆) button.
Playback will start and the file name will be displayed.
- Title, Artist & Album name are displayed if they are recorded in the USB memory device. ● Display content can be changed by pressing the DISPLAY button.
File Name Display Title Display (•TITLE-1 Indicator

(✗Only appears when clock is already set.
Note:
To pause playback:
Press the USB II button.
Auto power off function:
In the stop mode of USB operation, the main unit enters the stand-by mode after 15 minutes of inactivity.
To remove USB memory device
1 Press the USB ■ button to stop playback. Then press the USB ■ button again and wait until "UNPLUG OK" is displayed.

2 Disconnect USB memory device from the USB terminal.

Notes:
● SHARP will not be held liable for the loss of data whilst the USB memory device is connected to the audio system. - Files compressed in MP3 and / or WMA format can be played back when connected to the USB terminal. - This USB memory's format supports FAT 16 or FAT 32. ● SHARP cannot guarantee that all USB memory devices will work on this audio system. - USB cable is not recommended for use in this audio system to connect to USB memory device. Use of the USB cable will affect the performance of this audio system. ● This USB memory cannot be operated via USB hub. - If "NO SUPPORT" is displayed, it means "Copyright protected WMA file" or "Not supported playback file" is selected. - The USB terminal in this unit is not intended for a PC connection but is used for music streaming with a USB memory device. ● External HDD-storage cannot be played back via USB terminal. - If the data inside the USB memory is large, it may take longer time for the data to be read.
Advanced USB playback
XL-UR230H
XL-UR250H
XL-UR2110H
■ Repeat play
Repeat play can play all tracks sequence continuously.
To repeat all tracks:
Press the ▶ button twice.

To cancel repeat play:
Press the ▶ button again until " " will disappear.
■ Random play
The tracks can be played in random order automatically.
To random play all tracks:
Press the RÁNDOM button on the remote control.

To cancel random play:
Press the ▶ button. "R" will disappear.
Notes:
- If you press the button during random play, you can move to the track selected next by the random operation. However, the button does not allow you to move to the previous track. It will go to the beginning of the current track instead.
- In random play, the unit will select and play tracks automatically. (You cannot select the order of the tracks.)
Note:
( )When folder mode is on, the selected play mode can be used for the files in the selected folder only.
Notes:
- This unit only supports "MPEG-1 Audio Layer-3" format. (Sampling Frequency is 32, 44.1, 48kHz) "MPEG-2 Audio Layer-3", "MPEG-2.5 Audio Layer-3" and MP1, MP2 format are not supported. ● Programme playback for USB memory is not available.
- Playback order for MP3 files may differ depending on the writing software used during file download.
- Bitrate which is supported by MP3 is 32~320 kbps, WMA is 64~160 kbps.
- For MP3/WMA files, please put ".MP3" ".WMA" extension. Files cannot be played back if there is no MP3/WMA extension. ● Playlists are not supported on this unit.
- This unit can display Folder Name or File Name up to 32 characters.
- Maximum total number of MP3/WMA files is 65535. Maximum total number of folders is 128, not including the root directory. Folders with non-playable files are also counted.
- The display playback time may not be displayed correctly when playing back a variable bitrate file. ● Time display cannot be changed by the DISPLAY button.
- The ID3TAG information supported are TITLE, ARTIST, and ALBUM only.
- Title name, artist name, and album name can be displayed by pressing the DISPLAY button during file playback or pause mode.
- WMA meta tag also supports title, artist, and album name which are recorded in WMA files. ● Copyright-protected WMA files cannot be played back.
■ File Erase
- At USB STOP condition, press key to select the desired MP3 or WMA file to be erased.
- Press MODE key, and the display will show "ERASE" menu.
- Within 10 seconds press ENTER key. "ERASE?" will be displayed. To cancel file erase operation, press USB STOP key.
- Press ENTER key again to confirm the file erase selection. "FILE ERASE" will be displayed.
- "COMPLETE" will be displayed for a few seconds once erasing process is finished.
■ Folder Erase
- At USB STOP condition (Folder mode on), press TUNING (vor ^) key to select the desired folder to be erased.
- Press MODE key, and the display will show "ERASE" menu.
- Within 10 seconds press ENTER key. "ERASE?" will be displayed. To cancel folder erase operation, press USB STOP key.
- Press ENTER key again to confirm the folder erase selection. "FOL ERASE" will be displayed.
- "COMPLETE" will be displayed for a few seconds once erasing process is finished.

Recording on USB Memory device
This system can record a standard CD, CD-R/RW in the CD format or CD-R/RW with MP3 files, TUNER or AUX function to the USB device.
■ CD to USB recording
There are four kinds of recording from CD to USB. 1. One File Recording (for CD) or One File Copy (for MP3 disc). 2. One Disc Recording (for CD) or One Disc Copy (for MP3 disc). 3. Programme Recording (for CD only). 4. One Folder Copy (for MP3 disc only). Select the bitrate before starting recording.
Press the MODE button and "BIT RATE" will be displayed and then press ENTER button.
- This bitrate selection is valid for CD, TUNER and AUX function only. Within 10 seconds, press the ◄ or ► button to select the desired bitrate, and press the ENTER button.
![[128 kbps] 128 KBPS, [192 kbps] 192 KBPS, [96 kbps] 96 KBPS](/content/2026/06/1307294/images/0d5242e33967aff219e8bdc35b28e76c6e1a92afeed59692bc383bc0ac7b3774.jpg)
One File Recording (for CD) or One File Copy (for MP3 disc)
1 Perform steps 1 - 5 in "Listening to a CD or MP3/WMA disc" section on page 13. 2 Press ◀◀ or ▶▶ button to select the desired file to be recorded. 3 Press the RECORD button to start USB recording at the selected track. "REC START" will be displayed for a few seconds and recording will start after the USB device has been initialised. 4 During file recording, the display will show normal CD playback but during file copy process for MP3 disc, "COPY" will be displayed.
[CD]
[MP3]

5 After the selected song finishes playing, the unit will stop playback and recording process automatically and "WRITING USB" will be displayed for a few seconds.

Disc Recording (for CD) or Disc Copy (for MP3 disc)
1 Perform steps 1 - 5 in "Listening to a CD or MP3/WMA disc" section on page 13. 2 Whilst in the stop mode, press the RECORD button to start USB recording. "REC START" will be displayed for a few seconds and recording will start after the USB device has been initialised.

3 During disc recording, the display will show normal CD playback but during disc copy process for MP3 disc, "COPY" will be displayed. 4 After the last track of the disc is played, the unit will stop playback and recording process automatically, and "WRITING USB" will be displayed for a few seconds.
Programme Recording (for CD only)
1 Perform steps 1 - 6 in "Programmed play" section on page 17. 2 Whilst in the stop mode, press the RECORD button to start USB recording. "REC START" will be displayed for a few seconds and recording will start after the USB device has been initialised. 3 During recording process, the display will show normal CD programme playback. 4 After the last programme track is played, the unit will stop playback and recording process automatically, and "WRITING USB" will be displayed for a few seconds.
One folder copy (for MP3 disc only)
| 1 Perform steps 1 - 2 in “Procedure to playback MP3/WMA disc” section on page 19. |
| 2 Whilst in the stop mode, press the RECORD button to start USB recording.“REC START” will be displayed for a few seconds and recording will start after the USB device has been initialised. |
| 3 During folder copy process, “COPY” will be displayed. |
| 4 After the last track of a selected folder finishes playing, the unit will stop playback and recording process automatically and “WRITING USB” will be displayed for a few seconds. |
Tuner or Video/Aux to USB recording
| 1 To select tuner, press the TUNER (BAND) button and select desired band station (see “Tuning” on page 25).To select video/aux, perform steps 1 - 3 in “Listening to the playback sounds from VCR, DVD, etc.” section on page 36. | |
| 2 Press the RECORD button to start recording.“REC START” will be displayed for a few seconds and recording will start after the USB device has been initialised. | |
| 3 During recording process, the display show as normal TUNER orVIDEO/AUX function.[TUNER] [TUNER$IFM 9880][VIDEO/AUX] [AUX] |
To stop recording:
Press the USB STOP button. The unit will stop the recording process and "WRITING USB" will be displayed for a few seconds.
Notes:
● Recording can be operated in CD stop mode only. During CD play-back, the RECORD button is invalid. ● The sound is heard during CD disc recording but not with an MP3 disc. - Bitrate selection is valid for CD disc, TUNER and VIDEO/AUX recording only. It is invalid for MP3 disc. The default bitrate recording is 128 kbps.
● Disc Recording (for CD) can record up to 5 discs. ● Disc Copy (for MP3 disc) can copy only 1 disc. - It is not possible to display ID3 tag information during MP3 disc copy process. - Do not POWER OFF the main unit whilst "WRITING USB" shows on the display. Wait until "WRITING USB" display disappear before turning it off. ● This system does not support WMA disc recording. - "USB FULL" message will be displayed if USB device is set in write-protect mode or if there is insufficient free space in it. - USB playback order is the same as MP3/WMA playback order (see page 18) and follow the recording order of the folder.
■ USB folder structure (of recorded files)
When recording files to USB memory, folders inside it will be created automatically according to the source selected.
Example:
If recording from CD to USB, the files will be saved in a folder named CDREC001. For next recording session, the next folder will be created and named CDREC002 and so on.
If the source is TUNER (FM band), folder FMREC001 will be created. For TUNER (AM band), folder AMREC001 will be created.
If source is VIDEO/AUX, folder EXREC001 will be created.
![graph LR A["ROOT"] --> B["RECORD"] B --> C["CDREC001"] B --> D["CDRECn"] B --> E["FMREC001"] B --> F["FMRECn"] B --> G["AMREC001"] B --> H["AMRECn"] B --> I["EXREC001"] B --> J["EXRECn"] C --> K["Disc3T05.mp3, Disc1T04.mp3 (For CD-DA disc)"] D --> L["ABC001.mp3, DEF001.mp3 (For CD MP3 disc)"] E -->…](/content/2026/06/1307294/images/528d5412836e1b6639631e06debd2beefb967368816d4fbfe00146182eb8fd8a.jpg)
Maximum number of folders that can be created is 128.
XL-UR230H
XL-UR250H
XL-UR2110H
Listening to the radio

Auto power on function:
When you press any of the following buttons, the unit turns on.
- TUNER (BAND) button (main unit and remote control): The unit turns on and the "TUNER" function is activated.
- ▶/ button on the main unit: The unit turns on and playback of the last function starts (CD, TUNER, VIDEO/AUX, USB).
■ Tuning
1 Press the ON/STAND-BY button to turn the power on. 2 Press the TUNER (BAND) button repeatedly to select the desired frequency band (FM or AM). 3 Press the TUNING (or) button on the remote control to tune in to the desired station.
Manual tuning:
Press the TUNING (vor) button repeatedly to tune in to the desired station.
Auto tuning:
When the TUNING (vor) button is pressed for more than 0.5 seconds, scanning will start automatically and the tuner will stop at the first receivable broadcast station.
Notes:
- When radio interference occurs, auto scan tuning may stop automatically at that point. ● Auto scan tuning will skip weak signal stations.
- To stop the auto tuning, press the TUNING( or ^) button again.
- When an RDS (Radio Data System) station is tuned in, the frequency will be displayed first, and then the RDS indicator will light up. Finally, the station name will appear.
- Full auto tuning can be achieved for RDS stations "ASPM", see page 28.
To receive an FM stereo transmission:
Press the TUNER (BAND) button to select stereo mode and "ST" indicator will be displayed. ● "will appear when an FM broadcast is in stereo. - If the FM reception is weak, press the TUNER (BAND) button to extinguish the "ST" indicator. The reception changes to monaural, and the sound becomes clearer.
FM stereo mode indicator FM stereo receiving indicator
■ Memorising a station
You can store 40 AM and FM stations in memory and recall them at the push of a button. (Preset tuning)
| 1 Perform steps 1 - 3 in “Tuning” on page 25. |
| 2 Press the MEMORY button to enter the preset tuning saving mode. |
| 3 Within 30 seconds, press the PRESET (or) button to select the preset channel number.Store the stations in memory, in order, starting with preset channel 1. |
| 4 Within 30 seconds, press the MEMORY button to store that station in memory. |
| If the “MEMORY” and preset number indicators disappear before the station is memorised, repeat the operation from step 2. |
| 5 Repeat steps 1 - 4 to set other stations, or to change a preset station.When a new station is stored in the memory, the station previously memorised for that preset channel number will be erased. |
Note:
The backup function protects the memorised stations for a few hours should there be a power failure or the AC power lead become disconnected.
■ To recall a memorised station
Press the PRESET (^ or )button for less than 0.5 seconds to select the desired station.
■ To scan the preset stations
The stations saved in the memory can be scanned automatically. (Preset memory scan)
1 Press the PRESET (or Y) button for more than 0.5 seconds. The preset number will flash and the programmed stations will be tuned in sequentially, for 5 seconds each.
2 Press the PRESET (^ or ) button again when the desired station is located.

■ To erase entire preset memory
1 Press the ON/STAND-BY button to enter the stand-by mode. 2 Whilst pressing down the ⏻ button and the 5 button, press the TUNER (BAND) button until "TUNER CLEAR" appears.

Using the Radio Data System (RDS)
RDS is a broadcasting service which a growing number of FM stations provide. These FM stations send additional signals along with their regular programme signals. They send their station names, and information about the type of programme such as sport, music, etc.
When tuned to an RDS station, "RDS" and the station name will be displayed.
"TP" (Traffic Programme) will appear on the display when the received broadcast carries traffic information, and "TA" (Traffic Announcement) will appear whilst a traffic information is on air. "PTYI" (Dynamic PTY Indicator) will appear whilst the Dynamic PTY station is received.

You can control the RDS by using the buttons on the remote control only.

■ Information provided by RDS
Each time the RDS DISPLAY button is pressed, the display will switch as follows:

Station name (PS) Programme type (PTY)

Frequency Radio text (RT)
When tuning in to a station other than an RDS station or to an RDS station which sends weak signal, the display will change in the following order:
![graph LR A["NO PS NO PTY"] --> B["NO RT"] C["FM 98.80 MHz"] --> B](/content/2026/06/1307294/images/930973597a460607e6fc65d54b035a7c2c229ed571bee1f05c75d52bbb437c02.jpg)
■ Using the Auto Station Programme Memory (ASPM)
Whilst in the ASPM operation mode, the tuner will automatically search for new RDS stations. Up to 40 stations can be stored. If you have already stored some stations in the memory, the number of new stations you can store will be less.
1 Press the TUNER (BAND) button to select the FM band.
2 Press and hold down the RDS ASPM button on the remote control for at least 3 seconds.
1 After "ASPM" has flashed for about 4 seconds, scanning will start (87.50 - 108.00 MHz).

2 When an RDS station is found, "RDS" will appear for a short time and the station will be stored in memory.

3 After scanning, the number of stations stored in memory will be displayed for 4 seconds, and then "END" will appear for 4 seconds.

To stop the ASPM operation before it is completed:
Press the RDS ASPM button whilst it is scanning for stations. The stations which are already stored in memory will be kept there.
Notes:
- If the same station is broadcasting on different frequencies, the strongest frequency will be stored in the memory.
- Any station which has the same frequency as the one stored in the memory will not be stored.
- If 40 stations have already been stored in the memory, scanning will be aborted. If you want to redo the ASPM operation, erase the preset memory.
- If no stations have been stored in the memory, "END" will appear for about 4 seconds.
- If the RDS signals are very weak, station names may not be stored in the memory.
To erase all of the contents of preset memory:
1 Press the ON/STAND-BY button to enter the power stand-by mode. 2 Whilst pressing down the ⏻ button and the 5 button, press the TUNER (BAND) button until "TUNER CLEAR" appears. - After performing this operation, all of the preset memory information will be erased.
To store a station name again if the wrong name was stored in memory:
It may be impossible to store station names in the memory using the ASPM function if there is lots of noise or if the signal is too weak. In this case, perform as follows.
1 Press the PRESET (^or ) button to check whether the names are correct. 2 If you find a wrong name during receiving the station, wait until the correct name will be displayed. And then press the MEMORY button. 3 Within 30 seconds, press the MEMORY button whilst the preset channel number is flashing. ● The new station name has been stored in memory correctly.
Using the Radio Data System (RDS) (continued)
Notes:
● The same station name can be stored in different channels. - In a certain area or during certain period, the station names may temporarily be different.
■ Notes for RDS operation
If any of the following events occur, it does not mean that the unit is faulty:
- "PS", "NO PS" and a station name appear alternately, and the unit does not operate properly.
- If a particular station is not broadcasting properly or a station is conducting tests, the RDS reception function may not work properly.
- When you receive an RDS station whose signal is too weak, information like the station name may not be displayed.
- "NO PS", "NO PTY" or "NO RT" will flash for about 5 seconds, and then the frequency will be displayed.
Notes for radio text:
- The first 10 characters of the radio text will appear for 4 seconds and then they will scroll across the display.
- If you tune in to an RDS station which is not broadcasting any radio text, "NO RT" will be displayed when you switch to the radio text position.
- Whilst radio text data is received or when the text contents change, "RT" will be displayed.
■ To recall stations in memory
To specify programmed types and select stations (PTY search): You can search a station by specifying the programme type (news, sports, traffic programme, etc. ... see pages 30 - 31) from the stations in the memory.
1 Press the TUNER (BAND) button to select the FM. 2 Press the RDS PTY button on the remote control. "SELECT" and "PTY TI" will appear alternately for about 6 seconds. 3 Within 6 seconds, press the PRESET (or) button to select the programme type. Each time the button is pressed, the programme type will appear. If the button is held down for more than 0.5 seconds, the programme type will appear continuously. 4 Whilst the selected programme type is flashing (within 6 seconds), press the RDS PTY button again. After the selected programme type has been lit for 2 seconds, "SEARCH" will appear, and the search operation will start.


Notes:
- If the display stops flashing, start again from step 2. If the unit finds the desired programme type, the corresponding channel number will flash for about 4 seconds, and then the station name will flash for 7 seconds, which will remain lit.
- If you want to listen to the same programme type of another station, press the RDS PTY button whilst the channel number or station name is flashing. The unit will look for the next station.
- If no station can be found, "NOT FOUND" will appear for 4 seconds.
If you select the traffic programme:
If you select the traffic programme (TP) in step 3, "TP" will appear. (This does not mean that you can listen to the traffic information at that time.)
When the traffic information is broadcast, "TA" will appear.
Descriptions of the PTY (Programme Type) codes, TP (Traffic Programme) and TA (Traffic Announcement).
You can search for and receive the following PTY, TP and TA signals.
| NEWS Short | accounts of facts, events and publicly expressed views, reportage and actuality. |
| AFFAIRS Topical programme expanding or enlarging upon the news, generally in different presentation style or concept, including debate, or analysis. | |
| INFO Programmes whose purpose is to impart advice in the widest sense. | |
| SPORT Programme concerned with any aspect of sport. | |
| EDUCATE Programme intended primarily to educate, of which the formal element is fundamental. | |
| DRAMA All radio plays and serials. | |
| CULTURE Programmes concerned with any aspect of national or regional culture, including language, theatre, etc. | |
| SCIENCE Programmes about the natural sciences and technology. | |
| VARIED Used for mainly speech-based programmes usually of light-entertainment nature, not covered by other categories. Examples include: quizzes, panel games, personality interviews. | |
| POP M Commercial music, which would generally be considered to be of current popular appeal, often featuring in current or recent record sales charts. | |
| ROCK M Contemporary modern music, usually written and performed by young musicians. | |
| EASY M Current contemporary music considered to be “easy-listening”, as opposed to Pop, Rock or Classical, or one of the specialised music styles, Jazz, Folk or Country. Music in this category is often but not always, vocal, and usually of short duration. | |
XL-UR230H
XL-UR250H
XL-UR2110H
Using the Radio Data System (RDS) (continued)
| LIGHT M Classical music for general, rather than specialist appreciation. Examples of music in this category are instrumental music, and vocal or choral works. |
| CLASSICS Performances of major orchestral works, symphonies, chamber music, etc., and including Grand Opera. |
| OTHER M Musical styles not fitting into any of the other categories. Particularly used for specialist music of which Rhythm & Blues and Reggae are examples. |
| WEATHER Weather reports and forecasts and meteorological information. |
| FINANCE Stock Market reports, commerce, trading, etc. |
| CHILDREN For programmes targeted at a young audience, primarily for entertainment and interest, rather than where the objective is to educate. |
| SOCIAL Programmes about people and things that influence them individually or in groups. Includes: sociology, history, geography, psychology and society. |
| RELIGION Any aspect of beliefs and faiths, involving a God or Gods, the nature of existence and ethics. |
| PHONE IN Involving members of the public expressing their views either by phone or at a public forum. |
| TRAVEL Features and programmes concerned with travel to near and far destinations, package tours and travel ideas and opportunities. Not for use for announcements about problems, delays, or roadworks affecting immediate travel where TP/TA should be used. |
| LEISURE Programmes concerned with recreational activities in which the listener might participate. Examples include, Gardening, Fishing, Antique collecting, Cooking, Food & Wine, etc. |
| JAZZ Polyphonic, syncopated music characterised by improvisation. |
| COUNTRY Songs which originate from, or continue the musical tradition of the American Southern States. Characterised by a straightforward melody and narrative story line. | |
| NATION M Current Popular Music of the Nation or Region in that country's language, as opposed to International “Pop” which is usually US or UK inspired and in English. | |
| OLDIES Music from the so-called “golden age” of popular music. | |
| FOLK M Music which has its roots in the musical culture of a particular nation, usually played on acoustic instruments. The narrative or story may be based on historical events or people. | |
| DOCUMENT Programme concerned with factual matters, presented in an investigative style. | |
| TEST Broadcast when testing emergency broadcast equipment or receivers. | |
| ALARM ! Emergency announcement made under exceptional circumstances to give warning of events causing danger of a general nature. | |
| NONE | No programme type (receive only). |
| TP | Broadcasts which carry traffic announcements. |
| TA | Traffic announcements are being broadcast. |
Timer and sleep operation (Remote Control only)
Timer playback:
The unit turns on and plays the desired source (CD, TUNER, USB, AUX) at a preset time.
Timer recording:
The unit turns on and starts recording from the desired source (TUNER, AUX) at the preset time.
This unit has 2 types of timer: ONCE TIMER and DAILY TIMER.
Once timer: Once timer play or once timer recording works for one time only at a preset time.
For example, if you are away but want to record a program on a radio station.
Daily timer: Daily timer play or daily timer recording works at the same preset time every day.
For example, set the timer as a wake-up call every morning.
Using the once timer and daily timer in combination:
For example, use the once timer to record a radio program, and use the daily timer to wake up.
1 Set the daily timer (pages 32 - 34). 2 Set the once timer (pages 32 - 34).
![graph TD A["Start"] --> B["1 minute or more"] C["Stop Start Stop"] --> D["Once timer"] B --> D](/content/2026/06/1307294/images/6ce41091ae8f031f441ad735d298324744c9d696e8ab97ecf3c0e257312c3dec.jpg)
Note:
When set times for the daily timer and once timer overlap, the once timer takes priority. Allow an interval of at least 1 minute between operations.

■ Timer playback or timer recording Before setting timer:
1 Check that the clock is set to the correct time (refer to page 11). If it is not set, you cannot use the timer function. 2 For timer playback: Plug in USB or load discs to be played. For timer recording: Plug in USB for recording in the USB terminal.

1 Press the ON/STAND-BY button to turn the power on. 2 Press the CLOCK/TIMER button. 3 Within 10 seconds, press the button to select "ONCE" or "DAILY", and press the MEMORY button.

Continued to the next page
Timer and sleep operation (Remote Control only) (continued)
4 Within 10 seconds, press the hot button to select "ONCE SET" or "DAILY SET", and press the MEMORY button.


5 Press the button to select "PLAY" or "REC", and press the MEMORY button.

The illustrations show the daily timer setting.
6 Press the 10 button to adjust the hour and then press the MEMORY button.

The illustrations show the timer playback setting in the daily timer mode.
7 Press the button to adjust the minutes and then press the MEMORY button.

8 Set the time to finish as in steps 6 and 7 above.
9 Switch input with the button, and then press the MEMORY button.
To select the timer playback source: CD, TUNER, USB or AUX.
To select the timer recording source: TUNER or AUX.
- When you select the tuner, select a station by pressing the ◀◀ or ▶ button, and then press the MEMORY button.
- If a station has not been programmed, "NO PRESET" will be displayed and timer setting will be cancelled.
10 Adjust the volume using the VOLUME control, and then press the MEMORY button.
Do not turn the volume up too high.
11 Press the ON/STAND-BY button to enter the power standby mode.
The "TIMER" indicator lights up and the unit is ready for timer playback.

12 When the preset time is reached, playback or recording will start.
The volume will increase gradually until it reaches the preset volume.
13 When the timer end time is reached, the system will enter the power stand-by mode automatically.
Once timer:
The timer will be cancelled.
The “⊕” indicator will blink during timer playback.
Daily timer:
The timer operates at the same time every day. It will continue until the daily timer setting is cancelled. Cancel the daily timer when it is not in use.
The "DAILY Ⓤ" indicator will blink during timer playback.
Notes:
- When performing timer playback or recording using another unit connected to the USB terminal or AUX IN sockets, select "USB" or "AUX" in step 9.
This unit will turn on or enter the power stand-by mode automatically. However, the connected unit will not turn on or off.
- During timer playback or timer recording, TIMER indicator light and timer indicator on display ⏻, will blink.
To stop the blinking, follow step "Cancelling the timer setting in the timer stand-by mode" on the right hand side of this page.
Checking the timer setting in the timer stand-by mode:
1 Press the CLOCK/TIMER button.
2 Within 10 seconds, press the lock button to select "ONCE" or "DAILY", and press the MEMORY button.
3 Within 10 seconds, press the lock button to select "ONCE CALL" or "DAILY CALL", and press the MEMORY button. The unit returns to the timer stand-by mode after displaying the settings in order.
Cancelling the timer setting in the timer stand-by mode:
1 Press the CLOCK/TIMER button.
2 Within 10 seconds, press the lock button to select "ONCE" or "DAILY", and press the MEMORY button.
3 Within 10 seconds, press the 14 button to select "ONCE OFF" or "DAILY OFF", and press the MEMORY button. Timer will be cancelled (the setting will not be cancelled).
Reusing the memorised timer setting:
The timer setting will be memorised once it is entered. To reuse the same setting, perform the following operations.
1 Turn the power on and press the CLOCK/TIMER button.
2 Within 10 seconds, press the lock button to select "ONCE" or "DAILY", and press the MEMORY button.
3 Within 10 seconds, press the lock button to select "ONCE ON" or "DAILY ON", and press the MEMORY button.
4 Press the ON/STAND-BY button to enter the power stand-by mode.
Timer and sleep operation (Remote Control only) (continued)
■ Sleep operation
The radio, compact disc and USB can all be turned off automatically.
1 Play back the desired sound source.
2 Press the CLOCK/TIMER button.
3 Within 10 seconds, press the ◀◀ or ▶▶ button to select "SLEEP", and press the MEMORY button.
SLEEP 200
4 Press the lock button to select the time. (Maximum: 3 hours - Minimum: 1 minute)
● 3 hours - 5 minutes → 5-minute intervals ● 5 minutes - 1 minute → 1-minute intervals
5 Press the MEMORY button.
"SLEEP" will appear.

6 The unit will enter the power stand-by mode automatically after the preset time has elapsed.
The volume will be turned down 1 minute before the sleep operation finishes.
To confirm the remaining sleep time:
1 Whilst "SLEEP" is indicated, press the CLOCK/TIMER button.
2 Within 10 seconds, press the or button to select "SLEEP
X : XX"
"X : XX" is sleep remaining time.
● The remaining sleep time is displayed for about 10 seconds. - You can change the remaining sleep time whilst it is displayed by pressing the MEMORY button (steps 4 - 5).
To cancel the sleep operation:
Press the ON/STAND-BY button whilst "SLEEP" is indicated.
To cancel the sleep operation without setting the unit to the stand-by mode, proceed as follows.
1 Whilst "SLEEP" is indicated, press the CLOCK/TIMER button. 2 Within 10 seconds, press the button to select "SLEEP OFF", and press the MEMORY button.
■ To use timer and sleep operation together
Sleep and timer playback:
For example, you can fall asleep listening to the radio and wake up to CD in the next morning.
1 Set the sleep time (see left, steps 1 - 5). 2 Whilst the sleep timer is set, set the timer playback (steps 2 - 10, pages 32 - 33).
![graph LR A["Sleep timer setting"] --> B["Timer playback setting"] B --> C["End time"] D["1 minute - 3 hours Desired time"] --> E["Sleep operation will automatically stop."] E --> F["Timer playback start time"]](/content/2026/06/1307294/images/735aa2fa2b3dee4c5e55d047ad9d95ce4cbef8316c118a60397a641c65a4a00f.jpg)
Enhancing your system
The connection lead is not included. Purchase a commercially available lead as shown below.


Auto power on function (USB/AUX):
When you press any of the following buttons, the unit turns on.
- VIDEO/AUX/USB button (main unit and remote control): The unit turns on and the "USB" or "AUX" function is activated.
- ▶/ button on the main unit: The unit turns on and playback of the last function starts (CD, TUNER, VIDEO/AUX/USB).
■ Listening to the playback sounds from VCR, DVD, etc.
1 Use a connection lead to connect the VCR, DVD, etc. to the VIDEO/AUX IN sockets. When using video equipment, connect the audio output to this unit and the video output to a television. 2 Press the ON/STAND-BY button to turn the power on. 3 Press the VIDEO/AUX/USB button. 4 Play the connected equipment.
Note:
To prevent noise interference, place the unit away from the television.
Headphones
- Before plugging in or unplugging the headphones, reduce the volume.
- Be sure your headphones have a 3.5 mm (1/8") diameter plug and impedance between 16 and 50 ohms. The recommended impedance is 32 ohms.
- Plugging in the headphones disconnects the speakers automatically. Adjust the volume using the VOLUME control.
Enhancing your system (continued)
■ Subwoofer connection
When a commercially available subwoofer with a built-in amplifier is connected to this unit, you can enjoy sound with emphasised bass. Connect an RCA lead from a commercially available speaker with a built-in amplifier to the SUBWOOFER PRE-OUT socket.

Troubleshooting chart
Many potential problems can be resolved by the owner without calling a service technician.
If something is wrong with this product, check the following before calling your authorised SHARP dealer or service centre.
General
| Symptom Possible | cause |
| ● The clock is not set to the correct time. | ● Did a power failure occur? Reset the clock. (Refer page 11) |
| ● When a button is pressed, the unit does not respond. | ● Set the unit to the power stand-by mode and then turn it back on. ● If the unit still malfunctions, reset it. (Refer page 38) |
| ● No sound is heard. ● Is | the volume level set to “0”? ● Are the headphones connected? ● Are the speaker wires disconnected? |
■ CD player
| Symptom Possible | cause |
| ● Playback does not start. ● Playback stops in the middle or is not performed properly. | ● Is the disc loaded upside down? ● Does the disc satisfy the standards? ● Is the disc distorted or scratched? |
| ● Playback sounds are skipped, or stopped in the middle of a track. | ● Is the unit located near excessive vibrations? ● Is the disc very dirty? ● Has condensation formed inside the unit? |
■ Remote control
| Symptom Possible cause | |
| ● The remote control does not operate. | ● Is the AC power lead of the unit plugged in? ● Is the battery polarity correct? ● Are the batteries dead? ● Is the distance or angle incorrect? ● Does the remote control sensor receive strong light? |
Tuner
| Symptom Possible cause | |
| ● The radio makes unusual noises continuously. | ● Is the unit placed near the TV or computer? ● Is the FM aerial or AM loop aerial placed properly? Move the aerial away from the AC power lead if it's located nearby. |
USB
| Symptom Possible cause | |
| ● Device cannot be detected. | ● Is there any MP3/WMA file available? ● Is the device properly connected? ● Is it MTP device? ● Does the device contain AAC file only? |
| ● Playback does not start. | ● Is it the copyright protected WMA file? ● Is it the false MP3 file? |
| ● Wrong time display. ● Wrong file name display. | ● Is Variable Bitrate file being played back? ● Is the File Name written in Chinese or Japanese characters? |
| ● Recording cannot start. | ● Is the USB device in write protect mode? ● Is it a CD-WMA disc? ● Is the device's memory already full? |
Condensation
Sudden temperature changes, storage or operation in an extremely humid environment may cause condensation inside the cabinet (CD pickup, etc.) or on the transmitter on the remote control. Condensation can cause the unit to malfunction. If this happens, leave the power on with no disc in the unit until normal playback is possible (about 1 hour). Wipe off any condensation on the transmitter with a soft cloth before operating the unit.
■ If trouble occurs
When this product is subjected to strong external interference (mechanical shock, excessive static electricity, abnormal supply voltage due to lightning, etc.) or if it is operated incorrectly, it may malfunction.
If such problem occurs, do the following:
1 Set the unit to the stand-by mode and turn the power on again. 2 If the unit is not restored in the previous operation, unplug and plug in the unit again, and then turn the power on.
Note:
If neither operation above restores the unit, clear all the memory by resetting it.
■ Factory Reset, Clearing All Memory
1 Press the ON/STAND-BY button to enter the power stand-by mode. 2 Whilst pressing down the ⬤ button and the 5 button, press the ON/STAND-BY button until "CLEAR ALL" appears.

Caution:
This operation will erase all data stored in memory including clock, timer settings, tuner preset, and CD programme.
Troubleshooting chart (continued)
■ Before transporting the unit
Remove all CDs from the unit. Make sure there is no CD in the disc tray. Then, set the unit to the power stand-by mode. Carrying the unit with discs left inside can damage the unit.
■ Care of compact discs
Compact discs are fairly resistant to damage, however mistracking can occur due to an accumulation of dirt on the disc surface. Follow the guidelines below for maximum enjoyment from your CD collection and player.
- Do not write on either side of the disc, particularly the non-label side from which signals are read. Do not mark this surface.
- Keep your discs away from direct sunlight, heat, and excessive moisture.
- Always hold the CDs by the edges. Fingerprints, dirt, or water on the CDs can cause noise or mistracking. If a CD is dirty or does not play properly, clean it with a soft, dry cloth, wiping straight out from the centre, along the radius.

Maintenance
■ Cleaning the cabinet
Periodically wipe the cabinet with a soft cloth and a diluted soap solution, then with a dry cloth.
Caution:
- Do not use chemicals for cleaning (petrol, paint thinner, etc.). It may damage the cabinet finish.
- Do not apply oil to the inside of the unit. It may cause malfunctions.
Specifications
As part of our policy of continuous improvement, SHARP reserves the right to make design and specification changes for product improvement without prior notice. The performance specification figures indicated are nominal values of production units. There may be some deviations from these values in individual units.
■ General (XL-UR230H)
| Power source AC 230 | V, 50 Hz |
| Power consumption | Power on: 100 WPower stand-by: 0.6 W(*) |
| Dimensions Width: 175 mm (6-3/4")Height: 240 mm (9-1/2")Depth: 315 mm (12-1/5") | |
| Weight 5.45 kg (11.7 lbs.) | |
■ General (XL-UR250H)
| Power source AC 230 | V, 50 Hz |
| Power consumption | Power on: 90 WPower stand-by: 0.6 W(*) |
| Dimensions Width: 175 mm (6-3/4")Height: 240 mm (9-1/2")Depth: 315 mm (12-1/5") | |
| Weight 5.4 kg (11.7 lbs.) | |
■ General (XL-UR2110H)
| Power source AC 230 | V, 50 Hz |
| Power consumption | Power on: 60 WPower stand-by: 0.6 W(*) |
| Dimensions Width: 175 mm (6-3/4")Height: 240 mm (9-1/2")Depth: 315 mm (12-1/5") | |
| Weight 4.9 kg (10.8 lbs.) | |
(*) This power consumption value is obtained when the demonstration mode is cancelled in the power stand-by mode. Refer to page 8 to cancel the demonstration mode.
■ Amplifier (XL-UR230H)
| Output power PMPC: 364 WMPO: 182 W (91 W + 91 W) (DIN 45 324)RMS: 100 W (50 W + 50 W) (DIN 45 324)RMS: 76 W (38 W + 38 W) (DIN 45 500) |
| Output terminals Speakers: 6 ohmsHeadphones: 16 - 50 ohms(recommended: 32 ohms)Subwoofer pre-out (audio signal):200 mV/10 k ohms at 70 Hz |
| Input terminals Video/Auxiliary (audio signal):500 mV/47 k ohms |
■ Amplifier (XL-UR250H)
| Output power PMPO: 660 WMPO: 330 W (165 W + 165 W) (DIN 45 324)RMS: 160 W (80 W + 80 W) (DIN 45 324)RMS: 128 W (64 W + 64 W) (DIN 45 500) |
| Output terminals Speakers: 6 ohmsHeadphones: 16 - 50 ohms(recommended: 32 ohms)Subwoofer pre-out (audio signal):200 mV/10 k ohms at 70 Hz |
| Input terminals Video/Auxiliary (audio signal):500 mV/47 k ohms |
■ Amplifier (XL-UR2110H)
| Output power PMPO: 160 WMPO: 80 W (40 W + 40 W) (DIN 45 324)RMS: 40 W (20 W + 20 W) (DIN 45 324)RMS: 26 W (13 W + 13 W) (DIN 45 500) |
| Output terminals Speakers: 6 ohmsHeadphones: 16 - 50 ohms(recommended: 32 ohms)Subwoofer pre-out (audio signal):200 mV/10 k ohms at 70 Hz |
| Input terminals Video/Auxiliary (audio signal):500 mV/47 k ohms |
XL-UR230H XL-UR250H XL-UR2110H
Specifications (continued)
■ CD player
| Type 5-disc multi-play compact disc player | |
| Signal readout Non-contact, 3-beam semiconductor laser pickup | |
| D/A converter D/A Multi-bit converter | |
| Frequency response 20 - 20,000 Hz | |
| Dynamic range 90 dB (1 kHz) |
Tuner
| Frequency range FM: 87.5 - 108 MHzAM: 522 - 1,620 kHz | |
| Support preset memory | 40 presets (AM and FM). |
USB
| USB host interface | ● Complies with USB 1.1 (Full Speed)/ 2.0 Mass-Storage-Class.● Supports Bulk only and CBI protocol. |
| Support file ● MPEG 1 Layer 3● MPEG 2/2.5 Layer 3● WMA (Non DRM) | |
| Bitrate support ● MP3 (32 ~ 320 kbps)●WMA (64 ~ 160 kbps) | |
| Other ● Maximum total number of MP3/WMA files is 65 535.● Maximum total number of folders is 512 INCLUSIVE of root directory. (Folders with non playable files are also counted.)● The ID3TAG information supported are TITLE, ARTIST and ALBUM only.● Supports ID3TAG version 1 and version 2● Maximum number of folders that can be recorded is 128.● Maximum number of files in a folder that can be recorded is 128. | |
| File system support | ● Supports USB devices with Microsoft Windows/DOS/FAT 12/ FAT16/ FAT 32.● 2 kbyte block length for sector. |
■ Speaker (XL-UR230H)
| Type 2-way type speaker system | |
| 5 cm (2") tweeter10 cm (4") woofer | |
| Maximum input power 100 W | |
| Rated input power 50 W | |
| Impedance 6 ohms | |
| Dimensions Width: 140 mm (5-1/2")Height: 260 mm (10-1/4")Depth: 195 mm (7-11/16") | |
| Weight 2.7 kg (6.0 lbs.)/each | |
■ Speaker (XL-UR250H)
| Type 2-way type speaker system | |
| 5 cm (2") tweeter12 cm (4-3/4") woofer | |
| Maximum input power 160 W | |
| Rated input power 80 W | |
| Impedance 6 ohms | |
| Dimensions Width: 148 mm (5-13/16")Height: 260 mm (10-1/4")Depth: 224 mm (8-13/16") | |
| Weight 2.7 kg (6.0 lbs.)/each | |
■ Speaker (XL-UR2110H)
| Type 2-way type speaker system | |
| 2.5 cm (1") tweeter10 cm (4") woofer | |
| Maximum input power 40 W | |
| Rated input power 20 W | |
| Impedance 4 ohms | |
| Dimensions Width: 140 mm (5-1/2")Height: 240 mm (9-7/16")Depth: 190 mm (7-1/2") | |
| Weight 2.0 kg (4.4 lbs.)/each | |
XL-UR230H
XL-UR250H
XL-UR2110H
SHARP
SHARP ELECTRONICS (Europe) GmbH
- WARNING
- ● WARNING
- INFORMATION ON PROPER DISPOSAL
- INFORMATION ON DISPOSAL FOR USERS (PRIVATE HOUSEHOLDS)
- IN THE EUROPEAN UNION
- IN OTHER COUNTRIES OUTSIDE THE EU
- INFORMATION ON DISPOSAL FOR BUSINESS USERS 1. IN THE EUROPEAN UNION
- ENGLISH
- INTRODUCTION
- SPECIAL NOTE
- ACCESSORIES
- CONTENTS
- GENERAL INFORMATION
- PREPARATION FOR USE
- BASIC OPERATION
- CD OR MP3/WMA DISC PLAYBACK
- USB MEMORY PLAYBACK
- RADIO
- ADVANCED FEATURES
- REFERENCES
- PRECAUTIONS
- GENERAL
- PRECAUTIONS (CONTINUED)
- VOLUME CONTROL
- CONTROLS AND INDICATORS
- FRONT PANEL
- DISPLAY
- REAR PANEL
- SPEAKER SYSTEM
- CONTROLS AND INDICATORS (CONTINUED)
- REMOTE CONTROL
- SYSTEM CONNECTIONS
- SYSTEM CONNECTIONS (CONTINUED)
- AERIAL CONNECTION
- SUPPLIED FM AERIAL
- SUPPLIED AM LOOP AERIAL
- NOTE
- INSTALLING THE AM LOOP AERIAL
- SPEAKER CONNECTION
- CAUTION
- XL-UR230H/XL-UR250H
- XL-UR230H/XL-UR250H/XL-UR2110H
- SPEAKER GRILLES ARE REMOVABLE
- AC POWER CONNECTION
- COOLING FAN
- DEMONSTRATION MODE
- TO CANCEL THE DEMONSTRATION MODE
- TO RETURN TO THE DEMONSTRATION MODE
- EXTERNAL FM AERIAL
- BATTERY INSTALLATION
- GENERAL CONTROL
- TO TURN THE POWER ON
- ILLUMINATION LIGHT CONTROL
- VOLUME AUTO FADE-IN
- MAIN UNIT OPERATION
- REMOTE CONTROL OPERATION
- BASS CONTROL
- EQUALISER
- SETTING THE CLOCK (REMOTE CONTROL ONLY)
- LISTENING TO A CD OR MP3/WMA DISC
- MP
- WMA
- AUTO POWER ON FUNCTION
- AUTO POWER OFF FUNCTION
- LISTENING TO A CD OR MP3/WMA DISC (CONTINUED)
- TO EXCHANGE OTHER DISCS WHILST PLAYING A DISC
- TO REMOVE THE DISCS
- TO SKIP TO A DESIRED DISC
- NOTES FOR CD OR MP3/WMA DISC
- ADVANCED CD OR MP3/WMA DISC PLAYBACK
- TO SPECIFY A DISC TO PLAY
- TO STOP PLAYBACK
- DIRECT TRACK SEARCH
- FOR EXAMPLE, TO CHOOSE
- NOTES
- REPEAT PLAY
- TO REPEAT ONE DISC
- TO REPEAT ALL TRACKS ON UP TO 5 DISCS
- TO REPEAT DESIRED TRACKS (CD ONLY)
- TO CANCEL REPEAT PLAY
- RANDOM PLAY
- TO RANDOM PLAY ALL TRACKS ON UP TO 5 DISCS
- TO CANCEL RANDOM PLAY
- ADVANCED CD PLAYBACK
- PROGRAMMED PLAY
- MP3/WMA FOLDER MODE (ONLY FOR MP3/WMA FILES)
- TO PLAYBACK MP3/WMA (WINDOWS MEDIA AUDIO) FILE
- ABOUT FOLDER PLAYBACK ORDER
- FOLDER MODE OFF CASE
- FOLDER MODE ON CASE
- MP3/WMA FOLDER MODE (ONLY FOR MP3/WMA FILES) (CONTINUED)
- PROCEDURE TO PLAY BACK MP3/WMA DISC WITH FOLDER MODE ON
- LISTENING TO USB MASS STORAGE DEVICE / MP3 PLAYER
- LISTENING TO USB MASS STORAGE DEVICE / MP3 PLAYER (CONTINUED)
- TO REMOVE USB MEMORY DEVICE
- ADVANCED USB PLAYBACK
- TO REPEAT ALL TRACKS
- TO RANDOM PLAY ALL TRACKS
- FILE ERASE
- FOLDER ERASE
- RECORDING ON USB MEMORY DEVICE
- CD TO USB RECORDING
- ONE FILE RECORDING (FOR CD) OR ONE FILE COPY (FOR MP3 DISC)
- DISC RECORDING (FOR CD) OR DISC COPY (FOR MP3 DISC)
- PROGRAMME RECORDING (FOR CD ONLY)
- TO STOP RECORDING
- USB FOLDER STRUCTURE (OF RECORDED FILES)
- EXAMPLE
- LISTENING TO THE RADIO
- TUNING
- MANUAL TUNING
- AUTO TUNING
- TO RECEIVE AN FM STEREO TRANSMISSION
- MEMORISING A STATION
- TO RECALL A MEMORISED STATION
- TO SCAN THE PRESET STATIONS
- TO ERASE ENTIRE PRESET MEMORY
- USING THE RADIO DATA SYSTEM (RDS)
- INFORMATION PROVIDED BY RDS
- USING THE AUTO STATION PROGRAMME MEMORY (ASPM)
- PRESS THE TUNER (BAND) BUTTON TO SELECT THE FM BAND
- PRESS AND HOLD DOWN THE RDS ASPM BUTTON ON THE REMOTE CONTROL FOR AT LEAST 3 SECONDS
- TO STOP THE ASPM OPERATION BEFORE IT IS COMPLETED
- TO ERASE ALL OF THE CONTENTS OF PRESET MEMORY
- TO STORE A STATION NAME AGAIN IF THE WRONG NAME WAS STORED IN MEMORY
- USING THE RADIO DATA SYSTEM (RDS) (CONTINUED)
- NOTES FOR RDS OPERATION
- NOTES FOR RADIO TEXT
- TO RECALL STATIONS IN MEMORY
- IF YOU SELECT THE TRAFFIC PROGRAMME
- TIMER AND SLEEP OPERATION (REMOTE CONTROL ONLY)
- TIMER PLAYBACK
- TIMER RECORDING
- THIS UNIT HAS 2 TYPES OF TIMER: ONCE TIMER AND DAILY TIMER
- USING THE ONCE TIMER AND DAILY TIMER IN COMBINATION
- TIMER PLAYBACK OR TIMER RECORDING BEFORE SETTING TIMER
- TIMER AND SLEEP OPERATION (REMOTE CONTROL ONLY) (CONTINUED)
- ONCE TIMER
- DAILY TIMER
- REUSING THE MEMORISED TIMER SETTING
- SLEEP OPERATION
- TO CONFIRM THE REMAINING SLEEP TIME
- TO CANCEL THE SLEEP OPERATION
- TO USE TIMER AND SLEEP OPERATION TOGETHER
- SLEEP AND TIMER PLAYBACK
- ENHANCING YOUR SYSTEM
- AUTO POWER ON FUNCTION (USB/AUX)
- HEADPHONES
- ENHANCING YOUR SYSTEM (CONTINUED)
- SUBWOOFER CONNECTION
- TROUBLESHOOTING CHART
- CONDENSATION
- IF TROUBLE OCCURS
- IF SUCH PROBLEM OCCURS, DO THE FOLLOWING
- FACTORY RESET, CLEARING ALL MEMORY
- TROUBLESHOOTING CHART (CONTINUED)
- BEFORE TRANSPORTING THE UNIT
- CARE OF COMPACT DISCS
- MAINTENANCE
- CLEANING THE CABINET
- SPECIFICATIONS
- SPECIFICATIONS (CONTINUED)
- SHARP
Brand : SHARP
Model : XL-UR230H
Category : Hi-Fi System