
Dortmund 230 DAB - Car radio BLAUPUNKT - Free user manual and instructions
Find the device manual for free Dortmund 230 DAB BLAUPUNKT in PDF.


| Product Type | Car Stereo with DAB+ Radio |
| Model | Dortmund 230 DAB |
| Brand | Blaupunkt |
| Dimensions (W x H x D) | Approx. 180 x 50 x 160 mm (1-DIN) |
| Weight | Approx. 0.5 kg |
| Power Supply | 12 V DC (negative ground) |
| Maximum Power Output | 4 x 50 Watts |
| Tuner Bands | DAB/DAB+, FM (RDS) |
| Playback Media | CD, CD-R/RW, MP3 via USB |
| Audio Inputs | AUX (front 3.5 mm), USB (front) |
| Bluetooth | Yes (hands-free calling, audio streaming) |
| Display | LCD with white illumination |
| Remote Control | Included (wired or IR) |
| Supported Audio Formats | MP3, WMA, WAV |
| Equalizer | Preset EQ (Rock, Pop, Classic, etc.) |
| Steering Wheel Control Compatible | Yes (using adapter) |
| Cleaning Instructions | Use a soft, dry cloth. Do not use solvents. |
| Safety Notes | Replace fuses only with specified rating. Disconnect battery before installation. |
| Spare Parts & Repairability | Contact Blaupunkt service or authorized dealers. |
| General Information | Designed for 12V vehicles. Installation requires standard DIN slot. |
Frequently Asked Questions - Dortmund 230 DAB BLAUPUNKT
User questions about Dortmund 230 DAB BLAUPUNKT
0 question about this device. Answer the ones you know or ask your own.
Ask a new question about this device
Download the instructions for your Car radio in PDF format for free! Find your manual Dortmund 230 DAB - BLAUPUNKT and take your electronic device back in hand. On this page are published all the documents necessary for the use of your device. Dortmund 230 DAB by BLAUPUNKT.
USER MANUAL Dortmund 230 DAB BLAUPUNKT
Operating and installation instructions

8
① [button
Unlock the detachable control panel
② MENU button
Short press: Call up/close menu Long press: Start scan function
③ On/Off button
Short press: Switch on car sound system In operation: Mute car sound system (Mute) Long press: Switch off car sound system In the menu: Change menu level In Fast-Browse mode: Confirm selection
④ Volume control
In the menu: Select menu item, change setting In Fast-Browse mode: Category (iPod only), select folder and track
⑤ CD tray
⑥ Display
⑦ ^ button
In the menu: Select menu item, change setting Radio mode: Start seek tuning MP3/WMA/iPod mode: Change to next/previous folder
< / >button
In the menu: Change menu level Radio mode: Adjust the stations Other operating modes: Track selection
8
button
Eject a CD
⑨ Microphone
⑩ USB socket
⑪ Front AUX-IN socket
12
button
Short press: Answering a call, speed dial Long press: Open the phone book of the cell phone or activate voice dialing
⑬ Keys 1 - 5
⑭ Infrared receiver
15 SRC button
Select memory bank or audio source
⑯ DIS button
Short press: Switch display Long press: Switch display brightness
⑰ SD card slot
Access only with detached control panel

Safety notes 4
Cleaning notes 5
Disposal notes....5
Scope of delivery 5
Placing the device in operation 5
Attaching/detaching the control panel .... 5
Setting the reception area 6
Switching on/off 6
Volume 6
Display brightness 6
Switching demo mode on/off 7
DAB mode 7
Changing to DAB mode or selecting a DAB memory bank 7
Tuning into ensembles/services 7
List selection 8
Saving a service or calling up a saved service....8
Scanning services 8
Refreshing services received ....8
Switching between DAB and FM 8
DAB-PTY....9
Switching the display 9
Radio mode 9
RDS....9
Changing to radio mode or selecting a memory bank 9
Tuning into a station 10
Storing stations or calling stored stations .....10
Scanning stations 10
Storing stations automatically (Travelstore)....10
PTY....11
Traffic information ....11
Switching the display 12
CD/MP3/WMA/iPod mode 12
Basic information ....12
Changing to CD/MP3/WMA/iPod mode .....12
Inserting/ejecting a CD 13
Connecting/removing a USB data carrier .....13
Inserting/removing the memory card .....14
Selecting tracks 14
Selecting a folder (only in MP3/WMA/iPod mode) ....14
Fast searching 14
Interrupting playback 14
Scanning all tracks ....14
Playing tracks in random order ....14
Repeatedly playing individual tracks or directories ....15
Switching the display 15
Browse mode ....15
Bluetooth® 16
The Bluetooth® menu ......17
Pairing and connecting a Bluetooth® device....17
Telephone functions....18
Bluetooth® streaming mode.....21
Bluetooth® streaming mode via app control (Android cell phone) .....21
Additional functions in the Bluetooth® menu....22
External audio sources 24
Front AUX-IN socket 24
Sound settings 24
Calling and exiting the "AUDIO" menu .....24
Making settings in the "AUDIO" menu .....25
User settings 26
Calling the user menu and selecting a menu 26
Making settings in the "FM TUNER" menu .....26
Making settings in the "DAB TUNER" menu ...27
Making settings in the "DISPLAY" menu .....28
Making settings in the "VOLUME" menu .....29
Making settings in the "CLOCK" menu .....29
Making settings in the "VARIOUS" menu .....30
Factory settings 31
Useful information 31
Technical data 32
Installation instructions 33
Safety notes
The car sound system was manufactured according to the state of the art and established safety guidelines. Even so, dangers may occur if you do not observe the safety notes in these instructions.
These instructions contain important information to easily and safely install and operate the car sound system.
- Read these instructions carefully and completely before using the car sound system.
- Keep the instructions in a location where they are always accessible to all users.
- Always pass on the car sound system to third parties together with these instructions.
In addition, observe the instructions of the devices used in conjunction with this car sound system.
Symbols used
These instructions employ the following symbols:

DANGER!
Warns about injuries

CAUTION!
Warns about damaging the CD drive

DANGER!
Warns about high volume

The CE mark confirms compliance with EU directives.
Identifies a sequencing step
- Identifies a listing
Road safety
Observe the following notes about road safety:
- Use your device in such a way that you can always safely control your vehicle. In case of doubt, stop at a suitable location and operate your device while the vehicle is standing.
- Remove or attach the control panel only while the vehicle is standing.
- Always listen at a moderate volume to protect your hearing and to be able to hear acoustic warning signals (e.g., police sirens). During mute phases (e.g., when changing the audio source), changing the volume is not audible. Do not increase the volume during this mute phase.
General safety notes
Observe the following notes to protect yourself against injuries:
- Do not modify or open the device. The device contains a Class 1 laser that can cause injuries to your eyes.
- Do not increase the volume during mute phases, e.g., when changing the audio source. Changing the volume is not audible during a mute phase.
Use as directed
This car sound system is intended for installation and operation in a vehicle with 12 V vehicle system voltage and must be installed in a DIN slot. Observe the performance limits in the technical data. Repairs and installation, if necessary, should be performed by a specialist.
Installation instructions
You may only install the car sound system yourself if you are experienced in installing car sound systems and are very familiar with the electrical system of the vehicle. For this purpose, observe the installation instructions at the end of these instructions.
Declaration of conformity
The Blaupunkt Technology GmbH declares that the car sound system Dortmund 230 DAB complies with the basic requirements and the other relevant regulations of the directives 2004/108/EC and 1999/5/EC.
The declaration of conformity can be found on the Internet under www.blaupunkt.com.
Cleaning notes
Solvents, cleaning and scouring agents as well as dashboard spray and plastics care product may contain ingredients that will damage the surface of the car sound system.
- Use only a dry or slightly moistened cloth for cleaning the car sound system.
- If necessary, clean the contacts of the control panel regularly using a soft cloth moistened with cleaning alcohol.
Disposal notes

Do not dispose of your old unit in the household trash!
Use the return and collection systems available to dispose of the old device.
Scope of delivery
The scope of delivery includes:
1 Car sound system 1 Operating/installation instructions 1 Case for the control panel 1 Support frame 1 Antenna connection adapter 2 Disassembly tools 1 Spacer screw 1 Plastic cap 1 Handheld remote control (incl. battery)
Optional equipment (not part of the scope of delivery)
Use only accessories approved by Blaupunkt. Information is available from your Blaupunkt specialised dealer or on the Internet under www.blaupunkt.com.
Placing the device in operation
Attention
Transport securing screws
Before starting up the car sound system, ensure that the transport securing screws are removed (see the chapter "Installation instructions").
Attaching/detaching the control panel
The car sound system is equipped with a detachable control panel (release panel) to protect your equipment against theft. In the delivery state, the control panel is in the supplied case. To start operating the radio after installation, you must first attach the control panel (see the section "Attaching the control panel" in this chapter).
Always take the control panel with you when leaving the vehicle. The car sound system is worthless to a thief without this control panel.
Caution
Damage to the control panel
Never drop the control panel.
Transport the control panel so that it is protected against impacts and the contacts cannot become dirty.
Do not expose the control panel to direct sunlight or another heat source.
Avoid direct skin contact with the control panel's electrical contacts.
Attaching the control panel
→Push the control panel into the bracket at the right edge of the device. →Push the control panel carefully into the left bracket until it clicks into place.
Removing the control panel
Press button ① to unlock the control panel.
The left side of the control panel detaches from the device and is secured by the bracket to prevent it from falling out.
→ Move the control panel slightly to the left until it disengages from the right bracket. Carefully remove the control panel from the left bracket.
Note:
The car sound system automatically switches off as soon as the control panel is removed.
Setting the reception area
This car sound system is designed for operation in different regions with different frequency ranges and station technologies. The factory default reception area is "EUROPE". Additionally, the reception areas "ASIA", "USA", "S-AMERICA", and "THAILAND" are available.
Note:
If you operate the car sound system outside of Europe, you may first need to set a suitable reception area in the user menu (see the chapter "User settings", section "Making settings in the "FM TUNER" menu", menu item "AREA").
Switching on/off
Switching on/off with the On/Off button
To switch on, press the On/Off button 3 .
The car sound system switches on.
To switch off the device, press and hold down the On/Off button ③ for longer than 2 seconds.
The car sound system switches off.
Note:
If you switch on the car sound system while the vehicle ignition is switched off, it automatically switches off after 1 hour to preserve the vehicle battery.
Switching on/off via vehicle ignition
The car sound system will switch off /on simultaneously with the ignition if the device is correctly connected to the vehicle's ignition as shown in the installation instructions and you did not switch the device off by pressing the On/Off button 3 .
Volume
Adjusting the volume
You can adjust the volume in steps from 0 (off) to 50 (maximum).
Turn the volume control④ to change the volume.
Note:
If a telephone is connected with the car sound system as described in the installation instructions, the car sound system is muted in case of a phone call. During muting, the display shows "TELEPHONE".
Muting the car sound system (Mute)
Briefly press the On/Off button ③ to mute the car sound system or to reactivate the previous volume.
During muting, the display shows "MUTE".
Display brightness
You can manually switch the display brightness between daytime mode and night-time mode or switch automatically with the driving lights of the vehicle.
Notes:
- The manual or automatic switching of the display brightness is selected in the user menu (see the chapter "User settings", section "Making settings in the "DISPLAY" menu", menu item "DIM MODE").
- The display brightness can be adjusted separately for day and night (see the chapter "User settings", section "Making settings in the "DISPLAY" menu", menu items "DIM DAY" and "DIM NIGHT").
Press the DIS button ⑯ for approx. 2 seconds to manually switch the display brightness.
Switching demo mode on/off
The demo mode shows the functions of the car sound system as scrolling text on the display. By pressing any button, the demo mode is interrupted and you can operate the device.
The demo mode can be switched on and off in the user menu (see the chapter "User settings", section "Making settings in the "VARIOUS" menu", menu item "DEMO MODE").
DAB mode
With DAB, you can enjoy radio in digital sound quality.
In contrast with standard radio broadcasting, several programmes (services) are always broadcast over the same frequency for DAB. These services are combined into a so-called ensemble. In some cases, the same service can be received in different ensembles.
Note:
You will need a special DAB antenna to be able to receive DAB signals. This can be a separate DAB roof/window antenna or a DAB/AM/FM combination antenna.
Changing to DAB mode or selecting a DAB memory bank
Press the SRC button ⑮ repeatedly until the desired DAB memory bank is displayed:
DAB1 → DAB2 → DAB3
If DAB mode is switched on, the display shows the symbol DAB
Notes:
- Up to 5 services can be stored in each DAB memory bank.
- DAB memory banks can be activated or deactivated via the user menu (see the chapter "User settings", section "Making settings in the "DAB TUNER" menu, "PRESETS" menu item). Deactivated DAB memory banks are skipped during the source selection with the SRC button ⑮.
Tuning into ensembles/services
With DAB, several services broadcast over the same frequency are always combined into an "ensemble".
Selecting an ensemble
You can directly select ensembles that you have received once already (for this to work, the ensemble must be receivable).
Briefly press the √/ button ⑦ to change to the previous/next ensemble.
The first available service in the ensemble is played.
Note:
With activated PTY function, the next service with the currently selected programme type is set (see the section "DAB-PTY" in this chapter).
Ensemble seek tuning
You can find new ensembles using seek tuning.
Press the √ / button ⑦ for approx. 2 seconds to start the search for an ensemble.
The seek tuning stops if an ensemble is being received. The first available service in the ensemble is played.
Selecting a service
After you have tuned into an ensemble, you can select a service from the ensemble.
Briefly press the < / > button ⑦ to change to the previous/next service.
List selection
Services or ensembles that have previously been received can be selected directly in lists without interrupting the ongoing playback (for this purpose, the services/ensembles must be receivable).
Press the SRC button 15 for approx. 2 seconds to call up the list selection.
The 🎨 icon flashes on the display. In addition, the icon 🎨 (service) or 🎨 (ensemble) appears.
Notes:
- You can exit the list selection at any time by pressing the SRC button 15.
- With activated fast browsing, instead of the arrow buttons ⑦, you can use the volume control ④ and the On/Off button ③ for selecting and confirming list entries (see chapter "CD/MP3/WMA/iPod mode", section "Fast browsing").
Press the < button ⑦ to display the list of all received ensembles.
The display shows the current ensemble.
Press the V / button ⑦ or hold the button pressed to select a different ensemble.
Press the button ⑦ to display the services of the selected ensemble.
The first service of the ensemble is shown on the display.
Note:
Pressing the returns you to the list of ensembles.
Press the V / A button ⑦ once or several times or hold the button pressed to select a different service.
Press the> button ⑦ to play back the service.
The selected service is being played. You are exiting the list selection.
Saving a service or calling up a saved service
Select the desired DAB memory bank. If necessary, set the desired service.
Press the station button 1 - 5 13 for approx. 2 seconds to store the current service under the button.
- or -
Briefly press the station button 1 - 5 13 to call up the stored service.
Scanning services
You can use the scan function to play all the receivable services briefly.
Press the MENU button ② for approx. 2 seconds to start scanning. During the scanning, "SCAN" and the current service name are intermittently shown on the display. Briefly press the MENU button ② to continue listening to the service that is currently being scanned.
Refreshing services received
To update the received service, read the section "Making settings in the "DAB TUNER" menu", menu item "SERVICESCAN" in the chapter "User settings".
Switching between DAB and FM
You can select various settings for switching between DAB and FM radio mode. Switching may become necessary if the reception quality in the DAB or FM mode drops significantly.
Switching between DAB and FM is selected in the user menu (see the chapter "User settings", section "Making settings in the "DAB TUNER" menu", menu item "SERVICELINK").
DAB-PTY
You can select a programme type with the PTY function to purposefully search for services, for example, that broadcast rock music or sport events.
Note:
The PTY function is only available if it has been activated (see the chapter "User settings", section "Making settings in the "DAB TUNER" menu", menu item "PTY").
Selecting a programme type
To select a programme type, read the section "Making settings in the "DAB TUNER" menu", menu item "PTY TYPE" (programme type) in the chapter "User settings".
Searching for service
Press the √ / button ⑦.
During the seek tuning, the currently selected programme type is shown on the display.
As soon as a service with the desired programme type is found, it remains being tuned into.
Note:
If no service with the selected programme type is found, "PTY NONE" is briefly displayed and 2 beeps can be heard. The radio will then return to the service that it played last.
Switching the display
Press the DIS button ⑯ to toggle between these displays:
| Display Meaning | |
| ABCDEF Service name | |
| ABCDEF Ensemble name | |
| DAB1 5CorP1 5C | DAB memory bank/frequencyorMemory location/frequency |
| DAB1 18:30orP1 18:30 | DAB memory bank/timeorMemory location/time |
Radio mode
RDS
Many FM stations broadcast an RDS (Radio Data System) signal in addition to their programme in the reception area "EUROPE" that allows the following additional functions:
• The station name is shown on the display. - The car sound system recognises traffic announcements and news broadcasts and can automatically switch them through in other operating modes (e.g. in USB mode). - Alternate frequency: If RDS is activated, the car sound system automatically selects the best receivable frequency for the station that is currently set. - Regional: At certain times, some radio stations divide their programme into regional programmes providing different content. If the REGIONAL function is activated, the car sound system changes only to those alternate frequencies on which the same regional programme is being broadcast.
The functions RDS and REGIONAL are activated and deactivated in the user menu (see the chapter "User settings", section "Making settings in the "FM TUNER" menu", menu items "RDS AF" and "REGIONAL").
Changing to radio mode or selecting a memory bank
Press the SRC button ⑮ repeatedly until the desired memory bank is displayed:
FM1 → FM2 → FMT → AM → AMT
Notes:
- Up to 5 stations can be stored in each memory bank.
- Memory banks can be activated or deactivated via the user menu (see the chapter "User settings", section "Making settings in the "FM TUNER" menu", menu item "BANDS" (band selection)). Deactivated memory banks are skipped during the source selection with the SRC button ⑮.
Tuning into a station
There are various ways of tuning into a station:
Tuning into stations manually
Briefly press the </> button ⑦ once or several times to change the frequency in increments, or press and hold to quickly change the frequency.
Starting station seek tuning
Briefly press the V/ button ⑦ to start station seek tuning.
The radio tunes into the next receivable station.
Notes:
- For the reception area "EUROPE": In the FM waveband, only traffic information stations are tuned into if the priority for traffic information ( ) is switched on.
- For the reception areas "EUROPE" and "USA": In the FM waveband, the next station with the currently selected programme type is tuned into if the PTY function is activated (see the chapter "PTY").
- The sensitivity of seek tuning can be adjusted (see the chapter "User settings", section "Making settings in the "FM TUNER" menu", menu item "SEEK SENS").
Storing stations or calling stored stations
Select the desired memory bank.
If necessary, set the desired station.
Press the station button 1 - 5 13 for approx. 2 seconds to store the current station under the button.
- or -
Briefly press the station button 1 - 5 ⑬ to call up the stored station.
Scanning stations
With the scan function, you can scan either every receivable station or the stored stations of the current waveband.
Note:
You can adjust the scan time for each station (see the chapter "User settings", section "Making settings in the "VARIOUS" menu", menu item "SCAN TIME").
Scanning receivable stations
Press the MENU button ② for approx. 2 seconds to start scanning.
During the scan, the display alternately displays "SCAN" and the current frequency as well as memory bank or station name.
Briefly press the MENU button ② to continue listening to the station that is currently being received.
Scanning stored stations
Press the V/A button ⑦ for approx. 2 seconds to start scanning.
During the scan, the display shows the memory location and the current frequency or station name.
Briefly press the V / Button ⑦ to continue listening to the station that is currently being scanned.
Storing stations automatically (Travelstore)
With Travelstore, you can automatically search for and store the 5 stations offering the strongest reception in the region in the FM and AM wavebands. The stations are stored in the FMT or AMT memory bank. Any previously stored stations in this memory bank are deleted in the process.
Select a memory bank of the desired waveband, e.g. FM1 or AM.
Press the SRC button ⑮ for approx. 2 seconds.
The tuner starts the automatic station seek tuning; the display shows "FM TSTORE" or
"AM TSTORE". After the storing is completed, the radio plays the station at memory location 1 of the FMT or AMT level.
Notes:
- For the reception area "EUROPE": If the priority for traffic information is switched on ( ), only traffic information stations are stored.
- If the FMT or AMT memory bank is deactivated (see the chapter "User settings", section "Making settings in the "FM TUNER" menu", menu item "BANDS"), it is automatically reactivated if you initiate the Travelstore function.
PTY
In the reception areas "EUROPE" and "USA", an FM station can transmit its current programme type, e.g. CULTURE, POP, JAZZ, ROCK, SPORT or SCIENCE. Hence, the PTY function allows a targeted search for broadcasts of a certain programme type, e.g. for rock or sports broadcasts. Note that PTY is not supported by all stations.
Note:
The PTY function is only available if it has been activated (see the chapter "User settings", section "Making settings in the "FM TUNER" menu", menu item "PTY").
Selecting a programme type
To select a programme type, read the section "Making settings in the "FM TUNER" menu", menu item "PTY TYPE" in the chapter "User settings".
Note:
You can set the language in which the programme types should be displayed (see the chapter "User settings", section "Making settings in the "FM TUNER" menu", menu item "PTY LANG").
Searching for stations
Press the V / Button ⑦.
During the seek tuning, the currently selected programme type is shown on the display.
As soon as a station with the desired programme type is found, it remains being tuned into.
Notes:
- If no station with the selected programme type is found, "PTY NONE" is briefly displayed and 2 beeps can be heard. The radio will then retune to the station that it played last.
- If the tuned radio station or another station on the broadcasting network broadcasts your selected programme type at a later point in time, the car sound system will automatically switch from the currently tuned station or from the current audio source (e.g. CD) to the station whose programme type matches the one you selected. Note that this function is not supported by all stations.
Traffic information
In the reception area "EUROPE", an FM station can identify traffic reports by means of an RDS signal. If priority for traffic reports is switched on, a traffic report is automatically switched through, even if the car sound system is currently not in FM radio mode.
If priority is switched on, the display shows the traffic jam symbol (2). "TRAFFIC" is displayed during a switched-through traffic announcement.
The priority is activated and deactivated in the user menu (see the chapter "User settings", section "Making settings in the "FM TUNER" menu", menu item "TRAFFIC").
Notes:
- The volume is increased for the duration of the switched-through traffic announcement. You can adjust the minimum volume for traffic announcements (see the chapter "User settings", section "Making settings in the "VOLUME" menu", menu item "TA VOLUME").
- To cancel a switched-through traffic announcement, press the SRC button ⑮.
Switching the display
Press the DIS button ⑯ to toggle between these displays:
| Display Meaning | |
| ABCDEF Station name | |
| FM1 102.90orP1 102.90 | Memory bank/frequencyorMemory location/frequency |
| FM1 18:30orP1 18:30 | Memory bank/timeorMemory location/time |
CD/MP3/WMA/iPod mode
Basic information
CD/MP3/WMA mode
This car sound system can be used to play back audio CDs (CDDA) and CD-R/RWs with audio, MP3 or WMA files as well as MP3 or WMA files on USB data carriers and SD(HC)/MMC memory cards.
Notes:
- To ensure proper functioning, use only CDs with the Compact Disc logo.
- Blaupunkt cannot guarantee the flawless function of copy-protected CDs and all CD blanks, USB data carriers and memory cards available on the market.
Note the following information when preparing an MP3/WMA data carrier:
- Naming of tracks and directories:
- Max. 32 characters without the file extension ".mp3" or ".wma" (the use of more characters reduces the number of tracks and folders that the car sound system can recognise)
– No umlauts or special characters
• CD formats: CD-R/RW, ∅: 12 cm • CD data formats: ISO 9660 Level 1 and 2, Joliet • CD burn speed: Max. 16x (recommended)
- USB format/file system: Mass storage device / FAT16/32 • Memory card file system: FAT16/32
- File extension of audio files:
- .MP3 for MP3 files - .WMA for WMA files
- WMA files only without Digital Rights Management (DRM) and created with Windows Media Player version 8 or later • MP3 ID3 tags: Version 1 and 2
- Bitrate for creating audio files:
- MP3: 32 to 320 kbps
- WMA: 32 to 192 kbps
- Maximum number of files and directories: Up to 20,000 entries depending on the data structure
iPod mode
You can connect numerous iPod and iPhone models to the car sound system via the USB port and control the audio playback from the car sound system.
Note:
A list of compatible iPod and iPhone models is located at the end of these instructions. Blaupunkt cannot guarantee the flawless function of other iPod and iPhone models.
Use a suitable adapter cable to connect your iPod or iPhone with the USB port of the car sound system.
Changing to CD/MP3/WMA/iPod mode
Press the SRC button ⑮ repeatedly until the desired audio source is displayed:
- "CD": Inserted CD
- "SD(HC)": Inserted memory card
- "USB": Connected USB data carrier
- "IPOD" / "IPHONE": Connected iPod / iPhone
- "AUX": Connected external audio source
Notes:
- The respective audio source can be selected only if a corresponding CD is inserted or a corresponding device is connected.
- A connected iPod is initially selected under "USB" and as soon as the iPod has been recognised under "IPOD".
- If the car sound system first has to read the data of a connected device or data carrier before the playback, the display shows "READING". The duration of the reading depends on the data volume and design of the device or data carrier. If the device or data carrier is defective or the transferred data cannot be played back, a corresponding message appears on the display (e.g. "USB ERROR").
Inserting/ejecting a CD
Inserting a CD

Risk of severe damage to the CD drive!
Noncircular contoured CDs (shape CDs) and CDs with a diameter of 8 cm (mini CDs) must not be used.
We accept no responsibility for any damage to the CD drive that may occur as a result of the use of unsuitable CDs.
Note:
You must not hinder or assist the drive as it automatically draws in the CD.
Insert the CD with its printed side up into the CD tray ⑤ until you feel a slight resistance.
The drive automatically draws in the CD and checks its data. Afterwards, the playback starts in CD or MP3 mode.
Note:
If the inserted CD cannot be played back, "CD ERROR" is briefly displayed and the CD is automatically ejected after approx. 2 seconds.
Ejecting a CD
Note:
You must not hinder or assist the drive as it ejects the CD.
Press the ▲button ⑧ to eject an inserted CD.
Notes:
- If a CD is ejected and not removed, the drive will automatically draw it back in again after approx. 10 seconds.
- You can also eject CDs while the car sound system is switched off or whilst another audio source is activated.
Connecting/removing a USB data carrier
Connecting a USB data carrier
Switch off the car sound system so that the data carrier will be correctly registered. Pull the protective cap of the USB socket 10 to the front until it moves out of the socket and fold it down. Connect the USB data carrier. Turn on the car sound system. If the USB data carrier is initially selected as audio source, the data are read first.
Notes:
- If the connected USB data carrier cannot be seen, "USB ERROR" is briefly displayed.
- The time required for reading in the data depends on the design and size of the USB data carrier.
Removing a USB data carrier
Switch off the car sound system so that the data carrier will be correctly unregistered. - Disconnect the USB data carrier. Close the protective cap of the USB socket 10 .
Inserting/removing the memory card
Inserting the memory card
Detach the control panel. Insert the memory card with its labelled side up and its contacts first into the card slot 17 until it clicks into place. Attach the control panel.
After switch-on, the device automatically selects the inserted memory card as audio source. The data of the memory card are being read. Afterwards, the playback starts in MP3 mode.
Notes:
- If the inserted memory card cannot be played, "SD ERROR" is briefly displayed.
- The time required for reading the card depends on the design and size of the memory card.
Removing the memory card
Detach the control panel. →Push on the memory card until it disengages. Pull the memory card out of the card slot 17 . Attach the control panel.
Selecting tracks
Press the </> button ⑦ briefly to change to the previous/next track.
Note:
If the current track plays longer than 3 seconds, pressing ⩽⑦ once restarts the track.
Selecting a folder (only in MP3/WMA/iPod mode)
Press the V/ button ⑦ briefly to change to the previous/next folder.
Note:
In iPod mode, this allows you to change to the previous/next folder of the current category, e.g., to the next genre, if you previously selected a track on the iPod via the corresponding genre.
Fast searching
Press and hold down the </> button ⑦ until the desired position has been reached.
Interrupting playback
Press the 2▶ button ⑬ to interrupt the playback ("PAUSE") or to continue it.
Scanning all tracks
The scan function scans all available tracks.
Press the MENU button ② for approx. 2 seconds to start the scan, or briefly to continue playing the currently scanned track.
Note:
The scan time can be adjusted (see the chapter "User settings", section "Making settings in the "VARIOUS" menu", menu item "SCAN TIME").
Playing tracks in random order
Press the 4 MIX button 13 to change among the playback modes:
| Operation Display Meaning | ||
| CD/iPod | MIX ALL Mixing tracks | |
| MP3/WMA | MIX DIR | Mixing tracks of the current folder |
| MIX ALL | Mixing tracks of the data carrier | |
| Gen. MIX OFF Regular playback | ||
If the MIX function is switched on, the icon MIX (mix all tracks) or MIX (mix tracks of current folder) is shown on the display.
Repeatedly playing individual tracks or directories
Press the 3 RPT button 13 to change among the playback modes:
| Operation | Display Meaning | |
| CD/iPod | RPT TRACK | Repeating tracks |
| MP3/WMA | RPT TRACK | Repeating tracks |
| RPT DIR | Repeating folders | |
| Gen. RPT OFF Regular playback | ||
If the RPT function is switched on, the icon
(repeat tracks) or (repeat
folders) is shown on the display.
Switching the display
Press the DIS button ⑯ once or several times to switch among these displays:
| Operation | Display Meaning | |
| CD | T01 00:15 | Track number and playing time |
| T01 03:37 | Track number and duration | |
| T01 18:30 | Track number and time | |
| MP3/WMA/iPod | FILE File name 2 | |
| FOLDER Folder name 2 | ||
| SONG Track name 1 | ||
| ARTIST Artist 1 | ||
| ALBUM Album name 1 | ||
| GENRE Genre 3 | ||
| PLAY 00:15 | Playing time | |
| TOTAL03:37 | Track duration | |
| CLOCK18:30 | Time | |
| ALL INFO | All information as scrolling text | |
1 Track name, artist and album name must be stored as ID3 tag to be able to display them.
2 The file and folder name is displayed only in MP3/WMA mode.
3 The genre information is available only on iPod mode.
Browse mode
In Browse mode, you can directly search for and select a certain track on the MP3/WMA data carrier or iPod without interrupting the current playback.
Browse mode in MP3/WMA mode
In MP3/WMA mode, you can select and play a track from a directory of the data carrier.
Press the 1 button ⑬ to call up the browse mode in the MP3/WMA mode.
The 📊 icon flashes on the display. In addition, the icon 🎶 (track) or icon 🏠 (folder) appears.
Note:
You can exit the browse mode at any time by pressing the 1 button ⑬.
Press the <button ⑦ to display the folders of the data carrier.
The current folder is shown on the display.
Press the V/ ▲ button ⑦ once or several times or hold the button pressed to select a different folder.
Press the button ⑦ to display the tracks of the selected folder.
The first track of the folder is shown on the display.
Note:
Pressing the <button ⑦ returns you to the folder list.
Press the V/ ▲ button ⑦ once or several times or hold the button pressed to select a different track. Press the > button ⑦ to play the track.
The playback starts. You are exiting the browse mode.
Browse mode in iPod mode
In iPod mode, you can select and play back the tracks via the categories "ARTISTS", "ALBUMS", "GENRES", "PLAYLISTS" or "AUD-BOOKS" (audio books).
Press the 1 button ⑬ to call up the Browse mode in the iPod mode.
The 🎨 icon flashes on the display. In addition, the 🎨 on (categories) or the 🎨 icon (track) appears. The first category, "ARTISTS", is displayed.
Notes:
- Press the 1 button ⑬ for approx. 2 seconds to directly call up the "PLAYLISTS" category.
- You can exit the browse mode at any time by pressing the 1 button ⑬.
Press the V / A button ⑦ once or several times to select a different category. Press the button ⑦ to display the available folders of the category.
The first folder of the selected category is shown on the display (e.g. "JAZZ" in the "GENRES" category).
Note:
Pressing the < button ⑦ returns you to the list of categories.
Press the V / A button ⑦ once or several times or hold the button pressed to select a different folder. Press the > button ⑦ to display the available tracks of the folder.
The first track of the folder is shown on the display.
Note:
Pressing the < button ⑦ returns you to the list of folders.
Press the V / A button ⑦ once or several times or hold the button pressed to select a different track.
Press the button ⑦ to play back the track.
The playback starts. You are exiting the browse mode.
Fast browsing
Fast browsing enables faster access to tracks. Instead of the arrow keys ⑦, you use the volume control ④ and the On/Off button ③ to select and confirm list entries:
| Function Browse | mode | Fast browse mode |
| Selecting entries in lists | V/ ⑦ | Volume control 4 |
| Confirming entries | >⑦ | On/off button 3 |
| Return to the higher level | <⑦ | Select and confi rm option "<<" |
Fast browsing is switched on or off in the user menu (see the chapter "User settings", section "Making settings in the "VARIOUS" menu", menu item "BROWSE").
Note:
With activated fast browsing, you cannot change the volume in browse mode or mute the car sound system. To do so, first exit the browse mode by pressing the button 1 📋⑬ or starting the track playback.
Bluetooth®
You can connect the car sound system via Bluetooth® with other Bluetooth®-ready devices, such as cell phones. This allows you to use the car sound system with its integrated microphone as hands-free system for connected cell phones and control the audio output of other Bluetooth® devices and play them back via the loudspeakers of the car sound system (Bluetooth® streaming).
Note:
You can also connect an external microphone for hands-free calling (see the chapter "Installation instructions").
Bluetooth® technology is a wireless connection of short range. For this reason, Bluetooth® devices must be located near the car sound system (in the vehicle) to establish and maintain a connection.
To establish a Bluetooth® connection, you must first pair the car sound system and the Bluetooth® device. When you pair the devices, a Bluetooth® connection is subsequently established automatically. This connection remains in effect as long as the Bluetooth® device is within range. If the connection is interrupted, e.g. because you moved the cell phone outside the range, the connection is automatically re-established as soon as you are back within range.
Only one Bluetooth® device can be connected with the car sound system. If you connect a new device with the car sound system, the connection to a currently connected device is automatically interrupted. However, the car sound system leaves up to 5 different Bluetooth® devices paired, and you can quickly and easily connect any of these devices with the car sound system again.
The Bluetooth® menu
In the Bluetooth® menu, you find all the functions for pairing, connecting and managing Bluetooth® devices.
Calling the Bluetooth® menu
Briefly press the MENU button ② to open the user menu.
Turn the volume control ④ until the "BLUETOOTH" menu item is selected.
Press the On/Off button ③ to open the Bluetooth® menu.
Turn the volume control ④ until the desired menu item is selected.
- Perform the setting (see the following sections).
Briefly press the MENU button ② to exit the menu.
Notes:
- The Bluetooth® menu is automatically exited approx. 30 seconds after the last button activation and you are returned to the display of the current audio source.
- In the menu, you can press the button < ⑦ in each case to return to the higher menu level.
- If a Bluetooth® process is running (e.g. re-establishing the connection to the last connected device), the functions of the Bluetooth® menu are blocked. If you attempt to open the Bluetooth® menu during this time, "LINK BUSY" briefly appears on the display. If you want to cancel the Bluetooth® process and open the Bluetooth® menu, press the 5 button 13.
Pairing and connecting a Bluetooth® device
Notes:
- You can pair up to 5 Bluetooth® devices with this car sound system. Before you can pair another device, you must first unpair one of the already paired devices (see the chapter "Additional functions in the Bluetooth® menu", section "Managing paired devices"). If you should attempt to pair a fifth Bluetooth® device, "PHONE LIST FULL – PLEASE DELETE ENTRIES FROM LIST" is displayed.
- If a connection with a Bluetooth® device currently exists, this connection is automatically disconnected if you pair and connect another device.
In the Bluetooth® menu, select the "PAIRING" menu item.
Press the On/Off button 3 to pair a Bluetooth ® device.
The display shows "PRESS > TO CONFIRM".
Press the>button⑦.
The display shows "ENTER PIN" and the currently stored PIN (default "1234"). In addition, the Bluetooth® icon ✦fl ashes. The car sound system can now be recognised by a Bluetooth® device for approx. 2 minutes and connected.
Search the car sound system from your Bluetooth® device (Bluetooth® name: "BP 230 BT"). Establish the connection from your Bluetooth® device. Enter the PIN displayed by the car sound system.
The display briefly shows "PAIRED", followed by "CONNECTED", as soon as the car sound system and the Bluetooth® device are paired and connected.
Notes:
- If no connection can be established, the display briefly shows "CONNECT FAILED".
- If a Bluetooth® device is connected with the car sound system, the display shows the Bluetooth® icon *.
- If the device connected last cannot be located after switching on the car sound system, the car sound system attempts to connect one of the other paired devices. If none of the devices is located, the display briefly shows "NO DEVICE".
Telephone functions
Answering/rejecting an incoming phone call
With an incoming call, the display alternately shows "CALL" and the number of the caller. The current audio source is muted and a ring tone is played via the loudspeakers of the car sound system.
Note:
If the number of the caller is not being transmitted, the display shows "PRIVATE" instead of the number. If the number of the caller is stored together with a name in the car sound system, the name of the entry and the number are displayed.
Press the button ⑫ to answer the call.
"CALL" and the duration of the ongoing call are displayed.
Press the 5 button ⑬ to reject the call or to end the current call.
The display shows "CALL END".
Notes:
- During the call, you can adjust the volume with the volume control ④ or mute the device with a short press of the On/Off button ③.
- You can preset the hands-free volume in the user menu (see the chapter "User settings", section "Making settings in the "VOLUME" menu", menu item "TEL VOL").
- If the car sound system is switched off with active ignition, it automatically switches on with an incoming call. This allows you to make the call over the hands-free system. After the call has ended, the car sound system automatically switches off again.
Making a call
In the Bluetooth® menu, select the "DIAL NEW NUMBER" menu item. Press the On/Off button to open the entry menu. You can now enter a phone number with up to 20 digits: Turn the volume control 4 to select a digit for the respective position. Press the > or <button ⑦ to reach the next or previous position.
Notes:
- You can also reach the next position by pressing the ON/OFF button 3.
- While entering the phone number, you cannot change the volume or mute the car sound system.
Press button 12 to call the number entered.
"CALLING" and the dialed number are alternately shown on the display.
As soon as your calling party answers the call, the display shows "CALL" and the time of the current phone call.
Calling an entry in the phone book
Note:
This function is only available if the phone book of the connected cell phone was transferred to the car sound system (see the chapter "Additional functions in the Bluetooth® menu", section "Transferring the phone book of the cell phone to the car sound system").
In the Bluetooth® menu, select the "PHONEBOOK" menu item.
Press the ON/OFF button 3 to open the phone book.
The display shows the first phone book entry.
Note:
If the phone book has not yet been transferred, the display briefly shows "PHONEBOOK NOT AVAILABLE".
- or -
In the Bluetooth® menu, select the "PB SEARCH" (phone book search) menu item.
Press the On/Off button 3 to open the entry menu.
Turn the volume control 4 to select the first letter of the desired entry.
Press the On/Off button 3 to confirm the selection.
The display shows the first phone book entry that starts with the selected letter.
Note:
If the phone book does not contain any entry with the selected first letter, the display briefly shows "NOT FOUND".
Turn the volume control 4 to select the desired entry.
Press button 12 to call the number.
"CALLING" and the dialed number are alternately shown on the display.
Note:
You can also call an entry in the phone book via speed dial (see the section "Speed dial for phone book entries" in this chapter).
Making a call with voice dial
Note:
This function is only available if the connected cell phone supports voice dial.
In the Bluetooth® menu, select the "VOICE DIAL" menu item.
Press the On/Off button 3 to activate voice recognition.
The car sound system is muted and the display shows "SPEAK NOW".
Say the name of the desired calling partner.
Notes:
- If no Bluetooth® connection is established when voice recognition is activated, the display briefly shows "VOICE DIAL FAILED - NO BT CONNECTION".
- If the spoken name is not being recognized or the time for the voice recognition has already expired, the display briefly shows "DIAL FAILED".
- You can cancel the voice recognition by pressing the 5 button ⑬.
- Please note that the duration of the voice recognition is limited and depends on the respective cell phone.
- You can also activate the voice recognition via speed dial (see the section "Speed dial for voice dial" in this chapter).
Storing a phone number in the car sound system
You can store phone numbers in the car sound system and make calls using the speed dial (see the following section).
A phone number is stored for the currently connected telephone and is available only for this telephone. The car sound system can store up to five numbers for up to five paired devices.
Enter the phone number as described in the section "Making a call".
Press the desired memory button 1 - 5 ⑬ for approx. 2 seconds to store only the number.
- Or -
Press the button ⑦ for approx. 2 seconds to enter a name for the entry.
You can now enter a name with up to 15 characters:
Turn the volume control ④ to select a character for the respective position.
Press the or button ⑦ to reach the next or previous position.
Note:
You can also reach the next position by pressing the ON/Off button ③.
Press the desired memory button 1 - 5 13 for approx. 2 seconds to store the number and name.
The display briefly shows "NUMBER SAVED". Afterwards, you are returned to the Bluetooth® menu and the "DIAL NEW NUMBER" menu item.
Notes:
- A number previously stored on the memory button is replaced.
- If a telephone is unpaired, the numbers stored for this telephone are automatically deleted.
Speed dial for any phone number or for the number dialed last or a stored number
With speed dial, you can make a call without first having to select the corresponding function in the Bluetooth® menu.
To call the number dialed last,
press the button 12.
The display shows the number dialed last.
Note:
If no cell phone is currently connected, the Bluetooth® menu is opened. The "PAIRING" menu item is selected.
Press the button ⑫ to call the number.
To call a stored number,
press the button ⑫.
Press a memory button 1 - 5 13 to call the stored number.
Note:
If no number is stored under the selected memory button, the display briefly shows "NO NUMBER".
Press the button ⑫ to call the number.
To call any number,
→ press the button ⑫.
Press the On/Off button to open the entry menu and enter a number (enter the phone number as described in the section "Making a call").
Press the button ⑫ to call the number.
Speed dial for phone book entries
Note:
This function is only available
- if the phone book of the connected cell phone was transferred to the car sound system (see the chapter "Additional functions in the Bluetooth® menu", section "Transferring the phone book of the cell phone to the car sound system").
- if the speed dial is set for phone book entries (see the chapter "Additional functions in the Bluetooth® menu", section "Setting the button function for speed dial").
To select an entry of the phone book with the speed dial and call it,
■ press the button ⑫ for approx. 2 seconds.
The display shows the first phone book entry or the search function for phone book entries.
Turn the volume control④ to select the desired entry.
Press the button ⑫ to call the number.
Speed dial for voice dial
Note:
This function is only available
- if the connected cell phone supports voice dial.
- if the speed dial is set for voice dial (see the chapter "Additional functions in the Bluetooth® menu", section "Setting the button function for speed dial").
To activate the voice recognition with the speed dial,
Press button ⑫ for approximately 2 seconds.
The car sound system is muted and the display shows "SPEAK NOW".
Say the name of the desired calling partner.
Bluetooth® streaming mode
You can play back music from a Bluetooth® audio device via the loudspeakers of the car sound system if the audio device supports the Bluetooth® profile A2DP (Advanced Audio Distribution Profile).
Starting Bluetooth® streaming
Press the SRC button ⑮ repeatedly until the display shows "BT-STREAM".
The playback starts.
Notes:
- The Bluetooth® streaming mode can be selected only if a suitable audio device is connected.
- If the connection to the streaming device is lost during playback, the display
briefly shows "DISCONNECTED" and the car sound system changes to the previous audio source.
Selecting tracks
Briefly press the </> button ⑦ to change to the previous/next track.
Interrupting playback
Press the 2▶ button ⑬ to interrupt the playback ("PAUSE") or to continue it.
Bluetooth® streaming mode via app control (Android cell phone)
With the "Android Music Player Series 230" app from Blaupunkt, music files stored on an Android cell phone can be selected via the browse mode of the car sound system and played back. For this purpose, the app must be installed on the Android cell phone. The "Android Music Player Series 230" app can be downloaded on the Internet from www.blaupunkt.com.
If you are using an Android cell phone with app control for music playback, you have to enable the app mode in the Bluetooth® menu (see chapter "Additional functions in the Bluetooth® menu", section "Adjusting the application for Bluetooth® streaming mode").
Starting Bluetooth® streaming via app control
Press the SRC button ⑮ repeatedly until the display shows "ANDROID".
The playback starts.
During the playback, the display shows ID3 tag information, such as title, artist, album name, etc. In addition, the Android logo appears.
The "Android Music Player Series 230" app allows not only an operation using the buttons of the car sound system, but it also subdivides the music titles in certain music categories based on the ID3 tag information. As a result, you can quickly and easily select music titles via the browse mode of the car sound system (see chapter "CD/MP3/WMA/iPod mode", section "Browse mode").
Notes:
- The Bluetooth® streaming mode via "Android Music Player Series 230" app is available only for Android cell phones with operating system Android 2.3 and higher. In addition, the cell phone must be compatible with the Bluetooth® profiles SPP (Serial Port Profile) and A2DP (Advanced Audio Distribution Profile).
- A list of Android cell phones with verified compatibility is located on the Internet under www.blaupunkt.com. Blaupunkt cannot guarantee the flawless function of other Android cell phones.
- If the connection to the cell phone is lost during playback, the display briefly shows "DISCONNECTED" and the car sound system changes to the previous audio source.
Additional functions in the Bluetooth® menu
Changing the Bluetooth® PIN
The factory-set Bluetooth® PIN of the car sound system is "1234"; e.g. it must be entered on the cell phone when pairing a cell phone. This PIN can be changed.
In the Bluetooth® menu, select the "PIN EDIT" menu item.
Press the On/Off button 3 to open the entry menu.
You can now enter the PIN:
Turn the volume control④ to select a digit for the respective position.
Press the > or <button ⑦ to reach the next or previous position.
Notes:
- You can also reach the next position by pressing the ON/Off button 3 .
- While entering the PIN, you cannot change the volume or mute the car sound system.
Press the> button ⑦ repeatedly until you reach past the last position to confirm the PIN entered and return to the Bluetooth® menu.
Managing paired devices
The paired Bluetooth ® devices can be managed in the Bluetooth ® menu.
The device list shows the Bluetooth® names or addresses of the paired devices. You can do the following:
- Disconnecting the connection to the currently connected Bluetooth® device
- Establishing a connection to one of the paired Bluetooth® devices
- Unpairing Bluetooth® devices
In the Bluetooth® menu, select the "PHONE LIST" menu item. Press the On/Off button ³ to open the device list.
The first device on the list is displayed.
Note:
If no device is paired, "EMPTY LIST" is briefly displayed.
Turn the volume control ④ to select a different device.
You have the following options:
To connect the displayed device,
→ press button ⑫.
As soon as the device is connected, "CONNECTED" is briefly displayed and you are returned to the Bluetooth® menu.
Note:
If no connection can be established, the display briefly shows "CONNECT FAILED". If the device is already connected, the display briefly shows "CONNECT EXIST".
To disconnect the connection to the displayed device,
press button ⑬.
The display briefly shows "DISCONNECTED" and you are returned to the Bluetooth® menu.
Note:
If the device was not connected, the display briefly shows "NO CONNECTION".
To unpair the displayed device,
press the 5 button ⑬ for approx. 2 seconds.
The display briefly shows "DELETED" and you are returned to the Bluetooth® menu.
Note:
If a telephone is unpaired, the numbers stored for this telephone and a phone book transferred from this cell phone are automatically deleted.
Unpairing all Bluetooth® devices
All paired Bluetooth® devices can be unpaired in the Bluetooth® menu.
In the Bluetooth® menu, select the "DELETE ALL PAIRED DEVICES" menu item. Press the On/Off button 3.
The display shows "PRESS > TO CONFIRM".
Press the > button ⑦ to unpair all the devices.
The display briefly shows "DELETED".
Note:
If no device is paired, "EMPTY LIST" is briefly displayed.
Transferring the phone book of the cell phone to the car sound system
You can transfer the phone book of the connected cell phone to the car sound system to call entries of the phone book using the car sound system.
Notes:
- The car sound system accepts only entries from the memory of the telephone and not from the SIM card inserted in the telephone.
- The transfer does not delete the phone book from the cell phone.
The car sound system can store the phone books of the paired telephones with a total of up to 1000 entries. If several numbers are stored on the telephone for one contact (e.g. landline, cell phone number, office number and similar), each number is stored as a separate entry by the car sound system.
Each entry consists of a name and a number, each up to 20 characters on digits.
Note:
Do not switch off the car sound system while transferring the phone book. If you do or if the power supply of the car sound system should be interrupted for any reason, you have to re-start the transfer.
In the Bluetooth® menu, select the "DOWNLOAD P-BOOK" menu item. Press the On/Off button 3 .
The display shows "PRESS > TO CONFIRM".
Press the button ⑦ to transfer the phone book.
"PHONEBOOK DOWNLOADING - PLEASE WAIT" appears on the display.
After the download is complete, the display briefly shows "DOWNLD COMPLETE".
Notes:
- To cancel the transfer, press the 5 button ⑬.
- If the transfer of the phone book fails, the display briefly shows "DOWNLOAD FAILED".
- If the transfer of the phone book exceeds the storage capacity of the car sound system, the display briefly shows "PHONEBOOK FULL". The phone book entries transferred so far remain stored.
- If you supplemented or changed entries on your cell phone since the last transfer, you can update the phone book on the car sound system by transferring it again. If the storage capacity of the car sound system is exceeded in the process, first delete the already transferred phone book (see the next section) or unpair another cell phone, if necessary, so that its phone book is also deleted from the car sound system (see the section "Managing paired devices" in this chapter).
- If you insert a CD during an ongoing transfer, the playback does not start until the transfer is completed.
Deleting the phone book of the cell phone from the car sound system
You can delete the phone book of the connected cell phone.
Note:
The telephone remains connected.
In the Bluetooth® menu, select the "DELETE P-BOOK" menu item. Press the On/Off button 3 .
The display shows "PRESS > TO CONFIRM".
Press the > button ⑦ to delete the phone book.
"EMPTY LIST" briefly appears on the display.
Setting the button function for speed dial
You can select whether the long press of the button ⑫ directly opens the phone of the search function for phone book entries or activates voice dialing.
In the Bluetooth® menu, select the "SOFTKEY" menu item. Press the On/Off button ③ to change the setting. Turn the volume control ④ to change between the settings "PB SEARCH" (for phone book search), "PHONEBOOK" and "VOICE DIAL".
Adjusting the application for Bluetooth® streaming mode
Adjust which application (A2DP Mode or App Mode) you are using for the streaming mode.
In the Bluetooth® menu, select the "BT MUSIC" menu item. Press the On/Off button ③ to change the setting. Turn the volume control ④ to change between the settings "A2DP MODE" and "APP MODE".
External audio sources
Front AUX-IN socket

Danger! Increased risk of injury from connector.
In case of an accident, the protruding connector in the front AUX-IN socket may cause injuries. The use of straight plugs or adapters leads to an increased risk of injury.
For this reason, it is recommended to use angled jack plugs.
As soon as an external audio source, such as a portable MP3 player is connected to the front AUX-IN socket ⑪, it can be selected with the SRC button ⑮. "AUX" then appears on the display.
Sound settings
The following sound settings can be changed in the "AUDIO" menu:
- Adjusting bass and treble
- Setting the left/right volume distribution (Balance) or front/rear (Fader)
- Adjusting the increase of bass at low volume (X-Bass)
- Selecting a sound profile (Presets)
- Switching the subwoofer output on/off
- Adjusting the time delay for switching in an external amplifier
Calling and exiting the "AUDIO" menu
Briefly press the MENU ② button to open the user menu.
Turn the volume control ④ until the "AUDIO" menu item is selected. Press the On/Off button ³ to open the "AUDIO" menu.
Turn the volume control ⁴ until the desired menu item is selected. - Perform the setting (see the next section).
Briefly press the MENU button ② to exit the menu.
Notes:
- The menu is automatically exited approx. 16 seconds after the last button activation and you are returned to the display of the current audio source.
- In the menu, you can press the button ⑦ in each case to return to the higher menu level.
- The menu does not allow changing the volume or muting (Mute) the car sound system.
Making settings in the "AUDIO" menu
BASS
Bass level. Settings: -7 to +7.
Press the On/Off button ③ to change the setting. Turn the volume control ④ until the desired level is set.
TREBLE
Treble. Settings: -7 to +7.
Press the On/Off button ③ to change the setting. Turn the volume control ④ until the desired level is set.
BALANCE
Left/right volume distribution. Settings: L9 (left) to R9 (right).
Press the On/Off button ③ to change the setting. Turn the volume control ④ until the desired volume distribution is set.
FADER
Front/rear volume distribution. Settings: F9 (front) to R9 (rear).
Press the On/Off button ③ to change the setting. Turn the volume control ④ until the desired volume distribution is set.
X-BASS
Increase of bass at low volume. Settings: ON, OFF.
Press the On/Off button ③ to change the setting. Turn the volume control ④ to change between the settings.
PRESETS
Selecting equalizer presettings. Settings: POP, ROCK, CLASSIC, EQ OFF.
Press the On/Off button ③ to change the setting. Turn the volume control ④ to change between the settings.
Switching the subwoofer output on or off. Settings: ON, OFF.
Press the On/Off button ③ to change the setting. Turn the volume control ④ to change between the settings.
AMP DELAY
Setting the delay with which a connected amplifier is switched in. Settings: 0.5/1.0/1.5/2.0/2.5 seconds and OFF (no delay).
Press the On/Off button ③ to change the setting. Turn the volume control ④ until the desired delay is set.
User settings
Calling the user menu and selecting a menu
Briefly press the MENU ② button to open the user menu.
In the user menu, the user settings can be found in the following menus:
• FM TUNER • DAB TUNER • AUDIO (see chapter "Sound settings") • DISPLAY • VOLUME • CLOCK • VARIOUS - BLUETOOTH (see the chapter "Bluetooth®")
Turn the volume control ④ until the desired menu is selected.
Press the On/Off button ③ to open the selected menu.
Turn the volume control ④ until the desired menu item is selected.
- Perform the setting (see the following sections).
Briefly press the MENU button ② to exit the menu.
Notes:
- The menu is automatically exited approx. 16 seconds after the last button activation and you are returned to the display of the current audio source.
- In the menu, you can press the <button ⑦ in each case to return to the higher menu level.
- The menu does not allow changing the volume or muting (Mute) the car sound system.
Making settings in the "FM TUNER" menu
TRAFFIC (traffic information) (only for reception area EUROPE)
Only possible in FM radio mode: Switching priority for traffic announcements on or off. Settings: ON, OFF.
Press the On/Off button③ to change the setting. Turn the volume control ④ to change between the settings.
If priority is switched on for traffic information, the display shows the icon 📄.
BANDS (band selection)
Activating or deactivating memory banks. Memory banks that can be deactivated: FM2, FMT, AM, AMT.
Press the On/Off button 3 to open the menu. Turn the volume control④ until the desired memory bank is displayed. Press the On/Off button③ to change the setting. Turn the volume control ④ to toggle between the settings ON (activate memory bank) and OFF (deactivate memory bank).
Deactivated memory banks are skipped during the source selection with the SRC button ⑮ .
Note:
If a memory bank is deactivated, the stations stored in this memory bank are retained.
REGIONAL (only for reception area EUROPE)
Only possible in FM radio mode: Switching REGIONAL function on or off. Settings: ON, OFF.
Press the On/Off button③ to change the setting. Turn the volume control ④ to change between the settings.
SEEK SENS
Setting the sensitivity of station seek tuning. Settings: LOW, HIGH.
Press the On/Off button③ to change the setting. Turn the volume control ④ to change between the settings.
RDS AF
Switching the RDS function on or off. Settings: ON, OFF.
Press the On/Off button③ to change the setting. Turn the volume control ④ to change between the settings.
Note:
If the reception area "ASIA", "USA", "S-AMERICA" or "THAILAND" is selected, RDS is automatically switched off. The station name continues to be shown on the display.
PTY
(only for reception areas EUROPE and USA)
Switching the PTY function on or off. Settings: ON, OFF.
Press the On/Off button ③ to change the setting. Turn the volume control ④ to change between the settings.
PTY TYPE
Only possible with activated PTY function: Select a programme type.
Press the On/Off button ③ to change the setting. Turn the volume control ④ to select a programme type.
PTY LANG
Only possible with activated PTY function: Select the language for the display of the programme types. Settings: ENGLISH, DEUTSCH (German), FRANCAIS (French).
Press the On/Off button ③ to change the setting. Turn the volume control ④ to select a language.
AREA (reception area)
Select the reception area for the radio reception. Settings: EUROPE, ASIA, USA, S-AMERICA, THAILAND.
Press the On/Off button ③ to open the menu. Turn the volume control ④ to change between the reception areas. Press the On/Off button to select a reception area.
The display shows "PRESS> TO CONFIRM".
Press the > button ⑦ to confirm the selected reception area.
Making settings in the "DAB TUNER" menu
SERVICESCAN
Refreshing services received.
Press the On/Off button 3. The display shows "PRESS> TO CONFIRM". Press the > button 7 to start refreshing the services.
SERVICELINK
Selecting the setting for switching between DAB and FM radio mode.
Press the On/Off button 3 to change the setting. Turn the volume control 4 to change between the following settings:
- DAB > ALL
In case of poor DAB reception, the car sound system switches to the same service from another ensemble. If the service is not available in any other ensemble, the device switches to the FM frequency (if available).
- DAB > FM
If the service received is also provided on FM, the car sound system automatically switches to the FM frequency in case of poor DAB reception.
- DAB > DAB
The car sound system retains the DAB source. If the reception quality of the service received becomes poor, the car sound system automatically switches to the same service from another ensemble (if available).
- LINK OFF
No automatic switching.
PRESETS
Activating or deactivating DAB memory banks. DAB memory banks that can be deactivated: DAB2, DAB3.
Press the On/Off button 3 to open the menu. Turn the volume control 4 until the desired DAB memory bank is set. Press the On/Off button 3 to change the setting. Turn the volume control 4 to toggle between the settings ON (activate DAB memory bank) and OFF (deactivate DAB memory bank).
Deactivated DAB memory banks are skipped during the source selection with the SRC button ⑮.
Note:
If a DAB memory bank is deactivated, the services stored in this memory bank are retained.
PTY
Switching the PTY function on or off. Settings: ON, OFF.
Press the On/Off button③ to change the setting. Turn the volume control ④ to change between the settings.
PTY TYPE
Select a programme type.
Press the On/Off button③ to change the setting. Turn the volume control④ to select a programme type.
L BAND
Activating or deactivating L-band reception. Settings: ON, OFF.
Press the On/Off button③ to change the setting. Turn the volume control④ to change between the settings.
SERVICENAME
Setting the display of 16-digit service names. Most services use names that are 8 characters long (as you are already familiar with from RDS). If a programme uses names that are 16 characters long, you can either limit the display of the name to eight characters or display the 16-character name as scrolling text. Settings: 8, 16.
Press the On/Off button③ to change the setting. Turn the volume control④ to change between the settings.
Making settings in the "DISPLAY" menu
DIM MODE
Select automatic or manual switching of the display brightness for day or night. Settings: AUTO (display brightness is automatically switched by switching the driving lights on or off), MAN (display brightness can be switched manually).
Press the On/Off button③ to change the setting. Turn the volume control④ to change between the settings.
Automatic switching of the display brightness is possible only if your car sound system is installed as described in the installation instructions and your vehicle features the corresponding connection.
DIM DAY/DIM NIGHT
Setting the display brightness for the day (DIM DAY) or the night (DIM NIGHT). Settings: 1 – 16.
Press the On/Off button③ to change the setting. Turn the volume control④ to set the desired display brightness.
SCROLL
Select the display of scrolling text (e.g. when displaying MP3 file names) either as single display or continued display. Settings: 1X (single display), ON (continued display).
Press the On/Off button③ to change the setting. Turn the volume control④ to change between the settings.
Making settings in the "VOLUME" menu
ON VOLUME
Setting the power-on volume. Settings: 1 - 50.
Press the On/Off button③ to change the setting. Turn the volume control④ to set the desired power-on volume.
If you select the setting LAST VOL, every time you switch on the radio, the volume level that was set the last time you switched the radio off is activated again. Settings: ON, OFF.

Danger!
High volume
The power-on volume can be unexpectedly high if the LAST VOL setting is selected and a high volume was set the last time the radio was switched off.
Always set the device to a moderate volume.
Press the On/Off button 3 to change the setting.
Turn the volume control ④ to change between the settings.
TA VOLUME (traffic announcement volume) (only for reception area EUROPE)
Setting the minimum volume for traffic announcements. Settings: 1 – 50.
Press the On/Off button③ to change the setting. Turn the volume control④ to set the volume.
TEL VOL (handsfree volume)
Adjust handsfree volume. Settings: 1 – 50.
Press the On/Off button③ to change the setting. Turn the volume control 4 to set the volume.
Note:
During the phone call, you can change the volume directly by means of the volume control ④.
BEEP
Switching the confirmation beep on or off. Settings: ON, OFF.
Note:
When storing radio stations, a confirmation beep sounds even if the OFF setting is selected.
Press the On/Off button③ to change the setting. Turn the volume control ④ to change between the settings.
Making settings in the "CLOCK" menu
CLK DISP
Switch the permanent display of the time on or off. Settings: ON, OFF.
Press the On/Off button③ to change the setting. Turn the volume control ④ to change between the settings.
If the permanent display of the time is switched on, the time is shown on the display. The display of the respective audio source is shown only after pressing a button. Approximately 16 seconds after the button is pressed last, the time is displayed again.
HOUR MODE
Selecting the 12 or 24-hour time. Settings: 12, 24.
Press the On/Off button③ to change the setting. Turn the volume control ④ to change between the settings.
SET CLOCK
Setting the time.
Press the On/Off button ③ to change the setting. Turn the volume control ④ counterclockwise to set the hours. Turn the volume control ④ clockwise to set the minutes.
Note:
When you set the time in 12-hour mode (MODE 12H), an "A" is displayed before the time for the time before noon or a "P" for the time after noon.
RDS CLOCK (automatic time setting) (only for reception area EUROPE)
Switching automatic clock setting with clock data transmitted via RDS on or off. Settings: ON, OFF.
Note:
The time set with the clock data may not be correct, even if an RDS station is being received.
Press the On/Off button ③ to change the setting. Turn the volume control ④ to change between the settings.
Making settings in the "VARIOUS" menu
DEMO MODE
Switching the demo mode on or off. Settings: ON, OFF.
Press the On/Off button ③ to change the setting. Turn the volume control ④ to change between the settings.
In demo mode, the features of the radio are shown as scrolling text on the display.
BROWSE
Switching fast track selection in browse mode on or off using the volume control ④ and the On/Off button ③. Settings: ON, OFF.
Press the On/Off button ③ to change the setting. Turn the volume control ④ to change between the settings.
SCAN TIME
Setting the scan time in seconds. Settings: 4/8/12/16/60 seconds.
Press the On/Off button ③ to change the setting. Turn the volume control ④ to change between the settings.
SWC (Steering Wheel Control configuration)
Configuring the buttons of a connected steering wheel control.
Press the On/Off button ③ to open the menu. Turn the volume control ④ to change between the functions. Press the On/Off button ③ to select a function. Press the corresponding button on the steering wheel control for approx. 1 second to program the button with the selected function.
VERSION
Displaying the current software version of the radio.
Press the On/Off button ③ to open the menu. Turn the volume control ④ to change between the display of the version number of system, Bluetooth and DAB software.
NORMSET
Restoring the original factory settings of the car sound system.
Press the On/Off button ③.
The display shows "PRESS > TO CONFIRM".
Press the > button ⑦ to confirm the resetting.
The car sound system switches off and is reset to the factory settings. If a CD has been inserted in the CD drive, the car sound system automatically switches on again.
Factory settings
Important factory settings in the user menu:
| Menu item Factory setting | |
| AREA EUROPE | |
| FM2 / FMT ON | |
| AM / AMT OFF | |
| DAB2 ON | |
| DAB3 OFF | |
| RDS AF* ON | |
| REGIONAL* OFF | |
| TRAFFIC* | OFF |
| SEEK SENS | HIGH |
| ON VOLUME | 20 |
| TA VOLUME* | 20 |
| BEEP | ON |
| BROWSE | ON |
| Menu item Factory setting | |
| SCAN TIME | 8SEC |
| DIM MODE | MAN |
| HOUR MODE | 24H |
| SET CLOCK | 00:00 |
* Only in reception area "EUROPE"
In the user menu, you can restore the original factory settings of the car sound system (see the chapter "User settings", section "Making settings in the "VARIOUS" menu", menu item "NORMSET").
Useful information
Warranty
We provide a manufacturer's warranty for products bought within the European Union. For devices purchased outside the European Union, the warranty terms issued by our respective responsible domestic agency are valid. The warranty terms can be called up from www.blaupunkt.com.
Service
In some countries, Blaupunkt offers a repair and pick-up service.
Information about the availability of this service in your country can be found at www.blaupunkt.com.
If you want to take advantage of this service, you may request a pick-up service for your car sound system via the Internet.
Technical data
Voltage supply
Operating voltage: 10.5 – 14.4 V
Current consumption
In operation: < 10 A
10 sec. after switch-off: < 3.5 mA
Amplifier
Output power: 4 x 22 watts sine at 14.4 V at 4 ohms.
4 x 50 watts max. power
Tuner
Wavebands in Europe/Asia/Thailand:
FM: 87.5 - 108 MHz
AM: 531 - 1,602 kHz
Wavebands in the US:
FM: 87.7 – 107.9 MHz
AM: 530 - 1,710 kHz
Wavebands in South America:
FM: 87.5 - 107.9 MHz
AM: 530 - 1,710 kHz
FM frequency response: 30 – 15,000 Hz
DAB
Frequency ranges:
Band III: 174.928 - 239.200 MHz
(Channel 5A – Channel 13F)
L-Band: 1452.960 – 1490.624 MHz (Channel LA – Channel LW)
CD
Frequency range: 20 – 20,000 Hz
Pre-amp out
4 channels: 4 V
Input sensitivity
Front AUX-IN: 300 mV / 10 kΩ
Dimensions and weight
W x H x D: 178 x 52 x 170 mm (incl. antenna connection adapter)
Weight: approx. 1.41 kg
Installation instructions

Safety instructions
When carrying out installation work and making connections please observe the following safety instructions:
- Disconnect the negative terminal of the battery! When doing so, please observe the vehicle manufacturer's safety instructions.
- Make sure you do not damage vehicle components when drilling any holes.
- The cross sections of the positive and negative cables must not be less than 1.5 mm².
- Do not connect the vehicle's plug connectors to the radio!
You can obtain the adapter cable required for your vehicle type from any BLAUPUNKT dealer.
- Depending on the model, your vehicle may differ from the description provided here. We accept no responsibility for any damages due to incorrect installation or connection or for any consequential damages.
If the information provided here is not suitable for your specific installation requirements, please contact your Blaupunkt dealer, your vehicle manufacturer or our telephone hotline.
When installing an amplifier, you must first connect the device earth connections before connecting the plugs for the line-out jacks.
Earth connection of external devices may not be connected to earth of car sound system (housing).
Supplied mounting hardware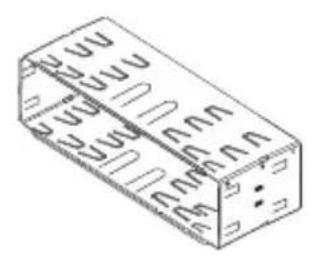


Available as an optional accessory
Installation kits


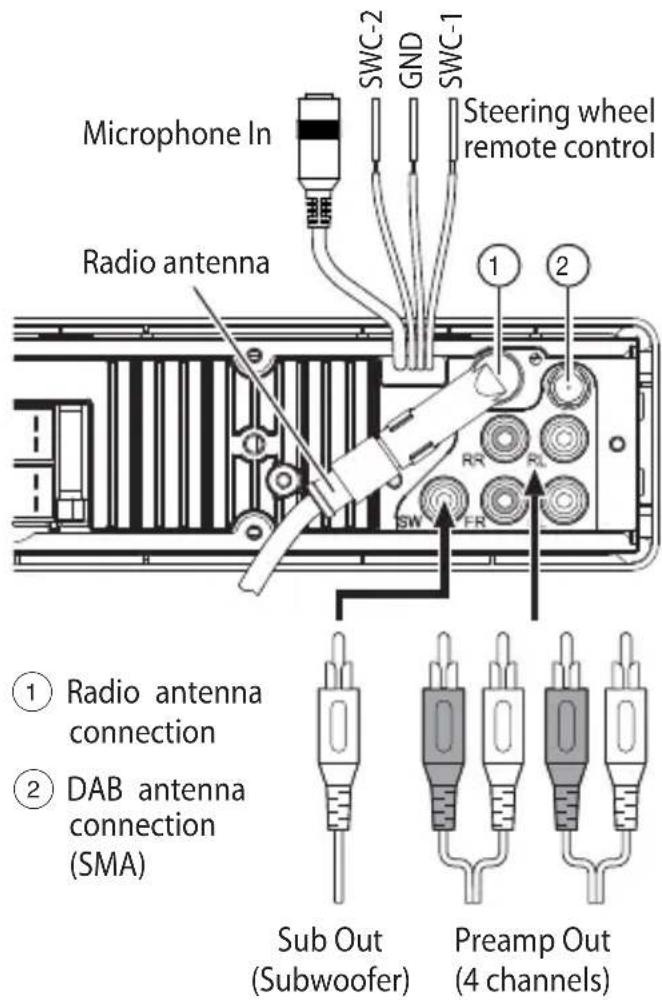

6. Removal


| A | B | ||
| 1 NC 1 Speaker out RR+ | |||
| 2 Telephone Mute 2 Speaker out RR- | RR- | ||
| 3 NC 3 Speaker out RF+ | |||
| 4 Permanent +12V 4 Speaker out RF- | RF- | ||
| 5 Auto antenna* 5 Speaker out LF+ | LF+ | ||
| 6 Illumination 6 Speaker out LF- | |||
| 7 | Kl.15/Ignition | 7 | Speaker ou |
| 8 Ground 8 Speaker out LR- | |||

* Switched power supply +12 V / max. 150 mA

Subject to changes!
Supported iPod/iPhone devices
Our product can support the following iPod/iPhone generations:
- iPod touch (5th generation)
- iPod touch (4th generation)
- iPod classic
- iPod nano (6th generation)
- iPhone 5s
- iPhone 5c
- iPhone 5
- iPhone 4s
"Made for iPod" and "Made for iPhone" mean that an electronic accessory has been designed to connect specifically to iPod and iPhone respectively, and has been certified by the developer to meet Apple performance standards.
Apple is not responsible for the operation of this device or its compliance with safety and regulatory standards.
Please note that the use of this accessory with iPod or iPhone may affect wireless performance.
iPhone and iPod are trademarks of Apple Inc., registered in the U.S. and other countries.
This product is protected by certain intellectual property rights of Microsoft. Use or distribution of such technology outside of this product is prohibited without a license from Microsoft.
The Bluetooth® word mark and logos are registered trademarks owned by Bluetooth SIG, Inc.
Android is a trademark of Google Inc.
© 2015 All rights reserved by Blaupunkt. This material may be reproduced, copied, or distributed for personal use only.
Please keep the filled-in radio pass in a safe place!


- SAFETY NOTES
- SYMBOLS USED
- DANGER
- CAUTION
- ROAD SAFETY
- GENERAL SAFETY NOTES
- USE AS DIRECTED
- INSTALLATION INSTRUCTIONS
- DECLARATION OF CONFORMITY
- CLEANING NOTES
- DISPOSAL NOTES
- SCOPE OF DELIVERY
- OPTIONAL EQUIPMENT (NOT PART OF THE SCOPE OF DELIVERY)
- PLACING THE DEVICE IN OPERATION
- ATTENTION
- TRANSPORT SECURING SCREWS
- ATTACHING/DETACHING THE CONTROL PANEL
- DAMAGE TO THE CONTROL PANEL
- ATTACHING THE CONTROL PANEL
- REMOVING THE CONTROL PANEL
- NOTE
- SETTING THE RECEPTION AREA
- SWITCHING ON/OFF
- SWITCHING ON/OFF WITH THE ON/OFF BUTTON
- SWITCHING ON/OFF VIA VEHICLE IGNITION
- VOLUME
- ADJUSTING THE VOLUME
- MUTING THE CAR SOUND SYSTEM (MUTE)
- DISPLAY BRIGHTNESS
- NOTES
- SWITCHING DEMO MODE ON/OFF
- DAB MODE
- CHANGING TO DAB MODE OR SELECTING A DAB MEMORY BANK
- TUNING INTO ENSEMBLES/SERVICES
- SELECTING AN ENSEMBLE
- ENSEMBLE SEEK TUNING
- SELECTING A SERVICE
- LIST SELECTION
- SAVING A SERVICE OR CALLING UP A SAVED SERVICE
- SCANNING SERVICES
- REFRESHING SERVICES RECEIVED
- SWITCHING BETWEEN DAB AND FM
- DAB-PTY
- SELECTING A PROGRAMME TYPE
- SEARCHING FOR SERVICE
- SWITCHING THE DISPLAY
- RADIO MODE
- RDS
- CHANGING TO RADIO MODE OR SELECTING A MEMORY BANK
- TUNING INTO A STATION
- TUNING INTO STATIONS MANUALLY
- STARTING STATION SEEK TUNING
- STORING STATIONS OR CALLING STORED STATIONS
- SCANNING STATIONS
- SCANNING RECEIVABLE STATIONS
- SCANNING STORED STATIONS
- STORING STATIONS AUTOMATICALLY (TRAVELSTORE)
- PTY
- SEARCHING FOR STATIONS
- TRAFFIC INFORMATION
- CD/MP3/WMA/IPOD MODE
- BASIC INFORMATION
- CD/MP3/WMA MODE
- IPOD MODE
- CHANGING TO CD/MP3/WMA/IPOD MODE
- INSERTING/EJECTING A CD
- INSERTING A CD
- RISK OF SEVERE DAMAGE TO THE CD DRIVE
- EJECTING A CD
- CONNECTING/REMOVING A USB DATA CARRIER
- CONNECTING A USB DATA CARRIER
- REMOVING A USB DATA CARRIER
- INSERTING/REMOVING THE MEMORY CARD
- INSERTING THE MEMORY CARD
- REMOVING THE MEMORY CARD
- SELECTING TRACKS
- SELECTING A FOLDER (ONLY IN MP3/WMA/IPOD MODE)
- FAST SEARCHING
- INTERRUPTING PLAYBACK
- SCANNING ALL TRACKS
- PLAYING TRACKS IN RANDOM ORDER
- REPEATEDLY PLAYING INDIVIDUAL TRACKS OR DIRECTORIES
- BROWSE MODE
- BROWSE MODE IN MP3/WMA MODE
- BROWSE MODE IN IPOD MODE
- FAST BROWSING
- BLUETOOTH®
- THE BLUETOOTH® MENU
- CALLING THE BLUETOOTH® MENU
- PAIRING AND CONNECTING A BLUETOOTH® DEVICE
- TELEPHONE FUNCTIONS
- ANSWERING/REJECTING AN INCOMING PHONE CALL
- MAKING A CALL
- CALLING AN ENTRY IN THE PHONE BOOK
- MAKING A CALL WITH VOICE DIAL
- STORING A PHONE NUMBER IN THE CAR SOUND SYSTEM
- SPEED DIAL FOR ANY PHONE NUMBER OR FOR THE NUMBER DIALED LAST OR A STORED NUMBER
- SPEED DIAL FOR PHONE BOOK ENTRIES
- SPEED DIAL FOR VOICE DIAL
- BLUETOOTH® STREAMING MODE
- STARTING BLUETOOTH® STREAMING
- BLUETOOTH® STREAMING MODE VIA APP CONTROL (ANDROID CELL PHONE)
- STARTING BLUETOOTH® STREAMING VIA APP CONTROL
- ADDITIONAL FUNCTIONS IN THE BLUETOOTH® MENU
- CHANGING THE BLUETOOTH® PIN
- MANAGING PAIRED DEVICES
- UNPAIRING ALL BLUETOOTH® DEVICES
- TRANSFERRING THE PHONE BOOK OF THE CELL PHONE TO THE CAR SOUND SYSTEM
- DELETING THE PHONE BOOK OF THE CELL PHONE FROM THE CAR SOUND SYSTEM
- SETTING THE BUTTON FUNCTION FOR SPEED DIAL
- ADJUSTING THE APPLICATION FOR BLUETOOTH® STREAMING MODE
- EXTERNAL AUDIO SOURCES
- FRONT AUX-IN SOCKET
- DANGER! INCREASED RISK OF INJURY FROM CONNECTOR
- SOUND SETTINGS
- CALLING AND EXITING THE "AUDIO" MENU
- MAKING SETTINGS IN THE "AUDIO" MENU
- BASS
- TREBLE
- BALANCE
- FADER
- X-BASS
- PRESETS
- AMP DELAY
- USER SETTINGS
- CALLING THE USER MENU AND SELECTING A MENU
- MAKING SETTINGS IN THE "FM TUNER" MENU
- TRAFFIC (TRAFFIC INFORMATION) (ONLY FOR RECEPTION AREA EUROPE)
- BANDS (BAND SELECTION)
- REGIONAL (ONLY FOR RECEPTION AREA EUROPE)
- SEEK SENS
- RDS AF
- (ONLY FOR RECEPTION AREAS EUROPE AND USA)
- PTY TYPE
- PTY LANG
- AREA (RECEPTION AREA)
- MAKING SETTINGS IN THE "DAB TUNER" MENU
- SERVICESCAN
- SERVICELINK
- DAB > ALL
- DAB > FM
- DAB > DAB
- LINK OFF
- L BAND
- SERVICENAME
- MAKING SETTINGS IN THE "DISPLAY" MENU
- DIM MODE
- DIM DAY/DIM NIGHT
- SCROLL
- MAKING SETTINGS IN THE "VOLUME" MENU
- ON VOLUME
- HIGH VOLUME
- TA VOLUME (TRAFFIC ANNOUNCEMENT VOLUME) (ONLY FOR RECEPTION AREA EUROPE)
- TEL VOL (HANDSFREE VOLUME)
- BEEP
- MAKING SETTINGS IN THE "CLOCK" MENU
- CLK DISP
- HOUR MODE
- SET CLOCK
- RDS CLOCK (AUTOMATIC TIME SETTING) (ONLY FOR RECEPTION AREA EUROPE)
- MAKING SETTINGS IN THE "VARIOUS" MENU
- DEMO MODE
- BROWSE
- SCAN TIME
- SWC (STEERING WHEEL CONTROL CONFIGURATION)
- VERSION
- NORMSET
- FACTORY SETTINGS
- USEFUL INFORMATION
- WARRANTY
- SERVICE
- TECHNICAL DATA
- VOLTAGE SUPPLY
- CURRENT CONSUMPTION
- AMPLIFIER
- TUNER
- DAB
- CD
- PRE-AMP OUT
- INPUT SENSITIVITY
- DIMENSIONS AND WEIGHT
- SAFETY INSTRUCTIONS
- REMOVAL
- SUPPORTED IPOD/IPHONE DEVICES
Brand : BLAUPUNKT
Model : Dortmund 230 DAB
Category : Car radio