
Dusseldorf CM102 - Car radio BLAUPUNKT - Free user manual and instructions
Find the device manual for free Dusseldorf CM102 BLAUPUNKT in PDF.
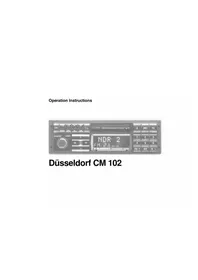


| Product Type | Car Stereo / Radio Cassette |
| Brand | Blaupunkt |
| Model | Dusseldorf CM102 |
| Power Supply | 12V DC (negative ground) |
| Maximum Output Power | 2 x 30 Watts |
| Tuner Bands | FM, AM |
| Cassette Player | Yes, auto-reverse |
| Display | LCD with backlight |
| Dimensions (H x W x D) | 50 x 178 x 150 mm (1 DIN) |
| Weight | 1.0 kg |
| Preset Stations | 30 (FM/AM) |
| Audio Controls | Volume, Balance, Fader, Bass, Treble |
| Security Feature | Detachable faceplate |
| Connector Type | ISO 10487 |
| Additional Functions | Clock, RDS (if equipped), Loudness |
| Material | Plastic chassis |
| Maintenance | Wipe with soft dry cloth; avoid liquids and abrasives |
| Spare Parts & Repairability | Contact Blaupunkt service centers or authorized dealers |
Frequently Asked Questions - Dusseldorf CM102 BLAUPUNKT
User questions about Dusseldorf CM102 BLAUPUNKT
0 question about this device. Answer the ones you know or ask your own.
Ask a new question about this device
Download the instructions for your Car radio in PDF format for free! Find your manual Dusseldorf CM102 - BLAUPUNKT and take your electronic device back in hand. On this page are published all the documents necessary for the use of your device. Dusseldorf CM102 by BLAUPUNKT.
USER MANUAL Dusseldorf CM102 BLAUPUNKT
Operation Instructions

Düsseldorf CM 102

Display Radio 18
Display Cassette 18
Display CD-Changer 18
Front Panel Description
① ON/OFF
Switch on the set by turning the knob.
Volume control:
by turning the knob
SCAN (search operation):
Pressing the button briefly samples the stations during radio reception or the next song during tape or CD operation (only CD changer).
② GEO button (broader interior sound impression)
Balance (left/right volume):
Adjust with rocker switch <</>> ⑳.
Fader (front/rear volume):
Adjust with rocker switch ∧/∨21.
③TREB / BASS button
Treble - Reproduction of the high frequencies
Adjust with rocker switch <</>> ⑳.
BASS - Reproduction of the low frequencies
Adjust with rocker switch ∧/√21.
④ LD button (Loudness)
Press this button to boost the bass frequencies at low volumes. This will lead to a more natural sound impression.
⑤ DSC button (Direct Software Control) This button is used for programming special functions of your car stereo.
⑥dx / lo button
This button is used for altering the sensitivity of the automatic station seek operation
dx - high sensitivity
lo - normal sensitivity
Additional function of the lo button: Switching from stereo to mono: Press for longer than 2 seconds.
⑦ button (Dolby-NR)
Use this button to activate noise suppression during tape playback.
⑧ RM button (Radio Monitor)
Use this button to listen to the radio while advancing or rewinding the tape.
⑨ Autoreverse
Automatic change from one side of the tape to the other
Additional function of the Δ∇ button: Stop fast forward operation.
⑩ Cassette compartment
⑪ ▲ button for ejecting the cassette
⑫ SRC button (Source)
This button is used for shifting from one audio source to another (tape ♦ radio ♦ CD ♦ tape).
⑬ PS button (Preset Station Scan)
Pressing this button briefly samples all memorized stations of the selected waveband (FM, MW, LW).
⑭ Preset buttons 1, 2, 3, 4, 5, 6
Store station - Keep button depressed during radio operation until the station becomes audible again.
Recall station - Briefly press the respective button.
⑮ M·L button (Medium wave - Long wave)
This button is used for selecting either the medium wave (MW) or long wave (LW) frequencies.
Press button again for shifting between MW and LW.
⑯ ARI button
Use this button to reproduce traffic stations only.
⑰ FM·T button (Frequency Modulation) FM button This button is used for shifting between the different individual FM storage levels I, II, III and T (Travelstore). ⑱ Display ⑲ 9 KeyCard slot To switch on the set insert KeyCard in the direction of the arrow. Remove KeyCard: Press on the card. 20 <</>> rocker switch Radio: Fine tuning of stations Tape: Fast forward or fast rewind operation CD changer: Change of CD
②1 ∧/√ rocker switch
Radio: Automatic selection of a station Tape: For repeating or skipping pieces of music CD changer: For jumping to the next or previous track, Cue (forward) or Review (backward) operation when keeping depressed for longer than 1 second.
22 Code LED
Contents
Important Notes...... 7
What You Should Read By All Means! ... 7
Safety Notes 7
KeyCard 7
Wrong KeyCard 7
KeyCard Lost 7
Amplifier Section...... 8
ON/OFF 8
Balance and Fader 8
Controlling Treble and Bass...... 8
Switching from Stereo to Mono 9
Loudness 9
Radio Section 9
Selecting the Desired Waveband...... 9
Tuning in a Station Automatically.... 9
Manual Tuning 9
Adjusting the Station Seek Sensitivity..... 9
Memorizing a Station 10
Automatically Storing the Strongest Stations .... 10
Briefly Sampling a Station 10
Sampling Memorized Stations ..... 11
Traffic Messages (ARI) 11
Switching Traffic Messages (ARI)
On and Off 11
Acoustic Alarm.... 11
Automatic Start of the Station Seek Operation 11
Tape Section 12
Inserting the Tape 12
Removing the Tape.... 12
Fast Forwarding and Rewinding the Tape (FF/FR) 12
Radio Reception during FF or FR Operation 12
Autoreverse
(Changing the Tape Side) 12
Dolby-NR 12
Automatic Tape Selection 12
Changing the Audio Source with SRC .. 13
Skipping/Repeating Tracks with CPS ... 13
Briefly Sampling a Track 13
Care Notes 13
CD Changer (Option) 14
Playing a CD 14
Changing the CD 14
Skipping/Repeating a Track (Cue/Review) 14
Briefly Sampling a Track 14
Changing the Audio Source with SRC .. 14
External CD Player 14
Programming with DSC 15
Adjusting Volume of Traffic Messages (ARI).... 15
Acoustic Signal after the Actuation of a Key (BEEP) 15
Choosing the Display Colour 15
Theft Protection by Code LED 15
Loudness 16
Indication of the Station Name 16
Sensitivity of the Automatic Station Seek Operation 17
Appendix 17
Technical Data 17
What To Do If Your Car Stereo Needs Service? 17
Important Notes
What You Should Read By All Means!
Before starting to use your new car radio, you should carefully read through the safety notes and the information about the 'KeyCard'.
Safety Notes
Being the driver of a motor vehicle you should dedicate your full attention to the traffic around you. Therefore always use your car stereo such that you are able to cope with the present traffic situation in any moment.
In difficult driving situations you should turn your set off. Please take into account that at a speed of 50 km/h you are almost covering a distance of 14 m per second!
When adjusting the volume, always make sure that acoustic signals from the outside can still be heard in order to be able to react to alert signals just as it is required by the present situation.
If you would like to mount or expand the unit by yourself, you should by all means read through the enclosed mounting and connection instructions before.
Do not connect the loudspeaker outputs to ground!
Only use the accessory and replacement parts approved by Blaupunkt.
Due to the high output power of the output stage, the metal housing of the set may heat up considerably. Therefore never touch this metal enclosure when removing the unit.
KeyCard
Your car radio is theft-protected and cannot be operated without the KeyCard. Therefore, other people cannot make use of your set. Since it is not possible to utilize the car radio with another KeyCard, it will be of no worth at all for a thief - in case the KeyCard was removed before.
Wrong KeyCard
If a wrong KeyCard is inserted, four dashes are first represented on the display ('----') before the indication changes to 'CARD ERR'. During this period the set cannot be operated even with the right KeyCard.
- Remove the false card. Now the correct card has to be inserted by all means.
After the third false try it will take one hour before the set can be operated with the correct card. In the meantime, '----' is indicated on the display.
After another 16 wrong attempts, the car stereo can only be put in operation by one of our authorized service partners. For this, the car radio passport has to be presented.
Switching the car stereo off during the waiting period will set the waiting time to 'zero' after the unit has been activated again.
KeyCard Lost
If you have lost your KeyCard or if it was damaged, one of our authorized service partners will help you against presentation of your car radio passport.
These service partners are designated by an in the radio's service register. If required, call the service centre of your country for detailed information about your local Key-Card service facility.
Amplifier Section
ON/OFF
For switching the set on,
- turn button ① clockwise and
- insert the KeyCard completely. Your stereo is now ready for operation.
For switching the set off,
- turn button ① counterclockwise or
- remove the KeyCard 19. First press on the KeyCard (to release it) and then take it out of the slot.
Balance and Fader
With two loudspeakers installed, you can balance the sound impression left/right; with four speakers available, you can also adjust the sound pattern of the front and rear level (fader).
The balance and fader function is activated by pressing the GEO button ②.
Balance
For balancing the sound level left/right:
- Press the GEO button ②. The display 18 a gives you BAL (Balance) or FAD (Fader) plus a number between -9 and +9.
- Press the rocker switch <</>> ⑳ left/right. The sound of the left and right
channel is balanced; the number on the display changes between -9 and +9. The display indication automatically stops at '0' (= sound of the left and right channel is balanced).
Fader
For balancing the sound level front/rear (Fader):
- Press the GEO button ②. The display 18 a gives you BAL (Balance) or FAD (Fader) plus a number between -9 and +9.
- Press the rocker switch ∩√21 up/down. The sound of the front and rear channel is balanced; the number on the display changes between -9 and +9. The display indication automatically stops at '0' (= sound of the front and rear channel is balanced).
The adjustment is terminated by pressing the GEO button ② once again; otherwise, the display will automatically return to indication of radio or tape functions approx. eight seconds after the last setting has been carried out.
Controlling Treble and Bass
Treble Control
For controlling the high frequencies:
- Press the TREB button ③. The display 18 a gives you TRE and a number between -6 and +6.
- Press the rocker switch <</>> 20 to the right for boosting the treble or to the left for treble reduction. The number on the display changes between -6 and +6. It will automatically stop at the '0' position (normal).
Bass Control
For controlling the low frequencies:
- Press the BASS button ③. The display ⑱a shows BAS and a number between -6 and +6.
- Press rocker switch <</>> ⑳ to the right for boosting the basses or to the left for bass reduction. The number on the display changes between -6 and +6. It will automatically stop at the '0' position (normal).
The treble and bass adjustment is terminated by pressing the BASS or TREB button ③ once again; otherwise, the display will automatically return to indication of radio or tape functions approx. eight seconds after the last setting has been carried out.
Radio Section
Switching from Stereo to Mono
For switching from stereo to mono:
- Press the lo button ⑥ for more than two seconds. For stereo reproduction, the stereo sign will light up on the display ⑱f.
When switching the unit on, stereo sound reproduction is adjusted.
When the signal strength gets poor, the set will automatically switch to mono.
Loudness
At low volumes, the human ear shows reduced sensitivity to low frequencies, while medium and high frequencies can be perceived better.
The loudness function compensates this phenomenon by boosting the low frequencies. For activating or deactivating it:
- Press the LD button ④. If the loudness is on, 'LD' is shown on the display ⑱j.
You can individually programme at which level you want the set to start boosting the basses (see chapter 'Programming').
Selecting the Desired Waveband
With your car radio you have free choice from the following wavebands: FM (ultra-short wave; frequency-modulated), MW (medium wave), and LW (long wave).
Selecting FM
- Briefly press the FM•T button ⑰. 'FM' lights up on the display ⑱b.
Selecting MW or LW
- Briefly press the M·L button ⑮. 'M' for MW or 'L' for LW lights up on the display ⑱b.
For changing between MW and LW:
- Press M·L ⑮ once again. If nothing else is indicated, the following operating notes hold for all wavebands.
Tuning in a Station Automatically
Tuning in the Following Station
- Press the upper part of the rocker switch ∧ ⭕. The car stereo automatically starts searching for the next station.
Tuning in the Previous Station
- Press the lower part of the rocker switch ∧/√21. The car radio automatically starts searching for the previous station. If the rocker switch ∧/√21 up/down is kept depressed, the station seek operation continues to be carried out quickly in the corresponding direction.
Manual Tuning
All stations can also be tuned in 'manually':
- Press the rocker switch <</>> ⑳ on the left or the right. The frequency band is scanned in small steps.
Adjusting the Station Seek Sensitivity
This set allows you to modify the station seek sensitivity.
If you only want to search for strong stations (reduced sensitivity):
- Press button lo ⑥. 'lo' illuminates on the display 18e. If you would also like to search for weaker stations (increased sensitivity):
- Press button dx ⑥. 'dx' illuminates on the display 18e.
The sensitivity level can be varied in either operating mode (lo and dx; see chapter 'Programming').
Memorizing a Station
You can memorize a station with each of the preset buttons ⑭.
For FM, each preset button ⑭ can be allocated four times, i.e. four stations can be stored on one button. The display 18 shows you the corresponding assignments (I, II, III stand for first, second, and third allocation; T stands for Travelstore (for Travelstore information see the following chapter)).
For jumping from one stored station to another:
- Press the FM•T button ⑰. For memorizing a station:
- Choose the storage level (only FM); for this, press FM•T 17 until I, II, III, or T is lit on the display 18c.
- Tune in the station (see chapter Automatic/Manual Tuning of Stations)
- Press the desired preset button ⑭ until the broadcast becomes audible again (approx. 2 seconds).
From the display 18 d you can see which button is currently pressed.
Now the station is stored.
Note:
When tuning in an already stored station, the display 18 d will show the corresponding preset button for approx. five seconds. In addition, for FM, the display 18 c will also give you the storage level.
Automatically Storing the Strongest Stations
(Travelstore)
With Travelstore, you have the opportunity to automatically store the six strongest FM stations of your respective region and have them sorted according to their signal strength. This feature is of special use while travelling.
- Press the FM•T button ⑰ for at least two seconds.
The set searches for the strongest FM stations and sorts them on the 'T' storage level (Travelstore). Once the process is finished, the car radio automatically tunes in to the strongest station.
If required, it is also possible to manually store a station on the Travelstore level. If less than six stations can be received, the free buttons are represented by dashes for a short period of time.
Activating a Stored Station
If required, the memorized stations can be activated at a keystroke.
- Choose the storage level (only FM). For this, press FM•T ⑰ until I, II, III, or T lights up on the display ⑱c.
- Briefly press the corresponding preset button 14.
Briefly Sampling a Station
(Radio Scan)
Starting with the currently tuned in station, you can have the following ones briefly sampled for approximately eight seconds each.
- Briefly press the Scan button ①. The display ⑱a shows 'SCAN'. If the next station is found, it is reproduced for approximately eight seconds. The station's frequency starts blinking on the display ⑱a; if it has already been memorized, the corresponding preset button starts blinking on the display ⑱d. In addition, for FM stations, the storage level indicator lights up on the display ⑱c. Subsequently, the set starts searching for the next station.
For selecting a sampled station:
- Press the Scan button ① once again. The Scan function is off.
After the search operation has been concluded, and no station has been chosen, the radio starts playing the station from which Station Scan was started before.
Sampling Memorized Stations
All memorized stations of a waveband can be briefly sampled.
- Press the PS button ⑬. One after another, the car radio will then start introducing all memorized stations of the selected waveband. If a preset button has no station allocated, this button is omitted.
If you want to cancel this function:
- Press the PS button ⑬ once again. The station currently sampled is maintained.
Traffic Messages (ARI)
(only FM)
Many FM stations broadcast the current traffic messages for their coverage area at regular intervals.
Together with the programme, the traffic stations transmit an 'ARI signal', which lets your car radio detect the actual traffic station and the zone identification. These individual zones are illuminated on the display 18 m (in Germany, for example, 'C' signifies that the station airs traffic messages for the North Rhine-Westphalia area).
The traffic stations indicate the beginning and the end of the message by an additional signal. Traffic messages are 'put through' with a preset volume, the level of which can be programmed (see chapter 'Programming'). The set automatically interrupts tape or CD playback and resumes play as soon as the message is over.
Switching Traffic Messages (ARI) On and Off
For switching ARI on and off
- Press the ARI button ⑯. If traffic radio is on, 'ARI' lights up on the display ⑱h.
When pressing the ARI button while listening to an MW or LW station, the unit automatically switches to an FM traffic station. When ARI is activated, you can only capture traffic stations which transmit an ARI signal.
Acoustic Alarm
When leaving the coverage area of the tuned in traffic station, your car radio automatically sends out an acoustic alarm after approximately 30 seconds.
This alarm tone can also be heard when pressing a preset button with no ARI station allocated to it.
For switching off the acoustic alarm,
- search for a new station (see chapter 'Tuning in a Station Automatically'). The set will then start searching for the next traffic station.
Automatic Start of the Station Seek Operation
(Tape Playback)
When leaving the coverage area of the tuned in traffic station, your car radio will automatically start searching for a new traffic station while you are listening to your tape.
During the seek operation, an alarm tone is sent out.
Tape Section
Inserting a Tape
If you want to listen to a tape:
- Switch on the set.
- Insert the cassette halfway into the slot with side 1 up and without applying force; the cassette will be loaded automatically.
The cassette side which was played last will be reproduced.
From the display 18 a you can see which side is currently played.
Removing the Tape
To stop tape play:
- Press the ▲ button ⑪. The cassette is ejected.
For this, the car stereo has to be switched on.
Fast Forwarding and Rewinding the Tape (FF/FR)
Fast Forward Operation
- Press the rocker switch <</>> ⑳ on the right. On the display ⑯ a e.g. 'TR1-FF' illuminates. Once fast forwarding is finished, the reversed side will start to play automatically.
Stopping Fast Forward Operation
- Press the button.
Fast Rewind Operation
- Press the rocker switch <</>> ⑳ on the left. On the display ⑱ a e.g. 'TR1-FR' illuminates. Once fast rewinding is finished, the same side will start to play automatically.
Stopping Fast Rewind Operation
- Press the button.
Radio Reception during FF or FR Operation
During cassette operation, the radio section is off. However, you are free to choose if you want to listen to the radio while the tape is forwarded or rewound:
- Press the RM button ⑧. When the function is on, 'RM' lights up on the display ⑱.
Autoreverse (Changing the Tape Side)
If you want to change to the other side of the cassette while listening to it:
- Press button ⑨.▽ The display indication ⑱a) changes from (TR1-PLAY ↔ TR2-PLAY).
Once the end of the cassette is reached, the set automatically switches to the other side.
Note:
When using stiff-going cassettes, the set may switch over to the other side although this is not desired. When this happens check the tape wound up so far; in these cases, fast forwarding or rewinding it often helps.
Dolby-NR*
This set allows it to play cassettes which have been recorded with Dolby-NR. These cassettes distinguish by their reduced background noise and improved dynamic characteristics.
For switching Dolby-NR on or off:
- Press the ☐ button ⑦. If Dolby NR is on, 'B' illuminates on the display ⑱ i.
* Noise reduction system manufactured under license from Dolby Laboratories. 'DOLBY' and the double-D symbol are trademarks of Dolby Laboratories.
Automatic Tape Selection
Your car radio automatically detects the employed type of tape. If a METAL or CrO2 tape is inserted, 'MTL' lights up on the display 18 k.
Changing the Audio Source with SRC
You can shift between the connected audio sources in the following order:
Cassette ♦ radio ♦ cassette
For switching to another audio source with the cassette being inserted:
- Press the SRC button 12.
The car radio shifts to radio operation.
Tape play is stopped; the audio head and the pinch roller are released. By this, both the cassette and the cassette mechanism are protected (standby operation).
Skipping/Repeating Tracks with CPS
Your car stereo is equipped with a Cassette Program Search feature (CPS). This function detects the beginning of the taped songs, and it can be used to fast forward to the beginning of the next one or to rewind to the beginning of the current song.
Skipping a Track
For skipping a track,
- press the upper part of the rocker switch /√21 .
On the display ⑱ a 'FF-CPS' lights up; the tape is fast forwarded.
Having reached the beginning of the next song, FF stops and the song is played.
Repeating a Track
If you want to listen to the current song once again,
- press the lower part of the rocker switch ∧/21. On the display 18 a 'FR-CPS' lights up and the tape is rewound.
Once the beginning of the current song is reached, the latter is played again. You can still repeat the previous track up to eight seconds after the new one has started.
Note:
It is only possible to skip or repeat songs if the in-between blanks are at least three seconds long.
Briefly Sampling a Track
(Cassette Scan)
Starting from the track currently being played you can briefly sample the following tracks for approx. eight seconds each:
- Press the Scan button ①. The display ⑱ a either gives you 'TR1-SCAN' or 'TR2-SCAN' while the tape is advanced. It stops at the beginning of the next track and samples the song for
about eight seconds.
If you want to keep on listening to the sampled track:
- Briefly press the Scan button ① once again. The Scan function is deactivated.
Note:
It is only possible to sample a song if the in-between blanks are at least three seconds long.
Care Notes
We recommend C-60 and C-90 type tapes for use in any automobile tape player; to protect your tapes, store them in a cool place away from dirt, dust, or excessive temperatures above 50° Celsius. In order to ensure smooth tape operation, cold tapes should be allowed to heat up a bit before they are played. If dust collects on the audio head or the rubber roller, problems related to rough tape operation or poor sound quality may occur after approx. 100 hours of operation. For normal contamination, use a head-cleaning cassette to remove the dust; for more intensive contamination, use a cotton-wool tip soaked with alcohol. Never use hard tools!
CD Changer (Option)
This car radio allows it to drive a Blaupunkt CD changer without remote control (e.g. CDC-M1, CDC-M3), and to operate it via the front panel of the set.
For information on its operation please refer to the operating manual of your changer.
Playing a CD
For listening to a CD, you will have to switch to the CD changer:
- Press the SRC button ⑫ until either the Disc/Track (i.e. CD number/title number) or Track/Time (i.e. title number/playing time) indication lights up on the display ⑯ a (see also chapter 'Programming').
The CD is played.
Changing the CD
For playing the next CD, proceed as follows:
- Press the rocker switch <</>> ⑳ on the right.
For playing the previous CD:
- Press the rocker switch <</>> ⑳ on the left.
Skipping/Repeating a Track
(Cue/Review)
For playing the next title
- briefly press the upper part of the rocker switch ∧ Ⓨ.
For playing the previous title
- briefly press the lower part of the rocker switch ∧/∨.
Cue (Fast Forward)
- Press the upper part of the rocker switch ∧ for longer than one second.
Review (Fast Backward)
- Press the lower part of the rocker switch ∧/∨ for longer than one second.
Briefly Sampling a Track
CD Scan
Starting from the track currently being played, you can briefly sample the following tracks of the CD for approximately ten seconds each:
- Press the Scan button ①. The display ⑱a shows 'TR1' followed by the track number. The next track is played.
If you want to keep listening to the sampled track:
- Briefly press the Scan button ① once again.
The Scan function is deactivated and the song continues to play.
Changing the Audio Source with SRC
You can switch between the connected audio sources in the following order:
Cassette ♦ radio ♦ CD ♦ cassette
To switch to another audio source:
- Press the SRC button ⑫.
Note:
You can modify the display indication for CD changer operation (see chapter 'Programming').
External CD Player
When connecting an external CD player (via the AUX jack), you can switch between the connected audio sources using the SRC button ⑫.
(Cassette ♦ radio ♦ CD ♦ cassette)
'AUX' will then light up on the display 18a.
Programming with DSC
The car radio's DSC function (Direct Software Control) allows it to adapt several adjustments and functions according to your personal preference and to store these individual settings.
Adjusting the Volume of Traffic Messages (ARI)
You can preselect the volume of ARI traffic messages (see chapter Traffic Messages). For changing the volume,
- press the DSC button 5. 'ARI' and a number between 1 and 9 (for the volume) illuminate on the display 18a. The car radio's volume is identical to the volume of the traffic messages.
For altering the setting,
- press the rocker switch << / >> 20 (left - lower; right - higher). The number on the display is changing correspondingly.
For memorizing your personal adjustment,
- press the DSC button 5 once again.
Acoustic Signal after the Actuation of a Key (BEEP)
All functions which require for a keystroke longer than two seconds (e.g. memorizing a station) are confirmed by an acoustic signal (BEEP).
For switching the BEEP tone on or off,
- press the DSC button 5. The display 18a gives you 'ARI'. The car radio's volume is identical to the volume of the traffic messages.
- Press the rocker switch \(\wedge/\vee^{21}\) until 'BEEP ON' or 'BEEP OFF' lights up on the display \(⑱a\).
- Using the rocker switch \(<< / >>\) \(⑳\) you can select between 'BEEP ON' (acoustic signal on) and 'BEEP OFF' (acoustic signal off).
To memorize your adjustment,
- press the DSC button \(⑤\) once again.
Choosing the Display Colour
With this set you can match the display colour to the colour of your vehicle's dashboard lighting. You can choose between green and orange.
To change the display colour,
- press the DSC button \(⑤\). The display \(⑱a\) shows 'ARI'. The
car radio's volume is identical to the volume of the traffic messages.
- Press the rocker switch \(/ 2N\) until 'COLOUR' lights up on the display \(18a\).
To change the colour,
- press \(<< / >>\) \(⑳\), and the display colour will change.
To store this adjustment,
- press the DSC button \(⑤\) once again.
Theft Protection by Code LED
As a preventive measure, you can let a light-emitting diode (LED) blink in the car's interior when it is parked.
For modifying the setting,
- press the DSC button ⑤. The display ⑱ a gives you 'ARI'. The car radio's volume is identical to the volume of the traffic messages.
- Press the rocker switch /21 until 'LED' and a number light up on the display 18 a.
- Via the rocker switch << / >>20 , you can adjust the following: LED 0 - Blinking is off. LED 1 - LED only blinks if the car radio is connected via the ignition.
LED 2 - LED only blinks if the car radio is not connected via the ignition.
Loudness
Since your in-car sound quality is influenced by the type of the installation (amplifier), the type and arrangement of the loudspeakers, and the vehicle itself, you may individually programme at which level you want the set to start boosting the basses (loudness).
For changing this loudness level,
- press the DSC button ⑤. The display 18 a gives you 'ARI'. The car radio's volume is identical to the volume of the traffic messages.
- Now press the rocker switch /21 until 'Loud' and a number between 1 and 6 illuminate on the display 18 a.
- With the rocker switch << / >> (20) you can match the above mentioned loudness level to your personal requirements.
For memorizing this adjustment,
- press the DSC button ⑤ once again.
Indication of the Station Name
After having selected a station, the corresponding frequency lights up on the display ⑱a. You can replace this frequency indication for all stored stations by the respective name of the station (e.g., German NDR, WDR, or BFBS).
Note the following:
The stations have to be stored.
The zone identification for traffic messages (ARI) is no longer indicated.
For entering a station name, proceed as follows:
- Press the DSC button ⑤. The display ⑱a gives you 'ARI'. The car radio's volume is identical to the volume of the traffic messages.
- Press the rocker switch ∧∨ 21 until 'PRESET' is illuminated on the display ⑱a.
- Choose the desired station (via the preset buttons), for which the name is to be entered.
The frequency is indicated on the display ⑱a. All free digits are represented by dashes.
89.60
The first dash is blinking. For changing it and entering the desired character:
- Press the rocker switch << / >> ⑳ on the right continuously.
The frequency indication disappears. Now the following characters light up one after another: a dot, the numbers (0 to 9), the capital letters (A to Z), the blank, and the special characters (e.g., umlauts and punctuation marks).
For selecting a character:
- Press the ON/OFF button ①. The selected character stops blinking while the next character starts to flash.
For modifying the previous character:
- Press the ON/OFF button ① for longer than two seconds.
Once you have finished your entry, press the corresponding preset button of the next station, which you would like to be named. The entered name for the previous station is then automatically stored.
For storing the adjustment:
- Press the DSC button ⑤ once again. Every time the station is selected, the specified name will be represented on the display. A memorized station name can be deleted by storing a new station on this button (i.e. keeping the respective preset button depressed for a longer period).
Sensitivity of the Automatic Station Seek Operation
In areas with an extremely high or very low station density it might be useful to alter the sensitivity of the automatic station seek (lo or dx button).
For changing the sensitivity (lo or dx button ⑥):
- Press the DSC button ⑤. The display ⑱a gives you 'ARI'. The car radio's volume is identical to the volume of the traffic messages.
- Press the ∧/Vrocker switch ②1 until 'LOCAL' and a number between 1 and 3 or 'DIS.' and a number between 1 and 3 appear on the display. LOCAL stands for local reception (lo button), DIS. signifies distant reception (dx button).
- Adjust the sensitivity with the << / >> rocker switch ⑳: 01 corresponds to high sensitivity 03 corresponds to low sensitivity For memorizing the setting:
- Press the DSC button ⑤ once again.
Appendix
Technical Data
Amplifier
Output power: 4 x 25 W watts RMS acc. to DIN 45324/3.1 4 Ω
FM:
Sensitivity: 0.9 ∝ V at 26dB signal-to-noise ratio
Frequency
response: 35-16 000 Hz (-3dB) Selectivity: >80dB at ±300kHz
40dB at ±200kHz
Crosstalk
attenuation: >30dB at 1kHz
Tape Section:
Frequency response: 30 - 18000 Hz (3 dB) Wow-and-flutter: 0.25% typ. Signal-to-noise ratio: 64 dB typ. with Dolby B 56 dB typ. without Dolby
AUX-IN: Input impedance 10 kΩ
Preamp-Out: Output impedance 150 Ω
What to Do If Your Car Stereo Needs Service?
Whenever your car radio fails to operate properly, and therefore needs to be repaired by an authorized service centre, please do not forget to bring the car radio passport and the KeyCard along with you.


- OPERATION INSTRUCTIONS
- DÜSSELDORF CM
- FRONT PANEL DESCRIPTION
- ① ON/OFF
- CONTENTS
- IMPORTANT NOTES
- AMPLIFIER SECTION
- RADIO SECTION
- TAPE SECTION
- CD CHANGER (OPTION)
- PROGRAMMING WITH DSC
- APPENDIX
- WHAT YOU SHOULD READ BY ALL MEANS
- SAFETY NOTES
- KEYCARD
- WRONG KEYCARD
- KEYCARD LOST
- ON/OFF
- BALANCE AND FADER
- BALANCE
- FADER
- CONTROLLING TREBLE AND BASS
- TREBLE CONTROL
- BASS CONTROL
- SWITCHING FROM STEREO TO MONO
- LOUDNESS
- SELECTING THE DESIRED WAVEBAND
- SELECTING FM
- SELECTING MW OR LW
- TUNING IN A STATION AUTOMATICALLY
- TUNING IN THE FOLLOWING STATION
- TUNING IN THE PREVIOUS STATION
- MANUAL TUNING
- ADJUSTING THE STATION SEEK SENSITIVITY
- MEMORIZING A STATION
- NOTE
- AUTOMATICALLY STORING THE STRONGEST STATIONS
- (TRAVELSTORE)
- ACTIVATING A STORED STATION
- BRIEFLY SAMPLING A STATION
- (RADIO SCAN)
- SAMPLING MEMORIZED STATIONS
- TRAFFIC MESSAGES (ARI)
- (ONLY FM)
- SWITCHING TRAFFIC MESSAGES (ARI) ON AND OFF
- ACOUSTIC ALARM
- AUTOMATIC START OF THE STATION SEEK OPERATION
- INSERTING A TAPE
- REMOVING THE TAPE
- FAST FORWARDING AND REWINDING THE TAPE (FF/FR)
- FAST FORWARD OPERATION
- STOPPING FAST FORWARD OPERATION
- FAST REWIND OPERATION
- STOPPING FAST REWIND OPERATION
- RADIO RECEPTION DURING FF OR FR OPERATION
- AUTOREVERSE (CHANGING THE TAPE SIDE)
- DOLBY-NR
- AUTOMATIC TAPE SELECTION
- CHANGING THE AUDIO SOURCE WITH SRC
- SKIPPING/REPEATING TRACKS WITH CPS
- SKIPPING A TRACK
- REPEATING A TRACK
- BRIEFLY SAMPLING A TRACK
- (CASSETTE SCAN)
- CARE NOTES
- PLAYING A CD
- CHANGING THE CD
- SKIPPING/REPEATING A TRACK
- (CUE/REVIEW)
- CUE (FAST FORWARD)
- REVIEW (FAST BACKWARD)
- CD SCAN
- EXTERNAL CD PLAYER
- ADJUSTING THE VOLUME OF TRAFFIC MESSAGES (ARI)
- ACOUSTIC SIGNAL AFTER THE ACTUATION OF A KEY (BEEP)
- CHOOSING THE DISPLAY COLOUR
- THEFT PROTECTION BY CODE LED
- INDICATION OF THE STATION NAME
- SENSITIVITY OF THE AUTOMATIC STATION SEEK OPERATION
- TECHNICAL DATA
- AMPLIFIER
- FM
- WHAT TO DO IF YOUR CAR STEREO NEEDS SERVICE
Brand : BLAUPUNKT
Model : Dusseldorf CM102
Category : Car radio