
UX-MD9000R - Radio JVC - Free user manual and instructions
Find the device manual for free UX-MD9000R JVC in PDF.
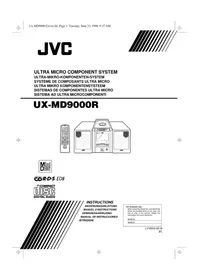


| Product Type | Mini Component System with MD Player and Radio |
| Brand | JVC |
| Model | UX-MD9000R |
| Color | Black / Silver |
| Power Supply | AC 220-240 V, 50/60 Hz |
| Power Consumption | 30 W (typical) |
| Dimensions (W x H x D) | 200 x 250 x 300 mm (approx.) |
| Weight | 4.5 kg (approx.) |
| FM Tuner Frequency Range | 87.5 - 108 MHz |
| AM Tuner Frequency Range | 530 - 1710 kHz |
| MD Player | Playback and Recording (MiniDisc) |
| Amplifier Output | 15 W per channel (RMS) |
| Speaker Impedance | 4 - 8 ohms |
| Remote Control | Included |
| Sleep Timer | Yes |
| Alarm Function | Yes (radio or MD) |
| Headphone Jack | Yes (3.5 mm) |
| Cleaning Instructions | Use a soft, dry cloth; avoid solvents |
| Safety Precautions | Do not open the unit; keep away from moisture |
| Spare Parts Availability | Contact JVC support for service |
Frequently Asked Questions - UX-MD9000R JVC
User questions about UX-MD9000R JVC
0 question about this device. Answer the ones you know or ask your own.
Ask a new question about this device
Download the instructions for your Radio in PDF format for free! Find your manual UX-MD9000R - JVC and take your electronic device back in hand. On this page are published all the documents necessary for the use of your device. UX-MD9000R by JVC.
USER MANUAL UX-MD9000R JVC

ULTRA MICRO COMPONENT SYSTEM
ULTRA-MICRO COMPONENT SYSTEM
ULTRA MICRO COMPONENT SYSTEM
ULTRA MICRO COMPONENT SYSTEM


R·D·S EON

DIGITAL AUDIO
INSTRUCTIONS
INSTRUCTIONS
INSTRUCTIONS
INSTRUCTIONS
Enter below the Model No. and Serial No. which are located either on the rear, bottom or side of the cabinet. Retain this information for future reference.
Model No.
Serial No.
LVT0053-001B
[E]
Warnings, Cautions and Others
Caution — switch!
Disconnect the mains plug to shut the power off completely. The power switch in any position does not disconnect the mains line. The power can be remote controlled.
Caution — switch!
To reduce the risk of electrical shocks, fire, etc.:
- Do not remove screws, covers or cabinet.
- Do not expose this appliance to rain or moisture.
CAUTION
Caution: Proper Ventilation
To avoid risk of electric shock and fire, and to prevent damage, locate the apparatus as follows:
1 Front: No obstructions and open spacing. 2 Sides/ Top/ Back: No obstructions should be placed in the areas shown by the dimensions below. 3 Bottom: Place on the level surface. Maintain an adequate air path for ventilation by placing on a stand with a height of 10 cm or more.
IMPORTANT FOR LASER PRODUCTS
REPRODUCTION OF LABELS
1 CLASSIFICATION LABEL, PLACED ON EXTERIOR SURFACE
2 WARNING LABEL, INSIDE THE APPARATUS
DANGER: Invisible laser radiation when open and interlock failed or defeated. AVOID DIRECT EXPOSURE TO BEAM. (a)
Thank you for purchasing the JVC Ultra Micro Component System.
We hope it will be a valued addition to your home, giving you years of enjoyment.
Be sure to read this instruction manual carefully before operating your new stereo system.
In it you will find all the information you need to set up and use the system.
If you have a query that is not answered by the manual, please contact your dealer.
Features
Here are some of the things that make your System both powerful and simple to use.
■ The controls and operations have been redesigned to make them very easy to use, freeing you to just enjoy the music. - With JVC's COMPU PLAY you can turn on the System and automatically start the Radio, CD Player, MD Player with a single touch. ■ The System incorporates Active Hyper Bass Super PRO circuitry to faithfully reproduce low frequency sounds. ■ A 45-station preset capability (30 FM and 15 AM (MW/LW)) in addition to auto-seek and manual tuning. ■ Versatile CD options include repeat, random and program play. ■ Versatile MD Player provides playback function, recording function, editing function of the tracks in the MD, title function to give title to the MD and tracks. ■ Sampling rate converter which supports 3 digital sources Incorporated. • 32 kHz, 44.1 kHz and 48 kHz. ■ Timer functions; set the system to automatically come on, switch off. ■ The System is compatible with RDS (Radio Data System) broadcasting. - The EON data enables you to standby for desired information. - The PTY Search function searches for programmes in the category you wish. In addition, Radio Text can be displayed using data sent by station. ■ You can connect various external units, such as a CD player, tape deck, etc.
How This Manual Is Organized
- Basic information that is the same for many different functions - e.g. setting the volume - is given in the section 'Common Operations', and not repeated under each function.
- The names of buttons/controls and display messages are written in all capital letters: e.g. TUNER BAND, "NO DISC".
- System functions are written with an initial capital letter only: e.g. Normal Play.
Use the table of contents to look up specific information you require.
We've enjoyed making this manual for you, and hope it serves you in enjoying the many features built into your System.
IMPORTANT CAUTIONS
1. Installation of the System
- Select a place which is level, dry and neither too hot nor too cold. (Between 5°C and 35°C or 41°F and 95°F.)
- Leave sufficient distance between the System and a TV.
- Do not use the System in a place subject to vibrations.
2. Power cord
- Do not handle the power cord with wet hands!
- Some power is always consumed as long as the power cord is connected to the wall outlet.
- When unplugging the System from the wall outlet, always pull the plug, not the power cord.
3. Malfunctions, etc.
- There are no user serviceable parts inside. In case of system failure, unplug the power cord and consult your dealer.
- Do not insert any metallic object into the System.
Table of Contents
Features ....1
How This Manual Is Organized ....1
IMPORTANT CAUTIONS ....1
Getting Started 2
Common Operations ......6
Using the Tuner 8
Using the CD Player ....11
Using the MD Player (Listening to an MD)......13
Recording onto an MD....15
Using the MD Player (Editing) ......16
Using External Equipments ......21
Using the Timers 22
Information on MDs (Minidiscs).... 23
MD (Minidisc) Error Messages.... 24
Minidisc limitations.... 25
Rules of Digital Dubbing.... 25
Care And Maintenance 26
Troubleshooting 27
Specifications 28
Getting Started
Accessories
Check that you have all of the following items, which are supplied with the System.
Power Cord (1)
AM Loop Antenna (1)
Remote Control (1)
Batteries (2)
FM Wire Antenna (1)
Speaker Cords (2)
Polishing Cloth (1)
If any of these items are missing, contact your dealer immediately.
How To Put Batteries In the Remote Control
Match the polarity (+ and -) on the batteries with the + and - markings in the battery compartment.
R6P(SUM-3)/AA(15F)

CAUTION: Handle batteries properly.
To avoid battery leakage or explosion:
- Remove batteries when the Remote Control will not be used for a long time.
- When you need to replace the batteries, replace both batteries at the same time with new ones.
- Don't use an old battery with a new one.
- Don't use different types of batteries together.
Using the Remote Control
The Remote Control makes it easy to use many of the functions of the System from a distance of up to 7m (23 feet) away. You need to point the Remote Control at the remote sensor on the System's front panel.

CAUTION: Make all connections before plugging the System into an AC power outlet.
Connecting the FM Antenna

Using the Supplied Wire Antenna
Using the Coaxial Type Connector (Not Supplied)
A 75-ohm antenna with coaxial type connector (IEC or DIN45 325) should be connected to the FM 75-ohm COAXIAL terminal.

If reception is poor, connect the outside antenna.

Note: Before attaching a 75 ohm coaxial lead (the kind with a round wire going to an outside antenna), disconnect the supplied FM Wire Antenna.
CAUTION: To avoid noise, keep antennas away from the System, the connecting cord and the AC power cord.
Connecting the AM (MW/LW) Antenna


Turn the loop until you have the best reception.
English
CAUTION: Make all connections before plugging the System into an AC power outlet.
Connecting the Speakers
- Open each of the terminals to connect the speaker wire leads.
- Connect the speaker cords between the Speaker terminals of the Unit and the terminals of the Speakers. Connect the cords with a black line to the (-) terminals and cords without a black line to the (+) terminals.
- Close each of the terminals to securely connect the cords.
Right speaker (rear side) Left speaker (rear side)

CAUTION: A TV may display irregular colors if located near the speakers. If this happens, set the speakers away from the TV.
Removing the speaker grilles
The speaker grilles can be removed.
When removing, Attaching the speaker grille
- Insert your fingers at the top and pull towards you.
- Also pull the bottom towards you.

Connecting External Equipment
Connecting a Tape Deck, etc.
Connect (not supplied) signal cords between the System's LINE IN (AUX1)/OUT terminals and the output/input terminals of the external tape deck, etc.
You can listen to one of these sources. Also, you can record the System's CD Player, MD Player, or tuner output signal to the external tape deck, etc.
![graph TD A["Line IN (AUX1)"] --> B["Pin-plug x 2"] A --> C["Signal cord (Not supplied)"] A --> D["Pin-plug x 2"] E["Line OUT"] --> F["Pin-plug x 2"] E --> G["Signal cord (Not supplied)"] E --> H["Pin-plug x 2"] B --> I["Tape deck, etc. (not supplied)"] C --> I D --> I F --> I G --> I H --> I](/content/2026/06/1304741/images/0b4a7828bf5305ee5dfca24eaf3866a965f1e1bfd7f1642bc614d2b6ff0b7e04.jpg)
CAUTION: Make all connections before plugging the System into an AC power outlet.
Connecting Auxiliary Equipment
Connect a (not supplied) signal cord between the LINE IN (AUX1) terminals on the System and the output terminals of your auxiliary equipment (e.g., turntable). You can listen to this source.

Connecting a CD Player, etc. (Digital Input (AUX2))
Unplug the cap and connect an (not supplied) optical digital cord between the System's OPTICAL DIGITAL IN (AUX2) terminal and the output terminal of the CD player, etc.
You can listen to the digital input signal from the CD player, etc.
![graph LR A["Cap"] --> B["Optical DIGITAL IN(AUX2)"] B --> C["Optical digital cord (not supplied)"] C --> D["CD player, etc. (not supplied)"]](/content/2026/06/1304741/images/b227cb893827e0737251834d7506031d2a52128eb47bdfa2604e44984c3d3a3b.jpg)
Connecting a Subwoofer System
Connect a signal cord (not supplied) between the SUB WOOFER OUT terminal and an external JVC subwoofer system, etc.

Connecting the AC Power Cord
Firmly insert the supplied AC power cord into the AC inlet on the back of the Unit.

CAUTIONS:
- ONLY USE THE JVC POWER CORD PROVIDED WITH THIS SYSTEM TO AVOID MALFUNCTION OR DAMAGE TO THE SYSTEM.
- BE SURE TO UNPLUG THE POWER CORD FROM THE OUTLET WHEN GOING OUT OR WHEN THE SYSTEM IS NOT IN USE FOR AN EXTENDED PERIOD OF TIME.
Now you can plug the AC power cord into the wall outlet, and your System is at your command!!
COMPU PLAY
JVC's COMPU PLAY feature lets you control the most frequently used System functions with a single touch.
With One Touch Operation you can play a CD, an MD, or turn on the radio with a single press of the play button for that function. One Touch Operation turns the power on for you, then starts the function you have specified. If the System is not ready (no CD in place, for example), the System still powers on so you can insert a CD.
How One Touch Operation works in each case is explained in the section dealing with that function.
The COMPU PLAY buttons are:
On the Unit
CD▶II button
TUNER BAND button
MD▶|| button
TAPE/AUX button
On the Remote Control
CD ▶■ button
TUNER BAND button
MD ▶ button
TAPE/AUX button
AUTOMATIC POWER ON
The System automatically turns on with the following operation.
- When you press the CD ▲ button, the System automatically turns on and the CD holder opens to allow CD insertion. However, this operation does not change the function to CD.
When you press the button to turn off the System, the CD holder will automatically close if it is opened.
- When you insert an MD, the System automatically turns on. However, this operation does not change the function to MD.
Common Operations


Turning the Power On and Off
Turning the System On
Press the ⏻/I button.
The display comes on and the STANDBY indicator goes out.
The System comes on ready to continue in the mode it was in when the power was last turned off.

For example, if the last thing you were doing was listening to a CD, you are now ready to listen to a CD again. If you wish, you can change to another source.
If you were listening to the Tuner last, the Tuner comes on playing the station it was last set to.
Turning the System Off
Press the ⏻/1 button again.
The "STANDBY" indicator lights up and the display is blank, except for the clock display.

■ Some power (5W) is always consumed even though power is turned off (called Standby Mode).
To switch off the System completely, unplug the AC power cord from the AC outlet. When you unplug the AC power cord, the clock will be reset to 0:00 after about 20 minutes, and preset Tuner stations will be erased after about 24 hours.
Adjusting the Brightness (DIMMER)
You can adjust the brightness of the display in three levels.
To change the brightness, press the DIMMER button on the Remote Control.
Each time you press the DIMMER button, the brightness changes as follows.
Bright (Level 1)→Dark (Level 2)→Darker (Level 3)→(back to the beginning)
- When the System is turned on, the display brightens with the Level 1.
- The "Minidisc" indicator will go out in Level 3.
Adjusting the Volume
You can adjust the volume level between 0 and 50.
The VOLUME indicator on the display indicates the volume level.

Press the VOLUME UP button of the Unit to increase the volume or press the VOLUME DOWN button to decrease it.
OR
Press the VOLUME + button on the Remote Control to increase the volume or press the VOLUME - button to decrease it.
CAUTION: DO NOT start playing any source without first setting the VOLUME control to minimum position, as a sudden blast of sound can damage your hearing, speakers and/or headphones.
For private listening
Connect a pair of headphones to the PHONES jack. No sound comes out of the speakers.
Be sure to turn down the volume before connecting or putting on headphones.
Reinforcing the Bass Sound (AHB SUPER PRO)
You can reinforce the bass sound to maintain rich, full bass at low volume (you can use this effect only for playback):
To get the effect, press the AHB (Active Hyper Bass) SUPER PRO button on the Remote Control.
The "BASS" indicator lights up on the display.
To cancel the effect, press the button again.
The "BASS" indicator goes out.
Tone Control (BASS/TREBLE)
You can control the tone by changing the bass and treble.
BASS Control
You can adjust the bass level (low frequency range level) between -6 and +6. (0: Flat)
- Press the BASS button on the Remote Control.
- Press the UP or DOWN button on the Remote Control to adjust the bass level.

TREBLE Control
You can adjust the treble level (high frequency range level) between -6 and +6. (0: Flat)
- Press the TREBLE button on the Remote Control.
- Press the UP or DOWN button on the Remote Control to adjust the treble level.

The bass or treble level display goes out when the BASS or TREBLE button is pressed again or when nothing is done for about 6 seconds.
Showing the Time (CLOCK)
In Standby mode, the clock appears on the display.
When the System is turned on, you can display the clock at any time.
To display the clock, press the CLOCK button.
To turn off the clock, press the CLOCK button again.

Note: To make the clock work, you need to set the clock beforehand. (See "Setting the Clock" on page 22.)
Using the Tuner


When the System is in use, the display shows other items as well. For simplicity, we show here only the items described in this section.

You can listen to FM and AM (MW/LW) stations. Stations can be tuned in manually, automatically, or from preset memory storage.
■ Before listening to the radio:
- Check that both the FM and AM (MW/LW) antennas are correctly connected. (See page 3).
One Touch Radio
Just press the TUNER BAND button to turn on the System and start playing the station you were last tuned to.
■ You can switch from any other sound source to the radio by pressing the TUNER BAND button.
Tuning In a Station
1. Press the TUNER BAND button.
The Band and Frequency you were last tuned to appear on the display.
Each time you press the button, the band alternates between FM and AM (MW/LW).

2. Select a station using one of the following methods.
■ Manual Tuning
Press the ◀◀ or ▶▶ button repeatedly to move from frequency to frequency until you find the station you want.
OR
■ Auto Tuning
If you press and hold the ◀◀ or ▶▶ button for one second or more, the frequency changes down, or up, automatically until a station is found.
OR
■ Preset Tuning using the Remote Control (Possible only after presetting stations)
Select the desired preset number using the UP, DOWN, >, and < buttons on the Remote Control. After 1 second the display will show the preset number's band and frequency.
UP button: Increases the preset number by 1. DOWN button: Decreases the preset number by 1.
button: Increases the tenth digit for preset number. < button: Decreases the tenth digit for preset number
Example: For program number 12, press the > button, then press the UP button twice (or simply press the UP button 12 times.).

Presetting Stations
You can preset up to 30 FM stations and up to 15 AM (MW/LW) stations using the Remote Control.
Note: Preset numbers may have been set to factory test frequencies prior to shipment. This is not a malfunction. You can preset the stations you want into memory by following one of the presetting methods below.
Manual Presetting![graph LR A["POWER INPUT"] --> B["+"] B --> C["+"] C --> D["-P 1-"] D --> E["+"] E --> F["DR"] F --> G["+"] G --> H["STORED"] I["When changing the Band"] --> J["FM-30,AM-15"]](/content/2026/06/1304741/images/bf5acff0cd531222cb04ff267c6a99b06f402d39fe8b335a4ca1b83c537fc48b.jpg)
- Select a band by pressing the TUNER BAND button.
- Press the ◀◀ or ▶▶ button to tune in a station.
- Press the SET button.
"P 1" will blink.
4. Press the UP, DOWN, >, or < button to select the preset number.
UP button: Increases the preset number by 1. DOWN button: Decreases the preset number by 1.
> button: Increases the tenth digit for preset number. < button: Decreases the tenth digit for preset number.
5. Press the SET button.
"STORED" appears and, after 1 second, the display returns to the broadcast frequency display.
- Repeat above steps 1 to 5 for each station you want to store in memory with a preset number.
To cancel the presetting, press the CANCEL button in step 3 or 4.
To change the preset stations, repeat the same steps as above.
Auto Presetting
In each band, you can automatically preset FM-30, AM (MW/LW)-15 stations. Preset numbers will be allocated as stations are found, starting from the lowest station and moving up the frequency.

- Select a band by pressing the TUNER BAND button.
- Press the AUTO PRESET button on the Remote Control for more than two seconds.
- Repeat steps 1-2 for the other band.
■ If you want to change the preset stations, carry out the Manual Presetting for the desired preset numbers.
CAUTION: If the System is unplugged or if a power failure occurs, the preset stations will be erased after about 24 hours. If this happens, you will need to preset the stations again.
To Change the FM Reception Mode
When you are tuned in an FM broadcast, the "STEREO" indicator lights up and you can hear stereo effects.
If an FM stereo broadcast is hard to receive or noisy, you can select Monaural mode. Reception improves, but you lose any stereo effect.
Press the FM MODE button on the Remote Control so that the "MONO" indicator lights up on the display.

To restore the stereo effect, press the FM MODE button on the Remote Control so that the "MONO" indicator goes off.
Receiving FM Stations with RDS
You can use the RDS (Radio Data System) by using the buttons on the Unit or the Remote Control.
RDS allows FM stations to send additional signals with their regular programme signals. For example, the stations send their station names, and information about what type of programmes they broadcast, such as sports or music, etc. This unit can receive the following types of RDS signals:
PS (Programme Service):
shows commonly known station names.
PTY (Programme Type):
shows types of broadcast programmes.
RT (Radio Text):
shows text messages the station sends.
TA (Traffic Announcement):
shows traffic announcements being broadcast.
What information can RDS signals provide?
The display shows RDS signal information that the station sends.
To show the RDS signals on the display:
Press the DISPLAY MODE button while listening to an FM station.
Each time you press the button, the display changes to show information in the following order:

PS (Programme Service):
While searching, "PS" appears, then station name is displayed. "NO PS" appears if no signal is sent.
PTY (Programme Type):
While searching, "PTY" appears, then broadcast programme type is displayed. "NO PTY" appears if no signal is sent.
RT (Radio Text):
While searching, "RT" appears, then a text message sent by the station is displayed. "NO RT" appears if no signal is sent.
Station Frequency:
Station frequency (non-RDS service)
Notes:
- All searching finishes at once, "PS", "PTY" and "RT" will not appear on the display.
- All you press the DISPLAY MODE button while listening to an AM (MW/LW) station, the display only shows station frequency.
- ARDS is not available for AM (MW/LW) broadcasts.
On characters displayed
When the display shows PS, PTY or RT signals:
The display cannot show accented letters; for example, “A” may represent accented “A’s” like “À, Á, Â, Ã, Ä and Å”.
[Example]
| A | A,A,A,A,A,A | K | K | U | U,O,U,O | 0 | 0 | * | < | < | ||
| B | B | L | L | U | V | 1 | 1 | + | + | > | > | |
| C | C,C,C | M | M | H | W | 2 | 2 | - | - | = | ||
| D | D,D | N | N,N | X | X | 3 | 3 | = | - | \ | ||
| E | E,E,E,E,E | O | O,O,O,O,O,O | Y | Y | 4 | 4 | * | - | " | ||
| F | F | P | P | Z | Z,Z,Z, | 5 | 5 | / | / | II | ||
| G | G | Q | Q | 6 | 6 | - | - | |||||
| H | H | R | R,R,R | 7 | 7 | - | - | |||||
| I | I,I,I,I | S | S,S,S | 8 | 8 | - | - | |||||
| J | J | T | T | 9 | 9 | | | | |
To search for a programme by PTY codes
One of the advantages of the RDS service is that you can locate a particular kind of programme by specifying the PTY codes.
To search for a programme using PTY or TA codes:

- Press the PTY/EON button once while listening to an FM station.
"SELECT PTY" appears on the display.
- Select the PTY code using the ◀◀ or ▶▶ button (or UP or DOWN button on the Remote Control) within 10 seconds.
Each time you press the button, the display shows a category in the following order:
NEWS - AFFAIRS - INFO - SPORT - EDUCATE - DRAMA - CULTURE - SCIENCE - VARIED - POP M
English
- ROCK M - M.O.R.M - LIGHT M - CLASSICS - OTHER M - WEATHER - FINANCE - CHILDREN - SOCIAL A - RELIGION - PHONE IN - TRAVEL - LEISURE - JAZZ - COUNTRY - NATIONAL - OLDIES - FOLK M - DOCUMENT - TRAFFIC - NEWS
3. Press the PTY/EON button within 10 seconds again.
While searching, the display alternates between "SEARCH" and the selected PTY code.
The unit searched preset stations and stops when it finds a station of the category you have selected, then tunes into that station.
If no programme is found, "NOT FOUND" appears on the display.
To continue searching after the first stop,
press the PTY button again while the display indications blink.
To stop searching at any time during the process
Press the PTY button to stop search operation.
Note: Station will change from the current one.
Descriptions of the PTY Codes
NEWS: News
AFFAIRS: Topical programme expanding on the current news or affairs
INFO: Programmes on medical service, weather forecasts, etc.
SPORT: Sports events
EDUCATE: Educational programmes
DRAMA: Radio plays
CULTURE: Programmes on national or regional culture
SCIENCE: Programmes on natural sciences and technology
VARIED: Other programmes like comedies or ceremonies
POP M: Pop music
ROCK M: Rock music
M.O.R.M: Middle-of-the-road music (usually called "easy listening")
LIGHT M: Light music
CLASSICS: Classical music
OTHER M: Other music
WEATHER: Weather information
FINANCE: Reports on commerce, trading, the Stock Market, etc.
CHILDREN: Entertainment programmes for children
SOCIAL A: Programmes on social activities
RELIGION: Programmes dealing with any aspect of belief or faith, or the nature of existence or ethics
PHONE IN: Programmes where people can express their views either by phone or in a public forum
TRAVEL: Programmes about travel destinations, package tours, and travel ideas and opportunities
LEISURE: Programmes concerned with recreational activities such as gardening, cooking, fishing, etc.
JAZZ: Jazz music
COUNTRY: Country music
NATIONAL: Current popular music from another nation or region, in that country's language
OLDIES: Classic pop music
FOLK M: Folk music
DOCUMENT: Programmes dealing with factual matters, presented in an investigative style
TRAFFIC: Broadcasts which carry traffic announcements
To temporarily switch to a broadcast programme of your choice —
EON (Enhanced Other Networks) is another convenient RDS service that allows this unit to switch temporarily to a broadcast programme of your choice (NEWS, TA or INFO) from the currently selected station, except if you are listening to a non-RDS station (all AM (MW/LW) stations or some FM stations).
- If an FM station does not broadcast EON information, EON cannot be activated.
To select a programme type

1. Press the PTY/EON button twice while listening to an FM station.
"SELECT EON" appears on the display.
2. Select the programme type with the ◀◀◀ or ▶▶◀ button (or UP or DOWN button on the Remote Control) within 10 seconds.
The display shows a programme type in the following order:

TA: Traffic Announcement
NEWS: News
INFO: Programmes on medical service, weather forecast, etc.
OFF: EON off
3. Press the PTY/EON button within 10 seconds again to set the selected programme type.
The selected programme type indicator lights up on the display, and the unit enters EON Standby mode.
- The EON indicator lights up when tuned to a station which provides EON information.
If there is no station broadcasting the type of programme you have selected
The broadcast station being currently heard will continue to be heard.
↓
When a station starts broadcasting the programme you have selected, this unit automatically switches to the station. The programme type (TA, NEWS or INFO) indicator starts blinking.
↓
When the programme is over, this unit goes back to the currently selected station, but still remains in EON Standby mode.
Notes:
- If the EON is in standby mode and the function (CD, MD, TAPE/AUX) switch is changed or the power is switched off, then the EON mode will be released. When the band is set to AM (MW/LW), the EON is not activated. When the band is set to FM again, the EON will be set to standby mode.
- When the EON is being operated (i.e. the selected programme type is being received from the broadcast station) and if the ◀◀◀, ▶▶▶ button is operated, the station will not switch back to the current selected station even after the programme ends. The programme type indicator remains in the display, indicating that the EON is in standby mode.
- When the EON is in standby mode and a radio broadcast is being recorded, be careful because the EON may be activated and a different programme than the intended one may be recorded. When the EON mode is not required, release the EON mode.
- When the alarm signal is detected by EON, the station broadcasting the alarm is received with priority. "ALARM" is not displayed.
Caution: When the sound alternated intermittently between the station tuned in by the EON function and the current selected station, cancel the EON mode. This does not constitute malfunction of the unit.
Using the CD Player


When the System is in use, the display shows other items as well. For simplicity, we show here only the items described in this section. OVER indicator which lights up if the number of tracks of the CD exceeds 20.
You can use Normal, Random, Program or Repeat Play. Repeat Play can repeat all the tracks or just one of the tracks on the CD. Here are the basic things you need to know to play a CD and locate the different tracks on it.
The Quickest Way To Start a CD Is With the One Touch Operation
■ Press the CD▶II button. - The power is automatically turned on. If a CD is already inserted, it will start playing from the first track. - If no CD is inserted, "NO DISC" appears on the display and the CD Player remains in Stop mode.
To Insert a CD
- Press the CD ▲ button on the Unit. The CD holder opens.
- Place a CD, with its label side up as shown below.

3. Press the CD ▲ button again to close the CD holder.
- To close the CD holder and play the CD, you can press the CD ▶ II button. ■ You can place an 8 cm (3") CD without an adaptor. If the CD cannot be read correctly (because it is scratched, for example), "0 0:00" appears on the display. ■ You can insert a CD while listening to the other source.
Basics of Using the CD Player - Normal Play
To Play a CD.
1. Insert a CD.
2. Press the CD ▶II button.
The first track of the CD begins playing.

• The track number that has been played disappears from the music calendar. • The CD Player automatically stops when the last track of the CD has finished playing.
To stop playing the CD, press the ■ button.
The following information for the CD is displayed.

To stop playing and remove the CD, press the CD▲ button to open the CD holder.
To pause, press the CD▶II button. The playback time blinks on the display.
To cancel pause, press the same button again. Play continues from the point where it was paused.
To Select a Track or Passage within a Track
During playback, press the ◀◀ or ▶▶ button to select the track you want.
The selected track starts playing.
- Press the ▶▶ button once to skip to the beginning of the next track.
- Press the ▶◀ button to skip to the beginning of the track being played. Press twice quickly to skip to the beginning of the previous track.
Search Play
Holding down the ◀◀ or ▶▶ button during playback will fast forward/backwards the CD so you can quickly find a particular passage in the track you are listening to.
English
Programming the Playing Order of the Tracks
You can program the playing order of the tracks using the Remote Control.
■ You can program up to 20 tracks in any desired order including the same tracks. ■ You can only make a program when the CD Player is stopped.
- Insert a CD.
- Press the CD ▶II button.
- Press the ■ button to stop the CD.
- Press the PROGRAM button.
The system enters programming mode and the "CD PROGRAM" indicator lights up.

- Press the UP, DOWN, >, or < button to select the track to program.
UP button: Increases the track number by 1.
DOWN button: Decreases the track number by 1.
> button: Increases the tenth digit of the track number. < button: Decreases the tenth digit of the track number.
- Example: for track 2, press the UP button twice. For track 12, press the > button, then press the UP button twice (or simply press the UP button 12 times).
- Press the SET button.
Program order number
![graph TD A["UP"] --> B["SET"] C["COGNL"] --> B B --> D["2"] B --> E["2"] D --> F["P 01 (After 2 seconds)"] E --> G["3:57"]](/content/2026/06/1304741/images/1b85c8765f2020d380c78508418770fc115e7541a84b9616e32ffcc07fbd7915.jpg)
- Repeat steps 5 and 6 to select the other tracks for the program.
You can see the total playback time of programmed tracks on the display. Also, you can see the programmed tracks on the music calendar.
- Press the CD▶II button.
The system plays the tracks in the order you have programmed them.
■ You can skip to a particular program track by pressing the ◀◀◀ or ▶▶▶ button during Program Play. ■ To stop playing, press the ■ button once.
To confirm the programmed tracks while the CD player is stopped, press the ◀◀ or ▶▶1 button; the tracks making up the program will successively be displayed in the programmed order.
To delete all the tracks in the program, press the ■ button repeatedly until all the tracks are cleared. Turning off the power or pressing the CD ▲ button to open the CD holder will also clear the programmed tracks.
To exit the program mode once, while the CD Player is stopped, press the PROGRAM button to light off the "CD PROGRAM" indicator.
Note: If the total playback time of the programmed tracks exceeds 99 minutes 59 seconds, the total playback time will go out on the display.
To Modify the Program
Modify the contents of the program while the CD Player is stopped. Each time you press the ■ button, the last track in the program is deleted. To add new tracks to the end of the program, repeat above steps 5 to 7.
Random Play
The tracks will play in no special order when you use this mode.
- Press the RANDOM button on the Remote Control.
The "CD RANDOM" indicator lights up on the display.
- Press the CD▶II button.
The tracks are played in random order.
To skip a track during playback, press the ▶▶ button to jump to the next track in the random sequence. Press the ◀◀ button to jump back to the start of a track being played.
To exit Random Play mode, press the RANDOM button to light off the "CD RANDOM" indicator and carry out Normal Play or Program Play, or press the CD▲ button to open the CD holder.
Repeating Tracks
You can set the program or individual track playing to repeat as many times as you like.
Press the REPEAT button on the Remote Control.
The Repeat indicator changes with each press of the button, as shown below.
ALL→blank display→ (back to the beginning): Repeats one track. ALL: In Normal Play mode, repeats all the tracks.
In Program Play mode, repeats all the tracks in the program.
In Random Play mode, repeats all the tracks in random order.
To exit Repeat mode, press the REPEAT button until the Repeat indicator on the display goes out.
In Random Play, as a matter of course, cannot be selected. ■ Repeat mode remains on the display even when you change the play mode.
Using the MD Player (Listening to an MD)


Repeat indicator Play mode indicator Music calendar Track number, Playing time, Preset number

When the System is in use, the display shows other items as well. For simplicity, we show here only the items described in this section. OVER indicator which lights up if the number of tracks of the MD exceeds 20.
You can use Normal, Random, Program or Repeat Play in the same way as for CD Player. Repeat Play can repeat all the tracks or just one of the tracks on the MD.
Here are the basic things you need to know to play an MD and locate the different tracks on it.
The Quickest Way To Start an MD Is With the One Touch Operation
Press the MD▶■ button.
- The power is automatically turned on. If an MD is already inserted, it will start playing from the first track.
- If no MD is inserted, "NO DISC" appears on the display and the MD Player remains in Stop mode.
To Insert an MD
■ Insert an MD into the MD slot.
Insert it with its label side up and the t> or ⇒ mark of the MD directed as shown in the figure.
The MD is automatically drawn inside the MD Player and the red MD indicator on the front of the Unit lights up.

■ You can insert an MD while listening to the other source.
Basics of Using the MD Player - Normal Play
To Play an MD
- Insert an MD.
The MD indicator lights up.
- Press the MD ▶II button.
The first track of the MD begins playing. (The MD indicator stays lit.)

• The tracks in the MD appear on the music calendar. - The track number that has been played disappears from the music calendar. - The MD Player automatically stops when the last track of the MD has finished playing. If the MD has the disc title, the disc title is displayed before playing the first track. ■ If the track has the title, the track title will be displayed before playing the track.
You can give the disc title and the track title as required. (See page 19.)
To stop playing the MD, press the ■ button. The following information for the MD is displayed.

To stop playing and remove the MD, press the MD▲ button to eject the MD. To pause, press the MD▶II button. The playback time blinks on the display. To cancel pause, press the same button again. Play continues from the point where it was paused.
Displaying the Disc Title
You can display the disc title of the MD during Stop mode. If the disc title is not given yet, "NO TITLE" appears.
During Stop mode, press the DISPLAY/CHARA button on the Remote Control.
Each time you press the button, the display changes as follows.
Total track number and total playback time → Disc title → Remaining time (recordable capacity) of MD (e.g., REM. 23:00) → (back to the beginning)
To Select a Track or Passage within a Track
During playback, press the ◀◀ or ▶▶ button to select the track you want.
The selected track starts playing.
- Press the ▶▶ button once to skip to the beginning of the next track.
- Press the ◄◀ button to skip to the beginning of the track being played. Press twice quickly to skip to the beginning of the previous track.
Search Play
Holding down the ◀◀◀ or ▶▶◀ button during playback will fast forward/backwards the MD so you can quickly find a particular passage in the track you are listening to.
Programming the Playing Order of the Tracks
You can program the playing order of the tracks using the Remote Control.
You can program up to 32 tracks in any desired order, including the same tracks. You can only make a program when the MD Player is stopped.
1. Insert an MD.
2. Press the MD ▶II button.
3. Press the ■ button to stop the MD.
4. Press the PROGRAM button.
The system enters the programming mode and the "MD PROGRAM" indicator lights up.

5. Press the UP, DOWN, >, or < button to select the track to program.
UP button: Increases the track number by 1.
DOWN button: Decreases the track number by 1.
> button: Increases the tenth digit of the track number.
< button: Decreases the tenth digit of the track number.
- Example: for track 2, press the UP button twice. For track 12, press the > button, then press the UP button twice (or simply press the UP button 12 times).
6. Press the SET button.
![graph TD A["Start"] --> B{2} B --> C["Program order number"] C --> D["1"] D --> E["P 01 (After 2 seconds)"] E --> F["3:57"] F --> G["Total playback time of the programmed tracks"]](/content/2026/06/1304741/images/62d67223fabf8c9b78deb1ba712f816119a1fdc6c2a5e72880052388bc5c7616.jpg)
7. Repeat steps 5 and 6 to select the other tracks for the program.
You can see the total playback time of programmed tracks on the display. Also, you can see the programmed tracks on the music calendar.
8. Press the MD▶II button.
The System plays the tracks in the order you have programmed them.
■ You can skip to a particular program track by pressing the ◀◀◀ or ▶▶▶ button during Program Play. ■ To stop playing, press the ■ button.
To confirm the programmed tracks while the MD Player is stopped, press the ◀◀ or ▶▶ button; the tracks making up the program will successively be displayed in the programmed order.
To delete all the tracks in the program, press the ■ button repeatedly until all the tracks are cleared. Turning off the power or pressing the MD ▲ button to eject the MD will also clear the programmed tracks.
To exit the program mode once, while the MD Player is stopped, press the PROGRAM button to light off the "MD PROGRAM" indicator.
Note: If the total playback time of the programmed tracks exceeds 150 minutes, the total playback time will go out on the display.
To Modify the Program
Modify the contents of the program while the MD Player is stopped. Each time you press the ■ button, the last track in the program is deleted. To add new tracks to the end of the program, repeat above steps 5 to 7.
Random Play
The tracks will play in no special order when you use this mode.
1. Press the RANDOM button on the Remote Control.
The "MD RANDOM" indicator lights up on the display.
2. Press the MD▶II button.
The tracks are played in random order.
To skip a track during playback, press the ▶▶ button to jump to the next track in the random sequence. Press the ◀◀ button to jump back to the start of a track being played.
To exit Random Play mode, press the RANDOM button to turn off the "MD RANDOM" indicator and carry out Normal Play or Program Play, or press the MD ▲ button to eject the MD.
Repeating Tracks
You can set the program or individual track playing to repeat as many times as you like.
Press the REPEAT button on the Remote Control.
The Repeat indicator changes with each press of the button, as shown below.
⊂ → ⊂ ALL → blank display → (back to the beginning) ⊂ : Repeats one track. ⊂ ALL: In Normal Play mode, repeats all the tracks. In Program Play mode, repeats all the tracks in the program. In Random Play mode, repeats all the tracks in random order.
To exit Repeat mode, press the REPEAT button until the Repeat indicator on the display goes out.
In Random Play, as a matter of course, cannot be selected. ■ Repeat mode remains on the display even when you change the play mode.
Recording onto an MD

Recording onto an MD from any of the sound sources is simple. Just insert an MD into the Unit, have the source ready, make one or two settings, and you are ready to record. For each source, the procedure is a little bit different so we explain each separately. But first, here are a few things to make your recordings better.
Things To Know Before You Start
Recording
■ It may be unlawful to record or play back copyrighted material without the consent of the copyright owner. ■ Carefully read the “Rules of Digital Dubbing” on page 25. ■ The MD Recorder supports the following sampling frequencies for digital sources. For the OPTICAL DIGITAL IN (AUX2): 32 kHz, 44.1 kHz and 48 kHz.
For the CD Player of the Unit: 44.1 kHz.
The recording level, which is the volume at which the new MD is being made, is automatically set correctly, so it is not affected by the VOLUME level of the System. Nor is it affected by adjusting the sound effects. Thus, during recording you can adjust the sound you are actually listening to without affecting the recording level. The accidental erasure prevention knob is provided on the back of an MD cartridge to prevent accidental erasure or recording. It must be set to the close position beforehand.

■ When you stick an adhesive label onto the MD cartridge, adhere it securely. If it peels off, ejection trouble, etc. will occur.
Preparation Before Recording
■ Be sure that the MD is not the Play-only type one. ■ Be sure that the accidental erasure prevention knob of the MD cartridge is set to the close position. Otherwise, "DISC PROTECTED" will appear when you try to record a signal to the MD. Be sure that the MD has enough space for recording. If not, carry out ALL ERASE or ERASE function to erase all the tracks or desired tracks in the MD. (See page 18-19.) You can check the recordable remaining time of the MD in Stop mode or during recording by pressing the DISPLAY/CHARA button.
(See "Checking the Remaining Time of the MD" mentioned on page 16.)
Indication of the MD Indicator for Recording
The MD indicator on the front panel of the Unit blinks as follows.
Record-pause mode: Blinks rapidly.
During recording: Blinks slowly.
MD inserted or played: Stays lit.
Standard Recording
You can record any sound source to an MD as follows.
1. Insert an MD with its label side up.
The MD indicator lights up.
2. Prepare one of the sources.
CD: Use the "CD Synchro Recording" mentioned below. Tuner: Tune in to a station.
AUX1 (LINE IN (AUX1)): Press the TAPE/AUX button on the Unit or the Remote Control until "AUX 1 ANALOG IN" appears on the display.
AUX2 (OPTICAL DIGITAL IN (AUX2)): Press the TAPE/AUX button on the Unit or the Remote Control until "AUX 2 DIGITAL IN" appears on the display.
3. Press the REC PAUSE button on the Unit or the ●/II button on the Remote Control.
The MD indicator starts blinking and the track number in the music calendar is increased by 1.
4. Play the record source selected in step 2.
5. Press the MD ▶II button to start recording.
The MD indicator blinks slowly and the selected source is recorded on the MD.

6. Press the ■ button to stop recording.
The MD indicator stays lit and "UTOCwriting" appears on the display, indicating that the recording is successfully completed. Then, the MD stops.
- If the MD becomes full before pressing the ■ button, the recording will be terminated after indicating "UTOCwriting".
Checking the Remaining Time of the MD
You can see the recordable remaining time of the MD in Stop or Recording mode.
Press the DISPLAY/CHARA button on the Remote Control, the remaining time appears on the display.
Track marking
- Whenever playback advances from one track to another during digital recording, the track number on the MD side is automatically incremented by 1.
- Whenever no sound at the playback side continues for 3 or more seconds during analog recording, the track number on the MD side is automatically incremented by 1.
- The track number on the MD side is automatically incremented by 1 by pressing the SET button on the remote control at the desired location during analog recording. (tuner or the equipment connected to the AUX-1.).
CD Synchro Recording
Everything on the CD goes onto the MD in the order it is on the CD, or according to the order you have set in the program. (See page 12 for programming the CD tracks.)
- Insert an MD with its label side up.
- Insert a CD. (See page 11.)
- Press the CD▶II button and then press the ■ button to stop the CD.
- Press the CD SYNCHRO REC button on the Unit.
Digital recording from the CD to the MD starts.
- The track number for the MD increases synchronously with the track on the CD.
- After the CD Player has played the entire CD or all the programmed tracks, "UTOCwriting" appears on the display, indicating that the recording is successfully completed. Then, the MD and the CD stop.
- When the MD becomes full before the CD Player finishes playback, the MD stops after indicating "UTOCwriting".
One Track Recording
- Insert an MD with its label side up.
- Play the track on the CD you wish to record.
- Press the CD SYNCHRO REC button on the Unit.
The CD Player returns to the beginning of that track and the track is recorded on the MD. After recording, the CD Player and MD Player automatically stop.
Using the MD Player (Editing)
In addition to its recording and play functions, the MD Player comes with editing functions. You can divide, join, move, or erase the recorded tracks in the MD as required. Also, you can give a disc title to the MD and track titles to the tracks in the MD.
Dividing tracks (DIVIDE function)
This involves adding a track mark (see Note) at some point during the track which is to be made into the start of an additional track so that the original track is divided into two tracks.
![graph TD A["Track No."] --> B["Track A"] A --> C["Track B"] A --> D["Track C"] A --> E["Track D"] F["DIVIDE"] --> G["Track A"] F --> H["Track B"] F --> I["Track C"] F --> J["Track D"]](/content/2026/06/1304741/images/fe8321f6588d82859a5f53f96d13b95f3ccce79def000105a064680cbbb586d8.jpg)
Joining tracks (JOIN function)
This involves erasing a track mark and turning two adjoining tracks into one track.
![graph TD A["Track A"] --> B["Track B"] B --> C["Track C"] C --> D["Track D"] D --> E["Track C"] style A fill:#f9f,stroke:#333 style B fill:#f9f,stroke:#333 style C fill:#f9f,stroke:#333 style D fill:#f9f,stroke:#333 subgraph JOIN direction TB A --> 1 B --> 2 C --> 3 D --> 4 end 1 --> 2 --> 3 --> 4 2…](/content/2026/06/1304741/images/b22c0f330a2356753b38c9913fc61ce7a0a5008ac562a0533a4704674d22acc4.jpg)
Moving tracks (MOVE function)
Tracks can be moved around so that they are in the desired sequence.
![graph TD A["Track A"] --> B["Track B"] B --> C["Track C"] C --> D["Track D"] D --> E["Track A"] E --> F["Track C"] F --> G["Track D"] G --> H["Track B"] style A fill:#f9f,stroke:#333 style B fill:#f9f,stroke:#333 style C fill:#f9f,stroke:#333 style D fill:#f9f,stroke:#333 style E fill:#f9f,stroke:#3…](/content/2026/06/1304741/images/aeab8d8d4608a5526f6f48207c0ec28f0bfdccb895529dbea6282c3b970a10a8.jpg)
Erasing tracks (ERASE function)
This enables unnecessary tracks, narration, etc. to be erased speedily. The erased parts do not remain as silences but are closed up by the subsequent tracks.
![graph TD A["Track No."] --> B["Track A Track B, Track C Track D"] B --> C["Track A Track C, Track D New tracks can be recorded"]](/content/2026/06/1304741/images/a189edb6ae3ad31b5385df51fe043ea89cdcd119a0883bca076d2d16fc458044.jpg)
Erasing all the tracks (ALL ERASE function)
All the tracks can be erased at once without recording fresh material over them.
![graph TD A["Track No."] --> B["Track A"] A --> C["Track B"] A --> D["Track C"] A --> E["Track D"] F["ALL ERASE"] --> G["New tracks can be recorded."]](/content/2026/06/1304741/images/3e1bd10d33f24d929ee21b3a47eed41a521fe20615ba8f5af72da12e30f63c57.jpg)
Giving titles to discs and tracks (TITLE function)
A title consisting of up to 32 characters can be given to a disc and a track. The title given appears in the display window.

Note: Track marks
These marks are provided to locate the start of each track. Whatever lies between one track mark and the next is considered to a track, and the numbers of the tracks (called "track numbers") are displayed in the sequence in which they are to be played.
Track number, Playing time, Preset number
![M II 28 55:45 Music calender 1 2 3 4 5 6 7 8 9 10 11 12 13 14 15 16 17 18 19 20 [VOLUME]](/content/2026/06/1304741/images/6ddcc531fee0d7af011eb13353f8502b23b751edbb4efbcfcbcb2712455f992b.jpg)
OVER Indicator which lights up if the number of tracks of the MD exceeds 20.
Dividing Tracks (DIVIDE Function)
■ Use the Remote Control to carry out this function. 1. Insert an MD to be edited with its label side up. 2. Press the MD ▶II button and then ■ button to set the function to MD.
The track numbers and total playback time are displayed.
- Press the EDIT/TITLE button until "DIVIDE?" is displayed.
The "EDIT" indicator appears on the display. DIVIDE→JOIN→MOVE→ERASE→ALL ERASE→DISC TITLE→TITLE→(Back to the beginning)
- Press the SET button.

- Select the track number to be divided.
The selected track is automatically played. To select the track number, press the UP, DOWN, >, or < button. UP button: Increases the track number by 1. DOWN button: Decreases the track number by 1.
> button: Rapidly increases the track number. < button: Rapidly decreases the track number.
• Example: for track 2, press the UP button twice. For track 12, use the > button to rapidly increase the track number (or simply press the UP button 12 times.)
- Press the SET button at the point where the track is to be divided.

POSITION
0

- The selected track is divided into two tracks and the track number in the music calendar will increase by 1.
- The recording lasting for 4 seconds starting where the track was divided is repeatedly played for your reference. Movement is possible within the POSITION-128 to 128 range (about 8 seconds before or after the position). The recording lasting for 4 seconds starting from the position to which the dividing point has been moved is repeatedly played.
- Press the SET button.
Alternates

PUSH←EDIT/TITLE
- Press the EDIT/TITLE button.
The "EDIT" indicator disappears on the display.
- Press the MD ▲ button to complete editing.
The MD is ejected after "UTOCwriting" is displayed.
- You can also complete the editing operation by pressing the ⏻/1 button to turn off the power.
To cancel the operation, press the CANCEL button in step 4, 5, or 7 until the display returns to the original display before editing the track.
English
Note: While "UTOCwriting" is displayed, do not disconnect the power cord or subject the Unit to vibration to avoid incorrect recording.
Joining Tracks (JOIN Function)
■ Use the Remote Control to carry out this function.
- Insert an MD to be edited with its label side up.
- Press the MD ▶II button and then ■ button to set the function to MD.
The track numbers and total playback time are displayed.
- Press the EDIT/TITLE button until "JOIN?" is displayed.
The "EDIT" indicator appears on the display.
DIVIDE→JOIN→MOVE→ERASE→ALL ERASE→DISC
TITLE→TITLE→(Back to the beginning)
- Press the SET button.

- Select the track number to be joined.
To select the track number, press the UP, DOWN, >, or < button. (For details, see step 5 in "Dividing Tracks (DIVIDE Function)"). Example: Track number 2.
Selected trackTrack to be joined

- Press the SET button.
Alternates

- Press the EDIT/TITLE button.
The selected track and the previous track are joined and the track numbers in the music calender will decrease by 1.
- Then the "EDIT" indicator disappears on the display.
- Press the MD▲ button to complete editing. The MD is ejected after "UTOCwriting" is displayed.
- You can also complete editing operation by pressing the button to turn off the power.
To cancel the operation, press the CANCEL button in step 4, 5, or 6 until the display returns to the original display before editing the track.
Note: While "UTOCwriting" is displayed, do not disconnect the power cord or subject the Unit to vibration to avoid incorrect recording.
Moving Tracks (MOVE Function)
■ Use the Remote Control to carry out this function.
- Insert an MD to be edited with its label side up.
- Press the MD ▶II button and then ■ button to set the function to MD.
The track numbers and total playback time are displayed.
- Press the EDIT/TITLE button until "MOVE?" is displayed.
The "EDIT" indicator appears on the display.
DIVIDE→JOIN→MOVE→ERASE→ALL ERASE→DISC
TITLE→TITLE→(Back to the beginning)
- Press the SET button.
Track to be moved

- Select the track number to be moved.
To select the track number, press the UP, DOWN, >, or < button. (For details, see step 5 in "Dividing Tracks (DIVIDE Function)".)
Example: Track number 12.

- Press the SET button.

- Select the destination to which the track is to be moved.
To select the track number, press the UP, DOWN, >, or < button.
In this example, the 12th track will move to the 14th track.
(Since the 12th track is lost, the tracks above the 12th one will be shifted toward the lower track numbers.)
Destination track Track to be moved

- Press the SET button.
Alternates

- Press the EDIT/TITLE button.
The "EDIT" indicator disappears on the display.
- Press the MD▲ button to complete editing.
The MD is ejected after "UTOCwriting" is displayed.
- You can also complete the editing operation by pressing the button to turn off the power.
To cancel the operation, press the CANCEL button in steps 4 through 8 until the display returns to the original display before editing the track.
Note: While "UTOCwriting" is displayed, do not disconnect the power cord or subject the unit to vibration to avoid incorrect recording.
Erasing Tracks (ERASE Function)
Use the remote control to carry out this function.
- Insert an MD to be edited with its label side up.
- Press the MD ▶II button and then the ■ button to set the function to MD.
The track numbers and total playback time are displayed.
- Press the EDIT/TITLE button until "ERASE ?" is displayed.
The "EDIT" indicator appears on the display.
DIVIDE→JOIN→MOVE→ERASE→ALL ERASE→DISC
TITLE→TITLE→(Back to the beginning)
- Press the SET button.
Track to be erased

- Select the track number to be erased.
To select the track number, press the UP, DOWN, >, or < button. (For details, see step 5 in "Dividing Tracks (DIVIDE Function)".)
- Press the SET button.
Alternates

- Press the EDIT/TITLE button.
The selected track is erased and the track numbers in the music calendar decrease by 1.
Then the "EDIT" indicator disappears on the display.
- Press the MD △ button to complete editing.
The MD is ejected after "UTOCwriting" is displayed.
- You can also complete the editing operation by pressing the button to turn off the power.
To cancel the operation, press the CANCEL button in step 4, 5, or 6 until the display returns to the original display before editing the track.
Note: While "UTOCwriting" is displayed, do not disconnect the power cord or subject the Unit to vibration to avoid incorrect recording.
Erasing all the Tracks (ALL ERASE Function)
■ Use the Remote Control to carry out this function.
- Insert an MD to be edited with its label side up.
- Press the MD ▶II button and then ■ button to set the function to MD.
The track numbers and total playback time are displayed.
- Press the EDIT/TITLE button until "ALL ERASE?" is displayed.
The "EDIT" indicator appears on the display.
DIVIDE→JOIN→MOVE→ERASE→ALL ERASE→DISC
TITLE→TITLE→(Back to the beginning)
- Press the SET button.
Alternates

- Press the EDIT/TITLE button.
All the tracks in the MD are erased and "BLANK DISC" is kept displayed.
The "EDIT" indicator disappears on the display.
To cancel the all erasing, press the CANCEL button in step 4.
To remove the MD, press the MD▲ button.
Note: While "UTOCwriting" is displayed, do not disconnect the power cord or subject the Unit to vibration to avoid incorrect recording.
Giving Titles to MD (DISC TITLE/TITLE Function)
You can give a disc title to the MD and a track title to the tracks in the MD. Any title name can be given up to 32 characters using the provided character sets.
The disc title you have given will be displayed in the following cases.
- When you insert the MD while the function is set to MD.
- When you press the MD ▶■ button and then ■ button to set the function to MD.
Once you have given the title to the tracks, the track title will be displayed before playing the track.
■ Since the procedure to give title is the same as for the disc title and track title except for step 4, both functions are explained together here.
■ Use the Remote Control to carry out these functions.
- Insert an MD to be edited with its label side up.
- Press the MD ▶II button and then ■ button to set the function to MD.
The total track numbers and total playback time are displayed.
- Press the EDIT/TITLE button until "DISC TITLE ?/TITLE ? (for track title)" is displayed.
The "EDIT" indicator appears on the display.
DIVIDE→JOIN→MOVE→ERASE→ALL ERASE→DISC
TITLE→TITLE→(Back to the beginning)
- Press the SET button.
- For DISC TITLE:
![graph LR A["MRI"] --> B["SUI"] B --> C["Cursor"] C --> D["Alternates"] D --> E["ABCDE"]](/content/2026/06/1304741/images/35dab94b3fd20aede734677161ea3e675591aa28df6023e7fd7d25666f5ca474.jpg)
Title name area Characters to be input
- For TITLE (Track Title):

①Select the track number to be given the title using the UP, DOWN, >, or < button. (For details, see step 5 in "Dividing Tracks (DIVIDE Function)".)
②Press the SET button.
Title name area Characters to be input
English
5. Input a preferred title (up to 32 characters).
Use the following buttons to input a title.
[Title editing buttons and their functions] (see below)
| Button Function | |
| DISPLAY /CHARA | Changes the type of characters to be input as follows.Upper-case letters and symbols↓Lower-case letters and symbols↓Numbers— |
| > | Moves the cursor for the character to be input to the right. |
| < | Moves the cursor for the character to be input to the left. |
| UP | Selects the characters in the upper row in the character set.e.g. FGHIJ→ ABCDE |
| DOWN | Selects the characters in the lower row in the character set.e.g. ABCDE → FGHIJ |
| ▶▶ | Moves the cursor for the title name to the right. |
| ◀◀ | Moves the cursor for the title name to the left. |
Example: When input the title "N(space)1"
- Display the letter N to be input.
- Press the > button until the letter N is displayed.
OR
- Press the DOWN button until "KLMNO" is displayed.
- Select "N" (put the cursor to the letter N using the > or < button).
- Press the SET button.
The letter N is now displayed in the title area.


- Select "(space)" and press the SET button.
- Press the DISPLAY/CHARA button until the numbers are displayed.
- Select "1" and press the SET button.
The title name "N(space)1" will be displayed.
Editing the Title Name:
- If the wrong character has been input, clear it using the CANCEL button.
- To clear a particular character which has been input, use the ▶▶ or ◀◀ button to align the cursor with the character, and press the CANCEL button. Then, select the correct character and press the SET button.
6. Press the EDIT/TITLE button.


7. Press the EDIT/TITLE button again.
The "EDIT" indicator disappears from the display.
8. Press the MD▲ button to complete editing.
The MD is ejected after "UTOCwriting" is displayed. - You can also complete the editing operation by pressing the ⏻/1 button to turn off the power.
To cancel the operation, press the CANCEL button in step 6.
Note: While "UTOCwriting" is displayed, do not disconnect the power cord or subject the unit to vibration to avoid incorrect recording.
[Character Layout Table]
You can write album or song names to a disc, using the following characters:
Uppercase letters Lowercase letters Numbers
| A | B | C | D | E |
| F | G | H | I | J |
| K | L | M | N | O |
| P | Q | R | S | T |
| U | V | W | X | Y |
| Z | ||||
| (space) | ! | " | # | $ |
| % | & | ' | ( | ) |
| + | , | - | .* | |
| / | : | ; | < | = |
| > | ? | @ | - | ` |
| a | b | c | d | e |
| f | g | h | i | j |
| k | l | m | n | o |
| p | q | r | s | t |
| u | v | w | x | y |
| z | ||||
| (space) | ! | ” | # | $ |
| % | & | ’ | ( | ) |
| + | , | - | .* | |
| / | : | ; | < | = |
| > | ? | @ | _ | ` |
| 0 | 1 | 2 | 3 | 4 |
| 5 | 6 | 7 | 8 | 9 |
Using External Equipment

English
Listening to External Equipment
You can listen to external equipment.
■ First make sure that the external equipment is properly connected to the System. (See page 4). 1. Set the VOLUME control to the minimum position. 2. Press the TAPE/AUX button.
The display changes with each press of the button, as shown below.
![graph TD A["ANALOG"] --> B["ANX 1"] B --> C["IN"] D["DIGITAL"] --> E["2"] E --> F["IN"]](/content/2026/06/1304741/images/a394dd84f8c80662aca8457f9e52d28dcfd944982e142ba64ff670cce89d7e0b.jpg)
When the "AUX 1 ANALOG IN" is selected:
You can use the external equipment connected to the LINE IN (AUX1) terminals of the System, such as cassette deck, turntable, etc.
- To listen to the external equipment, start playing the external equipment.
When the "AUX 2 DIGITAL IN" is selected:
You can use the external equipment connected to the OPTICAL DIGITAL IN (AUX2) terminal of the System, such as CD player, etc.
- To listen to the external equipment, start playing the external equipment.
- Adjust the VOLUME control to the desired listening level.
- Apply sound effects, if you wish.
■ Press the AHB Super PRO button to reinforce the bass sound. ■ Press the BASS/TREBLE button to control the tone. (See "Tone Control" on page 7.)
Note: For operation of the external equipment, refer to its Instructions.
Recording to External Equipment
You can record the System's source to external equipment which is connected to the LINE OUT terminals of the System, such as cassette deck, etc.
■ First make sure that the external equipment is properly connected to the System. (See page 4). 1. Play the System's CD Player, MD Player, or tune into a station. ■ The recording level is not affected by the VOLUME level set by the System. Also it is not affected by the sound effects. Note: For operation of the external equipment, refer to its Instructions.
Using the Timers

The timers let you control listening and recording functions automatically.
Setting the Clock
- When you plug the AC power cord into the wall outlet, the time indication blinks on the display. You can set the clock whether the System is on or off.
Note:
- The clock must be correctly set for the timers to work.
- The procedure must be completed within two minutes. Otherwise, the setting is cleared and must be repeated from the beginning.

1. Press the CLOCK button on the Unit for more than two seconds.
The time indication rapidly blinks on the display.
2. Press the ▶▶ or ◀◀ button on the Unit to set the time.
Pressing the ▶▶ button moves the time forwards and pressing the ◀◀ button moves it backwards. Hold down the button to move the time in 10-minute intervals.
3. Press the CLOCK button.
The selected time is set and the seconds start counting from 0.
CAUTION: If there is a power failure, the clock loses its setting after about 20 minutes. "0:00" blinks on the display and the clock must be reset.
Setting the Daily Timer
Once you have set the Daily Timer, the timer will be activated at the same time every day. It can be cancelled and re-activate whenever you wish.
The Timer indicator on the display shows when the Daily Timer you have set is in effect.
Note: Perform each setting within 30 seconds. Otherwise, setting is cleared and the procedure must be repeated from the beginning.
1. Press the ⏻/1 button to turn on the System.
2. Setting the ON time (Example: 12:15).
- Press the TIMER/SNOOZE button on the Unit. The Timer indicator lights up and the current ON time blinks on the display.
ON - 7:00 -
- Press the ▶▶▶ or ◀◀◀ button on the Unit to set the time you want the Unit to come on. Pressing the ▶▶▶ button moves the time forwards and pressing the ◀◀◀ button moves it backwards. Hold down the button to move the time in 10-minute intervals.
ON - 12:15 -
3. Setting the OFF time (Example: 13:15).
- Press the TIMER/SNOOZE button on the Unit. The current OFF time blinks on the display.
OFF - 7:00 -
- Press the ▶▶▶ or ◀◀◀ button on the Unit to set the time you want the Unit to be turned off. Pressing the ▶▶▶ button moves the time forwards and pressing the ◀◀◀ button moves it backwards. Hold down the button to move the time in 10-minute intervals.
OFF - 13:15 -
4. Selecting the music source.
- Press the TIMER/SNOOZE button on the Unit. The "TUNER" blinks on the display.
- Press the ▶▶ or ◀◀ button to select the music source you want to listen to.
The display changes as shown below.
TUNER↔TUNER REC↔CD↔MD↔(back to the beginning)
- When you select the "TUNER REC", the "REC" indicator appears on the display.
5. Setting the volume level.
- Press the TIMER/SNOOZE button on the Unit. The current volume setting blinks on the display.
- Press the ▶▶ or ◀◀ button to select the volume level. -- : The current volume level will be used. 0 to 50: When the timer is turned on, the Volume will be automatically set to the selected level.
VOLUME

6. Press the TIMER/SNOOZE button on the Unit.
The timer setting is completed and the display returns to the display before you set the timer. The timer indicator remains lit.
7. Before turning off the System, prepare the music source selected in step 4.
TUNER: Tune in to the desired station.
TUNER REC: Tune in to the desired station and insert an MD for recording the station.
CD: Insert a CD.
MD: Insert an MD.
8. Press the button to turn off the System.
To cancel the timer, press the TIMER/SNOOZE button. The Timer indicator goes out on the display.
To re-activate the cancelled timer, press the TIMER/SNOOZE button to light the Timer indicator. Then, press the TIMER/SNOOZE button until the display returns to the original display.
To confirm the timer settings, cancel the timer once by pressing the TIMER/SNOOZE button. Then, press the TIMER/SNOOZE button repeatedly, to see the current timer settings (ON time, OFF time, source, and volume).
To change the timer setting, repeat the setting procedure from the beginning.
- When the timer turns on, the Timer indicator starts blinking and the volume level gradually increases from 0 (zero) to the preset level, except when you set the volume level to "—" in step 5.
CAUTION: If the System is unplugged, or a power failure occurs, the timer setting will be lost. You will need to reset the clock first, then the timer.
5-Minute Snoozing
When the timer turns on the music source you can, if you wish, activate the 5-minute snoozing function to temporarily stop playback.
Press the TIMER/SNOOZE button on the Unit.
The "SNOOZE" indicator lights up on the display and the power is turned off for five minutes for snoozing.
Setting the SLEEP Timer
Use the Sleep Timer to turn the System off after a certain number of minutes when it is playing. By setting the Sleep Timer, you can fall asleep to music and know that your System will turn off by itself rather than play all night.
■ You can only set the Sleep Timer when the System is on and a source is playing.
1. Play a CD, MD, or tune in to the desired station.
2. Press the SLEEP button on the Remote Control.
The "SLEEP" indicator lights up.
3. Set the length of time you want the source to play before shutting off.
• Each time you press the SLEEP button, it changes the number of minutes shown on the display in this sequence:
→ 30 → 60 → 90 → 120 → Cancelled → (back to the beginning)
After setting the number of minutes for the Sleep Timer, the display will stop blinking and return to the display as before setting the Sleep Timer. (The display is dimmed.)
The System is now set to turn off after the number of minutes you set.
To Confirm the Sleep Time
When the SLEEP button is pressed, the remaining sleep time is displayed. Wait until the display returns to the original display.
To Cancel the SLEEP Timer Setting
Press the SLEEP button until the "SLEEP" indicator goes out on the display.
Turning off the System also cancels the SLEEP Timer.
If you are setting the Daily Timer, the System will be turned on at the set time to wake you up.
Information on MDs (Minidiscs)
This is a new digital audio disc format: it has a diameter of 64 mm and enables up to 74 minutes of playback and recording.
The cartridge
The diameter of the disc itself is 64 mm, smaller than a CD single. The disc sits inside a 68 x 72 mm cartridge, which also being pocket size, makes minidiscs extremely handy for carrying and storage. Since the disc is protected by the cartridge, dust and dirt cannot easily get into it. And thanks to a shutter which is closed at all times except during use, there is no need to worry about scratches or finger marks, making the handling of minidiscs very simple.

Two types of minidisc
There are two types of minidisc, “recordable MDs” and “playback-only MDs.” The playback method for each is the same: a laser irradiates the disc and the signal is read from the beam which comes back. However, the recording method for each type is different.
Playback-only MD
This is the type used for commercially-available pre-recorded MDs, on which recording cannot be done. Like a CD, data is recorded based on the presence or absence of small indentations called pits. A disc recorded with this format is called an “optical disc.”

Recordable MDs
These are the so-called "blank" MDs you can use to make your own recordings. Data is recorded by magnetism, which is easily processed, so that recording can be done again and again. By using a laser to heat the disc, the magnetism is erased and the magnetic head records the new data. Discs with this type of recording method are called magneto-optical (MO) discs.

ATRAC (Adaptive Transform Acoustic Coding)
Within recordings, there are sounds which cannot be readily heard. For example, as the volume decreases, high-pitched sounds and low-pitched sounds become difficult to hear. Also, if a quiet sound comes at the same time as or just after a loud sound, it will not be heard. With minidiscs, data is compressed using a technology called ATRAC (Adaptive Transform Acoustic Coding) which selectively chooses sounds based on human sense of hearing characteristics. With this technology, the recorded data is about one-fifth the volume of the original data, allowing it to fit on a compact minidisc.

Sound range and sensitivity of our ears
Sound skip guard memory
With the minidisc, the data of the track being played can be temporarily stored using a function called "sound skip guard memory". Even when data cannot be collected properly from the disc due to shaking or vibrations, information is stored in the "sound skip guard memory", so that there is no break in the sound which is actually delivered.
Optical pickup
Sound skip guard memory

During normal play When vibration has occurred
UTOC (User Table Of Contents)
In a minidisc, apart from the recorded tracks, there is the "UTOC". In this area, information such as the position where each track is recorded, the track divisions, and track order are listed. When music search is done, the UTOC is consulted, and the tracks are quickly found and played back. When editing is done, only the UTOC is changed, so there is no need to re-record the tracks.

MD (Minidisc) Error Messages
| Error message Meaning Action | ||
| BLANK DISC | A disc has been inserted with nothing recorded on it. | Except when making a new recording, replace the disc with one which has been recorded on. |
| CANNOT JOIN | You have tried to join tracks which cannot be joined. | This is a limitation of the minidisc system. See “Minidics limitations” on page 25. |
| DISC ERROR | There is a problem (damage) with the disc. | Replace the disc.. |
| DISC FULL | There is not enough space left on the disc. There are over 254 tracks. | Replace the disc with another recordable MD. |
| DISC PROTECTED | The disc is in accidental erasure protection mode. | Slide the accidental erasure protection tab. (So that the hole is covered.) |
| EMERGENCY STOP | A malfunction occurred during recording. | Stop the disc by pressing the ■ button and redo the operation. |
| NO DISC | There is no disc in the unit. | Insert a disc into the unit. |
| NON AUDIO CANNOT COPY | You have tried to digitally dub a CD-ROM | Stop recording. |
| PLAYBACK MD | You have tried to record or edit on a play-back-only disc. | Replace the disc with a recordable MD. |
| TRACK PROTECTED | The track is protected. | This unit cannot undo track protection. Undo the protection using the appliance that created it. |
| SCMS CANNOT COPY | You have tried to make a copy of a copy by digital dubbing. | Dub using analogue input (LINE IN). |
| DIGITAL IN UNLOCK | The digital cable is disconnected. | Connect the digital cable securely. |
Minidisc limitations
The minidisc records information in an original format that differs from that of conventional cassette tapes or DATs. Since there are some limitations with this recording format, the following types of conditions may arise. These conditions are not malfunctions.
| Condition Cause | |
| “DISC FULL” is displayed, even though the possible recording time is not used up. | With the minidisc, there is a maximum number of tracks which can be recorded, regardless of time. More than 254 tracks cannot be recorded on a disc. |
| “DISC FULL” is displayed, even though the number of tracks and recording time are not at the limit. | When parts of the disc are erased and re-recorded, blank spots are created on the disc. When recording to such a disc, one track of data is divided and recorded in the blank areas. During recording, when these divided parts become numerous, the “DISC FULL” message may be displayed. When a part of 8 seconds or less is created by division, that track cannot be joined by the JOIN function, and even if it is erased, the remaining usable time on the disc does not increase. Tracks divided into small pieces may skip when fast forward or fast rewind is done. |
| The JOIN function sometimes does’t work | |
| The remaining usable time on the disc doesn’t increase even when tracks are erased. | |
| The sound skip during fast forward or fast rewind. | |
| The amount of recorded time on the disc added to the amount of remaining time falls shout of the disc’s total possible recording time. | Minidiscs must have at least 2 seconds of continuous space in order to record. For this reason, the actual recording time of discs with a lot of short blank areas becomes shorter. |
Rules of Digital Dubbing
The following rules regarding copyright exist for dubbing to MDs from CDs or DATs through digital terminals.
SCMS (Serial Copy Management System)
Minidiscs can record clear sound with low loss of quality from CDs or DATs through each component's digital input/output terminal. However, minidiscs are set up so that a disc recorded in this way cannot be recorded onto another minidisc through digital input/output terminals. In other words, you cannot make a copy of a copy. This rule is called SCMS (Serial Copy Management System).
The recorder is designed in compliance with this rule. If you try to make a copy of a copy, the error message "SCMS CANNOT COPY" is displayed, and dubbing cannot be done.
![graph LR A["Ring"] -->|DIGITAL| B["ON/OFF Switch"] B -->|DIGITAL| C["NO"] style A fill:#f9f,stroke:#333 style B fill:#ccf,stroke:#333 style C fill:#cfc,stroke:#333](/content/2026/06/1304741/images/ac2ff167a10527e13f24229d1529be1d4617b57cd10b7c4d15a2b29c441ff798.jpg)
It may be unlawful to record or play back copyrighted material without the consent of the copyright owner.
Care And Maintenance
Handle your CDs and MDs carefully, and they will last a long time.
Compact Discs

- Only CDs bearing this mark can be used with this System. However, continued use of irregular shape CDs (heart-shape, octagonal, etc.) can damage the System.

- Remove the CD from its case by holding it at the edges while pressing the case's center hole lightly.
- Do not touch the shiny surface of the CD, or bend the CD.

- Put the CD back in its case after use to prevent warping.
- Be careful not to scratch the surface of the CD when placing it back in the case.
- Avoid exposure to direct sunlight, temperature extremes, and moisture.

• A dirty CD may not play correctly. If a CD does become dirty, wipe it with a soft cloth in a straight line from center to edge.
CAUTION: Do not use any solvent (for example, conventional record cleaner, spray thinner, benzine, etc.) to clean a CD.
MDs (Minidiscs)

Do not open the shutter. Since the shutter is locked to prevent it from opening, forcing it to open will break the disc.
Moisture Condensation

Moisture may condense on the lens inside the System in the following cases:
• After turning on heating in the room.
• In a damp room.
- If the System is brought directly from a cold to a warm place.
Should this occur, the System may malfunction. In this case, leave the System turned on for a few hours until the moisture evaporates, unplug the AC power cord, and then plug it in again.
General Notes
In general, you will have the best performance by keeping your CDs, MDs, and the mechanism clean.
- Store CDs and MDs in their cases, and keep them in cabinets or on shelves.
- Keep the system's CD holder closed when not in use.
Cleaning the lens
If the lens in the CD pickup is dirty, dropout, etc., could degrade sound.
Open the CD holder and clean the lens as shown.
- Use a blower (available from a camera store) to blow dust off the lens.

- If there are fingerprints, etc. on the lens, gently wipe clean with a cotton swab.

The cabinet of the speaker is coated with high-grade polished paint. When dirt such as a fingerprint, dust, etc. is stuck to the cabinet, first, dust the coating surface with the attached polishing cloth. Next, lightly wipe off the dirt.
If the polishing cloth is dirty, wash it using a synthetic detergent.
Troubleshooting
- If you are having a problem with your System, check this list for a possible solution before calling for service.
- If you cannot solve the problem from the hints given here, or the System has been physically damaged, call a qualified person, such as your dealer, for service.
Symptom Possible Cause Action
| No sound is heard.•Connections are incorrect, or loose. | •Check all connections and make corrections. (See pages 4-5.) | |
| •Headphones are connected. | •Disconnect the headphones. | |
| Poor radio reception•The antenna is disconnected. | •Reconnect the antenna securely. | |
| •The AM Loop Antenna is too close to the System. | •Change the position and direction of the AM Loop Antenna. | |
| •The FM Wire Antenna is not properly extended and positioned. | •Extend FM Wire Antenna to the best reception position. | |
| The CD skips.The CD is dirty or scratched.Clean or replace the CD. | ||
| The CD docs not play.The CD is upside down.Put the CD in with the label side up. | ||
| The MD cannot be inserted.An MD has already been inserted.Press the MD | ▲ button to eject the inserted MD and insert a new MD. | |
| Recording cannot be made on MD.The accidental erasure prevention knob of the MD is set to the open position. | Set it to the close position. | |
| Timer fails to start.Present time is not correct.Set the time correctly. | ||
| Unable to operate the Remote Control. | •The path between the Remote Control and the sensor on the Unit is blocked | •Remove the obstruction. |
| •The batteries have lost their charge. | •Replace the batteries. | |
| Operations are disabled. | The built-in microprocessor has malfunctioned due to external electrical interference. | Unplug the System then plug it back in |
Specifications
Amplifier
Output Power: 30 W (15 W + 15 W) at 4 ohms (Max.)
20 W (10 W + 10 W) at 4 ohms (10% THD)
Input Sensitivity/Impedance (1 kHz)
LINE IN (AUX 1): 500 mV/60 kohms
Optical In: -24 dBm - -15 dBm
Output Sensitivity/Impedance (1 kHz)
LINE OUT: 500 mV/5 kohms
Subwoofer: 0 - 144 mV/30 kohms
Speaker terminals: 4 - 16 ohms
Phones: 16 ohms - 1 kohms
MD Player
Wow and Flutter: Unmeasurable
CD Player
Wow and Flutter: Unmeasurable
Tuner
FM Tuner
Tuning Range: 87.5 - 108.0 MHz
AM Tuner
Tuning Range (MW): 522 - 1,629 kHz
(LW): 144 - 288 kHz
Speaker Specifications
(each unit) Speakers: 8 cm cone
Impedance: 4 ohms
Dimensions: 120 × 160 × 190 mm (W/H/D)
Mass: Approx. 1.3 kg
General
Dimensions: 380 × 164 × 301 mm (W/H/D)
Mass: Approx. 6.4 kg
Accessories
Power Cord (1)
AM Loop Antenna (1)
Remote Control (1)
Batteries R6P (SUM-3)/AA (15F) (2)
FM Wire Antenna (1)
Speaker Cords (2)
Polishing Cloth (1)
Power Specifications
Power Requirements: AC 230 V ~, 50 Hz
Power Consumption: 30 watts (power on mode)
5 watts (in Standby mode)
Design and specifications are subject to change without notice.


- ULTRA MICRO COMPONENT SYSTEM
- INSTRUCTIONS
- WARNINGS, CAUTIONS AND OTHERS
- CAUTION — SWITCH
- CAUTION
- CAUTION: PROPER VENTILATION
- FEATURES
- HOW THIS MANUAL IS ORGANIZED
- IMPORTANT CAUTIONS
- INSTALLATION OF THE SYSTEM
- POWER CORD
- MALFUNCTIONS, ETC
- TABLE OF CONTENTS
- GETTING STARTED
- ACCESSORIES
- HOW TO PUT BATTERIES IN THE REMOTE CONTROL
- CAUTION: HANDLE BATTERIES PROPERLY
- USING THE REMOTE CONTROL
- CONNECTING THE FM ANTENNA
- CONNECTING THE AM (MW/LW) ANTENNA
- ENGLISH
- CONNECTING THE SPEAKERS
- REMOVING THE SPEAKER GRILLES
- CONNECTING EXTERNAL EQUIPMENT
- CONNECTING A TAPE DECK, ETC
- CAUTION: MAKE ALL CONNECTIONS BEFORE PLUGGING THE SYSTEM INTO AN AC POWER OUTLET
- CONNECTING AUXILIARY EQUIPMENT
- CONNECTING A CD PLAYER, ETC. (DIGITAL INPUT (AUX2))
- CONNECTING A SUBWOOFER SYSTEM
- CONNECTING THE AC POWER CORD
- CAUTIONS
- COMPU PLAY
- ON THE UNIT
- ON THE REMOTE CONTROL
- AUTOMATIC POWER ON
- COMMON OPERATIONS
- TURNING THE POWER ON AND OFF
- TURNING THE SYSTEM ON
- PRESS THE ⏻/I BUTTON
- TURNING THE SYSTEM OFF
- PRESS THE ⏻/1 BUTTON AGAIN
- ADJUSTING THE BRIGHTNESS (DIMMER)
- ADJUSTING THE VOLUME
- FOR PRIVATE LISTENING
- REINFORCING THE BASS SOUND (AHB SUPER PRO)
- TONE CONTROL (BASS/TREBLE)
- BASS CONTROL
- TREBLE CONTROL
- SHOWING THE TIME (CLOCK)
- USING THE TUNER
- ONE TOUCH RADIO
- TUNING IN A STATION
- PRESS THE TUNER BAND BUTTON
- SELECT A STATION USING ONE OF THE FOLLOWING METHODS
- MANUAL TUNING
- AUTO TUNING
- PRESET TUNING USING THE REMOTE CONTROL (POSSIBLE ONLY AFTER PRESETTING STATIONS)
- PRESETTING STATIONS
- PRESS THE UP, DOWN, >, OR < BUTTON TO SELECT THE PRESET NUMBER
- PRESS THE SET BUTTON
- AUTO PRESETTING
- TO CHANGE THE FM RECEPTION MODE
- RECEIVING FM STATIONS WITH RDS
- TO SHOW THE RDS SIGNALS ON THE DISPLAY
- TO SEARCH FOR A PROGRAMME BY PTY CODES
- PRESS THE PTY/EON BUTTON WITHIN 10 SECONDS AGAIN
- TO CONTINUE SEARCHING AFTER THE FIRST STOP
- TO STOP SEARCHING AT ANY TIME DURING THE PROCESS
- DESCRIPTIONS OF THE PTY CODES
- TO TEMPORARILY SWITCH TO A BROADCAST PROGRAMME OF YOUR CHOICE
- TO SELECT A PROGRAMME TYPE
- PRESS THE PTY/EON BUTTON TWICE WHILE LISTENING TO AN FM STATION
- SELECT THE PROGRAMME TYPE WITH THE ◀◀◀ OR ▶▶◀ BUTTON (OR UP OR DOWN BUTTON ON THE REMOTE CONTROL) WITHIN 10 SECONDS
- PRESS THE PTY/EON BUTTON WITHIN 10 SECONDS AGAIN TO SET THE SELECTED PROGRAMME TYPE
- IF THERE IS NO STATION BROADCASTING THE TYPE OF PROGRAMME YOU HAVE SELECTED
- ↓
- NOTES
- USING THE CD PLAYER
- THE QUICKEST WAY TO START A CD IS WITH THE ONE TOUCH OPERATION
- TO INSERT A CD
- PRESS THE CD ▲ BUTTON AGAIN TO CLOSE THE CD HOLDER
- BASICS OF USING THE CD PLAYER - NORMAL PLAY
- TO PLAY A CD
- INSERT A CD
- PRESS THE CD ▶II BUTTON
- TO SELECT A TRACK OR PASSAGE WITHIN A TRACK
- SEARCH PLAY
- PROGRAMMING THE PLAYING ORDER OF THE TRACKS
- TO MODIFY THE PROGRAM
- RANDOM PLAY
- REPEATING TRACKS
- USING THE MD PLAYER (LISTENING TO AN MD)
- THE QUICKEST WAY TO START AN MD IS WITH THE ONE TOUCH OPERATION
- TO INSERT AN MD
- BASICS OF USING THE MD PLAYER - NORMAL PLAY
- TO PLAY AN MD
- DISPLAYING THE DISC TITLE
- DURING STOP MODE, PRESS THE DISPLAY/CHARA BUTTON ON THE REMOTE CONTROL
- INSERT AN MD
- PRESS THE MD ▶II BUTTON
- PRESS THE ■ BUTTON TO STOP THE MD
- PRESS THE PROGRAM BUTTON
- PRESS THE UP, DOWN, >, OR < BUTTON TO SELECT THE TRACK TO PROGRAM
- REPEAT STEPS 5 AND 6 TO SELECT THE OTHER TRACKS FOR THE PROGRAM
- PRESS THE MD▶II BUTTON
- PRESS THE RANDOM BUTTON ON THE REMOTE CONTROL
- PRESS THE REPEAT BUTTON ON THE REMOTE CONTROL
- RECORDING ONTO AN MD
- THINGS TO KNOW BEFORE YOU START
- RECORDING
- PREPARATION BEFORE RECORDING
- INDICATION OF THE MD INDICATOR FOR RECORDING
- STANDARD RECORDING
- INSERT AN MD WITH ITS LABEL SIDE UP
- PREPARE ONE OF THE SOURCES
- PRESS THE REC PAUSE BUTTON ON THE UNIT OR THE ●/II BUTTON ON THE REMOTE CONTROL
- PLAY THE RECORD SOURCE SELECTED IN STEP
- PRESS THE MD ▶II BUTTON TO START RECORDING
- PRESS THE ■ BUTTON TO STOP RECORDING
- CHECKING THE REMAINING TIME OF THE MD
- TRACK MARKING
- CD SYNCHRO RECORDING
- ONE TRACK RECORDING
- USING THE MD PLAYER (EDITING)
- DIVIDING TRACKS (DIVIDE FUNCTION)
- JOINING TRACKS (JOIN FUNCTION)
- MOVING TRACKS (MOVE FUNCTION)
- ERASING TRACKS (ERASE FUNCTION)
- ERASING ALL THE TRACKS (ALL ERASE FUNCTION)
- GIVING TITLES TO DISCS AND TRACKS (TITLE FUNCTION)
- NOTE: TRACK MARKS
- GIVING TITLES TO MD (DISC TITLE/TITLE FUNCTION)
- INPUT A PREFERRED TITLE (UP TO 32 CHARACTERS)
- OR
- PRESS THE EDIT/TITLE BUTTON
- PRESS THE EDIT/TITLE BUTTON AGAIN
- PRESS THE MD▲ BUTTON TO COMPLETE EDITING
- [CHARACTER LAYOUT TABLE]
- USING EXTERNAL EQUIPMENT
- LISTENING TO EXTERNAL EQUIPMENT
- RECORDING TO EXTERNAL EQUIPMENT
- USING THE TIMERS
- SETTING THE CLOCK
- NOTE
- PRESS THE CLOCK BUTTON ON THE UNIT FOR MORE THAN TWO SECONDS
- PRESS THE ▶▶ OR ◀◀ BUTTON ON THE UNIT TO SET THE TIME
- PRESS THE CLOCK BUTTON
- SETTING THE DAILY TIMER
- PRESS THE ⏻/1 BUTTON TO TURN ON THE SYSTEM
- SETTING THE ON TIME (EXAMPLE: 12:15)
- SETTING THE OFF TIME (EXAMPLE: 13:15)
- SELECTING THE MUSIC SOURCE
- SETTING THE VOLUME LEVEL
- PRESS THE TIMER/SNOOZE BUTTON ON THE UNIT
- BEFORE TURNING OFF THE SYSTEM, PREPARE THE MUSIC SOURCE SELECTED IN STEP
- PRESS THE BUTTON TO TURN OFF THE SYSTEM
- CAUTION: IF THE SYSTEM IS UNPLUGGED, OR A POWER FAILURE OCCURS, THE TIMER SETTING WILL BE LOST. YOU WILL NEED TO RESET THE CLOCK FIRST, THEN THE TIMER
- MINUTE SNOOZING
- SETTING THE SLEEP TIMER
- PLAY A CD, MD, OR TUNE IN TO THE DESIRED STATION
- PRESS THE SLEEP BUTTON ON THE REMOTE CONTROL
- SET THE LENGTH OF TIME YOU WANT THE SOURCE TO PLAY BEFORE SHUTTING OFF
- TO CONFIRM THE SLEEP TIME
- TO CANCEL THE SLEEP TIMER SETTING
- INFORMATION ON MDS (MINIDISCS)
- THE CARTRIDGE
- TWO TYPES OF MINIDISC
- PLAYBACK-ONLY MD
- RECORDABLE MDS
- ATRAC (ADAPTIVE TRANSFORM ACOUSTIC CODING)
- SOUND SKIP GUARD MEMORY
- UTOC (USER TABLE OF CONTENTS)
- MD (MINIDISC) ERROR MESSAGES
- MINIDISC LIMITATIONS
- RULES OF DIGITAL DUBBING
- SCMS (SERIAL COPY MANAGEMENT SYSTEM)
- CARE AND MAINTENANCE
- COMPACT DISCS
- MDS (MINIDISCS)
- MOISTURE CONDENSATION
- GENERAL NOTES
- CLEANING THE LENS
- TROUBLESHOOTING
- SPECIFICATIONS
- AMPLIFIER
- MD PLAYER
- CD PLAYER
- TUNER
- SPEAKER SPECIFICATIONS
- GENERAL
- POWER SPECIFICATIONS
Brand : JVC
Model : UX-MD9000R
Category : Radio