
SC-PT760 - Home Theater System PANASONIC - Free user manual and instructions
Find the device manual for free SC-PT760 PANASONIC in PDF.


| Product Type | Home Theater System |
| Brand | Panasonic |
| Model | SC-PT760 |
| Main Unit Dimensions (W x H x D) | 430 x 55 x 320 mm |
| Main Unit Weight | 3.2 kg |
| Speaker System | 5.1 channel |
| Total Power Output | 1000 W |
| Supported Disc Types | DVD-Video, DVD-R/RW, CD, CD-R/RW |
| Video Output | HDMI, Composite |
| Audio Decoding | Dolby Digital, DTS |
| Power Supply | AC 120V, 60 Hz |
| Power Consumption | 120 W |
| Standby Power Consumption | 0.5 W |
| Remote Control | Included |
| FM Tuner | Yes |
| USB Input | Yes, for music playback |
| Cleaning Instructions | Wipe with a soft, dry cloth. Do not use solvents. |
| Safety Precautions | Do not expose to moisture. Keep vents clear. |
| Spare Parts Availability | Contact authorized service centers. |
| Repairability Index | 6.5 / 10 (estimated) |
Frequently Asked Questions - SC-PT760 PANASONIC
User questions about SC-PT760 PANASONIC
0 question about this device. Answer the ones you know or ask your own.
Ask a new question about this device
Download the instructions for your Home Theater System in PDF format for free! Find your manual SC-PT760 - PANASONIC and take your electronic device back in hand. On this page are published all the documents necessary for the use of your device. SC-PT760 by PANASONIC.
USER MANUAL SC-PT760 PANASONIC
Operating Instructions
DVD Home Theater Sound System
Model No. SC-PT760
SC-PT960
SC-PT954
SC-PT1054

The illustration shows SC-PT760.
Region number
The player plays DVD-Video marked with labels containing the region number "1" or "ALL".
Example:

VIDEO
DIGITAL VIDEO

COMPATIBLE PLAYER
HIGH-DEFINITION MULTIMEDIA INTERFACE

ENERGY STAR
As an ENERGY STAR® Partner,
Panasonic has determined that this product meets the ENERGY STAR® guidelines for energy efficiency.
* For Canada only: The word "Participant" is used in place of the word "Partner".
6
Wireless surround speakers
28
Sound enhancement options
Surround Enhancer, Dolby Pro Logic II and more.
30
iPod connectivity
Enjoy iPod music through the speakers, view iPod photos or videos on the TV.
Before connecting, operating or adjusting this product, please read the instructions completely.
Please keep this manual for future reference.
If you have any questions contact
In the U.S.A.: 1-800-211-PANA (7262)
In Canada: 1-800-561-5505
Dear customer,
Thank you for purchasing this product. For optimum performance and safety, please read these instructions carefully.
- These operating instructions are applicable to models SC-PT760, SC-PT960, SC-PT954 and SC-PT1054.
- Unless otherwise indicated, illustrations in these operating instructions are of SC-PT760.
- Operations in these instructions are described mainly with the remote control, but you can perform the operations on the main unit if the controls are the same.
CAUTION!
THIS PRODUCT UTILIZES A LASER. USE OF CONTROLS OR ADJUSTMENTS OR PERFORMANCE OF PROCEDURES OTHER THAN THOSE SPECIFIED HEREIN MAY RESULT IN HAZARDOUS RADIATION EXPOSURE. DO NOT OPEN COVERS AND DO NOT REPAIR YOURSELF. REFER SERVICING TO QUALIFIED PERSONNEL.
WARNING:
TO REDUCE THE RISK OF FIRE, ELECTRIC SHOCK OR PRODUCT DAMAGE,
- DO NOT EXPOSE THIS APPARATUS TO RAIN, MOISTURE, DRIPPING OR SPLASHING AND THAT NO OBJECTS FILLED WITH LIQUIDS, SUCH AS VASES, SHALL BE PLACED ON THE APPARATUS.
- USE ONLY THE RECOMMENDED ACCESSORIES.
- DO NOT REMOVE THE COVER (OR BACK); THERE ARE NO USER SERVICEABLE PARTS INSIDE. REFER SERVICING TO QUALIFIED SERVICE PERSONNEL.
(For wireless system)
The following mark and symbols are located on bottom of the unit.

CAUTION
RISK OF ELECTRIC SHOCK DO NOT OPEN

CAUTION:
TO REDUCE THE RISK OF ELECTRIC SHOCK, DO NOT REMOVE SCREWS. NO USER-SERVICEABLE PARTS INSIDE. REFER SERVICING TO QUALIFIED SERVICE PERSONNEL.

The lightning flash with arrowhead symbol, within an equilateral triangle, is intended to alert the user to the presence of uninsulated “dangerous voltage” within the product’s enclosure that may be of sufficient magnitude to constitute a risk of electric shock to persons.

The exclamation point within an equilateral triangle is intended to alert the user to the presence of important operating and maintenance (servicing) instructions in the literature accompanying the appliance.
Indicates features applicable to:
| PT760 : SC-PT760 only | PT960 : SC-PT960 only | |
| PT954 : SC-PT954 only | PT1054 : SC-PT1054 only | |
| System | SC-PT760 SC-PT960 SC-PT954 SC-PT1054 | |
| Main unit | SA-PT760 SA-PT960 SA-PT954 SA-PT1054 | |
| Front speakers | SB-HF760 SB-HF960 SB-HF560 SB-HF860 | |
| Center speaker | SB-HC760 SB-HC760 SB-HC560 SB-HC560 | |
| Surround speakers | SB-HS760 SB-HS960 SB-HS560 SB-HS861 | |
| Subwoofer | SB-HW560 SB-HW560 SB-HW560 SB-HW560 | |
| Digital transmitter | SH-FX65T SH-FX65T SH-FX65T SH-FX65T | |
| Wireless system | SE-FX65A SE-FX65A SE-FX65A SE-FX65A | |
THE FOLLOWING APPLIES ONLY IN THE U.S.A.
FCC Note:
This equipment has been tested and found to comply with the limits for a Class B digital device, pursuant to Part 15 of the FCC Rules. These limits are designed to provide reasonable protection against harmful interference in a residential installation. This equipment generates, uses and can radiate radio frequency energy and, if not installed and used in accordance with the instructions, may cause harmful interference to radio communications. However, there is no guarantee that interference will not occur in a particular installation. If this equipment does cause harmful interference to radio or television reception, which can be determined by turning the equipment off and on, the user is encouraged to try to correct the interference by one or more of the following measures:
- Reorient or relocate the receiving antenna.
- Increase the separation between the equipment and receiver.
- Connect the equipment into an outlet on a circuit different from that to which the receiver is connected.
- Consult the dealer or an experienced radio/TV technician for help.
FCC caution: To maintain compliance with FCC regulations, shielded interface cables must be used with this equipment. Operation with non-approved equipment or unshielded cables may result in interference to radio and TV reception. Any changes or modifications not approved by the party responsible for compliance could void the user's authority to operate this equipment.
This device complies with Part 15 of the FCC Rules.
Operation is subject to the following two conditions:
(1) This device may not cause harmful interference, and (2) this device must accept any interference received, including interference that may cause undesired operation.
Responsible Party:
Panasonic Corporation of North America
One Panasonic Way
Secaucus, NJ 07094
Support Contact:
Panasonic Consumer Electronics Company
Telephone No.: 1-800-211-7262

WARNING:
To satisfy FCC RF exposure requirements for mobile transmitting devices, a separation distance of 20 cm or more should be maintained between the antenna of this device and persons during device operation. To ensure compliance, operations at closer than this distance is not recommended. The antenna used for this transmitter must not be co-located in conjunction with any other antenna or transmitter.
IMPORTANT SAFETY INSTRUCTIONS
Read these operating instructions carefully before using the unit. Follow the safety instructions on the unit and the applicable safety instructions listed below. Keep these operating instructions handy for future reference.
1) Read these instructions. 2) Keep these instructions. 3) Heed all warnings. 4) Follow all instructions. 5) Do not use this apparatus near water. 6) Clean only with dry cloth. 7) Do not block any ventilation openings. Install in accordance with the manufacturer's instructions. 8) Do not install near any heat sources such as radiators, heat registers, stoves, or other apparatus (including amplifiers) that produce heat. 9) Do not defeat the safety purpose of the polarized or grounding-type plug. A polarized plug has two blades with one wider than the other. A grounding-type plug has two blades and a third grounding prong. The wide blade or the third prong are provided for your safety. If the provided plug does not fit into your outlet, consult an electrician for replacement of the obsolete outlet.
10) Protect the power cord from being walked on or pinched, particularly at plugs, convenience receptacles, and the point where they exit from the apparatus. 11) Only use attachments/accessories specified by the manufacturer. 12) Use only with the cart, stand, tripod, bracket, or table specified by the manufacturer, or sold with the apparatus. When a cart is used, use caution when moving the cart/apparatus combination to avoid injury from tip-over. 13) Unplug this apparatus during lightning storms or when unused for long periods of time. 14) Refer all servicing to qualified service personnel. Servicing is required when the apparatus has been damaged in any way, such as power-supply cord or plug is damaged, liquid has been spilled or objects have fallen into the apparatus, the apparatus has been exposed to rain or moisture, does not operate normally, or has been dropped.
TABLE OF CONTENTS
Getting Started

IMPORTANT SAFETY INSTRUCTIONS ..... 2
step 1 Assembling the speakers ..... 4
step 2 Positioning....6 Speaker installation options....7
step 3 Cable connections....8 Audio and video connections....8 Speaker connections....9 Radio antenna connections....10
step 4 Digital transmitter connection ..... 11
step 5 AC cord connections ..... 11
step 6 Preparing the remote control ..... 11
step 7 Performing QUICK SETUP ..... 12
step 8 Presetting the radio stations ..... 13 Presetting stations automatically..... 1 Confirming the preset channels..... 1
Control reference guide .... 14 Utilizing the START menu.... 15
Playing Discs

Basic play....16
Using the main unit.... 16
Using the remote control 17
Other playback functions .... 18
Playing CDs sequentially (CD Mode) 18
Repeat play 18
Program and Random play....18
Using navigation menus .... 19
Playing data discs 19
Playing RAM and DVD-R/-RW (DVD-VR) discs ... 19
Using on-screen menus .... 20
Changing the player settings ..... 22 Selecting the delay time of the speakers ..... 25
Other Operations

Using the VIERA Link™ "HDAVI Control™"...26
One touch play 26
Auto input switching 26
Power off link 26
Speaker control 27
VIERA Link Control only with TV's remote control [for "HDAVI Control 2 (or later)"]....27
Using sound effects 28
Setting the sound effects 28
Using Dolby Pro Logic II 28
Using Whisper-mode Surround 28
Adjusting the subwoofer level 29
Using Subwoofer Boost 29
Adjusting the speaker level 29
Enjoying the FM/AM radio 29
Manual tuning 29
Operating other equipment 30
Enjoying TV audio 30
Enjoying digital audio 30
Using the iPod 30
Reference

Discs that can be played....32
Maintenance....33
Troubleshooting guide 34
Glossary 37
Specifications 38
Product Service 40
Limited Warranty (ONLY FOR U.S.A.) ..... 42
Limited Warranty (ONLY FOR CANADA)....43
Accessories .... Back cover


28

★★★☆
30
![graph TD A["Laptop"] -->|Signal| B["Audio Device 1"] A -->|Signal| C["Audio Device 2"] B --> D["Note: Note: Note is not present in image"]](/content/2026/06/1304657/images/42bf2ef186f4221b76e15bf2103bc5c5fa5b61e3fe45e873e6295ef507bcc749.jpg)


RQTX0105
Step 1
Assembling the speakers
Preparation
- To prevent damage or scratches, lay down a soft cloth and perform assembly on it.
- For assembly, use a Phillips-head screwdriver.
- For optional wall mount, refer to page 7.
PT760: Front speakers
PT960: Surround speakers
Make sure you have all the indicated components before starting assembly, setup, and connection.
PT760
2 Front speakers
PT960
2 Surround speakers
PT760
2 sets of pipes
(with cable):
For front speakers
PT960
2 sets of pipes
(with cable):
For surround speakers
2 bases, 8 screws, 4 small
screws


1

2 Tighten securely.
Small
screws

2

4
Tighten
securely.
Screws

3
1
2

3
Pull and press the cable into the groove.
Attach the pipes to the speaker.

Tighten securely.


4
Insert the wire fully.
+: White
-: Blue

Push!
5
Press into the groove.
Make sure you have all the indicated components before starting assembly, setup, and connection.


Speaker assembly option
Thread the speaker cable through the base.
Attach the speaker.

Preventing the speakers from falling
- You will need to obtain the appropriate screw eyes to match the walls or pillars to which they are going to be fastened.
- Consult a qualified housing contractor concerning the appropriate procedure when attaching to a concrete wall or a surface that may not have strong enough support. Improper attachment may result in damage to the wall or speakers.
e.g. PT760 Front speakers
e.g. PT960 Front speakers
step2 Positioning
How you set up your speakers can affect the bass and the sound field. Note the following points:
- Place speakers on flat secure bases.
- Placing speakers too close to floors, walls, and corners can result in excessive bass. Cover walls and windows with thick curtains.
Note
Keep your speakers at least 10 mm (13/32) away from the system for proper ventilation.
Setup example
Place the front, center, and surround speakers at approximately the same distance from the seating position. The angles in the diagram are approximate.

To avoid interference, maintain the following distances between the wireless system and other electronic devices that use the same radio frequency (2.4 GHz band).

Wireless LAN: approx. 2 m (6-1/2 ft)
Cordless phone and other electronic devices: approx. 2 m (6-1/2 ft)
The wireless system will automatically seek a clear channel if any of these other devices interfere with its communication. When this happens, the wireless link indicator ("|w1") flashes on the main unit, and there is a brief interruption in audio coming from the surround speakers.
This is the normal operation of the product working to assure the best possible performance of your home theater system.
If the interference persists, try moving the other devices to another location outside the range of the wireless system or move the wireless system nearer to the main unit.

Expand your listening options with a multi-room wireless sound system.
Optional Panasonic wireless accessory SH-FX85
You can enjoy a multi-room wireless sound system when you use the optional Panasonic wireless accessory SH-FX85. For details, please refer to the operating instructions for the optional Panasonic wireless accessory.
Notes on speaker use
- Use only supplied speakers
Using other speakers can damage the unit, and sound quality will be negatively affected. You can damage your speakers and shorten their useful life if you play sound at high levels over extended periods.
Reduce the volume in the following cases to avoid damage: When playing distorted sound.
When the speakers are reverberating due to a record player, noise from FM broadcasts, or continuous signals from an oscillator, test disc, or electronic instrument.
When adjusting the sound quality.
When turning the unit on or off.
If irregular coloring occurs on your TV
The center speaker is designed to be used close to a TV, but the picture may be affected with some TVs and setup combinations.
If this occurs, turn the TV off for about 30 minutes.
The demagnetizing function of the TV should correct the problem. If it persists, move the speakers further away from the TV.

Caution
- The main unit and supplied speakers are to be used only as indicated in this setup. Failure to do so may lead to damage to the amplifier and/or the speakers, and may result in the risk of fire. Consult a qualified service person if damage has occurred or if you experience a sudden change in performance.
- Do not attempt to attach these speakers to walls using methods other than those described in this manual.
Caution
Do not touch the front netted area of the speakers. Hold by the sides. e.g. Center speaker
DO NOT
DO
- Do not stand on the base. Be cautious when children are near. e.g. PT760 Front speaker
DO NOT
Speaker installation options
■ Attaching to a wall
You can attach all of the speakers (except subwoofer) to a wall.
- The wall or pillar on which the speakers are to be attached should be capable of supporting 10 kg (22 lbs) per screw. Consult a qualified building contractor when attaching the speakers to a wall. Improper attachment may result in damage to the wall and speakers.
① Drive a screw (not included) into the wall.

② Fit the speaker securely onto the screw(s) with the hole(s).
e.g. PT760
Front speaker
Attach to a wall without the base and the pipes
e.g. PT960
Front speaker
Attach to a wall without the base and the stand

e.g. DO NOT
In this position, the speaker will likely fall if moved to the left or right.
DO
Move the speaker so that the screw is in this position.

Surround speaker
Center speaker e.g. PT760
■ Fitting speaker stands (not included)
PT760
PT954 : Center and surround speakers
PT960
PT1054: Center speaker
Ensure the stands meet these conditions before purchasing them. Note the diameter and length of the screws and the distance between screws as shown in the diagram.
- The stands must be able to support over 10 kg (22 lbs).
- The stands must be stable even if the speakers are in a high position.
e.g. Center speaker
Metal screw holes
For attaching to speaker stands

5.0 mm (3/16"), pitch 0.8 mm (1/32")
Plate thickness plus 7.0 mm to 10 mm (plus 9/32" to 13/32")
60 mm (2 3/8")
Speaker stand (not included)
■ Reattaching the front speaker cable
(Except PT760)

Cable connections
Turn off all equipment before connection and read the appropriate operating instructions.
Do not connect the AC power supply or cord until all other connections are complete.
![graph LR A["Main unit"] --> B["1 Device"] A --> C["2 Device"] B --> D["Wireless System"] C --> D D --> E["Main unit"]](/content/2026/06/1304657/images/20d2ee4e5e5e38195419db9ae417274c7cf80f74e600962a9ed7176517b3967e.jpg)
1 Audio and video connections
Basic setup example![graph TD A["Main unit"] --> B["Video cable (included)"] B --> C["Audio cable (not included)"] C --> D["Cable TV box or video cassette recorder (not included)"] E["TV (not included)"] --> F["RF IN"] E --> G["RF OUT"] H["To your cable TV service or TV antenna"] --> I["RF IN"] I --> J["RF OUT"] K["TV (…](/content/2026/06/1304657/images/8948091ff470266794d572d25737ec0bb77ce7139351275858a7bc80202a1908.jpg)
Other video connections for improved picture quality
| TV terminal | Cable required(not included) | Main unit terminal Features | |
 | HDMI cable NoteNon-HDMI-compliant cables cannot be utilized.It is recommended that you use Panasonic's HDMI cable.Recommended part number:RP-CDHG15 (1.5 m/4.9 ft),RP-CDHG30 (3.0 m/9.8 ft),RP-CDHG50 (5.0 m/16.4 ft), etc. NoteNon-HDMI-compliant cables cannot be utilized.It is recommended that you use Panasonic's HDMI cable.Recommended part number:RP-CDHG15 (1.5 m/4.9 ft),RP-CDHG30 (3.0 m/9.8 ft),RP-CDHG50 (5.0 m/16.4 ft), etc. | HDMI | This connection provides the best picture quality.Set “VIDEO PRIORITY” to “ON” (→ 24, “HDMI” menu).Set “VIDEO FORMAT” in Menu 4 (HDMI) (→ 21).VIERA Link “HDAVI Control”If your Panasonic TV is an HDMI control compatible, you can operate your TV synchronizing with home theater operations or vice versa (→ 26, Using the VIERA LinkTM“HDAVI ControlTM”).Make the audio connection (→ above) when you use VIERA Link “HDAVI Control” function. |
 All Panasonic televisions that have 480p input connectors are compatible. Consult the manufacturer if you have another brand of TV. All Panasonic televisions that have 480p input connectors are compatible. Consult the manufacturer if you have another brand of TV. | Video cables | COMPONENT VIDEO Connect to terminals of the same color. Connect to terminals of the same color. | This connection provides a much purer picture than the VIDEO OUT terminal.After making this connection, select “DARKER” from the “BLACK LEVEL” in the “VIDEO” menu (→ 23).To enjoy progressive videoConnect to a progressive output compatible TV.- Set “VIDEO OUT (I/P)” in “VIDEO” menu to “PROGRESSIVE” and then follow the instructions on the menu screen (→ 23, “VIDEO” menu). |
Note
- Do not make the video connections through the video cassette recorder.
Due to copy guard protection, the picture may not be displayed properly.
- Only one video connection is required. Choose one of the video connections above depending on your TV.
Other audio connection
| TV terminal | Cable required (not included) | Main unit terminal Features | |
 OPTICAL OUT OPTICAL OUT | Optical digital audio cableDo not bend sharply when connecting. | OPTICAL IN | This unit can decode the surround signals received through cable TV box, digital broadcasting or satellite broadcasts. Refer to your equipment's operating instructions for details. Only Dolby Digital and PCM can be played with this connection.After making this connection, make settings to suit the type of audio from your digital equipment (→30). |
2 Speaker connections
DO NOT

- Be careful not to cross (short circuit) or reverse the polarity of the speaker wires as doing so may damage the speakers.
Connecting the speakers to the main unit:
Connect to terminals of the same color.
| Speaker Terminal/connector color | |
| 1 FRONT (L) White | |
| 2 FRONT (R) Red | |
| 5 CENTER Green | |
| 6 SUBWOOFER Purple | |
![graph TD A["Main unit"] --> B["Speaker cable sticker (included)"] B --> C["Center speaker"] C --> D["Wireless system"] D --> E["Insert the wires correctly."] D --> F["Insert the wires, taking care not to insert beyond the wire insulation."] B --> G["Insert fully."] G --> H["+ White - Blue Push!"] H…](/content/2026/06/1304657/images/424204b477cbdf7b46579b6b82949c458d98431d4e5f774efe33266b4dd9675a.jpg)
(Continued on next page)

Cable connections

3 Radio antenna connections
- Keep loose antenna cables away from other wires and cables.
FM indoor antenna
(included)
Affix this end of the antenna where reception is best.
![graph LR A["Adhesive tape"] --> B["Click!"] B --> C["Black"] B --> D["White"] C --> E["AM ANT"] D --> F["FM ANT (75Ω)"] E --> G["Main unit"] F --> G G --> H["Push!"] style A fill:#f9f,stroke:#333 style H fill:#ccf,stroke:#333](/content/2026/06/1304657/images/3f4a56301424eac4b2272fd8fa205d3c849d40110e1d415f500a0b69886fe1e6.jpg)
Using an FM/AM outdoor antenna (optional)
Use outdoor antenna if FM/AM radio reception is poor.
- Disconnect the antenna when the unit is not in use.
- Do not use the outdoor antenna during an electrical storm.
FM outdoor antenna
[Using a TV antenna (not included)]
- The antenna should be installed by a competent technician.
75 Ω coaxial cable (not included) Antenna plug (not included)![PANASONIC SC-PT760 - [Using a TV antenna (not included)] - 1](/content/2026/06/1304657/images/e3127e6eae4e78fe42ad5e11d050f4ee2190c77528a28e006b13028763a43625.jpg)
AM outdoor antenna
[Using a vinyl wire (not included)]
Run a piece of vinyl wire horizontally across a window or other convenient location.

* Rework your outdoor antenna's 75 Ω coaxial cable as follows.
① Remove a piece of the outer vinyl insulator.
② Carefully pull the tabs apart to remove the cover.

③ Install the coaxial cable.
Clamp the cable conductor, and wind it on so that it does not contact anything else.
④ Attach the cover.
4) Digital transmitter connection

Do not insert or remove while the main unit is on.
5) AC cord connections

Conserving power
The main unit and the wireless system consume a small amount of power when they are turned off (main unit: approx. 0.3 W, wireless system: approx. 0.2 W). To save power when they are not to be used for a long time, unplug them from the household AC outlet.
You will need to reset some memory items after plugging in the main unit.
6) Preparing the remote control
Batteries

CAUTION
Danger of explosion if battery is incorrectly replaced. Replace only with the same or equivalent type recommended by the manufacturer. Dispose of used batteries according to the manufacturer's instructions.
- Do not heat or expose to flame.
- Do not leave the battery(ies) in an automobile exposed to direct sunlight for a long period of time with doors and windows closed.
Note
The included AC power supply cords are for use with the main unit and wireless system only. Do not use them with other equipment. Also, do not use cords for other equipment with the main unit or wireless system.
Do not:
• mix old and new batteries. • use different types at the same time. • take apart or short circuit. • attempt to recharge alkaline or manganese batteries. • use batteries if the covering has been peeled off.
Mishandling of batteries can cause electrolyte leakage which can severely damage the remote control.
Remove the batteries if the remote control is not going to be used for a long period of time. Store in a cool, dark place.
Use
Aim at the remote control signal sensor (→ 15), avoiding obstacles, at a maximum range of 7.0 m (23 ft) directly in front of the unit.

Performing QUICK SETUP
The QUICK SETUP screen assists you to make necessary settings.

Preparation
Turn on your TV and select the appropriate video input mode (e.g. VIDEO 1, AV 1, HDMI, etc.).
- To change your TV's video input mode, refer to its operating instructions.
- This remote control can perform some basic TV operations (→ 14).

1

2

3

Turn on the unit.
Select "DVD/CD".
Show the setup menu.

4

Select "OTHERS".
5

Select "QUICK SETUP".
6

Select "SET".
7

Select "Yes".

8

Follow the messages and make the settings.
- MENU LANGUAGE •TV TYPE •TV ASPECT
To return to the previous screen, press [RETURN].
9

Finish QUICK SETUP.
10

Exit.
■ Details of settings
| MENU LANGUAGEChoose the language for the on-screen messages. | • ENGLISH • FRANÇAIS • ESPAÑOL | |
| TV TYPESelect to suit the type of TV. | • STANDARD • PROJECTION • PLASMA | • CRT • LCD |
| TV ASPECTChoose the setting to suit your TV and preference. | • 4:3PAN&SCAN • 16:9NORMAL | • 4:3LETTERBOX • 4:3ZOOM • 16:9SHRINK • 16:9ZOOM |
- Underlined items are the factory settings in the above table.


Presetting stations automatically
Up to 30 stations can be set in each band, FM and AM.
1

2

(press and hold)
Select "FM" or "AM".
- Main unit:
Press [SELECTOR].
Release the button when
"FM AUTO" or "AM AUTO" is displayed. e.g.

- Main unit:
Press and hold [MEMORY].
The tuner tunes to the lowest frequency and starts to preset all the stations it can receive into the channels in ascending order.
- "SET OK" is displayed when the stations are set, and the radio tunes to the last preset station.
- "ERROR" is displayed when automatic presetting is unsuccessful. Preset the channels manually (→ 29).
Confirming the preset channels
1

Select "FM" or "AM".
- Main unit: Press [SELECTOR].
2

Select the channel.
• To select a 2-digit number e.g. 12: [≥10] → [1] → [2]

Alternatively, press [v, ∧].
- Main unit: Press [-TUNE MODE] to select "PRESET" on the display, and then press [√ TUNE ∧] to select the channel.
When a stereo FM broadcast is being received, "ST" lights in the display.

- The FM/AM setting is also shown on the TV display.
■ If noise is excessive
When "FM" is selected
Press and hold [-PLAY MODE] (main unit: [—FM MODE]) to display "MONO".

Press and hold the button again to cancel the mode.
- The mode is also canceled when you change the frequency.
When "AM" is selected
Press [FUNCTIONS] on the remote control.
Each time you press the button: BP 2←→BP 1

Ⓐ [DVD]: Select disc as the source (→ 12): DVD/CD
[FM/AM]: Select FM/AM tuner (→ 13, 29)
[>, < SELECT]: Select FM/AM tuner or external audio as the source (→ 30)

The below function is available only when using the optional Panasonic wireless sound system SH-FX85.
[—2ND SELECT]: Press and hold the button to change the source for the second room;
MAIN SOURCE (follows the selected source for the main room)→(FM→AM)→IPOD→Return to MAIN SOURCE
* If the main room is in FM/AM mode, you can only select the same mode for the FM/AM tuner of the second room.
For details, refer to the operating instructions for the optional Panasonic wireless sound system SH-FX85.
Avoiding interference with other Panasonic equipment
Other Panasonic audio/video equipment may start functioning when you operate the unit using the supplied remote control.
You can operate this unit in another mode by setting the remote control operating mode to "REMOTE 2".
The main unit and remote control must be set to the same mode.
1 Press and hold [▶▶/▶▶] on the main unit and [2] on the remote control until the main unit's display shows "REMOTE 2".
2 Press and hold [OK] and [2] on the remote control for at least 2 seconds.
To change the mode back to "REMOTE 1", repeat both steps above by replacing [2] with [1].
① Turn the main unit on/off (→ 12) ② Select channels and title numbers etc. / Enter numbers (→ 13, 17) ③ Select a disc / Play all loaded CDs sequentially (→ 17, 18)
④ Select preset radio stations (→ 29)
⑤ Basic operations for play (→ 16, 17)
⑥ Show setup menu (→ 12)
⑦ Show a disc top menu or program list (→ 17, 19)
⑧ Select or confirm menu items / Frame-by-frame (→ 17)
⑨ Show a disc menu or play list (→ 17, 19)
⑩ Select sound mode (→ 28)
⑪ Turn Dolby Pro Logic II on/off (→ 28)
⑫ Cancel (→ 18)
⑬ Turn Whisper-mode Surround on/off (→ 28) or
Set the Sleep timer
Press and hold [—SLEEP].
While the time is shown on the main unit's display, press [—SLEEP] repeatedly.
SLEEP 30→SLEEP 60→SLEEP 90→SLEEP120 OFF (Cancel)
- To confirm the remaining time, press and hold the button again.
⑭ TV operations
Aim the remote control at the Panasonic TV and press the button. [⏻] TV: Turn the TV on/off
[TV/VIDEO]: Change the TV's video input mode. [+, -]: Adjust the TV volume.
This may not work properly with some models.
⑮ Select iPod as the source (→ 30)
⑯ Adjust the volume of the main unit
⑰ Select radio stations manually (→ 29)
⑱ Start up and play a disc automatically (→ 17, 26)
⑲ Show START menu (→ 15)
⑳ Show on-screen menu (→ 20)
②1 Return to previous screen (→ 17)
②2 Switch information on the main unit's display (→ 17)
②3 Select the play mode / Set the repeat mode (→ 18)
⑳ Mute the sound
- "MUTING" flashes on the main unit's display while the function is on.
- To cancel, press the button again or adjust the volume.
- Muting is canceled when you switch the unit to standby.
⑲ Adjust the subwoofer level or select speaker channel (→ 29)
AUTO OPERATION ON/OFF indicator
The indicator lights red when the wireless system is turned on and lights green when the wireless link is activated.
When the wireless link is inactive for a long time, it turns red.
Unit on/off button
[POWER ■ I, ■ ⏻]
Use this button to turn the wireless system on and off.
I: This unit is on. ■ ⏻: This unit is off.


① Standby/on switch [POWER ⏻/I]
Press to switch the unit from on to standby mode or vice versa. In standby mode, the unit is still consuming a small amount of power. (→ 16)
② 5 DISC SELECTOR
Select a disc directly (→ 16)
③ Disc exchange
Open the disc tray to exchange the disc. (→ 16)
④ Open/Close the disc tray (→ 16)
⑤ Turn Subwoofer Boost on/off (→ 29)
⑥ Select the source
DVD/CD→FM→AM→AUX→D-IN→IPOD
⑦ Skip or slow-search play / Select the radio stations (→ 13, 16)
⑧ Stop playing / Select the tuning mode / Adjust the FM reception condition (→ 13, 16)
⑨ Play discs / Memorize the receiving radio stations (→ 16, 29)
⑩ Connect iPod (→ 30)
⑪ Remote control signal sensor
⑫ Display
⑬ Adjust the volume of the main unit
⑭ PT960 PT1054 Jog LED
Lights when the unit is turned on.
⑮ Connect headphones (not included)
Headphone plug type: ∅3.5 mm (1/8") stereo mini plug
- Reduce the volume before connecting.
- Audio is automatically switched to 2-channel stereo.
- To prevent hearing damage, avoid listening for prolonged periods of time.
Utilizing the START menu
You can select desired source or access playback/menus by using the START menu.

Show the START menu.
e.g.
Select an item.
• To exit press [START].
When "Input select" is selected
You can select a desired source from the menu.
- DVD/CD (→ 12), FM (→ 13), AM (→ 13), AUX* (→ 30), DIGITAL IN* (→ 30), iPod (→ 30) * "(TV)" will appear beside "AUX" or "DIGITAL IN", indicating the TV audio setting for VIERA Link "HDAVI Control" (→ 26).
Press [▲, ▼], then press [OK] to make the settings.
When a disc is loaded, you can also access playback or menus from the START menu.
e.g. DVD-V
When the on-screen control panel appears
e.g. DVD-V (when "Playback Disc" is selected from the START menu)

You can operate the playback with the indicated controls.
Basic play
Preparation
To display the picture, turn on your TV and change its video input mode.
Basic play
![graph TD A["1 POWER ω/1"] --> B["2 SELECTOR Select "DVD/CD".Turn on the unit."] B --> C["3 ▲ OPEN/CLOSE Open all the disc trays.<br>To select a desired tray (→ below, Selecting the desired tray).<br>Press [▲OPEN/CLOSE"] again to close all the disc trays.] C --> D["4 Load the disc.<br>Load…](/content/2026/06/1304657/images/40659adc74a6d639c11fd4dc253223aed47a9e8d0bf7d7f7ece2c8dc0f0800a1.jpg)
![graph TD A["Selecting the desired tray"] --> B["5 DISC SELECTOR"] B --> C["OPEN/CLOSE"] C --> D["Press [▲OPEN/CLOSE"] again to close the tray.] E["Change discs without interrupting playback"] --> F["During play, EXCHANGE"] F --> G["All trays are opened (except the tray that the disc is playing)."] F…](/content/2026/06/1304657/images/6f5a74d4758d127fb0afcda2952571f16f76f6b13306ecbe93509f68326f17c9.jpg)
BQTX0105
Note
- DISC CONTINUES TO ROTATE WHILE MENUS ARE DISPLAYED. To preserve the unit's motor and your TV screen, press [■] (Stop) when you are finished with the menus.
- Total title number may not be displayed properly on +R/+RW.
Using the remote control

| One touch play | ONE TOUCH PLAY | The main unit automatically turns on and starts playing the disc in the tray. |
| Stop | The position is memorized while "RESUME STOP" is on the screen. • Press [▶ PLAY] to resume. • Press [■ STOP] again to clear the position. | |
| Pause | • Press [▶ PLAY] to restart play. | |
| Skip | — | |
| Search (during play) | SLOW/ SEARCH | • Up to 5 steps. • Press [▶ PLAY] to start normal play. • VCD Slow-motion: Forward direction only. |
| Slow-motion (during pause) | ||
| Frame-by-frame (during pause) | DVD-VR DVD-V VCD • DVD-VR VCD Forward direction only. | |
| On-screen item select | Select Confirm | — |
![Selecting a disc DISC Select OK Confirm or 1 2 3 4 5° Disc information screen is displayed. • To exit the screen, press [DISC]. e.g. DVD-V DISC CHANGE • DVD-VIDEO1 • 2 CD • 3 DATA-DISC • 4 UNCHECKED • 5 NO DISC Not yet readEmpty tray](/content/2026/06/1304657/images/a013799a89a611454516942aff8785b1f620e329705f96009337d54deb34aec1.jpg)
![Enter number 1 2 3 4 5° 6 7 89 0 ≧10 DVD-VR DVD-V VCD CD e.g. To select 12: [≥10] → [1] → [2] VCD with playback control Press [■ STOP] to cancel the PBO function, and then press the numbered buttons.](/content/2026/06/1304657/images/e8c16dc44cb5b72422ec003d320daf9479a4fe4515a3a02ec5b290612776b808.jpg)
| Disc menu | |DVD-V Shows a disc top menu. |DVD-VR Press the button to show the programs (→ 19). | |
| MENU PLAY LIST | |DVD-V Shows a disc menu. |DVD-VR Press the button to show a play list (→ 19). | |
| RETURN | |VCD with playback control Shows a disc menu. |
| Return to previous screen | RETURN | - |
| Main unit display | FL DISPLAY | DVD-VR DVD-V WMA MP3 Time display ↔ Information display (e.g. DVD-VR Program number) JPEG SLIDE↔Contents number |

Other playback functions

Playing CDs sequentially (CD Mode)
VCD CD WMA MP3
This feature allows you to play all loaded CDs sequentially. Select an applicable disc before playing (→ 17, Selecting a disc).
While stopped

- If all loaded discs are DVDs, CD Mode does not work. • Video CD playback control is disabled.
- You cannot turn CD Mode on or off during program or random mode.
- If you want to play a DVD, press and hold [—CD MODE] again while stopped to cancel CD Mode. (CD Mode is also canceled when you switch the unit to standby, select another source, or when the disc tray is opened.)
Repeat play
This works only when the elapsed play time can be displayed. It also works with all JPEG content.
1 During play, show the repeat mode.
2 While the repeat mode is displayed
Select an item to be repeated. - To cancel, select "OFF".
Items shown differ depending on the type of disc and playback mode.
Program and Random play
To enjoy program or random play with:
- 1 disc: ensure CD Mode (→ above) is off – all discs: ensure CD Mode is on
While stopped, select the play mode.
Program and random playback screens appear sequentially.

- |DVD-VR| Select "DATA" in "DVD-VR/DATA" (→ 24, "OTHERS" menu) to play WMA, MP3 or JPEG contents.
- DVD-V Some items cannot be played even if you have programmed them.
Program play (up to 30 items)
■ 1-Disc program
DVD-V VCD CD WMA MP3 JPEG You can program all the items on a disc in the selected tray.
1
Select an item.
e.g. DVD-V
- Repeat this step to program other items.
- To return to the previous menu, press [RETURN].
2
Start play.
■ All-Disc program (when CD Mode is on)
VCD CD You can program all the items on all the discs.
① Press [▲, ▼], and then press [OK] to select the disc. ② Press [▲, ▼], and then press [OK] to select the track. ③ Repeat steps ① and ② to program other items. - To return to the previous menu, press [RETURN]. ④ Press [▶ PLAY].
To select all the items
Press [▲, ▼] to select "ALL" and press [OK].
To clear the selected program
1 Press [▶] and then press [▲, ▼] to select the program. 2 Press [CANCEL].
To clear the whole program
Press [▶] several times to select "CLEAR ALL", and then press [OK]. The whole program is also cleared when the disc tray is opened, the unit is turned off, or another source is selected.
Random play
1-Disc random
VCD CD You can play back all the items on a disc in the selected tray in random order. DVD-V WMA MP3 JPEG You can play back selected item(s) on a disc in the selected tray in random order.
1

(Only when the disc has groups or multiple titles.)
Select a group or title.
- "*" represents selected. To deselect, press [OK] again.
e.g. DVD-V
2
Start play.
■ All-Disc random (when CD Mode is on)
VCD | CD | You can play back all the items on all the discs in random order.
e.g. CD
Press [▶ PLAY].
ALL DISC RANDOM
PRESS PLAY TO START


Using navigation menus

Playing data discs
WMA MP3 JPEG
DVD-VR Select "DATA" in "DVD-VR/DATA" (→ 24, "OTHERS" menu) to play WMA, MP3 or JPEG contents.
Playing from the selected item
You can select to play from your desired item while the "DATA-DISC" screen is displayed.
e.g.
Group (Folder):

Content (File):


• To display/exit the screen, press [MENU].

Select an item.
- To return to the previous screen, press [RETURN]. • Maximum: 12 characters for file/folder name.
Play starts from the selected content.
■ Selecting the picture in Thumbnail menu JPEG
1 While picture is displayed


Select a picture. - Press [◀◀, ▶▶| SKIP] to skip page by page.
To go to other group
1 Press [▲] to select the group name. 2 Press [◀, ▶] to select the group and press [OK].
Playing RAM and DVD-R/-RW (DVD-VR) discs DVD-VR
- Titles appear only if the titles are recorded on the disc.
- You cannot edit programs, play lists and disc titles.
Playing the programs
1 While stopped

e.g.

- To exit the screen, press [DIRECT NAVIGATOR].

Select the program.
- Press [◀, ▶] to skip page by page.
Playing a play list
This works only when the disc contains a play list.
1 While stopped

e.g.

• To exit the screen, press [PLAY LIST].

Select the play list.
- Press [◀, ▶] to skip page by page.


| 1 | Show the on-screen menu. Each time you press the button: Menu 1 (Disc/Play) Menu 2 (Video) Menu 3 (Audio) Menu 4 (HDMI) Exit e.g. Menu 1 (Disc/Play) DVD-V Current item T C1 1:ENG OFF TITLE SEARCH Item name |
| 2 | Select the item. e.g. Menu 1 (Disc/Play) DVD-V Current setting T1 C 1:ENG OFF CHAPTER SEARCH |
| 3 | Make the settings. |
| 4 | Exit. |
Items shown differ depending on the type of disc.
■ Menu 1 (Disc/Play)
| TRACK SEARCHTITLE SEARCHCONTENT SEARCHCHAPTER SEARCHPG SEARCH(Program Search)PL SEARCH(Playlist Search) | To start from a specific item• |VCD This does not work when using playback control.e.g. [DVD-V] : T2 C5To select numbers for data disce.g. 123: [≥10] → [1] → [2] → [3] → [OK] |
| AUDIO | DVD-V (with multiple soundtracks)To select audio soundtrackDVD-VR VCDTo select “L”, “R”, “L+R” or “L R”DVD-V (Karaoke disc)To select “ON” or “OFF” for vocalsTo select “OFF”, “V1”, “V2” or “V1+V2” for vocal selectionsActual operations depend on the disc. Read the disc’s instructions for details.Signal type/dataLPCM/PPCM/DOD/DTS/MP3/MPEG: Signal type kHz (Sampling frequency)/bit/ch (Number of channels)e.g. 3/2 .1ch.1: Low frequency effect(not displayed if there is no signal)0: No surround1: Mono surround2: Stereo surround (left/right)1: Center2: Front left+Front right3: Front left+Front right+Center |
| PLAY SPEED | DVD-VR DVD-VTo change play speed– from “×0.6” to “×1.4” (in 0.1-unit steps)Press [▶ PLAY] to return to normal play.After you change the speed– Dolby Pro Logic II has no effect.– Audio output switches to 2-channel stereo.– Sampling frequency of 96 kHz is converted to 48 kHz.This function may not work depending on the disc’s recording. |
| REPEAT MODE | (→ 18, Repeat play)A-B Repeat (To repeat a specified section)Except JPEG DVD-VR (Still picture part)VCD (SVCD)Press [OK] at the starting and ending points.Select “OFF” to cancel. |
| SUBTITLE | DVD-V (with multiple subtitles)VCD (SVCD only)To select subtitle languageOn +R/+RW, a subtitle number may be shown for subtitles that are not displayed.DVD-VR (with subtitle on/off information)To select “ON” or “OFF”This may not work depending on the disc. |
| ANGLE | DVD-V (with multiple angles)To select a video angle |
| JPG DATE DATE DISPLAY | JPEG To select “ON” or “OFF” for picture’s date display |
| ROTATION | To rotate a picture (during pause) JPEG : 0←→90←→180←→270 ↑ |
Menu 2 (Video)
| PICTURE MODE | NORMALCINEMA1: Mellows images and enhances detail in dark scenes.CINEMA2: Sharpens images and enhances detail in dark scenes.DYNAMIC: Enhances the contrast for powerful images.ANIMATION: Suitable for animation. |
| ZOOM | To select zoom sizesNORMAL, AUTO, ×2, ×4 |
| TRANSFER MODE | If you have chosen “480p”/“720p”/“1080p” (progressive), “1080i” (interlaced) [“VIDEO FORMAT” in Menu 4 (HDMI)] or “PROGRESSIVE” under “VIDEO OUT (I/P)” (→ 23, “VIDEO” menu), select the method of conversion for progressive output to suit the type of material.The setting will return to “AUTO1” when the disc tray is opened, the unit is turned off or another source is selected.AUTO1: Automatically detects the film and video content, and appropriately converts it.AUTO2: In addition to “AUTO1”, automatically detects film contents with different frame rates and appropriately converts itVIDEO: Select when using “AUTO1” or “AUTO2”, and the content is distorted. |
Menu 3 (Audio)
| DIALOGUE ENHANCER | To make the dialogue in movies easier to hearDVD-V(Dolby Digital, DTS, 3-channel or higher, with the dialogue recorded in the center channel)OFF, ON |
| DOPLIIDolby PL II | OFF, MOVIE, MUSIC(→28, Using Dolby Pro Logic II) |
Menu 4 (HDMI)
| HDMI HDMI STATUS | To show HDMI information. (→ below, Confirming HDMI information) |
| HD ENHANCER | This works when the HDMI connection is being used with “VIDEO PRIORITY” (→ 24, “HDMI” menu) set to “ON”.To sharpen the “720p”, “1080i” and “1080p” picture qualityOFF, 1 (weakest) to 3 (strongest) |
| VIDEO FORMAT | This works when the HDMI connection is being used with “VIDEO PRIORITY” (→ 24, “HDMI” menu) set to “ON”.To select suitable picture quality with your TV (Video recordings will be converted to, and output as, high-definition video.)*480p/720p/1080p (progressive)*480i/1080i (interlaced)If the picture is distorted, press and hold [CANCEL] until the picture is displayed correctly. (The output will return to “480p”).* The numbers displayed depend on the disc being played. One of the above numbers is displayed. |
| COLOR SPACE | This works when the HDMI connection is being used with “VIDEO PRIORITY” (→ 24, “HDMI” menu) set to “ON”.To select suitable picture color with your TV YCbCr (4:2:2)*– Luminance and color details is sent separately. Most of the picture details are in luminance. The color rate is much higher than composite video. Compatible for all TV models. YCbCr (4:4:4)*– All color details is sent. Luminance and color details are in same signal.RGB– Component video type of signal.If the setting above is not compatible with your TV, it will not be displayed.* Terms are descriptions of the sample formats used in digital video. YCbCr is a video signal for luminance (Y), blue ( Co ) and red ( Cr ) details. |
Confirming HDMI information
e.g.

① Connection status ② Shows the output signal type. ③ Shows the number of audio channels. ④ (→ above, VIDEO FORMAT) ⑤ (→ above, COLOR SPACE)
Note
When "OFF" is selected in "AUDIO OUT" (→ 24, "HDMI" menu), "-- -" will be displayed in "AUDIO STREAM".

Changing the player settings

- The settings remain intact even if you switch the unit to standby.
- Underlined items are the factory settings in the following table.

QUICK SETUP enables successive settings of the items in the shaded area.
■ "DISC" menu
| AUDIOChoose the audio language. | ENGLISHFRENCHSPANISHORIGINAL *1 OTHER - - - *2 |
| SUBTITLEChoose the subtitle language. | AUTOENGLISHFRENCHSPANISHOTHER - - - *2 |
| MENUSChoose the language for disc menus.Changing the menu language in QUICK SETUP also changes this setting. | ENGLISHFRENCHSPANISHOTHER - - - *2 |
| RATINGSSet a rating level to limit DVD-Video play. | Setting ratings (When level 8 is selected)0 LOCK ALL: To prevent play of discs without rating levels.1 to 78 NO LIMITWhen you select your ratings level, a password screen is shown.Follow the on-screen instructions.Do not forget your password.A message screen will be shown if a DVD-Video disc exceeding the rating level is inserted in the unit.Follow the on-screen instructions. |
| PASSWORDChange the password for “RATINGS”. | SETTINGTo change ratings (When level 0 to 7 is selected)CHANGE: Follow the on-screen instructions. |
^x1 The original language designated on the disc is selected.
^2 Input the appropriate code from the language code list (→ 25).
If the language selected for “AUDIO” is not available, subtitles appear in that language (if available on the disc).
QUICK SETUP enables successive settings of the items in the shaded area.
"VIDEO" menu
| TV ASPECTChoose the setting to suit your TV and preference. | 4:3PAN&SCAN: Regular aspect TV (4:3)The sides of the widescreen picture are cut off so it fills the screen (unless prohibited by the disc). |  |
| 4:3LETTERBOX: Regular aspect TV (4:3)Widescreen picture is shown in the letterbox style. |  | |
| 4:3ZOOM: Regular aspect TV (4:3)The picture zooms in and out. | ||
| 16:9NORMAL: Widescreen TV (16:9)Laterally stretches image. | ||
| 16:9SHRINK: Widescreen TV (16:9)Images appear at the center of the screen. | ||
| 16:9ZOOM: Widescreen TV (16:9)Expands to 4:3 aspect ratio. | ||
| TV TYPESelect to suit the type of TV. | STANDARD•CRTC•LCDPROJECTION•PLASMA | |
| TIME DELAYWhen connected with a Plasma display, adjust if you notice the audio is out of sync with the video. | 0 ms/AUTO•20 ms•40 ms•60 ms•80 ms•100 msWhen using VIERA Link “HDAVI Control” with “HDAVI Control 3” compatible TV (→26), select “0 ms/AUTO”.Audio and video will automatically be set in sync. (This works only when “DVD/CD” is selected as the source.) | |
| STILL MODESpecify the type of picture shown when paused. | AUTOFIELD: The picture is not blurred, but picture quality is lower.FRAME: Overall quality is high, but the picture may appear blurred. | |
| BLACK LEVELChange the black level of the picture. | LIGHTERDARKER | |
| VIDEO OUT (I/P)Select “PROGRESSIVE” only if connecting to a progressive output compatible TV. | INTERLACEPROGRESSIVE: A message screen will appear. Follow the on-screen instructions. | |
"AUDIO" menu
| DOLBY DIGITAL*5 | BITSTREAMPCM | Select to suit the type of equipment you connected to the HDMI AV OUT terminal. |
| DTS*5 | BITSTREAMPCM | Select “BITSTREAM” when the equipment can decode the bitstream (digital form of 5.1 channel data). Otherwise, select “PCM”.(If the bitstream is output to the equipment without a decoder, high levels of noise can be output and may damage your speakers and hearing.) |
| DYNAMIC RANGE | ON: Adjusts for clarity even when the volume is low. Convenient for late night viewing. (Only works with Dolby Digital)OFF | |
| SPEAKER SETTINGSMake settings for your speakers. | SETTINGS:C DELAY:0ms4ms, 2ms, 3ms, 4ms, 5msSelect the delay time for your center speaker (→25, Selecting the delay time of the speakers).SL/SR DELAY:0ms5ms, 10ms, 15msSelect the delay time for your surround speakers (→25, Selecting the delay time of the speakers).TEST TONE: SETTINGUse the test tone for speaker level adjustments (→29, Adjusting the speaker level).CENTER, SURROUND RIGHT, SURROUND LEFT: -6 dB to +6 dB (Factory preset: 0 dB) | |
*4 Refer to "Frame still and field still" (→ 37, Glossary). *5 When audio is output from HDMI AV OUT terminal, and the connected equipment does not support the item selected, the actual output will depend on the performance of this connected equipment.
(Continued on next page)
QUICK SETUP enables successive settings of the items in the shaded area.
■ "DISPLAY" menu
| LANGUAGEChoose the language for the on-screen messages. | • ENGLISH • FRANÇAIS • ESPAÑOL |
■ "HDMI" menu
| VIDEO PRIORITY | ●ON: When using the HDMI AV OUT terminal for video output. The resolution of the video output from the HDMI AV OUT terminal is optimized according to the capability of the connected equipment (e.g. TV).●OFF: When not using the HDMI AV OUT terminal for video output. Video output will not depend on the connected equipment, but on this unit. |
| AUDIO OUT | ●ON: When audio output is from the HDMI AV OUT terminal. (Depending on the capabilities of the connected equipment, audio output may differ from the audio settings of the main unit.)●OFF: When audio output is not from the HDMI AV OUT terminal. (The audio is output using the settings of the main unit.) |
| RGB RANGETHis works only when “COLOR SPACE” in Menu 4 (HDMI) is set to RGB (→21). | ●STANDARD●ENHANCED: When the black and white images are not distinct. |
| VIERA Link | ●ON: Th¶IERA Link “HDAVI Control” function is available (→26).●OFF |
■ "OTHERS" menu
| JPEG TIMESet the speed of the slideshow.Factory preset:3 SEC | 1 SEC to 15 SEC (in 1-unit steps)15 SEC to 60 SEC (in 5-unit steps)60 SEC to 180 SEC (in 30-unit steps) |
| FL DIMMERChange the brightness of the unit's display. | BRIGHTDIMAUTO: The display is dimmed, but brightens when you perform some operations. |
| QUICK SETUP | SETFollow the on-screen instructions. |
| DVD-VR/DATASelect to play only DVD-VR or DATA format. | DVD-VRTo play the video programs on DVD-RAM or DVD-R/-RW.DATA: To play the data files on DVD-RAM or DVD-R/-RW. |
| DEFAULTSThis returns all values in the MAIN menu to the default settings. | RESETThe password screen is shown if “RATINGS” (→22) is set. Please enter the same password, then turn the unit off and on again. |
Selecting the delay time of the speakers
(Effective when playing 5.1-channel sound)
(Center and surround speakers only)
For optimum listening with 5.1-channel sound, all the speakers, except for the subwoofer, should be the same distance from the seating position. If you have to place the center or surround speakers closer to the seating position, adjust the delay time to make up for the difference.


: Actual speaker position

Ideal speaker position

Primary listening distance
Approximate room dimensions
Circle of constant primary listening distance
If either distance ⓐ or ⓑ is less than ⓒ, find the difference in the table and change to the recommended setting.
| a Center speaker b Surround speaker | |||
| Difference (Approx.) | Setting | Difference (Approx.) | Setting |
| 30 cm (1 foot) 1ms | 150 cm (5 feet) 5ms | ||
| 60 cm (2 feet) 2ms | 300 cm (10 feet) 10ms | ||
| 90 cm (3 feet) 3ms | 450 cm (15 feet) 15ms | ||
| 120 cm (4 feet) 4ms | |||
| 150 cm (5 feet) 5ms | |||
To make the delay time settings
Select "C DELAY" (Center Delay) or "SL/SR DELAY" (Surround Left/ Surround Right Delay) from "SPEAKER SETTINGS" in "AUDIO" menu (→ 23).
Language code list
| Abkhazian: 6566 | Danish: | 6865 | Italian: | 7384 | Norwegian: 7879 | Swedish: | 8386 | ||
| Afar: 6565 | Dutch: | 7876 | Japanese: | 7465 | Oriya: | 7982 | Tagalog: | 8476 | |
| Afrikaans: 6570 | English: | 6978 | Javanese: 7487 | Pashto, Pushto: 8083 | Tajik: | 8471 | |||
| Albanian: 8381 | Esperanto: | 6979 | Kannada: | 7578 | Persian: | 7065 | Tamil: | 8465 | |
| Ameharic: 6577 | Estonian: 6984 | Kashmiri: 7583 | Polish: | 8076 | Tatar: | 8484 | |||
| Arabic: | 6582 | Faroese: | 7079 | Kazakh: | 7575 | Portuguese: | 8084 | Telugu: | 8469 |
| Armenian: | 7289 | Fiji: | 7074 | Kirghiz: | 7589 | Punjabi: | 8065 | Thai: | 8472 |
| Assamese: 6583 | Finnish: | 7073 | Korean: | 7579 | Quechua: | 8185 | Tibetan: | 6679 | |
| Aymara: | 6589 | French: | 7082 | Kurdish: | 7585 | Rhaeto-Romance: | 8277 | Tigrinya: | 8473 |
| Azerbaijani: | 6590 | Frisian: | 7089 | Laotian: | 7679 | Romanian: | 8279 | Tonga: | 8479 |
| Bashkir: | 6665 | Galician: | 7176 | Latin: | 7665 | Russian: | 8285 | Turkish: | 8482 |
| Basque: | 6985 | Georgian: 7565 | Latvian, Lettish: 7686 | Samoan: | 8377 | Turkmen: | 8475 | ||
| Bengali, Bangla: | 6678 | German: | 6869 | Lingala: | 7678 | Sanskrit: | 8365 | Twi: | 8487 |
| Bhutani: | 6890 | Greek: | 6976 | Lithuanian: | 7684 | Scots Gaelic: 7168 | Ukrainian: 8575 | ||
| Bihari: | 6672 | Greenlandic: | 7576 | Macedonian: | 7775 | Serbian: | 8382 | Urdu: | 8582 |
| Breton: | 6682 | Guarani: | 7178 | Malagasy: | 7771 | Serbo-Croatian: 8372 | Uzbek: | 8590 | |
| Bulgarian: 6671 | Gujarati: | 7185 | Malay: | 7783 | Shona: | 8378 | Vietnamese: 8673 | ||
| Burmese: | 7789 | Hausa: | 7265 | Malayalam: 7776 | Sindhi: | 8368 | Volapük: | 8679 | |
| Byelorussian: | 6669 | Hebrew: | 7387 | Maltese: | 7784 | Singhalese: | 8373 | Welsh: | 6789 |
| Cambodian: | 7577 | Hindi: | 7273 | Maori: | 7773 | Slovak: | 8375 | Wolof: | 8779 |
| Catalan: | 6765 | Hungarian: | 7285 | Marathi: | 7782 | Slovenian: | 8376 | Xhosa: | 8872 |
| Chinese: | 9072 | Icelandic: | 7383 | Moldavian: | 7779 | Somali: | 8379 | Yiddish: | 7473 |
| Corsican: | 6779 | Indonesian: | 7378 | Mongolian: | 7778 | Spanish: | 6983 | Yoruba: | 8979 |
| Croatian: | 7282 | Interlingua: 7365 | Nauru: | 7865 | Sundanese: | 8385 | Zulu: | 9085 | |
| Czech: | 6783 | Irish: | 7165 | Nepali: | 7869 | Swahili: | 8387 | ||


VIERA Link "HDAVI Control"
VIERA Link™ is a new name for EZ Sync™.
VIERA Link "HDAVI Control" is a convenient function that offers linked operations of this unit, and a Panasonic TV (VIERA) under "HDAVI Control". You can use this function by connecting the equipment with the HDMI cable. See the operating instructions for connected equipment for operational details.
- VIERA Link "HDAVI Control", based on the control functions provided by HDMI which is an industry standard known as HDMI CEC (Consumer Electronics Control), is a unique function that we have developed and added. As such, its operation with other manufacturers' equipment that supports HDMI CEC cannot be guaranteed.
- This unit supports "HDAVI Control 3" function.
"HDAVI Control 3" is the newest standard (current as of December, 2007) for Panasonic's HDAVI Control compatible equipment. This standard is compatible with Panasonic's conventional HDAVI equipment.
Please refer to individual manuals for other manufacturers' equipment supporting VIERA Link function.
The TV with "HDAVI Control 2 (or later)" function enables the following operation: VIERA Link Control only with TV's remote control [for "HDAVI Control 2 (or later)"] (→ 27).
Preparation
- Confirm that the HDMI connection has been made (→ 8).
- Set "VIERA Link" to "ON" (→ 24, "HDMI" menu).
- To complete and activate the connection correctly, turn on all VIERA Link "HDAVI Control" compatible equipment and set the TV to the corresponding HDMI input mode for this unit.
Setting the TV audio for VIERA Link "HDAVI Control"
Select between "AUX" and "D-IN" to work with the linked operations.
Confirm the audio connection to the AUX terminal (for "AUX") (→ 8) or OPTICAL IN terminal (for "D-IN") (→ 9).
1 Press [>, < SELECT] to select "AUX" or "D-IN".
2 Press [SETUP] to select "TV AUDIO", then press [▲, ▼] to switch "AUX" or "D-IN".
Whenever the connection or settings are changed, reconfirm the points above.
"AUX" or "D-IN" ("DIGITAL IN") works depending on the "TV AUDIO" setting (→ above, Setting the TV audio for VIERA Link "HDAVI Control").
■ Automatic setup
The settings for "TV ASPECT" 1 (→ 23, "VIDEO" menu) and "LANGUAGE" 2 (→ 24, "DISPLAY" menu) will automatically follow to the settings of the TV. (This may not work if the corresponding setting you have made for your TV is not available on this unit.)
* When using VIERA Link "HDAVI Control" with "HDAVI Control 3" compatible TV *2 When using VIERA Link "HDAVI Control" with "HDAVI Control 2 (or later)" compatible TV
One touch play
You can turn on this unit and the TV, and start playing the disc with a single press of a button.
ONE TOUCH PLAY
To start disc playback.
- This unit's speakers will be automatically activated (→ 27).
This function also works if you press [▶ PLAY] on this unit's remote control when this unit is in standby mode.
Note
Playback may not be immediately displayed on the TV. If you miss the beginning portion of playback, press [◀◀] or [◀◀] to go back to where playback started.
Auto input switching
- When you switch the TV input to TV tuner mode, this unit will automatically switch to "AUX" or "D-IN". (This does not work when this unit is in "IPOD" mode.)
- When you start disc play, the TV will automatically switch its input mode for this unit.
Power off link
When the TV is turned off, this unit goes into standby mode automatically.
- This function works only when "DVD/CD", "AUX" or "D-IN" is selected as the source on this unit.
- When the TV is turned on, this unit does not turn on automatically. (Power on link is not available.)
Note
When you press [⏻], only this unit turns off. Other connected equipment compatible with VIERA Link "HDAVI Control" stays on.
Speaker control VIERA Link Control only with
You can select whether audio is output from this unit's speakers or the TV speakers by using the TV menu settings. For details, refer to the operating instructions of your TV.
Home theater
This unit's speakers are active.
- When this unit is in standby mode, changing the TV speakers to this unit's speakers in the TV menu will automatically turn this unit on and select "AUX" or "D-IN" as the source.
- The TV speakers are automatically muted.
- You can control the volume setting using the volume or mute button on the TV's remote control. (The volume level is displayed on the main unit's FL display.)
- To cancel muting, you can also use this unit's remote control (→ 14).
- If you turn off this unit, TV speakers will be automatically activated.
TV
TV speakers are active.
- The volume of this unit is set to "0".
- This function works only when "DVD/CD", "AUX"* or "D-IN"* is selected as the source on this unit. • Audio output is 2-channel audio.
When switching between this unit speakers and TV speakers, the TV screen may be blank for several seconds.
/s remote
control [for "HDAVI Control 2 (or later)"]
You can control the playback menus of this unit with the TV's remote control. When operating the TV's remote control, refer to the below illustration for operation buttons.
1 Select this unit's operation menu by using the TV menu settings. (For details, refer to the operating instructions of your TV.)
The START menu will be shown.
e.g. DVD-V

- The START menu can also be shown by using a button on the TV's remote control (e.g. [SUB MENU]).
- When "DVD/CD" is selected as the source, this works only during stop mode.
- This does not work while iPod music playback screen is displayed on the TV.
2 Select the desired item on the START menu ( → 15).
When the on-screen control panel appears
e.g. DVD-V (when "Playback Disc" is selected from the START menu.)

You can operate the playback with the indicated controls.
- The on-screen control panel can also be shown by using a button on the TV's remote control (e.g. [SUB MENU]).
- This works only during "DVD/CD" playback and resume modes or, while iPod music playback screen is displayed on the TV.
Note
- Depending on the menu, some button operations cannot be performed from the TV's remote control.
- You cannot input numbers with the numbered buttons on the TV's remote control ([0] to [9]). Use this unit's remote control to select the play list etc.

Using sound effects

Note
- The following sound effects may not be available or have no effect with some sources, or when headphones are used (→ 15).
- You may experience a reduction in sound quality when these sound effects are used with some sources. If this occurs, turn the sound effects off.
Preparation
To display the picture, turn on the TV and select the appropriate video input mode.
Setting the sound effects
1

Select a sound mode.
Each time you press the button:
EQ: Equalizer
H.BASS PT960 PT1054: Harmonic Bass
R.C. FCS: Real Center Focus
SRD ENH: Surround Enhancer
S.MUSIC: Surround Music
2 While the selected mode is displayed

Make settings.
Refer to the followings for setting details of each sound effect.
Equalizer
You can select sound quality settings.
Each time you press [▲, ▼]:
HEAVY: Adds punch to rock.
CLEAR: Clarifies higher sounds.
SOFT: For background music.
FLAT: Cancel (no effect is added).
H.Bass PT960 PT1054
You can enhance low-frequency sound so that heavy bass sound can be heard clearly, even if the acoustics of your room are not optimal. The unit automatically selects the most suitable setting according to the type of playing source.
- The setting you make is retained, and recalled every time you play from the same type of source.
Real Center Focus
(Effective when playing audio containing center channel sound or when Dolby Pro Logic II is on.)
You can make the sound of the center speaker seem like it is coming from within the TV.
R.C.FCS ON←→R.C.FCS OFF
■ Surround Enhancer
Automatically adjusts each speaker to enhance the surround sound effect of 5.1-channel audio. When playing two-channel audio, the audio of the L/R front speakers is also output through the rest of the speakers creating a surround sound effect.
The sound fills the room, and comes from all directions with equal intensity.
Dolby Pro Logic II is an advanced decoder that derives 5-channel surround from stereo sound sources, whether or not it has been specifically Dolby Surround encoded.

Each time you press the button:
MOVIE: Movie software
MUSIC: Stereo sources
OFF: Cancel

- "☐☐PLIT" lights when there is effect.
- This does not work when audio is output from the HDMI AV OUT terminal.
- You can adjust the volume of the surround speakers to get the best surround effect (→ 29, Adjusting the speaker level).
Using Whisper-mode Surround
You can enhance the surround effect for low volume 5.1-channel sound. (Convenient for late night viewing.)


- “(( ))” lights when there is effect.
Each time you press the button:
WHISPER-MODE SRD ON

WHISPER-MODE SRD OFF
Enjoying the FM/AM radio
Adjusting the subwoofer level
You can adjust the amount of bass. The unit automatically selects the most suitable setting according to the type of playback source.

SUB W 1→SUB W 2→SUB W 3
• To check the current setting, press [SUBWOOFER LEVEL]. - The setting you make is retained, and recalled every time you play the same type of source.
Using Subwoofer Boost
Main unit only
You can enhance the subwoofer effect with strong bass.

BST ON←→BST OFF The SW BOOST indicator lights when Subwoofer Boost is turned on.
Adjusting the speaker level
You can adjust the surround sound levels.
Preparation
- Press [+, -VOL] to adjust the volume to normal listening level.
- Select "TEST TONE" from "SPEAKER SETTINGS" in "AUDIO" menu (→ 23).
1

Enter test tone mode.
e.g.

Test tone will be output to each channel in the following order.
• To exit the screen, press [SETUP].
■ To adjust speaker level during play
(Effective when playing 5.1-channel sound or when Dolby Pro Logic II is on.)
① Press and hold [—CH SELECT] to select the speaker. While the speaker channel is displayed, press [—CH SELECT].
L→C→R→RS→LS→SW
- You can adjust SW (Subwoofer) only if the disc includes a subwoofer channel and "☐☐PLIT" is not lit.
② Press [▲] (increase) or [▼] (decrease) to adjust the speaker level for each speaker.
C, RS, LS, SW: -6 dB to +6 dB
(L, R: Only the balance is adjustable.)
To adjust the balance of the front speakers, while "L" or "R" is selected, press [◀, ▶].


Manual tuning
1

Select "FM" or "AM".
- Main unit: Press [SELECTOR].
2

Select the frequency.
- Main unit: Press [-TUNE MODE] to select "MANUAL" on the display, and then press [√ TUNE ∧] to select the frequency. - To start automatic tuning, press and hold [◀◀, ▶▶] (main unit: [√ TUNE ∧]) until the frequency starts scrolling. Tuning stops when a station is found.
■ Presetting stations manually
Up to 30 stations can be set in each band, FM and AM.
① While listening to the radio broadcast
Press [OK].
② While the frequency is flashing on the display, press the numbered buttons to select a channel.
• To select a 2-digit number e.g. 12: [≥10] → [1] → [2]

Alternatively, press [v, ∧], and then press [OK].
Main unit:
① While listening to the radio broadcast
Press [MEMORY] twice.
② While a channel no. is flashing on the display, press [v TUNE ∧], and then press [MEMORY].
A station previously stored is overwritten when another station is stored in the same channel preset.
FM frequency step
Main unit only
The step is factory-set to 0.2-MHz, but you can change it to receive broadcasts allocated in 0.1-MHz steps.
① Press [SELECTOR] to select "FM".
② Press and hold [SELECTOR].
After a few seconds the display changes to show the current minimum frequency. Continue to hold the button down. The minimum frequency changes and the step is changed.
To return to the original step, repeat steps ① and ②.
Note
After changing the setting, previously preset frequencies will be cleared. Preset them again.

Operating other equipment

You can play an external source through your home theater system.
Enjoying TV audio
Preparation
Confirm the audio connection to the AUX terminal on the main unit (→ 8).

Select "AUX".
- Reduce the volume on the TV to its minimum, and then adjust the volume of the main unit.
- You can enjoy surround sound effect when you press [☐☐PLII] to turn on Dolby Pro Logic II (→ 28).
Enjoying digital audio
Preparation
Confirm the audio connection to the OPTICAL IN terminal on the main unit (→ 9).

Select "D-IN" (Digital In).
Making settings for digital audio input
Select to suit the type of audio from the OPTICAL IN terminal on the main unit.
1 While in "D-IN" mode
Press [SETUP] to select "MAIN/SAP", "DRC" or "PCM FIX".
2 While the selected mode is displayed
Press [▲, ▼] to make the setting.
MAIN/SAP mode (Only works with Dolby Dual Mono)
MAIN, SAP*, MAIN+SAP× (stereo audio)
"SAP" = Secondary Audio Program
Dynamic Range Compression
DRC ON: Adjust for clarity even when the volume is low by compressing the range of the lowest sound level and the highest sound level. Convenient for late night viewing. (Only works with Dolby Digital)
DRC OFF
PCM FIX mode
PCM ON: Select when receiving only PCM signals.
PCM OFF: Select when receiving Dolby Digital and PCM signals.
Note
Audio that is input through the OPTICAL IN terminal cannot be output through the HDMI terminal.
Using the iPod
Preparation
• To view photos/videos from the iPod - Ensure the video connection to the VIDEO OUT terminal on this unit (→ 8). - Operate the iPod menu to make the appropriate photo/video output settings for your TV. (Refer to operating instructions of your iPod.) - To display the picture, turn on the TV and select the appropriate video input mode. - Before connecting/disconnecting the iPod, turn the main unit off or reduce the volume of the main unit to its minimum.
Connect the iPod (not included) firmly.
Recharging starts when the iPod is inserted.
e.g.

- Hold the dock when connecting/disconnecting the iPod.
- Attach the dock adapter which should be supplied with your iPod to the dock for the stable use of the iPod. If you need an adapter, consult your iPod dealer.

To operate through display of iPod, press [FUNCTIONS].
Enjoying music

Select an item.
- Press [◀, ▶] to skip page by page.
- To return to the previous screen, press [RETURN].
Play starts from the selected song.
e.g.

*1 To select shuffle modes
Press [-PLAY MODE].
Each time you press the button:

Song shuffle
Album shuffle
Off: Cancel
2 To select repeat modes
Press and hold [—REPEAT] and then press the button repeatedly within 3 seconds.
Each time you press the button:

Repeat 1 song

Repeat all
Off: Cancel
Enjoying photos/videos
1

Switch the iPod to its own display mode.
Proceed operations through display of iPod.
2 Play a slideshow or video on your iPod.
The picture will be displayed on your TV.
You can also use the remote control to operate iPod menu.
[▲, ▼]: To navigate menu items
[OK]: To go to the next menu
[RETURN]: To return to the previous menu
Basic controls (For music and videos only)
| Button Function | |
| [▶ PLAY] Play | |
| [■ STOP], [■ PAUSE] | Pause |
| [|◀◀, ▶▶▶] Skip | |
| (press and hold)[|◀◀, ▶▶▶] | Search |
- You can enjoy surround sound effect when you press [☐☐PLII] to turn on Dolby Pro Logic II (→ 28).
When using the START menu in "IPOD" mode
Select "Music" or "Photos/Videos".
Music: Shows the music menu.
Photos/Videos: Switches to display of iPod.
About recharging the battery
- iPod will start recharging regardless of whether this unit is on or off.
- "IPOD ×" will be shown on the main unit's display during iPod charging in main unit standby mode.
- Check iPod to see if the battery is fully recharged.
- If you are not using iPod for an extended period of time after recharging has completed, disconnect it from main unit, as the battery will be depleted naturally. (Once fully recharged, additional recharging will not occur.)
Compatible iPod
- iPod touch (8GB, 16GB)
- iPod nano 3rd generation (video) (4GB, 8GB) • iPod classic (80GB, 160GB)
- iPod nano 2nd generation (aluminum) (2GB, 4GB, 8GB)
- iPod 5th generation (video) (60GB, 80GB) • iPod 5th generation (video) (30GB)
- iPod nano 1st generation (1GB, 2GB, 4GB)
- iPod 4th generation (color display) (40GB, 60GB)
- iPod 4th generation (color display) (20GB, 30GB)
- iPod 4th generation (40GB)
- iPod 4th generation (20GB)
- iPod mini (4GB, 6GB)
Compatibility depends on the software version of your iPod.

Discs that can be played
Commercial discs
| Disc Logo | Indicated in these instructions by | Remarks | |
| DVD-Video |  | DVD-V | High quality movie and music discs |
| Video CD |  | VCD | Music discs with videoIncluding SVCD (Conforming to IEC62107) |
| CD |  | CD | Music discs |
Recorded discs (○: Playable, —: Not playable)
| Disc Logo | Recorded on a DVD video recorder, etc. | Recorded on a personal computer, etc. | Finalizing ※6 | |||||
| DVD-VR ※2 | DVD-V ※4 | WMA | MP3 | JPEG | ||||
| DVD-RAM |  KAM4.7 KAM4.7 | ○ | — | — | ○ | ○ | Not necessary | |
| DVD-R/RW |  | ○ | ○ | —○ | ○ | Necessary | ||
| DVD-R DL |  R DL R DL | ○※3 | ○ | — | — | — | Necessary | |
| +R/+RW | — | — | ×5 | (— | —○) — | Necessary | ||
| +R DL | — | — | ×5 | (— | —○) — | Necessary | ||
| CD-R/RW ※1 | — | — | — | ○ | ○ Necessary ※7 | |||
- It may not be possible to play all the above-mentioned discs in some cases due to the type of disc, the condition of the recording, the recording method, or how the files were created (→ 33, Tips for making data discs). 21 This unit can play CD-R/RW recorded with CD-DA or Video CD format. 2 Discs recorded on DVD recorders or DVD video cameras, etc. using Version 1.1 of the Video Recording Format (a unified video recording standard). 3 Discs recorded on DVD recorders or DVD video cameras using Version 1.2 of the Video Recording Format (a unified video recording standard). 4 Discs recorded on DVD recorders or DVD video cameras using DVD-Video Format. ※5 Recorded using a format different from DVD-Video Format, therefore some functions cannot be used. ※6 A process that allows play on compatible equipment. To play a disc that is indicated as “Necessary”, the disc must first be finalized on the device it was recorded on. 7 Closing the session will also work.
Note about using a DualDisc
The digital audio content side of a DualDisc does not meet the technical specifications of the Compact Disc Digital Audio (CD-DA) format so playback may not be possible.
Discs that cannot be played
Blu-ray, HD DVD, AVCHD discs, DVD-RW version 1.0, DVD-Audio, DVD-ROM, CD-ROM, CDV, CD-G, SACD, DivX Video Discs and Photo CD, DVD-RAM that cannot be removed from their cartridge, 2.6 GB and 5.2 GB DVD-RAM, and "Chaoji VCD" available on the market including CVD, DVCD and SVCD that do not conform to IEC62107.
■ Disc handling precautions
- Do not attach labels or stickers to discs. This may cause disc warping, rendering it unusable.
- Do not write on the label side with a ball-point pen or other writing instrument.
- Do not use record cleaning sprays, benzine, thinner, liquids which prevent static electricity, or any other solvent.
- Do not use scratch-proof protectors or covers.
- Do not use the following discs:
– Discs with exposed adhesive from removed stickers or labels (rented discs, etc.). – Discs that are badly warped or cracked. – Irregularly shaped discs, such as heart shapes.
■ Tips for making data discs
| Format | Disc Extension | Reference | |
| WMA | CD-R/RW “.WMA” | “.wma” | Compatible compression rate: between 48 kbps and 320 kbpsYou cannot play WMA files that are copy-protected.This unit does not support Multiple Bit Rate (MBR: an encoding process for audio content that produces an audio file encoded at several different bit rates). |
| MP3 | DVD-R | “.MP3”“.mp3” | This unit does not support ID3 tags.Sampling frequency and compression rate:- DVD-RAM, DVD-R/RW: 11.02, 12, 22.05, 24 kHz (8 to 160 kbps), 44.1 and 48 kHz (32 to 320 kbps)- CD-R/RW: 8, 11.02, 12, 16, 22.05, 24 kHz (8to 160 kbps), 32, 44.1 and 48 kHz (32 to 320 kbps) |
| JPEG | DVD-RAM | “.JPG”“.jpg”“.JPEG”“.jpeg” | JPEG files taken on a digital camera that conform to DCF Standard (Design rule for Camera File system) Version 1.0 are displayed.- Files that have been altered, edited or saved with computer picture editing software may not be displayed.This unit cannot display moving pictures, MOTION JPEG and other such formats, still pictures other than JPEG (e.g. TIFF), or play pictures with attached audio. |
- There may be differences in the display order on the menu screen and computer screen.
- This unit cannot play files recorded using packet write.
DVD-RAM
• Discs must conform to UDF 2.0.
DVD-R/RW
• Discs must conform to UDF bridge (UDF 1.02/ISO9660). – This unit does not support multi-session. Only the default session is played.
CD-R/RW
- Discs must conform to ISO9660 level 1 or 2 (except for extended formats).
- This unit supports multi-session but if there are many sessions it takes more time for play to start. Keep the number of sessions to a minimum to avoid this.
Maintenance
■ To clean discs
Wipe with a damp cloth and then wipe dry.


Clean this unit with a soft, dry cloth.
- Never use alcohol, paint thinner or benzine to clean this unit.
- Before using chemically treated cloth, carefully read the instructions that came with the cloth.
Do not use commercially available lens cleaners as they may cause malfunction. Cleaning of the lens is generally not necessary although this depends on the operating environment.
Before moving the unit, ensure the disc trays are empty. Failure to do so will risk severely damaging the discs and the unit.
Troubleshooting guide
Before requesting service, make the following checks. If you are in doubt about some of the check points, or if the solutions indicated in the chart do not solve the problem, refer to "Customer Services Directory" on page 42 if you reside in the U.S.A., or refer to "Product information" on page 40 if you reside in Canada.
Power
| No power. | ● Insert the AC supply cord securely. | 11 |
| The unit is automatically switched to standby mode. | ● The Sleep timer was working and had reached the set time limit. | 14 |
Unit displays
| The display is dark. | ● Select “BRIGHT” in “FL DIMMER” in the “OTHERS” menu. | 24 |
| “NOPLAY” | ● You inserted a disc the unit cannot play; insert one it can.● You inserted a blank disc.● You inserted a disc that has not been finalized. | 32— |
| “NODISC” ● You have not inserted a disc; insert one.● You have not inserted the disc correctly; insert it correctly. | —16 | |
| “F61” ● Check and correct the speaker cable connections.If this does not fix the problem, consult the dealer. | 9 | |
| “F76” | ● There is a power supply problem. Consult the dealer. | — |
| “DVD U11” | ● Disc may be dirty. Wipe it clean. | 33 |
| “ERROR” | ● Incorrect operation performed. Read the instructions and try again. | — |
| “DVD H□□”“DVD F□□□”□ stands for a number. | ● Trouble may have occurred. The numbers following “H” and “F” depend on the status of the unit. Turn the unit off and then back on. Alternatively, turn the unit off, disconnect the AC supply cord, and then reconnect it.● If the service numbers fail to clear, note the service number and contact a qualified service person. | —— |
| “w1” is flashing. | ● There is no link between the main unit and the wireless system. Check that the wireless system is plugged into the AC outlet and is turned on.● Ensure that the digital transmitter is fully inserted into the slot of the main unit. | 11, 1511 |
| “U70□”□ stands for a number.The actual number following “U70” will depend on the state of the main unit. | ● The HDMI connection acts unusually.- The connected equipment is not HDMI-compatible.- Please use HDMI cables that have the HDMI logo (as shown on the cover).- The HDMI cable is too long.- The HDMI cable is damaged. | ——— |
| “REMOTE 1” or “REMOTE 2” | ● Match the modes on the main unit and remote control. Depending on the number being displayed (“1” or “2”), press and hold [OK] and the corresponding numbered button ([1] or [2]) for at least 2 seconds. | 14 |
General operation
| No response when any buttons are pressed. | This unit cannot play discs other than the ones listed in these operating instructions.The unit may not be operating properly due to lightning, static electricity or some other external factor. Turn the unit off and then back on. Alternatively, turn the unit off, disconnect the AC supply cord, and then reconnect it.Condensation has formed. Wait 1 to 2 hours for it to evaporate. | 32— |
| No response when remote control buttons are pressed. | Check that the batteries are installed correctly.The batteries are depleted. Replace them with new ones.Aim the remote control at the remote control signal sensor and operate. | 111115 |
| Other products respond to the remote control. | Change the remote control operating mode. | 14 |
| Cannot play DVDs. | CD Mode is on. Press and hold [—CD MODE] to turn CD Mode off. | 18 |
| No picture or sound. | Check the video or speaker connection.Check the power or input setting of the connected equipment and the main unit.Check that the disc has something recorded on it. | 8,9— |
| You have forgotten your ratings password.Reset all the settings to Factory Preset. | While stopped and “DVD/CD” is the source, press and hold [■] (Stop) on the main unit and [≥10] on the remote control until “INITIALIZED” disappears from the TV. Turn the unit off and on again. All settings will return to the default values.(This does not work during program and random modes, or when setup menu or START menu is displayed.) | — |
| The VIERA Link “HDAVI Control” function does not respond. | Depending on the condition of this unit or the connected equipment, it may be necessary to repeat the same operation so that the function can work correctly. | 26 |
| The setting you made in “TV ASPECT” (→ 23, “VIDEO” menu) or “LANGUAGE” (→ 24, “DISPLAY” menu) does not work. | He settings for “TV ASPECT”*1 and “LANGUAGE”*2 will automatically follow to the settings of the TV. Select using TV settings.*1 When using VIERA Link “HDAVI Control” with “HDAVI Control 3” compatible TV*2 When using VIERA Link “HDAVI Control” with “HDAVI Control 2 (or later)” compatible TV | — |
Disc trays
| Disc tray(s) cannot open.“CHGR ERR” is displayed. | • Press φ to release the jammed tray(s) as the unit will switch off. Switch it on again and the tray(s) will initialize to the previous tray(s) condition. If this still does not fix the problem, please consult the dealer. | — |
Disc operation
| It takes time before play starts. MP3 | ● Play may take time to begin when an MP3 track has still picture data. Even after the track starts, the correct play time will not be displayed. This is normal. | — |
| A menu screen appears during skip or search. VCD | ● This is normal for Video CDs. — | |
| Playback control menu does not appear. VCD with playback control | ● Press [■ STOP] twice and then press [▶ PLAY]. | — |
| Program and Random play do not work. DVD-V | ● These functions do not work with some DVD-Videos. | — |
| No subtitles. | ● Display the subtitles. (“SUBTITLE” in Menu 1) | 20 |
| Point B is automatically set. | ● The end of an item becomes point B when it is reached. | — |
| The Setup menu cannot be accessed. | ● Select “DVD/CD” as the source. ● Cancel Program and Random play. | — 18 |
Sound
| Sound is distorted. | ● Noise may occur when playing WMA.● When using the HDMI output, audio may not be output from other terminals. | — |
| Effects do not work. | ● Some audio effects do not work or have less effect with some discs. | — |
| Humming is heard during play. | ● An AC supply cord or fluorescent light is near the main unit or wireless system. Keep other appliances and cables away from the main unit and wireless system. | — |
| No sound. | ● There may be a slight pause in sound when you change the play speed.● Audio may not be heard when more than 4 devices are connected with HDMI cables. Reduce the number of connected devices.● When using the HDMI connection, ensure that “AUDIO OUT” in the “HDMI” menu is set to “ON”. | — |
| 24 | ||
| No sound from the TV. | ● Confirm the audio connection. Press [>, < SELECT] to select the corresponding source. | 8, 30 |
| No surround sound. | ● Press [☐☐PLII] to turn on Dolby Pro Logic II or turn on Surround Enhancer. | 28 |
Picture
| The picture on the TV is not displayed correctly or disappears. | Ensure that the unit is connected directly to the TV, and is not connected through a video cassette recorder.Mobile telephone chargers can cause some disturbance.If you are using an indoor TV antenna, change to an outdoor antenna.The TV antenna wire is too close to the unit. Move it away from the unit.Picture may not be seen when more than 4 devices are connected with HDMI cables. Reduce the number of connected devices.When using the COMPONENT VIDEO OUT terminal, ensure that progressive output is not selected when the connected TV is not progressive compatible. Press and hold [CANCEL] until “PRG” disappears from the main unit display and the picture is displayed correctly.When using the HDMI AV OUT terminal, ensure that video output unacceptable with the connected TV is not selected. Press and hold [CANCEL] until the picture is displayed correctly. (The output will return to “480p”.)Video images converted to 1920 × 1080 resolution may look different from the true, native 1080p full-HD sources. This is not malfunction of the main unit. | 8—————2321— |
| Picture size does not fit the screen. | Change “TV ASPECT” in the “VIDEO” menu.Use the TV to change the aspect.Change the zoom setting. (“ZOOM” in Menu 2) | 23—21 |
| Menu is not displayed correctly. | Restore the zoom ratio to “NORMAL”. (“ZOOM” in Menu 2) | 21 |
| Auto zoom function does not work well. | Turn off TV’s zoom function.Zoom function may not work well, especially in dark scenes and may not work depending on the type of disc. | —— |
Troubleshooting guide
iPod operation
| Cannot charge or operate. | Check that the iPod is connected firmly.The battery of the iPod is depleted. Charge the iPod, and then operate again. | 30— |
| Cannot display iPod photos/videos on the TV. | Ensure the video connection to the VIDEO OUT terminal on this unit.Operate the iPod menu to make the appropriate photo/video output settings for your TV. (Refer to operating instructions for your iPod.) | 8— |
HDMI or progressive video
| There is ghosting when HDMI or progressive output is on. | This problem is caused by the editing method or material used on DVD-Video, but should be corrected if you use interlaced output. When using the HDMI AV OUT terminal, set “VIDEO FORMAT” in Menu 4 to “480i”. Or, disable the HDMI AV OUT connection and use other video connections.When using the COMPONENT VIDEO OUT terminal, set “VIDEO OUT (I/P)” in “VIDEO” menu to “INTERLACE”. (Alternatively, press and hold [CANCEL] until “PRG” disappears from the main unit display.) | 2123 |
| Pictures not in progressive output. | Select “PROGRESSIVE” in “VIDEO OUT (I/P)” in “VIDEO” menu.The unit’s VIDEO OUT terminal outputs the interlaced signal even if “PRG” is displayed. | 23— |
| Closed captions not displayed. | When HDMI or progressive output is on, closed captions will not be displayed. | — |
Radio
| Distorted sound or noise is heard.“ST” flickers or does not light. | Adjust the position of the FM or AM antenna.Use an outdoor antenna. | —10 |
| A beat sound is heard. | Turn the TV off or move it away from the unit. | — |
| A low hum is heard during AM broadcasts. | Separate the antenna from other cables. — |
Wireless system
| No sound. | ● Ensure that the digital transmitter is fully inserted into the slot of the main unit.● Ensure that the wireless system is plugged into the AC outlet and is turned on. Ensure “ 1 ” is displayed on the main unit’s display. | 1111, 14, 15 |
| The indicator on the wireless system keeps flashing between red and green. | ● There is a power supply problem. Consult the dealer. | — |
TV displays
| “ ” | ● The operation is prohibited by the unit or disc. | — |
| “THIS DISC MAY NOT BE PLAYED IN YOUR REGION.” | ● Only DVD-Video discs that include or have the same region number as the one on the rear panel of this unit can be played. | Cover page |
Decoder
A decoder restores the coded audio signals on DVDs to normal. This is called decoding.
Dolby Digital
This is a method of coding digital signals developed by Dolby Laboratories. Apart from stereo (2-channel) audio, these signals can also be 5.1-channel sound.
Laboratories. Apart from stereo (2-channel) audio, these signals can also be 5.1-channel sound.
This surround system is used in many movie theaters around the world.
This surround system is used in many movie theaters around the world.
There is good separation between the channels, so realistic sound effects are possible.
Dynamic range
Dynamic range is the difference between the lowest level of sound that can be heard above the noise of the equipment and the highest level of sound before distortion occurs.
Frame still and field still
Frames are the still pictures that go together to make a moving picture. There are about 30 frames shown each second.
One frame is made up of two fields. A regular TV shows these fields one after the other to create frames.
A still is shown when you pause a moving picture. A frame still is made up of two alternating fields, so the picture may appear blurred, but overall quality is high.
A field still is not blurred, but it has only half the information of a frame still so picture quality is lower.
HDMI (High-Definition Multimedia Interface)
HDMI is a next-generation digital interface for consumer electronic products. Unlike conventional connections, it transmits uncompressed digital video and audio signals on a single cable. This unit supports high-definition video output (720p, 1080i, 1080p) from the HDMI AV OUT terminal. To enjoy high-definition video, a high-definition compatible TV is required.
I/P/B
MPEG 2, the video compression standard adopted for use with DVD-Video, codes frames using these 3 picture types.
I: Intra coded picture
This picture has the best quality and is the best to use when adjusting the picture.
P: Predictive coded picture
This picture is calculated based on past I- or P-pictures.
B: Bidirectionally-predictive coded picture
This picture is calculated by comparing past and future I- and P-pictures so it has the lowest volume of information.
JPEG (Joint Photographic Experts Group)
This is a system used for compressing/decoding color still pictures. The benefit of JPEG is less deterioration in picture quality considering the degree of compression.
Linear PCM (pulse code modulation)
These are uncompressed digital signals, similar to those found on CDs.
MP3 (MPEG Audio Layer 3)
An audio compression method that compresses audio to approximately one tenth of its size without any considerable loss of audio quality.
Playback control (PBC)
If a Video CD has playback control, you can select scenes and information with menus.
Progressive/Interlaced
NTSC, the video signal standard, has 480 interlaced (i) scan lines, whereas progressive scanning uses twice the number of scan lines. This is called 480p.
Using progressive output, you can enjoy the high-resolution video recorded on media such as DVD-Video.
Your television must be compatible to enjoy progressive video.
Sampling frequency
Sampling is the process of converting the heights of sound wave (analog signal) samples taken at set periods into digits (digital encoding).
Sampling frequency is the number of samples taken per second, so larger numbers mean more faithful reproduction of the original sound.
AMPLIFIER SECTION
PT760
RMS Output Power: Dolby Digital Mode
| Front Ch | 125 W per channel (3 Ω), 1 kHz, 10 % THD |
| Surround Ch | 125 W per channel (3 Ω), 1 kHz, 10 % THD |
| Center Ch | 250 W per channel (6 Ω), 1 kHz, 10 % THD |
| Subwoofer Ch | 250 W per channel (6 Ω), 100 Hz, 10 % THD |
| Total RMS Dolby Digital mode power | 1000 W |
FTC Output Power: Dolby Digital Mode
| Front Ch 63 W | per channel (3 Ω), 120 Hz to 20 kHz, 1 % THD |
| Surround Ch 34 | W per channel (3 Ω), 120 Hz to 20 kHz, 1 % THD |
| Center Ch | 113 W per channel (6 Ω), 120 Hz to 20 kHz, 1 % THD |
| Subwoofer Ch 121 W per channel (6 Ω), 45 Hz to 120 Hz, 1 % THD | |
| Total FTC Dolby Digital mode power 428 W | |
PT960
RMS Output Power: Dolby Digital Mode
| Front Ch | 250 W per channel (6 Ω), 1 kHz, 10 % THD |
| Surround Ch | 125 W per channel (3 Ω), 1 kHz, 10 % THD |
| Center Ch | 250 W per channel (6 Ω), 1 kHz, 10 % THD |
| Subwoofer Ch | 250 W per channel (6 Ω), 100 Hz, 10 % THD |
| Total RMS Dolby Digital mode power | 1250 W |
FTC Output Power: Dolby Digital Mode
| Front Ch 104 W | per channel (6 Ω), 120 Hz to 20 kHz, 1 % THD |
| Surround Ch 34 | W per channel (3 Ω), 120 Hz to 20 kHz, 1 % THD |
| Center Ch | 101 W per channel (6 Ω), 120 Hz to 20 kHz, 1 % THD |
| Subwoofer Ch 106 W per channel (6 Ω), 45 Hz to 120 Hz, 1 % THD | |
| Total FTC Dolby Digital mode power 483 W | |
PT954
RMS Output Power: Dolby Digital Mode
| Front Ch | 125 W per channel (3 Ω), 1 kHz, 10 % THD |
| Surround Ch | 125 W per channel (3 Ω), 1 kHz, 10 % THD |
| Center Ch | 200 W per channel (6 Ω), 1 kHz, 10 % THD |
| Subwoofer Ch | 200 W per channel (6 Ω), 100 Hz, 10 % THD |
| Total RMS Dolby Digital mode power | 900 W |
FTC Output Power: Dolby Digital Mode
| Front Ch 57 W | per channel (3 Ω), 120 Hz to 20 kHz, 1 % THD |
| Surround Ch 34 | W per channel (3 Ω), 120 Hz to 20 kHz, 1 % THD |
| Center Ch | 101 W per channel (6 Ω), 120 Hz to 20 kHz, 1 % THD |
| Subwoofer Ch 109 W per channel (6 Ω), 45 Hz to 120 Hz, 1 % THD | |
| Total FTC Dolby Digital mode power 392 W | |
PT1054
RMS Output Power: Dolby Digital Mode
| Front Ch | 200 W per channel (6 Ω), 1 kHz, 10 % THD |
| Surround Ch | 100 W per channel (3 Ω), 1 kHz, 10 % THD |
| Center Ch | 200 W per channel (6 Ω), 1 kHz, 10 % THD |
| Subwoofer Ch | 200 W per channel (6 Ω), 100 Hz, 10 % THD |
| Total RMS Dolby Digital mode power | 1000 W |
FTC Output Power: Dolby Digital Mode
| Front Ch 94 W | per channel (6 Ω), 120 Hz to 20 kHz, 1 % THD |
| Surround Ch 34 | W per channel (3 Ω), 120 Hz to 20 kHz, 1 % THD |
| Center Ch | 91 W per channel (6 Ω), 120 Hz to 20 kHz, 1 % THD |
| Subwoofer Ch | 96 W per channel (6 Ω), 45 Hz to 120 Hz, 1 % THD |
| Total FTC Dolby Digital mode power 443 W | |
FM/AM TUNER, TERMINALS SECTION
| Preset Memory | FM 30 stations |
| AM 30 stations |
Frequency Modulation (FM)
| Frequency range | 87.9 MHz to 107.9 MHz (200-kHz step) |
| 87.5 MHz to 108.0 MHz (100-kHz step) | |
| Antenna terminals | 75 Ω (unbalanced) |
Amplitude Modulation (AM)
| Frequency range | 520 kHz to 1710 kHz (10-kHz step) |
Digital audio input
| Optical digital input | Optical terminal |
| Sampling frequency | 32 kHz, 44.1 kHz, 48 kHz |
Phone jack
| Terminal | Stereo, 3.5 mm ( 1/ ) jack |
DISC SECTION
Discs played [8 cm (3") or 12 cm (5')]
| (1) DVD (DVD-Video) |
| (2) DVD-RAM (DVD-VR, MP3*2.5, JPEG*4.5) |
| (3) DVD-R (DVD-Video, DVD-VR, MP3*2.5, JPEG*4.5) |
| (4) DVD-R DL (DVD-Video, DVD-VR) |
| (5) DVD-RW (DVD-Video, DVD-VR, MP3*2.5, JPEG*4.5) |
| (6) +R/+RW (Video) |
| (7) +R DL (Video) |
| (8) CD, CD-R/RW (CD-DA, Video CD, SVCD*1, MP3*2.5, WMA*3.5, JPEG*4.5) |
| *1 Conforming to IEC62107 |
| *2 MPEG-1 Layer 3, MPEG-2 Layer 3 |
| *3 Windows Media Audio Ver.9.0 L3 |
| Not compatible with Multiple Bit Rate (MBR) |
| *4 Exif Ver 2.1 JPEG Baseline files |
| Picture resolution: between 160×120 and 6144×4096 pixels (Sub sampling is 4:0:0, 4:2:0, 4:2:2 or 4:4:4). Extremely long and narrow pictures may not be displayed. |
| *5 The total combined maximum number of recognizable audio and picture contents and groups: 4000 audio and picture contents and 400 groups. |
Pick up
| Wavelength (DVD/CD) | 655/785 nm | |
| Laser power (DVD/CD) | U.S.A. | CLASS II/CLASS I |
Audio output (Disc)
| Number of channels | 5.1ch (FL, FR, C, SL, SR, SW) |
VIDEO SECTION
| Video system | NTSC |
| Composite video output | |
| Output level | 1 Vp-p (75 Ω) |
| Terminal | Pin jack (1 system) |
Component video output
| Y output level | 1 Vp-p (75 Ω) |
| PB output level | 0.7 Vp-p (75 Ω) |
| PR output level | 0.7 Vp-p (75 Ω) |
| Terminal | Pin jack (Y: green, PB : blue, PR : red) (1 system) |
HDMI AV output
| Terminal | 19-pin type A connector |
| DAVI Control | This unit supports “HDAVI Control 3” function. |
SPEAKER SECTION
PT760 Front speakers SB-HF760
Type 1 way, 1 speaker system (Bass reflex)
Speaker unit(s) Impedance 3 Ω Full range 6.5 cm (2 1/2") Cone type
Input power (IEC) 125 W *6 (Max)
Output sound pressure 80 dB/W (1.0 m)
Frequency range 86 Hz to 25 kHz (-16 dB)
98 Hz to 22 kHz (-10 dB)
Dimensions (W×H×D) 252 mm×1123 mm×235 mm
(9 29/32" × 44 7/32" × 9 1/4")
Mass [Weight] 2.4 kg (5.2 lbs)
PT760 Surround speakers SB-HS760
Type 1 way, 1 speaker system (Bass reflex)
Speaker unit(s) Impedance 3 Ω
Full range 6.5 cm (2 1/2") Cone type
Input power (IEC) 125 W *6 (Max)
Output sound pressure 80 dB/W (1.0 m)
Frequency range 95 Hz to 25 kHz (-16 dB)
120 Hz to 22 kHz (-10 dB)
Dimensions (W×H×D) 92 mm×142 mm×95 mm
(3 5/8" × 5 19/32" × 3 3/4")
Mass [Weight] 0.6 kg (1.32 lbs)
PT960 Front speakers SB-HF960
Type 2 way, 2 speaker system (Bass reflex)
Speaker unit(s) Impedance 6 Ω
- Full range 6.5 cm (2 1/2") Cone type
- Full range 6.5 cm (2 1/2") Cone type
Input power (IEC) 250 W *6 (Max)
Output sound pressure 83 dB/W (1.0 m)
Cross over frequency 5 kHz
Frequency range 79 Hz to 25 kHz (-16 dB)
95 Hz to 22 kHz (-10 dB)
Dimensions (W×H×D) 252 mm×1123 mm×235 mm
(9 29/32" × 44 7/32" × 9 1/4")
Mass [Weight] 3.7 kg (8.2 lbs)
PT960 Surround speakers SB-HS960
Type 1 way, 1 speaker system (Bass reflex)
Speaker unit(s) Impedance 3 Ω
Full range 6.5 cm (2 1/2") Cone type
Input power (IEC) 125 W *6 (Max)
Output sound pressure 80 dB/W (1.0 m)
Frequency range 86 Hz to 25 kHz (-16 dB)
98 Hz to 22 kHz (-10 dB)
Dimensions (W×H×D) 252 mm×1123 mm×235 mm
(9 29/32" × 44 7/32" × 9 1/4")
Mass [Weight] 2.4 kg (5.2 lbs)
PT954 Front speakers SB-HF560
Type: 1 way, 1 speaker system (Bass reflex)
Speaker unit(s) Impedance: 3 Ω
Full range: 6.5 cm (2 1/2) Cone type
Input power (IEC): 125 W *6 (Max)
Output sound pressure: 80 dB/W (1.0 m)
Frequency range: 76 Hz to 25 kHz (-16 dB)
89 Hz to 22 kHz (-10 dB)
Dimensions (W×H×D): 252 mm × 1123 mm × 235 mm
(9 29/32" × 44 7/32" × 9 1/4")
Mass [Weight]: 3.8 kg (8.4 lbs)
PT954 Surround speakers SB-HS560
Type: 1 way, 1 speaker system (Bass reflex)
Speaker unit(s) Impedance: 3 Ω
Full range: 6.5 cm (2 1/2) Cone type
Input power (IEC) 125 W *6 (Max)
Output sound pressure 80 dB/W (1.0 m)
Frequency range 95 Hz to 25 kHz (-16 dB)
120 Hz to 22 kHz (-10 dB)
Dimensions (W×H×D) 92 mm × 142 mm × 95 mm
(3 5/8" × 5 19/32" × 3 3/4")
Mass [Weight] 0.6 kg (1.32 lbs)
PT1054 Front speakers SB-HF860
Type 2 way, 2 speaker system (Bass reflex)
Speaker unit(s) Impedance 6 Ω
- Full range 6.5 cm (2 1/2") Cone type
- Full range 6.5 cm (2 1/2") Cone type
Input power (IEC) 250 W *6 (Max)
Output sound pressure 83 dB/W (1.0 m)
Frequency range 79 Hz to 25 kHz (-16 dB)
95 Hz to 22 kHz (-10 dB)
Dimensions (W×H×D) 252 mm×1123 mm×235 mm
(9 29/32" × 44 7/32" × 9 1/4")
Mass [Weight] 4 kg (8.8 lbs)
PT1054 Surround speakers SB-HS861
Type 1 way, 1 speaker system (Bass reflex)
Speaker unit(s) Impedance 3 Ω
Full range 6.5 cm (2 1/2") Cone type
Input power (IEC) 125 W *6 (Max)
Output sound pressure 80 dB/W (1.0 m)
Frequency range 76 Hz to 25 kHz (-16 dB)
89 Hz to 22 kHz (-10 dB)
Dimensions (W×H×D) 252 mm×1123 mm×235 mm
(9 29/32" × 44 7/32" × 9 1/4")
Mass [Weight] 3.8 kg (8.4 lbs)
PT760 PT960 Center speaker SB-HC760
PT954 PT1054 Center speaker SB-HC560
Type 2 way, 2 speaker system (Bass reflex)
Speaker unit(s) Impedance 6 Ω
- Full range 6.5 cm (2 1/2") Cone type
- Full range 6.5 cm (2 1/2") Cone type
Input power (IEC) 250 W *6 (Max)
Output sound pressure 82 dB/W (1.0 m)
Cross over frequency 5 kHz
Frequency range 80 Hz to 25 kHz (-16 dB)
96 Hz to 22 kHz (-10 dB)
Dimensions (W×H×D) 270 mm × 94 mm × 95 mm
(10 5/8" × 3 11/16" × 3 3/4")
Mass [Weight] 1.3 kg (2.9 lbs)
Subwoofer SB-HW560
Type 1 way, 1 speaker system (Kelton type)
Speaker unit(s) Impedance 6 Ω
- Woofer 16 cm (6 1/2") Cone type
- Passive Radiator 25 cm (10")
Input power (IEC) 250 W (Max)
Output sound pressure 78 dB/W (1.0 m)
Frequency range 35 Hz to 200 Hz (-16 dB)
40 Hz to 198 Hz (-10 dB)
Dimensions (W×H×D) 181 mm × 361 mm × 315 mm
(71/8'' × 147/32'' × 1213/32'')
Mass [Weight] 4.7 kg (10.4 lbs)
GENERAL
Power supply AC 120 V, 60 Hz
Power consumption PT760 PT954 Main unit 130 W
PT960 PT1054 Main unit 135 W
Dimensions (W×H×D) 430 mm×68 mm×327 mm
(16 15/16" × 2 1/6" × 12 7/8")
Mass [Weight] Main unit 3.7 kg (8.2 lbs)
Operating temperature range 0 °C to +40 °C (+32 °F to +104 °F)
Operating humidity range 35 % to 80 % RH (no condensation)
Power consumption in standby mode approx. 0.3 W
(Continued on next page)
Specifications
WIRELESS SYSTEM AND DIGITAL TRANSMITTER
AMPLIFIER SECTION
RMS output power
Surround Ch
125 W per channel (3 Ω), 1 kHz, 10 % THD
Total RMS power 250 W
FTC output power
Surround Ch 34 W per channel (3 Ω), 120 Hz to 20 kHz, 1 % THD
Total FTC power 68 W
RF SECTION
Wireless module
Frequency range 2.400 GHz to 2.4835 GHz
No. of channels 3
GENERAL
Power supply AC 120 V, 60 Hz
Power consumption Digital transmitter 1.5 W
Wireless system 35 W
Dimensions (W×H×D)
| Digital transmitter | 65 mm×52 mm ×8.6 mm (29/16'' × 21/16'' × 11/32'' ) |
| Wireless system | 165 mm×90 mm ×164 mm (61/2'' × 317/32'' × 615/32'' ) |
| Digital transmitter | 0.02 kg (0.04 lbs) |
| Wireless system | 0.655 kg (1.54 lbs) |
Power consumption in off mode
approx. 0.2 W
*6 Rating with low-cut filter equipped amplifier
Note
- Specifications are subject to change without notice. Mass and dimensions are approximate.
- Total harmonic distortion is measured by a digital spectrum analyzer.
Product Service
- Damage requiring service—The unit should be serviced by qualified service personnel if:
(a) The AC power supply cord or AC adaptor has been damaged; or (b) Objects or liquids have gotten into the unit; or (c) The unit has been exposed to rain; or (d) The unit does not operate normally or exhibits a marked change in performance; or (e) The unit has been dropped or the cabinet damaged.
- Servicing—Do not attempt to service the unit beyond that described in these operating instructions. Refer all other servicing to authorized servicing personnel.
- Replacement parts—When parts need replacing ensure the servicer uses parts specified by the manufacturer or parts that have the same characteristics as the original parts. Unauthorized substitutes may result in fire, electric shock, or other hazards.
- Safety check—After repairs or service, ask the servicer to perform safety checks to confirm that the unit is in proper working condition.
The servicer will require all components to service your system.
Therefore, should service ever be necessary, be sure to bring the entire system.
Product information
For product information or assistance with product operation:
In the U.S.A., refer to "Customer Services Directory" on page 42.
In Canada, contact the Panasonic Canada Inc. Customer Care Centre at 1-800-561-5505, or visit the website (www.panasonic.ca), or an authorized Servicentre closest to you.
Listening caution


Selecting fine audio equipment such as the unit you've just purchased is only the start of your musical enjoyment. Now it's time to consider how you can maximize the fun and excitement your equipment offers. This manufacturer and the Electronic Industries Association's Consumer Electronics Group want you to get the most out of your equipment by playing it at a safe level. One that lets the sound come through loud and clear without annoying blaring or distortion—and, most importantly, without affecting your sensitive hearing.
We recommend that you avoid prolonged exposure to excessive noise.
Sound can be deceiving. Over time your hearing "comfort level" adapts to higher volumes of sound. So what sounds "normal" can actually be loud and harmful to your hearing.
Guard against this by setting your equipment at a safe level BEFORE your hearing adapts.
To establish a safe level:
- Start your volume control at a low setting.
- Slowly increase the sound until you can hear it comfortably and clearly, and without distortion.
Once you have established a comfortable sound level:
- Set the dial and leave it there.
Taking a minute to do this now will help to prevent hearing damage or loss in the future. After all, we want you listening for a lifetime.
Manufactured under license from Dolby Laboratories. Dolby, Pro Logic, and the double-D symbol are trademarks of Dolby Laboratories.
"DTS" and "DTS Digital Surround" are registered trademarks of DTS, Inc.
U.S. Patent Nos. 6,836,549; 6,381,747; 7,050,698; 6,516,132; and 5,583,936.
This product incorporates copyright protection technology that is protected by U.S. patents and other intellectual property rights. Use of this copyright protection technology must be authorized by Macrovision, and is intended for home and other limited viewing uses only unless otherwise authorized by Macrovision. Reverse engineering or disassembly is prohibited.
Windows Media and the Windows logo are trademarks or registered trademarks of Microsoft Corporation in the United States and/or other countries.
This product is protected by certain intellectual property rights of Microsoft Corporation and third parties. Use or distribution of such technology outside of this product is prohibited without a license from Microsoft or an authorized Microsoft subsidiary and third parties.
WMA is a compression format developed by Microsoft Corporation. It achieves the same sound quality as MP3 with a file size that is smaller than that of MP3.
HDMI, the HDMI logo and High-Definition Multimedia Interface are trademarks or registered trademarks of HDMI Licensing LLC.
HDAVI Control™ is a trademark of Matsushita Electric Industrial Co., Ltd.
VIERA Link™ is a trademark of Matsushita Electric Industrial Co., Ltd.
EZ Sync™ is a trademark of Matsushita Electric Industrial Co., Ltd.
iPod is a trademark of Apple Inc., registered in the U.S. and other countries.
User memo:
DATE OF PURCHASE
DEALER NAME
DEALER ADDRESS
TELEPHONE NUMBER
The model number and serial number of this product can be found on either the back or the bottom of the unit. Please note them in the space provided below and keep for future reference.
MODEL NUMBER
SERIAL NUMBER
Limited Warranty (ONLY FOR U.S.A.)
Panasonic Consumer Electronics Company, Division of Panasonic Corporation of North America One Panasonic Way Secaucus, New Jersey 07094
Panasonic Puerto Rico, Inc. Ave. 65 de Infantería, Km. 9.5 San Gabriel Industrial Park, Carolina, Puerto Rico 00985
Panasonic Audio Products Limited Warranty
Limited Warranty Coverage
If your product does not work properly because of a defect in materials or workmanship, Panasonic Consumer Electronics Company or Panasonic Puerto Rico, Inc. (collectively referred to as "the warrantor") will, for the length of the period indicated on the chart below, which starts with the date of original purchase ("warranty period"), at its option either (a) repair your product with new or refurbished parts, or (b) replace it with a new or a refurbished product. The decision to repair or replace will be made by the warrantor.
| Product or Part Name Parts Labor | ||
| Audio Products (except items listed below) One (1) year One (1) year | ||
| USB Reader-Writer, Personal Computer Card Adapters (in exchange for defective item) | One (1) year | Not Applicable |
| Accessories: Headphones, Cartridges, Microphones, Adapters | Ninety (90) days | Ninety (90) days |
| Rechargeable Batteries, DVD-R/-RAM Discs (in exchange for defective item) | Ten (10) days | Not Applicable |
| SD Memory Cards, Rechargeable Battery Packs (in exchange for defective item) | Ninety (90) days | Not Applicable |
During the "Labor" warranty period there will be no charge for labor. During the "Parts" warranty period, there will be no charge for parts. You must carry-in or mail-in your product during the warranty period. If non-rechargeable batteries are included, they are not warranted. This warranty only applies to products purchased and serviced in the United States or Puerto Rico. This warranty is extended only to the original purchaser of a new product which was not sold "as is". A purchase receipt or other proof of the original purchase date is required for warranty service.
Carry-In or Mail-In Service
For Carry-In or Mail-In Service in the United States call 1-800-211-PANA (1-800-211-7262) or visit Panasonic web site: http://www.panasonic.com For assistance in Puerto Rico call Panasonic Puerto Rico, Inc. (787)-750-4300 or fax (787)-768-2910.
Limited Warranty Limits And Exclusions
This warranty ONLY COVERS failures due to defects in materials or workmanship, and DOES NOT COVER normal wear and tear or cosmetic damage. The warranty ALSO DOES NOT COVER damages which occurred in shipment, or failures which are caused by products not supplied by the warrantor, or failures which result from accidents, misuse, abuse, neglect, mishandling, misapplication, alteration, faulty installation, set-up adjustments, misadjustment of consumer controls, improper maintenance, power line surge, lightning damage, modification, or commercial use (such as in a hotel, office, restaurant, or other business), rental use of the product, service by anyone other than a Factory Servicenter or other Authorized Servicer, or damage that is attributable to acts of God.
THERE ARE NO EXPRESS WARRANTIES EXCEPT AS LISTED UNDER "LIMITED WARRANTY COVERAGE". THE WARRANTOR IS NOT LIABLE FOR INCIDENTAL OR CONSEQUENTIAL DAMAGES RESULTING FROM THE USE OF THIS PRODUCT, OR ARISING OUT OF ANY BREACH OF THIS WARRANTY. (As examples, this excludes damages for lost time, travel to and from the servicer, loss of media or images, data or other memory content. The items listed are not exclusive, but are for illustration only.) ALL EXPRESS AND IMPLIED WARRANTIES, INCLUDING THE WARRANTY OF MERCHANTABILITY, ARE LIMITED TO THE PERIOD OF THE LIMITED WARRANTY.
Some states do not allow the exclusion or limitation of incidental or consequential damages, or limitations on how long an implied warranty lasts, so the exclusions may not apply to you. This warranty gives you specific legal rights and you may also have other rights which vary from state to state. If a problem with this product develops during or after the warranty period, you may contact your dealer or Servicenter. If the problem is not handled to your satisfaction, then write to the warrantor's Consumer Affairs Department at the addresses listed for the warrantor.
PARTS AND SERVICE WHICH ARE NOT COVERED BY THIS LIMITED WARRANTY ARE YOUR RESPONSIBILITY.
Customer Services Directory
Obtain Product Information and Operating Assistance; locate your nearest Dealer or Servicenter; purchase Parts and Accessories; or make Customer Service and Literature requests by visiting our Web Site at:
http://www.panasonic.com/consumersupport
or, contact us via the web at:
http://www.panasonic.com/contactinfo
You may also contact us directly at:
1-800-211-PANA (7262),
Monday-Friday 9 am-9 pm; Saturday-Sunday 10 am-7 pm, EST.
For hearing or speech impaired TTY users, TTY : 1-877-833-8855
Accessory Purchases
Purchase Parts, Accessories and Instruction Books online for all Panasonic Products by visiting our Web Site at: http://www.pstc.panasonic.com
or, send your request by E-mail to:
npcparts@us.panasonic.com
You may also contact us directly at:
1-800-332-5368 (Phone) 1-800-237-9080 (Fax Only) (Monday – Friday 9 am to 9 pm, EST.)
Panasonic Service and Technology Company
20421 84th Avenue South, Kent, WA 98032
(We Accept Visa, MasterCard, Discover Card, American Express, and Personal Checks)
For hearing or speech impaired TTY users, TTY : 1-866-605-1277
Service in Puerto Rico
Panasonic Puerto Rico, Inc.
Ave. 65 de Infantería, Km. 9.5, San Gabriel Industrial Park, Carolina, Puerto Rico 00985
Phone (787)750-4300, Fax (787)768-2910
Panasonic Canada Inc.
PANASONIC PRODUCT – LIMITED WARRANTY
Panasonic Canada Inc. warrants this product to be free from defects in material and workmanship and agrees to remedy any such defect for a period as stated below from the date of original purchase.
Technics Audio Product: One (1) year, parts and labour
Panasonic Portable / Clock Radio (without Tape, CD, MD): One (1) year, parts and labour
Panasonic Audio / SD Audio Product: One (1) year, parts and labour
Panasonic DVD Product: One (1) year, parts and labour
Panasonic Combination DVD Player / VCR: One (1) year, parts and labour
Panasonic Combination DVD Recorder / VCR: One (1) year, parts and labour
Accessories including rechargeable batteries: Ninety (90) days
LIMITATIONS AND EXCLUSIONS
This warranty does not apply to products purchased outside Canada or to any product which has been improperly installed, subjected to usage for which the product was not designed, misused or abused, damaged during shipping, or which has been altered or repaired in any way that affects the reliability or detracts from the performance, nor does it cover any product which is used commercially. Dry cell batteries are also excluded from coverage under this warranty.
This warranty is extended to the original end user purchaser only. A purchase receipt or other proof of date of original purchase is required before warranty service is performed.
THIS EXPRESS, LIMITED WARRANTY IS IN LIEU OF ALL OTHER WARRANTIES, EXPRESS OR IMPLIED, INCLUDING ANY IMPLIED WARRANTIES OF MERCHANTABILITY AND FITNESS FOR A PARTICULAR PURPOSE.
IN NO EVENT WILL PANASONIC CANADA INC. BE LIABLE FOR ANY SPECIAL, INDIRECT OR CONSEQUENTIAL DAMAGES.
In certain instances, some jurisdictions do not allow the exclusion or limitation of incidental or consequential damages, or the exclusion of implied warranties, so the above limitations and exclusions may not be applicable.
WARRANTY SERVICE
FOR PRODUCT OPERATION ASSISTANCE, please contact:
Our Customer Care Centre: Telephone #: (905) 624-5505
1-800 #: 1-800-561-5505
Fax #: (905) 238-2360
Email link: "Customer support" on www.panasonic.ca
FOR PRODUCT REPAIRS, please locate your nearest Authorized Servicentre at www.panasonic.ca:
Link: "Servicentres™ locator" under "Customer support"
IF YOU SHIP THE PRODUCT TO A SERVICENTRE
Carefully pack and send prepaid, adequately insured and preferably in the original carton. Include details of the defect claimed, and proof of date of original purchase.
Accessories

Please check and identify the supplied accessories. Use numbers indicated in parentheses when asking for replacement parts. (Product numbers correct as of December 2007. These may be subject to change.)
Only for U.S.A.: To order accessories, refer to "Accessory Purchases" on page 42.
For other areas: To order accessories, call the dealer from whom you made your purchase.
□ 1 Remote control (N2QAYB000214)


Screws (XTN5+10FFJK)
8 Screws PT760 PT954 16 Screws PT960 PT1054

4 Small screws
PT760 PT960
(XTB3+8JFJK)

□ 2 Remote control batteries

1 FM indoor antenna (RSA0007-M)

Pipes
☐ 2 Set of pipes (with cable)
PT760
- [RYBX0182-K (white)] - [RYBX0183-K (red)]
Stands
2 Stands (with cable) PT960
- [RYPX0303-KL (white)]
- [RYPX0303-KR (red)] PT954 PT1054
- [RYPX0281-KL (white)]
- [RYPX0281-KR (red)]

Bases
2 Bases
PT760 PT960 (RYBX0176-K)

1 Videocab (K2KA2BA00001)

1 Sheet of speaker cable stickers


PT960 (RYBX0185-K)

2 Stands (with cable) PT1054 (RYPX0283-K)

2 Bases
PT960 (RYPX0206-1K2) PT954 (RYPX0196-1K1)
4 Bases
PT1054 (RYPX0196-1K1)


CAUTION!
DO NOT INSTALL OR PLACE THIS UNIT IN A BOOKCASE, BUILT-IN CABINET OR IN ANOTHER CONFINED SPACE. ENSURE THE UNIT IS WELL VENTILATED. TO PREVENT RISK OF ELECTRIC SHOCK OR FIRE HAZARD DUE TO OVERHEATING, ENSURE THAT CURTAINS AND ANY OTHER MATERIALS DO NOT OBSTRUCT THE VENTILATION VENTS.
The socket outlet shall be installed near the equipment and easily accessible. The mains plug of the power supply cord shall remain readily operable.
To completely disconnect this apparatus from the AC Mains, disconnect the power supply cord plug from AC receptacle.
THE FOLLOWING APPLIES ONLY IN CANADA.
This device complies with RSS-210 of the IC Rules.
Operation is subject to the following two conditions:
(1) This device may not cause harmful interference,
(2) This device must accept any interference received, including interference that may cause undesired operation of the device.
For wireless system
Product Identification Marking is located on the bottom of unit.
-If you see this symbol-
Information on Disposal in other Countries outside the European Union

This symbol is only valid in the European Union. If you wish to discard this product, please contact your local authorities or dealer and ask for the correct method of disposal.
| CAUTION | - LASER RADIATION WHEN OPEN, DO NOT STARE INTO BEAV. | FDA 21 CTR / Class I |
| CAUTION | - CLASS IM VIMBLE AND INVEBILE LASER RADIATION WHEN OPEN, DO NOT VIEW DIRECTLY WITH OPTICAL INSTRUMENTAL, BECKERS-1 + ARI Class IV | |
| VARNING | - CLASS IM SYNLOG OCH OSYNLIG LASERSTRALING NAR DENNA DEL AR OPPNAL, BETRANCA SU STRÅLEN DIRECT GENOY OPPTIN INSTRUMENT | |
| FORSITIG | - SYNLOG OCH OSYNLIG LASERSTRALING KCLASS IM PAR LAGET IN ABEND, UNDGA AT LE GLE PÀ VED OPTIKE INSTRUMENTER. | |
| VARO! | - AKTIRESA OLET ALTTINA LUOKAN IM NAYKAVA JAKNYAMATONTA, LASERATELLYA, ALA KATO OPTIPELLA LARTETLLA SUOPAAN SATIENEEN. | |
| VORSICHT | - SICHTBARE UND USDCITBARE LASERSTRALUNG KRASSE IM MEIN ARDECKUNG SLÖDNET, NECH DIRECT MFT OPTIKON INSTRUMENTEN RETRACTION. | |
| ATTENTION | - RAYONNEVENT LASER VIMBLE ET INVEBLE, CLASSE IM EN CAS D'OUERTURE, NE PAS REGARDOI DIRECTMENT À DADE D'ISTRUMENTS OF TFIQUE. | |
| 注意 | - ここを聞くと可視及び不可視レープ光が出ます。ピームを見たり、触れたりしないでください。 | |
| 注意 | - 打开时有可见及不可见激光辐射,避免光束照射。GB7241_1-002138 度 | RQLXS00275 |
(Inside of product)
Panasonic Consumer Electronics Company, Division of Panasonic Corporation of North America
One Panasonic Way Secaucus, New Jersey 07094
http://www.panasonic.com
Panasonic Puerto Rico, Inc.
San Gabriel Industrial Park, Carolina,
Puerto Rico 00985
Panasonic Canada Inc.
5770 Ambler Drive
Mississauga, Ontario
L4W 2T3
www.panasonic.ca
En
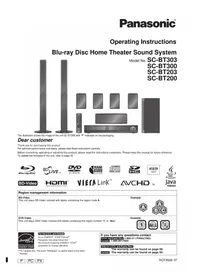

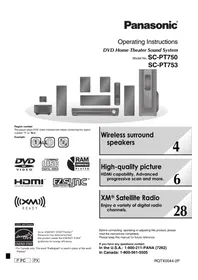
- REGION NUMBER
- DEAR CUSTOMER
- CAUTION
- WARNING
- THE FOLLOWING APPLIES ONLY IN THE U.S.A
- FCC NOTE
- IMPORTANT SAFETY INSTRUCTIONS
- TABLE OF CONTENTS
- GETTING STARTED
- PLAYING DISCS
- OTHER OPERATIONS
- USING THE VIERA LINK™ "HDAVI CONTROL™
- REFERENCE
- STEP
- ASSEMBLING THE SPEAKERS
- PREPARATION
- PT760: FRONT SPEAKERS
- PT960: SURROUND SPEAKERS
- PT
- SPEAKER ASSEMBLY OPTION
- PREVENTING THE SPEAKERS FROM FALLING
- STEP2 POSITIONING
- NOTE
- SETUP EXAMPLE
- EXPAND YOUR LISTENING OPTIONS WITH A MULTI-ROOM WIRELESS SOUND SYSTEM
- OPTIONAL PANASONIC WIRELESS ACCESSORY SH-FX
- NOTES ON SPEAKER USE
- USE ONLY SUPPLIED SPEAKERS
- IF IRREGULAR COLORING OCCURS ON YOUR TV
- IF THIS OCCURS, TURN THE TV OFF FOR ABOUT 30 MINUTES
- SPEAKER INSTALLATION OPTIONS
- ATTACHING TO A WALL
- E.G. PT
- FRONT SPEAKER
- E.G. CENTER SPEAKER
- REATTACHING THE FRONT SPEAKER CABLE
- CABLE CONNECTIONS
- AUDIO AND VIDEO CONNECTIONS
- SPEAKER CONNECTIONS
- DO NOT
- CONNECTING THE SPEAKERS TO THE MAIN UNIT
- RADIO ANTENNA CONNECTIONS
- USING AN FM/AM OUTDOOR ANTENNA (OPTIONAL)
- FM OUTDOOR ANTENNA
- [USING A TV ANTENNA (NOT INCLUDED)]
- AM OUTDOOR ANTENNA
- [USING A VINYL WIRE (NOT INCLUDED)]
- DIGITAL TRANSMITTER CONNECTION
- AC CORD CONNECTIONS
- CONSERVING POWER
- PREPARING THE REMOTE CONTROL
- BATTERIES
- USE
- PERFORMING QUICK SETUP
- DETAILS OF SETTINGS
- PRESETTING STATIONS AUTOMATICALLY
- SELECT "FM" OR "AM
- CONFIRMING THE PRESET CHANNELS
- SELECT THE CHANNEL
- IF NOISE IS EXCESSIVE
- AVOIDING INTERFERENCE WITH OTHER PANASONIC EQUIPMENT
- SET THE SLEEP TIMER
- ⑭ TV OPERATIONS
- ⑳ MUTE THE SOUND
- AUTO OPERATION ON/OFF INDICATOR
- UTILIZING THE START MENU
- WHEN "INPUT SELECT" IS SELECTED
- BASIC PLAY
- USING THE REMOTE CONTROL
- OTHER PLAYBACK FUNCTIONS
- PLAYING CDS SEQUENTIALLY (CD MODE)
- REPEAT PLAY
- PROGRAM AND RANDOM PLAY
- PROGRAM PLAY (UP TO 30 ITEMS)
- DISC PROGRAM
- ALL-DISC PROGRAM (WHEN CD MODE IS ON)
- TO SELECT ALL THE ITEMS
- TO CLEAR THE SELECTED PROGRAM
- TO CLEAR THE WHOLE PROGRAM
- RANDOM PLAY
- DISC RANDOM
- ALL-DISC RANDOM (WHEN CD MODE IS ON)
- USING NAVIGATION MENUS
- PLAYING DATA DISCS
- PLAYING FROM THE SELECTED ITEM
- SELECT AN ITEM
- SELECTING THE PICTURE IN THUMBNAIL MENU JPEG
- TO GO TO OTHER GROUP
- PLAYING RAM AND DVD-R/-RW (DVD-VR) DISCS DVD-VR
- PLAYING THE PROGRAMS
- SELECT THE PROGRAM
- PLAYING A PLAY LIST
- SELECT THE PLAY LIST
- MENU 1 (DISC/PLAY)
- CONFIRMING HDMI INFORMATION
- CHANGING THE PLAYER SETTINGS
- SELECTING THE DELAY TIME OF THE SPEAKERS
- (EFFECTIVE WHEN PLAYING 5.1-CHANNEL SOUND)
- TO MAKE THE DELAY TIME SETTINGS
- VIERA LINK "HDAVI CONTROL
- SETTING THE TV AUDIO FOR VIERA LINK "HDAVI CONTROL
- AUTOMATIC SETUP
- ONE TOUCH PLAY
- TO START DISC PLAYBACK
- AUTO INPUT SWITCHING
- POWER OFF LINK
- SPEAKER CONTROL VIERA LINK CONTROL ONLY WITH
- HOME THEATER
- TV
- S REMOTE
- CONTROL [FOR "HDAVI CONTROL 2 (OR LATER)"]
- USING SOUND EFFECTS
- SETTING THE SOUND EFFECTS
- SELECT A SOUND MODE
- WHILE THE SELECTED MODE IS DISPLAYED
- MAKE SETTINGS
- EQUALIZER
- H.BASS PT960 PT
- REAL CENTER FOCUS
- SURROUND ENHANCER
- USING WHISPER-MODE SURROUND
- ENJOYING THE FM/AM RADIO
- ADJUSTING THE SUBWOOFER LEVEL
- USING SUBWOOFER BOOST
- MAIN UNIT ONLY
- ADJUSTING THE SPEAKER LEVEL
- ENTER TEST TONE MODE
- TO ADJUST SPEAKER LEVEL DURING PLAY
- MANUAL TUNING
- SELECT THE FREQUENCY
- PRESETTING STATIONS MANUALLY
- FM FREQUENCY STEP
- OPERATING OTHER EQUIPMENT
- ENJOYING TV AUDIO
- SELECT "AUX
- ENJOYING DIGITAL AUDIO
- SELECT "D-IN" (DIGITAL IN)
- MAKING SETTINGS FOR DIGITAL AUDIO INPUT
- DYNAMIC RANGE COMPRESSION
- DRC OFF
- PCM FIX MODE
- USING THE IPOD
- CONNECT THE IPOD (NOT INCLUDED) FIRMLY
- ENJOYING MUSIC
- TO SELECT SHUFFLE MODES
- TO SELECT REPEAT MODES
- ENJOYING PHOTOS/VIDEOS
- PLAY A SLIDESHOW OR VIDEO ON YOUR IPOD
- WHEN USING THE START MENU IN "IPOD" MODE
- ABOUT RECHARGING THE BATTERY
- COMPATIBLE IPOD
- DISCS THAT CAN BE PLAYED
- NOTE ABOUT USING A DUALDISC
- DISCS THAT CANNOT BE PLAYED
- DISC HANDLING PRECAUTIONS
- DVD-RAM
- DVD-R/RW
- CD-R/RW
- MAINTENANCE
- TO CLEAN DISCS
- CLEAN THIS UNIT WITH A SOFT, DRY CLOTH
- TROUBLESHOOTING GUIDE
- DECODER
- DOLBY DIGITAL
- THIS SURROUND SYSTEM IS USED IN MANY MOVIE THEATERS AROUND THE WORLD
- DYNAMIC RANGE
- FRAME STILL AND FIELD STILL
- HDMI (HIGH-DEFINITION MULTIMEDIA INTERFACE)
- I/P/B
- JPEG (JOINT PHOTOGRAPHIC EXPERTS GROUP)
- LINEAR PCM (PULSE CODE MODULATION)
- MP3 (MPEG AUDIO LAYER 3)
- PLAYBACK CONTROL (PBC)
- PROGRESSIVE/INTERLACED
- SAMPLING FREQUENCY
- AMPLIFIER SECTION
- FM/AM TUNER, TERMINALS SECTION
- DISC SECTION
- VIDEO SECTION
- SPEAKER SECTION
- PT760 FRONT SPEAKERS SB-HF
- PT760 SURROUND SPEAKERS SB-HS
- PT960 FRONT SPEAKERS SB-HF
- PT960 SURROUND SPEAKERS SB-HS
- PT954 FRONT SPEAKERS SB-HF
- PT954 SURROUND SPEAKERS SB-HS
- PT1054 FRONT SPEAKERS SB-HF
- PT1054 SURROUND SPEAKERS SB-HS
- PT760 PT960 CENTER SPEAKER SB-HC
- SUBWOOFER SB-HW
- GENERAL
- SPECIFICATIONS
- WIRELESS SYSTEM AND DIGITAL TRANSMITTER
- RMS OUTPUT POWER
- FTC OUTPUT POWER
- RF SECTION
- WIRELESS MODULE
- PRODUCT SERVICE
- PRODUCT INFORMATION
- LISTENING CAUTION
- USER MEMO
- LIMITED WARRANTY (ONLY FOR U.S.A.)
- PANASONIC AUDIO PRODUCTS LIMITED WARRANTY
- LIMITED WARRANTY COVERAGE
- CARRY-IN OR MAIL-IN SERVICE
- LIMITED WARRANTY LIMITS AND EXCLUSIONS
- THERE ARE NO EXPRESS WARRANTIES EXCEPT AS LISTED UNDER "LIMITED WARRANTY COVERAGE". THE WARRANTOR IS NOT LIABLE FOR INCIDENTAL OR CONSEQUENTIAL DAMAGES RESULTING FROM THE USE OF THIS PRODUCT, OR ARISING OUT OF ANY BREACH OF THIS WARRANTY. (AS EXAMPLES, THIS EXCLUDES DAMAGES FOR LOST TIME, TRAVEL TO AND FROM THE SERVICER, LOSS OF MEDIA OR IMAGES, DATA OR OTHER MEMORY CONTENT. THE ITEMS LISTED ARE NOT EXCLUSIVE, BUT ARE FOR ILLUSTRATION ONLY.) ALL EXPRESS AND IMPLIED WARRANTIES, INCLUDING THE WARRANTY OF MERCHANTABILITY, ARE LIMITED TO THE PERIOD OF THE LIMITED WARRANTY
- CUSTOMER SERVICES DIRECTORY
- ACCESSORY PURCHASES
- SERVICE IN PUERTO RICO
- PANASONIC PRODUCT – LIMITED WARRANTY
- LIMITATIONS AND EXCLUSIONS
- WARRANTY SERVICE
- ACCESSORIES
- THE FOLLOWING APPLIES ONLY IN CANADA
Brand : PANASONIC
Model : SC-PT760
Category : Home Theater System