
SV-240B - VCR SAMSUNG - Free user manual and instructions
Find the device manual for free SV-240B SAMSUNG in PDF.
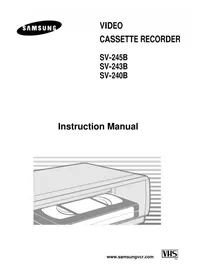


| Product Type | Video Cassette Recorder (VCR) |
| Brand | Samsung |
| Model | SV-240B |
| Video System | NTSC/PAL |
| Tape Format | VHS |
| Recording Speed | SP, LP, EP |
| Inputs | RF antenna, RCA composite audio/video |
| Outputs | RF out, RCA composite audio/video |
| Timer Recording | Up to 8 programs / 1 month |
| Remote Control | Infrared |
| Dimensions (W x H x D) | 430 x 95 x 275 mm |
| Weight | 3.5 kg |
| Power Consumption | 25 W |
| Power Supply | 110-240 V AC, 50/60 Hz |
| Head Cleaning | Auto cleaning mechanism |
| Maintenance | Clean tape heads regularly with cleaning tape |
| Safety | Do not insert objects; keep away from moisture; refer to manual |
| Spare Parts | Remote control, AC adapter, RCA cables |
| Reparability | Refer to qualified service personnel |
Frequently Asked Questions - SV-240B SAMSUNG
User questions about SV-240B SAMSUNG
0 question about this device. Answer the ones you know or ask your own.
Ask a new question about this device
Download the instructions for your VCR in PDF format for free! Find your manual SV-240B - SAMSUNG and take your electronic device back in hand. On this page are published all the documents necessary for the use of your device. SV-240B by SAMSUNG.
USER MANUAL SV-240B SAMSUNG
Safety Precautions

CAUTION
RISK OF ELECTRIC SHOCK DO NOT OPEN

CAUTION. TO REDUCE THE RISK OF ELECTRIC SHOCK, DO NOT REMOVE REAR COVER. NO USER SERVICEABLE PARTS INSIDE. REFER TO QUALIFIED SERVICE PERSONNEL.
IMPORTANT NOTE
The mains lead on this equipment is supplied with a moulded plug incorporating a fuse. The value of the fuse is indicated on the pin face of the plug. If it requires replacing, a fuse approved to BS1362 of the same rating must be used.
Never use the plug with the fuse cover omitted if the cover is detachable. If a replacement fuse cover is required, it must be of the same colour as the pin face of the plug. Replacement covers are available from your dealer.
If the fitted plug is not suitable for the power points in your house or the cable is not long enough to reach a power point, you should obtain a suitable safety approved extension lead or consult your dealer for assistance.
However, if there is no alternative to cutting off the plug, remove the fuse and then safely dispose of the plug. Do not connect the plug to a mains socket, as there is a risk of shock hazard from the bared flexible cord.
IMPORTANT
The wires in the mains lead are coloured in accordance with the following code: -
BLUE = NEUTRAL
BROWN = LIVE
As these colours may not correspond with the coloured markings identifying the terminals in your plug, proceed as follows: -
The wire coloured BLUE must be connected to the terminal marked with the letter N or coloured BLUE or BLACK. The wire coloured BROWN must be connected to the terminal marked with the letter L or coloured BROWN or RED.
WARNING: DO NOT CONNECT EITHER WIRE TO THE EARTH TERMINAL WHICH IS MARKED WITH THE LETTER E OR BY THE EARTH SYMBOL, OR COLOURED GREEN OR GREEN AND YELLOW.

DANGER
This symbol is intended to alert you to the presence of dangerous voltage within the product.

CAUTION
This symbol is intended to alert you to the presence of important instructions accompanying the product.
◆ FOREWORD
■ Safety Instructions.... 6
◆ VCR OVERVIEWS
■ Front View of the VCR.... 7 ■ Rear View of the VCR 7 ■ Infrared Remote Control (SV-245B) 8 ■ Infrared Remote Control (SV-243B/SV-240B) 8 ■ Display Indicators 9 ■ Accessories 9
■ Deciding How to Connect Your VCR.... 10 ■ Connecting Your VCR to the TV using the Coaxial Cable.... 11 ■ Connecting Your VCR to the TV using the SCART Cable 11 ■ Connecting Your VCR to the Satellite receiver or Other Equipment ...... 12 - Plug & Auto Set Up.... 13 ■ Tuning Your Television for the VCR.... 14
- Inserting Batteries in the Remote Control.... 15 ■ Setting the Date and Time.... 15 ■ Displaying/Hiding On-Screen Information 16 ■ Setting the VCR Output Channel.... 16 ■ Presetting the Stations Automatically.... 17 ■ Presetting the Stations Manually 18
- Clearing a Preset Station.... 19 ■ Changing the Preset Station Table.... 20
◆ RECORDING TELEVISION BROADCASTS
■ Selecting the Cassette Type.... 21 ■ Selecting the Recording Speed.... 21 ■ Protecting a Recorded Cassette.... 22 ■ Recording a Programme Immediately 22 - Recording a Programme with Automatic Stop.... 23 ■ Using the VIDEOPLUS+ Feature (SV-245B/SV-243B Only).... 24 ■ Modifying VIDEOPLUS+ Programming (SV-245B/SV-243B Only) 25 ■ Using the Timer Programming Feature 26 - Checking a Preset Recording.... 27 ■ Cancelling a Preset Recording 27
◆ PLAYING BACK
■ Playing a Cassette.... 28 ■ Adjusting Picture Alignment Automatically (SV-243B/SV-240B Only)...... 28 ■ Adjusting Picture Alignment Manually 28 ■ Intelligent Picture Control 29 ■ Intelligent Picture Control (SV-243B/SV-240B Only).... 29 ■ Selecting the Colour Mode 30 ■ Selecting the Audio Mute Mode.... 30

Safety Instructions
The following illustrations represent precautions.

The lightning bolt is a warning sign alerting you to dangerous voltage inside the product. DO NOT OPEN THE VCR. Refer to service personnel.

Do NOT expose the VCR to extreme temperature conditions (below 5°C and above 40°C) or to extreme humidity conditions (less than 10% and more than 75%).

Do NOT expose the VCR to direct sunlight.

Do NOT expose the VCR to any liquids.

Do NOT place any objects on the VCR or remote control.

During a storm and/or lightning, unplug the VCR from the mains socket and aerial.

If the remote control is not used for a long period of time, remove the batteries and store it in a cool, dry place.
THIS DEVICE IS NOT FOR USE IN INDUSTRIAL ENVIRONMENTS
Infrared Remote Control (SV-245B)

Infrared Remote Control (SV-243B/SV-240B)

Deciding How to Connect Your VCR
You must take into account various factors when connecting audio or video systems:
◆ Types of connectors available on your systems ◆ Systems connected permanently to the VCR (satellite receiver for example) or temporarily (camcorder for example)
Your VCR is equipped with the following connectors.
| Connector Location Type Direction Recommended Use | ||||
| AV1(EURO AV) | Rear SCART In/Out ◆ Television | ◆ Satellite receiver◆ Other VCR | ||
| OUT TO TV | Rear | 75 Ωcoaxial | Out | ◆ Television |
| IN FROM ANT. | Rear[56ZS] | 75 Ωcoaxial | In | ◆ Aerial◆ Cable television network◆ Satellite receiver |

Whenever you connect an audio or video system to your VCR, ensure that all elements are switched off.
Refer to the documentation supplied with your equipment for detailed connection instructions and associated safety precautions.
Connecting Your VCR to a Satellite Receiver or Other Equipment
You can connect your VCR to a satellite receiver or other VCR using the SCART cable if the appropriate outputs are available on the equipment chosen. The following illustrations give a few examples of the connection possibilities.
1. AV1 (EURO AV): By means of 21-pin Scart Cable
Plug the SCART cable from the satellite receiver or other equipment into the AV1 (EURO AV) socket on the rear of the VCR.
After making this connection, select the source by pressing the INPUT button for the AV1 input sources.
2. By means of RF Coaxial Cable
After making this connection, you must preset the station received through the satellite tuner.
The RF output channel of the satellite receiver should be adjusted away from channel 60, which is used by the VCR, e.g., re-adjust to channel 65.

Tuning Your Television for the VCR


You must tune your television for the VCR only if you are not using a Scart cable.
To view pictures from your VCR when a Scart cable is used, the television must be set to the audio/video mode (AV).
1 Switch on the television. 2 Switch on the VCR by pressing STANDBY/ON on the front of the VCR or VCR STANDBY/ON (STANDBY/ON) on the remote control. 3 Select a programme position on the television to be reserved for use with your VCR. 4 Insert the video cassette in the VCR. Check that the VCR starts reading the cassette; if not, press ▶II button. 5 Start a scan on your television or set the television to UHF channel 60. 6 Fine tune the television until the pictures and sound are obtained clearly. 7 If you cannot find the pictures and sound, or there is interference from nearby channels, it may be necessary to change the setting of the VCR output channel (see Setting the VCR Output Channel on page 16 and Problems and Solutions on page 40). 8 When the picture and sound are perfectly clear, store this channel at the desired programme position on the television. Result: That programme is now reserved for use with your VCR.
Inserting Batteries in the Remote Control
You must insert or replace the batteries in the remote control when you:
◆ Purchase the video cassette recorder ◆ Find that the remote control is no longer working correctly
1 Push the tab in the direction of the arrow to release the battery compartment cover on the rear of the remote control. 2 Insert two AA, R6 or equivalent batteries, taking care to respect the polarities:
◆ + on the battery with + on the remote control
◆ – on the battery with – on the remote control
3 Replace the cover by aligning it with the base of the remote control and pushing it back into place.

Do not mix different battery types (manganese and alkaline for example).


Setting the Date and Time
Your VCR contains a 24-hour clock and calendar used to:
◆ Automatically stop programme recording ◆ Preset your VCR to record a programme automatically
You must set the date and time when:
◆ You purchase the video cassette recorder

◆ The time and date are set automatically from the broadcast signal. If the signal is weak or ghosting occurs, the time and date may not be set automatically. In this case, they should be set manually.
◆ Do not forget to reset the time when you change clocks from winter to summer time and vice versa.
1 Press MENU on the remote control. Result: The programming menu is displayed.
2 Press the corresponding ▲, ▼ or ◀, ▶ buttons to select the CLOCK SET option.
3 Press the OK button to select this option. Result: The CLOCK SET menu is displayed.
4 Press ◀ or ▶ to select the hour, minutes, day, month and year. Result: The option selected flashes.
5 Press the ▲ or ▼ buttons to increase or decrease the value. Result: The day of the week is displayed automatically.
➢ You can hold the ▲ or ▼ buttons down to scroll more quickly through the values.
6 On completion, press MENU twice to exit the menu.


Displaying/Hiding On-Screen Information


Your VCR displays most information both on the VCR and the television.
You can choose to display or hide this information on the television screen (except for the Index, Programming MENU and
VIDEOPLUS+ functions ★(SV-245B/SV-243B only)), which cannot be hidden).
1 Press MENU on the remote control.
Result: The programming menu is displayed.
2 Press the corresponding
USER SET option.
Use the ▲, ▼, ◀, or ▶ buttons to select the
3 Press the OK button to select this option.
Result: The USER SET menu is displayed.
4 Press the corresponding selected.
Use the ▲ or ▼ buttons until the OSD option is
5 To... Press
◀ or ▶, until...
Display on-screen information: ON is displayed.
Hide on-screen information: OFF is displayed.
6 On completion, press MENU twice to exit the menu.
Setting the VCR Output Channel


Your VCR output channel may need to be changed if the pictures suffer from interference or if your TV cannot find the pictures. Also, you can change the VCR output channel to adjust the frequency in which information is displayed on the screen.
1 Press MENU on the remote control.
Result: The programming menu is displayed.
2 Press the corresponding
▲, ▼ or ◀, ▶ buttons to select the
INSTALLATION option.
3 Press the OK button to select this option.
Result: The INSTALLATION menu is displayed.
4 Press the corresponding
▲ or ▼ buttons, until the VCR OUTPUT
CH option is selected.
5 Select the required output channel (CH21~CH69) by pressing the
◀ or ▶ buttons.
6 On completion, press MENU twice to exit the menu.
Then tune your television again (see page 14).


You do not need to preset the stations manually if you have already set them automatically.
1 Press the MENU button on the remote control. Result: The programming menu is displayed.
2 Press the corresponding ▲, ▼ or ◀, ▶ buttons to select the INSTALLATION option.
3 Press the OK button to select this option. Result: The INSTALLATION menu is displayed.
4 Press the ▲ or ▼ buttons until the MANUAL SET UP option is selected.
5 Press the ▶ button to select a MANUAL SET UP option. Result: The TV STATION TABLE menu is displayed.
6 Press the ▲ or ▼ buttons to select a programme number as required.
7 Press the ▶ button to preset the station. Result: The MANUAL TUNING menu is displayed.
8 Press the ◀ or ▶ buttons to start scanning. Result: The frequency band is scanned and the first station found is displayed.
9 Press the ▲ or ▼ buttons until the cursor is placed in front of the NAME. The station name is set automatically from the broadcast signal.
10 To change the programme's name, press the ▶ button. Result: The first letter of the name flashes.
11 To... Then...
Select a character Press the ▲ or ▼ button until the in the name required character is displayed (letters, numbers or "-" character).
Move to the next or Press the previous character respectively. ▶or ◀buttons
12 If you... Then...
| Wish to store the◆ station displayed | Press the corresponding ▲ or ▼ buttons, until theMFTis selected.◆ Press the ◀ or ►buttons to adjust the picture, if necessary.◆ Press OK to store the station |
| Do not wish to store the station displayed | ◆ Press the corresponding ▲ or ▼ buttons, until theCHis selected.◆ Press the ◀ or ►buttons to go on scanning the frequency band and display the next station◆ Go back to the beginning of Step 12 |
13 Repeat this procedure from Step 6 onwards, until all the required stations have been stored.
14 On completion, press the MENU button three times to exit the menu.

Changing the Preset Station Table


You can rearrange the Station Table and give different programme numbers to the stations listed according to your own preferences.
1 Press the MENU button on the remote control. 2 Press the corresponding ▲, ▼ or ◀, ▶ buttons to select the INSTALLATION option. 3 Press the OK button to select this option. Result: The INSTALLATION menu is displayed. 4 Press the ▲ or ▼ buttons to select MANUAL SET UP option. And then press the ▶ button to select this option. Result: The TV STATION TABLE menu is displayed. 5 Press the corresponding ▲ or ▼ buttons, until the required preset TV programme is selected. Result: The selected station is displayed at the same time on the television screen. 6 To change the programme number assigned to a station press the OK button on the remote control. (For example, To move a TV station in programme 1 to programme 3) 7 Press the ▲ or ▼ buttons to select required position. And then press OK again to swap the position. 8 You can modify this station by repeating the same procedure from Step 5 onwards. 9 On completion, press the MENU button three times to exit the menu.

Protecting a Recorded Cassette

Video cassettes have a safety tab to prevent accidental erasure. When this tab has been removed, you cannot record on the tape.
1 If you wish to protect a cassette, break off the tab using a small screwdriver.
2 To re-record over a protected cassette (safety tab broken), cover the hole with adhesive tape.
Recording a Programme Immediately


Before recording a programme, you must have preset the corresponding station (unless you are recording via an external video source). If you have not done so, refer to pages 17 and 18.
1 Switch on the television.
2 To monitor the programme being recorded, select the television channel reserved for use with your VCR (or the AV input if used).
3 Insert the cassette on which the programme is to be recorded, with the window visible and the safety tab intact or the opening covered with adhesive tape.
Result: The VCR is switched on automatically.
4 Select:
◆ The station to be recorded using the PROG/TRK (▲ or ▼) / PROG (▲ or ▼) buttons or
◆ The AV1 source using the INPUT button for a satellite tuner or external video source
Result: The station number is displayed and the programme can be seen on the television.
5 Select the recording speed by pressing the SPEED button as many times as required (see page 21).
6 Hold REC down for a while to start recording.
Result: The record indicator appears on the television and VCR display. An index is recorded on the tape (see page 32).
7 To stop recording, press
■ once.

◆ If your VCR ejects the cassette when you start recording, check to make sure that the cassette's safety tab is intact or that the opening (created by a broken safety tab) is covered with adhesive tape.
◆ If you reach the end of the tape while recording, the cassette rewinds automatically.

Using the VIDEOPLUS+ Feature ★(SV-245B/SV-243B Only)


Before presetting your VCR:
◆ Switch on both the television and your VCR ◆ Check that the date and time are correct ◆ Insert the cassette on which the programme is to be recorded (safety tab intact)
Up to six programmes can be preset.
1 Press the TIMER button.
Result: The TIMER METHOD is displayed.
2 Press the corresponding option is selected.
▲ or ▼ buttons, until the VIDEOPLUS
3 Press the
Result: A message is displayed to allow you to enter the VIDEOPLUS+ code.

If all six programmes have been set, the message TIMER IS FULL is displayed. Refer to page 27 if you wish to cancel a preset recording.
4 Press the numeric buttons to enter the code opposite the programme that you wish to record in your television magazine.
If you wish to correct the VIDEOPLUS+ code that you are entering:
◆ Press the cleared ◀ button until the digit to be corrected is ◆ Enter the correct digit
5 Press the MENU button.
Result: The information concerning the programme is displayed.
When using the VIDEOPLUS+ function for the first time with stored stations, the programme number flashes. This one time, you must enter the station number manually by pressing the ▲ or ▼ buttons. Refer to the following page if:
◆ The programme number or times flash ◆ You wish to modify the programme
6 If the programme and times are correct, press the MENU button.
7 Press the VCR STANDBY/ON (STANDBY/ON) button to activate the timer.
8 Refer to page 27 if you wish to:
◆ Check that your VCR has been programmed correctly ◆ Cancel a preset recording

The numbers next to each TV programme listing are VIDEOPLUS+ code numbers, which allow you to programme your videorecorder instantly with the remote control. Tap in the VIDEOPLUS+ code for the programme you wish to record.
Using the Timer Programming Feature
★(SV-245B/SV-243B)


★(SV-245B)
★(SV-243B/SV-240B)
The Timer Programming feature allows you to preset the VCR to record a programme up to one month before that programme is to be broadcast. Up to six programmes can be preset.

Before presetting a recording, check that the date and time are correct.
1 - Insert the cassette and press the TIMER button.
Press the ▲ or ▼ buttons to select the STANDARD option and then press the ▶ button or,
◆ Press MENU on the remote control.
Result: The programming menu is displayed.
◆ Press the OK button to select TIMER PROGRAMMING option.
Result: The TIMER PROGRAMMING menu is displayed.
2 Press ▶ to select the input source.
3 Select the required station by pressing the to select the AV1 input sources. ▲, ▼ buttons or INPUT
4 Press ▶ to select the recording day.
5 Select the required day by pressing the ▲ or ▼ buttons.
6 Press ▶ to select the recording start time.
7 Select the required hour value by pressing the ▲ or ▼ buttons.
8 Press ▶ to select the minutes.
9 Select the required minute value by pressing the ▲ or ▼ buttons.
10 Press ▶ to select the recording end time.
11 Select the required recording end time by pressing the ▲ or ▼ buttons, following the same procedure as when selecting the recording start time.
12 Press ▶ to select the recording speed.
13 Press the ▲ or ▼ buttons to select the SP (Standard Play), LP (Long Play), AUTO (Auto Tape Speed Select) recording speeds.
14 Press ▶ to select the PDC recording mode.
15 Press the ▲ or ▼ buttons to toggle between the PDC mode (marked ON) and the non-PDC mode (marked -).
16 When you have finished, press the MENU button.
17 Press the VCR STANDBY/ON (STANDBY/ON) button to activate the timer.
Result: Before starting recording, the VCR compares the timer duration with the remaining time on the cassette.

Auto Tape Speed Select. The VCR's "Auto Tape Speed Select" function compares the duration of the timer recording to the actual recording time remaining on the tape loaded. If there is insufficient tape to complete a timer recording in AUTO mode, the VCR automatically switches to LP mode to record the whole programme.
Playing a Cassette

This function allows you to play back any pre-recorded cassette.
1 Switch on both the television and your VCR.
2 Insert the video cassette to be played. If the safety tab on the cassette is intact, press ▶II
Otherwise, the cassette is played automatically.
When a cassette is loaded, the tape position is optimized automatically to reduce disturbance (Digital Auto Tracking). When playing a cassette, if the end of the tape is reached, the cassette is rewound automatically. NTSC tapes can be played back but cannot be recorded with this VCR.
3 To... Then press...
Stop the playback ■ (STOP).
Eject the cassette (EJECT).
Adjusting Picture Alignment Automatically ★(SV-243B/SV-240B Only)

The Picture Alignment feature enables you to optimize the tape position automatically to obtain the best possible picture.
When noise bars or streaks appear during playback, adjust picture alignment by pressing the A.TRK button.
Result: ◆ The tracking bar appears.
◆ The picture is automatically adjusted.
◆ The tracking bar disappears when digital auto tracking has been completed.
Adjusting Picture Alignment Manually


The Picture Adjustment feature allows you to adjust the alignment manually to obtain the best possible picture.
When noise bars or streaks appear during playback, adjust alignment manually by pressing the PROG/TRK (▲ or ▼) / TRK (∧ or √) buttons until the picture is clear and stable.
Result: ♦ The tracking bar appears.
◆ The image is adjusted.
◆ The tracking bar disappears when you release the button.

Selecting the Colour Mode

Before recording or playing back a cassette, you can select the required system standard.
Otherwise, the system automatically selects the reception standard when you select AUTO.
When playing back a cassette, the standard is automatically selected by the VCR. When you playback an NTSC-recorded tape on this VCR make a setting on the colour system according to your TV. If your TV is a PAL system only TV, set NTPB. If your TV is Multi System TV (NTSC 4.43 compatible), set NT4.43 and you can record NT4.43.

1 Press MENU on the remote control. Result: The programming menu is displayed. 2 Press the corresponding ▲, ▼ or ◀, ▶ buttons to select the USER SET option. 3 Press the OK button to select this option. Result: The USER SET menu is displayed. 4 Press the corresponding ▲ or ▼ buttons, until the COLOUR SYSTEM option is selected. 5 Press the ▶ button to select AUTO → PAL → B/W.
AUTO When playing back a cassette, the system standard is automatically selected by the VCR.
B/W Black and White
6 On completion, press MENU twice to exit the menu.
Selecting the Audio Mute Mode

You can select the Audio Mute mode.
To select the audio mute mode on and off, simply press the AUDIO button on the remote control.
Playing a Sequence Frame by Frame
You can:
◆ Stop the cassette at a given frame (image) ◆ Advance one frame at a time

No sound is heard when playing back frame by frame.
1 Press:
◆ ▶ II to start playing the cassette ◆ ▶II to stop the tape at a given frame ◆ F.ADV (FADV) to advance frame by frame
2 To return to normal playback, press


When you have been using the Frame-by-Frame function for more than about five minutes, the VCR will automatically play to protect the cassette and video heads.

Picture Search, Fast Forward/Rewind
Picture Search enables you to Fast Forward or Rewind and look for a particular part of a tape.
1 Press PLAY, the VCR will enter normal play mode. While in play, press and release the ▶ (or ◀) button. The VCR will search at 5 times the normal playback speed. 2 To return to normal playback mode, press the ▶|| button. 3 If you press and HOLD down the ▶ (or ◀) button the VCR will search at 9 times the normal speed. Releasing the ▶ button will return the VCR to search at 5 times the normal speed. To return to normal playback mode, press the ▶ button. 4 Whilst in Picture Search mode, if you press the VCR will enter normal Fast Forward mode. ▶ button again, 5 Likewise, whilst in Picture Search ◀ mode, if you press the ◀ button again, the VCR will enter normal Rewind mode. 6 If, when Redwing (◀) or Fast Forwarding (▶), you press the ◀ (or ▶) button, the VCR will enter the Picture Search mode.

Searching for a Specific Sequence


Each time you record a cassette on this VCR, an "index" is automatically marked on the tape when recording starts.
The Search function allows you to fast-forward or rewind to a specific index and start playback from that point. Depending on the direction selected, the indexes are numbered as follows:
| etc. | Prev Seq. | Seq. being played | Next Seq. | etc. |
| 2 | 1 | 1 | 2 |
This VCR uses a standard indexing system (VISS). As a result, it will recognize any indexes marked by other VCRs using the same system and vice versa.
INTRO SCAN
1 To search for a specific index, press INDEX.
2 Press the ◀ or ▶ buttons depending on the direction where your desired programme is located.
3 When an Index mark is found the VCR will playback the tape for 5 seconds, after which it will continue searching for the next Index mark.
4 If you want to watch the tape from a particular Index, simply press ▶II.
Index Skip Search:
This feature will enable you to fast forward/rewind to a specific point on a tape: E.g. if you have recorded 3 different programmes on a tape and you have rewound the tape to the beginning, by using this feature you can go directly to the start of programme 2 simply by pressing the INDEX button.
1 Press the INDEX to start the Index search.
2 Press the ◀ or ▶ buttons twice more. This will take you directly to the start of the desired programme is located.
3 These Index searches can be made forwards: (press ▶) or backwards: (press ◀).
4 To cancel an Index search simply press the ▶|| or ■ button.
VPS/PDC Default

★(SV-245B/SV-243B)
★(SV-240B)
VPS/PDC is a system that tells the VCR when a programme actually starts. Typically, when you want to record a programme, you will tell the VCR to start recording, probably, five minutes before the advertised starting time of the programme and to finish ten minutes or so after the programme is due to finish. So even if the programme starts early or finishes late, you will normally still get to see what you wanted to record. However, when live programmes over-run or the day's television schedule is changed from that advertised, you may miss the desired programme which may have been delayed or even cancelled. With VPS/PDC, the VCR will wait until the signal is sent to confirm the programme is starting, and the VCR will record the programme even if it is two or more hours late.
1 Press the MENU button on the remote control. 2 Press the corresponding ▲, ▼ or ◀, ▶ buttons to select the EASY OPERATION option. 3 Press the OK button to select this option. Result: The EASY OPERATION menu is displayed. 4 Press the corresponding ▲ or ▼ buttons until the PDC/VPS DEFAULT option is selected. 5 Press ▶ button to select ON in the PDC/VPS DEFAULT option. 6 On completion, press MENU twice to exit the menu.

Using the Assemble Edit Function

This function allows you to start a new recording at a specific position on the cassette while maintaining a very smooth scene change.
1 Insert the cassette to be edited in your VCR. 2 Press the ▶II button to start playback. 3 When you reach the position from which you wish to start the new recording, press the ▶II button. 4 Press the F.ADV ( ) button again as often as necessary to advance frame by frame, until the exact recording position is located. 5 While the VCR is in still mode, hold the REC button down for a while to activate the Assemble Edit function. Result: Record symbol flashes in the display. 6 Select the source from which you wish to record by pressing: ◆ The PROG/TRK ( ▲ or ▼) / PROG ( ▲ or ▼ ) buttons for television channels ◆ The INPUT button for the AV1 input sources
7 Press the ▶II button to start recording.
8 When you have finished recording, press ■.
Recording from Another VCR or Camcorder

You can copy a cassette to your VCR from another video source, such as another VCR or a camcorder.

It is an infringement of copyright laws to copy prerecorded cassettes or to re-record them in any form without the permission of the owners of the corresponding copyright.
1 Connect the VCR, from which the cassette is to be copied, to the appropriate SCART audio and video input connectors on the rear of your VCR, as indicated on page 12. 2 Insert a blank cassette in your VCR. 3 Insert the pre-recorded cassette in the other video source (VCR or camcorder). 4 Press the INPUT button to select the appropriate input on your VCR: ◆ AV1 for the SCART input 5 Start playing back the cassette to be copied. 6 Hold REC down for a while to start recording on your VCR. 7 When you have finished recording, press ■ on both VCRs.


If you wish to view the cassette being copied:
◆ Your VCR must be connected as usual to the television (see page 11 for further details)

ECO Mode - Reducing Standby power consumption

Low Power Mode reduces the Standby power consumption of the VCR when in Standby mode.
Useful, for example, when you are away from the house on holiday. It saves actually turning the VCR off.
1 Press MENU on the remote control.
Result: The programming menu is displayed.
2 Press the corresponding ▲, ▼ or ◀, ▶ buttons to select the USER SET option.
3 Press the OK button to select this option.
Result: The USER SET menu is displayed.
4 Press the corresponding ▲ or ▼ buttons, until the ECO. MODE is selected.
5 Press the ▶ button to turn LOW(3Watts) mode on. Now, when the VCR is in standby mode the front display panel will shut off. Even the clock disappears. By pressing the VCR STANDBY/ON (STANDBY/ON) button again the display panel will reappear.
6 On completion, press MENU twice to exit the menu.

Before contacting the Samsung after-sales service, perform the following simple checks.
| Problem Explanation/Solution | |
| No power | ◆ Check that the power plug is connected to a wall outlet.◆ Have you pressed the VCR STANDBY/ON (STANDBY/ON) button? |
| You cannot insert a video cassette | ◆ A video cassette can only be inserted with the window side up and the safety tab facing you. |
| The television programme was not recorded ◆ Check the VCR aerial connections.◆ Is the VCR tuner properly set?◆ Check if the safety tab is intact on the cassette. | |
| Timer recording was unsuccessful ◆ Was the VCR STANDBY/ON (STANDBY/ON) button pressed to activate the timer?◆ Re-check the recording start/stop time settings.◆ If there was a power failure or interruption during timer recording, the recording will have been cancelled. | |
| No playback picture or the picture is distorted | ◆ Check to see if you are using a prerecorded tape. |
| You cannot see normal broadcasts ◆ Check the TUNER/EXTERNAL setting. It should be on TUNER.◆ Check the TV/VCR aerial connections. | |
| Noise bars or streaks on playback ◆ Press the PROG/TRK ( ▲ or ▼ ) / TRK ( ∧ or √ ) buttons to minimize this effect. | |
| When the ▶II button is pressed during playback, the still picture has severe “noise bars” streaks | ◆ A still picture may have “noise bars”, depending on the condition of the tape. Press the PROG/TRK (▲ or ▼ ) / TRK ( ∧ or √ ) buttons during SLOW motion to minimize this effect. |
| Video Head Cleaning ◆ If poor pictures appear on a variety of cassettes, the video heads may need cleaning. This is not a common problem and unless it appears, the heads should not be cleaned.When cleaning the video heads, read all instructions provided with the head cleaning cassette. Incorrect head cleaning can permanently damage the video heads. | |
| If when tuning in your TV to the VCR test pattern your TV does not find the test pattern or the pattern when found suffers from interference, it may be due to the VCR output channel clashing with the normal TV transmissions in your area. To prevent this you will need to change the VCR output channel in the following way | 1. Remove the aerial input plug from the socket marked (aerial symbol) on the rear of the VCR.2. Carry out the instructions “Tuning Your Television for the VCR” (see page 14).3. Carry out the instructions “Setting the VCR output Channel” (see page 16), move the channel number several channels down from the original setting. (example: from 60 to 57).4. Replace the aerial plug into the socket marked (aerial symbol) on the rear of the VCR.5. Re-tune your TV to the VCR again by following instructions “Tuning Your Television for the VCR” (page 14).6. If the problem still exists repeat steps 1 to 5 moving several more channels away from the original setting. |
If you are unable to solve the problem after reading the above instructions, note:
◆ The model and serial number on the rear of your VCR ◆ The warranty information ◆ A clear description of the problem
Then contact your nearest SAMSUNG after-sales service.
SAMSUNG
ELECTRONICS
| GUARANTEE |
| GARANZIA |
| GARANTI |
| GARANTÍA |
| GARANTIE |
| GARANTIA |
| ΕΓΓΥΗΣΗ |
| TAKUU |
WARRANTY CARD
MODEL NAME
Model name, Nombre de modelo, Nome de modelo, Modellbezeichnung, Modelnaam, Nom du modèle, Il nome di modello, Mont el o proiont o:, Asiakkaan puh.nro, Modelnaven, Modell
SERIAL NO.
Serial number, No. de serie, Número serial, Seriennummer, Serie nummer, Numéro de série, Il numero di matricola, Arigo, kat askeuh., Malli, Serienummer., Serienr
DATE OF PURCHASE
Kóbetid, Købsadato, Fecha de compra, Data de compra, Kaufdatum, Datum van aankoop, Date d'achat, La data d'acquisto, Hmeromhnia agora1 agorast h, Asiakkaan osoite, Salgsdato, Inköpsdatum
CUSTOMER'S NAME
Kundesnavn, Kundenavn, Nombre de cliente, Nombre del cliente, Nome de cliente, Name des Kunden, Naam van klant, Nom du client, il nome del clinte, Onomat epwnumo t ou agopast h, Sarjanro, Kundens navn, Kundens namn
CUSTOMER'S TEL. NO.
Customer's address, Customer's telephone number, No. de Tel. de client, No. de Tel del cliente, Número de telefone de cliente, Telefonnummer des Kunden, Telefoon nummer van klant, Numéro de téléphone du client, il numero de telefono del client, Arigmo1 tl hl ef wnou t ou agor ast h, Myyjän puh.nro, Kundens telefonnr, Kundens telefonnr.
CUSTOMER'S ADDRESS
Kundeasdress, Kundeadresse, Dirección de client, Dirección del cliente, Endereco de cliente, Adresse des Kunden, Adres van klant, adresse du client, L'indrizzo del cliente. Dieuqunsh t ou agopast h, Ostopäivä, Kundens adresse,
Customer's address
DEALER'S NAME
Handlendesnavn, Forhandler, Nombre de negociante, Nombre del vendedor, Nome de vendedor, Name des Händlers, Naam van handelaar, Nom du marchand, il nome del commerciante, Onoma t ou kat ast hmat oz, Jalleenmyyjan, Forhandler,
Atenforsaljare
DEALER'S TEL. NO.
Handlendestelesonnummer, Forhandiertelefonnummer, No. de Tel. de negociante, No. de Tel. del vendedor, Número de telefone de vendedos. Telefopernummer dos Handlers. Telefoper summary van handelsers Numéro téléphone du
Numero de telefono de vencedor, Telefonnummer des Handlers, Telefoon nummer van handelaar, Numero tel phone du marchand, il numero di telefono del commerciante. Ariema t h ef wngu t ou kat ast hmat o: Myviàn osoite, Forhandlerens
tel.nr., Handlarens telefonnr.
DEALER'S ADDRESS
Handlendesadress, Forhandleradresse, Dirección de negociante, Dirección del vendedor. Endereco de vendedor, Adrosse des Händlers, Adros van handelaar, Adresso du marchand, Diequunsh tau kat as lmalos. Asjakkaan nimi
Forhandlerens adresse, Handlarens adress
CUSTOMER'S SIGNATURE
Please ensure the form above is completed at the time of purchase and present it to the dealer to qualify for guarantee service, otherwise your guarantee may be affected.
CAUTION
DEALER'S STAMP & SIGNATURE
SAMSUNG EUROPEAN BLOC WARRANTY
THIS APPLIANCE IS DISTRIBUTED BY
SAMSUNG
ELECTRONICS


- SAFETY PRECAUTIONS
- CAUTION
- IMPORTANT NOTE
- IMPORTANT
- DANGER
- ◆ FOREWORD
- ◆ VCR OVERVIEWS
- ◆ RECORDING TELEVISION BROADCASTS
- ◆ PLAYING BACK
- SAFETY INSTRUCTIONS
- INFRARED REMOTE CONTROL (SV-245B)
- INFRARED REMOTE CONTROL (SV-243B/SV-240B)
- DECIDING HOW TO CONNECT YOUR VCR
- CONNECTING YOUR VCR TO A SATELLITE RECEIVER OR OTHER EQUIPMENT
- AV1 (EURO AV): BY MEANS OF 21-PIN SCART CABLE
- BY MEANS OF RF COAXIAL CABLE
- TUNING YOUR TELEVISION FOR THE VCR
- YOU MUST TUNE YOUR TELEVISION FOR THE VCR ONLY IF YOU ARE NOT USING A SCART CABLE
- INSERTING BATTERIES IN THE REMOTE CONTROL
- SETTING THE DATE AND TIME
- DISPLAYING/HIDING ON-SCREEN INFORMATION
- SETTING THE VCR OUTPUT CHANNEL
- CHANGING THE PRESET STATION TABLE
- PROTECTING A RECORDED CASSETTE
- RECORDING A PROGRAMME IMMEDIATELY
- USING THE VIDEOPLUS+ FEATURE ★(SV-245B/SV-243B ONLY)
- BEFORE PRESETTING YOUR VCR
- UP TO SIX PROGRAMMES CAN BE PRESET
- USING THE TIMER PROGRAMMING FEATURE
- PLAYING A CASSETTE
- THIS FUNCTION ALLOWS YOU TO PLAY BACK ANY PRE-RECORDED CASSETTE
- ADJUSTING PICTURE ALIGNMENT AUTOMATICALLY ★(SV-243B/SV-240B ONLY)
- ADJUSTING PICTURE ALIGNMENT MANUALLY
- SELECTING THE COLOUR MODE
- SELECTING THE AUDIO MUTE MODE
- PLAYING A SEQUENCE FRAME BY FRAME
- YOU CAN
- PRESS
- PICTURE SEARCH, FAST FORWARD/REWIND
- PICTURE SEARCH ENABLES YOU TO FAST FORWARD OR REWIND AND LOOK FOR A PARTICULAR PART OF A TAPE
- SEARCHING FOR A SPECIFIC SEQUENCE
- INTRO SCAN
- INDEX SKIP SEARCH
- VPS/PDC DEFAULT
- USING THE ASSEMBLE EDIT FUNCTION
- RECORDING FROM ANOTHER VCR OR CAMCORDER
- ECO MODE - REDUCING STANDBY POWER CONSUMPTION
- SAMSUNG
- WARRANTY CARD
- CUSTOMER'S SIGNATURE
- DEALER'S STAMP & SIGNATURE
- SAMSUNG EUROPEAN BLOC WARRANTY
- THIS APPLIANCE IS DISTRIBUTED BY
- ELECTRONICS
Brand : SAMSUNG
Model : SV-240B
Category : VCR