KOM-9F2CT - Microwave DAEWOO - Free user manual and instructions
Find the device manual for free KOM-9F2CT DAEWOO in PDF.


| Product type | Microwave oven |
| Brand | Daewoo |
| Model | KOM-9F2CT |
| Dimensions (W x H x D) | 45 x 25 x 35 cm |
| Weight | 12 kg |
| Power supply | 230 V, 50 Hz |
| Microwave output power | 800 W |
| Capacity | 20 L |
| Main functions | Cooking, defrosting, reheating |
| Power levels | 6 levels |
| Timer | Up to 60 minutes |
| Display | LED digital |
| Opening type | Pull handle |
| Child safety | Yes, key lock |
| Interior material | Easy-clean enamel |
| Turntable | Yes, diameter 27 cm |
| Interior light | Yes, built-in lamp |
| Maintenance and cleaning | Clean with a damp cloth and mild detergent; avoid abrasives |
| Spare parts and repairability | Turntable, waveguide, fuse; repair by professional |
| General information | Brand: Daewoo ; Model: KOM-9F2CT ; Manual available in PDF |
Frequently Asked Questions - KOM-9F2CT DAEWOO
User questions about KOM-9F2CT DAEWOO
0 question about this device. Answer the ones you know or ask your own.
Ask a new question about this device
Download the instructions for your Microwave in PDF format for free! Find your manual KOM-9F2CT - DAEWOO and take your electronic device back in hand. On this page are published all the documents necessary for the use of your device. KOM-9F2CT by DAEWOO.
USER MANUAL KOM-9F2CT DAEWOO
FOR COMMERCIAL USE
* CUSTOMER SERVICE HELP LINE
FEATURES DIAGRAM (continued) 8
UTILISATION....9
CONTROLS....10
Manual Cooking....10
Preprogrammed Pads....11
Double Quantity....12
Programming Pads 13
Programming Cook Factor....14
20 sec.+ pad 15
Changing User Options 16
INSTRUCTIONS DE CUISSON ....17
PRINCIPES D'UTILISATION DE MICRO-ONDES....18
COMMENT LES MICRO-ONDES CUISENT LES ALIMENTS....18
TABLEAU DE CONVERSION....18
TECHNIQUES DE CUISSON ....19
CARING FOR YOUR MICROWAVE OVEN....20
ENTRETIEN ET NETTOYAGE....20
CLEANING THE CEILING COVER....21
CLEANING THE AIR FILTER....21
UTILISATION DE VOTRE FOUR À MICRO-ONDES EN TOUTE SÉCURITÉ ....22
FORMATION D'ARC 22
AVANT DE FAIRE RÉPARER VOTRE FOUR 23
QUESTIONS AND ANSWERS....23
QUESTIONS AND ANSWERS (continued) 24
ÉVACUATION DES ÉQUIPEMENTS ÉLECTRIQUES ET ÉLECTRONIQUES USÉS .....24
INSTALLATION
1 Steady, flat location
This oven should be set on a steady, flat surface. This oven is designed for counter top use only.
2 Leave space behind and side
All air vents should be kept a clearance. If all vents are covered during operation, the oven may overheat and, eventually, oven failure.
3 Away from radio and TV sets
Poor television reception and radio interference may result if the oven is located close to a TV, Radio antenna, feeder and so on. Position the oven as far from them as possible.
4 Away from heating appliance and water taps
Keep the oven away from hot air, steam or splash when choosing a place to position it, or the insulation might be adversely affected and breakdowns occur.
5 Power supply
- Check your local power source. This oven requires a current of approximately 13 Amperes, 240V 50Hz.
• Power supply cord is about 1.7 meters long. - The voltage used must be the same as specified on this oven. Using a higher voltage may result in a fire or other accident causing oven damage. Using low voltage will cause slow cooking. We are not responsible for damage resulting from use of this oven with a voltage of ampere fuse other than those specified.
- If the supply cord is damaged, it must be replaced by the manufacturer or its service agent or a similarly qualified person in order to avoid a hazard.
6 Examine the oven after unpacking for any damage such as:
A misaligned door, Broken door, A dent in cavity. If any of the above are visible, DO NOT INSTALL, and notify dealer immediately.
7 Do not operate the oven if it is colder than room temperature.
(This may occur during delivery in cold weather.) Allow the oven to become room temperature before operating.
8 The minimum height of free space necessary above the top surface of the oven is 150mm.
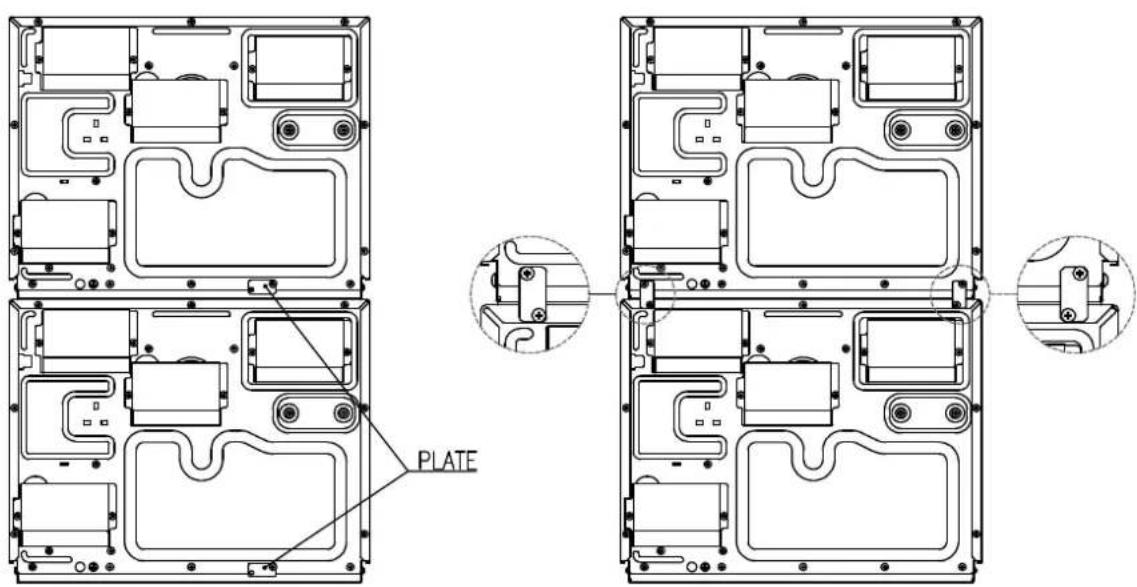
9. When you stack your microwave ovens.
1) Place one microwave oven on top of the other one, and remove the plate which are each secured by a single screw to the bottom-right corner at the rear of both microwaves. Secure the above hole of the two microwaves.
2) Remove the two screws which are securing at both end of the cabinet of the lower microwave oven.
Remove the two screws which is securing the bottom corner of the upper microwave oven.
3) Use the upper and lower plate screw holes to secure the upper and lower microwave ovens with the four screws.
4) Ensure the top oven is at a safe and workable height.
MISE À LA TERRE
IMPORTANT
① Safety Interlock System.
② Door Viewing Screen - Allows viewing of food. The screen is designed so that light can pass through, but not microwaves.
③ Door Hook - When door is closed, it will automatically shut off. If the door is opened while the oven is operating, magnetron will immediately stop operating.
④ Oven Cavity.
⑤ Door Seal - Door seal maintains the microwave energy within the oven cavity and prevents microwave leakage.
⑥ Plate Tray - Made of special heat resistant material. Food in a proper receptacle is placed on this plate for cooking.
⑦ Ceiling Cover - This is located on top side of the oven.
FEATURES DIAGRAM (continued)

① MICROWAVE indicator
Lights when the microwave is operation.
② Double Quantity indicator
Lights when DOUBLE QUANTITY pad is pressed.
③ STAGE indicator
Indicates which STAGE of mult-stage cooking is in progress
④ CLEAN FILTER indicator
Will display when the filter needs cleaning.
⑤ POWER LEVEL indicator
It will turn on when POWER LEVEL pad is pressed unless at full power.
⑥ POWER LEVEL pad
POWER LEVEL pad is used to set a variable power level.
⑦ Number pads
Number pads are used to set the manual cooking time.
It is also used to start preprogrammed cooking cycle.
⑧ DOUBLE QUANTITY pad
X2 pad increases a preprogrammed cooking time by a percentage of the original cooking time.
The user specifies the percentage and it can be changed for individual cooking sequences.
This feature is very useful for cooking multiple servings of foods.
⑨ STOP pad
STOP pad stops a cooking sequence in progress, clears out any remaining time, and also ends programming or user option cycle.
When STOP pad is used to end a programming or option change, the changes are discarded.
⑩ START/ 20sec.+ pad
START pad is used to begin a manual cooking cycle.
It is also used to save any changes to programming sequences or user options.
START pad can be used as speedy cooking pad.
In ready mode, 20sec.+ pad allows you to reheat for 20 seconds at full power by pressing it.
By repeatedly touching 20sec.+ pad, you can also extend reheating time to 5 minutes by 20 second increments.
UTILISATION
1 The oven light is on when the microwave oven is operating or the door is opened.
2 The oven door can be opened at any time during operation by opening the door. The oven will automatically stop working.
3 Each time a pad is touched, a BEEP will sound to acknowledge the touch.
4 Le four cuit automatiquement en puissance maximale, a moins qu'un niveau de puissance inférieur ait été défini.
5 All segments of the display will turn on when the oven door is closed and it is first plugged in.
6 When the oven is just plugged in at first or the display is turned off, the key pads are not activated. After oven door is opened and closed once, the oven is ready to work showing "HELLO" shows in the display.
7 When STOP pad is touched during the oven operation, the oven stops cooking and all information retained.
To erase all information, touch STOP pad once more. If the oven door is opened during the oven operation, all information is retained.
8 If START pad is touched and the oven does not operate, check the area between the door and door seal for obstructions and make sure the door is closed securely.
The oven will not start cooking until the door is completely closed or the program has been reset.
To cook food manually using a specific entered cook time and power level.
-
Open the door and put food in the oven. Close the door. • "HELLO" will show in the display.
-
Press POWER LEVEL pad.
-
If "HI" shows in the display, the power level is adjusted to full power.
- The % indicator will light if a lower power level is adjusted.
-
You can change a power level to adjust desired setting by pressing POWER LEVEL pad repeatedly.
-
Press number pads for entering the cooking time.
-
You can enter the maximum cooking time up to 60 minutes or 10 minutes.
-
To change maximum cooking time option, see User Options section in this manual.
-
If stage cooking is desired, repeat step 2 and 3.
-
Display changes to cook time and power level for the next stage.
-
Up to three different stages can be programmed.
-
Press START pad.
• The oven lamp will turn on and heating will start.
- The first STAGE indicator will start to blink and heating time will count down.
NOTE
Repeat Feature : The user can repeat exactly the same MANUAL COOKING by pressing only START pad, if you use the oven again within keypad activating time. After a MANUAL COOKING is ended, opening and closing the door will make the display show the same cook time and power level setting of the previous MANUAL COOKING. See User Options section in this manual.
NOTE
The cooling fan may automatically run for a while to cool the over down after working.
Preprogrammed Pads
To cook food using number pads preprogrammed with cooking sequences.
- Open the door and put food in the oven. Close the door.
- "HELLO" will show in the display.
-
Press a desired number pad.
-
For single digit entry, press only one number pad.
- For multiple digit entry, press from one to three pads one by one.
- To change single or multiple digit entry option, see User Options section in this manual.
NOTE
You can enter the number of a programmed cook from 0 to 9 by pressing only one number pad in single digit entry mode.
You can enter the number of a programmed cook from 0 to 199 by pressing from one to three number pads one by one in multiple digit entry mode.
- Oven begins to cook.
• The oven lamp will turn on and heating will start.
- The first STAGE indicator will start to blink and heating time will count down.
■ Factory Setting
| Pad Cooking time Power Level | |
| 1 10 sec. 100% | |
| 2 20 sec. 100% | |
| 3 30 sec. 100% | |
| 4 45 sec. 100% | |
| 5 1 min. 100% | |
| 6 1 min. 30 sec. 100% | |
| 7 2 min. 100% | |
| 8 3 min. 100% | |
| 9 4 min. 100% | |
| 0 5 min. 100% |
NOTE
The cooling fan may automatically run for a while to cool the oven down after working.
Double Quantity
To increase cooking time when cooking more than one serving.
-
Open the door and put food in the oven. Close the door. • "HELLO" will show in the display.
-
Press X2 pad. • Amount of time added is a percentage of the original preprogrammed cooking time. • The percentage can be changed. See Programming Cook Factor section in this manual.
-
Press desired preprogrammed pad.
-
Oven begins to cook. • The oven lamp will turn on and heating will start. • The first STAGE indicator will start to blink and heating time will count down.
NOTE
The cooling fan may automatically run for a while to cool the oven down after working.
Programming Pads
To change the amount of time or the power level for a preprogrammed pad.
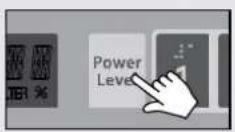
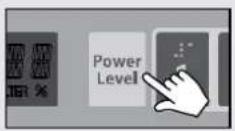
- Open the door.
- Display turns off.
- Press and hold POWER LEVEL pad for a while.
- When the oven enters Programming mode, it will show "PROGRAM" in the display.
- Press number pads to be programmed.
- It will show a program number in the display.
- For single digit entry, press only one number pad.
- For multiple digit entry, press from one to three pads one by one.
- Press POWER LEVEL pad to select a desired power level.
- If "HI" shows in the display, the power level is adjusted to full power.
- The % indicator will light if a lower power level is adjusted.
- You can change a power level to adjust desired setting by pressing POWER LEVEL pad repeatedly.
-
Enter desired cooking time by using number pads.
-
If stage cooking is desired, repeat step 4 and 5.
- Display changes to cook time and power level for the next stage.
- Up to three different stages can be programmed.
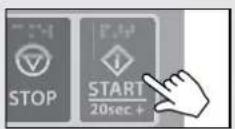
- Press START pad to save the program changes.
• To discard changes, press STOP pad.
Programming Cook Factor
To change cook factor for a preset pad.
- Open the door.
- Display turns off.
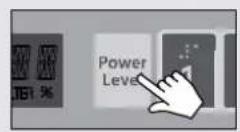
- Press and hold POWER LEVEL pad for a while.
- When the oven enters Programming mode, it will show "PROGRAM" in the display.
-
Press number pads to be programmed.
-
It will show a program number in the display.
- For single digit entry, press only one number pad.
-
For multiple digit entry, press from one to three pads one by one.
-
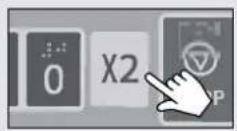
Press X2 pad to change a cooking factor.
-
It will show the current cook factor.
• Factory setting for cook factor is 80%. (CF:80 in the display) -
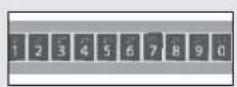
Enter desired cook factor by using number pads. (0\~9)
• Number 1 pad for 10% of cook factor through number 0 pad for 100% of cook factor.
- Press START pad to save the cook factor changes.
• To discard changes, press STOP pad.
20 sec.+ pad
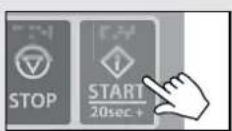
This function allows you to reheat for 20 seconds at full power by simply touching the 20 sec.+ pad. By repeatedly touching 20 sec.+ pad, you can also extend reheating time to 5 minutes by 20 second increments.
- Open the door and put food in the oven. Close the door.
- "HELLO" will show in the display.
-
Press 20 sec.+ pad.
-
When you press 20 sec.+ pad, " :20" shows in the display.
- The oven will start immediately. It will add 20 seconds to the time counting down each time the pad is pressed.
NOTE
The cooling fan may automatically run for a while to cool the oven down after working.
Changing User Options
User Options can be changed to suit individual preferences.
- Open the door.
- Display turns off.
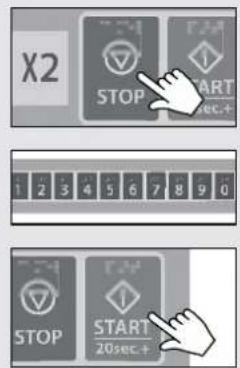
- Press and hold STOP pad for a while.
- When the oven enters Option Code mode, it will show "CODE---" in the display.
- Press two number pads in order for a two digit option code.
For example, if you want to choose "CODE 1-0" from the cook ending signal list, press number 1 pad and number 0 pad in order.
- Press START pad to save changes.
- To change additional option codes, repeat steps 3 and 4.
■ User Options Table
| Option Code | Setting | Description (Factory default setting in bold) |
| Cook Ending Signal | CODE 1-0CODE 1-1CODE 1-2CODE 1-3CODE 1-4 | 3 long beeps for 3 seconds1 short, 1 long beeps for 3 seconds3 second beep3 quick beeps for 3 seconds5 quick beeps for 3 seconds |
| Key Pad Beep On/Off | CODE 2-0CODE 2-1 | A key pad will beep when it is pressed.No beep when a key pad is pressed. |
| Stage Cook Change Beep On/Off | CODE 3-0CODE 3-1 | The oven will beep when stage cook changes to the next stage.No beep when stage cook changes to the next stage. |
| Maximum Cooking Time | CODE 4-0CODE 4-1 | Maximum Cooking Time is 60 minutes.Maximum Cooking Time is 10 minutes. |
| Preprogrammed Cook | CODE 5-0CODE 5-1 | 10 preprogrammed cooks for key pads (0~9)200 preprogrammed cooks for key pads (0~199) |
| Display OFF Time Counter | CODE 6-0CODE 6-1CODE 6-2CODE 6-3 | Display will turn off if a key isn't entered in 1 minute.Display will turn off if a key isn't entered in 2 minutes.Display will turn off if a key isn't entered in 3 minutes.Display will turn off if a key isn't entered in 4 minutes. |
| Repeat Feature | CODE 7-0CODE 7-1 | Repeat feature is not allowed.Repeat feature is allowed. |
| COOK END message Reminder | CODE 8-0CODE 8-1 | No END message after finishing a cooking.END message will be left on the display during display-on time. |
| Manual Time Cook Lock | CODE 9-0CODE 9-1 | A user may use preprogrammed pads and manual time cookA user may use preprogrammed pads only. |
| Clean Filter Reminder | CODE 0-0CODE 0-1CODE 0-2CODE 0-3CODE 0-4 | Clean filter message will show up for 24 hours every 90 daysClean filter message will show up for 24 hours every 60 days.Clean filter message will show up for 24 hours every 30 days.Clean filter message will show up for 24 hours every 10 days.The oven will not display clean filter message. |
■ How to shut off the clean filter reminder
- It will stop displaying automatically after 24 hours.
- Or it will be able to be shut off by pressing and holding stop pad for a while until a long beep sounds in idle mode with the closed oven door.
INSTRUCTIONS DE CUISSON
Guide d'ustensiles
1 Turn the oven off before cleaning.
2 Keep the inside of the oven clean. When food spatters or spilled liquids adhere to oven walls, wipe with a damp cloth. Mild detergent may be used if the oven gets very dirty. The use of harsh detergent or abrasives is not recommended.
3 The outside oven surface should be cleaned with soap and water, rinsed and dried with a soft cloth. To prevent damage to the operating parts inside the oven, water should not be allowed to seep into the ventilation openings.
4 If the Control Panel becomes wet, clean with a soft, dry cloth. Do not use harsh detergents or abrasives on Control Panel.
5 If steam accumulates inside or around the outside of the oven door, wipe with a soft cloth. This may occur when the microwave oven is operated under high humidity conditions and in no way indicates malfunction of the unit.
6 Oven cavity floor should be cleaned regularly to avoid excessive noise. Simply wipe the bottom surface of the oven with mild detergent water or window cleaner and dry.
ENTRETIEN ET NETTOYAGE
NOTE: The appliance should not be cleaned with a water jet.
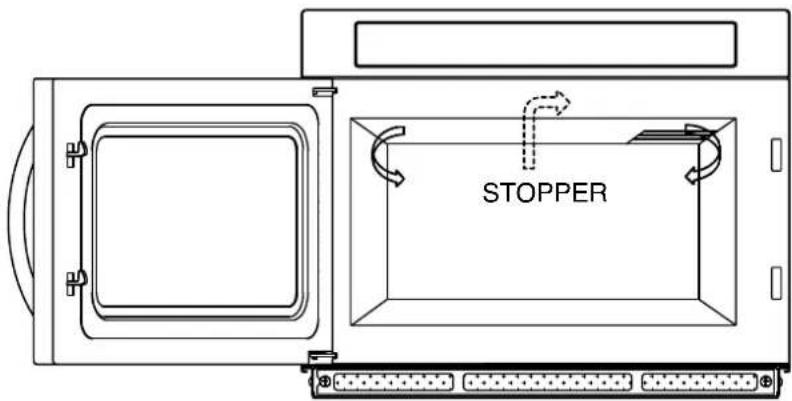
CLEANING THE CEILING COVER
- Push left side of stopper in centre of ceiling cover and separate it from cavity.
- Hold side stoppers of ceiling cover with both hands and pull down. Then take off the Ceiling Cover out of the oven cavity
- Wash this Ceiling Cover in soapy water or Food Sanitizer Solution.
- Be sure to replace the Ceiling Cover before using the oven.
Note Ceiling Cover must be placed securely when you use the oven.
When you remove the Ceiling Cover for the purpose of cleaning, be sure to be extremely careful about the exposed inside components on the top of the oven cavity.
If any of them are deformed, abnormal symptom can happen such as arcing or sparks during operation. In case of such problem, contact the nearest servise centre.
CLEANING THE AIR FILTER
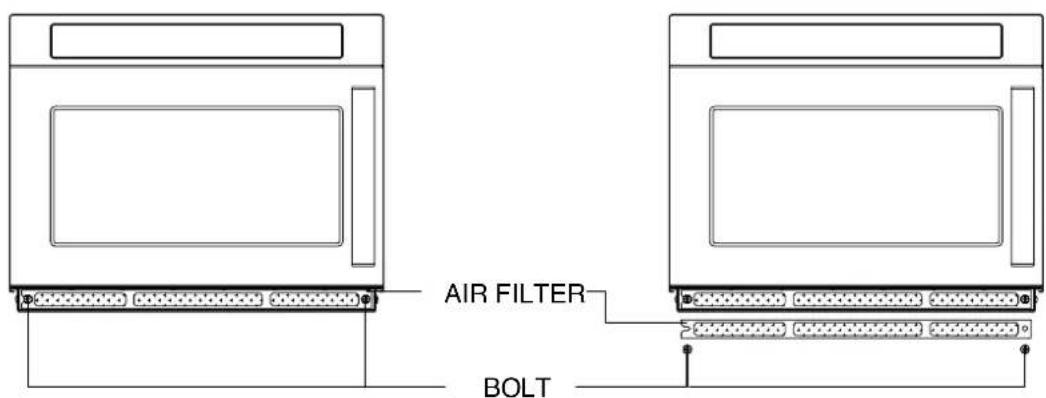
Clean the Air Filter regularly according to the following instructions.
- Remove the bolt at both ends of Air Filter.
- Take the Air Filter off carefully.
- Wash the Air Filter in warm soapy water.
- Be sure to replace the Air Filter before using the oven.
Note If the Air Filter becomes clogged with debris, this will cause problem on the oven.
If you want to change the air filter clean time, refer to "clean filter reminder" in page 16.
UTILISATION DE VOTRE FOUR À MICRO-ONDES EN TOUTE SÉCURITÉ
QUESTIONS AND ANSWERS
* Q : Can I open the door when the oven is operating?
* A : The door can be opened anytime during the cooking operation. Then microwave energy will be instantly switched off and the time setting will maintain until the door is closed and START is touched.
* Q : Why do I have moisture in my microwave oven after cooking?
* A : The moisture on the side of your microwave oven is normal. It is caused by steam form cooking food heating the cool oven surface.
* Q : Dose microwave energy pass through the viewing screen in the door?
* A : No. The metal screen bounces back the energy to the oven cavity. The holes are made to allow light to pass through. They do not let microwave energy pass through.
* Q : Why do eggs sometimes pop?
* A: When baking or poaching eggs, the yolk may pop due to steam build-up inside the yolk membrane. To prevent this, simply pierce the yolk with a toothpick before cooking. Never cook eggs without piercing their shells.
QUESTIONS AND ANSWERS (continued)
* Q : Why is standing time recommended after the cooking operation has been completed?
* A : Standing time is very important.
With microwave cooking, the heat is in the food, not in the oven. Many foods build up enough internal heat to allow the cooking process to continue, even after the food is removed from the oven. Standing time for joints of meat, large vegetables and cakes allows the inside to cook completely, without overcooking the outside.
* Q : What does "standing time" mean?
* A : "Standing time" means that food should be removed from the oven and covered for additional time to allow it to finish cooking. This frees the oven for other cooking.
* Q : Why does my oven not always cook as fast as the microwave cooking guide says?
* A : Check your cooking guide again, to make sure you've followed directions exactly ; and to see what might cause variations in cooking time. Cooking guide times and heat settings are suggestions, to help prevent over-cooking... the most common problem in getting used to a microwave oven. Variations in the size, shape and weights and dimensions could require longer cooking time. Use your own judgement along with the cooking guide suggestions to check whether the food has been properly cooked just as you would do with a conventional cooker.
* Q : Will the microwave oven be damaged if it operates while empty?
* A : Yes. Never run it empty.
* Q :Can I pop popcorn in my microwave oven? How do I get the best results?
* A: Yes. Pop packaged microwave popcorn following manufactures guidelines. Do not use regular paper bags. Use the "listening test" by stopping the oven as soon as the popping slows to a "pop" every 1 or 2 seconds. Do not repop unpopped kernels. Do not pop popcorn in glass cookware.
- INSTALLATION
- 1 STEADY, FLAT LOCATION
- 2 LEAVE SPACE BEHIND AND SIDE
- 3 AWAY FROM RADIO AND TV SETS
- 4 AWAY FROM HEATING APPLIANCE AND WATER TAPS
- 5 POWER SUPPLY
- 6 EXAMINE THE OVEN AFTER UNPACKING FOR ANY DAMAGE SUCH AS
- 7 DO NOT OPERATE THE OVEN IF IT IS COLDER THAN ROOM TEMPERATURE
- 8 THE MINIMUM HEIGHT OF FREE SPACE NECESSARY ABOVE THE TOP SURFACE OF THE OVEN IS 150MM
- WHEN YOU STACK YOUR MICROWAVE OVENS
- MISE À LA TERRE
- IMPORTANT
- FEATURES DIAGRAM (CONTINUED)
- UTILISATION
- NOTE
- PREPROGRAMMED PADS
- DOUBLE QUANTITY
- PROGRAMMING PADS
- PROGRAMMING COOK FACTOR
- 20 SEC.+ PAD
- CHANGING USER OPTIONS
- HOW TO SHUT OFF THE CLEAN FILTER REMINDER
- INSTRUCTIONS DE CUISSON
- GUIDE D'USTENSILES
- ENTRETIEN ET NETTOYAGE
- CLEANING THE CEILING COVER
- CLEANING THE AIR FILTER
- UTILISATION DE VOTRE FOUR À MICRO-ONDES EN TOUTE SÉCURITÉ
- QUESTIONS AND ANSWERS
- QUESTIONS AND ANSWERS (CONTINUED)
Brand : DAEWOO
Model : KOM-9F2CT
Category : Microwave