
SJ-F1529E0I-EU - Refrigerator SHARP - Free user manual and instructions
Find the device manual for free SJ-F1529E0I-EU SHARP in PDF.
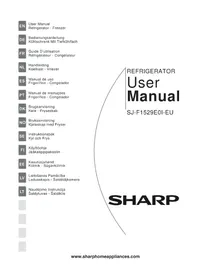


| Product type | Multi-door refrigerator-freezer |
| Brand | Sharp |
| Model | SJ-F1529E0I-EU |
| Dimensions (H x W x D) | 179 x 91 x 73 cm |
| Net weight | 82 kg |
| Total volume | 550 L (refrigerator 350 L, freezer 200 L) |
| Energy class | E |
| Annual consumption | 324 kWh/year |
| Noise level | 41 dB(A) |
| Climate class | SN-T (temperate to tropical) |
| Cooling technology | No Frost for both compartments |
| Main features | External water dispenser, LED lighting, open door alarm, electronic temperature control |
| Refrigerant gas type | R600a (isobutane) |
| Power supply | 220-240 V ~ 50 Hz |
| Power consumption | 150 W |
| Quick freeze function | Yes, manually activated |
| Maintenance and cleaning | Clean interior with a soft cloth and soapy water; automatic defrost |
| Spare parts and repairability | Repairability index 7.2/10; available parts (motor, thermostats, seals) |
| Safety | Child lock, temperature alarm, door stabilizers |
| Included accessories | Door shelves, glass shelves, vegetable drawer, water dispenser |
Frequently Asked Questions - SJ-F1529E0I-EU SHARP
User questions about SJ-F1529E0I-EU SHARP
0 question about this device. Answer the ones you know or ask your own.
Ask a new question about this device
Download the instructions for your Refrigerator in PDF format for free! Find your manual SJ-F1529E0I-EU - SHARP and take your electronic device back in hand. On this page are published all the documents necessary for the use of your device. SJ-F1529E0I-EU by SHARP.
USER MANUAL SJ-F1529E0I-EU SHARP
EN User Manual Refrigerator - Freezer
CHAPTER -3: USING YOUR FRIDGE FREEZER....6
CHAPTER -4: FOOD STORAGE GUIDE....9
CHAPTER -5: TROUBLESHOOTING ....10
CHAPTER -6: TIPS FOR SAVING ENERGY ......11
Your fridge freezer conforms to current safety requirements. Inappropriate use can lead to personal injury and damage to property. To avoid the risk of damage, read this manual carefully before using your fridge freezer for the first time. It contains important safety information on the installation, safety, use, and maintenance of your fridge freezer. Retain this manual for future use.
CHAPTER -1: GENERAL WARNINGS

WARNING: Keep the ventilation openings of the fridge freezer clear from obstruction.

WARNING: Do not use mechanical devices or other means to accelerate the defrosting process.

WARNING: Do not use other electrical appliances inside the fridge freezer.

WARNING: Do not damage the refrigerant circuit.
WARNING: To avoid personal injury or damage, this appliance must be installed in accordance with the manufacturer's instructions.

The small quantity of refrigerant used in this fridge freezer is eco-friendly R600a (an isobutene) and is flammable and explosive if ignited in enclosed conditions.
* While carrying and positioning the fridge, do not damage the cooler gas circuit. * Do not store any containers with flammable materials, such as spray cans or fire extinguisher refill cartridges, in the vicinity of the fridge freezer. * This appliance is intended to be used in household and similar applications such as: - staff kitchen areas in shops, offices, and other working environments; - farm houses and by clients in hotels, motels, and other residential type environments; - bed and breakfast type environments; - catering and similar non-retail applications.
* Your fridge freezer requires a 220-240V, 50Hz mains supply. Do not use any other supply. Before connecting your fridge freezer, ensure that the information on the data plate (voltage and connected load) matches the mains electricity supply. If in doubt, consult a qualified electrician.
* This appliance can be used by children aged from 8 years and above and persons with reduced physical, sensory or mental capabilities or lack of experience and knowledge if they have been given supervision or instruction concerning use of the appliance in a safe way and understand the
CHAPTER -1: GENERAL WARNINGS
hazard involved. Children shall not play with the appliance. Cleaning and user maintenance, shall not be made by children without supervision.
* A damaged power cord /plug can cause fire or give you an electric shock. When damaged it must be replaced, this should only be done by qualified personnel.
Disposal
- All packaging and materials used are environmentally friendly and recyclable. Please dispose of any packaging in an environmentally friendly manner. Consult your local council for further details.
- When the appliance is to be scrapped, cut off the electrical supply cable and destroy the plug and cable. Disable the door catch in order to prevent children becoming trapped inside.
- A cut off plug inserted into a 16 amp socket is a serious safety (shock) hazard. Please ensure the cut off plug is disposed of safely.
Disposal of your old appliance

This symbol on the product or package implies that the product should not be treated as domestic waste. Instead, it should be delivered to applicable waste collection places recycling electrical and electronic equipment. Recycling materials will help natural resources be preserved. For more detailed information regarding recycling of this product, please contact local authority, domestic waste disposal service or the shop you have purchased the product from.
Please ask your local authority about the disposal of the WEEE for the reuse, recycle and recovery purposes.
Notes:
- Please read the instruction manual carefully before installing and using your appliance. We are not responsible for the damage occurred due to misuse.
- Follow all instructions on your appliance and instruction manual, and keep this manual in a safe place to resolve the problems that may occur in the future.
- This appliance is produced to be used in homes and it can only be used in domestic environments and for the specified purposes. It is not suitable for commercial or common use. Such use will cause the guarantee of the appliance to be cancelled and our company will not be responsible for the losses to be occurred.
- This appliance is produced to be used in houses and it is only suitable for cooling / storing foods. It is not suitable for commercial or common use and/or for storing substances except for food. Our company is not responsible for the losses to be occurred in the contrary case.

Safety warnings
- Do not connect your Fridge Freezer to the mains electricity supply using an extension lead.
- A damaged power cord / plug can cause fire or give you an electric shock. When damaged it must be replaced, this should only be done by qualified personnel.
- Never bend the power cord excessively.
- Never touch the power cord / plug with wet hands as this could cause a short circuit or electric shock.
- Do not place glass bottles or beverage cans in the freezer department. Bottles or cans may explode.
- When taking ice made in the freezer department, do not touch it, ice may cause ice burns and/or cuts.
- Do not remove items from the freezer if your hands are damp or wet. This could cause skin abrasions or frost / freezer burns.
- Do not refreeze food once it has thawed out.
Installation Information
Before unpacking and manoeuvring your fridge freezer please take some time to familiarise yourself with the following points.
- Position away from direct sunlight and away from any heat source such as a radiator.
- Your appliance should be at least 50 cm away from stoves, Gas ovens and heater cores, and should be at least 5 cm away from electrical ovens.
- Do not expose your fridge freezer to moisture or rain.
- Your fridge freezer should be positioned at least 20mm away from another freezer.
- Clearance of at least 150 mm is required at the top and back of your fridge freezer. Do not place anything on top of your fridge freezer.
- For safe operation it is important that your fridge freezer is safe and balanced. The adjustable feet are used to level your fridge freezer. Make sure that your appliance is level before placing any foodstuffs inside it.
- We recommend that you wipe all shelving and trays with a cloth soaked in warm water mixed with a teaspoon of bicarbonate of soda before use. After cleaning rinse with warm water and dry.
- Install using the plastic distance guides, which can be found at the rear of the appliance. Turn 90 degrees (as shown in the diagram). This will keep the condenser from touching the wall.
- The refrigerator should be placed against a wall with a free distance not exceeding 75 mm.

Before Using Your Fridge

- Before setting up your fridge freezer, check for any visible damage. Do not install or use your fridge freezer if it is damaged.
- When using your fridge freezer for the first time, keep it in an upright position for at least 3 hours before plugging into the mains. This will allow efficient operation and prevents damage to the compressor.
- You may notice a light odour when using your fridge freezer for the first time. This is perfectly normal and will fade away as the fridge starts to cool.
CHAPTER -1: GENERAL WARNINGS
NO FROST technology
This differs from many other standard fridge freezers. Other appliances may experience ice in the freezer compartment due to the opening of the doors and humidity caused by the food. In such appliances defrosting is required. They have to be turned off periodically, the food inside moved and the ice removed.
Your "no frost" fridge freezer prevents such problems by evenly distributing cold air in the fridge and freezer compartments through the use of a fan. This cools your food evenly and uniformly, preventing humidity and freezing.
![graph TD A["Top Panel"] --> B["Top Section"] B --> C["Bottom Section"] C --> D["Bottom Section with Red Arrow indicating clockwise flow, Blue Arrow indicating clockwise flow"] style A fill:#f9f,stroke:#333 style B fill:#ccf,stroke:#333 style C fill:#cfc,stroke:#333 style D fill:#fcc,stroke:#333](/content/2026/06/1299520/images/85a90526606f4ca2976c24b8fa81d8a754175c9ab79004ec0b57091f32b6bd6b.jpg)
Blue arrows: Blow cold air
Red arrows: Returning hot air
CHAPTER -2: YOUR FRIDGE FREEZER

1) Cooler Compartment 2) Fridge compartment shelves 3) Cheese-Butter shelf covers 4) Cheese, butter shelf 5) Door shelves 6) Door bottle shelves 7) Eggcups 8) Chiller compartment 9) Crispers 10) Freezer top basket 11) Freezer bottom basket 12) Freezer hidden basket
This figure has been drawn for information purposes to show the various parts and accessories in the appliance.
Parts may vary according to the model of the appliance.
CHAPTER -3: USING YOUR FRIDGE FREEZER
General features of your fridge freezer
- When the doors are closed make sure there are no gaps between the gaskets on the door and the main section of the appliance.
- When the freezer door is closed a vacuum is formed. It may be difficult to open the door again straight away, this is normal so please let the pressure stabilise.
- The LED lights are designed to come on gradually and will take a few seconds to reach 100% brightness.
Electronic display
- Fridge Compartment Temperature indicator
- Freezer Compartment Temperature indicator
- Q. drink alarm counter
- Economy mode
- Holiday mode
- Q. drink light
- Night sensor indicator
- Child lock
- Demo mode
- Low voltage warning
- Alarm
- Screensaver button
- Freezer
- Mode button
- Cooler
- Q.drink mode
- Night sensor button

The values on the screen indicate temperature values specified by the consumer.
The display is designed to avoid error if unintentionally touched. To interact with the display, touch and hold the button for 2 seconds; an audible beep will sound to indicate it is ready for use.
Cooling beverages [q.drink]
To activate q.drink mode press the q.drink button. The time is set in increments of 5 minutes (up to a maximum of 30). The time selected is shown in the q.drink alarm counter - when the time has completed an audible beep will sound.
Important: It should not be confused with the cooling mode.
Please adjust the time according to the number of bottles you are placing in the freezer compartment. You can extend the time of the feature if the temperature of the bottles are not cool enough but it is important to check the temperature of the bottles regularly as they may explode if left too long.
Economic mode [eco]
Ensures that your refrigerator runs within ideal temperatures. In order to activate "ECO" mode, just press [mode] button until "eco and e" light is on.
Holiday mode (H)
(Umbrella & Sun Icon) Use this mode if you are going away for a period of time and do not need to use the fridge compartment. Press the holiday mode button until the holiday icon and H light appear.
Quick freezing (sf / super freeze)
Designed to quickly freeze meals and large amounts of food quickly. Press the [freezer] button until "sf" is displayed on the screen and you hear an audible beep. Please note this mode will automatically revert to the standard set temperature after 24 hours if not deactivated before - or when the freezer has reached the sufficient temperature.
Quick cooling (sc / super cool)
Quick Cooling is designed to cool large amounts of food quickly when placed in the fridge section. Press the [cooler] button until you see the "sc" letters in the display and you hear and audible beep. This mode will automatically revert to the standard temperature setting after a period to 4-6 hours or when the refrigerator has reached the required temperature.
Cooler [cooler]
Sets the fridge temperature in values of 1 from 2, 3, 4, 5, 6, 7, 8 Celsius.
Freezer
Sets the freezer temperature in values of 2 from -16, -17, -18, -19, -20, -21, -22, -23, -24 Celsius.
Child lock
Activate the Child Lock by pressing the [cooler] and [freezer] buttons simultaneously, this will deactivate the display. To remove the Child Lock repeat the process.
Screensaver [s.saver]
Use the Screensaver mode to save energy. Hold the [s.saver] button down for 3 seconds, to deactivate repeat the process.
CHAPTER -3: USING YOUR FRIDGE FREEZER
Night sensor [sensor]
Press the [sensor] button for 3 seconds to activate. This will turn the fridge lights off and save energy. To deactivate repeat the process.
Alarm
If the alarm light comes on it means there is something wrong with the fridge freezer and you will need to contact the Sharp service team. This indicator will continue to show until a qualified service engineer has seen the product.
Compartment On-Off mode
You can turn off the fridge compartment if not being used. Hold down the mode and cooler button simultaneously for 5 seconds, the display will black out the compartment that has been turned off. Repeat the process to turn the compartment back on.
Warnings about Temperature Adjustments
- Your temperature adjustments will not be deleted when an energy breakdown occurs.
- It is not recommended that you operate your fridge in environments colder than 10°C .
- Temperature adjustments should be made according to the frequency of door openings, the quantity of food kept inside the fridge, and the ambient temperature of the placement of your fridge.
- Your fridge should be operated up to 24 hours according to the ambient temperature without interruption after being plugged in, so that it is completely cooled. Do not open the doors of your fridge and do not place food inside it during this period.
- A 5-minute delay function is applied to prevent damage to the compressor of your fridge when you take the plug out and then plug it back in again after an energy breakdown has occurred. Your fridge will start to operate normally after 5 minutes.
- Your fridge is designed to operate in the ambient temperature intervals stated in the standards, according to the climate class stated in the information label. We do not recommend operating your fridge out of the stated temperature value limits in terms of cooling effectiveness.
Note: If the ambient temperature is higher than 38°C, the compartment temperature cannot be set to -22°C, -23°C, or -24°C. It can only be set to -16°C, -17°C, -18°C, -19°C, -20°C, or -21°C.
| Climate Class Ambient Temperature °C | |
| T Between | 16 and 43 (°C) |
| ST Between | 16 and 38 (°C) |
| N Between | 16 and 32 (°C) |
| SN Between | 10 and 32 (°C) |
Temperature indicator
In order to help you better set your refrigerator, we have equipped it with a temperature indicator located in the coldest area.
To better store the food in your refrigerator, especially in the coldest area, make sure the message “OK” appears on the temperature indicator. If “OK” does not appear, this means the temperature has not been set properly.
It may be difficult to see the indicator; make sure it is properly lit. Each time the temperature setting device is changed, wait for the stabilization of the temperature inside the appliance before proceeding, if necessary,
with a new temperature setting. Please change the position of the temperature setting device progressively and wait at least 12 hours before starting a new check and potential change.
NOTE: Following repeated openings (or prolonged opening) of the door or after putting fresh food into the appliance, it is normal for the indication "OK" not to appear in the temperature setting indicator. If there is an abnormal build-up of ice crystals (bottom wall of the appliance) on the refrigerator compartment, evaporator (overloaded appliance, high room temperature, frequent door openings), put the temperature setting device on a lower position until compressor off periods are obtained again.
Store food in the coldest area of the refrigerator.

Your foods will be better stored if you put them in the most appropriate cooling area. The coldest area is just above the crisper.
The following symbol indicates the coldest area of your refrigerator.
To be sure to have a low temperature in this area, make sure the shelf is located at the level of this symbol, as shown in the illustration.
The upper limit of the coldest area is indicated by the lower side of the sticker (head of the arrow). The coldest area upper shelf must be at the same level with the arrow head. The coldest area is below this level.
As these shelves are removable, make sure they are always at the same level with these zone limits described on the stickers, in order to guarantee temperatures in this area.


CHAPTER -3: USING YOUR FRIDGE FREEZER
Accessories
Icebox
- Fill the icebox with water and insert it.
- Your ice will be ready after approximately 2 hours.
(It applies to the refrigerators having the feature.)
Note: When placing the icebox after filling with water, make sure that you position it horizontally without tilting.
Otherwise, water inside icebox may pour on the basket.
Chiller Compartment
This section can be used as a 0 degrees compartment (chiller), ideal for keeping meat and fish at optimum temperatures. Please note this is not a freezer compartment.

Crisper air flow adjustment
If the salad crispers are full turn the knob (located between the chiller and the crisper) to the open position. This will increase the air flow and ensure food stays fresher for longer.

Visual and text descriptions on the accessories section may vary according which model you have.
Cleaning
• Before cleaning your fridge freezer, turn off the mains supply and remove the plug from the socket. Do not wash your fridge freezer by pouring water on it. Use a warm, soapy cloth or sponge to wipe the interior and exterior. Carefully remove all shelves and drawers by sliding them upwards or outwards and clean with soapy water. Do not wash them in a washing machine or dishwasher. Do not use solvents, abrasive cleaners, glass cleaners, or all-purpose cleaning agents, as the chemicals they contain may damage plastic surfaces and other components. Clean the condenser at the back of your fridge freezer at least once a year with a soft brush or vacuum cleaner.
Make sure that your fridge is unplugged while cleaning.
Cleaning evaporation bowl
Your fridge defrosts automatically. Water produced by defrosting flows to the evaporating container through the water collecting groove, and vaporizes here by itself.
CHAPTER -3: USING YOUR FRIDGE FREEZER
Replacing LED Lighting
If your fridge freezer has LED lighting, contact the Sharp help desk, as this should be changed by authorized personnel only.
CHAPTER -4: FOOD STORAGE GUIDE
• Take care when storing tropical fruit such as pineapples, as they can quickly deteriorate in lower temperatures. Divide and separate food into smaller pieces before storage. Cover or wrap food to prevent odors. We recommend that you store meat loosely covered, as this allows air to circulate around the meat, causing the surface to dry slightly, helping to prevent the growth of bacteria. Do not store food so close that it blocks the crisper air adjustment button.
The table below is a quick guide, showing you the most efficient way to store the major food groups in your refrigerator compartment.
| Food Storage Duration Location | ||
| Fruits and Vegetables 1 week Loose in Vegetable Holder | ||
| Fish and Meat 2-3 Days Wrapped on Glass Shelf | ||
| Fresh Cheese 3-4 Days Top Door Shelf | ||
| Butter and Margarine 1 Week Top Door Shelf | ||
| Bottles, Yogurt and Milk Refer to Packaging Top Door Shelf | ||
| Eggs 1 month In Egg Holder | ||
The Freezer Compartment:
You should use the freezer compartments for storing food for long periods and making ice. Aim to freeze fresh food as quickly as possible so that it keeps its taste and appearance. We recommend that you place food you would like to freeze in the upper tray of the freezer compartment for 24 hours before placing it next to other frozen foods. It is important that you do not exceed the maximum freezing capacity of your fridge freezer; this will help to ensure that your food freezes as quickly as possible. The maximum freezing capacity for freezing within a 24-hour period is 18 kg.
The storage durations of frozen food can be changed by a variety of factors, such as the frequency of the doors opening and closing, thermostat settings, food types, and the period of time that elapsed from when the food was acquired to the time it entered the freezer. It is important that you follow the packaging on frozen foods and do not exceed the storage duration. The table below contains some recommendations on freezing.
| Food | Preparation | Storage Duration (Months) | Thawing Period at Room Temperature (Hours) |
| Beef Steak | Cut into single Portions | 6-10 | 1-2 or until completely thawed |
| Lamb | Cut into single Portions | 6-8 | 1-2 or until completely thawed |
| Minced Meat | Packed in convenient Portions | 1-3 | 2-3 or until completely thawed |
| Sausage | Must be packed | 1-2 | Until completely thawed |
| Chicken and Turkey | Packed in convenient portions | 1-2 | 10-12 or until completely thawed |
| Freshwater Fish (such as trout) | Cleaned well inside and scaled. Washed and dried. Cut off head and tail where necessary | 2 | Until completely thawed |
| Lean Fish (such as Sea Bass) | 4-8 | Until completely thawed | |
| Fatty fish (such as Mackerel) | 2-4 | Until completely thawed | |
| Peas | Shelled and washed | 12 | May Be Used From Frozen |
WARNING: Do not re-freeze frozen food once it has thawed. It may be a danger to your health.
CHAPTER -5: TROUBLESHOOTING
Your Fridge Freezer is equipped with a built-in fault detection system, which is able to give you guidance should your fridge freezer not operate as expected. In the event of an error, a symbol will be displayed on the control panel. The most common error symbols are shown below. If your fridge freezer displays a symbol not shown below, contact the Sharp help-desk.
ERROR DISPLAY ERROR TYPE REMARK DO'S
 and audible warning and audible warning | Error warning | Part of your Fridge Freezer may not be working properly, or there could be a cooling problem. | Contact the Sharp Help-desk |
 | Freezer compartment is not cold enough. | This could be the result of a power supply disruption or failure of the cooling equipment. | Use the SUPERFREEZE mode, or set the freezer compartment to a lower temperature until the warning symbol disappears. Do not place fresh food in the freezer compartment when this warning symbol is showing. |
 | Fridge compartment is not cold enough | This could be the result of a power supply disruption or failure of the cooling equipment. | Use the SUPERCOOL mode or set the refrigerator to a lower temperature until the warning symbol disappears. Do not open the door while the warning system is displayed. |
 | The refrigerator compartment is too cool. | Food in the refrigerator is at risk of being frozen. | Cancel the SUPERCOOL function if it is active. Decrease the temperature of the fridge compartment. |
 | The supply voltage has dropped below 170V. | This symbol is intended for advice and to act as a precaution. It will disappear once the supply voltage rises above 170V. | - |
Troubleshooting information
If your Fridge Freezer is not operating as expected, you may find a simple solution listed in the table below. If your Fridge Freezer has developed a fault not covered in this manual, please contact the authorized service.
Fault Possible Cause Solution
| Your Fridge Freezer does not operate. | It is switched off at the mains. | Check that your Fridge Freezer is plugged in and turned on at the mains. |
| The different compartments of your Fridge Freezer do not get cold enough. | The temperature is set too high. | Set the temperature to a lower value. |
| The doors are opened and closed too frequently. | Try to reduce the number of times the doors are opened and closed. | |
| The door seals are faulty. Contact the Sharp helpdesk. | ||
| The refrigerator compartment is overfilled. | Check that there is enough space between items to allow air circulation. Make sure that no items are food are blocking the air vents. | |
| Food in the Freezer compartment is colder than necessary. | The temperature setting may be too low. | Select a higher value for the temperature setting. |
| Your Fridge Freezer is noisy. | Your Fridge Freezer may not be level. | Adjust the feet to level your Fridge Freezer. |
| Please note that certain noises may heard from your Fridge Freezer during use. They are perfectly normal from a frost free Fridge Freezer and are not damaging your Fridge Freezer. Contact the Sharp helpdesk if you have any concerns. | ||
CHAPTER -5: TROUBLESHOOTING
| Fault Possible Cause Solution | ||
| There is moisture on the inner parts of your Fridge Freezer. | The doors are opened and closed too frequently. | Try to reduce the number of times the doors are opened and closed. |
| The doors do not close properly. | Items of food may prevent them from closing. | Make sure that the doors are free from obstruction. |
| The shelves and drawers are not correctly in position. | Check that the shelves and drawers are properly placed in position. | |
| The door seal is damaged. Contact the Sharp helpdesk. | ||
| Your Fridge Freezer is not level. | Adjust the feet to level your Fridge Freezer. | |
Conformity Information
- This appliance is designed for use at an ambient temperature within the 16°C - 43°C range. • The appliance is designed in compliance with the IEC60335-1 / IEC60335-2-24, 2004/108/EC standards.
CHAPTER -6: TIPS FOR SAVING ENERGY
- Always allow foodstuffs to cool before storing in the appliance.
- Thaw food in the fridge compartment, this helps save energy.
Content
CHAPTER 1: GENERAL WARNINGS....13
CHAPTER 2: YOUR FRIDGE FREEZER....16

Beverage cooling [q.drink]

Accessories
the ice cube tray;

CHAPTER -2: PARTS AND PIECES OF YOUR REFRIGERATOR


1) Refrigerator compartment 2) Refrigerator compartment drawer 3) Cheese-butter drawer lids 4) Cheese, butter drawer 5) Door shelves 6) Door bottle shelves 7) Egg holders 8) Cooler (breakfast) compartment 9) Vegetable drawer 10) Freezer middle basket 11) Freezer lower basket 12) Freezer hidden basket
Quick cooling (sc / super cool)
the image.

CHAPTER 2: YOUR REFRIGERATOR


Accessories
Ice cube tray


1 Refrigerator compartment 2) Refrigerator compartment shelves 3) Cheese-butter shelf lids 4) Butter - cheese shelf 5) Door shelves 6) Door shelves for bottles 7) Egg holder 8) Refrigerator compartment (breakfast) 9) Vegetables 10) Freezer intermediate drawer 11) Freezer lower drawer 12) Freezer hidden drawer
Accessories
Ice cube tray


CHAPTER -3: HOW TO USE YOUR REFRIGERATOR-FREEZER
Accessories
Isterningboks

1) Kjølerseksjon 2) Hyller for kjøleskapsseksjon 3) Ost-Smør hylledekker 4) Ost, smør hylle 5) Hyller i døren 6) Flaskehyller i døren 7) Eggkopper 8) Svalskapsseksjon (frokost) 9) Grønnsaksskuff 10) Fryser øverste kurv 11) Fryser nederste kurv 12) Fryser skjult kurv
Night sensor [sensor]
![SHARP SJ-F1529E0I-EU - Night sensor [sensor] - 1](/content/2026/06/1299520/images/c110e918bc8f7db58f3d884da4567ee1a29fa48c68f7998136cd1818658724a3.jpg)
![SHARP SJ-F1529E0I-EU - Night sensor [sensor] - 2](/content/2026/06/1299520/images/52be51423ac8b020393658868521ca34ddbe830cc8edcfc60f7cb8a89840b582.jpg)
CHAPTER 3: USING YOUR COMBI FRIDGE
Accessories
Ice box

Installation information

1) Cooling compartment 2) Shelves for cooling compartment 3) Cheese-butter shelf cover 4) Cheese, butter shelf 5) Door shelves 6) Door bottle shelves 7) Egg cups 8) Cooling compartment (breakfast) 9) Vegetable drawer 10) Freezer top basket 11) Freezer bottom basket 12) Freezer hidden basket
CHAPTER 3: USING YOUR FRIDGE-FREEZER
CHAPTER 3: USING YOUR FRIDGE-FREEZER
Night sensor [sensor]
CHAPTER 3: USING YOUR FRIDGE-FREEZER
Accessories
Ice tray
CHAPTER 3: USING YOUR FRIDGE-FREEZER
CHAPTER 3: USING THE REFRIGERATOR-FREEZER
Accessories
Ice cube tray
CHAPTER 5: TROUBLESHOOTING
CHAPTER 5: TROUBLESHOOTING

CHAPTER 3: USING THE REFRIGERATOR-FREEZER
Accessories
Ice cube tray

Night sensor [sensor]
CHAPTER 3: USING THE REFRIGERATOR-FREEZER
Accessories
Ice cube tray
CHAPTER 5: TROUBLESHOOTING
CHAPTER 5: TROUBLESHOOTING
CHAPTER 2: PARTS OF YOUR REFRIGERATOR-FREEZER


3 SECTION: USING YOUR FRIDGE-FREEZER
Accessories
Ice cube tray
- CHAPTER -1: GENERAL WARNINGS
- DISPOSAL
- DISPOSAL OF YOUR OLD APPLIANCE
- NOTES
- SAFETY WARNINGS
- INSTALLATION INFORMATION
- BEFORE USING YOUR FRIDGE
- NO FROST TECHNOLOGY
- CHAPTER -3: USING YOUR FRIDGE FREEZER
- GENERAL FEATURES OF YOUR FRIDGE FREEZER
- ELECTRONIC DISPLAY
- COOLING BEVERAGES [Q.DRINK]
- ECONOMIC MODE [ECO]
- HOLIDAY MODE (H)
- QUICK FREEZING (SF / SUPER FREEZE)
- QUICK COOLING (SC / SUPER COOL)
- COOLER [COOLER]
- FREEZER
- CHILD LOCK
- SCREENSAVER [S.SAVER]
- NIGHT SENSOR [SENSOR]
- ALARM
- COMPARTMENT ON-OFF MODE
- WARNINGS ABOUT TEMPERATURE ADJUSTMENTS
- TEMPERATURE INDICATOR
- STORE FOOD IN THE COLDEST AREA OF THE REFRIGERATOR
- ACCESSORIES
- ICEBOX
- CHILLER COMPARTMENT
- CRISPER AIR FLOW ADJUSTMENT
- CLEANING
- CLEANING EVAPORATION BOWL
- REPLACING LED LIGHTING
- CHAPTER -4: FOOD STORAGE GUIDE
- THE FREEZER COMPARTMENT
- CHAPTER -5: TROUBLESHOOTING
- TROUBLESHOOTING INFORMATION
- CONFORMITY INFORMATION
- CHAPTER -6: TIPS FOR SAVING ENERGY
- CONTENT
- BEVERAGE COOLING [Q.DRINK]
- THE ICE CUBE TRAY
- CHAPTER -2: PARTS AND PIECES OF YOUR REFRIGERATOR
- CHAPTER 2: YOUR REFRIGERATOR
- ICE CUBE TRAY
- CHAPTER -3: HOW TO USE YOUR REFRIGERATOR-FREEZER
- ISTERNINGBOKS
- CHAPTER 3: USING YOUR COMBI FRIDGE
- ICE BOX
- CHAPTER 3: USING YOUR FRIDGE-FREEZER
- ICE TRAY
- CHAPTER 3: USING THE REFRIGERATOR-FREEZER
- CHAPTER 5: TROUBLESHOOTING
- CHAPTER 2: PARTS OF YOUR REFRIGERATOR-FREEZER
- SECTION: USING YOUR FRIDGE-FREEZER
Brand : SHARP
Model : SJ-F1529E0I-EU
Category : Refrigerator