
MCB30 - Microwave Oven HITACHI - Free user manual and instructions
Find the device manual for free MCB30 HITACHI in PDF.


| Product Type | Solo Microwave Oven |
| Brand | Hitachi |
| Model | MCB30 |
| Capacity | 20 liters |
| Dimensions (W x D x H) | Approx. 45 x 35 x 25 cm |
| Weight | Approx. 10 kg |
| Power Supply | 230 V ~ 50 Hz, 1200 W input |
| Microwave Power Output | 800 W |
| Control Type | Mechanical dials (timer and power) |
| Functions | Microwave cooking, defrost, variable power levels |
| Timer | Up to 30 minutes with bell |
| Interior Light | Yes |
| Turntable | Yes, removable glass plate |
| Child Safety Lock | Not available on mechanical models |
| Auto Shut-off | Yes, when door is opened or timer ends |
| Cleaning | Wipe interior and exterior with damp cloth; avoid abrasive cleaners |
| Spare Parts | Turntable, fuse, door seals (available from Hitachi service) |
| Repair Index | Repairable by authorized technicians; spare parts available for 5 years |
| Certifications | CE, RoHS |
Frequently Asked Questions - MCB30 HITACHI
User questions about MCB30 HITACHI
0 question about this device. Answer the ones you know or ask your own.
Ask a new question about this device
Download the instructions for your Microwave Oven in PDF format for free! Find your manual MCB30 - HITACHI and take your electronic device back in hand. On this page are published all the documents necessary for the use of your device. MCB30 by HITACHI.
USER MANUAL MCB30 HITACHI
HITACHI Inspire the Next
Model name
MCB30
natural_image
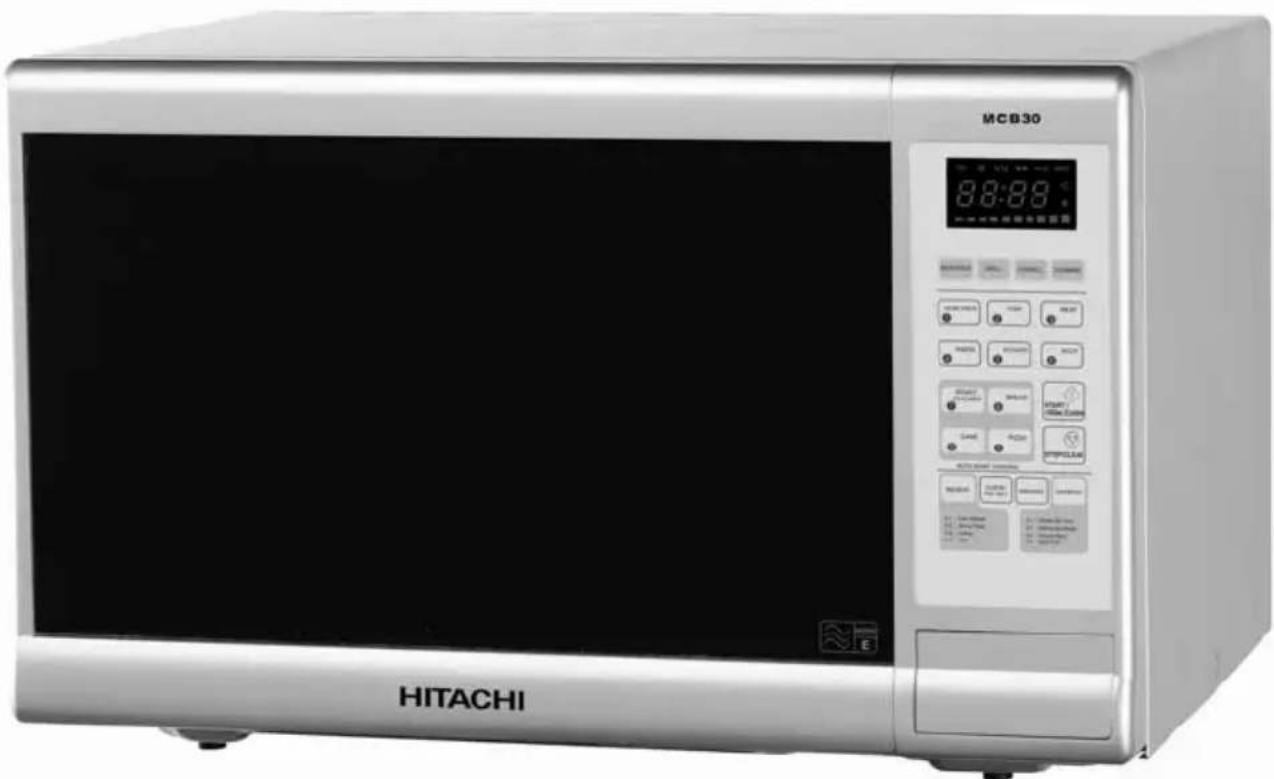
HITACHI microwave oven with digital display and control buttons (no visible text beyond branding)IMPORTANT:
Read the safety instructions and precautions carefully before using the microwave oven.
Keep all documents relating to the microwave oven in a safe place.
Contents
Safety Precautions....2
Electrical Connection....3
Important Safety Instructions....4
Do's And Don'ts....5
Other helpful instructions....7
Cleaning and Care....8
Setting up Your Oven....9
Countertop Installation....10
Installation....10
Operation Instructions....11
Questions and Answers......19
Containers....20
Technical Specifications....21
SAFETY PRECAUTIONS
Please read the following precautions to prevent microwave leakage
PRECAUTIONS WHEN USING YOUR MICROWAVE OVEN
Because the door on your microwave oven has been carefully designed to contain the microwave energy, the precautions below are important
- Do not tamper with or attempt to defeat the safety interlocks which are operated by the door mechanism, or to make any attempt to cause the appliance to operate with the door open
- Do not place any object between the oven front face and the door or allow dirt or cleaner residue to accumulate on sealing surfaces
- Do not operate the oven if it is damaged until it has been repaired by a fully qualified service technician. It is particularly important that the door closes properly and that there is no damage to the:
(a) Door (bent)
(b) Hinges and latches (broken or loosened)
(c) Door seals and door seal areas (broken or cracked) - It is dangerous for this oven to be adjusted or repaired by anyone other than a properly qualified and trained service technician
- Do not operate the oven empty. The appliance should not be operated without food in the oven, operation in this manner is likely to damage the appliance
IMPORTANT SAFETY INSTRUCTIONS
- Microwave heating of beverages can result in delayed eruptive boiling, therefore care must be taken when handling the container.
- The contents of feeding bottles and baby food jars shall be stirred or shaken and the temperature checked before consumption, in order to avoid burns
- This microwave oven is designed for freestanding use only and must not be placed in a built-in cabinet.
ELECTRICAL CONNECTION
For your safety please read the following information
Warning:
This appliance must be earthed.
The appliance must be connected to a 240 volts 50 Hz AC supply by means of a three pin socket, suitably earthed and should be protected by a 13 amp fuse in the plug.
The appliance is supplied with a 13-amp 3-pin mains plug fitted with a 13 amp fuse. Should the fuse require replacement, it must be replaced with a fuse rated at 13 amp and approved to BS1362
The plug contains a removable fuse cover that must be refitted when the fuse is replaced. In the event of the fuse cover being lost or damaged, the plug must not be used until a replacement cover has been obtained.
If the mains plug is unsuitable for the socket outlet in your home or is removed for any other reason, then the fuse should be removed and the cut off plug disposed of safely to prevent the hazard of electric shock.
There is a danger of electric shock if the cut off plug is inserted into any 13 amp socket outlet.
How to wire a 13 amp plug

Important
The wires in the mains lead on this appliance are coloured in accordance with the following code :
Green and Yellow – Earth
Blue - Neutral
Brown – Live
As the colours may not correspond with the markings identifying the terminals in your plug proceed as follows.
The green and yellow wire must be connected to the terminal in the plug, which is marked with the letter E, or with the earth symbol or coloured green and yellow.
The blue wire must be connected to the terminal marked N.
The brown wire must be connected to the terminal marked L.
IMPORTANT SAFETY INSTRUCTIONS
When using electrical appliances basic safety precautions should be followed, including the following:
WARNING – To reduce the risk of burns, electric shock, fire, injury to persons or exposure to excessive microwave energy
- Read all instructions before using the appliance
- Read and follow the specific 'Safety Precautions' found on page 2
-
This appliance must be earthed. Connect only to properly earthed outlet
-
Install or locate this appliance in accordance with the provided installation instructions
-
Some products such as whole eggs and sealed containers – for example, closed glass jars, narrow necked containers – may explode and should not be heated in this oven
-
Use this appliance only for its intended use as described in this manual
-
As with any appliance, close supervision is necessary when used by children
-
If the mains cord becomes damaged, it should be replaced by the manufacturer, its service agent or a similarly qualified person with a cord of the same type and rating to avoid an electrical hazard.
-
This product is intended for domestic use only, any other use may invalidate the warranty and might be dangerous.
-
Do not cover or block any openings on the appliance
-
Do not use outdoors
-
Do not immerse cord or plug in water
-
Keep cord away from heated surfaces
-
Do not let cord hang over the edge of a table or counter
-
Use only mild non-abrasive soaps or detergents applied with a sponge or soft cloth when cleaning surfaces of door and oven. See 'CLEANING AND CARE' of your microwave oven on page 8
-
To reduce the risk of fire in the oven cavity
(a) Do not overcook food. Carefully attend appliance if paper, plastic, or other combustible materials are placed inside the oven to facilitate cooking
(b) Do not use recycled kitchen paper as it may contain metal particles
(c) Remove wire twist-ties from paper or plastic bags before placing bags in the oven
(d) If materials inside the oven should ignite, keep oven door closed, turn off oven and disconnect the power cord, or shut off power at the fuse or circuit breaker panel
- If the microwave oven is out of order or damaged, do not try to repair it by yourself. Contact the nearest qualified service technician.
ADDITIONAL IMPORTANT SAFETY INSTRUCTIONS
- Microwave heating of beverages can result in delayed eruptive boiling, therefore care must be taken when handling the container.
- The contents of feeding bottles and baby food jars shall be stirred or shaken and the temperature checked before consumption, in order to avoid burns.
- This microwave oven is designed for freestanding use only and must not be placed in a built-in cabinet.
DO'S AND DON'TS
To use the microwave oven safely, be sure to observe the following rules
| Do not remove the cabinetThe cabinet contains high voltage wiring, and it is dangerous |
| Do not insert anything in to the holes of the safety catches, air outlets, air inlets, the small holes inside the oven, or the holes at the rear of the applianceThe insertion may cause not only the failure of the switches and internal parts but there is also the danger of an electric shock |
| Do not run the microwave oven when the turntable is emptyThe door, turntable, and other roller ring will be overheated and the life of the magnetron, an important part of the microwave oven, will be shortened |
| Do not cover the air outlets or inlets on the cabinet, nor place anything on the cabinetThe microwave oven may be damaged because the internal parts cannot be cooled sufficiently. Also, the item placed on the cabinet may be overheated and become dangerous |
| Do not boil eggs in the microwave ovenThe eggs will explode because of the build up of pressure within the shell. When cooking poached or baked eggs, pierce egg yolk with a pointed knife |
COOKING UTENSILS
Utensils should be checked to ensure that they are suitable for use in the microwave oven. The following chart summarises the proper use of cooking utensils in your oven.
Cooking utensils
Microwave
| Heat resistant glass, glass ceramic | Yes | |
| Ceramic, china | Yes | |
| Metal cookware | No | |
| Non resistance glass | No | |
| Microwave plastic | Yes | |
| Plastic wrap | Yes | |
| Paper (cup, plates, towels) | Yes | |
| Straw, wicker and wood | No | |
Microwave
- Most glass, glass ceramic, and heat resistant glassware utensils are excellent. Those with metal trim should not be used in a microwave oven.
- Paper napkins, towels, plates, cups, cartons and cardboard can be used in the microwave oven. Do not use recycled paper products since they may contain impurities which may cause sparks and / or fires when used in cooking.
- Plastic dishes, cups, freezer bags, and plastic wraps may be used in the microwave oven. Follow the manufacturers instructions or the information given in a microwave cookbook when using plastics in the microwave oven.
- Metal utensils and utensils with metallic trim should not be used in the microwave oven.
If the use of aluminium foil, skewers, or utensils containing metal in the oven is specified in the recipe, allow at least 2.5 cm clearance between the metal object and the interior oven wall. If arcing (sparks) occurs, remove immediately.
Notes:
- Care should be taken when removing utensils or the glass turntable, as they may become hot during cooking
- Only use a thermometer that is designed or recommended for use in the microwave oven.
- Ensure the turntable is in place when you operate the oven.
OTHER HELPFUL INSTRUCTIONS
For best results and more enjoyable cooking, please read these comments thoroughly.
For Best Results:
-
When determining the time for a particular food, begin by using short times and checking the cooking process frequently. It is easy to overcook food because microwaves cook very quickly.
-
Small quantities of food, or foods with low water content may dry out and become hard if cooked too long.
Defrosting Frozen Food:
- Foods that have been frozen can be placed directly in the oven for thawing. (Be certain to remove any metallic ties or wraps).
- Defrost according to the Defrosting Tips found in this manual.
- For areas of the food thawing faster than others, cover with small pieces of aluminium foil. This helps slow down or stop the defrosting process in the covered areas.
- Some foods should not be completely thawed before cooking. For example, fish cooks so quickly that it is sometimes better to begin cooking while still slightly frozen.
- It may be necessary to increase or decrease the cooking time in some recipes, depending on the starting temperature of the food.
NOTE:
Air from the vent may become warm during cooking.
Browning:
There are a few foods which are not cooked long enough in the microwave oven to brown and may need additional colour.
Coatings such as paprika, and browning agents such as Worcestershire sauce may be used on chops, meat patties or chicken pieces.
Roasts, poultry or ham, cooked for 10-15 minutes or longer, will brown without extra additives when cooking in combination mode.
CLEANING AND CARE
- It is important that the oven is cleaned frequently to avoid food splashes from becoming 'baked on'
- Clean the microwave oven after turning off the power and pulling out the plug
| Oven(Ceiling, walls, bottom, and inside of door) | Each time food has been cooked, wipe off the dirt or food splashes as soon as possibleGreasy spots should be wiped off with a cloth soaked in mild detergentIf dirt is left in the oven for a long time, it cannot be wiped off easily, it will hold the smell of the food and may cause corrosion or rustingAlso arcing may occur and the side cover may be scorched because the microwaves are concentrated on the food splashesIf the side cover becomes too dirty to be cleaned, consult your nearest store and replace itCheck the microwave oven for any visible damage, such as a misaligned door, damaged door seals around the door or dents inside the oven cavity or on the door. Ensure that the door and door sealing areas are clean before use, clean with a mild detergent, water and a soft cloth. Do not use scouring pads, powder or other abrasive materials | |
| Roller Ring | Always keep the roller ring cleanWhen it is soiled with food splashes or grease, remove the food splashes or grease using a sponge or cloth soaked with mild detergent and wash it in waterIf food splashes are left on the roller ring, arcing may occur because the microwaves are concentrated on the food splashesKeep the roller ring in position in the oven except when it is to be cleaned | |
| Turntable | When the turntable is soiled with grease or food splashes, remove the dirt with a sponge soaked in mild detergent, wash it in water and dry it | |
| Cabinet | Wipe the cabinet with a soft clothWhen the cabinet is heavily soiled, wipe it with a cloth soaked in mild detergent thoroughly with a clean damp clothDo not splash water on the air outlets | |
| CAUTIONS | Do not rub the oven and accessories with a wire brush or sharp-edged tool | Do not apply oven cleaner, benzene, or thinner to the surface of the panel or door |
| The surface may become scratched | The letters on the panel may fade, and the surface may lose gloss or may corrode | |
SETTING UP YOUR OVEN
Names of Oven Parts and Accessories
Remove the oven and all materials from the carton and oven cavity.
Your oven comes with the following accessories:
Glass tray 1
Turntable ring assembly 1
Instruction Manual 1
Grill stand 1

Turntable Installation

Turntable ring assembly
a. Never place the glass tray upside down. The glass tray should never be restricted.
b. Both glass tray and turntable ring assembly must always be used during cooking.
c. All food and containers of food are always placed on the glass tray for cooking.
d. If glass tray or turntable ring assembly cracks or breaks, contact your nearest authorized service center.
Countertop Installation
Remove all packing material and accessories. Examine the oven for any damage such as dents or broken door. Do not install if oven is damaged.
Cabinet: Remove any protective film found on the microwave oven cabinet surface.
Do not remove the light brown Mica cover that is attached to the oven cavity to protect the magnetron. (inside the cavity)
INSTALLATION
Remove all the packaging from the oven and check for any damage, for example, deformation or breakage of the door, gaps around the door or dents on the cabinet or door. Should any damage be found, do not use the microwave oven but contact a fully qualified service agent. The servicemen will check the damage and repair the oven if necessary.
PLACE OF INSTALLATION
| Place the microwave oven on a level and sturdy surfaceIf the surface is not level the door may not open automatically | Do not place the microwave oven near a gas appliance which produces heat or steam or near the sink where the water may splash on it Heat, steam or water may cause parts failure and damage |
| Allow an ample space between the microwave oven and wallThe wall may be soiled with the excess steam mist from the air outlets at the rear. Do not place the microwave ovennear a curtain. Allow a space of 7cm or more from the top surface, 3cm either side, and a minimum of 5cm at the rear for ventilation during cooking of the microwave oven. | Place the microwave oven more than three metres away from radios, TVs and antenna linesThe microwave oven may cause noise interference or distort the picture |
| Air inlets and air outlets should be kept free at all times to allow for ventilation. | Do not place the power cored across the oven or against a hot surface. |
When the microwave oven is first plugged into the supply, the oven will display "0:00", the oven will beep once. The input time should be within 0:00--23:59(24 Hour); 1:00--12:59
(12 Hour).
Example: To set 12:12.
(1) Press "CLOCK/PRE-SET" once to select 24 hours system and twice for 12 hours system, "24H" or "12H" will show in the display.
(2) Press the number buttons of "1", "2", "1", "2" in order.
(3) Press "CLOCK/PRE-SET" to finish clock setting. ":" will flash, and the time will be displayed.
Note: 1) If the clock is not set, the oven will not function.
2) During clock setting, if you press "STOP/CLEAR", the oven will go back to the previous status.
2. Microwave Cooking
Selecting different microwave power levels and setting the cooking time. There are five power levels available. Repeatedly press "MICROWAVE" to choose the power level.
Example: If you want to use 80% microwave power to cook for 10 minutes, you can follow these steps.
1) Press "MICROWAVE" once, the oven will display "P100", "💡" indicator will light.
2) Press "MICROWAVE" once again to choose 80% power, the oven will display "P80".
3) Press the number buttons of "1", "0", "0", "0" in order, the oven will display "10:00"
4) Press "START/+30SEC./CONFIRM" to start cooking, ":" will light and the " 🔺" indicator will flash.
Note: "MICROWAVE" Pad presses instructions
| Presses Instructions | Display | Microwave Power |
| 1 | P100 | 100% |
| 2 | P 80 | 80% |
| 3 | P 50 | 50% |
| 4 | P 30 | 30% |
| 5 | P 10 | 10% |
GB
3. Grill Cooking
Example: If you want to use 100% to cooking for 35 minutes, you can follow these steps.
1) Press the "GRILL" key, the oven will display "G-1", and "∪" will light.
2) Press the number buttons "3", "5", "0", "0" in order, the oven will display "35:00"
3) Press the "START/+30SEC./CONFIRM" key to start cooking. The " ∪ " will flash, ":" will light and cooking will start. Half way through the cooking time the oven will beep twice, if the food being cooked requires turning over / rotating, you can press STOP, open the door turn the food and close the door again, now continue cooking by pressing START.
4. Convection Cooking(With preheating function)
The convection cooking can let you to cook the food as a traditional oven. Microwave is not used. It is recommended that you should preheat the oven to the appropriate temperature before placing the food in the oven.
1) Press the "CONVEC." key repeatedly until the oven displays "180". Also, "°C", "※" will light. (Press the "CONVEC." key repeatedly to select the temperature.)
2) Press the "START/+30SEC./CONFIRM" key to start cooking. The temperature figure will flash when the set temperature is reached, the oven will beep to remind you to put the food into the oven.
3) Press the number buttons of "4", "0", "0", "0" in order, the oven will display "40:00"
4) Press the "START/+30SEC./CONFIRM" key to start cooking. The " Ⓧ " will flash, ":" will light.
Note: a. Cooking time cannot be input until the preheating temperature is reached. If the temperature arrives, door must be opened to input the cooking time.
b. When the preheating time is more than 30 minutes and the temperature not reached, The oven beeps twice to tell you to input the cooking time. If the time is not input within 5 minutes, the oven will stop preheating. The oven will beep five times and turn back to waiting state.
5. Convection Cooking(Without preheating function)
1) Press the "CONVEC." key once, the oven will display "140".
Also "°C", "※" will light. (Press the "CONVEC." key repeatedly to select the temperature.)
2) Press the number buttons of "4", "0", "0", "0" in order, the oven will display "40:00".
3) Press the "START/+30SEC./CONFIRM" key to start cooking. The "❄" will flash, ":" will light.
Note: "CONVEC." Pad presses instructions
| Presses Instructions | Display | Convection |
| 1 | 140^ | |
| 2 | 150^ |
GB
| 3 | 160°C | ● |
| 4 | 170°C | ● |
| 5 | 180°C | ● |
| 6 | 190°C | ● |
| 7 | 200°C | ● |
| 8 | 210°C | ● |
| 9 | 220°C | ● |
| 10 | 230°C | ● |
6. Combination Cooking
Example: If you want to use combination to cook (C-1) for 40 minutes, you can operate the oven as per the following steps.
1) Press the "COMBINE" key once, the oven will display "C-1".
At the same time, " ✉ " and " ⏰ " will light.
2) Press the number buttons of "4", "0", "0", "0" in order, the oven will display "40:00".
3) Press the "START/+30SEC./CONFIRM" key to start cooking. The " ", " will flash, ":" will light. The remaining cook time will count down in the display.
Note: "COMBINE" Pad presses instructions
| Presses Instructions | Display | Microwave Power | Grill Power Power | Convection |
| 1 | C-1 | |||
| 2 | C-2 | |||
| 3 | C-3 | |||
| 4 | C-4 |
7. Delay Start
Example: To start cooking at 12:12.
(1) First, set the clock, then set the cooking program you want(not including defrost function). Example: If you want to use 80% microwave power to cook for 15 minutes starting at 12:12.
a. Press "MICROWAVE" twice to choose 80% power.
b. Press "1", "5", "0", "0" to choose 15 minutes.
c. Be careful! Please do not press "START/+30SEC./CONFIRM" to start cooking.
(2) Press "CLOCK/PRE-SET" to display 0:00.
(3) Press "1", "2", "1", "2" in order.
(4) Press "START/+30SEC./CONFIRM" to confirm the setting. The unit will turn back to the clock state.
(5) Cooking begins at 12:12, ":" will light.
8. Reheat Cooking
1) Press "REHEAT" pad, the "h-1" will display in oven and flash." 🔊 " and " AUTO " indicators will light(Press the "REHEAT" key repeatedly to select the cooking program you want.
2) Press "START/+30SEC./CONFIRM" key to confirm, the "h-1" will display.
3) Press "REHEAT" pad, the oven will display "150"." 🔊" and "AUTO" and "g" indicators will light.(Press the "REHEAT" key repeatedly to select the weight of the food.)
4) Press "START/+30SEC./CONFIRM" key to start cooking.
Reheat Chart
| Menu | Weight(g) | Display |
| h-1(Auto Reheat) | 150 | 150 |
| 250 | 250 | |
| 350 | 350 | |
| 450 | 450 | |
| 600 | 600 | |
| h-2(Dinner Plate) | 250 | 250 |
| 350 | 350 | |
| 450 | 450 | |
| h-3(Coffee) | 1(approximately 240g) | 1 |
| 2(approximately 480g) | 2 | |
| 3(approximately 720g) | 3 | |
| h-4(Roll) | 1(approximately 70g) | 1 |
| 2(approximately 140g) | 2 | |
| 3(approximately 210g) | 3 |
9. Defrost By time
1) Press "DEFROST" once, the oven will display "d-1".
2) Input the figure of the time of cooking. " ", " **" indicators will light. (the maximum cooking time is 99 minutes and 99 seconds.)
3) Press "START/+30SEC./CONFIRM" key to start defrosting. " 🔊" and "**" indicators will flash.
10. Defrost By weight
1) Press "DEFROST" pad twice, the oven will display "d-2".
2) Input the weight of the food. (The input weight should be within 100--2000g)
3) Press "START/+30SEC./CONFIRM" key to start defrosting. " ", and " **" indicators will flash and "g" indicator will go out.
11. Defrost Ground meat
1) Press "DEFROST" pad three times, the oven will display "d-3".
2) Input the weight of the food. (The weight should be within 100--2000g)
3) Press "START/+30SEC./CONFIRM" key to start defrosting. " 🔊" and "**" indicators will flash.
12. Defrost Sea food
1) Press "DEFROST" pad 4 times, the oven will display "d-4".
2) Input the figure of the weight of food. (The weight should be within 100--2000g)
3) Press "START/+30SEC./CONFIRM" key to start defrosting. " 🔊" and "**" indicators will flash.
13. Auto Menu Cooking
The numeric buttons 0—9 are for selecting one of the ten different programme functions;
| Pad | Cook | Pad | Cook Pad | Cook | Pad Cook | ||
| 1 | VEGETABLE | 4 | PASTA | 7 | ROAST CHICKEN | 0 | PIZZA |
| 2 | FISH | 5 | POTATO | 8 | BREAD | ||
| 3 | MEAT | 6 | SOUP | 9 | CAKE | ||
Example: Cooking vegetable of 350g:
(1) Press "VEGETABLE" button, " 🔊 " and "AUTO " will light.
(2) Press "VEGETABLE" button again to choose weight, oven will display "350", "g", "", and "AUTO" will light.
(3) Press "START/+30SEC./CONFIRM" to start cooking, "g" will go out, time counts down, " ", and "AUTO" will flash.
Auto menu Chart
| Menu | Weight(g) | Press Times | Display |
| Vegetable | 150 | Once | 150 |
| 350 | Twice | 350 | |
| 500 | Thrice | 500 | |
| Fish | 150 | Once | 150 |
| 250 | Twice | 250 | |
| 350 | Thrice | 350 | |
| 450 | 4 times | 450 | |
| 650 | 5 times | 650 | |
| Meat | 150 | Once | 150 |
| 300 | Twice | 300 | |
| 450 | Thrice | 450 | |
| 600 | 4 times | 600 | |
| Pasta | 50(with cold water 450g) | Once | 50 |
| 100(with cold water 800g) | Twice | 100 | |
| 150(with cold water 1200g) | Thrice | 150 | |
| Potato | 1(approximately 230g) | Once | 1 |
| 2(approximately 460g) | Twice | 2 | |
| 3(approximately 690g) | Thrice | 3 | |
| Soup | 200ml | Once | 200 |
| 400ml | Twice | 400 | |
| 600ml | Thrice | 600 | |
| Roast Chicken | 500 | Once | 500 |
| 750 | Twice | 750 | |
| 1000 | Thrice | 1000 | |
| 1200 | 4 times | 1200 | |
| Bread | 50g | Once | 50 |
| 100g | Twice | 100 | |
| 150g | Thrice | 150 | |
| Cake | 475g | Once | 475 |
| Pizza | 200g | Once | 200 |
| 300g | Twice | 300 | |
| 400g | Thrice | 400 |
GB
Note: Cake menu is under convection cooking with 160^ C-warm-up function, and you should preheat first following the auto menu operation, when the oven reaches the temperature, it will stop working and sound to remind opening the door to put cake in, then press "Start/+30Sec./Confirm" to start cooking.
14. MEMORY
1) Press "MEMORY" key one to three times to set "memory 1", "memory 2" or "memory 3" program, and the oven will display "1", "2" or "3".
2) Set one or two stages program you want.
Example:a) Press "MICROWAVE" once to choose 100% microwave power;
b) Press number keys "1", "0", "0", "0" in order to adjust the cooking time;
3) Press "MEMORY" key repeatedly to select one of the 3 programme locations, or press "START/+30SEC./CONFIRM" to start cooking and save the program automatically.
4) Next time when you want to cook with the memory program which has been set, you only need to press "MEMORY" key to choose the program wanted and then press "START/+30SEC./CONFIRM" to start cooking.
Note: if the electricity is cut off, the procedure that has been saved will be cancelled.
15.Multi-Stage Cooking
A maximum of three stages of cooking can be set. If one of the stages is defrosting, it should be the first stage, Auto menu cannot be set here. The oven will beep once after each stage and the next stage will begin.
Example: If you want to cook the food with 100% microwave power for 10 minutes+ 80% microwave power for 15 minutes. Do it as following:
1) Press "MICROWAVE" once to choose 100% microwave power;
2) Press number keys "1", "0", "0", "0" in order to adjust the cooking time;
3) Press "MICROWAVE" twice to choose 80% microwave power;
4) Press number keys "1", "5", "0", "0" in order to adjust the cooking time;
5) Press "START/+30SEC./CONFIRM" to start cooking.
16. Speedy Cooking
When the oven is in the waiting state, press "START/+30SEC./CONFIRM" key to start cooking with full microwave power for 30 seconds. (each press adds 30 seconds to the time, the maximum time is 99 minutes and 99 seconds)
When the oven is in the grill, convection and combination cooking states, press "START/+30SEC./CONFIRM" key to add 30 seconds cooking time. (in the Defrosting, When using Multi-stage cooking or Auto Menu this function is not available.)
GB
17. Inquiring Function
(1) In cooking state, press "COMBINE", "MICROWAVE", or "CONVEC.", and the current power will be displayed for 2\~3 seconds.
(2) In cooking state, press "CLOCK/PRE-SET" to inquire the time for cooking. The cooking time will flash for 2-3 seconds.
(3) In pre-set state, press "CLOCK/PRE-SET" to inquire the time for delay start cooking. The pre-set time will flash for 2-3 seconds.
18. Lock-out Function for Children
Lock: In waiting state, press "STOP/CLEAR" for 3 seconds, there will be a long "beep" denoting entering into the children-lock state and a key " " will light. The oven will display the current time.
Lock quitting: In locked state, press "STOP/CLEAR" for 3 seconds, there will be a long "beep" denoting that the lock is released and "☐" will go out.
19. Display Specification
(1) In waiting state, the oven will display clock and " : " will flash.
(2) In function setting state, the oven will display the related setting.
(3) In the operation and suspending state, the oven will display the residual cooking time.
GB
QUESTIONS AND ANSWERS
Q. What is wrong when the oven light will not glow?
A. *Light bulb has blown.
* Door not closed.
Q. Why is steam coming out of the air exhaust vent and / or why is water dripping from the bottom of the door?
A. Steam is normally produced during cooking operations. This microwave oven has been made to vent this steam out of the side and top vents, occasionally this steam condenses on the door and water then drips out at the bottom of the door. This is quite normal and safe.
Q. Does microwave energy pass through the viewing screen in the door?
A. No. The metal screen reflects the energy to the oven cavity. the holes, or ports are made to allow light to pass, they do not let microwave energy through.
Q. Will the microwave oven be damaged if it operates while empty?
A. Yes. Never run it empty.
Q. Why do eggs sometimes pop?
A. When baking or poaching eggs, the yolk may pop due to steam build-up inside the yolk membrane. To prevent this, simply pierce the yolk with a toothpick before cooking. Never cook eggs without piercing their shells.
Q. Why is standing time recommended after the cooking operation has been completed?
A. Standing time is very important.
With microwave cooking, the heat is in the food, not in the oven. Many foods build up enough internal heat to allow the cooking process to continue, even after the food is removed from the oven. Standing time for joints of meat, large vegetables and cakes is to allow the inside to cook completely, without overcooking the outside.
Q. Why does my oven not always cook as fast as the microwave cooking guide says?
A. Check your cooking guide again, to make sure you've followed directions exactly and to see what might cause variations in cooking times. Cooking guide times and heat settings are suggestions, to help prevent over cooking the most common problem in getting used to a microwave oven. Variations in the size, shape and weights and dimensions could require longer cooking time. Use your own judgement along with the cooking guide suggestions to check whether the food has been properly cooked just as you would do with a conventional cooker.
Q. Why do sparks and crackling (arcing) occur in the oven?
A. There may be several reasons why sparks and crackling (arcing) within the cavity happens.
* You have left a fork or other metal utensils in the oven.
* You are using dishes with metal parts or trim (silver or gold).
* You are using a large amount of metal foil.
* You are using a metal twist tie.
CONTAINERS
| Container Type Explanation Microwave | ||
| Heat resisting glassware | Glass containers with high heat-resisting properties such as Pyrex and Corning are the most suitable for the microwave oven | YES |
| Normal glassware | Glass containers that may be broken easily by the sudden increase of temperature should be used carefullyTable glassware can be used for drinks, fruits, and sweetsLead crystal is unsuitableNOTE: Do not use plates or receptacles made of coloured glass or ones having metallic decorations, since these can be damaged | YES |
| Heat resisting ceramic ware | Ceramic ware and glazed earthenware are suitable | YES |
| Normal ceramic ware | Containers having cracks, scratches or metal brims cannot be used | YES |
| Polypropylene containers | Polypropylene containers can be used if the temperature of the food does not exceed 100 degree C | YES |
| Other containers | Melamine, styrol, and urea resin containers absorb the micro waves and easily become hot or are weak against heat | NO |
| Metal ware, iron skewers, wire nets etc | Since the micro waves cannot pass through these items, they cannot be used for microwave cookingMetal skewers and aluminium foil may be used partially for some types of cooking, but they must not touch the walls of the oven | NO |
| Plastic films | Plastic films that can resist temperature of 120 degree C or higher can be used if the temperature of the food is not estimated to exceed 100 degree CNote, however, that plastic film is not suitable for wrapping meat or foods with a high or fat or sugar content as it may melt when heated | YES |
| Bamboo ware, wooden ware etc | These containers may burn if they are heated for a long time (They can be used for microwave cooking for a short time) | YES |
How to test that a dish can be used in the microwave
First, put the dish on the turntable without food, and place a glass containing approximately 100 cc of water on the dish. Then select HIGH POWER and heat the water for 15 to 30 seconds. If the dish does not become warm it can be used in the microwave oven; if it becomes warm it cannot be used
Before You Call For Service
Refer to the following short checklist. You may find that the problem you are experiencing has nothing to do with the microwave oven itself. A couple of quick checks may save you an unnecessary service call.
Problem
The oven doesn't work at all.
Check the following
The mains plug is securely plugged into the power socket.
The door is firmly closed.
The cooking time is set on the timer selector control.
The fuse in the mains plug has not blown.
The mains circuit breaker in the home has not tripped.
Problem
"Arcing" or sparking in the oven interior.
Check the following
Any dishes, trays etc which are made of metal or have metal trims must not be used in the microwave oven.
Metal skewers should be covered with food and make sure they don't touch the sides of the oven interior when rotating. If "arcing" occurs again, remove skewers until food is cooked.
Remove any other metal cookware.
TECHNICAL SPECIFICATION
Input Power:
Output Power:
Microwave Frequency:
Outside Dimensions:
Oven Cavity Dimensions:
Oven Capacity:
Net Weight:
230-240V\~50Hz, 1450W
900W
2450MHz
326mm(H)x520mm(W)x477mm(D)
242mm(H)x332mm(W)x348mm(D)
30Liters
Approx.19.7kg

Waste electrical and electronic products must not be disposed of with household waste. Please refer to the retailer from whom you purchased this item for disposal instructions.
Packaging materials should be recycled using local facilities.
- HITACHI Inspire the Next
- IMPORTANT:
- Contents
- SAFETY PRECAUTIONS
- PRECAUTIONS WHEN USING YOUR MICROWAVE OVEN
- IMPORTANT SAFETY INSTRUCTIONS
- ELECTRICAL CONNECTION
- Warning:
- How to wire a 13 amp plug
- ADDITIONAL IMPORTANT SAFETY INSTRUCTIONS
- DO'S AND DON'TS
- COOKING UTENSILS
- Microwave
- Notes:
- OTHER HELPFUL INSTRUCTIONS
- For Best Results:
- Defrosting Frozen Food:
- NOTE:
- Browning:
- CLEANING AND CARE
- SETTING UP YOUR OVEN
- Names of Oven Parts and Accessories
- Turntable Installation
- Countertop Installation
- INSTALLATION
- Microwave Cooking
- GB
- Grill Cooking
- Convection Cooking(With preheating function)
- Convection Cooking(Without preheating function)
- Combination Cooking
- Delay Start
- Reheat Cooking
- Defrost By time
- Defrost By weight
- Defrost Ground meat
- Defrost Sea food
- Auto Menu Cooking
- MEMORY
- 15.Multi-Stage Cooking
- Speedy Cooking
- Inquiring Function
- Lock-out Function for Children
- Display Specification
- QUESTIONS AND ANSWERS
- Before You Call For Service
- Problem
- Check the following
- TECHNICAL SPECIFICATION
Brand : HITACHI
Model : MCB30
Category : Microwave Oven