
KF7900 - Coffee machine AEG - Free user manual and instructions
Find the device manual for free KF7900 AEG in PDF.


| Product type | Filter coffee machine |
| Brand | AEG |
| Model | KF7900 |
| Dimensions (W x D x H) | 25 x 35 x 40 cm |
| Weight | 3 kg |
| Power supply | 230 V, 50 Hz, 1000 W |
| Water tank capacity | 1.5 L |
| Carafe capacity | 10 cups |
| Filtration system | Permanent or disposable filter |
| Automatic shut-off function | Yes, after 40 minutes |
| Keep warm function | Yes, hot plate |
| Noise level | ≤ 60 dB |
| Maintenance and cleaning | Tank and carafe dishwasher safe, regular descaling required |
| Safety | Automatic shut-off, overheat protection |
| Spare parts / Repairability | Carafe, permanent filter, sealing ring available |
Frequently Asked Questions - KF7900 AEG
User questions about KF7900 AEG
0 question about this device. Answer the ones you know or ask your own.
Ask a new question about this device
Download the instructions for your Coffee machine in PDF format for free! Find your manual KF7900 - AEG and take your electronic device back in hand. On this page are published all the documents necessary for the use of your device. KF7900 by AEG.
USER MANUAL KF7900 AEG
GB INSTRUCTION BOOK


www.aeg.com








www.aeg.com
CONTENTS
ENGLISH 6
FRANÇAIS 18
PORTUGUÊS 30
DEUTSCH 9
ΕΛΛΗΝΙΚΑ 21

ITALIANO 24
ESPAÑOL 15
NEDERLANDS 27
FOR PERFECT RESULTS
Thank you for choosing this AEG product. We have created it to give you impeccable performance for many years, with innovative technologies that help make life simpler features you might not find on ordinary appliances. Please spend a few minutes reading to get the very best from it.
Visit our website to:

Get usage advice, brochures, trouble shooter, service information: www.aeg.com/webselfservice

Register your product for better service: www.registeraeg.com

Buy Accessories and Consumables for www.aeg.com/shop
CUSTOMER CARE AND SERVICE
When contacting Service, ensure that you have the following data available:
- Model Number
- PNC number
- Serial number
The information can be found on the rating plate.
www.aeg.com


ENGLISH
Thank you for choosing an AEG product. In order to ensure the best results, always use original AEG accessories and spare parts. They have been designed especially for your product. This product is designed with the environment in mind. All plastic parts are marked for recycling purposes.
COMPONENTS
A. Option button
B. Set button
C. Scroll up ( ∧) button
D. Scroll down ( ) button
E. LCD Display
F. Aroma button
G. Auto/Start button
H. Brew button
I. Cancel button
J. Removable water tank
K. Water level indicator
L. Hinged lid
M. Water filter holder with Active carbon filter cartridge
N. Filter holder with anti-drip valve
O. Permanent coffee filter
P. Coffee jug with fresh water graduation on both sides*
Q. Warming plate*
R. Extendable power cord & plug
S. Measuring spoon
T. Stainless steel thermo jug with a trigger*
* Depending on model
Picture page 2-3
GETTING STARTED
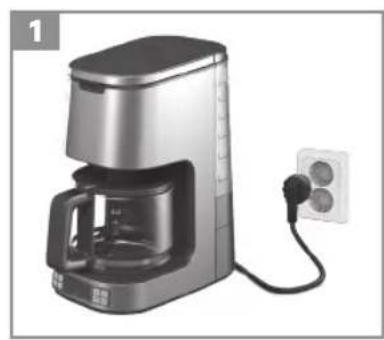
Before first use. Place the machine on a flat surface. When starting the machine for the first time, fill the tank with cold water. Press the Option button twice. The display will show "AUTO CLEAN". Press the Set button to confirm. Let a full tank of water pass through the machine once or twice to clean it, without using coffee.
2 Making coffee: open the lid and fill the water tank with fresh cold water up to the desired level. Note: The water tank is removable. There is a gauge for cups on the water tank and on the coffee jug (for the Coffee maker with Glass jug only). The machine must not be used with empty tank!
3 Insert the permanent coffee filter in the filter holder and fill it with ground coffee. For average strong coffee one measuring spoon (approx. 6-7 g) per cup is sufficient. Close the water tank lid and place the jug (complete with lid) onto the warming plate.
4 Start brewing coffee instantly: Press the Brew button. If you want to pause the brewing, press the Brew button again. When the brewing process is finished the appliance will enter keep warm mode (for the Coffee maker with Glass jug only).
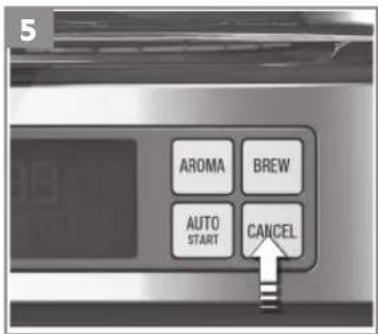
5 Press the Cancel button to stop a selected operation, the appliance will enter standby mode. Note: Press and hold the Cancel button for two seconds to turn off the display.
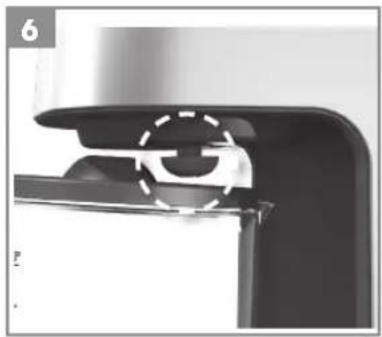
6 If the jug is removed, the filter valve prevents coffee from dripping onto the warming plate. While boiling, the jug must not be removed for longer than 30 seconds or the filter will overflow.
OTHER FUNCTIONS
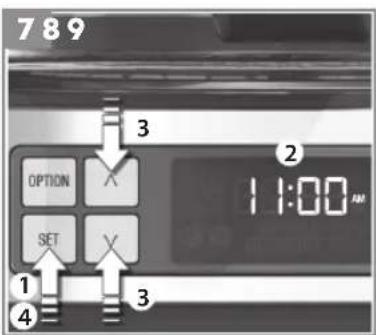
7 Adjusting the clock: Press and hold the Set button until the time (hours) on the display starts flashing. Press the Scroll up (A) or Scroll down (V) button to change hours, then press the Set button to confirm. Set minutes (and AM or PM) by using the (A) or (V) button, press the Set button to confirm.
Note: If no button is pressed the appliance will automatically close the clock setting interface after 5 seconds.
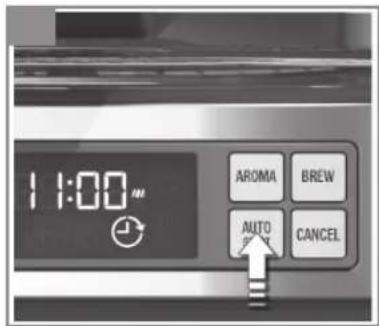
8 Brewing coffee with the program time setting: Press and hold the Auto/Start button until the display shows the time and the program time indicator. Set the time by using the (A) or (V) button, press the Set button to confirm. Press the Auto/Start button to start or pause the program time setting.
9 Adjusting the keep warm temperature (for the Coffee maker with Glass jug only): Press the Option button. Choose the desired temperature (High/Medium/Low) by pressing the (A) or (V) button. Press the Set button to confirm.
10 The Aroma Selector extends the brewing time to maximize the flavour extraction and get a stronger coffee for a small number of cups (normally less than 6). Press the Aroma button to adjust the aroma setting.
11 The display will show "Change Filter" after 60 brew cycles, to let the user know that the PureAdvantage™ water filter needs to be replaced. Place the filter into a container of clean cool water, and let soak for 10 minutes.
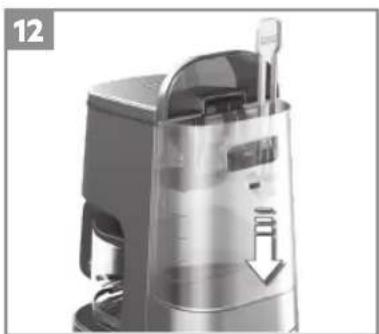
12 Place the PureAdvantage™ filter (filter end first) into the pocket located at the bottom of the water reservoir.
CLEANING AND CARE
13 Turn the machine off and unplug the power cord. Wipe all outer surfaces with a damp cloth. Coffee jug and jug lid are dishwasher proof. Never use caustic or abrasive cleaners, and never immerse the machine in liquid!
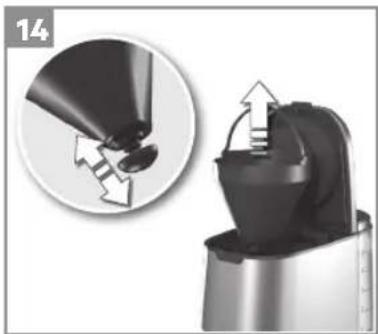
14 To clean the filter holder, lift up the handle and remove the filter holder. To clean the filter valve thoroughly, push it several times while it is being rinsed. The filter holder and the permanent coffee filter can also be washed in the dishwasher.
15 Decalcifying is recommended every three months for best performance. Fill the tank with water and decalcifier according to product instructions, then follow steps 16 and 17.
Note: The water tank is removable.
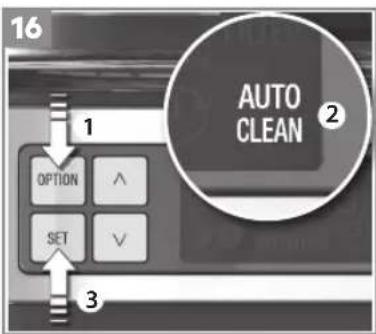
16 Place the coffee jug with its lid onto the warming plate. Allow the decalcifier to take effect for about 15 minutes. Press the Option button twice. The display will show "Auto Clean". Press the Set button to confirm. Once finished, the water will stop flowing, followed by three beep sounds. If necessary repeat the decalcifying process.
Note: Make sure no coffee is used.
17 Allow the machine to run at least twice with plain water. Then thoroughly rinse the coffee jug, lid and filter holder under running water, activate the filter valve repeatedly during the rinse process.
18 Never immerse the thermo jug in liquid or wash it in dishwasher.*
* Depending on model
Enjoy your new AEG product!
SAFETY ADVICE
Read the following instruction carefully before using machine for the first time.
- This appliance can be used by children aged from 8 years and above and persons with reduced physical, sensory or mental capabilities or lack of experience and knowledge if they have been given supervision or instruction concerning use of the appliance in a safe way and understand the hazards involved.
• Children shall not play with the appliance. - Cleaning and user maintenance shall not be made by children unless they are older than 8 and supervised.
- Keep the appliance and its cord out of reach of children less than 8 years.
- The appliance may only be connected to a power supply whose voltage and frequency comply with the specifications on the rating plate!
- Never use or pick up the appliance if
– the supply cord is damaged, – the housing is damaged. - The appliance must only be connected to an earthed socket. If necessary an extension cable suitable for 10 A can be used.
- If the appliance or the supply cord is damaged, it must be replaced by the manufacturer, its service agent or similarly qualified person, in order to avoid hazard.
• Always place the appliance on a flat, level surface. - Never leave the appliance unattended while connected to the supply mains.
- The appliance must be switched off and the mains plug withdrawn each
www.aeg.com
time after use, before cleaning and maintenance.
- The appliance and accessories become hot during operation. Use only designated handles and knobs. Allow to cool down before cleaning or storage.
- The mains cable must not come into contact with any hot parts of the appliance.
- Do not immerse the appliance in water or any other liquid.
- Do not exceed the maximum filling volume as indicated on the appliances.
- Do not use or place the appliance on a hot surface or near source of heat.
- This appliance is intended for domestic use only. The manufacturer cannot accept any liability for possible damage caused by improper or incorrect use.
DISPOSAL

This symbol on the product indicates that this product contains a battery which shall not be disposed with normal household waste.

This symbol on the product or on its packaging indicates that the product may not be treated as household waste. To recycle your product, please take it to an official collection point or to an AEG service center that can remove and recycle the battery and electric parts in a safe and professional way. Follow your country's rules for the separate collection of electrical products and rechargeable batteries.
AEG reserves the right to change products, information and specifications without notice.
DEUTSCH


AEG


Printed on recycled paper


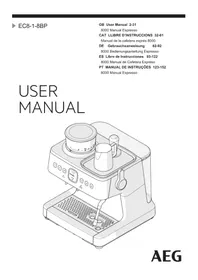
Brand : AEG
Model : KF7900
Category : Coffee machine