
IS 70 C (EX) - Tumble dryer INDESIT - Free user manual and instructions
Find the device manual for free IS 70 C (EX) INDESIT in PDF.
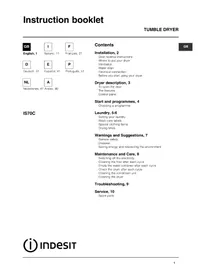


| Brand | Indesit |
| Model | IS 70 C (EX) |
| Product Type | Condenser Dryer |
| Drying Capacity | 7 kg |
| Dimensions (W x D x H) | 60 x 60 x 85 cm |
| Net Weight | Approx. 35 kg |
| Power Supply | 220-240 V ~ 50 Hz |
| Power Consumption | 2000 W |
| Drying Programs | Cotton, synthetics, delicates, easy iron, quick |
| Noise Level | 65 dB(A) |
| Energy Class | C (old standard) |
| Special Functions | Anti-crease, delayed start, quick dry |
| Drying System | Condensation |
| Maintenance | Regular cleaning of lint filter and condenser |
| Safety | Overheating protection, automatic cycle end stop |
| Spare Parts | Available (belt, filter, heating element, etc.) |
| Repairability | Index not provided |
| Included Accessories | Drain kit, user manual |
Frequently Asked Questions - IS 70 C (EX) INDESIT
User questions about IS 70 C (EX) INDESIT
0 question about this device. Answer the ones you know or ask your own.
Ask a new question about this device
Download the instructions for your Tumble dryer in PDF format for free! Find your manual IS 70 C (EX) - INDESIT and take your electronic device back in hand. On this page are published all the documents necessary for the use of your device. IS 70 C (EX) by INDESIT.
USER MANUAL IS 70 C (EX) INDESIT
Where to put your dryer
Ventilation
Water drain
Electrical connection
Before you start using your dryer
Dryer description, 3
To open the door
The features
Control panel
Start and programmes, 4
Choosing a programme
Laundry, 5-6
Sorting your laundry
Wash care labels
Special clothing items
Drying times
Warnings and Suggestions, 7
General safety
Disposal
Saving energy and respecting the environment
Maintenance and Care, 8
Switching off the electricity
Cleaning the filter after each cycle
Empty the water container after each cycle
Check the drum after each cycle
Cleaning the condenser unit
Cleaning the dryer
Troubleshooting, 9
Service, 10
Spare parts
Keep this instruction booklet on hand in order to refer to it when necessary. Take it with you when you move, and should you sell this appliance or pass it on to another party, make sure that this booklet is supplied along with the dryer so that the new owner may be informed about warnings and suggestions on how the dryer works.
Read these instructions carefully; the following pages contain important information on installation and suggestions on how the appliance works.
Door Reversal Instructions
The door of your dryer is reversible and can easily be changed. Exchange diagonally hinge brackets and blanking screws. Exchange door latch and catch with their opposite blanking plates (see diagram above).
Where to put your dryer
- Place your dryer at a distance from gas ranges, stoves, heaters, or cook tops because flames can damage the appliance.
- If you are going to install the appliance under a work counter, be sure to leave a 10mm space between the top and any other objects on or above the machine and a 15mm space between the sides and lateral furnishings or walls. This is to ensure proper air circulation. Make sure that the back vents are not obstructed.
Ventilation
When the dryer is in use, there has to be adequate ventilation. Make sure you put your dryer in an environment that is not damp and has proper air circulation throughout. Airflow around the dryer is essential to condense the water produced during the washing, the dryer will not operate efficiently in an enclosed space or cupboard.
If using the dryer in a small or cold room some condensation could be experienced.
Water drain
If your dryer is installed next to a drain the water can be plumbed into this drain. This does away with the need to empty the water container. Simply remove the top hose from its top fitting at the rear of the dryer and plumb the hose provided to the drain.
Electrical connections
Make sure of the following before you insert the plug into the electrical socket:
• The socket must be grounded. - The socket must be able to sustain the machines maximum power, which is indicated on the rating label (see Dryer Description). - Power voltage must be within the values indicated on the rating label (see Dryer Description). - The socket must be compatible with the dryers plug. Should this not be the case, replace the plug or the socket.
! The dryer must not be installed outdoors, even if the space is sheltered. It can be very dangerous if it is exposed to rain or storms. ! Once installed, the dryer's electrical wire and plug must be within easy reach. ! Do not use extension cords. ! The power cord must not be bent or squashed. ! The power cord supplied should be checked periodically and replaced by a cord specially prepared for this dryer and fitted only by authorized technicians (see Service). New or longer power cords are supplied at an extra charge by authorized dealers. ! The manufacturer denies any responsibility should any of these rules not be followed.
! If in doubt about any of the above, consult a qualified electrician.
Before you start using your dryer
Once you have installed your dryer and before you use it, clean the inside of the drum to remove any dust that could have accumulated during transport.
To open the door. The features

Control panel
The START button begins drying a selected programme (see Start and Programmes).
The HEAT button selects drying temperature (see Start and Programmes).
IN: HIGH heat OUT: LOW heat
The Drying Guide allows you to consult a user-friendly table of fabric types and load capacities.
Cottons
Synthetics
or Acrylics and other delicates
The Empty Water indicator light signals that the water container is full and must be emptied.
The light will take a few seconds to go out after replacing the empty water container; the dryer must be running for this to happen.
The TIMER knob sets a drying time.
Rotate it clockwise, never counter-clockwise, until the indicator points to the drying time you want to select (see Start and Programmes).
Choosing a programme
- Plug the dryer into the electrical socket.
- Sort your laundry according to fabric type (see Laundry).
- Open the door, make sure the filter is clean and in place, and the water container is empty and in place (see Maintenance).
- Load the machine and make sure items are not in the way of the door seal. Close the door.
- Choose the drying time by checking the Drying Guide table for the type of fabric you are drying (see Laundry).
- Set the temperature with the HEAT button.
- Select a drying time by rotating the TIMER knob clockwise.
- Press the START button to begin. During the drying programme, you can check on your laundry and take out items that are dry while others continue drying. When you close the door again, press the START button in order to resume drying.
- About 10 minutes before the programme is completed, it enters the final COOL TUMBLE phase (fabrics are cooled), which should always be allowed to complete.
- Open the door, take the laundry out, clean the filter and replace it. Empty the water container and replace it (see Maintenance).
- Unplug the dryer.
Sorting your laundry
- Check symbols on clothing labels to make sure that the articles can be tumble dried.
- Sort laundry by fabric type. • Empty pockets and check buttons.
- Close zippers and hooks and tie loose belts and strings.
- Wring out each item in order to eliminate as much excess water as possible.
! Do not load dripping wet clothes into the dryer.
Maximum load size
Do not load more than maximum capacity.
These numbers refer to dry weight:
Natural fibres: 7kg max (15lb)
Synthetic fibres: 3kg max (6.6lb)
! DO NOT overload the dryer as this could result in reduced drying performance.
Typical load
| Clothes | |
| Blouse Cotton 150g 5ozOther 100g 3oz | |
| Dress Cotton 500g 1lb 2ozOther 350g 12oz | |
| Jeans 700g 1lb 6oz | |
| 10 nappies 1000g 2lb 3oz | |
| Shirt Cotton 300g 10ozOther 200g 7oz | |
| T-Shirt 125g 4oz | |
| Household Items | |
| Duvet cover (Double) | Cotton 1500g 3lb 5ozOther 1000g 2lb3oz |
| Large Tablecloth | 700g 1lb 6oz |
| Small Tablecloth | 250g 9oz |
| Tea Towel | 100g 3oz |
| Bath Towel | 700g 1lb 6oz |
| Hand Towel | 350g 12oz |
| Double Sheet | 500g 1lb 2oz |
| Single Sheet | 350g 12oz |
At the end of a drying cycle, cottons could still be damp if you grouped cottons and synthetics together. If this happens, simply give them an additional short period of drying.
Wash Care Labels
Look at the labels on your garments, especially when tumble drying for the first time. The following symbols are the most common:

May be tumble dried

Do not tumble dry

Tumble dry at high heat setting

Tumble dry at low heat setting
Items not suitable for tumble drying
- Articles that contain rubber or rubber-like materials or plastic film (pillows, cushions, or PVC rainwear), any other flammable articles or objects that contain flammable substances (towels soiled with hair spray). • Glass fibres (certain types of draperies)
- Items which have been dry cleaned
- Items with the ITCL Code ☒ (see Special clothing items). These can be cleaned with special at-home dry cleaning products. Follow instructions carefully.
- Large bulky items (quilts, sleeping bags, pillows, cushions, large bedspreads etc). These expand when drying and would prevent airflow through the dryer.
GB
Special clothing items
Blankets and Bedspreads: acrylic items (Acilan, Courtelle, Orion, Dralon) must be dried with special care on LOW heat setting. Avoid drying for a long period of time.
Pleated or creased garments: read the manufacturer's drying instructions on the garment.
Starched articles: do not dry these with non-starched items. Make sure that as much of the starch solution is removed from the load as possible before placing it in the dryer. Do not over-dry: the starch will become powdery and leave your clothing limp, which defeats the purpose of starch.
Drying times
The table below presents APPROXIMATE drying times in minutes. Weights refer to dry garments:
| Cottons [BTK4]High (full) Heat | ||||||
| Drying times 800-1000rpm in washing machine | ||||||
| Half Load | Full Load | |||||
| 1kg 2kg | 3kg 4kg | 5kg 6kg | 7kg | |||
| 30-40 | 40-55 | 55-70 | 70-80 | 80-90 | 95-120 | 120-140 |
| SyntheticsLow (gentle) Heat | ||||||
| Drying times on reduced spin in washing machine | ||||||
| Half Load Full Load | ||||||
| 1kg 2kg | 3kg | |||||
| 40-50 | 50-70 | 70-90 | ||||
| AcrylicsLow (gentle) Heat | ||||||
| Drying times on reduced spin in washing machine | ||||||
| Half Load | Full Load | |||||
| 1kg | 2kg | |||||
| 40-60 | 55-75 | |||||
Times are approximate and can vary depending upon:
- Amount of water retained in clothes after spin cycle: towels and delicates retain a lot of water.
- Fabrics: items that are the same type of fabric but different textures and thicknesses may not have the same drying time.
- Quantity of laundry: single items or small loads may take longer to dry.
- Dryness: If you are going to iron some of your clothes, they can be taken out while still a bit damp. Others can be left longer if you need them to be completely dry.
- Heat setting.
- Room temperature: if the room where the dryer is located is cold, it will take longer for the dryer to dry your clothes.
- Bulk: some bulky items can be tumble dried with care. We suggest that you remove these items several times, shake them out, and return them to the dryer until finished.
! Do not over-dry your clothes.
All fabrics contain a little natural moisture, which keeps them soft and fluffy.
! The appliance has been designed and built according to international safety standards. These warnings are given for safety reasons and must be read carefully.
CE This appliance conforms to the following EEC Directives:
- 72/23/EEC and 93/68/EEC (Low Voltage Equipment)
- 89/336/EEC, 92/31/EEC and 93/68/EEC (Electromagnetic Compatibility)
General safety
- This tumble dryer has been designed for home, and not professional use.
- This dryer must be used by adults, and the instructions in this booklet should be followed carefully.
- Do not touch the appliance while barefoot or with wet hands or feet.
- Unplug the machine by pulling on the plug, not the cord.
- Children must not be in proximity of the dryer when in use. After using the dryer, turn it off and unplug it. Keep the door closed to make sure that children do not use it as a toy.
- The appliance must be installed correctly and have proper ventilation. The air intake at the front of the dryer and rear vent behind the dryer should never be obstructed (see Installation).
- Never use the dryer on carpeting where the pile height would prevent air from entering the dryer from the base.
- Check to see if the dryer is empty before loading it. • The back of the dryer could become very hot. Never touch it while in use.
- Do not use the dryer unless the filter, water container and condenser are securely in place (see Maintenance).
- Do not use liquid fabric softeners in the dryer, add it to the final rinse of your wash.
- Do not overload the dryer (see Laundry for maximum loads).
- Do not load items that are dripping wet.
- Tumble dry items only if they have been washed with detergent and water, rinsed and been through the spin cycle. It is a fire hazard to dry items that HAVE NOT been washed with water.
- Carefully check all instructions on clothing labels (see Laundry).
- Do not dry garments that have been treated with chemical products.
- Never dry articles that are contaminated with flammable substances (petrol, oil, paint, hair spray, creams, cooking fat or oils).
- Do not tumble dry rubber, foam rubber, plastic, plastic foam, nappy pants or liners, polythene or paper.
- Do not tumble dry large, very bulky items.
- Do not tumble dry acrylic fibres at high temperatures.
- Complete each programme with its Cool Tumble Phase.
- Do not turn off the dryer when there are still warm items inside.
- Clean the filter after each use (see Maintenance).
- Empty the water container after each use (see Maintenance).
- Clean the condenser unit after regular intervals (see Maintenance).
- Do not allow lint to collect around the dryer.
- Never climb on top of the dryer. It could result in damage.
- Always follow electrical standards and requirements (see Installation). Always buy original spare parts and accessories (see Service).
Recycling and disposal information

As part of our continued commitment to helping the environment, we reserve the right to use quality recycled components to keep down customer costs and minimise material wastage.
- Disposing of the packaging material: follow local regulations, so the packaging can be recycled.
- To minimise risk of injury to children, remove the door and plug - then cut off mains cable, flush with the appliance. Dispose of these parts separately to ensure that the appliance can no longer be plugged into a mains socket.
Disposal of old electrical appliances
The European Directive 2002/96/EC on Waste Electrical and Electronic Equipment (WEEE), requires that old household electrical appliances must not be disposed of in the normal unsorted municipal waste stream.
Old appliances must be collected separately in order to optimise the recovery and recycling of the materials they contain and reduce the impact on human health and the environment.

The crossed out "wheeled bin" symbol on the product reminds you of your obligation, that when you dispose of the appliance it must be separately collected.
Consumers should contact their local authority or retailer for information concerning the correct disposal of their old appliance.
Saving energy and respecting the environment
- Wring out items to eliminate excess water before tumble drying (if you use a washing machine first, select a high spin cycle). Doing this will save time and energy during drying.
- Always dry full loads - you save energy: single items or small loads take longer to dry.
- Clean the filter after each use to contain energy consumption costs (see Maintenance).
Switching off the electricity
! Unplug your dryer when not using it, when cleaning it and during all maintenance operations.
Clean the filter after each cycle
The filter is an important part of your dryer: it accumulates lint and fluff that is formed while drying. When finished drying, clean the filter by rinsing it under running water or with your vacuum cleaner. Should the filter become clogged up, the airflow inside the dryer will be seriously compromised: drying times lengthen and you will consume more energy. It may also damage your dryer.
The filter is found in front of the dryer trim (see diagram).
Removing the filter:
- Pull the plastic grip of the filter upwards (see diagram).
- Clean the filter and replace it correctly. Ensure the filter is fully located flush into the tumble dryer trim.
! Do not use the dryer without replacing the filter.
Empty the water container after each cycle
Pull the container out of the dryer and empty it into a sink or other suitable drain. Replace the water container securely.
Check the drum after each cycle
Turn the drum manually in order to remove small items (handkerchiefs) that could have been left behind.
Cleaning the condenser unit
Periodically (every month) remove the condenser unit and clean any build up of fluff from between the plates by rinsing it under the tap with cold water. This should be done with cold water from the rear of the condenser.
Removing the condenser:
- Unplug the dryer and open the door.
- Pull open the condenser cover (see diagram). Release the three catches by turning 90° counterclockwise then pull on the grip and remove from the dryer.
- Clean the surface of the seals and replace, making sure that the catches have been secured.
Cleaning the dryer
- External parts in metal or plastic and rubber parts can be cleaned with a damp cloth.
- Periodically (every 6 months) vacuum the front air intake grille and vents at the rear of the dryer, to remove any build up of fluff, lint or dust. Also to remove accumulation of fluff from the front of the condenser and filter areas, clean occasionally with a vacuum cleaner.
! Do not use solvents or abrasives. ! Your dryer uses special bearing components which do not need lubrication. ! Have your dryer checked regularly by authorised technicians to ensure electrical and mechanical safety (see Service).


One day your dryer seems not to be working. Before you call your Service Centre (see Service), go through the following troubleshooting suggestions:
Problem:
Possible causes / Solution:
The tumble dryer won't start.
- The plug is not plugged into the socket, or not making contact. • There has been a power failure.
- The fuse has blown. Try to plug another appliance into the socket.
- Are you using an extension cord? Try plugging the dryer's power cord directly into the socket. • Is the door not closed securely?
- The TIMER knob has not been set properly (see Start and Programmes).
- The START button has not been pressed (see Start and Programmes).
It's taking a long time to dry.
• The filter has not been cleaned (see Maintenance). - The temperature setting is not ideal for the type of fabric you are drying (see Start and Programmes, and see Laundry). - Does the water container need emptying? Is the empty water light on? (see Maintenance). - Does the condenser need cleaning? (see Maintenance). - The correct drying time has not been selected for the load (see Laundry). - The air intake grille or rear vents are obstructed (see Installation, and see Maintenance). • The items were too wet (see Laundry). • The dryer was overloaded (see Laundry).
Before calling the Service Centre:
- Use the troubleshooting guide to see if you can solve the problem yourself (see Troubleshooting).
- If not, turn off the dryer and call the Service Centre closest to you.
What to tell the Service Centre:
• name, address and post code. - telephone number. • the type of problem. • the date of purchase. • the appliance model (Mod.). • the serial number (S/N).
This information can be found on the data label inside the door of the machine.
Spare Parts
This dryer is a complex machine. Repairing it yourself or having a non-authorised person try to repair it could cause harm to one or more persons, could damage the machine and could invalidate the spare parts warranty.
Call an authorised technician if you experience problems while using the machine.
The spare parts have been designed exclusively for this appliance and not for other uses.

English, 1

Italiano, 11

Français, 21

Deutsch, 31

Español, 41

Português, 51

Nederlands, 61 Arabic, 80

IS70C
Index
Installation, 12
- 89/336/EEC, 92/31/EEC and 93/68/EEC
- DRYER DESCRIPTION
- START AND PROGRAMMES
- LAUNDRY
- WARNINGS AND SUGGESTIONS
- MAINTENANCE AND CARE
- TROUBLESHOOTING
- WHERE TO PUT YOUR DRYER
- VENTILATION
- WATER DRAIN
- ELECTRICAL CONNECTIONS
- BEFORE YOU START USING YOUR DRYER
- CHOOSING A PROGRAMME
- SORTING YOUR LAUNDRY
- MAXIMUM LOAD SIZE
- WASH CARE LABELS
- ITEMS NOT SUITABLE FOR TUMBLE DRYING
- SPECIAL CLOTHING ITEMS
- DRYING TIMES
- GENERAL SAFETY
- RECYCLING AND DISPOSAL INFORMATION
- DISPOSAL OF OLD ELECTRICAL APPLIANCES
- SAVING ENERGY AND RESPECTING THE ENVIRONMENT
- SWITCHING OFF THE ELECTRICITY
- CLEAN THE FILTER AFTER EACH CYCLE
- EMPTY THE WATER CONTAINER AFTER EACH CYCLE
- CHECK THE DRUM AFTER EACH CYCLE
- CLEANING THE CONDENSER UNIT
- CLEANING THE DRYER
- PROBLEM
- POSSIBLE CAUSES / SOLUTION
- THE TUMBLE DRYER WON'T START
- IT'S TAKING A LONG TIME TO DRY
- BEFORE CALLING THE SERVICE CENTRE
- WHAT TO TELL THE SERVICE CENTRE
- SPARE PARTS
- INDEX
- INSTALLATION
Brand : INDESIT
Model : IS 70 C (EX)
Category : Tumble dryer