
CBO 140 a - Refrigerator CANDY - Free user manual and instructions
Find the device manual for free CBO 140 a CANDY in PDF.
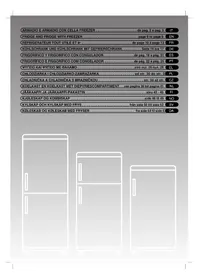


| Product type | Combined refrigerator with freezer compartment |
| Brand | Candy |
| Model | CBO 140 a |
| Height | 140 cm |
| Width | 55 cm |
| Depth | 60 cm |
| Net weight | 38 kg |
| Total net capacity | 200 L |
| Refrigerator compartment capacity | 180 L |
| Freezer compartment capacity | 20 L (1 star) |
| Climate class | N-ST |
| Noise level | 40 dB(A) |
| Annual energy consumption | 180 kWh/year |
| Energy class | E |
| Power supply | 220-240 V, 50 Hz |
| Main functions | Automatic defrost of refrigerator, interior light, mechanical thermostat, adjustable feet, reversible door |
| Maintenance and cleaning | Clean the interior with a soft cloth and soapy water. Manually defrost the freezer when the ice layer reaches 5 mm. |
| Safety | Automatic stop in case of power failure (cold retention system) |
| Spare parts and repairability | Parts available through Candy authorized after-sales service. Repairable by a professional. |
| General information | Combined refrigerator for domestic use, freestanding. Warranty: 2 years. |
Frequently Asked Questions - CBO 140 a CANDY
User questions about CBO 140 a CANDY
0 question about this device. Answer the ones you know or ask your own.
Ask a new question about this device
Download the instructions for your Refrigerator in PDF format for free! Find your manual CBO 140 a - CANDY and take your electronic device back in hand. On this page are published all the documents necessary for the use of your device. CBO 140 a by CANDY.
USER MANUAL CBO 140 a CANDY
CABINET AND CABINET WITH FREEZER CELL
CONTROL BOX FOR REVERSING THE
DEFROSTING
(1 - 2
COUPLING THE BUILT-IN COLUMN DOORS TO THE APPLIANCE DOORS
LARDER & FRIDGE
CONTROL PANEL REVERSING THE
In order to access and adjust the temperature of the fridge and freezer, it is necessary to turn the dial on the thermostat box.
The thermostat box is placed inside the fridge on the top right-hand side.
Setting the dial to "0" will turn the appliance off. Reduce the temperature by turning the dial from position 1 to 5. We recommend you set the temperature to 2 or 3.

DEFROSTING
Important: If the room temperature is very warm, the appliance may work continuously and a layer of frost will deposit on the back of the fridge compartment. In this case it is necessary to turn the dial to lower settings (1-2).

The fridge compartment is automatically defrosted when the compressor is inactive.

A small amount of frost or drops of water on the back of the fridge compartment.
Make sure the water outlet is always clean. Make sure foods do not touch the back or sides of the fridge compartment.
N.B. This is the rating plate. If you need to contact our Service Department in the event of faults, remember to give them the information on the plate.
OPENING OF THE DOORS
Remove the pin and the corresponding bush of the top crossbar.

Remove the top door.

Remove the pin of the bottom right-hand side hinge and remount it on the bottom left-hand side hinge.

Reassemble the hinges and doors working from bottom to top 1 2→3. →
![graph TD A["Start"] --> B["Process Block"] B --> C["Step 1"] B --> D["Step 2"] B --> E["Step 3"]](/content/2026/06/1297295/images/4a42cfae890c8984f84f29d8282f906fb75d71660178cad5340ade657e963285.jpg)
FREEZER COMPARTMENT
Some products are equipped with a freezer compartment. The following notes are specific to this type of products.
FREEZING
This product is equipped with a section * the top part of the product (see quick guide). Food requires 24 hours storage in the freezer compartment to reach the desired level of freezing.
N.B. In order to make sure that the freezer door is properly closed, check that the coloured door opening indicator is not visible.


REVERSING THE OPENING OF THE FREEZER COMPARTMENT
Disassemble the bottom right-hand hinge.

Unscrew the hook positioned on the left-hand side of the freezer compartment.

Remove the hole cover plugs, as indicated in the figure.

Insert the plugs as indicated in the figure.

Position the door and hinge first, then screw the latter to the product.

Screw the hook on the right-hand side of the freezer compartment.

Put the appliance in an upright position and wait two hours before turning it on.

SIZE OF THE APPLIANCE AND HOUSING UNIT

INSTALLATION OF THE APPLIANCE IN THE COLUMN
Fasten the gasket equipped with the appliance on the opposite side of the hinges.
1
Insert the appliance in the column, placing it on the opposite side of the hinges.
2
fits perfectly into the cabinet.
3
Fasten the top part of the appliance to the cabinet, using the screws provided.
4
Fasten the bottom part of the appliance with the screws provided.
5
Apply the ventilation grill. Make sure that the top plate of the cabinet
6
COUPLING OF THE BUILT-IN COLUMN PANELS TO THE DOORS OF THE APPLIANCE
The appliance is equipped with coupling devices for the appliance doors with the column panels (drive sleds).
Fasten the sled in the inner part of the built-in column panel at the desired height and at approx. 20 mm from the outer wire of the door.
1
Open the doors of the built-in column and the fridge. Position the built-in loader in the slide, then fit it into the fridge door.
2
Mark the fixing points for the screws and drill with a bit of a diameter of 2.5.
3
Connect the appliance door to the cabinet panel having the sled slots as references.
4
PRECAUTIONS FOR THE CORRECT FUNCTIONING
Once the product has been built in, position the rear part of the column in contact with the wall so as to prevent access to the compressor compartment.
For the product to operate correctly it is essential to allow adequate air circulation so as to cool down the condenser located in the rear part of the appliance.
For this reason, the column must be equipped with a rear chimney, whose upper opening must not be blocked and with a front slot which will be covered with a ventilation grill.
Dimensions of the column lock-pickings.

Dimensions of the gap to be left between the column and the ceiling.

REFRIGERATEUR TOUT UTILE ET 4*
THERMOSTAT INVERSER LE
DEGIVRAGE
INVERSER LE SENS D'OUVERTURE DU CONGELATEUR
congélateur.

MONTAGE DE LA PORTE DU MEUBLE A LA PORTE DU REFRIGERATEUR
PRECAUTIONS POUR UN FONCTIONNEMENT CORRECT
SPEISESCHRANK & KÜHLSCHRANK
ABTAUEN
VERBINDEN DER EINGEBAUTEN STANDSCHRANK-STIRNWAND MIT DEN GERÄTETÜREN
DESCONGELACIÓN
ASSEMBLY OF THE INTEGRATED COLUMN PANELS WITH THE APPLIANCE DOORS
DEFROSTING
Remove the upper door.

freezer.

PLACEMENT OF THE INTEGRATED COLUMN PANELS ON THE APPLIANCE DOORS
DEFROSTING
DEFROSTING
MOUNTING THE BUILT-IN PANELS TO THE APPLIANCE DOORS
NOTES ON CORRECT OPERATION
REFRIGERATOR
CONTROL PANEL ROTATION
DEFROSTING
CONNECTING THE APPLIANCE DOORS TO THE KITCHEN FURNITURE DOORS
MEASURES NECESSARY FOR PROPER FUNCTIONING
PROVISION CABINET & REFRIGERATOR
CONTROL PANEL OPENING DIRECTION OF THE
DEFROSTING
ATTACHING THE BUILT-IN CABINET DOORS TO THE APPLIANCE DOORS
PRECAUTIONS FOR CORRECT OPERATION
REFRIGERATOR AND REFRIGERATOR-FREEZER
DEFROSTING
Remove the upper door.

CONNECTING THE BUILT-IN PANELS TO THE APPLIANCE DOORS
SAFETY PRECAUTIONS FOR USE
REFRIGERATOR AND COMBI REFRIGERATOR
CONTROL PANEL OPEN THE DOORS
To adjust the temperature of the combi refrigerator, turn the switch on the thermostat box.
DEFROSTING
FREEZER SECTION
Some products are equipped with a freezer section. The following notes apply to these products.
This product is equipped with a * section at the top (see the quick guide). Food must be stored for 24 hours in the freezer section before it is properly deep-frozen.
Screw the hook onto the top of the freezer section.

SIZE OF THE APPLIANCE AND HOUSING UNIT

INSTALLING THE APPLIANCE IN THE CABINET
Insert the ventilation grille. Make sure that the top plate fits perfectly.
6
ATTACHING THE APPLIANCE DOORS TO THE BUILT-IN CABINET WALLS
Attach the door of the appliance to the cabinet wall using the holes you have made.
4
PRECAUTIONS FOR CORRECT OPERATION
REFRIGERATOR AND REFRIGERATOR WITH FREEZER
CONTROL PANEL CHANGE OF
DEFROSTING
ATTACHING THE BUILT-IN PANELS TO THE REFRIGERATOR DOORS
PRECAUTIONS FOR CORRECT FUNCTION
DEFROSTING
Release the hook located on the inner left side of the freezer.

INSTALLING THE APPLIANCE IN THE CABINET
CONNECTING THE BUILT-IN PANELS TO THE APPLIANCE DOORS
PRECAUTIONS FOR CORRECT OPERATION
- CABINET AND CABINET WITH FREEZER CELL
- CONTROL BOX FOR REVERSING THE
- DEFROSTING
- COUPLING THE BUILT-IN COLUMN DOORS TO THE APPLIANCE DOORS
- LARDER & FRIDGE
- CONTROL PANEL REVERSING THE
- OPENING OF THE DOORS
- FREEZER COMPARTMENT
- FREEZING
- REVERSING THE OPENING OF THE FREEZER COMPARTMENT
- INSTALLATION OF THE APPLIANCE IN THE COLUMN
- COUPLING OF THE BUILT-IN COLUMN PANELS TO THE DOORS OF THE APPLIANCE
- PRECAUTIONS FOR THE CORRECT FUNCTIONING
- REFRIGERATEUR TOUT UTILE ET
- THERMOSTAT INVERSER LE
- DEGIVRAGE
- INVERSER LE SENS D'OUVERTURE DU CONGELATEUR
- MONTAGE DE LA PORTE DU MEUBLE A LA PORTE DU REFRIGERATEUR
- PRECAUTIONS POUR UN FONCTIONNEMENT CORRECT
- SPEISESCHRANK & KÜHLSCHRANK
- ABTAUEN
- VERBINDEN DER EINGEBAUTEN STANDSCHRANK-STIRNWAND MIT DEN GERÄTETÜREN
- DESCONGELACIÓN
- ASSEMBLY OF THE INTEGRATED COLUMN PANELS WITH THE APPLIANCE DOORS
- PLACEMENT OF THE INTEGRATED COLUMN PANELS ON THE APPLIANCE DOORS
- MOUNTING THE BUILT-IN PANELS TO THE APPLIANCE DOORS
- NOTES ON CORRECT OPERATION
- REFRIGERATOR
- CONTROL PANEL ROTATION
- CONNECTING THE APPLIANCE DOORS TO THE KITCHEN FURNITURE DOORS
- MEASURES NECESSARY FOR PROPER FUNCTIONING
- PROVISION CABINET & REFRIGERATOR
- CONTROL PANEL OPENING DIRECTION OF THE
- ATTACHING THE BUILT-IN CABINET DOORS TO THE APPLIANCE DOORS
- PRECAUTIONS FOR CORRECT OPERATION
- REFRIGERATOR AND REFRIGERATOR-FREEZER
- CONNECTING THE BUILT-IN PANELS TO THE APPLIANCE DOORS
- SAFETY PRECAUTIONS FOR USE
- REFRIGERATOR AND COMBI REFRIGERATOR
- CONTROL PANEL OPEN THE DOORS
- FREEZER SECTION
- INSTALLING THE APPLIANCE IN THE CABINET
- ATTACHING THE APPLIANCE DOORS TO THE BUILT-IN CABINET WALLS
- REFRIGERATOR AND REFRIGERATOR WITH FREEZER
- CONTROL PANEL CHANGE OF
- ATTACHING THE BUILT-IN PANELS TO THE REFRIGERATOR DOORS
- PRECAUTIONS FOR CORRECT FUNCTION
Brand : CANDY
Model : CBO 140 a
Category : Refrigerator