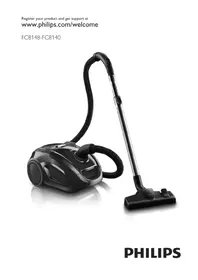
USER MANUAL EasyLife FC8148 PHILIPS


Introduction
Congratulations on your purchase and welcome to Philips! To fully benefit from the support that Philips offers, register your product at www.philips.com/welcome.
General description (Fig. 1)
1 Cover
2 On/off button
3 Dust container full indicator
4 Electronic suction power control
5 Cord rewind button
6 Rear wheel
7 Hose connector
8 Hose connection opening
9 Cover release tab
10 Handle
11 Filter cone
12 HEPA dust container filter
13 Foam filter
14 Dust container handle
15 Dust container
16 Cover latch
17 Bottom cover of dust container
18 Motor protection filter
19 Swivel wheel
20 Type plate
21 Storage slot
22 HEPA exhaust filter
23 Rocker switch for carpet/hard floor settings
24 Combination nozzle
25 Parking slot
26 Mains cord with plug
27 Exhaust filter grille
28 Crevice nozzle
29 Small nozzle
30 Telescopic tube
31 Hard floor nozzle (specific types only)
32 Small brush
33 Accessory holder
34 Hose with handgrip and suction power slide
35 Mini turbo brush (specific types only)
Important
Read this user manual carefully before you use the appliance and save it for future reference.
Danger
- Never suck up water or any other liquid. Never suck up flammable substances and do not suck up ashes until they are cold.
Warning
- Check if the voltage indicated on the appliance corresponds to the local mains voltage before you connect the appliance.
- Do not use the appliance if the mains cord, the plug or the appliance itself is damaged.
- If the mains cord is damaged, you must have it replaced by Philips, a service centre authorised by Philips or similarly qualified persons in order to avoid a hazard.
- This appliance is not intended for use by persons (including children) with reduced physical, sensory or mental capabilities, or lack of experience and knowledge, unless they have been given supervision or instruction concerning use of the appliance by a person responsible for their safety.
- Children should be supervised to ensure that they do not play with the appliance.
- Do not point the hose, the tube or any other accessory at the eyes or ears nor put it in your mouth when it is connected to the vacuum cleaner and the vacuum cleaner is switched on.
- Do not use the appliance and the mini turbo brush on pets.
- The plug must be removed from the socket-outlet before cleaning or maintaining the appliance.
Caution
- Do not suck up large objects as this may cause the air passage in the tube or hose to become obstructed.
- When you use the vacuum cleaner to vacuum ashes, fine sand, lime, cement dust and similar substances, the pores of the dust container filters and the motor protection filter become clogged. If you notice a strong decrease in suction power, clean the dust container filters and the motor protection filter.
- Always unplug the appliance before you empty the dust container, clean the filters and assemble or disassemble accessories.
- Never use the appliance without the motor protection filter. This could damage the motor and shorten the life of the appliance.
- Only use the Philips filter cone supplied with the appliance.
Electromagnetic fields (EMF)
This Philips appliance complies with all standards regarding electromagnetic fields (EMF). If handled properly and according to the instructions in this user manual, the appliance is safe to use based on scientific evidence available today.
Preparing for use
Hose

1 To connect the hose, push it into the appliance ('click').

2 To disconnect the hose, press the release buttons (1) and pull the hose connector out of the hose connection opening (2).
Telescopic tube

1 To connect the tube to the handgrip of the hose, insert the narrow section into the wider section while turning a little.
- To disconnect the tube, pull while turning a little.

2 Adjust the telescopic tube to the length you find most comfortable during vacuuming. Press the slide on the tube and push the lower tube part downwards or pull it upwards.
Combination nozzle

You can use the combination nozzle on carpet (with the brush strips folded in) or on hard floors (with the brush strips folded out).
- To clean hard floors, push the rocker switch on top of the combination nozzle with your foot to make the brush strips come out of the nozzle housing.

- To clean carpet, push the rocker switch on the other side to make the brush strips disappear into the housing.
Hard floor nozzle (specific types only)

- The hard floor nozzle is designed for gentle cleaning of hard floors.
Accessory holder

You can store two accessories in the accessory holder at the same time.
1 Connect the accessory holder to the tube (1) and then connect the hose to the accessory holder (2).

2 To store accessories in the accessory holder, push them onto the holder.
Crevice nozzle, small nozzle and brush nozzle

1 Connect the crevice nozzle, small nozzle or small brush to the handgrip of the hose or to the tube. To do this, insert the handgrip or tube into the accessory while turning a little.
- Use the crevice nozzle to clean narrow corners or hard-to-reach places.
- Use the small nozzle to clean small areas, e.g. the seats of chairs and sofas.
- Use the small brush to clean computers, bookshelves, etc.
Mini turbo brush (specific types only)
The mini turbo brush is specially designed to effectively pick up animal hairs and fluff from furniture and mattresses. The unique brush inside the mini turbo brush loosens the hairs from the fabric so that they can be picked up by the vacuum cleaner. The mini turbo brush can be attached to the handgrip of the hose or to the telescopic tube.
1 To attach the mini turbo brush, insert it into the handgrip or the telescopic tube while turning it a little. 2 To detach the mini turbo brush, pull it out of the handgrip or the telescopic tube while turning it a little.
Using the appliance
Vacuum cleaning

- You can carry the vacuum cleaner by the handle at the front of the appliance. 1 Pull the cord out of the appliance and insert the mains plug into the wall socket.

2 Press the on/off button on top of the appliance with your foot to switch on the appliance.

- If you want to pause for a moment, insert the ridge on the nozzle into the parking slot to park the tube in a convenient position.
Adjusting suction power

You can adjust the suction power with:
- the suction power slide on the handgrip.

- the electronic suction power control on the vacuum cleaner.
Cleaning and maintenance
The plug must be removed from the socket-outlet before cleaning or maintaining the appliance.
Do not clean any part of the vacuum cleaner in the dishwasher. If necessary, clean the parts with a moist cloth.
1 Clean the appliance with a damp cloth.
Emptying the dust container

- For optimal performance, empty the dust container and clean the filter cone, the HEPA dust container filter and the foam filter when the dust container full indicator goes on.
1 Disconnect the hose from the appliance.

2 Open the cover.

3 Lift the dust container out of the appliance by its handle.

4 Hold the dust container over a dustbin and push down the cover latch (1) to open the bottom cover of the dust container (2).

5 Empty the dust container into a dustbin.

6 To remove the filter cone, turn it anticlockwise in the direction marked by the arrow and lift it out of the dust container.

7 To clean the filter cone, tap it gently against the side of a dustbin.

8 Put the filter cone back into the dust container and turn it clockwise in the direction marked by the arrow to lock it in place ('click').

9 Close the bottom cover of the dust container and lock it by pushing it home behind the cover latch ('click').

10 Pull the latch of the HEPA dust container filter to open it.
The spring-loaded button on the dust container pushes the filter out of the hinges.
11 Rinse the pleated side of the HEPA dust container filter under a hot, slow-running tap.

- Hold the filter so that the pleated side points upwards and the water flows parallel to the pleats. Tilt the filter so that the water washes away the dirt inside the pleats.

- Turn the filter 180 degrees and let the water flow along the pleats in the opposite direction.
- Continue this process until the filter is clean.

Never clean the HEPA filter with a brush.
Note: Cleaning does not restore the original color of the filter, but it does restore its filtration power.

12 Remove the foam filter and rinse it under a tap.
13 Carefully shake the water from the surface of the HEPA dust container filter. Let the HEPA dust container filter and the foam filter dry completely before putting them back into the vacuum cleaner.
14 Place the foam filter back into the dust container.
15 To place the HEPA dust container filter back into the dust container, press the large lug onto the spring-loaded button, insert the small lugs into the hinges (1), and press the latch home until it locks in place ('click') (2).

16 Put the dust container back into the appliance.

17 Close the cover ('click').
Note: You cannot close the cover if the dust container has not been placed.
Cleaning the HEPA exhaust filter

To maintain optimal performance, clean the HEPA exhaust filter each time you empty the dust container.
1 To open the HEPA exhaust filter grille, grab the tabs and pull the grille upwards to remove it from the appliance. 2 Remove the HEPA exhaust filter. 3 Rinse the pleated side of the HEPA exhaust filter under a hot slow-running tap as described in steps 11 and 13 of section 'Emptying the dust container' above. 4 Place the dry HEPA exhaust filter back into the appliance. 5 To close the HEPA exhaust filter grille, first align the lugs on the top of the grille with the slots in the appliance (1). Then press the tabs downwards until the grille locks into place (2) ('click').

Cleaning the motor protection filter

To maintain optimal performance, clean the motor protection filter at least once a year.
1 Lift the dust container out of the appliance by its handle. 2 Pull the filter holder with the motor protection filter out of the appliance. 3 Take the motor protection filter out of the holder. Shake the motor protection filter over a dustbin to clean it. 4 Put the filter in the filter holder and slide the filter holder back into the appliance. 5 Put the dust container back into the appliance.
Cleaning the mini turbo brush

To clean the brush inside the mini turbo brush, follow the steps below.
1 Rotate the brush inside the mini turbo brush until the cutting groove faces you. Use a pair of scissors to cut the hairs, threads etc that have collected around the brush. 2 Remove fluff, hairs and other dirt from the brush.
Replacement
The plug must be removed from the socket-outlet before cleaning or maintaining the appliance.
Replacing filters
Replace the HEPA dust container filter and the HEPA exhaust filter every 12 months.
HEPA filters
- To remove the old filter and place the new filter, follow the instructions for removing and placing the filters in chapter 'Cleaning and maintenance'.
Ordering filters and accessories
- HEPA exhaust filters are available under type number FC8070.
- Dust container filters (HEPA and foam) are available under type number FC8071.
Storage

1 Switch off the appliance and remove the mains plug from the wall socket. 2 Press the cord rewind button to rewind the cord. 3 Put the appliance in upright position. To attach the nozzle to the appliance, insert the ridge on the nozzle into the storage slot.
Note: To ensure stable storage of the telescopic tube, adjust the tube to the shortest length.
Environment

- Do not throw away the appliance with the normal household waste at the end of its life, but hand it in at an official collection point for recycling. By doing this, you help to preserve the environment.
Guarantee and service
If you need service or information or if you have a problem, please visit the Philips website at www.philips.com or contact the Philips Consumer Care Centre in your country. You find its phone number in the worldwide guarantee leaflet. If there is no Consumer Care Centre in your country, go to your local Philips dealer.
Troubleshooting
1 The suction power is insufficient
- Perhaps the dust container is full. If necessary, empty the dust contain
- Perhaps the filters need to be cleaned or replaced. If necessary, clean or replace the filters.
- Perhaps the suction power slide on the handgrip is open. Close the slide.
- Perhaps the electronic suction power control is set to a low setting. Set the control to a higher setting.
- Perhaps the nozzle, tube or hose is blocked up.
To remove the obstruction, disconnect the blocked-up item and connect it (as far as possible) the other way round. Switch on the vacuum cleaner to force the air through the blocked-up item in opposite direction.
2 The dust container full indicator is on.
- The dust container is full and you have to empty and clean it. Empty the dust container and clean the filter cone, HEPA dust container filter and foam filter.
3 Specific types only: hairs are entangled around the brush inside the mini turbo brush.
- Clean the mini turbo brush. See chapter ‘Cleaning’, section ‘Cleaning the mini turbo brush’.

Introduction
2 Open the lid.

5 Empty the dust container into the trash bin.

17 Close the lid ("click").
Introduction


Introduction


2 Open the lid.

1 Suction power is insufficient.


Introduction
Introduction
2 Open the lid.

5 Empty the dust container into the trash bin.


17 Close the lid ('click').
Introduction
2 Open the cover.

1 When connecting the hose, push it into the appliance (you should hear a click).

1 Connect the tube to the handle on the hose by inserting the narrow part into the wide part while twisting the tube into place.
2 Adjust the telescopic tube to the most comfortable length for vacuuming. Press the slider on the tube and slide the lower tube section down or up.
Combination nozzle


- If you want to take a short break, place the edge of the nozzle into the parking slot to set the tube in a convenient position.
You can adjust the suction power with:
- the suction power slider on the handle.

- the electronic suction power control on the vacuum cleaner.
2 Open the cover.

5 Empty the dust container into a trash bin.


17 Close the cover (you should hear a click).
Introduction
2 Open the cover.

2 Open the cover.


2 Open the cover.