
TL-NC250 - Surveillance Camera TP-LINK - Free user manual and instructions
Find the device manual for free TL-NC250 TP-LINK in PDF.


| Product Type | Surveillance Camera |
| Brand | TP-Link |
| Model | TL-NC250 |
| Resolution | 2 Megapixels (1920x1080) |
| Night Vision | Up to 10 meters with IR LEDs |
| Wireless Standard | 802.11n |
| Network Protocol | TCP/IP, DHCP, DDNS |
| Two-Way Audio | Yes (built-in microphone and speaker) |
| Motion Detection | Yes (email alerts and recording) |
| Dimensions (WxDxH) | 100 x 70 x 60 mm |
| Weight | 250 g |
| Power Supply | 5V DC / 1A via micro USB |
| Power Consumption | 5W maximum |
| Storage | MicroSD card up to 32 GB (not included) |
| Operating Temperature | 0°C to 40°C |
| Humidity | 10% to 90% non-condensing |
| Mounting | Desk stand or wall mount (included) |
| Compatible Systems | Windows, Mac, iOS, Android |
| Maintenance | Clean lens with soft, dry cloth; ensure ventilation |
| Safety | Use only provided adapter; avoid water exposure |
| Spare Parts / Repairability | Not user-serviceable; contact TP-Link support |
Frequently Asked Questions - TL-NC250 TP-LINK
User questions about TL-NC250 TP-LINK
0 question about this device. Answer the ones you know or ask your own.
Ask a new question about this device
Download the instructions for your Surveillance Camera in PDF format for free! Find your manual TL-NC250 - TP-LINK and take your electronic device back in hand. On this page are published all the documents necessary for the use of your device. TL-NC250 by TP-LINK.
USER MANUAL TL-NC250 TP-LINK
HD Day/Night Wi-Fi Cloud Camera
NC250
HD Day/Night Cloud Camera, 300Mbps Wi-Fi

COPYRIGHT & TRADEMARKS
Specifications are subject to change without notice. TP-LINK is a registered trademark of TP-LINK TECHNOLOGIES CO., LTD. Other brands and product names are trademarks or registered trademarks of their respective holders.
No part of the specifications may be reproduced in any form or by any means or used to make any derivative such as translation, transformation, or adaptation without permission from TP-LINK TECHNOLOGIES CO., LTD. Copyright © 2015 TP-LINK TECHNOLOGIES CO., LTD. All rights reserved.
http://www.tp-link.com
FCC STATEMENT
FC
This equipment has been tested and found to comply with the limits for a Class B digital device, pursuant to part 15 of the FCC Rules. These limits are designed to provide reasonable protection against harmful interference in a residential installation. This equipment generates, uses and can radiate radio frequency energy and, if not installed and used in accordance with the instructions, may cause harmful interference to radio communications. However, there is no guarantee that interference will not occur in a particular installation. If this equipment does cause harmful interference to radio or television reception, which can be determined by turning the equipment off and on, the user is encouraged to try to correct the interference by one or more of the following measures:
- Reorient or relocate the receiving antenna.
- Increase the separation between the equipment and receiver.
- Connect the equipment into an outlet on a circuit different from that to which the receiver is connected.
- Consult the dealer or an experienced radio/TV technician for help.
This device complies with part 15 of the FCC Rules. Operation is subject to the following two conditions:
1) This device may not cause harmful interference. 2) This device must accept any interference received, including interference that may cause undesired operation.
Any changes or modifications not expressly approved by the party responsible for compliance could void the user's authority to operate the equipment.
Note: The manufacturer is not responsible for any radio or TV interference caused by unauthorized modifications to this equipment. Such modifications could void the user's authority to operate the equipment.
FCC RF Radiation Exposure Statement:
This equipment complies with FCC RF radiation exposure limits set forth for an uncontrolled environment. This device and its antenna must not be co-located or operating in conjunction with any other antenna or transmitter.
"To comply with FCC RF exposure compliance requirements, this grant is applicable to only Mobile Configurations. The antennas used for this transmitter must be installed to provide a separation distance of at least 20 cm from all persons and must not be co-located or operating in conjunction with any other antenna or transmitter."
CE Mark Warning
CE1588
This is a class B product. In a domestic environment, this product may cause radio interference, in which case the user may be required to take adequate measures.
RF Exposure Information
This device meets the EU requirements (1999/519/EC) on the limitation of exposure of the general public to electromagnetic fields by way of health protection.
The device complies with RF specifications when the device used at 20 cm from your body.
National Restrictions
This device is intended for home and office use in all EU countries (and other countries following the EU directive 1999/5/EC) without any limitation except for the countries mentioned below:
| Country | Restriction | Reason/remark |
| Belarus | Not implemented | |
| Norway | Implemented This subsection does not apply for the geographical area within a radius of 20 km from the centre of Ny-Ålesund on Svalbard. | |
| Italy | Implemented The public use is subject to general authorisation by the respective service provider. | |
| Russian Federation | Limited implementation | 1. SRD with FHSS modulation1.1. Maximum 2.5 mW e.i.r.p.1.2. Maximum 100 mW e.i.r.p. Permitted for use SRD for outdoor applications without restriction on installation height only for purposes of gathering telemetry information for automated monitoring and resources accounting systems. Permitted to use SRD for other purposes for outdoor applications only when the installation height is not exceeding 10 m above the ground surface.1.3.Maximum 100 mW e.i.r.p. Indoor applications.2. SRD with DSSS and other than FHSS wideband modulation2.1. Maximum mean e.i.r.p. density is 2 mW/MHz. Maximum 100 mW e.i.r.p.2.2. Maximum mean e.i.r.p. density is 20 mW/MHz. Maximum 100 mW e.i.r.p. It is permitted to use SRD for outdoor applications only for purposes of gathering telemetry information for automated monitoring and resources accounting systems or security systems.2.3. Maximum mean e.i.r.p. density is 10 mW/MHz. Maximum 100 mW e.i.r.p. Indoor applications. |
| Ukraine | Limited implementation | e.i.r.p. ≤100 mW with built-in antenna with amplification factor up to 6 dBi. |
ATTENTION: Due to EU law, the country settings must be identical to the country where the device is operating (important due to non-harmonised frequencies in the EU).
Canadian Compliance Statement
This device complies with Industry Canada license-exempt RSSs. Operation is subject to the following two conditions:
1) This device may not cause interference, and 2) This device must accept any interference, including interference that may cause undesired operation of the device.
Radiation Exposure Statement:
This equipment complies with IC radiation exposure limits set forth for an uncontrolled environment. This equipment should be installed and operated with minimum distance 20cm between the radiator & your body.
Industry Canada Statement
CAN ICES-3 (B)/NMB-3(B)
Korea Warning Statements:
- When product has power button, the power button is one of the way to shut off the product; when there is no power button, the only way to completely shut off power is to disconnect the product or the power adapter from the power source.
- Don't disassemble the product, or make repairs yourself. You run the risk of electric shock and voiding the limited warranty. If you need service, please contact us.
- Avoid water and wet locations.
- Adapter shall be installed near the equipment and shall be easily accessible.
- The plug considered as disconnect device of adapter.

- Use only power supplies which are provided by manufacturer and in the original packing of this product. If you have any questions, please don't hesitate to contact us.
This product can be used in the following countries:
| AT | BG BY CA CZ DE DK EE | ||||||
| ES | FI | FR | GB | GR | HU | IE | |
| LT | LV | MT | NL | NO | PL | PT | RO |
| RU | SE | SG | SK | TR | UA | US | |
IT
Explanation of the symbols on the product label
| Symbol | Explanation |
| DC voltage | |
 | RECYCLINGThis product bears the selective sorting symbol for Waste electrical and electronic equipment (WEEE). This means that this product must be handled pursuant to European directive 2012/19/EU in order to be recycled or dismantled to minimize its impact on the environment.User has the choice to give his product to a competent recycling organization or to the retailer when he buys a new electrical or electronic equipment. |
DECLARATION OF CONFORMITY
For the following equipment:
Product Description: HD Day/Night Wi-Fi Cloud Camera
Model No.: NC230
Product Description: HD Day/Night Cloud Camera, 300Mbps Wi-Fi
Model No.: NC250
Trademark: TP-LINK
We declare under our own responsibility that the above products satisfy all the technical regulations applicable to the product within the scope of Council Directives:
Directives 1999/5/EC, Directives 2004/108/EC, Directives 2006/95/EC, Directives 1999/519/EC, Directives 2011/65/EU
The above product is in conformity with the following standards or other normative documents
EN 300 328 V1.8.1
EN 301 489-1 V1.9.2 & EN 301 489-17 V2.2.1
EN 55022: 2010 + AC: 2011
EN 55024: 2010
EN 60950-1: 2006 + A11: 2009 + A1: 2010 + A12: 2011 + A2: 2013
EN 62311: 2008
The product carries the CE Mark:
CE1588
Person responsible for making this declaration:

Yang Hongliang
Product Manager of International Business
Date of issue: 2015-12-09
CONTENTS
Chapter 1 About this Guide.... 1
1.1 Conventions....1 1.2 Overview of This Guide .... 1
Chapter 2 Get to know about your camera 2
2.1 Product Overview 2 2.2 Main Features....2 2.3 Panel Appearance .... 3
2.3.1 Front Panel 3 2.3.2 Rear Panel 4
Chapter 3 Set Up Your Camera 6
3.1 Set up the Camera With the tpCamera APP....6 3.2 Position Your Camera....7
Chapter 4 Configure Your Camera....9
4.1 Log in to Your Camera....9 4.2 Live View 11 4.3 Basic....13
4.3.1 Basic > Status 13 4.3.2 Basic > Network....15 4.3.3 Basic > Wireless Connection 16 4.3.4 Basic > Cloud Setting....18 4.3.5 Basic > LED 19
4.4 Advanced....19
4.4.1 Advanced > Status....20 4.4.2 Advanced > Network....20 4.4.3 Advanced > Wireless Connection 23 4.4.4 Advanced > Wireless Extender....25 4.4.5 Advanced > Cloud Setting 26 4.4.6 Advanced > DDNS....26 4.4.7 Advanced > Video....27 4.4.8 Advanced > Motion Detection 28 4.4.9 Advanced > Sound Detection 29 4.4.10 Advanced > Notification Delivery 30 4.4.11 Advanced > LED 34
4.5 System....34
4.5.1 Account....35 4.5.2 Date/Time 37 4.5.3 Management....39 4.5.4 System Log....41
Appendix: Specifications.... 42
Chapter 1 About this Guide
This User Guide contains information for setup and management of the Cloud Camera. Please read this guide carefully before operation.
1.1 Conventions
In this Guide the following conventions are used:
The camera mentioned in this Guide stands for NC230 and NC250 without any explanation. This User Guide is shared by NC230 and NC250. NC250 is used for demonstration in this guide. The difference between them are: 1. Max Frame Rate: 20 fps for NC230; 30 fps for NC250. 2. Wi-Fi Data Rate: 150Mbps for NC230; 300Mbps for NC250. Bold font indicates a button, a toolbar icon, menu or menu item.
Symbol in this Guide:
| Symbol Description | |
| Note: | Ignoring this type of note might result in a malfunction or damage to the device. |
1.2 Overview of This Guide
| Chapter Introduction | |
| Chapter 1 About This Guide Introduces the guide structure and conventions. | |
| Chapter 2 Get to know about your camera | Introduces the features, application and appearance of the camera. |
| Chapter 3 Set up your camera Introduces how to quickly set up the camera using the tpCamera app and how to position your camera. | |
| Chapter 4 Managing the Camera | Introduces how to configure the camera using the built-in web management page. |
Chapter 2 Get to know about your camera
2.1 Product Overview
TP-LINK Cloud Camera is a versatile solution for home and office monitoring to keep an eye on your home, kids or workplace, whatever you care for most.
TP-LINK Cloud Camera is a cloud-based Wi-Fi video monitoring device with free live streaming and remote viewing, which makes it easy to stay connected with what you care most wherever you are. You can view and manage your camera from anywhere over the Internet through the TP-LINK Cloud website or through the tpCamera app for iOS and Android devices.
Through the camera's web management page, you can view the status of the camera, and configure lots of settings of the camera, such as network setting, the cloud setting, the motion detection, and the notification delivery.
With Night Vision function, TP-LINK Cloud Camera lets you view even in darkness.
With Motion Detection function, TP-LINK Cloud Camera can send you immediate notification by email or FTP whenever motion or sound is detected automatically, allowing you to remain aware of whatever is happening on the ground.
With a stable high speed Wi-Fi connection of up to 300Mbps for NC250, and 150Mbps for NC230, you can enjoy fluid video streaming with ease. In addition, the TP-LINK Cloud Camera can also expand your Wi-Fi network with its Wi-Fi Extender functionality.
With the sticky pad or screws, you can place your camera anywhere you want, on the table, the wall, or even on the ceiling.
2.2 Main Features
- Night Vision - Automatic night vision functionality supports 24-hour surveillance • Advanced H.264 Video - For amazingly smooth HD video streaming
- tpCamera App - Use the free tpCamera app to set up, view and manage the camera remotely with your iOS and Android devices
- TP-LINK Cloud (www.tplinkcloud.com) access for easy viewing and management
- Web-based management page for basic and advanced configurations
- Easy Setup – Connect and follow the tpCamera app's instructions to install and operate the camera within minutes
- Motion & Sound Detection - Immediate notification by email or FTP whenever motion or sound is detected
- Email or FTP notification triggered by motion detection
- Wireless connectivity compliant with WPS button
- Instantly eliminates dead zones and expands your home's wireless network • Supports wireless 802.11b/g/n with speeds up to 300Mbps for NC250, and 150Mbps for NC230.
- Ethernet port for wired connectivity
- UPnP support for network setup & configuration • 10x digital zoom for close-up viewing
2.3 Panel Appearance
2.3.1 Front Panel

Figure 2-1 Front Panel
Light Sensor: The camera has a built-in internal photodetector. It is used to identify day or night. Microphone: The camera has a built-in internal microphone. This microphone is hidden in the pinhole located on the front panel.
System LED:
| Status Indication | |
| Flashing Red | The camera starts booting up. |
| Solid Red | The camera has boot up, but is not connected to any network. |
| Flashing Green | The camera is in firmware upgrade procedure. |
| Solid Green | The camera is connected to a network or is transferring data. |
2.3.2 Rear Panel

Figure 2-2 Rear Panel
WPS LED:
| Status Indication | |
| Flashing Green | The camera starts booting up. |
| The camera is connecting to a network by WPS function. This process will last in the first 2 minutes. | |
| Off | The camera has boot up. |
| The camera failed to be added to a network by WPS function. | |
| Solid Green | The camera has been successfully added to a network by WPS function. This process will last in the first 2 minutes. |
ETHERNET Port: The ETHERNET port is used to connect the camera to a network via RJ45 cable. Power Jack: The power jack is where you connect the AC adapter to the camera. WPS/RESET Button: This button is used for both WPS and RESET function. To use the WPS function, press it for 1 second. To use the RESET function, press and hold for more than 5 seconds.
● Used as WPS button:
If your wireless router supports WPS (Wi-Fi Protected Setup), you can connect the camera to your Wi-Fi network using WPS. Press the WPS or QSS button on your router. Within 2 minutes, press the WPS/RESET button on the camera for about 2 seconds, then the LED above this button will start flashing quickly. When this LED becomes solid on, the WPS is successful.
● Used as RESET button:
With the camera powered on, press and hold the WPS/RESET button (more than 5 seconds) until the System LED turns off. Then release the button and wait the camera to reset to its factory default settings.
- Heat Emission Holes: These holes are used for heat dissipation.
Chapter 3 Set Up Your Camera
3.1 Set up the Camera with the tpCamera APP
You can install your camera in minutes with the free tpCamera app. If your router has a WPS button, you can complete the setup wirelessly using WPS function. Please follow the steps below to set up your camera.
Step 1. Connect the camera to the network your smartphone is on.
Before you start the setup process, get your smartphone and make sure that it is connected to your home network. To use the tpCamera app, your smartphone's operating system should meet these requirements: Android 3.0 or higher; iOS 7.0 or higher.
Steps for connecting your camera to the router are:
1) Power on the camera using the provided power supply unit as shown. 2) Connect a smartphone to the router as shown. 3) Connect the camera to the router via wired or wireless connection, and then wait until the camera's system LED becomes solid green.
Wired: Connect the camera to the router's LAN port via an Ethernet cable.
Wireless: If your wireless router supports WPS, you can connect the camera to your Wi-Fi network using WPS. Press the WPS or QSS button on your router. Within 2 minutes, press the WPS/RESET button on the back of the camera for about 2 seconds, then the LED above this button will start flashing quickly. When this LED becomes solid on, the WPS is successful and the camera is connected to the router wirelessly.
![graph TD A["Wireless Router"] --> B["LAN WAN"] B --> C["SmartphoneCameraC"] D["Internet"] --> B B --> E["Mobile Device"]](/content/2026/06/1295905/images/47bbf1ada37a9dc10b55c8478b310a84bceaf363c77874cf630131241e85d473.jpg)
Step 2. Download and install the tpCamera app.
You can download the free tpCamera app from the App Store or Google Play. You can also scan the QR code below to download the tpCamera app.

OR


Step 3. Add the camera to your TP-LINK Cloud account.
Launch the tpCamera app, log into your TP-LINK Cloud account or create one if you do not have an account. Then follow the app instructions to add your new camera to your account.
When you reach the My Cam page, you have successfully added your camera and can start to use your camera.
3.2 Position Your Camera
Before positioning your camera, please keep these safety guidelines in mind:
- Keep your camera out of reach of children and pets.
- Use your camera only indoors, and keep it out of direct sunlight. Make sure its operating temperature is in the range of 0-40°C (32-104°F).
- Pick a location which is close enough to a wall outlet. • Use only the power adapter that comes with this camera in the package.
You can place your camera to your desired location. Just unplug and replug it without having to go through the app's setup again, and then you can use it in a wired or wireless way as you've set in the app's setup process. If you use the camera wirelessly, please place the camera within the coverage of your wireless network. You can place the camera in various ways:
- Place it on a flat surface.
- Stick it with the included adhesive.
- Mount it as shown below.
Detailed instructions on mounting your camera to a wall or ceiling are shown as follows. Before you start to mount the camera, prepare two screws which meet the following requirements.

- Unscrew the camera head.

- Remove the base cover.

- Use two screws (not included) to secure the base.
- Put the base cover and camera head back on.


After relocating your camera, face it towards the area you'd like to view, and then plug the power adapter into a power outlet.
Now that you've finished positioning your camera, use the tpCamera app to check that your camera can see what you want to keep an eye on. Adjust its position if you need to.
Chapter 4 Configure Your Camera
You can use the tpCamera app and TP-LINK Cloud (www.tp-linkcloud.com) to view and manage your camera remotely. To configure the camera's settings, such as the network settings, cloud settings, notification delivery, you should use the camera's built-in web management page in your local network.
4.1 Log in to Your Camera
- Connect a computer to the router that your camera is connected to. You can use an Ethernet cable or connect it to the router's Wi-Fi network.
- Find the management IP address of the camera from the web management page of the router. Here we use the web management page of TP-LINK Archer D20 for demonstration.

- On a computer that connects to the same router as the camera does, open a web browser, type in the camera's IP address in the address field, and press Enter. Here we use http://192.168.0.106 for demonstration.

- Enter the default username and password (admin/admin). Click Login.

Note:
For the administrator, the default password is "admin". We recommend that you change it in the Account menu. (Go to "System > Account")
If you log in to the camera as an administrator, you can perform all the settings provided by the camera.
If you log in to the camera as a common user, you can only view the Live View. After logging as administrator, you can add up to five user accounts in the Account menu. (Go to "System > Account")
- Click Download to download and install the required plugin.

Note:
If the installed plugin doesn't work, set your browser security settings to allow plugins. Here we take the settings for IE browser as an example. Go to "Tools > Internet Options > Security". Click "Internet > Custom Level", find the item "Download signed ActiveX controls" and check Prompt. Click "Local Intranet > Custom Level", find the item "Download signed ActiveX controls" and check Prompt.
- After the plugin is successfully installed, refresh the webpage to display the monitor video.
![TP-LINK® The Reliable Choice HD Day/Night Cloud Camera, 300Mbps Wi-Fi NC250: [English] Live View Basic Advanced System Brightness: Contrast: Saturation: Preset](/content/2026/06/1295905/images/65b435634e0d2fcfecdd17b68403cc9fd40b7dbd9b0edad9cd070cb533e08569.jpg)
4.2 Live View
The Live View screen shows you the live video feed from your camera. On this screen, you can capture a picture, record a video and so on.

| Symbols Meaning Note | ||
 | Click to capture a still image shot by the camera. | The image file will be saved to your local computer. You can select a save path and rename the image file. |
 | Click to record the current video. | The video file will be saved to your local computer. You can select a save path and rename the video file.The icon will turn yellow once the save path is selected. If you want to stop recording, just click. |
 | Click to vertically flip the current image. | If the camera is installed upside down, Flip Image and Mirror should both be checked.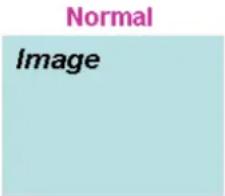  |
 | Click to horizontally flip the current image. |   |
 | Click to choose a camera working mode. | You can set the camera working mode to Auto ( ), Day ( ), or Night ( ). |
 | Drag the slider to adjust the size of the current image. | The maximum zoom ratio is 10 times. |
 | Mute off. You can hear the current sound by the camera. | Click and it will become |
 | Mute on. The current sound by the camera is turned off. | Click and it will become |
 | Drag the slider to adjust the sound volume. | You can adjust the sound volume only with mute off. |
| [HHSZ] | Click to enlarge the current image to full screen display. | Press ESC key to return to the original screen display. |
➢ Brightness: Drag the Brightness: slider to adjust the brightness level of camera. Large value will brighten the current displayed screen.
Contrast: Drag the Contrast slider to adjust the contrast level of the camera. A large value will increase the contrast of the currently displayed screen.
Saturation: Drag the Saturation slider to adjust the saturation level of the camera. A large value will make the currently displayed screen more colorful. ➢ Preset: Click the Preset button to restore the factory image settings.
4.3 Basic
Click the Basic menu to display the submenus including Status, Network, Wireless Connection, Cloud Setting, and LED.

4.3.1 Basic > Status
The Status page displays the current configuration information of the camera. You can find out the camera's settings such as wireless connection settings here. All the information is read-only.
Basic
Camera Name: NC250 1.0
Model: NC250 1.0
Firmware Version: 1.0.5 Build 151106 Rel.24446
Current Viewers: 0
Cloud Server
Connection Status: Not registered
Username: -
Wireless
Connection Status: Disconnected
Wireless Network Name: -
Channel: -
Rate/Signal Strength: -
Security: -
Network
Connection Type: Dynamic IP
MAC Address: 06-18-78-00-00-5B
LAN IP Address: 192.168.0.106
Subnet Mask: 255.255.255.0
Default Gateway: 192.168.0.1
Primary DNS Server: 192.168.0.1
Secondary DNS Server: 0.0.0.0
PPPoE
Status: Disconnected
WAN IP Address: -
Video Profile
Resolution: 1280*720
Frame Rate: 20FPS
Image Quality: Normal
Light Frequency: Auto
4.3.2 Basic > Network
On this page, you can configure your camera's IP address which is used to access and configure the camera.
Dynamic IP: Select this option when a DHCP server is installed on the network to issue IP address assignment. With this setting, the IP address of the camera is assigned automatically.

Static IP: Select this option when a static or fixed IP address is obtained for the camera. A static IP address will ease your access to the camera in the future. Add your camera's static IP information to your router to avoid IP conflicts.

- MAC Address: Displays the Ethernet MAC address of the camera. The MAC address is read-only.
- IP Address: Enter a fixed IP address for the camera in dotted-decimal notation.
- Subnet Mask: Enter the subnet mask in dotted-decimal notation. The default value is "255.255.255.0."
- Default Gateway: Enter the default gateway in dotted-decimal notation.
● Primary DNS Server: Enter a DNS address in dotted-decimal notation. - Secondary DNS Server: Enter a DNS address in dotted-decimal notation.
Click Save to save and enable the settings.
4.3.3 Basic > Wireless Connection
The camera's wireless function is enabled by default. This function helps to connect your camera to a wireless network wirelessly. If you don't want to use this function, just select the Disable option.

Wireless Network Name: Displays the wireless network's name. Make sure the camera and your PC connect to the same wireless network, or your PC can't access the camera. ➢ Signal: Displays the strength of the wireless signal. Security: Displays the wireless network's security mode. MAC Address: Displays the MAC address of the front device.
To connect your camera to a wireless network, follow the steps below:
- Click Scan to scan the available wireless network and to refresh the Wireless Network List.
- Select a wireless network from the wireless network list.
- If the wireless network's security mode is None, simply click Connect. If the security mode requires a password, enter the wireless network's password and then click Connect. You can select Show password to display what you've entered.

- A pop-up screen will prompt you for the network modification. Click Change to continue.

- Click OK on the pop-up screen to finish wireless connection procedure.

- To start using camera wirelessly, unplug its Ethernet cable.
4.3.4 Basic > Cloud Setting
A Cloud Camera can be viewed anytime and anywhere over the Internet with TP-LINK Cloud service. On this page, you can add the camera to your TP-LINK Cloud account.
Note:
- You can register a TP-LINK Cloud account in the tpCamera app only. If you do not get a tpCamera app, please refer to the Step 2 Download and install the tpCamera app in 3.1 Set up the Camera with the tpCamera APP.
- To add a camera to your TP-LINK Cloud account, make sure that the camera is connected to the Internet.
Add Your Camera to TP-LINK Cloud Account
If you already have a TP-LINK Cloud account, to add your camera to your account, just enter the TP-LINK Cloud account and password, and then click Register.

Account: Enter your TP-LINK Cloud account, either E-mail address or username is allowed. Password: Enter your TP-LINK Cloud account's password. Camera Name: The default value is the camera model. You can change it to an easy-to-remember one. Camera name can contain up to 31 characters. It cannot contain the following characters: \ / := & " < > { }.
After your camera is registered successfully, you can go to www.tplinkcloud.com to view it.
4.3.5 Basic > LED
The camera's LED is on by default. If you want to turn it off, just select Off.

4.4 Advanced
Click the Advanced menu to display the submenus including Status, Network, Wireless Connection, Wireless Extender, Cloud Setting, DDNS, Video, Motion Detection, Sound Detection, Notification Delivery, and LED.

4.4.1 Advanced > Status
Refer to 4.3.1 Basic > Status.
4.4.2 Advanced > Network
On this page, you can configure the network settings of the camera.

IP Address
On this section, you can configure your camera's IP address which is used to access and configure the camera.
Dynamic IP: Select this option when a DHCP server is installed on the network to issue IP address assignment. With this setting, the IP address of the camera is assigned automatically.

- Fallback IP: If the camera cannot get a Dynamic IP address from a DHCP server within limited tries, the camera will assign a default IP address, 192.168.0.10, by itself as the Fallback IP address.
Static IP: Select this option when a static or fixed IP address is obtained for the camera. A static IP address will ease your access to the camera in the future. Add your camera's static IP information to your router to avoid IP conflicts.

- MAC Address: Displays the Ethernet MAC address of the camera. The MAC address is read-only. ● IP Address: Enter a fixed IP address for the camera in dotted-decimal notation.
- Subnet Mask: Enter the subnet mask in dotted-decimal notation. The default value is "255.255.255.0."
- Default Gateway: Enter the default gateway in dotted-decimal notation. ● Primary DNS Server: Enter a DNS address in dotted-decimal notation. ● Secondary DNS Server: Enter a DNS address in dotted-decimal notation.
PPPoE (Point to Point Protocol over Ethernet)
This camera is a PPPoE enabled one. It can directly connect to the xDSL, however, it should be set up in a LAN environment to configure the PPPoE information first, and then connect to the xDSL modem. Power on again, and the camera will dial on to the ISP to get a dynamic IP address and connect to the WAN through the xDSL modem. In this case, you need to use a domain name to log in to the camera. For details, please refer to 4.4.6 Advanced > DDNS.

- PPPoE: To enable or disable the PPPoE service here. ➢ Status: Displays the PPPoE connection status. Username: Enter the username for PPPoE service provided by your ISP. ➢ Password: Enter the password for PPPoE service provided by your ISP.
HTTP (Hypertext Transfer Protocol)
This feature allows you to access and manage your camera via its IP address. Web browser access normally uses the standard HTTP service port 80. The camera uses HTTP port 80 by default. For greater security, you can change the port to a custom one.
When HTTP port is set to 80, you can access the camera by typing its IP address (for example, http://192.168.1.100) on a web browser. When HTTP port is set to another value (for example, 2000), you need to type http://192.168.1.100:2000 instead.

HTTP Port: The default value is 80. If you want to use a port number other than 80, enter a port number between 1 and 65535.
UPnP (Universal Plug and Play)
This function permits the camera to be seamlessly discovered by networked devices and establishes functional network services for data sharing, communications, and entertainment. For data security, UPnP is disabled by default.
UPnP
UPnP Port Forwarding:
Enable
Disable
UPnP Name:
NC250 1.0
UPnP Port Forwarding: To enable or disable the UPnP Port Forwarding service here. If this function is enabled and your router supports UPnP, the cameras and router can communicate with each other so that the router knows which ports are used by which camera. UPnP Name: Displays the camera name.
Bonjour
Bonjour, also known as zero-configuration networking, enables automatic discovery of computers, devices, and services on IP networks. Bonjour uses industry standard IP protocols to allow devices to automatically discover each other without the need to enter IP addresses or configure DNS servers.
Bonjour
Bonjour:

Enable

Disable
Bonjour Name:
NC250-00005b
➢ Bonjour: To enable or disable the Bonjour service here.
Bonjour Name: Displays the Bonjour name. By default, it is a combination of model and the last six characters of the camera's MAC address.
Click Save to save and enable the settings.
4.4.3 Advanced > Wireless Connection
The camera's wireless function is enabled by default. With this function enabled, you can connect your camera to a wireless network wirelessly. If you don't want to use this function, just select the Disable option.
On this page, you can either scan a wireless network to connect to or enter a wireless network's parameters manually. To scan a wireless network, refer to 4.3.3 Basic > Wireless Connection. To enter the parameters manually, see the following.

- Select Enable to enable your camera's wireless function.
- Click Manually, and you will see the following screen.

- In the Wireless Network Name field, enter the name of the wireless network to which your camera is ready to connect.
Note:
The name must be exactly the same as that used in the wireless access point, or the connection will not be established. Leaving this field blank means the camera will attempt to access the nearest open network. If your PC wants to access the camera, make sure your PC and the camera are connecting to the same wireless network.
- Select the wireless security mode used by your wireless network from the drop-down list. The security mode and its corresponding settings must be exactly the same as that used in the wireless network.
- Click Connect and a screen will pop up. Click Change on the pop-up screen.
- Click OK on the pop-up screen to finish wireless connection procedure.
- To start using camera wirelessly, unplug its Ethernet cable.
4.4.4 Advanced > Wireless Extender
On this page, you can set up and configure the wireless network extending feature of your camera. The wireless extender function allows your camera to extend the range of your existing wireless network. You can use the same network name and settings as the existing wireless network, or you can create a new one.
The camera's wireless extender function is disabled by default. If you want to use this function, just select the Enable option.

Host Wireless Network Name: Displays the name of the wireless network to which your camera is connected. It is read-only. Extended Wireless Network Name: Name of the wireless network that your camera will extend.
- Same as Host: The extended network will use the same name and settings as your host network. Your devices can use the same wireless information to connect to both the host and extended networks.
- Create a New One: Select this to manually set the name and security used for the extended network. Your devices can use the wireless parameters you set to connect to the extended network.

Max Clients: Set the maximum number of clients that are allowed to connect to the extended network.
Click Save to save and enable the settings.
4.4.5 Advanced > Cloud Setting
Refer to 4.3.4 Basic > Cloud Setting.
4.4.6 Advanced > DDNS
If your camera is connected directly to an xDSL modem or cable modem, you might need DDNS (Dynamic Domain Name Server) on the camera to allow you and your friends to access the camera using a domain name, without needing to remember the IP address. However, if your camera is behind a NAT router, you need to set DDNS on your router, without needing to set it on the camera. As for xDSL environments, most users use dynamic IP addresses.

Service Provider: Select one of the built-in DDNS servers from the drop-down list: No-IP (www.noip.com), DynDNS (www.dyn.com), and Comexe (www.comexe.cn).
Note:
If you have not registered for any of the listed DDNS servers, please select one and click Go to register... and follow the instructions provided on the official website to register.
Username: Enter the username that is used to log into DDNS. Password: Enter the password that is used to log into DDNS. Connection Status: Displays the current status of DDNS connection.
Domain Name: Enter the domain name that is applied to your camera and used to access your camera.
Click Login. After logging in successfully, click Save to save and enable the settings.
4.4.7 Advanced > Video
On this page, you can configure the video settings for your camera.

Coding Format: Displays the video coding format of the camera. Resolution: Displays the video resolution of the camera. Higher resolution offers better quality, but will require more bandwidth to stream. Frame Rate: Select the frame rate to use for the video stream from the drop-down list. Higher settings offer smoother video streams, but will require more bandwidth. Mode: Displays the bit rate mode of the camera. This camera uses the VBR (variable bit rate) mode. In this mode, the bit rate varies to keep consistent video quality. It allows a higher bit rate (and therefore requires more bandwidth) to be allocated to dynamic scenes while less bit rate to be allocated to static scenes.
Image Quality: Select the image quality from the drop-down list: Normal and Low. Normal settings offer better quality, but it may require more bandwidth to stream. Backlight Compensation: If enabled, this feature will compensate for bright backgrounds so foreground objects aren't silhouetted. It is disabled by default.
Enabled Disabled

Light Frequency: Select the frequency used by your lighting and power to help reduce image flicker. The default setting is auto, which is recommended. Time Stamp & On-Screen Display (OSD): If enabled, the current time of your camera, which can be set on the System > Date/Time page, will be displayed on the Live View screen. Meanwhile, you can set the OSD text to be displayed with the time stamp. The OSD text is camera name by default.
Enabled Disabled

Click Save to save and enable the settings.
4.4.8 Advanced > Motion Detection
Motion detection allows you to specify areas of your camera's video to monitor for motion, which can be used to trigger snapshots. Refer to 4.4.10 Advanced > Notification Delivery for more details.

Motion Detection: To enable or disable the motion detection function. The area with blue mask indicates that it is the area with motion detection on. All areas are selected by default. You can drag your mouse to draw specific areas that you want to monitor. Sensitivity: Specify the level of difference between two sequential images that would indicate motion. Select one of the three levels of sensitivity from the drop-down list: High, Medium, and Low.
Click Save to save and enable the settings.
4.4.9 Advanced > Sound Detection
Sound detection allows your camera to detect a loud sound, which can be used to trigger snapshots. Refer to 4.4.10 Advanced > Notification Delivery for more details.

Sound Detection: To enable or disable the sound detection function. Sensitivity: Specify the level of difference between current sound and the threshold you set. Select one of the three levels of sensitivity from the drop-down list: High, Medium, and Low. Threshold: Select the threshold of sound level. Snapshots will be triggered when current sound exceeds this threshold. You can also drag the arrow in the diagram to set the threshold.
Click Save to save and enable the settings.
4.4.10 Advanced > Notification Delivery
Notification Delivery settings are available only after the motion detection or sound detection function is enabled. It is used to inform you immediately by sending the snapshots triggered by a detected motion or sound to the specified FTP server or E-mail address.

FTP
Select FTP, you can configure your camera to send snapshots to a specified FTP server on the following screen:

FTP Server/ Port: Enter the IP or the domain (IP/domain without prefix ftp://) and the port of the FTP server that you will be connecting to. The port is 21 by default.
Note:
The FTP server you set and the camera should be in the same LAN.
Username: Enter the username that is used to log in to your FTP server. Password: Enter the password that is used to log in to your FTP server. Path: Enter the path to the destination on the FTP server. Passive Mode: Enabling passive mode may help you reach your FTP server if your camera is behind a router protected by a firewall.
To set up a FTP to receive notification, follow the steps below:

- Enter an IP address or domain of your FTP server, e.g. 192.168.1.168
- Remain the FTP port number as the default value: 21.
- Enter your username to log in to the FTP server, e.g. test.
- Enter your password to log in to the FTP server.
- Enter the path to the destination on the FTP server, e.g. /test
- Enable Passive Mode.
- Click Save to save and enable the settings.
Click Test, and a test JPEG snapshot will be sent to the specified FTP server to check whether your settings are correct.
If the settings are tested correct, click OK.
If the settings are tested incorrect, check your network and FTP settings and try again later.
Select E-mail, you can configure your camera to send snapshots to a specified E-mail address on the following screen.

Recipient E-mail Address: Enter the receiver's E-mail address that the notification E-mail will be sent to. Click Add recipient to add receiver's E-mail addresses. You can specify up to four recipient E-mail addresses. Sender E-mail Address: Enter the sender's E-mail address that is used to send the notification E-mail. ➢ Password: Enter your password if the SMTP server uses authentication. SMTP Server/Port: Enter the domain name or IP address and the port of your external E-mail server. The port is 25 by default. SSL Encryption: Select TLS or STARTTLS as the SSL encryption; select Close to disable SSL encryption. If TLS is selected, SMTP server port should be 465; if STARTTLS is selected, SMTP server port should be 25 or 587. Sending Interval: Set the limit for how frequently E-mail notifications will be sent. Select one interval from the drop-down list.
Note:
For example, if you want to use Gmail with TLS for E-mail notifications, follow the steps below:

- Enter the receiver's E-mail address in Recipient E-mail Address, e.g. test@tp-link.com.
- Enter your E-mail address in Sender E-mail Address, e.g. test@gmail.com.
- Enter the password required to access the SMTP server.
- Enter smtp.gmail.com in SMTP server.
- Select TLS as the SSL encryption and the SMTP server port number will be changed to 465 automatically.
- Set the Sending Interval, e.g. 1m.
- Click Save to save and enable the settings.
Click Test, and a test JPEG snapshot will be sent to the recipient E-mail address to check whether your settings are correct.
If the settings are tested correct, click OK.
If the settings are tested incorrect, check your network and E-mail settings and try again later.
4.4.11 Advanced > LED
Refer to 4.3.5 Basic > LED.
4.5 System
Click the System menu to display the submenus including Account, Date/Time, Management, and System Log.

4.5.1 Account
On this page, you can change the administrator's password and manage the user account(s) that are allowed to access to your camera.

Username: Displays the name of user account. User Group: Displays the group that the user account is in. Different user group has different limits of authority.
● admin: This group has all configuration authority. It can only have one account: admin. - user: This group can only view the Live View. It can have up to five accounts.
Add a New User Account
You can create a new user account to provide viewing access for your camera's video. User accounts will only be able to access the Live View section of the web configuration page, but cannot access any other parts or change any settings.
To add a new user account, follow the steps below:
- Click Add, and you will see the following screen.

- Enter a username for your new account.
- Enter a password for your new account. The password should contain 5 to 20 characters.
- Enter the password again to confirm it.
- Click Save to save and enable the settings.
Change Password
You can change the password of all the accounts here.

Note:
The default account and password are both admin. Everyone who knows the camera's IP address can access the device with all configuration authority. It is necessary to change the default password if the device is intended to be accessed only by administrator.
To change password, follow the steps below:
- Select a user account in the list whose password you want to change
- Click Change Password, and you will see the following screen.

- Enter the current password in the Old Password textbox.
- Enter a new password.
- Enter the new password again to confirm it.
- Click Save to save and enable the settings.
Delete a User Account
You can delete a user account except admin here. Click a user entry in the list and click Delete.
4.5.2 Date/Time
On this page, you can configure the settings of the internal system clocks for your camera.

Current Time: Displays the current date and time of the camera. Time Zone: Select the time zone for the region where the camera is installed from the drop-down list. Enable Daylight Saving Time: Select this option to enable daylight saving time adjustment. If enabled, you will see the following screen:

● Automatically: If selected, the internal system clocks of the camera will adjust the DST automatically. - Manually: If selected, you can adjust the DST by setting the Time Offset, Start Time, and End Time.
➢ Synchronize With NTP Server: Select this option to specify the NTP server name to synchronize the date and time of the camera with those of the time server, known as the NTP (Network Time Protocol) server. If enabled, you will see the following screen:

- NTP Server: You can either enter a domain name of the NTP server or select one which will be filled in automatically from the drop-down list.
- Set NTP Server from Dynamic IP: You can use the NTP server applied in the DHCP server on the network.
Set Date and Time Manually: Select this option to set the date and time of the camera manually. If enabled, you will see the following screen:

- Copy Your Computer's Time Settings: Click this button to copy your computer's current time settings.
Click Save to save and enable the settings.
4.5.3 Management
On this page, you can reboot the camera, backup and restore the camera's current settings, reset factory settings, and update the camera's software.

Reboot: Click Reboot and then click Reboot on the pop-up screen to confirm. Rebooting will not change the camera's setting. After rebooting, you need to log in to this page again. Backup: Click Backup and follow the instructions on the browser to save the setting data file to your specified location. Restore: Click Browse to locate the saved backup file and then click Restore. The camera will start rebooting and then the settings will be restored to the previous configuration. Reset: Click Reset and then click Reset on the pop-up screen to restore the camera to its factory defaults. Don't turn off the camera while resetting. After resetting, you need to find out the IP address of your camera (refer to 4.1 Log in to Your Camera) and use the default username and password (admin/admin) to log in to this page. Update: Before update, download the latest firmware from the product page at http://www.tp-link.com, and then use decompression software to extract the file. Click Browse to locate the latest downloaded software file, and then click Upgrade to update the camera's software to the latest version. Wait for the upgrading process to complete, and the camera will reboot automatically.
Note:
- We recommend that you use a wired connection for your camera and PC when upgrading firmware.
- The firmware upgrade procedure must not be interrupted or the camera may be damaged.
- The firmware upgrade procedure is always risky and do not try to upgrade new firmware if it's
not necessary.
4.5.4 System Log
On this page, you can review any changes and events happened to your camera. The system starts logging automatically after startup.
![System Log Time Module Level Content [2015-11-06/10:43:25] MotionDetection INFO Motion Detection, Setting Succeed [2015-11-06/10:41:15] MotionDetection INFO Motion Detection, Get setting success. [2015-11-06/10:40:21] MotionDetection INFO Motion Detection, Setting Succeed [2015-11-06/10:40:20] Motio…](/content/2026/06/1295905/images/53bf9400e680ef0bb00f7d34acf6ff6895293e7090b990de16413f413a4b2528.jpg)
Time: Displays the time when the log event occurs. The log can get the correct time after you configure on the Date/Time page. (go to Advanced > Date/Time) Module: Displays the module to which the log information belongs. You can specify the module by selecting one from the Module drop-down list at the bottom. Level: Displays the severity level of the log information. You can specify the level by selecting one from the Level drop-down list at the bottom. Content: Displays the details of the log information. ➢ Refresh: Click Refresh to refresh the log information. Save Log: Click Save Log and follow the instructions on the browser to save the log as a text file named log.txt to your specified location. ➢ Clear Log: Click Clear Log to clear all the log information.
Appendix: Specifications
| SYSTEM | |
| Image Sensor | 1/4" Progressive scan CMOS sensor |
| Resolution | 1280*720 |
| Lens | F: 2.8, f: 3.85mm |
| Viewing Angle | FOV=64° |
| Digital Zoom | 10x Digital |
| Video/Image | |
| Video Compression | H.264 |
| Frame Rate & Resolutions | NC230: Up to 20 fps at 1280*720 (HD) |
| NC250: Up to 30 fps at 1280*720 (HD) | |
| Video Streaming | Controllable frame rate and bandwidth |
| Image | Rotation: Mirror, Flip, Mirror Flip |
| Configurable brightness, contrast, saturation | |
| Overlay capabilities: time, date, text | |
| Audio | |
| Audio Communication | One-way |
| Audio Input | Built-in microphone |
| Audio Compression | AAC |
| Alarm and Event Management | |
| Input Trigger | Motion detection, sound detection |
| Notification Method | E-mail, FTP |
| Network | |
| Standards and Protocols | Bonjour, TCP/IP, DHCP, PPPoE, ARP, ICMP, FTP, SMTP, Samba, NFS, DNS, NTP, UPnP, RTP, RTCP, HTTP, HTTPS, |
| TCP, UDP | |
| Security | Multiple password-protected user levels |
| Wireless | |
| Wireless Data Rate | NC230: IEEE 802.11b/g/n, Up to 150Mbps |
| NC250: IEEE 802.11b/g/n, Up to 300Mbps | |
| Frequency | 2.4-2.4835GHz |
| Wireless Encryption | WEP, WPA-PSK/WPA2-PSK |
| System Requirements | |
| Supported Browser | Microsoft Internet Explorer 7 or higherFirefox 4.0 or higherSafari 4.0 or higherChrome 5.0 or higher (live view not supported)Opera 12.0 or higher |
| Supported OS | Windows XP or higherMac OS X 10.7 or higherAndroid 3.0 or higheriOS 7.0 or higher |
| General | |
| Certification | CE, FCC, RoHS |
| Environment | Operating Temperature: 0°C ~ 40°C (32°F ~ 104°F)Storage Temperature: -20°C ~ 60°C (-4°F ~ 140°F)Operating Humidity: 10%-90% non-condensingStorage Humidity: 5%-90% non-condensing |


- COPYRIGHT & TRADEMARKS
- FCC STATEMENT
- FC
- FCC RF RADIATION EXPOSURE STATEMENT
- CE MARK WARNING
- CE
- RF EXPOSURE INFORMATION
- NATIONAL RESTRICTIONS
- CANADIAN COMPLIANCE STATEMENT
- RADIATION EXPOSURE STATEMENT
- INDUSTRY CANADA STATEMENT
- KOREA WARNING STATEMENTS
- EXPLANATION OF THE SYMBOLS ON THE PRODUCT LABEL
- DECLARATION OF CONFORMITY
- CONTENTS
- CHAPTER 1 ABOUT THIS GUIDE
- CHAPTER 2 GET TO KNOW ABOUT YOUR CAMERA
- CHAPTER 3 SET UP YOUR CAMERA
- CHAPTER 4 CONFIGURE YOUR CAMERA
- APPENDIX: SPECIFICATIONS
- CONVENTIONS
- OVERVIEW OF THIS GUIDE
- PRODUCT OVERVIEW
- MAIN FEATURES
- PANEL APPEARANCE
- FRONT PANEL
- SYSTEM LED
- REAR PANEL
- WPS LED
- ● USED AS WPS BUTTON
- ● USED AS RESET BUTTON
- SET UP THE CAMERA WITH THE TPCAMERA APP
- STEP 1. CONNECT THE CAMERA TO THE NETWORK YOUR SMARTPHONE IS ON
- STEP 2. DOWNLOAD AND INSTALL THE TPCAMERA APP
- STEP 3. ADD THE CAMERA TO YOUR TP-LINK CLOUD ACCOUNT
- POSITION YOUR CAMERA
- LOG IN TO YOUR CAMERA
- NOTE
- LIVE VIEW
- BASIC
- BASIC > STATUS
- CLOUD SERVER
- WIRELESS
- NETWORK
- PPPOE
- VIDEO PROFILE
- BASIC > NETWORK
- BASIC > WIRELESS CONNECTION
- BASIC > CLOUD SETTING
- ADD YOUR CAMERA TO TP-LINK CLOUD ACCOUNT
- BASIC > LED
- ADVANCED
- ADVANCED > STATUS
- ADVANCED > NETWORK
- IP ADDRESS
- PPPOE (POINT TO POINT PROTOCOL OVER ETHERNET)
- HTTP (HYPERTEXT TRANSFER PROTOCOL)
- UPNP (UNIVERSAL PLUG AND PLAY)
- UPNP
- BONJOUR
- ADVANCED > WIRELESS CONNECTION
- ADVANCED > WIRELESS EXTENDER
- ADVANCED > CLOUD SETTING
- ADVANCED > DDNS
- ADVANCED > VIDEO
- ADVANCED > MOTION DETECTION
- ADVANCED > SOUND DETECTION
- ADVANCED > NOTIFICATION DELIVERY
- FTP
- ADVANCED > LED
- SYSTEM
- ACCOUNT
- ADD A NEW USER ACCOUNT
- TO ADD A NEW USER ACCOUNT, FOLLOW THE STEPS BELOW
- CHANGE PASSWORD
- TO CHANGE PASSWORD, FOLLOW THE STEPS BELOW
- DELETE A USER ACCOUNT
- DATE/TIME
- MANAGEMENT
- SYSTEM LOG
Brand : TP-LINK
Model : TL-NC250
Category : Surveillance Camera