
Viva Collection HR3551 - Blender PHILIPS - Free user manual and instructions
Find the device manual for free Viva Collection HR3551 PHILIPS in PDF.


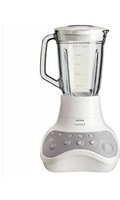
| Product type | Blender |
| Brand | Philips |
| Model | Viva Collection HR3551 |
| Power | 600 W |
| Bowl capacity | 1.5 L |
| Bowl material | Glass |
| Blade system | ProBlend 6 blades |
| Speeds | 2 speeds + pulse |
| Main functions | Mixing, crushing ice, making smoothies and soups |
| Dimensions (L x W x H) | 25 x 20 x 40 cm |
| Weight | 1.5 kg |
| Power supply | 220-240 V, 50-60 Hz |
| Power cord | 1.2 m |
| Maintenance and cleaning | Bowl and lid dishwasher safe |
| Safety | Bowl locking system and thermal cut-off |
| Spare parts and repairability | Replacement bowl, blades, seals available online |
| Warranty | 2 years |
| Color | White and black |
Frequently Asked Questions - Viva Collection HR3551 PHILIPS
User questions about Viva Collection HR3551 PHILIPS
0 question about this device. Answer the ones you know or ask your own.
Ask a new question about this device
Download the instructions for your Blender in PDF format for free! Find your manual Viva Collection HR3551 - PHILIPS and take your electronic device back in hand. On this page are published all the documents necessary for the use of your device. Viva Collection HR3551 by PHILIPS.
USER MANUAL Viva Collection HR3551 PHILIPS
natural_image
Black and white photo of a Philips blender with control buttons (no visible text or symbols on the device body)
natural_image
Diagram of three open panels with grid patterns and directional arrows, no text or symbols present
ENGLISH 6
FRANÇAIS 13
INDONESIA 20
BAHASA MELAYU 27
ภาษาไทย 34
TIÊNG VIÊT 40
繁體中文 47

Introduction
Congratulations on your purchase and welcome to Philips! To fully benefit from the support that Philips offers, register your product at www.philips.com/welcome.
Important
Read this user manual carefully before you use the appliance and save it for future reference.
General
Danger
- Never immerse the motor unit in water or any other liquid, nor rinse it under the tap. Use only a moist cloth to clean the motor unit.
Warning
- Check if the voltage indicated on the appliance corresponds to the local mains voltage before you connect the appliance.
- If the mains cord is damaged, you must have it replaced by Philips, a service centre authorised by Philips or similarly qualified persons in order to avoid a hazard.
- Do not use the appliance if the plug, the mains cord or other parts are damaged.
- Never use the blender jar or mill beaker to switch the appliance on and off.
- Never let the appliance run unattended.
- This appliance is not intended for use by persons (including children) with reduced physical, sensory or metal capabilities, or lack of experience and knowledge, unless they have been given supervision or instruction concerning use of the appliance by a person responsible for their safety.
- Children should be supervised to ensure that they do not play with the appliance.
- Do not touch the blades, especially when the appliance is plugged in. The blades are very sharp.
- If the blades get stuck, unplug the appliance before you remove the ingredients that block the blades.
- Never place the blade unit onto the motor unit if the blender jar or mill beaker (specific types only) is not or not properly attached to it.
Caution
- Always unplug the appliance before you assemble, disassemble or make adjustments to any of the parts.
- Never use any accessories or parts from other manufacturers or that Philips does not specifically recommend. If you use such accessories or parts, your guarantee becomes invalid.
- Noise level: Lc = 86 dB(A)
Blender
Warning
- Never reach into the blender jar with your fingers or an object while the appliance is running.
- Make sure the blade unit is securely fastened to the blender jar before you assemble the blender jar onto the motor unit.
Caution
- Never fill the blender jar with ingredients hotter than 80°C.
- To prevent spillage, do not put more than 1.5 litres of liquid in the blender jar, especially when you process at a high speed. Do not put more than 1 litre in the blender jar when you process hot liquids or ingredients that tend to foam.
-
If food sticks to the wall of the blender jar, switch off the appliance and unplug it. Then use a spatula to remove the food from the wall.
-
Always make sure the lid is properly assembled on the jar and the measuring cup is inserted properly in the lid before you switch on the appliance.
- Never forget to place the sealing ring on the blade unit before you connect the blade unit to the blender jar, otherwise leakage will occur.
- Do not let the appliance run for more than 3 minutes at a time. Let it cool down to room temperature between processing cycles.
- Always let the appliance cool down to room temperature between processing cycles.
Mill
Warning
- Never use the mill to grind very hard ingredients such as nutmeg, Chinese rock sugar and ice cubes.
- Do not touch the cutting edges of the mill blade unit when you clean it. They are very sharp and you could easily cut your fingers on them.
Caution
- Never use the mill for more than 30 seconds without interruption. Let the mill cool down to room temperature between processing cycles.
- Never forget to place the sealing ring in the blade unit before you assemble the mill jar, otherwise leakage occurs.
- Always process cloves, star anise and aniseed together with other ingredients. If processed separately, these ingredients may attack the plastic materials of the appliance.
- The mill beaker may become discoloured when you use the mill to process ingredients such as cloves, anise and cinnamon.
- The mill is not suitable for chopping raw meat. Use the blender instead.
- Do not use the mill to process liquids such as fruit juice.
Filter (HR2027 only)
Caution
- Never use the filter to process ingredients hotter than 80°C.
- Never overload the filter. Do not put more than 70g dried soy beans or 150g fruit in the filter at the same time.
- Always make sure the lid is assembled properly and the measuring cup is inserted properly in the lid before you switch on the appliance.
- Cut fruit into smaller pieces before you put it in the filter.
- Soak dried ingredients, such as soy beans, before you put them in the filter.
Electromagnetic fields (EMF)
This Philips appliance complies with all standards regarding electromagnetic fields (EMF). If handled properly and according to the instructions in this user manual, the appliance is safe to use based on scientific evidence available today.
Built-in safety lock
This feature ensures that you can only switch on the appliance if you have properly assembled the blender jar or mill beaker on the motor unit. If the blender jar or mill beaker is correctly assembled, the built-in safety lock will be unlocked.
Circuit breaker safety system
This appliance is equipped with a circuit breaker safety system. If the motor becomes too hot, the appliance switches off automatically.
If this is the case, follow the steps below:
1 Unplug the appliance and let it cool down for a few minutes.
2 Press the reset button on the bottom of the motor unit (Fig. 1).
3 Put the mains plug in the wall socket. You can now switch on the appliance again.
General description (Fig. 2)
A Measuring cup
B Lid of blender jar
C Blender jar
D Level indication
E Sealing ring
F Blade unit
G Motor unit
H Control panel
- Speed buttons (1 and 2)
- Pulse/off button
I Filter (HR2027 only)
J Mill beaker
K Mill sealing ring
L Mill blade unit
M Reset button
Before first use
Thoroughly clean the parts that come into contact with food before you use the appliance for the first time (see chapter 'Cleaning').
Using the appliance
You can adjust the length of the cord by winding part of it round the reel in the base. Pass the cord through the slot in the base.
Blender
The blender is intended for fine pureeing, chopping and blending. With the blender you can prepare soups, sauces and milk shakes. You can also use it to process vegetables, fruit, meat, pancake batter etc.
Preparing the blender for use
1 Assemble the sealing ring on the blender blade unit (Fig. 3).
2 Put the blade unit in the bottom of the blender jar (1). Screw the blade unit anticlockwise (2) until you cannot turn it any further. (Fig. 4)
3 Put the blender jar with the blade unit attached on the motor unit and fix it by turning it clockwise ('click'). (Fig. 5)
The blender jar can be mounted in two positions: with the handle on the right side or on the left side.
4 Put the mains plug in the wall socket.
Using the blender
1 Put the ingredients in the blender jar.
2 Put the lid on the jar and turn it until it is firmly fixed ('click').
3 Insert the measuring cup into the opening in the lid. (Fig. 6)
4 Press speed button 1 or 2 to switch on the blender.
After processing, press the pulse/off button to switch off the blender. If you want to process ingredients very briefly, use the pulse/off button instead of the speed buttons.
Tips
- If you want to crush ice cubes, put not more than 6 ice cubes (of approx. 25×35×25mm) in the blender jar and press the pulse button a few times.
- Cut meat or other solid ingredients into smaller pieces before you put them in the blender jar.
- Do not process a large quantity of solid ingredients at the same time. To get good results, we advise you to process these ingredients in a series of small batches.
- To make tomato juice, cut the tomatoes in four and drop the pieces through the opening in the lid onto the rotating blades.
Disassembling the blender
1 Remove the mains plug from the wall socket.
2 Remove the lid with the measuring cup from the blender jar.
3 Turn the blender jar with the blade unit attached anticlockwise to remove it from the motor unit.
4 Clean all removable parts immediately after use (see chapter 'Cleaning').
Filter (HR2027 only)
With the filter you can make delicious fresh fruit juices, cocktails or soy milk. The filter prevents pips and skins from ending up in your drink.
Never overload the filter. Do not put more than 70g of soy beans (unsoaked weight) or 150g of fruit in the filter at the same time.
Preparing the filter for use
1 Mount the blender jar with the blade unit attached on the motor unit. Turn the blender jar clockwise to fix it ('click') (Fig. 5).
The blender jar can be mounted in two positions: with the handle on the right side or on the left side.
2 Put the filter in the blender jar (Fig. 7).
Make sure that the grooves of the filter fit exactly onto the ribs inside the blender jar.
3 Put the mains plug in the wall socket.
Using the filter
1 Place the lid on the blender jar.
2 Put the ingredients in the filter. (Fig. 8)
Do not exceed the MAX indication on the sieve mesh.
3 Pour water or another liquid (milk, juice, etc.) into the blender jar.
4 Insert the measuring cup into the hole in the lid.
5 Let the appliance run for approx. 40 seconds.
6 Switch off the appliance and remove the blender jar with the blade unit attached from the motor unit.
Do not remove the lid. Leave the measuring cup and the filter in the jar.
7 Pour out the drink through the pouring lip of the blender jar. (Fig. 9)
ENGLISH10
Tip: For optimal results, put the jar with the remaining ingredients back onto the appliance and let it run for a few more seconds.
Note: When you process a large quantity, we advise you not to put all the ingredients in the filter at the same time. Start to process a small quantity and let the appliance run for a few seconds. Then switch off the appliance and add another small quantity. Repeat this procedure until you have processed all the ingredients. Always keep the lid on the blender jar during processing.
8 Clean all removable parts immediately after use (see chapter 'Cleaning').
Mill
Using the mill
1 Put the ingredients in the mill beaker (Fig. 10).
You can process wet and dry ingredients.
Do not fill the mill beaker beyond the MAX indication.
2 Place the rubber sealing ring on the mill blade unit. (Fig. 11)
Make sure that the sealing ring is placed correctly.
3 Put the mill blade unit on the mill beaker (1) and screw the blade unit anticlockwise (2) until it is fixed properly (Fig. 12).
4 Turn the assembled mill upside down and screw it clockwise onto the motor unit ('click') (Fig. 13).
5 Put the mains plug in the wall socket.
6 Switch on the appliance and let it run until the ingredients are fine enough.
This takes approx. 10-30 seconds.
Disassembling the mill
1 Unplug the appliance.
2 Screw the mill anticlockwise off the motor unit.
3 Turn the mill upside down and screw the blade unit anticlockwise off the mill beaker.
4 Clean all removable parts immediately after use (see chapter 'Cleaning').
Cleaning
Always unplug the appliance before you clean it.
Never immerse the motor unit in water, nor rinse it under the tap. Do not clean the motor unit in the dishwasher.
Never use scouring pads, abrasive cleaning agents or aggressive liquids such as petrol or acetone to clean the appliance.
Tip: Cleaning the appliance and its parts is easiest immediately after use.
1 Make sure the appliance is unplugged.
2 Disassemble all removable parts.
Do not forget to remove the blender sealing ring and the mill sealing ring.
Do not touch the blades. The blades are very sharp.
3 Clean the motor unit with a moist cloth.
4 Clean the removable parts in hot water with some washing-up liquid.
Note: All parts except the motor unit can be cleaned in the dishwasher.
Storage
Note: Make sure the blender is clean and dry when you store it.
1 To store the mains cord, wind it round the reel in the base of the motor unit (Fig. 14).
2 Screw the blade unit anticlockwise onto the bottom of the blender jar.
3 Turn the blender jar upside down.
4 Put the blender jar on the motor unit.
Note: Make sure the handle of the blender jar is at the back of the motor unit.
5 Place the lid on top of the blender jar (Fig. 15).
Disposal
- Do not throw away the appliance with the normal household waste at the end of its life, but hand it in at an official collection point for recycling. By doing this, you help to preserve the environment (Fig. 16).
Guarantee and service
If you need information or if you have a problem, please visit the Philips website at www.philips.com or contact the Philips Customer Care Centre in your country (you find its phone number in the worldwide guarantee leaflet). If there is no Customer Care Centre in your country, go to your local Philips dealer or contact the Service Department of Philips Domestic Appliances and Personal Care BV.
Recipes
Soy milk
Note: This recipe can only be prepared with the filter (HR2027 only). You can order the filter for the HR2021 as an extra accessory from your Philips dealer.
Always let the appliance cool down to room temperature between processing cycles.
Ingredients
1 Soak the soy beans for 4 hours before you process them. Then let them drain.
2 Put the soaked soy beans in the filter and pour the water into the blender jar. Blend for 40 seconds.
3 Pour the soy milk into a pan and bring to the boil. Then add some sugar and let the soy milk simmer until all sugar has dissolved.
4 Serve hot or cold.
Nourishing vegetable soup from Budapest
Ingredients
- 100g kohlrabi
- 150g potatoes
- 150g celery
- 50g carrots
- 100g smoked pork
- 0.55ltr water
- 100g lentils (canned)
- salt, freshly ground pepper, 1 stock cube, 1 bay leaf
1 Precut the ingredients into pieces of 2x2x2cm.
2 Put the kohlrabi, potatoes, celery, carrots and 0.35ltr water in the blender jar in this order. Then blend for 30 seconds.
3 Put the blended ingredients in a pan and bring them to boil. Add the rest of the water (0.2ltr), crème fraîche, lentils, meat, herbs, stock cube and seasonings.
4 Let the soup simmer for 30 minutes. Stir the soup regularly.
Introduction
The image is too blurry to recognize any text content.
لا تغ Perry airportwide Motors you will not stop my home. Let you go to your home.
natural_image
Diagram showing three open panels with grid patterns and curved arrows indicating rotation or movement (no text or symbols)
- Introduction
- Important
- General
- Danger
- Warning
- Caution
- Blender
- Mill
- Filter (HR2027 only)
- Electromagnetic fields (EMF)
- Built-in safety lock
- Circuit breaker safety system
- General description (Fig. 2)
- Before first use
- Using the appliance
- Preparing the blender for use
- Using the blender
- Tips
- Disassembling the blender
- Preparing the filter for use
- Using the filter
- ENGLISH10
- Using the mill
- Disassembling the mill
- Cleaning
- Storage
- Disposal
- Guarantee and service
- Recipes
- Soy milk
- Ingredients
- Nourishing vegetable soup from Budapest
- The image is too blurry to recognize any text content.
Brand : PHILIPS
Model : Viva Collection HR3551
Category : Blender