
VCMA15QS - Vacuum Cleaner SAMSUNG - Free user manual and instructions
Find the device manual for free VCMA15QS SAMSUNG in PDF.


| Product Type | Canister Vacuum Cleaner |
| Brand | Samsung |
| Model | VCMA15QS |
| Dimensions (L x W x H) | approx. 40 x 25 x 30 cm |
| Weight | approx. 5 kg |
| Rated Power | 2000 W |
| Tank Capacity | 2 liters |
| Filtration | Cyclonic with HEPA filter |
| Cord Length | 6 meters |
| Operating Radius | 8 meters |
| Noise Level | 78 dB |
| Included Accessories | Crevice tool, upholstery brush, floor nozzle, carpet nozzle |
| Maintenance | Clean the filter every month, empty the tank after each use |
| Spare Parts | HEPA filter, reusable dust bag, tank, motorized brush |
| Repairability | Repairability score 7.5/10 |
| Power Supply | Mains plug 230 V / 50 Hz |
| Warranty | 2 years |
| Certifications | CE, NF |
Frequently Asked Questions - VCMA15QS SAMSUNG
User questions about VCMA15QS SAMSUNG
0 question about this device. Answer the ones you know or ask your own.
Ask a new question about this device
Download the instructions for your Vacuum Cleaner in PDF format for free! Find your manual VCMA15QS - SAMSUNG and take your electronic device back in hand. On this page are published all the documents necessary for the use of your device. VCMA15QS by SAMSUNG.
USER MANUAL VCMA15QS SAMSUNG
Vacuum Cleaner user manual
* Before operating this unit, please read the instructions carefully.
* For indoor use only.
English
imagine the possibilities
Thank you for purchasing a Samsung product.
safety information
SAFETY INFORMATION

- Before operating the appliance, please read this manual thoroughly and retain it for your reference.

- Because these following operating instructions cover various models, the characteristics of your vacuum cleaner may differ slightly from those described in this manual.
CAUTION/WARNING SYMBOLS USED
 V i V i | Indicates that a danger of death or serious injury exists. |
 C C | Indicates that a risk of personal injury or material damage exists. |
OTHER SYMBOLS USED
 | Represents something you must NOT do. |
 | Represents something you must follow. |
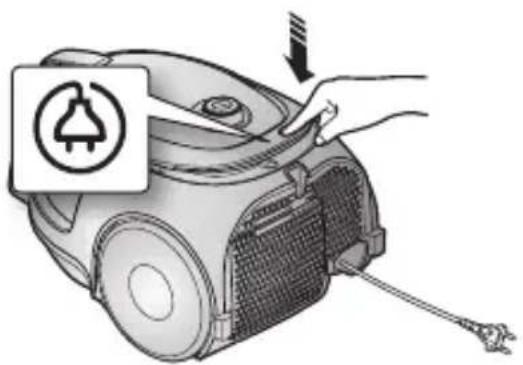
 | Indicates that you must disconnect the power plug from the socket. |

This vacuum cleaner is designed for household use only.
Do not use this vacuum cleaner to clean building waste and debris.
Regularly keep the filters in clean conditions to prevent of collecting fine dust in them.
Do not use this vacuum cleaner with any of the filters removed.
Failure to meet these requirements could cause damage to the internal parts and void your warranty.
IMPORTANT SAFEGUARDS
- Read all instructions carefully. Before switching on, make sure that the voltage of your electricity supply is the same as that indicated on the rating plate on the bottom of the cleaner.
- WARNING: Do not use the vacuum cleaner when rug or floor is wet. Do not use to suck up water.
- Close supervision is necessary when any appliance is used by or near children. Do not allow the vacuum cleaner to be used as a toy. Do not allow the vacuum cleaner to run unattended at any time. Use the vacuum cleaner only for its intended use as described in these instructions.
- Do not use the vacuum cleaner without a dust bin. Empty the dust bin before it is full in order to maintain the best efficiency.
- Slide to the Stop(or Min) position before inserting a plug into the electrical outlet.
- Do not use the vacuum cleaner to pick up matches, live ashes or cigarette butts. Keep the vacuum cleaner away from stoves and other heat sources. Heat can deform and discolour the plastic parts of the unit.
- Avoid picking up hard, sharp objects with the vacuum cleaner as they may damage the cleaner parts. Do not stand on the hose assembly. Do not put weight on the hose. Do not block the suction or the exhaust port.
safety information
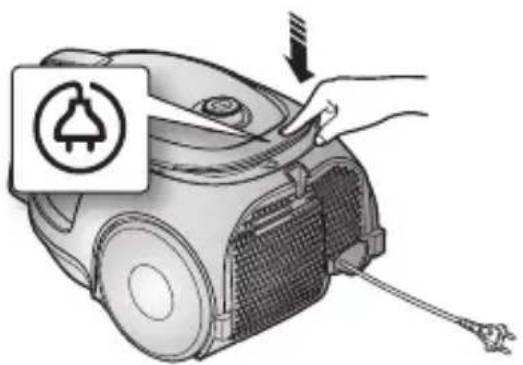
- Switch the vacuum cleaner off on the body of the machine before unplugging from the electrical outlet. Disconnect the plug from the electrical outlet before changing the dust bag or dust container. To avoid damage, please remove the plug by grasping the plug itself, not by pulling on the cord.
- This appliance can be used by children aged from 8 years and above and persons with reduced physical, sensory or mental capabilities or lack of experience and knowledge if they have been given supervision or instruction concerning use of the appliance in a safe way and understand the hazards involved.
- Children shall not play with the appliance.
- Cleaning and user maintenance shall not be made by children without supervision.
- The use of an extension cord is not recommended.
- If your vacuum cleaner is not operating correctly, switch off the power supply and consult an authorized service agent.
- If the supply cord is damaged, it must be replaced by the manufacturer or its service agent or a similarly qualified person in order to avoid a hazard.
- Don't carry the vacuum cleaner by holding the hose. Use the handle on the vacuum cleaner set.
- Unplug the cleaner when not in use. Turn off the power switch before unplugging.
ASSEMBLING THE CLEANER

MAINTAIN TOOLS AND FILTER
09 Using accessory
10 Maintain floor tools
11 Emptying the dust bin
12 When to clean the dust pack
13 Cleaning the dust pack
14 Cleaning the outlet filter
TROUBLESHOOTING

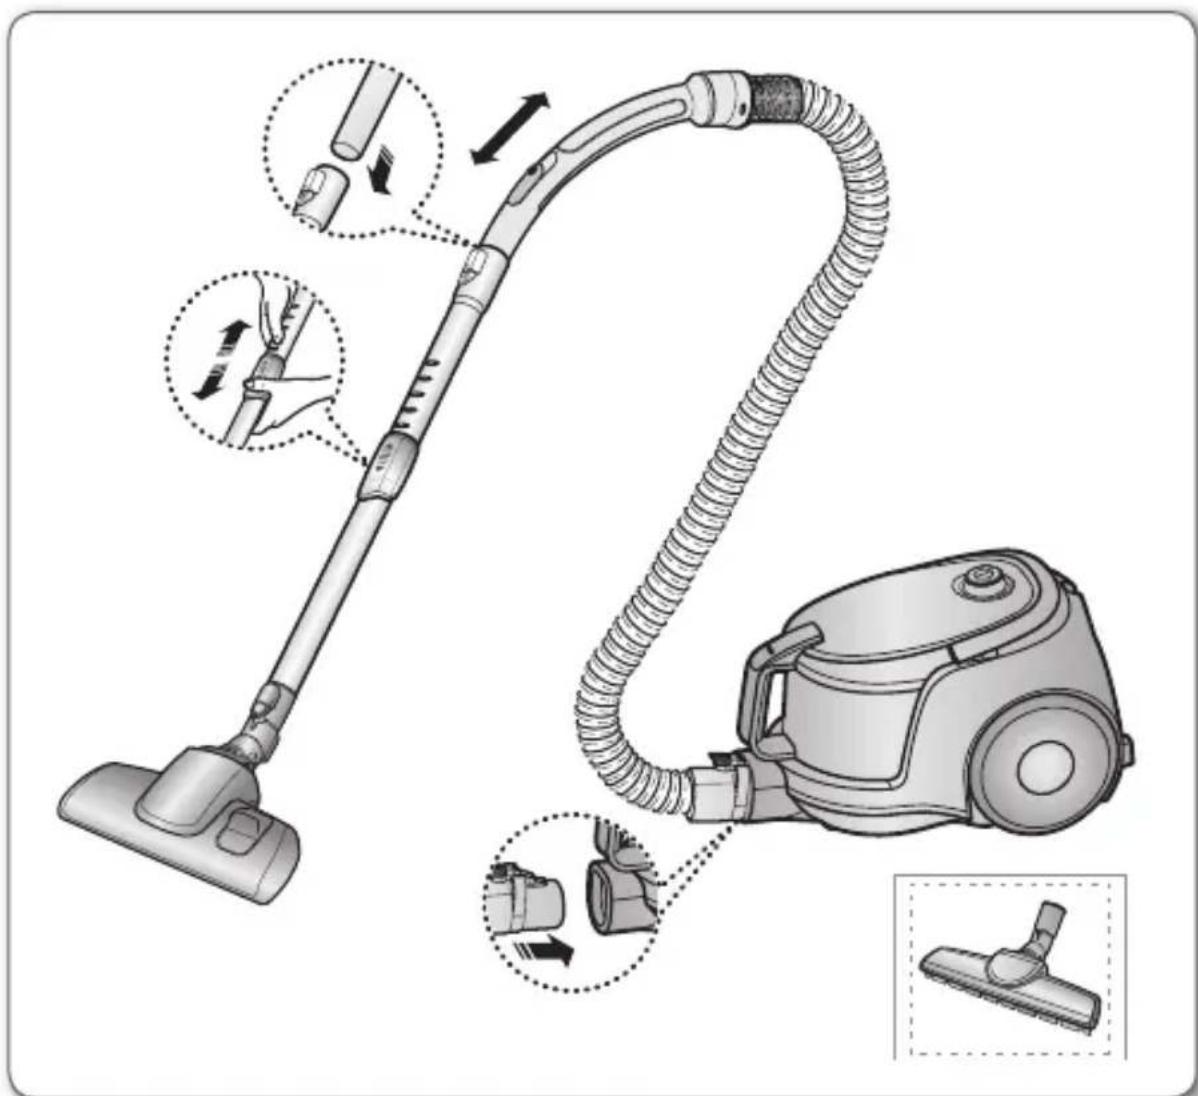
assembling the cleaner

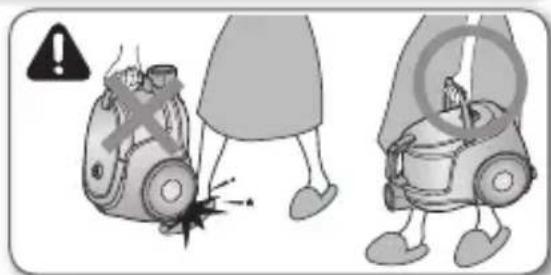
- Please do not press the button of dust bin handle when carrying machine.

- For storage, park the floor nozzle.

natural_image
Technical illustration of two different vacuum cleaner components (no text or symbols visible)06_ assembling the cleaner
operating the cleaner
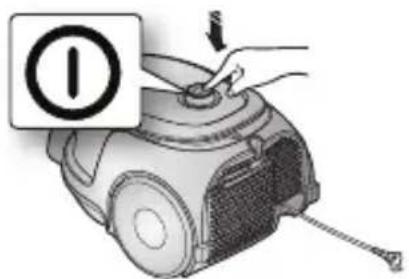
ON/OFF SWITCH
1) BODY CONTROL TYPE 2) ON/OFF TYPE


natural_image
Illustration of a hand using a power tool to press a small electronic device (no text or symbols visible)
- When removing the plug from the electrical outlet, grasp the plug, not the cord.

natural_image
Hand holding a power plug inserted into an electrical outlet (no text or symbols visible)POWER CORD
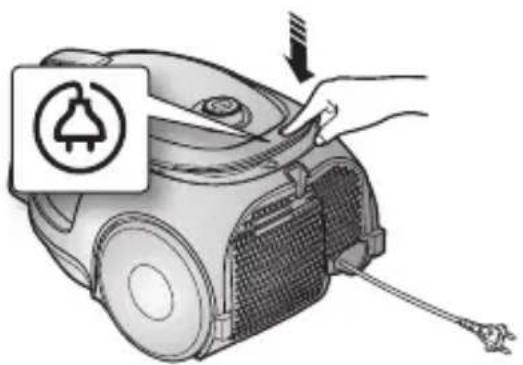
BODY-CONTROL TYPE / ON/OFF TYPE
• HOSE
To reduce suction for cleaning draperies, small rugs, and other light fabrics, pull the tap air until the hole is open.
• BODY (BODY-CONTROL TYPE ONLY)
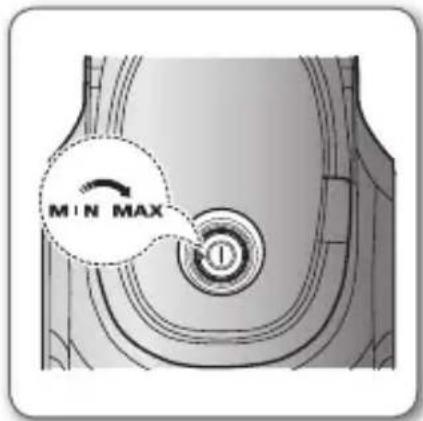
MIN = For delicate surface e.g. net curtains.
MAX = For hard floors and heavily soiled carpets.

natural_image
Diagram of a flexible hose with a black rubber band and directional arrow indicating motion (no text or symbols)
maintain tools and filter
USING ACCESSORY
Pipe (Option)
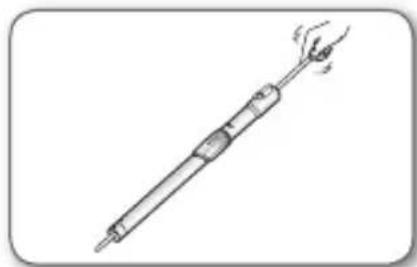
- Adjust the length of the telescopic pipe by sliding the length control button located in the center of the telescopic pipe back and forth.

natural_image
Simple line drawing of a cylindrical object with a double-headed arrow indicating compression or force (no text or symbols)- To check for blockages, separate the telescopic pipe and adjust to shorten. This allows for easier removal of waste clogging the tube.
natural_image
Illustration of a soldering iron with a handle and flame (no text or symbols)Accessory
- Dusting brush for furniture. shelves, books, etc.
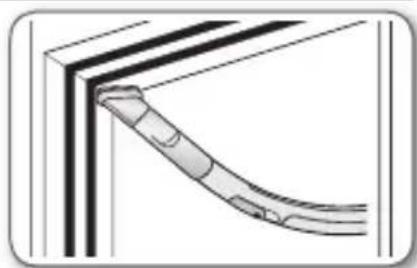
natural_image
Pure diagram of a bent pipe or conduit without any text, numbers, or symbols- Crevice tool for radiators, crevices, corners, between cushions.

natural_image
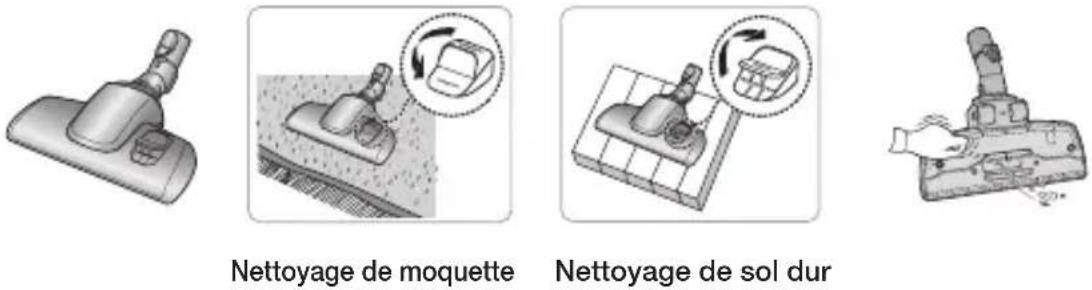
Illustration of a curved cable or connector with segmented ends, mounted on a rectangular frame (no text or symbols)2-STEP BRUSH (OPTION)

natural_image
Illustration of a vacuum cleaner (no text or symbols visible)
natural_image
Illustration of a mechanical component with a magnified inset showing rotational motion (no text or symbols)Carpet Cleaning
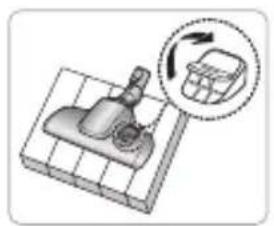
natural_image
Illustration of a mechanical component with a magnified inset showing rotational motion (no text or symbols)Floor Cleaning
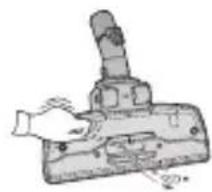
natural_image
Illustration of a hand using a tool to press or install a mechanical component (no text or symbols visible)- Adjust the inlet lever according to the floor surface.
- Remove waste matter completely from the inlet if the inlet is blocked.
PARQUET MASTER BRUSH (OPTIONAL)
• Vacuums dust in a wide area at once.
- Remove waste matter completely from the inlet if the inlet is blocked.

natural_image
Illustration of two different cleaning tools: a brush and a tool holder (no text or symbols present)maintain tools and filter
EMPTYING THE DUST BIN
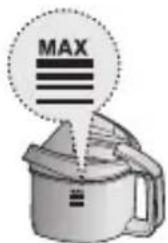
- Once dust reaches the MAX mark, or sution is noticeably reduced during cleaning, empty the dust bin.

natural_image
Illustration of a hand holding a tool next to a robotic vacuum cleaner (no text or symbols present)- Take the dust bin out by pressing the button.
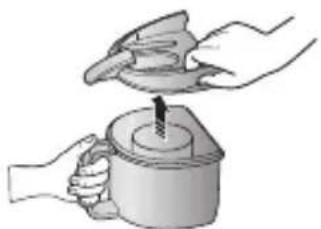
natural_image
Illustration of hands using a tool to press or install a mechanical component (no text or symbols visible)- Separate the dust bin cover.
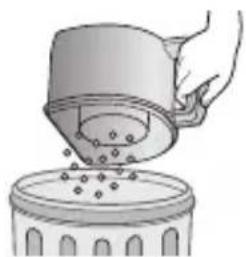
natural_image
Illustration of a hand pouring liquid into a container with granular contents (no text or symbols)- Throw away dust into the bin.
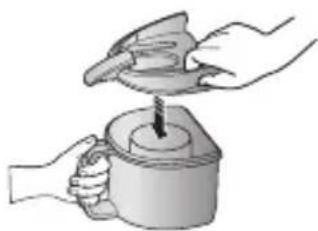
natural_image
Illustration of hands using a tool to press or install a mechanical component (no text or symbols visible)- Close the dust bin cover.

- Before use, push the dust bin into the main body of the vacuum cleaner until you hear the "click" sound.
- Empty into a plastic bag (recommended for asthma/allergy sufferers)
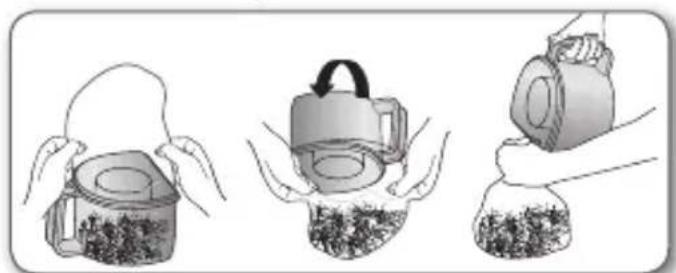
natural_image
Illustration of three steps of a container being filled with contents, showing the top-down view and lid (no text or symbols)
You may rinse the dust bin with cold water.
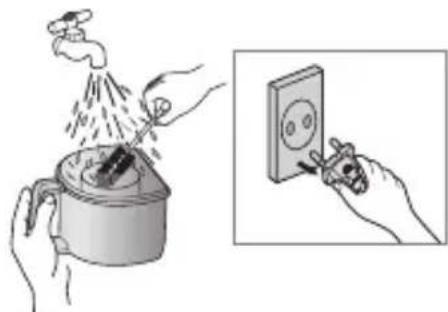
natural_image
Illustration showing hands using a tool to clean or spray the power of a water tap, with an inset close-up of the same hand holding a wall-mounted switch (no text or symbols present)maintain tools and filter _11
WhEN TO CLEAN The DUST PACK
- If suction is noticeably reduced during cleaning, please check the dust pack as indicated below.
Turn the vacuum power to 'MAX'.
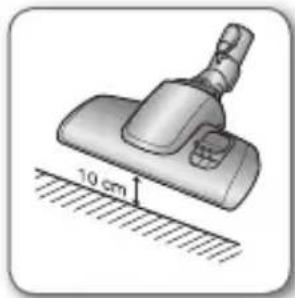
If suction is noticeably reduced with the inlet floating 10cm above flat floor, clean it.
natural_image
Illustration of a mechanical device with a 10 cm scale indicator (no text or symbols on the device itself)
When suction is noticeably reduced continuously, please cleaning the Dust Pack as shown in the following illustration.
- Remove the dust bin and dust pack as shown.

natural_image
Illustration of a hand cleaning a vacuum cleaner with a brush and cleaning device (no text or symbols)- Remove the sponge and filter from the dust pack.
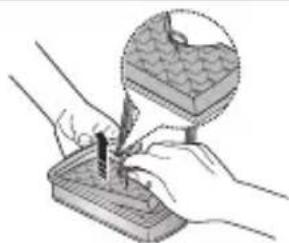
natural_image
Illustration of hands using a tool to apply material to a tray (no text or symbols visible)- Wash the sponge and the filter of the dust pack with water.

natural_image
Illustration showing two hand-painted scenes: one using a tool on a stove, the other cleaning a faucet (no text or symbols)- Let the sponge and filter dry in the shade for more than 12 hours.

natural_image
Isometric illustration of a brick wall and a textured surface (no text or symbols)- Put the sponge and filter into the dust pack.

natural_image
Illustration of hands using a tool to apply a component, with no visible text or symbols- Put the assembled dust pack into the main body.

natural_image
Illustration of a hand washing a small vacuum cleaner (no text or symbols present)
Make sure the filter is completely dry before putting it back into the vacuum cleaner. Allow 12 hours for it to dry.


maintain tools and filter
CIEANING The OUTIET FIITER

natural_image
Illustration of a robotic vacuum cleaner with mesh head and handle (no text or symbols)Press the fixed frame part at the back of the main body to remove.

natural_image
Illustration showing two hand-drawn scenes: one moving a rectangular block with arrows, the other handling a striped container (no text or symbols)Remove and replace the blocked outlet filter.

Replacement filters are available at your local Samsung distributor.
troubleshooting
| PROBLEM SOLUTION | |
| Motor dows not start. | Check cable, pulg and socket.Leave to cool. |
| Suction force is gradually decreasing. | Check for blockage and remove. |
| Cord does not rewind fully. | Pull the cord out 2-3m and push down the cord rewind button. |
| Vacuum cleaner dows not pick up dirt. | Check hose and replace if required. |
| Low or decreasing suction | Please check filter and, if required, clean as illustrated in the instructions. if filters are out of condition change them to new ones. |
| Body overheating | Please check filters, If required clean as illustrated in the instruction. |
| Static electricity discharge • Please decrease power suction. | |
This Vacuum cleaner is approved the following.
EMC Directive : 2004/108/EEC
Low Voltage Directive : 2006/95/EC
Product fiche
[English]
According to Comission Regulation(EU) No 665/2013
| A | Supplier Samsung Electronics., Co. Ltd |
| B | Model VCMA15QS |
| C | Type General purpose vacuum cleaner |
| D | Energy Efficiency Class F |
| E | Annual Energy Consumption (kWh/yr) 58.0 |
| F | Carpet Cleaning Performance Class E |
| G | Hardfloor Cleaning Performance Class D |
| H | Dust Re-Emission Class C |
| I | Sound Power Level (dBA) 82 |
| J | Power Consumption (W) 1300 |
| K | Eco Label No |
1) Annual energy consumption is calculated based on 50 cleaning tasks per year.
2) Actual annual energy consumption will depend on how the appliance is used.
Memo
Memo
Memo
SAMSUNG


natural_image
Technical illustration of two different vacuum cleaner components (no text or symbols visible)MISE SOUS/hORS TENSION
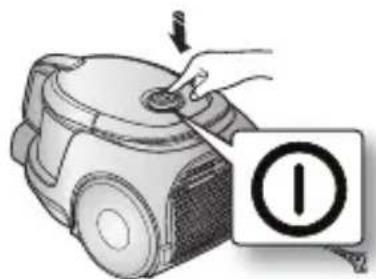
1) TYPE COMMANDE SUR L'APPAREIL
2) TYPE MARCHE/ARRÊT
natural_image
Illustration of a hand using a power tool to press a small electronic device (no text or symbols visible)
natural_image
Hand holding a power plug inserted into an electrical outlet (no text or symbols visible)CORDON D'AIIMENTATION

TYPE COMMANDE SUR l'APPAREII / MARChE/ARRÊT
• TUYAU
natural_image
Diagram of a flexible medical tube with coiled tubing and an arrow indicating direction (no text or symbols)• CORPS DE L'APPAREIL (TYPE COMMANDE SUR L'APPAREIL UNIQUEMENT)
natural_image
Simple line drawing of a cylindrical object with a double-headed arrow indicating compression or force (no text or symbols)natural_image
Line drawing of a soldering iron with a handle and flame (no text or symbols)Accessoires
natural_image
Illustration of a curved cable or connector with segmented ends, mounted on a rectangular frame (no text or symbols)BROSSE 2 POSITIONS (EN OPTION)
natural_image
Illustration of two different cleaning tools: a flat brush and a curved tool (no text or symbols present)natural_image
Illustration of a hand holding a tool next to a robotic vacuum cleaner (no text or symbols present)natural_image
Illustration of hands using a tool to press or install a mechanical component (no text or symbols visible)natural_image
Illustration of a hand pouring liquid into a container with granular material (no text or symbols)natural_image
Illustration of hands using a tool to press or install a mechanical component (no text or symbols visible)natural_image
Three-step illustration showing hands holding containers with a lid, one moving to a container, and another pouring liquid into a bag (no text or symbols)
natural_image
Illustration showing hands using a tool to clean or spray the power of a water tap, with an inset close-up of the same hand holding a wall-mounted switch (no text or symbols present)natural_image
Illustration of a vacuum cleaner with a 10 cm scale indicator (no text or symbols on the device itself)
natural_image
Illustration of a hand cleaning a vacuum cleaner with a brush and cleaning device (no text or symbols)natural_image
Illustration of hands using a tool to apply material to a tray (no text or symbols visible)natural_image
Illustration showing two hand-painted scenes: one using a tool on a stove, the other cleaning a faucet (no text or symbols)natural_image
Isometric illustration of a brick wall and a textured surface (no text or symbols)natural_image
Illustration of hands using a tool to apply a component, with no visible text or symbolsnatural_image
Illustration of a hand washing a small vacuum cleaner (no text or symbols present)
natural_image
Illustration of a robotic vacuum cleaner with mesh head and handle (no text or symbols)natural_image
Illustration showing hands removing a rectangular object into a trash bin (no text or symbols)

natural_image
Technical illustration of two different vacuum cleaner components (no text or symbols visible)06_ montage
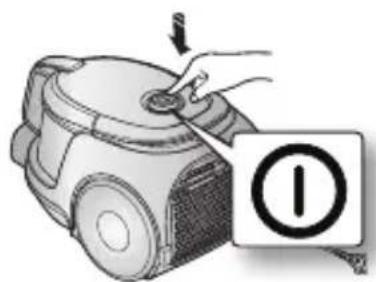
2) AAN-UITTYPE
natural_image
Illustration of a hand using a power tool to press a device, with a numbered label (1) nearby (no text or symbols on the device itself)
natural_image
Hand holding a power plug inserted into an electrical outlet (no text or symbols visible)NETSNOER
natural_image
Illustration of a hand inserting a plug into a vacuum cleaner's air vent (no text or symbols present)TYPE MET BEDIENING OP hET APPARAAT/ AAN/UIT-TYPE
- SLANG
natural_image
Diagram of a flexible hose with a black rubber band and an arrow indicating direction (no text or symbols)- BEHUIZING (ALLEEN VOOR TYPE MET BEDIENING OP HET APPARAAT)
natural_image
Simple line drawing of a cylindrical object with a double-headed arrow indicating compression or force (no text or symbols)natural_image
Simple line drawing of a soldering iron with a flame inside, no text or symbols presentAccessoires
natural_image
Illustration of a curved cable or connector with segmented ends, mounted on a rectangular frame (no text or symbols)2-STANDENBORSTEL (OPTIE)
natural_image
Illustration of two different cleaning tools: a brush and a tool holder (no text or symbols present)natural_image
Illustration of a hand holding a tool next to a robotic vacuum cleaner (no text or symbols present)natural_image
Illustration of hands using a tool to press or install a mechanical component (no text or symbols visible)natural_image
Illustration of a hand pouring liquid into a container with granular material (no text or symbols)natural_image
Illustration of hands using a tool to press or install a mechanical component (no text or symbols visible)natural_image
Three-step illustration showing a container being handled, with one being folded and the other pouring into a bag (no text or symbols)
natural_image
Illustration showing hands using a tool to clean or spray the power of a water tap (no text or symbols present)onderhoud _11
WANNEER REINIGT U hET STOFFIITER
natural_image
Illustration of a mechanical device with a 10 cm scale indicator (no text or symbols on the device itself)
natural_image
Illustration of a hand cleaning a vacuum cleaner with a brush and cleaning tool (no text or symbols)natural_image
Illustration of hands using a tool to apply material to a tray (no text or symbols visible)natural_image
Illustration showing two hand-painted scenes: one using a sponge on a stove, the other holding a faucet (no text or symbols)natural_image
Isometric illustration of a brick wall and a textured surface (no text or symbols)natural_image
Illustration of hands using a tool to apply a component, with no visible text or symbolsnatural_image
Illustration of a hand washing a small vacuum cleaner (no text or symbols present)
natural_image
Line drawing of a robotic vacuum cleaner with handle and mesh (no text or symbols)natural_image
Illustration showing hands removing a rectangular object into a trash bin (no text or symbols)

natural_image
Technical illustration of two different vacuum cleaner units (no text or symbols visible)
natural_image
Illustration of a hand using a power switch to press a small electronic device (no text or symbols visible)
natural_image
Hand holding a wall-mounted electrical socket with a screwdriver inserted (no text or symbols visible)NETZKABEI
natural_image
Diagram of a flexible medical tube with coiled tubing and a directional arrow indicating movement (no text or symbols)natural_image
Simple line drawing of a cylindrical object with a double-headed arrow indicating compression or force (no text or symbols)natural_image
Line drawing of a soldering iron with a handle and tip, emitting vapor (no text or symbols)Saugaufsätze
natural_image
Illustration of a curved cable or wire with segmented ends, no text or symbols present2-SCHRITTE-BÜRSTE (OPTION)

natural_image
Illustration of two different cleaning tools: a flat scrubber and a curved tool (no text or symbols present)natural_image
Illustration of a hand holding a tool next to a small robotic vacuum cleaner (no text or symbols)natural_image
Illustration of hands using a tool to press or install a mechanical component (no text or symbols visible)natural_image
Illustration of a hand pouring liquid into a container with granular material (no text or symbols)natural_image
Illustration of hands using a tool to press or install a mechanical component (no text or symbols visible)natural_image
Three-step illustration showing a container being filled with granular material, then being folded into a bag (no text or symbols)
natural_image
Illustration showing hands using a tool to clean or spray the power of a water tap, with an inset close-up of the same hand (no text or symbols present)natural_image
Illustration of a vacuum cleaner with 10 cm height measurement on a surface (no text or symbols)
natural_image
Illustration of a hand cleaning a vacuum cleaner with a brush and filter (no text or symbols)natural_image
Illustration of hands using a tool to apply material to a tray (no text or symbols visible)natural_image
Illustration showing two hand-painted scenes: one using a tool on a surface, the other cleaning a faucet (no text or symbols)natural_image
Isometric illustration of a brick wall and a small object on a surface (no text or symbols)natural_image
Illustration of hands using a tool to test a component with warning symbols (no text or labels)natural_image
Illustration of a hand holding a small container next to a vacuum cleaner (no text or symbols visible)
natural_image
Illustration of a robotic device with a handle and mesh cover (no text or symbols)natural_image
Illustration showing hands removing a rectangular object into a trash bin (no text or symbols)- Vacuum Cleaner user manual
- safety information
- CAUTION/WARNING SYMBOLS USED
- OTHER SYMBOLS USED
- IMPORTANT SAFEGUARDS
- ASSEMBLING THE CLEANER
- MAINTAIN TOOLS AND FILTER
- TROUBLESHOOTING
- operating the cleaner
- ON/OFF SWITCH
- POWER CORD
- BODY-CONTROL TYPE / ON/OFF TYPE
- USING ACCESSORY
- Pipe (Option)
- Accessory
- 2-STEP BRUSH (OPTION)
- PARQUET MASTER BRUSH (OPTIONAL)
- EMPTYING THE DUST BIN
- WhEN TO CLEAN The DUST PACK
- CIEANING The OUTIET FIITER
- Product fiche
- [English]
- Memo
- MISE SOUS/hORS TENSION
- CORDON D'AIIMENTATION
- TYPE COMMANDE SUR l'APPAREII / MARChE/ARRÊT
- Accessoires
- BROSSE 2 POSITIONS (EN OPTION)
- NETSNOER
- TYPE MET BEDIENING OP hET APPARAAT/ AAN/UIT-TYPE
- 2-STANDENBORSTEL (OPTIE)
- WANNEER REINIGT U hET STOFFIITER
- NETZKABEI
- Saugaufsätze
- 2-SCHRITTE-BÜRSTE (OPTION)
Brand : SAMSUNG
Model : VCMA15QS
Category : Vacuum Cleaner