
Jack HR6072 - Vacuum Cleaner PHILIPS - Free user manual and instructions
Find the device manual for free Jack HR6072 PHILIPS in PDF.


| Product Type | Vacuum Cleaner |
| Brand | Philips |
| Model | Jack HR6072 |
| Power Consumption | 1600 W |
| Voltage | 220-240 V, 50/60 Hz |
| Dust Capacity | 1.5 L (bagless) |
| Filtration | HEPA filter |
| Noise Level | 80 dB |
| Cord Length | 6 m |
| Weight | 5.5 kg |
| Dimensions (L x W x H) | 300 x 250 x 1100 mm |
| Cleaning Modes | Hard floor, carpet |
| Accessories Included | Crevice tool, brush tool |
| Filter Maintenance | Washable HEPA filter |
| Overheat Protection | Thermal overload switch |
| Reparability | Spare parts available (belt, filter, brush roll) |
Frequently Asked Questions - Jack HR6072 PHILIPS
User questions about Jack HR6072 PHILIPS
0 question about this device. Answer the ones you know or ask your own.
Ask a new question about this device
Download the instructions for your Vacuum Cleaner in PDF format for free! Find your manual Jack HR6072 - PHILIPS and take your electronic device back in hand. On this page are published all the documents necessary for the use of your device. Jack HR6072 by PHILIPS.
USER MANUAL Jack HR6072 PHILIPS




ENGLISH 6
POLSKI 15
ROMÂNĂ 25
РУССКИЙ 34
ČESKY 45
MAGYAR 54
SLOVENSKY 63
УКРАЇНСЬКА 72
HRVATSKI 83
EESTI 92
LATVISKI 101
LIETUVIŠKAI 110
SLOVENŠČINA 118
Important
- Read these instructions for use carefully and look at the illustrations before you start using the appliance.
- Always switch the vacuum cleaner off after use.
- Never suck up ashes until they are cold.
- Do not suck up flammable or corrosive liquids.
- Do not let water enter the vacuum cleaner or the wall holder. Never immerse the vacuum cleaner or the wall holder in water.
- The charger plug feels warm. This is normal.
- Only charge the vacuum cleaner with the charger supplied.
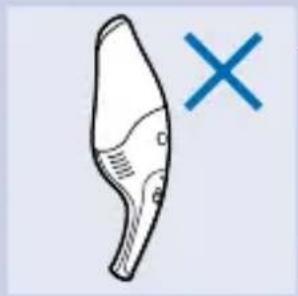
- Do not hold the appliance with the nozzle pointing upwards and do not tilt the appliance to one side when sucking up liquids.
- Do not use the appliance if it is damaged. Take it to an authorised Philips service centre for repair.
Preparing the appliance for use
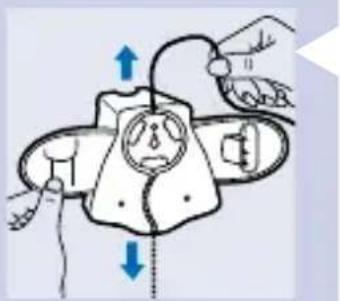
- Wind and store excess mains cord in the wall holder.


- Screw the wall holder to the wall with the screws supplied with the appliance.
- You can also place the vacuum cleaner and the wall holder FLAT on a table during charging.
- The crevice tool, floor nozzle, squeegee and the stick can be attached to the wall holder by pushing them into the appropriate fastening slots.
Charging the appliance
1 Make sure that the slide switch of the vacuum cleaner is in off position (0) during charging. The appliance will not charge if the slide switch is in another position. 2 Insert the charger plug into the wall socket. 3 Always put the vacuum cleaner back onto the holder after use to recharge the batteries, even if the batteries are still almost fully charged.
- The indicator light will come on to indicate that the appliance is charging.
The indicator light will stay on as long as the appliance is connected to the wall holder and the plug is in the wall socket.
The indicator light does not give any information about the charge level of the built-in batteries.

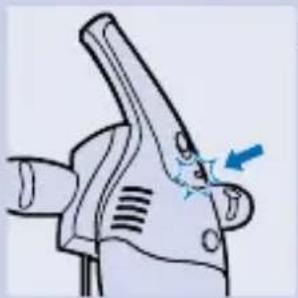
Charge the appliance for at least 16 hours before you use it for the first time.
Recharge the appliance as soon as the motor power decreases noticeably.
If you are not going to use the appliance for a longer period of time, we advise you to remove the charger plug from the wall socket to save energy.
Vacuum cleaning

1 Set the slide switch to position I for normal suction power. Set it to position II for turbo suction power.
Connecting accessories
Hard floors and carpets

1 Use the floor nozzle for vacuum cleaning hard floors and carpets.

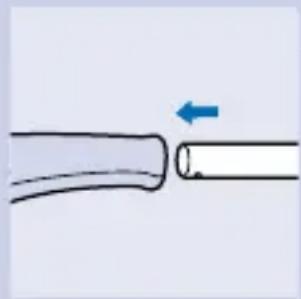

Fluff and hair
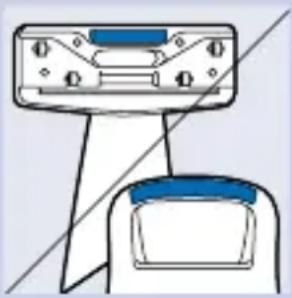
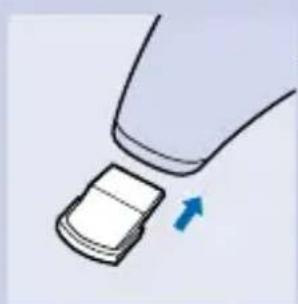
1 Assemble the fluff collector onto the nozzle of the appliance or onto the floor nozzle. Use the fluff collector to remove hair or fluff.
Pass the fluff collector gently over the hairs or fluff to be removed. The hairs or fluff will be worked loose from the surface, collected and then sucked up.
Hard-to-reach places
1 Use the crevice tool for vacuum cleaning hard-to-reach places.
Extra reach
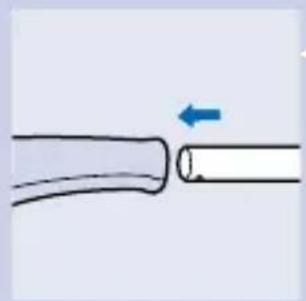
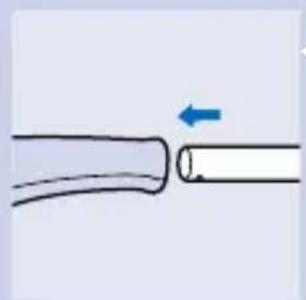
1 You can assemble the stick for extra reach when cleaning hard floors, carpets and hard-to-reach areas. Push the narrow part of the stick into the hole in the handle until you hear a click.
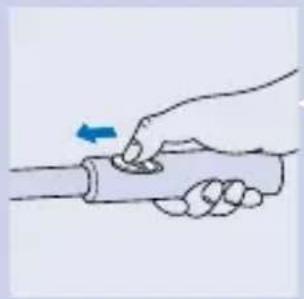
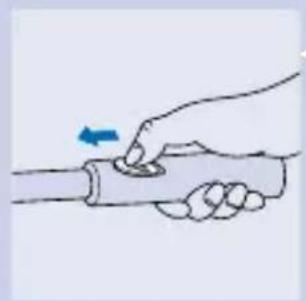
- You can switch the appliance on by means of the slide switch on the handle of the stick. The appliance may only be used in position II (turbo suction power) if the stick is attached.

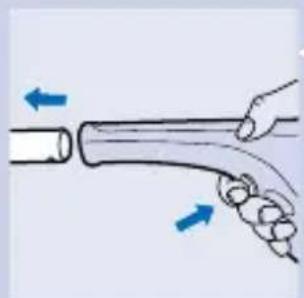
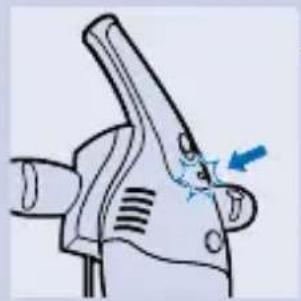
2 To detach the stick, press the release button underneath the handle of the vacuum cleaner and pull the stick out of the appliance.
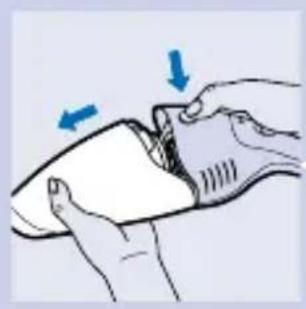
Liquids
Insert the deflector into the dust compartment if you want to suck up liquids.
1 Press the break button and open the vacuum cleaner. 2 Remove the dustbag from the dust compartment. 3 Insert the deflector and the filter into the dust compartment. 4 Push the filter firmly into the dust compartment.

5 Connect the squeegee to the nozzle.

6 When sucking up liquids, hold the appliance with the nozzle pointing downwards. Make sure the nozzle touches the surface to be cleaned. Do not tilt the appliance to one side.

7 Do not hold the appliance with its nozzle pointing upwards, as this would cause liquid to enter the appliance and damage the parts inside.
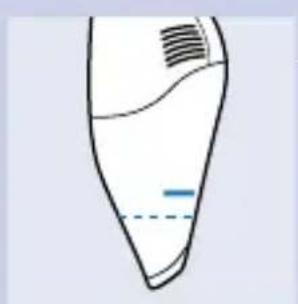
8 Stop sucking up liquids when the liquid level inside the dust compartment has reached the maximum indication line.
9 Empty the dust compartment each time you have used the appliance to suck up a liquid.
Emptying the dustbag
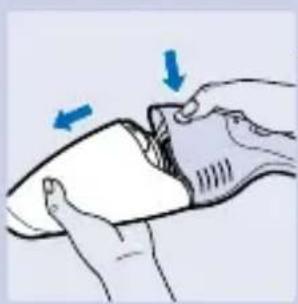
1 Press the break button and open the vacuum cleaner over a dustbin.

2 Remove the dustbag from the dust compartment. 3 Empty the dustbag and the dust compartment.
- Clean the dustbag with a brush or with a normal vacuum cleaner if it is very dirty.
Replacing the dustbag

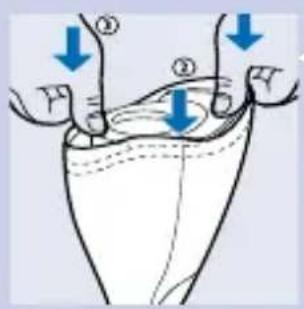
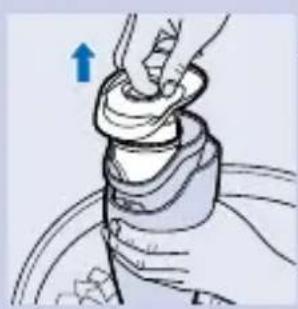
1 Slide the ring holding the edge of the dustbag upwards and remove the old dustbag.

2 Slide the new dustbag onto the dustbag frame.
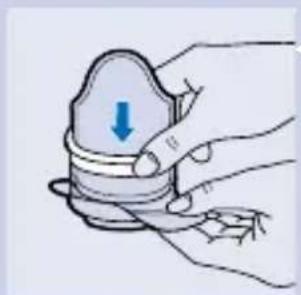
3 Push the ring down to fasten the dustbag.

4 Push the point of the dustbag inwards.
Cleaning the appliance
- You can clean the appliance with a damp cloth. Remove the mains plug from the wall socket before cleaning the wall holder.
Do not let water enter the vacuum cleaner or the wall holder. Never immerse the vacuum cleaner or the wall holder in water.
- If necessary, clean the dust compartment, the deflector and the dustbag with cold or lukewarm water. The dust compartment and the deflector may also be cleaned in a dishwasher.
Never use the vacuum cleaner when the dustbag or dust compartment is still wet.
Ordering dustbags
New (replacement) dustbags are available under type no. HR6918. Contact your Philips dealer.
If you have any difficulties obtaining dustbags or other accessories for this appliance, please contact the Philips Customer Care Centre in your country or consult the worldwide guarantee leaflet.
Environment
NiCd/NiMH batteries can be harmful to the environment and may explode if exposed to high temperatures or fire.


Remove the batteries when you discard the appliance. Do not throw the batteries away with the normal household waste, but hand them in at an official collection point. You can also take the batteries to a Philips service centre, which will dispose of them in an environmentally safe way.
Only remove the batteries if they are completely empty.
1 Let the appliance run until it stops, undo the screws and open the vacuum cleaner. 2 Cut the connecting wires one by one and remove the batteries.
Guarantee & service
If you need information or if you have a problem, please visit the Philips Web site at www.philips.com or contact the Philips Customer Care Centre in your country (you will find its phone number in the worldwide guarantee leaflet). If there is no Customer Care Centre in your country, turn to your local Philips dealer or contact the Service Department of Philips Domestic Appliances and Personal Care BV.
Important

Lint and hair
Better access
Liquid suction


Cleaning lint and hair


Liquid suction





Dust bunnies and hair
Vacuuming liquids



Fibers and hair


Press the interrupt button and open the vacuum cleaner.


Charging the device.
Dust and hair
Hard-to-reach places


- Wind up and store the excess power cord in the wall mount.

- The crevice nozzle, floor nozzle, water nozzle, and extension tube can be attached to the wall mount by inserting them into the corresponding slots.
Charging

Set the switch to position I for normal suction power. For turbo suction power, set it to position II.
Accessories
Hard floors and carpets

Use the floor nozzle for vacuuming hard floors and carpets.

Extended reach
Press the filter firmly into the dust container.

Attach the water nozzle to the vacuum cleaner.

6 When vacuuming up liquids, hold the vacuum cleaner tilted downward at a 30° angle so that it touches the surface you are vacuuming. Do not tilt the vacuum cleaner to one side.

8 Stop vacuuming when the liquid in the container reaches the maximum level line. 9 After each time you vacuum up water, empty the container.
Press the release button and open the vacuum cleaner above a trash can.

Move the ring upward while holding the edge of the bag and remove the old bag.

2 Place the new bag onto the frame. 3 Push the ring downward to secure the bag. 4 Push the top of the bag inward.
Cleaning
You can wipe the vacuum cleaner with a damp cloth. Before cleaning the wall mount, unplug the plug from the wall outlet.
Make sure that no water gets into the vacuum cleaner or the wall mount. Never immerse them in water.

Let the vacuum cleaner run until it stops, unscrew the screws and open the vacuum cleaner. 2 Cut the connecting wires one by one and remove the batteries.
Warranty and service
If you need information or have a problem, visit the Philips website www.philips.com or contact the Philips Consumer Care Center in your country (phone numbers are in the warranty booklet). If there is no such center, contact your local Philips dealer or an authorized service center.
Important

3 Insert the deflector and filter into the dust compartment.

4 Secure the filter firmly in the dust compartment.

2 Remove the dust bag from the dust compartment.
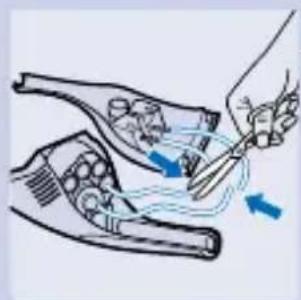
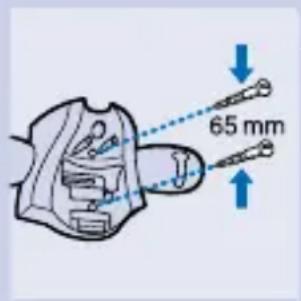
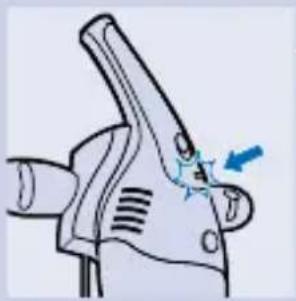
Remove the battery only when it is completely empty.


Set the suction power selector to position I for normal suction power. For turbo suction power, set it to position II.
Press the release button and open the vacuum cleaner.

2 Remove the dust bag from the dust compartment.

3 Insert the deflector and filter into the dust compartment.
4 Push the filter firmly into the dust compartment.

5 Attach the rubber squeegee to the hose nozzle.

6 When vacuuming liquids, hold the appliance with the hose nozzle directed. Make sure the hose nozzle touches the floor being cleaned. Do not tilt the appliance to one side.
Press the button and open the vacuum cleaner over a trash can.
2 Remove the bag from the dust compartment.
- Empty the bag and the dust compartment.
- Clean the bag with a brush or with a regular vacuum cleaner if it is very dirty.
Let the appliance run until it stops by itself, unscrew the screws and open it.

| 2017 | 2016 | |
| Cost of sales | 3,859 | 4,058 |
| Gross margin | 1.4% | 1.4% |
| Net sales | 3,859 | 4,058 |
| Earnings per share: | ||
| Basic | 0.43 | 0.43 |
| Diluted | 0.43 | 0.43 |
| Earnings per share (basic) | 0.43 | 0.43 |
| Diluted | 0.43 | 0.43 |
- IMPORTANT
- PREPARING THE APPLIANCE FOR USE
- CHARGING THE APPLIANCE
- VACUUM CLEANING
- CONNECTING ACCESSORIES
- HARD FLOORS AND CARPETS
- FLUFF AND HAIR
- HARD-TO-REACH PLACES
- EXTRA REACH
- LIQUIDS
- EMPTYING THE DUSTBAG
- REPLACING THE DUSTBAG
- CLEANING THE APPLIANCE
- ORDERING DUSTBAGS
- ENVIRONMENT
- GUARANTEE & SERVICE
- LINT AND HAIR
- BETTER ACCESS
- LIQUID SUCTION
- CLEANING LINT AND HAIR
- DUST BUNNIES AND HAIR
- VACUUMING LIQUIDS
- FIBERS AND HAIR
- CHARGING THE DEVICE
- DUST AND HAIR
- CHARGING
- ACCESSORIES
- EXTENDED REACH
- CLEANING
- WARRANTY AND SERVICE
Brand : PHILIPS
Model : Jack HR6072
Category : Vacuum Cleaner