
SPI 41 - Welding machine Weller - Free user manual and instructions
Find the device manual for free SPI 41 Weller in PDF.


| Product Type | Soldering Station |
| Brand | Weller |
| Model | SPI 41 |
| Power | 50 W |
| Temperature Range | 200 °C to 450 °C |
| Temperature Stability | ± 2 °C |
| Supply Voltage | 230 V AC, 50 Hz |
| Dimensions (L × D × H) | 170 × 120 × 95 mm |
| Weight | 1.5 kg |
| Tip Type | Interchangeable tip (ET series) |
| Main Functions | Electronic soldering, precise temperature adjustment, automatic standby mode |
| Maintenance and Cleaning | Clean the tip with a damp sponge; replace the tip if oxidized |
| Safety Instructions | Unplug before maintenance; do not touch hot tip; use in a ventilated area |
| Spare Parts and Repairability | Tips, heating elements, cables available; repairable by a professional |
| General Information | Professional soldering station for electronic work |
Frequently Asked Questions - SPI 41 Weller
User questions about SPI 41 Weller
0 question about this device. Answer the ones you know or ask your own.
Ask a new question about this device
Download the instructions for your Welding machine in PDF format for free! Find your manual SPI 41 - Weller and take your electronic device back in hand. On this page are published all the documents necessary for the use of your device. SPI 41 by Weller.
USER MANUAL SPI 41 Weller
EN Translation of the original instructions

∅ 0,8 mm

∅ 1,0 mm


XTRA


www.weller-tools.com


XTR
∅ 0,6 mm

∅ 1,5 mm






2

DE Heizelement
EN Heating element
ES Elemento calefactor
FR Élément de chauffe
IT Elemento riscaldante
PT Elemento de aquecimento
NL Verwarmingselement
SV Värmeelement
DK Varmeelement
FI Kuumennuselementti
GR Θερμαντικό στοιχείο
TR Isitma elemani
CZ Topný prvek
PL Element grzewczy
HU Fütöelem
SK Vyhrievací prvok
SL Grelni element
EE Kütteelement
LV Sildelements
LT Kaitinimo elementas
BG Нагревателен елемент
RO Rezistență
HR Grijaći element
CN 加热元件
JP ヒーターエレメント


HER 120



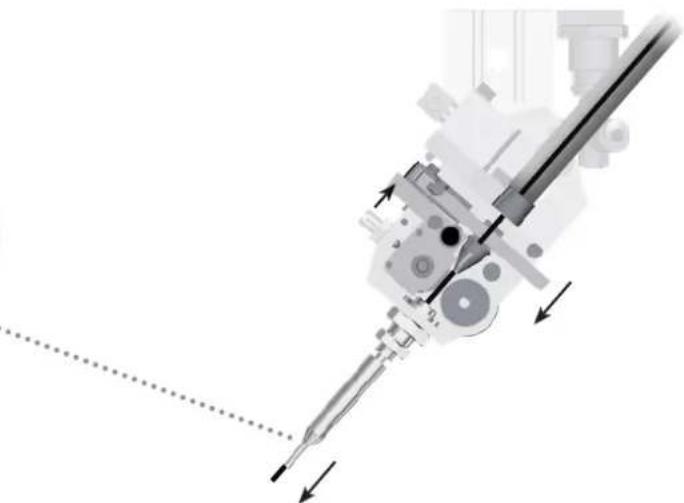
DE Lötdrahtvorschubsystem
EN Solder wire feed system
ES Sistema de alimentación de hilo de
soldadura
FR Système d'avance du fil de soudage
IT Sistema di avanzamento filo di saldatura
PT Sistema de avanço de arame de solda
NL Soldeerdraadvoedingssysteem
SV System för frammatning av lödtråd



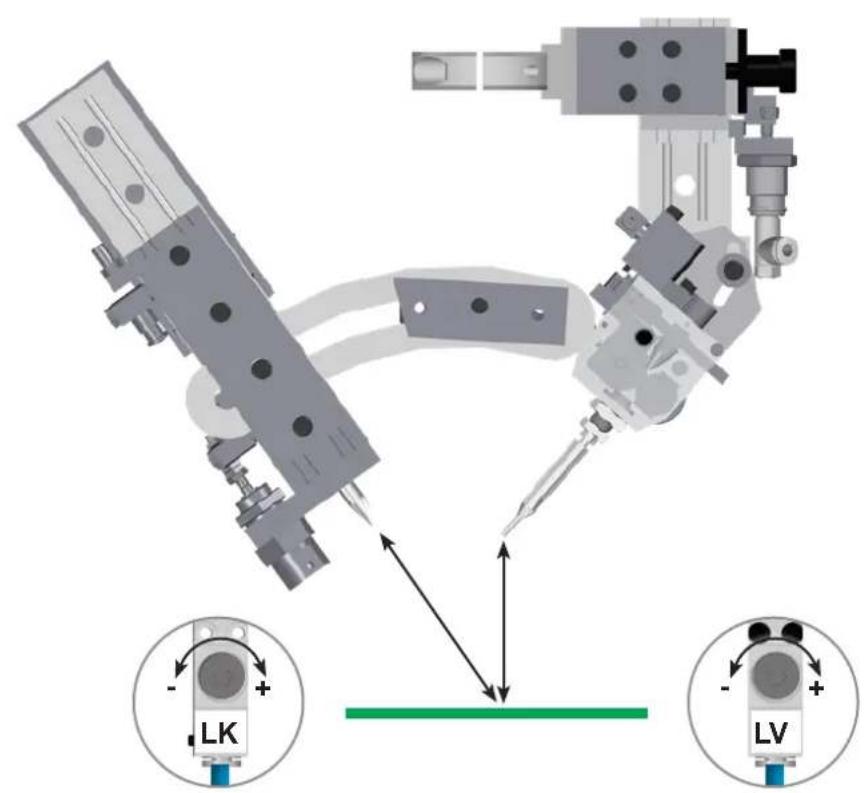
DE Kalibrierung
EN Calibration
ES Calibración
FR Calibrage
IT Calibrazione
PT Calibragem
NL Kalibratie
SV Kalibrering
DK Kalibrering
FI Kalibrointi
GR Βαθμονόμηση
TR Kalibrasyon
CZ Kalibrace
PL Kalibracja
HU Kalibrálás
SK Kalibrácia
SL Kalibriranje
EE Kaliibrimine
LV Kalibrēšana
LT Kalibravimas
BG Калибриране
RO Calibrare
HR Kalibracija
CN 校准
JP キャリブレーション


DE Betrieb
EN Operation
ES Operação
FR Fonctionnement
IT Esercizio
PT Operação
NL Gebruik
SV Drift
DK Funktion
FI Käyttö
GR Λειτουργία
TR Operasyon
CZ Provoz
PL Operacja
HU Üzemeltetés
SK Prevádzka
SL Delovanje
EE Operatsioon
LV Darbība
LT Operacija
BG Работа
RO Functionarea
HR Operativni rad
CN 运行
JP 運転

ON

Controller
WT 1H


![graph TD A["Robot 1"] -->|START F2| B["Computer"] C["Robot 2"] -->|Auto ✓| D["Computer"]](/content/2026/06/1289263/images/9ce662879f88e79abd59f9db5abd8303f721dc4068349759d7ee2263c6d3267d.jpg)
EMERGENCY STOP


DE Löten
EN Soldering
ES Soltar
FR Soudage
IT Saldare
PT Soldar
NL Solderen
SV Lödning
DK Lodning
FI Juottaminen
GR Συγκόλληση
TR Lehimleme
CZ Pájení
PL Lutowanie
HU Forrasztás
SK Spájkovanie
SL Spajkanje
EE Jootmine
LV Lodēšana
LT Litavimas
BG запояване
RO Lipire cu aliaj
HR Lemljenje
CN 焊接
JP ハンダ付け
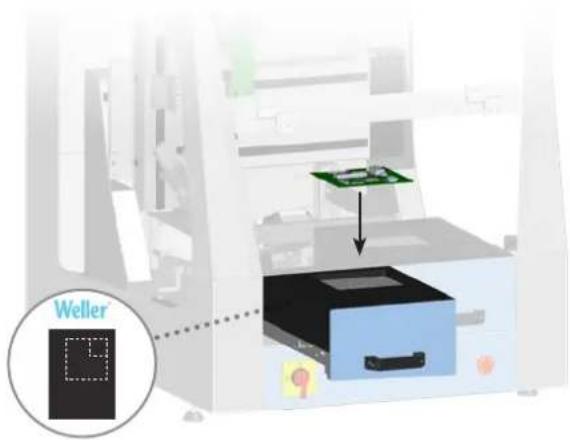
max. 195 x 205 mm


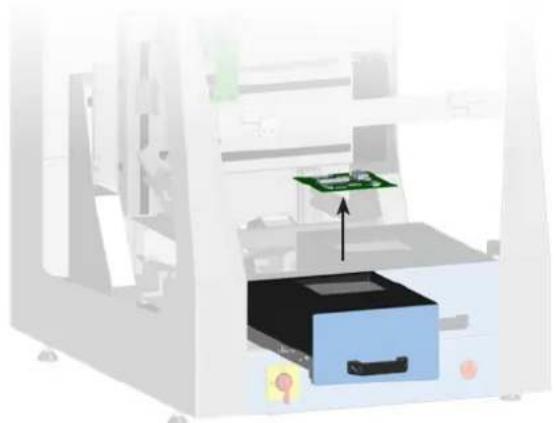

DE Reinigung
EN Cleaning
ES Limpieza
FR Nettoyage
IT Pulizia
PT Limpeza
NL Reiniging
SV Rengöring
DK Rengøring
FI Puhdistus
GR Καθαρισμός
TR Temizlik
CZ Čištění
PL Czyszczenie
HU Tisztítás
SK Čistenie
SL Čiščenje
EE Puhastamine
LV Tīrīšana
LT Valymas
BG Почистване
RO Curățarea
HR Čišćenje
CN 清洁
JP 清掃




| DE Deutsch | Sicherheitshinweise | Bestimmungsgemäße Verwendung | Benutzergruppen | Pflege und Wartung | Garantie | Technische Daten | Symbole | Original Konformitätserklärung | 16 |
| EN English | Safety information | Specified Conditions Of Use | User groups | Care and maintenance | Warranty | Technical Data | Symbols | Original declaration of conformity | 19 |
| ES Español | Advertencias de seguridad | Aplicación De Acuerdo A La Finalidad | Grupo de usuarios | Cuidado y mantenimiento | Garantía | Datos Técnicos | Símbolos | Declaración de conformidad original | 22 |
| FR Français | Consignes de sécurité | Utilisation Conforme Aux Prescriptions | Groupes d'utilisateurs | Entretien et maintenance | Garantie | Caractéristiques Techniques | Symboles | Déclaration de conformité d'origine | 25 |
| IT Italiano | Avvertenze per la sicurezza | Utilizzo Conforme | Gruppi utenti | Cura e manutenzione | Garanzia | Dati Tecnici | Simboli | Dichiarazione di Conformità originale | 28 |
| PT Portugues | Indicações de segurança | Utilização Autorizada | Grupos de utilizadores | Conservação e manutenção | Garantia | Características Técnicas | Símbolos | Original da declaração de conformidade | 31 |
| NL Nederlands | Veiligheidsinstructies | Voorgeschreven Gebruik Van Het Systeem | Gebruikersgroepen | onderhouden | Garantie | Technische Gegevens | Symbolen | Origineel conformiteitsverklaring | 34 |
| SV Svenska | Säkerhetsanvisningar | Använd Maskinen Enligt Anvisningarna | Användarkategorier | skötsel och underhåll | Garanti | Tekniska Data | Symboler | Ursprunglig försäkran om överensstämmelse | 37 |
| DK Dansk | Sikkerhedsanvisninger | Tiltænkt Formål | Brugergrupper | Pleje og vedligeholdelse | Garanti | Tekniske Data | Symboler | Original overensstemmelseserklæring | 40 |
| FI Suomi | Turvallisuusohjeet | Tarkoituksenmukainen Käyttö | Käyttäjäryhmät | aseman hoito ja huolto | Takuu | Tekniset Arvot | Symbolit | Alkuperäinen vaatimustenmukaisuusvakuutus | 43 |
| GR Ελληνικα | Υποδείξεις ασφαλείας | Xρήση σύμφωνα με το σκοπό προορισμού | Ομάδες χρηστών | Φροντίδα και συντήρηση της συσκευής | Εγγύηση | Τεχνικά στοιχεία | Σύμβολα | Γνήσια Δήλωση πιστότητας | 46 |
| TR Türkçe | Güvenlik uyarıları | Kullanim | Kullanıcı grupları | temizliği ve bakımı | Garanti | Teknik Veriler | Semboller | Orijinal uygunluk beyanı | 49 |
| CZ Český | Bezpečnostní pokyny | Použití v souladu s určením | Uživatelské skupiny | Údržba a servisní práce ohledně | Záruka | Technické údaje | Symboly | Originální prohlásení o shodě | 52 |
| PL Polski | Bezpieczeństwo | Użytkowanie | Grupy użytkowników | Pielęgnacja i konserwacja urządzenia | Gwarancja | Dane Techniczne | Symbole | Oryginalna deklaracja zgodności | 55 |
| HU Magyar | Biztonsági utasítások | Rendeltetésszerű használat | Felhasználói csoportok | Ápolás és karbantartás | Garancia | Műszaki Adatok | Szimbólu mok | Eredeti megfelelőségi nyilatkozat | 58 |
| SK Slovensky | Bezpečnostné pokyny | Používanie v súlade s určeným účelom použitia | Skupiny používatel’ov | Ošetrovanie a údržba | Záruka | Technické údaje | Symboly | Originálne vyhlásenie o zhode | 61 |
| SL Slovenščina | Varnostna navodila | Uporaba v skladu s predpisi | Skupine uporabnikov | Nega in vzdrževanje | Garancija | Tehnični Podatki | Simboli | Originalna Izjava o skladnosti | 64 |
| EE Eesti | Ohutusjuhised | Kasutusotstarbele vastav käitamine | Kasutajarühmad | Hooldamine ja teenindamine | Garantii | Tehnilised Andmed | Sümbol | Originaal-vastavusdeklaratsioon | 67 |
| LT Latviski | Drošības norādes | Atbilstoša lietošana | Lietotāju grupas | Apkope un kopšana | Garantija | Tehniskie dati | Simboli | Originālā atbilstības deklarācija | 70 |
| LV Lietuviškai | Saugos taisyklès | Naudojimas pagal paskirtį | Naudotoju grupės | Iprastinė ir techninė priežiūra | Garantija | Techniniai duomenys | Simboliai | Atitikties deklaracijos originalas | 73 |
| BG Български | Инструкции за безопасна работа | Използване по предназначение | Потребителски групи | Обслужване и поддържане | Гаранция | Технически данни | Символи | Оригинална Декларация за съответствие | 76 |
| RO Român | Indicatii de securitate | Utilizarea conformā cu destinația | Grupe de utilizatori | Іngrijirea și întreținerea curentă | Garanția pentru produs | Date tehnice | Simboluri | Declarație de conformitate originală | 79 |
| HR Hrvatski | Sigurnosna upozorenja | Namjenska uporaba | Skupine korisnika | Njega i servisiranje | Jamstvo | Tehnički podaci | Simboli | Originalna izjava o sukladnosti | 82 |
| CN 中文 | 安全信息 | 规定的使用条件 | 用户群体 | 小心维护 | 保修 | 技术资料 | 符号/标志 | 符合标准说明原件 | 85 |
| JP 日本語 | 安全に関する情報 | 指定の使用条件 | ユーザーグループ | 保守及びメンテナンス | 保証規定証 | 仕様諸元 | シンボル | オリジナルの適合宣言書 | 88 |

Read these instructions and the safety guidelines carefully before starting up the unit and starting work.
Please adhere to the operating instructions of the connected devices.
Installation and commissioning of the machines which we have supplied may only be performed by authorized specialist personnel.
Failure to observe the safety regulations results in a risk to life and limb.
Keep these instructions in a place that is accessible to all users.
Safety information
The soldering tool must be operated only in perfect technical working order. Safety devices must not be deactivated.
Faults and defects must be repaired immediately. Before using the unit / tool, safety devices must be carefully checked to make sure that they are functioning properly and in the manner intended. Check that moving parts are functioning properly and are not sticking, and whether parts are damaged. All parts must be correctly fitted and must satisfy all the requirements necessary to guarantee troublefree operation of the unit.
For safety reasons, children and youths under the age of 16, as well as persons who are not familiar with these operating instructions, may not use the device. Children shall not play with the appliance.
This device is not intended for use by persons (including children) with limited physical, sensory or mental aptitude, or by persons who lack knowledge or experience in handling the device.
Keep other persons well away from your workplace.
The work area is out of bounds for children and unauthorised persons. Never allow other persons to touch the soldering tool or cable.
WARNING
Danger of injury
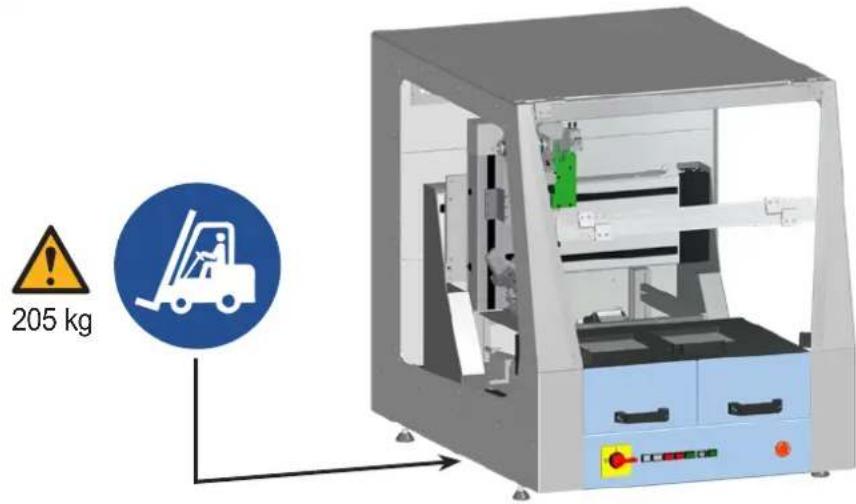
The device or parts of the device may fall off during transportation.
WARNING
Danger of injury
Danger of crushing injuries! / Cutting hazard
Risk of injury after opening the hood, as no protection against moving parts is provided.
- The key-operated switch may only be used by specialist, trained personnel, who are fully aware of the risks involved in operating the machine without any protective function, thanks to their specialist qualification and experience.
• The key must be kept in a safe place. - Do not leave the key in the switch during normal operation of the machine!
Risk of injury on interchangeable magazines - Never put your hand inside the device when the magazine is open
Danger: compressed air.
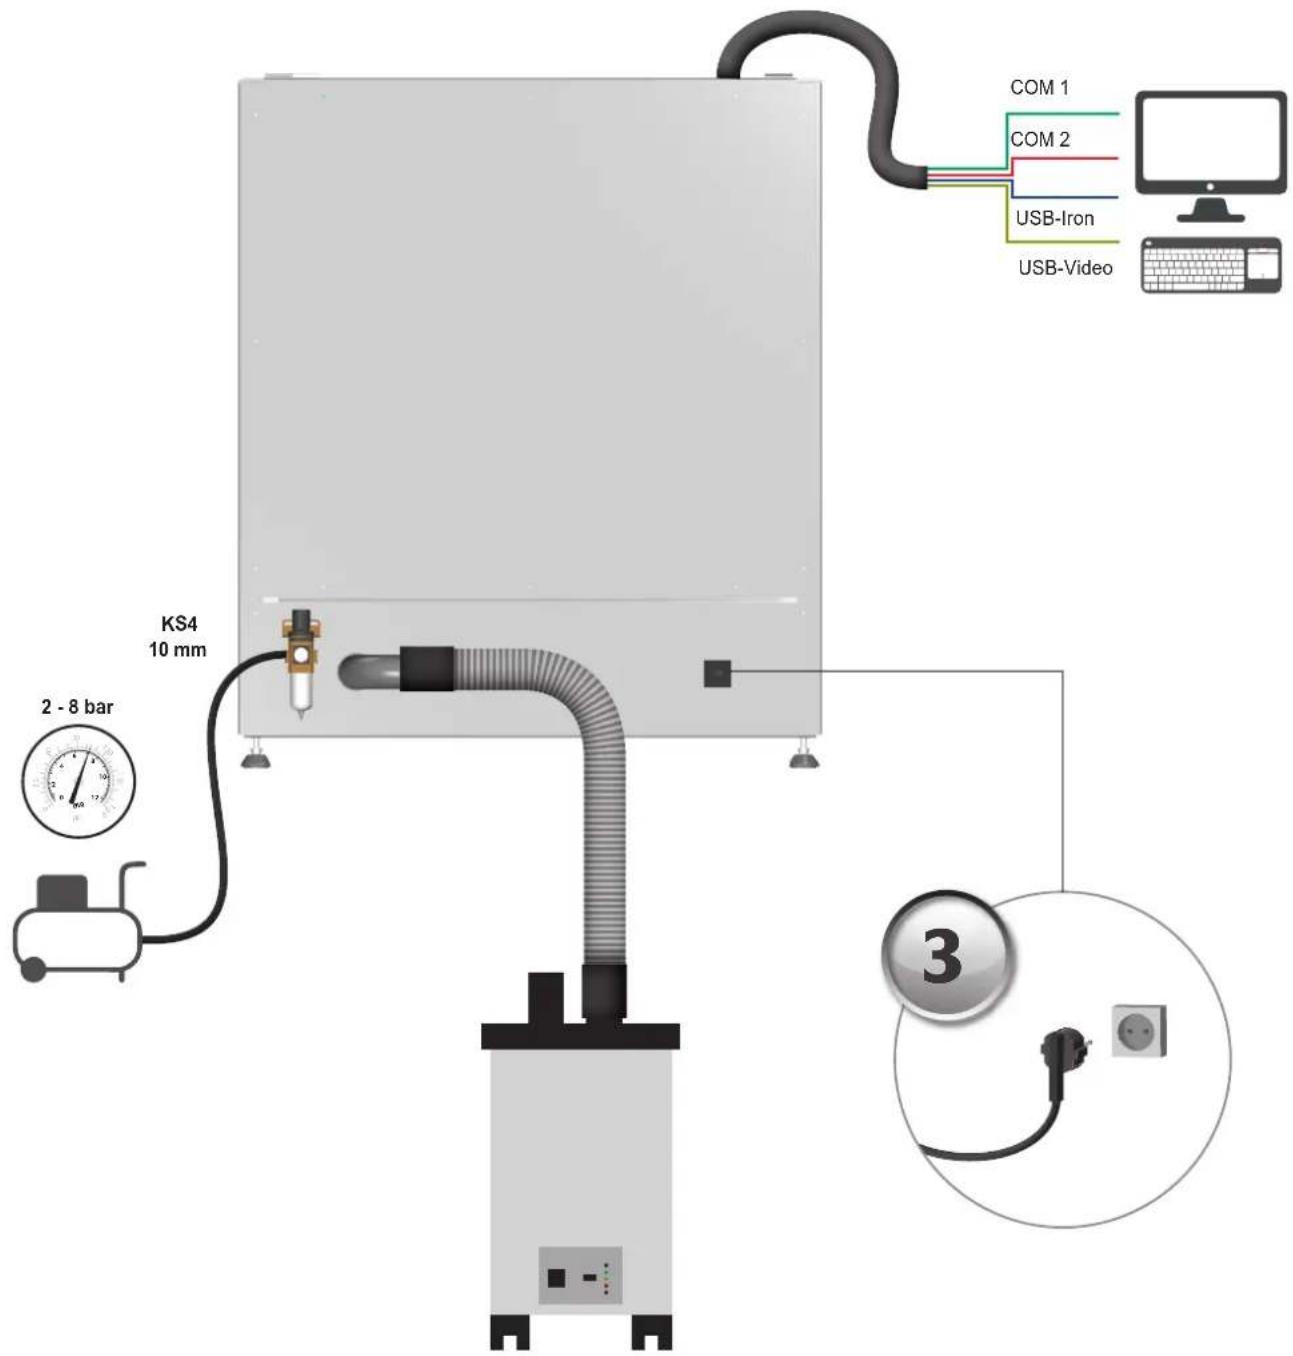
- Take care when fitting the compressed air connection. Depressurise the hose. When soldering, hold the coupling firmly as the coupling socket can spring out of your hand.
WARNING
Electrical shock
Protect yourself against electric shocks.
- Do not use the soldering tool in a damp or wet environment.
- Before doing any work on the machine, pull the plug out of the socket. Leave the unit to cool down.
Connecting the control unit incorrectly poses a risk of injury due to electric shock and can damage the device.
- Carefully read the attached safety information, the safety information accompanying these operating instructions as well as the operating instructions for your control unit before putting the control unit into operation and observe the safety precautions specified therein.
- Only connect WELLER tools.
If the device is faulty, active electrical conductors may be bare or the PE conductor may not be functional.
• Repairs must always be referred to a Weller-trained specialist. - If the electrical tool's power supply cord is damaged, it must be replaced with a specially prefabricated power supply cord available through the customer service organisation.
WARNING
Fire hazard
- Keep all combustible objects, liquids or gases well away from the hot soldering tool.
- Once switched on, never leave the tool unattended.
WARNING
Risk of burns
The soldering tip becomes very hot during soldering work. There is a risk of burns from touching the tips. Tools may still be hot long after they have been switched off.
- Do not touch the hot tools and workpieces.
- Only replace solder tips when cold
- Do not touch the housing until it has cooled down.
After the soldering process, the soldering tool and the workpiece holder are still hot.
- Soldering profiles must be configured so that the printed circuit boards are cold on removal.
- Wear gloves when removing the printed circuit boards. Care must be taken to ensure that hot printed circuit boards are beyond the reach of third parties after removal.
WARNING
Danger of poisoning
- The soldering process can produce hazardous solder vapours. Hazardous vapours and other aerosols may be released when printed circuit boards are heated and/or overheated. Use a solder fume extraction unit.
- When working with adhesives, special attention must be paid to the warning information provided by the adhesive manufacturer.
- Avoid skin contact with the adhesive or the solder paste. Skin contact with these substances can have adverse health effects.
The power cable must only be plugged into the power socket or adapter approved for this purpose. Check to see if the mains voltage matches the ratings on the nameplate. Make sure the machine is switched off before plugging in.
Do not use the cable for purposes other than those for which it is intended. Never carry the unit by the cable. Do not use the cable to pull the plug out of the socket. Protect the cable against heat, oil and sharp edges..
Be alert. Pay attention to what you are doing. Be smart when using the unit. Do not use the soldering tool if you are having difficulty concentrating.
Avoid abnormal posture. Arrange your work station in an ergonomically correct way. Avoid bad posture when using the unit, as this can lead to postural problems.
Use the correct tool. Use only accessories or auxiliary devices which are included in the list of accessories or approved for use by the manufacturer. Use WELLER accessories or auxiliary devices on original WELLER equipment only. The use of other tools and other accessories can cause injury.
Store your soldering tool in a safe place. When not in use, units and tools should be stored in a dry, high or locked area out of the reach of children. Make sure that unused soldering tools are free of voltage and de-pressurised.
Fix the axles in place during transport using cable ties.
Specified Conditions Of Use
The soldering installation may only be used to piston solder assemblies.
This device may only be used at room temperature and indoors. Protect against moisture and direct sunlight.
User groups
Due to differing degrees of risk and potential hazards, several work steps may only be performed by trained experts.
| Work step User groups | |
| Operation | Non-specialists (semi-skilled, experienced) |
| Machine operation, Fault clearance, Equipment | Technical trainees under the guidance and supervision of a trained expert |
| Installation., Starting up the device, Cleaning, Maintenance, Maintenance, Working on pneumatic equipment | Specialist personnel with technical training |
| Working on electrical equipment Electricians | Technical trainees under the guidance and supervision of a trained expert |
Default maintenance intervals Safety expert
Operating controls

① ON / OFF
② Fault
③ Stop
4 Start
Starts the process of the currently loaded WinControl program. After stopping, the machine starts the stopped movement in the exact place where it was interrupted, provided machining has not been ended via the operating interface.
⑤ Key-operated switch
You can use the key-operated switch to override the safety door switches during setup
⑥ Power Activation of the power amplifier for axle control and control voltage.
⑦ Emergency stop Abortion of all functions; the fault status can still be checked using the software.
Care and maintenance
WARNING

Before doing any work on the machine, pull the plug out of the socket. Leave the unit to cool down.
Daily
| Soldering tip Check for wear | Replace if necessary |
| Cleaning station Beat the brushes | Empty the collection tank |
| Solder wire guide tube Check for wear | Replace if necessary |
| Weekly | |
| Solder wire guide tube Clear | Replace if necessary |
| Every 3 months | |
| Soldering tip Check the temperature | necessary |
| Heating element Replace if necessary | |
| Solder wire feed system Visual check for wear on the drive wheels under pressure or the drive shaft | |
| Drive Check the switch point of the soldering end switch | |
Axles
| Every 500-1000 operating hours | Lubricate the axles (Ex works with sodium soap grease GP00/000F-20 in accordance with DIN 5105022) |
| Every 100-200 operating hours | If oil is used, relubricate. |
| The operating hours can be displayed in WinControl. | |
Check all connected cables and hoses on a regular basis. If power tools are damaged, they must be immediately removed from use.
Repairs and works specified in these Instructions may only be performed by qualified authorised staff.

Use original replacement parts only.
Warranty
Claims by the buyer for physical defects are time-barred after a period of one year from delivery to the buyer. This does not apply to claims by the buyer for indemnification in accordance with §§ 478, 479 BGB (German Federal Law Gazette). We shall only be liable for claims arising from a warranty furnished by us if the quality or durability warranty has been furnished by use in writing and using the term "Warranty".
The warranty shall be void if damage is due to improper use and if the device has been tampered with by unauthorised persons.
For more information please visit www.weller-tools.com.
Technical Data
| Piston soldering robot / Soldering machine | WTBR-1000 | |
| Dimensions L x W x H | (mm)(inch) | 1100 x 900 x 950 |
| Weight | (kg) | 205 |
| Mains supply voltage | (V / Hz) | 200-230 / 50-60100-120 / 50-60 |
| Power consumption | (W) | max. 1500 |
| Compressed air connection oil-free, dry compressed air | bar 5,5 - 8 | |
| Work area | (mm)(inch) | 390(2 x 195) x 205 x 100 |
| Positioning range | (mm) | Axles:x: 400y: 300z: 100t: 270° |
| Soldering iron | HER 120 | |
| Power consumption | (W) | 120 |
| Temperature range | (°C) | 50 - 450 |
| Stroke Pneumatic module | (mm) | 50 |
| Work angle | -30° - +30° | |
| Solder wire feed system | ||
| Solder wire diameter | (mm) | 0,5 - 1,5 |
| Speed | (mm /s) | 0 - 24 |
| Power consumption | (W) | 1,7 |
| Planetary gear reduction | 1:166 | |
| Stroke Pneumatic module | (mm) | 30 |
| Work angle | -30° - +30° | |
Subject to technical alterations and amendments.
Symbols

Caution! / Warning!

Warning! Risk of burns!

Warning against hand injuries

Warning against cutting injuries

Read the operating instructions!

Before performing work of any kind on the unit, always disconnect the power plug from the socket.

ESD-compatible design and ESD-compatible workstation

CE mark of conformity

Disposal
Do not dispose of electric tools together with household waste material! In observance of European Directive 2012/19/EU on waste electrical and electronic equipment and its implementation in accordance with national law, electric tools that have reached the end of their life must be collected separately and returned to an environmentally compatible recycling facility.
Original declaration of conformity
Piston soldering robot / Soldering machine WTBR-1000
We hereby declare that the products described herein comply with the following guidelines:
2006/42/EG, 2014/30/EU
Applied harmonised standards:
Global Quality Manager Managing director
Authorised to compile technical documentation.
Weller Tools GmbH
Global Quality Manager
B.Frühwald
Director general
Global Quality Manager

B.Frühwald
Gerente
Boutsoldeerobot WTBR-1000
Global Quality Manager VD
① ON / OFF
② Fault
③ Stop
4 Start
① ON/OFF
② Fault
③ Stop
4 Start
Global Quality Manager
B.Frühwald
Διευθύνων Σύμβουλος
Global Quality Manager Jednatel
① ON / OFF
② Fault
③ Stop
4 Start
⚠ BRĪDINĀJUMS | Apdegumu risks
Global Quality Manager
Управител
① ON / OFF
② Fault
③ Stop
4 Start
Global Quality Manager Director
Global Quality Manager
マネージングディレクター
技術文書の作成が認可される。
Weller Tools GmbH
Apex Tool Group, LLC
1000 Lufkin Road
Apex, NC 27539
Tel +1 (866) 498-0484
Fax +1 (919) 387-2639
CHINA
Apex Tool Group
2nd Floor, Area C, 177 Bi Bo Road
Pudong New Area
Shanghai, 201203 P.R.C
Tel: +86 (21) 60880320



Brand : Weller
Model : SPI 41
Category : Welding machine