
IVW6013A - Dishwasher INVENTUM - Free user manual and instructions
Find the device manual for free IVW6013A INVENTUM in PDF.


| Product Type | Built-in dishwasher |
| Brand | Inventum |
| Model | IVW6013A |
| Height (cm) | 84.5 |
| Width (cm) | 59.8 |
| Depth (cm) | 60 |
| Weight (kg) | 45 |
| Power supply | 220-240 V, 50 Hz, 10 A |
| Energy class | E |
| Number of place settings | 12 |
| Noise level (dB) | 46 |
| Wash programs | 5 including Eco, Intensive, Quick, Delicate, Pre-wash |
| Drying function | Condensation drying |
| Delayed start | Yes, up to 24h |
| Anti-overflow system | Yes |
| Installation type | Built-in under counter |
| Tub material | Stainless steel |
| Routine maintenance | Cleaning the filter and spray arms |
| Repairability index | Available on request |
Frequently Asked Questions - IVW6013A INVENTUM
User questions about IVW6013A INVENTUM
0 question about this device. Answer the ones you know or ask your own.
Ask a new question about this device
Download the instructions for your Dishwasher in PDF format for free! Find your manual IVW6013A - INVENTUM and take your electronic device back in hand. On this page are published all the documents necessary for the use of your device. IVW6013A by INVENTUM.
USER MANUAL IVW6013A INVENTUM
natural_image
Front view of a white stainless steel kitchen appliance with control panel and display screen (no visible text or symbols)natural_image
Simple line drawing of a faucet with a valve and handle, no text or symbols present4 • Nederlands
natural_image
Close-up of mechanical components with a black curved arrow indicating direction (no visible text or symbols)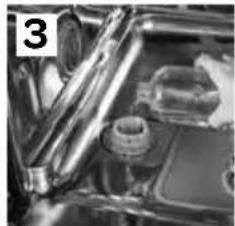
natural_image
Close-up of mechanical components with no visible text or symbols
natural_image
Close-up of mechanical components with no visible text or symbols
ZOUTVERBRUIK INSTELLEN
natural_image
Close-up of a hand inserting a device into a mobile phone (no visible text or symbols)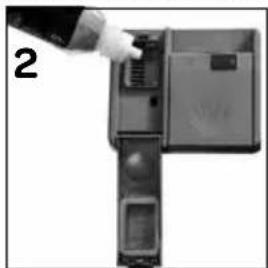
natural_image
Close-up of a hand inserting a device into a container (no visible text or symbols)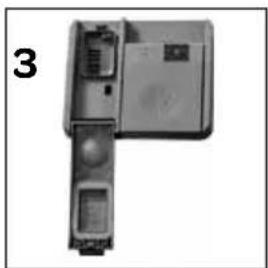
natural_image
Exterior view of a mechanical device with ports and a labeled part (no readable text or symbols)Let op!
natural_image
Two views of a gray plastic device with floral patterns, shown from top and side (no text or symbols visible)natural_image
Diagram of a hand holding a metal rod connected to a grid structure (no text or symbols visible)
natural_image
Diagram of a mechanical assembly with wheels and a central component, no visible text or symbolsDE ONDERSTE KORF
natural_image
Two isometric wireframe views of a shopping cart with internal compartments and wheels (no text or symbols)14 • Nederlands
Bovenste korf

natural_image
Diagram of a grid layout with vertical columns and horizontal bars, no visible text or symbolsOnderste korf

natural_image
Two grayscale images showing a food basket with various kitchen utensils and cooking pots, no text or symbols visible.natural_image
Abstract 3D rendering of stacked spherical objects with a black 'X' symbol overlay (no text or symbols present)
natural_image
Illustration of industrial machinery components with no visible text or symbols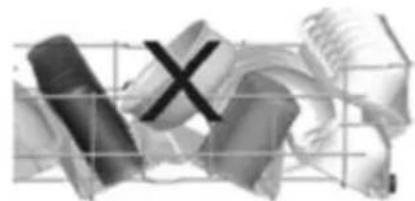
natural_image
Abstract grayscale graphic with intersecting lines and a grid overlay (no text or symbols)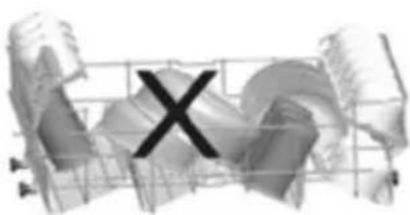
natural_image
Abstract 3D wireframe structure with a large 'X' symbol overlay (no text or symbols present)natural_image
Diagram of a device with directional arrows and a numbered circle (1), no readable text or symbols present.

natural_image
Diagram of a mechanical component with labeled parts (3 and C), no readable text or symbols present.
natural_image
Diagram of a mechanical or electrical component with directional arrows, no visible text or symbols7 storingen
- Safety and installation instructions page 24
Delivery page 24
Installation page 24
Positioning the appliance page 24
Connecting to the water tap and drainage page 25
Electrical connection page 26
In daily use page 26
Product fiche page 29
-
Description of the appliance page 31
-
Before first use page 32
Filling the salt reservoir page 32
Setting the salt consumption
Filling with rinse aid and setting the consumption
Dishwasher detergents
page 34
- Loading your dishwasher
Adjusting the height of the upper basket
Different ways of loading the baskets
- Setting the dishwasher
Switching the dishwasher on and off
Ending or changing a program
Program selection table
- Cleaning & maintenance
Cleaning the filters
Cleaning the spray arms
- Troubleshooting
What to do if...
Guarantee & after sales service
page 32
page 33
page 35
page 35
page 36
page 37
page 37
page 37
page 38
page 39
page 39
page 39
page 40
page 41
page 42
NEDERLANDS
DEUTSCH
FRANÇAIS
1 safety and installation instructions
- Please read these instructions before operating the appliance and retain for future use.
DELIVERY
- Check for any damage to the packaging or the appliance during transportation. Never use a damaged appliance, but contact your supplier.
- Dispose the packing materials according to local regulations.
- Keep the material out of reach of children. Danger of suffocation.
INSTALLATION
- This appliance should be installed and repaired by an authorised service only.
- Place and connect the appliance according to the installation regulations.
- Make sure that while placing the appliance is not plugged in.
- Check whether the indoor electrical fuse system is connected according to the regulations.
- All electrical connections must match the values indicated on the rating plate.
- If the connecting cable is damaged, it may only be replaced by the service organisation of the manufacturer or equivalently qualified persons.
- Pay special attention and be sure that the appliance is not placed on the electricity supply cable.
- Never use an extension cord or a multiple socket for making a connection. The plug should be comfortably accessible after the appliance has been installed.
- After installing the appliance to a suitable place, run it unloaded for the first time.
POSITIONING THE APPLIANCE
- When determining a place to position the dishwasher, make sure you choose a place where you can easily load and unload your dishes.
- Do not place the appliance in any location where there is the probability for the room temperature to fall below 0°C.
- Position the appliance close to a water tap or drain and socket. Take into consideration that the connections will not be altered
when they are made.
- Do not grip the appliance by its door or control panel in order to move it.
- Make sure that the water inlet and outlet hoses do not get stuck while positioning the appliance.
- Adjust the appliances adjustable feet to ensure the appliance is standing level and balanced. Proper positioning of the appliance ensures problem-free opening and closing of the door.
- If the door of your appliance does not close properly, check if the appliance stands level on the floor. If not, adjust the adjustable feet and ensure its stable position.
CONNECTING TO THE WATER TAP AND DRAINAGE
Make sure that the indoor plumbing is suitable for installing a dishwasher. Also, we recommend that you fit a filter at the beginning of the water supply in your house to avoid any damage to your appliance because of any contamination (sand, clay, rust, etc.)
that might occasionally carried in through the mains water supply.
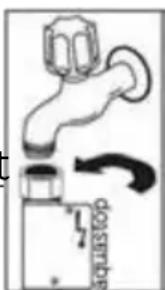
- Always use the new water inlet hose supplied with your appliance. If you are using the new water inlet hose, run water through it for a while before making the connection.
- Connect the water inlet hose directly to the water inlet tap. The pressure supplied by the tap should be at a minimum of 0,03 Mpa and at a maximum of 1 Mpa. If the water pressure is above 1 Mpa, a pressure-relief valve should be fitted inbetween.
• After the connections are made, the tap should be turned on fully and checked for water leakage. - The appliance is supplied with an double-walled aquastop. The system automatically cuts off the water supply if the water inlet hose starts to leak and the space between the walls is filled with water. Make sure not to cut into the aquastop or that it gets twisted or stuck.
Warning: When a drain hose longer than 4 m is used, the dishes might remain dirty. In that case Inventum will not accept responsibility.
- The plug of the appliance must be connected to an earthed socket. Make sure that the voltage and the frequency values for the current in the home correspond to those on the rating plate. Inventum is not responsible for damage when using the appliance with a socket that is not earthed.
- The electrical installation in the home must be provided with a fuse of 16 Amp. The dishwasher is designed for connection to 220 -240 V \~50 Hz. The appliance should not be plugged in during positioning. Always use the supplied plug.
- The appliance's electrical cable should only be replaced by an authorised service or an authorised electrician. Failure to do so may lead to accidents.
- For safety purposes, always make sure to disconnect the plug when a wash program has finished. In order not to cause an electric shock, do not unplug when your hands are wet.
- When disconnecting your appliance from the mains supply, always pull from the plug. Never pull the cord itself.
IN DAILY USE
- This appliance is intended to be used in household and similar applications such as:
- in shops, offices or other working environments;
- farm houses;
- by client in hotels, motels and other residential type environments;
- bed & breakfast type environments.
- An electrical appliance is not a toy, and should therefore always be placed outside the reach of children. Children are not always able to understand potential risks. Teach children a responsible handling of electrical appliances.
- This appliance shall not be used by children from 0 to 8 years. This appliance can be used by children over the age of 8 and above if they are continuously supervised. This can be used by people with reduced physical, sensory or mental capabilities or lack of experience or knowledge, if they have been given supervision or instruction concerning use of the appliance in a safe way and understand the hazards involved. Keep the appliance and its cord out of reach of children aged less than 8 years.
- Cleaning and maintenance shall not be made by children.
• Children must not play with the appliance.
- For your own safety, only use the accessories and spare parts from the manufacturer which are suitable for the appliance.
- This appliance must be earthed! Earthing reduces the risk of an electric shock in the event of errors and faults. This appliance is fitted with an earthed power lead and plug. Only insert the plug into an earthed wall socket that has been fitted in compliance with the local electrical regulations!
- Incorrect connection of the power lead can result in a lifethreatening situation. In case of doubt, contact a qualified electrician or service technician. Do not make any changes to the plug. If the plug does not fit into the wall socket, contact a qualified electrician to change it.
- Do not place heavy objects on the opened door. Do not stand on the door. The appliance may tip over, which can result in damage to the appliance.
- Do not put any chemical dissolving agents such as solvents in the appliance. There is risk of explosion.
- Do not clean unsuitable plastic dishes in the appliance, unless they bear a mark indicating that they are dishwasher-safe. Where dishes do not bear any such marking, always follow the manufacturer's instructions.
- Only use detergent, rinse aid and salt that is intended for use in a dishwasher. Inventum will not be responsible for any damage that might occur in your appliance otherwise.
- Keep the detergents out of reach of children.
- Keep detergents and rinse aids out of the reach of children. Keep children out of reach of the dishwasher when open. There may still be some cleaning agent present in the appliance. If swallowed, consult a doctor immediately and take the packaging with you.
- Keep the door closed. You can trip over an open door.
- Do not bend the inlet and drainage hoses or power lead excessively during installation. Take care to ensure they do not become stuck.
- Avoid contact with the skin and eyes. Keep children away from the dishwasher when the door is open.
- Make sure that all loose components in the dishwasher have been fitted correctly. Do not open the door during the cycle.
- This appliance is intended solely for washing dishes. Use the
appliance only in a frost-free room!
- Remove the door or deactivate the lock when disposing of the appliance. Children are known to have gotten themselves locked in old appliances. To forestall such a situation, break your appliance's door lock and tear off the electrical cables.
- Do not allow children to play with the appliance.
- Check whether the detergent reservoir is empty following the end of the wash cycle.
- Fill the salt and rinse aid reservoirs prior to first use and when the indicators light up. Set the salt consumption before use.
- Disconnect the appliance from the power supply when cleaning or performing repairs. Remove the plug from the socket or turn off the switch in the fuse box.
- Long and/or sharp items of cutlery, such as carving knives, should be placed with the points facing down in the cutlery basket or placed horizontally in the upper basket or cutlery drawer.
- Dispose of the packaging materials in a responsible manner and in accordance with government regulations.
- This appliance must only be used for its intended purpose. If the appliance is used for other purposes than intended, or is it not handled in accordance with the instruction manual, the full responsibility for any consequences will rest with the user. Any damages to the product or other things are not covered by the warranty.
- Do not put any items into your appliance which are not suitable for dishwashing. Also, do not fill any basket above its capacity. Inventum will not be responsible for any scratch or rust to form on the inner frame of your appliance due to basket movements otherwise.
- Legislation requires that all electrical and electronic equipment must be collected for reuse and recycling. Electrical and electronic equipment marked with the symbol indicating separate collection of such equipment must be returned to a municipal waste collection point.
| INVENTUM | |
| Model IVW6013A | |
| Number of place settings 12 place settings | |
| Energy efficiency class * A++ | |
| Annual energy consumption [Aec] kWh ** 258 | |
| Energy consumption standard cycle [Et] 0,90 | |
| Power consumption in OFF mode [Po] 0,50 | |
| Power consumption in standby mode [PI] 1,00 | |
| Annual water consumption ** 2520 | |
| Drying efficiency class *** A | |
| Standard program ECO 50°C | |
| Program duration standard **** [min] 162 | |
| Noise level dB(A) 45 | |
| Type of appliance built in | |
| Execution | |
| Fully integrated ● | |
| Color of control panel dark grey | |
| Number of spray arms | 2 |
| Upper basket adjustable height | ● |
| Maximum amount of place settings | 12 |
| Half load | ● |
| Timer [hours] | 1-19 |
| Type of display | LED display |
| Aquastop | ● |
| Type of drying system | Turbo |
| Dimensions | |
| Built in height [mm] | 820-870 |
| Built in width [mm] | 600 |
| Built in depth [mm] 570 | |
| Heigth of unit door (min./max. mm) | 647-717 |
| Weight of unit door (min./max. kg) | 3-8 |
| Technical specifications IVW6013A | |
| Dimensions [mm] (bxdxh) 598 x 550 x 820 | |
| Nett weight [kg] 38 | |
| Gross weight [kg] 40 | |
| Power consumption [W] 1900 | |
| Rated voltage [V] / frequency [Hz] 220-240/50 | |
| Length of power cord [m] 1,8 | |
| Type of plug EU/TR | |
| Type of supply hose connection 3/4 inch inner thread | |
| Position supply hose right rear | |
| Lenght of supply hose [m] 1,47 | |
| Position of outlet hose right rear | |
| Length of outles hose [m] 2,00 |
* A+++ (highest efficiency) to D (lowest efficiency).
** Based on 280 standard cleaning cycles. Actual annual energy/water consumption depends on the actual frequency of usage.
*** A (highest efficiency) to G (lowest efficiency).
**** This program is suitable for cleaning normally soiled tableware and that it is the most efficient program in terms of its combined energy and water consumption for that type of tableware.
Note: the above values have been measured in accordance with standards under specified operating conditions. Results may vary greatly according to quantity and the dishes, water hardness, amount of detergent, etc.
2 description of the appliance

- On/off button - when the on/off button is pressed the indicator light Ready (10) lights up.
- Display - shows the remaining time of the program and the timer.
- Program selector button - select the desired washing program with this button - P1-P9.
- Timer button - press this button to delay the start of the program at a maximum of 19 hours. Each press of the button changes the delay time with 1 hour. Press the button again after you have selected the 19 hour delay to cancel the delay time. Close the door to activate the delayed time. To select a different delay time, press the timer button and select a different delay time. As soon as the delayed time has passed the dishwasher will start the selected washing program.
- Tablet detergent button 3-in-1 - press the tablet detergent button when you use a combined detergent that include salt and rinse aid, such as 3-in-1 tablets.
- Prewash button with indicator light - press the button Prewash to improve the washing performance and select a washing program. The selected washing program takes longer because of the Prewash and the temperature can change. Note: When a program, which is not compatible with the pre-wash program, is selected, a buzzer sound is heard indicating that the selected program is nog compatible with the pre-wash option. Note: If you only want to pre-wash, please select the prewash program with the program selector button.
- Half load button - Using this function you can choose three types of washing when the dishwasher is not full. Just the lower basket, just the upper basket or both baskets.

If the dishwasher is not fully loaded and you want them washed, choose a program with half load. If you have dishes in both baskets press the button till both lights are on.
If the dishes are only in the upper basket, press the button till just the top light is on. Make sure there are no dishes in the lower basket.
If the dishes are only in the lower basket, press the button till just the bottom light is on. Make sure there are no dishes in the upper basket or cutlery drawer.
- Control lamp for softening salt - the dishwasher checks if there is enough salt available. If not, the control lamp lights up and you need to refill the salt reservoir.
- Control lamp for rinse aid - the dishwasher checks if there is enough rinse aid available. If not, the control lamp lights up and you need to refill the rinse aid reservoir.
-
Indicator light Ready - when the dishwasher has finished washing and drying this indicator light lights up. A buzzer will also sound five times to indicate the program is finished.
-
Upper basket
- Upper basket track latch
- Upper spray arm
- Filters
- Lower spray arm
- Lower basket
- Rating label
- Control panel
- Detergent and rinse aid reservoir
- Cutlery basket
- Salt reservoir

3
before first use
Prior to using the machine for the first time please check whether the electricity and supply water specifications match the values indicated by the installation instructions for the appliance.
Remove all packaging materials inside the machine.
Fill the salt reservoir and fill up with water until it almost overflows. Set the water hardness setting.
Fill the rinse aid reservoir.
FILLING THE SALT RESERVOIR
For a good washing result, the dishwasher needs soft, i.e. less calcareous water. Otherwise, white lime residues will remain on the dishes and the interior of the dishwasher. This has a negative effect on your applinace's washing, drying and shining
performance. For this purpose, dishwasher salt is used.
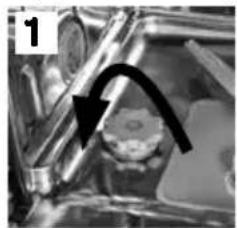
- Remove the lower basket and unscrew the cap of the salt reservoir (1 and 2).
- Fill the reservoir before first use with 1 litre of water (3). Place a funnel into the opening and fill with salt till the overflow level (4).
It is normal for a little water to flow out of the opening when doing this.
- Screw the cap back on firmly.
ATTENTION!
- Remove any spilled salt and run a full program to prevent corrosion to the bottom.
- Refill the salt reservoir when the indicator light of the salt reservoir lights up.
natural_image
Close-up of a mechanical component with a black arrow indicating direction (no visible text or symbols)
natural_image
Close-up of mechanical components with no visible text or symbols
natural_image
Close-up of mechanical components with no visible text or symbols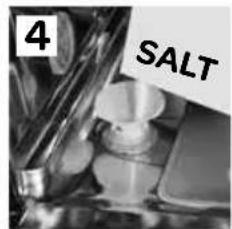
SETTING THE SALT CONSUMPTION
To find out the water hardness level in your area, contact your local water company. Adjust the salt consumption according to the table on the next page.
Note! Hardness level is adjusted to level 3 as a factory setting.


- Press the program selector button and keep it pressed down while the dishwasher is not on (3).

In the meanwhile switch on the dishwasher by pressing the On/Off button (4).

- Keep the program selector button (2) pressed down until SL appears brief in the display.

After the indicator lights (2) lit up, release the program selector button (3). The control panel shows the latest ed water hardness setting.

- Set the level of water hardness by pressing the program selector button (3). Use the table of water hardness levels on the next page.

After adjusting the level of water hardness, press the On/Off button (1) to confirm and store the setting.
Table of water hardness level settings
| Water hardness level | German hardness dH | French hardness dF | British hardness dE | Hardness level indicator |
| Display shows | ||||
| 10-50 | 90-6L1 | |||
| 26-111 | 0-207-14L2 | |||
| 312-17 | 21-3015-21 | L3 | ||
| 4 | 18-22 | 31-40 | 22-28 | L4 |
| 5 | 23-3141-55 | 29-39 | L5 | |
| 632-50 | 56-90 | 40-63 | L6 |
FILLING WITH RINSE AID AND SETTING THE CONSUMPTION
Rinse aid is used to prevent traces of water droplets being left on the clean dishes. It also increases the drying performance, since the water drains off more easily. Only use rinse aid which is designed for use in dishwashers.
- The rinse aid reservoir is located on the inside of the door, alongside the detergent reservoir.
- Open the lid of the rinse aid reservoir (1).
• Fill the rinse aid reservoir until the MAX-level (2). Be careful not to overfill and wipe up any spills. Close the lid.
• The rinse aid level can be adjusted between the setting 1 and 5. The factory setting for rinse aid is level 4.
In order to change the rinse aid level, follow the below steps before turning on the machine: - Press the program selector button and keep it pressed down while the dishwasher is not on.
- In the meanwhile switch on the dishwasher by pressing the On/Off button.
- Keep the program selector button pressed down until rA disappears from the display.
• The machine will display the current setting. - Set the level of rinse aid by pressing the program selector button. Use the table settings on the next page..
• After adjusting the rinse aid level press the On/Off button to confirm and store the setting.
You need to increase the level of rinse aid when water stains form on your dishes after a wash program. Decrease it when strips or blue stains form on the dishes. Keep adjusting the level until the dishes are streak-free when you take them out of the dishwasher.

natural_image
Close-up of a hand inserting a device into a mobile phone (no visible text or symbols)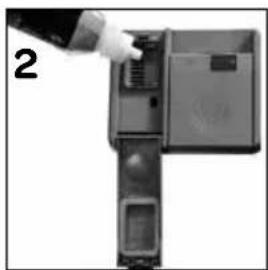
natural_image
Close-up of a hand inserting a small electronic device into a container (no visible text or symbols)
natural_image
L-shaped electronic device with ports and a small screen, no visible text or symbolsAttention!
- Refill the rinse aid reservoir when the rinse aid indicator lights up.
- Do not overfill the rinse aid reservoir. The reservoir will overflow.
- Spilled rinse aid must be cleaned up. Otherwise they may lead to leakage as a result of extreme foaming.
| Level Brightener Dose Display shows | ||
| 1 | Rinse-aid not dispensed | r1 |
| 2 | 1 dose is dispensed | r2 |
| 3 | 2 doses are dispensed | r3 |
| 4 | 3 doses are dispensed | r4 |
| 5 | 4 doses are dispensed | r5 |
DISHWASHER DETERGENTS
Use a detergent specifically designed for use in domestic dishwashers. You can find it in a powder, gelcapsules and tablets. Detergent must be placed into the reservoir before starting the dishwasher. Keep the detergents stored in a cool, dry place and out of reach of children. If swallowed, consult a doctor immediately and take the packaging with you.
Do not fill more detergent than required in the reservoir; otherwise it may cause scratches on your glasses as well as lead to a poorly dissolved detergent.

natural_image
Exterior view of a gray electronic device with two buttons and a display (no visible text or symbols)
natural_image
Exterior view of a modern office building (no signage)- Push the latch (1) to open the detergent reservoir. The detergent reservoir has level lines inside. It is possible to measure the right amount of detergent using these lines.
- The reservoir can contain a maximum of 40 grams of detergent. Fill the reservoir with 25 grams of detergent when the dishes are heavily soiled or with 15 grams if they are less soiled. Pour 5 grams in the compartment when there are dried food wastes in the dishes and when the dishwasher is overly loaded.
- Close the lid by sliding it in place, close the door and start the dishwasher.
- Depending on the water hardness and the amount of dirt on the dishes add extra detergent.
Detergent manufacturers also produce combined detergents called 2-in-1, 3-in-1, 5-in-1 etc. Generally, combined detergents produce sufficient results under certain usage conditions only. Observe the instructions on packaging when using a combined product. Never put the detergent tablet into the interior section or in the cutlery basket of the dishwasher. Always put the tablet into the detergent reservoir.
When using short wash cycles it is possible the tablet does not dissolve fully. Therefore use detergent tablets only in combination with long wash cycle, so that the detergent tablet has time to fully dissolve.
4 loading your dishwasher
Properly placing your dishes into the dishwasher has a positive effect on the energy consumption and the washing and drying performance.
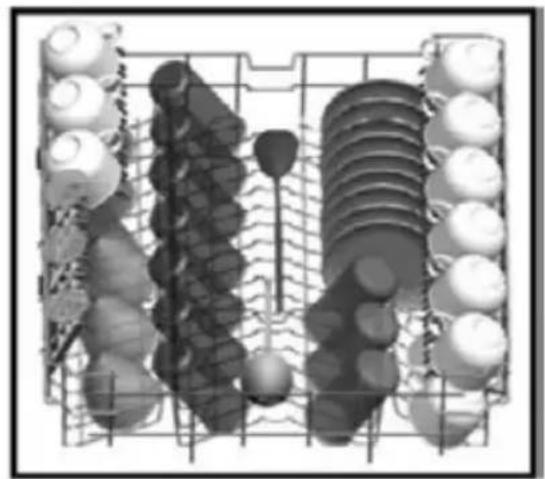
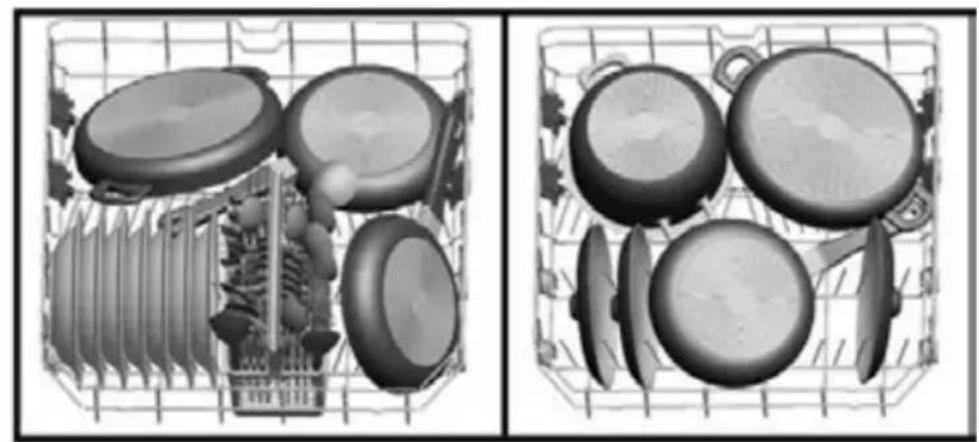
The lower basket can be loaded with large items such as pots with long handles, pans, lids, plates, salad bowls and the cutlery basket.
The upper basket is for cups and saucers, mugs, small bowls and glasses. Wine glasses and long-stem glasses must be placed against the edge of the basket, rack or glass supporter wire and not against other items. Long, small cooking utensils, such as wooden spoons, should be placed lying down in the middle of the upper basket.
The cutlery basket is designed for cutlery. Sharp items of cutlery, such as knives and forks should be placed with their sharp points facing down. Place the cutlery piece by piece in a compartent to ensure the spray arms can reach every part.
WARNING: place your dishes into your dishwasher in a way that they will not prevent the upper and lower spray arms from spinning.
The upper basket has height adjustable racks. They are designed to increase the capacity of the upper basket. You can place your glasses and cups on the racks. You can adjust them in height. Thanks to this feature, you can place different sizes of glasses under the racks. In addition, you can place long forks, knives and spoons on these racks laterally, so that they do not block the spinning of the spray arm.
IVW6013A
2 adjustable heights

Different ways of loading the baskets are shown on the next pages.
ADJUSTING THE HEIGHT OF THE UPPER BASKET
The upper basket is in the upper position. When it is in this position, you can place large items, such as pots and large plates, on the lower basket. When the upper basket is in the lower position, you can place large plates in the upper basket. Adjust the height of the upper basket only when it is empty.
Use the runners to adjust the height of the basket. Open the basket track latch by turning them sideways. Take the basket out of the guiding rails. Place the other runners in the guiding rails and push the basket back in the rails. Close the track latches. You have now placed the upper basket in the lower position.

natural_image
Illustration of a hand holding a tool next to a wire cage (no text or symbols visible)
natural_image
Diagram of a mechanical assembly with wheels and a conveyor belt, showing motion direction (no text or symbols)THE LOWER BASKET
The lower basket has folding racks. This makes it easier for you to place more large items if you don't have many plates to clean. If needed, each part can be folded separately, or all of them can be folded and larger spaces can be obtained. You can uses the folding racks by raising them upwards, or by folding them.

natural_image
Two 3D wireframe models of a shopping cart with internal compartments and wheels, no text or symbols visible.Upper basket

natural_image
Top-down architectural or engineering diagram showing a grid layout with multiple vertical structures and circular elements (no text or labels)Lower basket

natural_image
Two grayscale images showing a grid of kitchen utensils, one with a fan and plate, the other with six panes (no text or symbols visible)Upper and lower basket faulty loading

natural_image
Abstract graphic with a black 'X' symbol overlaying a grid of circular shapes (no text or symbols)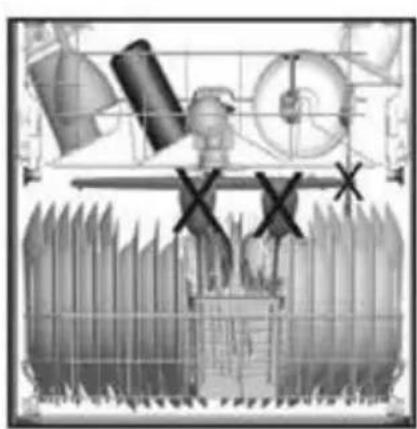
natural_image
Illustration of industrial machinery components with no visible text or symbols
natural_image
Abstract grayscale graphic with intersecting lines and a grid overlay (no text or symbols)
natural_image
Abstract 3D wireframe structure with a large 'X' symbol overlay (no text or symbols present)WARNING: place your dishes into your dishwasher in a way that they will not prevent the upper and lower spray arms from spinning. Make sure that no objects are sticking through the bottom of the cutlery basket.
SWITCHING THE DISHWASHER ON AND OFF

- Switch the dishwasher on by pressing the On/off button (1).
- Select the desired program with the program selector knob (2).
- If you prefer, you can choose an additional function (3), like prewash.
- Close the door and the program starts automatically.
The dishwasher remains silent for about 40-50 minutes whilst drying. When the buzzer sounds five times, the program is finished.
- Open the door and switch the dishwasher of with the On/off button (1).
NOTE! You can slightly open the door and wait a few minutes before unloading the dishwasher. The dishes and cutlery will still be very hot and may break as a result of the heat. Moreover, the dishes dry better when allowed to stand for a few minutes.
ENDING OR CHANGING A PROGRAM
If you would like to end a program of change a program while a washing cycle is already running.
- Carefully open the door and select another program with the program selector knob (2).
- Close the door and the new program will resume the course of the old program.
NOTE: open the door slightly when you want to open the door in order to stop the washing program before it is completed to avoid water spillage.
If you would like to end a program or stop the dishwasher:
- Open the door slightly and keep the program selector button (2) pressed for 3 seconds. The indicator light of the program turns off and the indicator light Ready blinks.
- Close the door so the dishwasher can discharge the water in it for about 30 seconds
- As soon as the program is ended, the buzzer will sound five times and the indicator light Ready is lit.
- Open the door and switch the dishwasher off with the On/off button (1) or select another program with the program selector button (2) and turn the dishwasher back on.
| Program Program information Program process Time in minutes | ||||
 P1-intensief P1-intensief | 60-70°C | Automatically adjusts the washing time with temperature and the amount of water by determining the soil level of the dishes. | 111-183 | |
 P2-normaal P2-normaal | 50-60°C 100-127 | |||
 P3-delicaat P3-delicaat | 30-50°C 64-92 | |||
| [1300]P4-hygiène | HYGIENIC - Wash program for heavily soiled dishes which haven't been cleaned immediately. | Pre-wash60°C washCold rinseWarm rinseDryingReady | 123 | |
 P5-snel 55 min P5-snel 55 min | FAST 55 MIN - A short program for dirty dishes, such as casseroles. | Pre-wash60°C washCold rinseWarm rinseDryingReady | 55 | |
| [6038]P6-eco | ECO - Daily program for normally soiled dishes (The program takes a little longer, but uses less water and heats slower which decreases the energy consumption). | Pre-wash50°C washCold rinseWarm rinseDryingReady | 162 | |
| [4808]P7-snel 30 min | FAST 30 MIN - A short program for lightly soiled dishes, such as cups and glasses. | Pre-wash40°C washCold rinseWarm rinseDryingReady | 30 | |
 P8-spoelen P8-spoelen | RINSE - Pre-wash and soaking of leftover foods on dishes that you plan to wash later. | Pre-washReady | 15 | |
| [5K13]Extra hygiène | EXTRA HYGIENIC - Press the button Pre-wash and select the hygienic program (P4). For heavily soiled dishes which haven't been cleaned immediately or which need a hygienic cleaning. | Pre-wash50°C wash70°C washCold rinseLukewarm rinseWarm rinseDryingReady | 161 | |
6
cleaning & maintenance
Cleaning the dishwasher regularly, prolongs the dishwasher's service life.
Check before cleaning the dishwasher if it's is turned off. Unplug the dishwasher and turn off the tap.
Clean the outside of the dishwasher with a damp cloth. To prevent odors from forming within the dishwasher, clean the seals of the door regularly with a soft damp cloth.
To prevent the dishwasher from getting clogged, we advise to clean the dishwasher regularly with a special cleanser. Fill the detergent reservoir with detergent, select a cycle with a high temperature and start the program. If this is insufficient, use a special cleanser for dishwasher and follow the instructions on the packaging.
Clean the filters and the spray arms once a week.
CLEANING THE FILTERS
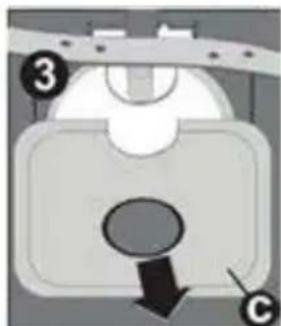
Check once a week if there is any residue on the filters. Remove the filters and clean them thoroughly under the water tap. The filter system consist of three components: the micro filter (2a), the main filter (2b) and the sieve (3c).
- To remove the filters, turn the main filter (2b) anti-clockwise and pull it upwards. The micro filter (2a) is attached to the main filter.
- Pull the main filter from the micro filter and clean both parts with warm water using a dishwashing brush.
- Take the sieve out of the dishwasher and clean it with warm water and if needed a dishwashing brush. Place the sieve back in the dishwasher.
- Place the main filter in the micro filter with the markings allined. Re-fit the filters in the sieve and turn it clockwise to fixe it.

natural_image
Diagram of a device with directional arrows and a numbered label (1), no readable text or symbols present.

natural_image
Diagram of a mechanical component with labeled parts (3 and C), no readable text or symbols present.
- Do not use the dishwasher when there are no filters in place.
- Incorrect fitting of one the filters will result in the dishwasher no longer delivering maximum performance.
- Make sure the filters are clean. This ensures proper functioning of the dishwasher.
CLEANING THE SPRAY ARMS
Check the nozzles of the upper and lower spray arms regularly for waste. Waste can block the nozzles and bearing in the spray arms. Remove the clogging in the spray arms and clean them with warm water.
- Unscrew the nut of the upper spray arm to remove it. Remove the spray arm.
- Remove the lower spray arm by pulling it upwards.
- Clean the spray arm with warm water.
• Make sure that the nut is perfectly tightened when refitting the upper spray arm.

natural_image
Pure diagram of a mechanical or electrical component with no text, numbers, or symbols7 troubleshooting
| FAULTCODE | DESCRIPTION CHECK | |
| Display code | ||
| F5 | Inadequate water supply • Check whether the tap is fully open and there is nothing blocking the water mains. • Close the tap, remove the input hose and check whether it is clogged. • Start the dishwasher again. Contact the service department of Inventum when the error remains. | |
| F3 | Water supply is not stopping. • Close the tap. • Contact the service department of Inventum. | |
| F2 | The waste water can not be discharged. | • The water discharge hose is clogged. • The filters might be clogged. • Turn the dishwasher off. Reset the dishwasher's program and check the filters and the discharge hose. Restart the dishwasher. • Contact the service department of Inventum when the error remains. |
| F8 | The water temperature is not correct. Heating defect. | • Contact the service department of Inventum. |
| F1 | Safety is activated against water overflow. | • Turn off the dishwasher and close the tap. • Contact the service department of Inventum. |
| FE Faulty electronics. • Contact the service department of Inventum. | ||
| F7 Overheating error. • Contact the service department of Inventum. | ||
| F9 Position of the distributor error. • Contact the service department of Inventum. | ||
| F6 Faulty heat sensor. • Contact the service department of Inventum. | ||
...the program won't start?
- Check if the plug is connected.
- Check the fuse in the fuse box.
• Make sure the water tap is open. - Make sure the door of the dishwasher is closed properly.
- Check whether the dishwasher is turned on with the On/off button.
- Check whether the water inlet hose and filters aren't clogged.
...the indicator lights won't go off after the cycle has finished?
- The On/off button is not released yet.
- Detergent has been added when the reservoir was damp.
...detergent residues are left in the detergent reservoir?
...water is left inside the dishwasher at the end of the cycle?
• The water drain hose is clogged or twisted.
• The filters are clogged.
• The cycle has not finished yet.
...the dishwasher stops during a wash cycle?
- Power failure.
• Water supply failure.
• The program can be paused.
...you hear noise during a wash cycle?
• The dishwasher is not loaded properly.
• One of the spray arms is hitting the dishes.
...there are partial food wastes left on the dishes?
- The dishes aren't placed correctly which prevents the spray arms from reaching everything.
• The basket is overly loaded.
• The dishes lean against each other. - Too small amount of detergent is added.
- Wrong program selected.
• One of the spray arms is clogged with food waste.
• The filters are clogged.
• The filters are not placed correctly.
• The water drain pump is clogged.
...there are whitish stains on the dishes?
- Too small amount of detergent is added.
• The dosage of the rinse aid is too low. - In spite of the high level of water hardness there is no special salt added.
• The level of water hardness is set too low. - The cap of the salt reservoir is not closed well.
...the dishes won't dry?
- A program without a dry process was selected.
• The dosage of the rinse aid is too low.
• The dishes are unloaded too fast.
...there are rust stains on the dishes?
- The stainless steel quality of the dishes is insufficient.
• The dosage of salt is too high. - The cap of the salt reservoir is not closed well.
- Too much salt was spilt inside the dishwasher while refilling the reservoir.
• The water mains is polluted.
Contact the service department of Inventum when a malfunction occurs which is not described.
general terms and conditions of service and warranty
We do not need to remind you of the importance of service. After all, we develop our products to a standard so that you can enjoy them for many years, without any concerns. If, nevertheless, there is a problem, we believe you are entitled to a solution straight away. Hence our products come with an exchange service, on top of the rights and claims you are entitled to by law. By exchanging a product or part, we save you time, effort and costs.
2-year full manufacturer's warranty
- Customers enjoy a 2-year full manufacturer's warranty on all Inventum products. Within this period, a faulty product or part will always be exchanged for a new model, free of charge. In order to claim under the 2-year full manufacturer's warranty, you can either return the product to the shop you bought it from or contact the Inventum costumer service department via the form at www.inventum.eu/service-aanvraag.
- The 2-year warranty period starts from the date the product is bought.
- In order to claim under the warranty, you must produce a copy of the original receipt.
- The warranty applies only to normal domestic use of Inventum products within the Netherlands.
5-year Inventum warranty
- Inventum offers a 5-year warranty on most large domestic appliances and a selection of small domestic appliances. This 5-year Inventum warranty consists of a 2-year full manufacturer's warranty, extended by a further 3-year warranty. The only thing you need to do to qualify for the 3-year extended warranty is to register the product within 45 days of purchase. You can read more about registering the product in the following paragraph.
- In accordance with the 5-year Inventum warranty provisions, a faulty product or part will always be exchanged for a new model during the first 2 years under the warranty. During the 3rd to 5th year under the warranty, you will only pay the costs of exchange. The current costs of exchange are listed at www.inventum.eu/omruilkosten.
- In order to claim under the 5-year Inventum warranty, you can either return the product to the shop you bought it from or contact the Inventum costumer service department via the form at www.inventum.eu/service-aanvraag.
- The 5-year warranty period starts from the date the product is bought.
- In order to claim under the warranty, you must produce a copy of the original receipt.
- The warranty applies only to normal domestic use of Inventum products within the Netherlands.
Product registration
- The 3-year extended warranty is easy to obtain, free of charge, by registering the product within 45 days of purchase, via the website www.inventum.eu/garantie-registratie. If you did not register the product within 45 days of purchase, you can still do so up to 2 years after the purchase date. However, there will be a charge. The one-off registration charge is € 89 for each separate product. Registration is possible only for products that are subject to the 5-year Inventum warranty. Whether the product qualifies for the 5-year Inventum warranty is stated in the product user manual and in the product information sheet, on Inventum's website.
- The warranty period always starts from the date the product is bought. If the product is registered for the extended warranty at a later date, the warranty period still starts from the original date of purchase.
- The 3-year extended warranty can only be applied for if you are in the possession of a copy of the original receipt and the Inventum 5-year warranty certificate.
Large domestic appliances
- Breakdowns or faults in large domestic appliances (separate and built-in white goods) can be registered via the form at www.inventum.eu/service-aanyraag, by calling the Inventum costumer service department or in the store where you bought the device. The telephone number of the costumer service department can be found at www.inventum.eu.
- In the event of breakdowns or faults in large domestic appliances, Inventum will have the option to have a service engineer inspect the faulty device onsite at the customer in the Netherlands and to carry out repairs, there and then. The Inventum customer service department can also decide to have the device exchanged.
- If you suffer a breakdown or fault in a large domestic appliance during the first 2 years from the date of purchase, Inventum will not charge any costs for the exchange, call-out or for parts and labour.
- If you registered the product as described before at www.inventum.eu/garantie-registratie and you subsequently report a breakdown of a large domestic appliance in the 3rd to 5th year of the date of purchase, the 5-year Inventum warranty applies and the device will be repaired or exchanged, free of charge. In the event of a repair or exchange of the device, you only pay the costs of exchange. The current costs of exchange are listed at www.inventum.eu/omruilkosten. If you did not register the product, the 3-year extended warranty does not apply.
- When reporting a breakdown or fault, a service engineer will contact the customer within 1 working day in order to make an appointment. When the report is made in a weekend or during a public holiday, this will be the next working day.
- If you report a breakdown or fault via the form at www.inventum.eu/service-aanvraag, you will be kept informed of the progress via mobile messages and e-mail.
- The warranty period starts from the date the product is bought.
42 · English
- In order to claim under the warranty, you must produce a copy of the original receipt and the Inventum 5-year warranty certificate.
- The warranty applies only to normal domestic use of Inventum products within the Netherlands.
Breakdowns or faults outside the warranty period
- Breakdowns or faults in small or large domestic appliances outside the warranty period, can be reported to the costumer services department via the form at www.inventum.eu/service-aanvraag or by calling the costumer services department.
- The costumer services department may ask you to send the product for inspection or repair. The costs of dispatch will be at your expense.
- The inspection to establish whether repair is possible involves a charge. You need to grant your permission for this, in advance.
- In the event of a large domestic appliance, Inventum, at your request, can send out a service engineer. In that case, you will be charged the call-out costs, as well as parts and labour.
- In the event of an instruction to repair, the repair costs must be paid in advance. In the event of a repair by a service engineer, the costs of the repair must be settled with the engineer onsite, preferably by means of PIN payment.
Warranty exclusions
- The following is excluded from the aforesaid warranties:
• normal wear and tear;
- improper use or misuse;
• insufficient maintenance;
- failure to comply with the operating and maintenance instructions;
- unprofessional installation or repairs by third parties or the customer himself;
• non-original parts used by the customer;
- use for commercial or business purposes;
- removal of the serial number and/or rating label.
-
In addition, the warranty does not apply to normal consumer goods, such as:
-
dough hooks, baking tins, (carbon) filters, etc.;
- batteries, bulbs, carbon filters, fat filters etc.;
• external connection cables; - glass accessories and glass parts such as oven doors;
-
and similar items.
-
Transport damage not caused by Inventum is also excluded. Therefore, inspect your new device before starting to use it. If you detect any damage, you must report this to the store where you purchased the product within 5 working days, or to the Inventum customer service department via the form at www.inventum.eu/service-aanvraag. If transport damage is not reported within this period, Inventum does not accept any liability in this respect.
-
The following are excluded from warranty and/or replacement: faults, loss of and damage to the device as a result of an event that is normally insured under the home contents insurance.
Important to know
- The replacement or repair of a faulty product, or a part thereof, does not lead to an extension of the original warranty period.
- Parts that have been replaced, packaging material and exchanged devices are taken back by the service engineer and become the property of Inventum.
- If a complaint is unfounded, all costs arising from it will be at the customer's expense.
- Following expiry of the warranty period, all costs of repair or replacement, including administration costs, dispatch and call-out charges, will be charged to the customer.
- Inventum cannot be held liable for damage as a result of devices built in incorrectly.
- Inventum cannot be held liable for damage caused by external events, unless this liability arises from mandatory statutory provisions.
- These warranty and service provisions are governed by Dutch law. Disputes will be settled exclusively by the competent Dutch court.
Deutsch
ENGLISH pages 23 to 43
natural_image
Illustration of a faucet with a valve and a bag, no text or symbols presentnatural_image
Close-up of mechanical components with a black arrow indicating direction (no visible text or symbols)
natural_image
Close-up of mechanical components with no visible text or symbols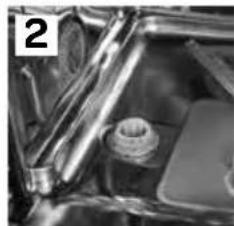
natural_image
Close-up of mechanical components with no visible text or symbols
SALZVERBRAUCH EINSTELLEN
natural_image
Close-up of a hand inserting a device into a device (no visible text or symbols)
natural_image
Close-up of a hand inserting a small electronic device into a device casing (no visible text or symbols)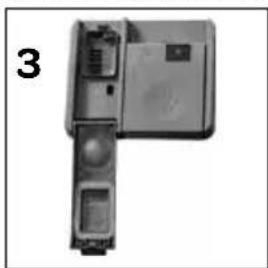
natural_image
Mechanical device with a numbered label '3' on the left side (no visible text or symbols on the device itself)Achtung!
natural_image
Exterior view of a gray electronic device casing with buttons and decorative patterns (no visible text or symbols)
natural_image
Exterior view of a gray electronic device with ventilation slots and a small rectangular component (no visible text or symbols)natural_image
Technical illustration of a mechanical assembly with wire mesh and a hand holding a component (no text or symbols)
natural_image
Diagram of a mechanical assembly with wheels and a shaft, showing directional arrows (no text or symbols)DER UNTERKORB
natural_image
Two isometric wireframe views of a shopping cart with internal compartments and wheels, no text or symbols present.Oberkorb
natural_image
Diagram of a multi-layered industrial or chemical process with cylindrical tanks and flasks, no visible text or symbolsUnterkorb
natural_image
Two grayscale images showing a basket of kitchen utensils and cooking pots, no text or symbols present.natural_image
Black X symbol on a grid of circular objects, no text or symbols present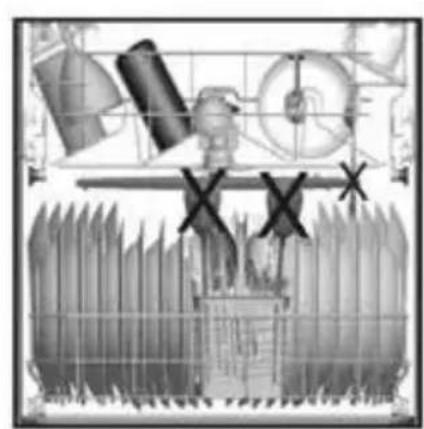
natural_image
Illustration of industrial machinery components with no visible text or symbols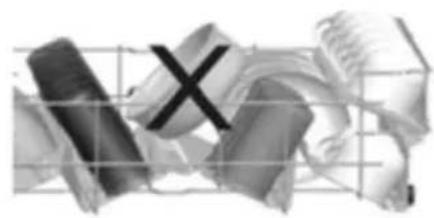
natural_image
Abstract grayscale graphic with intersecting lines and a cross symbol, no readable text or symbols present.
natural_image
Abstract 3D wireframe structure with a black 'X' mark overlay, no text or symbols present
natural_image
Diagram of a car interior with labeled parts (no readable text or symbols)
natural_image
Pure diagram of a mechanical or electrical component with no text, numbers, or symbols7 Störungen
ENGLISH pages 23 to 44
natural_image
Close-up of a mechanical component with an arrow indicating direction (no visible text or symbols)
natural_image
Close-up of mechanical components with no visible text or symbols
natural_image
Close-up of a mechanical component with metallic rods and a central cylindrical part (no visible text or symbols)
RÉGLAGE DE LA CONSOMMATION DE SEL RÉGÉNÉRANT
natural_image
Close-up of a hand inserting a device into a device housing (no visible text or symbols)
natural_image
Close-up of a hand inserting a small electronic device into a device housing (no visible text or symbols)
natural_image
Exterior view of a mechanical device with multiple ports and a labeled part (3), no visible text or symbols on the device itself.Attention!
natural_image
Exterior view of a gray electronic device casing with ventilation grilles and a small button (no visible text or symbols)
natural_image
Exterior view of a silver mobile phone device with ventilation slots and a front panel (no visible text or symbols)natural_image
Technical illustration of a mechanical assembly with wire meshing and a hand holding a tool (no text or symbols visible)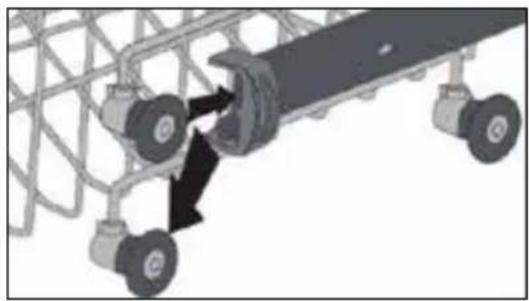
natural_image
Diagram of a mechanical assembly with wheels and a central component, no visible text or symbolsLE PANIER INFERIEUR
natural_image
Two 3D wireframe models of a shopping cart with internal compartments and wheels, no text or symbols present.Panier supérieur

natural_image
Top-down architectural rendering of a building facade with vertical columns and horizontal beams (no text or symbols)Panier inférieur

natural_image
Two grayscale images showing a food basket with various kitchen utensils and cooking pots, no text or symbols visible.natural_image
Black X symbol crossed over a grid of circular objects, no text or symbols present
natural_image
Illustration of industrial machinery components with no visible text or symbols
natural_image
Abstract 3D rendered shapes with a black 'X' mark overlay, no text or symbols present
natural_image
Abstract 3D wireframe structure with a black 'X' symbol overlay (no text or symbols present)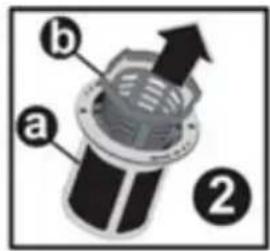

natural_image
Diagram of a mechanical component with labeled parts (3 and C), showing a circular feature and directional arrow (no text or symbols beyond labels)
natural_image
Pure diagram of a mechanical or electrical component with no visible text, numbers, or symbols7 pannes
twitter.com/inventum1908
facebook.com/inventum1908
youtube.com/inventum1908


- • Nederlands
- ZOUTVERBRUIK INSTELLEN
- Let op!
- DE ONDERSTE KORF
- • Nederlands
- storingen
- safety and installation instructions
- DELIVERY
- INSTALLATION
- POSITIONING THE APPLIANCE
- CONNECTING TO THE WATER TAP AND DRAINAGE
- IN DAILY USE
- description of the appliance
- 3
- before first use
- FILLING THE SALT RESERVOIR
- ATTENTION!
- SETTING THE SALT CONSUMPTION
- FILLING WITH RINSE AID AND SETTING THE CONSUMPTION
- DISHWASHER DETERGENTS
- loading your dishwasher
- IVW6013A
- ADJUSTING THE HEIGHT OF THE UPPER BASKET
- THE LOWER BASKET
- SWITCHING THE DISHWASHER ON AND OFF
- ENDING OR CHANGING A PROGRAM
- 6
- cleaning & maintenance
- CLEANING THE FILTERS
- CLEANING THE SPRAY ARMS
- troubleshooting
- ...the program won't start?
- ...the indicator lights won't go off after the cycle has finished?
- ...detergent residues are left in the detergent reservoir?
- ...water is left inside the dishwasher at the end of the cycle?
- ...the dishwasher stops during a wash cycle?
- ...you hear noise during a wash cycle?
- ...there are partial food wastes left on the dishes?
- ...there are whitish stains on the dishes?
- ...the dishes won't dry?
- ...there are rust stains on the dishes?
- general terms and conditions of service and warranty
- 2-year full manufacturer's warranty
- 5-year Inventum warranty
- Product registration
- Large domestic appliances
- · English
- Breakdowns or faults outside the warranty period
- Warranty exclusions
- Important to know
- Deutsch
- SALZVERBRAUCH EINSTELLEN
- Achtung!
- DER UNTERKORB
- Störungen
- RÉGLAGE DE LA CONSOMMATION DE SEL RÉGÉNÉRANT
- LE PANIER INFERIEUR
- pannes
Brand : INVENTUM
Model : IVW6013A
Category : Dishwasher