
Juke (2017) - Car NISSAN - Free user manual and instructions
Find the device manual for free Juke (2017) NISSAN in PDF.


| Product Type | Compact crossover SUV |
| Brand | Nissan |
| Model | Juke (2017) |
| Dimensions (L x W x H) | 4135 mm x 1765 mm x 1565 mm |
| Wheelbase | 2530 mm |
| Curb Weight | Approximately 1250 kg (varies by engine) |
| Fuel Type | Gasoline or Diesel (depending on market) |
| Engine Options | 1.2L Turbo, 1.6L, 1.5L dCi |
| Transmission | 5-speed manual, 6-speed manual, CVT automatic |
| Drivetrain | Front-wheel drive or All-wheel drive |
| Seating Capacity | 5 |
| Fuel Tank Capacity | 46 liters |
| Main Functions | Driving, infotainment (radio, CD, Bluetooth, USB), navigation, climate control, safety assist |
| Safety Features | Front/side airbags, ABS, ESP, hill start assist, brake assist |
| Maintenance Intervals | Oil change every 10,000 km or 12 months; rotate tires every 8,000-10,000 km |
| Cleaning | Wash exterior with mild soap; vacuum interior; clean upholstery with fabric cleaner |
| Spare Parts Availability | Available through Nissan dealerships and authorized parts suppliers |
| Reparability | Moderate DIY potential; specialist tools may be required for some systems |
| Manual Language | English (original), other languages available via translation request |
| Manual Pages | 418 |
Frequently Asked Questions - Juke (2017) NISSAN
User questions about Juke (2017) NISSAN
0 question about this device. Answer the ones you know or ask your own.
Ask a new question about this device
Download the instructions for your Car in PDF format for free! Find your manual Juke (2017) - NISSAN and take your electronic device back in hand. On this page are published all the documents necessary for the use of your device. Juke (2017) by NISSAN.
USER MANUAL Juke (2017) NISSAN
For your safety, read carefully and keep in this vehicle.
Foreword
WelcometothegrowingfamilyofnewNISSAN owners. This vehicle is delivered to you with confidence. It was produced using the latest techniques and strict quality control.
Thismanual was prepared to help you understand the operation and maintenance of your vehicles that you may enjoy many miles of driving pleasure. Pleasereadthrough this manual before operating your vehicle.
AseparateWarrantyInformationBooklet explainsdetailsaboutthewarrantiescoveringyourvehicle. Additionally,aseparate CustomerCare/LemonLawBooklet(U.S. only)willexplainhowtoresolveany concernsyoumayhavewithyourvehicle, aswellasclarifyyourrightsundryour state'slemonlaw.
Inadditiontofactoryinstalledoptions,your vehiclemayalsobeequippedwithadditional accessoriesinstalledbyNISSANorbyyour NISSANdealerpriortodelivery.Itisimportant thatyoufamiliarizeyourselfwithalldisclosures, warnings,cautionsandinstructionsconcerning properuseofsuchaccessoriespriortooperatingthevehicleand/oraccessory.ItisrecommendedyouseeaNISSANdealerfordetails concerningtheparticularaccessorieswith whichyourvehicleisequipped.
YourNISSANdealerknowsyourvehiclebest.
Whenyourequireanyserviceorhaveany questions,wewillbegladtoassistyouwiththe extensiveresourcesavailabletous.
READFIRST—THENDRIVESAFELY
Beforedrivingyourvehicle,readyourOwner's Manualcarefully. Thiswillensurefamiliaritywith controlsandmaintenancerequirements,assistingyouinthesafeoperationofyourvehicle.

WARNING
IMPORTANT SAFETY INFORMATION REMINDERS!
Followtheseimportantdrivingrulesto helpensureasafeandcomfortabletrip foryouandyourpassengers!
- NEVERdriveundertheinfluenceof alcoholordrugs.
- ALWAYSobservepostspeedlimitsandneverdrivetoofastfor conditions.
- ALWAYSgiveyourfullattentionto driving and avoid using vehicle featuresortakingotheractionsthat could distract you.
- ALWAYSuseyourseatbeltsand appropriatechildrestraintsystems.
Pre-teenchildrenshouldbeseated intherearseat.
- ALWAYSprovideinformationabout theproperuseofvehiclesafety featurestoallooccupantsofthe vehicle.
- ALWAYSreviewthisOwner'sManualforimportantsafetyinformation.
On-pavementandoff-roaddriving
Thisvehiclewillhandleandmaneuver differentlyfromanordinarypassenger carbecauseithasahighercenterof gravity.Aswithothervehicleswithfeaturesofthistype,failuretooperatethis vehiclecorrectlymayresultinlossof controloranaccident.Besuretoread "Avoidingcollisionandrollover" and "Drivingsafetyprecautions"inthe"5. Startinganddriving"sectionofthis manual.
MODIFICATIONOFYOURVEHICLE
This vehicles should not be modified. Modification could affect its performance, safety or durability, and may even violate governmental regulations. In addition, damage or performance problems resulting from modification may not be recovered under NISSAN warranties.

WARNING
InstallinganaftermarketOn-BoardDiagnostic(OBD)plug-indevicethatuses theportduringnormaldriving,for exempleremoteinsurancecompany monitoring,remotevehiclediagnostics, telematicsorenginereprogramming, maycauseinterferenceordamageto vehiclesystems.Wedonotrecommend orendorsetheuseofanyaftermarket OBDplug-indevices,unlessspecifically approvedbyNISSAN.Thevehiclewarrantymaynotcoverdamagecausedby anyaftermarketplug-indevice.
WHENREADINGTHEMANUAL
Thismanualincludesinformationforall featuresandequipmentavailableonthis model.Featuresandequipmentinyour vehiclemayvarydependingonmodel,trim level,optionsselected,order,dateof production,regionoravailability.Therefore,youmayfindinformationabout featuresorequipmentthatarenotincludedorinstalledonyourvehicle.
Allinformation, specifications and illustrations in this manual are those ineffect at the time of printing. NISSAN reserve the right to change specifications, performance, design or components suppliers without notice and without obligation. From timetotime, NISSAN may update or revisit this manual to provide Owners with them most accurate information currently available. Please carefully read and retain with this manual all revision updates sent to you by NISSAN to ensure you have access to accurate and up-to-date information regarding your vehicle. Current version of vehicle Owner's Manuals and any updates can also be found in the Owner section of the NISSAN website at https://owners.nissanusa.com/nowners/navigation/manualsGuide.If you have questions concerning any information in your Owner's Manual, contact NISSAN Consumer Affairs. Seethe NISSANCUSTOMERCAREPROGRAM page
inthisOwner'sManualforcontactinformation.
IMPORTANT INFORMATION ABOUT THISMANUAL
Youwillseevarioussymbolsinthismanual.They areusedinthefollowingways:

WARNING
Thisisusedtoindicatethepresenceof ahazardthatcouldcausedeathor seriouspersonalinjury.Toavoidor reducetherisk,theproceduresmust befollowedprecisely.

CAUTION
Thisisusedtoindicatethepresenceof ahazardthatcouldcauseminoror moderatepersonalinjuryordamageto yourvehicle.Toavoidorreducetherisk, theproceduresmustbefollowedcarefully.

If you seethesymbol above, it means "Donot do this" or "Donot let this happen".


If you see easy symbols similar to those above in an illustration, it means the arrow point to the front of the vehicle.


Arrowsinanillustrationthataresimilartothose aboveindicatemovementoration.


Arrowsinanillustrationthataresimilartothose
abovecallattentiontoanitemintheillustration. CALIFORNIAPROPOSITION65 WARNING

WARNING
Engineexhaust, some of its constituents, and certain vehicle components containoremitchemicalsknown to the State of Californiatocausecancer and birth defects or other reproductive harm. In addition, certain fluids contained in vehicles and certain products of component wear containoremit chemicalsknown to the State of Californiatocausecancer and birth defects or other reproductive harm.
CANADA'SPRODUCTSCONTAINING MERCURYREGULATIONS
Thexenonheadlights(ifsoequipped)on yourvehiclecontainmercury.Ifthese partsrequiredisposal,therepairfacility vehicledismantlerorrecyclershould makesuretheyarerecycledordisposed ofashazardouswasteinaccordance withapplicablelaws.Forinformationon safehandlingprocedures,disposaland recyclingoptionsinaccordancewith Canada'sProductsContainingMercury Regulations,gotohttp://www.ec.gc.ca/mercury-mercury/.
CALIFORNIAPERCHLORATEADVISORY
Somevehicleparts,suchaslithiumbatteries,maycontainperchloratematerial. The following advisory is provided: "PerchlorateMaterial-specialhandlingmay apply, see www.dtsc.ca.gov/hazardouswaste/perchlorate."
Bluetooth®
Bluetooth ^® isattrademarkowned byBluetoothSIG,Inc.,and licensedtoVisteonCorporation andRobertBoschGmbH.
SiriusXM® servicesrequirea subscriptionaftertrialperiod andaresoldseparatelyorasa package. Thesatelliteserviceis availableonlyinthe48contiguousUSAandDC.SiriusXM satelliteserviceisalsoavailable inCanada:seewww.siriusxm.ca
((SiriusXM)
R
Both NISSAN and your NISSAN dealer are dedicated to serving all your automotive needs. Your satisfaction with your vehicle and your NISSAN dealer are our primary concerns. Your NISSAN dealer is always available to assist you with all your automobile sales and service needs.
However, if there is something that your NISSAN dealer cannot assist you with or you would like to provide NISSAN directly with comments or questions, please contact the NISSAN Consumer Affairs Department using our toll-free number:
ForU.S.customers
1-800-NISSAN-1
(1-800-647-7261)
ForCanadiancustomers
1-800-387-0122
The Consumer Affairs Department will ask for the following information:
-Yourname,address,andtelephonenumber
- Vehicleidentificationnumber(attached to the top of the instrument panel on the driver's side)
- Dateofpurchase
- Currentodometerreading
-YourNISSANdealer'sname
-Yourcommentsorquestions
OR
YoucanwritetoNISSANwiththeinformationat:
ForU.S.customers
NissanNorthAmerica, Inc.
ConsumerAffairsDepartment
P.O.Box685003
Franklin,TN37068-5003
orviae-mailat:
nnaconsumeraffairs@nissan-usa.com
ForCanadiancustomers
NissanCanadaInc.
5290OrbitorDrive
Mississauga,OntarioL4W4Z5
orviae-mailat:
information.centre@nissancanada.
com
If you prefer, visit us at:
www.nissanusa.com(forU.S.customers)or
www.nissan.ca(forCanadiancustomers)
WeappreciateyourinterestinNISSANand
thankyouforbuyingaqualityNISSANvehicle.
Tableof Contents
| Illustratedtableofcontents | 0 |
| Safety—Seats,seatbeltsandsupplementalrestraintsystem | 1 |
| Instrumentsandcontrols | 2 |
| Pre-drivingchecksandadjustments | 3 |
| Heater,airconditioner,audioandphonesystems | 4 |
| Startinganddriving | 5 |
| Incaseofemergency | 6 |
| Appearanceandcare | 7 |
| Do-it-yourself | 8 |
| Maintenanceandschedules | 9 |
| Technicalandconsumerinformation | 10 |
| Index | 11 |
0Illustratedtableofcontents
Seats,seatbeltsandSupplementalRestraint
System(SRS)....0-2
Exteriorfront....0-3
Exteriorrear....0-4
Exterior(NISMOmodels)....0-5
Passengercompartment....0-6
Cockpit....0-7
Instrumentpanel....0-8
Metersandgauges....0-9
Enginecompartment....0-11
MR16DDTengine....0-11
Warningandindicatorlights....0-12
SEATS,SEATBELTSAND SUPPLEMENTALRESTRAINT SYSTEM(SRS)

- Rearheadrestraints(Page1-5)
- Childrestraintanchorpoints(fortoptetherstrap childrestraint)(P.1-30,P.1-34)
3.Frontheadrestraints(P.1-5) —Front-seatActiveHeadRestraints*(P.1-9)
4.Roof-mountedcurtainside-impactandrollover supplementalairbags(P.1-38)
5.Seatbelts(P.1-10)
6.Frontseats(P.1-3)
7. Supplementalfront-impactairbags(P.1-38)
8.LATCH(LowerAnchorsandTethersforCHil-
dren)system(P.1-20)
9. Rearseats(P.1-4)
—Childrestraints(P.1-18)
- Frontseat-mountedside-impactsupplemental airbags(P.1-38)
11.Seatbeltwithpretensioners(P.1-52) - Occupantclassificationsensors(weightsensors)
—AdvancedAirBagSystem(P.1-44)
13.Frontpassengerairbagstatuslight(P.1-46)
*:ifsoequipped
0-2 Illustratedtableofcontents
EXTERIORFRONT
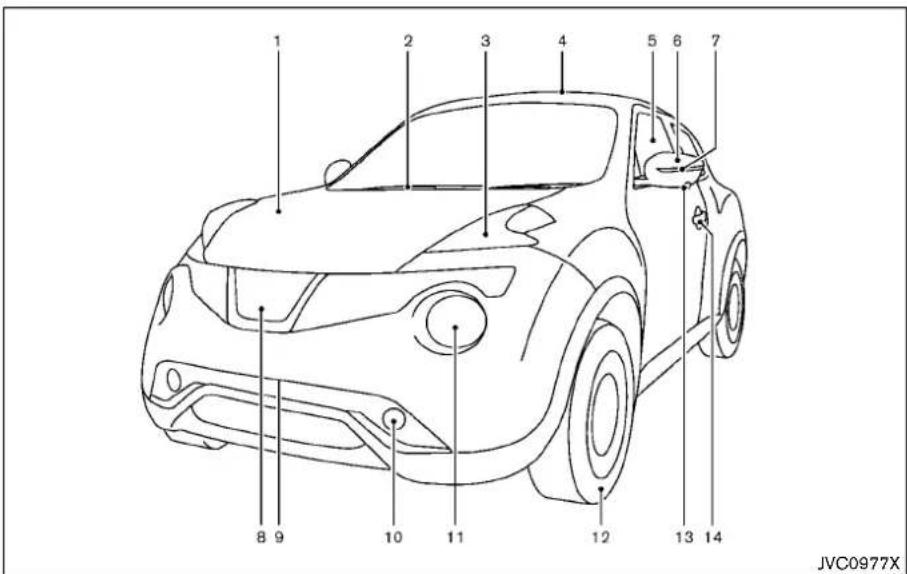
1.Hood(P.3-15)
2.Windshieldwiperandwasher
—Switchoperation(P.2-36)
—Bladereplacement(P.8-15)
—Windowwasherfluid(P.8-9)
- Parkinglights, turnsignallights and frontside markerlights
—Switchoperation(P.2-39)
—Bulbreplacement(P.8-26)
4.Moonroof*(P.2-52)
5.Powerwindows(P.2-50)
- Outsidemirrors(P.3-22)
7.Sideturnsignallights
—Switchoperation(P.2-43)
—Bulbreplacement(P.8-26)
8.Frontviewcamera*(P.4-13)
- Licenseplateinstallation(P.10-13)
10.Foglights*
—Switchoperation(P.2-44)
—Bulbreplacement(P.8-26)
11.Headlights
—Switchoperation(P.2-39)
—Bulbreplacement(P.8-23)
12.Tires
—Wheelsandtires(P.8-28,P.10-9)
—Flattire(P.6-3)
—TirePressureMonitoringSystem(TPMS) (P.2-18,P.5-3)
13.Sideviewcamera*(P.4-13)
14.Doors
—Keys(P.3-2)
—Doorlocks(P.3-4)
—IntelligentKeysystem(P.3-6)
—Securitysystem(P.2-33)
*:ifsoequipped
EXTERIORREAR

- Liftgate(P.3-16)
—IntelligentKeysystem(P.3-6) - Rearwindowwiperandwasher
—Switchoperation(P.2-37)
—Windowwasherfluid(P.8-9) - High-mounted stoplight (P.8-23)
4.Antenna(P.4-75)
—Satelliteradioantenna*(P.4-35)
5.Rearwindowdefroster(P.2-38)
6.Fuel-fillerdoor
-Operation(P.3-18)
—Fuelinformation(P.10-4)
0-4 Illustratedtableofcontents
7.Rearviewcamera
—RearViewMonitor*(P.4-8)
—AroundView ^40 Monitor*(P.4-13)
8.Rearcombinationlights
—Bulbreplacement(P.8-26)
- Childsafetyreardoorlock(P.3-6)
*:ifsoequipped
EXTERIOR(NISMOmodels)

ForNISMOmodels,thevehiclepartslisted belowrequirespecialcareorcautionfor cleaning.Refertotheadditionalinformationin eachsection.
1.Frontbumper(P.3-17)
2.Daytimerunninglight(P.2-42,P.3-17,P.8-23, P.8-26)
3.Sidesillextensions(P.3-17)
4. Rearspoiler(P.3-17, P.7-3)
PASSENGERCOMPARTMENT

1.Cargoarea
-
Outsidermirrorremotecontrolswitch(P.3-22)
-
Headlight, foglight and turn signals switch
—Headlight(P.2-40)
—Turnsignallight(P.2-43)
-Foglight*(P.2-44)
3.Paddleshifter*(P.5-16)
4.Steeringwheel
—Electricpowersteering(P.5-34)
—Horn(P.2-44)
—Driver'ssupplementalairbag(P.1-38)
5.Wiperandwasherswitch(P.2-36)
6.Shiftlever
—ContinuouslyVariableTransmission(CVT) (P.5-14)
—ManualTransmission(MT)(P.5-19)
7.Fuseboxcover(P.8-19)
-
VehicleDynamicControl(VDC)OFFswitch (P.5-37)
-
All-WheelDrive(AWD) switch*(P.5-29)
10.Tiltingsteeringwheellever(P.3-20)
- Steering-wheel-mounted controls(leftside)
—Audiocontrol(P.4-73)
—Siri ^® EyesFree(P.4-76)
—Bluetooth ^® Hands-FreePhoneSystemcontrol(P.4-80,P.4-89)
—NISSANVoiceRecognitionSystem(with navigationsystem)*(P.4-96)
- Steering-wheel-mounted controls(rightside)
—Cruisecontrolswitches(P.5-26)
13.Heatedseatswitch*(P.2-45)
*:ifsoequipped
INSTRUMENTPANEL

1.Metersandgauges(P.2-5)
2. Centerventilator(P.4-27)
3. Audiosystem*orNavigationsystem**(P.4-35)
4.Hazardwarningflasherswitch(P.6-2)
5.IntegratedControlSystem*(P.2-24)
—Drivemode(P.5-22)
—Heaterandairconditionercontrol(P.4-28)
—Defrosterswitch(P.2-38)
5.Heaterandairconditionercontrol(models
withoutIntegratedControlSystem)(P.4-28)
—Defrosterswitch(P.2-38)
6.Frontpassengersupplementalairbag(P.1-38)
7. Sideventilator(P.4-27)
8.Fuel-fillerdoorreleasehandle(P.3-18)
0-8 Illustratedtableofcontents
9.Hoodreleasehandle(P.3-15)
10.Push-buttonignitionswitch(P.5-9)
11.Auxiliaryinputjack/USBconnectionport* (P.4-38)
12. Parkingbrake(P.5-25)
13.Cupholder(P.2-47)
14.Poweroutlet(P.2-46)
15.Glovebox(P.2-48)
*:ifsoequipped
**:RefertotheseparateNavigationSystemOwner'sManual.
METERSANDGAUGES

TypeA(ifsoequipped)
1.Tachometer(P.2-9)
- Vehicleinformationdisplay(P.2-11)
—Odometer/twintripodometer(P.2-7)
—Tripcomputer(P.2-13)
—TorquevectoringAWD(AWDmodel)
(P.2-14)
—Outsideairtemperature(P.2-12)
3.Fuelgauge(P.2-11)
4.Speedometer(P.2-7)
- Warning/indicatorlights(P.2-15)
6.Instrumentbrightnesscontrolknob(P.2-43)
-
Continuously Variable Transmission (CVT) position indicator ^4 (P.2-12)
-
RESET switch for tripodometer (P.2-7)/Trip computer modes switch (P.2-13)
*:ifsoequipped

TypeB(ifsoequipped)
- RESET switch for tripodometer (P.2-7)/Trip computer modes switch (P.2-13)
*:ifsoequipped
1.Tachometer(P.2-9)
2. Enginecoolanttemperaturegauge(P.2-10)
3. Vehicle information display(P.2-11)
—Odometer/twintripodometer(P.2-7)
—Tripcomputer(P.2-13)
—TorquevectoringAWD(AWDmodel)
(P.2-14)
—Outsideairtemperature(P.2-12)
4.Fuelgauge(P.2-11)
5.Speedometer(P.2-7)
6. Warning/indicatorlights(P.2-15)
7. Instrument brightness control knob (P.2-43)
8. Continuously Variable Transmission (CVT) position indicator* (P.2-12)
0-10 Illustratedtableofcontents
ENGINECOMPARTMENT

MR16DDTENGINE
- Engineoilfillercap(P.8-5)
2.Radiatorfillercap(P.8-5)
—Vehicleoverheat(P.6-11)
3.Brakeandclutch*fluidreservoir(P.8-9)
4.Aircleaner(P.8-14)
-
Windowwasherfluidreservoir(P.8-9)
-
Engine drive belt location (P.8-12)
-
Engineoildipstick(P.8-5)
-
Enginecoolantreservoir(P.8-5)
9.Fuse/fusiblelinkholder(P.8-17)
10.Battery(P.8-10)
—Jumpstarting(P.6-9)
*:forManualTransmission(MT)models
WARNINGANDINDICATORLIGHTS
| Warning light | Name | Page |
| All-WheelDrive(AWD)warning light(yellow)(AWDmodel) | 2-16 | |
| Anti-lockBrakingSystem (ABS)warninglight | 2-16 | |
| Brakewarninglight | 2-16 | |
| Chargewarninglight | 2-17 | |
| Dooropenwarninglight | 2-17 | |
| Electricpowersteeringwarning light | 2-17 | |
| Engineoilpressurewarning light | 2-17 | |
| Hightemperaturewarninglight (ifsoequipped) | 2-18 | |
| IntelligentKeysystemwarning light | 2-18 | |
| Lowfuelwarninglight | 2-18 | |
| Lowtirepressurewarninglight | 2-18 | |
| Lowwasherfluidwarninglight (ifsoequipped) | 2-20 | |
| Ppositionselectingwarning light | 2-20 |
| Warning light | Name | Page |
| Seatbeltwarninglight | 2-20 | |
| Supplementalairbagwarning light | 2-20 | |
| VehicleDynamicControl(VDC) warninglight | 2-21 |
| Indicator light | Name | Page |
| All-WheelDrive(AWD)indicatorlight(green)(AWDmodel) | 2-21 | |
| All-WheelDrive(AWD)-Vindicatorlight(green)(AWDmodel) | 2-21 | |
| ContinuouslyVariableTransmission(CVT)indicatorlight(if soequipped) | 2-21 | |
| Cruiseindicatorlight | 2-21 | |
| Enginestartoperationindicator light | 2-21 | |
| Exteriorlightindicator | 2-22 | |
| Frontfoglightindicatorlight(if soequipped) | 2-22 | |
| Frontpassengerairbagstatus light | 2-22 | |
| Highbeamindicatorlight | 2-22 | |
| MalfunctionIndicatorLight (MIL) | 2-22 | |
| Securityindicatorlight | 2-23 | |
| Turnsignal/hazardindicator lights | 2-23 | |
| VehicleDynamicControl(VDC)offindicatorlight | 2-23 |
0-12 Illustratedtableofcontents
1 Safety—Seats, seatbeltsandsupplemental restraintsystem
Seats....1-2
Frontseats....1-3
Rearseats....1-4
Headrestraints/headrests....1-5
Adjustableheadrestraint/headrestcomponents.....1-6
Non-adjustablehead restraint/headrestcomponents....1-7
Remove....1-7
Install....1-7
Adjust....1-8
Front-seatActiveHeadRestraints(if soequipped)....1-9
Seatbelts....1-10
Precautionsonseatbeltusage....1-10
Pregnantwomen....1-12
Injuredpersons....1-12
Three-pointtypeseatbelt....1-12
Seatbeltextenders....1-15
Seatbeltmaintenance....1-15
Childsafety....1-16
Infants....1-17
Smallchildren....1-17
Largerchildren....1-17
Childrestraints....1-18
Precautionsonchildrestraints....1-19
LowerAnchorsandTethersforCHildren
System(LATCH)....1-20
Rear-facingchildrestraintinstallation
usingLATCH....1-23
Rear-facingchildrestraintinstallationusingthe
seatbelts....1-25
Forward-facingchildrestraintinstallation
usingLATCH....1-28
Forward-facingchildrestraintinstallationusingthe
seatbelts....1-30
Boosterseats....1-34
Supplementalrestraintsystem....1-38
Precautionsonsupplementalrestraintsystem.....1-38
NISSANAdvancedAirBagSystem
(frontseats)....1-44
Frontseat-mountedside-impactsupplemental
airbagandroof-mountedcurtainside-impactand
rolloversupplementalairbagsystems....1-51
Seatbeltswithpretensioners(frontseats)....1-52
Supplementalairbagwarninglabels....1-54
Supplementalairbagwarninglight....1-54
Repairandreplacementprocedure....1-55
SEATS

SSS0133

WARNING
- Donotrideinamovingvehicle whenteseatbackisreclined.This canbedangerous.Theshoulderbelt willnotbeagainstyourbody.Inan accident,youcouldbethrownintoit andreiveneckorotherserious injuries.Youcouldalsolideunder thelapbeltandreceiveserious internalinjuries.
- Forthemosteeffectiveprotection whenthevehicleisinmotion,the seatshouldbeupright.Alwayssit
wellbackanduprightintheseat withbothfeetonthefloor and adjusttheseatproperly.See"Precautionsonseatbeltusage"(P.1-10).
•Afteradjustment, gentlyrockin the seattomakesureitissecurely locked.
- Donotleavechildrenunattended insidethevehicle.Theycouldunknowinglyactivateswitchesorcontrols.Unattendedchildrencould becomeinvolvedinseriousaccidents.
•Tohelpavoidriskofinjuryordeath throughunintendedoperationof thevehicleand/oritssystems,do notleavechildren,peoplewhore-quiretheassistanceofothersor petsunattendedinyourvehicle. Additionally,thetemperatureinside aclosedvehicleonawarmdaycan quicklybecomehighenoughto causeasignificantriskofinjuryor deathtopeopleandpets.
- Theseatbackshouldnotbereclined anymorethanneededforcomfort. Seatbeltsaremosteffectivewhen thepassengersitswellbackand straightupintheseat.Iftheseat-backisreclined,theriskofsliding underthelapbeltandbeinginjured isincreased.

CAUTION
When adjusting theseatpositions, be surenottocontactanymovingpartsto avoidpossibleinjuriesand/ordamage.

natural_image
Line drawing of a car seat with directional arrows indicating rotation (no text or symbols)
natural_image
Line drawing of a car seatbelt with a numbered arrow indicating seat number (no text or symbols)SSS0792
TypeA(ifsoequipped)

natural_image
Line drawing of a car seat with a numbered component and directional arrow (no text or symbols)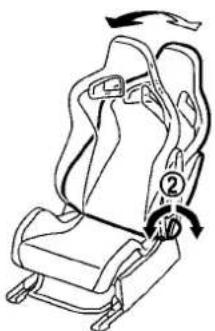
JVR0342X
TypeB(ifsoequipped)
FRONTSEATS
Frontmanualseatadjustment
Forwardandbackward:
Pullthelever ① upandholditwhileyouslide theseatforwardorbackwardtothedesired position. Releasethelevertolocktheseatin position.
Reclining(TypeA)(ifsoequipped):
Toreclinetheseatback,pullthelever ② upand leanback.Tobringtheseatbackforward,pull theleverupandleanyourbodyforward.Release thelevertolocktheseatbackinposition.
Therecliningfeatureallowsadjustmentofthe seatbackforoccupantsofdifferentsizesfor addedcomfortandtohelpobtainproperseat beltfit.(See "Precautionsonseatbeltusage" (P.1-10).)Also,theseatbackcanbereclinedto allowoccupantstorestwhenthevehicleis stoppedandthetransmissionsintheP(Park) positionorN(Neutral)positionwiththeparking brakefullyapplied.
Reclining(TypeB)(ifsoequipped):
Toreclinetheseatback,turntheadjustingdial ② towardtherearofthevehicleandleanback. Tobringtheseatbackforward,turntheadjusting dialtowardthefrontofthevehicleandleanyour bodyforward.
Safety—Seats, seat belts and supplemental restraintsystem 1-3
Therecliningfeatureallowsadjustmentofthe seatbackforoccupantsofdifferentsizesfor addedcomfortandtohelpobtainproperseat beltfit.(See"Precautionsonseatbeltusage" (P.1-10).)Also,theseatbackcanbereclinedto allowoccupantstorestwhenthevehicleis stoppedandthetransmissionisintheP(Park) positionorN(Neutral)positionwiththeparking brakefullyapplied.
NOTE:
- Depending on the passenger's seat sliding position when the passenger seatisunoccupied while driving, a noisem maybe heard as beside part of the passenger's seat contact the seat belt tongue. In this case, movethe seat to there are most position to avoid interference.
- If you are having difficulty turning the adjusting dial, park the vehicle and then open the door or get out of the vehicle to operate the medial.

natural_image
Diagram of a car seatbelt with directional arrows indicating movement (no text or symbols)Seatlifter(fordriver'sseat):
Pulluporpushdowntheadadjustingleverto adjusttheseatheightuntilthedesiredposition isachieved.

REARSEATS
Folding
Beforefoldingtherearseats:
Securetheseatbeltsontheseatbelthookson thesidewall.(See"Seatbelthooks"(P.1-15).)
Tofoldtheseatback,pulltheadjustingknob ①.
Toreturntheseatbacktotheseatingposition,lift upeachseatbackandpushittotheupright positionuntilitislatched.
HEADRESTRAINTS/HEADRESTS

CAUTION
When folding or returning these at back (s) to the upright position, to avoid injury to yourself and others:
- Makesurethattheseatpathisclear beforemovingtheseat.

WARNING
- Donotfolddowntherearseats whenoccupantsareintherearseat areaoranyobjectsareontherear seats.
●Neverallowanyonetorideinthe cargoareaorontherearseats whentheyareinthefold-down position.Useoftheseareasby passengerswithoutproperrestraintscouldresultinseriousinjury inanaccidentorsuddenstop.
•Properlysecureallcargowithropes orstrapstohelppreventitfrom slidingorshifting.Donotplace cargohigherthantheseatbacks.In asuddenstoporcollision,unsecuredcargocouldcausepersonal
injury.
- When returning these at back to the upright position, be certain they are completely secured in the elatched position. If they are not completely secured, passengers maybe injured in an accident or sudden stop.

WARNING
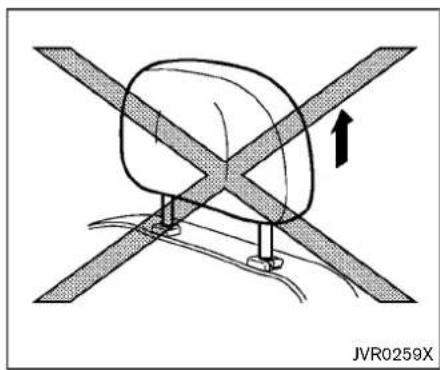
Headrestraint/headrestsupplement theothervehiclesafetysystems.They may provide additional protection againstinjuryincertainrearendcollisions.Adjustableheadrestraints/headrestsmustbeadjustedproperly,as specifiedinthissection.Checkthe adjustmentaftersomeoneelseuses theseat.Donotattachanythingtothe headrestraint/headreststalksorremovetheheadrestraint/headrest.Do notusetheseatiftheheadrestraint/headresthasbeenremoved.Ifthehead restraint/headrestwasremoved,reinstallandproperlyadjustthehead restraint/headrestbeforeanoccupant usestheseatingposition.Failureto followtheseinstructionscanreducethe effectivenessoftheheadrestraint/headrest.Thismayincreasetheriskof seriousinjuryordeathinacollision.

The illustrations show theseating positions equipped with headrestraint/headrest.
▲ Indicate theseating position is equipped with a head restraint.
■ Indicate theseating position is equipped with a headrest.
+Indicate theseating position is not equipped with a head restraint or head rest.
- Yourvehicleisequippedwithahead restraint/headrestthatmaybeintegrated, adjustableornon-adjustable.
- Adjustableheadrestraints/headrestshave multiplenotchesalongthestalktolockthem inadesiredadjustmentposition.
- Thenon-adjustableheadrestraints/head-restshavesinglelockingnotchtosecure themtotheseatframe.
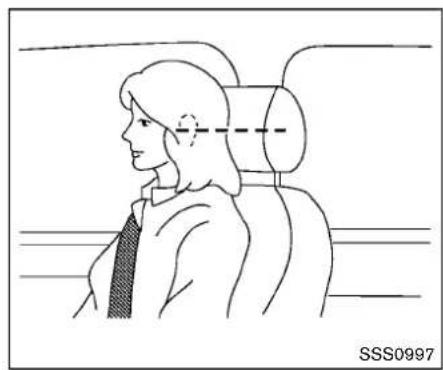
●ProperAdjustment:
—Fortheadjustabletype, alignthehead restraint/headrestsothecenterofyour earsapproximatelylevelwiththecenter oftheheadrestraint/headrest.
—If you rear position is still higher than the recommended alignment, placethe head restraint/head rest at the highest position. - If the head restraint/head rest has been removed, ensure that it is reinstalled and locked in place before reiding in that designated seating position.

ADJUSTABLEHEADRESTRAINT/ HEADRESTCOMPONENTS
- Removableheadrestraint/headrest
2.Multiplenotches
3.Lockknob
4.Stalks
1-6 Safety—Seats, seatbeltsandsupplementalrestraintsystem

NON-ADJUSTABLEHEADRESTRAINT/HEADRESTCOMPONENTS
- Removableheadrestraint/headrest
2.Singlenotch
3.Lockknob
4.Stalks
natural_image
Diagram of a car seat with directional arrows indicating movement (no text or symbols)REMOVE
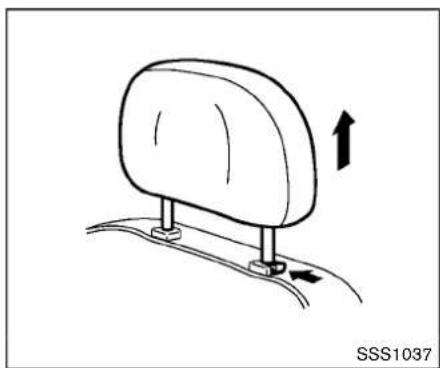
Use the following procedure to remove the head restraint/headrest.
- Pulltheheadrestraint/headrestuptothe highestposition.
2.Pushandholdthelockknob. - Removetheheadrestraint/headrestfrom theseat.
- Storetheheadrestraint/headrestproperly in asecureplacesoitisnotlooseinthe vehicle.
- Reinstallandproperlyadjustthehead restraint/headrestbeforeanoccupantuses theseatingposition.

INSTALL
- Align the head restraint/head rest stalk with the holes in these seat. Makes sure that the head restraint/head rest is facing the correct direction. The talk with head adjustment notch ① must be installed in the hole with the lock knob ②.
- Pushandholdthelockknobandpushthe headrestraint/headrestdown.
- Properly adjust the head restraint/head rest before an occupant use these seating position.
Safety—Seats, seatbeltsandsupplementalrestraintsystem 1-7
natural_image
Side profile illustration of a person seated in a car seat, viewed from the side (no text or symbols)ADJUST
Foradjustableheadrestraint/headrest
Adjusttheheadrestraint/headrestsothecenter islevelwiththecenterofyourears.Ifyourear positionisstillhigherthantherecommended alignment,placetheheadrestraint/headrestat thehighestposition.
natural_image
Diagram of a mechanical or structural assembly with intersecting beams and a central component, no visible text or symbols.Fornon-adjustableheadrestraint/head-rest
Makesuretheheadrestraint/headrestispositionedsothelockknobisengagedinthenotch beforeridinginthatdesignatedseatingposition.
natural_image
Diagram of a car seat with an arrow indicating upward motion, no text or symbols presentRaise
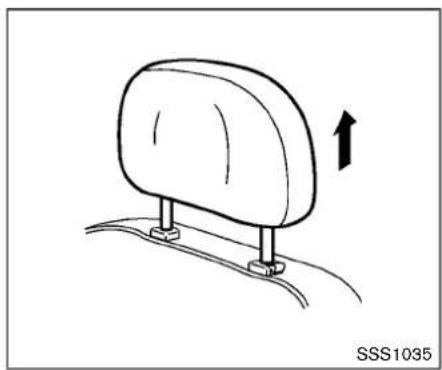
Toraisetheheadrestraint/headrest,pullitup. Makesuretheheadrestraint/headrestispositionedsothelockknobisengagedinthenotch beforeridinginthatdesignatedseatingposition.
1-8 Safety—Seats, seat belts and supplemental restraintsystem
natural_image
Diagram of a car seat with directional arrows indicating movement (no text or symbols)Lower
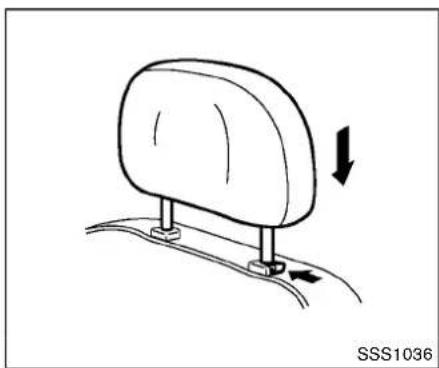
Tolower, pushandhold the lock knob and push the head restraint/head restdown.
Makesuretheheadrestraint/headrestispositionedsothelockknobisengagedinthenotch beforeridinginthatdesignatedseatingposition.

natural_image
Line drawing of a human head and arm with a hand holding a globe, no text or symbols presentFRONT-SEATACTIVEHEADRESTRAINTS(ifsoequipped)
The Active Head Restraint moves forward utilizing the forcethattheseatbackreceives from the occupantinarear-end collision. The movement of the head restraint help support the occupant's head by reducing its backward movement and helping absorb some of the force that may lead to whiplash-type injuries.
ActiveHeadRestraintsareeffectiveforcollisionsatlowtomediumspeedsinwhichitissaid thatwhiplashinjuryoccursmost.
ActiveHeadRestraintsoperateonlyincertain rear-endcollisions.Afterthecollision,thehead restraintsreturntotheiroriginalpositions.
Thefrontheadrestraintshavemultipleadjustmentnotches.
ProperlyadjusttheActiveHeadRestraintsas describedinthissection.
SEATBELTS
PRECAUTIONSONSEATBELT USAGE
If you are wearing your seat belt properly adjusted, and you are sitting upright and well back in your seat with both feet on the floor, your chances of being injured or killed in an accident and or these severity of injury may beg greatly reduced. NISSAN strongly encourages you and allof your passenger's to buckle up every time you drive, even if your seating position includes a supplemental airbag.
MostU.S.statesandCanadianprovinces orterritoriesspecifythatseatbeltsbe wornatalltimeswhenavehicleisbeing driven.


natural_image
Line drawing of a person sitting in a car, showing seatbelt and dashboard (no text or symbols)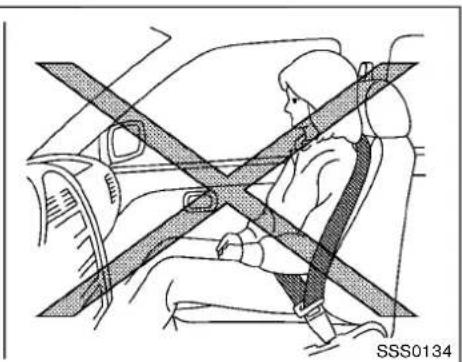
natural_image
Diagram of a person seated in a car with a cross-shaped barrier, no text or symbols present1-10 Safety—Seats, seat belts and supplemental restraintsystem

natural_image
Diagram of car seatbelt and seatbelt cross-section showing no text or symbols
natural_image
Diagram of a person sitting inside a car with a cross-shaped seatbelt (no text or symbols)
WARNING
- Everypersonwhodrivesorridesin thisvehicleshoulduseaseatbeltat alltimes.Childrenshouldbeproperlyrestrainedintherearseatand, ifappropriate,inachildrestraint.
- Theseatbeltshouldbeproperly adjustedtoasnugfit.Failuretodo somayreducetheeffectiveness of theentirerestraintsystemandin- creasethechanceorseverity of injuryinanaccident.Seriousinjury ordeathcanoccuriftheseatbeltis notwornproperly.
●Alwaysroutetheshoulderbeltover yourshoulder and across your chest. Neverputthebeltbehind yourback, underyourarmoracross yourneck. Thebeltshouldbeaway fromyourfaceandneck, but not fallingoffyourshoulder. -
Positionthelapbeltaslowand snugaspossibleAROUNDTHE HIPS,NOTTHEWAIST.Alapbelt worntoohighcouldincreasethe riskofinternalinjuriesinanaccident.
-
Besuretheseatbelttongueis securelyfastenedtotheproper buckle.
- Donotweartheseatbeltinsideout ortwisted.Doingsomayreduceits effectiveness.
- Donotallowmorethanoneperson tousethesameseatbelt.
●Nevercarrymorepeopleinthe vehiclethanthereareseatbelts. - Iftheseatbeltwarninglightglows continuouslywhiletheignitionis turnedONwithalldoorsclosedand allseatbeltsfastened,itmayindicateamalfunctioninthesystem. Havethesystem checked.It is recommendedyouvisitaNISSAN dealerforthisservice.
- Nochangesshouldbemadetothe seatbeltsystem. Forexample, do notmodifytheseatbelt, addmaterial, or install devices that may changetheseatbeltroutingor tension. Doingsomay affect the operation of theseatbeltsystem. Modifyingortampering with the seatbeltsystem may result in serious personal injury.
Safety—Seats, seatbeltsandsupplementalrestraintsystem 1-11
- Onceaseatbeltpretensionerhas activated, it cannot be reused and must bereplaced together with the retractor. It is recommended you visit a NISSAN dealer for this service.
- Allseatbeltassemblies, including retractors and attaching hardware, should be inspected after an oscillation. It is recommended you to visit a NISSAN dealer forth this service. NISSAN recommend that all seat belt assemblies in used during a collision bereplaced unless the collision was minor and the belts shown on damage and continueto operate properly. Seat belt assemblies not in used during a collision should also be inspected and replaced if either damage or improper operation is noted.
- Allchildrestraintsandattaching hardwareshouldbeinspectedafter anycollision.Alwaysfollowthe restraintmanufacturer'sinspection instructionsandreplacementrecommendations.Thechildrestraints shouldbereplacediftheyare damaged.
PREGNANTWOMEN
NISSANrecommendsthatpregnantwomenuse seatbelts.Theseatbeltshouldbewornsnug, andalwayspositionthelapbeltaslowas possiblearoundthehips,notthewaist.Place theshoulderbeltoveryourshoulderandacross yourchest.Neverputthelap/shoulderbeltover yourabdominalarea.Contactyourdoctorfor specificrecommendations.
INJUREDPERSONS
NISSANrecommendsthatinjuredpersonsuse seatbelts,dependingontheinjury.Checkwith yourdoctorforspecificrecommendations.
THREE-POINTTYPESEATBELT

WARNING
- Everypersonwhodrivesorridesin thisvehicleshoulduseaseatbeltat alltimes.
- Donotrideinamovingvehicle whentheseatbackisreclined.This canbedangerous.Theshoulderbelt willnotbeagainstyourbody.Inan accident,youcouldbethrownintoit andreceiveneckorotherserious injuries.Youcouldalsoslideunder thelapbeltandreceiveserious
internalinjuries.
- Forthemosteeffectiveprotection whenthevehicleisinmotion,the seatshouldbeupright.Alwayssit wellbackanduprightintheseat withbothfeetonthefloorand adjusttheseatbeltproperly.
- Donotallowchildrentoplaywith theseatbelts.MostseatingpositionsareequippedwithAutomatic LockingRetractor(ALR)modeseat belts.Iftheseatbeltbecomes wrappedaroundachild'sneckwith theALRmodeactivated,thechild canbeseriouslyinjuredorkilledif theseatbeltretractsandbecomes tight.Thiscanoccurevenifthe vehicleisparked.Unbuckletheseat belttoreleasethechild.Iftheseat beltcannotbeunbuckledoris alreadyunbuckled,releasethechild bycuttingtheseatbeltwith a suitabletool(suchasaknifeor scissors)toreleasetheseatbelt.
Fasteningtheseatbelts
- Adjusttheseat.(See "Seats"(P.1-2).)

natural_image
Illustration of a person sitting in a car seatbelt, showing the seatbelt being lifted by a black arrow (no text or symbols present)-
Slowlypulltheseatbeltoutoftheretractor andinsertthetongueintothebuckleuntil youhearandfeelthelatchengage.
-
Theretractorisdesignedtolock duringasuddenstoporonimpact. Aslowpullingmotionpermitsthe beltomoveandallowsyousome freedomofmovementintheseat.
- If these seat belt cannot be pulled from its fully retracted position, firmly pull the belt and release it. Then smoothly pull the belt out of the retractor.

natural_image
Line drawing of a person sitting in a car seatbelt, showing the seatbelt being lifted (no text or symbols present)- Positionthelapbeltportionlowandsnug onthehipsasshown.
- Pulltheshoulderbeltportiontowardthe retractortotakeupextraslack. Besurethe shoulderbeltisroutedoveryourshoulder andacrossyourchest.
Thefrontpassengerseatandtherearseating positionsthree-pointseatbeltshavetwomodes ofoperation:
Thefrontpassengerseatandtherearseating positionsthree-pointseatbeltshavetwomodes ofoperation:
●EmergencyLockingRetractor(ELR)
●AutomaticLockingRetractor(ALR)
TheEmergencyLockingRetractor(ELR)mode allowstheseatbelttoextendandretractto allowthedriverandpassengerssomefreedom
of movementintheseat.TheELRlocktheseat beltwhenthevehicleslowsdownrapidlyor duringcertainimpacts.
The Automatic Locking Retractor (ALR) mode (childrestraint mode) lock these seat belt for childrestraint installation.
When ALRmode is activated theseatbelt cannot be extended again until theseatbelt tongue is detached from the buckle and fully retracted. Theseatbelt return to the ELRmode after theseatbelt fully retracts. For additional information, see "Childrestraints" (P.1-18).
The ALR modes should be used only for child restraint installation. During normal seat belt use by an occupant, the ALR modes should not be activated. If it is activated, it may cause uncomfortable seat belt tension.

WARNING
When fastening these seat belts, be certain that seat backs are completely secured in the elatched position. If they are not completely secured, passengers may be injured in an accidentors sudden stop.

natural_image
Illustration of a person's seatbelt being adjusted, showing banding and a black arrow indicating direction (no text or symbols)Unfasteningtheseatbelts
Tounfastentheseatbelt, pushthebuttononthe buckle. Theseatbeltautomaticallyretracts.
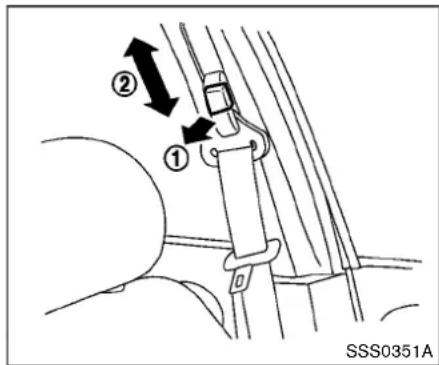
Shoulderbeltheightadjustment(forfront seats)
Theshoulderbeltanchorheightshouldbe adjustedtothepositionbestforyou.(See
"Precautionsonseatbeltusage"(P.1-10).)
Toadjust, pull the adjustment button ①, and then movetheshoulderbeltanchortothe desired position ②, so that the beltpasses over the center of the shoulder. The belt should be away from your face and neck, but not falling off of your shoulder. Releasetheadjustment button to lock the shoulder belt anchor into position.
Therangeofheightadjustmentoftheshoulder
1-14 Safety—Seats, seat belts and supplemental restraintsystem
beltmayvarydependingonthemodel.

WARNING
•Afteradjustment,releasethead-justmentbuttonandtrytomovethe shoulderbeltanchorupanddown tomakesureitissecurelyfixedin position.
- Theshoulderbeltanchorheight shouldbeadjustedtotheposition bestforyou.Failuretodosomay reducetheeffectivenessofthe entirerestraintsystemandincrease thechanceorseverityofinjuryinan accident.

natural_image
Line drawing of a car seatbelt buckle assembly (no text or symbols)Seatbelthooks
Whentherearseatbeltsarenotinuse and whenfoldingdowntherearseats, hooktherear seatbeltsontheseatbelthooks.
SEATBELTEXTENDERS
If, because of bodysize or driving position, it is not possible to properly fit the lap - shoulder belt and fasten it, an extender that is compatible with the installed seat belts available that can be purchased. The extender adds approximately 8 in (200mm) of length hand maybe used for either the driver or front passenger seating position. It is recommended you visit a NISSAN dealer for assistance with purchasing an extender ifan
extenderisrequired.

WARNING
- It is recommended that only NISSANseatbeltextenders, made bythesamecompanywhichmade theoriginalequipmentseatbelts, beusedwithNISSANseatbelts.
- Adultsandchildrenwhocanusethe standardseatbeltshouldnotusean extender. Suchunnecessaryuse couldresultinseriouspersonal injuryintheeventofanaccident.
- Neveruseseatbeltextendersto installchildrestraints.Ifthechild restraintisnotsecuredproperly,the childcouldbeseriouslyinjuredor killedinacollisionorasuddenstop.
SEATBELTMAINTENANCE
- Tocleantheseatbeltwebbing,applya mildsoapsolutionoranysolutionrecommendedforcleaningupholsteryorcarpets. Thenwipewithaclothandallowtheseat beltstodryntheshade.Donotallowthe seatbeltstoretractuntiltheyarecompletely dry.
CHILDSAFETY
- Ifdirtbuildsupintheshoulderbelt
guideoftheseatbeltanchors,theseat beltsmayretractslowly.Wipetheshoulder beltguidewithaclean,drycloth.
- Periodicallychecktoseethattheseat beltandthemetalcomponents,suchas buckles,tongues,retractors,flexiblewires andanchors,workproperly.Iflooseparts, deterioration,cutsorotherdamageonthe webbingisfound,theentireseatbelt assemblyshouldbereplaced.

WARNING
Donotallowchildrentoplaywiththe seatbelts.Mostseatingpositionsare equippedwithAutomaticLockingRetractor(ALR)modeseatbelts.Ifthe seatbeltbecomeswrappedarounda child'sneckwiththeALRmodeactivated,thechildcanbeseriouslyinjured orkillediftheseatbeltretractsand becomestight.Thiscanoccurevenif thevehicleisparked.Unbuckletheseat belttoreleasethechild.Iftheseatbelt cannotbeunbuckledorisalready unbuckled,releasethechildbycutting theseatbeltwithasuitabletool(such asaknifeorscissors)toreleasethe seatbelt.
Childrenneedadultstohelpprotectthem. Theyneedtobeproperlyrestrained.
In addition to the general information in this manual, child safety information is available from many others, including doctors, teachers, government traffic safety offices, and community organizations. Every child is different, sobesure to learn the best way to transport your child.
Therearethreebasictypesofchildrestraint
systems:
●Rear-facingchildrestraint
-Forward-facingchildrestraint
- Boosterseat
The proper restraint depends on the child's size. Generally, infants up to about 1 year and less than 20 lbs (9 kg) should be placed in rear-facing child restraints. Forward-facing child restraints are available for children who outgrow rear-facing child restraints and are at least 1 year old. Booster seats are used to help position vehicle lap/shoulder belton a child who can no longer use forward-facing child restraint.

WARNING
Infantsandchildrenneedspecialpro- tection.Thevehicle'sseatbeltsmaynot fithemproperly.Theshoulderbeltmay cometooclosetothefaceorneck.The lapbeltmaynotfitovertheirsmallhip bones.Inanaccident,animproperly fittingseatbeltcouldcauseseriousor fatalinjury.Alwaysuseappropriate childrestraints.
AllU.S.statesandCanadianprovincesor territoriesrequiretheuseofapprovedchild restraintsforinfantsandsmallchildren.See
"Childrestraints"(P.1-18).
Achildrestraintmaybesecuredinthevehicle byusingeithertheLATCH(LowerAnchorsand TethersforCHildren)systemorwiththevehicle seatbelt.See"Childrestraints"(P.1-18)for moreinformation.
NISSANrecommendsthatallpre-teens andchildrenberestrainedintherearseat. Studiesshowthatchildrenaresaferwhen properlyrestrainedintherearseatthanin thefrontseat.
Thisisespeciallyimportantbecauseyour vehiclehasasupplementalrestraintsystem(Airbagsystem)forthefrontpassenger.See“Supplementalrestraintsystem”(P.1-38).
INFANTS
Infantsuptoatleast1yearoldshouldbeplaced inarear-facingchildrestraint.NISSANrecommendsthatinfantsbeplacedinchildrestraints thatcomplywithFederalMotorVehicleSafety StandardsorCanadianMotorVehicleSafety Standards.Youshouldchooseachildrestraint thatfitsyourvehicleandalwaysfollowthe manufacturer'sinstructionsforinstallationand use.
SMALLCHILDREN
Childrenthatareover1yearoldandweighat least20lbs(9kg)shouldremaininarear-facing childrestraintaslongaspossibleuptothe heightorweightlimitofthechildrestraint. Childrenwhooutgrowtheheightorweightlimit oftherear-facingchildrestraintandareatleast 1yearoldshouldbesecuredinaforward-facing childrestraintwithaharness.Refertothe manufacturer'sinstructionsforminimumand maximumweightandheightrecommendations. NISSANrecommendsthatsmallchildrenbe placedinchildrestraintsthatcomplywith FederalMotorVehicleSafetyStandardsor CanadianMotorVehicleSafetyStandards.You shouldchooseachildrestrainthatfitsyour vehicleandalwaysfollowthemanufacturer's instructionsforinstallationanduse.
LARGERCHILDREN
Childrenshouldremaininaforward-facingchild restraintwithaharnessuntiltheyreachthe maximumheightorweightlimitallowedbythe childrestraintmanufacturer.
Onceachildoutgrowstheheightorweightlimit oftheharness-equippedforward-facingchild restraint,NISSANrecommendsthatthechildbe placedinacommerciallyavailableboosterseat toobtainproperseatbeltfit.Foraseatbelttofit properly,theboosterseatshouldraisethechild
sothattheshoulderbeltisproperlypositioned acrossthechestandthetop,middleportionof theshoulder.Theshoulderbeltshouldnotcross theneckorfaceandshouldnotfalloffthe shoulder.Thelapbeltshouldliesnuglyacross thelowerhipsorupperhighs,nottheabdomen.
Aboosterseatcanonlybeusedinseating positionsthathaveathree-pointtypeseatbelt. Theboosterseatshouldfitthevehicleseatand havealabelcertifyingthatitcomplieswith FederalMotorVehicleSafetyStandardsor CanadianMotorVehicleSafetyStandards.
Aboosterseatshouldbeuseduntilthechild canpasstheseatbeltfittestbelow:
- Arethechild'sbackandhipsagainstthe vehicleseatback?
- Isthechildabletositwithoutslouching?
- Dothechild'skneesbendeasilyoverthe frontedgeoftheseatwithfeetflatonthe floor?
- Canthechildsafelyweartheseatbelt(lap beltlowandsnugacrossthehipsand shoulder belt across mid-chest and shoulder)?
- Isthechildabletousetheproperlyadjusted headrestraint/headrest?
- Willthechildbeabletostayinpositionfor theentireride?
CHILDRESTRAINTS

natural_image
Line drawing of a person sitting in a seat inside a vehicle, wearing a seatbelt (no text or symbols)If you answered not to any of these questions, the child should remain in a booster seat using a three-point type seat belt.
NOTE:
Lawsinsomecommunitiesmayfollow differentguidelines.Checklocalandstate regulationstoconfirmyourchildisusing thecorrectrestraintsystembeforetraveling.

WARNING
Neverletachildstandorkneelonany seatanddonotallowachildinthe cargoarea.Thechildcouldbeseriously
injuredorkilledinasuddenstopor collision.

natural_image
Diagram showing car seatbelt and passenger inside a vehicle, no text or symbols present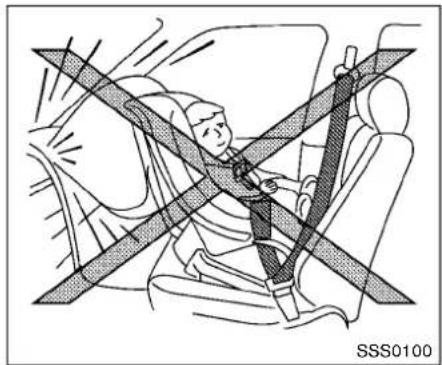
natural_image
Diagram of a person wearing a car seatbelt and headboard, with no visible text or symbols1-18 Safety—Seats, seat belts and supplemental restraintsystem
PRECAUTIONSONCHILDRESTRAINTS

WARNING
- Failuretofollowthewarningsand instructionsforproperuseandin-stallationofchildrestraintscould resultinseriousinjuryordeathofa child or other passengers in a suddenstoporcollision:
—The child restraint must be used and installed properly. Always follow a llof the child restraint manufacturer's instructions for installation and use.
—Infants and children should never beheldon anyone's lap. Eventhestrongest adult cannot resist the forces of a collision.
—Donotputaseatbeltaround bothachildandanotherpassenger.
—NISSANrecommendsthatall childrestraintsbeinstalledin therearseat.Studieshowthat childrenaresaferwhenproperly restrainedintherearseatthan
inthefrontseat.Ifyoumust installaforward-facingchild restraintinthefrontseat,see "Forward-facingchildrestraint installationusingtheseatbelts" (P.1-30).
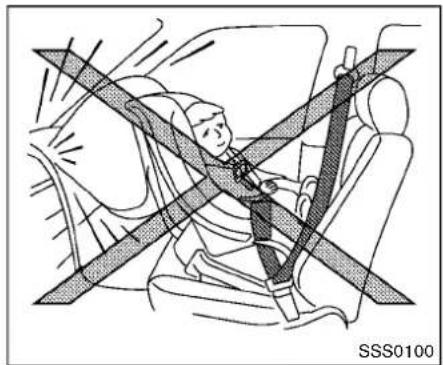
—EvenwiththeNISSANAdvanced AirBagSystem,neverinstalla rear-facingchildrestraintinthe frontseat.Aninflatingairbag couldseriouslyinjureorkilla child.Arear-facingchildrestraintmustonlybeusedinthe rearseat.
—Besuretopurchaseachild restraintthatwillfitthechild andvehicle.Somechildrestraintsmaynotfitproperlyin yourvehicle.
—Childrestraintanchorpointsare designedtowithstandloads fromchildrestraintsthatare properlyfitted.
—Neverusetheanchorpointsfor adultseatbeltsorharnesses.
—Achildrestraintwithatoptether strapshouldnotbeusedinthe frontpassengerseat.
—Keepseatbacksasuprightas possibleafterfittingthechild restraint.
—Infantsandchildrenshouldalwaysbeplacedinanappropriatechildrestraintwhileinthe vehicle.
- Whenthechildrestraintisnotin use, keepitsecured with the LATCH systemoraseatbelt. In as sudden stopor collision, loose object scan injure occupants or damage the vehicle.

CAUTION
Achildrestraintinaclosedvehiclecan becomeveryhot.Checktheseating surfaceandbucklesbefore placinga childinthechildrestraint.
Thisvehicleisequippedwithauniversalchild restraintanchorsystem,referredtoasthe LATCH(LowerAnchorsandTethersforCHildren)system.Somechildrestraintsincluderigid orwebbing-mountedattachmentsthatcanbe connectedtotheseanchors.
Fordetails, see "LowerAnchorsandTethersfor CHildrenSystem(LATCH)" (P.1-20).
If you donothavea LATCH compatible child restraint, the vehicle seat belt scan be used.
Several manufacturers offer childrestraints for infants and small children of various sizes. When selecting any child restraint, keep the following points in mind:
- Chooseonlya restraintwithalabelcertifying thatitcomplieswithFederalMotorVehicle SafetyStandard213orCanadianMotor VehicleSafetyStandard213.
- Checkthechildrestraintinyourvehicleto besureitiscompatiblewiththevehicle's seatandseatbeltsystem.
- If the child restraint is compatible with your vehicle, place your child in the child restraint and check the various adjustment to be sure the child restraint is compatible with your child. Choose a child restraint that is designed for your child's height and weight. Always follow all recommended procedures.
-
If the combined weight of the child and child restraint is less than 65 lbs (29.5 kg), you may see either the LATCH anchors or the seat belt to install the child restraint (not both the same time).
-
If the combined weight of the child and child restraint is greater than 65 lbs (29.5 kg), use the vehicle's seat belt (not the lower anchors) to install the child restraint.
- Besuretofollowthechildrestraintmanufacturer'sinstructionsforinstallation.
AllU.S.statesandCanadianprovincesor territoriesrequirethatinfantsandsmall childrenberestrainedinanapprovedchild restraintatalltimeswhilethevehicleis beingoperated.Canadianlawrequiresthe toptetherstraponforward-facingchild restraintsbesecuredtothedesignated anchorpointonthevehicle.
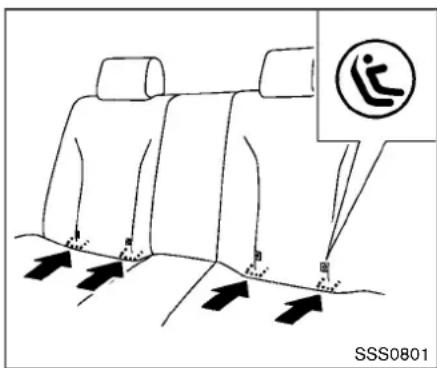
LATCHlabellocation
LowerAnchorsandTethersforCHildren System(LATCH)
Yourvehicleisequippedwithspecialanchor pointsthatareusedwithLATCH(Lower AnchorsandTethersforCHildren)system compatiblechildrestraints.Thissystemmay alsobereferredtoastheISOFIXorISOFIX compatiblesystem.Withthisystem,youdonot havetousevehicleseatbelttosecurethe childrestraintunlessthecombinedweightofthe childandchildrestraintexceeds65lbs(29.5 kg).Ifthecombinedweightofthechildandchild restraintisgreaterthan65lbs(29.5kg),usethe vehicle'sseatbelt(nottheloweranchors)to installthechildrestraint.Besuretofollowthe
1-20 Safety—Seats, seat belts and supplemental restraintsystem
childrestraintmanufacturer'sinstructionsfor installation.
LATCHloweranchor

WARNING
Failuretofollowthewarningsand instructionsforproperuseandinstallationofchildrestraintscouldresultin seriousinjuryordeathofachildor otherpassengersinasuddenstopor collision:
- AttachLATCHsystemcompatible childrestraintsonlyatthelocations shownintheillustration.
- Donotsecureachildrestraintinthe centerrearseatingpositionusing theLATCHloweranchors.Thechild restraintwillnotbesecuredproperly.
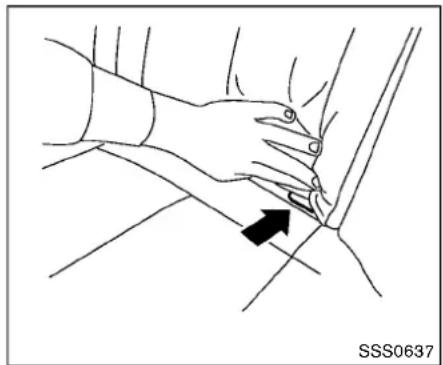
- Inspecttheloweranchorsbyinsertingyourfingersintothelower anchorarea.Feeltomakesure therearenoobstructionsoverthe anchorssuchasseatbeltwebbing orseatkushionmaterial.Thechild restraintwillnotbesecuredproperlyiftheloweranchorsareob-
structed.
Childrestraintanchoragesaredesignedtowithstandonlythoseloads imposedbycorrectlyfittedchildrestraints.Undernocircumstancesare theytobeusedtoattachadultseat belts,orotheritemsorequipmentto thevehicle.Doingsocoulddamagethe childrestraintanchorages.Thechild restraintwillnotbeproperlyinstalled usingthedamagedanchorage,anda childcouldbeseriouslyinjuredorkilled inacollision.
natural_image
Line drawing of a hand pressing down on a car seat, with an arrow indicating the pressure point (no text or symbols present)LATCHloweranchorlocation
LATCHloweranchorlocation
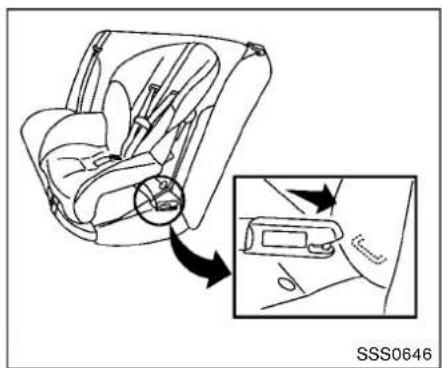
The LATCHloweranchors are located at the rear of these seat cushion near these seat back. A label is attached to these seat back to help you locate the LATCH lower anchors.
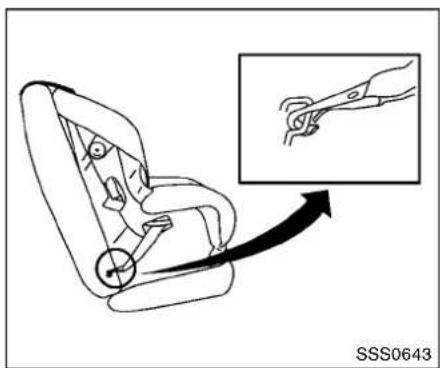
LATCHwebbing-mountedattachment
InstallingchildrestraintLATCHlower anchorattachments
LATCHcompatiblechildrestraintsincludetwo rigidorwebbing-mountedattachmentsthatcan beconnectedtotwoanchorslocatedatcertain seatingpositionsinyourvehicle.Withthis system,youdonothavetouseavehicleseat belttosecurethechildrestraint.Checkyour childrestraintforalabelstatingthatitis compatiblewithLATCH.Thisinformationmay alsobeintheinstructionsprovidedbythechild restraintmanufacturer.

natural_image
Line drawing of a car seatbelt with an inset showing a cable being inserted (no text or symbols)LATCHrigldattachment
Wheninstallingachildrestraint,carefullyread andfollowtheinstructionsinthismanualand thoseuppliedwiththechildrestraint.
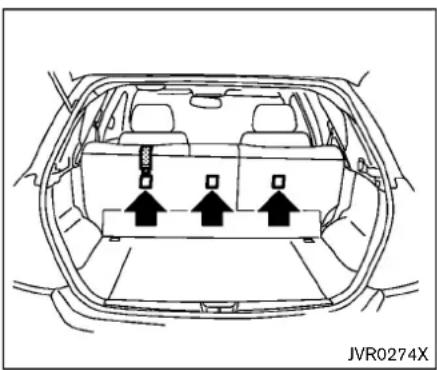
Toptetheranchor

WARNING
Properlysecurecargoandonotallow ittocontactthetoptetherstrapwhenit isattachedtothetoptetheranchor. Cargothatisnotproperlysecuredor cargothatcontactsthetoptetherstrap maydamagethetoptetherstrapduring acollision.Ifthecargocover(ifso
equipped)contactsthetoptetherstrap whenitisattachedtothetoptether anchor,removethecargocoverfrom thevehicleorsecureitonthecargo floorbelowitsattachmentlocation.If thecargocoverisnotremoved,itmay damagethetoptetherstrapduring a collision.Yourchildcouldbeseriously injuredorkilledinacollisionifthechild restrainttopptetherstrapisdamaged.
1-22 Safety—Seats, seat belts and supplemental restraintsystem

natural_image
Top-down line drawing of a car interior showing vent, rear seats, and three directional arrows indicating flow or movement (no text or symbols)Toptetheranchorpointlocations

WARNING
Childrestraintanchoragesaredesignedtowithstandonlythoseloads imposedbycorrectlyfittedchildrestraints.Undernocircumstancesare theytobeusedtoattachadultseat belts,orotheritemsorequipmentto thevehicle.Doingsocoulddamagethe childrestraintanchorages.Thechild restraintwillnotbeproperlyinstalled usingthedamagedanchorage,anda childcouldbeseriouslyinjuredorkilled
inacollision.
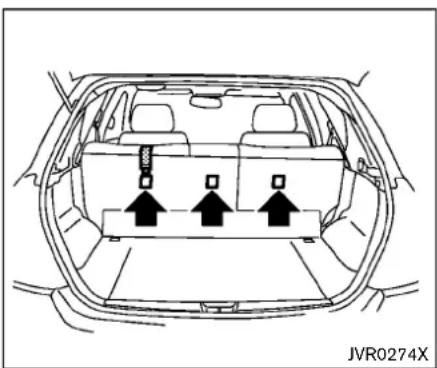
Anchorpointsarelocatedonthebacksideof theseatbacks.
Thechildrestrainttoptetherstrapmustbeused wheninstallingchildrestraintswiththeLATCH loweranchorattachmentsorseatbelts.
If you have any questions when installing a toptetherstrapchildrestraint therear seat, it is recommended you visit a NISSAN dealer forth this service.
REAR-FACINGCHILDRESTRAINTINSTALLATIONUSINGLATCH
RefertoallWarningsandCautionsinthe"Child safety"and"Childrestraints"sectionsbefore installingachildrestraint.
Donotusetheloweranchorsifthecombined weightofthechildandthechildrestraint exceeds65lbs(29.5kg).Ifthecombined weightofthechildandthechildrestraintis greaterthan65lbs(29.5kg),usethevehicle's seatbelt(nottheloweranchors)toinstallthe childrestraint.Besuretofollowthechild restraintmanufacturer'sinstructionsforinstallation.
Followthesestepstoinstallarear-facingchild restraintusingtheLATCHsystem:
- Position the child restraint on these seat. Always follow the child restraint manufacturer's instructions.
natural_image
Diagram showing a car seatbelt mechanism with an inset close-up of the joint detail (no text or symbols)Rear-facingweb-mounted—step2
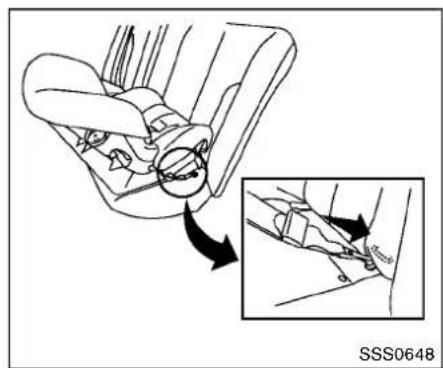
2. Secure the child restraint anchor attachment to the LATCH lower anchors. Check to make sure the LATCH attachment is properly attached to the lower anchors.

natural_image
Diagram showing car seatbelt fastening mechanism with magnified inset (no text or symbols)Rear-facingrigid-mounted—step2

natural_image
Diagram of a car seatbelt being adjusted for a person's seatbelt, showing mechanical components and force arrows (no text or symbols)Rear-facing—step3
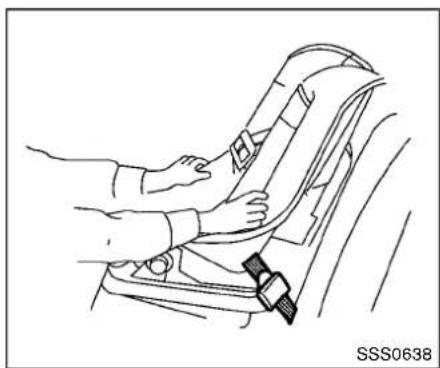
3. For child restraint that are equipped with webbing-mounted attachments, remove any addition of slack from the anchor attachments. Press downward and rearward firmly in the center of the child restraint with your hand to compress the vehicle seat cushion and seat back while tightening the webbing of the anchor attachments.
1-24 Safety—Seats, seat belts and supplemental restraintsystem

natural_image
Line drawing of a car seatbelt with hands adjusting the seat (no text or symbols)Rear-facing—step4
- After attaching the child restraint, test it before you place the childinit. Push it from sidetosidewhile holding the child restraint near the LATCH attachment path. The child restraint should not move more than 1 inch (25mm), from sidetoside. Try to get forward and check to see if the LATCH attachment hold stherer e raintin place. If the restraint is not secure, tighten the LATCH attachment as necessary, or put the restraint in another seat and testit again. You may need to try a different child restraint or try installing by using the vehicle seat belt (if applicable). Not all child restraints fit in all types of vehicles.
5.Checktomakesurethechildrestraintis properlysecuredpriortoeachuse.Ifthe childrestraintisloose,repeatsteps1 through4. REAR-FACINGCHILDRESTRAINTINSTALLATIONUSINGTHESEATBELTS

WARNING
The three-point seat belt with Automatic Locking Retractor (ALR) must be used when installing a child restraint. Failure to set the ALR modewill result in the child restraint not being properly secured. There strain could tip over or beloose and cause injury to a child in sudden stop or collision. Also, it can change the operation of the front passenger air bag. See "Front passenger air bag and status light" (P.1-46).
natural_image
Diagram of a car seatbelt with diagonal bands indicating steering wheel (no text or symbols)Rear-facing—step1
RefertoallWarningsandCautionsinthe"Child safety"(P.1-16)and"Childrestraints"(P.1-18) beforeinstallingachildrestraint.
Donotusetheloweranchorsifthecombined weightofthechildandthechildrestraint exceeds65lbs(29.5kg).Ifthecombined weightofthechildandthechildrestraintis greaterthan65lbs(29.5kg),usethevehicle's seatbelt(nottheloweranchors)toinstallthe childrestraint.Besuretofollowthechild restraintmanufacturer'sinstructionsforinstallation.
Followthesestepstoinstallarear-facingchild restraintusingthevehicleseatbeltsintherear
seats:
- Childrestraintsforinfantsmustbe usedintherear-facingdirectionand thereforemustnotbeusedinthefront seat.Positionthechildrestraintontheseat. Alwaysfollowtherestraintmanufacturer's instructions.

natural_image
Line drawing of a car seatbelt with hands adjusting the seat (no text or symbols)Rear-facing—step2
- Routetheseatbelttonguethroughthechild restraintandinsertitintothebuckleuntilyou hearandfeelthelatchengage.Besureto followthechildrestraintmanufacturer's instructionsforbeltrouting.

natural_image
Diagram of a car seatbelt mechanism with a black arrow indicating the grip (no text or symbols present)Rear-facing—step3
- Pulltheshoulderbeltuntilthebeltisfully extended.Atthistime,theseatbeltretractor isintheAutomaticLockingRetractor(ALR) mode(childrestraintmode).Itrevertstothe EmergencyLockingRetractor(ELR)mode whentheseatbeltisfullyretracted.
1-26 Safety—Seats, seat belts and supplemental restraint system
natural_image
Diagram of a car interior showing steering wheel and dashboard with directional arrows indicating movement (no text or symbols)Rear-facing—step4
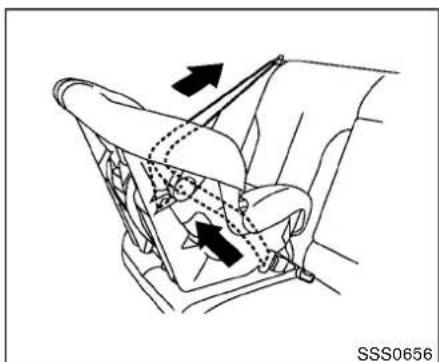
4. Allow these seat belt to retract. Pull upon the shoulder belt to remove any slack in the belt.

natural_image
Line drawing of a car seatbelt with hands adjusting the seatbelt (no text or symbols)Rear-facing—step5
5. Remove any additional slack from these seat belt; press downward and rearward firmly in the center of the child restraint to compress the vehicle seat cushion and seat back while pulling upon these seat belt.

natural_image
Line drawing of a car seatbelt with hands adjusting the seatbelt (no text or symbols)Rear-facing—step6
6. After attaching the child restraint, test it before you place the childinit. Pushit from sidetosidewhile holding the child restraint near these at beltpath. The child restraint should not move more than 1 inch (25mm), from sidetoside. Try to get forward and check to see if the belthold st her restraint in place. If thereerat is not secure, tighten these at beltas necessary, or put the restraint in another seat and test it again. You may need to try a different child restraint. Not all child restraints fit in all types of vehicles.
7. Checktomakesurethatthechildrestraintis properlysecuredpriortoeachuse.Ifthe
Safety—Seats, seatbeltsandsupplementalrestraintsystem 1-27
seatbeltisnotlocked,repeatsteps1 through6.
Afterthechildrestraintisremovedandtheseat beltfullyretracted,theALRmode(childrestraint mode)iscanceled.
FORWARD-FACINGCHILDRESTRAINTINSTALLATIONUSING LATCH
RefertoallWarningsandCautionsinthe"Child safety"and"Childrestraints"sectionsbefore installingachildrestraint.
Donotusetheloweranchorsifthecombined weightofthechildandthechildrestraint exceeds65lbs(29.5kg).Ifthecombined weightofthechildandthechildrestraintis greaterthan65lbs(29.5kg),usethevehicle's seatbelt(nottheloweranchors)toinstallthe childrestraint.Besuretofollowthechild restraintmanufacturer'sinstructionsforinstallation.
Followthesestepstoinstallaforward-facing childrestraintusingtheLATCHsystem:
- Positionthechildrestraintontheseat. Alwaysfollowthechildrestraintmanufacturer'sinstructions.

natural_image
Diagram of a car seat assembly with an inset showing the mechanism of fastening a seat (no text or symbols present)Forward-facingweb-mounted — step2
- Securethechildrestraintanchorattach-mentstotheLATCHloweranchors.Check tomakesuretheLATCHattachmentis properlyattachedtotheloweranchors. Ifthechildrestraintsequippedwithatop tetherstrap, routethetoptetherstrap and securethetetherstraptothetetheranchor point.See"Installingtoptetherstrap"(P.1-30).Donotinstallchildrestraintsthat requiretheuseofatoptether strap in seatingpositionsthatdonothaveatop tetheranchor.
natural_image
Line drawing of a car seat assembly with an inset showing the seatbelt mechanism (no text or symbols)Forward-facing rigid-mounted—step 2
- Thebackofthechildrestraintshouldbe securedagainstthevehicleseatback. Ifnecessary, adjustorremovethehead restrainttoobtainthecorrectchildrestraint fit.Iftheheadrestraintisremoved,storeitin asecureplace.Besuretoreinstallthe headrestraintwhenthechildrestraint is removed. See "Head restraints/head-rests"(P.1-5)forheadrestraintadjustment information. Iftheseatingpositiondoesnothaveahead restraintanditisinterferingwiththeproper childrestraintfit,tryanotherseatingposition oradifferentchildrestraint.
1-28 Safety—Seats, seat belts and supplemental restraint system

natural_image
Diagram of a car seatbelt mechanism showing two directional arrows indicating movement (no text or symbols present)Forward-facing—step4
-
For child restraint that are equipped with webbing-mounted attachments, remove any additional slack from the anchor attachments. Press downward and rearward firmly in the center of the child restraint with your kneetocompress the vehicle seat cushion and seat back while tightening the webbing of the anchor attachments.
-
Tightenthetherstrapaccordingtothe manufacturer'sinstructionstoremoveany slack.
natural_image
Line drawing of a car seatbelt being adjusted for a hand, no text or symbols presentForward-facing—step6
-
After attaching the child restraint, testit before you placethe childinit. Pushit from sidetosidewhileholding the child restraint near the LATCH attachment path. The child restraint should not move more than 1 inch (25mm), from sidetoside. Trytotugit forward and check to see if the LATCH attachment hold sthererestraint in place. If the restraint is not secure, tightenthe LATCH attachment as necessary, or puttherestraint in another seat and testitagain. You may need to try a different child restraint. Not all child restraints fit in all types of vehicles.
-
Checktomakesurethechildrestraintis properlysecuredpriortoeachuse.Ifthe
childrestraintisloose,repeatsteps1 through6.
natural_image
Top-down line drawing of a car backrest with three upward-pointing arrows indicating traffic or movement (no text or symbols)Installingtoptetherstrap

WARNING
Childrestraintanchoragesaredesignedtowithstandonlythoseloads imposedbycorrectlyfittedchildrestraints.Undernocircumstancesare theytobeusedtoattachadultseat belts,orotheritemsorequipmentto thevehicle.Doingsocoulddamagethe childrestraintanchorages.Thechild restraintwillnotbeproperlyinstalled usingthedamagedanchorage,anda childcouldbeseriouslyinjuredorkilled
inacollision.
Thechildrestrainttoptetherstrapmustbeused wheninstallingthechildrestraintwiththe LATCHloweranchorattachments.
First, secure the child restraint with the LATCH lower anchors (rearout board seat positions only).
-
Removetheheadrestraintandstoreitina secureplace. Besuretoreinstallthehead restraintwhenthechildrestraintisremoved (rearoutboardseatpositions).
See "Headrestraints/headrests" (P.1-5) for headrestraint adjustment, removal and installation information.
Positionthetoptetherstrapoverthetopof theseatback. -
Securethetoptetherstraptothetether anchorpointonthebackoftheseatback behindthechildrestraint.
-
Refertotheappropriatechildrestraint installation procedure steps in this section beforetighteningthetetherstrap.
If you have any questions when installing a toptetherstrap, consult your NISSAN dealer for details.
FORWARD-FACINGCHILDRESTRAINTINSTALLATIONUSINGTHE SEATBELTS

WARNING
The three-point seat belt with Automatic Locking Retractor (ALR) must be used when installing a child restraint. Failure to set the ALR modewill result in the child restraint not being properly secured. There are a could tip over or beloose and cause injury to a child in sudden stop or collision. Also, it can change the operation of the front passenger air bag. See "Front passenger air bag and status light" (P.1-46).

natural_image
Line drawing of a car interior showing seat, rear seats, and window (no text or symbols)Forward-facing(frontpassengerseat)—step1
RefertoallWarningsandCautionsinthe"Child safety"and"Childrestraints"sectionsbefore installingachildrestraint.
Donotusetheloweranchorsifthecombined weightofthechildandthechildrestraint exceeds65lbs(29.5kg).Ifthecombined weightofthechildandthechildrestraintis greaterthan65lbs(29.5kg),usethevehicle's seatbelt(nottheloweranchors)toinstallthe childrestraint.Besuretofollowthechild restraintmanufacturer'sinstructionsforinstallation.
Followthesestepstoinstallaforward-facing childrestraintusingthevehicleseatbeltinthe
rearseatsorinthefrontpassengerseat:
-
If you must install a child restraint in the front seat, it should be placed in forward-facing direction only. Movethe seat to there are most position. Child restraints for infants must be used in therear-facing direction and, therefore, must not be used in the front seat.
-
Position the child restraint on these seat. Always follow the child restraint manufacturer's instructions.
Thebackofthechildrestraintshouldbe securedagainstthevehicleseatback.
If necessary, adjustorremovethehead restraint to obtain the correct child restraint. If the head restraint is removed, store it in secure place. Besuretore install the head restraint when the child restraint is removed. See "Headrestraints/headrests" (P. 1-5) for head restraint adjustment, removal and installation information.
If these seating position does not have an adjustable head restraint and it is interfering with the proper child restraint, try another seating position or different child restraint.

natural_image
Car seatbelt buckle diagram showing seatbelt being inserted into the seat (no text or symbols)Forward-facing—step3
- Routetheseatbelttonguethroughthechild restraintandinsertitintothebuckleuntilyou hearandfeelthelatchengage.Besureto followthechildrestraintmanufacturer's instructionsforbeltrouting.
If the child restraint is equipped with atop tether strap, routethetoptether strap and secure theether strap to the ether anchor point (rearseat installation only). See "Installingoptether strap" (P.1-34). Do not install child restraint that require the use of atopether strap in seating positions that do not have atopether anchor.

natural_image
Medical illustration showing a hand adjusting a belt on a seated car seat (no text or symbols present)Forward-facing—step4
4. Pulltheshoulderbeltuntilthebeltisfully extended.Atthistime,theseatbeltretractor isintheAutomaticLockingRetractor(ALR) mode(childrestraintmode).Itrevertsto EmergencyLockingRetractor(ELR)mode whentheseatbeltisfullyretracted.

natural_image
Line drawing of a car seatbelt with arrows indicating movement or force (no text or symbols)Forward-facing—step5
5. Allow these seat belt to retract. Pull upon the shoulder belt to remove anyslack in the belt.

natural_image
Line drawing of a car seatbelt buckle assembly (no text or symbols)Forward-facing—step6
6. Remove any additional slack from these seat belt; press downward and rear forward firmly in the center of the child restraint with your kneetocompress the vehicle seat cushion and seat back while pulling up on these seat belt.
7. Tightenthetherstrapaccordingtothe manufacturer'sinstructionstoremoveany slack.
1-32 Safety—Seats, seat belts and supplemental restraintsystem

natural_image
Line drawing of a car seatbelt with hands adjusting the seat (no text or symbols)Forward-facing—step8
-
Afterattachingthechildrestraint, testit beforeyouplacethechildinit.Pushitfrom sidetosidewhileholdingthechildrestraint neartheseatbeltpath.Thechildrestraint shouldnotmovemorethan1inch(25mm), fromsidetoside.Trytotugitforwardand checktoseeifthebeltholdstherestraintin place.Iftherestraintisnotsecure,tighten theseatbeltasnecessary,orputthe restraintinanotherseatandtestitagain.Youmayneedtotryadifferentchild restraint.Notallchildrestraintsfitinall typesofvehicles.
-
Checktomakesurethechildrestraintis properlysecuredpriortoeachuse.Ifthe
seatbeltisnotlocked,repeatsteps2 through8.
Forward-facing—step10
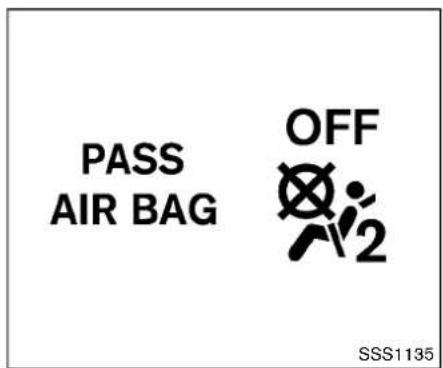
- If the child restraint is installed in the front passenger seat, placetheignitions switch in the ON position. The front passenger air bag status light should illuminate. If this light is not illuminated, see "Front passenger air bag and status light" (P. 1-46). Movethe child restraint to another seating position. Haveth system checked. It is recommended you visit a NISSAN dealer for this service.
Afterthechildrestraintisremovedandtheseat beltisfullyretracted,theALRmode(child restraintmode)iscanceled.
natural_image
Top-down line drawing of a car backrest with three directional arrows indicating traffic or movement (no text or symbols)Installingtoptetherstrap

WARNING
Childrestraintanchoragesaredesignedtowithstandonlythoseloads imposedbycorrectlyfittedchildrestraints.Undernocircumstancesare theytobeusedtoattachadultseat belts,orotheritemsorequipmentto thevehicle.Doingsocoulddamagethe childrestraintanchorages.Thechild restraintwillnotbeproperlyinstalled usingthedamagedanchorage,anda childcouldbeseriouslyinjuredorkilled
inacollision.
Thechildrestrainttoptetherstrapmustbeused wheninstallingthechildrestraintwiththeseat belts.
First, secure the child restraint with these at belt.
-
Removetheheadrestraintandstoreitina secureplace.Besuretoreinstallthehead restraintwhenthechildrestraintisremoved (rearoutboardseatpositions).
See "Headrestraints/headrests" (P.1-5) for headrestraint adjustment, removal and installation information.
Positionthetoptetherstrapoverthetopof theseatback. -
Securethetoptetherstraptothetether anchorpointonthebackoftheseatback behindthechildrestraint.
-
Refertotheappropriatechildrestraint installation procedure steps in this section beforetighteningthetetherstrap.
If you have any questions when installing a toptetherstrap, it is recommended you visita NISSAN dealer forth this service.
BOOSTERSEATS
Precautionsonboosterseats

WARNING
Ifaboosterseatandseatbeltarenot usedproperly,theriskofachildbeing injuredinasuddenstoporcollision greatlyincreases:
- Make sure the shoulder portion of thebeltisawayfromthechild'sface andneckandthelapportionofthe beltdoesnotcrossthestomach.
- Make sure the shoulder belt is not behindthechildorunderthechild's arm.
- Aboosterseatmustonlybeinstalledinaseatingpositionthathas alap/shoulderbelt.
natural_image
Line drawing of two car seat compartments with labeled parts (1 and 2), no text or symbols present.Boosterseatsofvariouszisesareofferedby severalmanufacturers.Whenselectingany boosterseat,keepthefollowingpointsinmind:
- Chooseonlyaboosterseatwithalabel certifyingthatitcomplieswithFederalMotor VehicleSafetyStandard213orCanadian MotorVehicleSafetyStandard213.
- Checktheboosterseatinyourvehicletobe sureitiscompatiblewiththevehicle'sseat andseatbeltsystem.

natural_image
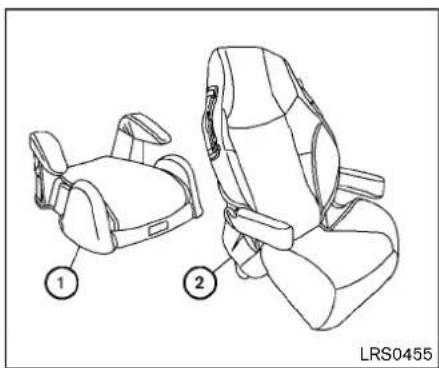
Line drawing of a person sitting in a car with a diagonal band crossing the seat, no text or symbols present●Makesurethechild'sheadwillbeproperly supportedbytheboosterseatorvehicle seat.Theseatbackmustbeatorabovethe centerofthechild'sears. Forexample,ifa lowbackboosterseat ① ischosen,the vehicleseatbackmustbeatorabovethe centerofthechild'sears.Iftheseatbackis lowerthanthecenterofthechild'sears,a highbackboosterseat ② shouldbeused.
- If the booster seatis compatible with your vehicle, place your child in the booster seat and check the various adjustments to be sure the booster seatis compatible with your child. Always follow all recommended procedures.

natural_image
Line drawing of a person sitting in a car seat with a belt, no text or symbols presentAllU.S. states and Canadian provinces or territories require that infants and small children berestrained in an approved child restraint at all times while the vehicle is being operated.
The instructions in this section apply to booster seat installation in there are seats or the front passenger seat.
Boosterseatinstallation

CAUTION
Donotusethelap/shoulderbeltAutomaticLockingRetractor(ALR)mode
Safety—Seats, seat belts and supplemental restraintsystem 1-35
whenusingaboosterseatwiththeseat belts.
RefertoallWarningsandCautionsinthe"Child safety", "Childrestraints" and "Boosterseats" sectionsearlierinthissectionbeforeinstallinga childrestraint.
Followthesestepstoinstallaboosterseatinthe rearseatorinthefrontpassengerseat:

natural_image
Line drawing of a car interior showing seat, rear seats, and window (no text or symbols)- If you must install a booster seat in the front seat, movethese at to there are most position.
- Positiontheboosterseatontheseat. Only placeitinaforward-facingdirection. Always followtheboosterseatmanufacturer's instructions.

natural_image
Line drawing of a person sitting in a car seat, holding a rifle (no text or symbols)Frontpassengerposition
3.Theboosterseatshouldbepositionedon thevehicleseatsothatitisstable. Ifnecessary,adjustorremovethehead restrainttoobtainthecorrectboosterseat fit.Iftheheadrestraintisremoved,storeitin asecureplace.Besuretoreinstallthe headrestraintwhentheboosterseatis removed.See"Headrestraints/headrests" (P.1-5)forheadrestraintadjustment,re-movalandinstallationinformation. Iftheseatingpositiondoesnothaveahead restraintanditisinterferingwiththeproper boosterseatfit,tryanotherseatingposition oradifferentboosterseat.
1-36 Safety—Seats, seat belts and supplemental restraintsystem
- Position the lapportion of these at belt low and snug on the child's ships. Besureto follow the booster seat manufacturer's instructions for adjusting these at belt routing.
- Pulltheshoulderbeltportionoftheseatbelt towardtheretractortotakeupextraslack. Besuretheshoulderbeltispositioned acrossthetop,middleportionofthechild's shoulder.Besuretofollowtheboosterseat manufacturer'sinstructionsforadjustingthe seatbeltrouting.
- Followthewarnings, cautions and instructions for properly fastening a seat belt shown in "Seatbelts" (P.1-10).
PASS AIR BAG

SSS1135
- If the booster seatis installed in the front passenger seat, placetheignitions switch in the ON position. The front passenger air bag status light may may not illuminate depending on the size of the child and the type of booster seated. See "Front passenger air bag and status light" (P. 1-46).
SUPPLEMENTALRESTRAINT SYSTEM
PRECAUTIONSONSUPPLEMENTAL RESTRAINTSYSTEM
This Supplemental Restraint System(SRS) section contains important information concerning the following systems:
- Driverandpassengersupplementalfront-impactairbag(NISSANAdvancedAirBag System)
- Frontseat-mountedside-impactsupplementalairbag
●Roof-mountedcurtainside-impactandroll-oversupplementalairbag - Seatbeltwithpretensioner
Supplementalfront-impactairbagsystem:
TheNISSANAdvancedAirBagSystemcan helpcushiontheimpactforcetotheheadand chestofthedriverandfrontpassengerincertain frontalcollisions.
Frontseat-mountedside-impactsupplementalairbagsystem: This system can help cushion the impact for ceto the chest and pelvic area of the driver and front passenger uncertain side impact collisions. These air bag is designed to inflate on the sides when the vehicle is impacted.
Roof-mountedcurtainside-impact and rolloversupplementalairbagsystem:This systemcanhelpcushiontheimpactforcetothe
headofoccupantsinfrontandrearoutboard seatingpositionsincertainsideimpactor rollovercollisions.Inaside-impact,thecurtain airbagsaredesignedtoinflateontheside wherethevehicleisimpacted.Inarollover,the curtainairbagsonbothsidesaredesignedto inflate.Underbothside-impactandrollover situations,thecurtainairbagswillremain inflatedforashortperiodoftime.
Thesesupplementalrestraintsystemsaredesignedtosupplementthecrashprotection providedbythedriverandpassengerseatbelts andarenotasubstituteforthem.Seatbelts shouldalwaysbecorrectlywornandthe occupantseatedasuitabledistanceawayfrom thesteeringwheel,instrumentpanelanddoor finishers.(See "Seatbelts"(P.1-10)forinstructionsandprecautionsonseatbeltusage.)
Thesupplementalairbagsoperateonly whentheignitionswitchisintheON position.
AftertheignitionisplacedintheON position,thesupplementalairbagwarning lightilluminates.Thesupplementalairbag warninglightwillturnoffafterabout7 secondsifthesystemsareoperational.


WARNING
- Thefrontairbagsordinarilywillnot inflateintheeventofasideimpact, rearimpact, rollover, orlowerseverityfrontalcollision. Alwayswear yourseatbeltstohelpreducethe riskorseverityofinjuryinvarious kindsofaccidents.
- Thefrontpassengerairbagwillnot inflateifthefrontpassengerairbag statuslightislitorifthefront passengerseatisunoccupied.See "Frontpassengerairbagandstatus light"(P.1-46).
•Theseatbeltsandthefrontairbags aremosteffectivewhenyouare sittingwellbackanduprightinthe seatwithbothfeetonthefloor.The frontairbagsinflatewithgreat force.EvenwiththeNISSANAdvancedAirBagSystem,ifyouare unrestrained,leaningforward,sittingsidewaysoroutofpositionin anyway,youareatgreaterriskof injuryordeathinacrash.Youmay alsoreceiveseriousorfatalinjuries fromthefrontairbagifyouareup againstitwhenitinflates.Alwayssit
Safety—Seats,seatbeltsandsupplementalrestraintsystem1-39
backagainsttheseatbackandas far-awayspracticalfromthesteeringwheelorinstrumentpanel.Alwaysusetheseatbelts.
- Thedriverandfrontpassengerseat beltbucklesareequipped with sensorthatdetectiftheseatbelts arefastened.TheAdvancedAirBag Systemmonitorstheseverityofa collisionandseatbeltusagethen inflatestheairbags.Failureto properlywearseatbeltscanincreasetheriskorseverityofinjury inanaccident.
- The front passenger seat is equipped with occupant classificationsensors (weightsensors) that turn the front passenger airbag OFFundersome conditions. This sensor is only used in this seat. Failure to be properly seated and wearing these seat belt can increase the risk of severity of injury in an accident. See "Front passenger air bag and status light" (P.1-46).
- Keephandsontheoutsideofthe steeringwheel.Placingtheminside thesteeringwheelrimcouldincreaseetheriskthattheyareinjured
ifthefrontairbaginflates.

natural_image
Diagram of a person wearing a seatbelt and standing in a car, crossed with diagonal lines indicating seatbelting (no text or symbols present)
natural_image
Diagram showing a person sitting on a vehicle with a diagonal line crossing the seat, no text or symbols present.1-40 Safety—Seats, seat belts and supplemental restraintsystem

natural_image
Diagram showing a car interior with a cross-shaped barrier and a person seated, no text or symbols present
natural_image
Diagram showing car seatbelt and passenger inside a vehicle, no text or symbols present
natural_image
Diagram of car seatbelt cross-section showing diagonal and horizontal lines (no text or symbols)
natural_image
Diagram of a person wearing a seatbelt inside a vehicle, showing no text or symbols
WARNING
- Neverletchildrenrideunrestrained orextendtheirhandsorfaceoutof thewindow.Donotattempttohold theminyourlaporarms.Some examplesofdangerousridingpositionsareshownintheillustrations.
- Childrenmaybeseverelyinjuredor killedwhenthefrontairbags,side airbagsorcurtainairbagsinflateif theyarenotproperlyrestrained. Pre-teensandchildrenshouldbe properlyrestrainedintherearseat, ifpossible.
- EvenwiththeNISSANAdvancedAir BagSystem,neverinstallarear-facingchildrestraintinthefront seat.Aninflatingfrontairbagcould seriouslyinjureorkillyourchild. See"Childrestraints"(P.1-18)for details.

Donotleanagainstdoorsorwindows.
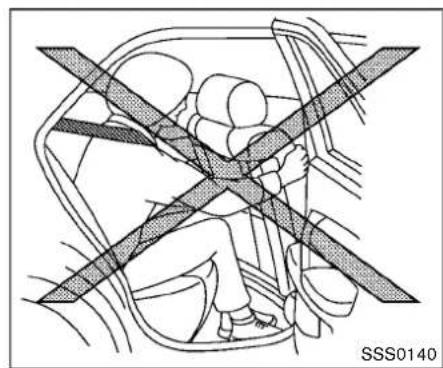
natural_image
Diagram of a car interior showing steering wheel and dashboard (no text or symbols)
natural_image
Diagram showing a person sitting on a vehicle with a cross-shaped barrier, no text or symbols present
WARNING
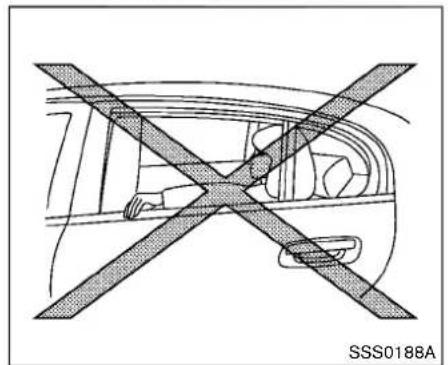
natural_image
Diagram of a car interior with two crossed diagonal lines indicating no movement or restriction (no text or symbols)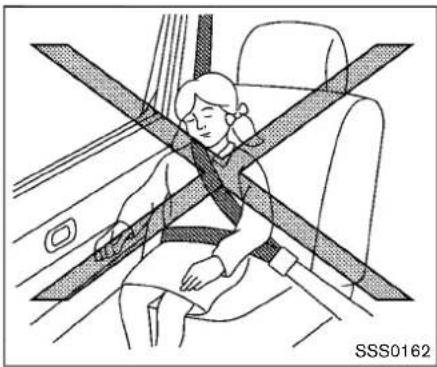
natural_image
Diagram of a person sitting in a car seat with a cross-shaped object crossed out, no text or symbols presentFrontseat-mountedside-impactsupplementalairbagsandroof-mounted curtainside-impactandrolloversupplementalairbags:
- Thesideairbagsordinarilywillnot inflateintheeventofafrontal impact,rearimpact,rolloverorlowerseveritydecollision.Always wearyourseatbeltstohelpreduce theriskorseverityofinjuryin variouskindsofaccidents.
1-42 Safety—Seats, seat belts and supplemental restraintsystem
- Thecurtainairbagsordinarilywill notinflateintheeventofafront impact,rearimpact,orlowerseveritysidecollision.Alwayswearyour seatbeltstohelpreducetheriskor severityofinjuryinvariouskindsof accidents.
•Theseatbelts,thesideairbagsand curtainairbagsaremosteffective whenyouaresittingwellback and uprightintheseat.Thesideairbag andcurtainairbaginflatewithgreat force.Donotallowanyonetoplace theirhand,legorfaceneartheside airbagonthesideoftheseatback ofthefrontseatorneartheside roofrails.Donotallowanyone sittinginthefrontseatsorrear outboardseatstoextendtheirhand outofthewindoworleanagainst thedoor.Someexamplesofdangerousridingpositionsareshown inthepreviousillustrations.
- Whensittingintherearseat, donot holdontotheseatbackofthefront seat. If the side airbag inflates, you may be seriously injured. Beespecially careful with children, who should always be properly re-
strained.Someexamplesofdanger- ousridingpositionsareshownin theillustrations.
- Donotuseseatcoversonthefront seatbacks. They may interferewith sideairbaginflation.

- Crashzonesensor
- Supplementalfront-impactairbagmodules
- Frontseat-mountedside-impactsupplemental airbagmodules
- Occupantclassificationsensors(weightsensors)
- Occupantclassificationsystemcontrolunit
6.Roof-mountedcurtainside-impactandrollover supplementalairbaginflators
7. Roof-mounted curtainside-impact and rollover supplemental airbags modules
8. Seatbeltwithpretensioners
9.Satellitesensors
10.AirbagControlUnit(ACU)
NISSANADVANCEDAIRBAGSYS-TEM(frontseats)

WARNING
To ensure proper operation of the passenger's advanced air bagsystem, please observ the following items.
- Donotallowapassengerintherear seattopushorpullontheseatback pocket.
- Donotplaceheavyloadsheavier than9.1lbs.(4kg)ontheseatback, headrestraint orin theseatback pocket.
- Do not store luggage behind the seatthatcanpressintotheseat-back.
- Confirm the operating condition with the front passenger airbag statuslight.
- Ifyounotice that thefrontpassengerairbagstatuslightisnot operating,itisrecommendedyou visitaNISSANdealertocheckthe occupantclassificationsystem.
1-44 Safety—Seats, seat belts and supplemental restraintsystem
- Untilyouhaveconfirmedwithyour dealerthatyourpassengerseat occupantclassificationsystemis workingproperly,positiontheoccupantsintherearseatingpositions.
ThisvehicleisequippedwiththeNISSAN AdvancedAirBagSystemforthedriverand frontpassengerseats.Thissystemisdesigned tomeetcertificationrequirementsunderU.S. regulations.ItisalsopermittedinCanada.Allof theinformation,cautionsandwarningsin thismanualapplyandmustbefollowed.
The drivers supplemental front-impact air bag is located in the center of the steering wheel. The passengers supplemental front-impact air bag is mounted in the instrument panel above the glove box. The frontair bags are designed to inflate in higher severity frontal collisions, although they may inflate if the forces in another type of collision are similar to those of higher severity frontal impact. They may not inflate in certain frontal collisions. Vehicle damage (or lack of it) is not always an indication of proper frontair bag operation.
TheNISSANAdvancedAirBagSystemhas dualstageairbaginflators.Thesystemmonitors informationfromtheAirbagControlUnit(ACU), seatbeltbucklesensorsandtheoccupant
classificationsensors(weightsensors).Inflator operationisbasedontheseverityofacollision andseatbeltusageforthedriver.Forthefront passenger,theoccupantclassificationsensors arealsomonitored.Basedoninformationfrom thesensors,onlyonefrontairbagmayinflatein acrash,dependingonthecrashseverityand whetherthefrontoccupantsarebeltedor unbelted.Additionally,thefrontpassengerair bagmaybeautomaticallyturnedOFFunder someconditions,dependingontheinformation providedbytheoccupantclassificationsensors. IfthefrontpassengerairbagisOFF,thefront passengerairbagstatuslightwillbeilluminated (iftheseatisunoccupied,thelightwillnotbe illuminated,buttheairbagwillbeoff).(See "Frontpassengerairbagandstatuslight"(P.1-46)forfurtherdetails.)Onefrontairbaginflating doesnotindicateimproperperformanceofthe system.
If you have any questions about your airbag system, it is recommended you visit a NISSAN dealer to obtain information about the system. If you are considering modification of your vehicle duetoadisability, you may also contact NISSAN. Contact information is contained in the front of this Owner's Manual.
Whenafrontairbaginflates,afairlyloudnoise maybeheard,followedbyreleaseofsmoke. Thissmokeisnotharmfulanddoesnotindicate
afire. Careshouldbetakennottoinhaleit, asit may cause irritation and choking. Those with a history of breathing conditions should get fresh air promptly.
Frontairbags, alongwiththeuseofseatbelts, helptocushiontheimpactforceonthehead and chestofthefrontoccupants. Theycanhelp savelivesandreduceseriousinjuries. However, aninflatingfrontairbagmaycausefacial abrasionsorotherinjuries. Frontairbagsdo notproviderestrainttothelowerbody.
EvenwithNISSANAdvancedAirBags,seat beltsshouldbecorrectlywornandthedriver andpassengerseateduprightsfaraspractical awayfromthesteeringwheelorinstrument panel.Thefrontairbagsinflatequicklyinorder tohelpprotectthefrontoccupants.Becauseof this,theforceofthefrontairbaginflatingcan increasetheriskofinjuryiftheoccupantistoo closeto,orisagainst,theairbagmoduleduring inflation.
Thefrontairbagsdeflatequicklyafteracollision.
Thefrontairbagsoperateonlywhenthe ignitionswitchisintheONposition.
AftertheignitionisplacedintheON position,thesupplementalairbagwarning lightilluminates.Thesupplementalairbag warninglightwillturnoffafterabout7 secondsifthesystemisoperational.
Safety—Seats, seat belts and supplemental restraintsystem 1-45
PASS AIR BAG

SSS1135
Frontpassengerairbagstatuslight
Frontpassengerairbagandstatuslight

WARNING
Thefrontpassengerairbagisdesigned toautomaticallyturnOFFundersome conditions.Readthissectioncarefully tolearnhowitoperates.Properuseof theseat,seatbeltandchildrestraintsis necessaryformosteeffectiveprotection. Failuretofollowallinstructionsinthis manualconcerningtheuseofseats, seatbeltsandchildrestraintscan increasetheriskorseverityofinjuryin
anaccident.
Statuslight:
Thefrontpassengerseatisequippedwiththe occupantclassificationsensors(weightsensors)thatturnthefrontpassengerairbagonor offdependingontheweightappliedtothefront passengerseat.Thestatusofthefrontpassengerairbag(ONorOFF)isindicatedbythefront passengerairbagstatuslight which is locatedontheinstrumentpanel.Afterthe ignitionswitchisplacedinthe"ON"position, thefrontpassengerairbagstatuslightilluminatesforabout7secondsandthenturnsoffor illuminatesdependingonthefrontpassenger seatoccupiedstatus.Thelightoperatesas follows:
●Unoccupiedpassengerseat:The off light isOFFandthefrontpassengerairbagis OFFandwillnotinflateinacrash.
- Passenger'sseatoccupiedbyasmalladult, childorchildrestraintasoutlinedin this section:The lightilluminatestoindicate thatthefrontpassengerairbagisOFFand willnotinflateinacrash.
- Occupiedpassengerseatandthepassengermeetstheconditionsoutlinedinthis section:The lightisOFFtoindicatethat thefrontpassengerairbagisoperational.
Inadditiontotheabove,certainobjectsplaced onthefrontpassengerseatmayalsocausethe lighttooperateasdescribedabovedepending ontheirweight.
For additional information related to the normal operation and troubleshooting of this occupant classification sensors system, pleasereferto "Normaloperation" (P.1-48) and "Troubleshooting" (P.1-48) in this section.
Frontpassengerairbag:
Thefrontpassengerairbagisdesignedto automaticallyturnOFFwhenthevehicleis operatedundersomeconditionsasdescribed belowaspermittedbyU.S.regulations.Ifthe frontpassengerairbagisOFF,itwillnotinflate inacrash.Thedriverairbagandotherairbags inyourvehiclearenotpartofthissystem.
The purpose of the regulation is to help reduce the risk of injury or death from an inflating airbag to certain front passenger seat occupants, such as children, by requiring the airbag to be automatically turned OFF.
The occupantclassificationsensors(weight sensors) are on these at cushion frame under the front passenger seat and are designed to detect an occupant and object on these seat. For example, if such is in the front passenger seat, the Advanced Air Bag System is designed to turn the passenger air bag off in accordance
withtheregulations.Also,ifachildrestraintof thetypespecifiedintheregulationsisonthe seat,theoccupantclassificationsensorscan detectitandcausetheairbagtoturnOFF.
Frontpassengerseatadultoccupantswhoare properlyseatedandusingtheseatbeltas outlinedinthismanualshouldnotcausethe passengerairbagtobeautomaticallyturned OFF.ForsmalladultsitmaybeturnedOFF, however,iftheoccupantdoesnotsitintheseat properly(forexample,bynotsittingupright,by sittingonanedgeoftheseat,orbyotherwise beingoutofposition),thiscouldcausete sensorstoturntheairbagOFF.Alwaysbesure tobeseatedandwearingtheseatbeltproperly forthemosteeffectiveprotectionbytheseatbelt andsupplementalairbag.
NISSANrecommendsthatpre-teensandchildrenbeproperlyrestrainedinarearseat. NISSANalsorecommendsthatappropriate childrestraintsandboosterseatsbeproperly installedinarearseat. If this is not possible, the occupantclassificationsensorsaredesigned to operate as described abovetoturnthefront passengerairbagOFFforspecifiedchild restraints. Failingtoproperlysecurechild restraintsandtousetheAutomaticLocking Retractor(ALR)mode(childrestraintmode) may allow therestrainttotipormoveinan accidentorsuddenstop. This can also result in thepassengerairbaginflatinginacrashinstead of beingOFF.(See "Childrestraints" (P.1-18) for proper use and installation.)
If the front passenger seat is not occupied, the passenger air bag is designed not to inflate a crash. However, heavy objects placed on the seat could result in air bag inflation, because of the object being detected by the occupant classifications sensors. Other conditions could also result in air bag inflation, such as if a child is standing on these seat, or two children are on the seat, contrary to their instructions in this manual. Always be sure that you and all vehicle occupants are seated and restrained properly.
Using the frontpassenger air bag status light, you can monitor when the frontpassenger air bag is automatically turned OFF with these at occupied. The light will not illuminate when the frontpassenger seat is unoccupied.
Ifanadultoccupantisintheseatbutthefront passengerairbagstatuslightisilluminated (indicatingthattheairbagisOFF),itcouldbe thatthepersonisasmalladult,orisnotsitting ontheseatproperly.
Ifachildrestraintmustbeusedinthefrontseat, thefrontpassengerairbagstatuslightmayor maynotbeilluminated,dependingonthesizeof thechildandthetypeofchildrestraintbeing used.Ifthefrontpassengerairbagstatuslightis notilluminated(indicatingthattheairbagmight inflateinacrash),itcouldbethatthechild restraintorseatbeltisnotbeingusedproperly. Makesurethatthechildrestraintisinstalled properly,theseatbeltisusedproperlyandthe occupantispositionedproperly.Ifthefront passengerairbagstatuslightisnotilluminated, repositiontheoccupantorchildrestraintina rearseat.
If the front passenger air bag status light will not illuminate event though you believe that the child restraint, these seat belts and the occupant are properly positioned, the system may be sensing an unoccupied seat (in which case the air bag is OFF). Your NISSAN dealer can check that the system is OFF by using a special tool. However, until you have confirmed with your dealer that your air bag is working properly, reposition the occupant or child restraint in a separate seat.
Theairbagsystemandfrontpassengerairbag statuslightwilltakeafewsecondstoregistera changeinthepassengerseatstatus.However,if theseatbecomesunoccupied,thefrontpassengerairbagstatuslightwillremainoff. Ifamalfunctionoccursinthefrontpassengerair bagsystem,thesupplementalairbagwarning light ,locatedinthemeterandgaugesarea, willblink.Havethesystemchecked.Itis recommendedyouvisitaNISSANdealerfor
thisservice.
Normaloperation:
Inorderfortheoccupantclassificationsensor systemtoclassifythefrontpassengerbasedon weight,pleasefollowtheprecautionsandsteps outlinedbelow:
Precautions:
- Makesurethattherearenoobjectsweighingover9.1lbs(4kg)hangingontheseat orplacedintheseatbackpocket.
- Makesurethatachildrestraintorother objectisnotpressingagainsttherearofthe seatback.
- Makesurethatarearpassengerisnot pushingorpullingonthebackofthefront passengerseat.
- Makesurethatthefrontpassengerseator seatbackisnotforcedbackagainstan objectontheseatorfloorbehindit.
●Makesurethatthereisnoobjectplaced underthefrontpassengerseat.
Steps:
- Adjusttheseatasoutlined.(See "Seats" (P.1-2).)Situpright, leaningagainstthe seatback, and centeredontheseatcushion withyourfeetcomfortablyextendedtothe floor.
- Makesuretherearenoobjectsonyourlap.
3.Fastentheseatbeltasoutlined.(See"Seat belts"(P.1-10).) - Remain in this position for 30 seconds allowing the system to classify the front passenger before the vehicle is put into motion.
- Ensure proper classification by checking the frontpassengerairbagstatuslight.
NOTE:
This vehicle's occupantclassificationsensor systemlockstheclassification during drivingsoitisimportantthatyouconfirm thatthefrontpassengerisproperlyclassifiedpriortodriving.Also,theoccupant classificationsensorsystemmayrecalculatetheweightoftheoccupantwhenthe vehicle comes to a stop (i.e. stop light, stop sign,etc.),sothefrontpassengerseat occupant should continue to remain seatedasoutlinedabove.
Troubleshooting:
If youthinkthefrontpassengerairbagstatus lightisincorrect:
- If the light is ON with no front passenger and no objectsonthefrontpassengerseat:
This may be due to the following conditions that maybe interfering with the weights sensors:
●Anobjectweighingover9.1lbs(4kg) hangingon theseator placedinthe seatbackpocket.
- Achildrestraintorotherobjectpressing againsttherearoftheseatback.
- Arearpassengerpushingorpullingonthe backofthefrontpassengerseat.
- Forcing the front seat or seatback against an objectontheseatorfloorbehindit.
●Anobjectplacedunderthefrontpassenger seat.
●Anobjectplacedbetweentheseatcushion andcenterconsoleorbetweentheseat cushionandthedoor.
Ifthevehicleismoving,pleasecometoastop whenitissafetodoso.Checkandcorrectany oftheaboveconditions.Restartthevehicleand wait1 minute.
NOTE:
Asystemcheckwillbeperformedduring whichthefrontpassengerairbagstatus
lightwillremainlitforabout7seconds initially.
IfthelightisstillONafterthis,itisrecommendedthatthevehicleshouldbecheckedbyaNISSANdealerassoonaspossible.
- If the light is ON with an adult occupying the front passenger seat:
- Occupantisasmalladult—thefront passengerairbagstatuslightisfunctioning asintended. Thefrontpassengerairbagis suppressed.
However, if the occupant is not asmall adult, thenthism may be due to the following conditions that maybe interfering with the weights sensors: - Occupantisnotsittingupright,leaning againsttheseatback,andcenteredonthe seatcushionwithhis/herfeetcomfortably extendedtothefloor.
- Achildrestraintorotherobjectpressing againsttherearoftheseatback.
- Arearpassengerpushingorpullingonthe backofthefrontpassengerseat.
- Forcingthefrontseatorseatbackagainstan objectontheseatorfloorbehindit.
●Anobjectplacedunderthefrontpassenger seat. - Anobjectplacedbetweentheseatcushion andcenterconsoleorbetweentheseat cushionandthedoor.
Ifthevehicleismoving,pleasecometoastop whenitissafetodoso.Checkandcorrectany oftheaboveconditions.Restartthevehicleand wait1 minute.
NOTE:
Asystemcheckwillbeperformedduring whichthefrontpassengerairbagstatus lightwillremainlitforabout7seconds initially.
IfthelightisstillONafterthis,thepersonshould beadvisednottorideinthefrontpassenger seatanditisrecommendedthatthevehicle shouldbecheckedbyaNISSANdealerassoon aspossible.
- If the light is OFF with a small adult, child or child restraint occupying the front passenger seat. This may be due to the following conditions that maybe interfering with the weights sensors:
- Smalladultorchildisnotsittingupright, leaningagainsttheseatback,andcentered ontheseatcushionwithhis/herfeet comfortablyextendedtothefloor.
-
The childrestraint is not properly installed, as outlined. (See "Childrestraints" (P.1-18).)
●Anobjectweighingover9.1 lbs(4kg) hangingontheseatorplacedinthe seatbackpocket. -
Achildrestraintorotherobjectpressing againsttherearoftheseatback.
- Arearpassengerpushingorpullingonthe backofthefrontpassengerseat.
- Forcingthefrontseatorseatbackagainstan objectontheseatorfloorbehindit.
●Anobjectplacedunderthefrontpassenger seat. - Anobjectplacedbetweentheseatcushion andcenterconsole.
If the vehicle is moving, please cometoastop when it's safetodoso. Check and correct any of the above conditions. Restart the vehicle and wait 1 minute.
NOTE:
Asystemcheckwillbeperformedduring whichthefrontpassengerairbagstatus lightwillremainlitforabout7seconds initially.
IfthelightisstillOFFafterthis,thesmalladult, childorchildrestraintshouldberepositionedin therearseatanditisrecommendedthatthe vehicleshouldbecheckedbyaNISSANdealer as soonaspossible.
Othersupplementalfront-impactairbag precautions

WARNING
- Donotplaceanyobjectsonthe steeringwheelpadorontheinstrumentpanel. Also, donotplaceany objectsbetweenanyoccupantand thesteeringwheelorinstrument panel. Suchobjectsmaybecome dangerousprojectilesandcause injuryifthefrontairbagsinflate.
- Donotplaceobjectswithsharp edgesontheseat.Also,donot placeheavyobjectsontheseatthat willleavepermanentimpressionsin theseat.Suchobjectscandamage theseatoroccupantclassification sensors(weightsensors).Thiscan affecttheoperationoftheairbag systemandresultinseriouspersonalinjury.
- Donotusewateroracidiccleaners (hotsteamcleaners)ontheseat. Thiscandamagetheseatoroccupantclassificationsensors.Thiscan alsoaffecttheoperationoftheair bagsystemandresultinserious
personalinjury.
- Immediatelyafterinflation,several frontairbagsystemcomponents willbehot.Donottouchthem;you mayseverelyburnyourself.
- Nounauthorizedchangesshouldbe madetoanycomponentsorwiring ofthesupplementalairbagsystem. Thisistopreventaccidentalinflationofthesupplementalairbagor damagetothesupplementalairbag system.
- Donotmakeunauthorizedchanges toyourvehicle'selectricalsystem, suspensionsystemorfrontend structure. This could affect proper operation of the frontairbagsystem.
-
Tamperingwiththefrontairbag systemmayresultinseriouspersonalinjury. Tampering includes changestothesteeringwheel and theinstrumentpanelassembly by placingmaterialoverthesteering wheelpadandabovetheinstrument panelorbyinstallingadditionaltrim materialaroundtheairbagsystem.
-
Removingormodifyingthefront passengerseatmayaffectthefunctionoftheairbagsystemandresult inseriouspersonalinjury.
- Modifyingortamperingwiththe frontpassengerseatmayresultin seriouspersonalinjury.Forexample,donotchangethefrontseatsby placingmaterialontheseatcushion orbyinstallingadditionaltrimmaterial,suchasseatcovers,onthe seatthatisnotspecificallydesigned toassureproperairbagoperation. Additionally,donotstowanyobjectssunderthefrontpassengerseat ortheseatkushionandseatback. Suchobjectsmayinterferewiththe properoperationoftheoccupant classificationsensors.
- Nounauthorizedchangesshouldbe madetoanycomponentsorwiring oftheseatbeltsystem.Thismay affectthefrontairbagsystem. Tamperingwiththeseatbeltsystem mayresultinseriouspersonalinjury.
-Itisrecommended youvisit a NISSANdealerforworkonand aroundthefrontairbag.Itisalso
recommendedyouvisitaNISSAN dealerforinstallationofelectrical equipment.TheSupplementalRestraintSystem(SRS)wiringharnesses*shouldnotbemodifiedor disconnected.Unauthorizedelectricaltestequipmentandprobing devicesshouldnotbeusedonthe airbagsystem.
- Acrackedwindshieldshould be replacedimmediatelybyaqualified repairfacility.Acrackedwindshield could affectthefunctionofthe supplementalairbagsystem.
\*The SRSwiringharnessconnectorsare yellowandorangeforeasyidentification.
Whensellingyourvehicle, werequestthatyou informthebuyeraboutthefrontairbagsystem andguidethebuyertotheappropriatesections inthisOwner'sManual.

natural_image
Line drawing of a car rear seat and seatbelt (no text or symbols)SSS0978
FRONTSEAT-MOUNTEDSIDE-IMPACTSUPPLEMENTALAIRBAGAND ROOF-MOUNTEDCURTAINSIDE-IMPACTANDROLLOVERSUPPLEMENTALAIRBAGSYSTEMS
Thesideairbagsarelocatedintheoutsideof theseatbackofthefrontseats.Thecurtainair bagsarelocatedinthesideroofrails.Allofthe information,cautionsandwarningsinthis manualapplyandmustbefollowed.The sideairbagsandcurtainairbagsaredesigned toinflateinhigherseveritysidecollisions, althoughtheymayinflateiftheforcesinanother typeofcollisionaresimilartothoseofahigher severitysideimpact.Theyaredesignedtoinflate
onthesidewherethevehicleisimpacted. They may not inflate incertainside collisions.
Curtainairbagsarealsodesignedtoinflatein certaintyesofrollovercollisionsornear rollovers.Asaresult,certainvehiclemovements (forexample,duringsevereoff-roading)may causethecurtainairbagstoinflate.
Vehicledamage(orlackofit)isnotalwaysan indicationofpropersideairbagandcurtainair bagoperation.
Whenthesideairbagsandcurtainairbags inflate,afairlyloudnoisemaybeheard,followed byreleaseofsmoke.Thissmokeisnotharmful anddoesnotindicateafire.Careshouldbe takennottoinhaleit,asitmaycauseirritation andchoking.Thosewithahistoryofabreathing conditionsshouldgetfreshhairpromptly.
Sideairbags, alongwiththeuseofseatbelts, helptocushiontheimpactforceonthechest andpelvicareaofthefrontoccupants. Curtain airbagshelptocushiontheimpactforcetothe headofoccupantsinthefrontandrearoutboard seatingpositions. Theycanhelpsavelivesand reduceseriousinjuries. However, aninflating sideairbagorcurtainairbagmaycause abrasionsorotherinjuries. Sideairbagsand curtainairbagsdonotproviderestrainttothe lowerbody.
Theseatbeltsshouldbecorrectlywornandthe
Safety—Seats, seatbeltsandsupplementalrestraintsystem 1-51
driverandpassengerseateduprightasfaras practicalawayfromthesideairbags.Rearseat passengersshouldbeseatedasfarawayas practicalfromthedoorfinishersandsideroof rails.Thesideairbagsandcurtainairbags inflatequicklyinordertohelpprotectthe occupants.Becauseofthis,theforceofthe sideairbagsandcurtainairbagsinflatingcan increasetheriskofinjuryiftheoccupantistoo closeto,orisagainst,theseairbagmodules duringinflation.Inarollover,thecurtainairbags onbothsidesaredesignedtoinflate.Under bothside-impactsituations,thecurtainairbags willremaininflatedforashortperiodoftime.
Thesideairbagsandcurtainairbags operateonlywhentheignitionswitchisin theONposition.
AfterturningtheignitionswitchtotheON position,thesupplementalairbagwarning lightilluminates.Thesupplementalairbag warninglightwillturnoffafterabout7 secondsifthesystemsareoperational.

WARNING
- Donotplaceanyobjectsnearthe seatbackofthefrontseats.Also,do notplaceanyobjects(anumbrella, bag,etc.)betweenthefrontdoor
finisherandthefrontseat.Such objectsmaybecomedangerous projectilesandcauseinjuryifaside airbaginflates.
- Rightafterinflation,severalsideair bagandcurtainairbagsystem componentswillbehot.Donot touchthem;youmayseverelyburn yourself.
- Nounauthorizedchangesshouldbe madetoanycomponentsorwiring ofthesideairbagandcurtainair bagsystems. This is to prevent damagetooraccidentalinflation ofthesideairbagandcurtainair bagsystems.
- Donotmakeunauthorizedchanges toyourvehicle'selectricalsystem, suspensionsystemorsidepanel. This could affect proper operation of the sideairbag and curtain air bagsystems.
- Tamperingwiththesideairbag systemmayresultinseriouspersonalinjury. Forexample, donot changethefrontseatsbyplacing materialneartheseatbacksorby installingadditionaltrimmaterial, suchaseatcovers, aroundtheside
airbag.
-Itisrecommendedyouvisita NISSANdealerforworkonand aroundthesideairbagandcurtain airbag.ItisalsorecommendedyouvisitaNISSANdealerforinstallationofelectricalequipment.The Supplemental Restraint System (SRS)wiringharnesses*shouldnot bemodifiedordisconnected.Unauthorizedelectricaltestequipment andprobingdevicesshouldnotbe usedonthesideairbagorcurtain airbagsystems.
*The SRSwiringharnessconnectorsare yellowandorangeforeasyidentification.
Whensellingyourvehicle, werequestthatyou informthebuyeraboutthesideairbagand curtainairbagsystemsandguidethebuyerto theappropriatesectionsinthisOwner'sManual.
SEATBELTSWITHPRETENSIONERS (frontseats)

WARNING
•Thepretensionerscannotbereused afteractivation. Theymustbere-
placedtogetherwiththeretractor andbuckleasaunit.
- If the vehicle becomes involved a collision but apretensioner is not activated, besureto havethe pretensionersystem checked and, if necessary, repaired. It is recommended you visit a NISSAN dealer for this service.
- Nounauthorizedchangesshouldbe madetoanycomponentsorwiring ofthepretensionersystem. This is topreventdamagetooraccidental activation of the pretensioners. Tamperingwiththepretensioner systemmayresultinseriouspersonalinjury.
-It is recommended you visit a NISSAN dealer for work on and around the pretensionersystem. It is also recommended you visit a NISSAN dealer for installation of electrical equipment. Unauthorized electrical test equipment and probing devices should not be used on the pretensionersystem.
- If you need to dispose of a preten- sionerorscrap the vehicle, it is recommended you visit a NISSAN
dealerforthisservice.Correctpre-tensionerdisposalproceduresare setforthintheappropriateNISSAN ServiceManual.Incorrectdisposal procedurescouldcausepersonal injury.
Thepretensionersystemmayactivatewiththe supplementalairbagsystemincertaintypesof collisions.Workingwiththeseatbeltretractor,it helpstightentheseatbeltwhenthevehicle becomesinvolvedincertaintypesofcollisions, helpingtorestrainfrontseatoccupants.
Thepretensionerisencasedwiththeseatbelt retractor. Theseseatbeltsareusedthesame wayasconventionalseatbelts.
Whenapretensioneractivates,smokeisre- leasedandaloudnoisemaybeheard.The smokeisnotharmfulanddoesnotindicatea fire.Careshouldbetakennottoinhaleit,asit maycauseirritationandchoking.Thosewitha historyofabreathingconditionshouldgetfresh airpromptly.
Afterpretensioneractivation, loadlimitersallow theseatbeltto release webbing(ifnecessary) to reduceforcesagainstthechest.
Thesupplementalairbagwarninglight is used to indicate malfunctions in the pretensioner system. See "Supplementalairbagwarning
light"(P.1-54).Iftheoperationofthesupplementalairbagwarninglightindicatesthereisa malfunction,havethesystemchecked.Itis recommendedyouvisita NISSANdealerforth this service.
Whensellingyourvehicle, werequestthatyou informthebuyeraboutthepretensionersystem andguidethebuyertotheappropriatesections inthisOwner'sManual.
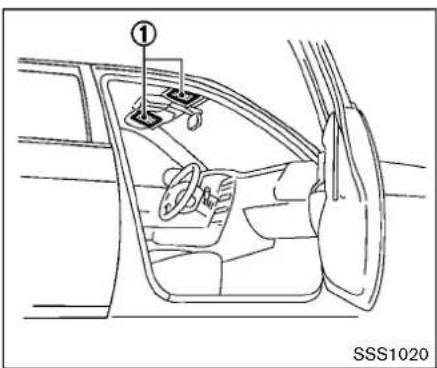
SUPPLEMENTAL AIRBAG WARNING LABELS
Warninglabelsaboutthesupplementalfront-impactairbagsystemareplacedinthevehicle asshownintheillustration.
①SRSairbag
Thewarninglabelsarelocatedonthesurfaceof thesunvisors.

natural_image
Silhouette of two figures in dynamic poses, one climbing and one standing (no text or symbols)SUPPLEMENTAL AIRBAG WARNING LIGHT
Thesupplementalairbagwarninglight,displaying intheinstrumentpanel,monitorsthe circuitsfortheairbagsystems,pretensioners andallrelatedwiring.
WhentheignitionswitchisintheONposition, thesupplementalairbagwarninglightilluminatesforabout7secondsandthenturnsoff. Thismeansthesystemisoperational.
Ifanyofthefollowingconditionsoccur,theair bagand/orpretensionersystemsneedservicing:
●Thesupplementalairbagwarninglight remainsonafterapproximately7seconds.
- Thesupplementalairbagwarninglight flashes intermittently.
- Thesupplementalairbagwarninglightdoes notcomeonatall.
Undertheseconditions,theairbagand/or pretensionersystemsmaynotoperateproperly. Theymustbecheckedandrepaired.Itis recommendedyouvisitaNISSANdealerfor thisservice.

WARNING
If the supplemental airbag warning lightison, it could mean that the front airbag, side airbag, curtain airbag and/or pretension systems will not operate in an accident. To help avoid injury to your self for others, have your vehicle checked as soon as possible. It is recommended you visit a NISSAN dealer forth this service.
1-54 Safety—Seats, seat belts and supplemental restraintsystem
REPAIRANDREPLACEMENTPROCEDURE
Thefrontairbags,sideairbags,curtainairbags andpretensionersaredesignedtoactivateona one-time-onlybasis.Asareminder,unlessitis damaged,thesupplementalairbagwarninglight willremainilluminatedafterinflationhasoccurred.Thesesystemsshouldberepairedand/orreplacedassoonaspossible. ItisrecommendedyouvisitaNISSANdealerforth this service.
When maintenance work is required on the vehicle, the front air bags, side air bags, curtain air bags and pretensioners and related parts should be pointed out to the person performing themaintenance. The ignitions switch should always be in the LOCK position when working under the hood or inside the vehicle.

WARNING
- Onceafrontairbag,sideairbagor curtainairbaghasinflated,theair bagmodulewillnotfunctionagain andmustbereplaced.Additionally, theactivatedpretensionersmust alsobereplaced.Theairbagmoduleandpretensionersshouldbe replaced.Itisrecommendedyou
visitaNISSANdealerforthisservice. However, the airbag modules and pretensionersystem cannot be repaired.
- Thefrontairbag,sideairbag and curtainairbagsystems,andpretensionersystemshouldbeinspected ifthereisanydamagethefront endorsingportionofthevehicle.It isrecommendedyouvisitaNISSAN dealerforthisservice.
- If you need to dispose of as supplemental air bag or pretensioner or scrap the vehicle, it is recommended you visit a NISSAN dealer. Correct supplemental air bag and pretensioners system disposals procedures are set forth in the appropriate NISSAN Service Manual. Incorrect disposal procedures could cause personal injury.
- If there is an impact to your vehicle from any direction, your Occupant Classification Sensor (OCS) should be checked to verify it is still functioning correctly. It is recommended that you visit a NISSAN dealer forth this service. The OCS should be checked even if no air
bagsdeployasaresultofthe impact.Failureretoverifyproper OCSfunctionmayresultinan improperairbagdeploymentresultingininjuryordeath.
MEMO
1-56 Safety—Seats, seat belts and supplemental restraintsystem
MEMO
Safety—Seats, seatbeltsandsupplementalrestraintsystem 1-57
MEMO
1-58 Safety—Seats, seat belts and supplemental restraintsystem
2Instrumentsandcontrols
Cockpit....2-3
Instrumentpanel....2-4
Metersandgauges....2-5
Speedometerandodometer....2-7
Tachometer....2-9
Enginecoolanttemperaturegauge(TypeB)(if soequipped)....2-10
Fuelgauge....2-11
Vehicleinformationdisplay(TypeA)(if soequipped)....2-11
Vehicleinformationdisplay(TypeB)(if soequipped)....2-12
Outsideairtemperature....2-12
ContinuouslyVariableTransmission(CVT)position indicator(ifsoequipped)....2-12
Tripcomputer....2-13
Warninglights, indicatorlights and
audiblereminders....2-15
Checkinglights....2-16
Warninglights....2-16
Indicatorlights....2-21
Audiblereminders....2-23
Integratedcontrolsystem(ifsoequipped)....2-24
Drivemode....2-24
Setupfunction....2-25
Driveinformation....2-30
Ecoinformation....2-31
Securitysystems....2-33
VehicleSecuritySystem....2-33
NISSANVehicleImmobilizerSystem....2-34
Wiperandwasherswitch....2-36
Rearwindowwiperandwasherswitch....2-37
Rearwindowandoutsidemirrordefrosterswitch.....2-38
Headlightandturnsignalswitch....2-39
Xenonheadlights(ifsoequipped)....2-39
Headlightswitch....2-40
Turnsignalswitch....2-43
Foglightswitch(ifsoequipped)....2-44
Horn....2-44
VehicleDynamicControl(VDC)offswitch....2-44
Heatedseats(ifsoequipped)....2-45
Poweroutlet....2-46
Storage....2-47
Cupholders....2-47
Cargofloorbox....2-48
Glovebox....2-48
Coathook....2-48
Cargocover(ifsoequipped)....2-49
Windows....2-50
Powerwindows....2-50
Moonroof(ifsoequipped)....2-52
Powermoonroof....2-52
Interiorlights....2-54
Maplights(ifsoequipped)....2-54
Maplightcontrolswitch(ifsoequipped)....2-55
Cargolight....2-55
COCKPIT

- Outsidermirrorremotecontrolswitch
2.Headlight,foglightandturnsignalswitch
—Headlight
—Turnsignallight
—Foglight*
3.Paddleshifter*
4.Steeringwheel
—Electricpowersteering
—Horn
—Driver's supplementalairbag
5.Wiperandwasherswitch
6.Shiftlever
—ContinuouslyVariableTransmission(CVT)
—ManualTransmission(MT)
7.Fuseboxcover
- VehicleDynamicControl(VDC)OFFswitch
9.All-WheelDrive(AWD)switch*
10.Tiltingsteeringwheellever
- Steering-wheel-mounted controls(leftside)
—Audiocontrol
—Siri ^® EyesFree
—Bluetooth ^® Hands-FreePhoneSystemcon-
trol
—NISSANVoiceRecognitionSystem(with
navigationsystem)*
- Steering-wheel-mounted controls(rightside)
—Cruisecontrolswitches
13.Heatedseatswitch*
*:ifsoequipped
INSTRUMENTPANEL

- Metersandgauges
- Centerventilator
- Audiosystem*orNavigationsystem**
4.Hazardwarningflasherswitch
5.IntegratedControlSystem*
—Drivemode
—Heaterandairconditionercontrol
—Defrosterswitch
5.Heaterandairconditionercontrol(models
withoutIntegratedControlSystem)
—Defrosterswitch
6.Frontpassengersupplementalairbag
7.Sideventilator
8.Fuel-fillerdoorreleasehandle
2-4 Instrumentsandcontrols
9.Hoodreleasehandle
10.Push-buttonignitionswitch
11.Auxiliaryinputjack/USBconnectionport*
12. Parkingbrake
13.Cupholder
14.Poweroutlet
15.Glovebox
*:ifsoequipped
**:RefertotheseparateNavigationSystemOwner'sManual.
METERSANDGAUGES

TypeA(ifsoequipped)
1.Tachometer
- Vehicleinformationdisplay
—Odometer/twintripodometer
—Tripcomputer
—TorquevectoringAWD(AWDmodel)
—Outsideairtemperature
3.Fuelgauge
4.Speedometer
- Warning/indicatorlights
6.Instrumentbrightnesscontrolknob
-
Continuously Variable Transmission (CVT) position indicator*
-
RESET switch for tripodometer/Tripcomputer modeswitch
*:ifsoequipped
Theneedleindicatorsmaymoveslightly aftertheignitionswitchisplacedinthe OFForLOCKposition.Thisisnota malfunction.

TypeB(ifsoequipped)
- Tachometer
- Enginecoolanttemperaturegauge
- Vehicleinformationdisplay
—Odometer/twintripodometer
—Tripcomputer
—TorquevectoringAWD(AWDmodel)
—Outsideairtemperature
4.Fuelgauge
5.Speedometer
6. Warning/indicatorlights
7.Instrumentbrightnesscontrolknob
8. Continuously Variable Transmission (CVT) position indicator*
- RESET switch for tripodometer/Tripcomputer modeswitch
*:ifsoequipped
Theneedleindicatorsmaymoveslightly aftertheignitionswitchisplacedinthe OFForLOCKposition.Thisisnota malfunction.

CAUTION
- Forcleaning, use as soft cloth, dampened with water. Never use arough cloth, alcohol, benzine, thinner or any kind of solvent or papertowel with a chemical cleaning agent. They will scratch or caused discoloration to the lens.
- Donotsprayanyliquidsuchas wateronthemeterlens.Spraying liquidmaycausethesystem to malfunction.
2-6 Instrumentsandcontrols

natural_image
Diagram of a circular gauge or dial with concentric rings and a pointer, no text or symbols present.Speedometer
SPEEDOMETERANDODOMETER
Speedometer
Thespeedometerindicatesvehiclespeedin milesperhour(MPH)andkilometersperhour (km/h).

Odometer/twintripodometer
Odometer/twintripodometer(TypeA)(if soequipped)
Theodometerandtwintripodometer ① are displayedwhentheignitionswitchisintheON position.
Theodometerrecordsthetotaldistancethe vehiclehasbeendriven.
Thetwintripodometerrecordsthedistanceof individualtrips.
Changingthedisplay:
Pushingtheresetswitch ② locatedonthe meterpanelchangesthedisplayasfollows:
ODO→TRIPA→TRIPB→Tripcomputer mode→ODO
Fortripcomputerinformation,see"Tripcomputer"(P.2-13).
Resettingthetripodometer:
Pushingtheresetswitch ② forapproximately1 secondresetsthetripodometertozero.
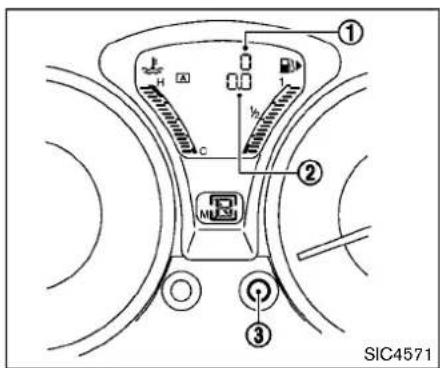
Odometer/twintripodometer
Odometer/twintripodometer(TypeB)(if soequipped)
Theodometer ①/twintripodometer ② are displayedwhentheignitionswitchisintheON position.
Theodometerrecordsthetotaldistancethe vehiclehasbeendriven.
Thetwintripodometerrecordsthedistanceof individualtrips.
Changingthedisplay:
Pushingtheresetswitch ③ locatedonthe meterpanelchangesthedisplayasfollows:
TRIPA→TRIPB→Tripcomputermode→ TRIPA
Fortripcomputerinformation,see"Tripcomputer"(P.2-13).
Resettingthetripodometer:
Pushingtheresetswitch ③ forapproximately1 secondresetsthetripodometertozero.

Loosefuelcapwarningmessage
Pushtheresetswitch Ⓐ formorethan1 secondtoresettheLOOSEFUELCAPwarning messageafterthefuelcaphasbeentightened. Foradditionalinformationsee“Fuel-fillercap” (P.3-18)ofthismanual.
2-8 Instrumentsandcontrols
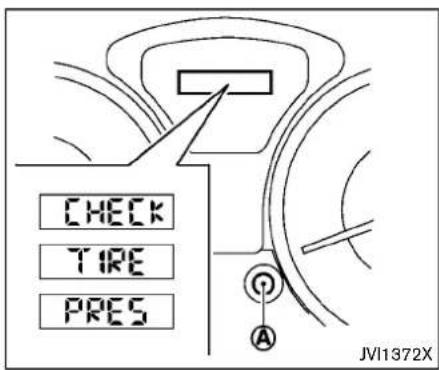
Checktirepressurewarningmessage TheCHECKTIREPRES(pressure)warning messageisdisplayedwhenthelowtirepressure warninglight (↓) isilluminatedandlowtire pressureisdetected.Checkandadjustthetire pressuretotherecommendedCOLDtire pressureshownontheTireandLoading Informationlabel.TheCHECKTIREPRES warningmessageturnsoffwhenthelowtire pressurewarninglight (↓) turnsoff.
Thelowtirepressurewarninglight (↓) remains illuminateduntilthetiresareinflatedtotherecommendedCOLDtirepressure.TheCHECK TIREPRESwarningmessageisdisplayedeach timetheignitionswitchisplacedintheON
positionaslongasthelowtirepressurewarning light (↓) remainsilluminated.
TheCHECKTIREPRESwarningmessagecan beturnedoffbypushingtheresetswitch Ⓐ.
Formoreinformationsee "Lowtirepressure warninglight"(P.2-18), "TirePressureMonitoringSystem(TPMS)"(P.5-3), and "Wheelsand tires"(P.8-28).
Extendedstoragefusewarningmessage
TheSHIPPHASEOn/PUSHFUSEInwarning messagemaybedisplayediftheextended storagefuseswitchisnotpushedin(switched on).Whenthismessageisdisplayed,pushin (switchon)theextendedstoragefuseswitchto turnoffthemessage.Formoreinformation,see "Extendedstoragefuseswitch" (P.8-20).

TACHOMETER
Thetachometerindicatesenginespeedin revolutionsperminute(RPM).Donotrevthe engineintotheredzone ①.

CAUTION
Whenenginespeedapproachesthered zone, shifttoahighergearorreduce enginespeed. Operatingtheenginein theredzonemaycauseseriousengine damage.

SIC4123
ENGINECOOLANTTEMPERATURE GAUGE(TypeB)(ifsoequipped)
Thegauge ① indicate the engine coolant temperature.
Theenginecoolanttemperatureiswithinthe normalrangewhenthegaugeiswithinthezone ② shownintheillustration.
The enginecoolant temperature varies with the outside air temperature and driving conditions.

CAUTION
Ifthegaugeindicatesenginecoolant temperaturenearthehot(H)endofthe
2-10 Instrumentsandcontrols
normalrange,reducevehiclespeedto decreasetemperature.lfgaugeisover thenormalrange,stopthevehicleas soonassafelypossible.Iftheengineis overheated,continuedoperationofthe vehiclemayseriouslydamagetheengine.See"Ifyourvehicleoverheats" (P.6-11)forimmediateactionrequired.

JVI1324X
TypeA(ifsoequipped)

SIC4124
TypeB(ifsoequipped)
FUELGAUGE
Thegauge ① indicate the approximate fuel level in the tank.
Thegaugemaymoveslightlyduringbraking, turning,acceleration,orgoingupordownhills.
Refillthefueltankbeforethegauge registers0(empty).
Thelowfuelwarninglight

illuminateswhen
theamountoffuelinthetankisgettinglow.
Refuelassoonasitisconvenient, preferably beforethegaugereaches0. Therewillbea smallreserveoffuelinthetankwhenthefuel gaugereaches0.
The ▶ indicate that the fuel-filler door is located on the front passenger's side of the vehicle.

CAUTION
- Ifthevehiclerunsoutoffuel, the
SERVICE malfunctionindicatorlight(MIL) maycomeon.Refuelassoonas possible.Afterafewdrivingtrips, the SERVICE lightshouldturnoff.Ifthe lightremainsonafterafewdriving trips,havethevehicleinspected.It isrecommendedyouvisitaNISSAN dealerforthisservice.
- For additional information, see "MalfunctionIndicatorLight(MIL)" (P.2-22).

VEHICLEINFORMATIONDISPLAY(TypeA)(ifsoequipped)
WhentheignitionswitchisplacedintheON position,thevehicleinformationdisplayshows thefollowinginformation:
- Outside air temperature
- Continuously Variable Transmission (CVT) position indicator (ifsoequipped)
3.Twintrip odometer/Odometer/Tripcomputer/Instrumentbrightnesscontroldisplay

VEHICLEINFORMATIONDISPLAY (TypeB)(ifsoequipped)
WhentheignitionswitchisplacedintheON position,thevehicleinformationdisplayshows thefollowinginformation:
- Outside air temperature
- Continuously Variable Transmission (CVT) position indicator (if so equipped)
- Odometer/Instrumentbrightnesscontroldisplay
4.Twintripodometer/Tripcomputer
The outside air temperature is displayed in °C.
Whentheoutsideairtemperaturebecomes 37^ F ( 3^ C) or lower, the outside air temperature displayblinkstogiveawarning. Thedisplaywill stopblinkingafter1 minuteorwhentheoutside air temperature becomes 39^ F ( 4^ C) or above.
Thedisplaymaydifferfromtheactualoutside temperaturedisplayedonvarioussignsorbillboards.
CONTINUOUSLYVARIABLETRANSMISSION(CVT)POSITIONINDICATOR (ifsoequipped)
The Continuously Variable Transmission (CVT) position indicator indicates the shift lever position when the ignition switch is in the ON position.

TypeA(Ifsoequipped)

TypeB(ifsoequipped)
2-12 Instrumentsandcontrols
TRIPCOMPUTER
Theswitchforthetripcomputerislocatedon themeterpanel.
When theignitionswitchisplaced in the ON position, modes of the trip computer can be selected by pushing the trip computer mode switch ①.
Eachtimethetripcomputermodeswitch pushed, the display will change as follows:
A is
ForTypeA(ifsoequipped):
ODO→(TRIPA→TRIPB)→Currentfuel consumption→Distancetoempty(dte)→Averagefuelconsumption→Torquevectoring AWD(AWDmodel)→ODO
ForTypeB(ifsoequipped):
(TRIPA→TRIPB)→Currentfuelconsumption →Distancetoempty(dte)→Averagefuel consumption→Elapsedtime→Torquevector- ingAWD(AWDmodel)(→TRIPA)
Currentfuelconsumption
The current fuel consumption modes show the current fuel consumption.
Distancetoempty(dte—mlsorkm)
Thedistancetoempty(dte)modeprovidesyou withanestimationofthedistancethatcanbe drivenbeforerefueling. Thedteisconstantly beingcalculated, basedontheamountoffuelin thefueltankandtheactualfuelconsumption.
Thedisplayisupdatedevery30seconds.
Thedtemodeincludesalowrangewarning feature. Whenthefuellevelislow, thedtemode is automaticallyselected and thedtedisplaywill blink. Pushthetripcomputermodeswitch to returntothemodethatwasselectedbefore thewarningoccurred.
Whenthefuelleveldropsevenlower,thedte displaywillchangeto“----”.
- If the amount off fuel added small, the display just before the ignition switch is turned off may continue to be displayed.
- Whendrivinguphillorroundingcurves, the fuelinthetankshifts, whichmaymomentarilychangethedisplay.
Averagefuelconsumption(mpgorl (liter)/100km)
Theaveragefuelconsumptionmodeshowsthe averagefuelconsumptionsincethelastreset. Resettingisdonebypushingthetripcomputer modeswitch Ⓐ forapproximately1second.
Thedisplayisupdatedevery30seconds.At aboutthefirst1/3mile(500m)afterareset,the displayshows"---".
Elapsed time(TypeB)(ifsoequipped)
Theelapsedtimemodeshowsthetimesince thelastreset. Thedisplayedtimecanbereset bypushingthetripcomputermodeswitch forapproximately1 second.
A
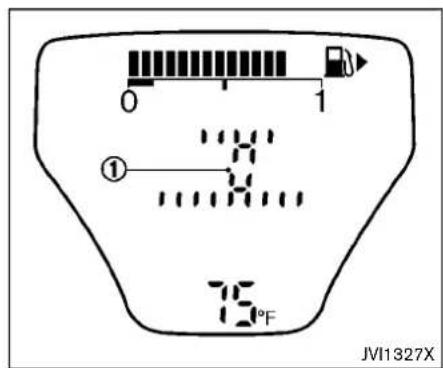
TypeA(Ifsoequipped)
TorquevectoringAWD(AWDmodel)
The Torquevectoring modeshowsthe current amountoftorquedistributedtoeachwheel. Each torque indicator is displayed as a bar graph ① divided into 3 segments. The upper indicator display the current amount of torque distribution (left and right) for the front wheels. The lower indicator display the current amount of torque distribution (left and right) for therear wheels. Then number of segment show the amount of torque currently distributed to each wheel.
Resettingdisplays
ForTypeA(ifsoequipped):
When the average fuel consumption or TRIPB is displayed, push the trip computer mode switch A for longer than 3 seconds. The average fuel consumption and tripometer (TRIPB only) displays will be reset at the same time.
ForTypeB(ifsoequipped):
When the average fuel consumption, elapsed time or TRIPB is displayed, push the trip computer modes switch ① for longer than 3 seconds. The average fuel consumption, elapsed time and tripodometer (TRIPB only) displays will be reset at the same time.

TypeB(ifsoequipped)
2-14 Instrumentsandcontrols
WARNINGLIGHTS,INDICATOR LIGHTSANDAUDIBLEREMINDERS
| AWD | All-WheelDrive(AWD)warninglight(AWD model)(ifsoequipped) |  | Lowfuelwarninglight |  | Enginestartoperationindicatorlight |
| ABS | Anti-lockBrakingSystem(ABS)warning light |  | Lowtirepressurewarninglight |  | Exteriorlightindicator |
 | Lowwasherfluidwarninglight(ifso equipped) |  | Frontfoglightindicatorlight(ifsoequipped) | ||
| BRAKE | Brakewarninglight |  | Ppositionselectingwarninglight |  | Frontpassengerairbagstatuslight |
 | Seatbeltwarninglight |  | Highbeamindicatorlight | ||
| ChargewarninglightSupplementalairbagwarning |  |  | MalfunctionIndicatorLight(MIL) | ||
| DooropenwarninglightVehicleDynamicControl |  | Warninglight |  | Securityindicatorlight | |
| PS | Electricpowersteeringwarninglight |  | All-WheelDrive(AWD)indicatorlight(AWD model)(ifsoequipped) |  | Turnsignal/hazardindicatorlights |
| Engineoilpressurewarninglight |  | All-WheelDrive(AWD)-Vindicatorlight (AWDmodel)(ifsoequipped) |  | VehicleDynamicControl(VDC)offindicator light | |
| Hightemperaturewarninglight(ifso equipped) |  | ContinuouslyVariableTransmission(CVT) indicatorlight(ifsoequipped) | |||
| IntelligentKeysystemwarninglightCruiseindicators |  |
CHECKINGLIGHTS
Withalldoorsclosed, apply the parking brake, fastentheseatbeltsand placetheignition switch in the ON position without starting the engine. The following lights (if so equipped) will come on:


The following lights(ifsoequipped)comeon brieflyandthengooff:

ABS


Ifanylightdoesnotcomeonoroperatesina wayotherthandescribed,itmayindicatea burned-outbulband/orasystemmalfunction.It isrecommendedyouhavethesystemchecked byaNISSANdealer.
WARNINGLIGHTS

All-WheelDrive(AWD)warning AWDmodel)
Whentheignitionswitchisinthe"ON"position, the All-Wheel Drive (AWD) warning light will illuminate.Itwillturnoffsoonaftertheengineis started.
If the AWD system malfunctions or therevolution or radius of the front and there are wheel differs, the AWD warning light while either remain illuminated or blink. (See "All-Wheel Drive
2-16 Instrumentsandcontrols
(AWD)"(P.5-29).)

or (ABD) Anti-lockBrakingSystem warninglight
WhentheignitionswitchisintheONposition, theAnti-lockBrakingSystem(ABS)warning light illuminates and then turns off. This indicates theABSisoperational.
If the ABS warning light illuminates while the engine is running, or while driving, it may indicate the ABS is not functioning properly. Havethesystem checked. It is recommended you visit a NISSAN dealer forth this service.
If an ABS malfunction occurs, the anti-lock function is turned off. The brake system then operates normally, but without anti-lock assistance. (See "Brakesystem" (P.5-35).)

or Ⓑ Brakewarninglight
Thislightfunctionsforboththeparkingbrake andthefootbrakesystems.
Parkingbrakeindicator:
WhentheignitionswitchisintheONposition, thelightilluminateswhentheparkingbrakeis applied.
Lowbrakefluidwarninglight:
WhentheignitionswitchisintheONposition,
thelightwarnsofalowbrakefluidlevel.Ifthe lightilluminateswhiletheengineisrunningwith theparkingbrakenotapplied,stopthevehicle andperformthefollowing:
- Checkthebrakefluidlevel.lfbrakefluidis necessary, add fluid and havethesystem checked. It is recommended you have this service performed by a NISSAN dealer. (See "Brakeandclutchfluid" (P.8-9).)
- Ifthebrakefluidleveliscorrect,havethe warning system checked. It is recommended you have this service performed by a NISSANdealer.
Anti-lockBrakingSystem(ABS)warning indicator:
When the parking brake is released and the brakefluidlevelissufficient,ifboththebrake warninglightandtheAnti-lockBrakingSystem (ABS)warninglightilluminate,itmayindicate theABSisnotfunctioningproperly.Havethe brakesystemchecked,andifnecessaryrepaired.ItisrecommendedyouvisitaNISSAN dealerforthisservice.(See"Anti-lockBraking System(ABS)warninglight"(P.2-16).)

WARNING
-Yourbrakesystemmaynotbe workingproperlyifthewarninglight ison.Drivingcouldbedangerous.If youjudgeittobesafe,drivecarefullytothenearestservicestation forrepairs.Otherwise,haveyour vehicletowedbecausedrivingit couldbedangerous.
- Pressingthebrakepedalwiththe enginestoppedand/orlowbrake fluidlevelmayincreaseyourstoppingdistanceandbrakingwillrequiregreaterpedaleffortaswellas pedaltravel.
- If the brake fluid level is below the minimum or MIN mark on the brake fluid reservoir, donot drive until the brakesystem has been checked. It is recommended you visit a NISSAN dealer for this service.
Chargewarninglight
Ifthelightilluminateswhiletheengineisrunning, itmayindicatehechargingsystemisnot functioningproperly.Turntheengineoffand checkthealternatorbelt.Ifthebeltisloose, broken,missingorifthelightremainson,have yourvehicleservicedimmediately.ItisrecommendedyouvisitaNISSANdealerforth this service.

CAUTION
Donotcontinuedrivingifthealternator beltisloose,brokenormissing.
Dooropenwarninglight
Thislightilluminateswhenanyofthedoorsand/orliftgatearenotclosedsecurelywhiletheignitionswitchisintheONposition.
PS Electricpowersteeringwarning light
When the ignitions switch this in the ON position, the electric power steering warning light illuminates. After starting the engine, the electric power steering warning light turnoff. This indicates the electric power steering is open
tional.
If the electric power steering warning light illuminates while the engine is running, it may indicate the electric power steering is not functioning properly and may need servicing. Have the electric power steering checked. It is recommended you visit a NISSAN dealer for this service.
When the electric power steering warning light illuminates with the engineer running, the power assist to the steering will cease operation but you will still have control of the vehicle. At this time, greater steering efforts are required to operate the steering wheel, especially in sharp turns and allows speeds.
See "Electricpowersteering" (P.5-34).
Engineoilpressurewarninglight
Thislightwarnsoflowengineoilpressure.Ifthe lightflickersorilluminatesduringnormaldriving, pullofftheroadinasafearea,stoptheengine immediatelyandcallaNISSANdealerorother authorizedrepairshop.
Theengineoilpressurewarninglightis notdesignedtoindicatealowoillevel.
Usethedipsticktochecktheoillevel.(See "Engineoil"(P.8-5).)

CAUTION
Runningtheenginewiththeengineoil pressurewarninglightoncouldcause seriousdamagetotheenginealmost immediately.Suchdamageisnotcoveredbywarranty.Turnofftheengineas soonasitissafetodoso.

Hightemperaturewarninglight(if uipped)
WhentheignitionswitchisintheONposition, thehightemperaturewarninglightilluminates andthenturnsoff. Thisindicatesthatthehigh temperaturesensorintheenginecoolantsystem isoperational.

CAUTION
- If the hight temperature warning light illuminates while the engine is running, it may indicate the einginetemperature is extremely high. Stop the vehicles safely as soon as possible. If the vehicle is overheated, continuing vehicle operation may seriously damage the
engine.(Forthe immediateaction required,see"Ifyourvehicleoverheats"(P.6-11).)

IntelligentKeysystemwarninglight
AftertheignitionswitchisplacedintheON position, thislightcomesonforabout2seconds andthenturnsoff.
Thislightilluminatesorblinksasfollows:
●Thelightblinksinyellowwhenthedooris closedwiththeIntelligentKeyleftoutside thevehicleandtheignitionswitchinthe ACCorONposition.Makesurethatthe IntelligentKeyisinsidethevehicle.
- ThelightblinksingreenwhentheIntelligent Keybatteryisrunningoutofpower.Replace thebatterywithanewone.(See“Intelligent Keybatteryreplacement”(P.8-20).)
- Thelightilluminatesinyellowwhenitwarns ofamalfunctionwithIntelligentKeysystem. Ifthewarninglightilluminatesinyellowwhilethe engineisstopped, itmaybeimpossibletostart theengine.Ifthelightcomesonwhiletheengine isrunning,youcandrivethevehicle.Howeverin thesecases,itisrecommendedyouvisita NISSANdealerforrepairassoonaspossible.

Lowfuelwarninglight
Thislightilluminateswhenthefuelinthetankis gettinglow. Refuelassoonasitisconvenient, preferablybeforethefuelgaugereachesthe0 (empty)position.
Therewillbeasmallreserveoffuel remaininginthetankwhenthefuelgauge reachesthe0position.

Lowtirepressurewarninglight
YourvehicleisequippedwithaTirePressure MonitoringSystem(TPMS)thatmonitorsthetire pressureofalltiresexcepthespare.
Thelowtirepressurewarninglightwarnsoflow tirepressureorindicatesthattheTPMSisnot functioningproperly.
AftertheignitionswitchisplacedintheON position, thislightilluminatesforabout1 second andturnsoff.
Lowtirepressurewarning:
Ifthevehicleisbeingdrivenwithlowtire pressure, the warninglightwillilluminate. A CHECKTIREPRES(pressure)warningmessageisalsodisplayedinthevehicleinformation display.
Whenthelowtirepressurewarninglight illuminates,youshouldstopandadjustthetire
pressuretotherecommendedCOLDtire pressureshownontheTireandLoading Informationlabel.Thelowtirepressurewarning lightdoesnotautomaticallyturnoffwhenthetire pressureisadjusted.Afterthetireisinflatedto therecommendedpressure,thevehiclemustbe drivenatspeedsabove16MPH(25km/h)to activatetheTPMSandturnoffthelowtire pressurewarninglight.Useatrepressure gaugetocheckthetirepressure.
Thelowtirepressurewarninglightremains illuminateduntilthetiresareinflatedtothe recommendedCOLDtirepressure.TheCHECK TIREPRESwarningmessageisdisplayedeach timetheignitionswitchisplacedintheON positionaslongasthelowtirepressurewarning lightremainsilluminated.
For additional information, see "Checktire pressure warning message" (P.2-9), "TirePressureMonitoringSystem(TPMS)" (P.5-3) and "TirePressureMonitoringSystem(TPMS)" (P.6-3).
TPMSmalfunction:
If the TPMS is not functioning properly, the low tire pressure warning light will flash for approximately 1 minute when the ignition switch is placed in the ON position. The light will remain on after 1 minute. The CHECKTIREPRES warning message is not displayed if the low light pressurewarninglightilluminatestoindicatea TPMSmalfunction.Havethesystemchecked.It isrecommendedyouvisitaNISSANdealerfor thisservice.
For additional information, see "TirePressure MonitoringSystem(TPMS)" (P.5-3).

WARNING
- Ifthelightdoesnotilluminatewith theignitionswitchplacedintheON position,havethevehiclechecked. Itisrecommendedyouvisita NISSANdealerforthisserviceas soonaspossible.
- Ifthelightilluminateswhiledriving, avoidsuddensteeringmaneuversor abruptbraking, reducevehicle speed,pullofftheroadtoasafe locationandstopthevehicleas soonaspossible.Drivingwithunder-inflatedtiresmaypermanently damagethetiresandincreasethe likelihoodoftirefailure.Serious vehicledamagedouldoccurand mayleadtoanaccidentandcould resultinseriouspersonalinjury. Checkthetirepressureforallfour tires.Adjustthetirepressuretothe
recommendedCOLDtirepressure shownontheTireandLoading Informationlabeltoturnthelow tirepressurewarninglightOFF. If thelightstillilluminateswhiledrivingafteradjustingthetirepressure, atiremaybeflatortheTPMSmay bemalfunctioning.Ifyouhaveaflat tire,replaceitwithasparetireas soon as possible. If no tire is flat andalltiresareproperlyinflated,it isrecommendedyouconsulta NISSANdealer.
- Sincethesparetireisnotequipped withtheTPMS,whenasparetireis mountedorawheelisreplaced,the TPMSwillnotfunctionandthelow tirepressurewarninglightwillflash forapproximately1minute.The lightwillremainonafter1minute.Haveyourtiresreplacedand/or TPMSsystemresetassoonas possible.Itisrecommendedyou visitaNISSANdealerforthese services.
- Replacingtires withthose notoriginallyspecifiedbyNISSANcould affecttheproperoperationofthe TPMS.

CAUTION
•TheTPMSisnotasubstituteforthe regulartirepressurecheck.Besure tocheckthetirepressureregularly.
- If the vehicle is being driven at speed so flessthan 16 MPH (25 km/h), the TPMS may not operate correctly.
- Besuretoinstallthespecifiedsize oftirestothefourwheelscorrectly.
Lowwasherfluidwarninglight (Canadaonly)
Thislightilluminateswhenthewasherfluidisat alowlevel.Addwasherfluidasnecessary.(See "Windowwasherfluid"(P.8-9).)
Ppositionselectingwarninglight
Thewarninglightblinksinredwhentheignition switchispushedtostoptheenginewiththe shiftleverinanypositionexcepttheP(Park) position.
If this warning appears, movetheshiftleverto the P(Park) position or push the ignitions switch to the ON position.
Aninsidewarningchimewillalsosound. See "IntelligentKeysystem" (P.3-6).
Seatbeltwarninglight
Thelightandchimeremindyoutofastenseat belts. Thelightilluminateswhenevertheignition switchisplacedintheONposition, and will remainilluminateduntilthedriver'sseatbeltis fastened. Atthesametime, thechimewillsound forabout6secondsunlessthedriver'sseatbelt issecurelyfastened.
Theseatbeltwarninglightforthefront passengerwillilluminateiftheseatbeltisnot fastenedwhenthefrontpassenger'sseatis occupied.Forabout5secondsaftertheignition switchisintheONposition,thesystemdoes notactivatethewarninglightforthefront passenger.
See "Seatbelts" (P.1-10) for precaution on seatbelt usage.
Supplementalairbagwarninglight
AfterplacingtheignitionswitchintheON position,thesupplementalairbagwarninglight willilluminate.Thesupplementalairbagwarning lightwillturnoffafterabout7secondsifthe supplementalfrontairbagandsupplemental sideairbag,curtainairbagsystemsand/or pretensionerseatbeltareoperational.
Ifanyofthefollowingconditionsoccur, thefront airbag, sideairbag, curtainairbag and pretensionersystemsneedservicing.
- Thesupplementalairbagwarninglight remainsonafterapproximately7seconds.
●Thesupplementalairbagwarninglight flashes intermittently. - Thesupplementalairbagwarninglightdoes notilluminateatall.
ItisrecommendedyouvisitaNISSANdealerfor theseservices.
Unless checked and repaired, the Supplemental Restraint Systems and orthepretensioners may not function properly.
For additional information, see "Supplemental restraintsystem" (P.1-38).

WARNING
If the supplemental airbag warning lightison, it could mean that the front airbag, side airbag, curtain airbag and or pretension systems will not operate in an accident. To help avoid injury to yourself for others, have your vehicle checked. It is recommended you visit a NISSAN dealer forth this service.
2-20Instrumentsandcontrols
VehicleDynamicControl(VDC) warninglight
Whentheignitionswitchisinthe"ON"position, theVehicleDynamicControl(VDC)warning lightilluminatesandthenturnsoff.
ThelightwillblinkwhentheVehicleDynamic Control(VDC)systemorthetractioncontrol systemisoperating,thusalertingthedriverthat thevehicleisnearingitstractionlimits.Theroad surfacemaybeslippery.
IftheVDCwarninglightilluminateswhilethe VDCsystemison,thislightalertsthedriverto thefactthattheVDCsystem'sfail-safemodeis operating,forexampletheVDCsystemmaynot befunctioningproperly.Havethesystem checked.ItisrecommendedyouvisitaNISSAN dealerforthisservice.Ifamalfunctionoccursin thesystem,theVDCsystemfunctionwillbe canceledbutthevehicleisstilldriveable.For additionalinformation,see"VehicleDynamic Control(VDC)system"(P.5-37)ofthismanual.
INDICATORLIGHTS
AWD All-WheelDrive(AWD)indicator light(AWDmodel)
Whentheignitionswitchisinthe"ON"position, theAll-WheelDrive(AWD)indicatorlight illuminatesandthenturnsoff.
WhenselectingAWDmodewhiletheengineis running,theAWDindicatorlightilluminates. (See"All-WheelDrive(AWD)("P.5-29).)
All-WheelDrive(AWD-V)indicator light(AWDmodel)
WhenselectingAWD-Vmodewhiletheengine isrunning,theAWD-Vindicatorlightilluminates. (See"All-WheelDrive(AWD)("P.5-29).)
CVT ContinuouslyVariableTransmission(CVT)indicatorlight(ifsoequipped)
Whentheignitionswitchisinthe"ON"position, theContinuouslyVariableTransmission(CVT) indicatorlightilluminatesandthenturnsoff.
CRUISE Cruiseindicatorlight
Cruisemainswitchindicator:
Thislightilluminateswhenthecruisecontrol mainswitchispushed. Thelightturnsoffwhen themainswitchispushedagain. Whenthe cruiseindicatorlightilluminates, thecruise controlsystemisoperational.
Cruisemalfunction:
If the cruise indicator light blinks while the engine is running, it may indicate the cruise control system is not functioning properly. Have the system checked. It is recommended you visit a NISSAN dealer forth this service.
See "Cruisecontrol" (P.5-26).
Light Enginestartoperationindicator
ThislightappearswhentheshiftleverisintheP (Park)position(ContinuouslyVariableTransmission(CVT)models)orN(Neutral)position (ManualTransmission(MT)models).Thislight meansthattheenginewillstartbypushingthe ignitionswitchwiththebrakepedal(CVT models)orclutchpedal(MTmodels)depressed. Youcanstarttheenginedirectlyinanyposition.

Exteriorlightindicator
This indicator illuminates when the headlight switchisturned to the AUTO(ifsoequipped), or position and the front parking lights, instrument panellights, rear combination lights, license plate lights or headlights are on. The indicator turn soff when the selights are turned off.

Frontfoglightindicatorlight(ifso ped)
Thefrontfoglightindicatorlightilluminates whenthefrontfoglightsareon.(See "Foglight switch"(P.2-44).)

Frontpassengerairbagstatuslight
Thefrontpassengerairbagstatuslight(located onthecenteroftheinstrumentpanel)willbelit andthepassengerfrontairbagwillbeOFF dependingonhowthefrontpassengerseatis beingused.
Forfrontpassengerairbagstatuslightoperation,see“NISSANAdvancedAirBagSystem(frontseats)”(P.1-44)ofthismanual.

Highbeamindicatorlight
Thislightilluminateswhentheheadlighthigh beamisonandgoesoutwhenthelowbeamis selected.

MalfunctionIndicatorLight(MIL)
Ifthemalfunctionindicatorlightcomeson steadyorblinkswhiletheengineisrunning, it may indicate apotentialemissioncontrol and/or ContinuouslyVariableTransmission(CVT)malfunction.
Themalfunctionindicatorlightmayalsoilluminatesteadyifthefuel-fillercapislooseor missing,orifthevehicilerunsoutoffuel.Check tomakesurethefuel-fillercapisinstalled and closedtightly,andthatthevehiclehasatleast3 USgallons(1 1.4liters)offuelinthefueltank.
Afterafewdrivingtrips, the

lightshould
turnoffifnootherpotentialemissioncontrol systemmalfunctionexists.
If this indicator light remains on for 20 seconds and then blinks for 10 seconds when the engine is not running, it indicates that the vehicle is not ready for an emission control system inspection/maintenance test. (See "Readiness for Inspection/Maintenance (I/M) test" (P.10-21).)
Operation:
Themalfunctionindicatorlightwillcomeonin oneoftwoways:
- Malfunctionindicatorlightilluminatedsteady
—Anemissioncontrolsystemand/orCVT
malfunctionhasbeendetected.Checkthe
fuel-fillercapiftheLOOSEFUELCAP
warningmessageisdisplayonthetwin
tripodometer.Ifthefuel-fillercapislooseor
missing,tightenor installthecapand
continuetodrivethevehicle.The SERVICE ENGINE light
shouldturnoffafterafewdrivingtrips.Ifthe
SERVICE ENGINE SOCON light does not turn off after a few driving trips,havethe vehicleinspected. It is recommended you visit a NISSAN dealer forthisservice.Youdonotneedtohave yourvehicletowedtothedealer.
- Malfunctionindicatorlightblinking—An engine misfire has been detected which may damagetheemissioncontrolsystem.
Toreduceoravoidemissioncontrolsystem damage:
1) Donotdriveatspeedsabove45MPH (72km/h).
2) Avoid hard acceleration or deceleration.
3) Avoidsteepuphillgrades.
4) If possible, reduce the amount of cargo being hauledortowed.
Themalfunctionindicatorlightmaystop
blinkingandremainon.
Havethevehicleinspected.ItisrecommendedyouvisitaNISSANdealerforthis service.Youdonotneedtohaveyour vehicletowedtothedealer.

CAUTION
Continuedvehicleoperationwithout havingtheemissioncontrolsystem and/orCVTsystemcheckedandre-pairedasnecessarycouldleadtopoor driveability,reducedfueleconomy,and possibledamagetotheemissioncontrolsystem.

Securityindicatorlight
Thelightblinkswhentheignitionswitchisinthe ACC,OFFForLOCKposition.Thisfunction indicatethesecuritysystemequippedonthe vehicleisoperational.
If these security system is misfunctioning, this light will remain on while the ignition switch in the ON position. For additional information, see "Security systems" (P.2-33).

Turnsignal/hazardindicatorlights
Thelightflasheswhentheturnsignalswitch leverorhazardswitchisturnedon.

VehicleDynamicControl(VDC)off torlight
When the ignitions switch this the "ON" position, the Vehicle Dynamic Control (VDC) off indicator light illuminates and then turn soff.
ThelightcomesonwhentheVehicleDynamic Control(VDC)offswitchispushedtoOFF.This indicate that the VDC system and traction control system are not operating.
AUDIBLEREMINDERS
Keyreminderchime
Achimewillsoundifthedriversidedooris openedwhiletheignitionswitchispushedto theACCposition.
Makesuretheignitionswitchispushedtothe OFFposition,andtakethelIntelligentKeywith youwhenleavingthevehicle.
Lightreminderchime
Thelightreminderchimewillsoundwhenthe driversidedoorisopenedwiththeheadlight switchinthe orposition,andthe ignitionswitchisintheACC,OFFForLOCK position.
Turnthelightswitchchoffwhenyouleavethe vehicle.
Brakepadwearwarning
Thediscbrakepadshaveaudiblewearwarnings.Whenabratepad requiresreplacement,it willmakeahighpitchedscrapingsoundwhen thevehicleisinmotion. Thisscrapingsound will firstoccuronlywhenthebrakepedalis depressed.Aftermorewearofthebrakepad, the sound will always be heard even if the brake pedalisnotdepressed.Havethebrakes checkedassoonaspossibleifthewarning soundis heard.
Parkingbrakereminderchime
Theparkingbrakereminderchimewillsoundif thevehicleisdrivenatmorethan4MPH(7 km/h)withtheparkingbrakeapplied.Stopthe vehicleandreleasetheparkingbrake.
INTEGRATEDCONTROLSYSTEM(if soequipped)
Seatbeltwarningchime
Theseatbeltwarningchimewillsoundforabout 6secondsunlessthedriver'sseatbeltis securelyfastened.
The Integrated Control System is located below the audiosystem or navigations system (if so equipped). Two Integrated Control System modescan be selected: Drivemode and ClimateControlmode.
DependingonwhichIntegratedControlSystem modeisselected(DrivemodeorClimate Controlmode),thescreendisplayandsome buttonfunctionswillchange.
- Drivemode
IntheDrivemode, three types of driving modescan beselected: NORMAL, SPORT and ECO. See "Drivemode" (P.5-22). In addition, while in the Drivemode, SETUP, Drive information and ECO information can be displayed and adjusted. See "Drive mode" (P.2-24).
●ClimateControlmode
IntheClimateControlmode, theclimate control can be set and adjusted. See "Automatic air conditioner (with Integrated Control System)" (P.4-32).
DRIVEMODE
WhentheDrivemodeselectbuttonispressed, thedisplayandbuttonsappearasshown.

1.Drivemodeselectbutton
2.SETUPbutton
3.DrivemodeNORMALbutton
4.DrivemodeSPORTbutton
5.DrivemodeECObutton
6.Displayscreen
7.Driveinformationbutton
8.ECOinformationbutton
- ENTERbutton/Selectiondial
SETUPFUNCTION
WhileintheDrivemode, the following item scan besetupbypressing the SETUP button.
- DisplayBrightness
-ButtonBrightness - ClockTimeSetting
- SelectLanguage
-SelectUnits
●AutoInteriorIllumination - SelectiveDoorunlock
●AutoHeadlightSensitivity(ifsoequipped)
•CLIMATEECO
NOTE:
●TheSETUPfunctioncannotbeadjustedwhiledriving.
- When the battery is disconnected, the SETUP memory is erased and revert to the default settings. If necessary, reset the SETUP memory after reconnecting the battery.

flowchart
graph TD
    A["NORMAL"] --> B["Display Brightness"]
    B --> C["Button Brightness"]
    C --> D["Select Language"]
SettingDisplayBrightnessandButton Brightness
- PresstheDriveModeSelectbutton.
2.PresstheSETUPbutton.
3.TurntheSelectiondialto"DisplayBrightness"or"ButtonBrightness"thenpressthe ENTERbutton.
4.TurntheSelectiondialto+toincrease brightnessorto- todecreasebrightness, thenpresstheENTERbuttontoapply the selection.
DisplayBrightnessandButtonBrightnesscan bemanuallyadjustedduringtheday(whenthe headlightswitchisoff)oratnight(whenthe headlightswitchison).
Whenthebarisattheminimumormaximum brightnesslevel,thebrightnesslevelisthesame asthedaytimelevel(headlightswitchison)or nighttimelevel(headlightswitchoff).
ClockTimeSetting
NOTE:
ClockTimeSettingisusedforddisplaying the ECOinformation.See "Ecoinformation"(P.2-31).

flowchart
graph TD
    A["NORMAL"] --> B["Select Units"]
    B --> C["ClockTime Setting"]
    C --> D["CLIMATE ECO"]
1.PresstheDriveModeSelectbutton.
2.PresstheSETUPbutton.
3.TurntheSelectiondialto"ClockTime Setting",thenpresstheENTERbutton.

- TurntheSelectiondialtoselectthedayof theweek, thenpresstheENTERbuttonto applytheselection.
5.TurntheSelectiondialtoselectthehourand AMorPM,thenpresstheENTERbuttonto applytheselection. - TurntheSelectiondialtoselectthemminutes, thenpresstheENTERbuttontoapply the selection.

flowchart
graph TD
    A["NORMAL"] --> B["Display Brightness"]
    B --> C["Button Brightness"]
    C --> D["Select Language"]
SelectLanguage
1.PresstheDriveModeSelectbutton.
2.PresstheSETUPbutton.
3. TurntheSelectiondialto"SelectLanguage", thenpresstheENTERbutton.

4.TurntheSelectiondialtoselectthepreferredlanguage,thenpresstheENTER buttontoapplytheselection.

flowchart
graph TD
    A["NORMAL"] --> B["Select Units"]
    B --> C["Clock Time Setting"]
    C --> D["CLIMATE ECO"]
SelectUnits
- PresstheDriveModeSelectbutton.
2.PresstheSETUPbutton.
3.TurntheSelectiondialto"SelectUnits"then presstheENTERbutton.
- TurntheSelectiondialtoselect "US" or "METRIC", then press the ENTERbutton to apply these selection.
AutoInteriorIllumination
Selecttoturntheilluminationoftheinterior lightsonoroffwhenanydoorisunlocked.
- PresstheDriveModeSelectbutton.
2.PresstheSETUPbutton.
3.TurntheSelectiondialto"AutoInterior Illumination"thenpresstheENTERbutton toswitchonoroff.

SelectiveDoorUnlock
Whenthisitemisturnedon,onlythedriver's doorisunlockedafterthedoorunlockoperation isperformedonce.Allofthedoorscanbe unlockedifthedoorunlockoperationisperformedagainwithin1 minute.
Whenthisitemisturnedoff, allthedoorswillbe unlockedafterthedoorunlockoperationis performedonce.
- PresstheDriveModeSelectbutton.
2.PresstheSETUPbutton. - TurntheSelectiondialto"SelectiveDoor Unlock"thenpresstheENTERbuttonto switchonoroff.
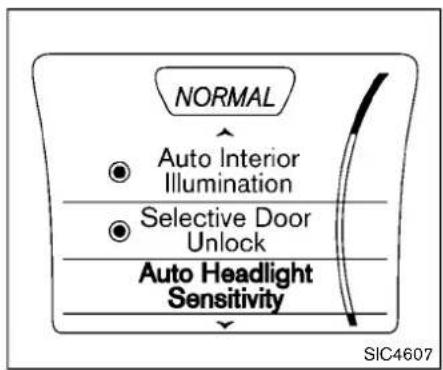
flowchart
graph TD
    A["NORMAL"] --> B["Auto Interior Illumination"]
    A --> C["Selective Door Unlock"]
    A --> D["Auto Headlight Sensitivity"]
AutoHeadlightSensitivity(ifso equipped)
Selecttoadjustthesensitivityoftheautomatic headlight.
- PresstheDriveModeSelectbutton.
2.PresstheSETUPbutton.
3.TurntheSelectiondialto"AutoHeadlight Sensitivity"thenpresstheENTERbutton.

- TurntheSelectiondialto+toincrease sensitivityorto- todecreasesensitivity, thenpresstheENTERbuttontoapply the selection.
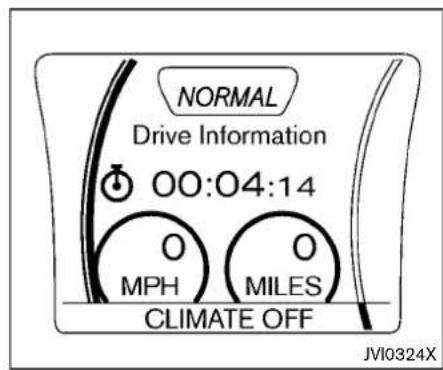
DRIVEINFORMATION
While in the Drivemode, push the Drive information button to display elapsed time, averages speed and trip distance. Pressing the Drive information button as second timewill display the G (gravity) - Forcescreen.
Elapsedtime
Theelapsedtimeshowsthetimesincethelast reset.
Averagespeed(km/horMPH)
Theaveragespeedshowstheaveragevehicle speedsincethelastreset.
Tripdistance(kmorMILES)
Thetripdistanceshowsthedistancedriven sincethelastreset.
Toresettheelapsedtime,averagespeedand tripdistance,pushtheENTERbuttonformore thanonesecond.Allthreedriveinformation displayswillresetatthesametime.
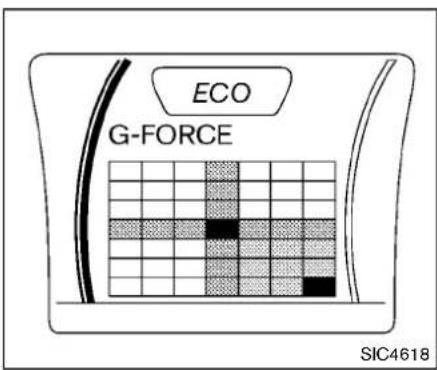
The following ECOINFOmodewillappear on the display by pushing the ECO information button, then turning these selection dial to scroll through the different screens.
While driving, only one ECO information screen is displayed. The vehicle must best be stopped to scroll through the different screens.
G-Forcescreen
The G(gravity)-Forcescreendisplaysthe currentaccelerationanddeceleration(front-to-rear)andcornering(side-to-side)G-Forceon thevehicle.
ECOINFORMATION

CAUTION
Donotadjustthedisplaycontrolswhile drivingsothatfullattentionmaygiven tovehicleoperation.

flowchart
graph TD
    A["NORMAL\nFuel Economy Record\nDaily Reset"] <--> B["NORMAL\nFuel Economy Record\nWeekly Reset"]
    B <--> C["NORMAL\nFuel Economy Record\nManual Reset"]
    C <--> D["NORMAL\nFuel Economy Record\nReset at Start"]
JVI1165X
DailyReset
Recordsofuptothepast4daysoffuel consumptioncanbeshownonthedisplay.
WeeklyReset
Recordsofuptothepast4weeksofeach week'sfuelconsumptioncanbeshownonthe display.
NOTE:
When the clock is not set, the ECO information (daily and weekly) cannot be used.
ResetatStart
Recordsofuptothepast4timesofeachtimeof ignitionswitchONfuelconsumptioncanbe shownonthedisplay.
ManualReset
Recordsofuptothepast4timesofresetting fuelconsumptioncanbeshownonthedisplay.
ThedisplayedECOINFOcanberesetby pushingtheENTERbuttonforlongerthan1 second.
SECURITYSYSTEMS

natural_image
Line drawing of a car with a circular component, showing motion arrows around the wheel (no text or symbols)Yourvehiclehastwotypesofsecuritysystems, asfollows:
●Vehiclesecuritysystem
•NISSANVehicleImmobilizerSystem
Theseurityconditionwillbeshownbythe securityindicatorlight.
VEHICLESECURITYSYSTEM
The vehicle security system provides visual and audio alarms signals if someone open the doors, or lift gate when the system is armed. It is not, however, amotion detection types system that activates when vehicle is moved or when a vibration occurs.
Thesystemhelpsdetervehicletheftbutcannot
preventit,norcanitpreventthetheftofinterior orexteriorvehiclecomponentsinallsituations. Alwayssecureyourvehicleevenifparkingfora briefperiod.Neverleaveyourkeysinthevehicle, andalwayslockitwhenunattended.Beaware ofyoursurroundings,andparkinsecure,well-lit areaswheneverpossible.
Manydevicesofferingadditionalprotection, suchascomponentlocks,identificationmarkers, andtrackingsystems,areavailableatauto supplystoresandspecialtyshops.Your NISSANdealermayalsooffersuchequipment. Checkwithyourinsurancecompanytoseeif youmaybeeligiblefordiscountsforvarious theftprotectionfeatures.

natural_image
Simple line drawing of a car silhouette with a key inside, no text or symbols presentHowtoarmthevehiclesecuritysystem
- Closeallwindows.
Thesystemcanbearmedevenifthe windowsareopen.
-
PlacetheignitionswitchintheOFFposition andremovethelIntelligentKeyfromthe vehicle.
-
Closealldoors. Lockalldoors. Thedoors canbelockedwith:
- theLOCK buttonontheIntelligent Key
- anyrequestswitch
- Confirm that these security indicator light illuminates. These security indicator light stays on for about 30 seconds. The vehicle security system is now pre-armed. After about 30 second the vehicle security system automatically shifts into the armed phase. These security light begins to flash once every approximately 3 seconds. If, during this 30-second pre-arm time period, the door is unlocked, or the ignition switch is placed in the ACC or ON position, the system will not arm.
Evenwhenthedriverand/orpassengers areinthevehicle,thesystemwillactivate withalldoorslockedwiththeignition switchintheLOCKposition.Whenplacing theignitionswitchintheACCorON position,thesystemwillbereleased.
Vehiclesecuritysystemactivation
The vehicle security system will give the following alarm:
●Theheadlightsblinkandthehornsounds intermittently.
●Thealarmautomaticallyturnsoffafter approximately50 seconds. However, the alarmreactivatesifthevehicleistampered withagain.
2-34 Instrumentsandcontrols
Thealarmisactivatedby:
- Unlocking the door without using the Intelligent Key, therequest switch the key. (Even if the door is opened by releasing the door inside lock knob, the alarm will activate.)
Howtostopanactivatedalarm
Thealarmwillstopbyunlockingadoorby pushingtheUNLOCK buttononthe IntelligentKey,pushingtherequestswitchor usingthekey.Thealarmwillnotstopifthe ignitionswitchisplacedintheACCorON position.
If the system does not operate as described above, have it checked. It is recommended you visit a NISSAN dealer forthisservice.
NISSANVEHICLEIMMOBILIZERSYSTEM
TheNISSANVehicleImmobilizerSystemwillnot allowtheenginetostartwithouttheuseoftheregisteredkey.
Iftheenginefailsto startusingtheregistered key, itmaybeduetointerferencecausedby anotherregistered key, an automatedtollroad deviceorautomatedpaymentdeviceonthekey ring. Restarttheengineusingthefollowing procedures:
1.LeavetheignitionswitchintheONposition forapproximately5seconds.
2. PlacetheignitionswitchintheOFF for LOCKposition and wait approximately 10 seconds.
3.Repeatstep1 and 2 again.
4.Restarttheenginewhileholdingthedevice (whichmay havecausedtheinterference) separatefromtheregisteredkey. Ifthisprocedureallowstheenginetostart, NISSANrecommendsplacingtheregistered key on a separate key ring to avoid interferencefromotherdevices.
Statementrelatedtosection15ofFCC rulesforNISSANVehicleImmobilizer System(CONTASSY-BCM.ANTASSY-IMMOBILISER)
FCCNotice:
ForUSA:
This devicecomplieswithPart 15ofthe FCCRules.Operationissubjecttothe followingtwoconditions:(1)Thisdevice maynotcauseharmfulinterference,and (2)thisdevicemustacceptanyinterference received, including interference that maycauseundesiredoperation.
Note: Changesormodificationsnotexpresslyapprovedbythepartyresponsible
forcompliancecouldvoidtheuser's authoritytooperatetheequipment.
ForCanada:
This device complies with Industry Canada licence-exempt RSS standard(s). Operation is subject to the following two conditions: (1) this device may not cause interference, and (2) this device must accept any interference, including interference that may cause undesired operation of the device.

SIC2045
Securityindicatorlight
Theseurityindicatorlightislocatedonthe meterpanel.Itindicatesthestatusofthe NISSANVehicleImmobilizerSystem.
Thelightblinkswhenevertheignitionswitchisin theLOCK,OFFForACCposition.Thisfunction indicatethesecuritysystemsequippedonthe vehicleareoperational.
If the NISSAN Vehicle Immobilizer System is malfunctioning, this light will remain on while the ignition switch is in the ON position.
Ifthelightstillremainsonand/orthe enginewillnotstart,seekserviceforthe NISSANVehicleImmobilizerSystemas
soonaspossible.Pleasebringallregisteredkeysthatyouhave.ItisrecommendedyouvisitaNISSANdealerfor thisservice.
WIPERANDWASHERSWITCH

WARNING
Infreezingtemperaturesthewasher solutionmayfreezeonthewindshield and obscureyourvisionwhichmaylead toanaccident.Warmwindshieldwith thedefrosterbeforeyouwashthe windshield.

CAUTION
- Donotoperatethewashercontinuouslyformorethan30seconds.
- Donotoperatethewasherifthe reservoirtankisempty.
- Donotfillthewindowwasher reservoirtankwithwasherfluid concentratesatfullstrength.Some methylalcoholbasedwasherfluid concentratesmaypermanentlystain thegrilleifspilledwhilefillingthe windowwasherreservoirtank.
- Pre-mixwasherfluidconcentrates withwatertothemanufacturer's recommendedlevelsbeforepouring thefluidintothewindowwasher
reservoirtank. Donotusethe windowwasherreservoirtankto mixthewasherfluidconcentrate andwater.
Ifthewindshieldwiperoperationisinterruptedbysnoworice,thewipermaystop movingtoprotectitsmotor.Ifthisoccurs, turnthewiperswitchtotheOFFposition andremovethesnoworicethatisonand aroundthewiperarms.Inapproximately1 minute,turntheswitchonagaintooperate thewiper.

flowchart
graph TD
    A["④"] --> B["③"]
    B --> C["②"]
    C --> D["①"]
    D --> E["OFF ON"]
    E --> F["INT"]
    F --> G["FRONT"]
    G --> H["MEST"]
    H --> I["OFF"]
    I --> J["INT"]
    J --> K["H1"]
    K --> L["⑤"]
    L --> M["④"]
    M --> N["③"]
    N --> O["OFF"]
    O --> P["INT"]
    P --> Q["H2"]
    Q --> R["④"]
    R --> S["OFF"]
    S --> T["INT"]
    T --> U["H3"]
    U --> V["⑤"]
    V --> W["OFF"]
    W --> X["INT"]
    X --> Y["H4"]
    Y --> Z["④"]
Thewindshieldwiperandwasheroperates whentheignitionswitchisintheONposition.
Pushtheleverdowntooperatethewiperatthe followingspeed:
① Intermittent—intermittentoperationcanbe adjustedbyturningtheknobtoward (Slower)or Ⓑ (Faster).
② Low—continuouslowspeedoperation
③ High—continuoushighspeedoperation
Pushtheleverup operationofthew
④ tohaveonesweep
Pullthelevertowardyou ⑤ tooperatethe washer.Thenthewiperwillalsooperateseveral times.
REARWINDOWWIPERAND WASHERSWITCH
Pullingupthewiperarm:
Thewindshieldwipersmustbeintheservice positioninordertoreplacethewiperblades.
Tomovethewiperbladestotheserviceposition, followthisprocedure:
- Whentheignitionswitchisinthe"ON" positionorwithin60secondsofplacingthe ignitionswitchtothe"OFF"position,liftthe leverup ④ twotimesinlessthan0.5 seconds.Thewindshieldwiperswillmoveto theservicepositionautomatically,andthe wiperbladescannowbereplaced.To replacethewiperblades,see"Windshield wiperblades"(P.8-15).
Tomovethewiperbladesbacktotheoriginal position:
- Lifttheleverup ④ orpushtheleverdown tooperateatanywiperspeed.

CAUTION
- Thisfunctioncanbeoperatedeven iftheignitionswitchisinthe"ON" position. However, topreventan accidentordamagewhenpulling upthewiperarm, besuretoobserve thefollowingprecautions.
—Makesuretheshiftleverisin theP(Park)position(ContinuouslyVariableTransmission models).
—Makesuretheshiftleverisin theN(Neutral)position,withthe parking brakefully applied (ManualTransmissionmodels).
—Neverallowthepassengersto operatethewindshieldwiper switchinadvertently.
- Donotoperatethewindshieldwiper whilethewiperarmispulledup.The wiperarmmaybedamaged.

WARNING
Infreezingtemperaturesthewasher solutionmayfreezeontherearwindow glassand obscure yourvision. Warm therearwindowwiththedefroster beforeyouwashtherearwindow.

CAUTION
- Donotoperatethewashercontinuouslyformorethan30seconds.
- Donotoperatethewasherifthe reservoirtankisempty.
- Donotfillthewindowwasher reservoirtankwithwasherfluid concentratesatfullstrength.Some methylalcoholbasedwasherfluid concentratesmaypermanentlystain thegrilleifspilledwhilefillingthe windowwasherreservoirtank.
- Pre-mixwasherfluidconcentrates withwatertothemanufacturer's recommendedlevelsbeforepouring thefluidintothewindowwasher reservoirtank.Donotusethe
windowwasherreservoirtankto mixthewasherfluidconcentrate andwater.
Iftherearwindowwiperoperationis interruptedbysnoworice,thewipermay stopmovingtoprotectitsmotor.Ifthis occurs,turnthewiperswitchtotheOFF positionandremovethesnoworicethatis onandaroundthewiperarms.Inapproximately1 minute,turntheswitchonagain tooperatethewiper.
REARWINDOWANDOUTSIDE MIRRORDEFROSTERSWITCH
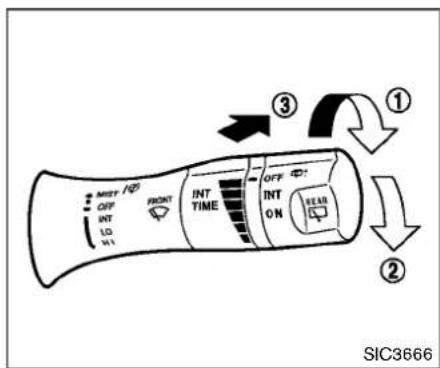
Therearwindowwiperandwasheroperate whentheignitionswitchisintheONposition.
TurntheswitchclockwisefromtheOFFposition tooperatethewiper.
① Intermittent(INT)—intermittentoperation(not adjustable)
② Low(ON)—continuouslowspeedoperation
Pushtheswitchforward ③ tooperatethe washer. Thenthewiperwillalsooperateseveral times.
TypeA(ifsoequipped)
TypeB(ifsoequipped)
HEADLIGHTANDTURNSIGNAL SWITCH
Todefog/defrosttherearwindowglassand outsidemirrors(ifsoequipped),starttheengine andpushtheswitch ① on.Theindicatorlight ② willilluminate.Pushtheswitchagaintoturn thedefrosteroff.
Itwillautomaticallyturnoffinapproximately15 minutes.

CAUTION
Whencleaningtheinnersideoftherear window,becarefulnottoscratchor damagetherearwindowdefroster.
XENONHEADLIGHTS(ifsoequipped)

WARNING

HIGHVOLTAGE
- Whenxenonheadlightsareon,they produceahighvoltage.Toprevent anelectricshock,neverattemptto modifyordisassemble.ItisrecommendedtohaveyourxenonheadlightsreplacedataNISSANdealer.
- Xenonheadlightsprovideconsiderablymorelightthanconventional headlights.Iftheyarenotcorrectly aimed,theymighttemporarilyblind anoncomingdriverorthedriver aheadofyouandcauseaserious accident.Ifheadlightsarenotaimed correctly,itisrecommendedtotake yourvehicletoaNISSANdealerand havetheheadlightsadjustedcorrection.
Whenthexenonheadlightisinitiallyturnedon, itsbrightnessorcolorvariesslightly. However, thecolorandbrightnesswillsoonstabilize.
- Thelifeofxenonheadlightswillbe shortenedbyfrequenton-offopera-
tion.Itisgenerallydesirablenottoturn offtheheadlightsforshortintervals (forexample,whenthevehiclestopsat atrafficsignal).
- Ifthexenonheadlightbulbiscloseto burningout,thebrightnesswilldrasticallydecrease,thelightwillstart blinking,orthecolorofthelightwillbecomereddish.Ifoneormoreofthe abovesignsappear,itisrecommended youvisitaNISSANdealer.
HEADLIGHTSWITCH
Lighting
① Turntheswitchtotheposition:
Thefrontparking,sidemarker,tail,licenseplate,
instrumentlightswillcomeon.However,the
daytimerunninglight(forNISMOmodelsand
Canada)willturnoff.
② Turntheswitchtotheposition:
Headlightswillcomeonandalltheotherlights
remainon.However,thedaytimerunninglight
(forNISMOmodelsandCanada)willturnoff.
Autolightsystem(ifsoequipped)
Theautolightsystemallowstheheadlightstobe setsotheyturnonandoffautomatically.
Tosettheautolightsystem:
- Makesuretheheadlightswitchisinthe AUTOposition ①.
- PlacetheignitionswitchintheONposition.
- The autolightsystem automatically turns the headlightson and off.
Toturntheautolightsystemoff,turntheswitch totheOFF, orposition.
Theautolightsystemcanturnontheheadlights automaticallywhenitisdarkandturnoffthe
headlightswhenitislight.
Theheadlightswillalsobeturnedonautomaticallyattwilightorinrainyweather(whenthe windshieldwiperisoperatedcontinuously).
IftheignitionswitchisplacedintheOFF positionandoneofthedoorsisopenedandthis conditioniscontinued,theheadlightsremainon for5minutes.
2-40Instrumentsandcontrols

natural_image
Line drawing of a car interior showing dashboard and steering wheel (no text or symbols)Besurenottoputanythingontopofthe photosensor ① locatedonthetopofthe instrumentpanel.Thephotosensorcontrolstheautolight;ifitiscovered,the photosensorreactsasifitisdarkandthe headlightswillilluminate.
Automaticheadlightsoffdelay
Youcankeeptheheadlightsonforupto45 secondsafteryouplacetheignitionswitchinthe OFFpositionandopenanydoorthencloseall thedoors.

Headlightbeamselect
① Toselectthelowbeam, puttheleverinthe neutralpositionasshown.
② Toselectthehighbeam, pushtheleverforward whiletheswitchisinthe 0 position. Pullit backtoselectthelowbeam.
③ Pullingthelevertowardyouwillflashthe headlighthighbeamevenwhentheheadlight switchisintheOFFposition.
Batterysaversystem
- When the headlight switch is in theorem 3.0 position while the ignition switch is in the ON position, the light switch automatically turn off within a period of time after the ignition switch has been placed in the OFF position.
- When the headlight switch remains in the position after the lights automatically turn off, the light will turn on when the ignition switch is placed in the ON position.

CAUTION
- Whenyouturnontheheadlight switchagainafterthelightsautomaticallyturnoff,thelightswillnot turnoffautomatically.Besureto turnthelightswitchtotheOFF positionwhenyouleavethevehicle forextendedperiodsoftime,otherwisethebatterywillbedischarged.
- Neverleavethelightswitchon whentheengineisnotrunningfor extendedperiodsoftimeevenifthe headlightsturnoffautomatically.
Daytimerunninglightsystem(forNISMO modelsandCanada)
Thedaytimerunninglightsautomaticallyilluminatewhentheengineisstartedwiththeparking brakereleased. Thedaytimerunninglights operatewiththeheadlightswitchintheOFF position.Turntheheadlightswitchtothe positionforfullilluminationwhendrivingatnight. (Thedaytimerunninglightswillturnoff.)
If the parking brake is applied before the engine is started, the daytime running lights donot illuminate. The daytime running lights illuminate once the parking brake is released. The daytime running light will remain on until the ignition switch is placed in the OFF position.

WARNING
Whenthedaytimerunninglightsystem isactive,taillightsonyourvehicleare noton.Itisnecessaryatdusktoturnon yourheadlights.Failureretodosocould causeanaccidentinjuringyourselfand others.

TypeA(ifsoequipped)

TypeB(ifsoequipped)

TypeA(ifsoequipped)

TypeB(ifsoequipped)
2-42 Instrumentsandcontrols
Instrumentbrightnesscontrol
Theinstrumentbrightnesscontroloperates whentheignitionswitchisintheONposition.
Pushthecontrolknob Ⓐ toadjustthebrightnessoftheinstrumentpanellights.Thebrightnessindicator Ⓑ willbeshownbrieflyinthe vehicleinformationdisplaywhenthecontrolis turned.
Whenthebrightnesslevelreachesthemaximum orminimum, abeepwillsound.

Choosetheappropriatemethodtosignalalane changebasedonroadandtrafficconditions.
TURNSIGNALSWITCH
①Turnsignal
Movetheleverupordowntosignaltheturning direction. Whentethurniscompleted, theturn signalscancelautomatically.
②Lanechangesignal
Movetheleverupordownuntiltheturnsignal beginstoflash,buttheleverdoesnotlatch,to signalalanechange.Holdtheleveruntilthelane changeiscompleted.
Movetheleverupordownuntiltheturnsignal beginstoflash,buttheleverdoesnotlatch,and releasethelever.Theturnsignalwillautomaticallyflashtreetimes.

FOGLIGHT SWITCH(ifsoequipped)
Toturnthefoglightson,turntheheadlight switchtothe 0 position,thenturntheswitch tothe 10 position.Toturnthemoff,turnthe switchtotheOFFposition.
Theheadlightsmustbeonforthefoglightsto operate. Thefoglightsautomaticallyturnoff whenthehighbeamheadlightsareselected.
HORN

natural_image
Diagram of a car steering wheel with a black arrow indicating clockwise direction (no text or symbols)Tosoundthehorn, push the center pad area of the steering wheel.

WARNING
Donotdisassemblethehorn.Doingso couldaffectproperoperationofthe supplementalfrontairbagsystem. Tamperingwiththesupplementalfront airbagsystemmayresultinserious personalinjury.
VEHICLEDYNAMICCONTROL(VDC) OFFSWITCH

The vehicles should be driven with the Vehicle Dynamic Control (VDC) system on most driving conditions.
Ifthevehicleisstuckinmudorsnow,theVDC systemreducetheengineoutputtoreduce wheelspin.Theenginespeedwillbereduced eveniftheacceleratorisdepressedtothefloor. Ifmaximumenginepowerisneededtofreea stuckvehicle,turntheVDCsystemoff.
ToturnofftheVDCsystem,pushtheVDCOFF switch.The indicatorlightwillilluminate.
PushtheVDCOFFswitchagainorrestartthe enginetoturnonthesystem.(See "Vehicle DynamicControl(VDC)system"(P.5-37).)
HEATEDSEATS(ifsoequipped)

WARNING
Donotuseorallowoccupantstouse theseatheaterifyouortheoccupants cannotmonitorelevatedseattemperaturesorhaveaninabilitytofeelpainin bodypartsthatcontacttheseat.Useof theseatheaterbysuchpeoplecould resultinseriousinjury.

CAUTION
- The battery could rundown if the seat theater is operated while the engine is not running.
- Donotusetheseatheaterfor extendedperiodsorwhennoone isusingtheseat.
- Donotputanythingontheseat whichinsulatesheat,suchasa blanket,cushion,seatcover,etc. Otherwise,theseatmaybecome overheated.
- Donotplaceanythinghardorheavy ontheseatorpierceitwithapinor similarobject.Thismayresultin
damagetotheheater.
- Anyliquidspilledontheheatedseat shouldberemovedimmediately withadrycloth.
- Whencleaningtheseat,neveruse gasoline,thinner,oranysimilar materials.
- Ifanymalfunctionsarefoundorthe heatedseatdoesnotoperate,turn theswitchoffandhavethesystem checked.Itisrecommendedyou visitaNISSANdealerforthisservice.

SIC2770
Theseatsarewarmedbybuilt-inheaters. The switcheslocatedonthecenterconsolecanbe operatedindependentlyofeachother.
- Starttheengine.
- Selectheatrange.
① Forhighheat, pushtheHI(High)sideof theswitch.
② Forlowheat, pushtheLO(Low)sideof theswitch.
The indicator light in the switch illuminate when the heater is on.
③ will
- Toturnofftheheater, returntheswitch to thelevelposition. Makesuretheindicator lightgoesoff.
Instrumentsandcontrols2-45
POWEROUTLET
Theheateriscontrolledbyathermostat, automaticallyturningtheheateronandoff. Theindicatorlightwillremainonaslongas theswitchison.
Whenthevehicle'sinterioriswarmed,or beforeyouleavethevehicle,besuretoturn offtheswitch.
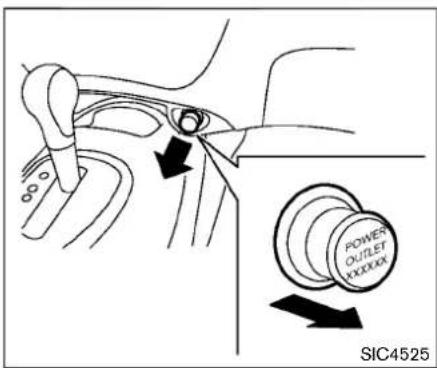
The power outlet is located in the instrument panel.
- Avoidusingpoweroutletwhenthe airconditioner,headlightsorrrear windowdefrosterison.
- Thispoweroutletisnotdesigned forusewithacigarettelighterunit.
- Pushthepluginasfarasitwillgo. Ifgoodcontactisnotmade,theplug mayoverheatortheinternaltemperaturefusemayopen.
- Beforeinsertingordisconnectinga plug, besuretheelectricalaccessorybeingusedisturnedOFF.
- Whennotinuse, besuretoclose thecap. Donotallowwaterorany liquidtocontacttheoutlet.

CAUTION
•Theoutletandplugmaybehot duringorimmediatelyafteruse.
- Donotusewithaccessoriesthat exceeda12volt,120W(10A)power draw.Donotusedoubleadaptersor morethanoneelectricalaccessory.
- Usepoweroutletwiththeengine runningtoavoiddischargingthe vehiclebattery.
STORAGE
CUPHOLDERS

CAUTION
- Avoid abrupt starting and braking when the cupholder is being used to prevent spilling the drink. If the liquid is shot, it can scald you or your passenger.
•Useonlysoftcupsinthecupholder. Hardobjectscaninjureyouinan accident.

natural_image
Diagram of a vehicle dashboard with three circular control panels and a lever, showing an arrow indicating direction (no text or symbols)Centerconsole
Softbottleholders

CAUTION
- Donotusebottleholderforany otherobjectsthatcouldbethrown aboutinthevehicleandpossibly injurepeopleduringsuddenbraking oranaccident.
- Donotusebottleholderforopen liquidcontainers.

natural_image
Line drawing of a car headrest lever with a knob and scroll wheel (no text or symbols)Door(frontandrear)

CARGOFLOORBOX
- Toopenthecargofloorbox, pulltheboard Ⓐ .

natural_image
Diagram of a car interior showing airflow direction and wheel (no text or symbols)GLOVEBOX

WARNING
Keepgloveboxlidclosedwhiledriving tohelppreventinjuryinanaccidentora suddenstop.
Toopentheglovebox, pullthehandle.
Toclose, pushthelidin until the locklatches.
Thegloveboxlightilluminateswhenthehead-lightswitchisturnedon.

COATHOOK
Thecoathookislocatedabovetherearside window.

CAUTION
Donotapplyatotalloadofmorethan2 kg(4lb)tothehook.
2-48 Instrumentsandcontrols
CARGOCOVER(ifsoequipped)

WARNING
- Neverputanythingonthecargo cover,nomatterhowsmall.Any objectonitcouldcauseaninjury inanaccidentorsuddenstop.
- Donotleavethecargocoverinthe vehiclewithitdisengagedfromthe holder.
•Thechildrestrainttoptetherstrap maybedamagedbycontactwith thecargocoveroritemsinthe luggagearea.Removethecargo coverfromthevehicleorsecureit andanyluggage.Yourchildcould beseriouslyinjuredorkilledina collisionifthetoptetherstrapis damaged.
Thecargocoverkeepstheluggagecompartmentcontentshiddenfromtheoutside.

Toinstallthecargocover:
- Openthelfitgate.
2.Fixtheclip Ⓐ ontheliftgatelowergarnish.
3.Fixtheclip Ⓑ ontheliftgatesidegarnish.
4.Hooktheropeonthecliplocatedonthe liftgatesidegarnish.
Toremovethecargocover:
- Openthelfitgate.
-
Removetheropefromtheliftgateside garnish.
-
Removetheclip garnish.
B fromtheliftgateside
- Removetheclip garnish.
Ⓐ fromtheliftgatelower
WINDOWS
POWERWINDOWS

WARNING
- Makesurethatallpassengershave theirhands,etc.insidethevehicle whileitisinmotionandbefore closingthewindows.Usethewindowlockswitchtopreventunexpecteduseofthepowerwindows.
●Tohelpavoidriskofinjuryordeath throughunintendedoperationof thevehicleandoritssystems, includingentrapmentinwindows orinadvertentdoorlockactivation, donotleavechildren,peoplewho requiretheassistanceofothersor petsunattendedinyourvehicle. Additionally,thetemperatureinside aclosedvehicleonawarmdaycan quicklybecomehighenoughto causeasignificantriskofinjuryor deathtopeopleandpets.
The power windows operate when the ignition switch is in the ON position, or for about 45 seconds after the ignitions switch is placed in the OFF position. If the driver's front passenger's door is opened during this period of about 45
seconds,powertothewindowsiscanceled.

- Windowlockbutton
- Driversidewindow
- Rearleftpassengersidewindow
4.Frontpassengersidewindow - Rear right passengersidewindow
Mainpowerwindowswitch(driver's side)
Toopenorclosethewindow,pushdown ① or pullup ② theswitchandholdit.Themain switch(driversideswitches)willopenorclose allthewindows.
2-50Instrumentsandcontrols
Lockingpassengers'windows
Whenthelockbutton © ispushedin, only the driversidewindowcanbeopenedorclosed. Pushitinagaintocancel.

natural_image
Simple line drawing of a capsule-shaped object with two arrows indicating direction (no text or symbols)SIC4523
Passengersidepowerwindowswitch
Thepassengersideswitchwillopenorclose onlythecorrespondingwindow.Toopenor closetehindow,pushdownorpullupthe switchandholdit.

natural_image
Top-down line drawing of a car with arrows indicating motion or force (no text or symbols)SIC4524
Automaticoperation
The automatic operation is available for the switch that has an A mark on its surface.
Tofullyopenorclosethewindow, completely pushdownorpulluptheswitchandreleaseit; theswitchneednotbeheld. Thewindowwill automaticallyopenorclosealltheway. Tostop thewindow, justpushorlifttheswitchinthe oppositedirection.
Alightpushorpullontheswitchwillcausethe windowtoopenorcloseuntiltheswitchis released.
Auto-reversefunction

WARNING
Therearesomesmalldistancesimmediatelybeforetheclosedpositionwhich cannotbedetected.Makesurethatall passengershavetheirhands,etc.,insidethevehiclebeforeclosingthe window.
If the control unit detect something caught in the window was it disclosing, the window will be immediately lowered.
The autoreverse function can be activated when the window is closed by automatic operation when the ignition switch is in the ON position or for 45 seconds after the ignition switch is placed in the OFF position.
Dependingontheenvironmentordriving conditions,theautoreversefunctionmay beactivatedifanimpactorloadsimilarto somethingbeingcaughtinthewindow occurs.
Ifthewindowsdonotcloseautomatically Ifthepowerwindowautomaticfunction(closing only)doesnotoperateproperly,performthe followingprocedureoinitializethepower windowsystem.
- PlacetheignitionswitchintheONposition.
2.Closethedoor. - Openthewindowcompletelybyoperating thepowerwindowswitch.
- Pullthepowerwindowswitchandholditto closethewindow, and thenholdtheswitch morethan3secondsafterthewindowis closedcompletely.
- Releasethepowerwindowswitch. Operate the window by the automatic function to confirm the initialization is complete.
If the power window automatic function does not operate properly after performing procedure above, it is recommended you have your vehicle checked by a NISSAN dealer.
MOONROOF(ifsoequipped)

WARNING
- Inanaccidentyoucouldbethrown fromthevehiclethroughanopen moonroof.Alwaysuseseatbelts andchildrestraints.
- Donotallowanyonetostandupor extendanyportionoftheirbodyout ofthemoonroofopeningwhilethe vehicleisinmotionorwhilethe moonroofisclosing.

CAUTION
- Removewaterdrops, snow, iceor sand from the moonroof before opening.
- Donotplaceanyheavyobjecton themoonrooforsurroundingarea.
POWERMOONROOF
Themoonroofonlyoperateswhentheignition switchisintheONposition.
Themoonroofisoperationalforabout45 seconds, even if the ignitionswitch is pushed to the OFF position. If the driver's door or the
passenger'sdoorisopenedduringthisperiodof about45seconds,powertothemoonroofis canceled.
Sunshade
Thesunshadowillopenautomaticallywhenthe moonroofisopened.However,itmustbeclosed manually.
SIC4624
Slidingthemoonroof
Tofullyopenorclosethemoonroof, push the switchtoward ① or ② andrelease it; it need not beheld. Theroof will automatically openor close all the way. Tostoptheroof, push the switchinany direction while it is opening or closing.
Tiltingthemoonroof
Totiltup, firstclosethemoonroof by pushing the switch toward ②. Pushtheswitchtoward ② again and release it; it need not be held. Totiltdownthemoonroof, pushtheswitch toward ①.
Autoreversefunction

WARNING
Therearesomesmalldistancesimmediatelybeforetheclosedpositionwhich cannotbedetected.Makesurethatall passengershavetheirhands,etc.,insidethevehiclebeforeclosingthe moonroof.
If the control unit detect something caught in themoonroof when it is closing, themoonroof will be immediately opened.
The autoreverse function can be activated when the moonroof is closed by automatic operation when the ignition switch is in the ON position or for about 45 seconds after the ignition switch is pushed to the OFF position.
Ifthemoonroofcannotbeclosedautomatically whentheautoreversefunctionactivatesduetoamalfunction,pushandholdtheswitchtoward ②.
Dependingontheenvironmentordriving conditions,theautoreversefunctionmay beactivatedifanimpactorloadsimilarto somethingbeingcaughtinthemoonroof occurs.
INTERIORLIGHTS
Ifthemoonroofdoesnotoperate
Ifthemoonroofdoesnotoperateproperly, performthefollowingproceduretoinitializethe moonroofoperationsystem.
- Ifthemoonroofisopen, closeitfully by repeatedly pushing the switch toward ②.

2.Pushandholdtheswitchtoward tiltthemoonroofup.

-
Releasethemoonroofswitchafterthe moonroofmovesslightlyupanddown.
-
Pushandholdtheswitchtoward fullytiltthemoonroofdown.

- Checkifthemoonroofswitchoperates normally.
Ifthemoonroofdoesnotoperateproperlyafter performingtheprocedureabove,haveyour moonroofcheckedandrepaired.ItisrecommendedyouvisitaNISSANdealerforthis service.

CAUTION
Donotuseforextendedperiodsoftime withtheenginestopped.Thiscould resultinadischargedbattery.

MAPLIGHTS(ifsoequipped)
Operatethemaplightswitchtoturnthemap lightonoroff.
① :ONposition
② :OFFposition
2-54 Instrumentsandcontrols
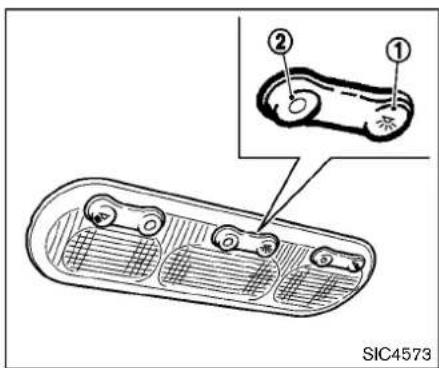
MAPLIGHTCONTROL SWITCH(ifso equipped)
Themaplightscontrolswitchhashthreepositions:ON ①,OFF ② andcenter.
ONposition
WhentheswitchisintheONposition maplightswillilluminate. ①, the
OFFposition
WhentheswitchisintheOFFposition ②, the maplightswillnotilluminate, regardless of the condition.
Centerposition
Whentheswitchisinthecenterposition,the maplightswillilluminateunderthefollowing conditions:
-ignitionswitchisplacedintheOFFposition
—remainonforabout15seconds.
- doorsare unlocked by pushing the UN-LOCK button (on the Intelligent Key) or therequest switch with the ignition switch in the LOCK position
—remain on for about 15 seconds.
-anydoorisopenedandthenclosedwiththe ignitionswitchintheLOCKposition —remainonforabout15seconds.
-anydoorisopenedwiththeignitionswitch intheACCorONposition
—remainonwhilethedoorisopened.
Whenthedoorisclosed,thelightsgo off.
Thelightswillturnoffafteraperiodof timewhenthelightsremainilluminatedto preventthebatteryfrombecomingdischarged.
CARGOLIGHT
Thecargoroomlightsilluminatewhenthe liftgateisopened.Whenthelfitgateisclosed, thelightswillturnoff.
MEMO
2-56 Instrumentsandcontrols
3Pre-drivingchecksandadjustments
Keys....3-2
IntelligentKeys....3-2
Doors....3-4
Lockingwithkey....3-4
Lockingwithinsidelockknob....3-4
Lockingwithpowerdoorlockswitch....3-5
Automaticdoorlocks....3-5
Childsafetyreardoorlock....3-6
IntelligentKeysystem....3-6
IntelligentKeyoperatingrange....3-8
Doorlocks/unlocksprecaution....3-8
IntelligentKeyoperation....3-9
Batterysaversystem....3-10
Warninglightsandaudiblereminders....3-10
Troubleshootingguide....3-11
Howtouseremotekeylessentryfunction....3-12
Hood....3-15
Liftgate....3-16
Frontsideandrearuniqueparts(NISMOmodels).....3-17
Fuel-fillerdoor....3-18
Openingthefuel-fillerdoor....3-18
Fuel-fillercap....3-18
Tiltsteeringcolumn....3-20
Tiltoperation....3-20
Sunvisors....3-21
Mirrors....3-21
Insidemirror....3-21
Outsidemirrors....3-22
Vanitymirror....3-23
KEYS
Akeynumberplateissuppliedwithyourkeys. Recordthekeynumberandkeepitinasafe place(suchasyourwallet),notinthevehicle.If youloseyourkeys,itisrecommendedyouvisita NISSANdealerforduplicatesbyusingthekey number.NISSANdoesnotrecordanykey numberssoitisveryimportanttokeeptrackof yourkeynumberplate.
Akeynumberisonlynecessarywhenyouhave lostallkeysanddonothaveonetoduplicate from.Ifyoustillhaveakey,itcanbeduplicated withoutknowingthekeynumber.
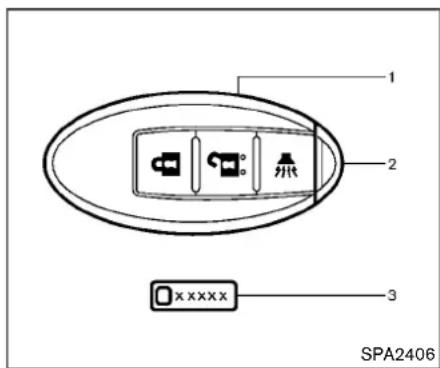
-
IntelligentKey(2sets)
-
Mechanicalkey(insidelIntelligentKey)(2sets)
3.Keynumberplate
INTELLIGENTKEYS
Yourvehiclecanonlybedrivenwiththe IntelligentKeyswhichareregisteredtoyour vehicle'sIntelligentKeysystemcomponentsand NISSANVehicleImmobilizerSystemcomponents. As many as 4 Intelligent Keys can be registeredandusedwithonevehicle.Thenew keysmustbe registeredbya NISSANdealer priortousewiththeIntelligentKeysystemand NISSANVehicleImmobilizerSystemofyour vehicle.Sincetheregistrationprocessrequires erasingallmemoryinthelIntelligentKeycompo-
nents when registering new keys, be sure to take allIntelligentKeysthatyouhavetotheNISSAN dealer.

CAUTION
- BesuretocarrythelIntelligentKey with you when driving. The IntelligentKeyisaprecisiondevicewith a built-intransmitter.Toavoiddamagingit,pleasenotethefollowing.
—The IntelligentKeyiswater resistant;however,wettingmay damagetheIntelligentKey.If theIntelligentKeygetswet, immediatelywipeuntilitiscompletelydry.
—Do notbend,droporstrikeit againstanotherobject.
- If the outside temperature is below 14^(-10^) degrees, the battery of the intelligent key may not function properly.
—DonotplacetheIntelligentKey foranextendedperiodina placewheretemperaturesexceed140°F(60°C).
—Donotchangeormodifythe IntelligentKey.
—Donotuseamagnetkeyholder.
—DonotplacethelIntelligentKey nearanelectricappliancesuch asatelevisionset, personal computerorcellularphone.
—DonotallowtheIntelligentKey tocomeintocontactwithwater orsaltwater,anddonotwashit inawashingmachine.This could affect the system function.
•IfanIntelligentKeyislostorstolen, NISSANrecommendserasingtheID codeofthatIntelligentKey.Thiswill preventtheIntelligentKeyfrom unauthorizedusetounlockthe vehicle.Forinformationregarding theerasingprocedure,itisrecommendedyouvisitaNISSANdealer.

Mechanicalkey
Toremovethemechanicalkey,releasethelock knobatthebackoftheIntelligentKey.
Toinstallthemechanicalkey, firmly insert it into the Intelligent Key until the lock knob return to the lock position.
Usethemechanicalkeytolockorunlockthe doors.(See "Doors"(P.3-4).)

CAUTION
AlwayscarrythemechanicalkeyinstalledinthelIntelligentKey.
DOORS

WARNING
●Alwayshavethedoorslockedwhile driving. Alongwiththeuseofseat belts, thisprovidesgreatersafety in theeventofanaccidentbyhelping to prevent persons from being thrownfromthevehicle. Thisalso helpskeepchildrenandothersfrom unintentionallyopeningthedoors, andwillhelpkeepoutintruders.
●Beforeopeninganydoor,always lookforandavoidoncomingtraffic.
●Tohelpavoidriskofinjuryordeath throughunintendedoperationof thevehicleandoritssystems, includingentrapmentinwindows orinadvertentdoorlockactivation, donotleavechildren,peoplewho requiretheassistanceofothersor petsunattendedinyourvehicle. Additionally,thetemperatureinside aclosedvehicleonawarmdaycan quicklybecomehighenoughto causeasignificantriskofinjuryor deathtopeopleandpets.
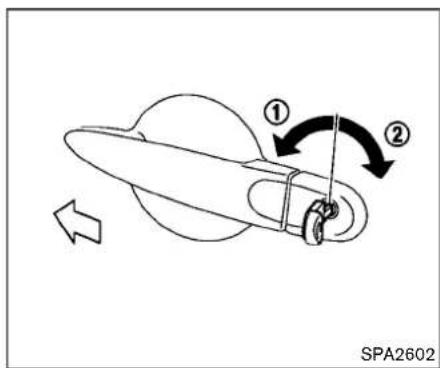
LOCKINGWITHKEY
Thepowerdoorlocksystemallowsyoutolock orunlockalldoorssimultaneously.
- Turningthedriver'sdoorkeycylindertothe frontofthevehicle ① willlockalldoorsand theliftgate.
- Turningthedriver'sdoorkeycylinderonce totherearofthevehicle ② willunlockthe driver'sdoor. Afterreturningthekeytothe neutralposition, turningittotherearagain within5secondswillunlockalldoorsand theliftgate.

LOCKINGWITHINSIDELOCKKNOB
Tolockthedoorwithoutthekey,movetheinside lockknobtothelockposition ① thenclosethe door.
Tounlock, movetheinsidelockknobtothe unlockposition ②.
Whenlockingthedoorwithouttakey, be surenottoleavethekeyinsidethevehicle.
3-4 Pre-driving checks and adjustments

Driver'sarmrest
LOCKINGWITHPOWERDOORLOCK SWITCH
Operating the power door lock switch will lock or unlock all the doors. Theswitch is located on the driver's door arm rest.
Tolockthedoors, pushthepowerdoorlock switchtothelockposition ① withthedriver's dooropen, thenclosethedoor.
Whenlockingthedoorthisway,besure nottoleavethekeyinsidethevehicle.
Tounlockthedoors, pushthepowerdoorlock switchtotheunlockposition ②.
Lockoutprotection
Lockoutprotectionfunctionhelpstoppreventthe keysfrombeingaccidentallylockedinsidethe vehicle.
- Whenthepowerdoorlockswitchismoved tothelockpositionwiththeignitionswitch placedintheACCorONpositionandany dooropen,alldoorswilllockandthen unlockautomatically.
- Whenthepowerdoorlockswitchismoved tothelockpositionwiththeIntelligentKey leftinthevehicleandanydooropen,all doorswillunlockautomaticallyandachime willsoundafterthedoorisclosed.
AUTOMATICDOORLOCKS
●Alldoorslockautomaticallywhenthevehicle speedreaches15MPH(24km/h).
- Alldoorsunlockautomaticallywhenthe ignitionswitchisplacedintheOFFposition.
The automatic unlock function can be deactivated or activated.
Todeactivateoractivatetheautomaticdoor unlocksystem,performthefollowingprocedure.
- Closealldoors.
- PlacetheignitionswitchintheONposition.
-
Within20seconds, pushandhold the powerdoorlockswitchtothe (UN-LOCK)positionformorethan5seconds.
-
Whenactivated, the hazardwarninglights will flashtwice. Whendeactivated, the hazardwarninglightswillflashonce.
- Theignitionswitchmustbeplacedinthe OFFandONpositionagainbetweeneach settingchange.
Whentheautomaticdoorunlocksystemis deactivated, thedoorsdonotunlockwhenthe ignitionisplacedintheOFFposition.Tounlock thedoormanually, usetheinsidelockknobor thepowerdoorlockswitch.
INTELLIGENTKEYSYSTEM

CHILDSAFETYREARDOORLOCK
Childsafetyreardoorlockshelppreventtherear doorsfrombeingopenedaccidentally,especiallywhensmallchildrenareinthevehicle.
Whentheleversareinthelockposition ① ,thereardoorscanbeopenedonly fromtheoutside.
Todisengage, movetheleverstotheunlock position ②.

WARNING
•Radiowavescouldadverselyaffect electricmedicalequipment. Those whoseapacemakershouldcontacttheelectricmedicalequipment manufacturerforthepossibleinfluencesbeforeuse.
- The Intelligent Keytransmitsradio waves when the buttons are pushed. The FAA advises that the radiowaves may affect aircraft navigation and communications systems. Do not operate the Intelligent Key while on an airplane. Makes sure the buttons are not operated unintentionally when the unit is stored during a flight.
The Intelligent Keysystem can operate all the doorlocks using theremote controller function or pushing therequest switch the vehicle without taking the key out from a pocket or purse. The operating environment and/or conditions may affect the Intelligent Keysystem operation.
Besuretoreadthefollowingbeforeusingthe IntelligentKeysystem.

CAUTION
- BesuretocarrytheIntelligentKey withyouwhenoperatingthevehicle.
- NeverleavetheIntelligentKeyin thevehiclewhen youleavethe vehicle.
The Intelligent Keyisalways communicating with the vehicle as it receives radiowaves. The Intelligent Keysystem transmits weak radio waves. Environmental conditions may interfere with the operation of the Intelligent Keysystem under the following operating conditions.
- Whenoperatingnearalocationwhere strongradiowavesaretransmitted, such asaTVtower,powerstationandbroadcastingstation.
- Wheninpossessionofwirelessequipment, suchasacellularphone,transceiver,and CBradio.
- When the Intelligent Key is in contact with or covered by metallic materials.
- Whenanytypeofradiowaveremotecontrol isusednearby.
- WhentheIntelligentKeyisplacednearan electricappliance such as apersonal
3-6 Pre-driving checks and adjustments
computer.
- Whenthevehicleisparkednearaparking meter.
Insuchcases, correct the operating conditions before using the Intelligent Key function or use themechanical key.
Although the life of the battery varies depending on the operating conditions, the battery's life is approximately 2 years. If the battery is discharged, replace it with anewone.
SincetheIntelligentKeyiscontinuouslyreceivingradiowaves,ifthekeyisleftnearequipment whichtransmitsstrongradiowaves,suchas signalsfromaTVandpersonalcomputer,the batterylifemaybecomeshorter.
Forinformationregardingreplacementofa battery,see"IntelligentKeybatteryreplacement" (P.8-20).
Asmanyas4IntelligentKeyscanberegistered andusedwithonevehicle.Forinformationabout thepurchaseanduseofadditionalIntelligent Keys,contactaNISSANdealer.

CAUTION
- DonotallowthelIntelligentKey, whichcontainselectricalcomponents,tocomeintocontactwith
waterorsaltwater. This could affect the system function.
- DonotdroptheIntelligentKey.
- DonotstrikethIntelligentKey sharplyagainstanotherobject.
- DonotchangeormodifytheIntelligentKey.
- WettingmaydamagetheIntelligent Key.IfthelIntelligentKeygetswet, immediatelywipeuntilitiscompletelydry.
- If the outside temperature is below 14^(-10^) degrees, the battery of the Intelligent Keymay not function properly.
- DonotplacethelIntelligentKeyfor anextendedperiodinanareawhere temperaturesexceed140°F(60°C).
- DonotattachtheIntelligentKey withakeyholderthatcontainsa magnet.
- DonotplacethIntelligentKeynear equipmentthatproducesamagneticfield,suchasaTV,audio equipment,personalcomputorsor cellularphone.
IfanIntelligentKeyislostorstolen,NISSAN recommendserasing theIDcode of that IntelligentKeyfromthevehicle.Thismayprevent theunauthorizeduseoftheIntelligentKeyto operatethevehicle.Forinformationregarding theerasingprocedure,itisrecommendedthat youcontactaNISSANdealer.
The Intelligent Key function can be disabled. For information about disabling the Intelligent Key function, it is recommended that you contact a NISSAN dealer.

natural_image
Top-down diagram of a car showing front and rear views with numbered annotations (no text or symbols present)SPA2074
The Intelligent Key functions can only be used when the Intelligent Key is within these specified operating range from therequest switch ①
WhentheIntelligentKeybatteryisdischargedor strongradiowavesarepresentneartheoperatinglocation,theIntelligentKeysystem'soperatingrangebecomesnarrower,andthelntelligent Keymaynotfunctionproperly.
Theoperatingrangeiswithin31.50in(80cm) fromeachrequestswitch ①.
If the Intelligent Keyistooclosetothedoor glass, handleorrearbumper, therequest
switchesmaynotfunction.
WhentheIntelligentKeyiswithintheoperating range,itispossibleforanyonewhodoesnot carrytheIntelligentKeytopushtherequest switchtolock/unlockthedoorsincludingthe liftgate.
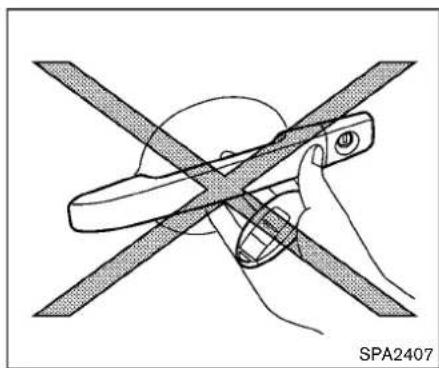
natural_image
Diagram of a hand holding a flat blade intersecting a circular object, with no visible text or symbols.DOORLOCKS/UNLOCKSPRECAUTION
- Donotpushthedoorhandlerequestswitch withthelntelligentKeyheldinyourhandas illustrated. Theclosedistancetothedoor handlewillcausethelntelligentKeysystem tohavedifficultyrecognizingthatthelntelligentKeyisoutsidethevehicle.
- Afterlockingwiththedoorhandlerequest switch,verifythedoorsaresecurelylocked bytestingthem.
- TopreventtheIntelligentKeyfrombeingleft insidethevehicle,makesureyoucarrythe keywithyouandthenlockthedoors.
3-8Pre-drivingchecksandadjustments
- Donotpullthedoorhandlebeforepushing thedoorhandlerequestswitch. Thedoor willbeunlockedbutwillnotopen. Release thedoorhandleonceandpullitagainto openthedoor.

natural_image
Line drawing of a car with a person standing beside it, showing exhaust or cleaning process (no text or symbols)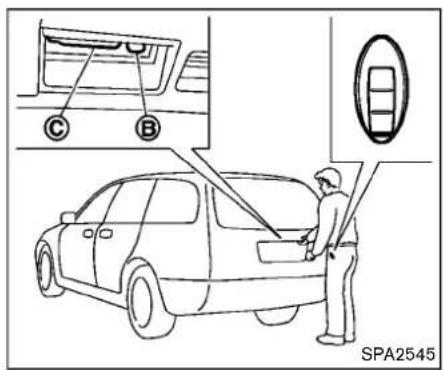

Youcanlockorunlockthedoorswithouttaking thekeyoutfromyourpocketorbag.
WhenyoucarrythelIntelligentKeywithyou,you canlockorunlockalldoorsbypushingthedoor handlerequestswitch(driver'sorfrontpassenger's) Ⓐ orliftgaterequestswitch Ⓑ within therangeofoperation.
Whenyoulockorunlockthedoors,thehazard indicatorwillflashandthehorn(ortheoutside chime)willsoundasaconfirmation.Fordetails, see"Settinghazardindicatorandhornmode" (P.3-13).
Pre-drivingchecksandadjustments3-9
Lockingdoors
- PlacetheignitionswitchintheOFFposition andcarrytheIntelligentKeywithyou.*1
2.Closeallthedoors.*2 - Pushthedoorhandlerequestswitch(driver'sorfrontpassenger's) ① ortheliftgate requestswitch ② whilecarryingthe IntelligentKeywithyou.*3
- Allthedoorsandtheliftgatewilllock.
- The hazard indicator flashest twice and the outside chimesound twice.
*1: Doorswilllockwiththerequestswitchwhilethe ignitionswitchisintheACCorONposition.
*2: Doorswillnotlockwiththerequestswitchwhile anydoorisopen.
*3: Doorswillnotlockwiththerequestswitchwhen theIntelligentKeyisleftinsidethevehicle. However, when an Intelligent Key is insidethe vehicle, doorscan belocked with another registered Intelligent Key.
Unlockingdoors
- Pushthedoorhandlerequestswitch Ⓐ or theliftgaterequestswitch Ⓑ whilecarryingtheIntelligentKeywithyou.
- The hazard indicator flashes once and outside chimes sounds once. The corresponding door orthelift gate will unlock.
3-10 Pre-driving checks and adjustments
- Pushtherequestswitchagainwithin1 minute.
- The hazard indicator flashes once and outside chimes soundsonce again. All the doors and the lift gate will unlock.
Alldoorswillbelockedautomaticallyunlessone ofthefollowingoperationsisperformedwithin1 minuteafterpushingtherequestswitchwhile thedoorsarelocked.
- Openinganydoor.
- Pushingtheignitionswitch.
During this 1 - minutetime period, if the UNLOCK
buttononthelIntelligentKeyispushed, all doorswillbelockedautomaticallyafteranother 1 minute.
Openingliftgate
- CarrytheIntelligentKey.
- Pushtheliftgateopenerswitch
- Theliftgatewillunlock.
BATTERYSAVERSYSTEM
When all the following conditions are met fora period of time, the batteriesaversystem will cut off the powers supply to prevent battery discharge.
●TheignitionswitchisintheACCposition, and
●Alldoorsareclosed, and
- The shift lever is in the P (Park) position (ContinuouslyVariable Transmission models).
WARNINGLIGHTSANDAUDIBLE REMINDERS
Tohelpprevent the vehicle from moving unexpectedly by erroneous operation of the Intelligent Key listed on the following chartor tohelpprevent the vehicle from being stolen, chimeorbeeps sounds inside and outside the vehicle and awarning light illuminates or blinks.
Whenachimeorbeepsoundsorthewarning lightilluminatesorblinks,besuretocheckthe vehicleandIntelligentKey.
See "Troubleshootingguide"(P.3-11) and "Warninglights, indicatorlights and audible reminders"(P.2-15).
IntelligentKeysystemwarninglight:
Ppositionselectingwarninglight:


TROUBLESHOOTINGGUIDE
| SymptomPossiblecause | Actiontotake | ||
| Whenpushingtheignitionswitch tostoptheengine | ThePpositionselectingwarninglightinthe meterilluminatesandtheinsidewarningchime soundscontinuously(ContinuouslyVariable Transmissionmodels). | TheshiftleverisnotintheP(Park) position. | ShifttheshiftlevertotheP(Park)position. |
| Whenshiftingtheshiftlevertothe P(Park)position. | Theinsidewarningchimesoundscontinuously (ContinuouslyVariableTransmissionmodels). | TheignitionswitchisintheACCorON position. | PushtheignitionswitchtotheOFFposition. |
| Whenopeningthedriver'sdoor togetoutofthevehicle | Theinsidewarningchimesoundscontinuously. | TheignitionswitchisintheACC position. | PushtheignitionswitchtotheOFFposition. |
| Whenclosingthedooraftergettingoutofthevehicle | TheIntelligentKeysystemwarninglightinthe meterblinksinyellow,andtheoutsidechime sounds3timesandtheinsidewarningchime soundsforafewseconds. | TheignitionswitchisintheACCorON position. | PushtheignitionswitchtotheOFFposition. |
| ThePpositionselectingwarninglightinthe meterilluminatesandtheoutsidechime soundscontinuously(ContinuouslyVariable Transmissionmodels). | TheignitionswitchisintheACCorOFF positionandtheshiftleverisnotintheP (Park)position. | MovetheshiftlevertotheP(Park)position andpushtheignitionswitchtotheOFF position. | |
| Whenclosingthedoorwiththe insidelockknobturnedtoLOCK | Theoutsidechimesoundsforafewseconds andallthedoorsunlock. | TheIntelligentKeyisinsidethevehicle. | CarrythelIntelligentKeywithyou. |
| Whenpushingtherequestswitch ortheLOCK buttononthe IntelligentKeytolockthedoor | Theoutsidechimesoundsforafewseconds. | TheIntelligentKeyisinsidethevehicle. | CarrythelIntelligentKeywithyou. |
| Adoorisnotclosedsecurely. | Closethedoorsecurely. | ||
| Whenpushingtheignitionswitch tostarttheengine | TheIntelligentKeysystemwarninglightinthe meterblinksingreen. | Thebatterychargeislow. | Replacethebatterywithanewone.(See "IntelligentKeybatteryreplacement"(P.8-20).) |
| TheIntelligentKeysystemwarninglightinthe meterblinksinyellowandtheinsidewarning chimesoundsforafewseconds. | TheIntelligentKeyisnotinthevehicle. | CarrythelIntelligentKeywithyou. | |
| Whenpushingtheignitionswitch | TheIntelligentKeysystemwarninglightinthe meterilluminatesinyellow. | Itwarnsofamalfunctionwiththe IntelligentKeysystem. | Itisrecommendedthatyoucontacta NISSANdealer. |
Pre-drivingchecksandadjustments3-11
HOWTOUSEREMOTEKEYLESS ENTRYFUNCTION

WARNING
- Radiowavescouldadverselyaffect electricmedicalequipment. Those whoseapacemakershouldcontacttheelectricmedicalequipment manufacturerforthepossibleinfluencesbeforeuse.
- The Intelligent Keytransmitsradio waves when the buttons are pushed. The FAA advises that the radiowaves may affect aircraft navigation and communications systems. Do not operate the Intelligent Key while on an airplane. Makes sure the buttons are not operated unintentionally when the unit is stored during a flight.

CAUTION
- Donot allow the Intelligent Key, which contain selectrical components, to come into contact with water or salt water. This could affect
3-12 Pre-driving checks and adjustments
thesystemfunction.
- DonotdroptheIntelligentKey.
- Donot striketh Intelligent Key sharply againstanotherobject.
- DonotchangeormodifytheIntelligentKey.
- WettingmaydamagethelIntelligent Key.IfthelIntelligentKeygetswet, immediatelywipeuntilitiscompletelydry.
- If the outsidetemperature is below 14^(-10^) degrees, the battery of the intelligent key may not function properly.
- DonotplacetheIntelligentKeyfor an extended period in an area where temperaturesexceed140°F(60°C).
- Do not attach the Intelligent Key withakeyholderthatcontainsa magnet.
- Do not place the Intelligent Key near equipment that produces amagnetic field, such as a TV, audio equipment, personal computer or cellular phone.
Theremotekeylessentryfunctioncanoperate alldoorlocksusingtheremotekeylessentry
functionoftheIntelligentKey.Theremote keylessentryfunctioncanoperateatadistance ofapproximately33ft(10m)fromthevehicle. (Theoperatingdistancedependsuponthe conditionsaroundthevehicle.)
Theremotekeylessentryfunctionwillnot operate:
- WhentheIntelligentKeyisnotwithinthe operationalrange.
- Whenthedoorsareopenornotclosed securely.
- When the Intelligent Key battery is discharged.
Theremote keylessentryfunctioncanalso operatethevehiclealarm.

SPA2252
① LOCKbutton
② UNLOCKbutton
③ PANICbutton
Whenyoulockorunlockthedoors,thehazard indicatorwillflashandthehornwillsoundasa confirmation.Fordetails,see"Settinghazard indicatorandhornmode"(P.3-13).
Lockingdoors
- PlacetheignitionswitchintheOFFposition andcarrytheIntelligentKeywithyou.*
- CarrytheIntelligentKeywithyou.
- Closeallthedoors.
4.PushtheLOCK IntelligentKey. button ① onthe
button
onthe


- Allthedoorsandtheliftgatewilllock.
- The hazard indicator flashestwice and the hornchirpsonce.
*:DoorswilllockwiththeIntelligentKeywhiletheignitionswitchisintheACCorONposition.
Operatethedoorhandlestoconfirmthatthe doorshavebeensecurelylocked.
Unlockingdoors
- Push the UNLOCK button Intelligent Keyonce.
② onthe
-
The hazard indicator flashes once. The driver's door will unlock.
-
Push the UNLOCK 1 minute.
buttonagainwithin
- The hazard indicator flashesonce. All the doors and the lift gate will unlock.
All doors will be locked automatically unless one of the following operations is performed within 1 minute after pushing the UNLOCK button while the doors are locked.
- Openinganydoor(includingtheliftgate).
- Pushingtheignitionswitch.
During this 1-minute time period, if the UNLOCK
buttonispushed, alldoorswillbelocked automaticallyafteranother1 minute.
Usingpanicalarm
If you are necessary your vehicle and feel threatened, you may activate the alarm to call attention as follows:
- Push the PANIC ➕ button ③ on the Intelligent Key form more than 1 second.
-
The theft warning alarm and headlight will stay on for 25 seconds.
3.Thepanicalarmstopswhen: -
Ithasrunfor25seconds,or
- AnyofthebuttonsonthelntelligentKey is pushed.(Note:thePANIC buttonmust bepushedformorethan1second.)
Settinghazardindicatorandhornmode
This vehicle is a set in hazard indicator and horn mod when you first receive the vehicle.
Inhazardindicatorand hornmode, whenthe LOCK 🔒 button ① ispushed, the hazard indicator flashes twice and the horn chirps once. WhentheUNLOCK 🔒 button ② ispushed, thehazardindicatorflashesonce.
Ifhornsarenotnecessary, thesystemcanbe switched to the hazard indicator mode.
Inhazardindicatormode,whentheLOCK buttonispushed,thehazardindicatorflashes twice. Whenthe UNLOCK button is pushed,neitherthehazardindicatornorthe
Pre-drivingchecksandadjustments
hornoperates.Hazardindicatorandhornmode:
| Operation | DOORLOCK | DOORUNLOCK |
| Pushingdoorhandlerequestswitch orliftgaterequestswitch | HAZARD-twice OUTSIDECHIME-twice | HAZARD-once OUTSIDECHIME-once |
| Pushingorbuption | HAZARD-twice HORN-once | HAZARD-once HORN-none |
Hazardindicatormode:
| Operation | DOORLOCK | DOORUNLOCK |
| Pushingdoorhandlerequestswitch orliftgaterequestswitch | HAZARD-twice OUTSIDECHIME-none | HAZARD-none OUTSIDECHIME-none |
| Pushingorbutton | HAZARD-twice HORN-none | HAZARD-none HORN-none |
3-14 Pre-driving checks and adjustments
HOOD
Switchingprocedure:
Toswitchthehazardindicatorandhorn(chime) operation,pushtheLOCK 🔒 ① andUN-LOCK 🔒 ② buttonsontheIntelligentKey simultaneouslyformorethan2seconds.
- Whenthehazardindicatormodeisset, the hazardindicatorflashes3times.
- Whenthehazardindicatorandhornmodeis set,thehazardindicatorflashesonceand thehornchirpsonce.
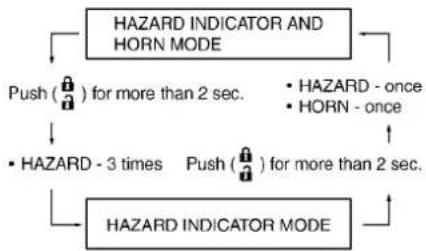
flowchart
graph TD
    A["HAZARD INDICATOR AND HORN MODE"] --> B["Push (🔒) for more than 2 sec."]
    B --> C["• HAZARD - once"]
    B --> D["• HORN - once"]
    C --> E["• HAZARD - 3 times"]
    D --> F["• HAZARD - once"]
    E --> G["Push (🔒) for more than 2 sec."]
    F --> G
    G --> H["HAZARD INDICATOR MODE"]

WARNING
- Makesurethehoodiscompletely closedandlatchedbeforedriving. Failuretodosocouldcausethe hoodtoflyopenandresultinan accident.
- If you se esteamorsmoke coming from the engine compartment, to avoid injury donotopenthehood.
LIFTGATE

Whenopeningthehood:
- Pullthehoodreleasehandle ① located belowtheinstrumentpanel; thehoodwill thenspringupslightly.
- Locatethelever ② inbetweenthehood andgrille, and pull the lever up with your fingertips.
3.Raisethehood ③.
4.Removethesupportrod ④ andinsertit intotheslot ⑤.
Holdthecoatedpart Ⓐ whenremovingor resettingthesupportrod.Avoiddirect contactwiththemetalparts,astheymay behotimmediatelyaftertheenginehas
3-16 Pre-driving checks and adjustments
beenstopped.
Whenclosingthehood:
- While supporting the hood, return the support rod to its original position.
2.Slowlylowerthehoodtoabout8to12in (20to30cm)abovethehoodlock,thenlet itdrop. - Makesureitissecurelylatched.

WARNING
•Alwaysbesuretheliftgatehasbeen closedsecurelytopreventitfrom openingwhiledriving.
- Donotdrivewiththeliftgateopen. This could allow dangerous exhaust gas estobedrawn into the vehicle. See "Exhaustgas(carbonmonoxide)" (P.5-2) of this manual.
- Do not leave children unattended insidethevehicle.Theycouldunknowinglyactivateswitchesorcontrols.Unattendedchildrencould becomeinvolvedinseriousaccidents.
- Makesurethatallpassengershave theirhands,etc.insidethevehicle beforeclosingtheliftgate.
FRONTSIDEANDREARUNIQUE PARTS(NISMOmodels)

Toopentheliftgate, unlockitandpushthe liftgateopenerswitch Ⓐ. Pulluptheliftgateto open.
Theliftgatecanbeunlockedby:
- pushingtheUNLOCK IntelligentKeytwice. buttononthe
- pushingtheliftgaterequestswitchwiththe IntelligentKeycarriedwithyou.
- pushingthepowerdoorlockswitchtothe unlockposition.
- insertingthekeyintothedriver'sdoorkey cylinderandturningittotherearofthe vehicletwice.
TheNISMOmodelshavethefollowingunique partsonthefront,sideandreofthevehicle.
- Frontbumper
●Daytimerunninglight(P.2-42,P.8-23, P.8-26) - Sidesillextensions
●Rearspoiler(P.7-3)
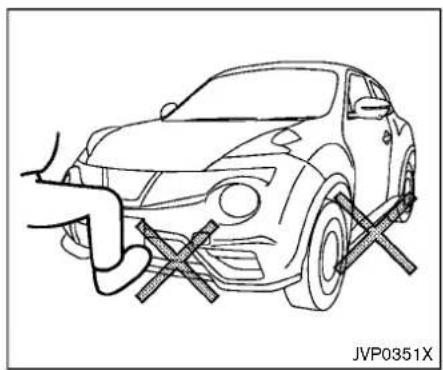
natural_image
Line drawing of a car being adjusted for a tool, no text or symbols present
CAUTION
Donotplaceyourfootonorsteponthe frontbumper.Also,donotsteponthe sidesillextensionswhengettinginor outofthevehicle.Doingsomayresult indamagetothefrontbumperandside sillextensions.
FUEL-FILLERDOOR
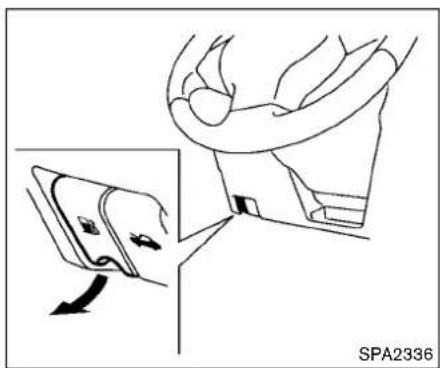
natural_image
Diagram showing a hand holding a device with an arrow indicating rotation, no text or symbols presentOPENINGTHEFUEL-FILLERDOOR
Toopenthefuel-fillerdoor,pulltherelease handlelocatedbelowtheinstrumentpanel.To lock,closethefuel-fillerdoorsecurely.
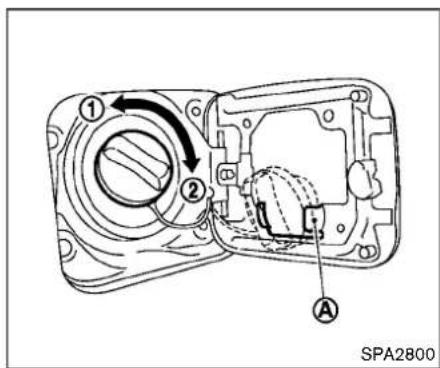
FUEL-FILLERCAP
Toremovethefuel-fillercap:
1.Turnthefuel-fillercapcounterclockwise toremove. ①
- Putthefuel-fillercaponthecapholder whilerefueling.
Toinstallthefuel-fillercap:
- Insert the fuel-fillercap straight into the fuel-fillertube.
2.Turnthefuel-fillercapclockwise ② untila singleclickisheard.

WARNING
•Gasolineisextremelyflammable andhighlyexplosiveundercertain conditions. You could be burnedor seriously injured if it is misused or mishandled. Always stop engine and donot smoke or allow open flames or sparks near the vehicle when refueling.
- Donotattempttotopoffthefuel tankafterthefuelpumpnozzle shutsoffautomatically.Continued refuelingmaycausefueloverflow, resultinginfuelsprayandpossibly afire.
- Useonlyanoriginalequipmenttype fuel-fillercapasareplacement.It hasabuilt-insafetyvalveneeded forproperoperationofthefuel systemandemissioncontrolsystem.Anincorrectcapcanresultina seriousmalfunctionandpossible injury.Itcouldalsocausethemal-functionindicatorlighttocomeon.
- Neverpourfuelinto thethrottle bodytoattempttostartyourvehicle.
3-18 Pre-driving checks and adjustments
- Donotfillaportablefuelcontainer inthevehicleortrailer. Staticelectricitycancauseanexplosionof flammableliquid, vapororgasin anyvehicleortrailer. Toreducethe riskofseriousinjuryordeathwhen fillingportablefuelcontainers:
—Alwaysplacethecontaineron thegroundwhenfilling.
—Donotuseelectronicdevices whenfilling.
—Keepthepumpnozzleincontact withthecontainerwhileyouare fillingit.
—Useonlyapprovedportablefuel containersforflammableliquid.

CAUTION
- Iffuelisspilledonthevehiclebody, flushitawaywithwatertoavoid paintdamage.
- Insertthecapstraightintothefuel-fillertube, thentightenuntilthe fuel-fillercapclicks. Failuretotight-enthefuel-fillercapproperlymay
causethe SERVICE ENGINE SOON malfunctionindicator light(MIL)toilluminate.Ifthe SERVICE ENGINE SOON lightilluminatesbecausethefuel- fillercapislooseormissing,tighten orinstallthecapandcontinueto drivethevehicle.The SERVICE light shouldturnoffafterafewdriving trips.Ifthe SERVICE ENGINE SOON lightdoesnotturn offafterafewdrivingtrips,havethe vehicleinspected.ItisrecommendedyouvisitaNISSANdealer forthisservice.
Foradditionalinformation,see "MalfunctionIndicatorLight(MIL)" (P.2-22).
•TheLOOSEFUELCAPwarning messagewillbedisplayedifthe fuel-fillercapisnotproperlytightened.Itmaytakeafewdrivingtrips forthemessagetobdisplayed. Failuretotightenthefuel-fillercap properlyaftertheLOOSEFUELCAP warningmessageisdisplayedmay causethe SERVICE Engine MalfunctionIndicator Light(MIL)toilluminate.
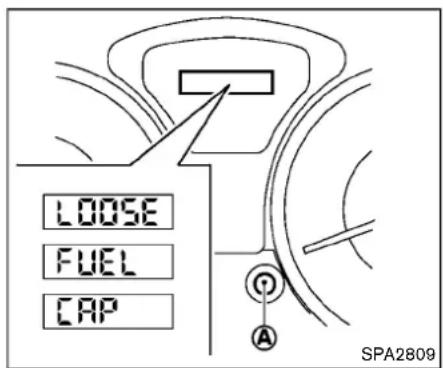
LOOSEFUELCAPwarningmessage
TheLOOSEFUELCAPwarningmessageis displayedonthevehicleinformationdisplay whenthefuel-fillercapisnottightenedcorrectly afterthevehiclehasbeenrefueled.Itmaytakea fewdrivingtripsforthemessagetobe displayed.Toturnoffthewarningmessage,do thefollowingprocedure:
- Remove and install the fuel-fillercapas previously described as soon as possible.
- Tightenthefuel-fillercapuntilitclicks.
- Pushthetripcomputermodeswitch Ⓐ for about1 secondtoturnofftheLOOSEFUEL CAPwarningmessageaftertighteningthe
Pre-drivingchecksandadjustments
TILTSTEERINGCOLUMN
WARNING
Donotadjustthesteeringwheelwhile driving. You could lose control of your vehicle and cause an accident.
SPA2808
TILT OPERATION
Push the lock lever down steering wheel up or down position.
*1 and adjust the *2 to the desired
Pull the lock lever up steering wheel in place.
securely to lock the
3-20 Pre-drivingchecksandadjustments
SUNVISORSMIRRORS
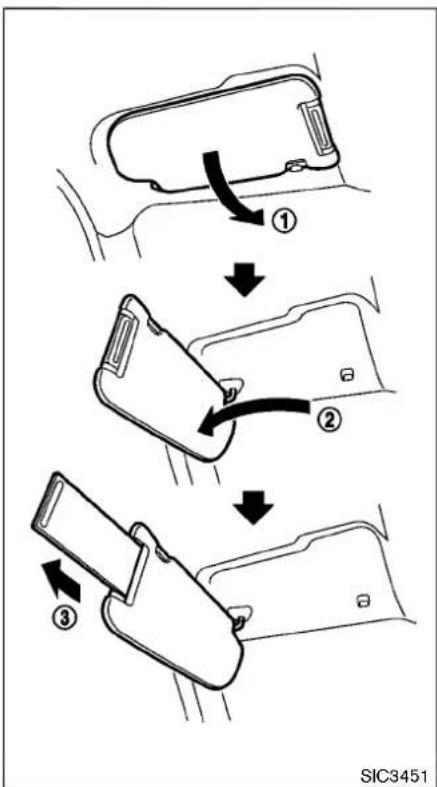
flowchart
graph TD
    A["Opening Seatbelt"] --> B["Adjustment Step ①"]
    B --> C["Adjustment Step ②"]
    C --> D["Adjustment Step ③"]
    D --> E["End"]

CAUTION
- Donotstorethemainsunvisor beforestoringtheextensionsun visor.
-
Donotpulltheextensionsunvisor forcedlydownward.
-
Toblockoutglarefromthefront, swing downthemainsunvisor ①.
- Toblockglarefromtheside, remove the mainsunvisorfromthecentermountand swingittotheside ②.
- Drawouttheextensionsunvisor ③ from themainsunvisortoblockfromfurther glare.

natural_image
Simple diagram of a curved object with bidirectional arrows indicating rotation or movement (no text or symbols)INSIDEMIRROR
Adjusttheangleoftheinsidemirrortothe desiredposition.

Thenightposition ① willreduceglarefromthe headlightsofvehiclesbehindyouatnight. Usethedayposition ② whendrivingindaylight hours.

WARNING
Usethenightpositiononlywhenne- cessary, because it reduces rearview clarity.
OUTSIDEMIRRORS

WARNING
Objectsviewedintheoutsidemirroron thepassengersidearecloserthanthey appear.Becarefulwhenmovingtothe right.Usingonlythismirrorcouldcause anaccident.Usetheinsidemirroror glanceoveryourshouldertoproperly judgedistancestootherobjects.
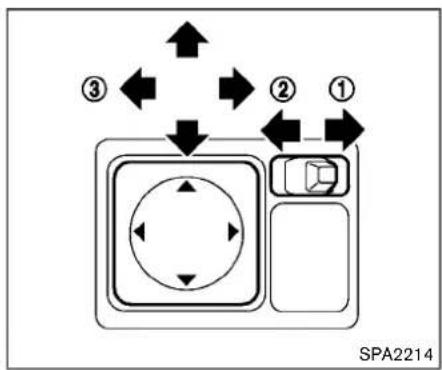
flowchart
graph TD
    A["①"] --> B["②"]
    B --> C["③"]
    C --> D["SPA2214"]
    style A fill:#f9f,stroke:#333
    style B fill:#f9f,stroke:#333
    style C fill:#f9f,stroke:#333
    style D fill:#ccf,stroke:#333
Adjustingoutsidemirrors
The outside mirror control switch is located at the lower part of the instrument panel.
The outside mirror will operate only when the ignitions switch this in the ACCorON position.
Movetheswitchright ① orleft ② toselect therightorleftsidemirror, thenadjust ③ using thecontrolswitch.
3-22 Pre-driving checks and adjustments
Defrostingoutsidemirrors(ifso equipped)
Theoutsidemirrorswillbeheatedwhentherear windowdefrosterswitchisoperated.(See"Rear windowandoutsidemirrordefrosterswitch" (P.2-38).)

natural_image
Diagram of a car wheel mounting a roof, showing motion direction with an arrow (no text or symbols)Foldableoutsidemirrors
Foldtheoutsidemirrorbypushingittowardthe rearofthevehicle.
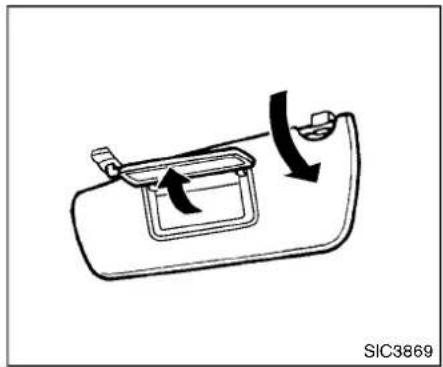
natural_image
Diagram of a car door handle with directional arrows indicating movement (no text or symbols)VANITYMIRROR
Tousethefrontvanitymirror,pulldownthesun visorandpullupthecover.
MEMO
3-24 Pre-driving checks and adjustments
4Heater, airconditioner, audioandphonesystems
Safetynote....4-3
Controlbuttonsandfunctions(modelswith
navigationsystem)....4-3
Howtousetouchscreen....4-4
HowtousetheBACKbutton....4-5
HowtousetheAPPS·ibutton....4-5
Howtousebrightnesscontrolbutton....4-8
HowtousetheON·OFFbutton/Volume
controlknob....4-8
HowtousetheCAMERAbutton....4-8
RearViewMonitor(modelswithout
navigationsystem)....4-8
RearViewMonitorsystemoperation....4-9
Howtoreadthedisplayedlines....4-9
Adjustingthescreen....4-11
RearViewMonitorsystemlimitations....4-11
Systemmaintenance....4-12
AroundView ^® Monitor(AVM)(modelswith
navigationsystem)....4-13
AroundView ^® Monitorsystemoperation......4-14
Howtoadjustthescreenview....4-20
AroundView ^® Monitorsystemlimitations......4-20
Systemmaintenance....4-23
MovingObjectDetection(MOD)(modelswith
navigationsystem)....4-24
MODsystemoperation....4-24
MODsystemlimitations....4-26
Systemmaintenance....4-27
Ventilators....4-27
Centerventilators....4-27
Sideventilators....4-28
Heaterandairconditioner....4-28
Manualairconditioner(ifsoequipped)....4-29
Automaticairconditioner(withIntegrated ControlSystem)....4-32
Operatingtips(forautomaticairconditioner)......4-35
In-cabinmicrofilter....4-35
Servicingairconditioner....4-35
Audiosystem....4-35
Audiooperationprecautions....4-35
FM-AMradiowithCompactDisc(CD)player(if soequipped)....4-45
FM-AM-SATradiowithCompactDisc(CD)player (TypeA)(ifsoequipped)....4-53
FM-AM-SATradiowithCompactDisc(CD)player(TypeB)(ifsoequipped)....4-62
CD/USBmemorycareandcleaning....4-73
Steeringwheelswitchforaudiocontrol....4-73
Antenna....4-75
NissanConnect ^SM Appsmartphoneintegration......4-75
RegisteringwithNissanConnect ^SM App......4-75
Connectphone....4-76
Applicationdownload....4-76
Siri ^® EyesFree....4-76
GeneralInformation....4-76
Requirements....4-77
Siri ^® EyesFreeActivation....4-77
OperatingSiri ^® EyesFree......4-77
ChangingSiri ^® EyesFreeSettings(modelswithout navigationsystem)....4-78
Troubleshootingguide....4-79
CarphoneorCBradio....4-80
Bluetooth® Hands-FreePhoneSystem(modelswithout navigationsystem)....4-80
Regulatoryinformation....4-81
Usingthesystem....4-82
Bluetooth ^® Hands-FreePhoneSystem(modelswith navigationsystem)....4-89
Regulatoryinformation....4-91
Voicecommand....4-91
Connectingprocedure....4-92
Vehiclephonebook....4-92
Makingacall....4-92
Receivingacall....4-92
Duringacall....4-93
Endingacall....4-93
Textmessaging....4-93
Bluetooth® settings....4-94
Phonesettings....4-96
NISSANVoiceRecognitionSystem(modelswith navigationsystem)....4-96
Usingthesystem....4-97
Systemfeatures....4-98
Bluetooth® Hands-FreePhoneSystem voicecommands....4-98
Navigationsystemvoicecommands....4-99
Audiosystemvoicecommands....4-100
Informationvoicecommands....4-100
MyAPPSvoicecommands....4-100
Helpvoicecommands....4-100
Troubleshootingguide....4-100
SAFETYNOTE

WARNING
- Donotdisassembleormodifythis system.Ifyoudo,itmayresultin accidents,fire,orelectricshock.
- Donotusethissystemifyounotice anyabnormality,suchasafrozen screenorlackofsound.Continued useofthesystemmayresultin accident,fireorelectricshock.
•Incaseyounoticeanyforeign objectinthesystemhardware,spill liquidonit,ornoticesmokeorsmell comingfromit,stopusingthe systemimmediately.ItisrecommendedyouvisitaNISSANdealer forservicing.Ignoreingsuchconditionsmayleadtoaccidents,fire,or electricshock.
Donotattempttooperatethesystemin extremetemperatureconditions[below -4°F (-20°C) and above 158°F (70°C)]. Operatingthissystemunderthesecondi- tionsmayresultinsystemmalfunctions.
CONTROLBUTTONSAND FUNCTIONS(modelswith navigationsystem)

1.MAPbutton*
2.Displayscreen
3. button(P.4-89)
4. APPS button(P.4-5)
5. ⚙/J (brightnesscontrol)button(P.4-8)
6.BACKbutton(P.4-5)
7.ON-OFFbutton/VOL(volume)controlknob (P.4-8)
8.CAMERAbutton(P.4-8)
9.NAVbutton*
*ForinformationregardingtheNavigationsys-
temcontrolbuttons, refertotheseparate
NavigationSystemOwner'sManual.
Heater, airconditioner, audioandphonesystems4-3
Whenyouusethissystem, makesurethe engineisrunning.
If youusethesystemwiththeenginenot running(ignitionONorACC)foralong time, it will dischargethebattery, and the enginewillnotstart.
Referencesymbols:
"Example"—Wordsmarkedinquotesrefertoa keyshownonlyonthedisplay.Thesekeyscan beselectedbytouchingthescreen.
HOWTOUSETOUCHSCREEN

CAUTION
- The glassscreenontheliquid crystaldisplaymaybreakifitishit withahardorsharpobject.Ifthe glassscreenbreaks, donottouchit. Doingsocouldresultinaninjury.
- Tocleanthedisplay,neverusea roughcloth,alcohol,benzine,thinnerorykindofsolventorpaper towelwitha chemicalcleaning agent.Theywillscratchordeterioratethepanel.
- Donotsplashanyliquidsuchas waterorcarfragranceonthedisplay.Contactwithliquidwillcause
4-4Heater, airconditioner, audioandphonesystems
thesystemtomalfunction.
To help ensures a fed driving, some functions cannot be operated while driving.
Theon-screenfunctionsthatarenotavailable whiledrivingwillbe"grayedout"ormuted. Parkthevehicleinasafelocationandthen operatethenavigationsystem.

WARNING
•ALWAYSgiveyourfullattentionto driving.
- Avoidusingvehiclefeaturesthat could distract you. If distracted, you could close control of your vehicle and cause an accident.
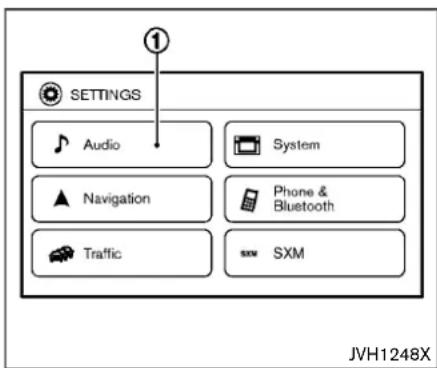
Touchscreenoperation
Selectingtheitem:
Touchanitemtoselect.Toselectthe"Audio"key,touchthe"Audio"key ① onthescreen.
Adjustingtheitem:
Touchthe"+"keyorthe"-"keytoadjustthe settingsofanitem.Touchtheparrowtoscroll upthepage.Touchthedownarrowtoscroll downthepage.
Inputtingcharacters:
Touchtheletterornumberkey.Therearesome optionsavailablewheninputtingcharacters.
●123/ABC:
Changesthekeyboardbetweennumbers andalphabets.
•Space:
Insertsaspace.
- Delete:
Deletesthelastinputtedcharacterwithone touch.Touchandholdthe"Delete"keyto deleteallofthecharacters.
•OK:
Completesthecharacterinput.
Touchscreenmaintenance
If you cleanthedisplayscreen, use adry, soft cloth. If additional cleaning is necessary, use a small amount of neutral detergent with as soft cloth. Neverspray the screen with water or detergent. Dampenthe cloth first and then wipe the screen.
HOWTOUSETHEAPPS·IBUTTON
Forinformationaboutthe "SiriusXMTravelLink", and "SiriusXMTraffic"features,seetheseparate NavigationSystemOwner'sManual.
Forinformationaboutthe"MyApps"key,see "NissanConnect ^SM Appsmartphoneintegration" (P.4-75).
Forinformationaboutthe"VoiceCommands" key,see"NISSANVoiceRecognitionSystem (modelswithnavigationsystem)"(P.4-96).

Toselectand/oradjustseveralfunctions, featuresandmodesthatareavailableforyour vehicle:
-
Pushthe APPS button.
-
Touchthe"Settings"key.
-
Touchthedesireditem.
| MenuItem | Result | ||
| Audio | Formoredetails,see“FM-AM-SATradiowithCompactDisc(CD)player(TypeB)”(P.4-62). | ||
| Navigation | Seetheseparate教育教学Owner'sManualformoreinformation. | ||
| Phone&Bluetooth | Formoredetails,see“Bluetooth®Hands-Free Phone System(modelswithnavigation system)”(P.4-89). | ||
| System | Touchthiskeytoselectand/oradjustvariousfunctionsofthissystem.Ascreenwithadditionaloptionswill appear. | ||
| Display | Touchthiskeytoadjusttheappearanceofthedisplay. | ||
| Brightness | Adjuststhebrightnesssofthedisplay. | ||
| Display Mode | Adjusts to fit the level of lighting in the vehicle. Touch key to cycle through options. “Day” and “Night” modes are suitedfortherospectivetimesofdaywhile“Auto”controlsthedisplayautomatically. | ||
| ScrollDirection | Adjuststhedirectionofthemenuscroll.Choosetoeithermoveupordown. | ||
| Clock | Touchthiskeytoadjustthetime. | ||
| TimeFormat | Theclockcanbesetto12hoursor24hours. | ||
| DateFormat | Selectfromfivepossibleformatsofdisplayingtheday,month,andyear. | ||
| Clock Mode | Adjust the mode for the clock. "Auto" uses the system's GPS to automatically maintain the time. “Manual” allows youtosettheclockusingthe“SetClockManually”key. | ||
| Set Clock Manually | Adjust the clock manually, Touch the "+" or "-" keys to adjust the hours, minutes, day, month and year up or down. "ClockMode"mustbesettomanualforthisoptiontobeavailable. | ||
| DaylightSavingsTime | Adjuststhedaylightsavingstimeonoroff. | ||
| TimeZone | Choosetheapplicabletimezonefromthelist. | ||
| Language | Touchthiskeytochangethelanguageonthedisplay. | ||
| CameraSettingsTouchthiskeytochangethecamerasettings. | |||
| DisplayModeTouchthiskeytoselectthetouch-screendisplaymode(day,night,orautomatic). | |||
| BrightnessAdjusttouch-screenbrightness. | |||
| ContrastAdjusttouch-screencontrast. | |||
4-6Heater, airconditioner, audioandphonesystems
| ColorAdjusttouch-screencolor. | ||
| TemperatureUnit | Touchthiskeytochangethtemperatureunitbeingdisplayed(FahrenheitCelsius). | |
| Touchscreen click | Toggles the touch-screen click feature on or off. When activated a click sound will be heard every time a key on thescreenistouched. | |
| SystemBeepsTogglethesystembeeptonesfeatureconoroff.Whenactivated,abeepsoundwillbeheardwhenapop-upmessageappearonthescreenorabuttonontheunit(suchastheseconds. | button)ispushedandheldfor2 | |
| ReturntoFactorySettings/ClearMemory | Touchthiskeytoreturnallsettingstodefaultandtoclearthememory. | |
| SoftwareLicenses | Touchthiskeytodisplaysoftwarelicensinginformation. | |
| TrafficTouchthiskeytodisplaytrafficsettings.SeetheseparateNavigationSystemOwner'sManualformoreinformation. | ||
| SXMTouchthiskeytodisplaySXMstatusinformation.ForSXMsetup,see"FM-AM-SATradiowithCompactDisc(CD)player(TypeB)("P.4-62). | ||
REARVIEWMONITOR(models withoutnavigationsystem)
Ifnooperationisperformed, the display will return to the previous display.
Pushandholdthe 🟢 buttonoturnthedisplay off.Pushthebuttonagaintoturnthedisplayon.
HOWTOUSETHEON-OFFBUTTON/VOLUMECONTROLKNOB
PushtheON-OFFbuttontoturnaudiofunction onandoff.Turnthevolumecontrolknobto adjustaudiovolume.
HOWTOUSETHECAMERABUTTON
FormoreinformationregardingtheCAMERA button,see"AroundView ^® Monitor(AVM)(modelswithnavigationsystem)("P.4-13).

WARNING
Failuretofollowthewarningsand instructionsforproperuseoftheRear-ViewMonitorcouldresultinserious injuryordeath.
•TheRearViewMonitorisaconveniencebutitisnotasubstitutefor properbacking.Alwaysturnandlookoutthewindows,andcheck mirrorstobesurethatitissafeto movebeforeoperatingthevehicle. Alwaysbackupslowly.
- Thesystemisdesignedasanaidto thedriverinshowinglargestationaryobjectsdirectlybehindthevehicle,tohelpavoiddamagingthe vehicle.
- Thedistanceguidelineandthe vehiclewidthlineshouldbeused asareferenceonlywhenthevehicle isonalevelpavedsurface.The distanceviewedonthemonitoris forreference only and maybe differentthantheactualdistance between the vehicle and displayed objects.

CAUTION
Do not scratch the camera lens when cleaning dirtorsnow from the front of the camera.
TheRearViewMonitorsystemautomatically showsarearviewofthevehiclewhentheshift leverisplacedinthe“R”(Reverse)position.
TheradiocanstillbeheardwhiletheRearView Monitorisactive.

natural_image
Line drawing of a car front view with labeled component (no text or symbols on the car itself)Todisplaytherearview,theRearViewMonitor systemusesacameralocatedjustabovethe vehicle'slicenseplate ①.
Indicated distances from the bumper.
●Redline ①:approx.1.5ft(0.5m)
●Yellowline ②:approx.3ft(1m)
●Greenline ③:approx.7ft(2m)
●Greenline ④:approx.10ft(3m)
Vehiclewidthguidelines ⑤ :
Indicatethevehiclewidthwhenbackingup.
Differencebetweenpredictiveandactual distances
Thedisplayedguidelinesandtheirlocationson thegroundareforapproximatereferenceonly. Objectsonuphillordownhillsurfacesor projectingobjectswillbeactuallylocatedat distancesdifferentfromthosedisplayedinthe monitorrelativetotheguidelines(referto illustrations).Whenindoubt,turnaroundand viewtheobjectsasyouarebackingup,orpark andexitthevehicletoviewthepositioningof objectsbehindthevehicle.
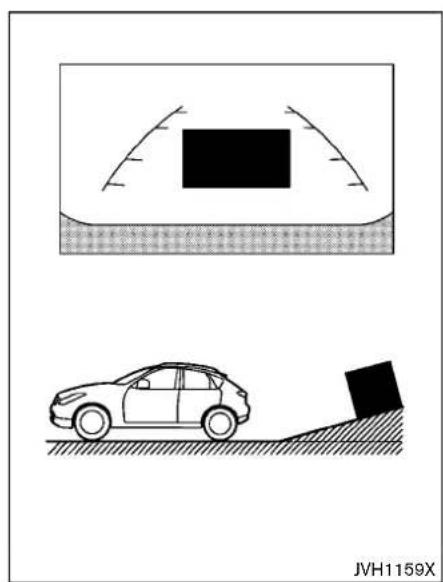
natural_image
Diagram showing a car on a slope next to a vehicle under an arch, with no visible text or symbols.Backinguponasteepuphill:
Whenbackingupthevehicleupahill, the distanceguidelinesandthevehiclewidthguide linesareshowncloserthantheactualdistance. Notethatanyobjectonthehillisfartherthanit appearsonthemonitor.

Backinguponasteepdownhill:
Whenbackingupthevehicledownahill,the distanceguidelinesandthevehiclewidthguide linesareshownfartherthantheactualdistance. Notethatanyobjectonthehilliscloserthanit appearsonthemonitor.

natural_image
Technical diagram showing a vehicle collision with impact lines and a separate view of the car (no text or symbols)Backingupnearaprojectingobject:
Thevehiclemayseemtonearlycleartheobject inthedisplay.However,thevehiclemayhitthe objectifitprojectsovertheactualbackingup course.
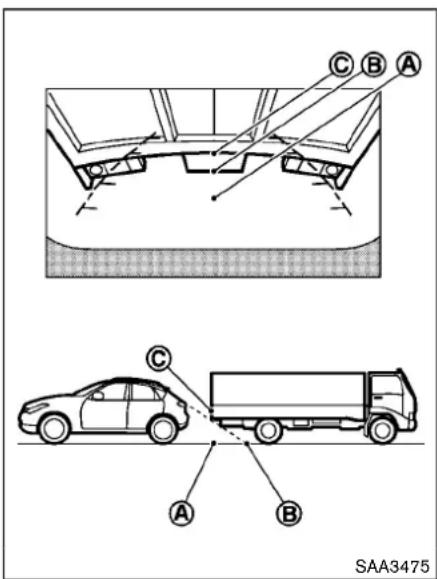
Backingupbehindaprojectingobject:
Theposition Ⓐ isshownfartherthanthe position Ⓑ inthedisplay. However, the position Ⓓ isactuallyatthesamedistance astheposition Ⓔ .Thevehiclemayhitthe objectwhenbackinguptotheposition Ⓔ if theobjectprojectsovertheactualbackingup
course.
ADJUSTINGTHESCREEN
- Push the ENTER/SETTING button while the Rear View monitors screen is displayed.
- Adjust the brightness using the TUNE·FOLDERorTUNE·SCROLLcontrol knob.
- Push the ENTER/SETTING button and adjust the contrast using the TUNE·FOLDER or TUNE·SCROLL control knob.
- Push the ENTER/SETTING button to return to the Rear View monitors screen.
NOTE:
Donotadjustanyofthedisplaysettings of theRearViewMonitorwhilethevehicleis moving.Makesuretheparkingbrakeis firmlyapplied.
REARVIEWMONITORSYSTEMLIMITATIONS

WARNING
Listedbelowarethesystemlimitations forRearViewMonitor.Failuretooperatethevehicleinaccordancewiththese systemlimitationscouldresultinseriousinjuryordeath.
- Thesystemcannotcompletelyeliminateblindspotsandmaynotshow everyobject.
• Underneaththebumperand the cornerareasofthebumpcannot beviewedontheRearViewMonitor becauseofitsmonitoringrange limitation. Thesystemwillnotshow smallobjectsbelowthebumper, andmaynotshowobjectscloseto thebumperorontheground. - Objectsviewed in the Rear View Monitor differr from actual distance because a wide-angle lens is used.
- ObjectsintheRearViewMonitor willappearvisuallyoppositecomparedtowhenviewedintherear viewandoutsidemirrors.
- Usethedisplayedlinesasareference. Thelinesarehighlyaffected bythenumberof occupants, fuel level, vehicleposition, roadconditionsandroadgrade.
- Makesurethattheliftgateissecurelyclosedwhenbackingup.
- Donotputanythingontherearview camera.Therearviewcamerais installedabovethelicenseplate.
- When washing the vehicle with high-pressurewater, besurenotto sprayitaround the camera. Otherwise, water may enter the camera unit causing water condensation on the lens, malfunction, fireor an electric shock.
- Donotstrikethecamera.Itisa precisioninstrument. Otherwise, it may malfunctionorcaused damage resultinginafireoranelectric shock.
The following are operating limitations and do not represent asystemmalfunction:
- Whenthetemperatureisextremelyhighor low,thescreenmaynotclearlydisplay objects.
- When strong light is directly coming on the camera, objects may not be displayed clearly.
- Verticallinesmaybeseeninobjectsonthe screen. Thisisduetostrongreflectedlight fromthebumper.
- Thescreenmayflickerunderfluorescent light.
- ThecolorsofobjectsontheRearView Monitormaydiffersomewhatfromtheactual colorofobjects.
4-12 Heater, airconditioner, audioandphonesystems
- Objectsonthemonitormaynotbeclearina darkenvironment.
- Ifdirt,rainorsnowaccumulatesonthe camera,theRearViewMonitormaynot displayobjectsclearly.Cleanthecamera.
- Donotusewaxonthecamerawindow. Wipeoffanywaxwithacleancloth dampenedwithmilddetergentdilutedwith water.

natural_image
Line drawing of a car front view with labeled component (no text or symbols on the car itself)SYSTEMMAINTENANCE

CAUTION
- Donotusealcohol, benzineor thinnertocleanthecamera. This will caused discoloration. Toclean thecamera, wipewithaclothdampened with diluted mild cleaning agent and then wipewithadry cloth.
- Donotdamagethecameraasthe monitorscreenmaybeadversely affected.
AROUNDVIEW ^® MONITOR(AVM) (modelswithnavigationsystem)
Ifdirt,rainorsnowaccumulatesonthecamera ① ,RearViewMonitormaynotdisplayobjects clearly.Cleanthecamerabywipingitwitha clothdampenedwithadilutedmildcleaning agentandthenwipingitwithadrycloth.

1.CAMERAbutton

WARNING
Failuretofollowthewarningsand instructionsfortheproperuseofthe
AroundView ^® Monitorsystemcould resultinseriousinjuryordeath.
•TheAroundView ^® Monitorisa convenientfeaturebutitisnota substituteforpropervehicleoperationbecauseithasareaswhere
Heater, airconditioner, audioandphonesystems4-13
objectscannotbeviewed. The four corners of the vehicle in particular, are areas where objects donot always appear in the bird's-eye, front, or rear views. Always check your surrounding stobesure that it issafetomove before operating the vehicle. Always operate the vehicle slowly. Always look out the windows and check mirror stobesure that it issafetomove.
- Thedriverisalwaysresponsiblefor safetyduringparkingandother maneuvers.

CAUTION
Donotscratchthelenswhencleaning dirtorsnowfromthefrontofthe camera.
TheAroundView ^® Monitorsystemisdesigned asanaidtothedriverinsituationssuchasslot parkingorparalleelparking.
Themonitordisplaysvariousviewsofthe positionofthevehicleinasplitscreenformat. Allviewsarenotavailableatalltimes.
Availableviews:
- Bird's-eyeview Thesurroundingviewofthevehicle.
- Front-sideview The view around and ahead of the front passenger'ssidewheel.
- Frontview
The view to the front of the vehicle.
●Rearview The view to there are of the vehicle.

natural_image
Line drawing of a car front view with a numbered arrow pointing to the side panel (no text or symbols present)JVH1224X
Todisplaythemultipleviews,theAroundView Monitorsystemusescameras ① locatedinthe frontgrill,onthevehicle'soutsidemirrorsand onejustabovethevehicle'slicenseplate.
4-14 Heater, airconditioner, audioandphonesystems
Availableviews

WARNING
- Thedistanceguidelinesandthe vehiclewidthlinessshouldbeused asareferenceonlywhenthevehicle isonapaved,levelsurface.The distanceviewedonthemonitoris forreferenceonlyandmaybe differentthantheactualdistance betweenthevehicleanddisplayed objects.
- Usethedisplayedlinesandthe bird's-eyeviewasareference. The linesandthebird's-eyeviewware greatlyaffectedbythenumberof occupants,fuellevel,vehicleposition,roadconditionandroadgrade.
- Ifthetiresarereplacedwithdifferentsizedtires, thepredictivecourse linesandthebird's-eyeviewmaybe displayedincorrectly.
-
When driving the vehicle up a hill, objects viewed in the monitor are farther than they appear. When driving the vehicle down a hill, objects viewed in the monitor are closer than they appear.
-
Objectsinthemonitorwillappear visuallyoppositecomparedtowhen viewedintherearviewandoutside mirrors.
•Usethemirrorsoractuallylookto properlyjudgedistancetoother objects. - The distance between objects viewed in therear view differs from actual distance because a wide-angle lens is used.
- Onasnow-coveredorslipperyroad, theremaybeadifferencebetween thepredictivecourselineandthe actualcourseline.
•Thevehiclewidthandpredictive courselinesarewiderthanthe actualwidthandcourse. - Thedisplayedlinesontherearview willappearslightlyofftotheright becausetherearviewcameraisnot installedintherearcenterofthe vehicle.

Frontview

Rearview
Heater, airconditioner, audioandphonesystems4-15
Frontandrearview:
Guidinglines, which indicate the vehicle width and distance to objects with reference to the vehicle bodyline (A), are displayed on the monitor.
Distanceguidelines:
Indicated distances from the vehicle body.
●Redline ①: approx.1.5ft(0.5m)
●Yellowline ② :approx.3ft(1m)
●Greenline ③ :approx.7ft(2m)
●Greenline ④ :approx.10ft(3m)
Vehiclewidthguidelines ⑤ :
Indicatethevehiclewidthwhenbackingup.
Thebird's-eyeviewshowstheoverheadviewof thevehiclewhichhelpsconfirmthevehicle positionandthepredictedcoursetoaparking space.
Thevehicleicon ① show the position of the vehicle. Notethatthedistance between objects viewed in the bird's-eye view differs from the actual distance.
The areas that the cameras cannot cover ② are indicated in black.
AftertheignitionswitchisplacedintheON position,thenon-viewablearea ② ishigh-lightedinyellowfor3secondsafterthebird's-
4-16 Heater, airconditioner, audioandphonesystems
eyewiewisdisplayed.
Inaddition, thenon-viewable corners are displayed in red (blink for the first 3 seconds) to remind the driver's be cautious.
③

WARNING
- Objectsinthebird's-eyeviewwill appearfartherthantheactualdistancebecausethebird's-eyeviews apseudoviewthatisprocessed by combiningtheviewsfromthecamerasontheoutsidemirrors,the frontandtherearofthevehicle.
•Tallobjects,suchasacurbor vehicle,maybemisalignedornot displayedattheseamoftheviews. - Objectsthatareabovethecamera cannotbedisplayed.
•Theviewforthebird's-eyeviewmay bemisalignedwhenthecamera positionalters. - Alineonthegroundmaybemis-alignedandisnotseenasbeing straightattheseamoftheviews. Themisalignmentwillincreaseas thelineproceedsawayfromthe vehicle.

SAA3571
Front-sideview:
Guidinglines:
Guidinglinesthatindicatethewidthandthe frontendofthevehiclearedisplayedonthe monitor.
Thefront-of-vehicleline ① showsthefrontpart ofthevehicle.
Theside-of-vehicleline ② showsthevehicle widthincludingtheoutsidemirrors.
The extensions ③ of both the front ① and side ② lines are shown with a greyed dotted line.

CAUTION
- Theturnsignallightmaylooklike theside-of-vehicleline. This is not a malfunction.
Differencebetweenpredictiveandactual distances
Thedisplayedguidelinesandtheirlocationson thegroundareforapproximatereferenceonly. Objectsonuphillordownhillsurfacesor projectingobjectswillbeactuallylocatedat distancesdifferentfromthosedisplayedinthe monitorrelativetotheguidelines(referto illustrations).Whenindoubt,turnaroundand viewtheobjectsasyouarebackingup,orpark andexitthevehicletoviewthepositioningof objectsbehindthevehicle.
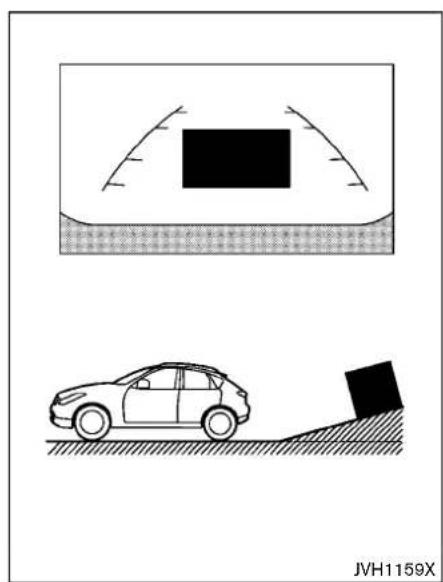
natural_image
Diagram showing a car on a slope next to a vehicle under an arch, with no visible text or symbols.Backinguponasteepuphill:
Whenbackingupthevehicleupahill, the distanceguidelinesandthevehiclewidthguide linesareshowncloserthantheactualdistance. Notethatanyobjectonthehillisfartherthanit appearsonthemonitor.

Backinguponasteepdownhill:
Whenbackingupthevehicledownahill,the distanceguidelinesandthevehiclewidthguide linesareshownfartherthantheactualdistance. Notethatanyobjectonthehilliscloserthanit appearsonthemonitor.

Backingupnearaprojectingobject:
Thepredictivecourselines ① donottouchthe objectinthedisplay.However,thevehiclemay hittheobjectifitprojectsovertheactual backingupcourse.
4-18Heater, airconditioner, audioandphonesystems
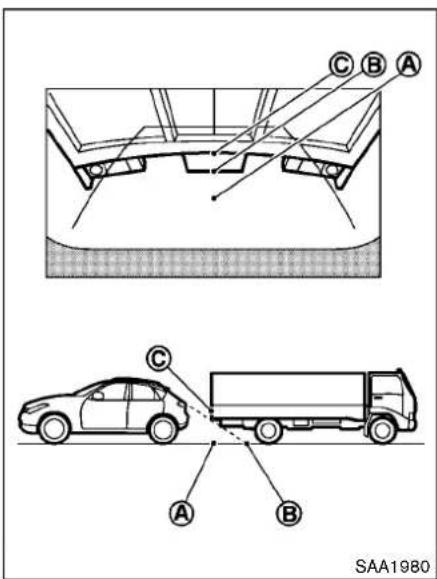
Backingupbehindaprojectingobject:
Theposition Ⓐ isshownfartherthanthe position Ⓑ inthedisplay.However,the position Ⓓ isactuallyatthesamedistance astheposition Ⓔ .Thevehiclemayhitthe objectwhenbackinguptotheposition Ⓔ if theobjectprojectsovertheactualmoving
course.
Howtoparkwithpredictivecourselines

WARNING
- If the tires are replaced with different-sized tires, the predictive course lines may be displayed incorrectly.
- Onasnow-coveredorslipperyroad, theremaybeadifferencebetween thepredictivecourselineandthe actualcourseline.
- If the battery is disconnected or becomes discharged, the predictive courelines may be displayed in correctly. If this occurs, please perform the following procedures:
—Turnthesteeringwheelfrom locktolockwhiletheengineis running.
—Drivethevehicleonastraight roadformorethan5minutes. - When the steering wheel is turned with the ignition switch in the ACC position, the predictive course lines may be displayed incorrectly.
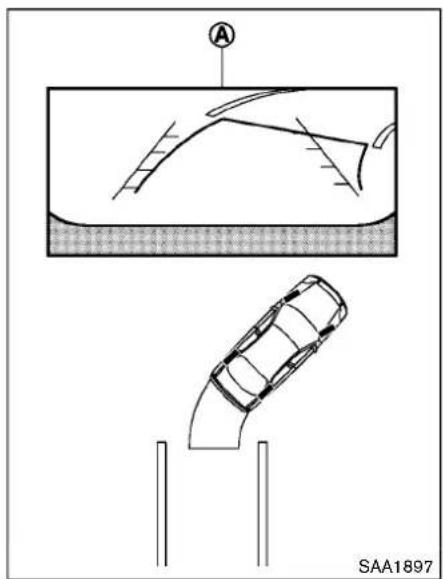
natural_image
Technical diagram showing a car under two different scenarios: top-down view and bottom-down view, with no visible text or symbols.- Visually check that the parkingspace is safe before parking your vehicle.
- Therearviewofthevehicleisdisplayed on thescreen Ⓐ whentheshiftleverismoved totheR(Reverse)position.

3.Slowlybackupthevehicleadjustingthe steeringwheelsothatthepredictivecourse lines Ⓑ entertheparkingspace ⓒ.
4. Maneuverthesteeringwheeltomakethe vehiclewidthguidelines ⑭ paralleltothe parkingspace ⑤ whilereferringtothe predictivecourselines.
- Whenthevehicleisparkedinthespace completely, movetheshiftlevertotheP (Park)positionandapplytheparkingbrake.
Howtoswitchthedisplay
TheAroundView ^® Monitorcandisplaytwosplit views. PushtheCAMERButton, changethe shiftleverposition, toswitchbetween the availableviews.
HOWTOADJUSTTHESCREENVIEW
ThedisplaysettingssuchasDisplayMode, Brightness, ContrastandColoroftheAround View® Monitorcanbeadjusted.
- Pushthe APPS button.
2.Touch"Settings". - Touch "System" and thentouch "Camera Settings".
- Selectanitemyouwishtoadjust.
- Adjust the level of these setting item using the TUNEknob.
NOTE:
Donotadjustanyofthedisplaysettings of theAroundView ^® Monitorwhilethevehicleismoving.Makesuretheparkingbrake isfirmlyapplied.
AROUNDVIEW ^® MONITORSYSTEM LIMITATIONS

WARNING
Listedbelowarethesystemlimitations forAroundView ^® Monitor.Failureto operatethevehicleinaccordancewith thesesystemlimitationscouldresultin seriousinjuryordeath.
- DonotusetheAroundView ^® Monitorwiththeoutsidemirrorsinthe storedposition,andmakesurethat theliftgateissecurelyclosedwhen operatingthevehicleusingthe AroundView ^® Monitor.
- The distance between objects viewed on the AroundView ^ Monitordiffers from the actual distance.
- Thecamerasareinstalledabovethe frontgrille,theoutsidemirrorsand abovetherearlicenseplate.Donot putanythingonthecameras.
- When washing the vehicle with high pressure water, besurenotto sprayitaround the cameras. Otherwise, water may enter the camera unit causing water condensation on
thelens,amalfunction,fireoran electricshock.
- Donotstrikethecameras.Theyare precisioninstruments.Doingso couldcauseamalfunctionorcause damageresultinginafireoran electricshock.
The following are operating limitations and do not represent asystemmalfunction:
- ThescreendisplayedontheAroundView Monitorwillautomaticallyreturntothe previousscreen3minutesaftertheCAM-ERAbuttonhasbeenpushedwhiletheshift leverisinapositionotherthantheR (Reverse)position.
- Whentheviewisswitched, the display imagesonthescreenmaybedisplayedwith somedelay.
- Whenthetemperatureisextremelyhighor low,thescreenmaynotdisplayobjects clearly.
- When strong light is shining directly on the camera, objects may not be displayed clearly.
-
Thescreenmayflickerunderfluorescent light.
-
ThecolorsofobjectsontheAroundView Monitormaydiffersomewhatfromtheactual colorofobjects.
- Objectsonthemonitormaynotbeclearand thecoloroftheobjectmaydifferinadark environment.
- Theremaybe differences in sharpness between each camera view of the bird's-eyeview.
- Ifdirt, rainorsnow accumulates on the camera, theAroundView ^ Monitormaynot displayobjectsclearly. Cleanthecamera.
- Donotusewaxonthecameralens.Wipeoff anywaxwithacleancloththathasbeen dampenedwithamilddetergentdilutedwith water.
H

natural_image
Side profile sketch of a car with roof and side panel, shown in perspective view (no text or symbols)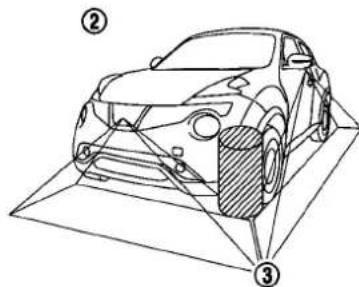
natural_image
Line drawing of a car on a 3D coordinate system with labeled points (② and ③), no text or symbols present.JVH1036X
Therearesomeareaswherthesystemwillnot showobjectsandthesystemdoesnotwarnof movingobjects.Wheninthefrontortherear viewdisplay,anobjectbelowthebumperoron thegroundmaynotbeviewed ①. Wheninthe bird's-eyeview,atalobjectneartheseam ofthecameraviewingareaswillnotappearin ③
themonitor ②.

Systemtemporarilyunavailable
Whenthe "i" onisdisplayedonthescreen, therewillbeabnormalconditionsintheAround View® Monitor. This will nothindernormal drivingoperationbutthesystemshouldbe inspected. It is recommended you visit a NISSAN dealer.

natural_image
Top-down diagram of a car interior layout with vehicle and parking area, no text or symbols presentWhenthe"icdisdisplayonthe screen, the cameraimagemaybereceiving temporaryelectronicdisturbancesfromsurroundingdevices. This will nothindernormal driving operation but the system should be inspected. It is recommended you visit a NISSAN dealer.
4-22Heater, airconditioner, audioandphonesystems

natural_image
Line drawing of a car with a triangular roof and a numbered component, no text or symbols presentIfdirt,rainorsnowaccumulatesonanyofthe cameras ①,theAroundView ^® Monitormaynot displayobjectsclearly.Cleanthecameraby wipingwithaclothdampenedwithadilutedmild cleaningagentandthenwipingwithadrycloth.
SYSTEMMAINTENANCE

CAUTION
- Donotusealcohol, benzineor thinnertocleanthecamera. This will caused discoloration. Toclean thecamera, wipewithaclothdampened with diluted mild cleaning agent and then wipewithadry cloth.
- Donotdamagethecameraasthe monitorscreenmaybeadversely affected.
MOVINGOBJECTDETECTION (MOD)(modelswithnavigation system)
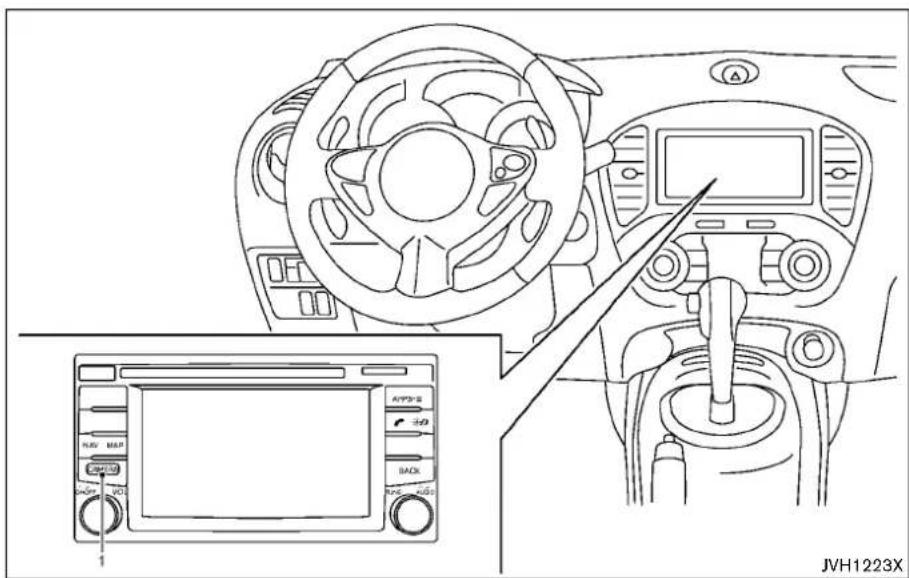
1.CAMERAbutton

WARNING
Failuretofollowthewarningsand instructionsforproperuseoftheMov-
ingObjectDetectionsystemcouldresultinseriousinjuryordeath.
•TheMODsystemisnotasubstitute forpropervehicleoperationandis notdesignedtopreventcontact withtheobjectssurroundingthe
vehicle.Whenmaneuvering,always usetheoutsidemirrorandrearview mirrorandturnandcheckthesurroundingtoensureitissafeto maneuver.
- Thesystemisdeactivatedatspeeds above5MPH(8km/h).Itisreactivatedatlowerspeeds.
•TheMODsystemisnotdesignedto detectthesurroundingstationary objects.
The Moving Object Detection (MOD) system can inform the driver of moving objects when driving out of garages, maneuvering into parking lots and in others such instances.
TheMODsystemdetectsmovingobjectsby usingimageprocessingtechnologyonthe imageshowninthedisplay.
MODSYSTEMOPERATION
TheMODsystemwillturnonautomatically underthefollowingconditions:
- WhentheshiftleverisintheR(Reverse) position.
- When the CAMERA button is pushed to switch from a different screen to the camera view on the display.
- When vehiclespeeddecreasesbelow approximately5MPH(8km/h).
TheMODsystemoperatesinthefollowing conditionswhenthecameraviewisdisplayed: - WhentheshiftleverisintheP(Park)orN (Neutral)position(CVTmodel)ortheshift leverisoutoftheR(Reverse)position(MT model)andthevehicleisstopped,theMOD systemdetectsthemovingobjectsinthe bird's-eyeview.TheMODsystemwillnot operateiftheoutsidemirrorsaremovingin oroutorifeitherdoorisopened.
- WhentheshiftleverisintheD(Drive) position(CVTmodel)ortheshiftleverisout oftheR(Reverse)position(MTmodel),and thevehiclespeedisbelowapproximately5 MPH(8km/h),theMODsystemdetects movingobjectsinthefrontview.
- WhentheshiftleverisintheR(Reverse) positionandthevehiclespeedisbelow approximately5MPH(8km/h),theMOD systemdetectsmovingobjectsintherear view.TheMODsystemwillnotoperateifthe liftgateisopen.
- Whentheignitionswitchisplacedinthe "OFF"positionandthenbacktothe"ON" position.
TheMODsystemdoesnotdetectmoving objectsinthefront-sideview.TheMODicon
isnotdisplayedonthescreenwheninthisview. WhentheMODsystemdetectsamovingobject nearthevehicle,theyellowframewillbe displayedontheviewwheretheobjectsare detectedandachimewillsoundonce.Whilethe MODsystemcontinuestodetectmoving objects,theyellowframecontinuestobe displayed.

Frontandbird's-eyeviews

Rearandbird's-eyeviews
Heater, airconditioner, audioandphonesystems4-25

Rearandfront-sideviews
Inthebird's-eyeview,theyellowframe ① is displayedoneachcameraimage(front,rear,right,left)dependingonwheremovingobjects aredetected.
Theyellowframe ② isdisplayedoneachview inthefrontviewandrearviewmodes.
AblueMODicon ③ isdisplayedintheview wheretheMODsystemisoperative.Agray MODicon ③ isdisplayedintheviewwherethe MODsystemisnotoperative.
IftheMODsystemisturnedoff,theMODicon ③ isnotdisplayed.
MODSYSTEMLIMITATIONS

WARNING
Listedbelowarethesystemlimitations forMOD.Failureretooperatethevehicle inaccordancewiththesesystemlimitationscouldresultinseriousinjuryor death.
- Excessivenoise(forexample, audio systemvolumeoropenvehicle window)willinterferewiththe chimesound,anditmaynotbe heard.
•TheMODsystemperformancewill belimitedaccordingtoenvironmentalconditionsandsurroundingobjectssuchas:
—Whenthereislowcontrastbetweenbackgroundandthemovingobjects
—Whenthereisblinkingsourceof light.
—When strong lights such as another vehicle's headlightors sunlight is present.
—Whenthereisdirt,waterdrops orsnowonthecameralens.
—When the position of themoving objects in the display is not changed.
•TheMODsystemmightdetectflowingwaterdropletsonthecamera lens,whitesmokefromthemuffler,movingshadows,etc.
•TheMODsystemmaynotfunction properlydependingonthespeed, direction,distanceor shape of the movingobjects.
- If your vehicle sustains damage to the part where the camera is installed, leaving it misaligned or bent, the sensing zone may be altered and the MOD system may not detect objects properly.
- Whenthetemperatureisextremely high orlow, thescreenmay not displayobjectsclearly. Thisisnota malfunction.

natural_image
Line drawing of a car with a triangular roof and a right-angle valve, no text or symbols presentSYSTEMMAINTENANCE

CAUTION
- Donotusealcohol, benzineor thinnertocleanthecamera. This will caused discoloration. Toclean thecamera, wipewithaclothdampened with diluted mild cleaning agent and then wipewithadry cloth.
- Donotdamagethecameraasthe monitorscreenmaybeadversely affected.
Ifdirt,rainorsnowaccumulatesonanyofthe cameras ①,theMODsystemmaynotoperate properly.Cleanthecamerabywipingwitha clothdampenedwithadilutedmildcleaning agentandthenwipingwithadrycloth.
VENTILATORS

natural_image
Diagram of a directional arrow with grid pattern and central circle, no text or symbols presentCENTERVENTILATORS
Adjust the airflow direction of ventilators as illustrated.
Adjust the airflow direction of the ventilators by moving the center knob (up/downandleft/right) until the preferred position is achieved.

SIDEVENTILATORS
Openorclosethevents, and adjust the airflow direction of ventilators as illustrated.
HEATERANDAIRCONDITIONER

WARNING
•Theairconditionercoolingfunction operatesonlywhentheengineis running.
- Donotleavechildrenoradultswho wouldnormallyrequirethesupport ofothersaloneinyourvehicle.Pets shouldnotbeleftaloneeither.On hot,sunnydays,temperaturesina closedvehiclecouldquicklybecome highenoughtocausesevereor possiblyfatalinjuriestopeopleor animals.
- Donotusetherecirculationmode forlongperiodsasitmaycausethe interiorairtobecomestaleandthe windowstofogup.
Starttheengineandoperatetheheaterandthe airconditionersystem.
NOTE:
- Odorsfrominsideandoutsidethe vehiclecanbuildupintheairconditionerunit.Odorcanenterthepassengercompartmentthroughthevents.
- Whenparking, settheheaterandair conditionercontrolstoturnoffair
recirculationtoallowfreshairintothe passengercompartment.Thisshould helpreduceodorsinsidethevehicle.

SAA3447

- Airintakelever(Outsideaircirculation/Air recirculation 📄)
2.Airflowcontroldial
3.Fanspeedcontrol
4.A/C(AirConditioner)button
5.Temperaturecontroldial - Rearwindowdefroster button(See "Rear windowandoutsidemirrordefrosterswitch" (P.2-38).)
MANUALAIRCONDITIONER(ifso equipped)
Toturnofftheheaterandairconditioner,turnthe fanspeedcontrol ✿ dialtotheOFF(0) position.
Controls
Outsideaircirculation:
Movetheairintakelevertothe position. The airflowisdrawnfromoutsidethevehicle.
Airrecirculation:
Movetheairintakelevertothe position. The airflowiscirculatedinsidethevehicle.
Airflowcontrol:
Turntheairflowcontroldialtochangetheair flowmode.
Airflowsfromthecenterandside ventilators.
Airflowsfromthecenterandside ventilatorsandfootoutlets.
Airflowsmainlyfromthefootoutlets.
—Airflowsfromthedefrosterandfoot outlets.
—Airflowsmainlyfromthedefrosteroutlets.
- When the or position is selected, the air conditioner will automatically turn on. This will dehumidify the air and helptode fog the windows.
Heater, airconditioner, audioandphonesystems4-29
Fanspeedcontrol:
Turnthefanspeedcontrol ✿ dialclockwiseto increasethefanspeed.
Turnthefanspeedcontrol ✿ dialcounter-clockwisetodecreasethefanspeed.
A/C(AirConditioner)operation:
PushtheA/Cbuttontoturnonorofftheair conditioner. Whentheairconditionerison, the A/Cindicatorlightonthebuttonilluminates.
Temperaturecontrol:
Turnthetemperaturecontroldialtosethesiredtemperature.Turnthedialbetweenthemiddleandtherightpositiontoselectthehottemperature.Turnthedialbetweenthemiddleandtheleftpositiontoselectthecooltemperature.
Heateroperation
Heating:
Thismodeisusedtodirectheatedairtothefoot outlets.
1.Movetheairintakelevertothe position.
2.Turntheairflowcontroldialtothe position.
3.Turnthefanspeedcontrol dialtothe desiredposition.
- Turnthetemperaturecontroldialtothe desiredpositionbetweenthemiddleandthe hot(right)position.
Ventilation:
Thismodedirectsoutsideairtothesideand centerventilators.
1.Movetheairintakelevertothe position.
2.Turntheairflowcontroldialtothe position.
3.Turnthefanspeedcontrol desiredposition. dialtothe
Defrostingordefogging:
Thismodedirectstheairtothedefrosteroutlets todefrost/defogthewindows.
1.Movetheairintakelevertothe position.
2.Turntheairflowcontroldialtothe position.
3.Turnthefanspeedcontrol desiredposition. dialtothe
- Turnthetemperaturecontroldialtothe desiredpositionbetweenthemiddleandthe hot(right)position.
- Toremovefrostfromtheoutsidesurface of thewindshieldquickly,turnthetemperature controldialtothemaximumhotposition and thefanspeedcontrol ✿ dialtothe maximumposition.
- When the positionisselected, the air conditioner will automatically turn on. This will dehumidify the air and help to defog the windows.
Bi-levelheating:
Thismodedirectscoolairfromthesideand centerventsandwarmairfromthefootoutlets. Whenthetemperaturecontroldialisturnedto themaximumhotorcoolposition,theair betweentheventilatorsandthefootoutletsis thesametemperature.
1.Movetheairintakelevertothe position.
2.Turntheairflowcontroldialtothe position.
3.Turnthefanspeedcontrol desiredposition. dialtothe
- Turnthetemperaturecontroldialtothe desiredposition.
Heatinganddefogging:
Thismodeheatstheinterioranddefogsthe windows.
1.Movetheairintakelevertothe position.
2.Turntheairflowcontroldialtothe position.
3.Turnthefanspeedcontrol desiredposition. dialtothe
- Turnthetemperaturecontroldialtothe desiredposition.
When the positionisselected, the air conditioner will automatically turn on. This will dehumidify the air and help to defog the windows.
Airconditioneroperation
The air conditionersystem should be operated for approximately 10 minutes at least once a month. This helps prevent damage to the air conditionersystem dueto the lack of lubrication.
Cooling:
Thismodeisusedtocoolanddehumidifytheair.
- Movetheairintakelevertothe
position.
- Turn the airflow controldial to the position.

- Turnthefanspeedcontrol desiredposition.
dialtothe
-
Push the A/C button on. (The A/C indicator light will illuminate.)
-
Turnthetemperaturecontroldialtothe desiredpositionbetweenthemiddleandthe cool(left)position.
-Forquickcoolingwhentheoutsidetemperatureishigh,movetheairintakeleverto the position.Besuretomovetheair intakelevertothe positionfornormal
cooling.
●Avisiblemistmaybeseencomingfromthe ventilatorsinhot,humidconditionsastheair iscooledrapidly.Thisdoesnotindicatea malfunction.
Dehumidifiedheating:
Thismodeisusedtoheatanddehumidifythe air.
- Movetheairintakelevertothe

position.
- Turn the airflow controldial to the position.

- Turnthefanspeedcontrol desiredposition.

dialtothe
- Push the A/C button on. (The A/C indicator light willilluminate.)
5.Turnthetemperaturecontroldialtothe desiredpositionbetweenthemiddleandthe hot(right)position.
Dehumidifieddefogging:
Thismodeisusedtodefogthewindowsand dehumidifytheair.
- Movetheairintakelevertothe

position.
- Turn the airflow controldial to the position.

- Turnthefanspeedcontrol desiredposition.

dialtothe
- Turnthetemperaturecontroldialtothe desiredposition.
Whenthe positionisselected, theair conditionerwillautomaticallyturnon. This will dehumidifytheairandhelptodefogthe windows.
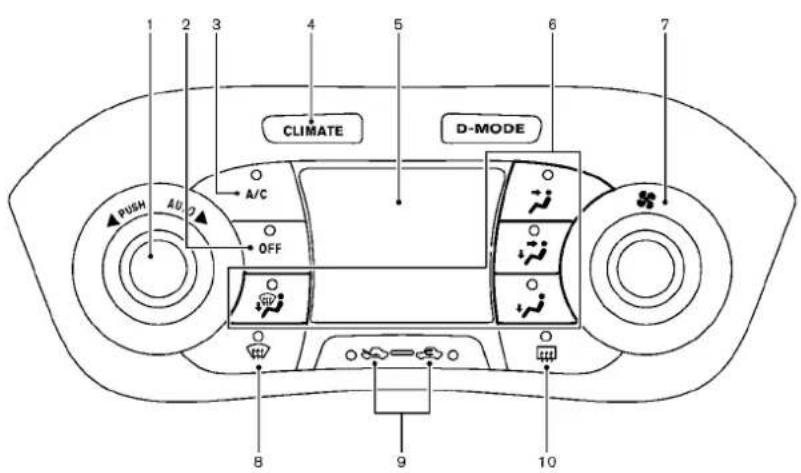
SAA3443
- AUTObutton/Temperaturecontroldial
2.OFFbutton
3.A/Cbutton
4.CLIMATEbutton
5.Displayscreen*
6.Airflowcontrolbuttons
7.Fanspeedcontrol

8.Frontdefroster
9.Airintakebutton(Outsideaircirculation
recirculation (C)
- Rear window defroster button (See "Rear window and outside mirror defrosterswitch" (P.2-38).)
*: Temperature is displayed in °F (US) or °C (Canada).

AUTOMATICAIRCONDITIONER(with IntegratedControlSystem)
Automaticoperation(AUTO)
The AUTOmodemaybeusedyear-roundasthe systemautomaticallycontrolsconstanttemperature,airflowdistributionandfanspeed.
Toturnofftheheaterandairconditioner,push theCLIMATEbuttontochangetotheClimate ControlMode,thenpushtheOFFbutton.
Coolinganddehumidifiedheating:
-
Push the AUTO button. (The AUTO indicator will be displayed.)
-
Turn the temperature control dial to set the preferred temperature. The temperature range is between 60°F (18°C) and 90°F (32°C).
A visible mist may be seen coming from the ventilatorsinhot, humidconditionsastheairis cooled rapidly. This does not indicate a malfunction.
Dehumidifieddefrosting/defogging:
1.Push the front defroster 📋 button. (The indicatorlightwillilluminate.)
- Turnthetemperaturecontroldialtosetthe preferredtemperature.
4-32Heater, airconditioner, audioandphonesystems
- Toremovemoistureorfogonthefront windowquickly,setthetemperatureto thehightemperatureandthefanspeed totheirmaximumlevel.
- Afterthewindshielddiscleared, pushthe frontdefroster 📊 buttonagain.(The indicatorlightwillturnoff.)
- Whenthefrontdefrosterbuttonis pushed, theairconditionerwillautomaticallyturnontodefogthewindshield. Theoutsideaircirculationmodewillbe selectedtoimprovethedefoggingperformance.
- Whenthepositionisselected, the airrecirculationmodecannotbeturned ontopreventthewindowsfrombeing foggedup.
Manualoperation
Themanualmodecanbeusedtocontrolthe heaterandairconditionertoyourdesired settings.
Toturnofftheheaterandairconditioner, push theOFFbutton.
If theDriveMode is indicated on the screen, push the CLIMATE button to chan get the ClimateControl Mode, then push the OFF button.
Fanspeedcontrol:
Turnthefanspeedcontrol ✿ dialtoadjustthe fanspeed.
Airflowcontrol:
Pushtheairflowcontrolbuttonstochangethe airflowmode:
Airflowsfromthecenterandside ventilators.
—Airflowsfromthecenterandside ventilatorsandfootoutlets.
Airflowsmainlyfromthefootoutlets.
—Airflowsfromthedefrosteroutletsand footoutlets.
Temperaturecontrol:
Turnthetemperaturecontroldialtosetthe preferredtemperature.
Thetemperaturerangeisbetween60°F(18°C) and90°F(32°C).
Airintakecontrol:
- Pushtheairintakebuttontotochangetheair circulationmode. Whentheindicatorlight on “ ” sideilluminates, theflowingairis recirculatedinsidethevehicle.
Whenthe 🚫 or 📌 positionisselected, theairrecirculationmodecannotbe turned ontopreventthewindowsfrombeing foggedup.
- Push the air intake button to changetheair circulation mode. When the indicator light on “ ” side illuminates, the flowing air is drawn from outside the vehicle.
- Pushandholdtheairintakebuttonformore than1.5secondstosettheautomatic controlbetweentheoutsideaircirculation andairrecirculationmodes.
When the " 🔊" or " 🔔" position is selected, the air recirculation mode does not activate.
Whensettingtheautomaticcontrolmode, theindicatorlights" "and" will blinktwiceindicatingthatthesystemisin theautomaticcontrolmode.

Airconditionermodescreen
DisplayingClimatecontrol
WheninClimateControlMode, theselected temperature and airflow, and automatic mode or manual mode are indicated on the display.
WheninDriveMode,thesameitemsasabove areindicated,butonthebottomofthedisplay.
ToswitchtoClimateControlMode, push the CLIMATE control modes e select button.
SettingclimateECO
WheninDriveMode,CLIMATEECOcanbe switchedonoroff.WhenCLIMATEECOis switchedon,theclimatecontrolsystemoperatestoenhancefueleconomy.
See"SettingtheclimateECOmode"(P.5-24).

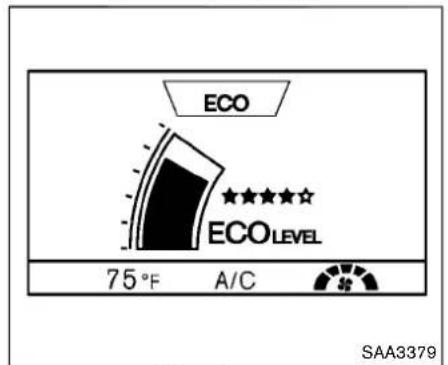
Drivemodescreen
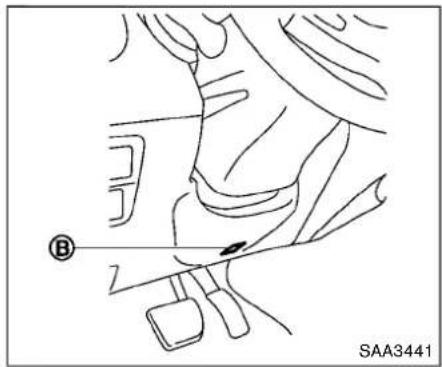
4-34Heater, airconditioner, audioandphonesystems
OPERATINGTIPS(forautomaticair conditioner)
- When the engine coolant temperature and outside air temperature are low, the airflow from the foot outlets may not operate. This is not a malfunction. After the coolant temperature warmsup, air will flown normally from the foot outlets.
- The automatic air conditioner is equipped with sensors as illustrated. Thesensors and ⑧ on the instrument panel help maintain a constant temperature. Donot put anything on or around these sensors.
IN-CABINMICROFILTER
The airconditioningsystemisequipped with an in-cabin microfilter which collects dirt, pollen, dust, etc. Tomakesure the air conditioner heats, defogs, and ventilates efficiently, replace the filter in accordance with the specified maintenance intervals listed in the "9. Maintenance and schedules" section. It is recommended to see a NISSAN dealer to replace the filter.
Thefiltershouldbereplacediftheairflow decreasesignificantlyorifwindowsfog upeasilywhenoperatingtheheaterorair conditioningsystem.
A
SERVICINGAIRCONDITIONER
The airconditionersysteminyourvehicleis chargedwitharefrigerantdesignedwiththe environmentinmind. This refrigerantwillnot harmtheearth'sozonelayer. Specialchargingequipmentandlubricantarerequiredwhen servicingyourvehicleairconditioner. Using improperrefrigerantsorlubricantswillcause severedamagetoyourairconditionersystem. (See "Capacitiesandrecommendedfluids/lubricants"(P.10-2)forairconditionersystem refrigerantandlubricantrecommendations.) YourNISSANdealerwillbeabletoserviceyour environmentallyfriendlyairconditionersystem.

WARNING
Thesystemcontainsrefrigerantunder highpressure.Toavoidpersonalinjury, anyairconditionerserviceshouldbe doneonlybyanexperiencedtechnician withtheproperequipment.
AUDIOSYSTEM
AUDIOOPERATIONPRECAUTIONS
Radio
PlacetheignitionswitchintheACCorON positionandpushtheFM-AMbuttontoturnon theradio.Ifyoulistentotheradiowiththe enginenotrunning,theignitionswitchshouldbe placedintheACCposition.
Radioreceptionisaffectedbystationsignal strength,distancefromradiotransmitter,buildings,bridges,mountainsandotherexternal influences.Intermittentchangesinreception qualitynormallyarecausedbytheseexternal influences.
Usingacellularphoneinornearthe vehiclemayinfluenceradioreception quality.
Radioreception:
Yourvehicleradiosystemisequipped with state-of-the-artelectroniccircuitstoenhance radioreception. These circuits are designed to extend reception range, and toenhance the quality of that reception.
Howevertherearesomegeneralcharacteristics of both FM and AM radiosignal that can affect radioreception quality in an moving vehicle, even when the finest equipment is used. These characteristics are completely normal in given reception area, and do not indicate anymal-
Heater, airconditioner, audioandphonesystems4-35
functioninyourvehicleradiosystem.
Receptionconditionswillconstantlychange becauseofvehiclemovement.Buildings,terrain, signaldistanceandinterferencefromother vehiclescanworkagainstidealreception. Describedbelowaresomeofthefactorthat canaffectyourradioreception.
Somecellularphonesorotherdevicesmay causeinterferenceorabuzzingnoisetocome fromtheaudiosystemspeakers.Storingthe deviceinadifferentlocationmayreduceor eliminatethenoise.
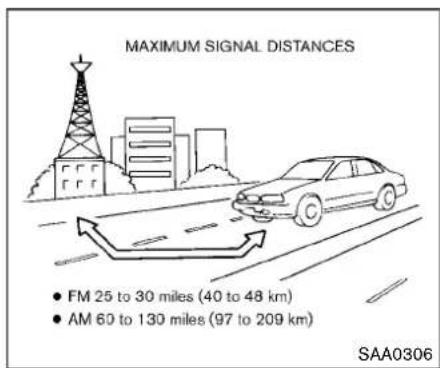
FMradioreception:
Range:FMrangeisnormallylimitedto25to30 miles(40to48km),withmonaural(single station)FMhavingslightlymorerangethan stereoFM.Externalinfluencesmaysometimes interferewithFMstationreceptionevenifthe FMstationiswithin25miles(40km).The strengthoftheFMsignalisdirectlyrelatedtothe distancebetweenthetransmitterandreceiver. FMsignalsfollowaline-of-sightpath,exhibiting manyofthesamecharacteristicssaslight.For exampletheywillreflectoffobjects.
Fadeanddrift: As your vehicle moves away from astation transmitter, the signals will tend to fade and ordrift.
Staticandflutter: Duringsignalinterference from buildings, largehillsorduetoantennaposition, usually inconjunction within increased distance from the station transmitter, staticor flutter can be heard. This can be reduced by lowering the treblesetting to reduce the trebler response.
Multipathreception: Because of the reflective characteristics of FM signals, direct and reflected signals reach there receiver at the same time. The signals may cancel each other, resulting in momentary flutter or loss of sound.
AMradioreception:
AMsignals, because of their low frequency, can bendaround objects and skip along the ground. In addition, the signals can be bounced off the ionosphere and bent back to earth. Because of these characteristics. AMsignals are also subject to interference as they travel from transmittentoreceiver.
Fading: Occurswhilethevehicleispassing throughfreewayunderpassesorinareaswith manytallbuildings.Itcanalsooccurforseveral secondsduringionosphericturbulenceevenin areaswherenoobstaclesexist.
Static: Caused by thunderstorms, electrical powerlines, electricsignsandeventrafficlights.
Satelliteradioreception(ifsoequipped):
When the satelliteradio is used for the first time or the battery has been replaced, the satellite radiomay not work properly. This is not a malfunction. Wait more than 10 minutes with the satelliter radio ON and the vehicle away from any metal large buildings forth the satelliter radioto receive all of them necessary data.
Thesatelliteradiomoderequiresanactive SiriusXMSatelliteRadiosubscription.ThesatelliteradioisnotavailableinAlaska,Hawaiiand Guam.
Satelliteradioperformancemaybeaffectedif cargocarriedontheroofblocksthesatellite radiosignal.
If possible, donotputcargonearthesatellite antenna.
Abuildupoficeonthesatelliteradioantenna canaffectsatelliteradioperformance.Remove theicetorestoresatelliteradioreception.

CompactDisc(CD)player
- DonotforceacompactdiscintotheCD insertslot. This could damage the CD and/or CD player.
- Duringcoldweatherorrainydays,the playermaymalfunctionduetothe humidity.Ifthisoccurs,removetheCD
anddehumidifyorventilatetheplayer completely.
•Theplayermayskipwhiledrivingon roughroads.
•TheCDplayersometimescannotfunctionwhenthepassengercompartment temperatureisextremelyhigh.Decreasethetemperaturebeforeuse.
-Onlyusehighquality4.7in(12cm) rounddiscsthathavethe"COMPACT discDIGITALAUDIO"logoonthedisc orpackaging.
- DonotexposetheCDtodirectsun-light.
- CDsthatareofpoorquality,dirty, scratched,coveredwithfingerprints, orthathavepinholesmaynotwork properly.
•The followingCDsmaynotworkproperly:
—Copycontrolcompactdiscs(CCCD)
—Recordablecompactdiscs(CD-R) —Rewritablecompactdiscs(CD-RW)
- DonotusethefollowingCDsasthey maycausetheCDplayertomalfunc- tion.
-3.1in(8cm)discs
—CDsthatarenotround
—CDswithapaperlabel
—CDsthatarewarped, scratched, or haveabnormaledges
- This audiosystemcanonlyplaypre-recorded CDs. Ithasnocapabilitiesto recordorburn CDs.
- If the CD cannot be played, error messages asthe following examples will be displayed.
CheckDisc:
—ConfirmthattheCDisinserted correctly(thelabelsideisfacing up,etc.).
—ConfirmthattheCDisnotbentor warpedanditisfreeofscratches. PushEject:
Thisisanerrorduetothetemperature insidetheplayeristoohigh.Remove theCDbypushingtheEJECTbutton, andafterashorttimereinserttheCD. TheCDcanbeplayedwhenthetemperatureoftheplayerreturnstonormal.
UnplayableTrack: Thefileisunplayableinthisaudio system(onlyMP3orWMACD).
USB(UniversalSerialBus)Connection Port

WARNING
Donotconnect, disconnector operate the USB device while driving. Doing so can bead distraction. If distracted you could lose control of your vehicle and cause an accident or serious injury.

CAUTION
- DonotforcetheUSBdeviceintothe USBport.InsertingtheUSBdevice tiltedorup-side-downintotheport maydamagetheport.Makesure thattheUSBdeviceisconnected correctlyintotheUSBport.
- DonotgrabtheUSBportcover(if soequipped)whenpullingtheUSB deviceoutoftheport.Thiscould damagetheportandthecover.
- DonotleavetheUSBcableina placewhereitcanbepulledunintentionally.Pullingthecablemay damagetheport.
The vehicle is not equipped with a USB device. USB devices should be purchased separately as necessary.
This system cannot be used to format USB devices. To form a USB device, use a personal computer.
Insomestates/area,theUSBdeviceforthe frontseatsplaysonlysoundwithoutimagesfor regulatoryreasons,evenwhenthevehicleis parked.
This systems supports various USB memory devices, USB hard drives and iPod ^® players. Some USB devices may not be supported by this system.
- PartitionedUSBdevicesmaynotbeplayed correctly.
- Somecharactersusedinotherlanguages (Chinese, Japanese, etc.) are not displayed properly on display. Using English language characters with a USB device is recommended.
GeneralnotesforUSBuse:
Refertoyourdevicemanufacturer'sowner informationregardingtheproperuseandcare ofthedevice.
NotesforiPod ^® use:
iPod ^® isatrademarkofAppleInc., registered in the U.S. and other countries.
- ImproperlypluggingintheiPod ^ maycause acheckmarktobedisplayedonandoff (flickering).AlwaysmakesurethattheiPod ^ isconnectedproperly.
●AniPodnano ^ (1stGeneration)mayremain infastforwardorrewindmodeifitis connectedduringaseekoperation.Inthis case,pleasemanuallyresettheiPod ^ . - AniPodnano ^ (2ndGeneration) will continuetofast-forwardorrewindifitis disconnected during a seek operation.
- Anincorrectsongtitlemayappearwhenthe PlayModeischangedwhileusinganiPod nano® (2ndGeneration)
- Audiobooksmaynotplayinthesameorder astheyappearonaniPod ^® .
•Largevideofilescauseslowresponsesinan iPod®.Thevehiclecenterdisplaymay momentarilyblackout,butwillsoonrecover.
-lfaniPod ^® automaticallyselectslargevideo fileswhileintheshufflemode,thevehicle centerdisplaymaymomentarilyblackout, butwillsoonrecover.
CompressedAudioFiles(MP3/WMA)
Explanationofterms:
- MP3—MP3isshortforMovingPictures ExpertsGroupAudioLayer3.MP3isthe mostwellknowncompresseddigitalaudio fileformat.Thisformatallowsfornear"CD quality"sound,butatafractionofthesizeof normalaudiofiles.MP3conversionofan audiotrackcanreducethefilesizeby approximatelya10:1ratio(Sampling:44.1 kHz,Bitrate:128kbps)withvirtuallyno perceptiblelossinquality.Thecompression reducescertainpartsofsoundthatseem inaudibletomostpeople.
●WMA—WindowsMediaAudio(WMA)isa compressedaudioformatcreatedbyMicrosoftasanalternativetoMP3.TheWMA codeoffersgreaterfilecompressionthan theMP3codec,enablingstorageofmore digitalaudiotracksinthesameamountof spacewhencomparedtoMP3satthesame levelofquality. - Bitrate—Bitratedenotesthenumberof bitspersecondusedbyadigitalmusicfile. Thesizeandqualityofacompresseddigital audiofileisdeterminedbythebitrateused whenencodingthefile.
- Samplingfrequency—Samplingfrequency istherateatwhichthesamplesofasignal
areconvertedfromanalogtodigital(A/D conversion)persecond.
- Multisession—Multisessionisoneofthe methodsforwritingdatatomedia.Writing dataoncetothemediaiscalledasinglesession,andwritingmorethanonceis calledamultisession.
- ID3/WMATag—TheID3/WMAtagisthe partoftheencodedMP3orWMAfilethat containsinformationaboutthedigitalmusic filesuchassongtitle,artist,albumtitle, encodingbitrate,tracktimeduration,etc. ID3taginformationisdisplayonthe Album/Artist/Tracktitlelineonthedisplay.
*Windows® and WindowsMedia® are registered trademarksortrademarksof Microsoft Corporation in the United States of America and/or other countries.
Playbackorder:

flowchart
graph TD
    A["ROOT FOLDER"] --> B["1"]
    A --> C["2"]
    A --> D["3"]
    A --> E["4"]
    A --> F["5"]
    A --> G["6"]
    A --> H["7"]
    style A fill:#f9f,stroke:#333
    style B fill:#ccf,stroke:#333
    style C fill:#cfc,stroke:#333
    style D fill:#fcc,stroke:#333
    style E fill:#cff,stroke:#333
    style F fill:#ffc,stroke:#333
    style G fill:#cfc,stroke:#333
    style H fill:#fcc,stroke:#333
Playbackorderchart
MusicplaybackorderofaCDwithMP3or
WMAfilesisasillustrated.
- ThenamesoffoldersnotcontainingMP3or WMAfilesarenotshowninthedisplay.
- Ifthereisafileinthetoplevelofthedisc, "RootFolder" is displayed.
- The playbackorderistheorderinwhichthe fileswerewrittenbythewritingsoftware. Therefore, thefilesmightnotplayinthe desiredorder.
4-40Heater, airconditioner, audioandphonesystems
Specificationchart(formodelswithoutnavigationsystem):
| Supportedmedia | CD,CD-R,CD-RW,USB2.0 | ||
| Supportedfilesystems | CD,CD-R,CD-RW:ISO9660LEVEL1,ISO9660LEVEL2,Romeo,Joliet*ISO9660Level3(packetwriting)isnotsupported.*FilessavedusingtheLiveFileSystemcomponent(onaWindowsVista-basedcomputer)are notsupported. | ||
| USBmemory:FAT16,FAT32 | |||
| Supportedversions*1 | MP3 | Version | MPEG1AudioLayer3 |
| Samplingfrequency | 32kHz-48kHz | ||
| Bitrate | 32kbps-320kbps,VBR*4 | ||
| WMA*2 | Version | WMA7,WMA8,WMA9 | |
| Samplingfrequency | 32kHz-48kHz | ||
| Bitrate | 32kbps-192kbps,VBR4,32kbps-320kbps(WMA9only) | ||
| Taginformation(SongtitleandArtistname) | ID3tagVER1.0,VER1.1,VER2.2,VER2.3,VER2.4(MP3only) | ||
| WMAtag(WMAonly) | |||
| Folderlevels | CD,CD-R,CD-RWFolderlevels | 8,Folders:255,Files:999(Max.255filesforonefolder) | |
| USB | Folderlevels:8,Folders255,Files:2500(Max.255filesforonefolder)Memorysize:4GB | ||
| Displayablecharactercodes*3 | 01:ASCII,02:ISO-8859-1,03:UNICODE(UTF-16BOMBigEndian),04:UNICODE(UTF-16 Non-BOMBigEndian),05:UNICODE(UTF-8) | ||
*1 Filescreatedwithacombinationof48kHzsamplingfrequencyand64kbpsbitratecannotbeplayed.
*2ProtectedWMAfiles(DRM)cannotbeplayed.
*3Availablecodesdependonwhatkindofmedia,versionsandinformationaregoingtobedisplayed.
*4WhenVBRfilesareplayed,theplaybacktimemaynotbedisplayedcorrectly.
Specificationchart(formodelswithnavigationsystem):
| Supportedmedia | CD,CD-R,CD-RW | ||
| Supportedfilesystems | ISO9660LEVEL1,ISO9660LEVEL2,AppleISO,Romeo,Joliet*ISO9660Level3(packetwriting)isnot supported. | ||
| Supported versions*1 | MP3 | Version | MPEG1,MPEG2,MPEG2.5 |
| Samplingfrequency | 8kHz-48kHz | ||
| Bitrate | 8kbps-320kbps,VBR | ||
| WMA*2 | Version | WMA7,WMA8,WMA9 | |
| Samplingfrequency | 32kHz-48kHz | ||
| Bitrate | 48kbps-192kbps,VBR | ||
| Taginformation | ID3tagVER1.0,VER1.1,VER2.2,VER2.3(MP3only) | ||
| Folderlevels | Folderlevels:8,Maxfolders:255(includingrootfolder),Files:512(Max.255filesforonefolder) | ||
| Textcharacternumberlimitation | 128characters | ||
| Displayablecharactercodes*2 | 01:ASCII,02:ISO-8859-1,03:UNICODE(UTF-16BOMBigEndian),04:UNICODE(UTF-16Non-BOMBig Endian),05:UNICODE(UTF-8),06:UNICODE(Non-UTF-16BOMLittleEndian) | ||
*1 Filescreatedwithacombinationof48kHzsamplingfrequencyand64kbpsbitratecannotbeplayed.
*2Availablecodesdependonwhatkindofmedia,versionsandinformationaregoingtobedisplayed.
4-42Heater, airconditioner, audioandphonesystems
Troubleshootingguide:
| Symptom | CauseandCountermeasure |
| Cannotplay | CheckifthediscorUSBdevicewasinsertedcorrectly. |
| Checkifthediscisscratchedordirty. | |
| Check if there is condensation inside the player. If there is, wait until the condensation is gone (about 1 hour) before using the player. | |
| Ifthereisatemperatureincreaseerror,theCDplayerwillplaycorrectlyafteritreturnstothenormaltemperature. | |
| If there is a mixture of music CD files (CD-DA data) and MP3/WMA files on a CD, only the music CD files (CD-DA data) will be played. | |
| Files with extensions other than ".MP3", ".WMA", ".mp3" or ".wma" cannot be played. In addition, the character codes and number of charactersforfoldernamesandfilenamesshouldbeincompliancewiththespecifications. | |
| Checkifthefinalizationprocess,suchassessioncloseanddiscclose,isdoneforthedisc. | |
| CheckifthediscorUSBdeviceisprotectedbycopyright. | |
| Poorsoundquality | Checkifthediscisscratchedordirty. |
| Bitratemaybetoolow. | |
| Ittakesarelativelylongtimebefore themusicstartsplaying. | If there are many folders or file levels on the MP3/WMA disc, or if it is a multisession disc, or USB device, some time may be required beforethemusicstartsplaying. |
| Musiccutsofforskips | The writing software and hardware combination might not match, or the writing speed, writing depth, writing width, etc., might not matchthespecifications.Tryusingtheslowestwritingspeed. |
| Skippingwithhighbitratefiles | Skippingmayoccurwithlargequantitiesofdata,suchasforhighbitratedata. |
| Moveimmediatelytothenextsong whenplaying | Whenanon-MP3/WMAfilehasbeingenanextensionof".MP3",".WMA",".mp3"or".wma",orwhenplayisprohibitedbycopyrightprotection,therewillbeapproximately5secondsofnosoundandthentheplayerwillskiptothenextsong. |
| Songsdonot playbackinthe desiredorder | The playback order is the order in which the files were written by the writing software. Therefore, the files might not play in the desired order. |
Bluetooth® Audioplayer
Bluetooth®
Bluetooth ^® isatrademarkowned byBluetoothSIG,Inc.andlicensedtoRobertBoschGmbH andVisteonCorporation.
- SomeBluetooth ^ audiodevicesmaynotbe recognizedbythein-vehicleaudiosystem.
- It is necessary to setup the wireless connection between incompatible Bluetooth® audiodevice and their vehicle Bluetooth® module before using the Bluetooth® audioplayer.
- Operating procedure of the Bluetooth audioplayer will vary depending on the device. Makes sure it is understood how to operate an audiodevice before using it with this system.
- The Bluetooth ^® audioplayermaybe stoppedunderthefollowingconditions: - Receivingahands-freecall. - Checkingtheconnectiontothehands-freephone.
- DonotplaceaBluetooth ^ audiodevicein anareasurroundedbymetalorfaraway fromthein-vehicleBluetooth ^ moduleto preventtonequalitydegradationandwirelessconnectiondisruption.
- Whileanaudiodeviceisconnectedthrough aBluetooth ^ wirelessconnection,thebat-
4-44Heater, airconditioner, audioandphonesystems
terypowerofthedevicemaydischarge quickerthanusual.
- This systems supports the Bluetooth ^ Audio Distribution Profile(A2DP,AVRCP).
●WirelessLAN(Wi-Fi)andtheBluetooth® functionssharethesamefrequencyband (2.4GHz).UsingtheBluetooth® andthe wirelessLANfunctionsatthesametimemay slowdownordisconnectthecommunicationandcauseundesirednoise.It is recommendedthatyouturnoffthewireless LAN(Wi-Fi)whenusingtheBluetooth® functions.
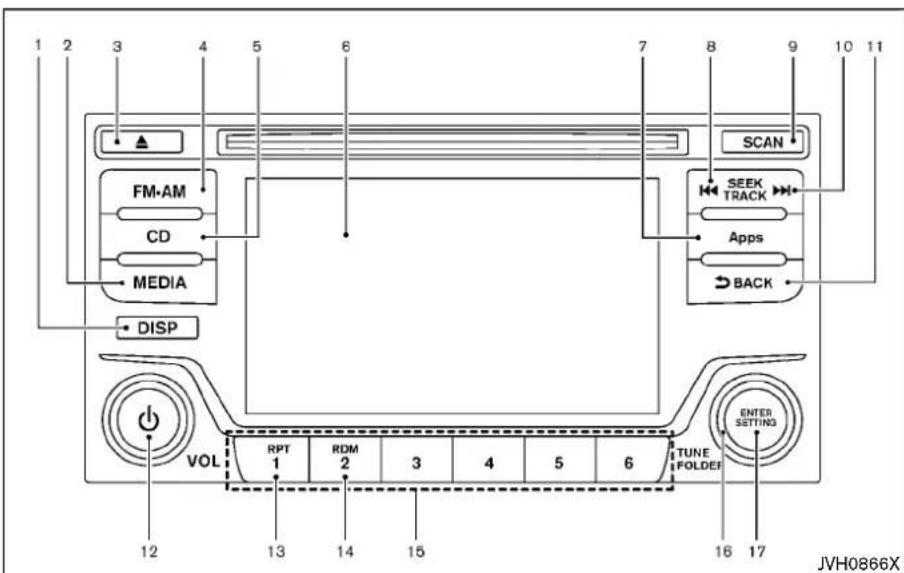
- DISP(display)button
2.MEDIAbutton
3.CDejectbutton
4.FM·AMbutton
5.CDbutton
6.Colordisplay - Appsbutton
8.SEEKTRACK(rewind)button
9.RadioSCANtuningbutton
10.SEEKTRACK(forward)button
11.BACKbutton
12.Powerbutton/VOL(volume)controlknob
13.RPT(repeat)playbutton
14.RDM(random)playbutton
15.Radiostationpresetselectbuttons
16.TUNE·FOLDERknob
17. ENTER/SETTINGbutton
FM-AMRADIOWITHCOMPACTDISC (CD)PLAYER(ifsoequipped)
Audiomainoperation
Headunit:
Theautoloudnesscircuitenhancesthelowand highfrequencyrangesautomatically.

Powerbutton/VOL(volume)control
knob:
PushthePowerbutton/VOL(volume)control knobtoturnonandofftheaudiosystem.
TurnthePowerbutton/VOL(volume)control knobtoadjustthevolume.
Audiosettings:
Thesettingsscreenwillappearwhenthe ENTER/SETTINGbuttonispushed.
The following items are available in the settings screen.
- Bluetooth
ItispossibletosettheBluetooth ® settings.
FordetailsoftheBluetooth ^® settings,see
"Bluetooth® settings"(P.4-88).
●Bass, Treble, Balance and Fade
Controlsthesoundoftheaudiosystem.
Heater, airconditioner, audioandphonesystems4-45
Balanceadjuststhesoundbetweentheleft andrightspeakers.Fadeadjuststhesound betweenthefrontandrearspeakers. Selectthe"Bass","Treble","Balance"or "Fade"usingtheTUNE·FOLDERknob,and thenpushtheENTER/SETTINGbutton. TurntheTUNE·FOLDERknobtoadjustthe Bass,Treble,balanceandFadeofthe screentothepreferredlevel.Pushthe ENTER/SETTINGbuttontoapply the setting.
●SpeedSensitiveVol.
TochangetheSpeedSensitiveVolume (SpeedSensitiveVol.) level from off(0) to 5, turn the TUNE·FOLDER knob.
•AUXVol.
Controlsthevolumlevelofincomingsound whenanauxiliarydeviceisconnectedtothe system.Chooseasettingbetween+1 and +3orchoose0todisablethefeature entirely.
●BrightnessandContrast
Adjustthebrightnessandcontrastofthe screen.
Select"Brightness"or"Contrast"usingthe TUNE·FOLDERknobandthenpushthe ENTER/SETTING button. Turn the TUNE·FOLDERknobtoadjustthebrightnessandcontrastofthescreentothe
preferredlevel.PushtheENTER/SETTING buttontoapplythesetting.
- ClockAdjust
Adjust the clock according to the following procedure.
1) Select "ClockAdjust" using the TUNE·FOLDERknobandthenpush theENTER/SETTINGbutton.
2) Adjust the hour with the TUNE·FOLDER knob and then push the ENTER/SETTING button.
3) Adjust the minute with the TUNE·FOLDERknobandthenpush theENTER/SETTINGbutton.
24hourclockisnotavailable.
- On-ScreenClock
Whenthisitemis turnedon, aclockis alwaysdisplayedintheupperrightcornerof thescreen.
Selectthe"On-ScreenClock" using the TUNE-FOLDERknobandthenpushthe ENTER/SETTINGbutton.Youcantoggle between ON and OFF using the TUNE-FOLDERknob.
●RDSDisplay(ifsoequipped)
RDS(radiodatasystem)informationcanbe shownonthedisplay.Select"RDSDisplay" usingtheTUNE-FOLDERknobandthen pushtheENTER/SETTINGbutton.Youcan
togglebetweenONandOFFusingthe TUNE-FOLDERknob.PushtheENTER/ SETTINGbuttontoapplythesetting.
●LanguageSelect
Thelanguagesettingscanbechanged. Select "LanguageSelect" using the TUNE-FOLDERknobandthenpushthe ENTER/SETTING button. Use the TUNE-FOLDERknobtoselectthepreferred language.PushtheENTER/SETTINGbuttontoapplythesetting.
DISP
DISPbutton:
Displayofthescreencanbecanceledby pushingthe DISP button.Youcanstillistento musicthatisbeingplayedbackevenwhile the screendisplayisturnedoff.Ifyouwantto displaythescreenagain,pushthe DISP button oncemore.Pushingsomeoftheaudiosource buttonswillalsoturnthescreenbackonand displaythescreensofthecorresponding sources.
MEDIA
MEDIAbutton:
Pushingthe MEDIA buttonwillswitchtheaudio sourceasfollows:
USB/iPod → BluetoothAudio → AUX → USB/iPod
4-46Heater, airconditioner, audioandphonesystems
Apps Appsbutton:
The Apps buttonlaunches the Smartphone Integrationmode. See "NissanConnect ^SM App smartphone integration" (P.4-75).
FM-AMRadiooperation
FM·AM radio(FM-AM)bandselect:
Pushthe FU-AM buttonochangethebandas follows:
AM→FM1→FM2→AM
TUNE(Tuning):
TurntheTUNE·FOLDERknobformanualtuning.
SEEKtuning:
Pushthe ▶▶▶ orbitontotunefromlowto highorhightlowfrequenciesandtostopat thenextbroadcastingstation.
SCAN SCANtuning:
Pushthe SCAN buttontotunefromlowtohigh frequenciesandstopateachbroadcasting stationforseveralseconds.Pushingthebutton againduringthisseveralsecndsperiodwill stopSCANtuningandtheradiowillremain tunedtothatstation.
If the SCAN buttonisnotpushedwithinthis period,SCANtuningmovestothenextstation.
1 toRadiomemorybuttons:
Upto12stationscanbesetfortheFMband(6 eachforFM1 and FM2)and6stationscanbe setfortheAMband.
-
Choosetheradiobandusing the button.
-
Tunetothedesiredstation.
3.Pushandholdthedesiredstationpreset button 1 to 6 untilbeepsounds.
-
The station indicator will then come on. The station is now set to the button memory.
-
Other button scan beset in the same manner.
If the battery cable is disconnected, or if the fuse opens, the station memory will be erased. In that case, reset the desired stations.
CDplayeroperation
PlacetheignitionswitchintheONorACC position.InserttheCompactDisc(CD)intothe slotwiththelabelsidefacingup.TheCDwillbe guidedautomaticallyintotheslotandstart playing.
AfterloadingtheCD, thenumberoftrackson theCDandtheplaytimewillappearonthe display.
Ifanotheraudiosourceisalreadyoperating, it will automatically turnoff and the CD will play.
If the system has been turned off while the CD was playing, pushing the Power button will start the CD.
CD CDPLAY:
WhentheCDbuttonispushedwhileaCDis loaded,theCDwillstartplaying.
SEEKTRACK:
When the ▶ or ▶ button is pushed and hold whiletheCDisbeingplayed,theCDwillplay whilefastforwardingorrewinding.Whenthe buttonisreleased,theCDwillreturntonormal playspeed.
Whenthe or buttonispushedwhile theCDisbeingplayed,thenextrackorthe beginningofthecurrenttrackontheCDwillbe played.Pushthe buttonagaintoselectthe previoustrack.
RPT REPEAT (RPT):
When the RPT button is pushed while the CD is played, the play pattern can be changed as follows:
(CD)
(Normal) □ 1 Track Repeat
(CD with compressed audio files)
(Normal) ? 1 Folder Repeat ? 1 Track Repeat ? (Normal)
RDM RANDOM (RDM):
When the RDM button is pushed while a CD is being played, the play pattern can be changed as follows:
(CD)
(Normal) 1 Disc Random
(CD with compressed audio files)
(Normal) ? 1 Disc Random ? 1 Folder Random ? (Normal)
CD eject:
When the ▲ button is pushed with the CD loaded, the CD will be ejected.
If the CD comes out and is not removed, it will be pulled back into the slot to protect it.
USB (Universal Serial Bus) connection port
WARNING
Do not connect, disconnect or operate the USB device while driving. Doing so can be a distraction. If distracted you could lose control of your vehicle and cause an accident or serious injury.
CAUTION
Do not force the USB device into the USB port. Inserting a USB device tilted or upside-down into the port may damage the port. Make sure that the USB device is connected correctly to the USB port.
. Do not grab the USB port cover (if so equipped) when pulling a USB device out of the port. This could damage the port and the cover.
. Do not leave a USB cable in a place where it can be pulled unintentionally. Pulling the cable may damage the port.
Refer to your device manufacturer's owner information regarding the proper use and care of the device.

natural_image
Line drawing of a car gear shift lever with a belt switch (no text or symbols)USBmainoperation:
TheUSBconnectionportislocatedonthe lowerpartoftheinstrumentpanel.Connecta USBmemorydeviceintotheconnector.When theaudiosystemoperates,thesystemwill switchtotheUSBmemorydevicemode automatically.
If the system has been turned off while the USB memory device was playing, pushing the Power button will start the USB memory device.
MEDIA MEDIAButton:
TochangetotheUSBmode, push the buttonwithaUSBconnecteduntiltheUSB modeisselected.

|◀◀ ▶▶▶ Next/PreviousFileandFast Forward/Rewind:
When the button is pushed and held while a USB memory is being played, the USB memory will play while forwarding or rewinding. When the button is released, the USB memory will return on normal playspeed.
When the button is pushed while the USB memory is being played, then next track or the beginning of the current track on the USB memory will be played. Push the button against select the previous track.
Folderselection:
TochangetoanotherfolderintheUSBmemory, chooseafolderdisplayedonthescreenusing theTUNE·SCROLLknob.
RPT REPEAT(RPT):
WhentheRPTbuttonispushedwhiletheUSB memoryisplayed,theplaypatterncanbe changeasfollows.
Tochangetheplaymode, pushtheRPTbutton repeatedly and themodewillchangeasfollows. (Normal) → 1 FolderRepeat → 1 TrackRepeat → (Normal)
RDM RANDOM(RDM):
When the RDM button is pushed while a USB memory is being played, the play pattern can be changed as follows.
Tochangetheplaymode, pushtheRDMbutton repeatedly, and themodewillchangeasfollows. (Normal) → AllRandom → 1 FolderRandom → (Normal)
BACK BACKbutton:
WhentheBACKbuttonispushed,itreturnsto thepreviousdisplay.
iPod® playeroperation

WARNING
Donotconnect, disconnector operate the USB device while driving. Doing so can bead distraction. If distracted you could lose control of your vehicle and cause an accident or serious injury.

CAUTION
- DonotforcetheUSBdeviceintothe USBport.InsertingtheUSBdevice tiltedorup-side-downintotheport maydamagetheport.Makesure thattheUSBdeviceisconnected correctlyintotheUSBport.
- DonotgrabtheUSBportcover(if soequipped)whenpullingtheUSB deviceoutoftheport.Thiscould damagetheportandthecover.
- DonotleavetheUSBcableina placewhereitcanbepulledunintentionally.Pullingthecablemay damagetheport.
Refertoyourdevicemanufacturer'sowner informationregardingtheproperuseandcare ofthedevice.
ConnectingiPod®:
TheUSBconnectionportislocatedonthe lowerpartoftheinstrumentpanel.Connectthe iPod® cabletotheUSBconnector.See"USB (UniversalSerialBus)connectionport"(P.4-48). Whentheaudiosystemoperates,thesystem willswitchtotheiPod ® modeautomatically.The batteryoftheiPod ® ischargedwhilethecableis
connectedtothevehicle.
DependingontheversionoftheiPod ^® , the displayontheiPod ^® showsaNISSANor AccessoryAttachedscreenwhentheconnectioniscompleted. WhentheiPod ^® isconnected tothevehicle, theiPod ^® musiclibrarycanonly beoperatedbythevehicleaudiocontrols.
* i P o dandiPhone areatrademarkofApple Inc., registeredintheU.S.andothercountries.
Compatibility:
The following models are compatible:
- iPodnano ^ 1G(Firmwareversion1.3.1-)
- iPodnano ^ 2G(Firmwareversion1.1.3-)
- iPodnano ^ 3G(Firmwareversion1.0.0-)
- iPodnano ^ 4G(Firmwareversion1.0.2-)
- iPodnano ^ 5G(Firmwareversion1.0.1-)
- iPodnano ^ 6G(Firmwareversion1.0-)
- iPodnano 7G(Firmwareversion1.0.0-)
- iPod ^ 5G(Firmwareversion1.2.1-)
- iPodclassic ^ (Firmwareversion1.0.0-)
- iPodTouch ^ (iOS1.1-)
- iPodTouch ^ 2G(iOS2.1.1-)
- iPodTouch ^ 3G(iOS3.1-)
- iPodTouch ^ 4G(iOS4.1-)
- iPodTouch ^ 5G(iOS6.0.0-)
- iPhone ^ (iOS1.0.0-2.2.1)
- iPhone ^ 3G(iOS2.1-)
- iPhone ^ 3GS(iOS3.0-)
- iPhone ^ 4/4S(iOS4.0-)
- iPhone ^ 5(iOS6.0.0-)
Operationsattributabletofirmwareupdateby Applearenotguaranteed.
Thesystemoperateswhentheignitionswitchis intheONorACCposition.Pushthe MEDIA button repeatedlytoswitchtotheiPod mode. IfthesystemwasturnedoffwhiletheiPod was playing,pushingthePowerbuttonwillstartthe iPod.
IfanotheraudiosourceisplayingandtheiPod isconnected,pushingthe MEDAL tonrepeat- edlywillchangethesystemtotheiPod mode. WhenintheiPod mode,theinterfaceforiPod operationisshownontheaudiodisplay.The itemsonthemenulistcanbescrolledbyturning theTUNE·FOLDERdialwhiletheiPod is operational. To select an item, push the ENTER/SETTINGbutton.Thefollowingitems intheiPod menuappearonthedisplay.
●Nowplaying
●Playlists
●Artists
•Albums
●Songs
- Podcasts
-Genres
•Composers
●Audiobooks
- ShuffleSongs
Formoreinformationabouteachitem,seethe iPod ^® Owner'sManual.
▶▶| ◀◀ Next/PreviousTrackandFast Forward/Rewind:
Whenthe ▶orbuttonispushedandhold whiletheiPod ® isplaying,theiPod ® willplay whilefastforwardingorrewinding.Whenthe buttonisreleased,theiPod ® willreturntothe normalplayspeed.
When the button is pushed while the iPod is playing, then next track the beginning of the current track on the iPod will be played. Push the button again to select the previous track.
Pushthe ▶▶▶ orbuttonmorethanonceto skipthroughthetracks.
RPT RPT(repeat)button:
When the RPT button is pushed while at track is being played, the play pattern can be changed as follows:
(RepeatOff)→1TrackRepeat→AllRepeat→(RepeatOff)
RDM RDM(random)button:
When the RDM button is pushed while at track is being played, the play pattern can be changed as follows:
(ShuffleOff)→TrackShuffle→(ShuffleOff)
BACK BACKbutton:
Thedisplaywillreturntothepreviousscreen.
Bluetooth® audioplayeroperation If you have incompatible Bluetooth® audio device that is capable of playing audio files, the device can be connected to the vehicle's audiosystem so that the audio files on the device play through the vehicle's speakers.
Regulatoryinformation:
Bluetooth® trademark:
Bluetooth®
Bluetooth® isatrademarkowned by BluetoothSIG, Inc. and licensed to Visteon Corporation.
ConnectingBluetooth ^® device:
ToconnectyourBluetooth ^ device to the vehicle, follow the procedure below:
- PushtheENTER/SETTINGbutton.

-
Select "Bluetooth".
-
Select "AddPhoneorDevice". This same screencanbeaccessedtoremove, replace orselectadifferentBluetooth ^ device.
-
Thesystemacknowledgesthecommand andasksyoutoinitiateaconnectionfrom theBluetooth ^ device. Theprocedurefor connectingaBluetooth ^ devicevaries accordingtothecellularphonemodel.See theOwner'smanualoftheBluetooth devicefordetails.
Bluetooth® audiomainoperation:
ToswitchtotheBluetooth ^® audiomode,push the MEDIA buttonrepeatedlyuntiltheBluetooth ^®
4-52Heater, airconditioner, audioandphonesystems
audiomodeisdisplayedonthescreen. ThecontrolsfortheBluetooth ^® audioare displayedonthescreen. UsethePreset buttonoplayandusethePresetbuttonto pause.

natural_image
Pure mechanical component diagram without any text, numbers, or symbolsAUX(Auxiliary)inputjack
TheAUXinputjackislocatedonthelowerpart oftheinstrumentpanel.TheAUXinputjack acceptsanystandardanalogaudioinputsuch as from a portable cassette tape/CD player, MP3playerorlaptopcomputer.
Pushthe MEDIA buttonrepeatedlytoplaya compatibledevicewhenitispluggedintothe AUXinputjack.
NISSANstronglyrecommendsusingastereo miniplugcablewhenconnectingyourmusic devicetotheaudiosystem.Musicmaynotplay properlywhenamonauralcableisused.
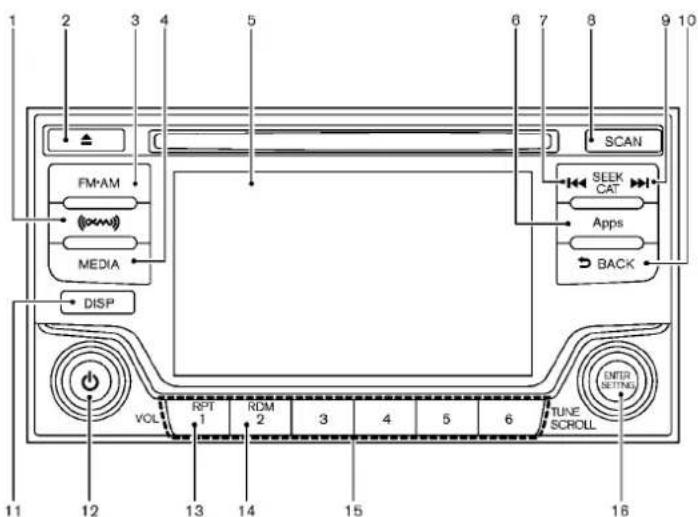
JVH1055X
1.XMbandselectbutton
2.CDejectbutton
3.FM-AMbutton
4.MEDIAbutton
5.Colordisplay
6. Appsbutton
7. RadioCAT(category)/REW(rewind)buttonfor SEEK/TRACK
8.RadioSCANtuningbutton
9. RadioCAT(category)/FF(fastforward)button forSEEK/TRACK
10.BACKbutton
11.DISP(display)button
12.Powerbutton/VOL(volume)controlknob
13.RPT(repeat)playbutton
14.RDM(random)playbutton
15.Radiostationpresetselectbuttons
16. ENTER/SETTINGbutton/TUNE-SCROLLcontrolknob
FM-AM-SATRADIOWITHCOMPACT DISC(CD)PLAYER(TypeA)(ifso equipped)
Foralloperationprecautions,see"Audiooperationprecautions"(P.4-35).
- Nosatelliteradioreceptionisavailablewhen theSATbandoptionisselectedunlesssthe optionalsatelliterceiverandantennaare installed,andthereisanactiveSiriusXM SatelliteRadiosubscription.
- Thesatelliteradiomoderequiresanactive SiriusXMSatelliteRadiosubscription. The satelliteradioisnotavailableinAlaska, HawaiiandGuam.
- It may takes sometime to receive the activationsignalaftersubscribingtheSiriusXMSatelliteRadio. After receiving the activationsignal, an available channel list will be automatically updated in theradio. Push the ignition switch from LOCK to ACC to update the channel list.
Audiomainoperation
The audiosystem operates when the ignition switch is placed in the ON or ACC position.
Headunit:
Theautoloudnesscircuitenhancesthelowand highfrequencyrangesautomatically.
Powerbutton/VOL(volume)control knob:
PushthePowerbutton/VOL(volume)control knobtoturnonandofftheaudiosystem.
TurnthePowerbutton/VOL(volume)control knobtoadjustthevolume.
Audiosettings:
Thesettingsscreenwillappearwhenpushing theENTER/SETTINGbutton.
The following items are available in the settings screen.
- Bluetooth
ItispossibletosettheBluetooth ^ settings. FordetailsoftheBluetooth ^ settings,see "Bluetooth ^ settings"(P.4-88).
●Bass, Treble, Balance and Fade
Controlsthesoundoftheaudiosystem. Balanceadjuststhesoundbetweentheleft andrightspeakers.Fadeadjuststhesound betweenthefrontandrearspeakers. Selectthe"Bass", "Treble", "Balance" or
4-54Heater, airconditioner, audioandphonesystems
"Fade" using the TUNE-SCROLL control knob and then push the ENTER/SETTING button. Turn the TUNE-SCROLL control knob to adjust the Bass, Treble, balance and Fade of the screent the preferred level. Push the ENTER/SETTING button to apply the setting.
●BrightnessandContrast
Adjustthebrightnessandcontrastofthe screen.
Selectthe"Brightness"or"Contrast"using theTUNE:SCROLLcontrolknobandthen pushtheENTER/SETTINGbutton.Turnthe TUNE:SCROLLcontrolknobtoadjustthe brightnessandcontrastofthescreentothe preferredlevel.PushtheENTER/SETTING buttontoapplythesetting.
- ClockAdjust
Adjust the clock according to the following procedure.
1) Select "ClockAdjust" using the TUNE-SCROLL control knob and then push the ENTER/SETTING button.
2) Adjust the hour with the TUNE-SCROLL control knob and then push the ENTER/SETTING button.
3) Adjust the minute with the TUNE-SC-ROLL control knob and then push the ENTER/SETTING button.
24hourclockisnotavailable.
- On-ScreenClock
Whenthisitemisturnedon,aclockis alwaysdisplayedintheupperrightcornerof thescreen.
Selectthe"On-ScreenClock"usingthe TUNE·SCROLLcontrolknobandthenpush theENTER/SETTINGbutton.YoucantogglebetweenON andOFFusingthe TUNE·SCROLLcontrolknob.
- RDSDisplay(ifsoequipped)
RDS(radiodatasystem)informationcanbe shownonthedisplay.Select"RDSDisplay" usingtheTUNE-SCROLLcontrolknoband thenpushtheENTER/SETTINGbutton.You cantogglebetweenONandOFFusingthe TUNE-SCROLLcontrolknob.Pushthe ENTER/SETTINGbutton toapplythe setting.
●SpeedSensitiveVol.
TochangetheSpeedSensitiveVolume (SpeedSensitiveVol.) levelfromoff(0) to 5, turntheTUNE-SCROLLcontrolknob.
•AUXVol.
Controlsthevolumlevelofincomingsound whenanauxiliarydeviceisconnectedtothe system.Chooseasettingbetween+1and +3orchoose0todisablethefeature entirely.
●LanguageSelect
Thelanguagesettingscanbechanged. Select"LanguageSelect"usingtheTUNE-SCROLLcontrolknobandthenpushthe ENTER/SETTINGbutton. Use the TUNE-SCROLLcontrolknobtoselect the preferredlanguage.Push the ENTER/SETTINGbutton to apply the setting.
DISP DISPbutton:
Displayofthescreencanbecanceledby pushingthe DISP button.Youcanstillistento musicthatisbeingplayedbackevenwhilethe screendisplayisturnedoff.Ifyouwantto displaythescreenagain,pushthe DISP button oncemore.Pushingsomeoftheaudiosource buttonswillalsoturnthescreenbackonand displaythescreensofthecorresponding sources.
MEDIA MEDIAbutton:
Pushingthe MEDIA buttonwillswitchtheaudio sourceasfollows: CD →USB/iPod → Bluetooth Audio → AUX → CD
Apps Appsbutton:
The Apps buttonlaunches the Smartphone Integrationmode. See "NissanConnect SM App
smartphoneintegration"(P.4-75).
FM-AM-SATRadiooperation
FM·AM radio(FM-AM)bandselect:
PushingtheFM·AMbuttonwillchangetheband asfollows: AM→FM1→FM2→AM
XM radio(SAT)bandselect:
PushingtheXMbandselectbuttonwillchange thebandasfollows:
XM1→XM2→XM3→XM1
WhentheXMbandselect buttonispushed whiletheignitionswitchisintheACCorON position,theradiowillcomeonatthechannel lastplayed.
Thelastchannelplayedwillalsocomeonwhen thePowerbuttonispushedtoON.
The satellite radio is not available in Alaska, Hawaii and Guam.
Ifanotheraudiosourceisplayingwhentheradio bandselectbuttonisturnedtoON,theaudio sourcewillautomaticallybeturnedoffandthe lastradiochannelplayedwillcomeon.
Whenthestereobroadcastsignalisweak, the radiowillautomaticallychangefromstereoto monauralreception.
TUNE(Tuning):
- ForAMandFMradio TurntheradioTUNE·SCROLLcontrolknob formualtuning. - ForSiriusXMSatelliteRadio TurntheradioTUNE·SCROLLcontrolknob toseekchannelsfromallofthecategories whenanycategoryisnotselected.
SEEKtuning/CAT(category):
●ForAMandFMradio
PushtheSEEKbutton or totune fromlowtohighorhightlowfrequencies andtostopatthenextbroadcastingstation.
●ForSiriusXMSatelliteRadio
PushtheSEEKbutton or totneto the first channel of the next or previous category.
SCAN SCANtuning:
PushtheSCANtuningbuttontotunefromlow tohighfrequenciesandstopateachbroadcastingstationforseveralseconds.Pushingthe buttonagainduringthisseveralsecondsperiod willstopSCANtuningandtheradiowillremain tunedtothatstation. IftheSCANtuningbuttonisnotpushedwithin5 seconds, SCANtuningmovestothenext
station.
1 toStationmemoryoperations:
12stationscanbesetfortheFMband(6each forFM1 and FM2)and6stationscanbesetfor theAMband.
- Choosetheradiobandusing the button.
2.Tunetothedesiredstation.
3.Pushandholdthedesiredstationpreset button 1 toun#beepsounds. - Thestationindicatorwillthencomeon. Memorizingisnowcomplete.
- Other button scan beset in the same manner.
If the batterycable is disconnected, or if the fuse opens, the station memory will be erased. In that case, reset the desired stations.

CDplayeroperation
PlacetheignitionswitchintheONorACC position, and insert the compact disc(CD) into the slot with the labelside facing up. The CD will be guided automatically into the slot and start playing.
AfterloadingtheCD, thenumberoftrackson theCDandtheplaytimewillappear onthe display.
Ifanotheraudiosourceisalreadyoperating, it will automatically turnoff and the CD will play.
If the system was turned off while the CD was playing, pushing the Power button will start the CD.
MEDIA PLAY:
WithaCDloaded, press the MEDIA button until the CDmode is displayed on the screen.
|◀◀ ▶▶▶ Next/PreviousTrackandFast Forward/Rewind:
When the ▶ or ▶ button is pushed and hold while the CD is being played, the CD will play while fast forwarding or rewinding. When the button is released, the CD will return on normal playspeed.
Whenthe □◀◀ or ▶▶◀ buttonispushedwhile the CD is being played, the next track or the beginningofthecurrenttrackontheCDwillbe played.Pushthe buttonagaintoselectthe previoustrack.
RPT RPT(repeat)button:
Whenthe RPT buttonispushedwhiletheCDis played, the play pattern can be changed as follows:
(CD)
(Normal)⇔ 1TrackRepeat
(CDwithcompressedaudiofiles)
(Normal)→1 FolderRepeat→1 TrackRepeat →(Normal)
RDM RDM(random)button:
When the RDM button is pushed while a CD is being played, the play pattern can be changed as follows:
(CD)
Whenthe ▲ buttonis pushed with the CD loaded, the CD will beejected.
If the CD comes out and is not removed, it will be pulled back into the slot to protect it.
USB(UniversalSerialBus)connection port

WARNING
Donotconnect, disconnector operate the USB device while driving. Doing so can bead distraction. If distracted you could lose control of your vehicle and cause an accident or serious injury.

CAUTION
- DonotforcetheUSBdeviceintothe USBport.InsertingaUSBdevice tiltedorupside-downintotheport maydamagetheport.Makesure thattheUSBdeviceisconnected correctlytotheUSBport.
- DonotgrabtheUSBportcover(if soequipped)whenpullingaUSB deviceoutoftheport.Thiscould damagetheportandthecover.
- DonotleaveaUSBcableinaplace whereitcanbepulledunintentionally.Pullingthecablemaydamage theport.
Refertoyourdevicemanufacturer'sowner informationregardingtheproperuseandcare ofthedevice.

natural_image
Line drawing of a car gear shift lever with a belt switch (no text or symbols)USBmainoperation:
TheUSBoutletconnectorislocatedonthe lowerpartoftheinstrumentpanel.Connecta USBmemorydeviceintotheconnector.When theaudiosystemoperates,thesystemwill switchtotheUSBmemorydevicemode automatically.
If the system has been turned off while the USB memory device was playing, pushing the Power button will start the USB memory device.
MEDIA
MEDIAbutton:
TochangetotheUSBmode, push the buttonwithaUSBconnecteduntiltheUSB modeisselected.

Heater, airconditioner, audioandphonesystems4-57
Back/PreviousFileandFast Forward/Rewind:
When the button is pushed and held while a USB memory is being played, the USB memory will play while forwarding or rewinding. When the button is released, the USB memory will return on normal playspeed.
When the button is pushed while the USB memory is being played, then next track or the beginning of the current track on the USB memory will be played. Push the button against select the previous track.
Folderselection:
TochangetoanotherfolderintheUSBmemory, chooseafolderdisplayonthescreenusing theTUNE·SCROLLknob.
RPT REPEAT(RPT):
WhentheRPTbuttonispushedwhiletheUSB memoryisplayed,theplaypatterncanbe changeasfollows.
Tochangetheplaymode, pushtheRPTbutton repeatedly and themodewillchangeasfollows. (Normal)→1 FolderRepeat→1 TrackRepeat →(Normal)
RDM RANDOM(RDM):
When the RDM button is pushed while a USB memory is being played, the play pattern can be changed as follows.
Tochangetheplaymode, pushtheRDMbutton repeatedly, and themodewillchangeasfollows.
(Normal)→AllRandom→1FolderRandom→(Normal)
BACK BACKbutton:
WhentheBACKbuttonispushed,itreturnsto thepreviousdisplay.
iPod ^® playeroperation

WARNING
Donotconnect, disconnector operate the USB device while driving. Doing so can bead distraction. If distracted you could lose control of your vehicle and cause an accident or serious injury.

CAUTION
- DonotforcetheUSBdeviceintothe USBport.InsertingtheUSBdevice tiltedorup-side-downintotheport maydamagetheport.Makesure thattheUSBdeviceisconnected correctlyintotheUSBport.
- DonotgrabtheUSBportcover(if soequipped)whenpullingtheUSB deviceoutoftheport.Thiscould damagetheportandthecover.
- DonotleavetheUSBcableina placewhereitcanbepulledunintentionally.Pullingthecablemay damagetheport.
Refertoyour devicemanufacturer's owner informationregardingtheproperuseandcare ofthedevice.
ConnectingiPod®:
TheUSBportislocatedonthelowerpartofthe instrumentpanel.ConnecttheiPod ^® cableto theUSBconnector.See"USB(UniversalSerial Bus)connection port"(P.4-57). Whentheaudio systemoperates,thesystemwillswitchtothe iPod ^® modeautomatically.Thebatteryofthe iPod ^® ischargedwhilethecable is connectedto
thevehicle.
DependingontheversionoftheiPod ^® , the displayontheiPod ^® showsaNISSANor AccessoryAttachedscreenwhentheconnectioniscompleted. WhentheiPod ^® isconnected tothevehicle, theiPod ^® musiclibrarycanonly beoperatedbythevehicleaudiocontrols.
* i P o®dandiPhone ® areattrademarkofApple Inc., registeredintheU.S.andothercountries.
Compatibility:
The following models are compatible:
- iPodnano ^ 1G(Firmwareversion1.3.1-)
- iPodnano ^ 2G(Firmwareversion1.1.3-)
- iPodnano ^ 3G(Firmwareversion1.0.0-)
- iPodnano ^ 4G(Firmwareversion1.0.2-)
- iPodnano ^ 5G(Firmwareversion1.0.1-)
- iPodnano ^ 6G(Firmwareversion1.0-)
- iPodnano ^ 7G(Firmwareversion1.0.0-)
- iPod ^ 5G(Firmwareversion1.2.1-)
- iPodclassic ^ (Firmwareversion1.0.0-)
- iPodTouch ^ (iOS1.1-)
- iPodTouch ^ 2G(iOS2.1.1-)
- iPodTouch ^ 3G(iOS3.1-)
- iPodTouch ^ 4G(iOS4.1-)
- iPodTouch ^ 5G(iOS6.0.0-)
- iPhone ^ (iOS1.0.0-2.2.1)
- iPhone ^ 3G(iOS2.1-)
- iPhone ^ 3GS(iOS3.0-)
- iPhone ^ 4/4S(iOS4.0-)
- iPhone ^ 5(iOS6.0.0-)
Operationsattributabletofirmwareupdateby Applearenotguaranteed.
iPod ^® mainoperation:
Thesystemoperateswhentheignitionswitchis intheONorACCposition.Pushthe MEDIA button repeatedlytoswitchtotheiPod ^ mode. IfthesystemwasturnedoffwhiletheiPod ^ was playing,pushingthePowerbuttonwillstartthe iPod ^ .
IfanotheraudiosourceisplayingandtheiPod isconnected,pushingthebuttonpeatedlywillchangethesystemtotheiPod mode. WhenintheiPod mode,theinterfaceforiPod operationisshownontheaudiodisplay.The itemsonthemenulistcanbescrolledbyturning theTUNE-SCROLLdialwhiletheiPod is operational.Toselectanitem,pushthe ENTER/SETTINGbutton.Thefollowingitems intheiPod menuappearonthedisplay.
●Nowplaying
●Playlists
●Artists
•Albums
•Songs
- Podcasts
-Genres
- Composers
●Audiobooks
- ShuffleSongs
Formoreinformationabouteachitem,seethe iPod ^® Owner'sManual.
Back/PreviousTrackandFast Forward/Rewind:
When the 🖼◀ or ▶ buttonispushedandhold while the iPod ^ is playing, the iPod ^ will play whilefastforwardingorrewinding.Whenthe buttonisreleased,theiPod ^ willreturntothe normalplayspeed.
Whenthe 📄 or 🎥 buttonispushedwhile theiPod ® isplaying,thenexttrackor the beginningofthecurrenttrackontheiPod ® will beplayed.Pushthe 🎥 buttonagaintoselect theprevioustrack.
RPT RPT(repeat)button:
Whenthe RPT buttonispushedwhileatrackis beingplayed,theplaypatterncanbechanged asfollows:
(RepeatOff)→1TrackRepeat→AllRepeat→(RepeatOff)
RDM RDM(random)button:
Whenthe RDM buttonispushedwhileatrackis beingplayed,theplaypatterncanbechanged asfollows:
(ShuffleOff)→TrackShuffle→(ShuffleOff)
BACK BACKbutton:
Thedisplaywillreturntotheprevioussscreen.
Bluetooth ^® audioplayeroperation
If you have incompatible Bluetooth ^ audio device that is capable of playing audio files, the device can be connected to the vehicle's audiosystem so that the audio files on the device play through the vehicle's speakers.
Regulatoryinformation:
Bluetooth ^® trademark:
Bluetooth®
Bluetooth® isatrademarkowned by BluetoothSIG, Inc. and licensed to Visteon Corporation.
ConnectingBluetooth ^® device:
ToconnectyourBluetooth ^ device to the vehicle, follow the procedure below:
- Push the ENTER/SETTING button.

- Select "Bluetooth".
- Select "AddPhone". This samescreencan be accessed to remove, replace or select a different Bluetooth ^® device.
- Thesystemacknowledgesthecommand andasksyoutoinitiateaconconnectionfrom theBluetooth ^ device. Theprocedurefor connectingaBluetooth ^ devicevaries accordingtothecellularphonemodel.See theOwner'smanualoftheBluetooth ^ devicefordetails.
Bluetooth® audiomainoperation:
ToswitchtotheBluetooth ^ audiomode, push the MEDIA button repeatedly until the Bluetooth ^
audiomodeisdisplayedonthescreen. ThecontrolsfortheBluetooth® audioare displayedonthescreen.UsethePreset buttontoplayandusethePresetbuttontop pause.

natural_image
Close-up of a mechanical component with a circular button labeled 'e1' and no visible text or symbols beyond the label.AUX(Auxiliary)inputjack
TheAUXinputjackislocatedonthelowerpart oftheinstrumentpanel.TheAUXinputjack acceptsanystandardanalogaudioinputsuch asfromaportablecassettetape/CDplayer, MP3playerorlaptopcomputer.
Pushthe MEDIA buttonrepeatedlytoplaya compatible device when it is plugged into the AUXinputjack.
NISSANstronglyrecommendsusingastereo miniplugcablewhenconnectingyourmusic devicetotheaudiosystem.Musicmaynotplay properlywhenamonauralcableisused.
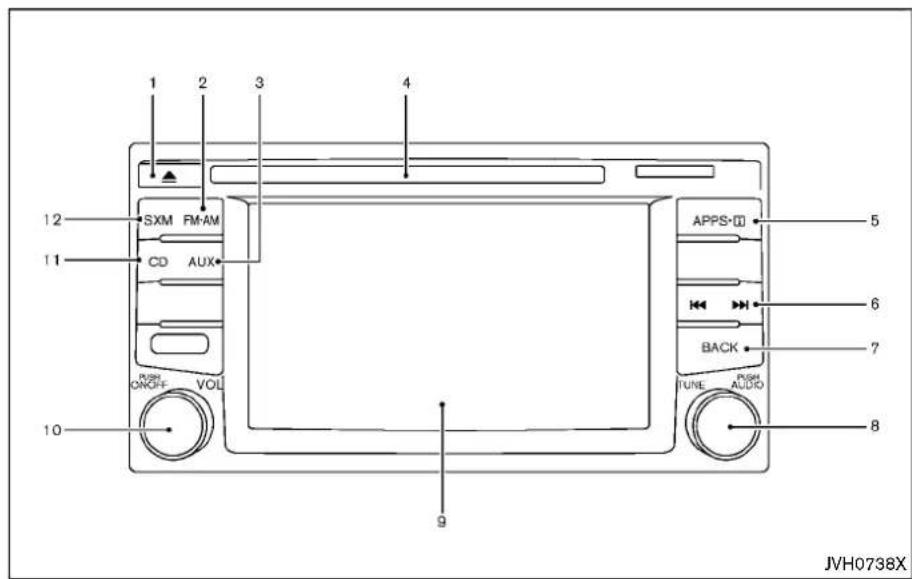
1.CDejectbutton
2.FM·AMbutton
3.AUXbutton
4.CDinsertslot
5. APPS button
Pushtodisplaytheappsinformationscreen. For details, see "HowtousetheAPPS·ibutton" (P.4-5).
- BackwardseekbuttonandForward seekbutton
7.BACKbutton
8.TUNEknob/AUDIObutton
9.Displayscreen
10.ON-OFFbutton/VOL(volume)controlknob
11.CDbutton
4-62Heater, airconditioner, audioandphonesystems
12.SXMbutton*
FM-AM-SATRADIOWITHCOMPACT DISC(CD)PLAYER(TypeB)(ifso equipped)
*Nosatelliteradioreceptionisavailablewhen theSXMbuttonispushedtoaccesssatellite radiostationsunlessoptionalsatellitereceiver andantennaareinstalledandaSiriusXM SatelliteRadioservicesubscriptionisactive. SatelliteradioisnotavailableinAlaska,Hawaii andGuam.
Foralloperationprecautions, see "Audiooperationprecautions" (P.4-35).
Audiomainoperation
ON-OFFbutton/VOL(volume)control knob:
PlacetheignitionswitchintheACCorON positionandpushtheON-OFFbuttonwhilethe systemisofftocalluptheavailableaudiosource thatwasplayingimmediatelybeforethesystem wasturnedoff.
Toturnthesystemoff, pushtheON·OFFbutton. TurntheVOL(volume) control knob to adjust the volume.
Thisvehiclemaybe equipped withSpeed SensitiveVolume.Whenthisfeatureisactive, theaudiovolumechangesasthedrivingspeed
changes.
Audiosettings:
-
pushthe APPS-i button.
-
Touchthe "Settings" key.
-
Touch the "Audio" key.
Usethetouch-screentoadjustthefollowing itemstothedesiredsetting:
- Bass:
Adjuststhebasstothedesiredlevel. - Treble:
Adjuststhetrebletothedesiredlevel.
• Balance:
Adjuststhebalancetothedesiredlevel. Balanceadjuststhesoundlevelbetween theleftandrightspeakers.
- Fade:
Adjuststhefadetothedesiredlevel. Fadeadjuststhesoundlevelbetween thefrontandrearspeakers.
- SpeedSensitiveVol.:
Adjuststhespeedsensitivevolume function,whichincreases the volume of the audiosystemasthespeedofthe vehicle increases.Setto"OFF"todisable the feature.The higher the setting, themore the volume increases in relation to vehiclespeed.
- AUXVolumeLevel:
Controlsthevolumelevelofincoming soundwhenanauxiliarydeviceisconnectedtothesystem.Availableoptions areLow(Quiet),Medium,andHigh (Loud).
Bass, treble, balance and fade can also be adjusted by pushing the AUDIO control knob and turning it to select the item to adjust. When the desired item is shown on the display, turn the tuning to adjust and then push the AUDIO button until the display return to them a audio screen. If the button is not pushed for approximately 10 seconds, theradioor CD display will automatically reappear.
SXMsettings:
ToviewtheSXMsettings:
-
Pushthe APPS button.
-
Touchthe "Settings" key.
-
Touchthe "SXM" key.
Thesignalstrength, activationstatus and other information are displayed on the screen.
FM/AM/SATradiooperation
FM-AMbutton:
PushtheFM-AMbuttontochangethebandas follows:
AM→FM1→FM2→AM
Ifanotheraudiosourceisplayingwhenthe FM-AMbuttonispushed,theaudiosource playingwillautomaticallybeturnedoffandthe lastradiostationplayedwillbeginplaying.
TheFMstereoindicator(ST)isshownonthe screenduringFMstereoreception.Whenthe stereobroadcastsignalisweak,theradio automaticallychangesfromstereotomonaural reception.
SXMbandselect:
PushingtheSXMbuttonwillchangetheband asfollows:
SXM1*→SXM2*→SXM3*→SXM1* (satellite, ifsoequipped)
WhentheSXMbuttonispushedwhilethe ignitionswitchisintheACCorONposition,the radiowillcomeonatthelaststationplayed.
Thelaststationplayedwillalsocomeonwhen theON·OFFbuttonispushed.
*WhentheSXMbuttonispushed,thesatellite radiomodewillbeskippedunlessanoptional satellitereceiverandantennaareinstalledanda
SiriusXMSatelliteRadioservicesubscriptionis active.SatelliteradioisnotavailableinAlaska, HawaiiandGuam.
IfacompactdiscisplayingwhentheSXM buttonispushed, thecompactdiscwillautomaticallybeturnedoffandthelastradiostation playedwillcomeon.
WhiletheradioisinSXMmode,theoperation canbecontrolledthroughthetouch-screen. Touchthe"Channels"keytodisplayalistof channels.Touchachanneldisplayedonthelist tochangetothatchannel.Touchthe"Categories"keytodisplayalistofcategories.Touch acategorydisplayedonthelisttodisplay optionswithinthatcategory.
Tuningwiththetouch-screen:
WheninAMorFMmode,theradiocanbe tunedusingthetouch-screen.Tobringupthe visualtuner,touchthe"Tune"keyonthelower rightcornerofthescreen.Ascreenappears withabarrunningfromlowfrequenciesonthe lefttohighfrequenciesontheright.Touchthe screenatthelocationofthefrequencyyouwish totuneandthestationwillchangetothat frequency.Toreturntotheregularradiodisplay screen,touchthe"OK"key.
TuningwiththeTUNEknob:
Theradiocanalsobemanuallytunedusingthe TUNEknob.WheninFMorAMmode,turnthe TUNEknobtotheleftforlowerfrequenciesorto therightforhigherfrequencies.WheninSXM mode,turntheTUNEknobtochangethe channel.
|◀◀ ▶▶▶ SEEKtuning:
WheninFMorAMmode, pushtheseekbuttons ortownefromlowtohighorhighto lowfrequenciesandtostopatthenextbroadcastingstation.
WheninSXMmode, pushtheseekbuttons ortochangethecategory.
◀◀
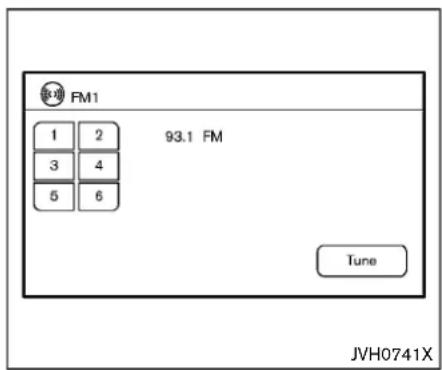
1to6Stationmemoryoperations:
TwelvestationscanbesetfortheFMband(6 forFM1,6forFM2)andsixstationscanbeset fortheAMband.Eighteenstationscanbeset fortheSXMband(6forSXM1,6forSXM2,6 forSXM3).
-
ChoosetheradiobandAM,FM1 or FM2 using the FM·AM select button or choose theradiobandSXM1, SXM2, SXM3 using the SXM button.
-
Tunetothedesiredstationusingmanualor seektuning.Touchandholdanyofthe desiredstationmemorykeys(1-6)untila beepsoundisheard.
-
The channel indicator will then come on and the sound will resume. Programming is now complete.
- Otherkeyscanbesetinthesamemanner.
If the batterycable is disconnected or if the fuse opens, theradiomemory will be erased. In that case, reset the desired stations.
Presetscanalsobeselectedbytouchingthe desiredpresetnumberonthescreen.
CompactDisc(CD)playeroperation
Iftheradioisalreadyoperating, it automatically turnsoffandthecompactdiscbeginstoplay.
CDbutton:
When the CD button is pushed with the system off and the compact discarded, the system will turn on and the compact disc will start to play.
When the CD button is pushed with a compact discarded and theradioplying, theradiow will automatically be turned off and the compact discwill start to play.
CD/MP3/WMAdisplaymode:
| Menuitem | ||
| CD/MP3displaymode | WhilelisteningtoaCDoranMP3/WMACD,certaintextmaybedisplayed(whena CDencodedwithtextisbeingused).DependingonhowtheCDorMP3/WMACD isencoded,thetextisdisplayedlistingtheartist,albumandsongtitle.Thereare otherkeysdisplayedonthescreenwhenaCDdisplaying: | |
| Random | Touchthe"Random"keytoapplyarandomplaypatterntotheCD.IfanMP3CDis playing,touching"Random"oralternatesbetweenRandomFolder,andRandomAll. Thistextwillappearonthedisplay.TocancelRandommode,touchthe"Random" keyuntilthekeyisnolongerhighlighted. | |
| Repeat | Touchthe"Repeat"keytoapplyarepeatplaypatterntotheCD.IfanMP3CDis playing,touching"Repeat"alternatesbetweenrepeatingthecurrentsong and repeatingthecurrentfolder.Thistextwillappearonthedisplay.TocancelRepeat mode,touchthe"Repeat"keyuntilthekeyisnolongerhighlighted. | |
| Browse | Touchthe"Browse"keytodisplaythetitlesontheCDinlistformat.Touchthetitleof asonginthelisttobeginplayingthatsong.IfanMP3CDDisplaying,touchingthe "Browse"keywillalsolistthefoldersonthedisc.Followtheprocedureforselecting asongwiththetouch-screentochooseafolder. | |
SEEK(FastForward/Rewind) buttons:
Pushandholdtheseekbuttons orfor 1.5secondswhilethecompactdiscisplayingto reverseorfastforwardthetrackbeingplayed. Thecompactdiscplaysatanincreasedspeed whilereversingorfastforwarding.Whenthe buttonisreleased,thecompactdiscreturnsto normalplayspeed.
SEEK(Previous/NextTrack) buttons:
Pushtheseekbutton ◀ whileaCDorMP3/WMACDisplayingtoreturntothebeginningof thecurrenttrack.Pushtheseekbutton severaltimestoskipbackwardseveraltracks.
Pushtheseekbutton ▶ whileaCDorMP3/WMACDisplayingtoadvanceonetrack.Push theseekbutton ▶ severaltimestoskip forwardseveraltracks.lfthelasttrackona CDisskipped,thefirsttrackonthediscis played.lfthelasttrackinafolderofanMP3/WMACDisskipped,thefirsttrackofthenext folderisplayed.
CDejectbutton:
Whenthebuttonispushedwithacompactdisc loaded,thecompactdiscwillejectandthelast sourcewillbeplayed. Ifthediscisnotremovedwithin10seconds,the discwillreload.
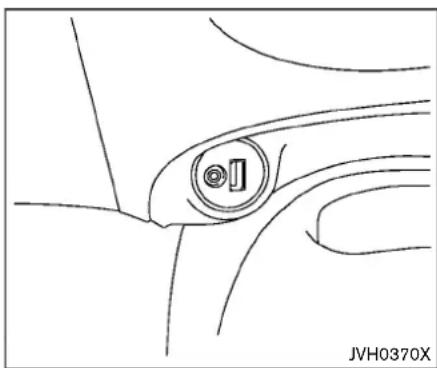
natural_image
Pure mechanical component diagram without any text, numbers, or symbolsAUX(Auxiliary)input
TheAUXINjackislocatedonthelowercenter oftheinstrumentpanel.TheAUXINjack acceptsanystandardanalogaudioinputsuch asfromaportablecassettetape/CDplayer, MP3playeroralaptopcomputer.PushtheAUX buttontoplayacompatibledevicepluggedinto theAUXINjack.
NISSANstrongly recommends using a stereo mini plug cable when connecting your music device to the audiosystem. Music may not play properly when a musical cable is used.
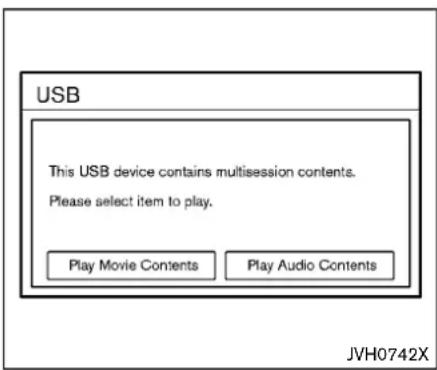
USB(UniversalSerialBus)connection port
ConnectingadevicetotheUSBport:

WARNING
Donotconnect, disconnect, or operate the USB device while driving. Doing so can be distraction. If distracted you could lose control of your vehicle and cause an accident or serious injury.

CAUTION
- DonotforcetheUSBdeviceintothe USBport.InsertingtheUSBdevice tiltedorup-side-downintotheport maydamagetheport.Makesure thattheUSBdeviceisconnected correctlyintotheUSBport.
- DonotgrabtheUSBportcover(if soequipped)whenpullingtheUSB deviceoutoftheport.Thiscould damagetheportandthecover.
- DonotleavetheUSBcableina placewhereitcanbepulledunintentionally.Pullingthecablemay damagetheport
Refertoyourdevicemanufacturer'sowner informationregardingtheproperuseandcare ofthedevice.
TheUSBportislocatedonthelowercenterof theinstrumentpanel.InserttheUSBdeviceinto theport.
When incompatible storage device is plugged into the port, compatible audio files on the storage device can be played through the vehicle's audiosystem.
Audiofileoperation:
AUXbutton:
PlacetheignitionswitchintheONorACC positionandpushtheAUXbuttontoswitchto theUSBinputmode.Ifanotheraudiosourceis playingandaUSBmemorydeviceisinserted, pushtheAUXbuttonuntilthecenterdisplay changestotheUSBmemorymode.
If the system has been turned off while the USB memory was playing, push the ON-OFF button to restart the USB memory.
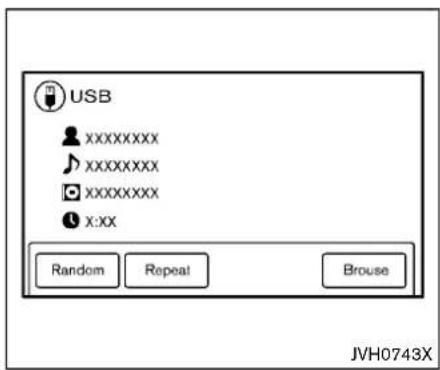
Playinformation:
Informationabouttheaudiofilesbeingplayedis shownonthedisplayscreenofthevehicle's audiosystem.Touch"Browse"todisplaythelist ofcategoriesthatcanbeusedtonarrowthe search.Touchthenameofasongonthescreen tobeginplayingthatsong.


Seekbutton:
Pushthe ◀ buttonwhileanaudiofileonthe USBdeviceisplayingtoreturntothebeginning ofthecurrenttrack.Pushthe ◀ buttonseveral timestoskipbackwardseveraltracks.
Pushthe ▶ buttonwhileanaudiofileonthe USBdeviceisplayingtoadvanceonetrack.
4-68Heater, airconditioner, audioandphonesystems
Pushthe buttonseveraltimestoskip forwardseveraltracks.Ifthelasttrackinafolder ontheUSBdeviceisskipped,thefirsttrackof thenextfolderisplayed.
Randomandrepeatplaymode:
WhilefilesonaUSBdeviceareplaying, the play pattern can be altered so that songs are repeated or played randomly.
●Random:
Touchthe"Random"keytoapplyarandom playpatterntotheUSBdevice.Tocancel Randommode,touchthe"Random"key again.
- Repeat:
Touchthe"Repeat"keytoapplyarepeat playpatterntotheUSBdevice.Tocancel Repeatmode,touchthe"Repeat"keyagain.

iPod® playeroperation(ifsoequipped)
ConnectingiPod®:

WARNING
Donotconnect, disconnector operate the USB device while driving. Doing so can be ad distraction. If distracted you could lose control of your vehicle and cause an accident or serious injury.

CAUTION
- DonotforcetheUSBdeviceintothe USBport.InsertingtheUSBdevice tiltedorup-side-downintotheport maydamagetheport.Makesure thattheUSBdeviceisconnected correctlyintotheUSBport.
- DonotgrabtheUSBportcover(if soequipped)whenpullingtheUSB deviceoutoftheport.Thiscould damagetheportandthecover.
- DonotleavetheUSBcableina placewhereitcanbepulledunintentionally.Pullingthecablemay damagetheport.
Refertoyourdevicemanufacturer'sowner informationregardingtheproperuseandcare ofthedevice.
ToconnectaniPod ^ tothevehiclesothatthe iPod ^ canbecontrolledwiththeaudiosystem controlsanddisplayscreen,usetheUSBport locatedonthelowercenteroftheinstrument panel.ConnecttheiPod ^ -specificendofthe cabletotheiPod ^ andtheUSBendofthecable totheUSBportonthevehicle.IfyouriPod supportschargingviaaUSBconnection,its
batterywillbechargedwhileconnectedtothe vehiclewiththeignitionswitchintheACCor ONposition.
While connected to the vehicle, the iPod ^® may only be able to be operated by the vehicle audio controls.
TodisconnecttheiPod ^® fromthevehicle, removetheUSBendofthecablefromthe USBportonthevehicle, thenremovethecable fromtheiPod ^® .
iPod ^® isatrademarkofAppleInc., registered in the U.S. and other countries.
Compatibility:
The following models are compatible:
- iPodClassic ^ 5thgeneration(firmware version1.3.0orlater)
- iPodClassic ^ 6thgeneration(firmware version2.0.1 or later)
- iPodClassic ^ 6th(6.1)generation(firmware version2.0.1 or later)
- iPodClassic ^ 6th(6.2)generation(firmware version2.0.4orlater)
- iPodTouch ^® 2ndgeneration(firmwareversion4.2.1 or later)*
-
iPodTouch ^ 3rdgeneration(firmwareversion5.1.1 or later)
-
iPodTouch ^ 4thgeneration(firmwareversion6.1.3orlater)
- iPodTouch ^ 5thgeneration(firmwareversion6.1.3orlater)
- iPodnano ^® -2ndgeneration(firmware version1.1.3orlater)
- iPodnano ^® -3rdgeneration(firmware version1.1.3orlater)
- iPodnano ^® -4thgeneration(firmware version1.0.4orlater)
- iPodnano ^ -5thgeneration(firmware version1.0.2orlater)
- iPodnano ^® -6thgeneration(firmware version1.2orlater)
- iPodnano ^® -7thgeneration(firmware version1.2orlater)
- iPhone ^ 3G(firmwareversion4.2.1 or later)
- iPhone ^ 3GS(firmwareversion5.1.1or later)
- iPhone ^ 4(firmwareversion6.1.3orlater)
- iPhone ^ 4S(firmwareversion6.1.3orlater)
- iPhone ^ 5(firmwareversion6.1.3orlater)
*SomefeaturesofthisiPod ^ maynotbefully functional.
MakesurethatyouriPod ^® firmwareisupdated totheversionindicatedabove.

Audiomainoperation:
PlacetheignitionswitchintheACCorON position.PushtheAUXbuttonrepeatedlyto switchtotheiPod ^® mode.
If the system has been turned off while the Pod was playing, pushing the ON-OFF button will start the Pod.
AUXbutton:
WhentheAUXbuttonispushedwiththesystem offandtheiPod ^® connected,thesystemwillturn on.Ifanotheraudiosourceisplayingandthe iPod ^® isconnected,pushtheAUXbutton repeatedlyuntilthecenterdisplaychangesto theiPod ^® mode.

Interface:
TheinterfaceforiPod ^ operationshownonthe vehicle'saudiosystemdisplayscreenissimilar totheiPod ^ interface.Usethetouch-screen, BACKbuttonortheTUNEknobtonavigatethe menusonthescreen.
WhentheiPod ^ isplaying,touchthe"Menu" keytobringuptheiPod ^ interface.
DependingontheiPod ^® model,thefollowing itemsmaybeavailableonthemenulistscreen. Forfurtherinformationabouteachitem,seethe iPod ^® Owner'sManual.
●Playlists
•Artists
•Albums
-Genres
•Songs
•Composers
●Audiobooks
- Podcasts
Shuffleandrepeatplaymode:
WhiletheiPod ^® isplaying,theplaypatterncan bealteredsothatsongsarerepeatedorplayed randomly.
- Shuffle:
Touchthe"Shuffle"keytoapplyarandom playpatterntotheiPod ^® .WhentheShuffle modeisactive,thetextishhighlighted.To cancelShufflemode,touchthe"Shuffle"key againuntilthetextisnolongerhighlighted.
- Repeat:
Touchthe "Repeat" keytoapplyarepeat playpatterntotheiPod ^® . Whentherepeat modeisactive, the text highlighted. To cancelRepeatmode, touchthe "Repeat" keyagain until the text is no longer highlighted.
Seekbutton:
Pushtheseekbutton orto ship backwardorforwardonetrack.
4-70Heater, airconditioner, audioandphonesystems
Pushandholdtheseekbuttonorfor 1.5secondswhileatrackisplayingtoreverseor fastforwardthetrackbeingplayed.Thetrack playsatanincreasedspeedwhilereversingor fastforwarding.Whenthebuttonisreleased, thetrackreturnstonormalplayspeed.

Bluetooth® streamingaudio If you have incompatible Bluetooth® audio devicethatis capable of playing audio files, the device can be connected to the vehicle's audiosystem so that the audio files on the device play through the vehicle's speakers.
Scrollingmenus:
Whilenavigatinglonglistsofartists,albumsor songsinthemusicmenu,itispossibletoscroll thelistbythefirstcharacterinthename.To activatecharacterindexing,touchthe"A-Z"key intheupperrightcornerofthescreen.Turnthe TUNEknobtochoosethenumberorletterto jumptointhelistandthenpushtheAUDIO button.


ThecontrolsfortheBluetooth ^® audioare displayedonthescreen.
ConnectingBluetooth ^® audio:
ToconnectyourBluetooth ^® audiodevicetothe vehicle, follow the procedure below:
- Push the APPS button.
- Touchthe"Settings"key.
-
Touch the "Phone & Bluetooth" key.
-
Touch the "ConnectNewDevice" key.
- Thesystemacknowledgesthecommand andasksyoutoinitiateconnectingfromthe phonehandset.Theconnectingprocedure ofthecellularphonevariesaccording to eachcellularphonemodel.Seethecellular phoneOwner'sManualfordetails.Youcan alsovisitwww.nissanusa.com/bluetoothfor instructionsonconnectingNISSANrecommendedcellularphones.
Audiomainoperation:
ToswitchtotheBluetooth ^ audiomode,push theAUXbuttonrepeatedlyuntiltheBluetooth ^ audiomodeisdisplayedonthescreen.
4-72Heater, airconditioner, audioandphonesystems

natural_image
Four-step illustration showing hands using a tool to adjust a disc, with no text or symbols present.CD/USBMEMORYCAREAND CLEANING
CD
- HandleaCDbyitsedges.Nevertouchthe surfaceofthedisc.Donotbendthedisc.
●Alwaysplacethediscsinthestoragecase whentheyarenotbeingused. - Tocleanadisc, wipethesurface from the centertotheouteredge using a clean, soft cloth. Donotwipethediscusing a circular motion.
Donotuseaconventionalrecordcleaneror alcoholintendedforindustrialuse.
- Anewdiscmayberoughontheinnerand outeredges.Removetheroughedgesby rubbingtheinnerandouteredgeswiththe sideofapenorpencilasillustrated.
USBmemory
- DonottouchtheterminalportionoftheUSB memory.
- DonotplaceheavyobjectsontheUSB memory.
- DonotstoretheUSBmemoryinveryhumid locations.
- DonotexposetheUSBmemorytodirect sunlight.
- DonotspillanyliquidsontheUSBmemory. RefertotheUSBmemoryOwner'sManualfor thedetails.

1.SOURCEselectswitch
2.Tuningswitch
3.VOLUMEcontrolswitch
STEERINGWHEELSWITCHFOR AUDIOCONTROL
Theaudiosystemcanbeoperatedusingthe controlsonthesteeringwheel.
SOURCEselectswitch
PushtheSOURCEselectswitchtochangethe modetoavailableaudiosource.
VOLUMEcontrolswitch
PushupordowntheVOLUMEcontrolswitchto increaseordecreasethevolume.
Tuningswitch
AMandFMradio:
- Pushthetuningswitchforlessthan1.5 secondstochangethenextorprevious radiopreset.
- Pushthetuningswitchformorethan1.5 secondstoreeekthenextorpreviousradio station.
SXMoperation(ifsoequipped):
- Tiltup/downforlessthan1.5secondsto increaseordecreasethepresetstation.
- Tiltup/downformorethan1.5secondsto gotothenextorpreviouscategory.
iPod®:
- Pushthetuningswitchforlessthan1.5 secondstoreturntothebeginningofthe presentprogramorskiptothenextprogram. Pushseveraltimestoskipbackorskip throughprograms.
- Thissystemsearchesfortheblankintervals betweenselections. If thereisablank intervalwithinoneprogramorthereisno intervalbetweenprograms, thesystemmay
notstopinthedesiredorexpectedlocation.
CD:
- Pushthetuningswitchforlessthan1.5 secondstoreturntothebeginningofthe presentprogramorskiptothenextprogram. Pushseveraltimestoskipbackorskip throughprograms.
- Thissystemsearchesfortheblankintervals betweenselections. If thereisablank intervalwithinoneprogramorthereisno intervalbetweenprograms, thesystemmay notstopinthedesiredorexpectedlocation.
- Pushthetuningswitchformorethan1.5 secondstochangethe folders(ifthereare any folders).
USB:
- Pushthetuningswitchforlessthan1.5 secondstoreturntothebeginningofthe presentprogramorskiptothenextprogram. Pushseveraltimestoskipbackorskip throughprograms.
- Thissystemsearchesfortheblankintervals betweenselections. If thereisablank intervalwithinoneprogramorthereisno intervalbetweenprograms, thesystemmay notstopinthedesiredorexpectedlocation.
- If there are any folders, push the tuning switch from more than 1.5 second to change
thefolders(ifsoequipped).
Bluetooth® Audiooperation:
- Tiltup/downforlessthan1.5secondsto skipaheadorbacktothenextsong.
- Tiltup/downformorethan1.5secondsto reverseorfastforwardthecurrenttrack.

natural_image
Line drawing of a hand holding a pen and a small object, no text or symbols presentTypeA(ifsoequipped)

natural_image
Line drawing of a hand holding a pen and stylus above a small object, no text or symbols presentTypeB(ifsoequipped)
ANTENNA
Toremovetheantenna, holdthebottomofthe antennaandturnitcounterclockwise.
Toinstalltheantenna,turntheantennaclockwiseandtighten.

CAUTION
•Toavoiddamagingordeformingthe antenna,besuretofolddown(ifso equipped)orremovetheantenna underthefollowingconditions.
—Thevehicleentersagaragewith alowceiling.
—The vehicle is covered with a car cover.
- Besurethatantennaisremoved beforethevehicleentersanautomaticcarwash.
- Alwaysproperlytightentheantenna rodduringinstallation. Otherwise, theantennarodmaybreakduring vehicleoperation.
NISSANCONNECT ^SM APP SMARTPHONEINTEGRATION
This vehicle is equipped with Smartphone Integration technology. This allows many compatible Smartphone application to be displayed and easily controlled through the vehicle's touchscreen.
NOTE:
Acompatiblesmartphoneandregistration isrequiredtousemobileapplicationsorto accessconnectedfeaturesofcertainvehicleapplications.
REGISTERINGWITHNISSANCON-NECT ^SM APP
TousetheSmartphoneIntegrationfeature,itis necessaryfortheusertoregister.Inorderto register,visittheNissanConnect ^SM websiteand signuporcreateanaccountthroughthe promptsontheNissanConnect ^SM App.Once registered,downloadtheNissanConnect ^SM App from yourcompatiblephone'sapplicationdown- losourcesandthenlogintotheapplication.If youalreadyhaveanaccountcreatedthrough theApp,please login.
NissanConnect ^SM website:
ForU.S.
www.nissanusa.com/connect/
ForCanada
Canada.NissanConnect.com
CONNECTPHONE
Tousethisfeature, acompatiblesmartphone mustbeconnectedviaBluetooth ^ or USB to the vehicle. Formoreinformationonconnecting your phone, see "Bluetooth ^ Hands-FreePhone System (modelswithoutnavigationsystem)" (P.4-80) or "Bluetooth ^ Hands-FreePhone System (modelswithnavigationsystem)" (P.4-89).
NOTE:
-ForAppleiPhones ^ ,NissanConnect ^SM AppsREQUIRESthephonetobe pluggedinviaUSB.
-ForAndroidphones,NissanConnect AppsREQUIRES thephonetobe pairedviaBluetooth ^® .
APPLICATIONDOWNLOAD
Onceconnected, the Nissan Connect ^SM App will search your phonetodeterminewhich compatible applications are currently installed. The user will then choose which they want to bring into their vehicle from the list of apps within the "ManageMyApps" section of the Nissan Connect ^SM App on their smartphone. The vehicle will then download their vehicle interface for each of these compatible applications. On cedownloaded, the user can access their selected smartphone applications through the vehicle touchscreen. Form more information on
4-76Heater, airconditioner, audioandphonesystems
applicationavailabilityseeNissanConnect website.
NissanConnect ^SM website:
ForU.S.
www.nissanusa.com/connect/
ForCanada
www.Nissan.ca/NissanConnect(English)
www.Nissan.ca/NissanConnect/fr(French)
SM
SIRI® EYESFREE
GENERALINFORMATION
AppleSiri ^® EyesFreepersonalassistantcanbe accessedfromthevehicle.Siri ^® EyesFreecan beaccessedinSiri ^® EyesFreemodetoreduce userdistraction.Inthismode,Siri ^® EyesFreeis availableforinteractionbyvoicecontrol.After connectingacompatibleAppledevicebyusing Bluetooth ^® ,Siri ^® EyesFreecanbeactivated using the TALKswitch on the steering wheel.
Siri® isattrademarkofAppleInc., registered in the U.S. and other countries.

INFO:
- SomeSiri ^® EyesFreefunctions,suchas openingapps,maynotbeavailableduring driving.
- Forbestresults, alwaysupdateyourdevice tothelatestsoftwareversion.
- Keeptheinteriorofthevehicleasquietas possible. Closethewindowstoeliminate the surroundingnoises(trafficnoises, vibration sounds, etc.), which may prevent the system from recognizing the voice command correctly.
- ForfunctionsthatcanbeusedinSiri ^ Eyes Free, pleaserefertotheApplewebsite.
REQUIREMENTS
Siri® isavailableontheiPhone 4Sorlater.
DevicesreleasedbeforeiPhone ^® 4Sarenot supportedbytheSiri ^® EyesFreesystem.
Visitwww.apple.com/ios/sirifordetailsabout devicecompatibility.
Siri ^® mustbeenabledonthephone.Please checkphonesettings.
If the device has a lock screen, Siri must be accessible from the lock screen. Please check phones settings.
Forbestresults,alwaysupdateyourdeviceto thelatestsoftwareversion.
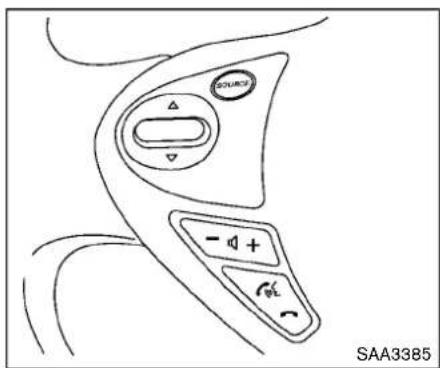
SIRI® EYESFREEACTIVATION
Siri® EyesFreefunctioncanbeactivatedby usingthe TALKswitchonthesteering wheel.
Modelswithnavigationsystem
-
ConnectaSiri ^® EyesFreeenablediPhone tothevehicle.(See "Connectingprocedure" (P.4-92).)
-
AftertheBluetooth ^ connectionisestablished, pushandholdthe TALKswitch toactivatetheSiri ^ EyesFreefunction.
Modelswithoutnavigationsystem
-
ConnectaSiri ^® EyesFreeenablediPhone ^® tothevehicle.(See"Initialization"(P.4-83).)
-
After the Bluetooth ^ connection is established, the switch operation selects screen is displayed.
-
Select "ShortPress" or "LongPress" for Siri® EyesFreeactivation.Switchactioncan also be changed from the Bluetooth settingsmenu.(See "ChangingSiri® Eyes FreeSettings(modelswithoutnavigation system)"(P.4-78).)
- Speak your command and then list to the Siri® Eyes Freereply.
AfterstartingSiri ^® EyesFree,pushthe TALKswitchagainwithin5secondsoftheend oftheSiri ^® EyesFreeannouncementtoextend thesession.
Example1-Playingmusic
1.Pushorpushandholdthe TALKswitch.
2.Say"Play(artistname, songname, etc.)".
- Your vehicle will automatically changeto Bluetooth ^® AudiooriPod ^® mode* when the music starts playing. Modeselection is determined by the phone. *: If the iPhone ^® is also connected with the USB cable.
If the audiotrack does not start playing
automaticallyafterSiri ^® EyesFreends,try changingthetrackoraudiosourcetoresume playback.
NOTE:
Forbestresults, usethenativemusicapp. Performance of music control function while using Podcasts, Audiobook or other 3rd partymusic apps may vary and is controlled by the iPhone ^® .
Example2-Replyingtotextmessages
-
If a compatible iPhone is connected and "Show Notifications" of the iPhone settings is enabled, the vehicle will display an notification for new incoming text messages.
-
Afterreadingthemessage, pushorpush and hold the TALK switch to reply using Siri® EyesFree.
-
Afterabeepsounds, say "Textmessage" or asimilarcommandtoreplyusing Siri ^ Eyes Free.
CHANGINGSIRI ^® EYESFREE SETTINGS(modelswithoutnavigationsystem)
SettingsforSiri ^® EyesFreecanbefoundinthe Bluetooth ^® settingsmenu.(See“Bluetooth ^® settings”(P.4-88).)
- Push the ENTER/SETTING button.
- Use the TUNE·FOLDER or TUNE·SCROLL knob to select "Bluetooth" and then push the ENTER/SETTING button.
- Use the TUNE·FOLDER or TUNE·SCROLL knob to select "Siri" and then push the ENTER/SETTING button.
- Select "ShortPress" or "LongPress" using the TUNE·FOLDER or TUNE·SCROLL knob and then push the ENTER/SETTING button.
TROUBLESHOOTINGGUIDE
| SymptomCauseandCountermeasure | |
| CannotaccessSiri®EyesFreefromtheswitchonthesteeringwheelCheck | ifaBluetooth®connectionisestablishedbetweentheiPhone®andthesystem. |
| CheckifSiri®isenabledonthedevice.Onyourphone,gotoSiri®setting. | |
| CheckthatSiri®canbeaccessedfromthedevicelockscreen.Thiscanbesetinthesettingsmenu ofyourphone. | |
| Modelswithoutnavigationsystem:CheckthesettingsforSiri®EyesFreeactivationonthevehicleaudiosystem.Ifthesettingis"Long Press",youmustpushandholdtheTALKswitchonthesteeringwheelformorethan1.5 secondstostartSiri®EyesFree.Ifthesettingis"ShortPress",ashortpushandreleaseoftheswitch shouldstartSiri®EyesFree. | |
| AudiosourcedoesnotchangeautomaticallytoiPod®orBluetooth®Audiomode | Forbestresults,usethenativemusicapp.Performanceofmusiccontrolfunctionwhileusing Podcasts,Audiobookorother3rdpartymusicappsmayvary. |
| Forbestresults,playmediaalreadystoredonyourdevice.Streamingmusicorplaybackfromcloud storagemaydegradeperformance. | |
| SwitchthesourcemanuallybypushingtheAUXorMEDIAbuttononthevehicleaudiosystemorthe SOURCEselectswitchonthesteeringwheel. | |
| Play, pause, next track, previous track or play timer does not work | For best results, use the native music app. Performance of music control function while using Podcasts,Audiobookorother3rdpartymusicappsmayvaryandiscontrolledbythedevice. |
| Cannothearanymusic/audiobeingplayedbackfromaconnected iPhone® | CheckthattheaudiosourceissettoBluetooth®AudiooriPod®mode.AUSBconnectionis requiredforiPod®mode. |
| Cannothearmapturn-by-turndirectionguidancefromaconnected iPhone® | CheckthattheaudiosourceissettoBluetooth®AudiooriPod®mode.AUSBconnectionis requiredforiPod®mode. |
| Cannotreceivetextmessagenotificationsonthevehicleaudio system | Checkif"ShowNotifications"isenabledonyourphone.Onyourphone,gotoBluetooth®settings.Findthedevicename,like"MyCar".Tap onyourphone.Turnon"ShowNotifications". |
| CannotreplytotextmessagenotificationsusingSiri®EyesFreeAfter | receivinganincomingtextmessage,followtheon-screenguidance.Pushorpushandholdthe TALKswitchonthesteeringwheelforSiri®EyesFree.AfterSiri®EyesFreestarts,say"Text Message". |
CARPHONEORCBRADIO
WheninstallingacarphoneoraCBradioin yourvehicle,besuretoobservethefollowing precautions,otherwisethenewequipmentmay adverselyaffecttheelectroniccontrolmodules andelectroniccontrolsystemharness.

WARNING
- Acellularphoneshouldnotbeused foranypurposewhiledrivingsofull attentionmaybegiventovehicle operation.Somejurisdictionsprohibittheuseofcellularphoneswhile driving.
- If you must make a call while your vehicle is in motion, the hands-free cellular phone operational mode (if so equipped) is highly recommended. Exercise extremecution at all times of full attention maybe giventovehicleoperation.
- Ifaconversationinamovingvehicle requiresyoutotakenotes,pulloff theroadtoasafelocationandstop yourvehiclebeforedoingso.

CAUTION
- Keeptheantennaasfarawayas possiblefromtheelectroniccontrol modules.
- Keeptheantennawiremorethan8 in(20cm)awayfromtheelectronic controlsystemharness. Donot routetheantennawirenexttoany harness.
- Adjusttheantennastanding-wave ratioasrecommendedbytheman- ufacturer.
- Connectthegroundwirefromthe CBradiochassistothebody.
●Fordetails,itisrecommendedyou visitaNISSANdealer.
Bluetooth® HANDS-FREEPHONE SYSTEM(modelswithout navigationsystem)

WARNING
- Useaphoneafterstoppingyour vehicleinasafelocation.Ifyou havetouseaphonewhiledriving, exerciseextremecautionatall timesofullattentionmaybegiven tovehicleoperation.
- If you are unable to devote full attention to vehicle operation while talking on the phone, pulloff the road to as a location and stop your vehicle.

CAUTION
To avoid draining the vehicle battery, use a phone after starting the engine.
®
YourvehicleisequippedwiththeBluetooth Hands-FreePhoneSystem.Ifyouhavea compatibleBluetooth® enabledcellularphone, youcansetupthewirelessconnectionbetween yourcellularphoneandtheir-vehiclephone module.WithBluetooth® wirelesstechnology, youcanmakeorreceiveahands-freetelephone callwithyourcellularphoneinthevehicle.
Onceyourcellularphoneisconnectedtothein-vehiclephonemodule,nootherphoneconnectingprocedureisrequired.Yourphoneis automaticallyconnectedwiththein-vehicle phonemodulewhentheignitionswitchis placedintheACCorONpositionwiththe previouslyconnectedcellularphoneturnedon andcarriedinthevehicle.
NOTE:
Somedevicesrequiretheusertoaccept connectionstoootherBluetooth ^® devices.If yourphonedoesnotconnectautomatic allytothesystem,consultthephone's Owner'sManualfordetailsondevice operation.
Youcanconnectupto5differentBluetooth cellularphonestothein-vehiclephonemodule. However, you cantalkononlyonecellularphone atatime.
BeforeusingtheBluetooth ^® Hands-FreePhone System, refertothefollowingnotes.
- Setupthewirelessconnectionbetweena compatiblecellularphoneandthein-vehicle phonemodulebeforeusingtheHands-Free PhoneSystem.
- SomeBluetooth ^® enabledcellularphones may not be recognized by their vehicle phonemodule. Please visit www.nissanusa.com/bluetoothforarecommendedphone
list.
- Youwillnotbeabletouseahands-free phoneunderthefollowingconditions: —Yourvehicleisoutsideofthecellular servicearea.
—Yourvehicleisinanareawhereitis difficulttoreceiveacellularsignal;such asinatunnel,inanundergroundparking garage,nearatallbuildingorina mountainousarea. - Whetheradiowaveconditionisnotideal orambientsoundistooloud, it maybe difficult to hear the other person's voice during acall.
- Donotplacethecellularphoneinanarea surroundedbymetalorfarawayfromthein-vehiclephonemoduletopreventtonequality degradationandwirelessconnectiondisruption.
●Whileacellularphoneisconnectedthrough theBluetooth ^® wirelessconnection,the batterypowerofthecellularphonemay dischargequickerthanusual.TheBluetooth ^® Hands-FreePhoneSystemcannot chargecellularphones. - If the Hands-Free Phone System seem to be malfunctioning, see "Troubleshooting guide" in this section. You can also visit www.nissanusa.com/bluetoothfortrouble-
shootinghelp.
- Somecellularphonesorotherdevicesmay causeinterferenceorabuzzingnoiseto comefromtheaudiosystemspeakers. Storingthedeviceinadifferentlocation mayreduceoreliminatethenoise.
- RefertothecellularphoneOwner'sManual regardingthetelephonecharges,cellular phoneantennaandbody,etc.
REGULATORYINFORMATION
FCCRegulatoryinformation
- CAUTION: Tomaintaincompliance with FCC's RFexposureguidelines, use only the supplied antenna. Unauthorizedantenna, modification, or attachmentscould damage the transmitter and may violate FCC regulations.
- Operationissubjecttothefollowingtwo conditions:
1) this device may not cause interference and
2) this device must accept any interference, including interference that may cause undesired operation of the device
ICRegulatoryinformation
- Operationissubjecttothefollowingtwo conditions:(1)thisdevicemaynotcause interference,and(2)thisdevicemustaccept anyinterference,includinginterferencethat maycauseundesiredoperationofthe device.
- ThisClassBdigitalapparatusmeetsall requirementsoftheCanadianInterference-CausingEquipmentRegulations.
Bluetooth® trademark
Bluetooth®
Bluetooth® isattrademarkowned byBluetoothSIG,Inc.,and licensedtoVisteonCorporation.
USINGTHESYSTEM
Thevoicerecognitionsystemallowshands-free operationoftheBluetooth ^® PhoneSystem.
If the vehicle is in motion, some commands may not be available so full attention may begin to vehicle operation.

Controlbuttonsandmicrophone
The control buttons for the Bluetooth ^® Hands-Free Phone System are located on the steering wheel.
PHONESEND:
Pushthe buttonontoinitiateaVRsessionor answeranincomingcall.

INFO:
Ifthe "Siri" on the Bluetooth ® settings menu is setto "ShortPress", pushing and holding the
PHONESENDbuttoninitiatesaVR sessionforHands-FreePhoneoperation.(See "Bluetooth® settings"(P.4-88).)
Youcanalsousethe buttonontinterruptthe systemfeedbackandgiveacommandatonce. See "Listofvoicecommands" and "Duringa call" in this section form more information.

PHONEEND:
Whilethevoicerecognitionsystemisactive, pushandholdthe 📄 buttontoquitthevoice recognitionsystematanytime.
Microphone:
Microphoneislocatednearthemaplights.
Manualcontrol:
WhileusingtheVoiceRecognitionsystem,itis possibletoselectmenuoptionsbyusingthe steering wheel controls instead of speaking voicecommands.Toactivatemanualcontrol mode,pushthe buttononthesteering wheeltoaccesssthephonemenuandthentilt thetuningswitch( ▲ or ▼)upordown.
Themanualcontrolmodedoesnotallowdialing aphonenumberbydigits. Theusermayselect anentryfromthePhonebookorRecentCalls lists. ToreactivateVoiceRecognition,exitthe manualcontrolmodebypushingandholdingthe
button.Atthattime,pushingthe button willstarttheHands-FreePhoneSystem.
4-82Heater, airconditioner, audioandphonesystems
Choosingalanguage
Youcan interact with the Bluetooth ^® Hands-Free Phone System using severallanguages that are available. For operation to changethe language, see "Audiomainoperation" (P.4-45) or "Audiomainoperation" (P.4-54).
If you want to adjust the volume of the voice feedback, push the volume control switch on the steering wheel while being provided with feedback. You can also set the VOL (volume) control knob on the audiounit.
Initialization
WhentheignitionswitchisplacedintheACC orONposition,voicerecognitionisinitialized, whichtakesafewseconds.Ifthe button is pushedbeforetheinitializationcompletes,the systemwillannounce"Hands-freephonesystemnotready"andwillnotreacttovoice commands.
Connectingprocedure:
NOTE:
Theconnectingproceduremustbeperformedwhenthevehicleisstationary.If thevehiclestartsmovingduringtheprocedure,theprocedurewillbecancelled.
Youcanregisterupto5differentBluetooth cellularphonesinthein-vehiclephonemodule. However, you cantalkononlyonecellularphone atatime.
ToconnectaphonetotheBluetooth ^® Hands-FreePhoneSystem;
-
PushtheENTER/SETTINGbutton.
-
Use the TUNE·FOLDER or TUNE·SCROLL control knob to select "Bluetooth" and then push the ENTER/SETTING button.
-
Select "AddPhone" and then push the ENTER/SETTING button.
-
WhenamessagewithaPINappearsonthe screen, operatetheBluetooth ^ phoneto enterthePIN.
Theconnectingprocedurevariesaccordingto eachphone.Seethephone'sOwner'sManual fordetails.
Givingvoicecommands
Tooperatevoicerecognition, pushandrelease the buttonlocatedonthesteeringwheel. Afterthetonesounds, speakacommand.
The command given is picked up by the microphone, and voice feedback is given when the command is accepted.
- If you need to hear the available commands for the current menu again, say "Help" and the system will repeat them.
- If command is not recognized, the system announces, "Command not recognized. Pleasetry again." Makes sure the command issaid exactly as prompted by the system and repeat the command in a clear voice.
- If you want to go back to the previous command, you can say "Goback" anytime the system is waiting for a response.
- Youcancancelacommandwhenthe systemiswaitingforaresponsebysaying, "Cancel"or"Quit."Thesystemannounces "Cancel"andendstheVRsession.Youcan alsopushandholdthe buttononthe steeringwheelatanytimetoendtheVR session.WhenevertheVRsessionis cancelled,adoublebeepisplayedto indicateyouhaveexitedthesystem.
- If you want to adjust the volume of the voice feedback, push the ( -or+) button on the steering wheel while being provided with feedback. You can also set her radio volume control knob.
VoicePromptInterrupt:
Inmostcasesyoucaninterruptthevoice feedbacktospeakthenextcommandby pushingthe buttononthesteeringwheel. Afterinterruptingthesystem,waitforabeep beforespeakingyourcommand.
OneShotCall:
Tousethesystemfaster,youmayspeakthe secondlevelcommandswiththemainmenu commandonthemainmenu.Forexample,push the buttonandafterthetonesay,"Call Redial".
Operatingtips:
Togetthebestperformanceoutofthevoice recognitionsystem,observethefollowing:
- Keeptheinteriorofthevehicleasquietas possible. Closethewindowstoeliminate surroundingnoises(trafficnoises,vibration sounds,etc.),which may preventthesystem fromrecognizingvoicecommandscorrectly.
- Wait until the tone sounds before speaking a command. Otherwise, the command will not bereceived properly.
4-84Heater, airconditioner, audioandphonesystems
- Start speaking a command within 5 seconds afterthetonesounds.
- Speakinanaturalvoice without outpausing between words.
Voicecommands
Voicecommandscanbeusedtooperatethe Bluetooth® Hands-Free Phone System. Push the buttonandsay"Phone"tobringupthe phonecommandmenu.Theavailableoptions are:
-Call
-Phonebook
-RecentCalls
●ShowApplications
- Messaging
- SelectPhone
Call:
Formoreinformationonthe"Call"command, see"Makingacall"(P.4-85).
Phonebook:
The following commands are available under "Phonebook":
•(AName)
Sayanameinthephonebooktobringupa listofoptionsforthatphonebookentry.The systemwillsaythenameitinterpreted basedonthevoicecommandprovided.If
thenameisincorrect,say"Correction"to hearanothername.
Once the correct phone book entry is identified, say "Dial" to dial then number or "Send Text" to send at text message to that number. Say "Record Name" to record a name for the phone book entry. Say "Delete Recording" to delete are recorded name for the phone book entry.
●ListNames
Speakthiscommandtohavethesystemlist thenamesinthephonebookonebyone alphabetically. Say "Dial"todialthenumber of the current name or "Send Text" to send a text message to that number. Say "Next Entry"or"PreviousEntry"tomovethrough the list alphabetically. Say "Record Name" to recordanameforthecurrentphonebook entry. Say "DeleteRecording"todeletea recordednameforthecurrentphonebook entry.
- DeleteEntry
Speakthiscommandtodeleteanentryin thephonebook.Chooseanentrytodelete byspeakingthedesirednameorsay"List Names".
RecentCalls:
The following commands are available under "RecentCalls":
- Incoming(Calls)
Speakthiscommandtolistthelastfive incomingcallstothevehicle.Ifthecallis fromanentryinthephonebook,thename willbedisplayed. Otherwise,thephone numberoftheincomingcallwillbedis-played.
Say "Dial" to call then number or "Send Text" to send at text message to that number. Say "NextEntry" or "PreviousEntry" to move through the list of incoming calls.
- Missed(Calls)
Speakthiscommandtolistthelastfive missedcallstothevehicle.Ifthecallisfrom anentryinthephonebook,thenamewillbe displayed. Otherwise,thephonenumberof themissedcallwillbedisplayed.
Say "Dial" to call then number or "Send Text" to send at text message to that number. Say "NextEntry" or "PreviousEntry" to move through the list of missed calls.
-Outgoing(Calls)
Speakthiscommandtolistthelastfive outgoingcallsfromthevehicle.Ifthecall wastoanentryinthephonebook,thename willbedisplayed. Otherwise,thephone
numberoftheoutgoingcallwillbedisplayed.
Say "Dial" to call then number or "Send Text" to send at text message to that number. Say "NextEntry" or "PreviousEntry" to move through the list of outgoing calls.
•Redial
Speakthiscommandtocallthelastnumber dialed.
- CallBack
Speakthiscommandtocallthenumberof thelastincomingcalltothevehicle.
ShowApplications:
Select this command to display list of smart phone apps available.
Messaging:
Speakthiscommandtoaccesstextmessaging functions.Formoreinformationonthesecommands,see"Textmessaging"(P.4-86).
SelectPhone:
Speakthiscommandtoselectaphonetouse fromalistofthosephonesconnectedtothe vehicle.
Makingacall
Tomakeacallfromaphoneconnectedtothe vehicle'sBluetooth ^® Hands-FreePhoneSystem:
1. Pushthe
button.
-
Thesystemwillpromptyouforacommand. Say "Call".
-
Selectoneoftheavailablevoicecommands tocontinue:
- (AName)
Speakthenameofaphonebookentryto placeacalltothatentry.Thesystemwill respondwiththenameitinterpretedfrom yourcommandandwillpromptyouto confirmthaththenameiscorrect.Say "Yes"toinitiatethecallor"No"tohear anothernamefromthephonebook.
- ListNames
Selectthiscommandtocallaphone numberthatisstoredinthephonebook.
- PhoneNumber
Speakthiscommandtoplaceacallby inputtingnumbers.
For7-and10-digitphonenumbers, speakthenumbers.Whenfinished,say "Dial"toinitiatethecall.Say"Correction" atanytimeintheprocesstocorrecta misspokenormisinterpretednumber.
Forphonenumberswithmoredigitsorspecialcharacters,say"SpecialNum-
ber",thenspeakthedigits.Upto24 digitscanbeentered.Availablespecial charactersare"star","pound","plus"and "pause".Whenfinished,say"Dial"to initiatethecall.Say"Correction"atany timeintheprocessstocorrectamis-spokenormisinterpretednumberor character.
- Redial
Speakthiscommandtodialthenumber ofthelastoutgoingcall.Thesystemwill display"Redialing(name/number)".The nameofthephonebookentrywillbe displayedifitavailable,otherwisethe numberbeingredialedwillbedisplayed.
- CallBack
Speakthiscommandtodialthenumber ofthelastincomingcall.Thesystemwill display"Callingback(name/number"). Thenameofthephonebookentrywillbe displayedifitavailable,otherwisethe numberbeingcalledbackwillbedis- played.
Receivingacall
Whenacallisreceivedbythephoneconnected tothevehicle'sBluetooth ^® Hands-FreePhone System, thecallinformationisdisplayedone eitherthevehicleinformationdisplayorboththe vehicleinformationdisplayandthecontrolpanel display.
Pushthe 📊 buttonoacceptthecall.Pushthe
- buttontorejectthecall.
4-86Heater, airconditioner, audioandphonesystems
Duringacall
Whileacallisactive, pushthebutton to accessadditionaloptions.Speakoneofthe followingcommands:
- Send
Speakthiscommandfollowedbythedigits toenterdigitsduringthephonecall. - MuteOnorMuteOff
Speakthecommandtomuteorunmutethe system. - TransferCall
Speakthiscommandtotransferthecallto thehandset.Totransferthecallbackfrom thehandsettotheBluetooth ^ Hands-Free PhoneSystem,pushthe buttonand confirmwhenprompted.
Ifsupportedbythephone,theBluetooth Hands-FreePhoneSystemallowsforcallwaitingfunctionality.Ifacallisreceivedwhile anothercallisalreadyactive,amessagewill bedisplayedonthescreen.Pushthe buttontoholdtheactivecallandswitchtothe secondcall.Pushthe buttonorejectthe secondcall.
While these second call is active, pushing the button will allow the same command that available during any call as well as two additional commands:
- SwitchCall
Speakthiscommandtoholdthesecondcall andswitchbacktotheoriginalcall. - EndOtherCall
Speakthiscommandtostaywiththe secondcallandendtheoriginalcall.
Pushthe 📞 buttonoacceptthecall.Pushthe
- buttontorejectthecall.
Endingacall
Toendanactivecall, pushthe

Textmessaging

WARNING
- Lawsinsomejurisdictionsmay restricttheuseofsomeofthe applicationsandfeatures,suchas socialnetworkingandtexting.
- Lawsinsomejurisdictionsmay restricttheuseof"Text-to-Speech". Checklocalregulationsbefore usingthisfeature.
- Usethetextmessagingfeatureafter stoppingyourvehicleinasafe location.Ifyouhavetousethe featurewhiledriving,exerciseextremec cautionatalltimessoful attentionmaybegiventovehicle operation.
- If you are unable to devote full attention to vehicle operation while using the text messaging feature, pulloff the road to as a location and stop your vehicle.
NOTE:
- Thisfeatureisautomaticallydisabledif theconnecteddevicedoesnotsupport theMessageAccessProfile(MAP).See thephone'sOwner'sManualfordetails andinstructions.
- Manyphonesmayrequirespecialpermissiontoenabletextmessaging. Checkthephone'sscreenduringBluetooth® pairing.Forsomephones,you mayneedtoenable"Notifications"in thephone'sBluetooth® menufortext messagestoappearonthevehicle audiosystem.Seethephone'sOwner's Manualfordetails.Textmessageintegrationrequiresthatthephonesupport
MAP(MessageAccessProfile)forboth receivingandsendingtextmessages. Somephonesmaynotsupportalltext messagingfeatures.Refertowww.nissanusa.com/bluetoothorwww.nissan.ca/bluetoothforcompatibility information,aswellasyourdevice's Owner'sManual.
Thesystemallowsforthesendingandreceiving oftextmessagesthroughthevehicleinterface.
Sendingatextmessage:
- Push the button.
2.Say"Messaging".
3.Say"SendText".
-
The system will provide a list of available commandsinordertodeterminetherecipientofthetextmessage.Choosefromthe following:
-
(Aname)
- Number
- IncomingCalls
- OutgoingCalls
- MissedCalls
If"IncomingCalls", "OutgoingCalls", or "Missed Calls" is selected, the following additional commandswillbedisplayed:
- SendText
- NextEntry
- PreviousEntry
Formoreinformationabouttheseoptions, see"Voicecommands"(P.4-84).
-
Once a recipient is chosen, the system promptsforwhichmessage tosend. Five predefinedmessagesareavailableaswell asthreecustommessages.Tochooseone ofthepredefinedmessages,speakoneof thefollowing:
-
"Driving,can'ttext"
- "Callme"
- "Onmyway"
- "Runninglate"
- "Okay"
Tosendoneofthecustommessages, say "CustomMessage". If more than one custom message is stored, the system will prompt for the number of the desired custom message. For more information on setting and managing custom text messages, see "Bluetooth ^ settings" (P.4-88).
Readingareceivedtextmessage:
- Push the button.
2.Say"Messaging".
3.Say"ReadText".
Thetextmessage,senderanddeliverytimeare shownonthescreen.Usethetuningswitchon thesteeringwheeltoscrollthroughalltext messagesifmorethanoneareavailable.Push the buttontoexitthetextmessagescreen. Pushthe buttontoaccessthefollowing optionsforreplyingtothetextmessage:
- CallBack
Speakthiscommandtocallthesenderof the textmessageusingtheBluetooth Hands-FreePhoneSystem.
- SendText
Speakthiscommandtosendatextmessageresponsetothesenderofthetext message.
- ReadText
Speakthiscommandtoreadthetext messageagain.
●PreviousText
Speak this command to moveto the previous text message (if available).
- NextText
Speakthiscommandtomovetothenext textmessage(ifavailable).
4-88Heater, airconditioner, audioandphonesystems
NOTE:
- Textmessagesareonlydisplayedifthe vehiclespeedislessthan5MPH(8 km/h).
- iPhones ^® canonlysendtextmessages viaSiri ^® EyesFree.
MakingcustommessageswithSiri ^® Eyes Free:
IfaconnectediPhone ^® isequippedwithSiri ^® , it canalsobeusedtocreatecustommessages. (See“Siri ^® EyesFree”(P.4-76).)
Bluetooth ^® settings
Toaccessandadjustthesettingsforthe Bluetooth® Hands-FreePhoneSystem:
-
Push the ENTER/SETTING button.
-
Use the TUNE·FOLDER or TUNE·SCROLL knob to select "Bluetooth" and then push the ENTER/SETTING button:
- Bluetooth Select"ON"or"OFF"toturnthe vehicle'sBluetooth® systemonoroff.
- AddPhone Toconnectaphonetothesystem,see "Initialization"(P.4-83).
- DeletePhone Selecttodeleteaphonefromthe displayedlist.Thesystemwillaskto confirmbeforedeletingthephone.
- ReplacePhone
Selecttoreplaceaphonefromthe displayedlist.Whenaselectionismade, thesystemwillasktoconfirmbefore proceeding.Therecordedphonebookfor thephonebeingdeletedwillbesavedas longasthenewphone'sphonebookis thesameastheoldphone'sphonebook.
- SelectPhone
Selecttoconnecttoapreviouslyconnectedphonefromthedisplayedlist.
- PhonebookDownload Selecttoturnonorofftheautomatic downloadofaconnectedphone'sphonebook.
- Siri
Select the PHONESENDbutton operationforSiri ^® EyesFreefunction from"ShortPress"and"LongPress"(if available).(see"Siri ^® EyesFree"(P.4-76).) "Siri"isdisplayedonlywhenaSiri ^® Eyes FreeenablediPhone ^® isconnectedto thevehicle.
• ShowIncomingCalls
Select "DriverOnly" to have incoming callinformationdisplayed only in the vehicleinformationdisplay. Select "Both" to have incoming callinformationdisplayed in both the vehicleinformation display and the center displayscreen
- TextMessage
Selecttoturnonoroffthevehicle'stext messagingfeature.
- NewTextSound
Selecttoadjustthevolumeofthesound thatplayswhenanewtextisreceivedby aphoneconnectedtotheBluetooth Hands-FreePhoneSystem. Thesetting allthewaytotheleftindicatesthatthe newtextsoundwillbemuted.
®
- ShowIncomingText
Select"DriverOnly"tohaveincoming textmessagesdisplayonlyinthe vehicleinformationdisplay.Select"Both" tohaveincomingtextmessagesdisplayinboththevehicleinformation displayandthecenterdisplayscreen. Select"None"tohavenodisplayof incomingtextmessages.
- EditCustomMessages
Selecttosetacustommessagethatwill beavailablewiththestandardoptions when sendingatextmessage.Toseta custommessage,sendatextmessageto yourownphonenumberwhilethephone isconnectedtothesystem.Three custommessagescanbeset.Custom messagescanonlybesetwhilethe vehicleisstationary.
- AutoReply
SelecttoturnonorofftheAutoReply function.Whenenabled,thevehiclewill automaticallysendapredefinedtext
messagetothesenderwhenatext messageisreceivedwhiledriving.
- AutoReplyMessage
Selecttochoosethemessagethatis sentwhentheAutoReplyfunctionis enabled.Choosefrom"I'mDriving"or oneofthethreecustommessages storedinthesystem.
- VehicleSignatureOn/Off
Selecttochoosewhetherornotthe vehiclesignatureisaddedtooutgoing textmessagesfromthevehicle.This messagecannotbechangedorcustomized.
Bluetooth® HANDS-FREEPHONE SYSTEM(modelswithnavigation system)

WARNING
- Useaphoneafterstoppingyour vehicleinasafelocation.Ifyou havetouseaphonewhiledriving, exerciseextremec cautionatall timessofullattentionmaybegiven tovehicleoperation.
•If you are unable to devote full attention to vehicle operation while talking on the phone, pulloff the road to as a location and stop your vehicle.

CAUTION
To avoid discharging the vehicle battery, use a phone after starting the engine.
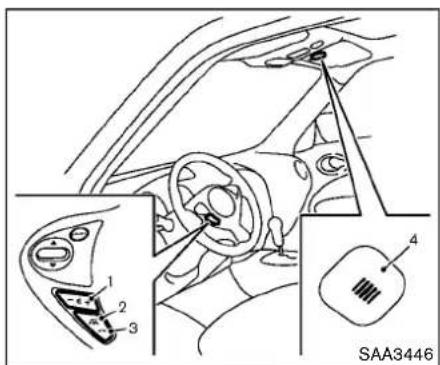
- Volumecontrolswitch-/+
2.PHONESEND
3.PHONEEND
4.Microphone

button
button
Thephonebuttonislocatedonthecontrol panelcanalsousetocontroltheBluetooth Hands-FreePhoneSystem.(See"Controlbuttonsandfunctions(modelswithnavigation system)("P.4-3).)
YourvehicleisequippedwiththeBluetooth Hands-FreePhoneSystem.Ifyouhavea compatibleBluetooth ^® enabledcellularphone, youcansetupthewirelessconnectionbetween yourcellularphoneandthein-vehiclephone module.WithBluetooth ^® wirelesstechnology,
youcanmakeorreceiveahands-freetelephone callwithyourcellularphoneinthevehicle.
Onceyourcellularphoneisconnectedtothein-vehiclephonemodule,nootherphoneconnectingprocedureisrequired.Yourphoneis automaticallyconnectedwiththein-vehicle phonemodulewhentheignitionswitchis placedintheONpositionwiththeconnected cellularphoneturnedonandcarriedinthe vehicle.
Youcanregisterupto5differentBluetooth® cellular phones to the in-vehicle phone module. However, you can talk on only one cellular phone ata time.
NISSANVoiceRecognitionsystemsupports the phonecommands,sodialingaphonenumber usingyourvoiceispossible.Formoredetails, see "NISSAN Voice Recognition System (modelswith navigation system)" (P.4-96).
BeforeusingtheBluetooth ^® Hands-FreePhone System, refer to the following notes.
- Setupthewirelessconnectionbetweena cellularphoneandthein-vehiclephone modulebeforeusingtheHands-FreePhone System.
- SomeBluetooth ^® enabledcellularphones may not be recognized by the in-vehicle phone module. Please visit www.nissanusa.com/bluetoothforarecommendedphone
listand connecting.
- Youwillnotbeabletouseahands-free phoneunder the following conditions: —Your vehicleisoutside ofthecellular servicearea.
—Yourvehicleis inanareawhereitis difficulttoreceivecellularsignal;suchas inatunnel,inanundergroundparking garage,nearatallbuildingorina mountainous area.
—Yourcellularphoneislocked topreventit frombeing dialed.
- When the radio wave condition is not ideal orambientsoundis tooloud, it maybe difficult to hear the other person's voice duringa call.
- Immediatelyaftertheignitionswitchis placedintheONposition,itmaybe impossibletoreceiveacallforashort periodof time.
- Donotplacethecellularphoneinanarea surroundedbymetalorfarawayfromthein-vehicle phone module to prevent tone quality degradationand wireless connectiondisruption.
- Whileacellularphoneisconnectedthrough theBluetooth ^® wirelessconnection,the battery powerof thecellular phonemay dischargequickerthanusual.TheBlue-
4-90Heater, airconditioner, audioandphonesystems
tooth® Hands-FreePhoneSystemcannot chargecellularphones.
- If the Hands-Free Phone System seem to bemalfunctioning, visit www.nissanusa.com/bluetoothfortroubleshootinghelp.
- Somecellularphonesorotherdevicesmay causeinterferenceorabuzzingnoiseto comefromtheaudiosystemspeakers. Storingthedeviceinadifferentlocation mayreduceoreliminatethenoise.
- RefertothecellularphoneOwner's Manual regarding the telephone charges, cellular phone antenna and body, etc.
- Thesignalstrengthdisplayonthemonitor willnotcoincidewiththesignalstrength displayofsomecellularphones.
REGULATORYINFORMATION
FCCRegulatoryinformation
-CAUTION: Tomaintaincompliance with FCC's RFexposureguidelines, use only the supplied antenna. Unauthorized antenna, modification, or attachment should damage the transmitter and may violate FCC regulations.
-Operationissubjecttothefollowingtwo conditions:
- This device may not cause interference and
- This device must accept any interference, including interference that may cause un-
desired operation of the device.
ICRegulatoryinformation
-Operationissubjecttothefollowingtwo conditions:(1)thisdevicemaynotcause interference,and(2)thisdevicemustaccept anyinterference,includinginterferencethatmay causeundesiredoperationofthedevice.
-ThisClassBdigitalapparatusmeetsall requirementsoftheCanadianInterference-CausingEquipmentRegulations.
Bluetooth®
Bluetooth® isatrademark ownedbyBluetoothSIG,Inc. andlicensedtoRobertBosch GmbH.
VOICECOMMAND
Youcanusevoicecommandstooperatevarious Bluetooth® Hands-FreePhoneSystemfeatures usingtheNISSANVoiceRecognitionsystem. Formoredetails,see "NISSANVoiceRecognitionSystem(modelswithnavigationsystem)" (P.4-96).
VoicePromptInterrupt
Whileusingthevoicerecognitionsystem,the systemvoicecanbeinterruptedtoallowthe usertospeakcommands.Whilethesystemis speaking,pushthe buttononthesteering wheel.Thesystemvoicewillstopandatonewill beheard.Afterthetone,speakdesiredcom-
mand(displayedonthetouch-screen).
OneShotCall
Tousethesystemfaster,youmayspeakthe secondlevelcommandswiththemainmenu commandonthemainmenu.Forexample,push the buttonandafterthetonesay,"Call Redial".

CONNECTINGPROCEDURE NOTE:
Theconnectingproceduremustbeperformedwhenthevehicleisstationary.If thevehiclestartsmovingduringtheprocedure,theprocedurewillbecancelled.
- Push the APPS button on the control panel.
- Touch the "Settings" key.
- Touch the "Phone&Bluetooth" key.
- Touch the "ConnectNewDevice" key.
- Initiatetheconnectingprocessfromthe handset. Thesystemwilldisplaytheme-sage: "IsPINXXXXXXdisplayonyour Bluetoothdevice?". If the PINisdisplayed
4-92Heater, airconditioner, audioandphonesystems
onyourBluetooth ^ device, select "Yes" to completethepairingprocess.
Formoreinformation,seetheBluetooth device'sOwner'sManual.
VEHICLEPHONEBOOK
Toaccessthevehiclephonebook:
- Push the button on the control panel.
- Touch the "Phonebook" key.
- Choosethedesiredentryfromthedisplayed list.
- Thenumberoftheentrywillbedisplayedon thescreen.Touchthenumbertoinitiate dialing.
NOTE:
Toscrollquicklythroughthelist,touchthe
"A-Z" keyintheupperrightcornerofthe screen.TurntheTUNEknobtochoosea letterornumberandthenpushAUDIO button.Thelistwillmovetothefirstentry thatbeginswiththatnumberorletter.
MAKINGACALL
Tomakeacall, follow the procedure below:
-
Push the button on the control panel. The "Phone" screen will appear on the display.
-
Selectoneofthefollowingoptionstomake acall:
-
"Phonebook": Selectthenamefromanentry storedinthevehiclephonebook.
- "CallLists": Selectthenamefromthe incoming,outgoingormissed.
- "Redial": Dialthelastoutgoingcallfromthe vehicle.
- " [REDACTED]":Inputthephonenumbermanually usingakeypaddisplayedonthescreen. For informationonhowtousethetouch-screen, see"Controlbuttonsandfunctions(models withnavigationsystem)"(P.4-3).
RECEIVINGACALL
Whenacallisplacedtotheconnectedphone, thedisplaywillchangetophonemode.
Toaccepttheincomingcall:
●Pushthe buttononthesteeringwheel.
- Touchthegreenphoneicononthescreen.
Torejecttheincomingcall:
- Pushthe buttononthesteeringwheel.
- Touchtheredphoneicononthescreen.
DURINGACALL
Whileacallisactive, the following options are available on the screen:
- "Handset"
Selectthisoptiontoswitchcontrolofthe phonecallovertothehandset.
- "MuteMic."
Selectthisoptiontomutethemicrophone. Selectagaintounmutethemicrophone.
●Redphone(

)icon
Selecttoendthephonecall.
ENDINGACALL
Toendaphonecall,selecttheredphone()

icononthescreenorpushthe thesteeringwheel.

buttonon
TEXTMESSAGING

WARNING
- Lawsinsomejurisdictionsmay restricttheuseofsomeofthe applicationsandfeatures,suchas socialnetworkingandtexting.
-
Lawsinsomejurisdictionsmay restricttheuseof"Text-to-Speech". Checklocalregulationsbefore usingthisfeature.
-
Use the text messaging feature after stopping your vehicle in as safe location. If you have to set the feature while driving, exercise extreme caution at all times so full attention may begin to vehicle operation.
- If you are unable to devote full attention to vehicle operation while using the text messaging feature, pullofftheroadto as a location and stop your vehicle.
NOTE:
Manyphonesmayrequirespecialpermissiontoenabletextmessaging.Checkthe phone'sscreenduringBluetooth ^® pairing. Forsomephones,youmayneedtoenable "Notifications"inthephone'sBluetooth menufortextmessagestoappearonthe vehicleaudiosystem.Seethephone's Owner'sManualfordetails.Textmessage integrationrequiresthatthephonesupportMAP(MessageAccessProfile)for bothreceivingandsendingtextmessages. Somephonesmaynotsupportalltext messagingfeatures.Refertowww.nissanusa.com/bluetoothorwww.nissan.ca/bluetoothforcompatibilityinformation,
aswellasyourdevice'sOwner'sManual.
Thesystemallowsforthesendingandreceiving oftextmessagesthroughthevehicleinterface.
Sendingatextmessage
- Pushthe buttononthesteeringwheel.
- Say"Phone"afterthetone.
- Say"SendText"afterthetone.
-
Thesystemwillprovidealistofavailable commandsinordertodeterminetherecipientofthetextmessage.Choosefromthe following:
-
To(aname)
- EnterNumber
- MissedCalls
- IncomingCalls
- OutgoingCalls
Formoreinformationabouttheseoptions, see"Voicecommand"(P.4-91).
-
Oncearecipientischosen,thesystem promptsforwhichmessagetosend.Nine predefinedmessagesareavailableaswell asthreecustommessages.Tochooseone ofthepredefinedmessages,speakoneof thefollowingafterthetone:
-
"Driving,can'ttext"
-
"Callme"
-
"Onmyway"
- "Runninglate"
- "Okay"
- "Yes"
- "No"
- "Whereareyou?"
- "When?"
Tosendoneofthecustommessages, say "CustomMessages". If more than one custommessage is stored, the system will prompt for the number of the desired custommessage. Form more information on setting and managing custom messages, see "Phonesettings" (P.4-96).
Readingareceivedtextmessage
- Push the button on the steering wheel.
2.Say"Phone"afterthetone.
3.Say"ReadText"afterthetone.
Thetextmessage, senderanddeliverytime are shownonthescreen. Usethetuningswitchto scrollthroughalltextmessagesifmorethanone are available. Pushthe buttontoexitthetext messagescreen. Pushthe buttonto accessthefollowingoptionsforreplyingtothe textmessage:
- CallBack
Speakthiscommandtocallthesenderof thetextmessageusingtheBluetooth®
Hands-FreePhoneSystem.
- SendText
Speakthiscommandtosendatextmessage response to the sender of the text message.
- ReadText
Speakthiscommandtoreadthetext messageagain.
●PreviousText
Speakthiscommand tomove tothe previoustextmessage(ifavailable).
- NextText
Speakthiscommandtomovetothenext textmessage(ifavailable).
NOTE:
- Textmessagesareonlydisplayedifthe vehicle speed is less than 5 MPH (8 km/h).
- iPhones ^® canonlysendtextmessages viaSiri ^® EyesFree.
MakingcustommessageswithSiri ^® EyesFree
IfaconnectediPhone ^® isequippedwithSiri ^® , it canalsobeusedtocreatecustommessages. (See“Siri ^® EyesFree”(P.4-76).)

Bluetooth® SETTINGS
Toaccessthephonesettings:
-
Push the APPS button.
-
Touch the "Settings" key.
-
Touch the "Phone&Bluetooth" key.
4-94Heater, airconditioner, audioandphonesystems
| Menultem | Result |
| PhoneSettings | Fordetailedinformation,see“Phonesettings”(P.4-96). |
| ConnectNewDevice | TouchtoconnectanewBluetooth® devicetotheBluetooth® Hands-FreePhoneSystem. |
| SelectConnectedDevice | TouchtochooseaBluetooth® devicefromalistofthosedeVICESconnectedtotheBluetooth® Hands-FreePhoneSystem. |
| ReplaceConnectedDevice | TouchtoreplaceaBluetooth® devicefromalistofthosedeVICESconnectedtotheBluetooth® Hands-FreePhoneSystem. |
| DeleteConnectedDevice | TouchtodeleteaBluetooth® devicefromalistofthosedeVICESconnectedtotheBluetooth® Hands-FreePhoneSystem. |
| Bluetooth | TouchtotoggleBluetooth® onandoff. |
PHONE SETTINGS
Toaccessthephonesettings:
1. Pushthe APPS button.
2. Touch the "Settings" key.
3. Touch the "Phone & Bluetooth" key.
4. Touch the "Phone Settings" key and adjust the following settings as desired:
- SortPhonebookBy:
Touch "FirstName" or "LastName" to choosehowphonebookentriesarealphabeticallydisplayonthescreen.
- UsePhonebookFrom: Touch"Handset"tousethephone'sphone-book.Select"SIM"tousethephonebookon theSIMcard.Touch"Both"touseboth sources.
-DownloadPhonebookNow: Touchtodownloadthephonebooktothe vehiclefromthechosensource.
- RecordNameforPhonebookEntry: Touchtorecordanameforaphonebook entryforusewiththeNISSANVoice RecognitionSystem.
- PhoneNotificationsfor:
Touch "Driver" to have phonenotifications shown in the vehicle information display.
Touch "Both" to have phonenotifications
showninboththevehicleinformationdisplayandthecenterdisplayscreen.
- TextMessaging:
Touchtotogglethetextmessagefunction-
alityonoroff.
●ShowIncomingTextfor: Touch "Driver" to have incoming text notifications shown in the vehicle information display. Touch "Both" to have text notifications shown in both the vehicle information display and the center displays screen. Touch "Off" to turn off all text notifications.
●AutoReply: Touchtotoggletheautoreplyfunctionality onoroff.
●AutoReplyMessage: Touchtoindicatepreferredmessagetobe sentwhen "AutoReply" functionisactivated. - UseVehicle'sSignature: Touchtotoggleonorofftheadditionofthe vehiclesignaturetooutgoingmessages
- CustomTextMessages: Touchthisoptiontoselectacustom messagetoedit.Thereare4customer messageslotsavailable.
NISSANVOICERECOGNITION SYSTEM(modelswithnavigation system)
TheNISSANVoiceRecognitionsystemallows hands-freeoperationofthesystemsequipped onthisvehicle,suchasthephoneandnavigationsystems.
TooperateNISSANVoiceRecognition, pushthe
buttonlocatedonthesteeringwheel. Whenprompted, speak the command for the system you wish to activate. The command given is picked up by the microphone and performed when it is properly recognized. NISSAN Voice Recognition will provide avoicer response as well as message in the center display to inform you of the command results.
USINGTHESYSTEM
Initialization
WhentheignitionswitchisintheONposition, NISSANVoiceRecognitionisinitialized,which takesafewseconds.Whencompleted,the systemisreadytoacceptvoicecommands.If the buttonispushedbeforetheinitialization completes,thesystemwillannounce:"Voice RecognitionSystemnotready.Pleaseawait."

Givingvoicecommands
- Pushthebutton
- Thesystemannounces: "Please say a categorylikephoneoracommandlike pointsofinterestfollowedbyabbrandname". Alistofavailablecommandsisthenspoken bythesystem.
- Afterthetonesoundsandthefaceiconon thedisplaychanges, speakacommand. Available commands are discussed in this section.
-
Voiceanddisplayfeedbackareprovided whenthecommandisaccepted.
-
Ifthecommandisnotrecognized, the systemannounces: "Commandnotrecognized". Repeatthecommandinaclear voice.
- Ifyouwanttocancelthecommandorgo backtothepreviousmenuofcommands, pushthe button. Thesystemwill announce: "Cancellingvoicerecognition" or "Goback" dependingon the current menulevel.
- PushtheBACKbuttononthecontrolpanel tomovebackthroughthemenusdisplayed onthescreen.
- If you want to adjust the volume of the voice feedback, use the volume control switches on the steering wheel or the volume knob on the control panel.
-
Thevoicecommandscreencanalsobe accessedusingthecontrolpaneldisplay:
-
Pushthe APPS(1) button.
-
Touch the "Voice Commands" key.
Operatingtips
Togetthebestperformance outof NISSAN VoiceRecognition,observethefollowing:
- Keeptheinteriorofthevehicleasquietas possible.Closethewindowstoeliminate the surroundingnoises(trafficnoises,vibration sounds,etc.),whichmaypreventthesystem
from recognizing the voice commands correctly.
- Waituntilatonesoundsbeforespeakinga command. Otherwise, the command will not bereceived properly.
-Startspeakingacommandwithin3.5 secondsafterthetonesounds.
●Speakinanaturalvoicewithoutpausing betweenwords.
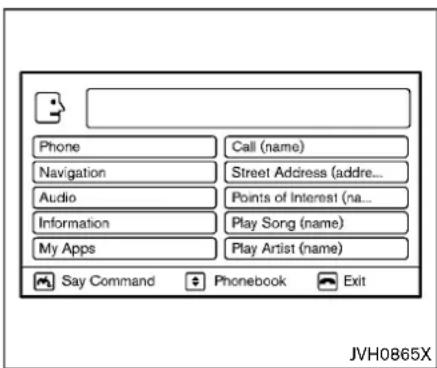
SYSTEMFEATURES
NISSANVoiceRecognitioncanactivatethe followingsystems:
- Bluetooth ^ Hands-FreePhoneSystem
●Navigation
●Audio
•Information - MyApps
For additional information on thenavigation system, seetheseparateNavigationSystem Owner's Manual.
Howtosaynumbers
NISSANVoiceRecognitionrequiresacertain waytospeaknumbersinvoicecommands. Refertothefollowingexamples.
Generalrule: Either "zero" or "oh" can be used for "0".
Phonenumbers:
Speakphonenumbersaccordingtothefollowingexample.For1-800-662-6200,saydial numberandthenspeakthephonenumberin anyofthefollowingformats:
- "oneeightohohsixsixtwosixtwoohoh"
- "oneeighthundredsixsixtwosixtwoohoh"
- "oneeightzerozerosixsixtwosixtwooh oh"
Forthebestvoicerecognitionphonedialing results, sayphonenumbersassingledigits. Also, fullnumberscanonlybespokenfor "800". Forexample, youcannotsay555-6000as "five fivefivesixthousand".
Bluetooth® HANDS-FREEPHONE SYSTEMVOICECOMMANDS
ToaccesstheBluetooth ^® Hands-FreePhone Systemvoicecommands:
-
Push the button.
-
Say "Call" and then an name in the vehicle phonebook to call that entry. Otherwise, say
"Phone"toaccessvariousphonecommands.
IftheBluetooth ^ has been setto "Off", the systemannounces: "Bluetooth ^ isoff. Would you liketoturnBluetooth ^ on?"
Ifnophoneisconnectedtothesystemandthe vehicleisstationary,thesystemannounces:
"Thereisnophoneconnected.Wouldyouliketo connectaphonenow?"Say"Yes"toconnectaphone.AllfurtherBluetooth®Hands-FreePhone Systemvoicecommandsareonlyavailableifa phoneisconnected.
IfaphoneisconnectedandBluetooth ^® issetto
"On", the following voice commands are available:
- Call(aname)
Speakthenameofthecontactinwhichyou aretryingtocall.Systemwillconfirmcorrect contact.Say"Dial"toinitiatedialing.
- DialNumber
Allowsforupto24digitstobedialed. After thenumberisentered, say "Dial" toinitiate dialing. Say "Correction" tocorrect the numberentered. Say "GoBack" toreturn tothemainmenu.
●ListPhonebook
Startingwiththefirstalphabeticalentryin thevehiclephonebook,thesystemprompts
foranadditionalcommand.Say“Dial”tocall thenumberofthephonebookentry.Say “SendText”tosendatextmessagetothe numberofthephonebookentry.Say“Next Entry”toskiptothenextalphabeticalentry inthevehiclephonebook,wherethesame optionswillthenbeavailable.
-RecentCalls
Thesystem prompts for an additional command. Say "Missed Calls", "Incoming Calls" or "Outgoing Calls" to display a list of such calls on the screen.
Speakthenumberoftheentrydisplayedon thescreentodialthatnumberorsay"Next Page"toviewentriesonthenextpage(if available).
•Redial
Redialsthelastcallednumber.
- ReadText
Readsanincomingtextmessage.Formore informationabouttextmessagingwiththe Bluetooth® Hands-FreePhoneSystem,see "Bluetooth® Hands-FreePhoneSystem (modelswithnavigationsystem)("P.4-89).
- SendText
Sendsatextmessage.Formoreinformation abouttextmessagingwiththeBluetooth® Hands-FreePhoneSystem,see“Bluetooth® Hands-FreePhoneSystem(modelswith
navigationsystem)"(P.4-89).
- SelectPhone
Thesystemreplies "Pleaseusemanual controlstocontinue". Use manual controls to changetheactive phone from among the listed phones connected to the vehicle.
FormoreinformationabouttheBluetooth Hands-FreePhoneSystem,see"Bluetooth Hands-FreePhoneSystem(modelswithnavigationsystem")(P.4-89).
NAVIGATIONSYSTEMVOICECOM-MANDS
The following voice commands are available for the Navigation System:
- StreetAddress(address)
- Pointsoflnterest(name)
- POIbyCategory
Home - AddressBook
●PreviousDestinations - EnterAddressinSteps
- CancelRoute
Formoreinformationaboutthesecommands, seetheseparateNavigationSystemOwner's Manual.
AUDIOSYSTEMVOICECOMMANDS
Toaccesstheaudiosystemvoicecommands:
- Pushthe button.
2.Say"Audio".
- Speakacommandfromthefollowing availablecommands:
-Play(AM,FM,etc.) Allowsusertoselectradioband
- TuneAM(number) AllowsusertotunedirectlytoadesiredAM frequency
- TuneFM(number) AllowsusertotunedirectlytoadesiredFM frequency
- SXMchannel(number) Allowsusertotunedirectlytoadesired SXMstation(ifsoequipped)
- CDTrack(number) Allowsusertoselecttracktobeplayed
-PlaySong(name) Allowsusertoselectsongnametobe played
●PlayArtist(name) Allowsusertoselectartisttobeplayed
●PlayAlbum(name) Allowsusertoselectalbumnametobe played
4-100Heater, airconditioner, audioandphonesystems
Formoreinformationabouttheaudiosystem, see "FM-AM-SATradiowithCompactDisc(CD) player(TypeB)"(P.4-62).
INFORMATIONVOICECOMMANDS
The following voice commands are available for the information functions of the Navigation System:
- Traffic
●FuelPrices
•Stocks
●MovieListings
- CurrentWeather
-WeatherMap
-5-dayForecast
-6-hourForecast
Formoreinformationaboutthesecommands, seetheseparateNavigationSystemOwner's Manual.
MYAPPSVOICECOMMANDS
Many Apps can be accessed using this voice command. See "NissanConnect ^SM App smart-phoneintegration"(P.4-75).
HELPVOICECOMMANDS
The following voice commands can be spoken to have the system provide instructions and tips for using the NISSAN Voice Recognition system.
●ListCommands
- WhatCanISay?
- GeneralHelp
•Quit
- Exit
TROUBLESHOOTINGGUIDE
The system should respond correctly to all voice commands without difficulty. If problems are encountered, follow the solutions given in this guide for the appropriate error. Where the solutions are listed by number, try each solution in turn, starting with number one, until the problem is resolved.
| Symptom/errormessage | Solution |
| Thesystemresponds"Command NotRecognized"orthesystemfails torecognizethecommandcorrectly. | 1.Ensurethatthecommandformatisvalid.Usethe"ListCommands"or"WhatCanISay?"commandunderthe"Help"menu. |
| 2.Speakclearlywithoutpausingbetweenwordsandatalevelappropriatetotheambientnoiselevel. | |
| 3.Ensurethattheambientnoiselevelisnotexcessive(forexample,withthewindowsopenorthedefrosteron).NOTE:Ifitistoonoisytousethephone,itislikelythatvoicecommandswillnotberecognized. | |
| 4.Ifoptionalwordsofthecommandhavebeenomitted,thenthecommandshouldbetriedwiththeseinplace. |
MEMO
4-102Heater, airconditioner, audioandphonesystems
5Startinganddriving
Precautionswhenstartinganddriving....5-2
Exhaustgas(carbonmonoxide)....5-2
Three-waycatalyst....5-3
TirePressureMonitoringSystem(TPMS)....5-3
Avoidingcollisionandrollover....5-6
Off-roadrecovery....5-6
Rapidairpressureloss....5-6
Drinkingalcohol/drugsanddriving....5-7
Drivingsafetyprecautions....5-7
Push-buttonignitionswitch....5-9
Operatingrangeforenginestartfunction....5-10
Push-buttonignitionswitchoperation....5-10
Push-buttonignitionswitchpositions....5-11
Emergencyengineshutoff....5-11
IntelligentKeybatterydischarge....5-12
Beforestartingtheengine....5-12
Startingtheengine....5-13
Drivingthevehicle....5-14
ContinuouslyVariableTransmission(CVT)......5-14
ManualTransmission(MT)....5-19
Integratedcontrolsystem(ifsoequipped)....5-21
Drivemode....5-22
Parkingbrake....5-25
Cruisecontrol....5-26
Precautionsoncruisecontrol....5-26
Cruisecontroloperations....5-26
Break-inschedule....5-27
FuelEfficientDrivingTips....5-28
Increasingfueleconomy....5-29
All-WheelDrive(AWD)(ifsoequipped)......5-29
All-WheelDrive(AWD)mode switchoperations....5-29
AWDwarninglight....5-31
Parking/parkingonhills....5-33
Electricpowersteering....5-34
Brakesystem....5-35
Brakingprecautions....5-35
Brakeassist....5-36
Brakeassist....5-36
Anti-lockBrakingSystem(ABS)....5-36
VehicleDynamicControl(VDC)system....5-37
Coldweatherdriving....5-39
Freeingafrozendoorlock....5-39
Anti-freeze....5-39
Battery....5-39
Drainingofcoolantwater....5-39
Tireequipment....5-39
Specialwinterequipment....5-39
Drivingonsnoworice....5-39
Engineblockheater(ifsoequipped)....5-40
PRECAUTIONSWHENSTARTING ANDDRIVING

WARNING
- Donotleavechildrenoradultswho wouldnormallyrequirethesupport ofothersaloneinyourvehicle.Pets shouldnotbeleftaloneeither.They couldaccidentallyinjurethemselves orothersthroughinadvertentoperationofthevehicle.Also,onhot, sunny days, temperatures in a closedvehiclecouldquicklybecome highenoughtocausesevereor possiblyfatalinjuriestopeopleor animals.
•Properlysecureallcargowithropes orstrapstohelppreventitfrom slidingorshifting.Donotplace cargohigherthantheseatbacks.In asuddenstoporcollision,unsecuredcargocouldcausepersonal injury.
EXHAUSTGAS(carbonmonoxide)

WARNING
- Donotbreatheexhaustgases;they containcolorlessandodorlesscarbonmonoxide.Carbonmonoxideis dangerous.Itcancauseunconsciousnessordeath.
- Ifyoususpectthatexhaustfumes areenteringthevehicle,drivewith allwindowsfullyopen,andhavethe vehicleinspectedimmediately.
- Donotruntheengineinclosed spacessuchasagarage.
- Donotparkthevehiclewiththe engineerunningforanyextended lengthoftime.
- Keeptheliftgateclosedwhiledriving,otherwiseexhaustgasescould bedrawnintothepassengercompartment.Ifyoumustdrivewiththe liftgateopen,followtheseprecautions:
1.Openallthewindows.
- Setthe airrecirculationtooff and the fan control to highto
circulatetheair.
- If electrical wiring or other cable connections must pass to a trailer through these along the lift gate or the body, follow the manufacturer's recommendation to prevent carbon monoxide entry into the vehicle.
- Ifaspecialbody,camperorother equipmentisaddedforrecreational orotherusage,followthemanufac-turer'srecommendationtoprevent carbonmonoxideentryintothe vehicle.(Somerecreationalvehicle appliancesuchasstoves,refrigerators,heaters,etc.mayalsogen-eratecarbonmonoxide.)
•Theexhaustsystem andbody shouldbeinspectedbyaqualified mechanicwhenever:
—The vehicle is raised for service.
—Yoususpectthatexhaustfumes areenteringintothepassenger compartment.
— You notice a change in the sound of the exhaust system.
—Youhavehadanaccidentinvolvingdamagetotheexhaust
system, underbody, orrear of the vehicle.
THREE-WAYCATALYST
Thethree-waycatalystisanemissioncontrol deviceinstalledintheexhaustsystem.Exhaust gasesinthethree-waycatalystareburnedat hightemperaturestohelpreducepollutants.

WARNING
•Theexhaustgasandtheexhaust systemareveryhot.Keeppeople, animalsorflammablematerials awayfromtheexhaustsystemcomponents.
- Donotstoporparkthevehicleover flammablematerialssuchasdry grass,wastepaperorrags.They mayigniteandcauseafire.

CAUTION
- Donotuseleadedgasoline.Depositsfromleadedgasolinewillseriously reduce the three-way catalyst'sabilitytohelpreduceex-
haustpollutants.
- Keepyourenginetunedup.Malfunctionsintheignition,fuelinjection,orelectricalsystemscancause overrichfuelflowintothethree-way catalyst,causingittooverheat.Do notkeepdrivingiftheenginemisfires,orifnoticeablelossofperformanceor otherunusual operating conditions aredetected.Havethe vehicleinspected.It isrecommendedyouvisitaNISSANdealer forthisservice.
- Avoiddrivingwithanextremelylow fuellevel.Runningoutoffuelcould causetheenginetomisfire,dama-gingthethree-waycatalyst.
- Donotracetheenginewhilewarm-ingitup.
- Donotpushortowyourvehicletostarttheengine.
TIREPRESSUREMONITORINGSYSTEM(TPMS)
Eachtire, including the spare (if provided), should be checked monthly when cold and inflated to the inflation pressurerecommended by the vehicle manufacturer on the vehicle placardortire inflation pressure label. (If your vehicle hastires of different sizes, then the vehicle has been indicated on the vehicle placardortire inflation pressure label, you should determin the proper tire inflation pressure forthosetires.)
Asanadded safetyfeature, yourvehiclehas beenequippedwithaTirePressureMonitoring System(TPMS)thatilluminatesalowtire pressuretelltalewhenoneormoreofyourtires issignificantlyunder-inflated. Accordingly,when thelowtirepressuretelltaleilluminates,you shouldstopandcheckyourtiresassoonas possible,andinflatethemtotheproperpres-sure.Drivingonasignificantlyunder-inflatedtire causesthetiretooverheatandcanleadtotire failure.Under-inflationalsoreducesfuelefficiencyandtire treadlife,andmay affectthe vehicle'shandlingandstoppingability.
Please note that the TPMS is not a substitute for propertiremaintenance, and itisthedriver's responsibility to maintain incorrect tire pressure, even if under-inflation has not reached the level to trigger illumination of the TPMS slow tire
pressuretelltale.
Yourvehiclehasalsobenequippedwitha TPMSmalfunctionindicatortoindicatewhenthe systemisnotoperatingproperly. TheTPMS malfunctionindicatoriscombinedwiththelow tirepressuretelltale.Whenthesystemdetectsa malfunction, thetelltalewillflashforapproximatelyoneminuteandthenremaincontinuously illuminated. Thissequencewillcontinueupon subsequentvehiclestart-upsaslongasthe malfunctionexists.Whenthemalfunctionindicatorisilluminated, thesystemmaynotbeable todetectorsignallowtirepressureasintended. TPMSmalfunctionsmayoccurforvarietyof reasons, includingtheinstallationofreplacementoralternatetiresorwheelsonthevehicle thatpreventtheTPMSfromfunctioningproperly. AlwayschecktheTPMSmalfunctiontelltale afterreplacingoneormoretiresorwheelson yourvicletoensurethatthereplacementor alternatetiresandwheelsallowtheTPMSto continuetofunctionproperly.
Additional information
- Sincethesparetireisnotequippedwiththe TPMS,theTPMSdoesnotmonitorthetire pressureofthesparetire.
●The TPMSwillactivateonlywhenthe vehicleisdrivenatspeedsabove16MPH (25km/h).Also, thissystemmaynotdetect
5-4 Starting and driving
asuddendropintirepressure(forexamplea flattirewhiledriving).
- Thelowtirepressurewarninglightdoesnot automaticallyturnoffwhenthetirepressure isadjusted. After the tire is inflated to the recommended pressure, the vehicle must be driven at speeds above 16 MPH (25 km/h) to activate the TPMSand turnoffthelowtire pressure warning light. Use atire pressure gaugeto check the tire pressure.
- The CHECK TIRE PRES (pressure) warning message is displayed in the vehicle information displaywhenthelowtirepressure warninglightisilluminatedandlowtire pressureisdetected.TheCHECKTIRE PRESwarningmessageturnsoffwhenthe low tirepressurewarninglight turnsoff.The lowtirepressurewarninglightremains illuminateduntilthetiresareinflatedtothe recommendedCOLDtirepressure.The CHECKTIREPRESwarningmessageis displayedeachtimetheignitionswitchis placed in the ON position as long as the low tirepressurewarninglightremainsilluminated."Checktirepressurewarningmessage"(P.2-9).
- The CHECKTIREPRES warning message is not displayed if the low tire pressure warning light illuminate to indicate a TPMS malfunction.
●Tirepressurerisesandfallsdependingon theheatcausedbythevehicle'soperation and theoutsidetemperature.Donotreduce thetirepressureafterdrivingbecausethe tirepressurerisesafterdriving.Lowoutside temperaturecanlowerthetemperatureof theairinsidethetirewhichcancausea lowertireinflationpressure.Thismaycause thelowtirepressurewarninglight to illuminate.Ifthewarninglightilluminatesin lowambienttemperature,checkthetire pressureforallfourtires.
For additional information, see "Lowtirepressure warninglight" (P.2-18) and "TirePressure MonitoringSystem(TPMS)" (P.6-3).

WARNING
- If the low tire pressure warning light illuminates whiledriving, avoid suddensteeringmaneuversorabrupt braking, reducevehiclespeed, pull offtheroadtoasafelocationand stopthevehicleassoonaspossible. Driving withunder-inflatedtires may permanentlydamagethetires andincreasethelikelihoodoftire failure. Serious vehicledamage couldoccurandmayleadtoan
accidentandcouldresultinserious personalinjury.Checkthetirepressureforallfourtires.Adjustthetire pressuretotherecommendedCOLD tirepressureshownontheTireand LoadingInformationlabeltoturn thelowtirepressurewarninglight OFF.Ifyouhaveaflattire,replaceit withasparetireassoonaspossible.(See"Flattire"(P.6-3)forchangingaflattire.)
- Sincethesparetireisnotequipped withtheTPMS,whenasparetireis mountedorawheelisreplaced,the TPMSwillnotfunctionandthelow tirepressurewarninglightwillflash forapproximately1minute.The lightwillremainonafter1minute.Haveyourtiresreplacedand/or TPMSsystemresetassoonas possible.Itisrecommendedyou visitaNISSANdealerforthese services.
- ReplacingtireswiththosenotoriallyspecifiedbyNISSANcould affecttheproperoperationofthe TPMS.
- Donotinjectanytireliquidor aerosoltiresealantintothetires,
asthismaycauseamalfunction of the tirepressuresensors.

CAUTION
- TheTPMSmaynotfunctionproperly whenthewheelsareequippedwith tirechainsorthewheelsareburied insnow.
- Donotplacemetalizedfilmorany metalparts(antenna,etc.)onthe windows.Thismaycausepoorreceptionofthesignalsfromthetire pressuresensors,andtheTPMSwill notfunctionproperly.
Somedevicesandtransmittersmaytemporarily interferewiththeoperationoftheTPMSand causethelowtirepressurewarninglightto illuminate.Someexamplesare:
●Facilitiesorelectricdevicesusingsimilar radiofrequenciesarenearthevehicle.
- Ifatransmittersettosimilarfrequenciesis beingusedinornearthevehicle.
- Ifacomputer(orsimilarequipment)oraDC/ACconverterisbeingusedinornearthe vehicle.
Lowtirepressurewarninglightmayilluminatein the following cases.
- If the vehicle is equipped with a wheeland tire without TPMS.
- If the TPMShasbeenreplacedandtheID hasnotbeenregistered.
- If the wheel is not originally specified by NISSAN.
FCCNotice:
ForUSA:
ThisdevicecomplieswithPart15ofthe FCCRules.Operationissubjecttothe followingtwoconditions:(1)Thisdevice maynotcauseharmfulinterference,and (2)thisdevicemustacceptanyinterferencereceived,includinginterferencethat maycauseundesiredoperation.
Note: Changesormodificationsnotexpresslyapprovedbythepartyresponsible forcompliancecouldvoidtheuser's authoritytooperatetheequipment.
ForCanada:
This device complies with Industry Canada licence-exempt RSS standard(s). Operation is subject to the following two conditions: (1) this device may not cause interference, and (2) this device must accept any interference, including interfer-
encethatmaycauseundesiredoperation ofthedevice. AVOIDINGCOLLISIONANDROLL- OVER

WARNING
Failuretooperatethisvehicleinasafe andprudentmannermayresultinloss ofcontroloranaccident.
Bealertanddrivedefensivelyataltimes. Obey alltrafficregulations. Avoidexcessivespeed, highspeedcornering, orsuddensteering maneuvers, because the driving practices could causeyoutolose control of your vehicle. Aswithanyvehicle, a lossof control could result in a collision with other vehicles or objects, or causethe vehicletorollover, particularly if the lossof control causes the vehicletoslidesideways. Beattentive at all times, and avoid driving whentired. Never drive when under the influence of alcohol or drugs (including prescription or over-the-counter drugs which may causedrowsiness). Always weary our seat belt as outlined in "Seat belts" (P.1-10) of this manual, and also instruct your passengerstodoso.
Seatbeltshelpreducetheriskofinjuryin 5-6 Startinganddriving
collisionsandrollovers. Inarollovercrash, an unbeltedorimproperlybeltedpersonis significantlymorelikelytobeinjuredor killedthanapersonproperlywearinga seatbelt.
OFF-ROADRECOVERY
Iftherightsdeorleftsidewheelsleavetheroad surface, maintaincontrolofthevehicleby followingtheprocedurebelow. Plesenotethat thisprocedureisonlyageneralguide. The vehiclemustdrivenasappropriatebasedon theconditionsofthevehicle,roadandtraffic.
- Remaincalmanddonotoverreact.
- Donotapplythebrakes.
- Maintainafirmgriponthesteeringwheel withbothhandsandtrytoholdastraight course.
- Whenappropriate, slowlyreleasetheacceleratorpedaltograduallyslowthevehicle.
- If there is nothing in the way, steer the vehicle to follow the road while the vehicle speed is reduced. Donot attempt to drive the vehicle back on other roads surface until vehicles speed is reduced.
- Whenitissafetodoso, gradually turn the steering wheel until both tires return to the roads surface. When all tires are on the road surface, steer the vehiclet to stay in the
appropriatedrivinglane.
- If you decide that it is not a safety return the vehicle to other roads surface based on vehicle, road traffic conditions, gradually slow the vehicle to as topinasafe place off the road.
RAPIDAIRPRESSURELOSS
Rapidairpressurelossora"blow-out"can occurifthetireispuncturedorisdamageddue tohittingacurborpothole.Rapidairpressure losscanalsobecausedbydrivingonunderinflatedtires.
Rapidairpressurelosscanaffectthehandling andstabilityofthevehicle,especiallyathighway speeds.
Helppreventrapidairpressurelossbymaintainingthecorrectairpressureandvisually inspectthetiresforwearanddamage.See "Wheelsandtires"(P.8-28)ofthismanual.
Ifatirerapidlylosesairpressureor"blows-out" whiledrivingmaintaincontrolofthevehicleby followingtheprocedurebelow.Pleasenotethat thisprocedureisonlyageneralguide. The vehiclemustbedrivenasappropriatebasedon theconditionsofthevehicle,roadandtraffic.

WARNING
The following actions can increase the chance of losing control of the vehicle if there is a sudden loss of tire air pressure. Losing control of the vehicle may cause a collision and result in personal injury.
•Thevehiclegenerallymovesorpulls inthedirectionoftheflattire.
- Donotrapidlyapplythebrakes.
- Donotrapidlyreleasetheacceleratorpedal.
- Donotrapidlyturnthesteering wheel.
- Remaincalmanddonotoverreact.
- Maintain a firm grip on the steering wheel with both hands and try to hold a straight course.
- When appropriate, slowly releasethe acceleratorpedaltogradually slow the vehicle.
- Graduallysteerthevehicletoasafelocation offtheroadandawayfromtrafficifpossible.
-
Lightly apply the brake pedalt gradually stop the vehicle.
-
Turnonthehazardwarningflashersand eithercontactaroadsideemergencyservice tochangethetireorsee"Changingaflat tire"(P.6-4)ofthisOwner'sManual.
DRINKINGALCOHOL/DRUGSAND DRIVING

WARNING
Neverdriveundertheinfluence of alcoholordrugs. Alcohol in the bloodstream reduces coordination, delays reaction time and impairs judgement. Driving after drinking alcohol increases the likelihood of being involved in accident injurying yourself and others. Additionally, if you are injured in an accident, alcohol can increase severity of the injury.
NISSANiscommittedtosafedriving. However, youmustchoosenottodriveundertheinfluence ofalcohol.Everyearthousandsofpeopleare injuredorkilledinalcohol-relatedaccidents. Although the local laws vary on what is consideredtobelegallyintoxicated, the fact is that alcohol affects all peopled differently and most people underestimate the effect of alcohol.
Remember, drinking and driving don't mix! And that istrue for drugs, too (over-the-counter, prescription, and illegal drugs). Don't drive if your ability to operate your vehicle is impaired by alcohol, drugs, or some other physical condition.
DRIVINGSAFETYPRECAUTIONS
Yourvehicleisdesignedforbothnormalandoff-roaduse. However, avoiddrivingindeepwater ormudasyourvehicleismainlydesignedfor leisureuse, unlikeaconventionaloff-road vehicle.
Remember that Two-WheelDrive(2WD) models are less capable than All-WheelDrive (AWD) models for rough road driving and extrication when stuck in deep snow, mud, or the like.
Pleaseobservethefollowingprecautions:

WARNING
- Drivecarefullywhenofftheroad andavoiddangerousareas.Every personwhodrivesorridesinthis vehicleshouldbeseatedwiththeir seatbeltfastened.Thiswillkeep youandyourpassengersinposition whendrivingoverroughterrain.
- Donotdriveacrosssteepslopes. Insteaddriveeitherstraightupor straightdowntheslopes. Off-road vehiclescantipoversidewaysmuch moreeasilythantheycanforwardor backward.
- Manyhillsaretoosteepforany vehicle.Ifyoudriveupthem,you maystall.Ifyoudrivedownthem, youmaynotbeabletocontrolyour speed.Ifyoudriveacrossthem,you mayrollover.
- Donotshiftrangeswhiledrivingon downhillgradesasthiscouldcause lossofcontrolofthevehicle.
- Stayalertwhendrivingtothetopof ahill.Atthetoptherecouldbeadrop-offorotherhazardthatcouldcauseanaccident.
-
If you'renginestallsoryoucannot make it to the top of fasteephill, never attempt to turnaround. Your vehicle could tip or rollover. Always back straight down in R (Reverse) range. Never back down in N (Neutral), using only the brake, ast his could cause loss of control.
-
Heavybrakinggoingdownahill could cause your brake to overheat and fade, resulting in loss of control and an accident. Apply brakes lightly and use a low range to control your speed.
●Unsecuredcargocanbethrown aroundwhendrivingoverrough terrain.Properlysecureallcargo soitwillnotbethrownforward andcauseinjurytoyouoryour passengers.
•Toavoidraisingthecenterofgravity excessively,donotexceedtherated capacityoftheroofrack(ifso equipped)andevenlydistributethe load.Secureheavyloadsinthe cargoareaas farforwardand as lowaspossible.Donotequipthe vehiclewithtireslargerthanspecifiedinthismanual.Thiscouldcause yourvehicletorollover. -
Donotgriptheinsideorspokesof thesteeringwheelwhendrivingoff-road. Thesteeringwheelcould movesuddenly and injureyour hands. Instead drivewith your fingers and thumbson the outside of therim.
-
Beforeoperatingthevehicle,ensure thatthedriverandallpassengers havetheirseatbeltsfastened.
•Alwaysdrivewiththefloormatsin placeasthefloormaybecamehot. - Loweryourspeedwhenencounter- ingstrongcrosswinds.Withahigher centerofgravity,yourvehicleis moreaffectedbystrongsidewinds. Slowerspeedsensurebettervehicle control.
- Donotdrivebeyondtheperformancecapabilityofthetires,even withAWDengaged.
- For AWDequipped vehicles, donot attempt toraisetwowheel soff the ground and shift the transmission to any drive or reverse position with the engineer running. Doings may result in drivetrain damage or un-expected vehicle movement which could result in serious vehicleda- damage or personal injury.
- DonotattempttotestanAWD equippedvehicleona2-wheeldynamometer(suchasthedynamometers used by some states for emissionstesting),orsimilarequip-
PUSH-BUTTONIGNITIONSWITCH
menteveniftheothertwowheels areraisedofftheground.Makesure youinformtestfacilitypersonnel thatyourvehicleisequippedwith AWDbeforeitisplacedona dynamometer.Usingthewrongtest equipmentmayresultindrivetrain damageorunexpectedvehicle movementwhichcouldresultin seriousvehicledamageorpersonal injury.
- Whenawheelisoffthegrounddue toanunlevelsurface, donotspin thewheelexcessively (AWDmodel).
- Accelerating quickly, sharpsteering maneuvers sudden braking may cause loss of control.
- Ifatallpossible, avoid sharp turning maneuvers, particularly at high speeds. Your vehicle has a higher center of gravity than a conventional passenger car. The vehicle is not designed for cornering at the same speeds as conventional passenger cars. Failure to operate this vehicle correctly could result in loss of control and/or rollover accident.
●Alwaysusetiresofthesametype, size,brand,construction(bias,bias-
beltedorradial), andtreadpattern onallfourwheels.Installtraction devicesonthefrontwheelswhen drivingonslipperyroadsanddrive carefully.
- Besuretocheckthebrakesimmediatelyafterdrivinginmudorwater. See"Brakesystem"(P.5-35)forwet brakes.
- Avoidparkingyourvehicleonsteep hills.Ifyougetoutofthevehicle anditrollsforward,backwardor sideways,youcouldbeinjured.
- Whenever you drive off-road throughsand,mudorwaterasdeep asthewheelhub,morefrequent maintenancemayberequired.See themaintenancescheduleshownin the"9.Maintenanceandschedules" section.
- Spinningthefrontwheelsonslip-perysurfacesmaycausetheAWD warninglighttoflashandtheAWD systemtoautomaticallyswitchfrom theAWDmodetothe2WDmode. Thiscouldreducetraction.

WARNING
Donotoperatethepush-buttonignition switchwhiledrivingthevehicleexcept inanemergency.(Theenginewillstop whentheignitionswitchispushed3 consecutivetimesortheignitionswitch is pushed and held for more than 2 seconds.)Iftheenginestopswhilethe vehicleisbeingdriven,thiscouldlead toacrashandseriousinjury.
Before operating the push-button ignition switch, besuretomovetheshiftlevertotheP (Park) position(for Continuously Variable Transmission models) ortheshiftlevertotheN (Neutral) position(formanualtransmission models).
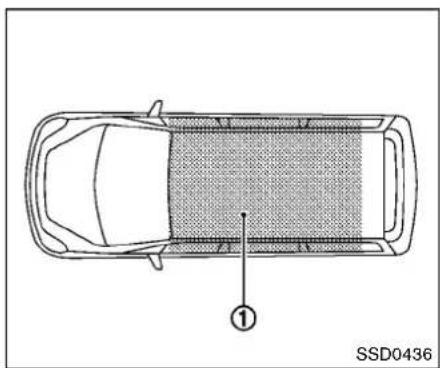
natural_image
Top-down line drawing of a car with a grid-patterned roof and labeled component (no text or symbols beyond label)WhenthelIntelligentKeybatteryisalmost dischargedorstrongradiowavesarepresent neartheoperatinglocation,thelIntelligentKey system'soperatingrangebecomesnarrower andmaynotfunctionproperly.
IfthelIntelligentKeyiswithintheoperating range,itispossibleforanyone,evensomeone whodoesnotcarrytheIntelligentKey,topush theignitionswitchtostarttheengine.
- Thecargoroomareaisnotincludedinthe operatingrangebuttheIntelligentKeymay function.
- If the Intelligent Key is placed on the instrument panel, insidethegloveboxor doorpocket, the Intelligent Key may not function.
- If the Intelligent Key is placed near the door or window outside the vehicle, the Intelligent Key may function.
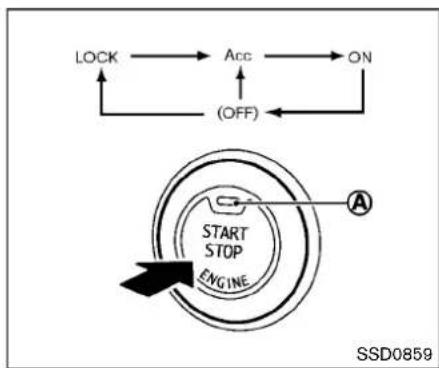
flowchart
graph TD
    A["LOCK"] --> B["Acc"]
    B --> C["ON"]
    D["(OFF)"] --> B
    E["START STOP ENGINE"] --> F["A"]
    style E fill:#f9f,stroke:#333
    style F fill:#ccf,stroke:#333
PUSH-BUTTONIGNITIONSWITCH OPERATION
When the ignitions switch is pushed without depressing the brake pedal (Continuously Variable Transmission models) or the clutch pedal (manual transmission models), the ignition switch position will change as follows:
- PushoncetochangetoACC.
●PushtwotimestochangetoON. - PushthreetimestochangetoOFF.
- PushfourtimestoreturntoACC.
- OpenorcloseanydoortoreturntoLOCK duringtheOFFposition.
Theindicatorlight Ⓐ ontheignitionswitch
5-10 Startinganddriving
illuminateswhentheignitionswitchisinthe ACCorONposition.
Someindicatorsandwarningsforoperationare displayedonthemeter.(See "Warninglights, indicatorlightsandaudiblereminders"(P.2-15).)
ContinuouslyVariableTransmission models
Theignitionlockisdesignedsothattheignition switchpositioncannotbeswitchedtoLOCK untilheshiftleverismovedtotheP(Park) position.
Whentheignitionswitchcannotbepushed towardtheLOCKposition,proceedasfollows:
-
MovetheshiftleverintotheP(Park) position.
-
PushtheignitionswitchtotheOFFposition.
-
Openthedoor. Theignitionswitchwill changetotheLOCKposition.
TheshiftlevercanbemovedfromtheP (Park)positioniftheignitionswitchisin theONpositionandthebrakepedalis depressed.
PUSH-BUTTONIGNITIONSWITCH POSITIONS
LOCK(Normalparkingposition)
Theignitionswitchcanonlybelockedinthis position.
Theignitionswitchwillbeunlockedwhenitis pushedtotheACCpositionwhilecarryingthe IntelligentKey.
ACC(Accessories)
Thispositionactivateselectricalaccessories suchastheradio,whentheengineisnot running.
ON(Normaloperatingposition)
This position turns on the ignition system and electrical accessories.
OFF
Theenginecanbeturnedoffinthisposition.
ContinuouslyVariableTransmissionmodels:The ignitionlockisdesignedsothattheignition switch cannot be switched to the LOCK position untilheshiftleverismovedtotheP(Park) position.

CAUTION
Donotleavethevehiclewiththepush-buttonignitionswitchinACCorON positionwhentheengineisnotrunning foranextendedperiod.Thiscandis-chargethebattery.
EMERGENCYENGINESHUTOFF
Toshutofftheengineinanemergencysituation whiledriving,performthefollowingprocedure:
- Rapidly push the push-button ignition switch 3 consecutive times in less than 1.5 seconds, or
- Pushandholdthepush-buttonignition switchformorethan2seconds.

natural_image
Illustration of a hand holding a circular device with a knob, alongside a close-up of the grip (no text or symbols)INTELLIGENTKEYBATTERYDISCHARGE
If the battery of the Intelligent Key is discharged, environmental conditions interferewith the Intelligent Key operation, start the engine according to the following procedure:
- MovetheshiftlevertotheP(Park)position (for ContinuouslyVariableTransmission models)ortheshiftlevertotheN(Neutral) position(formanualtransmissionmodels).
- Firmly apply the footbrake.
- Touchtheignitionswitchwiththelntelligent Keyasillustrated.(Achimewillsound.)
5-12 Startinganddriving
- Push the ignitions switch while depressing the brake pedal within 10 seconds after the chimesounds. The engine will start.
Afterstep3isperformed,whentheignition switchispushedwithoutdepressingthebrake pedal,theignitionswitchpositionwillchangeto ACC.
NOTE:
- Whentheignitionswitchispushed to theACCorONpositionortheengineis startedbytheaboveprocedures,the IntelligentKeysystemwarninglight mayblinkinyellowevenifththeIntelligent Key is inside the vehicle. This is notamalfunction.Tostopthewarning light from blinking,touchtheignition switchwiththelntelligentKeyagain.
- If the Intelligent Keysystem warning lightinthemeterisblinking green, replacethe battery as soon as possible. (See "Intelligent Key battery replacement" (P.8-20).)
BEFORESTARTINGTHEENGINE
- Makesuretheareaaroundthevehicleis clear.
- Checkfluidlevelssuchasengineoil,coolant,brakefluid,andwindowwasherfluidas frequentlyaspossible,oratleastwhenever yourefuel.
- Check that all windows and lights are clean.
- Visually inspect tires for their appearance and condition. Also check tires for proper inflation.
- Lockalldoors.
- Positionseatandadjustheadrestraints.
-Adjustinsideandoutsidemirrors. - Fastenseatbeltsandaskallpassengersto dolikewise.
- Checktheoperationofwarninglightswhen the ignition switch is placed in the ON position.(See"Warning lights,indicator lightsandaudiblereminders"(P.2-15).)
STARTINGTHEENGINE
- Apply the parking brake.
2.MovetheshiftlevertotheP(Park)orN (Neutral)position.(Pisrecommended.)
Thestarterisdesignednottooperateunless theshiftleverisineitheroftheabove positions.
ManualTransmission(MT)models:
MovetheshiftlevertotheN(Neutral) position.Depresstheclutchpedalfully to thefloor.
Thestarterisdesignednottooperateunless theclutchpedalisfullydepressed.
The Intelligent Key must be carried when operating the ignitions switch.
- Push the ignitionswitch to the ON position. Depressthebrakepedal (CVT models) or the clutch pedal (MT models) and push the ignitionswitch to start the engine.
Tostarttheengineimmediately,pushand releasetheignitionswitchwhiledepressing thebrakepedal(CVTmodels)ortheclutch pedal(MTmodels)withtheignitionswitchin anyposition.
- Iftheengineisveryhardtostartin extremelycoldweatherorwhenrestarting,depresstheacceleratorpedalalittle (approximately1/3tothefloor)andwhile holding,cranktheengine.Releasethe
acceleratorpedalwhentheenginestarts.
- Iftheengineisveryhardtostartbecause itsflooded,depresstheaccelerator pedalallthewaytothefloorandholdit. PushtheignitionswitchtotheON positiontostartcrankingtheengine. After5or6seconds,stopcrankingby pushingtheignitionswitchtoOFF.After crankingtheengine,releasetheacceleratorpedal.Cranktheenginewithyour footofftheacceleratorpedalby depressingthebrakepedalandpushing thepush-buttonignitionswitchtostart theengine.Iftheenginestarts,butfails torun,repeattheaboveprocedure.

CAUTION
Donotoperatethestarterformore than15secondsatatime.Iftheengine doesnotstart,pushtheignitionswitch toOFFandwait10secondsbefore crankingagain,otherwisethestarter couldbedamaged.
4.Warm-up
Allowtheenginetoidleforatleast30 secondsafterstarting.Donotracethe enginewhilewarmingitup.Driveat
moderatespeedforashortdistancefirst, especiallyincoldweather.Incoldweather, keeptheengineerunningforaminimumof2-3minutesbeforeshuttingitoff.Startingand stoppingtheengineoverashortperiodof timemaymakethevehiclemoredifficultto start.
When racing the engine upto 4,000rpm or more undernoload condition, the engine will enter the fuel cut mode.
- Tostoptheengine, movetheshiftleverto theP(Park)position(CVTmodels)ormove theshiftlevertotheN(Neutral)position(MT models), andpushtheignitionswitchtothe OFFposition.
NOTE:
Careshouldbetakentoavoidsituations thatcanleadtopotentialbatterydischarge andpotentialno-startconditionssuchas:
-
Installationorextendeduseofelectronicaccessoriesthatconsumebattery powerwhentheengineisnotrunning (Phonechargers,GPS,DVDplayers, etc.)
-
Vehicle is not driven regularly and/or only drivenshort distances.
In these cases, the battery may need to be charged to maintain battery health.
Startinganddriving5-13
DRIVINGTHEVEHICLE
CONTINUOUSLYVARIABLETRANSMISSION(CVT)
The Continuously Variable Transmission(CVT) in your vehicle is electronically controlled to produce maximum power and smooth operation.
Therecommendedoperatingproceduresforthis transmissionareshownonthefollowingpages. Followtheseproceduresformaximumvehicle performanceanddrivingenjoyment.
EnginepowermaybeautomaticallyreducedtoprotecttheCVTiftheengine speedincreasesquicklywhendrivingon slipperyroadsorwhilebeingtestedon somedynamometers.
Startingthevehicle
- After starting the engine, fully depress the footbrakepedal before moving the shift lever out of the P(Park) position.
ThisCVTisdesignedsothatthefoot brakepedalmustbedepressedbefore shiftingfromP(Park)toanydriving positionwhiletheignitionswitchisin theONposition.
Theshiftlevercannotbemovedoutof theP(Park)positionandintoanyof theotherpositionsiftheignition switchisplacedintheLOCK,OFFFor ACCpositionorifthekeyisremoved.
5-14 Starting and driving
-
Keep the foot brake pedal depressed, push the shift lever button and moveth shift lever to driving position.
-
Releasetheparkingbrake and footbrake pedal, and thengradually start the vehicle in motion.

WARNING
- Donotdepress the accelerator pedalwhile shifting from P(Park) or N(Neutral) to R(Reverse), D(Drive), or manual shift mode (if so equipped). Always depress the brake pedal until shift is completed. Failure todos could cause youtolose control and have an accident.
- Coldengineidlespeedishigh,so usecautionwhenshiftingintoa forwardorreversegearbeforethe enginehaswarmedup.
- NevershifttoeithertheP(Park)orR(Reverse)positionwhilevehicleismovingforwardandP(Park)orD(Drive)whilethevehicleisreversing.Thiscouldcauseanaccidentordamagethetransmission.
- Donotdownshiftabruptlyonslipperyroads. This may cause all loss of control.

CAUTION
- To avoid possible damage to your vehicle; when stopping the vehicle on an uphill grade, donothold the vehicle by depressing the accelerator. The footbrakes should be used for this purpose.
- Exceptinanemergency, donotshift totheN(Neutral)positionwhile driving. Coasting with the transmission in the N(Neutral)position may cause serious damage to the transmission.

flowchart
graph TD
    A["Input"] --> B["Mode"]
    B --> C{+}
    C --> D["M"]
    D --> E["D"]
    E --> F["Output"]
    style A fill:#f9f,stroke:#333
    style B fill:#ccf,stroke:#333
    style C fill:#cfc,stroke:#333
    style D fill:#fcc,stroke:#333
    style E fill:#cff,stroke:#333
    style F fill:#ffc,stroke:#333
Tomovetheshiftlever,

Pushthebutton
brakepedal.

whiledepressingthe

Pushthebutton


Justmovetheshiftlever.
Shifting
Afterstartingtheengine,fullydepressthebrake pedal,pushtheshiftleverbuttonandmovethe shiftleverfromtheP(Park)positiontoanyofthe desiredshiftpositions.

WARNING
Applytheparkingbrakeiftheshiftlever isinanypositionwhiletheengineis notrunning.Failuretodosocould causethevehicletomoveunexpectedly orrollawayandresultinserious personalinjuryorpropertydamage.
IftheignitionswitchisplacedintheOFFor
ACCpositionforanyreasonwhiletheshiftlever isinanypositionsotherthantheP(Park),the ignitionswitchcannotbeplacedintheLOCK position.
Iftheignitionswitchcannotbeplacedinthe
LOCKposition, perform the following steps:
-
Apply the parking brakewhenthe vehicle is stopped.
-
PlacetheignitionswitchintheONposition whiledepressingthefootbrakepedal.
3.MovetheshiftlevertotheP(Park)position.
- PlacetheignitionswitchintheOFFposition.

CAUTION
Topreventtransmissiondamage,move theshiftlevertotheP(Park)orR (Reverse)positiononlywhenthevehicleiscompletelystopped.
P(Park):
Use this position when the vehicle is parked or when starting the engine. Makes sure the vehicle is completely stopped. The brake pedal must be depressed and the shift lever button pushed into movetheshift lever from N (Neutral) or any drive position to P (Park). Apply the parking brake. When parking on a hill, apply the parking brake first, then movetheshift levert to the P (Park) position.
R(Reverse):
Use this position to backup. Makes sure the vehicle is completely stopped before selecting the R (Reverse) position. The brake pedal must be depressed and the shift lever button pushed into moveth shift lever from Park, N (Neutral) or any driving position to R (Reverse).
N(Neutral):
Neitherforwardnorreversegearisengaged. Theenginecanbestartedinthisposition.You mayshifttoN(Neutral)andrestartastalled enginewhilethevehicleismoving.
D(Drive):
Use this position for all normal forward driving.
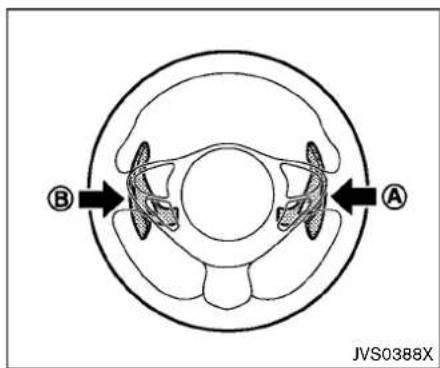
Paddleshifter(ifsoequipped)
Manualshiftmode(ifsoequipped)
WhentheshiftleverisshiftedfromtheD(Drive) positiontothemanualshiftgate, thetransmissionentersthemanualshiftmode.Shiftranges canbeselectedmanuallybymovingtheshift leverupordown, orpullingtheright-sideorleft-sidepaddleshifter(ifsoequipped).
Inthemanualshiftmode, theshiftrangeis displayed on thepositionindicatorinthemeter.
Shiftrangesupordownonebyoneasfollows:
ExceptforNISMORSmodels:
M1 → M2 → M3 → M4 → M5 → M6 → M7
NISMORSmodels:
M1 → M2 → M3 → M4 → M5 → M6 → M7 → M8
- Whenshiftingup, movetheshiftlevertothe +(up)sideorpulltheright-sidepaddle shifter(+) Ⓐ (ifsoequipped). The transmissionshiftstoahigherrange.
- Whenshiftingdown, movetheshiftleverto the- (down)sideorpulltheleft-sidepaddle shifter(-) Ⓑ (ifsoequipped). The transmissionshiftstoalowerrange.
- Movingtheshiftlevertothesamesidetwice willshifttherangesinsuccession. However, ifthismotionisrapidlydone,thesecond shiftingmaynotbecompletedproperly.
- When canceling the manual shift mode, return the shift lever to the D (Drive) position. The transmission returns to the normal driving mode.
- When you pull the paddle shifter (if so equipped) while intheD(Drive) position, the transmission will shift to the upper or lower range temporarily. The transmission will automatically return to the D(Drive) position
afterashortperiodoftime.Ifyouwantto returntotheD(Drive)positionmanually,pull andholdthepaddleshifterforabout1.5 seconds.
M7(7th)(exceptforNISMORSmodels):
M8(8th)(NISMORSmodels):
Use this position for all normal forward driving at highways speeds.
M6(6th)andM5(5th)(exceptforNISMO RSmodels):
M7(7th)andM6(6th)(NISMORSmodels):
Usethesepositionswhendrivinguplong slopes,orforenginebrakingwhendrivingdown longslopes.
M4(4th), M3(3rd) and M2(2nd) (except for NISMORS models):
M5(5th), M4(4th), M3(3rd) and M2(2nd) (NISMORSmodels):
Usethesepositionsforhillclimbingorengine brakingondownhillgrades.
M1(1st):
Use this position when climbing steep hills slowly or drivings slowly through deep snow, sandormud, or maximum engine braking on steep downhill grades.
- Remembernottodriveathighspeedsfor extendedperiodsoftimeinlowerthanM7 (exceptforNISMORSmodels)orM8 (NISMORSmodels)range. This reduces fueleconomy.
•Inthemanualshiftmode, the transmission may not shift to these selected range. This helps maintain driving performance and reduce the chance of vehicle damage or loss of control. Whenthissituation occurs, the Continuously Variable Transmission (CVT) position indicator light will blink and the chimewill sound.
- Inthemanualshiftmode, the transmis-sion automatically shifts down to 1st gear before the vehicle comesto a stop. When accelerating again, it is necessary to shift up to the desired range.
- WhentheCVTfluidtemperatureisextremelylow,themanualshiftmodemaynot workandautomaticallyshiftasadrivemode. Thisisnotamalfunction.Inthiscase,return theshiftlevertotheD(Drive)positionand driveforwhileandthenshifttothemanual shiftmode.
- When the CVT fluid temperature is high, the shift rangemayupshift tatalower engine speed than unusual. This is not a malfunction.
Acceleratordownshift—InDposition—
Forpassingorhillclimbing,fullydepressthe acceleratorpedaltothefloor.Thisshiftsthe transmissiondownintoalowergear,depending onthevehiclespeed.
Highfluidtemperatureprotectionmode
Thistransmissionhasahighfluidtemperature protectionmode.Ifthefluid temperaturebecomes too high (for example, when climbing steepgradesinhighttemperaturewithheavy loads),enginepowerand,undersoneconditions, vehicle speed will be decreased automaticallytoreducethechanceoftransmission damage.Vehiclespeedcanbecontrolledwith theacceleratorpedal,buttheengineandvehicle speedmaybelimited.
Fail-safe
If the vehicle is driven under extreme conditions, such as excessive wheel-spinning and subsequent hard braking, the fail-safesystem may be activated. The MIL may illuminate to indicate the fail-safe mode is activated. (See "Malfunction Indicator Light(MIL)" (P.2-22).) This will occur even if all electrical circuits are functioning properly. In this case, place the ignition switch in the OFF position and wait for 10 seconds. Thenturntheswitch
Startinganddriving
backtotheONposition.Thevehicle shouldreturntoitsnormaloperating condition.Ifitdoesnotreturntoitsnormal operatingcondition,havethetransmission checkedandrepaired,ifnecessary.Itis recommendedyouvisitaNISSANdealer forthisservice.

WARNING
Whenthehighfluidtemperatureprotectionmodeorfail-safeoperation occurs, vehiclespeedmaybegradually reduced. Thereducedspeedmaybe lowerthanothertraffic, which could increasethechanceofacollision. Be especially carefulwhendriving. If necessary, pulltothesideoftheroadata safeplace and allow the transmission to return on normal operation, or have it repaired if necessary.
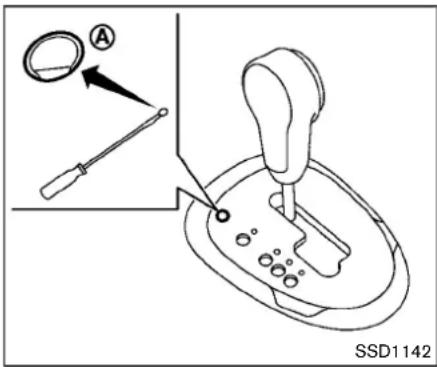
Shiftlockrelease
If the battery charge is low word discharged, the shift lever may not be removed from the Park position even with the brake pedal depressed and the shift lever button pushed.
Tomovetheshiftlever, perform the following procedure:
- PlacetheignitionswitchintheOFFFor LOCKposition.
- Apply the parking brake.
- Removetheshiftlockreleasecover usingasuitabletool.
A
4.Pushdowntheshiftlockreleaseusinga suitabletool.
5. Pushtheshiftleverbuttonandmovethe shiftlevertotheN(Neutral)positionwhile holdingdowntheshiftlockrelease.
PlacetheignitionswitchintheONposition.The vehiclemaybemovedtothedesiredlocation.
Replacetheremovedshiftlockreleasecover aftertheoperation.
If the battery is discharged completely, the steering wheel cannot be unlocked. Donot mov the vehicle with the steering wheel locked.
IftheshiftlevercannotbemovedoutoftheP (Park)position,havetheCVTsystemchecked as soonaspossible.Itisrecommendedyouvisit aNISSANdealerforthisservice.

WARNING
If the shift lever cannot be removed from the P(Park) position while the engine is running and the brake pedal is depressed, the stoplights may not work. Malfunctioning stoplights could cause an accident in juring yourself and others.
MANUALTRANSMISSION(MT)

WARNING
- Donotdownshiftabruptlyonslip-peryroads. This may cause all loss of control.
- Donotover-revtheenginewhen shiftingtoalowergear. This may cause alossof controlorengine damage.
- When the high fluid temperature protection mode or fail-safe operation occurs, vehicles speed maybe gradually reduced. The reduced speed may below another traffic, which could increase the chance of a collision. Beespecially careful when driving. If necessary, pull to the side of the road at a safe place and allow the transmission to return on normal operation, or have it repaired if necessary.

CAUTION
- Donotrestyourfootontheclutch pedalwhiledriving. This may damage theclutch.
- Fullydepresstheclutchpedalbeforeshiftingtohelppreventtransmissiondamage.
- Stopyourvehiclecompletelybefore shiftingintoR(Reverse).
- Whenthevehicleisstoppedfora periodoftime,forexampleatastop light,shifttoN(Neutral)andrelease theclutchpedalwiththefootbrake applied.
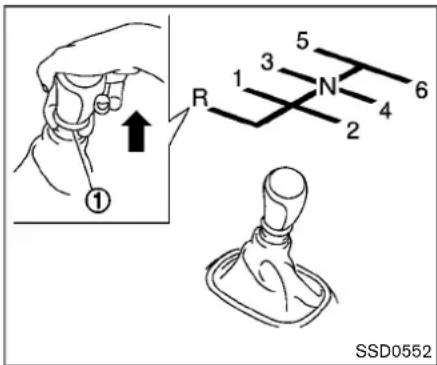
Shifting
Tochangegears,orwhenupshiftingordown-shifting,fullydepresstheclutchpedal,shiftinto theappropriategear,thenslowlyandsmoothly releasetheclutchpedal.
Toensuresmoothgearchanges,besuretofully depresstheclutchpedalbeforeoperatingthe shiftlever.Iftheclutchpedalisnotfully depressedbeforethetransmissionisshifted,a gearnoisemaybeheard.Transmissiondamage couldoccur.
Startthevehiclein1stgearandshiftto2nd, 3rd,4th,5thand6thgearinsequenceaccordingtovehiclespeed.
Tobackup, pulltheshiftlevering ① upward and thenmoveittotheR(Reverse)gearafter stoppingthevehiclecompletely.
Theshiftleveringreturnstoitsoriginalposition whentheshiftleverismovedtotheN(Neutral) position.
IfitisdifficultomovetheshiftleverintotheR (Reverse)or1stgear, shifttotheN(Neutral) position, and then releasetheclutchpedalonce. Fully depress theclutchpedalagain and shift intotheR(Reverse)or1stgear.
Suggestedupshiftspeeds
The following aresuggested vehicles speeds for shifting into a higher gear. Thesesuggestions relatetofueleconomy and vehicle performance. Actual upshifts speed will vary according to road conditions, the weather and individual driving habits.
| Gearchange | MPH(km/h) |
| 1stto2nd | 13(21) |
| 2ndto3rd | 22(35) |
| 3rdto4th | 30(48) |
| 4thto5th | 35(56) |
| 5thto6th | 42(68) |
Suggestedmaximumspeedineachgear
| Downshifttoalowergeariftheengineisnot runningsmoothly,orifyouneedtoaccelerate. Donotexceedthemaximumsuggestedspeed (shownbelow)inanygear.Forlevelroad driving,usethehighestgearsuggestedforthat speed.Alwaysobservepostedspeedlimits,and driveaccordingtotheroadconditions,which willensuresafeoperation.Donotover-revthe enginewhenshiftingtoalowergearasitmay causeenginedamageorlossofvehiclecontrol. |
ExceptforNISMORSmodels:
| Gear | MPH(km/h) |
| 1st | 31(50) |
| 2nd | 55(88) |
| 3rd | 76(122) |
| 4th | — |
| 5th | — |
| 6th | — |
ForNISMORSmodels:
| Gear | MPH(km/h) |
| 1st | 27(44) |
| 2nd | 50(80) |
| 3rd | 73(118) |
| 4th | — |
| 5th | — |
| 6th | — |
INTEGRATEDCONTROLSYSTEM(if soequipped)
TheIntegratedControlSystemislocatedbelow theaudiosystemornavigationsystem(ifso equipped).TwointegratedControlSystem modescanbeselected:Drivemode and ClimateControlmode.
DependingonwhichIntegratedControlSystem modeselected(DrivemodeorClimateControl mode),thescreendisplayandsomebutton functionswillchange.
- Drivemode
IntheDrivemode, three types of driving modescanbeselected: NORMAL, SPORT and ECO. See "Drivemode" (P.5-22). In addition, while in the Drivemode, SETUP, Driveinformation and ECO information can be displayed and adjusted. See "Integrated control system" (P.2-24).
•ClimateControlmode
IntheClimateControlmode, theclimate control can be set and adjusted. See "Automatic air conditioner (with Integrated Control System)" (P.4-32).

- NORMALdrivemodebutton
2.Climatecontrolmodeselectbutton
3.Drivemodeselectbutton
4.SETUPbutton
5.SPORTdrivemodebutton
6.ECOdrivemodebutton
7.Displayscreen
8.Enterbutton/Selectiondial
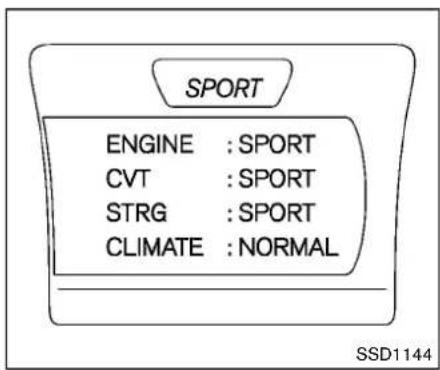
Example
DRIVEMODE
Threedrivemodes(NORMAL,SPORTand ECO)canbeselecteddependingonthedriving condition. Wheneachmodeisselected, the controlstateoftheengine, CVT (ifso equipped), steeringandclimateappearson thedisplaybriefly.
EachselectedDrivemode(NORMAL,SPORT or ECO)isdisplayedatthetopofthedisplay screen.
NOTE:
- Thedisplayvaluesoftorque,boostand currentfueleconomymaydifferdependingondrivingconditions.Usethe
5-22 Startinganddriving
displayvaluesasreferenceonly. •ThevehiclewillbesettotheNORMAL drivemodewhenrestartingtheengine.
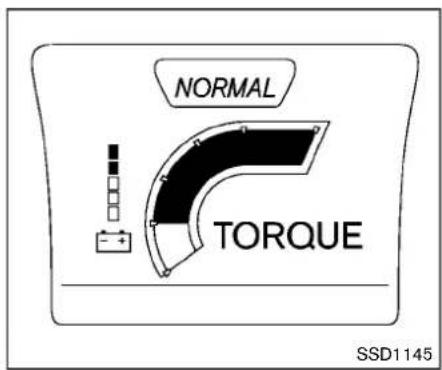
NORMALdrivemode
TheNORMALdrivemodeisrecommendedfor normaldriving.TosettheNORMALdrivemode, presstheDrivemodeselectbuttonandthen presstheNORMALdrivemodebutton.The controlstateoftheengine,CVT(ifsoequipped) steeringandclimateisdisplayedbriefly.
When the NORMAL drivemode is selected, a voltagemeter and an enginetorquemeter appear on the display screen.
NOTE:
- Thevoltagemetermaychangeaccordingtothedrivingcondition. Thisisnot amalfunction.
- Atstartup, the vehicle is automatically set to the NORMAL drivemode.
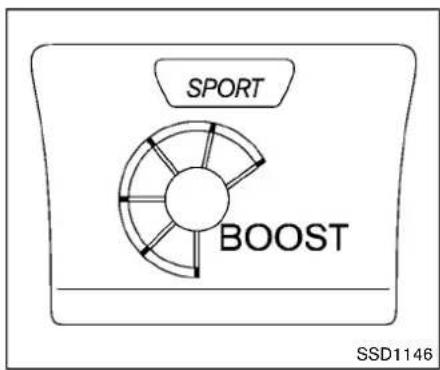
NOTE: IntheSPORTmode,fueleconomymaybe reduced.
SPORTdrivemode
TheSPORTdrivemodeisrecommendedforan enhancedperformancefeel.TosetheSPORT drivemode,pressthedrivemodeselectbutton. Thecontrolstateoftheengine,CVT(ifso equipped),steeringandclimatecontrolis displayedbriefly.IntheSPORTmode,the engine,CVT(ifsoequipped)andsteeringare settoSPORT.Climatecontrolissetto NORMAL.
WhentheSPORTdrivemodeisselected, a boostmeterappearsonthedisplayscreen.
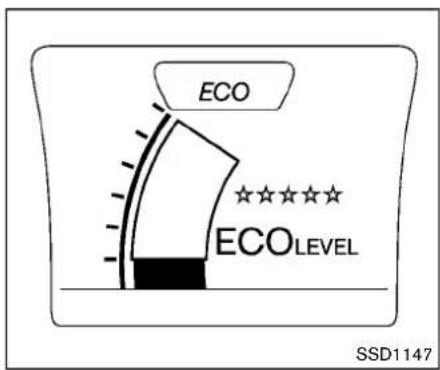
ECOdrivemode
The ECO drivemode is recommended for maximum fueleconomy. In the ECO drivemode, the engine and CVT (if soe equipped) are adjusted to enhance fueleconomy.
TosettheECOdrivemode, press the drive modes e select button and then press the ECO drivemode button. The control state of the engine, CVT (ifsoe equipped), steering and climate control is displayed briefly.
WhentheECOdrivemodeisselected,the currentfueleconomyappearsonthedisplay screen.
WhentheclimateECOmodeisalsoswitched
5-24Startinganddriving
on, theclimatecontrolsystemisadjustedto furtherenhancefueleconomy.
TheclimateECOmodecanbeswitchedonor offintheSETUPmode.See"Settingtheclimate ECOmode"(P.5-24).
NOTE:
- Manydrivingfactorsinfluencefuel economy. SelectingtheECOdrive modemaynotimprovefueleconomy.
•IntheECOdrivemode,performance maybereduced.

flowchart
graph TD
    A["NORMAL"] --> B["Select Units"]
    B --> C["ClockTime Setting"]
    C --> D["CLIMATE ECO"]
    D --> E["A"]
SettingtheclimateECOmode:
WhentheclimateECOmodeisswitchedon, theclimatecontrolsystemoperatestoenhance fueleconomy.
ToturntheclimateECOmodeonoroff
- Pressthedrivemodeselectbuttontoselect thedrivemode.
- PresstheSETUPbutton.
- Turntheselectiondialuntil"CLIMATEECO" isselected.
- Press the ENTER button to switch climate ECO onoroff. When the CLIMATEECO modeisturnedon, the CLIMATE ECO indicator Ⓐ turnsredonthedisplay
PARKINGBRAKE

WARNING
- Besuretheparkingbrakeisfully releasedbeforedriving.Failureto dosocancausebrakefailureand leadtoanaccident.
- Donotreleasetheparkingbrake fromoutsidethevehicle.
- Donotusetheshiftleverinplace of theparkingbrake. When parking, be sure the parking brake is fully engaged.
•Tohelpavoidriskofinjuryordeath throughunintendedoperationof thevehicleand/oritssystems,do notleavechildren,peoplewhore-quiretheassistanceofothersor petsunattendedinyourvehicle. Additionally,thetemperatureinside aclosedvehicleonawarmdaycan quicklybecomehighenoughto causeasignificantriskofinjuryor deathtopeopleandpets.
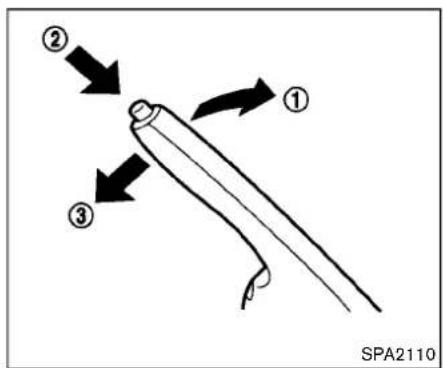
Toapply: Pull the parking brake leverup ①.
Torelease:
- Firmlyapplythefootbrake.
- While pulling up on the parking brake lever slightly, push the button ② and lower the lever completely ③.
- Before driving, besure the brakewarning light goes out.
CRUISECONTROL
PRECAUTIONSONCRUISECONTROL
- If the cruise controlsystem malfunctions, it will cancel automatically. The CRUISE indicator light on themeter panel will then blink to warn the driver.
- If the engine coolant temperature becomes excessively high, the cruise control system will cancel automatically.
- If the CRUISE indicator light blinks, turn the cruise control MAIN switchoff and have the system checked. It is recommended you visit a NISSAN dealer forth this service.
●TheCRUISEindicatorlightmayblinkwhen thecruisecontrolMAINswitchisturnedON whilepushingtheACCEL/RES,COAST/ SETorCANCELswitch.Toproperlysetthe cruisecontrolsystem,performthefollowing procedures.

WARNING
Donotusethecruisecontrolwhen drivingunderthefollowingconditions:
- whenitisnotpossibletokeepthe vehicleatasetspeed
•inheavytrafficorintrafficthat variesinspeed
5-26 Startinganddriving
•onwindingorhillyroads
- onslipperyroads(rain,snow,ice, etc.)
•inverywindyareas
Doingsocouldcausealossofvehicle controlandresultinanaccident.

CAUTION
OnManualTransmission(MT)models, donotshiftintoN(Neutral)without depressingtheclutchpedalwhenthe cruisecontrolisset.Shouldthisoccur, depresstheclutchpedalandturnthe MAINswitchoffimmediately.Failureto dosomaycauseengine damage.

- ACCEL/RES switch
2.COAST/SETswitch
3.CANCELswitch
4.MAIN(ON-OFF)switch
CRUISECONTROLOPERATIONS
The cruise control allows driving at a speed between 25 to 89 MPH (40 to 144 km/h) without keeping your foot on the accelerator pedal.
Toturnonthecruisecontrol, push the MAIN switch on. The CRUISE indicator light will illuminate.
Tosetcruisingspeed,acceleratethevehicle tothedesiredspeed,pushtheCOAST/SET switchandreleaseit.Takeyourfootoffthe
acceleratorpedal. Your vehicle will maintain the setspeed.
- Topassanothervehicle, depress the accelerator pedal. When you are a set of the pedal, the vehicle will return to the previously sets speed.
●The vehicle may not maintain the sets speed on winding or hilly roads. If this happens, drivewithout the cruise control.
Tocancelthepresetspeed, useoneofthe followingmethods:
a)PushtheCANCELswitch.
b) Tapthebrakepedal.
c) TurntheMAINswitchoff. The CRUISE indicator lightwillturnoff.
- If you depress the brake pedal while pushing the ACCEL/RES or COAST/SET switch and reset at the cruising speed, the cruise control will disengage. Turn the MAIN switch off once and then turn it on again.
- Thecruisecontrolwillautomaticallycancelif thevehicleslowsmorethan8MPH(13 km/h)belowthesetspeed.
- If you movetheshiftlevertotheN(Neutral) position(ContinuouslyVariableTransmissionmodels)ordepressingtheclutchpedal (ManualTransmissionmodels), the cruise control will be canceled.
Toresetatafastercruisingspeed, useone of the following methods:
- Depress the accelerator pedal. When the vehicleattainsthedesiredspeed,pushand releasetheCOAST/SETswitch.
- PushandholdtheACCEL/RESswitch. Whenthevehicleattainsthedesiredspeed, releasetheswitch.
- Push, then quickly releasetheACCEL/RES switch. Each time you do this, the sets speed will increase by about 1 MPH (1.6 km/h).
Toresetataslowercruisingspeed,useone of the following methods:
●Lightlytapthebrakepedal. Whenthe vehicleattainsthedesiredspeed, pushthe COAST/SETswitchandreleaseit.
- PushandholdtheCOAST/SETswitch. Releasetheswitchwhenthevehicleslows downtothedesiredspeed.
- Push, then quickly releasethe COAST/SET switch. Each time you do this, the sets speed will decrease by about 1 MPH (1.6 km/h).
Toresumethepresetspeed, pushand releasetheACCEL/RESswitch. The vehicle will resumethelastsetcruisingspeed when the vehiclespeed is over 25 MPH (40 km/h).
BREAK-INSCHEDULE

CAUTION
During the first 1,200 miles (2,000 km), follow these recommendations to obtain maximum engine performance and ensure the futurer reliability and economy of your new vehicle. Failure to follow the recommendations may result in shortened engine life and reduced engine performance.
- Avoiddrivingforlongperiodsat constant speed, either fast or slow. Do not run the engineover4,000rpm.
- Donotaccelerateatfullthrottleinanygear.
- Avoidquickstarts.
- Avoidhardbrakingasmuchaspossible.
FUELEFFICIENTDRIVINGTIPS
Followtheseeasy-to-useFuelEfficientDriving Tipstohelpyouachievethemostfueleconomy fromyourvehicle.
- Usesmoothacceleratorandbrakepedal application.
- Avoidrapidstartsandstops.
- Usesmooth, gentleaccelerator and brakeapplicationwheneverpossible.
-
Maintainconstantspeedwhilecommut-ingandcoastwheneverpossible.
-
Maintainconstantspeed.
-
Lookaheadtotryandanticipateand minimizestops.
- Synchronizingyourspeedwithtraffic lightsallowsyoutoreduceyournumber ofstops.
-
Maintainingasteadyspeedcanminimize redlightstopsandimprovefuelefficiency.
-
Use air conditioning (A/C) at higher vehicle speeds.
-
Below40MPH(64km/h), it is more efficient to open window stocool the vehicleduetoreduced engine load.
- Above40MPH(64km/h), it is more efficienttouseA/Ctocoolthevehicle duetoincreasedaerodynamicdrag.
• Recirculating the cool air in the cabin when the A/Cison reduces cooling load.
-
Driveateconomicals speeds and distances.
-
Observing the speed limit and not exceeding 60 MPH (97 km/h) (where legally allowed) can improve fuel efficiency due to reduced aerodynamic drag.
- Maintaining as safe following distance behind other vehicles reduces unnecessary braking.
- Safelymonitoringtrafficioanticipate changesinspeedpermitsreducedbrakingandsmoothaccelerationchanges.
-
Selectagearrangesuitabletoroad conditions.
-
Usecruisecontrol.
• Usingcruise controlduringhighway drivinghelpsmaintainasteadyspeed.
- Cruisecontrolisparticularlyeffectivein providingfuelsavingswhendrivingon flatterrains.
-
Planfortheshortestroute.
-
Utilizeamapornavigationsystemto determinethebestroutetosavetime.
-
Avoididling.
- Shuttingoffyourenginewhensafefor stopsexceeding30-60secondssaves
fuelandreducesemissions.
- Buyanautomatedpassfortollroads.
- Automatedpassespermitdriverstouse speciallanestomaintaincruisingspeed throughthetollandavoidstoppingand starting.
-
Winterwarmup.
-
Limitidlingtimetominimizeimpacttofuel economy.
- Vehiclestypicallyneednomorethan30 secondsofidlingatstart-uptoeffectively circulatetheengineoilbeforedriving.
-
Yourvehiclewillreachitsidealoperating temperaturemorequicklywhiledriving versusidling.
-
Keeping your vehicle cool.
-
Parkyourvehicleinacoveredparking areaorintheshadewheneverpossible.
- Whenenteringahotvehicle, opening the windowswillhelptoreducetheinside temperaturefaster, resultinginreduced demandonyourA/Csystem.
INCREASINGFUELECONOMY
- Keepyourenginetunedup.
- Followtherecommended scheduled maintenance.
- Keep the tires inflated to the correct pressure. Low tire pressure increases are wear and lowers the fuel economy.
- Keepthewheelsincorrectalignment. Improperalignmentincreasestirewearand lowersfueleconomy.
- Usetherecommendedviscosityengineoil. (See "Engineoilandoilfilterrecommendation" (P.10-7).)
ALL-WHEELDRIVE(AWD)(ifso equipped)

WARNING
- For AWDequippedvehicles, donot attempttoraisetwowheelsoffthe groundandshiftthetransmissionto anydriveorreversepositionwith theenginerunning.Doingsomay resultindrivetraindamageorun-expectedvehiclemovementwhich couldresultinseriousvehicledamageorpersonalinjury.
- DonotattempttotestanAWD equippedvehicleona2-wheeldynamometer(suchasthedynamometersusedbysomestatesfor emissionstesting)orsimilarequipmenteveniftheothertwowheels areraisedofftheground.Makesure thatyouinformthetestfacility personnelthatyourvehicle is equippedwithAWDbeforeitis placedonadynamometer.Using thewrongtestequipmentmayresultindrivetraindamageorunexpected vehicle movementwhich couldresultinseriousvehicledamageorpersonalinjury.

SSD1129
AWDmodeswitch
ALL-WHEELDRIVE(AWD)MODE SWITCHOPERATIONS
TheAll-WheelDrive(AWD)systemisused to selectthe2WD(Two-WheelDrive),AWD-V or AWDmodedependingonthedrivingconditions.
The AWD mode indicator lights (AWD (green), 📋) are located in the instrument panel. The AWD mode indicator lights AWD (green) illuminate when the ignition switch is placed in the ON position. The indicator light turnoff within 1 second.
TheAWDmodeindicatorlightswilldisplaythe modeselectedbytheAWDmodeswitchwhile
Starting anddriving
engineisrunning.
If the AWD warning light AWD (yellow) illuminates, the AWD mode indicator light will turn off.
PushtheAWDmodeswitch, located on the instrument panel, to select 2WD, AWD-Vor AWD.
AWD-V:PushtheAWDmodeswitchtothe neutral(AWD-V)position.TheAll-WheelDrive (AWD)AWD-Vindicatorlight inthemeter illuminates.
2WD:PushtheAWDmodeswitchtothe2WD position.
AWD:PushtheAWDmodeswitchtotheAWD position.TheAWDindicatorlight AWD (green)in themeterilluminates.
| AWDmodeWheelsdriven | AWDmodeindicatorlight(.,green))AWD | Useconditions | |
| 2WD | Frontwheels:ThewheeldrivemodeisinTwo-WheelDrive(2WD)whendrivingonanormalroad. | Turnsoff | Fordrivingondry,pavedroads |
| AWD-V | Distributionoftorquetothefrontandrearwheelschangesautomatically[ratio;100:0(2WD)→50:50(AWD)]anddistributionoftorquebetweenleftandrightwheelofrearwheelschangesautomaticallydependingonroadconditionsencountered[ratio;100:0(2WD)→50:50(AWD)]. | IlluminatesAWD-V | Fordrivingonpavedorslipperyroads |
| AWD | Distributionoftorquetothefrontandrearwheelschangesautomatically[ratio;100:0(2WD)→50:50(AWD)]andthedistributionoftorquebeteentheteleftandrightrearwheelschangesautomaticallydependingontheslipperyroadconditionsencountered. | Illuminates(green)AWD | Fordrivingonslipperyroads |
AWDshifttips
- Theoiltemperatureofpowertrainpartswill increaseifthevehicleiscontinuously operatedunderconditionswherethedifferenceinrotationbetweenthefrontandrear wheelsislarge(wheelslip),suchaswhen drivingthevehicleonroughroadsthrough sandormudorwhenfreeingastuckvehicle. Inthesecases,theAWDwarninglightblinks rapidlyandtheAWDmodechangestothe 2WDmodetoprotectthepowertrainparts. Ifyoustopdrivingwiththeengineidlingand waituntilthewarninglightstopsblinking, theAWDreturnstotheAWD-VorAWD mode.
- BrakedistanceintheAWDmodeisthe sameas2WD.

CAUTION
- Donotstarttheengine with the AWDmodeswitchinanymode in the following cases:
—whenthevehicleisplacedona free-rollerorjackingupthe vehiclewiththefronttires raisedandthereartiresonthe ground.
—whentowingthevehiclewiththe reartires raised from the ground.
- OperatetheAWDmodeswitchonly whendrivingstraight.DonotoperatetheAWDmodeswitchwhen makingaturnorbackingup.Ifthe AWDmodeswitchisoperatedwhile makingaturn,acceleratingordecelerating,oriftheignitionswitchis turnedoffwhileintheAWD-Vor AWDmode,youmayfeelajolt.This isnotamalfunction.
- DonotoperatetheAWD mode switchwiththefrontwheelspinning.
- Engineidlingspeedishhighwhile warminguptheengine.Beespeciallycarefulwhenstartingordrivingonslipperysurfaceswiththe AWDmodeswitchsetintheAWD-V orAWDmode.
| Warning light (yellow) | Comes on or blinks when |
 Comes on Comes on | There is a malfunction in the All-Wheel Drive (AWD) system. |
 Blinks rapidly Blinks rapidly | The power-train oil temperature rises abnormally. |
 Blinks slowly Blinks slowly | The difference in wheel rotation is large. SSD0336-D |
AWDWARNINGLIGHT
TheAWDwarninglightlocatedintheinstrument panelilluminateswhentheignitionswitchis placedintheONposition.Itturnsoffsoonafter theengineisstarted.
IfanymalfunctionoccursintheAWDsystem whiletheengineisrunning,orwhiledriving,the
Startinganddriving
warninglightwilleitherremainilluminatedor blink.
High-temperaturepowertrainoiduetocontinuousoperationofthevehicletofreeeastuck vehiclemakethewarninglightblinkrapidly (abouttwicepersecond). Thedrivingmodemay changetothe2WDmode. If thewarninglight blinksrapidlyduringoperation, stopthevehicle with the engineidlinginasafeplaceimmediately. Thenifthelight goesoffafterawhile, you can continuedriving.
Alargedifferencebetweenthediametersof frontandrearwheelswillmakethewarninglight blinkslowly(aboutonceper2seconds).Pulloff theroadinasafearea,andidletheengine. Checkthatalltiresizesarethesame,tire pressureiscorrectandtiresarenotworn. ChangetheAWDmodeswitchtothe2WD modeandonotdrivefast.

CAUTION
- If the warning light illuminates while driving, AWD modewill be changed to 2WD mode. Reducethe vehicle speed and have your vehicle checked as soon as possible. It is recommended you visit a NISSAN dealer forth this service. Be especially
5-32 Starting and driving
carefulwhendriving. •Thepowertrainmaybedamagedif youcontinuedrivingwiththeAWD warninglightblinkingrapidly.
PARKING/PARKINGONHILLS
①
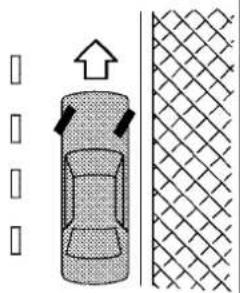
natural_image
Diagram showing a car interior with directional arrows and a textured surface (no text or symbols)②
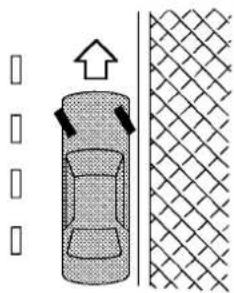
natural_image
Diagram showing a car with directional arrows and a textured surface, no text or symbols present③


WARNING
- Donotstoporparkthevehicleover flammablematerialssuchasdry grass,wastepaperorrags.They mayigniteandcauseafire.
- Neverleavetheengine running while the vehicle is unattended.
- Donotleavechildrenunattended insidethevehicle.Theycouldunknowinglyactivateswitchesorcontrols.Unattendedchildrencould becomeinvolvedinseriousacci-
dents.
- To help avoid risk of injury or death through unintended operation of the vehicle and/or it systems, do not leave children, people who require assistance of others or pets unattended in your vehicle. Additionally, the temperature inside aclosed vehicle on a warm day can quickly become high enough to cause significant risk of injury or death to people and pets.
• Safeparking procedures require that both the parking brakebe
appliedandthetransmissionplaced intoP(Park)forContinuouslyVariableTransmission(CVT)modelorin anappropriategearforManual Transmission(MT)model.Failure todosocouldcausethevehicleto moveunexpectedlyorrollawayand resultinanaccident.
- Makesurethecontinuouslyvariable transmissionshiftleverhasbeen pushedasfarforwardasitcango andcannotbemovedwithoutdepressingthefootbrakepedal.
- Firmly apply the parking brake.
- Continuously Variable Transmission (CVT) models:
MovetheshiftlevertotheP(Park)position.
ManualTransmission(MT)models:
MovetheshiftlevertotheR(Reverse)gear. Whenparkingonanuphillgrade, placethe shiftleverinthe1stgear.
- To help prevent the vehicle from rolling into the street when parked on as sloping drive way, it is good to turn the wheels as illustrated.
• HEADEDDOWNHILLWITHCURB: Turnthewheelsintothecurbandmove
①
Startinganddriving5-33
ELECTRICPOWERSTEERING
thevehicleforwarduntilthecurbside wheelgentlytouchesthecurb.
• HEADEDUPHILLWITHCURB: ②
Turnthewheelsawayfromthecurband movethevehiclebackuntilthecurbside wheelgentlytouchesthecurb.
- HEADEDUPHILLORDOWNHILL, NO CURB: ③
Turnthewheelstowardthesideofthe roadsothevehiclewillmoveawayfrom thecenteroftheroadifitmoves.
- PlacetheignitionswitchintheOFFposition.

WARNING
- If the engine is not running or is turned off while driving, the power assist for the steering will not work. Steering will be hard to operate.
- When the electric power steering warning light illuminates with the engineer running, the power assist for the steering will cease operation. You will still have controlof the vehicle but the steering will be hard to operate.
The electric power steering is designed to provide power assist while driving to operate the steering wheel with light force.
Whenthesteeringwheelisoperatedrepeatedly orcontinuouslywhileparkingordrivingatavery lowspeed,thepowerassistforthesteering wheelwillbereduced.Thisistoprevent overheatingoftheelectricpowersteeringand protectitfromgettingdamaged.Whilethe powerassistisreduced,steeringwheeloperationwillbecomeheavy.Whenthetemperature ofthelectricpowersteeringgoesdown,the power assist level will return to normal. Avoid repeating such steering wheel operations that
couldcausetheelectricpowersteeringto overheat.
Youmayhearasoundwhenthesteeringwheel isoperatedquickly.However,thisisnota malfunction.
If the electric power steering warning light illuminates while the engine is running, it may indicate the electric power steering is not functioning properly and may need servicing. It is recommended you have the electric power steering checked by a NISSAN dealer. (See "Electric power steering warning light" (P.2-17).)
When the electric power steering warning light illuminates with the engineer running, the power assist for the steering will cease operation. You will still have control of the vehicle. However, greater steering efforts needed, especially in sharp turns and latlowspeeds.
BRAKESYSTEM
BRAKINGPRECAUTIONS
Thebrakesystemhastwoseparatehydraulic circuits. Ifonecircuitmalfunctions, you will still have braking attwowheels.
Youmayfeelasmalclickandhearasound whenthebrakepedalisfullydepressedslowly. Thisisnotamalfunctionandindicatesthatthe brakeassistmechanismisoperatingproperly.
Vacuumassistedbrakes
Thebrakeboosteraidsbrakingbyusingengine vacuum. If the engine stops, you can stop the vehicle by depressing the brake pedal. However, greater foot pressure on the brake pedal will be required to stop the vehicle and the stopping distance will be longer.
Whenthebrakepedalisdepressedslowly and firmly, you may hear a clicking noise and feel a slight pulsation. This is normal and indicate that the Brake Assist System is operating.
Usingthebrakes
Avoidrestingyourfootonthebrakepedalwhile driving. This will cause overheating of the brakes, wearing out the brake pads and shoes faster and reduce gasmileage.
To help reduce brakewear and to prevent the brakes from overheating, reduces speed and downshift to lower gear before going downa
slopeorlonggrade. Overheatedbrakesmay reducebrakingperformanceandcouldresultin lossofvehiclecontrol.

WARNING
- Whiledrivingonaslippery surface, be careful when braking, acceleratingordownshifting. Abruptbraking oraccelerating could cause the wheelstoskid and result in an accident.
- If the engine is not running or turned off while driving, the power assist for the brakes will not work. Braking will be harder.
Wetbrakes
Whenthevehicleiswashedordriventhrough water,thebrakesmaygetwet.Asaresult,your brakingdistancewillbelongerandthevehicle maypulltoonesideduringbraking.
Todrybrakes, drivethevehicleatasafespeed whilelightlytappingthebrakepedaltoheat-up thebrakes. Do this until the brakes return to normal. Avoid driving the vehicle at high speeds until the brakes function correctly.
Parkingbrakebreak-in
Breakin the parking brakeshoes whenever the stopping effect of the parking brake is weakened or whenever the parking brakeshoes and/or drums/rotors are replaced, in order to assure the best braking performance.
Thisprocedureisdescribedinthevehicle servicemanual.Itisrecommendedyouvisita NISSANdealerforthisservice.
BRAKEASSIST
BRAKEASSIST
Whentheforceappliedtothebrakepedal exceedsacertainlevel,theBrakeAssistis activatedgeneratinggreaterbrakingforcethana conventionalbrakeboosterevenwithlightpedal force.

WARNING
The Brake Assistis only anaid to assist braking operation and is not a collision warning or avoidance device. It is the driver's responsibility to stay alert, drive safely and be in control of the vehicle at all times.
ANTI-LOCKBRAKINGSYSTEM(ABS)

WARNING
•The Anti-lock Braking System (ABS) is asophisticated device, but it cannot prevent accidents resulting from careless or dangerous driving techniques. It can help maintain vehicle control during braking on slipperysurfaces. Remember that stopping distances on slipperysurfaces will be longer than on normal
5-36Startinganddriving
surfacesevenwithABS.Stopping distancesmayalsobelongeron rough,gravelorsnowcovered roads,orifyouareusingtirechains. Alwaysmaintainasafedistance fromthevehicleinfrontofyou. Ultimately,thedriverisresponsible forsafety.
•Tiretypeandconditionmayalso affectbrakingeffectiveness.
—Whenreplacingtires,installthe specifiedsizeoftiresonallfour wheels.
—Wheninstallingasparetire, makesurethatitistheproper sizeandtypeasspecifiedonthe TireandLoadingInformation label.See "TireandLoading Informationlabel"(P.10-12)of thismanual.
—Fordetailedinformation,see "Wheelsandtires"(P.8-28)of thismanual.
The Anti-lock Braking System (ABS) controls the brakessothewheelsdonotlockduringhard brakingorwhenbrakingonslippery surfaces. Thesystemdetectstherotationspeedateach
wheelandvariesthe brakefluidpressure to preventeachwheelfromlockingandsliding.By preventingeachwheelfromlocking,thesystem helpsthedrivermaintainsteeringcontrol and helpsto minimizeswervingandspinningon slippery surfaces.
Usingthesystem
Depressthe brakepedalandholditdown. Depressthebrakepedalwithfirmsteady pressure, butdonotpump thebrakes.The ABSwilloperatetopreventthewheelsfrom lockingup.Steerthevehicletoavoidobstacles.

WARNING
Donotpumpthebrakepedal.Doingso mayresultinincreasedstoppingdistances.
Self-testfeature
TheABSincludeselectronicsensors,electric pumps,hydraulicsolenoidsandacomputer.The computerhasabuilt-indiagnosticfeaturethat teststhesystemeachtimeyoustarttheengine andmovethevehiclatalowspeedinforward orreverse.Whentheself-testoccurs,youmay heara"clunk"noiseand/orfeelapulsationinthe brakepedal.Thisisnormalanddoesnot
VEHICLEDYNAMICCONTROL(VDC) SYSTEM
indicateamalfunction.Ifthecomputersensesa malfunction,itswitchestheABSoffand illuminatestheABSwarninglightonthe instrumentpanel.Thebrakesystemthenoperatesnormally,butwithoutanti-lockassistance.
If the ABS warning light illuminates during the self-testor while driving, have the vehicle checked. It is recommended you visit a NISSAN dealer for this service.
Normaloperation
TheABSoperatesatspeedsabove3to6MPH (5to10km/h). Thespeedvariesaccording to roadconditions.
When the ABS sensesthatoneormorewheels are closetolocking up, the actuator rapidly applies and releases hydraulic pressure. This action is similar to pumping the brakes very quickly. You may feel up pulsation in the brake pedaland hearanoise from under the hoodor feel vibration from the actuator when it is operating. This is normal and indicate that the ABS is operating properly. However, the pulsation may indicate that road conditions are hazardous and extracare is required while driving.
The Vehicle Dynamic Control (VDC) system uses various sensorstomonitor driver inputs and vehicle motion. Under certain driving conditions, the VDC system help stop performance following functions.
- Controlsbrakepressuretoreducewheel slipononeslippingdrivewheelsopoweris transferredtoanonslippingdrivewheelon thesameaxle.
- Controlsbrakepressureandengineoutput toreducedrivewheelslipbasedonvehicle speed(tractioncontrolfunction).
- Controlsbrakepressureatindividualwheels and engine output to help the driver maintain controlofthevehicleinthefollowing conditions:
—understeer(vehicletendstonotfollow thesteeredpathdespite increased steeringinput)
—oversteer(vehicletendstospindueto certainroadordrivingconditions).
The VDC system can help the driver to maintain control of the vehicle, but it cannot prevent loss of vehicle control in all drivings situations.
WhentheVDCsystemoperates,theVDC warning light 🚗 in the instrumentpanel flashes sonotethefollowing:
- Theroadmaybeslipperyorthesystemmay determinesomeactionisrequiredtohelp keepthevehicleonthesteeredpath.
- You may feel apulsation in the brake pedal and hearanoise or vibration from under the hood. This is normal and indicates that the VDC system is working properly.
- Adjustyourspeedanddrivingtotheroad conditions.
Ifamalfunctionoccursinthesystem,theVDC warninglight illuminatesintheinstrument panel.TheVDCsystemautomaticallyturnsoff.
The VDC OFF switch is used to turn off the VDC system. TheVDC offindicator 🌐 illuminates to indicate the VDC system is off. When the VDC switch is used to turn off the system, the VDC system still operates to prevent one drivewheel from slipping by transferring power to an on slipping drivewheel. The VDC warning light flashes if this occurs. All other VDC functions are off, and the VDC warning light will not flash. The VDC system is automatically reset to on when the ignition switch is placed in the off position then back to the on position.
See "VehicleDynamicControl(VDC)warning light"(P.2-21) and "VehicleDynamicControl
(VDC)offindicatorlight"(P.2-23).
Thecomputerhasabuilt-indiagnosticfeature thatteststhesystemeachtimeyoustartthe engineandmovethevehicleforwardorin reverseataslowspeed.Whentheself-test occurs,youmayheara"clunk"noiseand/orfeel apulsationinthebrakepedal.Thisisnormaland isnotanindicationofamalfunction.

WARNING
•TheVDCsystemisdesignedtohelp improvedrivingstabilitybutdoes notpreventaccidentsduetoabrupt steeringoperationathighspeedsor bycarelessordangerousdriving techniques.Reduce vehicle speed andbeespeciallycarefulwhendrivingandcorneringonslipperysurfacesandalwaysdrivecarefully.
- Donotmodifythevehicle'ssuspension.Ifsuspension parts such as shockabsorbers,struts,springs, stabilizer bars,bushings and wheelsarenotNISSANrecommendedforyourvehicleorare extremelydeteriorated,theVDC systemmaynotoperateproperly. Thiscouldadverselyaffectvehicle
handlingperformance,andtheVDC warninglight mayilluminate.
- Ifbrakerelatedpartssuchasbrake pads, rotors and calipers are not NISSANrecommendedorareextremelydeteriorated,theVDCsystem maynotoperateproperlyandthe VDCwarninglight mayilluminate.
- Ifenginecontrolrelatedpartsare notNISSANrecommended orare extremelydeteriorated, the VDC warninglight mayilluminate.
- Whendrivingonextremelyinclined surfacesuchashigherbanked corners,theVDCsystemmaynot operateproperlyandtheVDCwarninglight mayilluminate.Donot driveonthesetypesofroads.
- Whendrivingonanunstablesurfacesuchasaturntable,ferry, elevatororramp,theVDCwarning light mayilluminate.Thisisnot amalfunction.Restart theengine afterdrivingontoastablesurface.
- If wheels or tires other than the NISSANrecommendedonesare used, the VDCsystemmaynot
operateproperlyandtheVDCwarninglight mayilluminate.
•TheVDCsystemisnotasubstitute forwintertiresortirechainsona snowcoveredroad.
COLDWEATHERDRIVING
FREEINGAFROZENDOORLOCK
Topreventadoorlockfromfreezing,apply deicerthroughthekeyhole.Ifthelockbecomes frozen,heatthekeybeforeinsertingitintothe keyholeorusetheIntelligentKeysystem.
ANTI-FREEZE
Inthewinterwhenitisanticipatedthatthe outside temperature will drop below 32°F (0°C), checktheanti-freezetoassureproperwinter protection. For additional information, see "Enginecoolingsystem" (P.8-4).
BATTERY
If the battery is not fully charged during extremely cold weather conditions, the battery fluid may freeze and damage the battery. To maintain maximum efficiency, the battery should be checked regularly. For additional information, see "Battery" (P.8-10).
DRAININGOFCOOLANTWATER
If the vehicle is the oldest outside without anti-freeze, drain the cooling system, including the engine block. Refill before operating the vehicle. Ford details, see "Engine cooling system" (P.8-4).
TIREEQUIPMENT
SUMMERtireshaveatreaddesignedtoprovide superiorperformanceondrypavement.However,theperformanceofthesetireswillbe substantiallyreducedinsnowyandicyconditions.Ifyouoperateyourvehicleonsnowyoricy roads,NISSANrecommendstheuseofMUD&SNOWorALLSEASONtiresonallfourwheels. ItisrecommendedyouconsultaNISSANdealer forthetiretype,size,speed rating and availabilityinformation.
For additional traction on icy roads, studded tires maybe used. However, some U.S. states and Canadian provinces prohibit their use. Check local, state and provincial laws before installing studded tires.
Skidandtractioncapabilitiesofstudded snowtires,onwetordrysurfaces,maybe poorerthanthatofnon-studdedsnow tires.
Tirechainsmaybeused. Fordetails, see "Tire chains" (P.8-37) of this manual.
All-WheelDrive(AWD)model
If you install snowtires, they must also be the same size, brand, construction and tread pattern on all four wheels.
SPECIALWINTER EQUIPMENT
It is recommended that the following items be carried in the vehicle during winter:
- Ascraper and stiff-bristled brushtoremove ice and snow from the windows and wiper blades.
- A sturdy, flat board to be placed under the jacktogiveitfirmsupport.
- Ashoveltodigthevehicleoutofsnow-drifts.
- Extrawindowwasherfluidtorefillthe reservoirtank.
DRIVINGONSNOW ORICE

WARNING
- Wet ice (32°F, 0°C and freezing rain), very cold snow or ice can be slick and very hard to drive on. The vehicle will have much less traction or "grip" under these conditions. Try to avoid driving on wetice until the road dissalted or sanded.
-
Whateverthecondition,drivewith caution.Accelerateandslowdown withcare.Ifacceleratingordown-shiftingtoofast,thedrivewheels willloseevenmoretraction.
-
Allowmorestoppingdistanceunder theseconditions.Brakingshouldbe startedsoonerthanondrypavement.
- Allowgreaterfollowingdistances onslipperyroads.
- Watchforslipperyspots(glareice). These may appear on otherwise clear road in shaded areas. If a patch of these seen ahead, brake before reaching it. Try not to brake while on the time, and avoid any sudden steering maneuvers.
- Donotusecruise control on slip-pery roads.
- Snowcantrapdangerousexhaust gasesundryourvehicle. Keep snowclearoftheexhaustpipe and fromaroundyourvehicle.
ENGINEBLOCKHEATER(ifso equipped)
Engineblockheatersareusedtoassistincold temperaturestarting.
The engine blockheaters should be used when the outside temperature is 20^ F ( -7^ C) or lower.
Tousetheengineblockheater
- Turntheengineoff.
- Openthehoodandunwraptheengine blockheatercord.
- Plugtheengineblockheatercordintoa grounded3-wire,3-prongedextensioncord.
- PlugtheextensioncordintoaGroundFault Interrupt(GFI) protected, grounded110-voltAC(VAC)outlet.
- Theengineblockheatermustbepluggedin foratleast2-4hours,depending on outside temperatures,toproperlywarm the enginecoolant.Useanappropriatetimerto turntheengineblockheateron.
- Beforestartingtheengine,unplugand properlystorethecordtokeepitawayfrom movingparts.

WARNING
- Donotuseyouengineblockheater withanungroundedelectricalsystemora2-prongedadapter.Youcan beseriouslyinjuredbyanelectrical shockifyouuseanungrounded connection.
- Disconnect and properly store the engine block heater cord before starting the engine. Damageto the cord could result in an electrical shock and can cause serious injury.
- Useaheavy-duty3-wire,3-pronged extensioncordratedforatleast 10A.Plugtheextensioncordintoa GroundFaultInterrupt(GFI)protected,grounded110-VACoutlet. Failuretousetheproperextension cordoragroundedoutletcanresult inafireorelectricalshockand causeseriouspersonalinjury.
6Incaseofemergency
Hazardwarningflasherswitch....6-2
Roadsideassistanceprogram....6-2
Emergencyengineshutoff....6-3
Flattire....6-3
TirePressureMonitoringSystem(TPMS)......6-3
Changingaflattire....6-4
Jumpstarting....6-9
Pushstarting....6-11
If your vehicle overheats....6-11
Towingyourvehicle....6-13
TowingrecommendedbyNISSAN....6-14
Vehiclerecovery(freeingastuckvehicle)......6-15
- Ifstoppingforanemergency, be suretomovethevehiclewelloffthe road.
- Donotusethehazardwarning flasherswhilemovingonthehighwayunlessunusualcircumstances forceyoutodrivesoslowlythat yourvehiclemightbecomeahazard
6-2 Incaseofemergency
ROADSIDEASSISTANCE PROGRAM
Intheeventofaroadsideemergency,Roadside AssistanceServiceisavailabletoyou.Please refertoyourWarrantyInformationBooklet(U.S.) or Warranty&RoadsideAssistanceInformation Booklet(Canada)fordetails.
EMERGENCYENGINESHUTOFFFLATTIRE
Toshutofftheengineinanemergencysituation whiledriving,performthefollowingprocedure:
- Rapidlypushthepush-buttonignitionswitch 3consecutivetimesinlessthan1.5 seconds,or
- Pushandholdthepush-buttonignition switchformorethan2seconds.
TIREPRESSUREMONITORINGSYSTEM(TPMS)
ThisvehicleisequippedwiththeTirePressureMonitoringSystem(TPMS).Itmonitorstire pressureofalltiresexceptthespare.When thelowtirepressurewarninglightislit,andthe CHECKTIREPRES(pressure)warningmessageisdisplayedinthevehicleinformation display,oneormoreofyourtiresissignificantly under-inflated.Ifthevehicleisbeingdrivenwith lowtirepressure,theTPMSwillactivateand warnyouofitbythelowtirepressurewarning light.Thissystemwillactivateonlywhenthe vehicleisdrivenatspeedsabove16MPH(25 km/h).Formoredetails,see"Warninglights, indicatorlightsandaudiblereminders"(P.2-15) and "TirePressureMonitoringSystem(TPMS)" (P.5-3).

WARNING
- Ifthelowtirepressurewarninglight illuminateswhiledriving,avoidsuddensteeringmaneuversorabrupt braking,reducevehiclespeed,pull offtheroadtoasafelocationand stopthevehicleassoonaspossible.Drivingwithunder-inflatedtires maypermanentlydamagethetires
andincreasethelikelihoodoftire failure.Seriousvehicledamage couldoccurandmayleadtoan accidentandcouldresultinserious personalinjury.Checkthetirepressureforallfourtires.Adjustthetire pressureotherecommendedCOLD tirepressureshownontheTireand LoadingInformationlabeltoturn thelowtirepressurewarninglight OFF.Ifyouhaveaflattire,replaceit withasparetireassoonaspossible.
- Sincethesparetireisnotequipped withtheTPMS,whenasparetireis mountedorawheelisreplaced,the TPMSwillnotfunctionandthelow tirepressurewarninglightwillflash forapproximately1minute.The lightwillremainonafter1minute.Haveyourtiresreplacedand/or TPMSsystemresetassoonas possible.Itisrecommendedyou visitaNISSANdealerforthese services.
- ReplacingtireswiththosenotoriallyspecifiedbyNISSANcould affecttheproperoperationofthe TPMS.
- Donotinjectanytireliquidor aerosoltiresealantintothetires, asthismaycauseamalfunction of the tirepressuresensors.
CHANGINGAFLATTIRE
If you have a flattire, follow the instructions below.
Stoppingthevehicle
- Safelymovethevehicleofftheroadand awayfromtraffic.
- Turnonthehazardwarningflashers.
- Parkonalevel surface and apply the parking brake.
- Continuously Variable Transmission (CVT) models:
MovetheshiftlevertotheP(Park)position.
ManualTransmission(MT)models:
MovetheshiftlevertotheR(Reverse) position.
5.Turnofftheengine.
6. Raisethehoodtowarnothertraffic, and to signal professionalroadassistancepersonnelthatyouneedassistance.
7. Have all passengers get out of the vehicle and standinasafeplace, away from traffic
6-4 Incaseofemergency
andclearofthevehicle.

WARNING
- Makesuretheparkingbrakeis securelyappliedandtheManual TransmissionisshiftedintoR(Reverse),ortheContinuouslyVariable TransmissionintoP(Park).
- Neverchangetireswhenthevehicle isonaslope,iceorslipperyareas. Thisishazardous.
●Neverchangetiresifoncoming trafficisclosetoyourvehicle.Wait forprofessionalroadassistance.

natural_image
Diagram showing three types of tire components with arrows indicating movement, no text or symbols presentBlockingwheels
Placesuitableblocks ① atboththefrontand backofthewheeldiagonallyoppositetheflat tiretopreventthevehiclefrommovingwhenitis jackedup.

WARNING
Besuretoblockthewheelasthe vehiclemaymove and resultin personal injury.

Jackingtools
Gettingthesparetireandtools
Openthelfitgate.Raisethecargofloorboard
① .Removejackingtoolslocatedbehindthe spare tire.

Thesparetireislocatedunderthecargofloor board.
Loosentheclamp ② andremovethespacer ① andtakeoutthesparetire.
Jackingupthevehicleandremovingthe damagedtire

WARNING
- Nevergetunderthevehiclewhileit issupportedonlybythejack.Ifitis necessarytoworkunderthevehicle, supportitwithsafetystands.
•Useonlythejackprovidedwithyour vehicletoliftthevehicle.Donotuse thejackprovidedwithyourvehicle onothervehicles.Thejackisdesignedforliftingonlyyourvehicle duringatirechange. - Usethecorrectjack-uppoints. Neveruseanyotherpartofthe vehicleforjacksupport.
- Neverjackupthevehiclemorethan necessary.
- Neveruseblocksonorunderthe jack.
- Donotstartorruntheenginewhile vehicleisonthejack,asitmay causethevehicletomove.This is especiallytrueforvehicleswith limitedslipdifferentials.
- Donotallowpassengerstostayin thevehiclewhileitisonthejack.
Carefullyreadthecautionlabelattached tothejackbodyandthefollowinginstructions.
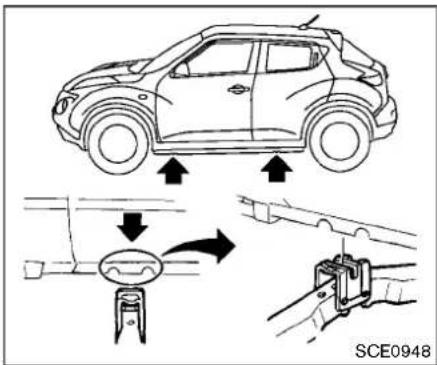
Jack-uppoint
- Placethejackdirectlyunderthejack-up pointasillustratedsothetopofthejack contactsthevehicleatthejack-uppoint. Alignthejackheadbetweenthetwo notchesinthefrontortherearasshown. Alsofitthegrooveofthejackheadbetween thenotchesasshown.
Thejackshouldbeusedonlevelfirm ground.
6-6 Incaseofemergency
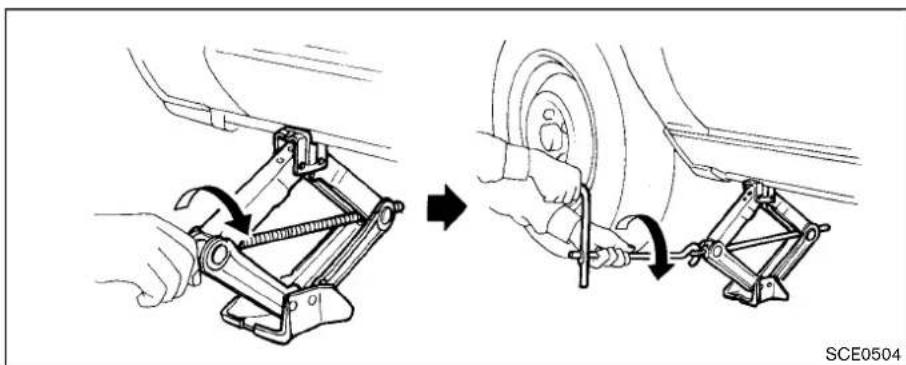
natural_image
Mechanical assembly diagram showing two steps of car wheel mounting and steering wheel (no text or symbols)- Looseneachwheel nutoneortwoturnsby turningitcounterclockwisewiththewheel nutwrench. Donotremovethewheel nutsuntilthetireisofftheground.
3.Toliftthevehicle,securelyholdthejacklever androdwithbothhandsasshownabove. Carefullyraisethevehicleuntilthetireclears theground.Removethewheelnuts,and thenremovethetire.

Installingthesparetire
Thesparetireisdesignedforemergency use.(Seespecificinstructionsunderthe heading"Wheelsandtires"(P.8-28).)
- Cleananymudordirtfromthesurface betweenthewheelandhub.
- Carefullyputthesparetireonandtighten thewheelnutsfingertight. Check that all the wheelnutscontact the wheelsurface horizontally.
- With the wheel nut wrench, tighten wheel nuts alternately and evenly in these sequence illustrated (①, ②, ③, ④, ⑤), more than 2 times, until they are tight.
Incaseofemergency6-7
- Lowerthevehicleslowlyuntilthetire touchestheground. Then, withthewheel nutwrench, tightenthewheelnutssecurely inthesequenceillustrated. Lowerthe vehiclecompletely.

WARNING
- Incorrectwheelnutsorimproperly tightenedwheelnutscancausethe wheeltobecomelooseorcomeoff. Thiscouldcauseanaccident.
- Donotuseoilorgreaseonthe wheelstudsornuts. This could cause thenutstobecome loose.
- Retightenthewheelnutswhenthe vehiclehasbeendrivenfor600 miles(1,000km)(alsoincasesofa flattire,etc.).
- As soon as possible, tighten the wheelnut stothespecified torque withatorquewrench.
Wheelnuttighteningtorque: 80ft-lb(108N·m)
Thewheelnutsmustbekepttightened to specificationsatalltimes.Itis recommended that the wheelnuts be
6-8 Incaseofemergency
tightenedtospecificationsateach lubricationinterval.
- AdjusttirepressuretotheCOLD pressure.
COLDpressure:
Afterthevehiclehasbeenparkedfor3 hoursormoreordrivenlessthan1mile (1.6km).
COLDtirepressuresareshownonthe TireandLoadingInformationlabel affixedtothedriversidecenterpillar.
Stowingthedamagedtireandthetools
- Securelystorethejack, tools and the damaged tire in the storage area.
- Replacethecargofloorboxandboard.
- Closetheliftgate.

WARNING
●Alwaysmakesurethatthesparetire andjackingequipmentareproperly securedafteruse.Suchitemscan becomedangerousprojectilesinan accidentorsuddenstop.
- Thesparetireandsmallsizespare tirearedesignedforemergencyuse. Seespecificinstructionsunderthe
heading "Wheelsandtires" (P.8-28).
JUMPSTARTING
Tostartyourenginewithaboosterbattery,the instructionsandprecautionsbelowmustbe followed.

WARNING
- Ifdoneincorrectly,jumpstarting canleadtoabatteryexplosion, resultinginsevereinjuryordeath. Itcouldalsodamageyourvehicle.
- Explosivehydrogengasisalways presentinthevicinityofthebattery. Keepallsparksandflamesaway fromthebattery.
- Donotallowbatteryfluidtocome intocontactwitheyes,skin,clothing orpaintedsurfaces.Batteryfluidis acorrosivesulfuricacidsolution whichcancausesevereburns.If thefluidshouldcomeintocontact withanything,immediatelyflushthe contactedareawithwater.
- Keepthebatteryoutofthereachof children.
-
Theboosterbatterymustberatedat 12volts.Useofanimproperlyrated batterycandamageyourvehicle.
-
Wheneverworkingonorneara battery,alwayswearsuitableeye protectors(forexample,gogglesor industrialsafetyspectacles)and removerings,metalbands,orany otherjewelry.Donotleanoverthe batterywhenjumpstarting.
- Donotattempttojumpstarta frozenbattery.Itcouldexplode andcauseseriousinjury.
- Yourvehiclehasanautomaticenginecoolingfan.Itcouldcomeonat anytime.Keephandsandother objectsawayfromit.


WARNING
Alwaysfollowtheinstructionsbelow. Failuretodosocouldresultindamage tothechargingsystemandcause personalinjury.
- If the booster battery is in another vehicle
⑧ ,positionthetwovehicles( ⑨ and ⑩ ) tobringtheirbatteriesintocloseproximityto eachother.
Donotallowthetwovehiclestotouch.
-
Apply the parking brake.
-
Continuously Variable Transmission (CVT) models:
MovetheshiftlevertotheP(Park)position.
ManualTransmission(MT) models: MovetheshiftlevertotheN(Neutral) position.
4.Switchoffallunnecessaryelectricalsystems (headlights, heater, airconditioner, etc.).
-
Removetheventcapsonthebattery(ifso equipped). Coverthebatterywithafirmly wrungoutmoistclothtoreduceexplosion hazard.
-
Connectjumpercablesinthesequenceas
illustrated( ① → ② → ③ → ④). If the battery is discharged, the ignition switch cannot be moved from the OFF position. Connect the jumper cable to the booster vehicle ⑧ before pushing the ignition switch.

CAUTION
- Alwaysconnectpositive(+)topositive(+)andnegative(-)tobody ground(forexample,asillustrated), nottothebattery.
- Makesurethejumpercablesdonot touchmovingpartsintheengine compartmentandthatthecable clampsdonotcontactanyother metal.
- Starttheengine ofthebooster vehicle andletitrunforafewminutes.
B
- Keep the engines speed of the booster vehicle ⑧ at about 2,000 rpm, and start the engine of the vehicle ⑨ being jump started.

CAUTION
Donotkeepthestartermotorengaged formorethan10seconds.Iftheengine doesnotstartrightaway, placethe ignitionswitchintheOFFpositionand wait10secondsbeforetryingagain.
- After starting your engine, carefully disconnect then negative cable and then the positive cable (④ → ③ → ② → ①).
- Replacetheventcaps(ifsoequipped). Be suretodisposeoftheclothusedtocover theventholesasitmaybecontaminated withcorrosiveacid.
PUSHSTARTING
Donotattempttostarttheenginebypushing.

CAUTION
- ContinuouslyVariableTransmission (CVT) models cannot be push-startedortow-started. Attempting todosomaycausetransmission damage.
- Three-waycatalystequippedmodelsshouldnotbestartedbypushing sincethethreewaycatalystmaybe damaged.
- Nevertrytostartthevehicleby towingit;whentheenginestarts, theforwardsurgecouldcausethe vehicle to collidewith the tow vehicle.
IFYOURVEHICLEOVERHEATS

CAUTION
- Donotcontinuetodriveify your vehicleoverheats.Doingsocould causeenginedamageorvehicle fire.
•To avoid the danger of being scalded, never removetheradiator capwhile the engine is still hot. Whentheradiator capis removed, pressurized hot water will spurt out, possibly causing serious injury.
- Do not open the hood if steam is comingout.
If your vehicle is overheating (indicated by the hight temperature warning light (if soe equipped) or an extremely high temperature gaugereading (if soe equipped)), orify you feel alack of engine power, detect abnormal noise, etc., takethe following steps:
-
Move the vehicles safely off the road and apply the parking brake.
-
Continuously Variable Transmission (CVT) models:
MovetheshiftlevertotheP(Park)position.
ManualTransmission(MT)models:
MovetheshiftlevertotheN(Neutral) position.
Donotstoptheengine.
3.Turnofftheairconditioner(ifsoequipped). Openallthewindows,movetheheaterorair conditionertemperaturecontroltomaximum hotandfancontroltohighspeed.
4.Getoutofthevehicle.Lookandlistenfor steamorcoolantescapingfromtheradiator beforeopeningthehood.(Ifsteamor coolantisescaping,turnofftheengine.) Donotopenthehoodfurtheruntilnosteam orcoolantcanbeseen.
5. Opentheenginehood.

WARNING
Ifsteamorwateriscomingfromthe engine,standcleartopreventgetting burned.
- Visuallycheckthedrivebeltfordamageor looseness. Also check if the cooling fan is running. Theradiator hoses and radiator should not leak water. If coolant is leaking or the cooling fandoes not run, stop the engine.
6-12 Incaseofemergency

WARNING
Becarefulnottoallowyourhands,hair, jewelryorclothingtocomeintocontact with,orgetcaughtin,enginebeltsor theenginecoolingfan.Theengine coolingfancanstartatanytime.
- After the engine cools down, check the coolant level in the reservoir with the engine running. Add coolant to the reservoir if necessary. Have your vehicle repaired. It is recommended you visit a NISSAN dealer for this service.
TOWINGYOURVEHICLE
Whentowingyourvehicle, all State (Provincialin Canada) and local regulations for towing must be followed. Incorrect towing equipment could damage your vehicle. Towing instructions are available from a NISSAN dealer. Localservice operators are familiar with the applicable laws and procedures for towing. To assure proper towing and to prevent accidental damage to your vehicle, NISSAN recommend that you have as service operator to your vehicle. It is advisable to have the service operator carefully read the following precautions.

WARNING
●Neverrideinavehiclethatisbeing towed.
- Nevergetunderyourvehicleafterit hasbeenliftedbyatowtruck.

CAUTION
- Whentowing, makesure that the transmission, axles, steeringsystem and powertrain are in working condition. If any unit is damaged, dollies must be used.
•Alwaysattachsafetychainsbefore towing.
Forinformationabouttowingyourvehiclebehind arecreationalvehicle(RV),see"Flattowing"(P.10-18)ofthismanual.

SCE0950
- When towing a CVT model with the rearwheelsontheground(ifyoudo notusetowingdollies):Always releasethe parkingbrake.
Two-wheeldrivemodels
TOWINGRECOMMENDEDBYNISSAN
Two-WheelDrive(2WD)models
NISSANrecommendsthatyourvehiclebe towedwiththedriving(front)wheelsoffthe groundorplacethevehicleonaflatbedtruckas illustrated.

CAUTION
- NevertowCVTmodelswiththefront wheels on the ground or four wheels on the ground (forwardor backward), asthismaycauseserious and expensedamagetothe
transmission.Ifitisnecessaryto towthevehiclewiththerearwheels raised,alwaysusetowingdollies underthefrontwheels.
- WhentowingCVTmodelswiththe frontwheelsontowingdollies: Pushtheignitionswitchtothe ACCorONposition,and secure the steeringwheelin astraight-ahead position with a rope or similardevice.Movetheshiftleverto theN (Neutral)position.
6-14 Incaseofemergency

natural_image
Three line drawings of a car carrier truck with different types of maintenance equipment (trowing, lifting, and mounting), no text or symbols present.
SCE0952
All-wheeldrivemodels
All-WheelDrive(AWD)models
NISSANrecommendsthattowingdolliesbe usedwhentowingyourvehicleorthevehiclebe placedonaflatbedtruckasillustrated.

CAUTION
NevertowAWDmodelswithanyofthe wheelsonthegroundasthismaycause seriousandexpensivedamagetothe powertrain.
VEHICLERECOVERY(freeingastuck vehicle)

WARNING
Toavoidvehicledamage,seriouspersonalinjuryordeathwhenrecoveringa stuckvehicle:
- Contactaprofessionaltowingservicetorecoverthevehicleifyou haveanyquestionsregardingthe recoveryprocedure.
- Towchainsorcablesmustbeat- tachedonlytomainstructuralmem-
bersofthevehicle.
- Donotusethevehicletie-downsto toworfreeeastuckvehicle.
- Onlyusedevicessspecificallydesignedforvehiclerecoveryand followthemanufacturer'sinstructions.
•Alwayspulltherecoverydevice straightoutfromthefrontofthe vehicle.Neverpullatanangle.
- Routerecoverydevicessotheydo nottouchanypartofthevehicle excepttheattachmentpoint.
If your vehicle is stuckins and snow, mud, etc., use atowstrap or other devices designed specifically for vehiclerecovery. Always follow the manufacturer's instructions for therecovery device.
Rockingastuckvehicle
If your vehicle is stuckins and snow, mud, etc., use the following procedure:
-
TurnofftheVehicleDynamicControl(VDC) system.
-
Makesuretheareainfrontandbehindthe vehicleisclearofobstructions.
-
Turnthesteeringwheelrightandlefttoclear anareaaroundthefronttires.
-
Slowlyrockthevehicleforwardandbackward.
-
ShiftbackandforthbetweenR(Reverse) andD(Drive)(ContinuouslyVariable Transmissionmodels)or1standR (Reverse)(ManualTransmissionmodels).
- Applytheacceleratoraslittleaspossible tomaintaintherockingmotion.
- Releasetheacceleratorpedalbefore shiftingbetweenRandD(Continuously VariableTransmissionmodels)or1 stand R(ManualTransmissionmodels).
-
Donotspinthetiresabove35MPH(55 km/h).
-
If the vehicle cannot be freed after a few tries, contact professional towingservice to remove the vehicle.
6-16 Incaseofemergency
7Appearanceandcare
Cleaningexterior....7-2
Washing....7-2
Waxing....7-3
Removingspots....7-3
Underbody....7-3
Glass....7-3
Wheels....7-4
Aluminumalloywheels....7-4
Chromeparts....7-4
Tiredressing....7-4
Cleaninginterior....7-5
Airfresheners....7-5
Floormats....7-5
Seatbelts....7-7
Corrosionprotection....7-7
Mostcommonfactorscontributingto vehiclecorrosion....7-7
Environmentalfactorsinfluencetherate of corrosion....7-7
Toprotectyourvehiclefromcorrosion....7-8
CLEANINGEXTERIOR
Inordertomaintaintheappearanceofyour vehicle,itisimportanttotakepropercareofit.
Toprotectthepaintsurfaces, washyourvehicle assoonasyoucan:
●afterarainfalltopreventpossibledamage fromacidrain
●afterdrivingoncoastalroads
- whencontaminantssuchassoot,bird droppings,treesap,metalparticlesorbugs getonthepaintsurface
- whendustormudbuildsuponthesurface Wheneverpossible,storeorparkyourvehicle insideagarageorinacoveredarea.
Whenitisnecessarytoparkoutside,parkina shadyareaorprotectthevehiclewithabody cover.
Becarefulnottoscratchthepaintsurface whenputtingonorremovingthebody cover.
WASHING
Washdirtoffthevehiclewithawetspongeand plentyofwater.Cleanthevehiclethoroughly usingamildsoap,aspecialvehiclesoapor generalpurposedishwashingliquidmixedwith clean,lukewarm(neverhot)water.

CAUTION
- Donotusecarwashesthatuseacid inthedetergent. Some car washes, especially brush lessons, usesome acid for cleaning. The acid may react with some plastic vehicle components, causing them to crack. This could affect their appearance, and also could cause them not to function properly. Always check with your car was to confirm that acid is not used.
- Donotwashthevehiclewithstrong householdsoap,strongchemical detergents,gasolineorsolvents.
- Donotwashthevehicleindirect sunlightorwhilethevehiclebodyis hot,asthesurfacemaybecome water-spotted.
- Avoidusingtight-nappedorrough cloths,suchaswashingmitts.Care must be taken when removing caked-ondirtorotherforeignsubstancesothepaintsurfaceisnot scratchedordamaged.
Rinsethevehiclethoroughlywithplentyofclean water.
Insideflanges, seamsandfoldsonthedoors, hatchesandhoodareparticularlyvulnerableto theeffectsofroadsalt. Therefore, theseareas mustberegularlycleaned. Makesurethatthe drainholesintheloweredgeofthedoorare open. Spraywaterunderthebodyandinthe wheelwellstoloosenthedirtandwashaway roadsalt.
Avoidleavingwaterspotsonthepaintsurface byusingadampchamoistodrythevehicle.

natural_image
Line drawing of a car parked near a gas station, with no visible text or symbolsModelwithrearspoiler

CAUTION
Donotuseanautomaticcarwashfor modelwithrearspoiler.Therearspoiler maybedamaged.
WAXING
Regularwaxingprotectsthepaintsurfaceand helpsretainnewvehicleappearance.Polishing isrecommendedtoremovebuilt-upwaxresidue andtoavoidawweatheredappearancebefore reapplyingwax.
ANISSANdealercanassistyouinchoosingthe properproduct.
●Waxyourvehicleonlyafterathorough washing.Followtheinstructionssupplied withthewax.
- Donotuseawaxcontaininganyabrasives, cuttingcompoundsorcleanersthatmay damagethevehiclefinish.
Machinecompoundoraggressivepolishingona basecoat/clearcoatpaintfinishmaydullthe finishorleaveswirlmarks.
REMOVINGSPOTS
Removetarandoilspots,industrialdust, insects,andtreesapasquicklyaspossible fromthepaintsurfacetoavoidlastingdamage orstaining.Specialcleaningproductsare availableataNISSANdealeroranyautomotive accessorystores.
UNDERBODY
Inareaswhereroadsaltisusedinwinter,the underbodymustbecleanedregularly.Thiswill preventdirtandsaltfrombuildingupand causingtheaccelerationofcorrosiononthe underbodyandsuspension.Beforethewinter periodandagaininthespring,theunderseal mustbecheckedand,ifnecessary,re-treated.
GLASS
Useglasscleanertoremovesmokeanddust filmfromtheglasssurfaces.Itisnormalforglass tobecomecoatedwithafilmafterthevehicleis parkedinthehotsun.Glasscleanerandasoft clothwilleasilyremovethisfilm.

CAUTION
Whencleaningtheinsideofthewindows,donotusesharp-edgedtools,abrasivecleanersorchlorine-based disinfectantcleaners.Theycoulddamagetheelectricalconductors,radio antennaelementsorrearwindow defrosterelements.
WHEELS
Washthewheelswhenwashingthevehicle to maintaintheirappearance.
- Cleantheinnersideofthewheelswhenthe wheelischangedortheundersideofthe vehicleiswashed.
- Inspectwheelrimsregularlyfordentsor corrosion. Suchdamagemaycauselossof pressureorpoorsealatthetirebead.
- NISSANrecommendsthattheroadwheels bewaxedtoprotectagainstroadsaltin areaswhereitisusedduringwinter.

CAUTION
Donotuseabrasivecleanerswhen washingthewheels.
ALUMINUMALLOYWHEELS
Washregularlywithaspongedampenedina mildsoapsolution,especiallyduringwinter monthsinareaswhereroadsaltisused.Salt coulddiscolorthewheelsifnotremoved.

CAUTION
Followthedirectionsbelowtoavoid stainingordiscoloringthewheels:
- Donotuseacleanerthatuses strongacidoralkalicontentsto cleanthewheels.
- Donotapplywheelcleanerstothe wheelswhentheyarehot. The wheeltemperatureshouldbethe sameasambienttemperature.
- Rinsethewheeltocompletelyremovethecleanerwithin15minutes afterthecleanerisapplied.
CHROMEPARTS
Cleanchrome parts regularly with anon-abrasive chromepolishtomaintain the finish.
TIREDRESSING
NISSANdoesnotrecommendtheuseoftire dressings.Tiremanufacturersapplyacoatingto thetirestohelpreducediscolorationofthe rubber.Ifatiredressingisappliedtothetires,it mayreactwiththecoatingandformacompound.Thiscompoundmaycomeoffthetire whiledrivingandstainthevehiclepaint.
If you choosetouse atiredressing, takethe following precautions:
- Useawater-basedtiredressing. The coating on the tired dissolves more easily with an oil-basedtiredressing.
- Applyalightcoatoftiredressingtohelp preventitfromenteringthetiretread/grooves(whereitwouldbedifficultto remove).
- Wipeoffexcesstiredressing usingadry towel. Makesurethetiredressingis completelyremovedfromthetiretread/grooves.
- Allow the tired dressing today as recommended by tired dressing manufacturer.
CLEANINGINTERIOR
Occasionallyremoveloosedustfromtheinterior trim,plasticpartsandseatsusingavacuum cleanerorsoftbristledbrush.Wipethevinyland leathersurfaceswithaclean,softclothdam-penedinmildsoapsolution,thenwipeclean withadrysoftcloth.
Regularcareandcleaningisrequiredinorderto maintaintheappearanceoftheleather.
Before using any fabric protector, read the manufacturer's recommendations. Some fabric protectors contain chemical that may stain or bleach these at material.
Useaclothdampenedonlywithwater, toclean themeterandgaugelens.

WARNING
Donotusewateroracidiccleaners(hot steamcleaners)ontheseat.Thiscan damagetheseatoroccupantclassificationsensors.Thiscanalsoaffectthe operationoftheairbagsystemand resultinseriouspersonalinjury.

CAUTION
- Neverusebenzine, thinner, orany similar material.
- Forcleaning,useasoftcloth,dampenedwithwater.Neverusearough cloth,alcohol,benzine,thinneror anykindofsolventorpapertowel withachemicalcleaningagent. Theywillscratchorcausediscolorationtothelens.
- Donotsprayanyliquidsuchas wateronthemeterlens.Spraying liquidmaycausethesystem to malfunction.
- Smalldirtparticlescanbeabrasive anddamagingtotheleathersurfaces and should be removed promptly.Donotusesaddlesoap, carwaxes,polishes,oils,cleaning fluids,solvents,detergentsorammonia-basedcleanersastheymay damagetheleather'snaturalfinish.
- Neverusefabricprotectorsunless recommendedbythemanufacturer.
- Donotuseglassorplasticcleaner onmeterorgaugelenscovers.It
maydamagethelenscover.
AIRFRESHENERS
Mostairfreshenersuseasolventthatcould affectthevehicleinterior.Ifyouuseanair freshener,takethefollowingprecautions:
●Hanging-typeairfreshenerscancause permanentdiscolorationwhentheycontact vehicleinteriorsurfaces. Placetheair freshenerinalocationthatallowsittohang freeandnotcontactaninteriorsurface.
- Liquid-typeairfreshenerstypicallyclipon thevents. Theseproductscancause immediatedamageanddiscolorationwhen spilledoninteriorsurfaces.
Carefullyreadandfollowthemanufacturer's instructionsbeforeusingairfresheners.
FLOORMATS

WARNING
To avoid potential pedal interference that may result in a collision, injury or death:
- NEVERplaceafloormatontopof anotherfloormatinthedriverfront positionorinstallthemupside downorbackwards.
Appearanceandcare
- It is recommended that you use only genuine NISSANfloormatsspecifically designed for use in your vehicle model and model year.
- Properlypositionthematsinthe floorwellusingthefloormatpositioninghooks.See "Floormatin-stallation"(P.7-6).
- Makesurethefloormatdoesnot interferewithpedaloperation.
- Periodicallycheckthefloormatsto makesuretheyareproperlyinstalled.
- Aftercleaningthevehicleinterior, checkthefloormatstomakesure theyareproperlyinstalled.
TheuseofgenuineNISSANfloormatscan extendthelifeofyourvehiclecarpetandmakeit easiertocleantheinterior.Matsshouldbe maintainedwithregularcleaningandreplacedif theybecomeexcessivelyworn.

natural_image
Technical line drawing of a mechanical component with no visible text or symbolsFloormatinstallation
Yourvehicleisequippedwithfloormatpositioninghook(s).Thenumberandshapeofthefloor matpositioninghook(s)foreachseatingposition variesdependingonthevehicle.
WheninstallinggenuineNISSANfloormats, followtheinstallationinstructionsprovidedwith thefloormatandthefollowing:
- Positionthefloormatinthefloorwellsothat thefloormatgrommetholesarealignedwith thehook(s).
-
Securethegrommetholesintothehook(s) andensurethatthefloormatisproperly positioned.
-
Makesurethefloormatdoesnotinterfere withpedaloperation.Withtheignitioninthe OFFpositionandtheshiftleverintheP (Park)position(ContinuouslyVariableTransmission(CVT)models)ortheshiftleverin theN(Neutral)position(ManualTransmission(MT)models),fullyapplyandreleaseall pedals.Thefloormatmustnotinterferewith pedaloperationorpreventthepedalfrom returningtoitsnormalposition.ItisrecommendedyouseeaNISSANdealerfor detailsaboutinstallingthefloormatsinyour vehicle.
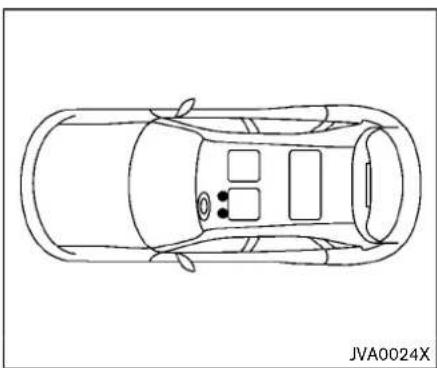
natural_image
Top-down line drawing of a car showing front and rear views with no text or symbolsPositioninghook(s)
The illustrations show the location of the floor mat positioning hook(s).
SEATBELTS
Theseatbeltscanbecleanedbywipingthem withaspongedampenedinamildsoap solution.Allowthebeltstodrycompletely in theshadebeforeusingthem.
See"Seatbelts"(P.1-10).

WARNING
Donotallowwetseatbeltstorollupin theretractor.NEVERusebleach,dye,or chemicalsolventstocleantheseat
belts, sincethesematerialsmayseverelyweakentheseatbeltwebbing.
CORROSIONPROTECTION
MOSTCOMMONFACTORSCONTRIBUTINGTOVEHICLECORROSION
- The accumulation of moisture-retaining dirt and debrisin body panel sections, cavities, and other areas.
- Damagetopaintandotherprotectivecoatingscausedbygravelandstonechipsor minortrafficaccidents.
ENVIRONMENTALFACTORSINFLUENCETHERATEOFCORROSION
Moisture
Accumulation of sand, dirt and water on the vehicle body underside can accelerate corrosion. Wet floor coverings will not dry completely inside the vehicle, and should be removed for drying to avoid floor panel corrosion.
Relativehumidity
Corrosionwillbeacceleratedinareasofhigh relativehumidity,especiallythoseareaswhere thetemperaturesstayabovefreezingwhere atmosphericpollutionexists,orwhereroadsalt isused.
Appearanceandcare7-7
Temperature
Atemperatureincreasewillacceleratetherate ofcorrosiontothosepartswhicharenotwell ventilated.
Airpollution
Industrial pollution, the presence of salt in the air in coastal areas, or heavy roads salt use will accelerate the corrosion process. Roads salt will also accelerate the integration of paint surfaces.
TOPROTECT YOURVEHICLEFROM CORROSION
- Washandwaxyourvehicleoftentokepthe vehicleclean.
●Alwayscheckforminordamagetothepaint andrepairitassoonaspossible. - Keepdrainholesatthebottomofthedoors opentoavoidwateraccumulation.
- Checktheunderbodyforaccumulationof sand, dirtorsalt. If present, washwithwater as soon as possible.

CAUTION
- NEVERremovedirt, sandorother debris from the passenger compartment by washing it out with a hose.
7-8 Appearance and care
Removedirtwithavacuumcleaner. ●Neverallowwaterorotherliquidsto comeincontactwithelectronic componentsinsidethevehicleas thismaydamagethem.
Chemicalsusedforroadsurfacedeicingare extremelycorrosive. Theyacceleratecorrosion anddeteriorationofunderbodycomponents suchastheexhaustsystem,fuelandbrake lines,brakecables,floorpanandfenders.
Inwinter, the underbody must be cleaned periodically.
For additional protection against trust and corrosion, which may be required in some areas, its recommended you consult a NISSAN dealer.
8Do-it-yourself
Maintenance precautions....8-2
Enginecompartmentchecklocations....8-3
MR16DDTengine....8-3
Enginecoolingsystem....8-4
Checkingenginecoolantlevel....8-5
Changingenginecoolant....8-5
Engineoil....8-5
Checkingengineoillevel....8-5
Changingengineoilandfilter....8-6
ContinuouslyVariableTransmission(CVT)fluid......8-8
ForNISMORSmodels....8-8
ExceptforNISMORSmodels....8-8
Brakeandclutch(ifsoequipped)fluid....8-9
Windowwasherfluid....8-9
Battery....8-10
Jumpstarting....8-12
Variablevoltagecontrolsystem....8-12
Drivebelt....8-12
Sparkplugs....8-13
Replacingsparkplugs....8-13
Aircleaner....8-14
Windshieldwiperblades....8-15
Cleaning....8-15
Replacing....8-15
Rearwindowwiperblade....8-16
Brakes....8-16
Self-adjustingbrakes....8-16
Brakepadwearwarning....8-16
Fuses....8-17
Enginecompartment......8-17
Passengercompartment....8-19
IntelligentKeybatteryreplacement....8-20
Lights....8-23
Headlights....8-23
Exteriorandinteriorlights....8-26
Wheelsandtires....8-28
Tirepressure....8-28
Tirelabeling....8-34
Changingwheelsandtires....8-38
MAINTENANCEPRECAUTIONS
When performing any inspection or maintenance work your vehicle, always take care to prevent serious accident in injury to yourself for damage to the vehicle. The following are general precautions which should be closely observed.

WARNING
- Parkthevehicleonalevelsurface, applytheparkingbrakesecurely andblockthewheelstopprevent thevehiclefrommoving.Movethe shiftlevertotheP(Park)position (CVTmodel)ortheshiftlevertothe N(Neutral)position(MTmodel).
- Besuretheignitionswitchisinthe OFForLOCKpositionwhenperforminganypartsreplacementor repairs.
- If you must work with the engine running, keep your hands, clothing, hair and tools away from moving fans, belts and any other moving parts.
- Itisadvisabletosecureorremove anylooseclothingandremoveany jewelry,suchasrings,watches,etc. beforeworkingonyourvehicle.
●Alwaysweareyeprotectionwheneveryouworkonyourvehicle.
- Ifyoumustruntheengineinan enclosedspacesuchasagarage,be surethereisproperventilationfor exhaustgasestoescape.
- Nevergetunderthevehiclewhileit issupportedonlybyajack.Ifitis necessarytoworkunderthevehicle, supportitwithsafetystands.
- Keepsmokingmaterials,flameand sparksawayfromfueltankandthe battery.
- Because the fuellines are under high pressure even when the engine is off, it is recommended you visit a NISSAN dealer for service of the fuel filter or fuellines.

CAUTION
- Donotworkunderthehoodwhile theengineishot.Turntheengine offandwaituntilcoolsdown.
- Avoiddirectcontactwithusedengineoilandcoolant.Improperly disposedengineoil,andengine
coolantand/orothervehiclefluids candamagetheenvironment.Alwaysconformtolocalregulations fordisposalofvehiclefluid.
- NeverleavetheengineortheCVT relatedcomponentharnessesdisconnectedwhiletheignitionswitch isintheONposition.
- Neverconnectordisconnectthe batteryoranytransistorizedcomponentwhiletheignitionswitchis intheONposition.
-Yourvehicleisequippedwithan automaticenginecoolingfan.Itmay comeonatanytimewithoutwarning,eveniftheignitionkeyisinthe OFFpositionandtheengineisnot running.Toavoidinjury,always disconnectthenegativebattery cablebeforeworkingnearthefan.
This "8.Do-it-yourself" section gives instructions regarding only those items which are relatively easy for an owner to perform.
AgenuineNISSANServiceManualisalso available.(See "Owner'smanual/servicemanual orderinformation"(P.10-22).)
Youshouldbeawarethatincompleteor
ENGINECOMPARTMENTCHECK LOCATIONS
improperservicingmayresultinoperating difficultiesorexcessiveemissions,andcould affectyourwarrantycoverage.Ifindoubt aboutanyservicing,itisrecommended youhaveitdonebyaNISSANdealer.
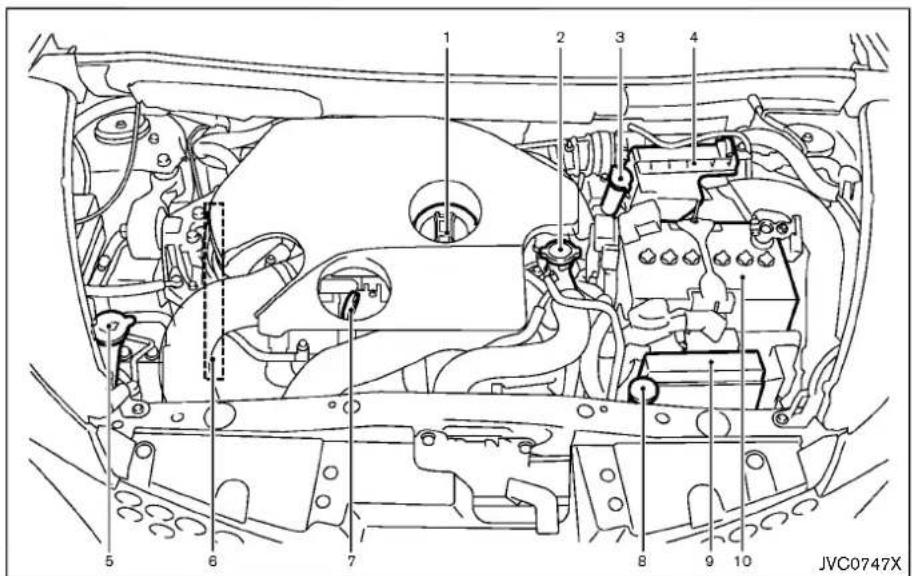
MR16DDTENGINE
- Engineoilfillercap
2.Radiatorfillercap - Brakeandclutch*fluidreservoir
4.Aircleaner -
Windowwasherfluidreservoir
6.Enginedrivebeltlocation -
Engineoildipstick
- Enginecoolantreservoir
9.Fuse/fusiblelinkholder
10.Battery
*:forManualTransmission(MT)models
Do-it-yourself8-3
ENGINECOOLINGSYSTEM
Theenginecoolingsystemisfilledatthefactory withapre-dilutedmixtureof50%Genuine NISSANLongLifeAntifreeze/Coolant(blue)and 50%watertoprovideyear-roundanti-freeze andcoolantprotection.Theanti-freezesolution containsrustandcorrosioninhibitors.Additional enginecoolingsystemadditivesarenotnecessary.

WARNING
- Neverremovetheradiatororcool-
antreservoircapwhentheengineis
hot.Waituntiltheengineand
radiatorcooldown.Seriousburns
couldbecausedbyhighpressure
fluidescapingfromtheradiator.
Seeprecautionsin"Ifyourvehicle
overheats"(P.6-11)ofthismanual.
•Theradiatorisequippedwitha pressuretyperadiatorcap.Topreventenginedamage,useonlya genuineNISSANradiatorcap. - If the engine was stopped soon when the engine is shot, the cooling fan may operate for approximately 10 minutes after the engine was stopped to cool the components in the engine compartment. When the
coolingfanisoperating,besure thathandsorotheritemsdonotget caughtinit.

CAUTION
- Neveruseanycoolingsystemadditivessuchasradiatorsealer.Additivesmayclogthecoolingsystem andcausedamagetotheengine, transmissionand/orcoolingsystem.
- Whenaddingorreplacingcoolant, be sure to use only Genuine NISSANLongLifeAntifreeze/Coolant(blue)orequivalent.Genuine NISSANLongLifeAntifreeze/Coolant(blue)ispre-dilutedtoprovide antifreeze protection to -34 °F (-37 °C).Ifadditionalfreezeprotectionisneededduetoweatherwhere youoperateyourvehicle,addGenuineNISSANLongLifeAntifreeze/Coolant(blue)concentratefollowingthedirectionsonthecontainer. Ifanequivalentcoolantotherthan GenuineNISSANLongLifeAntifreeze/Coolant(blue)isused,fol-
low the coolant manufacture's instructionstomaintain minimum antifreeze protection to -34°F (-37°C). Theuseofothertypes of coolantsolutionsotherthanGenuineNISSANLongLifeAntifreeze/ Coolant(blue)orequivalentmay damagetheenginecoolingsystem.
- Thelifeexpectancyofthefactory-fill coolantis105,000miles(168,000 km)or 7years.Mixing anyother typeofcoolantotherthanGenuine NISSANLongLifeAntifreeze/Coolant(blue),including Genuine NISSANLongLifeAntifreeze/Coolant(green),ortheuseofnon-distilledwaterwillreducethelife expectancyofthefactory-fillcoolant.Refertothe"9.Maintenance and schedules"sectionofthismanualformoredetails.

CHECKINGENGINECOOLANTLEVEL
Checkthecoolantlevelinthereservoirwhen theengineiscold.lfthecoolantlevelisbelow theMINlevel ② ,openthereservoircapand addcoolantuptotheMAXlevel ① .Ifthe reservoirisempty,checkthecoolantlevelinthe radiatorwhentheengineiscold.lfthereis insufficientcoolantintheradiator,filltheradiator withcoolantuptothefilleropeningandalsoadd ittothereservoiruptotheMAXlevel ① .
Tightenthecapsecurelyafteraddingengine coolant.
If the cooling system frequently requires coolant, have it checked. It is recommended you visit a NISSAN dealer for this
service.
CHANGINGENGINECOOLANT
It is recommended that major cooling system repairs be performed by a NISSAN dealer. The service procedures can be found in the appropriate NISSAN Service Manual.
Improperservicingcanresultinreduced heaterperformanceandengineoverheating.

WARNING
•To avoid the danger of being scalded, never changethe coolant when the engine is shot.
- Neverremovetheradiatorcapwhen theengineishot.Seriousburns couldbecausedbyhighpressure fluidescapingfromtheradiator.
- Avoiddirectskincontactwithused coolant.Ifskincontactismade, washthoroughlywithsoaporhand cleanerassoonaspossible.
- Keepcoolantoutofreachofchildrenandpets.
Enginecoolantmustbedisposedofproperly. Checkyourlocalregulations.
ENGINEOIL
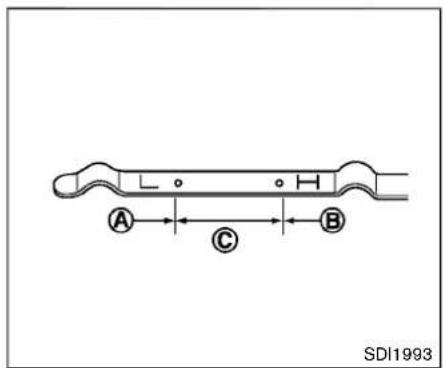
CHECKINGENGINEOILLEVEL
- Parkthevehicleonalevelsurfaceandapply theparkingbrake.
- Runtheengineuntilreachesoperating temperature.
- Turnofftheengine. Waitmorethan10 minutesfortheoiltodrainbackinto theoilpan.
- Removethedipstickandwipeitclean. Reinsertitalltheway.
- Removethedipstickagainandchecktheoil level.Itshouldbewithintherange ©. Ifthe oillevelisbelow Ⓐ,removetheoilfiller capandpourrecommendedoilthroughthe
opening.Donotoverfill Ⓑ.
- Recheckoillevelwiththedipstick.
Itisnormaltoaddsomeoilbetweenoil maintenanceintervalsorduringthebreak-inperiod,dependingontheseverityof operatingconditions.
CAUTION
Oillevelshouldbecheckedregularly. Operatingtheenginewithaninsufficientamountofoilcandamagethe engine, and such damage is not covered by the warranty.
CHANGINGENGINEOILANDFILTER
Vehicleset-up
- Parkthevehicleonalevelsurfaceandapply theparkingbrake.
- Runtheengine until treachestheoperating temperature.
-
Turntheengineoffandwaitmorethan10 minutes.
-
Raise and support the vehicle using a suitable floor jack and safety jack stands.
-
Placethesafetyjackstandsunderthe vehiclejack-uppoints.
- Asuitableadaptersshouldbeattachedto thejackstandsaddle.
CAUTION
Makesurethecorrectliftingandsupportpointsareusedtoavoidvehicle damage.

ForNISMORSmodels

ExceptforNISMORSmodels
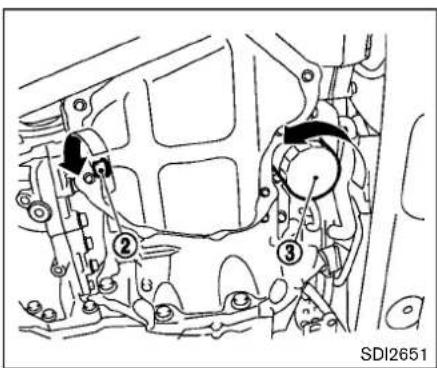
1.Oilfillercap
2.Oildrainplug
3.Oilfilter
Engineoilandfilter
- Placealargedrainpanunderthedrainplug.
- Removetheoilfillercap.
- Removethedrainplugwithawrenchand completelydraintheoil.

CAUTION
Becarefulnottoburnyourself,asthe engineoilishot.
- Wasteoilmustbedisposedof properly.
- Checkyourlocalregulations.
(Performsteps4to7onlywhentheengine oilfilterchangeisneeded.)
- Loosentheoilfilterwithanoilfilterwrench. Removetheoilfilterbyturningitbyhand.
- Wipetheengineoilfiltermountingsurface withacleanrag.

CAUTION
Besuretoremoveanyoldgasket materialremainingonthemounting surfaceoftheengine.Failureretodoso couldleadtoengine damage.
- Coatthegasketonthenewfilterwithclean engineoil.
- Screwintheoilfilterclockwiseuntilaslight resistanceisfelt, thentightenadditionally morethan2/3turn.
Oilfiltertighteningtorque:
11to15ft-lb (14.7to20.5N·m)
- Cleanandre-installthedrainplugwitha newwasher.Securelytightenthedrainplug withawrench.
Drainplugtighteningtorque: 22to29ft-lb (29to39N·m)
Donotuseexcessiveforce.
- Refilltheenginewiththerecommendedoil throughtheoilfilleropening,andinstallthe oilfillercapse securely.
See "Capacitiesandrecommendedfluids/ lubricants" (P.10-2) fordrainandrefill capacity. The drainandrefill capacity depends on the oil temperature and drain time. Use the specifications for reference only. Always used the dipstick to determine the proper amount of oil in the engine.
10.Starttheengineandcheckforleakage aroundthedrainplugandtheoilfilter. Correctasrequired. - Turntheengineoffandwaitmorethan10 minutes. Checktheoillevelwiththedipstick. Addengineoilifnecessary.
Aftertheoperation
- Lowerthevehiclecarefullytotheground.
- Disposeofwasteoilandfilterproperly.
CONTINUOUSLYVARIABLE TRANSMISSION(CVT)FLUID
Whencheckingorreplacementisrequired,we recommendaNISSANdealerforservicing.
FORNISMORSMODELS

WARNING
•Prolonged and repeated contact with used engine oil may cause skin cancer.
- Trytoavoiddirectskincontactwith usedoil.Ifskincontactismade, washthoroughlywithsoaporhand cleanerassoonaspossible.
- Keepusedengineoiloutofreachof children.

CAUTION
- NISSAN recommends using GenuineNISSANCVTFluidNS-2 (or equivalent) ONLY in NISSANCVTs. Donotmix with other fluids.
- DonotuseAutomatictransmission fluid(ATF)orManualtransmission fluidinaNISSANCVT,asitmay damagetheCVT.Damagecaused by theuseoffluidsotherthanas recommendedisnotcovered by theNISSAN'sNewVehicleLimited Warranty.
- Usingfluidsthatarenotequivalent toGenuineNISSANCVTFluidNS-2 mayalsodamagetheCVT.Damage causedbytheuseoffluidsother thanasrecommendedisnotcoveredbytheNISSAN'sNewVehicle LimitedWarranty.
EXCEPTFORNISMORSMODELS

CAUTION
- NISSAN recommends using Genuine NISSANCVTFluidNS-3 (or equivalent) ONLY in NISSANCVTs. Donotmix with other fluids.
- DonotuseAutomatictransmission fluid(ATF)orManualtransmission fluidinaNISSANCVT,asitmay damagetheCVT.Damagecausedby theuseoffluidsotherthanas recommendedisnotcoveredby theNISSAN'sNewVehicleLimited Warranty.
- Usingfluidsthatarenotequivalent toGenuineNISSANCVTFluidNS-3 mayalsodamagetheCVT.Damage causedbytheuseoffluidsother thanasrecommendedisnotcoveredbytheNISSAN'sNewVehicle LimitedWarranty.
BRAKEANDCLUTCH(ifso equipped)FLUID
For additional brake and clutch fluid information, see "Capacities and recommended fluids/lubricants" (P.10-2) of this manual.

WARNING
•Useonlynewfluidfromasealed container.Old,inferiororcontaminatedfluidmaydamagethebrake andclutchsystems.Theuseof improperfluidscandamagethe brakeandclutchsystems,andaffect thevehicle'sstoppingability.
•Cleanthefillercapbeforeremoving.
- Brakeandclutchfluidispoisonous andshouldbestoredcarefullyin markedcontainersoutofthereach ofchildren.

CAUTION
Donotspillthefluidonanypainted surfaces. This will damage the paint. If fluidisspilled, immediately wash the surface with water.

Checkthefluidlevelinthereservoir.Ifthefluidis belowtheMINline ② orthebrakewarning lightcomeson,addGenuineNISSANSuper HeavyDutyBrakeFluidorequivalentDOT3 fluiduptotheMAXline ① .Iffluidmustbe addedfrequently,the system should be checked.ItisrecommendedyouvisitaNISSAN dealerforthisservice.
WINDOWWASHERFLUID

Tofillthewindowwasherfluidreservoir, lift the capandpourthewindowwasherfluidintothe reservoiropening.
Addawashersolventtothewasherforbetter cleaning.Inthewinterseason,addawindshield washerantifreeze.Followthemanufacturer's instructionsforthemixtureratio.
Fillthewindowwasherfluidreservoirperiodically.
Addfluidwhenthelowwasherfluidwarning lightilluminates(ifsoequipped).
Tocheckthefluidlevel, use your fingertoplug the centerhole ① of the cap/tube assembly, then remove it from the reservoir. If there is no fluid in the tube, add fluid.
Refillthereservoirmorefrequentlywhendriving conditionsrequireanincreasedamountof windowwasherfluid.
Recommendedfluid:
GenuineNISSANWindshieldWasherConcentrateCleaner&Antifreezeorequivalent

CAUTION
- Donotsubstituteengineanti-freeze coolantforwindowwashersolution. Thismayresultindamagetothe paint.
- Donotfillthewindowwasher reservoirtankwithwasherfluid concentratesatfullstrength.Some methylalcoholbasedwasherfluid concentratesmaypermanentlystain thegrilleifspilledwhilefillingthe windowwasherreservoirtank.
- Pre-mixwasherfluidconcentrates withwatertothemanufacturer's recommendedlevelsbeforepouring thefluidintothewindowwasher
reservoirtank. Donotusethe windowwasherreservoirtankto mixthewasherfluidconcentrate andwater.
BATTERY
- Keepthebatterysurfacecleananddry. Cleanthebatterywithasolutionofbaking sodaandwater.
●Make certaintyheterminalconnectionsare cleanandsecurelytightened. - If the vehicle is not to be used for 30 days or longer, disconnect then negative ⊖ battery terminal cable to prevent discharging it.
NOTE:
Careshouldbetakentoavoidsituations thatcanleadto potential batterydischarge andpotentialno-startconditionssuchas:
- Installationorextendeduseofelectronicaccessoriesthatconsumebattery powerwhentheengineisnotrunning (Phonechargers,GPS,DVDplayers, etc.)
- Vehicleisnotdrivenregularly and/or only drivenshortdistances.
In these cases, the battery may need to be charged to maintain battery health.

WARNING
- Donotexposethebatterytoflames orelectricalsparks.Hydrogengas generatedbythebatteryisexplosive.Donotallowbatteryfluidto
contactyourskin,eyes,fabricsor paintedsurfaces.Aftertouchinga batteryorbatterycap,donottouch orrubyoreyes.Thoroughlywash yourhands.Iftheacidcontactsyour eyes,skinorclothingimmediately flushwithwaterforatleast15 minutesandseekmedicalattention.
- Donotoperatethevehicleifthe fluidinthebatteryislow.Low batteryfluidcancauseahigherload onthebatterywhichcangenerate heat,reducebatterylife,andin somecasesleadtoanexplosion.
- Whenworkingtonornearabattery, alwayswearsuitableeyeprotection andremovealljewelry.
- Batteryposts,terminalsandrelated accessoriescontainleadandlead compounds.Wash hands after handling.
- Keepthebatteryoutofthereachof children.
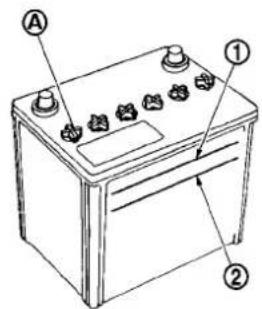
DI0137MA
Checkthefluidleveleachcell.Itshouldbe betweentheUPPERLEVEL ① andLOWER LEVEL ② lines.
Ifitisnecessarytoaddfluid,addonlydistilled watertobringtheleveltotheindicatorineach filleropening.Donotoverfill.
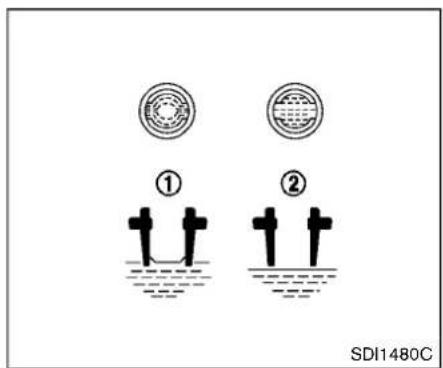
- Removethecellplugs Ⓐ
- AdddistilledwateruptotheUPPERLEVEL ① line. Ifthesideofthebatteryisnotclear,check thedistilledwaterlevelbylookingdirectly abovethecell;thecondition ① indicates OKandthecondition ② needsmoretobe added.
- Tightencellplugs Ⓐ
Vehiclesoperatedinhightemperaturesorunder severeconditionsrequirefrequentchecksofthe batteryfluidlevel.
JUMPSTARTING
Ifjumpstartingisnecessary,see "Jumpstarting" (P.6-9).Iftheenginedoesnotstartbyjump starting,thebatterymayhavetobereplaced.It isrecommendedyouvisitaNISSANdealerfor thisservice.
VARIABLEVOLTAGECONTROL SYSTEM

CAUTION
- Donotgroundaccessoriesdirectly tothebatteryterminal.Doingsowill bypasssthevariablevoltagecontrol systemandthevehiclebatterymay notchargecompletely.
- Use electrical accessories with the engineer running to avoid discharging the vehicle battery.
The variable voltage control system measures the amount of electrical discharge from the battery and control voltage generated by the generator.
DRIVEBELT

- Alternator
2.Drivebeltauto-tensioner
3.Crankshaftpulley - Airconditionercompressor
- Waterpump

WARNING
BesuretheignitionswitchisintheOFF orLOCKpositionbeforeservicingdrive belts.Theenginecouldrotateunexpectedly.
- Visually inspect the belt for sign of unusual wear, cuts, fraying or looseness. If the belt is
SPARKPLUGS
inpoorconditionorloose,haveitreplaced oradjusted.Itisrecommendedyouvisita NISSANdealerforthisservice.
- Havethebeltconditioncheckedregularly.

WARNING
Besuretheengineandignitionswitch areoffandthattheparkingbrakeis engagedsecurely.

CAUTION
Besuretousethecorrectsocketto removethesparkplugs.Anincorrect socketcandamagethesparkplugs.

natural_image
Technical illustration of a spark plug and its internal coil component (no text or symbols)REPLACINGSPARKPLUGS
Ifreplacementisrequired,itisrecommended youvisitaNISSANdealerforthisservice.
Iridiumplatinum-tippedsparkplugs
Itisnotnecessarytoreplacetheiridium platinum-tippedsparkplugsasfrequentlyas theconventionaltypesparkplugssincetheywill lastmuchlonger.Followthemaintenance scheduleshowninthe"9.Maintenanceand schedules"section.Donotreusetheiridium platinum-tippedsparkplugsbycleaningor regapping.
Alwaysreplacesparkplugswithrecommendedorequivalentones.
Do-it-yourself8-13
AIRCLEANER

Toremovethefilter, pulltheairduct ① upward toremoveit. Pullthetabs ② , thenpullthe cover ③ upward.
Theaircleanerfiltershouldnotbecleanedand reused.Replaceitaccordingtothemaintenance scheduleshowninthe"9.Maintenanceand schedules"section.Whenreplacingthefilter, wipetheinsideoftheaircleanerhousingand thecoverwithadampcloth.

WARNING
- Operating the engine with the air cleaner removed can cause you or other stobe burned. The aircleaner
8-14 Do-it-yourself
notonlycleanstheair,itstops flameiftheenginebackfires.Ifit isnotthere,andtheenginebackfires,youcouldbeburned.Donot drivewiththeaircleanerremoved, andbecarefulwhenworkingonthe enginewiththeaircleanerremoved.
- Neverpourfuelintothethrottle bodyorattempttostarttheengine withtheaircleanerremoved.Doing socouldresultinseriousinjury.
WINDSHIELDWIPERBLADES
CLEANING
If your windshield is not clear after using the windshield washer or if a blade chatters when running, wax or other material maybe on the blade or windshield.
Cleantheoutsideofthewindshieldwitha washersolutionoramildetergent.Your windshielddiscleanifbeadsdonotformwhen rinsingwithclearwater.
Cleaneachbladebywipingitwithacloth soakedinawashersolutionoramilddetergent. Thenrinsethebladewithclearwater.Ifyour windshieldisstillnotclearaftercleaningthe bladesandusingthewiper,replacetheblades.

CAUTION
Wornwindshieldwiperbladescan damagethewindshieldandimpair drivervision.
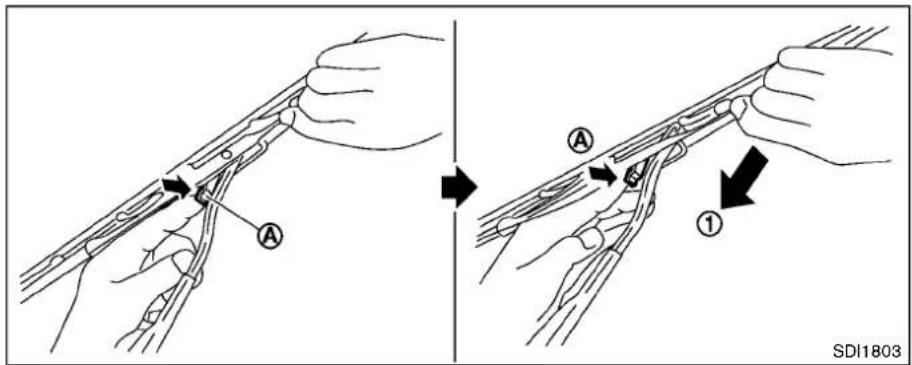
REPLACING
Replacethewiperbladesiftheyareworn.
Before replacing the wiper blades, the wiper should be in the fully up position to avoid scratching the engine hood or damaging the wiper arm. Topullup the wiper arm, see "Wiper and washerswitch" (P.2-36).
- Liftthewiperarmawayfromthewindshield.
2.Pushandholdthereleasetab Ⓐ, and movethewiperbladedownthewiperarm Ⓡ.
-
Insertthenewwiperbladeontothewiper armuntilaclicksounds.
-
Rotatethewiperbladesothatthedimpleis inthegroove.

CAUTION
- Afterwiperbladereplacement, returnthewiperarmtoitsoriginal position; otherwiseitmaybedamagedwhenthehoodisopened.
- Makesurethewiperbladescontact theglass;otherwisethearmmay be damagedfromwindpressure.
REARWINDOWWIPERBLADE
BRAKES

Becarefulnottoclogthewashernozzle A. Thismaycauseimproperwindshieldwasher operation.Ifthenozzleisclogged,removeany objectswithaneedleorsmallpin B. Be carefulnottodamagethenozzle.
ItisrecommendedyoucontactaNISSANdealer ifcheckingorreplacementisrequired.
Ifthebrakesdonotoperateproperly,itis recommendedyouhavethebrakescheckedby aNISSANdealer.
SELF-ADJUSTINGBRAKES
Your vehicle is equipped with self-adjusting brakes.
Thedisc-typebrakesself-adjusteverytimethe brakepedalisapplied.

WARNING
Haveyourbrakesystemcheckedifthe brakepedalheightdoesnotreturnto normal.Itisrecommendedyouvisita NISSANdealerforthisservice.
BRAKEPADWEARWARNING
Thediscbrakepadshaveaudiblewearwarnings. Whenabrakepadrequiresreplacement, it willmakeahighpitchedscrapingsoundwhen thevehicleisinmotion. Thisscrapingsoundwill firstoccuronlywhenthebrakepedalis depressed. Aftermorewearofthebrakepad, thesoundwillalwaysbeheardevenifthebrake pedalisnotdepressed. Havethebrakes checkedassoonaspossibleifthewearwarning soundisheard.
FUSES
Undersomedrivingorclimateconditions, occasionalbrakesqueak,squealorothernoise maybeheard.Occasionalbrakenoiseduring lighttomoderatestopsisnormalanddoesnot affectthefunctionorperformanceofthebrake system.
Properbrakeinspectionintervalsshould befollowed. For additional information, seethe maintenancescheduleshowninthe "9.Maintenanceandschedules" section.

ENGINECOMPARTMENT

WARNING
Neveruseafuseofahigherorlower amperageratingthanthatspecified on thefuseboxcover. This could damage the electrical system more electronic control units or cause a fire.
Ifanyelectricalequipmentdoesnotoperate, checkforanopenfuse.
-
Besuretheignitionswitchandtheheadlight switchareturnedoff.
-
Opentheenginehood.
- Removethefuse/fusiblelinkholdercoverby pushingthetab ① and liftingthecover fromtherightside ②, thentheleftside ③.
- Locatethefusethatneedstobereplaced.
- Removethefuse using the fuse puller located in the passenger compartment fuse box.

-
If the fuse is open fuse Ⓑ.
Ⓐ ,replaceitwithanew -
Ifanewfusealsoopens, havetheelectrical system checked and repaired. It is recommended you visit a NISSAN dealer for this service.
Theholder ④ alsocontainsthefuses.Itis recommendedyouvisitaNISSANdealerfor checkingand/orreplacing.
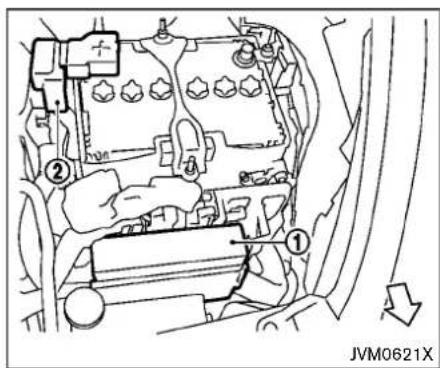
Fusiblelinks
Ifanyelectricalequipmentdoesnotoperate and thefusesareingoodcondition,checkthe fusiblelinksintheholders ① and ②.Ifanyof thesefusiblelinksaremelted,replaceonlywith genuineNISSANparts.
Forcheckingandreplacingthefusiblelinksin theholders ②,itisrecommendedyouvisita NISSANdealer.

PASSENGERCOMPARTMENT

WARNING
Neveruseafuseofahigherorlower amperageratingthanthatspecified on thefuseboxcover. This could damage the electrical system more electronic control units or cause a fire.
Ifanyelectricalequipmentdoesnotoperate, checkforanopenfuse.
- Besuretheignitionswitchandtheheadlight switchareturnedoff.
2.Removethefuseboxcover ①.
3. Removethefusewiththefusepuller ②.


- If the fuse is open fuse Ⓑ.
Ⓐ ,replaceitwithanew
- Ifanewfusealsoopens, have the electrical system checked and repaired. It is recommended you visit a NISSAN dealer for this service.

Extendedstoragefuseswitch(ifso equipped)
Toreducebatterydrain, theextendedstorage fuseswitchcomesfromthefactoryswitchedoff. Priorodeliveryofyourvehicle, theswitchis pushedin(switchedon)andshouldalways remainon.
Iftheextendedstoragefuseswitchisnot pushedin(switchedon),themetermaydisplay awarningmessage.See"Extendedstoragefuse warningmessage"(P.2-9).
Ifanyelectricalequipmentdoesnotoperate, removetheextendedstoragefuseswitchand checkforanopenfuse.
8-20Do-it-yourself
NOTE:
Iftheextendedstoragefuseswitchmal-functionsorifthefuseisopen,itisnot necessarytoreplacetheswitch.Inthis case,removetheextendedstoragefuse switchandreplaceitwithanewfuseofthe samerating.
Howtoremovetheextendedstoragefuse switch:
- Toremovetheextendedstoragefuseswitch, besuretheignitionswitchisintheOFFFor LOCKposition.
- BesuretheheadlightswitchisintheOFF position.
- Removethefuseboxcover.
- Pinchthestoragefuseswitchandpullitin thedirectionillustrated.
INTELLIGENTKEYBATTERY REPLACEMENT

CAUTION
Becarefulnottoallowchildrento swallowthebatteryandremovedparts.

flowchart
graph TD
    A["Initial heating component"] --> B["Switching cable"]
    B --> C["Electric shock"]
    C --> D["Discharge meter with polarity indicators"]
    D --> E["Load capacitor symbol"]
    E --> F["DC motor with + and - polarity indicators"]
ReplacethebatteryinthelIntelligentKeyas follows:
- Removethemechanicalkeyfromtheln- telligentKey.
- Insertasmallscrewdriverintotheslitofthe cornerandtwistitoseparatetheupperpart fromthelowerpart.Useaclothtoprotect
thecasing.
- Replacethebattery with anewone.
Recommendedbattery:
CR2025orequivalent
- Donottouchtheinternalcircuitand electricterminalsasdoingsocould causeamalfunction.
- Holdthebatterybytheedges.Holding thebatteryacrossthecontactpointswill seriouslydepletethestoragecapacity.
- Makesurethatthe ⊕ sidefacesthe bottomofthecase.
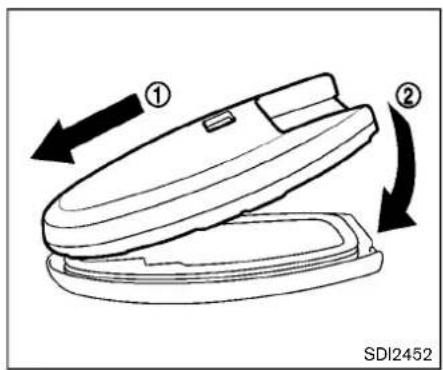
- Alignthetipsoftheupperandlowerparts ① ,andthenpushthemtogether ② until issecurelyclosed.
- Operatethebuttonstocheckitsoperation. If you need any assistance for replacement, it is recommended you visit a NISSAN dealer for this service.
FCCNotice:
ForUSA:
ThisdevicecomplieswithPart15ofthe FCCRules.Operationissubjecttothe followingtwoconditions:(1)Thisdevice maynotcauseharmfulinterference,and (2)thisdevicemustacceptanyinterfer-
Do-it-yourself8-21
encereceived, including interference that may cause undesired operation.
Note: Changesormodificationsnotexpresslyapprovedbythepartyresponsible forcompliancecouldvoidtheuser's authoritytooperatetheequipment.
ForCanada:
This device complies with Industry Canada licence-exempt RSS standard(s). Operation is subject to the following two conditions: (1) this device may not cause interference, and (2) this device must accept any interference, including interference that may cause undesired operation of the device.
LIGHTS

1.Maplight
2.Frontfoglight(ifsoequipped)
3.Headlight(high-beam/low-beam)
4.Frontparkinglight
5.Frontturnsignallight/Frontsidemarkerlight
6.Sideturnsignallight
7.Daytimerunninglight(NISMOmodels)
8. High-mounted stoplight
9.Reverselight
10. Rearturnsignallight
11.Stop/taillight
12. Licenseplatelight
13.Cargolight
14.Taillight(LED)
HEADLIGHTS
Fogmaytemporarilyforminsidethelensofthe exteriorlightsintherainorinacarwash.A temperaturedifferencebetweentheinsideand theoutsideofthelenscausesthefog. Thisis notamalfunction.Iflargedropsofwatercollect insidethelens,itisrecommendedyouvisita NISSANdealerforservicing.
Replacing
Xenonheadlightmodel:
Ifreplacementisrequired,itisrecommended youvisitaNISSANdealerforthisservice.

WARNING

HIGHVOLTAGE
When xenonheadlights are on, they produce a high voltage. Topreventan electric shock, never attempt to modify or disassemble. It is recommended to have your xenon headlights replaced at a NISSAN dealer. For additional information, see "Headlight and turn signal switch" (P.2-39).
Halogenheadlightmodel:
Theheadlightisasemi-sealedbeamtypewhich usesareplaceableheadlight(halogen)bulb.

CAUTION
- Donotleavethebulboutofthe headlightreflectorforalongperiod oftime.Dust,moisture,smoke,etc. enteringtheheadlightbodymay
8-24Do-it-yourself
affectbulbperformance.
•Highpressurehalogengasissealed inside the halogen bulb. The bulb may break if the glass envelope is scratched or the bulb is dropped.
- Onlytouchthebasewhenhandling thebulb.Never touchtheglass envelope.Touchingtheglassenvelope could significantly affectbulb lifeand/orheadlightperformance.
- Aimingisnotnecessaryafterreplacingthebulb.Whenaimingadjustment is necessary, it is recommendedyouvisitaNISSAN dealerforthisservice.
Usethesamenumberandwattageasoriginally installedasshowninthechart.

Leftsideofthevehicle
Disconnectthebatterynegativecablebefore replacingbulbs.
- Removeclip

2.Pulluppart

oftheairduct,andthen
movepart

sideways.
- Removetheairduct

- Removebackcover

5.Disconnectconnector

- Turnandpulloutsocket removethebulb.

,andthen
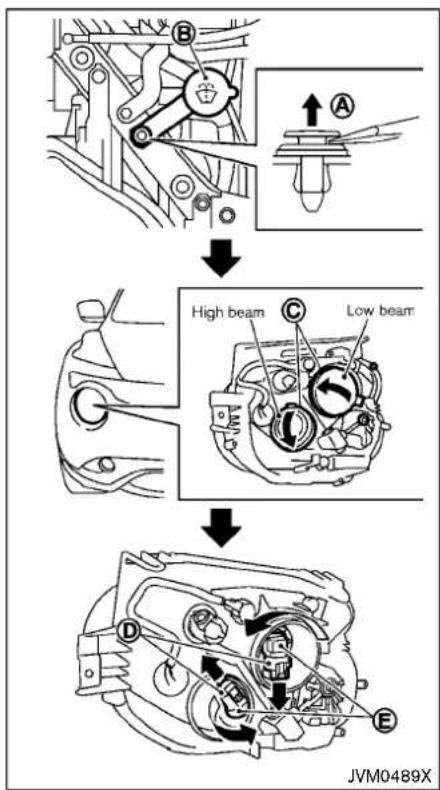
Rightsideofthevehicle
Disconnectthebatterynegativecablebefore replacingbulbs.
-
Removeclip Ⓐ.
-
Removewasherinlet Ⓑ .
-
Removebackcover © .
4.Disconnectconnector
5.Turnandpulloutsocket removethebulb. ①, and then
EXTERIORANDINTERIORLIGHTS
| ItemWattage(W)BulbNo. | ||
| Headlighthigh/lowbeams(Xenon)* | 60/35 | HB3/D2S |
| Headlighthigh/lowbeams(Halogen) | 60/55 | HB3/H11 |
| Frontturnsignallight*21WY21W | ||
| Frontparkinglight*LED-Frontsidemarkerlight*5W5W | ||
| Frontfoglight(ifsoequipped)*55H11 | ||
| Sideturnsignallight*LED-Daytimerunninglight(forNISMOmodels)*LED-Rearcombinationlight* | ||
| turnsignallight | 21WY21W | |
| stop/taillight | 21/5 | W21/5W |
| taillight(LED) | LED | — |
| back-up | 16W16W | |
| Licenseplatelight* | 5W5W | |
| Maplight | 5 | — |
| High-mountedstoplight* | LED | — |
| Cargolight | 5 | — |
| Gloveboxlight* | 1.4 | — |
*: ItisrecommendedyouvisitaNISSANdealerforreplacement.
NOTE: Always check with the Parts Department at a NISSAN dealer for the latest information about parts.


Maplight
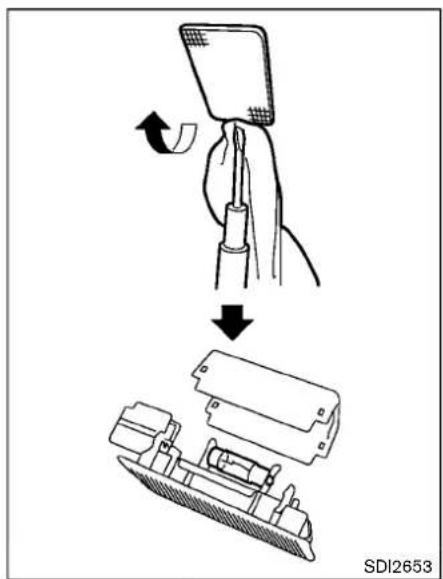
Cargolight

:REMOVE
:INSTALL
Replacementprocedures
AllotherlightsareeithertypeA,B,C,DorE.
Whenreplacingabulb,firstremovethelens and/orcover.
WHEELSANDTIRES
If you have a flattire, see "Flattire" (P.6-3). TIREPRESSURE
TirePressureMonitoringSystem(TPMS)
ThisvehicleisequippedwiththeTirePressure MonitoringSystem(TPMS).Itmonitorstire pressureofalltiresexceptthespare.When thelowtirepressurewarninglightislit,andthe CHECKTIREPRES(pressure)warningmessageisdisplayedinthevehicleinformation display,oneormoreofyourtiresissignificantly under-inflated.
The TPMS will activate only when the vehicle is driven at speeds above 16 MPH (25 km/h). Also, this system may not detect as a sudden drop in tire pressure (fore example of all tire while driving).
Formoredetails, see "Lowtirepressurewarning light" (P.2-18), "TirePressureMonitoringSystem(TPMS)" (P.5-3) and "TirePressureMonitoringSystem(TPMS)" (P.6-3).
Tireinflationpressure
Check the pressure of the tires (including the spare) often and always prioritolong distancetrips. There recommended tire pressures specifications are shown on the Tire and Loading Information label under
the"ColdTirePressure"heading.The TireandLoadingInformationlabelis affixedtothedriversidecenterpillar.
Tirepressuresshouldbecheckedregularlybecause:
- Mosttiresnaturallyloseairovertime.
- Tirescanloseairsuddenlywhen drivenoverpotholesorotherobjects orifthevehiclestrikesacurbwhile parking.
Thetirepressuresshouldbechecked whenthetiresarecold. Thetiresare consideredCOLDafterthevehiclehas beenparked for3 ormorehours, or drivenlessthan1 mile(1.6km)at moderatespeeds.
Incorrect tire pressure, including underinflation, may adversely affect tire life and vehicle handling.

WARNING
- Improperlyinflatedtirescan failsuddenlyandcausean accident.
- TheGrossVehicleWeighttrating(GVWR)islocatedontheF.M.V.S.S./C.M.V.S.S.certificationlabel.Thevehicleweight capacityisindicatedonthe TireandLoadingInformation label.Donotloadyourvehicle beyondthiscapacity.Overloadingyourvehiclemayresultinreducedtirelife,unsafe operatingconditionsdueto prematuretirefailure,orunfavorablehandlingcharacteristicsandcouldalsoleadtoa seriousaccident.Loadingbeyondthespecifiedcapacity mayalso result infailure of othervehiclecomponents.
- Beforetakingalongtrip,or whenever you heavily load your vehicle,useatirepressuregaugetoensurethatthe tirepressuresareatthespecifiedlevel.
- For additional information regarding tires, refer to "Important Tire Safety Information" (US) or "Tire Safety Information" (Canada) in the Warranty Information Booklet.
Do-it-yourself8-29


SDI2503
TireandLoadingInformationlabel
① Seatingcapacity: The maximum number of occupant that can be seated in the vehicle.
② Vehicleloadlimit: See "Vehicle loadinginformation" (P.10-15).
③ Originalsize: Thesizeofthetires originally installed on the vehicle at the factory.
④ Coldtirepressure:Inflatethetiresto thispressurewhenthetiresare cold.TiresareconsideredCOLD
afterthevehiclehasbeenparkedfor 3ormorehours,ordrivenlessthan 1 mile(1.6km)atmoderatespeeds. Therecommendedcoldtireinflation issetbythemanufacurertoprovide thebestbalanceoftirewear,vehicle handling,driveability,tirenoise,etc., uptothevehicle'sGVWR.
⑤ Tiresize—see "Tirelabeling" (P.8-34).
⑥ Sparetiresizeorcompactsparetire size(ifsoequipped)

natural_image
Technical line drawing of a mechanical assembly with a central component and surrounding components (no text or symbols)Checkingthetirepressure
- Removethevalvestemcapfromthe tire.
- Pressthepressuregaugesquarely ontothevalvestem.Donotpresstoo hardorforcethevalvestemsideways,orairwillescape.Ifthehissing soundofairescapingfromthetireis heardwhilecheckingthepressure, repositionthegaugetoeliminatethis leakage.
3.Removethegauge.
- Read the tire pressure on the gauge stemand compare it to the specifications shown on the Tire and Loading Information label.
5.Addairtothetireasneeded.Iftoo muchairisadded,pressthecoreof thevalvestembrieflywiththetipof thegaugestemtoreleasepressure. Recheckthepressureandaddor releaseairasneeded. - Installthevalvestemcap.
- Check the pressure of all other tires, including the spare.
ExceptforNISMOandNISMORSmodels:
| SIZE | COLDTIREINFLATION PRESSURE | |
| FRONTORIGINAL TIRE | P215/55R1793V | 230kPa,33PSI(2WD MTmodels)250kPa,36PSI(2WD CVTmodels)240kPa,35PSI(AWD models) |
| REARORIGINALTIREP | 215/55R1793V | 230kPa,33PSI(2WD MTmodels)250kPa,36PSI(2WD CVTmodels)240kPa,35PSI(AWD models) |
| SPARETIRE | T135/80D16101M(2WD models)T135/90D16102M(AWD models) | 420kPa,60PSI |
ForNISMOmodels:
| SIZE | COLDTIREINFLATION PRESSURE | |
| FRONTORIGINAL TIRE | 225/45R1895Y | 230kPa,33PSI(2WD MTmodels)240kPa,35PSI(AWD models) |
| REARORIGINALTIRE2 | 25/45R1895Y | 230kPa,33PSI(2WD MTmodels)240kPa,35PSI(AWD models) |
| SPARETIRE | T135/80D16101M(2WD models)T135/90D16102M(AWD models) | 420kPa,60PSI |
ForNISMORSmodels:
| SIZE | COLDTIREINFLATION PRESSURE | |
| FRONTORIGINAL TIRE | 225/45R1895Y | 230kPa,33PSI(2WD MTmodels)240kPa,35PSI(AWD models) |
| REARORIGINALTIRE2 | 25/45R1895Y | 230kPa,33PSI(2WD MTmodels)240kPa,35PSI(AWD models) |
| SPARETIRET135/ | 70D1792M | 420kPa,60PSI |

Example
TIRELABELING
Federallawrequirestiremanufacturers toplacestandardizedinformationonthe sidewallofalltires.Thisinformation identifiesanddescribesthefundamental characteristicsofthetireandalso providesthetireidentificationnumber (TIN)forsafetystandardcertification. TheTINcanbeusedtoidentifythetire incaseofarecall.

Example
① Tiresize(example:P215/60R1694H)
1.P:The "P"indicatesthetireis designedforpassengervehicles. (Notalltireshavethisinformation.)
2. Three-digitnumber(215): This number gives the width in millimeters of the tire from sidewalled getosidewall edge.
3. Two-digitnumber(60): This number, knownastheaspectratio, gives the tire's ratio of height to width.
4.R:The"R"standsforradial.
5. Two-digit number(16): This number isthewheelorrimdiameterin inches.
6. Two-orthree-digitnumber(94): This numberisthetire'sloadindex.Itisa measurementofhowmuchweight eachtirecansupport.Youmaynot findthisinformationonalltires becauseitisnotrequiredbylaw.
7.H:Tirespeedrating.Youshouldnot drivethevehiclefasterthanthetire speedrating.

Example
② TIN(TireIdentificationNumber)fora newtire(example:DOTXXXXXXXX XXXX)
- DOT: Abbreviation for the "Department of Transportation". Thesymbol can be placed above, below to the left right of the Tire Identification Number.
-
Two-digitcode: Manufacturer's identificationmark
3.Two-digitcode:Tiresize -
Three-digitcode: Tiretypecode (Optional)
-
Fournumbers represent the week and year the tire was built. For example, then numbers 3103 means the 31st week of 2003. If these numbers are missing, then look on the others' wall of the tire.
③ Tireplycompositionandmaterial Thenumberoflayersorpliesofrubber-coatedfabricinthetire.
Tiremanufacturersalsomustindicatethe materialsinthetire,whichincludesteel, nylon,polyester,andothers.
④ Maximumpermissibleinflationpressure
Thisnumberisthegreatestamountofair pressurethatshouldbeputinthetire. Donotexceedthemaximumpermissible inflationpressure.
⑤ Maximumloadrating
Thisnumberindicatethemaximumload inkilogramsandpoundsthatcanbe 8-36Do-it-yourself
carriedbythetire. Whenreplacing the tiresonthevehicle,alwaysuseatirethat hasthesameloadratingasthefactory installedtire.
⑥ Termof"tubeless"or"tubetype" Indicateswhetherthetirerequiresan innertube("tubetype")ornot("tubeless").
⑦ Theword"radial"
Theword"radial"isshown,ifthetirehas radialstructure.
⑧ Manufacturerorbrandname Manufacturerorbrandnameisshown.
Othertire-relatedterminology:
Inadditiontothemanytermsthatare definedthroughoutthissection,Intended OutboardSidewallis(1)thesidewall thatcontainsawhitewall,bearswhite letteringorbearsmanufacturer,brand and/ormodelnamemoldingthatis higherordeeperthanthesamemolding ontheothersidewallofthetire,or(2)the outwardfacingsidewallofanasymme-
tricaltirethathasaparticularsidethat must always face outward when mountedonavehicle.
TYPESOFTIRES

WARNING
- Whenchangingorreplacingtires, be sure all four tires are of the same type(Example:Summer,AllSeason or Snow) and construction. A NISSANdealermaybeableto help you with information about tire type, size,speedratingandavailability.
- Replacement tires may have a lower speed rating than the factory equipped tires, and may not match the potential maximum vehicle speed. Never exceed them maximum speed rating of the tire.
- ReplacingtireswiththosenotoriginallyspecifiedbyNISSANcould affecttheproperoperationofthe TPMS.
- Foradditionalinformationregardingtires,referto"ImportantTire SafetyInformation"(US)or"Tire SafetyInformation"(Canada)inthe
WarrantyInformationBooklet.
Allseasontires
NISSANspecifiesallseasontiresonsome modelstoprovidegoodperformanceallyear, includingsnowyandicyroadconditions.All SeasontiresareidentifiedbyALLSEASON and/orM&S(MudandSnow)onthetire sidewall.Snowtireshavebettersnowtraction thanAllSeasontiresandmaybemoreappropriateinsomeareas.
Summertires
NISSANspecifiessummertiresonsome modelstoprovidesuperiorperformanceondry roads.Summertireperformanceissubstantially reducedinsnowandice.Summertiresdonot havethetiretractionratingM&Sonthetire sidewall.
Ifyouplantooperateyourvehicleinsnowyor icyconditions,NISSANrecommendstheuseof SNOWtiresorALLSEASONtiresonallfour wheels.
Snowtires
Ifsnowtiresareneeded,itisnecessarytoselect tiresequivalentinsizeandloadratingtothe originalequipmenttires.Ifyoudonot,itcan adverselyaffectthesafetyandhandlingofyour vehicle.
Generally, snowtireswillhavelowerspeed ratingsthanfactoryequippedtiresandmaynot matchthepotentialmaximumvehiclespeed. Neverexceedthemaximumspeedratingofthe tire.
If you install snowtires, they must be the same size, brand, construction and tread pattern on all four wheels.
Foradditionaltractiononicyroads,studded tiresmaybeused.However,someU.S.states andCanadianprovincesprohibittheiruse. Checklocal,stateandprovinciallawsbefore installingstuddedtires.Skidandtractioncapabilitiesofstuddedsnowtires,onwetordry surfaces,maybepoorerthanthatofnon-studdedsnowtires.
TIRECHAINS
Useoftirechainsmaybeprohibitedaccording tolocation.Checkthelocallawsbeforeinstallingtirechains.Wheninstallingtirechains,make suretheyarethepropersizeforthetiresonyour vehicleandareinstalledaccordingtothechain
manufacturer's suggestions. UseonlySAE ClassSchains. Class "S" chains are used on vehicles with restricted tire to vehicle clearance. Vehiclesthat can use Class "S" chains are designed to meet the SAE standard minimum clearances between the tire and the closest vehicle suspension or body component required to accommodate the use of a winter traction device (tire chains or cables). The minimum clearances are determined using the factory equipped tiresize. Othertypes may damage your vehicle. Use chaintensioners when recommended by the tire chain manufacturer to ensure atight fit. Loose end link so the tire chain must be secured or removed to prevent the possibility of whipping action damage to the fenders or under body. If possible, avoid fully loading your vehicle when using tire chains. In addition, drive a reduced speed. Otherwise, your vehicle may be damaged and/or vehicle handling and perform an e may be adversely affected.
Tirechainsmustbeinstalledonlyonthe frontwheelsandnotontherearwheels.
NeverinstalltirechainsonaTEMPORARYUSE ONLYsparetire.
Donotusetirechainsondryroads.Drivingwith tirechainsinsuchconditionscancausedamage tothevariousmechanismsofthevehicledueto
someoverstress.
CHANGINGWHEELSANDTIRES

Tirerotation
NISSAN recommends rotating the tires every 5,000 miles (8,000 km). (See "Flat tire" (P.6-3) fortirereplacing procedures.)
Assoonaspossible,tightenthe wheelnutstothespecifiedtorque withatorquewrench.
Wheelnuttighteningtorque: 80ft-lb(108N·m)
The wheel nuts must be kept tightened to the specification at all times. It is recommended that wheel nuts be tightened to the specification at a chirerotation interval.

WARNING
•Afterrotatingthetires, check and adjust the tire pressure.
•Retightenthe wheelnuts whenthevehiclehasbeen drivenfor600miles(1,000 km)(alsoincasesofaflattire, etc.).
- Donotincludethesparetireor anyothersmallsizesparetire inthetirerotation.
- For additional information regarding tires, referto "Important Tire Safety Information" (US) or "Tire Safety Information" (Canada) in the Warranty Information Booklet.
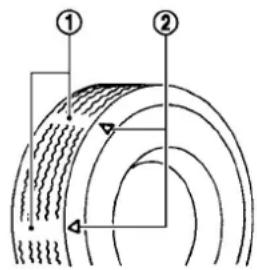
SDI1663
- Wearindicator
- Wearindicatorlocationmark
Tirewearanddamage

WARNING
•Tiresshouldbeperiodically inspectedforwear, cracking, bulgingorobjectscaughtin thetread. Ifexcessivewear, cracks, bulgingordeepcuts arefound, thetire(s)should be replaced.
•Theoriginaltireshavebuilt-in treadwearindicators.When wearindicatorsarevisible, thetire(s)shouldbereplaced.
•Tiresdegradewithage and use. Havetires, including the spare, over 6 years old checked by a qualified technician, because some simulated damage may not be obvious. Replacethetires as necessary to prevent tire failure and possible personal injury.
- Improperserviceofthespare tiremayresultinseriouspersonalinjury.Ifitisnecessary torepairthesparetire,itis recommended youvisit a NISSANdealerforthisservice.
•Foradditionalinformationregardingtires,referto"ImportantTireSafetyInformation"(US)or"TireSafetyInformation"(Canada)intheWarranty InformationBooklet.
Replacingwheelsandtires
When replacing atire, usethesamesize, tread design, speed rating and load carrying capacity as originally equipped. (See "Specifications" (P.10-9) for recommended types and sizes of tires and wheels.)

WARNING
•Theuseoftiresotherthanthose recommendedorthemixeduseof tiresofdifferentbrands,construction(bias,bias-beltedorradial),or treadpatternscanadverselyaffect theride,braking,handling,ground clearance,body-to-tireclearance, tirechain clearance, speedometer calibration,headlightaimandbumperheight.Someoftheseeffects mayleadtoaccidentsandcould resultinseriouspersonalinjury.
- ForTwo-WheelDrive(2WD)models, if your vehicle was originally equipped with 4tiresthatwerethe samesizeandyouareonlyreplacing2ofthe4tires, installthenew tiresontherearaxle.Placingnew tiresonthefrontaxlemaycause lossofvehiclecontrolinsome
Do-it-yourself8-39
drivingconditionsandcausean accidentandpersonalinjury.
- If the wheels are changed for any reason, always replace with wheels which have the same off-set dimension. Wheel of different off-set could cause premature tire wear, degrade vehicle handling characteristics and/or interference with the braked discs/drums. Such interference can lead to decreased braking efficiency and/or early brake pad/ show wear. See "Wheelsandtires" (P.10-9) of this manual for wheel off-set dimensions.
- Sincethesparetireisnotequipped withtheTPMS,whenasparetireis mountedorawheelisreplaced,the TPMSwillnotfunctionandthelow tirepressurewarninglightwillflash forapproximately1minute.The lightwillremainonafter1minute.Haveyourtiresreplacedand/or TPMSsystemresetassoonas possible.Itisrecommendedyou visitaNISSANdealerforthese services.
- Replacingtireswiththosenotori- ginallyspecifiedbyNISSANcould
affect the proper operation of the TPMS.
•TheTPMSsensormaybedamaged ifitisnothandledcorrectly.Be carefulwhenhandlingtheTPMS sensor.
- When replacing the TPMS sensor, the ID registration may be required. It is recommended you visit a NISSAN dealer for ID registration.
- Donotuseavalvestemcapthatis notspecifiedbyNISSAN.Thevalve stemcapmaybecomestuck.
- Besurethatthevalvestemcapsare correctlyfitted. Otherwisethevalve maybecloggedupwithdirtand causeamalfunctionorlossof pressure.
- Donotinstalladamagedordeformedwheelortireevenifithas beenrepaired.Suchwheelsortires couldhavestructuraldamageand couldfailwithoutwarning.
•Theuseofretreadtireisnotre- commended.
- For additional information regarding tires, referto "Important Tire Safety Information" (US) or "Tire
SafetyInformation"(Canada)inthe WarrantyInformationBooklet.
All-WheelDrive(AWD)models

CAUTION
●Alwaysusetiresofthesamesize, brand, construction (bias, bias-beltedorradial), and tread pattern on all four wheels. Failuretodoso may result in a circumferenced difference between the front and rear axles which will cause excessive vitirewear and may damage the transmission, transfer case and rear differential gears.
- Onlyusesparetiressspecifiedfor eachAWDmodel.
Ifexcessivetirewearisfound,itisrecommendedthatallfourtiresbereplacedwithtires ofthesamesize,brand,constructionandtread pattern. The tire pressure and wheel alignment shouldalsobecheckedandcorrectedas necessary.Itisrecommendedyouvisita NISSANdealerforthisservice.
Wheelbalance
Unbalanced wheels may affect vehicle handling and tire life. Even with regular use, wheels can get out of balance. Therefore, they should be balanced as required.
Wheelbalanceservicesshouldbeperformedwiththewheelsoffthevehicle. Spinbalancingthewheelsonthevehicle couldleadtomechanicaldamage.
For additional information regarding tires, refer to "Important Tire Safety Information" (US) or "Tire Safety Information" (Canada) in the Warranty Information Booklet.
Careofwheels
See "Cleaningexterior"(P.7-2)fordetailsabout careofthewheels.
Sparetire
Sincethesparetireisnotequippedwith the TPMS, whenasparetireismounted(TEMPORARYUSEONLY), the TPMS will not function.
ObservethefollowingprecautionsiftheTEMPORARYUSEONLYsparetiremustbeused, otherwiseyourvehiclecouldbedamagedor involvedinanaccident.

WARNING
•TheTEMPORARYUSEONLYspare tireshouldbeusedforemergency use.Itshouldbereplacedwiththe standardtireatthefirstopportunity toavoidpossibletireordifferential damage.
- DrivecarefullywhiletheTEMPORARYUSEONLYsparetireisinstalled.Avoidsharpturnsand abruptbrakingwhiledriving.
- Periodicallychecksparetireinflationpressure.Alwayskeepthe pressureoftheTEMPORARYUSE ONLYsparetireat60psi(420kPa, 4.2bar).
- With the TEMPORARY USE ONLY spare tire installed on not drive your vehicle speeds faster than 50 MPH (80km/h).
- Whendrivingonroadscoveredwith snoworice, theTEMPORARYUSE ONLYsparetireshouldbeusedon therearwheelsandoriginaltire usedonthefrontwheels(drive wheels).Usetirechainsonlyon thefront(original)tires.
•TiretreadoftheTEMPORARYUSE ONLYsparetirewillwearatafaster ratethanthestandardtire.Replace thesparetireassoonasthetread wearindicatorsappear.
- Donotusethesparetireonother vehicles.
- Donotusemorethanonesparetire atthesametime.

CAUTION
- DonotusetirechainsonaTEM-PORARYUSEONLYsparetire.Tire chainswillnotfitproperlyandmay causedamagetothevehicle.
- Because the TEMPORARY USE ONLY spare tire is smaller than the original tire, ground clearance is reduced. To avoid damage to the vehicle, donot drive over obstacles. Also do not drive the vehicle through an automatic car wash since it may get caught.
MEMO
8-42Do-it-yourself
9Maintenanceandschedules
Maintenancerequirement....9-2
Generalmaintenance....9-2
Scheduledmaintenance....9-2
Wheretogoforservice....9-2
Generalmaintenance....9-2
Explanationofgeneralmaintenanceitems....9-2
Explanation of scheduled maintenance items....9-5
Emissioncontrolsystemmaintenance....9-5
Chassisandbodymaintenance....9-6
Maintenanceschedules....9-7
Additionalmaintenanceitemsforsevere
operatingconditions....9-7
Standardmaintenance....9-7
Emissioncontrolsystemmaintenance....9-8
Chassisandbodymaintenance....9-11
Maintenanceunderseveredrivingconditions....9-14
Maintenancelog....9-15
MAINTENANCEREQUIREMENT
Someday-to-day and regular maintenance is essential to maintain your vehicle, good mechanical condition, as well as its mission and engine performance.
Itistheowner's responsibility to make sure that the scheduled maintenance, as well as general maintenance, is performed.
Asthevehicleowner,youaretheonlyonewho canensurethatyourvehiclereceivestheproper maintenancecare.Youareavitallinkinthe maintenancechain.
GENERALMAINTENANCE
Generalmaintenanceincludesthoseitems whichshouldbecheckedduringnormalday-to-dayoperation. Theyareessentialforproper vehicleoperation.Itisyourresponsibilityto performtheseproceduresregularlyasprescribed.
Performinggeneralmaintenancechecksrequiresminimalmechanicalskillandonlyafew generalautomotivetools.
These checks or inspections can be done by yourself, a qualified technician, if you prefer, a NISSAN dealer.
Themaintenanceitemslistedinthissectionare requiredtobeservicedatregularintervals. However,underseveredrivingconditions,additionalormorefrequentmaintenancewillbe required.
WHERETOGOFORSERVICE
Ifmaintenanceserviceisrequiredoryourvehicle appearstomalfunction,havethesystems checkedandserviced.Itisrecommendedyou visitaNISSANdealerforthisservice.
NISSANtechniciansarewell-trainedspecialists andarekeptup-to-datewiththelatestservice informationthroughtechnicalbulletins,service tips,andtrainingprograms.Theyarecompletely qualifiedtoworkonNISSANvehiclesbefore workbegins.
YoucanbeconfidentthataNISSANdealer's servicedepartmentperformsthebestjobto meetthemaintenancerequirementsonyour vehicle.
GENERALMAINTENANCE
During thenormalday-to-day operation of the vehicle, general maintenances should be performed regularly as prescribed in this section. If you detect any unusual sounds, vibrations or smell, besure to check for the cause or its recommended to have a NISSAN dealer do it promptly. In addition, it is recommended you visit a NISSAN dealer to youth think that repairs are required.
When performing any checks or maintenance work, see "Maintenance precautions" (P.8-2).
EXPLANATIONOFGENERALMAINTENANCEITEMS
Additionalinformationonthefollowing itemswith“\*”isfoundinthe“8.Do-it yourself”sectionofthismanual.
Outsidethevehicle
Themaintenanceitemslistedhereshouldbe performedfromtimetotime, unless otherwise specified.
Doorsandenginehood: Check that all doors and the engine hood operate properly. Also ensure that all latches lock securely. Lubricate hinges, latches, latch pins, rollers and links if necessary. Makes sure that these secondary latch keep the hood from opening when the primary latch is released.
Whendrivinginareasusingroadsaltorother
corrosivematerials, checklubricationfrequently.
Lights*:Cleantheheadlightsonaregularbasis. Makesurethattheheadlights,stoplights,tail lights,turnsignallights,andotherlightsareall operatingproperlyandinstalledsecurely.Also checkheadlightaim.
Roadwheelnuts(lugnuts)*:Whenchecking thetires,makesurenowheelnutsaremissing, andcheckforanyloosewheelnuts.Tightenif necessary.
Tirerotation*:Tiresshouldberotatedevery 5,000miles(8,000km).
Tires*:Checkthepressurewithagaugeoften andalwayspriortolongdistancetrips. If necessary, adjustthepressureinalltires, includingthespare,tothepressurespecified. Checkcarefullyfordamage,cutsorexcessive wear.
TirePressureMonitoringSystem(TPMS) transmittercomponents:ReplacetheTPMS transmittergrommetseal,valvecoreandcap whenthetiresarereplacedduetowearorage.
Wheelalignmentandbalance:Ifthevehicle shouldpulltoeithersidewhiledrivingona straightandlevelroad,orifyoudetectunevenor abnormaltirewear,theremaybeaneedfor wheelalignment.
If the steering wheel or seat vibrates at normal
highwayspeeds, wheelbalancing maybe needed.
For additional information regarding tires, refer to "Important Tire Safety Information" (US) or "Tire Safety Information" (Canada) in the NISSAN Warranty Information Booklet.
Windshield: Cleanthewindshieldonaregular basis. Check the windshield at least every six months for cracks or other damage. Have a damaged windshield repaired by a qualified repair facility.
Windshieldwiperblades*:Checkforcracks orweariftheydonotwipeproperly.
Insidethevehicle
Themaintenanceitemslistedhereshouldbe checkedonaregularbasis,suchaswhen performingscheduledmaintenance,cleaning thevehicle,etc.
Acceleratorpedal: Checkthepedalfor smoothoperationandmakesurethepedal doesnotcatchorrequireuneveneffort. Keep thefloormatawayfromthepedal.
Brakepedal:Checkthepedalforsmooth operation.Ifthebrakepedalsuddenlygoes downfurtherthannormal,thepedalfeels spongyorthevehicleseemstotakelongerto stop,haveyourvehiclecheckedimmediately.It isrecommendedyouvisitaNISSANdealerfor
thisservice.Keepthefloormatawayfromthe pedal.
Brakes: Check that the brakes donot pull the vehicle to onesidewhen applied.
ContinuouslyVariableTransmission(CVT) P(Park)mechanism:Onafairlysteephill, checkthatthevehicleisheldsecurelywiththe shiftleverintheP(Park)positionwithout applyinganybrakes.
Parkingbrake: Check the parking brake operation regularly. The vehicle should be securely held on a fairly steep hill with only the parking brake applied. If the parking brakeneeds adjusted, it is recommended you visit a NISSAN dealer forth this service.
Seatbelts: Check that all part of these seat belt system (forexample, buckles, anchors, adjusters and retractors) operate properly and smoothly, and are installed securely. Check the belt webbing for cuts, fraying, wearordamage.
Seats: Checkseatpositioncontrolssuchas seatadjusters, seatbackrecliners, etc. to ensure they operates smoothly and that all latches lock securely every position. Check that the head restraints move up and down smoothly and that the locks (if so equipped) hold securely in all latched positions.
Steeringwheel: Checkforchangesinthe steeringconditions, such as excessivefreeplay,
Maintenanceandschedules
hardsteeringorstrangenoises.
Warninglightsandchimes: Makesurethat all warninglightsandchimesareoperating properly.
Windshielddefroster:Checkthattheair comesoutofthedefrosteroutletsproperly and insufficientquantitywhenoperatingtheheater orairconditioner.
Windshieldwiperandwasher*:Checkthat thewipersandwashersoperateproperly and thatthewipersdonotstreak.
Underthehood and vehicle
Themaintenanceitemslistedhereshouldbe checkedperiodically(forexample,eachtimeyou checktheengineoilorrefuel).
Battery*:Checkthefluidlevelineachcell. ItshouldbebetweentheMAXandMINlines. Vehiclesoperatedinhightemperaturesorunder severeconditionrequirefrequentchecksofthe batteryfluidlevel.
NOTE:
Careshouldbetakentoavoidsituations thatcanleadtopotentialbatterydischarge andpotentialno-startconditionssuchas:
- Installationorextendeduseofelectronicaccessoriesthatconsumebattery powerwhentheengineisnotrunning
9-4 Maintenanceandschedules
(Phonechargers, GPS, DVDplayers, etc.)
- Vehicle is not driven regularly and/or only drivenshort distances.
In these cases, the battery may need to be charged to maintain battery health.
Brakeandclutchfluidlevel*: Makesurethat thebrakeandclutchfluidlevelisbetweenthe MAXandMINlinesonthereservoir.
Enginecoolantlevel*:Checkthecoolantlevel whentheengineiscold.
Enginedrivebelt*: Makesurethatthedrive beltisnotfrayed, worn, crackedorily.
Engineoillevel*:Checkthelevelafterparking thevehicleonalevelsurfaceandturningoffthe engine.Waitmorethan10minutesfortheoilto drainbackintotheoilpan.
Exhaustsystem: Makesuretherearenoloose supports,cracksorholes. If the sound of the exhaust seems unusual or there is a mellof exhaust fumes, immediately have the exhaust system inspected. It is recommended you visit a NISSAN dealer forthisservice. (See "Precautions when starting and driving" (P.5-2) for exhaust gas (carbon monoxide).)
Fluidleaks: Checkunderthevehicleforfuel, oil, waterorotherfluidleaksafterthevehiclehas beenparkedforawhile. Waterdrippingfromthe airconditionerafteruseisnormal.Ifyoushould noticeanyleaksorifgasolinefumesareevident, checkforthecauseandhaveitcorrected immediately.
Radiatorandhoses: Checkthefrontofthe radiatorandcleanoffanydirt, insects, leaves, etc., that may have accumulated. Makesurethe hoseshavenocracks, deformation, rotorloose connections.
Underbody: The underbody is frequently exposed to corrosives substances such as those used on icy roads, to control dust. It is very important to remove the substances, otherwise must form the floor plan, frame, fuel lines and around the exhaust system. At the end of winter, the underbody should be thoroughly flushed with plain water, being careful to clean those areas where mud and dirt may accumulate. For additional information, see "Cleaning exterior" (P. 7-2).
Windshieldwasherfluid*:Checkthatthereis adequatefluidinthereservoir.
EXPLANATIONOFSCHEDULED MAINTENANCEITEMS
The following descriptions are provided to give you better understanding of the scheduled maintenance item that should be regularly checked or replaced. Themaintenance schedule indicates at which mileage / time intervals each item requires service.
In addition to scheduled maintenance, your vehiclerequiresthat some items be checked during normal day-to-day operation. Referto "General maintenance" (P.9-2).
Itemsmarkedwith“*”arerecommended by NISSAN for reliable vehicle operation. You are not required to perform maintenance on these items in order to maintain the warranties which comewith your vehicle. Other maintenance items and intervals are required.
When applicable, additional information can be found in the "8.Do-ityourself" section of this manual.
NOTE:
NISSANdoesnotadvocatetheuseofnon-OEMapprovedaftermarketflushingsystemsandstronglyadvisesagainstperformingtheseservicesonaNISSAN product.Manyoftheaftermarketflushing systemsusenon-OEMapprovedchemicals orsolvents,theuseofwhichhasnotbeen validatedbyNISSAN.
Forrecommended fuel, lubricants, fluids, grease, and refrigerant, referto "Capacities and recommended fluids/lubricants" (P.10-2) of this manual.
Checkenginedrivebeltsforwear,frayingor crackingandforpropertension.Replaceany damageddrivebelts.
Engineairfilter:
Replaceatspecifiedintervals. Whendrivingfor prolongedperiodsindustyconditions, check/replacethefiltermorefrequently.
Enginecoolant\*:
Replacecoolantatthespecifiedinterval.When addingorreplacingcoolant,besuretouseonly GenuineNISSANLongLifeAntifreeze/Coolant (blue)orequivalentwiththepropermixture. (Referto"Enginecoolingsystem"(P.8-4)to determinethepropermixtureforyourarea.)
NOTE:
Mixinganyothertypeofcoolantortheuse of non-distilledwatermayreducethe recommendedserviceintervalofthecoolant.
Engineoilandoilfilter:
Replaceengineoilandoilfilteratthespecified intervals. For recommended oil grade and viscosity referto "Capacities and recommended fluids/lubricants" (P.10-2).
Enginevalveclearance\*:
Inspectonlyifvalvenoiseincreases.
Adjustvalveclearanceifnecessary.
Evaporative emissions control vapor lines\*:
Checkvaporlinesforleaksorlooseness.
Tightenconnectionsorreplacepartsasnecessary.
Fuelfilter
Periodic maintenance is not required (in-tank typefilter).
Fuellines\*:
Checkthefuelhoses, piping and connections for leaks, looseness, ordeterioration. Tighten connections or replace parts as necessary.
Sparkplugs:
Replaceatspecifiedintervals.Installnewplugs ofthetypeasoriginallyequipped.
CHASSISANDBODYMAINTENANCE
Brakelinesandcables:
Visually inspect for proper installation. Check for chafing, cracks, deterioration, and sign of leaking. Replace any deteriorated or damaged parts immediately.
Brakepadsandrotors:
Checkforwear, deterioration and fluidleaks. Replace any deteriorated or damaged parts immediately.
Exhaustsystem:
Visually inspect the exhaust pipes, muffler and hangers for leaks, cracks, deterioration, and damage. Tighten connections or replace parts as necessary.
In-cabinmicrofilter:
Replaceatspecifiedintervals. Whendrivingfor prolongedperiodsindustyconditions,replace thefiltermorefrequently.
Propellershaft(s):
Checkfordamage, looseness, and grease leakage.(AWD)
Steeringgearandlinkage, axleandsuspensionparts, driveshaftboots:
Checkfordamage, looseness, and leakage of oil orgrease. Underseveredriving conditions, inspect more frequently.
9-6 Maintenanceandschedules
Tirerotation:
Tiresshouldberotatedevery5,000miles (8,000km) according to the instructions under "Explanation of general maintenance items" (P.9-2). When rotating tires, checkford damage and uneven wear. Replace if necessary.
Transmissionfluid/oil,differentialoiland transfercaseoil:
Visuallyinspectforsignsofleakageatspecified intervals.
Ifusingacar-topcarrier,ordrivingonroughor muddyroads:
●Replacethemanualtransmissiongearoil every20,000miles(32,000km)or24 months.
-Replace the CVTfluid every 60,000 miles (96,000 km) or request the dealer to inspect the fluid deterioration data using a CONSULT. If the deterioration data is more than 210,000, replace the CVTfluid.
Off-roadmaintenance:
Check the following items frequently whenever you drive off-road through deep sand, mudor water:
-Brakepadsandrotors
●Brakeliningsanddrums
●Brakelinesandhoses
●Differential, transmission and transference case oil
-Steeringlinkage
●Propellershaft(s)andfrontdriveshafts
-Engineairfilter
- Clutchhousingdrain(AWDonly)
MAINTENANCESCHEDULESSTANDARDMAINTENANCE
Tohelpensuresmooth,safeandeconomical driving,NISSANprovidestwomaintenance schedulesthatmaybeused,dependingupon theconditionsinwhichyouusuallydrive.These schedulescontainbothdistanceandtime intervals,upto120,000miles(192,000km)/144months.Formostpeople,theodometer readingwillindicatewhenserviceisneeded. However,ifyoudriveverylittle,yourvehicle shouldbeservicedattheregulartimeintervals shownintheschedule.
After 120,000 miles (192,000 km) / 144 months, continuemaintenance at the samemileage/timeintervals.
ADDITIONALMAINTENANCEITEMS FORSEVEREOPERATINGCONDITIONS
Additionalmaintenanceitemsforsevere operatingconditions;shouldbeperformed onvehiclesthataredrivenunderespecially demandingconditions.Additionalmaintenance itemsshouldbeperformedifyouprimarily operateyourvehicleunderthefollowingconditions:
-
Repeatedshorttripsoflessthan5miles(8 km).
●Repeatedshorttripsoflessthan10miles (16km)withoutsidetemperaturesremainingbelowfreezing. -
Operatinginhotweatherinstop-and-go "rushhour"traffic.
- Extensiveidlingand/orlowspeeddrivingfor longdistances,suchaspolice,taxiordoor-to-doordeliveryuse.
●Drivingindustyconditions. - Drivingonrough, muddyorsaltspread roads.
●Usingacar-topcarrier.
NOTE:
ForvehiclesoperatedinCanada, both standardandseveremaintenanceitems shouldbeperformedateveryinterval.
The following table shows how the standard maintainances schedule. Depending upon weather and atmospheric conditions, varying road surfaces, individual driving habits and vehicle usage, additional or more frequent maintenance may be required.
After 120,000 miles (192,000 km) / 144 months, continuemaintenance at the samemileage/timeintervals.
(1) After 40,000 miles (64,000 km) or 48 months, inspect every 10,000 miles (16,000 km) or 12 months. Replacethedrive belts if found damaged.
(2) If operating mainly industry conditions, more frequent maintenance may be required.
(3)Periodicmaintenanceisnotrequired.
(4)Firstreplacementintervalis105,000 miles(168,000km)or84months. Afterfirst replacement, replace every 75,000 miles (120,000km) or 60 months.
(5)UseonlyGenuineNISSANLongLife Antifreeze/Coolant(blue)orequivalent withpropermixtureratioof50%anti-freezeand50%demineralizedordistilled water.Mixinganyothertypeofcoolantor theuseofnon-distilledwatermayreduce thelifeexpectancyofthefactoryfillcoolant.
(6)Replacesparkplugwhenthepluggap exceeds0.043in(1.1mm)evenifwithin specifiedreplacementmileage.
(7)Periodic maintenance is not required. However, if valvenoise increases, inspect valve clearance.
*:Maintenanceitemsandintervalswith"*"
arerecommendedbyNISSANforreliable vehicleoperation.Theownerdoesnot needtoperformsuchmaintenancein ordertomaintaintheemissionwarranty ormanufacturerrecallliability.Other maintenanceitemsandintervalsarere- quired.
CHASSISANDBODYMAINTENANCE
Abbreviations: l = Inspectandcorrectorreplaceasnecessary, R = Replace
| MAINTENANCEOPERATIONPerformatofmiles,kilometersormonths,whichevercomesfirst. | Miles × 1,000(km × 1,000)Months | MAINTENANCEINTERVAL | |||||||||||
| 5(8)6 | 10(16)12 | 15(24)18 | 20(32)24 | 25(40)30 | 30(48)36 | 35(56)42 | 40(64)48 | 45(72)54 | 50(80)60 | 55(88)66 | 60(96)72 | ||
| Brakelinesandcablesllllll | |||||||||||||
| Brakepadsandrotors★I | I | I | I | I | |||||||||
| Brakefluid★R | R | R | |||||||||||
| CVTfluidSeeNOTE(1) | I | I | I | I | I | ||||||||
| Manualtransmissiongearoil | SeeNOTE(2) | llllll | |||||||||||
| Transferfluid anddifferential gear oil | SeeNOTE(2) | llllll | |||||||||||
| Steeringgearandlinkage,axle andsuspensionparts★ | I | I | I | ||||||||||
| Tirerotation | SeeNOTE(3) | ||||||||||||
| Propellershaft(AWD) anddrive shaftboots★ | I | I | I | I | |||||||||
| Exhaustsystem★ | I | I | |||||||||||
| In-cabin microfilter | R | R | R | R | |||||||||
| Intelligent Key battery | R | R | R | R | |||||||||
| Brakelinesandcablesllllll | |||||||||||||
| Brakepadsandrotors★I | I | I | I | I | |||||||||
| Brakefluid★R | R | R | |||||||||||
| CVTfluidSeeNOTE(1) | I | I | I | I | I | ||||||||
| ManualtransmissiongearoilSeeNOTE(2)llllll | |||||||||||||
| Transfer fluid anddifferential gear oil | SeeNOTE(2)llllll | ||||||||||||
| Steeringgearandlinkage,axle andsuspensionparts★ | I | I | I | ||||||||||
| Tirerotation | SeeNOTE(3) | ||||||||||||
| Propellershaft(AWD) anddrive shaftboots★ | I | I | I | I | |||||||||
| Exhaustsystem★ | I | I | I | ||||||||||
| In-cabin microfilter | R | R | R | R | |||||||||
| Intelligent Key battery | R | R | R | R | |||||||||
NOTE:
Maintenanceitemswith“★”shouldbe performedmorefrequentlyaccordingto "Maintenanceunderseveredrivingconditions"(P.9-14).
(1)Ifusingacar-topcarrier,ordrivingon roughormuddyroads,inspectCVTfluid deteriorationatNISSANdealerevery 60,000miles(96,000km),thenchange CVTfluidifnecessary.Andiftheinspectionisnotperformed,change(notjust inspect)CVTfluidevery60,000miles (96,000km).
(2)Ifusingacar-topcarrier,ordrivingon roughormuddyroads,change(notjust inspect)oilatevery20,000miles(32,000 km)or24months.
(3)Referto "Tirerotation" under "General maintenance"(P.9-2).
MAINTENANCEUNDERSEVERE DRIVINGCONDITIONS
Themaintenanceintervalsshownontheprecedingpagesarefornormaloperatingconditions.Ifthevehicleismainlyoperatedunderseveredrivingconditionsasshownbelow,more frequentmaintenancemustbeperformedonthe followingitemsasshowninthetable.
Severedrivingconditions
●Repeatedshorttripsoflessthan5miles(8 km).
- Repeatedshorttripsoflessthan10miles (16km)withoutsidetemperaturesremainingbelowfreezing.
- Operatinginhotweatherinstop-and-go "rushhour"traffic.
- Extensiveidlingand/orlowspeeddrivingfor longdistances,suchaspolice,taxiordoor-to-doordeliveryuse.
- Driving industry conditions.
- Drivingonrough, muddy, or salt spread roads.
- Usingacar-topcarrier.
Maintenanceoperation:Inspect=Inspectand
correctorreplaceasnecessary.
| MaintenanceitemMaintenance | eoperation | Maintenanceinterval |
| Brakefluid | Replace | Every10,000miles(16,000km)or12 months |
| Brake pads & rotors | Inspect | Every 5,000 miles (8,000 km) or 6 months |
| Steeringgear&linkage,axle& suspensionparts | Inspect | Every5,000miles(8,000km)or6months |
| Propellershaft(AWD)anddrive shaftboots | Inspect | Every5,000miles(8,000km)or6months |
| Exhaustsystem | Inspect | Every5,000miles(8,000km)or6months |
9-14 Maintenanceandschedules
MAINTENANCELOG
| 5,000Miles(8,000km)or6MonthsDealerName:Date:Mileage:DealerStamp: | 10,000Miles(16,000km)or12MonthsDealerName:Date:Mileage:DealerStamp: | 15,000Miles(24,000km)or18MonthsDealerName:Date:Mileage:DealerStamp: |
| 20,000Miles(32,000km)or24MonthsDealerName:Date:Mileage:DealerStamp: | 25,000Miles(40,000km)or30MonthsDealerName:Date:Mileage:DealerStamp: | 30,000Miles(48,000km)or36MonthsDealerName:Date:Mileage:DealerStamp: |
| 35,000Miles(56,000km)or42MonthsDealerName:Date:Mileage:DealerStamp: | 40,000Miles(64,000km)or48MonthsDealerName:Date:Mileage:DealerStamp: | 45,000Miles(72,000km)or54MonthsDealerName:Date:Mileage:DealerStamp: |
| 50,000Miles(80,000km)or60MonthsDealerName:Date:Mileage:DealerStamp: | 55,000Miles(88,000km)or66MonthsDealerName:Date:Mileage:DealerStamp: | 60,000Miles(96,000km)or72MonthsDealerName:Date:Mileage:DealerStamp: |
| 65,000Miles(104,000km)or78MonthsDealerName:Date:Mileage:DealerStamp: | 70,000Miles(112,000km)or84MonthsDealerName:Date:Mileage:DealerStamp: | 75,000Miles(120,000km)or90MonthsDealerName:Date:Mileage:DealerStamp: |
| 80,000Miles(128,000km)or96MonthsDealerName:Date:Mileage:DealerStamp: | 85,000Miles(136,000km)or102MonthsDealerName:Date:Mileage:DealerStamp: | 90,000Miles(144,000km)or108MonthsDealerName:Date:Mileage:DealerStamp: |
| 95,000Miles(152,000km)or114MonthsDealerName:Date:Mileage:DealerStamp: | 100,000Miles(160,000km)or120MonthsDealerName:Date:Mileage:DealerStamp: | 105,000Miles(168,000km)or126MonthsDealerName:Date:Mileage:DealerStamp: |
| 110,000Miles(176,000km)or132MonthsDealerName:Date:Mileage:DealerStamp: | 115,000Miles(184,000km)or138MonthsDealerName:Date:Mileage:DealerStamp: | 120,000Miles(192,000km)or144MonthsDealerName:Date:Mileage:DealerStamp: |
MEMO
9-18 Maintenanceandschedules
10Technicalandconsumerinformation
Capacitiesandrecommendedfluids/lubricants......10-2
Fuelinformation....10-4
Engineoilandoilfilterrecommendation....10-7
Airconditioningsystemrefrigerantand lubricantrecommendations....10-8
Specifications....10-9
Engine....10-9
Wheelsandtires....10-9
Dimensionsandweights....10-10
Whentravelingorregisteringinanothercountry.....10-10
Vehicleidentification....10-11
VehicleIdentificationNumber(VIN)plate....10-11
Vehicleidentificationnumber(chassisnumber)....10-11
Engineserialnumber....10-11
F.M.V.S.S./C.M.V.S.S.certificationlabel....10-12
Emissioncontrolinformationlabel....10-12
TireandLoadingInformationlabel....10-12
Airconditionerspecificationlabel....10-13
Installingfrontlicenseplate....10-13
Vehicleloadinginformation....10-15
Terms....10-15
Vehicleloadcapacity....10-15
Loadingtips....10-17
Measurementofweights....10-17
Towingatrailer....10-18
Flattowing....10-18
ContinuouslyVariableTransmission(CVT)......10-18
ManualTransmission....10-18
Uniformtirequalitygrading....10-19
Treadwear....10-19
TractionAA,A,BandC....10-19
TemperatureA,BandC....10-19
Emissioncontrolsystemwarranty....10-20
Reportingsafetydefects....10-20
ReadinessforInspection/Maintenance(I/M)test.....10-21
EventDataRecorders(EDR)....10-22
Owner'smanual/servicemanualorderinformation.....10-22
CAPACITIES AND RECOMMENDED FLUIDS/LUBRICANTS
The following are approximate capacities. The actual refill capacities may be a little different. When refilling, follow the procedure instructed in the "8.Do-it-yourself" section to determinethe proper refill capacity.
| Fluidtype | Capacity(Approximate) | RecommendedFluids/Lubricants | |||||
| Metric Measure | US Measure | Imperial Measure | |||||
| Fuel2WDmodel5013-1/4gal11gal: See"Fuelinformation"(P.1)0-4). | |||||||
| AWDmodel4511-7/8gal9-7/8gal | |||||||
| Engineoil *1Drainandrefill*1:Foradditional information,see "Changingengine oil andfilter" (P.8-6). | With oil filter change | For NISMO RS model | 4.3 | 4-1/2 qt | 3-3/4 qt | For NISMO RS modelsGenuine*NissanMotorOil5W-30SN*isrecommended.Iftheabovemotoroilisnotavailable,useanequivalentmotoroilthatmatchestheabove grade and viscosity. For additional information, see "Engine oil and oil filter recommendation" (P.10-7).ExceptforNISMORS modelsGenuine*NissanMotorOil0W-20SN*isrecommended.Iftheabovemotoroilisnotavailable,useanequivalentmotoroilthatmatchestheabove grade and viscosity. For additional information, see "Engine oil and oil filter recommendation" (P.10-7). | |
| Except for NISMO RS model | 4.5 | 4-3/4 qt | 4 qt | ||||
| Withoutolifiter change | ForNISMORSmodel4.1 | 4-3/8qt | 3-5/8qt | ||||
| Except for NISMO RS model | 4.3 | 4-1/2 qt | 3-3/4 qt | ||||
| Enginecoolant | Withreservoir | ForNISMO RSmodel | CVT model | 8.1 | 8-5/8 qt | 7-1/8 qt | Pre-diluted Genuine NISSAN Long Life Antifreeze/Coolant (blue) or equivalent |
| MT model | 7.9 | 8-3/8qt?q | |||||
| Exceptfor NISMORS model | CVT model | 8.7 | 9-1/4 qt | 7-5/8 qt | |||
| MT model | 8.5 | 8-3/8qt?q | |||||
| Reservoir | 0.6 | 5/8qt1/2qt | |||||
| Continuously Variable Transmission (CVT) fluid | — | — | — | For NISMO RS modelsGenuineNISSANCVTFluidNS-2NISSANrecommendusingGenuineNISSANCVTFluidNS-2(orequivalent)ONLYin NISSANCVTs.Donotmixwithotherfluids.UsingfluidsthatarenotequivalenttoGenuine NISSANCVTFluidNS-2maydamagetheCVT.Damagecausedbytheuseoffluidsother than as recommended is not covered under NISSAN's New Vehicle Limited Warranty.ExceptforNISMORS modelsGenuineNISSANCVTFluidNS-3NISSANrecommendusingGenuineNISSANCVTFluidNS-3(orequivalent)ONLYin NISSANCVTs.Donotmixwithotherfluids.UsingfluidsthatarenotequivalenttoGenuine NISSANCVTFluidNS-3maydamagetheCVT.Damagecausedbytheuseoffluidsother than as recommended is not covered under NISSAN's New Vehicle Limited Warranty. | |||
| ManualTransmission(MT)gearoil----ForNISMORSmodels | ·GenuineNISSANManualTransmissionFluid(MTF)HQMulti75W-85orequivalent·IfGenuineNISSANManualTransmissionFluid(MTF)HQMultiisnotavailable,APIGL-4,ViscositySAE75W-85maybeusedasatemporaryreplacement.However,useGenuineNISSANManualTransmissionFluid(MTF)HQMultiassoonasitisavailable.ExceptforNISMORSmodels·GenuineNISSANManualTransmissionFluid(MTF)TL/JRType75W-80orequivalent·IfGenuineNISSANManualTransmissionFluid(MTF)TL/JRTypeisnotavailable,APIGL-4+,ViscositySAE75W-80maybeusedasatemporaryreplacement.However,useGenuineNISSANManualTransmissionFluid(MTF)TL/JRTypeassoonasitisavailable. | ||||||
| Differential gear oil | — | — | — | ·Genuine NISSAN Differential Oil Hypoid Super GL-5 80W-90 or equivalent conventional (non-synthetic)oil | |||
| Transferfluid---- | |||||||
| BrakeandclutchfluidRefilltotheproperoilevelaccording | totheinstructionsinthe*8.Do-it-yourself*section. | ·GenuineNISSANSuperHeavyDutyBrakeFluid *orequivalentDOT3*AvailableinmainlandU.S.A.throughaNISSANdealer. | |||||
| Multi-purposegrease---- NLGINo.2(Lithiumsoapbase) | |||||||
| Air conditioning system refrigerant | — | — | — | ·For additional information, see "Vehicle identification" (P.10-11) for air conditioner specification/label.HFC-134a(R-134a) | |||
| Air conditioning system lubricants | — | — | — | ·NISSAN A/C System Oil Type R or exact equivalent | |||
| Window washer fluid | 4.5 | 1-1/4 gal | 1 gal | ·Genuine NISSAN Windshield Washer Concentrate Cleaner & Antifreeze or equivalent | |||
FUELINFORMATION
ExceptforNISMORSmodels:
NISSANrecommendstheuseofunleaded premiumgasolinewithanoctaneratingofat least91AKI(Anti-KnockIndex)number(Researchoctanenumber96).
Ifunleadedpremiumgasolineisnotavailable, youmayuseunleadedregulargasolinewithan octaneratingofatleast87AKInumber (Researchoctanenumber91),butyoumay noticeadecreaseinperformance.
ForNISMORSmodels:
Useunleadedpremiumgasolinewithanoctane ratingofatleast91AKI(Anti-KnockIndex) number(Researchoctanenumber96).
If unleaded premium gasoline is not available, unleaded regular gasolinewith an octanerating of at least 87 AK In number (Research octane number 91) may be temporarily used, but only under the following precautions:
●Havethefueltankfilledonlypartially with unleadedregulargasoline, andfillupwith unleadedpremiumgasolineassoonas possible.
- Avoidfullthrottledrivingandabruptacceleration.
Useunleadedpremiumgasolineformax- imumvehicleperformance.
10-4 Technical and consumer information

CAUTION
- Usingafuelotherthanthatspecifiedcouldadverselyaffecttheemissioncontrolsystem,andmayalso affectwarrantycoverage.
- Undernocircumstances should leaded gasolinebeused, because this will damage the three-way catalyst.
- DonotuseE-15orE-85fuelinyour vehicle. Your vehicle is not designed torunonE-15orE-85fuel. Using E-15orE-85fuel in a vehiclenot specifically designed for E-15orE-85 fuel can adversely affect the emission control devices and system of the vehicle. Damage caused by such fuel is not covered by the NISSAN new vehicle limited warranty.
- Donotusefuelthatcontainsthe octaneboostermethylcyclopenta-dienyl manganese tricarbonyl (MMT).UsingfuelcontainingMMT mayadverselyaffect vehicleperformanceandvehicleemissions.Not allfueldispensersarelabeledto
indicateMMTcontent,soyoumay haveto consultyour gasolineretailer formoredetails. NotethatFederalandCalifornialawsprohibitthe useofMMTinreformulatedgasoline.
•U.S. government regulations require ethanoldispensingpumpstobe identified byasmall, square, orange and black label with the common abbreviation or the appropriate percentage forthat region.
Gasolinespecifications
NISSAN recommends using gasolin that meets the World-Wide Fuel Charter (WWFC) specifications where it is available. Many of the automobile manufacturers developed this specification to improve emission control system and vehicle performance. Ask your service station manager if the gasolin meet the WWFC specifications.
Reformulated gasoline
Somefuelsuppliersarenowproducingreformulatedgasolines. These gasolines are especially designed to reduce vehicle emissions. NISSAN support should towards cleaner air and suggest that you are reformulated gasolin when available.
Gasolinecontainingoxygenates
Somefuelsuppliersellgasolinecontaining oxygenatessuchasethanol,MTBEandmethanolwithorwithoutadvertisingtheirpresence. NISSANdoesnotrecommendtheuseoffuels ofwhichtheoxygenatecontentandthefuel compatibilityforyourvehiclecannotbereadily determined.Ifindoubt,askyourservicestation manager.
If you use oxygenate - blend gasoline, please take the following precautions asthe usage of such fuelsmay cause vehicle performance problems and/or fuel system damage.
- The fuel should be unleaded and have an octanerating no lower than that recommended for unleaded gasoline.
- Ifanoxygenate-blend, other than methanol blend is used, it should contain non more than 10% oxygenate. (MTBEmay, however, be added up to 15%).
- E-15fuelcontainsmorethan 10% oxygenate.E-15fuelwilladversely affecttheemissioncontroldevices andsystemsofthevehicleandshould notbeused.Damagecausedbysuch fuelisnotcoveredbytheNISSANnew vehiclelimitedwarranty.
- Ifamethanolblendisused, it should containnomorethan5% methanol (methylalcohol, woodalcohol). It should also contain suitable amount of appropriate cosolvents and corrosion inhibitors. If not properly formulated with appropriate cosolvents and corrosion inhibitors, such methanol blends may cause fuel system damage and/or vehicle performance problems. At this time, sufficient data is not available to ensure that all methanol blends are suitable for use in NISSAN vehicles.
Ifanydriveabilityproblemssuchasengine stallinganddifficulthot-startingareexperienced afterusingoxygenate-blendfuels,immediately changetoanon-oxygenatefuelorafuelwitha lowblendofMTBE.
Takecarenottospillgasolineduring refueling. Gasolinecontainingoxygenates cancausepaintdamage.
E-15fuel
E-15fuelisamixtureofapproximately 15% fuel ethanol and 85% unleaded gasoline. E-15 can only be used in vehicles designed for unon E-15 fuel. Donot use E-15 in your vehicle. U.S. government regulations require fuel ethanol dispensing pumpstobe identified with small, square, orange and black label with the common abbreviation or the appropriate percentage for that region.
E-85fuel
E-85fuelisamixtureofapproximately85%fuel ethanoland15%unleadedgasoline.E-85can onlybeusedinaFlexibleFuelVehicle(FFV).Do notuseE-85fuelinyourvehicle.U.S.govern-mentregulationsrequirefuelethanoldispensing pumpstobeidentifiedbyasmall,square, orangeandblacklabelwiththecommon abbreviationortheappropriatepercentagefor thatregion.
FuelcontainingMMT
MMT,ormethylcyclopentadienylmanganese tricarbonyl,isanoctaneboostingadditive. NISSANdoesnotrecommendtheuseoffuel containingMMT.Suchfuelmayadverselyaffect vehicleperformance,includingtheemissions controlsystem.Notethatwhilesomefuelpumps labelMMTcontent,notalldo,soyoumayhave
Technicalandconsumerinformation10-5
toconsultyourgasolineretailerformoredetails.
Aftermarketfueladditives
NISSANdoesnotrecommendtheuseofany aftermarketfueladditives(forexample,fuel injectorcleaner, octanebooster,intakevalve depositremovers,etc.)whicharesoldcommercially.Manyoftheseadditivesintendedforgum, varnishordepositremovalmaycontainactive solventorsimilaringredientsthatcanbeharmful tothefuelsystemandengine.
Octaneratingtips
Usingunleadedgasolinewithanoctane ratinglowerthanrecommendedcancause persistent,heavy"sparkknock".(Spark knockisametallicrappingnoise.)If severe,thiscanleadtoenginedamage.If youdetectapersistentheavysparkknock evenwhenusinggasolineofthestated octanerating,orifyouhearsteadyspark knockwhileholdingasteadyspeedon levelroads,itisrecommendedyouhavea NISSANdealercorrectthecondition.Failuretocorrecttheconditionmisuseof thevehicle,forwhichNISSANisnot responsible.
Incorrectignitiontimingwillresultinspark knock,after-runand/oroverheating,whichmay causeexcessivefuelconsumptionorengine
damage.Ifanyoftheabovesymptomsare encountered,haveyourvehiclechecked.Itis recommendedyouvisitaNISSANdealerfor servicing.
However, now and then you may notice light sparkknock for a short time while accelerating or driving up hills. This is not a cause for concern, because you get the greatest fuel benefit when there is light sparkknock for a short time under heavy engine load.
①

②

JVT0159X
ForNISMORSmodels
①

②

JVT0351X
ExceptforNISMORSmodels

APIcertificationmark

APIservicesymbol
ENGINEOILANDOILFILTERRE- COMMENDATION
Selectingthecorrectoil
Itisessentialtochoosethecorrectgrade, quality,andviscosityengineoiltoensure satisfactoryenginelifeandperformance,see "Capacitiesandrecommendedfluids/lubricants" (P.10-2).NISSANrecommendstheuseofan energyconservingoilinordertoimprovefuel economy.
SelectonlyengineoilsthatmeettheAmerican PetroleumInstitute(API)certificationorInternationalLubricantStandardizationandApproval Committee(ILSAC)certificationandSAEviscositystandard.TheseoilshavetheAPI certificationmarkonthefrontofthecontainer.Oilswhichdonothavethespecifiedquality labelshouldnotbeusedastheycouldcause enginedamage.
Oiladditives
NISSANdoesnotrecommendtheuseofoil additives. Theuseofanoiladditiveisnot necessarywhentheproperoiltypeisusedand maintenanceintervalsarefollowed.
Oilwhichmaycontainforeignmatterorhas beenpreviouslyusedshouldnotbeused.
Technicalandconsumerinformation10-7
Oilviscosity
Theengineoilviscosityorthicknesschanges with temperature. Because of this, it is important to select the engineoilviscosity based on the temperatures at which the vehicle will be operated before then extoil change. Choosing an oilviscosity other than that recommended could cause serious engine damage.
Selectingthecorrectoilfilter
YournewNISSANvehicleisequippedwitha high-qualitygenuineNISSANoilfilter.When replacing,useagenuineNISSANoilfilterorits equivalentforthereasondescribedin"Change intervals".
Changeintervals
Theoilandoilfilterchangeintervalsforyour enginearebasedontheuseofthespecified qualityoilsandfilters.Usinganengineoiland filterotherthanthespecifiedquality,orexceedingrecommendedoilandfilterchangeintervals couldreduceenginelife.Damagetotheengine causedbyimpropermaintenanceoruseof incorrectoilandfilterqualityand/orviscosityis notcoveredbytheNISSANnewvehiclelimited warranty.
Yourenginewasfilledwithahighqualityengine oilwhenitwasbuilt.Youdonothavetochange theoilbeforethefirstrecommendedchange
10-8 Technical and consumer information
interval.
AIRCONDITIONINGSYSTEMREFRIGERANTANDLUBRICANTRECOMMENDATIONS
The air conditioningsystem in your NISSAN vehicle must be charged with the refrigerant HFC-134a(R-134a) and the oil, NISSANA/Csystemoil Type Rorthe exact equivalents.

CAUTION
Theuseofanyotherrefrigerantoroil maycauseseveredamagetotheair conditioningsystemandmayrequire thereplacementofallairconditioner systemcomponents.
TherefrigerantHFC-134a(R-134a)inyour NISSANvehiclewillnotharmtheearth'sozone layer. Although this refrigerant does not affect the earth's atmosphere, certain governmental regulations require there recovery and recycling of any refrigerant during automotive air conditioningsystemservice.ANISSANdealer has the trained technicians and equipment needed to recover and recycle your air conditioningsystem refrigerant.
It is recommended you to visit a NISSAN dealer when servicing your air conditionings system.
SPECIFICATIONS
ENGINE
| ModelMR16DDT | ||
| TypeGasoline,4-cycle,DOHC | ||
| Cylinderarrangement | 4-cylinder,in-line | |
| Bore × Strokein(mm) | 3.138 × 3.193(79.7 × 81.1) | |
| Displacementcuin(cm) | ^3 98.78(1,618) | |
| Firingorder1-3-4-2 | ||
| Idlespeedrpm | Noadjustmentisnecessary. | |
| Ignitiontiming(B.T.D.C.)degree/rpm | ||
| Sparkplug | Standard | DILKAR7C9H(forNISMORSmodels)DILKAR7E9HS(exceptforNISMORSmodels) |
| Sparkpluggap(Normal) | in(mm) | 0.035(0.9) |
| CamshaftoperationTimingchain | ||
ThissparkignitionsystemcomplieswiththeCanadianstandardICES-002.
WHEELSANDTIRES
Roadwheel
| TypeSizeOffsetin | (mm) | ||
| Conventional | 17 × 7J | 1.85(47) | |
| NISMO models | 18 × 7J | 1.85(47) | |
| Spare | 16 × 4T | 1.18(30) | |
| NISMORS models | 17 × 4T | 1.18(30) | |
Tire
| TypeSize | Pressure PSI(kPa) [Cold] | ||
| Conven-tional | P215/55-R1793V | 33(230)*136(250)*235(240)*3 | |
| NISMO models | 225/45R1895Y 33(230)*135(240)*3 | ||
| Spare | T135/80-D16101M*1*2 | 60(420) | |
| T135/90-D16102M*3 | |||
| NISMORS models | T135/70-D1792M | ||
*1:2WDMTmodel
*2:2WDCVTmodel
*3:AWDmodel
DIMENSIONSANDWEIGHTS
| Overalllengthin(mm) | 162.8(4,135)*1 |
| 162.4(4,125)*2 | |
| 164.0(4,165)*3 | |
| 163.8(4,160)*4 | |
| Overallwidthin(mm) | 69.5(1,765) |
| 69.7(1,770)*5 | |
| Overallheightin(mm) | 61.8(1,570) |
| Fronttreadin(mm) | 60.0(1,525) |
| Reartreadin(mm) | 60.0(1,525)*6 |
| 59.3(1,505)*7 | |
| Wheelbasein(mm) | 99.6(2,530) |
| GrossVehicle | |
| WeightRating (GVWR) | lb(kg) |
| SeetheF.M.V.S.S.or | |
| GrossAxle | C.M.V.S.S.certification |
| WeightRating (GAWR) | labelonthedriver's sidecenterpillar. |
| Frontlb(kg) | |
| Rearlb(kg) | |
*1:Withfrontlicenseplatebracket
*2:Withoutfrontlicenseplatebracket
*3: With front license plate bracket (NISMO models)
*4: Withoutfrontlicenseplate bracket(NISMO models)
*5:NISMOmodels
*6:for2WDmodel
*7:forAWDmodel
WHEN TRAVELINGOR REGISTERINGIN ANOTHER COUNTRY
Whenplanningtotravelinanother country,youshouldfirstfindoutifthefuelavailableis suitable foryour vehicle'sengine.
Using fuel with an octane rating that is too low may cause engaged damage. All gasoline vehicles must be operated with unleaded gasoline. Therefore, avoid taking your vehicle to areas where appropriate fuel is not available.
When transferring the registration of your vehicle to another country, state, province ordistrict, it may be necessary to modify the vehicle to meet local laws and regulations.
The laws and regulations for motor vehicle emission control and safety standards vary according to the country, state, province or district; therefore, vehicle specifications may differ.
When any vehicle is to be taken into another country, state, province or district and registered, its modifications, transportation, and registration are the responsibility of the user. NISSAN is not responsible for any inconvenience that may result.
VEHICLEIDENTIFICATION

natural_image
Medical illustration showing anatomical structures with a black arrow indicating a specific region (no text or symbols present)VEHICLEIDENTIFICATIONNUMBER (VIN)PLATE
Thevehicleidentificationnumberplateisattachedasshown. Thisnumberistheidentificationforyourvehicleandisusedinthevehicle registration.

VEHICLEIDENTIFICATIONNUMBER (chassisnumber)
The vehicle identification number is located as shown.
Removethecovertoaccessthenumber.

natural_image
Technical line drawing of a mechanical component with no visible text or symbolsENGINESERIALNUMBER
Thenumberisstampedontheengineasshown.
Technicalandconsumerinformation10-11

natural_image
Technical line drawing of a car interior showing structural components and a directional arrow (no text or symbols)F.M.V.S.S./C.M.V.S.S.CERTIFICATION LABEL
The Federal/Canadian Motor Vehicle Safety Standards (F.M.V.S.S./C.M.V.S.S.) certification labelisaffixedasshown. This label contains valuable vehicle information, such as: Gross Vehicle Weight Ratings (GVWR), Gross Axle Weight Rating (GAWR), month and year of manufacture, Vehicle Identification Number (VIN), etc. Review it carefully.

EMISSIONCONTROLINFORMATION LABEL
The emission control information label is attached to the underside of the hood as shown.

natural_image
Technical line drawing of a vehicle door and seat assembly (no text or symbols)TIREANDLOADINGINFORMATION LABEL
ThecoldtirepressureisshownontheTireand LoadingInformationlabelaffixedtothepillaras shown.
INSTALLINGFRONTLICENSEPLATE
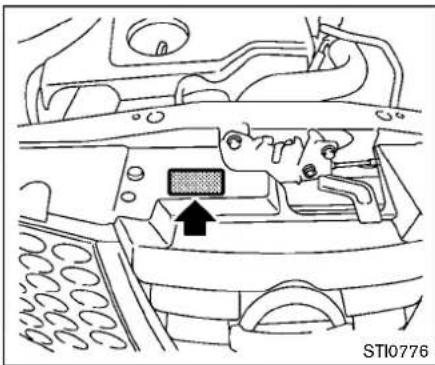
natural_image
Technical diagram of a car interior showing engine compartment and air vent (no text or symbols)AIRCONDITIONERSPECIFICATION LABEL
Theairconditionerspecificationlabelisattachedtotheenginecompartmentasshown.

Technicalandconsumerinformation10-13
Usethefollowingstepstomountthelicense plate:
Beforemountingthelicenseplate, confirm that the following parts are enclosed in the plastic bag.
- Licenseplatebracket
●J-nut × 2 - Screw × 2
- Screwgrommet × 2
- Licenseplatebracket
●J-nut × 2 - Screw × 2
-
Screwgrommet × 2
-
Parkthevehicleonflat, levelground.
-
Locatethecenterposition Ⓐ asillustrated. Makesurethesideendsurfaceofthe licenseplatebracketisalignedwiththe bumper Ⓑ.
3.Markthecenteroftheholes
© withafelt-
tippen.
4. Carefully drill the twopilo thes using a 0.39in(10mm) drill bit at them marked locations. (Besure that the drill only goesthrough the bumper fascia.)
5. Insertgrommets into the hole on the fascia.
6. Insertaflat-bladescrewdriver into the grommetholetoadda90°turnonto the part ①.
7. InsertaJ-nutintothelicenseplatebracket beforeplacingthelicenseplatebracketon thefascia.
10-14 Technical and consumer information
- Install the license plate bracket with the screws.
- Install the license plate with bolt sthat are not longer than 0.55 in (14mm).
bag.
VEHICLELOADINGINFORMATION

WARNING
•Itisextremelydangerousto rideinacargoareainsidethe vehicle.Inacollision,people ridingintheseareasaremore likelytobeseriouslyinjuredor killed.
- Donotallowpeopleoridein anyareaofyourvehiclethatis notequippedwithseatsand seatbelts.
- Besureeveryoneinyourvehicleisinaseatandusinga seatbeltproperly.
TERMS
It is important to familiarize yourself with the following terms before loading your vehicle:
- CurbWeight(actualweightofyour vehicle)-vehicleweightincluding: standardandoptionalequipment, fluids,emergencytools,andspare
tireassembly. Thisweight does not include passengers and cargo.
•GVW(GrossVehicleWeight)-curb weightplusthecombinedweightof passengersandcargo.
•GVWR(GrossVehicleWeightRating)-maximumtotalcombinedweightoftheunloadedvehicle,passengers,luggage,hitch,trailertongue loadandanyotheroptionalequipment.Thisinformationislocatedon theF.M.V.S.S./C.M.V.S.S.label.
- GAWR(GrossAxleWeightRating)-maximumweight(load)limitspecified forthefrontorrearaxle. This information is located on the F.M.V.S.S./C.M. V.S.S.label.
- GCWR(GrossCombinedWeight Rating)-Themaximumtotalweight ratingofthevehicle,passengers, cargo,andtrailer.
- VehicleCapacityWeight,Loadlimit, Totalloadcapacity- maximum total weightlimitspecifiedoftheload (passengersandcargo)forthevehicle. Thisisthemaximumcombined
weightofoccupants andcargothat canbeloadedintothevehicle.Ifthe vehicle is used to tow a trailer, the trailertongueweightmustbein- cluded as part of the cargo load. This informationis locatedonthe Tireand LoadingInformationlabel.
•Cargocapacity-permissibleweight of cargo, the subtracted weight of occupants from the load limit.
VEHICLELOADCAPACITY
Donotexceedtheloadlimitofyour vehicleshownas"Thecombinedweight of occupantsand cargo"on the Tire and Loading Information label. Donot exceed thenumberofoccupantsshownas "SeatingCapacity" on the Tire and Loading Information label.
To get "the combined weight of occupantsandcargo",addtheweightofall occupants,thenaddthetotalluggage weight.Examplesareshowninthe followingillustration.
Technical and consumer information 10-15
Example
$$ \boxed {\text {Load limit}} _ {(6 4 0 \mathrm{kg})} - \left( \begin{array}{c c} \text {Occupants} & \text {Luggage} \ 1 5 0 \mathrm{lb} \times 2 = 3 0 0 \mathrm{lb} & 3 0 \mathrm{lb} \times 2 = 6 0 \mathrm{lb} \ (7 0 \mathrm{kg}) & (1 3 5 \mathrm{kg}) \end{array} \right) = \begin{array}{l} \text {Remaining available} \ \text {cargo and luggage} \ \text {load capacity} \ 1, 0 4 0 \mathrm{lb} \ (4 7 2 \mathrm{kg}) \end{array} $$
$$ \boxed { \begin{array}{l} \text {Load limit} \ 1, 4 0 0 \mathrm{lb} \ (6 4 0 \mathrm{kg}) \end{array} } - \left( \begin{array}{c c c c} \text {Occupants} & & \text {Luggage} \ \bigcirc & \bigcirc & \bigcirc & \bigcirc \ \text {150 lb x 5 = 750 lb} & & + & \ (7 0 \mathrm{kg}) & (3 4 0 \mathrm{kg}) & & 3 0 \mathrm{lbx5=150lb} \ & & (1 4 \mathrm{kg}) & (7 0 \mathrm{kg}) \end{array} \right) = \begin{array}{l} \text {Remaining available} \ \text {cargo and luggage} \ \text {load capacity =} \ 5 0 0 \mathrm{lb} \ (2 2 7 \mathrm{kg}) \end{array} $$
STI0447
Stepsfordeterminingcorrectloadlimit
-
Locatethestatement "Thecombined weight of occupants and cargo should never exceed XXXkgorXXX lbs" on your vehicle's placard.
-
Determinethecombinedweightof thedriverandpassengersthatwillbe ridinginyourvehicle.
-
Subtract the combined weight of the driver and passengers from XXXkg or XXXlbs.
-
Theresultingfigureequalstheavailableamountofcargoandluggage loadcapacity. Forexample, iftheXXX amountequals1400lbs.andthere willbefive150lb.passengersinyour vehicle, theamountofavailablecargo andluggageloadcapacityis650lbs. (1400- 750(5x150)=650lbs)or (640- 340(5x70)=300kg.)
-
Determinethecombinedweightof luggageandcargobeingloadedon thevehicle.Thatweightmaynot safelyexceedtheavailablecargo andluggageloadcapacitycalculated inStep4.
Beforedrivingloadedvehicle, confirm that you donot exceed the Gross Vehicle Weight Rating (GVWR) or the Gross Axle Weight Rating (GAWR) for your vehicle. (See "Measurement of weights" (P.10-17).)
Alsochecktiresforproperinflation pressures.SeetheTireandLoading Informationlabel.
10-16 Technical and consumer information
LOADINGTIPS
•TheGVWmustnotexceedGVWRor GAWRassspecifiedontheF.M.V.S. S./C.M.V.S.S.certificationlabel.
- Donotloadthefrontandrearaxleto the GAWR.Doingsowillexceedthe GVWR.

WARNING
•Properlysecureallcargowith ropesorstrapstohelpprevent itfromslidingorshifting.Do notplacecargohigherthan theseatbacks.Inasudden stoporcollision,unsecured cargocouldcausepersonal injury.
- Donotloadyourvehicleany heavierthantheGVWRorthe maximum front and rear GAWRs.Ifyoudo,partsof yourvehiclecanbreak,tire damagecouldoccur,oritcan changethewayyourvehicle handles.Thiscouldresultin
lossofcontrolandcauseper- sonalinjury.
•Overloading not only can shortenthelifeofyourvehicle andthetire, butcancause unsafevehiclehandling and longerbrakingdistances. This may cause apremature tire failure, which could result in a serious accident and personal injury. Failures caused by overloading are not covered by the vehicle's warranty.
MEASUREMENTOFWEIGHTS
Securelooseitemstopreventweight shiftsthatcouldaffectthebalanceof yourvehicle.Whenthevehicleisloaded, drivetoascaleandweighthefrontand therearwheelsseparatelytodetermine axleloads.Individualaxleloadsshould notexceedeitheroftheGrossAxle WeightRatings(GAWR).Thetotalof theaxleloadsshouldnotexceedthe GrossVehicleWeightRating(GVWR).
Theseratingsaregivenonthevehicle certificationlabel. Ifweightratingsare exceeded,moveorremoveitemstobring allweightsbelowtheratings.
TOWINGATRAILER
FLATTOWING
Donottowatralerwithyourvehicle.Towingyourvehiclewithallfourwheelsonthe
groundissometimescalledflattowing. This methodissometimesusedwhentowinga vehiclebehindarecreationalvehicle,suchasa motorhome.

CAUTION
- Failuretofollowtheseguidelines canresultinseveretransmission damage.
- Whenever flattowing your vehicle, alwaystowforward, never backward.
- DONOTtowanyContinuouslyVariableTransmission(CVT)vehicle withallfourwheelsontheground (flattowing).DoingsoWILLDA-MAGEinternaltransmissionparts duetolackoftransmissionlubrication.
- DONOTtowanAll-WheelDrive (AWD) vehicle with any of the wheels on the ground. Doing so may cause serious and expensive damage to the powertrain.
- Foremergencytowingprocedures referto"Towingyourvehicle"(P.6-
13).
CONTINUOUSLYVARIABLETRANSMISSION(CVT)
All-WheelDrive(AWD)models:
DonottowanAWDvehiclewithanyofthe wheelsontheground.
Two-WheelDrive(2WD)models:
TotowavehicleequippedwithaContinuously VariableTransmission(CVT),anappropriate vehicledollyMUSTbeplacedunderthetowed vehicle's driving wheels. Always follow the dolly manufacturer'srecommendationswhenusing theirproduct.
MANUALTRANSMISSION
- Alwaystowwiththemanualtransmissionin Neutral.
- Your vehiclespeed should never exceed 70 MPH (112 km/h) when flattening your vehicle.
- Aftertowing500miles(805km),startand idletheenginewiththetransmission in Neutralfortwominutes.Failuretoidle the engineafterevery500miles(805km) of towingmaycausedamagetothetransmis- sion'sinternalparts.
UNIFORMTIREQUALITYGRADING
DOT(DepartmentOfTransportation)Quality Grades: Allpassengercartiresmustconformto federalsafetyrequirementsinadditiontothese grades.
Qualitygradescanbefoundwhereapplicable onthetiresidewallbetweentreadshoulderand maximumsectionwidth. Forexample:
Treadwear200TractionAATemperatureA TREADWEAR
Thetreadweargradeisacomparativerating basedonthewearrateofthetirewhentested undercontrolledconditionsaspecified governmenttestcourse.Forexample,atire graded150wouldwearoneandone-half
(11/2)timesaswellonthegovernmentcourse asatiregraded 100. Therelativeperformance oftiresdependsuponactualconditionsoftheir use,however,andmaydepartsignificantlyfrom thenormduetovariationsindrivinghabits, servicepracticesanddifferencesinroadcharacteristicsandclimate.
TRACTIONAA,A,BANDC
Thetractiongrades, from highest to lowest, are AA, A, Band C. Those grades represent the tire's ability to stop on wet pavement as measured under controlled conditions specified government tests surfaces of asphalt and concrete. Atiremarked C may have poor
tractionperformance.

WARNING
Thetractiongradeassignedtothistire isbasedonstraight-aheadbraking tractiontests, and does not include acceleration, cornering, hydroplaning, or peaktraction characteristics.
TEMPERATUREA, BANDC
ThetemperaturegradesA(thehighest),B,and C,representingthetire'sresistancetothe generationofheatanditsabilitytodissipate heatwhentestedundercontrolledconditionson aspecifiedindoorlaboratorytestwheel.Sustainedhightemperaturecancausethematerial ofthetiretodegenerateandreducetirelife,and excessivetemperaturecanleadtosuddentire failure.ThegradeCcorrespondstoalevelof performancewhichallpassengercartiresmust meetundertheFederalMotorVehicleSafety StandardNo.109.GradesBandArepresent higherlevelsofperformanceonthelaboratory testwheelthanthemminumrequiredbylaw.

WARNING
Thetemperaturegradeforthistireis establishedforatirethatisproperly inflatedandnotoverloaded.Excessive speed,under-inflation,orexcessive loading,eitherseparatelyorincombination,cancauseheatbuild-upand possibletirefailure.
EMISSIONCONTROLSYSTEM WARRANTY
Your vehicle is discovered by the following emission warranties.
ForUSA:
●EmissionDefectsWarranty
●EmissionsPerformanceWarranty
Detailsofthesewarrantiesmaybefoundwith othervehiclewarrantiesinyourWarrantyInformationBookletwhichcomeswithyour vehicle.IfyoudidnotreceiveaWarranty InformationBooklet,orithasbecomelost,you mayobtainareplacementbywritingto:
●NissanNorthAmerica,Inc.
ConsumerAffairsDepartment
P.O.Box685003
Franklin,TN37068-5003
ForCanada:
EmissionControlSystemWarranty
Detailsofthiswarrantymaybefoundwithother vehiclewarrantiesinyourWarrantyInformation Bookletwhichcomeswithyourvehicle.Ifyou didnotreceiveaWarrantyInformationBooklet, orithasbecomelost,youmayobtain a replacementbywritingto:
•NissanCanadaInc.
5290OrbitorDrive
Mississauga, Ontario, L4W4Z5
REPORTINGSAFETYDEFECTS
ForUSA
If you believe that your vehicle has a defect which could cause acrashor could cause injury or death, you should immediately inform the National Highway Traffic Safety Administration (NHTSA) in addition to notifying NISSAN.
IfNHTSAreceivessimilarcomplaints, it may open an investigation, and if finds that as safety defect exists in a group of vehicles, it may order are call and remedy campaign. However, NHTSA cannot become involved in individual problems between you, your dealer, or NISSAN.
TocontactNHTSA,youmaycallthe VehicleSafetyHotlinetoll-freeat1-888-327-4236(TTY:1-800-424-9153);go to http://www.safercar.gov; or write to: Administrator,NHTSA,400Seventh Street,SW.,Washington,D.C.20590. Youcanalsoobtainotherinformation about motor vehicle safety from http:// www.safercar.gov.
You may notify NISSAN by contacting ourConsumer Affairs Department, tollfree, at 1-800-NISSAN-1.
ForCanada
If you believethat your vehicle has a defect which could cause acrashor could cause injury or death, you should immediately inform Transport Canada in addition to notifying NISSAN.
If Transport Canadareceives complaints, it may open an investigation, and if it find that as safety defect exists in a group of vehicles, it may request that NISSAN conduct a recall campaign. However, Transport Canadac cannot become involved in individual problems between you, your dealer, or NISSAN.
You may contact Transport Canada's Defect Investigations and Recalls Division toll free at 1-800-333-0510. You may also reports safety defect online at: https://wwwapps.tc.gc.ca/Saf-Sec-Sur/7/PCDB-BDPP/Index.aspx.
Additional information concerning motor vehicle safety may be obtained from Transport Canada's Road Safety Infor-
10-20Technicalandconsumerinformation
READINESSFORINSPECTION/MAINTENANCE(I/M)TEST
mationCentreat1-800-333-0371 or onlineatwww.tc.gc.ca/roadsafety(Englishspeakers)orwww.tc.gc.ca/securiteroutiere(Frenchspeakers).
TonotifyNISSANofanysafetyconcerns pleasecontactourConsumerInformationCentretollfreeat1-800-387-0122

WARNING
AvehicleequippedwithAll-WheelDrive (AWD)shouldneverbetestedusinga twowheeldynamometer(suchasthe dynamometersusedbysomestatesfor emissionstesting),orsimilarequipment.Makesureyouinformtestfacility personnelthatyourvehicleisequipped withAWDbeforeitisplacedona dynamometer.Usingthewrongtest equipmentmayresultintransmission damageorunexpectedvehiclemovementwhichcouldresultinserious vehicledamageorpersonalinjury.
Duetolegalrequirementsinsomestates/areas orprovinces,yourvehiclemayberequiredtobe inwhatiscalledthe"readycondition"foran Inspection/Maintenance(I/M)testoftheemissioncontrolsystem.
The vehicle is set to the "ready condition" when it is driven through certain driving patterns. Usually, the "ready condition" can be obtained by ordinary usage of the vehicle.
Ifapowertrainsystemcomponentisrepairedor thebatteryisdisconnected,thevehiclemaybe resettoa"notreadycondition".Beforetaking
thel/Mtest,checkthevehicle'sinspection/maintenancetestreadinesscondition.Placethe ignitionswitchintheONpositionwithout startingtheengine.IftheMalfunctionIndicator Light(MIL)comesonsteadyfor20secondsand thenblinksfor10seconds,thel/Mtest conditionis"notready".IftheMILdoesnot blinkafter20seconds,thel/Mtestconditionis "ready".
ItisrecommendedyouvisitaNISSANdealerto set"readycondition"ortopreparethevehicle fortesting.
EVENTDATARECORDERS(EDR)
ThisvehicleisequippedwithanEventData Recorder(EDR).ThemainpurposeofanEDRis torecord,incertaincrashornearcrash-like situations,suchasanairbagdeploymentor hittingaroadobstacle,datathatwillassistin understandinghowavehicle'ssystemsperformed.TheEDRisdesignedtorecorddata relatedtovehicledynamicsandsafetysystems forashortperiodoftime,typically30seconds orless.TheEDRinthisvehicleisdesignedto recordsuchdataas:
- Howvarious systems in your vehicle were operating;
●Whetherornotthedriverandpassenger safetybeltswerebuckled/fastened; - Howfar(ifatall)thedriverwasdepressing theacceleratorand/orbrakepedal;and,
●Howfastthevehiclewastraveling.
●Soundsarenotrecorded.
Thesedatacanhelpprovideabetterunderstandingofthecircumstancesinwhichcrashes andinjuriesoccur.
NOTE:EDRdataarerecordedbyyourvehicle onlyifanontrivialcrashsituationoccurs;nodata arerecordedbytheEDRundernormaldriving conditionsandnopersonaldata(e.g.name, gender,ageandcrashlocation)arerecorded. However,otherparties,suchaslawenforce-ment,couldcombinetheEDRdatawiththetype
of personally identifying dataroutinely acquired during acrashinvestigation.
ToreaddatarecordedbyanEDR, special equipmentisrequiredandaccesstothevehicle ortheEDRisneeded.Inadditiontothevehicle manufacturerandNISSANdealer,otherparties, suchaslawenforcement,thathavethespecial equipment,canreadtheinformationiftheyhave accesstothevehicleortheEDR.EDRdatawill onlybeaccessedwiththeconsentofthevehicle ownerorlesseeorasotherwiserequiredor permittedbylaw.
OWNER'SMANUAL/SERVICE MANUALORDERINFORMATION
GenuineNISSANServiceManualsforth this modelyearandpriorcanbepurchased.A genuineNISSANServiceManualisthebest sourceofserviceandrepairinformationforyour vehicle.Thismanualisthesameoneusedbythe factorytrainedtechniciansworkingataNISSAN dealer.GenuineNISSANOwner'sManualscan alsobepurchased.
IntheUSA:
Forcurrentpricingandavailabilityofgenuine
NISSANServiceManualscontact:
www.nissan-techinfo.com
Forcurrentpricingandavailabilityofgenuine
NISSANOwner'sManualscontact:
1-800-247-5321
InCanada:
TopurchaseacopyofagenuineNISSAN ServiceManualorOwner'sManualforth this modelyearandpriorpleasecontactaNISSAN dealer.Forthephonenumberandlocationofa NISSANdealerinyourareacalltheNISSAN InformationCenterat1-800-387-0122anda bilingualNISSANrepresentativewillassistyou.
10-22 Technical and consumer information
11Index
A
ABS(Anti-lockBrakingSystem)....5-36
Adjustingthescreen....4-11
Advancedairbagsystem....1-44
Airbagsystem
Advancedairbagsystem....1-44
Frontpassengerairbagandstatuslight.....1-46
Front-seatmountedside-impact
supplementalairbagsystem....1-51
Roof-mountedcurtainside-impact
supplementalairbagsystem....1-51
Airbagwarninglabels....1-54
Airbagwarninglight....1-54,2-20
Aircleanerhousingfilter....8-14
Airconditioner
Airconditioneroperation....4-28
Airconditionerservice....4-35
Airconditionerspecificationlabel....10-13
Airconditioningsystemrefrigerantand
lubricantrecommendations....4-35,10-8
In-cabinmicrofilter....4-35
Airconditioneroperation....4-31
Alarm,Howtostopalarm(seevehicle
securitysystem)....2-34
Alcohol, drugs and driving 5-7
All-wheeldrive(AWD)....5-29
Antenna....4-75
Anti-lockBrakingSystem(ABS)....5-36
Anti-lockbrakingsystem(ABS)warninglight....2-16
Appearancecare
Exteriorappearancecare....7-2
Interiorappearancecare....7-5
Applicationdownload....4-76
AroundView ^® Monitor....4-13
Audiblereminders....2-23
Audiooperationprecautions....4-35
Audiosystem....4-35
Steeringwheelaudiocontrols....4-73
Autolightsystem....2-40
Automatic
Airconditioner....4-32
Doorlocks....3-5
Averagefuelconsumption....2-13
Avoidingcollisionandrollover....5-6
B
Backdoor(Seeliftgate)....3-16
Battery....8-10
Batteryreplacement,IntelligentKey......8-20
Batterysaversystem....2-41
Variablevoltagecontrolsystem....8-12
Beforestartingtheengine....5-12
Bluetooth® Hands-FreePhoneSystem....4-80,4-89
Bluetooth® settings....4-88,4-94
Bluetooth ^® streamingaudio....4-60,4-71
Boosterseats....1-34
Brake
Anti-lockBrakingSystem(ABS)....5-36
Brakeandclutchfluid....8-9
Brakesystem....5-35
Parkingbrakeoperation....5-25
Warninglight....2-16
Break-inschedule....5-27
Brightnesscontrol
Instrumentpanel....2-43
Bulbcheck/instrumentpanel....2-16
Bulbreplacement....8-23
C
Cabinairfilter....4-35
Capacitiesand
recommendedfluids/lubricants....10-2
CarphoneorCBradio....4-80
Cargocover....2-49
Cargofloorbox....2-48
Catalyticconverter, Threewaycatalyst....5-3
CD/USBmemorycareandcleaning....4-73
Chassisandbodymaintenance....9-11
Checktirepressurewarning....2-9
Childrestraints....1-18
Boosterseats....1-34
LATCHsystem....1-20
Precautionsonchildrestraints....1-19
Childsafety....1-16
Childsafetyreardoorlock....3-6
Chimes, Audiblereminders....2-23
Circuitbreaker,Fusiblelink....8-18
Cleaningexteriorandinterior....7-2,7-5
Clutchfluid....8-9
Coathook....2-48
Cockpit....2-3
Coldweatherdriving....5-39
CompactDisc(CD)player(See
ContinuouslyVariableTransmission(CVT)fluid...8-8
Controlbuttonsandfunction....4-3
Controls,Steeringwheelaudiocontrols......4-73
Coolant
Capacitiesand
recommendedfluids/lubricants....10-2
Changingenginecoolant....8-5
Checkingenginecoolantlevel....8-5
Hightemperaturewarninglight....2-18
Corrosionprotection....7-7
Cover, Carqocover....2-49
Cruisecontrol....5-26
Cupholders....2-47
CVT, Driving with CVT (Continuously
VariableTransmission)....5-14
D
Daytimerunninglightsystem....2-42
Defrosterswitch, Rearwindowandoutside
mirrordefrosterswitch....2-38
Dimensionsandweights....10-10
DisplayingClimatecontrol....4-34
Dooropenwarninglight....2-17
Drivebelt....8-12
Driving
All-wheeldrive(AWD)....5-29
Coldweatherdriving....5-39
DrivingwithCVT(Continuously
VariableTransmission)....5-14
Drivingwithmanualtransmission....5-19
Precautionswhenstartinganddriving......5-2
Safetyprecautions....5-7
E
Economy,Fuel....5-29
Elapsedtime....2-13,2-30
Electricpowersteering....5-34
Electricpowersteeringwarninglight....2-17
Emissioncontrolinformationlabel....10-12
Emissioncontrolsystemmaintenance....9-8
Emissioncontrolsystemwarranty....10-20
Engine
Beforestartingtheengine....5-12
Break-inschedule....5-27
Capacitiesand
recommendedfluids/lubricants....10-2
Changingenginecoolant....8-5
Changingengineoilandfilter....8-6
Checkingenginecoolantlevel....8-5
Checkingengineoillevel....8-5
Coolanttemperaturegauge....2-10
Emergencyengineshutoff....5-11,6-3
Engineblockheater....5-40
Enginecompartmentchecklocations......8-3
Enginecoolingsystem 8-4
Engineoil....8-5
Engineoilandoilfilterrecommendation.....10-7
Engineoilviscosity....10-8
Engineserialnumber....10-11
Enginespecifications....10-9
Hightemperaturewarninglight....2-18
Ifyourvehicleoverheats....6-11
Startingtheengine....5-13
EventDataRecorders(EDR)....10-22
Exhaustgas(carbonmonoxide)....5-2
Explanation of scheduled maintenance items.....9-5
Extendedstoragefusewarning....2-9
F
F.M.V.S.S./C.M.V.S.S.certificationlabel.....10-12
Filter
Aircleanerhousingfilter....8-14
Changingengineoilandfilter....8-6
Flashers(Seehazardwarningflasherswitch).....6-2
Flattire....6-3
Flattowing....10-18
Floormatcleaning....7-5
Fluid
Brakeandclutchfluid....8-9
Capacitiesand
recommendedfluids/lubricants....10-2
ContinuouslyVariableTransmission
(CVT)fluid....8-8
Enginecoolant....8-4
Engineoil....8-5
Windowwasherfluid....8-9
FM-AMradiowithCompactDisc(CD)player....4-45
FM-AM-SATradiowithCompactDisc(CD)
player(TypeA)....4-53
FM-AM-SATradiowithCompactDisc(CD)
player(TypeB)4-62
Foglightswitch....2-44
Frontmanualseatadjustment....1-3
Frontpassengerairbagandstatuslight....1-46
Frontseat, Frontseatadjustment....1-3
Front-seataactiveheadrestraints....1-9
Fue
Capacitiesand
recommendedfluids/lubricants....10-2
Distancetoempty....2-13
Fueleconomy....5-29
Fuelinformation....10-4
Fueloctanerating....10-4
Fuel-fillercap....3-18
Fuel-fillerdoor....3-18
Gauge....2-11
FuelEfficientDrivingTips....5-28
Fuses....8-17
Fusiblelinks....8-18
G
Gascap....3-18
Gauge....2-5
Enginecoolanttemperaturegauge....2-1
Fuelgauge....2-11
Odometer....2-7
Speedometer....2-7
Tachometer....2-9
Tripcomputer....2-13
Generalmaintenance....9-2
Givingvoicecommands....4-97
Glovebox....2-48
H
Hazardwarningflasherswitch....6-2
Headrestraints/headrests....1-5
Headlights
Bulbreplacement....8-23
Headlightswitch....2-40
Xenonheadlights....2-39
Heatedseats....2-45
Heater
Engineblockheater....5-40
Heaterandairconditioneroperation....4-28
Helpvoicecommands....4-100
Hightemperaturewarninglight....2-18
Hoodrelease....3-15
Horn....2-44
Howtosaynumbers....4-98
Howtousebrightnesscontrolbutton....4-8
HowtousetheAPPS·ibutton....4-5
Howtousethebackbutton....4-5
HowtousetheCAMERAbutton....4-8
HowtousetheON-OFFbutton/Volume
controlknob....4-8
|
Ignitionswitch....5-9
Immobilizersystem....2-34
In-cabinmicrofilter....4-35
Indicatorlights....2-21
Insidemirror....3-21
Inspection/maintenance(I/M)test....10-21
Instrumentbrightnesscontrol....2-43
Instrumentpanel....2-4
Integratedcontrolsystem....2-24,5-21
IntelligentKeysystem....3-6
IntelligentKeysystemwarninglight....2-18
Keyoperatingrange....3-8
Keyoperation....3-9
Ppositionselectingwarninglight....2-20
Remotekeylessoperation....3-12
Interiorlightreplacement....8-26
Interiorlights....2-54
iPod® playeroperation....4-68
ISOFIXchildrestraint....1-20
J
Jumpstarting....6-9
K
Keylessentry
With Intelligent Keysystem(See Intelligent
Keysystem)....3-12
Keys....3-2
For Intelligent Keysystem....3-6
L
Labels
Airbagwarninglabels....1-54
Airconditionerspecificationlabel....10-13
Emissioncontrolinformationlabel....10-12
Engineserialnumber....10-11
F.M.V.S.S./C.M.V.S.S.certificationlabel.....10-12
TireandLoadinginformationlabel....8-30,10-12
Vehicleidentificationnumber(VIN)....10-11
LATCHsystem....1-20
Licenseplate,Installingfrontlicenseplate.....10-13
Liftgate....3-16
Light
Airbagwarninglight....1-54
Bulbreplacement....8-23
Foglightswitch....2-44
Headlightswitch....2-40
Headlightsbulbreplacement....8-23
Indicatorlights....2-21
Interiorlights....2-54
Maplights....2-54
Replacement....8-23
Warning/indicatorlightsand
audiblereminders....2-16
Xenonheadlights....2-39
Lights, Exterior and interior light replacement....8-26
Loadinginformation(Seevehicle
loadinginformation)....10-15
Lock
Automaticdoorlocks....3-5
Doorlocks....3-4
Liftgatelock....3-16
Loosefuelcapwarning....2-8,3-19
Lowfuelwarninglight....2-18
Lowtirepressurewarninglight....2-18
Lowtirepressurewarningsystem(Seetire
pressuremonitoringsystem(TPMS))......5-3
M
Maintenance
Battery....8-10
Generalmaintenance....9-2
Insidethevehicle....9-3
Maintenancelog....9-15
Maintenance precautions....8-2
Maintenancerequirements....9-2
Maintenanceschedules....9-7
Maintenanceundersevere
drivingconditions....9-14
Outsidethevehicle....9-2
Seatbeltmaintenance....1-15
Standardmaintenance....9-7
Maintenanceschedules....9-7
Makingacall....4-92
Malfunctionindicatorlight(MIL)....2-22
Manualairconditioner....4-29
Manualfrontseatadjustment....1-3
Maplights....2-54
Mechanicalkey(IntelligentKeysystem)....3-3
Meter
Tripcomputer....2-13
Metersandgauges....2-5
Instrumentbrightnesscontrol....2-43
Mirror
Insidemirror....3-21
Outsidemirrors....3-22
Vanitymirror....3-23
Monitor,RearViewMonitor....4-8
Moonroof....2-52
MovingObjectDetection(MOD)......4-24
N
Navigationsystemvoicecommands....4-99
Newvehiclebreak-in....5-27
NISSANVehicleImmobilizerSystem....2-34
NISSANVoiceRecognitionSystem....4-96
NissanConnectAppsmartphoneintegration.....4-75
0
Odometer....2-7
Off-roadrecovery....5-6
Oil
Capacitiesand
recommendedfluids/lubricants....10-2
Changingengineoilandfilter....8-6
Checkingengineoillevel....8-5
Engineoil....8-5
Engineoilviscosity....10-8
OneShotCall....4-91
Outsideairtemperaturedisplay....2-12
Outsidemirrors....3-22
Overheat, If your vehicle overheats....6-11
Owner's Manual/ServiceManual
orderinformation....10-22
P
Panicalarm....3-13
Parking
Brakebreak-in....5-35
Parkingbrakeoperation....5-25
Parkingonhills....5-33
Phone
CarphoneorCBradio....4-80
Phonesettings....4-96
wer
Elevation coordinates 5.24
Electricpowersteering....5-34
Moonroot 2-52
Powerdoorlock....3-4
Poweroutlet....2-46
Powerwindows....2-50
Phonesettings....4-96
Precautions
Audiooperation....4-35
Brakingprecautions....5-35
Childrestraints....1-19
Cruisecontrol....5-26
Drivingsafety....5-7
Maintenance....8-2
Seatbeltusage....1-10
Supplementalrestraintsystem....1-38
Whenstartinganddriving....5-2
Pushstarting....6-11
Push-buttonignitionswitch....5-9,5-10
R
Radio....4-35
CarphoneorCBradio....4-80
Steeringwheelaudiocontrols....4-73
Rapidairpressureloss....5-6
Readinessforinspection/maintenance
(I/M)test....10-21
Reardoorlock, Childsafetyreardoorlock......3-6
Rearseats....1-4
Rearwindowandoutsidemirror
defrosterswitch....2-38
Rearwindowwiperandwasherswitch....2-37
RearViewMonitor....4-8
Recorders, Eventdata....10-22
Registeringinanothercountry....10-10
RegisteringwithNissanConnectApp....4-75
Remotekeylessentryfunction, For Intelligent
Keysystem....3-12
Reportingsafetydefects....10-20
Roadsideassistanceprogram....6-2
Rollover....5-6
Roof,Moonroof....2-53
S
Safety
Childseatbelts....1-16
Reportingsafetydefects....10-20
Seatadjustment
Frontmanualseatadjustment....1-3
Frontseats....1-3
Seatbelt(s)
Childsafety....1-16
Infants....1-17
Injuredpersons....1-12
Largerchildren....1-17
Precautionsonseatbeltusage....1-10
Pregnantwomen....1-12
Seatbeltcleaning....7-7
Seatbeltextenders....1-15
Seatbelthooks....1-15
Seatbeltmaintenance....1-15
Seatbeltwarninglight....2-20
Seatbelts....1-10
Seatbeltswithpretensioners....1-52
Shoulderbeltheightadjustment....1-14
Smallchildren....1-17
Three-pointtype....1-12
Seat(s)
Heatedseats....2-45
Seats....1-2
Securitysystem(NISSANVehicleImmobilizer
System),Enginestart....2-34
Securitysystem, Vehiclesecurity system....2-33
Servicingairconditioner....4-35
Settingclimateeco....4-34
Shiftlever
Shiftlockrelease....5-18
Shiftlockrelease
Transmission....5-18
Shifting
CVT(ContinuouslyVariableTransmission)....5-14
Manualtransmission....5-19
Shoulderbeltheightadjustment,For
frontseats....1-14
Siri ^® EyesFree....4-76
SOURCEselectswitch....4-73
Sparetire....8-41,10-9
Sparkplugs....8-13
Speedometer....2-7
Standardmaintenance....9-7
Starting
Beforestartingtheengine....5-12
Jumpstarting....6-9
Precautionswhenstartinganddriving....5-2
Pushstarting....6-11
Startingtheengine....5-13
Statuslight, Frontpassengerairbag....1-46
Steering
Electricpowersteering....5-34
Steeringwheelswitchforaudiocontrols.....4-73
Tiltingsteeringcolumn....3-20
Storage....2-47
Sunvisors....3-21
Supplementalairbagwarninglabels....1-54
Supplementalairbagwarninglight......1-54,2-20
Supplementalrestraintsystem....1-38
Precautionsonsupplemental
restraintsystem....1-38
Switch
Audiocontrolsteeringwheelswitch....4-73
Autolightswitch....2-40
Foglightswitch....2-44
Hazardwarningflasherswitch....6-2
Headlightswitch....2-40
Turnsignalswitch....2-43
Vehicledynamiccontrol(VDC)offswitch....2-44
T
Tachometer....2-9
Temperaturedisplay....2-12
Temperaturegauge,Enginecoolant
temperaturegauge....2-10
Textmessaging....4-93
Theft(NISSANVehicleImmobilizerSystem)
Enginestart....2-34
Three-waycatalyst....5-3
Tiltsteeringcolumn....3-20
Tirepressure,Lowtirepressurewarninglight....2-18
Tires
Flattire....6-3
Lowtirepressurewarningsystem....5-3
TireandLoadinginformationlabel....8-30,10-12
Tirechains....8-37
Tiredressing....7-4
Tirepressure....8-28
I trepressuremonitoring
system(TPMS)....5-3,6-3
Tirerotation....8-38
Typesoftires 8-36
Uniformtirequalitygrading....10-19
Wheel/tiresize....10-9
Wheelsandtires....8-28
Tonneaucover(seecargocover)......2-49
Touchscreen....4-4
Towing
Flattowing....10-18
Towtrucktowing....6-13
Towingatrailer....10-18
TPMS, Tirepressuremonitoringsystem....5-3
TPMS,Tirepressurewarningsystem....6-3
Trailertowing....10-18
Transmission
ContinuouslyVariableTransmission
(CVT)fluid....8-8
DrivingwithCVT(Continuously
VariableTransmission)....5-14
Drivingwithmanualtransmission....5-19
Transmissionshiftleverlockrelease......5-18
Transmitter,WithIntelligentKeysystem
(SeelntelligentKeysystem)....3-12
Travelingorregisteringinanothercountry......10-10
Tripcomputer....2-13
Turnsignalswitch....2-43
U
Underbodycleaning....7-3
Uniformtirequalitygrading....10-19
USB(UniversalSerialBus)
connectionport....4-57,4-67
v
Vanitymirror....3-23
Variablevoltagecontrolsystem....8-12
Vehicle
Dimensionsandweights....10-10
Identificationnumber(VIN)....10-11
Informationdisplay....2-11,2-12
Loadinginformation....10-15
Recovery(freeingastuckvehicle)......6-15
Securitysystem....2-33
Vehicledynamiccontrol(VDC)offswitch....2-44
Vehicledynamiccontrol(VDC)system.....5-37
Ventilators....4-27
Voicecommand....4-91
VoicePromptInterrupt....4-91
W
Warning
Hazardwarningflasherswitch....6-2
Lights....2-16
Tirepressuremonitoring
system(TPMS)....5-3,6-3
Warninglights, indicatorlights and
audiblereminders....2-15
Warninglabels, Airbagwarninglabels.....1-54
Warninglight
Airbagwarninglight....1-54,2-20
Anti-lockbrakingsystem(ABS)
warninglight....2-16
AWDwarninglight....5-31
Brakewarninglight....2-16
Dooropenwarninglight....2-17
Electricpowersteeringwarninglight....2-17
IntelligentKeysystemwarninglight......2-18
Lowfuelwarninglight....2-18
Lowtirepressurewarninglight......2-18
Seatbeltwarninglight....2-20
Warranty, Emission control system warranty....10-20
Washerswitch
Rearwindowwiperandwasherswitch.....2-37
Wiperandwasherswitch....2-36
Washing....7-2
Waxing....7-3
Weights(Seedimensionsandweights)......10-10
Wheel/tiresize....10-9
Wheelsandtires....8-28
Careofwheels....7-4
Cleaningaluminumalloywheels....7-4
Windowwasherfluid....8-9
Window(s)
Cleaning....7-3
Powerwindows....2-50
Wiper
Rearwindowwiperandwasherswitch.....2-37
Rearwindowwiperblade....8-16
Wiperandwasherswitch....2-36
Wiperblades....8-15
Wiperandwasherswitch....2-36
x
Xenonheadlights....2-39
MEMO
MEMO
MEMO
GAS STATION INFORMATION
FUELINFORMATION:
ExceptforNISMORSmodels:
NISSANrecommendstheuseofunleaded premiumgasolinewithanoctaneratingofat least91AKI(Anti-KnockIndex)number(Researchoctanenumber96).
Ifunleadedpremiumgasolineisnotavailable, youmayuseunleadedregulargasolinewithan octaneratingofatleast87AKInumber (Researchoctanenumber91),butyoumay noticeadecreaseinperformance.
ForNISMORSmodels:
Useunleadedpremiumgasolinewithanoctane ratingofatleast91AKI(Anti-KnockIndex) number(Researchoctanenumber96).
If unleaded premium gasoline is not available, unleaded regular gasolinewith an octanerating of at least 87 AK Inumber (Research octane number 91) may be temporarily used, but only under the following precautions:
●Havethefueltankfilledonlypartiallywith unleadedregulargasoline,andfillupwith unleadedpremiumgasolineassoonas possible.
- Avoidfullthrottledrivingandabruptacceleration.
Useunleadedpremiumgasolineformax- imumvehicleperformance.

CAUTION
- Usingafuelotherthanthatspecifiedcouldadverselyaffecttheemissioncontrolsystem,andmayalso affectwarrantycoverage.
- Undernocircumstances should leaded gasolinebeused, because this will damagethethree-way catalyst.
- DonotuseE-15orE-85fuelinyour vehicle.Yourvehicleisnotdesigned torunonE-15orE-85fuel.UsingE-15orE-85fuelinavehiclenot specificallydesignedforE-15orE-85fuelcanadverselyaffectthe emissioncontroldevicesandsystemsofthevehicle.Damagecaused bysuchfuelisnotcoveredbythe NISSANnewvehiclelimitedwarranty.
•U.S. government regulations require ethanold dispensing pumpstobe identified by a small, square, orange
andblack labelwith thecommon abbreviationortheappropriatepercentageforthatregion.
For additional information, see "Capacities and recommended fluids/lubricants" (P.10-2).
ENGINEOILRECOMMENDATION: ForNISMORSmodels:
●Genuine"NissanMotorOil5W-30SN"
ExceptforNISMORSmodels:
●Genuine"NissanMotorOil0W-20SN"
See "Capacitiesandrecommendedfluids/lubricants"(P.10-2)forengineoilandoilfilter recommendation.
COLD TIREPRESSURES:
The labelistypicallylocated onthedriverside centerpillar. For additional information, see "Wheelsandtires"(P.8-28).
NEW VEHICLEBREAK-INPROCEDURESECOMMENDATION:
During the first 1,200 miles (2,000 km) of vehicle use, follow there recommendations outlined in the "Break-inschedule" (P.5-27) of this Owner's Manual. Follow these recommendations for the futurereliability and economy of your new vehicle.

Printing: January 2017 (36)
Publication No.: OM17E0 0F15U0
Printed in U.S.A.
TOOUM-3PUOD
F15-D

- Foreword
- WARNING
- IMPORTANT SAFETY INFORMATION REMINDERS!
- On-pavementandoff-roaddriving
- MODIFICATIONOFYOURVEHICLE
- WHENREADINGTHEMANUAL
- IMPORTANT INFORMATION ABOUT THISMANUAL
- CAUTION
- CANADA'SPRODUCTSCONTAINING MERCURYREGULATIONS
- CALIFORNIAPERCHLORATEADVISORY
- Bluetooth®
- ((SiriusXM)
- 0Illustratedtableofcontents
- SEATS,SEATBELTSAND SUPPLEMENTALRESTRAINT SYSTEM(SRS)
- EXTERIORFRONT
- EXTERIORREAR
- 0-4 Illustratedtableofcontents
- EXTERIOR(NISMOmodels)
- PASSENGERCOMPARTMENT
- INSTRUMENTPANEL
- METERSANDGAUGES
- ENGINECOMPARTMENT
- MR16DDTENGINE
- Safety—Seats, seatbeltsandsupplemental restraintsystem
- SEATS
- FRONTSEATS
- Forwardandbackward:
- Reclining(TypeA)(ifsoequipped):
- Reclining(TypeB)(ifsoequipped):
- NOTE:
- Seatlifter(fordriver'sseat):
- REARSEATS
- Beforefoldingtherearseats:
- HEADRESTRAINTS/HEADRESTS
- ADJUSTABLEHEADRESTRAINT/ HEADRESTCOMPONENTS
- REMOVE
- INSTALL
- Foradjustableheadrestraint/headrest
- Lower
- FRONT-SEATACTIVEHEADRESTRAINTS(ifsoequipped)
- SEATBELTS
- PRECAUTIONSONSEATBELT USAGE
- PREGNANTWOMEN
- INJUREDPERSONS
- THREE-POINTTYPESEATBELT
- internalinjuries.
- Seatbelthooks
- SEATBELTEXTENDERS
- SEATBELTMAINTENANCE
- CHILDSAFETY
- - Ifdirtbuildsupintheshoulderbelt
- Childrenneedadultstohelpprotectthem. Theyneedtobeproperlyrestrained.
- NISSANrecommendsthatallpre-teens andchildrenberestrainedintherearseat. Studiesshowthatchildrenaresaferwhen properlyrestrainedintherearseatthanin thefrontseat.
- Thisisespeciallyimportantbecauseyour vehiclehasasupplementalrestraintsystem(Airbagsystem)forthefrontpassenger.See“Supplementalrestraintsystem”(P.1-38).
- INFANTS
- SMALLCHILDREN
- LARGERCHILDREN
- CHILDRESTRAINTS
- PRECAUTIONSONCHILDRESTRAINTS
- structed.
- inacollision.
- FORWARD-FACINGCHILDRESTRAINTINSTALLATIONUSING LATCH
- BOOSTERSEATS
- whenusingaboosterseatwiththeseat belts.
- PASS AIR BAG
- SUPPLEMENTALRESTRAINT SYSTEM
- PRECAUTIONSONSUPPLEMENTAL RESTRAINTSYSTEM
- Supplementalfront-impactairbagsystem:
- Thesupplementalairbagsoperateonly whentheignitionswitchisintheON position.
- anaccident.
- Statuslight:
- Frontpassengerairbag:
- Normaloperation:
- Precautions:
- Steps:
- Troubleshooting:
- lightwillremainlitforabout7seconds initially.
- Asystemcheckwillbeperformedduring whichthefrontpassengerairbagstatus lightwillremainlitforabout7seconds initially.
- personalinjury.
- \*The SRSwiringharnessconnectorsare yellowandorangeforeasyidentification.
- FRONTSEAT-MOUNTEDSIDE-IMPACTSUPPLEMENTALAIRBAGAND ROOF-MOUNTEDCURTAINSIDE-IMPACTANDROLLOVERSUPPLEMENTALAIRBAGSYSTEMS
- Thesideairbagsandcurtainairbags operateonlywhentheignitionswitchisin theONposition.
- ①SRSairbag
- REPAIRANDREPLACEMENTPROCEDURE
- 2Instrumentsandcontrols
- COCKPIT
- 2-4 Instrumentsandcontrols
- SPEEDOMETERANDODOMETER
- Speedometer
- Changingthedisplay:
- Resettingthetripodometer:
- TACHOMETER
- ENGINECOOLANTTEMPERATURE GAUGE(TypeB)(ifsoequipped)
- FUELGAUGE
- Refillthefueltankbeforethegauge registers0(empty).
- VEHICLEINFORMATIONDISPLAY(TypeA)(ifsoequipped)
- TRIPCOMPUTER
- ForTypeA(ifsoequipped):
- ForTypeB(ifsoequipped):
- Currentfuelconsumption
- Averagefuelconsumption(mpgorl (liter)/100km)
- Elapsed time(TypeB)(ifsoequipped)
- TorquevectoringAWD(AWDmodel)
- Resettingdisplays
- WARNINGLIGHTS,INDICATOR LIGHTSANDAUDIBLEREMINDERS
- CHECKINGLIGHTS
- WARNINGLIGHTS
- 2-16 Instrumentsandcontrols
- Parkingbrakeindicator:
- Lowbrakefluidwarninglight:
- Anti-lockBrakingSystem(ABS)warning indicator:
- Chargewarninglight
- Donotcontinuedrivingifthealternator beltisloose,brokenormissing.
- Dooropenwarninglight
- PS Electricpowersteeringwarning light
- Engineoilpressurewarninglight
- Theengineoilpressurewarninglightis notdesignedtoindicatealowoillevel.
- Lowtirepressurewarning:
- TPMSmalfunction:
- VehicleDynamicControl(VDC) warninglight
- INDICATORLIGHTS
- AWD All-WheelDrive(AWD)indicator light(AWDmodel)
- All-WheelDrive(AWD-V)indicator light(AWDmodel)
- CVT ContinuouslyVariableTransmission(CVT)indicatorlight(ifsoequipped)
- CRUISE Cruiseindicatorlight
- Cruisemainswitchindicator:
- Cruisemalfunction:
- Light Enginestartoperationindicator
- Exteriorlightindicator
- Frontfoglightindicatorlight(ifso ped)
- Frontpassengerairbagstatuslight
- Highbeamindicatorlight
- MalfunctionIndicatorLight(MIL)
- Afterafewdrivingtrips, the
- lightshould
- Operation:
- Securityindicatorlight
- Turnsignal/hazardindicatorlights
- VehicleDynamicControl(VDC)off torlight
- AUDIBLEREMINDERS
- Keyreminderchime
- Lightreminderchime
- Brakepadwearwarning
- Parkingbrakereminderchime
- INTEGRATEDCONTROLSYSTEM(if soequipped)
- Seatbeltwarningchime
- DRIVEMODE
- SETUPFUNCTION
- SelectUnits
- DRIVEINFORMATION
- Elapsedtime
- Averagespeed(km/horMPH)
- Tripdistance(kmorMILES)
- G-Forcescreen
- ECOINFORMATION
- DailyReset
- WeeklyReset
- ManualReset
- SECURITYSYSTEMS
- VEHICLESECURITYSYSTEM
- Thesystemcanbearmedevenifthe windowsareopen.
- ForCanada:
- WIPERANDWASHERSWITCH
- REARWINDOWWIPERAND WASHERSWITCH
- Pullingupthewiperarm:
- HEADLIGHTANDTURNSIGNAL SWITCH
- HIGHVOLTAGE
- HEADLIGHTSWITCH
- Lighting
- Batterysaversystem
- Daytimerunninglightsystem(forNISMO modelsandCanada)
- TURNSIGNALSWITCH
- HEATEDSEATS(ifsoequipped)
- POWEROUTLET
- STORAGE
- CUPHOLDERS
- Softbottleholders
- CARGOCOVER(ifsoequipped)
- WINDOWS
- POWERWINDOWS
- MOONROOF(ifsoequipped)
- POWERMOONROOF
- Sunshade
- Slidingthemoonroof
- Tiltingthemoonroof
- INTERIORLIGHTS
- MAPLIGHTCONTROL SWITCH(ifso equipped)
- ONposition
- OFFposition
- Centerposition
- CARGOLIGHT
- 3Pre-drivingchecksandadjustments
- KEYS
- INTELLIGENTKEYS
- DOORS
- LOCKINGWITHKEY
- LOCKINGWITHINSIDELOCKKNOB
- LOCKINGWITHPOWERDOORLOCK SWITCH
- Whenlockingthedoorthisway,besure nottoleavethekeyinsidethevehicle.
- Lockoutprotection
- AUTOMATICDOORLOCKS
- The automatic unlock function can be deactivated or activated.
- INTELLIGENTKEYSYSTEM
- CHILDSAFETYREARDOORLOCK
- Whentheleversareinthelockposition ① ,thereardoorscanbeopenedonly fromtheoutside.
- 3-6 Pre-driving checks and adjustments
- DOORLOCKS/UNLOCKSPRECAUTION
- 3-8Pre-drivingchecksandadjustments
- Lockingdoors
- Unlockingdoors
- 3-10 Pre-driving checks and adjustments
- Openingliftgate
- WARNINGLIGHTSANDAUDIBLE REMINDERS
- HOWTOUSEREMOTEKEYLESS ENTRYFUNCTION
- thesystemfunction.
- Usingpanicalarm
- Settinghazardindicatorandhornmode
- HOOD
- Switchingprocedure:
- LIFTGATE
- beenstopped.
- FRONTSIDEANDREARUNIQUE PARTS(NISMOmodels)
- FUEL-FILLERDOOR
- LOOSEFUELCAPwarningmessage
- TILTSTEERINGCOLUMN
- TILT OPERATION
- SUNVISORSMIRRORS
- INSIDEMIRROR
- OUTSIDEMIRRORS
- Defrostingoutsidemirrors(ifso equipped)
- 4Heater, airconditioner, audioandphonesystems
- SAFETYNOTE
- thesystemtomalfunction.
- Selectingtheitem:
- Adjustingtheitem:
- Inputtingcharacters:
- ●123/ABC:
- •Space:
- - Delete:
- •OK:
- Touchscreenmaintenance
- HOWTOUSETHEAPPS·IBUTTON
- REARVIEWMONITOR(models withoutnavigationsystem)
- HOWTOUSETHEON-OFFBUTTON/VOLUMECONTROLKNOB
- HOWTOUSETHECAMERABUTTON
- Backinguponasteepuphill:
- Backinguponasteepdownhill:
- Backingupnearaprojectingobject:
- Backingupbehindaprojectingobject:
- ADJUSTINGTHESCREEN
- AROUNDVIEW ® MONITOR(AVM) (modelswithnavigationsystem)
- Availableviews:
- Availableviews
- Frontandrearview:
- Distanceguidelines:
- Front-sideview:
- Guidinglines:
- Howtoswitchthedisplay
- HOWTOADJUSTTHESCREENVIEW
- AROUNDVIEW ® MONITORSYSTEM LIMITATIONS
- SYSTEMMAINTENANCE
- MODSYSTEMOPERATION
- MODSYSTEMLIMITATIONS
- CENTERVENTILATORS
- SIDEVENTILATORS
- HEATERANDAIRCONDITIONER
- MANUALAIRCONDITIONER(ifso equipped)
- Outsideaircirculation:
- Airrecirculation:
- Airflowcontrol:
- Fanspeedcontrol:
- A/C(AirConditioner)operation:
- Temperaturecontrol:
- Heateroperation
- Heating:
- Ventilation:
- Defrostingordefogging:
- Bi-levelheating:
- Heatinganddefogging:
- Airconditioneroperation
- Cooling:
- Dehumidifiedheating:
- Dehumidifieddefogging:
- AUTOMATICAIRCONDITIONER(with IntegratedControlSystem)
- Automaticoperation(AUTO)
- Coolinganddehumidifiedheating:
- Dehumidifieddefrosting/defogging:
- Manualoperation
- Airintakecontrol:
- OPERATINGTIPS(forautomaticair conditioner)
- IN-CABINMICROFILTER
- SERVICINGAIRCONDITIONER
- AUDIOSYSTEM
- AUDIOOPERATIONPRECAUTIONS
- Radio
- Usingacellularphoneinornearthe vehiclemayinfluenceradioreception quality.
- Radioreception:
- FMradioreception:
- AMradioreception:
- Satelliteradioreception(ifsoequipped):
- CompactDisc(CD)player
- GeneralnotesforUSBuse:
- NotesforiPod ® use:
- CompressedAudioFiles(MP3/WMA)
- Explanationofterms:
- Bluetooth® Audioplayer
- Headunit:
- knob:
- Audiosettings:
- DISPbutton:
- MEDIAbutton:
- Apps Appsbutton:
- FM·AM radio(FM-AM)bandselect:
- TUNE(Tuning):
- SEEKtuning:
- SCAN SCANtuning:
- toRadiomemorybuttons:
- CDplayeroperation
- CD CDPLAY:
- SEEKTRACK:
- RPT REPEAT (RPT):
- RDM RANDOM (RDM):
- CD eject:
- USBmainoperation:
- MEDIA MEDIAButton:
- |◀◀ ▶▶▶ Next/PreviousFileandFast Forward/Rewind:
- Folderselection:
- RPT REPEAT(RPT):
- RDM RANDOM(RDM):
- BACK BACKbutton:
- ConnectingiPod®:
- Compatibility:
- ▶▶| ◀◀ Next/PreviousTrackandFast Forward/Rewind:
- RPT RPT(repeat)button:
- RDM RDM(random)button:
- Regulatoryinformation:
- Bluetooth® trademark:
- ConnectingBluetooth ® device:
- FM-AM-SATRADIOWITHCOMPACT DISC(CD)PLAYER(TypeA)(ifso equipped)
- Audiomainoperation
- Powerbutton/VOL(volume)control knob:
- - Bluetooth
- ●Bass, Treble, Balance and Fade
- ●BrightnessandContrast
- - ClockAdjust
- - On-ScreenClock
- - RDSDisplay(ifsoequipped)
- ●SpeedSensitiveVol.
- •AUXVol.
- DISP DISPbutton:
- XM radio(SAT)bandselect:
- SEEKtuning/CAT(category):
- toStationmemoryoperations:
- MEDIA PLAY:
- |◀◀ ▶▶▶ Next/PreviousTrackandFast Forward/Rewind:
- Back/PreviousFileandFast Forward/Rewind:
- iPod ® mainoperation:
- Back/PreviousTrackandFast Forward/Rewind:
- Bluetooth ® audioplayeroperation
- Bluetooth ® trademark:
- Bluetooth® audiomainoperation:
- AUX(Auxiliary)inputjack
- FM-AM-SATRADIOWITHCOMPACT DISC(CD)PLAYER(TypeB)(ifso equipped)
- ON-OFFbutton/VOL(volume)control knob:
- SXMsettings:
- FM/AM/SATradiooperation
- FM-AMbutton:
- SXMbandselect:
- Tuningwiththetouch-screen:
- TuningwiththeTUNEknob:
- |◀◀ ▶▶▶ SEEKtuning:
- 1to6Stationmemoryoperations:
- CDbutton:
- SEEK(FastForward/Rewind) buttons:
- SEEK(Previous/NextTrack) buttons:
- CDejectbutton:
- AUX(Auxiliary)input
- Audiofileoperation:
- AUXbutton:
- Playinformation:
- Seekbutton:
- Randomandrepeatplaymode:
- Audiomainoperation:
- Interface:
- Shuffleandrepeatplaymode:
- Scrollingmenus:
- ConnectingBluetooth ® audio:
- CD
- USBmemory
- STEERINGWHEELSWITCHFOR AUDIOCONTROL
- SOURCEselectswitch
- VOLUMEcontrolswitch
- Tuningswitch
- AMandFMradio:
- SXMoperation(ifsoequipped):
- iPod®:
- CD:
- USB:
- Bluetooth® Audiooperation:
- ANTENNA
- NISSANCONNECT SM APP SMARTPHONEINTEGRATION
- Acompatiblesmartphoneandregistration isrequiredtousemobileapplicationsorto accessconnectedfeaturesofcertainvehicleapplications.
- REGISTERINGWITHNISSANCON-NECT SM APP
- NissanConnect SM website:
- CONNECTPHONE
- APPLICATIONDOWNLOAD
- SIRI® EYESFREE
- GENERALINFORMATION
- INFO:
- REQUIREMENTS
- SIRI® EYESFREEACTIVATION
- Modelswithnavigationsystem
- Modelswithoutnavigationsystem
- Example1-Playingmusic
- Example2-Replyingtotextmessages
- CARPHONEORCBRADIO
- Bluetooth® HANDS-FREEPHONE SYSTEM(modelswithout navigationsystem)
- Somedevicesrequiretheusertoaccept connectionstoootherBluetooth ® devices.If yourphonedoesnotconnectautomatic allytothesystem,consultthephone's Owner'sManualfordetailsondevice operation.
- REGULATORYINFORMATION
- FCCRegulatoryinformation
- ICRegulatoryinformation
- Bluetooth® trademark
- USINGTHESYSTEM
- Controlbuttonsandmicrophone
- PHONESEND:
- PHONEEND:
- Microphone:
- Manualcontrol:
- Choosingalanguage
- Initialization
- Connectingprocedure:
- Theconnectingproceduremustbeperformedwhenthevehicleisstationary.If thevehiclestartsmovingduringtheprocedure,theprocedurewillbecancelled.
- Givingvoicecommands
- VoicePromptInterrupt:
- OneShotCall:
- Operatingtips:
- Voicecommands
- Call:
- Phonebook:
- ●ListNames
- - DeleteEntry
- RecentCalls:
- - Incoming(Calls)
- - Missed(Calls)
- -Outgoing(Calls)
- •Redial
- - CallBack
- ShowApplications:
- Messaging:
- SelectPhone:
- Makingacall
- Pushthe
- - (AName)
- - ListNames
- - PhoneNumber
- Receivingacall
- Duringacall
- Endingacall
- Sendingatextmessage:
- Readingareceivedtextmessage:
- Bluetooth® HANDS-FREEPHONE SYSTEM(modelswithnavigation system)
- VOICECOMMAND
- VoicePromptInterrupt
- OneShotCall
- CONNECTINGPROCEDURE NOTE:
- VEHICLEPHONEBOOK
- TEXTMESSAGING
- aswellasyourdevice'sOwner'sManual.
- Sendingatextmessage
- PHONE SETTINGS
- NISSANVOICERECOGNITION SYSTEM(modelswithnavigation system)
- Operatingtips
- SYSTEMFEATURES
- Howtosaynumbers
- Phonenumbers:
- Bluetooth® HANDS-FREEPHONE SYSTEMVOICECOMMANDS
- NAVIGATIONSYSTEMVOICECOM-MANDS
- AUDIOSYSTEMVOICECOMMANDS
- INFORMATIONVOICECOMMANDS
- MYAPPSVOICECOMMANDS
- HELPVOICECOMMANDS
- TROUBLESHOOTINGGUIDE
- 5Startinganddriving
- PRECAUTIONSWHENSTARTING ANDDRIVING
- THREE-WAYCATALYST
- haustpollutants.
- TIREPRESSUREMONITORINGSYSTEM(TPMS)
- Additional information
- 5-4 Starting and driving
- FCCNotice:
- ForUSA:
- OFF-ROADRECOVERY
- RAPIDAIRPRESSURELOSS
- DRIVINGSAFETYPRECAUTIONS
- PUSH-BUTTONIGNITIONSWITCH
- PUSH-BUTTONIGNITIONSWITCH OPERATION
- PUSH-BUTTONIGNITIONSWITCH POSITIONS
- EMERGENCYENGINESHUTOFF
- INTELLIGENTKEYBATTERYDISCHARGE
- BEFORESTARTINGTHEENGINE
- STARTINGTHEENGINE
- ManualTransmission(MT)models:
- The Intelligent Key must be carried when operating the ignitions switch.
- 4.Warm-up
- DRIVINGTHEVEHICLE
- CONTINUOUSLYVARIABLETRANSMISSION(CVT)
- EnginepowermaybeautomaticallyreducedtoprotecttheCVTiftheengine speedincreasesquicklywhendrivingon slipperyroadsorwhilebeingtestedon somedynamometers.
- Startingthevehicle
- Shifting
- P(Park):
- R(Reverse):
- N(Neutral):
- D(Drive):
- Manualshiftmode(ifsoequipped)
- M7(7th)(exceptforNISMORSmodels):
- M8(8th)(NISMORSmodels):
- M6(6th)andM5(5th)(exceptforNISMO RSmodels):
- M7(7th)andM6(6th)(NISMORSmodels):
- M4(4th), M3(3rd) and M2(2nd) (except for NISMORS models):
- M5(5th), M4(4th), M3(3rd) and M2(2nd) (NISMORSmodels):
- M1(1st):
- Acceleratordownshift—InDposition—
- Highfluidtemperatureprotectionmode
- Fail-safe
- MANUALTRANSMISSION(MT)
- NORMALdrivemode
- SPORTdrivemode
- ECOdrivemode
- 5-24Startinganddriving
- SettingtheclimateECOmode:
- PARKINGBRAKE
- Torelease:
- CRUISECONTROL
- PRECAUTIONSONCRUISECONTROL
- CRUISECONTROLOPERATIONS
- BREAK-INSCHEDULE
- FUELEFFICIENTDRIVINGTIPS
- INCREASINGFUELECONOMY
- ALL-WHEELDRIVE(AWD)(ifso equipped)
- AWDmodeswitch
- ALL-WHEELDRIVE(AWD)MODE SWITCHOPERATIONS
- AWDshifttips
- AWDWARNINGLIGHT
- PARKING/PARKINGONHILLS
- dents.
- ELECTRICPOWERSTEERING
- BRAKESYSTEM
- BRAKINGPRECAUTIONS
- Vacuumassistedbrakes
- Usingthebrakes
- Wetbrakes
- Parkingbrakebreak-in
- BRAKEASSIST
- ANTI-LOCKBRAKINGSYSTEM(ABS)
- Self-testfeature
- VEHICLEDYNAMICCONTROL(VDC) SYSTEM
- Normaloperation
- COLDWEATHERDRIVING
- FREEINGAFROZENDOORLOCK
- ANTI-FREEZE
- BATTERY
- DRAININGOFCOOLANTWATER
- TIREEQUIPMENT
- Skidandtractioncapabilitiesofstudded snowtires,onwetordrysurfaces,maybe poorerthanthatofnon-studdedsnow tires.
- All-WheelDrive(AWD)model
- SPECIALWINTER EQUIPMENT
- DRIVINGONSNOW ORICE
- ENGINEBLOCKHEATER(ifso equipped)
- Tousetheengineblockheater
- 6Incaseofemergency
- ROADSIDEASSISTANCE PROGRAM
- EMERGENCYENGINESHUTOFFFLATTIRE
- CHANGINGAFLATTIRE
- Thesparetireisdesignedforemergency use.(Seespecificinstructionsunderthe heading"Wheelsandtires"(P.8-28).)
- JUMPSTARTING
- PUSHSTARTING
- IFYOURVEHICLEOVERHEATS
- Donotstoptheengine.
- Ifsteamorwateriscomingfromthe engine,standcleartopreventgetting burned.
- TOWINGYOURVEHICLE
- •Alwaysattachsafetychainsbefore towing.
- TOWINGRECOMMENDEDBYNISSAN
- 7Appearanceandcare
- CLEANINGEXTERIOR
- Becarefulnottoscratchthepaintsurface whenputtingonorremovingthebody cover.
- WASHING
- WAXING
- REMOVINGSPOTS
- UNDERBODY
- GLASS
- WHEELS
- ALUMINUMALLOYWHEELS
- CHROMEPARTS
- TIREDRESSING
- CLEANINGINTERIOR
- maydamagethelenscover.
- AIRFRESHENERS
- FLOORMATS
- Floormatinstallation
- CORROSIONPROTECTION
- MOSTCOMMONFACTORSCONTRIBUTINGTOVEHICLECORROSION
- ENVIRONMENTALFACTORSINFLUENCETHERATEOFCORROSION
- Moisture
- Relativehumidity
- Temperature
- Airpollution
- TOPROTECT YOURVEHICLEFROM CORROSION
- Inwinter, the underbody must be cleaned periodically.
- 8Do-it-yourself
- MAINTENANCEPRECAUTIONS
- ENGINECOMPARTMENTCHECK LOCATIONS
- ENGINECOOLINGSYSTEM
- CHECKINGENGINECOOLANTLEVEL
- service.
- CHANGINGENGINECOOLANT
- ENGINEOIL
- CHECKINGENGINEOILLEVEL
- CHANGINGENGINEOILANDFILTER
- Vehicleset-up
- Drainplugtighteningtorque: 22to29ft-lb (29to39N·m)
- CONTINUOUSLYVARIABLE TRANSMISSION(CVT)FLUID
- EXCEPTFORNISMORSMODELS
- BRAKEANDCLUTCH(ifso equipped)FLUID
- WINDOWWASHERFLUID
- VARIABLEVOLTAGECONTROL SYSTEM
- DRIVEBELT
- SPARKPLUGS
- REPLACINGSPARKPLUGS
- AIRCLEANER
- WINDSHIELDWIPERBLADES
- CLEANING
- REPLACING
- REARWINDOWWIPERBLADE
- BRAKES
- SELF-ADJUSTINGBRAKES
- FUSES
- Fusiblelinks
- Extendedstoragefuseswitch(ifso equipped)
- INTELLIGENTKEYBATTERY REPLACEMENT
- LIGHTS
- HEADLIGHTS
- Xenonheadlightmodel:
- Halogenheadlightmodel:
- Leftsideofthevehicle
- Rightsideofthevehicle
- WHEELSANDTIRES
- If you have a flattire, see "Flattire" (P.6-3). TIREPRESSURE
- TireandLoadingInformationlabel
- TIRELABELING
- Othertire-relatedterminology:
- WarrantyInformationBooklet.
- Allseasontires
- Summertires
- Snowtires
- TIRECHAINS
- Tirechainsmustbeinstalledonlyonthe frontwheelsandnotontherearwheels.
- Wheelbalance
- Wheelbalanceservicesshouldbeperformedwiththewheelsoffthevehicle. Spinbalancingthewheelsonthevehicle couldleadtomechanicaldamage.
- Careofwheels
- Sparetire
- 9Maintenanceandschedules
- MAINTENANCEREQUIREMENT
- GENERALMAINTENANCE
- WHERETOGOFORSERVICE
- EXPLANATIONOFGENERALMAINTENANCEITEMS
- Additionalinformationonthefollowing itemswith“\*”isfoundinthe“8.Do-it yourself”sectionofthismanual.
- Outsidethevehicle
- EXPLANATIONOFSCHEDULED MAINTENANCEITEMS
- Engineairfilter:
- Enginecoolant\*:
- Engineoilandoilfilter:
- Enginevalveclearance\*:
- Evaporative emissions control vapor lines\*:
- Fuelfilter
- Fuellines\*:
- Sparkplugs:
- CHASSISANDBODYMAINTENANCE
- Brakelinesandcables:
- Brakepadsandrotors:
- Exhaustsystem:
- In-cabinmicrofilter:
- Propellershaft(s):
- Steeringgearandlinkage, axleandsuspensionparts, driveshaftboots:
- 9-6 Maintenanceandschedules
- Tirerotation:
- Transmissionfluid/oil,differentialoiland transfercaseoil:
- Off-roadmaintenance:
- MAINTENANCESCHEDULESSTANDARDMAINTENANCE
- After 120,000 miles (192,000 km) / 144 months, continuemaintenance at the samemileage/timeintervals.
- MAINTENANCEUNDERSEVERE DRIVINGCONDITIONS
- Severedrivingconditions
- 10Technicalandconsumerinformation
- CAPACITIES AND RECOMMENDED FLUIDS/LUBRICANTS
- FUELINFORMATION
- ExceptforNISMORSmodels:
- ForNISMORSmodels:
- Useunleadedpremiumgasolineformax- imumvehicleperformance.
- Gasolinespecifications
- Reformulated gasoline
- Gasolinecontainingoxygenates
- E-15fuel
- E-85fuel
- FuelcontainingMMT
- Aftermarketfueladditives
- Octaneratingtips
- ENGINEOILANDOILFILTERRE- COMMENDATION
- Selectingthecorrectoil
- Oiladditives
- Oilviscosity
- Selectingthecorrectoilfilter
- Changeintervals
- AIRCONDITIONINGSYSTEMREFRIGERANTANDLUBRICANTRECOMMENDATIONS
- SPECIFICATIONS
- WHEN TRAVELINGOR REGISTERINGIN ANOTHER COUNTRY
- VEHICLEIDENTIFICATION
- INSTALLINGFRONTLICENSEPLATE
- VEHICLELOADINGINFORMATION
- TERMS
- VEHICLELOADCAPACITY
- LOADINGTIPS
- MEASUREMENTOFWEIGHTS
- TOWINGATRAILER
- FLATTOWING
- 13).
- All-WheelDrive(AWD)models:
- Two-WheelDrive(2WD)models:
- MANUALTRANSMISSION
- UNIFORMTIREQUALITYGRADING
- Treadwear200TractionAATemperatureA TREADWEAR
- TRACTIONAA,A,BANDC
- TEMPERATUREA, BANDC
- EMISSIONCONTROLSYSTEM WARRANTY
- REPORTINGSAFETYDEFECTS
- ForUSA
- ForCanada
- READINESSFORINSPECTION/MAINTENANCE(I/M)TEST
- EVENTDATARECORDERS(EDR)
- OWNER'SMANUAL/SERVICE MANUALORDERINFORMATION
- IntheUSA:
- InCanada:
- 11Index
- A
- B
- C
- D
- E
- F
- G
- H
- |
- J
- K
- L
- M
- N
- 0
- P
- R
- S
- Safety
- Seatadjustment
- Seatbelt(s)
- Seat(s)
- Shiftlockrelease
- Shoulderbeltheightadjustment,For
- Starting
- Steering
- Switch
- T
- Tires
- Towing
- U
- v
- W
- x
- GAS STATION INFORMATION
- FUELINFORMATION:
- ENGINEOILRECOMMENDATION: ForNISMORSmodels:
- COLD TIREPRESSURES:
- NEW VEHICLEBREAK-INPROCEDURESECOMMENDATION:
Brand : NISSAN
Model : Juke (2017)
Category : Car