
KAD99PI30 - Refrigerator BOSCH - Free user manual and instructions
Find the device manual for free KAD99PI30 BOSCH in PDF.


| Product type | Built-in fridge-freezer |
| Brand | Bosch |
| Model | KAD99PI30 |
| Dimensions (H x W x D) | 177 x 56 x 55 cm |
| Net weight | 85 kg |
| Power supply | 220-240 V, 50 Hz, 10 A |
| Energy class | A++ |
| Annual energy consumption | 220 kWh/year |
| Total net volume | 365 L (refrigerator 256 L, freezer 109 L) |
| Noise level | 38 dB (A) |
| Climate class | SN-ST (10-38 °C) |
| Cooling technology | NoFrost (frost-free freezer) |
| Temperature control | FreshSense (temperature sensors) |
| Shelves | 5 adjustable safety glass shelves |
| Vegetable drawer | 1 VitaFresh drawer with humidity control |
| Lighting | LED, interior and freezer compartment |
| Special functions | SuperCool, SuperFreeze, holiday mode, door alarm |
| Display | TFT touch screen, temperature indicator |
| Maintenance and cleaning | Clean with soft cloth and soapy water, accessible condenser |
| Safety | Child lock, temperature alarm, automatic shut-off in case of overheating |
| Spare parts | Available through Bosch after-sales service (filters, shelves, seals) |
| Repairability | Repairability index 7.8/10, manual available online |
Frequently Asked Questions - KAD99PI30 BOSCH
User questions about KAD99PI30 BOSCH
0 question about this device. Answer the ones you know or ask your own.
Ask a new question about this device
Download the instructions for your Refrigerator in PDF format for free! Find your manual KAD99PI30 - BOSCH and take your electronic device back in hand. On this page are published all the documents necessary for the use of your device. KAD99PI30 by BOSCH.
USER MANUAL KAD99PI30 BOSCH
Free-standing appliance
Using the installation instructions ..... 8
Installation location 8
Installing appliances next to each other 9
Changing over the door hinges ...... 9
Changing the door handle 10
Fitting the wall spacer 10
Aligning the appliance 10
Using the installation instructions

Please fold out the illustrated last page. These installation instructions refer to several models.
The diagrams may differ.
Installation location
A dry, well ventilated room is suitable as an installation location. The installation location should not be exposed to direct sunlight and not placed near a heat source, e.g. a cooker, radiator, etc. If installation next to a heat source is unavoidable, use a suitable insulating plate or observe the following minimum distances from the heat source:
■ 3 cm to electric or gas cookers. ■ 30 cm to an oil or coal-fired cooker.
The floor of the installation location must not give way; if required, reinforce floor. If the floor is uneven, compensate with supports.
Distance from wall
Appliances with fitted handles must be situated at least 525 mm from the wall on the hinge side so that the door can be opened by 160°.

Installing appliances next to each other
Fig. 3
When installing two appliances, ensure that the refrigerator is on the left and the freezer is on the right.
The right side panel of the refrigerator is heated slightly. This prevents condensation from forming between the appliances.
Attaching spacers
Fig. 4
- On the right side of the refrigerator degrease the adhesive areas with petroleum ether or spirit.
- Stick spacers in all four corners at a distance of 5 cm from the side edges to ensure a minimum gap between the appliances.
Note
You can purchase a connection set from your dealer.
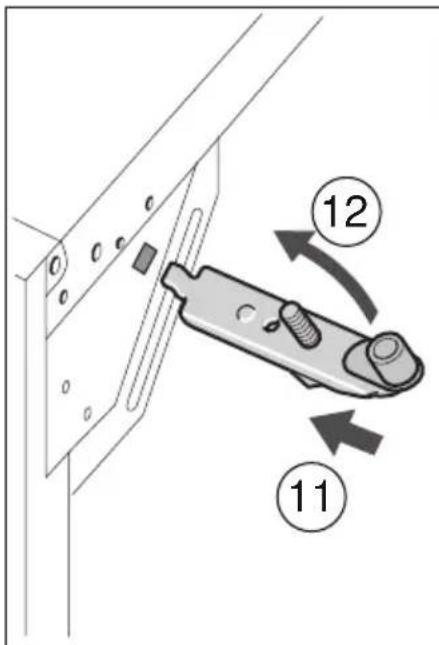
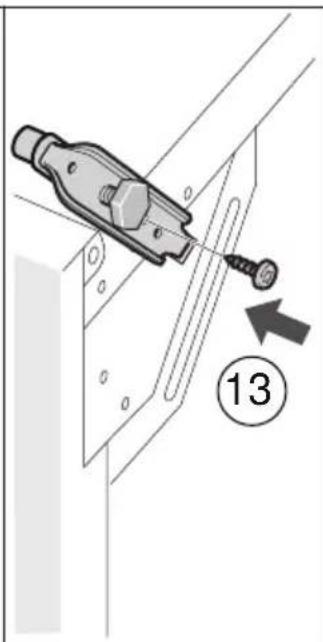
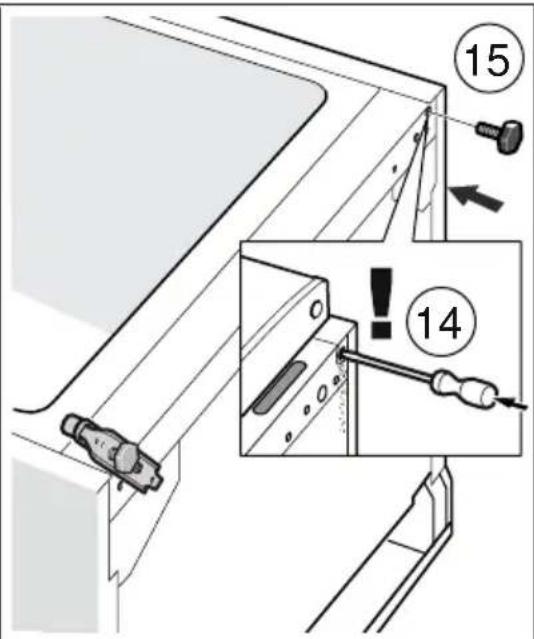
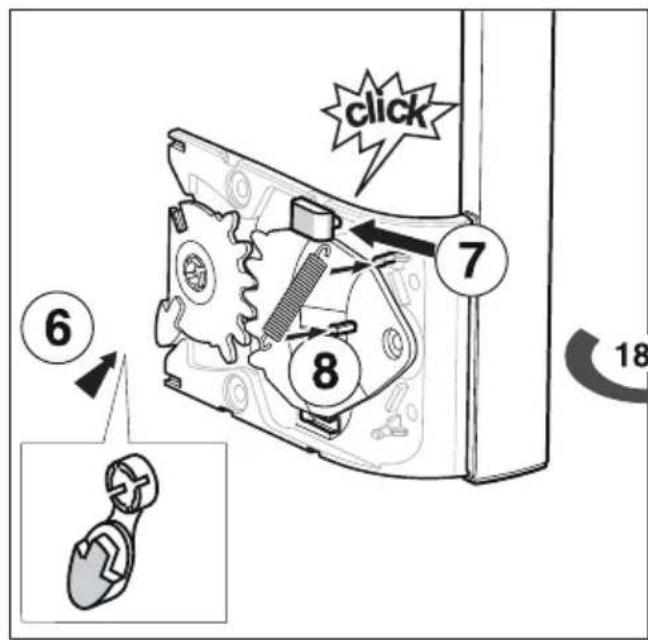
Changing over the door hinges
(if required)
We recommend that you have the door hinges changed over by our customer service. You can find out the costs for changing over the door hinges from your appropriate customer service.

Warning
While changing over the door hinges, ensure that the appliance is not connected to the power supply. Pull out the mains plug beforehand. To prevent damaging the back of the appliance, place adequate padding underneath. Carefully place the appliance on its back.
Change over the door hinges in numerical sequence. Fig. 1
Note
If the appliance is placed on its back, ensure that the wall spacer is not fitted.
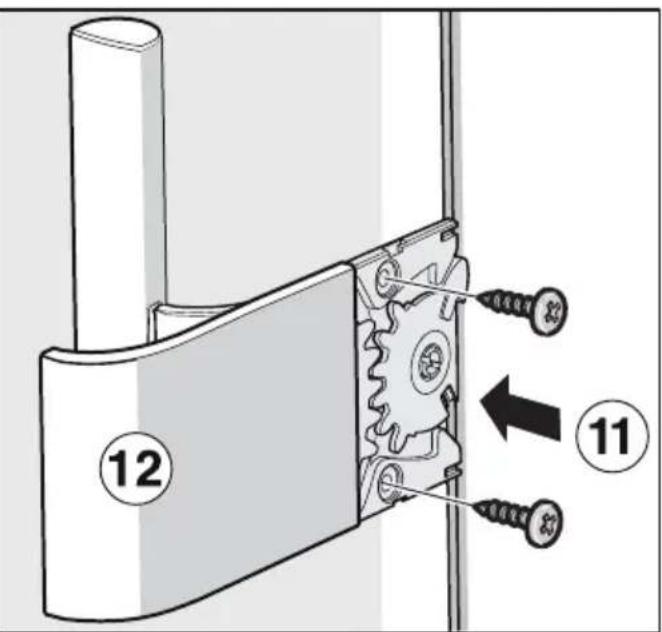
Changing the door handle
(if required)
Fig. 2 A/B
Change the door handle in numerical sequence.
Fitting the wall spacer
Fig. 5
If available:
Fit wall spacers to obtain the indicated energy rating of the appliance.
A reduced wall gap will not restrict the function of the appliance. The energy rating may then increase slightly.
Distance to the back wall
The distance of 75 mm must not be exceeded.
Aligning the appliance
Place the appliance in the designated location and align. The appliance must be level. If the floor is uneven, use the front height-adjustable feet. Adjust the height-adjustable feet with a wrench.
Note
The appliance must be upright. Please align it with a spirit level.







2/B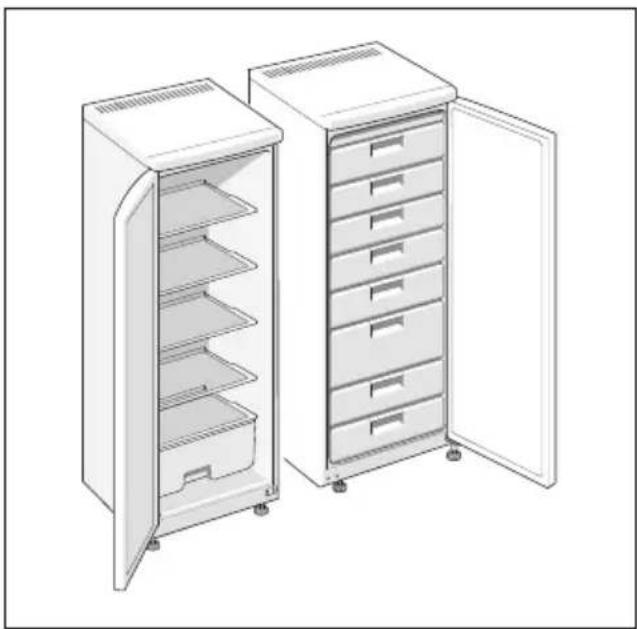
3

4

5

Brand : BOSCH
Model : KAD99PI30
Category : Refrigerator