
Voice Tracer VTR5000 - Voice recorder PHILIPS - Free user manual and instructions
Find the device manual for free Voice Tracer VTR5000 PHILIPS in PDF.


| Product Type | Digital Voice Recorder |
| Brand | Philips |
| Model | Voice Tracer VTR5000 |
| Recording Format | MP3, WAV |
| Storage Capacity | 4GB internal memory |
| Maximum Recording Time | Up to 1000 hours (MP3 8kbps) |
| Dimensions | 4.5 x 1.5 x 0.5 inches |
| Weight | 2.5 oz (71 g) |
| Power Source | 2 x AAA batteries (not included) |
| Battery Life | Up to 30 hours |
| Display | LCD with backlight |
| Microphone | Built-in stereo microphone |
| Speaker | Built-in speaker |
| Recording Modes | Voice activation, manual, timer |
| File Transfer | USB 2.0 |
| Supported OS | Windows, macOS |
| Headphone Jack | 3.5mm |
| Maintenance | Clean with a soft, dry cloth. Avoid moisture. |
| Safety | Keep away from water and heat sources. Do not disassemble. |
| Spare Parts & Repairability | Batteries are user-replaceable. Other parts require authorized service. |
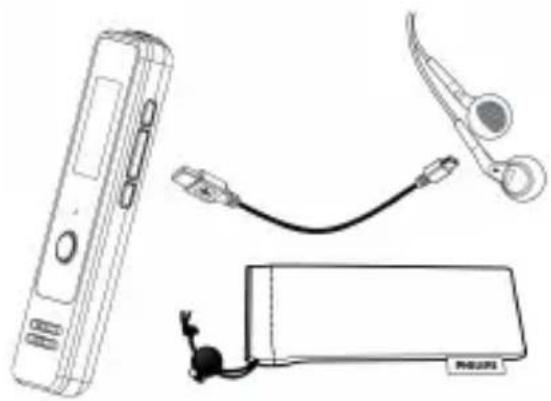
| General Information | Comes with user manual, USB cable, and carrying case. |
Frequently Asked Questions - Voice Tracer VTR5000 PHILIPS
User questions about Voice Tracer VTR5000 PHILIPS
0 question about this device. Answer the ones you know or ask your own.
Ask a new question about this device
Download the instructions for your Voice recorder in PDF format for free! Find your manual Voice Tracer VTR5000 - PHILIPS and take your electronic device back in hand. On this page are published all the documents necessary for the use of your device. Voice Tracer VTR5000 by PHILIPS.
USER MANUAL Voice Tracer VTR5000 PHILIPS
(VTR5000录音笔)
使用手册
目录
1 欢迎
产品特点
2 重要须知
安全
听力保护
3 您的数码录音笔
供货范围
概览
4 开始使用
电源开/关
连接电脑
5 录音
6 语音模式
删除文件
复读模式
播放模式
音量调节
7 音乐模式
删除文件
复读模式
播放模式
音效模式
音量调节
8 系统设置
录音类型
录音灯开关
声控功能
分段录音功能
系统时间设置
定时录音设置
录音长度
语言选择
背光时间
对比度调节
自动关机
剩余时间
格式化磁盘
固件版本
9 常见问题
10 技术参数
1 欢迎

图 1 图 2
播放模式
1 Welcome Product Features
2 Important Safety Hearing Protection
3 Your Voice Tracer What's in the box? Overview
4 Start to use Power On/Off Connect to Computer
5 Recording
6 Voice Mode Delete A-B Replay Play Mode Volume Adjustment
7 Music Mode Delete A-B Replay Play Mode
Equalizer Mode
Volume Adjustment
8 System Setting
Record Type
Record Light
Voice-activated
Auto Divide Feature Recording
System Time Setting
Record Timer
Duration
Language
Backlight
Contrast
Auto Power-off
Remain Time
Clear Memory
Firmware Version
9 Frequently Asked Questions
10 Technical Parameters
Welcome to the world of Philips! We are honored by your choice and purchase of Philips' products. You can have Philips comprehensive technical supports from our website, e.g. user's manuals, software downloading and warranty information etc. www.philips.com
Product Features
Digital Noise Reduction: Effectively filter the ambient noise in the recording environment and record clear sound, which is recommended to use in noisy environment. It's recording type is PCM Noise Reduction.
- HD Loudspeaker: The adoption of high quality speaker allows you to experience natural sound during playback of recordings or music files as well.
- Record in MP3 format.
- Quick access to recordings and data by using high speed USB 2.0.
• Voice-activated recording. - USB mass storage, ensuring maximum compatibility.
2 Important
Safety
- To avoid a short circuit, do not expose the product to rain water.
- Do not expose the device to excessive heat caused by heating equipment or direct sunlight.
- Protect the cables from being pinched, particularly at plugs.
- Attention! Before using the device please read this User's Manual carefully. The company shall not be liable for any data loss due to erroneous operation or causes of a force majeure nature. Special attention should be given to careful operations and prepare backup of files.
Hearing Protection
Observe the following guidelines when using your headphones:
- Adjust to suitable volume; do not use the earphone for a lot time.
- Please do not turn the volume up beyond your tolerance.
-
Do not turn up the volume so high that you can't hear what around you.
-
When in dangerous conditions, please carefully use the earphones or stop using.
- Do not use the earphones when driving, cycling and skateboarding to avoid traffic accident and violating laws and regulations.
What's in the box?

Overview:
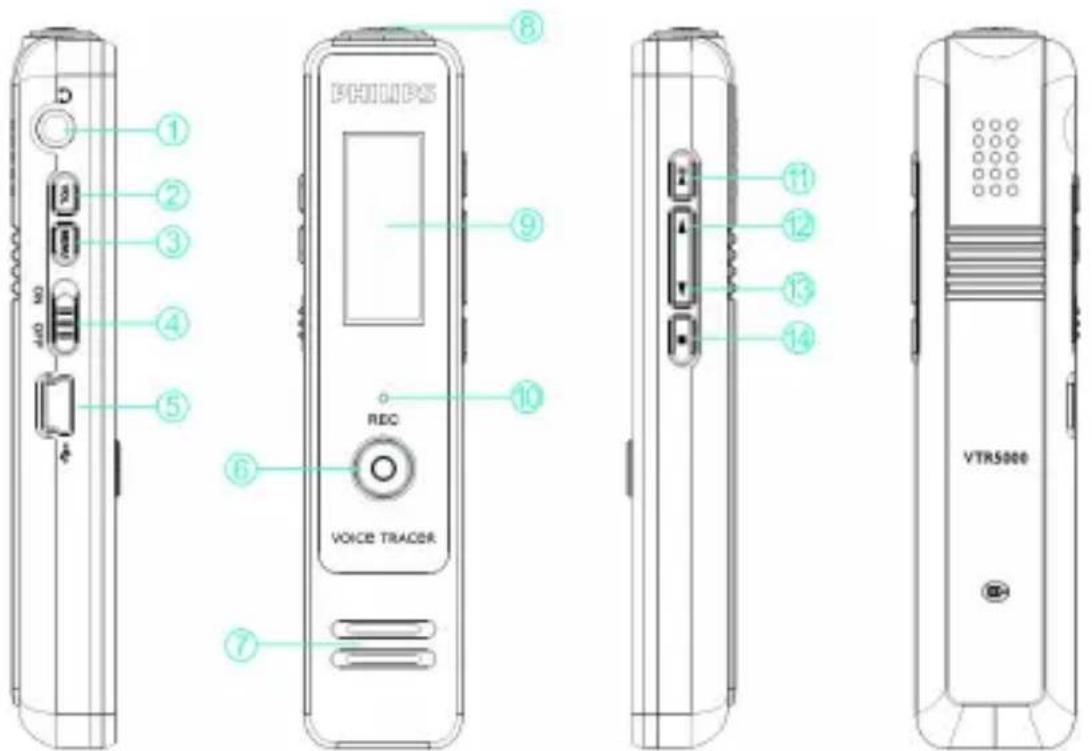
- Headset Jack
- Volume (VOL)
- Menu Key (MENU)
- Power On/Off (ON/OFF)
-
USB Port
-
Record, Pause, A-B replay (REO)
-
Speaker
-
Microphone jack (MIC)
-
Display
-
Record, Play, Charging Indicator
-
Play, Pause (PLAY)
-
Volume up, Fast reverse, File selection previous, Menu item selection ▲()
-
Volume down, Fast forward, File selection next, Menu item selection (▼)
-
Stop, Folder selection( )
Power On/Off
Note:
Please recharge the device for three hours before using it for the first time!
(1) When the power switch is in the "OFF" position, the device is cut off from power.
(2) When the power switch is slid to "ON", the device starts automatically and then displays "PHILIPS", as shown below.

Then, directly enter voice mode, switch among voice mode, music mode and system setting with a short click on the MEN key.
At this moment, the device's On/Off is controlled by the PLAY button as follows:
Switch off: When in the power-on state, press down the PLAY
button (▶) until the "ByeBye" is displayed, then the device is switched off.
Switch on: When in the power-off state, press down the PLAY button ( ) until the startup logo “PHILIPS” is displayed.
Note:
- The device has a built-in lithium battery. If the device shall idle for a long time, please slide the power switch to OFF position.
- If the device cannot work normally, please make sure the device is not out of electricity.
- When the device is recording, please do not cut off the power otherwise damaged file or malfunction may be resulted.
- When the battery indicator “” is displayed, please charge the device promptly.

Battery Charging:
Note:
Prior to charging, please slide power switch to ON position.
(1) Connect the device to PC through USB cable.
(2) Use special charger to recharge.
When using the above methods to recharge, the device enters the charging status. The battery indicator shows a battery icon turning from empty to full repeatedly, indicating that the device is recharging, with orange charging indicator being lit. Under normal circumstance, the device can be fully recharged in around 3 hours. The orange charging indicator is off when the battery icon is full which indicates that it is fully recharged.
Note:
During charging, the device cannot be used to record or playback.
Connect to Computer
The device can be used as a USB mass storage to conveniently store, back up and move files. Link the device to computer with a USB cable, the voice recorder can automatically be recognized as a portable device without the need to install any software.
Note:
When moving files into or out of the device, please do not disconnect the device from the computer.
USB Connection and Charging Interface:
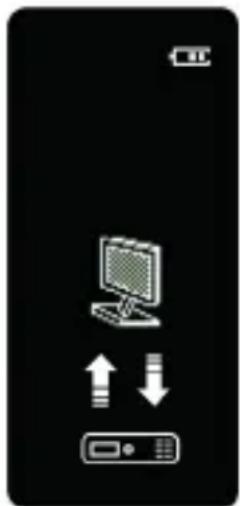
When the power switch is slide to the OFF position, the batte symbol will not be displayed.
Before using the device, please read carefully the following instructions.
(1) In the stop state of voice mode, press STOP button to select the folder you prefer. You can select folder A, E, D.
(2) Press REC button for 2-3 seconds to start recording; the red indicator light is on and the display shows "REC"; please point the top of the device towards the source of sound.
(3) Press REC button to pause recording, the red indicator light flickers, and the display shows “Pause”.
(4) Press REC button again to resume recording.
(5) Press STOP button to save recording; red indicator light is turned off, and the device returns to the Stop interface of current recorded file.
Recording Interface Reference:
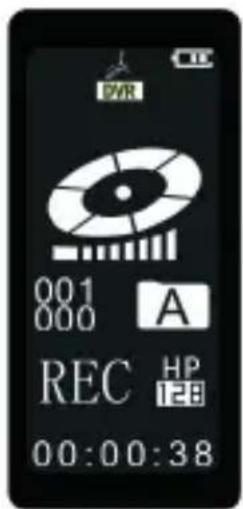
Illustration of Recording Interface:

Note:
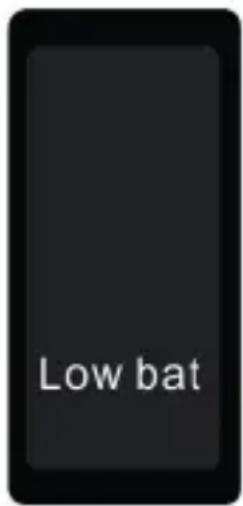
When the low battery icon occurs, it means the battery is near empty and the system will automatically shut down. If the device is recording, the system will automatically save the recorded file then shut down. If the device has low battery, please recharge promptly. When the device is to shut down due to low battery, the following icon will display.
Note:
- Prior to recording, please preset the record type you need (See “Record Type” in The System Setting, Chapter 8) and the folder where you want to save recorded files (See “Voice Folder Selection” in the Voice Mode, Chapter 6).
- Check if the remaining recording time is sufficient for the next recording (See “Remain Time” in The System Setting, Chapter 8).
- When recording, press button to save the current recording and start the next recording.
- Please test recording to ensure that the Voice Tracer setting is right.
- A、B、C and D folder can store 99 files at most, with 396 files in total (99 x 4).
- If the recording time exceeds the usable capacity of the device or the number of files reaches the limit of 396, the
recording stops. Please delete part of recording or move it a computer.
- When the device is in the recording mode, please do not slide power switch to OFF, otherwise the current recoding files will be damaged.
- Please charge battery in advance if you need to record for long time. A fully charged battery will allow you to record for approx 6.5 hours.
6 Voice Mode
Voice Mode Interface Information

(1) When in Stop state, press STOP button to select voice folder, A→B→C→D→MUSIC→A...
(2) Press or ▲ button to select the file you want to play.
(3) When in Stop state, press MENU button for 2-3 seconds
to enter file deleting or directory deleting.
(4) When in the state of Play, press REC button to enter A-B replay.
(5) When in the state of Play, press MENU button to set play mode, including Sequence, Repeat one and Repeat all.
(6) Press VOL button to enter volume adjustment interface, and pres or to adjust volumes.
(7) Press STOP to finish playing.
(8) When playing, press PLAY to pause playing, and repress PLAY button to resume playing.
(9) When playing, long press o to fast forward or backward, release the button to automatically resume playing.
Note:
- When the earphone is inserted into the jack, the Voice Track speaker is disabled.
- Green indicator light is on during playing; it flashes when devices pause and it will be turned off when stop playing.
Delete
In the state of stop, press MENU for 2-3 seconds to enter the deletion interface, as shown in the following figures:
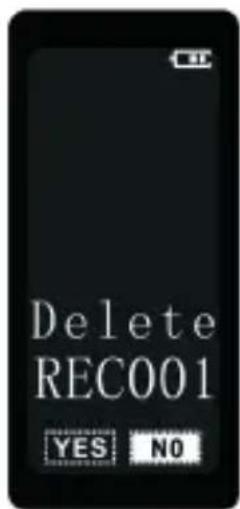

Delete current file Delete all files in the folder
Press PLAY to select "Delete one" or "Delete all"; press or to select "YES" or "No" and press MENU to confirm.
A-B Replay
When playing, press REC to enter A-B replay mode, and set the start mark A, then the screen displays A→B, and B flashes as shown in Figure 1; press the REC button to set the finish mark B, screen displays A→B, and start to replay as shown in Figure 2; repress the REC again to cancel replay, display A→B disappears and return to normal playing (if not press REC button to cancel replay, device will automatically ex replay mode after replay for five times).
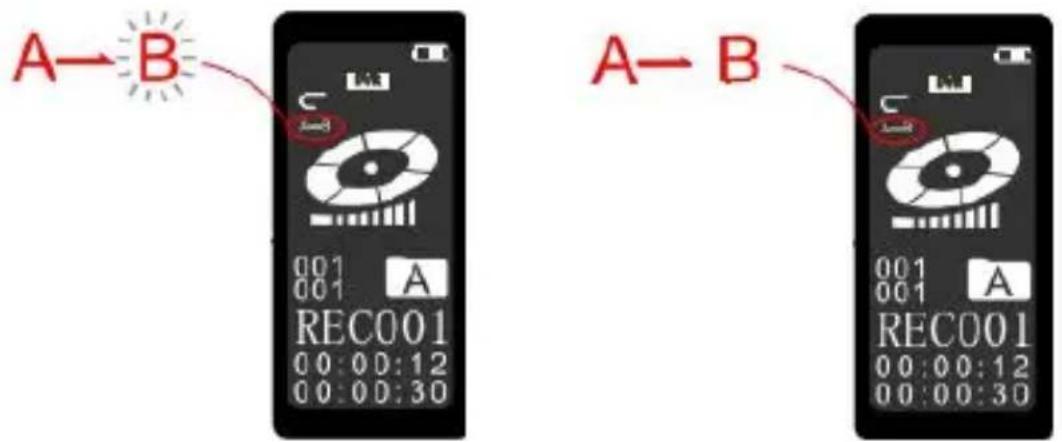
Figure 1 Figure 2
Play Mode
The device supports three play modes, including Sequence, Repeat one and Repeat all. It is able to switch among those three play modes by pressing MENU button when playing.
C: Sequence, it means to play in the order that from the current file to the last one, and then it automatically stops playing.
C: Repeat one, it means to repeatedly play the current file only.
ALL: Repeat all, it means to play all files in the current fold repeatedly.
Volume Adjustment
Press VOL button to enter volume adjustment, with screen displaying a speaker icon flashing, as shown in the following
figure. Press button ▲ to turn up or turn down the volume, then the volume bar on the screen will correspondingly increase or reduce.

When the voice mode is in the state of stop, press MENU button to enter Music Mode.
Note: music files can only be played when they are in "MUSI folder.
Music Mode Interface Information
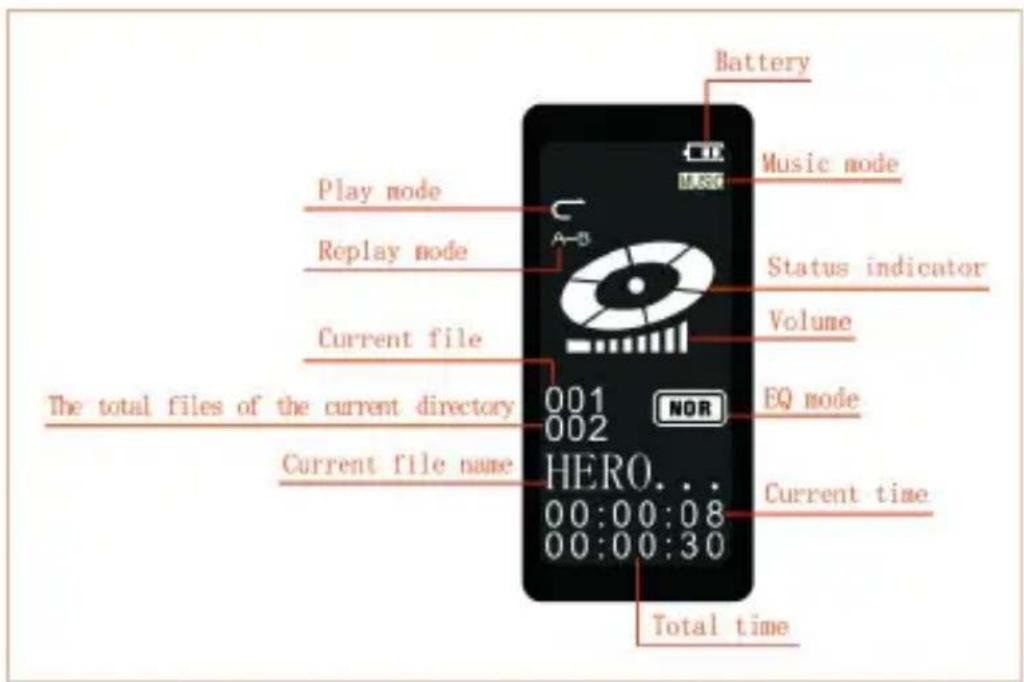
(1) Press or to select the file you need to play.
(2) In the state of stop, press MENU button for 2-3 seconds to enter the file deleting or directory deleting.
(3) When playing, press REC enter A-B replay.
(4) When playing, press MENU button to set play mode, including Sequence, Repeat one and Repeat all.
(5) When playing, press MENU button for 2-3 seconds to set equalizer mode.
(6) Press VOL button to enter volume adjustment interface, then press or button to adjust the volume.
(7) Press STOP key to stop playing.
(8) When playing, press PLAY button pause playing and resume playing by pressing PLAY button again.
(9) When playing, keep pressing on button to fast forward or backward, release the button to automatically resume normal playing.
(10) In the state of stop, press MENU button to enter system setting. Press STOP button to return voice mode.
Note:
- When the earphone plug is inserted into the jack, the Voice Tracer speaker is disabled.
- Green indicator light is on during playing; it flashes when devices pause and it will be turned off when stop playing.
Delete
In the state of stop, press MENU button for 2-3 seconds to enter the deletion interface, as shown in the following figure:
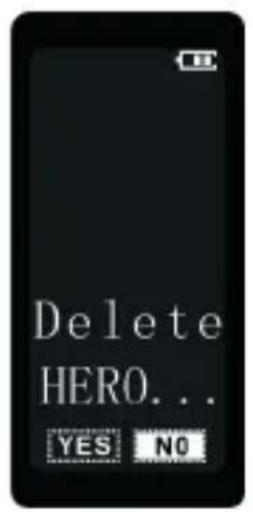
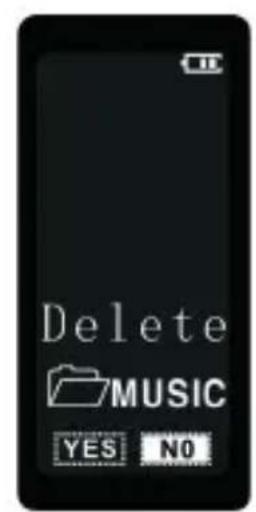
Delete single file Delete all files in a folder
The operation methods are the same as “Delete” of “Voice Mode”.
A-B Replay
The operation methods are the same as “A-B Replay” of “Voice Mode”.
Play Mode
The operation methods are the same as “Play Mode” of “Voice Mode”.
Equalizer Mode
The device supports seven sound effect modes, including normal, rock, popular, classic, soft, and jazz and DBB. Press MENU key for 2-3 seconds to switch among them when
playing.
| Icon Sound Effect | |
 | Normal |
 | Rock |
 | Popular |
 | Classic |
 | Soft |
 | Jazz |
 | DBB |
Volume Adjustment
The operation methods are the same as “Volume Adjustment” of “Voice Mode”.
8 System Setting
When the music mode is in the state of stop, press MENU button to enter system setting.
Note: Since there are many menus under the system setting, is possible to return to the voice mode interface by pressing STOP button from any system menu interface.
Record Type
In the stop interface of music mode, press MENU button to enter the record type setting Interface as shown in the followir figure:
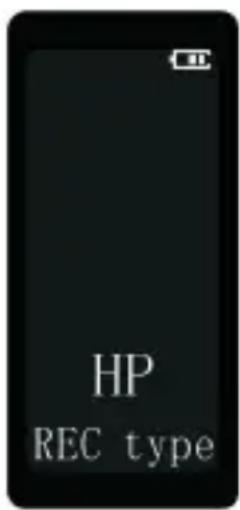
Two types of recording are available: the high quality recording and the long time recording. Press or to select the one you prefer, and press MENU to confirm and enter the next
menu.
HP: MP3 format, high quality, with bit rate of 128kbps.
LP: MP3 format, long time, with bit rate of 8kbps.
N.R: WAV format, high quality, with bit rate of 384kbps.
Record Light
On the stop interface of music mode, consecutively short press on MENU button to enter record light setting interface, as shown in the following figure:
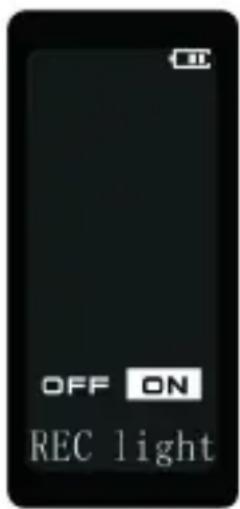
Press ▲r to select “ON” or “OFF”, press MENU to confirm and enter the next menu.
Voice-activated (VA)
Practical voice control recording function, no button operation is needed. When the function is activated, at the moment you speak, the Voice Tracer will automatically record it. In the
course of recording, if no voice is detected, the device will automatically pause recording 3 seconds later; if voice is detected again, the device resumes recording.
From the stop interface of music mode, consecutively short press the MENU to enter the VA setting interface, as shown in the following figure:
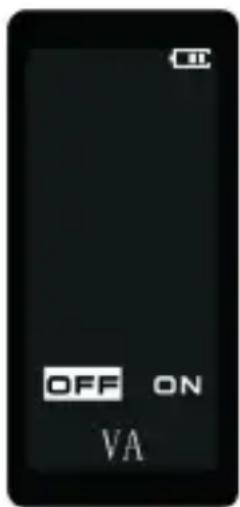
Press ▲ to select "ON" or "OFF", press MENU to confirm and enter the next menu.
Auto Divide Feature Recording
When the auto divide feature recording is started, in the cours of recording, the auto divide feature recording enables recordings to be saved automatically into a new file at preset auto divide time and the next recording will be started. On the stop interface of music mode, consecutively short press on the MENU to enter the auto divide feature recording setting
interface, as shown in the following figure:

Press or to select preset auto divide time : "OFF",
“30min” and “60min”, press MENU to confirm and enter the new menu.
System Time Setting
On the stop interface of music mode, consecutively short press on the MENU to enter the time format setting interface, as shown in the following figure:
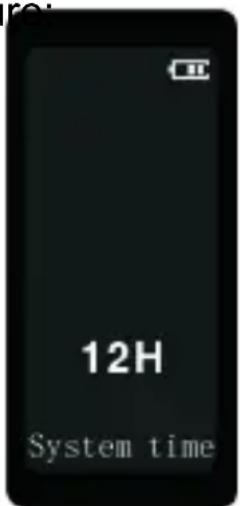
Press ▲r to ▼ select “12H” or “24H” format, press MENU to confirm and enter the system time setting interface, as shown
the following figures:
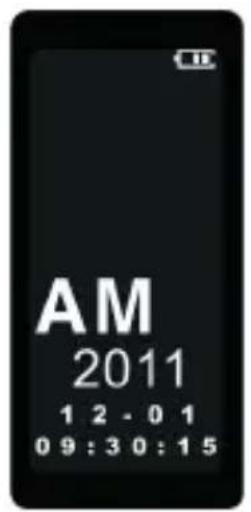
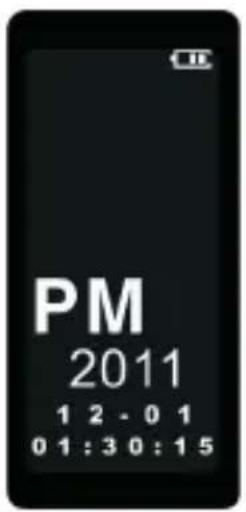
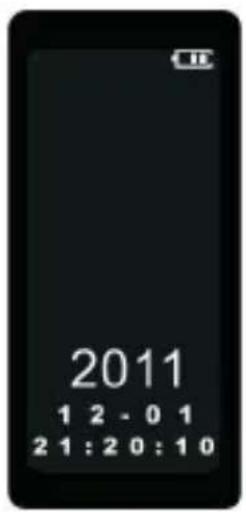
12h 24h
In this state, press VOL to switch among the year, month, day hour, minute and second. The number will flash in the state of setting, press ▲ to ▼ adjust the numerical value. Press
MENU to save the current time/date settings and enter the new menu.
Record Timer
Record Timer setting: first pre-set a length of time, as system time turns to the pre-set time, the system automatically starts recording. On the stop interface of music mode, consecutively short press on the MENU to enter the s record timer setting interface, as shown in the following figures:

12h 24h
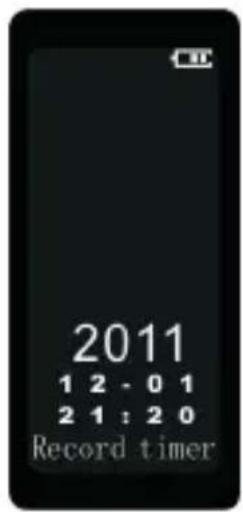
The setting method refers to "System Time Setting".
Duration
It is used to set duration of auto record. Device will automatically save recording when reach the preset time.
On the stop interface of music mode, consecutively short press on the MENU to enter the duration setting, as shown in the following figures:
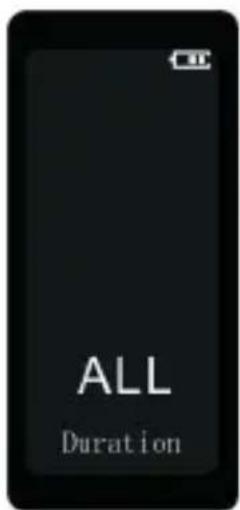
Press ▲ button to select "ALL"(to disable auto save)、
“30m”(to auto save at a 30min interval)、“60m”(to auto save at 60min interval)、“120m”(to auto save at a 120min interval), press MENU to confirm and enter the next menu.
Language
It is used for setting the system language.
On the stop interface of music mode, consecutively short press on the MENU to enter the language setting interface, as show in the following figures:
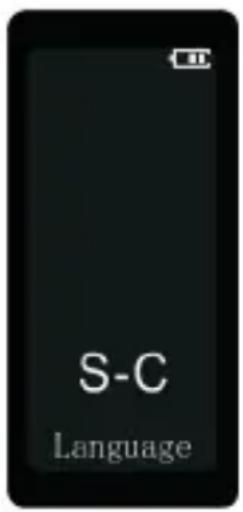
Press o to select “Simplified Chinese” (S-C),
"Traditional Chinese" (T-C) or "English" (EN), press MENU to confirm and enter the next menu.
Backlight Time
Five types of backlight time are available: 0, 15s, 30s, 45s and 60s. If there's no operation on the device after the set time,
backlight is off automatically. The backlight will be always on when “0” is selected.
On the stop interface of music mode, consecutively short press on the MENU to enter the backlight time setting, as shown in the following figures:

Press or to select "0", "15s", "30s", "45s" and "60s", press MENU to confirm and enter the next menu.
Contrast
It is used for setting the contrast of the display screen, ranging 1-16. The larger the contrast value is, the whiter the background will be; the smaller the contrast value is, the blacker the background will be.
On the stop interface of music mode, consecutively short press on the MENU to enter the contrast setting interface, as shown in the following figures:
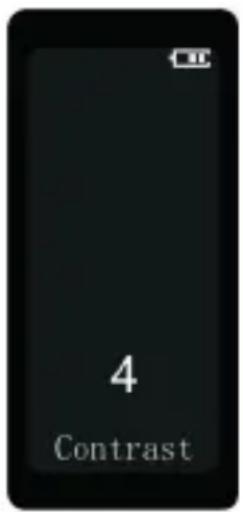
Press ▲ to adjust numerical value, press MENU to confirm and enter the next menu.
Auto Power-off
The system will automatically power off if no operation is performed to the device in specified time. There are two auto power-off options: 5min or 15min.
On the stop interface of music mode, consecutively short press on the MENU to enter the auto power-off setting, as shown in the following figures:
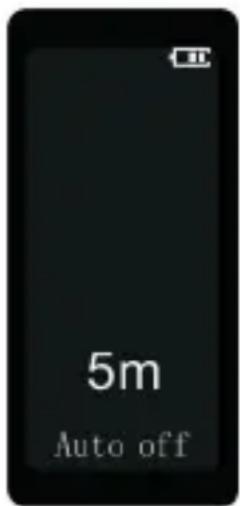
Press ▲ to select "5min" or "15min", press MENU to confirm and enter the next menu.
Remain Time
It is be used for check remaining time for recording.
On the stop interface of music mode, consecutively short press on the MENU to enter the remaining time checking interface, a shown in the following figures:
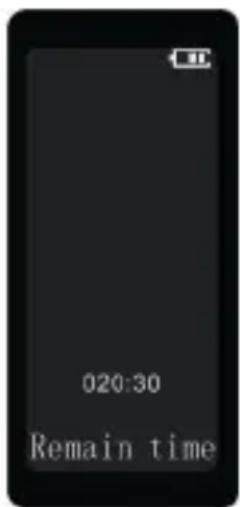
Note: Different record types vary in remaining time.
Clear Memory
It is used for formatting the internal storage of the device.
Note: Prior to formatting, please backup important data or files in advance.
On the stop interface of music mode, consecutively short press on the MENU to enter the clear memory interface, as shown
the following figures:
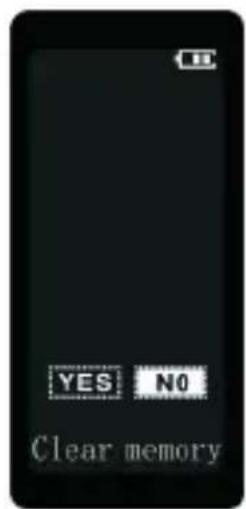
Press ▲r to select "YES" or "NO", in case of misoperation, please press VOL first, then press MENU to confirm the formatting when you selecting "YES"; if press MENU only, it will cancel the formatting and enter the next menu.
Firmware Version
It is used for checking the version of firmware and the date. On the stop interface of music mode, consecutively short press on the MENU to enter the firmware version checking interface, as shown in the following figures:

Press MENU to return to the voice mode.
9 Frequently Asked Questions (FAQ)
Answers to the frequently asked questions are listed here to solve simple problems that may occur. If the problem cannot be solved, please contact the dealer or visit our official website: www.philips.com/support
Cannot switch on the device:
The battery is empty, please recharge promptly.
Cannot record with the device:
Exceed the maximum file number or the device's storage is fu Please delete some recordings or move them to other storage devices.
Voice Tracer fails to play:
Please recharge the battery as it has run out power.
Unable to listen to recording via speaker:
(1) Please unplug the headset.
(2) Adjust the volume of speaker as the volume may have been set at the minimum value.
10 Technical Parameter
Memory
Reference recording time (4GB): About 24 hours for Digital Noise Reduction recording mode, 68 hours for high quality recording mode and 1114 hours for long time recording mode. Type of internal memory: NAND Flash (flash memory) Mobile storage device (PC): Yes Recording time with fully charged battery: approx 12 hours
Size and Weight
W × H × D: 22.7×97.6×14.8 (mm)
Weight (Inclusive of battery): 40g
System Requirement
Operating System: Windows 7/Vista/XP/2000, Mac OS X, Linux Port: USB port
Recording
Recording Format: MP3 / WAV
(High quality) HP: Bit rate 128kbps, MP3 format
(long time) LP: Bit rate 8kbps, MP3 format
(Digital Noise Reduction) N.R: Bit rate 384kbps, WAV format
Operational Condition
Temperature: 5° – 45° C
Air Humidity: 10% – 90%, Non-condensing
Warranty card
质保书
1
year warranty
一年质保
Type: VTR5000
Serial nr:
Date of purchase
购买日期
Dealer's name, address and signature
销售商名称、地址及签字
www.philips.com/welcome
This document is printed on chlorine free produced paper Data subject to change without notice
This product was brought to the market by Speech Processing Solutions GmbH or one of its affiliates, further referred to in this document as SPS, which is the manufacturer of the product. SPS is the warrantor in relation to the product with which this booklet was packaged.
For China only
只限中国地区
Printed in China


Specifications subject to change without notice.
Trade marks are the property of Royal Philips or their respective owners.
© 2014 Speech Processing Solutions GmbH. All rights reserved. Philips and the Philips' shield emblem are registered trademarks of Koninklijke Philips N.V. and are used by Speech Processing Solutions GmbH under license from Koninklijke Philips N.V. All trademarks are the property of their respective owners.
Document version 1.0,2014-01-01


- 目录
- 音量调节
- 8 系统设置
- 9 常见问题
- 10 技术参数
- 1 欢迎
- 播放模式
- 8 SYSTEM SETTING
- 9 FREQUENTLY ASKED QUESTIONS
- 10 TECHNICAL PARAMETERS
- PRODUCT FEATURES
- 2 IMPORTANT
- SAFETY
- HEARING PROTECTION
- POWER ON/OFF
- NOTE
- BATTERY CHARGING
- CONNECT TO COMPUTER
- USB CONNECTION AND CHARGING INTERFACE
- 6 VOICE MODE
- VOICE MODE INTERFACE INFORMATION
- DELETE
- A-B REPLAY
- PLAY MODE
- VOLUME ADJUSTMENT
- MUSIC MODE INTERFACE INFORMATION
- EQUALIZER MODE
- RECORD TYPE
- RECORD LIGHT
- VOICE-ACTIVATED (VA)
- AUTO DIVIDE FEATURE RECORDING
- SYSTEM TIME SETTING
- RECORD TIMER
- DURATION
- LANGUAGE
- BACKLIGHT TIME
- CONTRAST
- AUTO POWER-OFF
- REMAIN TIME
- CLEAR MEMORY
- FIRMWARE VERSION
- 9 FREQUENTLY ASKED QUESTIONS (FAQ)
- CANNOT SWITCH ON THE DEVICE
- CANNOT RECORD WITH THE DEVICE
- VOICE TRACER FAILS TO PLAY
- UNABLE TO LISTEN TO RECORDING VIA SPEAKER
- 10 TECHNICAL PARAMETER
- MEMORY
- SIZE AND WEIGHT
- SYSTEM REQUIREMENT
- RECORDING
- OPERATIONAL CONDITION
- WARRANTY CARD
- 质保书
- 1
Brand : PHILIPS
Model : Voice Tracer VTR5000
Category : Voice recorder