
CKSTGR3006 - Barbecue OSTER - Free user manual and instructions
Find the device manual for free CKSTGR3006 OSTER in PDF.


| Product type | Electric barbecue / 3-in-1 griddle |
| Brand | Oster |
| Model | CKSTGR3006 |
| Dimensions (L x W x H) | 50 x 30 x 15 cm |
| Weight | 4.5 kg |
| Power supply | 120 V – 1500 W |
| Plate material | Non-stick |
| Removable plates | Yes, dishwasher-safe |
| Main functions | Grill, griddle, versatile cooking with interchangeable plates |
| Adjustable thermostat | Yes, variable temperature |
| Indicator light | Heating indicator |
| Cool-touch handles | Yes |
| Non-slip base | Yes |
| Care and cleaning | Dishwasher-safe removable plates; wipe exterior with a damp cloth |
| Safety | Automatic shut-off in case of overheating, insulated handles |
| Spare parts available | Replacement plates, power cord |
| Repairability | Repairability index not communicated |
| Color | Black / Silver |
| Warranty | 2 years (depending on country) |
Frequently Asked Questions - CKSTGR3006 OSTER
User questions about CKSTGR3006 OSTER
0 question about this device. Answer the ones you know or ask your own.
Ask a new question about this device
Download the instructions for your Barbecue in PDF format for free! Find your manual CKSTGR3006 - OSTER and take your electronic device back in hand. On this page are published all the documents necessary for the use of your device. CKSTGR3006 by OSTER.
USER MANUAL CKSTGR3006 OSTER
natural_image
3D rendering of a bioceramic device with visible heat exchanger and external casing (no text or symbols)MODEL/MODÈLE MODELO
CKSTGR3006
INSTRUCTION MANUAL
GRILL/GRIDDLE WITH HEAT RESISTANT LID
READ ALL INSTRUCTIONS BEFORE USING THIS APPLIANCE
MANUEL D'INSTRUCTIONS
GRILL/PLAQUE A GRILLER AVEC COUVERCLE RÉSISTANT À LA CHALEUR
LIRE TOUTES LES INSTRUCTIONS AVANT D'UTILISER CET APPAREIL
MANUAL DE INSTRUÇÕES
GRELHA/CHAPA COM TAMPA DE VIDRO REFRATÁRIO
LEIA TODAS AS INSTRUÇÕES ANTES DE USAR ESTE APARELHO
IMPORTANT SAFEGUARDS
When using electrical appliances, basic safety precautions should always be observed including the following:
- READ AND SAVE ALL INSTRUCTIONS.
- Make sure the voltage in your outlet is the same as the voltage indicated on the appliance's rating label.
- To protect against the risk of electric shock, DO NOT immerse the cord, plug or unit in water or any other liquid.
- DO NOT touch hot surfaces ⚠️. Use handles.
- Children should not use this appliance.
- Unplug from outlet when not in use and before cleaning. Allow unit to cool before cleaning or storing it.
- NEVER yank the cord to disconnect the unit from the electrical outlet. Instead, grasp the plug and pull it to disconnect.
- DO NOT operate any appliance if the cord is damaged. DO NOT use the appliance if it malfunctions or has been damaged in any manner. In order to avoid the risk of an electric shock, NEVER try to repair it yourself. Take it to the nearest Authorized Oster® Service Center for examination and repair. An incorrect re-assembly could present a risk of electric shock when the unit is in use.
- The use of replacement parts or accessories not recommended by the manufacturer may cause fire, electrical shock or injuries.
- DO NOT use outdoors or for commercial purposes.
- DO NOT use this appliance for purposes other than the one for which it was designed.
- DO NOT let the electrical cord hang over the edge of the table or countertop, or touch hot surfaces.
- DO NOT place on or near a hot gas or electric burner, heated oven or microwave oven.
- Use it on a heat-resistant, flat level surface only.
- Extreme caution must be used when moving any appliance containing hot foods or oils.
- When using this appliance, provide adequate air space above and on all sides for air circulation.
- DO NOT leave unit unattended during use.
- Use it with a wall receptacle only.
- When using this appliance, make sure there are no flammable materials close to it, such as curtains, paper, plastic, etc.
- This appliance is not intended for use by persons (including children) with reduced physical, sensory or mental capabilities, or lack of experience and knowledge, unless they have been given supervision or instruction concerning use of the appliance by a person responsible for their safety. Children should be supervised to ensure that they DO NOT play with the appliance.
-
Close supervision is necessary when any appliance is used near children, or incapacitated individuals.
-
Always insert temperature probe into the appliance first, then plug cord in the electric wall outlet. To disconnect, turn control dial to the off "O" position, then remove plug from the electric wall outlet.
- This appliance is not intended to be operated by means of an external timer or separate remote-control system.
- This appliance is intended to be used in household and similar applications such as: staff kitchen areas in shops, offices and other working environments farm houses by clients in hotels, motels and other residential type environments bed and breakfast type environments.
THIS UNIT IS FOR HOUSEHOLD USE ONLY.
SAVE THESE INSTRUCTIONS
EXTENSION CORD USE
A short power-supply cord is provided to reduce the risk resulting from becoming entangled in or tripping over a longer cord. An extension cord may be used if care is exercised in its use. If an extension cord is used, the electrical rating of the cord must be at least as great as the electrical rating of the appliance. The extension cord should be arranged so that it will not drape over the countertop or tabletop where it can be pulled on by children or tripped over unintentionally.
DESCRIPTION OF THE APPLIANCE
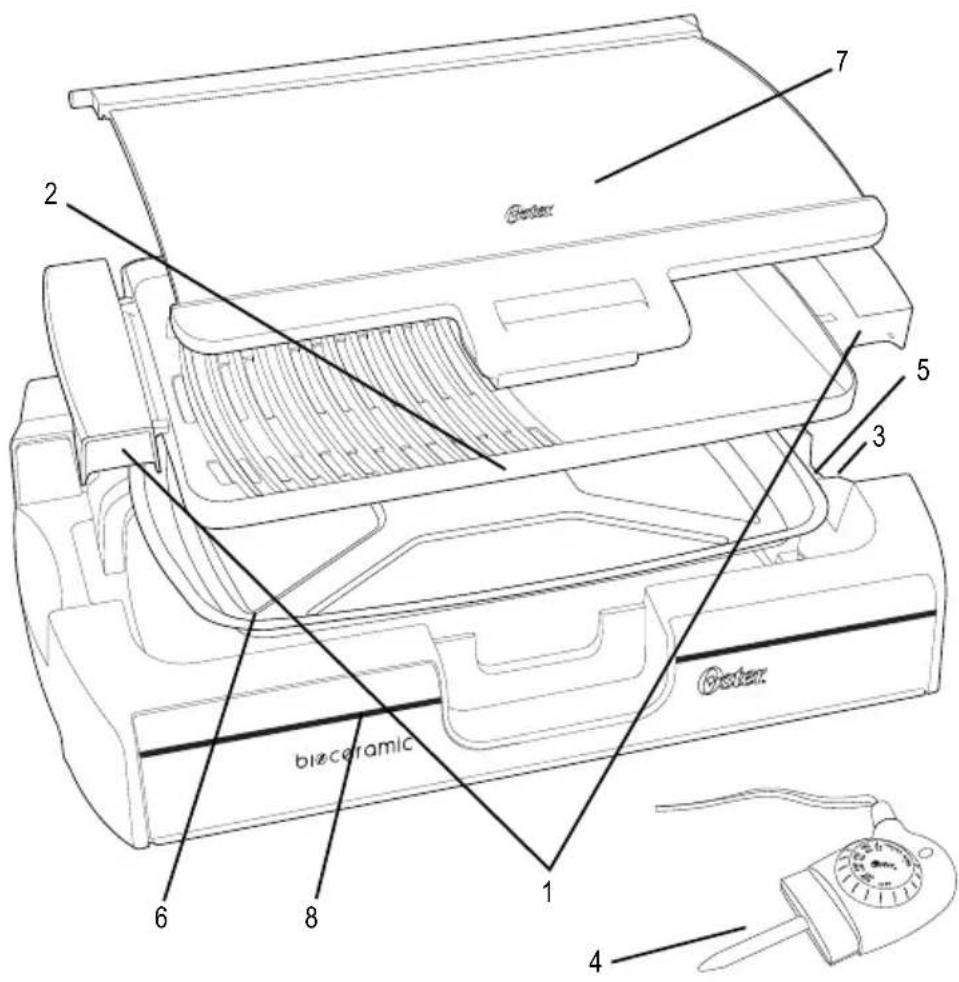
- Cool Touch Handles
- Removable Ceramic Non-Stick Grill/Griddle Cooking Surface
- Safety System
- Removable Temperature Control Probe with Ready Light
- Socket for Temperature Control Probe
- Removable Drip Pan
- Heat Resistant Lid
- Base
BEFORE USING YOUR APPLIANCE
Before using your Oster® Grill/ Griddle for the first time, please follow the instructions below:
- Remove any stickers from the product.
- DO NOT IMMERSE TEMPERATURE CONTROL PROBE IN WATER.
-
Clean and condition the non-stick surface:
-
Make sure the probe is not inserted into the unit; otherwise remove it from the unit. The cooking plate will only be released from the base once the probe is removed. Your appliance includes a safety system that prevents that the cooking plate be removed while the probe is inserted. Wash the cooking plate, drip pan, lid and base with a soft sponge with hot, soapy water. Rinse and dry them well.
- Place the drip pan, cooking plate and lid back in the base. Set the temperature control to the off position "O" and insert the probe into the unit. If temperature control probe is not completely inserted, abnormal heating may occur, resulting in accident or damage.
- To condition the cooking surface, plug the appliance into the appropriate electrical outlet. Turn the temperature control knob clockwise choosing one of the low temperature settings. The orange indicator light will illuminate. Allow the unit to pre-heat until the orange ready light goes off indicating that the selected cooking temperature has been reached.
- Wipe a small amount of butter or margarine onto the cooking surface, spread slightly and wipe away any excess.
NOTE: When using the unit for the first time, you may notice a fine smoke haze coming out from the unit. This is normal. It is due to the initial heating of internal components.
Your Oster ^® Grill/ Griddle is now ready to use and it will not be necessary to condition it again.
USING YOUR APPLIANCE
- Place the drip pan correctly in the base as illustrated below (see Figure 1).

natural_image
Technical line drawing of a car interior frame with two black arrows indicating directional movement (no text or symbols)Figure 1

natural_image
Technical line drawing of a mechanical component or bracket (no text or symbols)WARNING: To prevent personal injury or property damage, this drip pan must be in place during cooking.
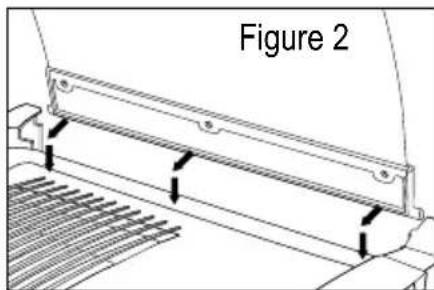
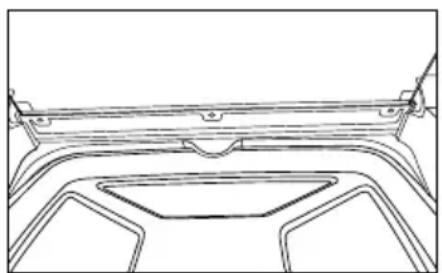
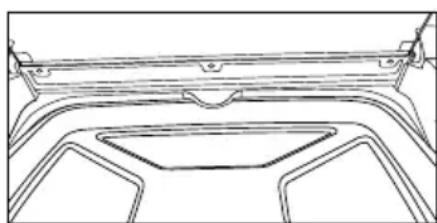
- Place the cooking surface on the base and then place the lid by inserting its guides into the back grooves located in the back of the base (see Figure 2).
- Set the temperature dial to the off position "OFF" and insert the probe into its socket found at the side of the appliance.
- Plug the power cord into the appropriate electrical outlet.
- Set the temperature dial to the desired setting and pre-heat the unit until the orange ready light goes off.
- With the lid up in the open position, place the foods to be prepared on top of the non-stick cooking surface. Keep the lid open or closed as you may prefer or your recipe indicates.
- Allow your foods to cook until done.
NOTE: The orange ready indicator light may turn on and off during cooking. This indicates that the thermostat is maintaining the proper cooking temperature to grill/griddle to perfection.
- If the lid is closed, press the latch under the lid handle to release it and then lift it up until it sits in the upright/open position.
- The cooking surface has a durable non-stick coating. Some foods such as melted cheese might cause the foods to slightly stick to the surfaces. Use heat resistant plastic or wood spatula to remove the food. Never use a sharp or metal object since that might damage the non-stick surface.
- After you have finished using your Oster® Grill/Griddle, turn the temperature dial to the off position "O" and unplug it from the electric outlet.
TIPS AND SUGGESTIONS
• Always pre-heat the unit before using it.
- Pour a small amount water onto drip pan (approximately 0.5 cm (1/4 inch) high) to help reduce smoke and clean up.
- Be careful when biting into foods containing fillings such as cheese, tomato or jam, as they retain heat and can burn if eaten too quickly after cooking.
- It is not necessary to butter the outside of breads since the unit has a non-stick surface. However, if you would like to brown the bread, it is recommended spreading a small amount of butter or margarine.
CLEANING AND MAINTENANCE
• Unplug and allow unit to cool completely before cleaning.
- Remove temperature control probe. DO NOT IMMERSE TEMPERATURE CONTROL PROBE IN WATER OR ANY OTHER LIQUID.
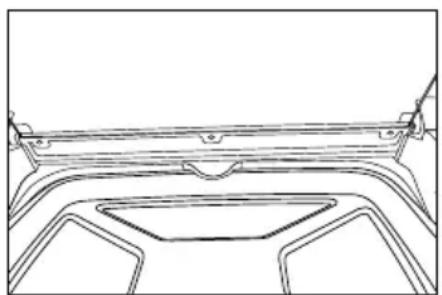
- Remove the lid by lifting it up and towards the back until lid guides are outside the grooves located in the back of the base (see Figure 3).

- Remove cooking place holding it by the handles.
- Remove the drip pan carefully to avoid spilling the water with any collected oils, juices and liquids.
- Wash the cooking plate, drip pan, lid and base with a soft sponge with hot, soapy water. DO NOT use a steel wool pad or other abrasive cleansers, which may damage the non-stick surface. Rinse and dry them well. These parts are dishwasher safe.
- DO NOT use metal utensils or sharp metal objects such as a knife, as this will damage the non-stick cooking surface.
- DO NOT cut food on top of the cooking surface to avoid damaging the non-stick coating.
STORAGE
- Allow appliance to cool before storing.
• Store unit in a dry location such as a tabletop, countertop or a cupboard shelf.
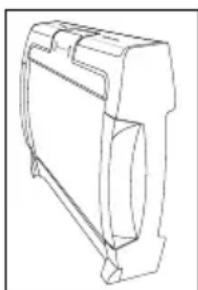
• This appliance can also be stored vertically for space saving (see Figure 4).
natural_image
Technical line drawing of a mechanical component (no text or symbols)Figure 4
IMPORTANTES PRECAUTIONS D'EMPLOI
natural_image
Technical line drawing of a car interior frame with two black arrows indicating upward movement (no text or symbols)Schéma 1
natural_image
Technical line drawing of a car front panel with mounting brackets (no text or symbols)natural_image
Technical line drawing of a mechanical component (no text or symbols)Schéma 4
PRECAUCIONES IMPORTANTES
natural_image
Technical line drawing of a car interior frame with two black arrows indicating directional movement (no text or symbols)Figura 1
natural_image
Technical line drawing of a car front panel with structural brackets (no text or symbols)natural_image
Line drawing of a mechanical component or housing (no text or symbols)Figura 4
PRECAUÇÕES IMPORTANTES
natural_image
Technical line drawing of a car front bumper with two upward arrows indicating measurement or alignment points (no text or symbols present)Figura 1
natural_image
Technical line drawing of a car front panel with mounting brackets (no text or symbols)natural_image
Technical line drawing of a mechanical component (no text or symbols)Figura 4
Oster®
| Electric characteristics of series models:Características eléctricas de los modelos de la serie:CKSTSK3006-XXX | ||
| Características eléctricas dos modelos da série: | ||
| Voltage/Voltaje/ Voltagem | Frequency/Frecuencia/Frequência Power | Potencia/ Potência |
| 120 V 60 Hz | 1200 W | |
| 220 V 50/60 Hz | 1500 W | |
| 220 V 50 Hz | 1500 W | |
| 220 V 60 Hz | 1500 W | |
XXX where X is any number between 0 and 9 or any letter between A and Z. XXX en donde X es cualquier numero entre 0 y 9 o cualquier letra entre A y Z. XXX onde X é qualquer número entre 0 e 9 ou qualquer letra entre A e Z.
© 2012 Sunbeam Products, Inc. All rights reserved. Distributed by Sunbeam Latin America, LLC, 5200 Blue Lagoon Drive, Suite 470, Miami, FL 33126. One year limited warranty – please see insert for details.
Brand : OSTER
Model : CKSTGR3006
Category : Barbecue