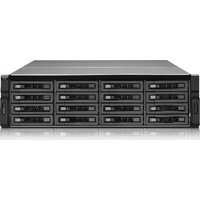
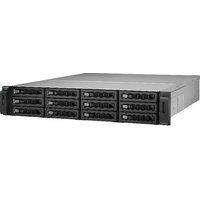
REXP-1620U-RP - Disk array QNAP - Free user manual and instructions
Find the device manual for free REXP-1620U-RP QNAP in PDF.


| Product Type | Disk Array Enclosure |
| Model | REXP-1620U-RP |
| Brand | QNAP |
| Form Factor | 3U Rackmount |
| Drive Bays | 16 x 2.5-inch/3.5-inch SATA/SAS |
| Expansion Interface | SAS (Mini-SAS HD) |
| Redundant Power Supply | Dual 350W hot-swappable |
| Dimensions (WxDxH) | 482 x 532 x 130 mm (19.0 x 20.9 x 5.1 in) |
| Weight | Approximately 20 kg (44.1 lbs) without drives |
| Cooling | 4 x 40mm hot-swappable fans |
| Management | Front panel LEDs and LCD |
| Compatibility | QNAP SAS-expandable NAS models |
| Supported Drive Types | SATA HDD/SSD, SAS HDD/SSD |
| Max Capacity | Up to 256 TB (using 16TB drives) |
| Operating Temperature | 0 to 40°C (32 to 104°F) |
| Power Supply Input | AC 100-240V, 50/60Hz |
| Safety Certifications | CE, FCC, UL |
| Maintenance | Clean air filters monthly; check LED status regularly |
| Spare Parts | Power supply units, fan modules, controller modules |
| Repairability | Hot-swappable components for easy replacement |
Frequently Asked Questions - REXP-1620U-RP QNAP
User questions about REXP-1620U-RP QNAP
0 question about this device. Answer the ones you know or ask your own.
Ask a new question about this device
Download the instructions for your Disk array in PDF format for free! Find your manual REXP-1620U-RP - QNAP and take your electronic device back in hand. On this page are published all the documents necessary for the use of your device. REXP-1620U-RP by QNAP.
USER MANUAL REXP-1620U-RP QNAP
QNAP RAID Expansion Enclosure Hardware User Manual
© 2015. QNAP Systems, Inc. All Rights Reserved.
Thank you for choosing QNAP products! This user manual provides descriptions of the hardware of the QNAP RAID expansion enclosure and relevant guidelines of certain functions. Please read this manual carefully and strictly adhere to its instructions.
This user manual is applicable to the following RAID expansion enclosure(s): REXP-1220-RP, REXP-1620-RP, REXP-1200U-RP, REXP-1600U-RP, REXP-1000 Pro
Note:
- The product you purchased may not support certain functions dedicated to specific models.
- All features, functionality, and other product specifications are subject to change without prior notice or obligation.
- Information presented is subject to change without notice.
- No part of this publication may be reproduced, stored in a retrieval system, or transmitted, in any form or by any means, mechanical, electronic, photocopying, recording, or otherwise, without prior written permission of QNAP Systems, Inc.
- QNAP and the QNAP logo are registered trademarks of QNAP Systems, Inc. Other products and company names mentioned herein may be the trademarks of their respective companies.
DISCLAIMER
In no event shall the liability of QNAP Systems, Inc. (QNAP) exceed the price paid for the product from direct, indirect, special, incidental, or consequential software, or its documentation. QNAP makes no warranty or representation, expressed, implied, or statutory, with respect to its products or the contents or use of this documentation and all accompanying software, and specifically disclaims its quality, performance, merchantability, or fitness for any particular purpose. QNAP reserves the right to revise or update its products, software, or documentation without obligation to notify any individual or entity.
Note:
- Back up your system periodically to avoid any potential data loss. QNAP disclaims any responsibility of all sorts of data loss or recovery.
- Should you return any components of the RAID expansion enclosure package for refund or maintenance, make sure they are carefully packed for shipping. Any form of damages due to improper packaging will not be compensated.
Regulatory Notice

FCC STATEMENT
This equipment has been tested and found to comply with the limits for a Class B digital device, pursuant to Part 15 of FCC Rules. These limits are designed to provide reasonable protection against harmful interference in a residential installation. This equipment generates, uses, and can radiate radio frequency energy and, if not installed and used in accordance with the instructions, may cause harmful interference to radio communications. However, there is no guarantee that interference will not occur in particular installation. If this equipment does cause harmful interference to radio or television reception, which can be determined by turning the equipment off and on, the user is encouraged to try to correct the interference by one or more of the following measures:
Reorient or relocate the receiving antenna.
Increase the separation between the equipment and receiver.
Connect the equipment into an outlet on a circuit different from that to which the receiver is connected.
Consult the dealer or an experienced radio/television technician for help.
The changes or modifications not expressly approved by the party responsible for compliance could void the user's authority to operate the equipment.
Shielded interface cables, if any, must be used in order to comply with the emission limits.

Class B only.
Symbols in this document
 Warning Warning | This icon indicates the instructions must be strictly followed. Failure to do so could result in injury to human body or death. |
 Caution Caution | This icon indicates the action may lead to disk clearance or loss OR failure to follow the instructions could result in data damage, disk damage, or product damage. |
Table of Contents
SAFETY WARNINGS....7
BEFORE YOU START....9
CHAPTER 1. PACKAGE CONTENTS....10
1.1. REXP-1220U-RP AND REXP-1620U-RP 10
1.2. REXP-1200U-RP AND REXP-1600U-RP 10
1.3. REXP-1000 PRO 11
CHAPTER 2. HARDWARE SPECIFICATION....13
2.1. REXP-1220U-RP AND REXP-1620U-RP 13
2.2. REXP-1200U-RP AND REXP-1600U-RP 15
2.3. REXP-1000 PRO 17
CHAPTER 3. RAID EXPANSION ENCLOSURE HARDWARE ILLUSTRATION .....19
3.1. FRONT VIEW.... 19
3.2. REXP-1220URP AND REXP-1620U-RP REAR VIEW 21
3.3. REXP-1200U-RP AND REXP-1600U-RP REAR VIEW 22
3.4. REXP-1000 PRO FRONT VIEW....24
3.5. REXP-1000 PRO REAR VIEW 26
CHAPTER 4. CABLE THE SYSTEM....27
4.1. CABLING INSTRUCTIONS 27
4.2. MINI SAS CABLE REMOVAL 30
CHAPTER 5. REMOVE AN AIR DUCT (APPLIED TO REXP-1600U-RP)......31
CHAPTER 6. INSTALL/REMOVE A FAN MODULE ......32
6.1. INSTALL A FAN MODULE (APPLIED TO REXP-1600U-RP,REXP-1200U-RP,REXP-1620U-RP,REXP-1220U-RP)....32
6.2. REMOVE A FAN MODULE (APPLIED TO REXP-1620U-RP, REXP-1220U-RP, REXP-1600U-RP AND REXP-1200U-RP).... 32
CHAPTER 7. INSTALL POWER SUPPLY UNIT (APPLIED TO REXP-1600U-RP, REXP-1200U-RP, REXP-1620U-RP AND REXP-1220U-RP) ...... 33
TECHNICAL SUPPORT....35
Safety Warnings
- The RAID expansion enclosure can operate normally in the temperature of 0° C– 40° C and relative humidity of 5%–95%. Please make sure the environment is well-ventilated.
- The power cord and devices connected to the RAID expansion enclosure must provide correct supply voltage (100-127 / 200-240V AC).
- Do not place the RAID expansion enclosure in direct sunlight or near chemicals. Make sure the temperature and humidity of the environment are within normal levels.
- Unplug the power cord and all connected cables before cleaning. Wipe the RAID expansion enclosure with a dry towel. Do not use chemical or aerosol to clean the RAID expansion enclosure.
- Do not place any objects on the RAID expansion enclosure to ensure normal operation and to avoid overheating.
- Use the flat head screws in the product package to lock the hard disks in the RAID expansion enclosure when installing hard disks for proper operation.
- Do not place the RAID expansion enclosure near any liquid.
- Do not place the RAID expansion enclosure on any uneven surface to avoid falling off and damage.
- Make sure the voltage is correct in the location where the RAID expansion enclosure is installed. Contact the distributor or the local power supply company for more information.
- Do not place any object on the power cord.
- Do not attempt to repair the RAID expansion enclosure. Improper disassembly of the product may expose the users to electric shock or other risks. For any enquiries, please contact the distributor.
- The RAID expansion enclosure should only be installed in the server room and maintained by authorized server managers or IT administrators. The server room should be locked by key or keycard access and only certified staff allowed access.

Warning:
- Danger of explosion if battery is incorrectly replaced. Replace only with the same or equivalent type recommended by the manufacturer. Dispose of used batteries according to the manufacturer's instructions.
- Do NOT touch the fan inside the RAID expansion enclosure to avoid serious injuries.
- The RAID expansion enclosure is heavy and should be installed into a rack by at least two people. To avoid personal injury and/or damage to the equipment, do not attempt to lift and install the enclosure into a rack without a mechanical lift and/or help from other people.
Before You Start
- The RAID expansion enclosures can ONLY be used with the QNAP Turbo NAS.
- Install the hard drives in sequential order following the tray number.
- The RAID expansion enclosures are applicable to the TS-x79 and TS-ECx80 Turbo NAS series.
- Always turn on the RAID expansion enclosures before turning on the attached NAS.
- Always shut down the NAS before turning off the RAID expansion enclosures.
Chapter 1. Package Contents
1.1. REXP-1220U-RP and REXP-1620U-RP
The product package contains the following items.
| Item Picture Quantity | ||
| REXP-1220U-RP or REXP-1620U-RP |  or or  | 1 |
| Power cord |  | 2 |
| Screw pack |  | 1 |
| Quick Installation Guide |  | 1 |
| 0.5m Mini SAS cable |  | 1 |
| Rail kit (optional purchase) |  | 1 |
| Storage expansion card (optional purchase) | 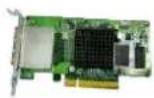 | 1 |
1.2. REXP-1200U-RP and REXP-1600U-RP
The product package contains the following items.
| Item Picture Quantity | ||
| REXP-1200U-RP or REXP-1600U-RP |  or or  | 1 |
| Power cord |  | 2 |
| Screw pack | 1 | |
| Quick Installation Guide |  | 1 |
| 0.5m Mini SAS cable |  | 1 |
| Hardware Installation CD |  | 1 |
| Rail kit (optional purchase) |  | 1 |
| Storage expansion card (optional purchase) |  | 1 |
1.3. REXP-1000 Pro
The product package contains the following items.
| Item Picture Quantity | ||
| REXP-1000 Pro | 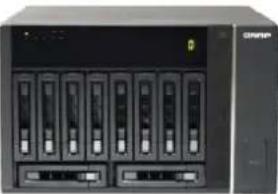 | 1 |
| Power cord | 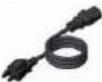 | 1 |
| Screw pack | 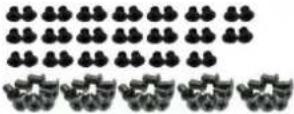 | 1 |
| Quick Installation Guide |  | 1 |
| 0.5m Mini SAS cable |  | 1 |
| Hardware Installation CD |  | 1 |
| Storage expansion card (optional purchase) |  | 1 |
Chapter 2. Hardware Specification
The physical specifications, operating environment, and power requirements of the RAID expansion enclosure are listed below.
2.1. REXP-1220U-RP and REXP-1620U-RP
| Model REXP-1 | 220U-RP REXP-1620U-RP | |
| Host Interface | Three SAS 4x wide port (SFF-8644) | |
| Hard Drive | 12 x 3.5-inch SAS/SATA 6Gb/s, SAS/SATA 3Gb/s hard drives or 2.5-inch SAS/SATA, SSD hard drives | 16 x 3.5-inch SAS/SATA 6Gb/s, SAS/SATA 3Gb/s hard drives or 2.5-inch SAS/SATA, SSD hard drives |
| Note:The standard system is shipped without hard drives. For the hard drive compatibility list, please visit http://www.qnap.com/pro_compatibility.asp | ||
| LED Indicators | Front panel: Status, fault, system over heat, fan errorRear panel: SAS link, SAS error, enclosure ID | |
| Form Factor | 2U, rackmount 3U, rackmount | |
| Dimensions | 88(H) x 439(W) x 520(D) mm3.46(H) x 17.28(W) x 20.47(D) inch | 130(H) x 442.4(W) x 528.3(D) mm5.12(H) x 17.42(W) x 20.80(D) inch |
| Weight | Net weight: 14.8 kg/32.63 lbGross weight: 21.99 kg/48.48 lb | Net weight: 18.14 kg/39.99 lbGross weight: 25.92 kg/57.14 lb |
| Sound Level | Standby: 43.3 dBIn operation: 44.1 dB(with 12 x 1TB hard drives installed) | Standby: 30.1 dBIn operation: 41.5 dB(with 16 x 1TB hard drives installed) |
| Power Consumption | Idle mode: 105WIn operation: 147W(with 12 x 500GB hard | Idle mode:199WIn operation: 289W |
| Model REXP-1220U-RP REXP-1620U-RP | |
| drives installed) (with 16 x WD WDCWD20EVDS 2TB hard drives installed) | |
| Temperature | 0-40°C |
| Relative Humidity | 5-95% |
| Power Supply | Input: 100-240V AC, 50-60Hz; Output: 650W |
| COM port Reserved for system maintenance | |
| Fan 3 x 6 cm smart cooling fan | |
| Management (via NAS) | 1. Supports disk S.M.A.R.T. information2. RAID expansion enclosure identifier3. Locate RAID expansion enclosures4. Locate hard disks on RAID expansion enclosures5. Smart fan control6. In-band SAS firmware update |
Remark:The rackmount RAID expansion enclosure complies with ANSI/EIA-RS-310-D rack mounting standards. Before purchasing the server racks for this model, please make sure the server racks conform to the following criteria:1. Rack sizea. Mounting post width: ≥ 450mmb. Panel width: ≥ 500mmc. Mounting post depth: 650mm-850mm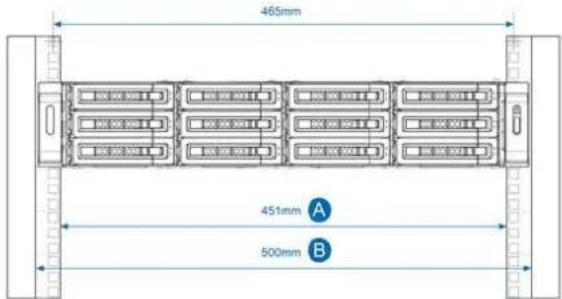  | |
| Model REXP-1 | 220U-RP REXP-1620U-RP | |
2. The optional rack kits for the rackmount RAID expansion enclosure are only compatible with square-hole server racks. 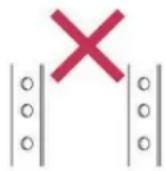 | ||
2.2. REXP-1200U-RP and REXP-1600U-RP
| Model REXP-1 | 200U-RP REXP-1600U-RP | |
| Host Interface | Two SAS 4x wide port (IN port, OUT port) | |
| Hard Drive | 12 x 3.5-inch SAS/SATA 6Gb/s,SAS/SATA 3Gb/s hard drive or2.5-inch SAS/SATA, SSD hard drive | 16 x 3.5-inch SAS/SATA 6Gb/s,SAS/SATA 3Gb/s hard drive or2.5-inch SAS/SATA, SSD hard drive |
| Note:The standard system is shipped without hard drives. For the harddrive compatibility list, please visithttp://www.qnap.com/pro_compatibility.asp | ||
| LED Indicators | Front panel: Status, fault, system over heat, fan errorRear panel: SAS link, SAS error, enclosure ID | |
| Form Factor | 2U, rackmount 3U, rackmount | |
| Dimensions | 88(H) x 439(W) x 520(D) mm3.46(H) x 17.28(W) x 20.47(D)inch | 130(H) x 442.4(W) x 528.3(D) mm5.12(H) x 17.42(W) x 20.80(D)inch |
| Weight | Net weight: 14.8 kg/32.63 lbGross weight: 21.99 kg/48.48 lb | Net weight: 18.14 kg/39.99 lbGross weight: 25.92 kg/57.14 lb |
| Sound Level | Standby: 43.3 dBIn operation: 44.1 dB(with 12 x 1TB hard drive installed) | Standby: 30.1 dBIn operation: 41.5 dB(with 16 x 1TB hard drive installed) |
| Power Consumption | Idle mode: 105WIn operation: 147W(with 12 x 500GB hard | Idle mode:199WIn operation: 289W |
| Model REXP-1200U-RP REXP-1600U-RP | ||
| drive installed) | (with 16 x WD WDCWD20EVDS 2TB hard drive installed) | |
| Temperature | 0-40°C | |
| Relative Humidity | 5-95% | |
| Power Supply | Input: 100-240V AC, 50-60Hz; Output: 600W | |
| COM port Reserved for system maintenance | ||
| Fan 3 x 6 cm smart cooling fan | ||
| Management (via NAS) | 1. Supports disk S.M.A.R.T. information2. RAID expansion enclosure identifier3. Locate RAID expansion enclosures4. Locate hard disks on RAID expansion enclosures5. Smart fan controlIn-band SAS firmware update | |
| Remark:The rackmount RAID expansion enclosure complies with ANSI/EIA-RS-310-D rack mounting standards. Before purchasing the server racks for this model, please make sure the server racks conform to the following criteria:3. Rack sized. Mounting post width: ≥ 450mme. Panel width: ≥ 500mmf. Mounting post depth: 650mm-850mm | ||
| Model REXP-1 | 200U-RP REXP-1600U-RP | |
4. The optional rack kits for the rackmount RAID expansion enclosure are only compatible with square-hole server racks. 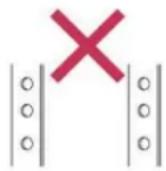 | ||
2.3. REXP-1000 Pro
| Model REXP-1000 Pro | |
| Host Interface | Two SAS 4x wide port (IN port, OUT port) |
| Hard Drive | 10 x 3.5-inch SAS/SATA 6Gb/s, SAS/SATA 3Gb/s hard drive2.5-inch SAS/SATA, SSD hard drive |
| Note:The standard system is shipped without hard drives. For the hard drive compatibility list, please visithttp://www.qnap.com/pro_compatibility.asp | |
| LED Indicators | Status, system over heat, fan error, SAS IN , SAS Out, enclosure ID |
| Form Factor Tower | |
| Dimensions | 217(H) x 327(W) x 321.2(D) mm8.56(H) x 12.8(W) x 12.65(D) inch |
| Weight | Net weigh: 14.8 kg/32.63 lbGoss weigh: 21.99 kg/48.48 lb |
| Sound Level | Standby: 24.5 dBIn operation: 34.6 dB(with 10 x 1TB hard drive installed) |
| Power Consumption | Idle mode: 63.6WIn operation: 168.92W(with 10 x 500GB hard drive installed) |
| Temperature | 0-40°C |
| Relative Humidity | 5-95% |
| Power Supply | Input: 100-240V AC, 50-60Hz Output: 350W |
| COM port Reserved for system maintenance | |
| Fan 2 x 12 cm smart cooling fan | |
| Management (via NAS) | 1. Supports disk S.M.A.R.T. information2. RAID expansion enclosure identifier3. Locate RAID expansion enclosures4. Locate hard disks on RAID expansion enclosures5. Smart fan control6. In-band SAS firmware update |
Chapter 3. RAID Expansion Enclosure Hardware Illustration

Caution: Modifying the hardware, software, or firmware of QNAP products will void the warranty. QNAP is not responsible for any form of damage or loss of data caused by users modifying QNAP products. Users should bear their own risks of all sorts of possible data loss or system instabilities due to changing hardware parts, modifying the default system firmware, or installing any unauthorized third party applications on QNAP products.
3.1. Front view

REXP-1200U-RP / REXP-1220U-RP
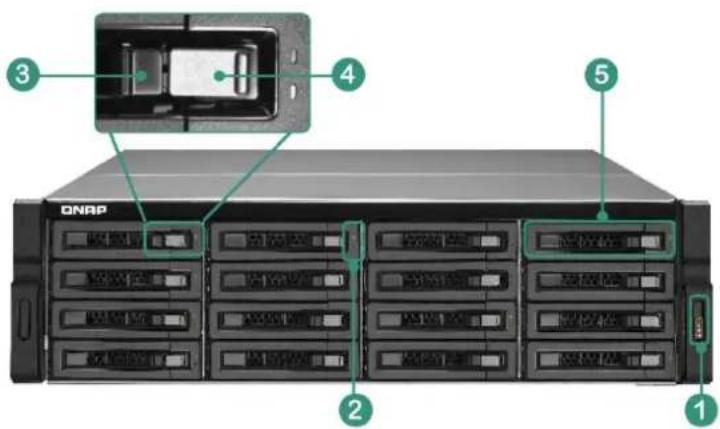
REXP-1600U-RP / REXP-1620U-RP
| 1 LED Indicators: System status, system fault, system over heat, fan error |
| 2 Hard Drive LEDs |
| 3 Tray Lock |
| 4 Release Button |
| 5 Hard Drive Tray |

Caution:
• Always turn on the RAID expansion enclosure before turning on the attached NAS.
• Always shut down the NAS before turning off the RAID expansion enclosure.
| LED Color State | Description | ||
| System Status | Green Green | The system is ready | |
| Flash green The system is starting up | |||
| Off The system is off | |||
| System Fault | Amber Amber System fault | It detected (overheat, fan error, power supply unit fails or is plugged out, etc.) | |
| Off No fault has occurred | |||
| System over Heat | Amber Amber The system | overheat | |
| Off No fault has occurred | |||
| Fan Error | Amber Amber A fan error | occurred | |
| Off No fault has occurred | |||
| Hard Drive | Red/Green | Flashes red | The disk data is being accessed and a read/write error occurred during the process |
| Red | A hard disk drive read/write error occurred | ||
| Flashes green | The disk data is being accessed | ||
| Green | The hard disk drive is ready | ||
Table 1: Description of RAID Expansion Enclosure LEDs
3.2. REXP-1220URP and REXP-1620U-RP Rear view

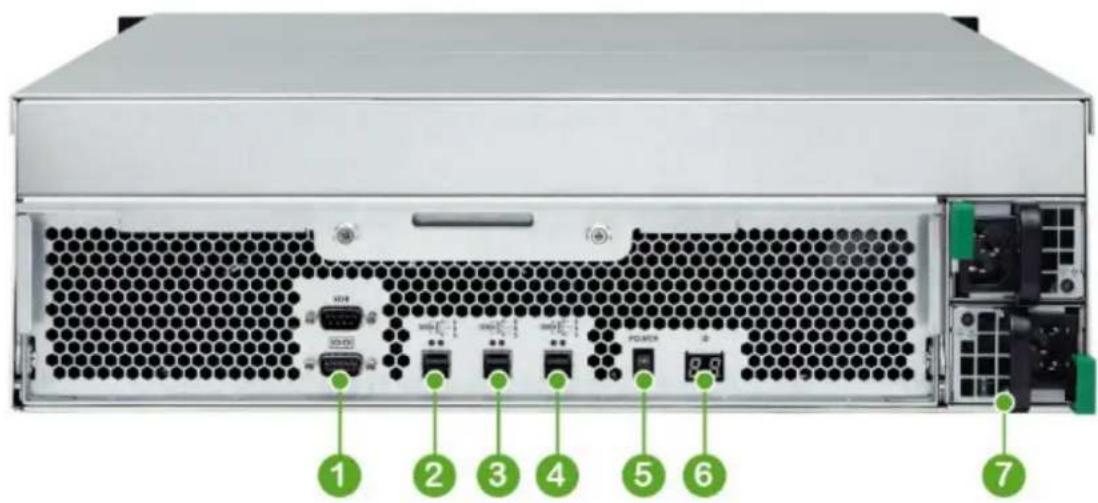
| 1 COM Port (Reserved) | |
| 2-4 | Three mini SAS ports |
| 5 Power Switch | |
| 6 Enclosure ID | |
| 7 Power Connection | |
| LED Color | State Description | ||
| Link Status | Green Green Port | rt linked | |
| Flash green Data is being transmitted | |||
| Off No link activity | |||
| Link Fault Amber | Amber Amber Port | linked but without | ut all fourlanes |
| Flash amber SAS cabling error | ||
| Off No faults have occurred |
3.3. REXP-1200U-RP and REXP-1600U-RP Rear view
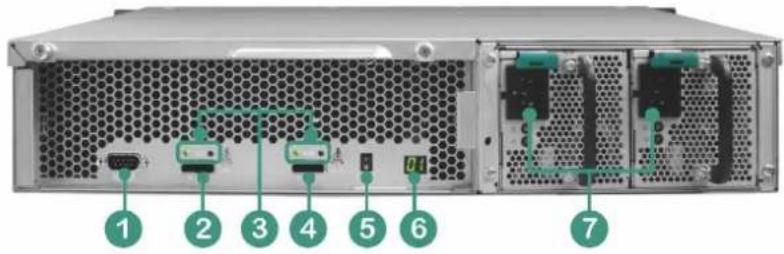
REXP-1200U-RP

REXP-1600U-RP
| 1 COM Port (Reserved) |
| 2 IN Port |
| 3 IN/OUT Port Status LED |
| 4 OUT Port |
| 5 Power Switch |
| 6 Enclosure ID |
| 7 Power Connection |
| LED Color | State Description | ||
| Link Status | Green Green Port linked | ||
| Flash green Data is being transmitted | |||
| Off No link activity | |||
| Link Fault Amber Amber Port | linked but without lanes | out all four | |
| Flash amber SAS cabling error | |||
| Off No fault has occurred | |||
Table 2: RAID Expansion Enclosure IN/OUT Port Status LEDs
3.4. REXP-1000 Pro Front view

| 1 LED Indicators: Status, fan error, system over heat , SAS IN , SAS Out |
| 2 Enclosure ID |
| 3 Hard Drive Tray |
| 4 Tray Lock |
| 5 Release Button |
| 6 Hard Drive LEDs |

Caution:
• Always turn on the RAID expansion enclosure before turning on the attached NAS.
• Always shut down the NAS before turning off the RAID expansion enclosure.
| LED Color State | Description | ||
| i System Status | Green Green | The system | is ready |
| Flash green The system is starting up | |||
| Off The system is off | |||
| Amber Amber System fault | It detected (overheat, fan error, power supply unit fails or is plugged out, etc.) | ||
| Off No fault has occurred | |||
| System over Heat | Amber | Amber | The system overheat |
| Off No fault has occurred | |||
| Fan Error | Amber Amber A fan error | occurred | |
| Off No fault has occurred | |||
| IN Port Status | Green Green | Port linked | |
| Flash green Data is being transmitted | |||
| Off No link activity | |||
| Amber Amber Port linked | but without all four lanes | ||
| Flash amber SAS cabling error | |||
| Off No fault has occurred | |||
| OUT Port Status Green Green | Port linked | ||
| Flash green Data is being transmitted | |||
| Off No link activity | |||
| Amber Amber Port linked | but without all four lanes | ||
| Flash amber SAS cabling error | |||
| Off No fault has occurred | |||
| Hard Drive Red/Green | Flashes red | The disk data is being accessed and a read/write error occurred during the process | |
| Red A hard disk drive read/write error occurred | |||
| Flashes green | The disk data is being accessed | ||
| Green | The hard disk drive is ready | ||
Table 1: Description of RAID Expansion Enclosure LEDs
3.5. REXP-1000 Pro Rear view

| 1 | Power Connection |
| 2 | Power Switch |
| 3 | K-lock |
| 4 | IN Port |
| 5 | OUT Port |
| 6 | COM Port (Reserved) |
| 7 | System Cooling Fan |
Chapter 4. Cable the System
4.1. Cabling Instructions
An example of connecting a QNAP NAS to four REXP-1200U-RP enclosures is shown below.

| 1 | Connect the QNAP NAS to the REXP-1220U-RP:If one REXP-1200U-RP enclosure is configured, connect storage expansion ports on the NAS to the expansion port of the enclosure. |
| 2 | Connect the REXP-1220U-RP to other REXP-1220U-RP:If two REXP-1220U-RP enclosures are configured, connect one of *the mini SAS ports to a port on the other REXP-1220U-RP using the external Mini SAS cable (SFF-8644).(*Note: An optional storage expansion card is required on the QNAP NAS.) |
An example of connecting a QNAP NAS to four REXP-1200U-RP enclosures is shown below.

| 1 | Connect the QNAP NAS to the REXP-1200U-RP:If two (or above) REXP-1200U-RP enclosures are configured, connect the two storage expansion ports on the NAS to two REXP-1200U-RP enclosures for maximized performance. |
| 2 | Connect the QNAP NAS to the REXP-1200U-RP:Connect the storage expansion port* on the QNAP NAS to the IN (●●) port of a REXP-1200U-RP using the external Mini SAS cable (SFF-8088).(*Note: Optional storage expansion card is required on the QNAP NAS.) |
| 3 | Connect the REXP-1200U-RP to another REXP-1200U-RP:Connect a Mini SAS cable (SFF-8088) from the OUT (◆◆) port of the REXP-1200U-RP to the IN (●●) port of another REXP-1200U-RP. |

Caution: Do not connect an OUT port (◆◆) to another OUT port (◆◆) or an IN port
(●●) to another IN port (●●).
An example of connecting a QNAP NAS to four REXP-1000 Pro enclosures is shown below.

| 1 | Connect the QNAP NAS to the REXP-1000 Pro:If two (or above) REXP-1000 Pro enclosures are configured, connect the two storage expansion ports on the NAS to two REXP-1000 Pro enclosures for maximized performance. |
| 2 | Connect the QNAP NAS to the REXP-1000 Pro:Connect the storage expansion port* on the QNAP NAS to the IN (●●) port of a REXP-1000 Pro using the external Mini SAS cable (SFF-8088).(*Note: Optional storage expansion card is required on the QNAP NAS.) |
| 3 | Connect the REXP-1000 Pro to another REXP-1000 Pro:Connect a Mini SAS cable (SFF-8088) from the OUT (◆◆) port of the REXP-1000 Pro to the IN (●●) port of another REXP-1000 Pro. |

Caution: Do not connect an OUT port (◆◆) to another OUT port (◆◆) or an IN port
(●●) to another IN port (●●).
4.2. Mini SAS Cable Removal
Follow the steps below to remove the Mini SAS cable:
- Pull up the restraining clip latch of the Mini SAS cable.
- Remove the Mini SAS cable from its restraining clip.

Chapter 5. Remove an Air Duct (Applied to REXP-1600U-RP)
Unlatch the air duct with your thumb and index finger. Pull the air duct upward to disengage it from the RAID expansion enclosure.

Chapter 6. Install/Remove a Fan Module
6.1. Install a Fan Module (Applied to
REXP-1600U-RP, REXP-1200U-RP, REXP-1620U-RP, REXP-1220U-RP)
Insert a fan module into the fan slot until the fan module is fully seated.


Warning: To avoid system overheating, replace the fan module within 3 minutes. Do
not attempt to operate the system without operational fan module(s).
6.2. Remove a Fan Module (Applied to REXP-1620U-RP, REXP-1220U-RP, REXP-1600U-RP and REXP-1200U-RP)
Remove the fan module by grasping and pulling up the fan module from the fan slot.
Chapter 7. Install Power Supply Unit (Applied to REXP-1600U-RP, REXP-1200U-RP, REXP-1620U-RP and REXP-1220U-RP)
Warning: The RAID expansion enclosure supports replacing a redundant power supply unit without turning off the enclosure when the redundant power supply mode is enabled. However, users are strongly recommended to turn OFF the RAID expansion enclosure before replacing the power supply unit to reduce the risk of electric shock.
To replace a failed power supply unit, follow the steps below:
- Turn off the RAID expansion enclosure.
- Hold the black handler and press and hold the green button firmly.

- Unplug the failed power supply.

- Plug in a new power supply.
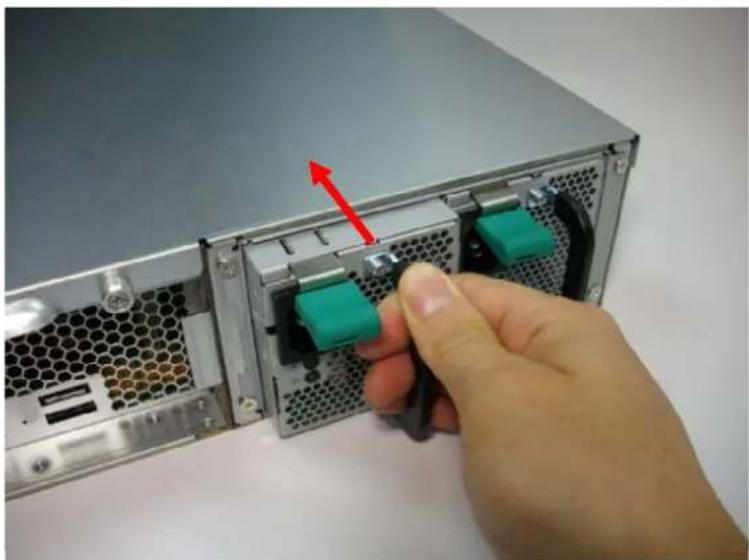
- Turn on the RAID expansion enclosure.
Technical Support
QNAP provides dedicated online support and customer service via instant messenger.
Online Support: http://helpdesk.qnap.com/
Forum: http://forum.qnap.com
Technical Support in the U.S. and Canada:
Online Support: http://helpdesk.qnap.com/
TEL: +1-909-595-2782 #3
Address: 166 University Parkway Pomona, CA 91768-4300
Service Hours: 08:00-17:00 (GMT- 08:00 Pacific Time, Monday to Friday)


- QNAP RAID EXPANSION ENCLOSURE HARDWARE USER MANUAL
- NOTE
- DISCLAIMER
- REGULATORY NOTICE
- FCC STATEMENT
- TABLE OF CONTENTS
- SAFETY WARNINGS....7
- BEFORE YOU START....9
- CHAPTER 1. PACKAGE CONTENTS....10
- CHAPTER 2. HARDWARE SPECIFICATION....13
- CHAPTER 3. RAID EXPANSION ENCLOSURE HARDWARE ILLUSTRATION .....19
- CHAPTER 4. CABLE THE SYSTEM....27
- CHAPTER 5. REMOVE AN AIR DUCT (APPLIED TO REXP-1600U-RP)......31
- CHAPTER 6. INSTALL/REMOVE A FAN MODULE ......32
- CHAPTER 7. INSTALL POWER SUPPLY UNIT (APPLIED TO REXP-1600U-RP, REXP-1200U-RP, REXP-1620U-RP AND REXP-1220U-RP) ...... 33
- TECHNICAL SUPPORT....35
- SAFETY WARNINGS
- WARNING
- BEFORE YOU START
- CHAPTER 1. PACKAGE CONTENTS
- REXP-1220U-RP AND REXP-1620U-RP
- REXP-1200U-RP AND REXP-1600U-RP
- REXP-1000 PRO
- CHAPTER 2. HARDWARE SPECIFICATION
- CHAPTER 3. RAID EXPANSION ENCLOSURE HARDWARE ILLUSTRATION
- FRONT VIEW
- CAUTION
- REXP-1220URP AND REXP-1620U-RP REAR VIEW
- REXP-1200U-RP AND REXP-1600U-RP REAR VIEW
- REXP-1000 PRO FRONT VIEW
- REXP-1000 PRO REAR VIEW
- CHAPTER 4. CABLE THE SYSTEM
- CABLING INSTRUCTIONS
- MINI SAS CABLE REMOVAL
- CHAPTER 5. REMOVE AN AIR DUCT (APPLIED TO REXP-1600U-RP)
- CHAPTER 6. INSTALL/REMOVE A FAN MODULE
- INSTALL A FAN MODULE (APPLIED TO
- REMOVE A FAN MODULE (APPLIED TO REXP-1620U-RP, REXP-1220U-RP, REXP-1600U-RP AND REXP-1200U-RP)
- CHAPTER 7. INSTALL POWER SUPPLY UNIT (APPLIED TO REXP-1600U-RP, REXP-1200U-RP, REXP-1620U-RP AND REXP-1220U-RP)
- TECHNICAL SUPPORT
- TECHNICAL SUPPORT IN THE U.S. AND CANADA
Brand : QNAP
Model : REXP-1620U-RP
Category : Disk array