
Microscope Kit - Microscope CELESTRON - Free user manual and instructions
Find the device manual for free Microscope Kit CELESTRON in PDF.


| Product Type | Compound Optical Microscope |
| Brand | Celestron |
| Model | Microscope Kit |
| Magnification | 40x, 100x, 400x (interchangeable eyepieces and objectives) |
| Illumination Type | Built-in LED, bottom illumination |
| Power Supply | 3 AA batteries (not included) or optional AC adapter |
| Dimensions | Approx. 30 cm x 20 cm x 15 cm |
| Weight | Approx. 1.2 kg |
| Material | ABS plastic with metal parts |
| Included Accessories | Blank slides, cover slips, dropper, forceps, syringe, labels |
| Main Functions | Specimen observation, coarse and fine focus adjustment, stage rotation |
| Maintenance and Cleaning | Clean lenses with a soft cloth and isopropyl alcohol; store away from dust |
| Safety | Do not look directly at the sun; use under adult supervision for children |
| Spare Parts and Repairability | Spare parts available via Celestron customer service; repair by qualified technician |
| Warranty | 2 years |
| General Information | Suitable for children from 8 years old; ideal for introducing microscopy |
Frequently Asked Questions - Microscope Kit CELESTRON
User questions about Microscope Kit CELESTRON
0 question about this device. Answer the ones you know or ask your own.
Ask a new question about this device
Download the instructions for your Microscope in PDF format for free! Find your manual Microscope Kit - CELESTRON and take your electronic device back in hand. On this page are published all the documents necessary for the use of your device. Microscope Kit by CELESTRON.
USER MANUAL Microscope Kit CELESTRON
Basic Microscope Kit

Everything you need to begin exploring the wonders of the microscopic world
[ Ages 8+ ]
INSTRUCTION MANUAL
MODEL #44124
Congratulations on your Celestron microscope purchase. Your new microscope is a precision optical instrument, made of high quality materials to ensure durability and long life. It is designed to give you a lifetime of enjoyment with a minimal amount of maintenance.
Before attempting to use your microscope, please read through the instructions to familiarize yourself with the functions and operations in order to maximize your enjoyment and usage. See the microscope diagrams to locate the parts discussed in this manual.
CAUTION!
NOTE: This kit may include chemicals that could be harmful if misused. This kit is NOT to be used by children under 8 years of age, and ALWAYS should be used under adult supervision.
SPECIFICATIONS- MODEL #44124
Stage - Plain Stage with metal clips - 66mm x 73mm (2.6 " x 2.8 ")
Focuser - Coarse focus
Magnification - 100X, 600X and 1200X
Illumination - Adjustable bottom illuminator with mirror and incandescent light bulb
Nosepiece - 3-position with click stop
Power - Runs on 2 AA batteries (not included)
WHAT'S IN THE BOX
A. 7 Blank Specimen Slides
B. 2X Hand Lens
C. Extra Illuminator Bulb
D. 7 Slide Covers




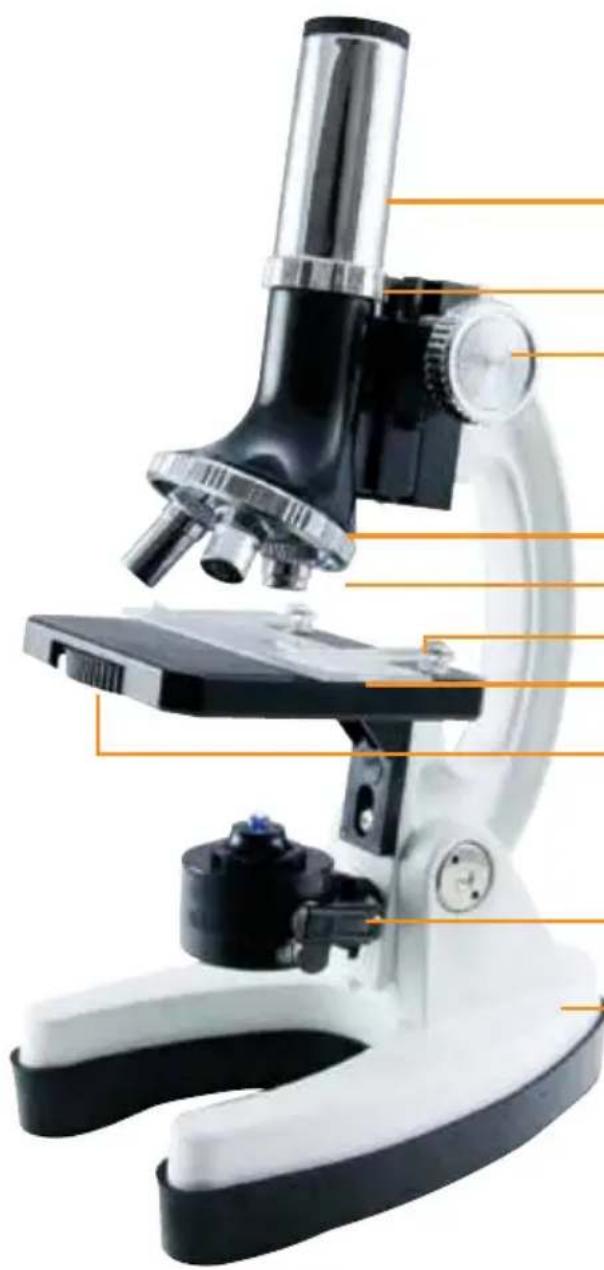
E. Eyepiece
F. Body Tube
G. Focus Knob
H. Objective Nosepiece
I. Objective Lens
J. Stage Clips
K. Stage
L. Filter Wheel
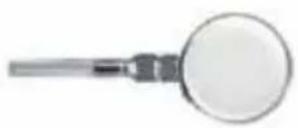
M. Mirror/Bottom Illuminator
N. Base with Battery Holder
Figure 1
GETTING STARTED
Open the box and carefully remove the microscope placing one hand around the microscope arm and one under the base. Place on a flat, sturdy surface.
- Remove the plastic dust cap from the eyepiece (E).
- Unscrew at least one screw holding in the rubber cover on the base (N) and install the two AA batteries (not included) See Fig. 2
CAUTION: Take care to install the batteries in the correct orientation. Follow battery manufacturer's precautions. Do not install batteries backwards, or mix new and used batteries. Do not mix alkaline, standard (carbon-zinc), or rechargeable batteries.
- You are now ready to use your microscope!

Figure 2
OBSERVING
- Lower the stage (K). Then rotate the objective nosepiece (H) until the shortest objective (100X) is over the stage opening as shown in Fig. 3.
- Place a specimen of your choice on a slide (A) and place the slide under the stage clips (J). Position the specimen over the Stage opening.
- Look through the eyepiece (E) and slowly turn the focus knob (G) until the specimen comes into focus.
- Adjust the mirror or bottom illuminator (M) to change the amount of light shining through the specimen to optimize the image.
- To increase the magnification, lower the stage once again and rotate the nosepiece to line up either the 600X or 1200X Objective.

Figure 3
HELPFUL TIPS
• Always make sure to lower the stage before rotating the nosepiece to change the objective power. This will ensure the objective will not be damaged by contacting the stage.
- The view through the eyepiece will appear upside down and reversed from left to right. Take this into consideration when moving the specimen slide around on the stage.
- Do not always assume that increasing magnification will produce the best image for viewing. Each time you increase the magnification, the amount of light decreases, and the section of the image you are able to view also decreases. Experiment observing with all three objectives for all specimens until you get a feel for the magnification levels.
CAUTION: When finished observing using the light bulb illuminator, be sure to flip the Illuminator over 180°, turning off the lamp ensuring a long life of the bulb.
FUN OBSERVATIONS
-
Filter Wheel: Locate the filter wheel (L) on the stage of the microscope. The filter wheel has 7 positions. There are 4 color filters (Red, Yellow, Blue and Green) and 3 aperture filters (9mm, 6mm and 3mm DIA). It's fun to see how the image will change with each filter.
-
Make Your Own Slides: It is easy to make slides! A section of almost any material can be placed on a slide and observed with a microscope. Your kit includes some of the items you will need, but you will also need to gather the following typical household items:
-
Scissors
- Petroleum jelly
• Natural uncolored toothpicks - A few small bottle caps
- A wide mouth jar with a lid
- Paper cups, or similar small disposable container
- Paper towels
- Measuring cup
- Plastic dropper
- Scalpel
- Tweezers
Setup your work area on a flat open space, like a desktop. Label 3 cups as "Clean", "Flush" and "Waste". Fill the "Flush" cup with clean water. You are now ready to find a specimen. Here is a suggestion for a simple first slide - Crystals.
TIP: Start thinking like a scientist as you perform your experiments. Observe carefully, take notes, and keep your equipment and work environment clean. Experiments work best with clean and uncontaminated equipment.
- Seeing Crystals: One of the easiest slides to make is a Crystal slide. Here's how it's done:
a. Use your measuring cup to measure one or two ounces of hot (not boiling) water and pour it into a clean cup.
b. Slowly add as much table salt to the water as will dissolve. Stir continuously while pouring.
c. Use your plastic dropper to place one or two drops of the salt solution onto a clean slide as shown in Figure 4.
d. Set the slide aside and allow it to dry completely.

Figure 4
e. Clean your tools, using the "Flush" cup.
f. When the slide is completely dried, it should be covered in a white substance. Now place the slide on the microscope stage and center it over the hole in the stage.
g. Flip the illuminator over to turn on the light bulb. Set the objective to the shortest. Look through the microscope eyepiece and focus in on the specimen. You should see crystals!
h. Experiment with different objectives and note the changes.
i. Try other salts and sugars in the same manner to create other crystal slides!
4. Creating Smears:
a. Using a scalpel, gently scrape off small shavings from the surface of a freshly cut potato.
b. Smear the shavings onto a clean slide as shown in Figure 5.
c. This creates a very thin specimen that is ready to view under the microscope.

Figure 5
- Preparing a Mount: Preparing a mount refers to larger objects like the petal of a plant or an ant leg.
a. Dip your scalpel in some clean water and make a smear across a clean slide.
b. Use your tweezers to place a portion of an insect wing, or other part, on the slide.
c. Attach a cover slide (D) over the specimen and place the slide onto the microscope stage, align and focus.
6. Life Under Glass:
a. Fill the wide mouthed jar with fresh water.
b. Drop a handful of grass and a pinch or two of dirt into the water.
c. Put the lid on the jar and place it in an area that will get moderate sunlight.
d. Let it stand for 3-4 days.
e. After 5 days, it is time to examine the water.
f. Make a specimen slide by using a clean slide and petroleum jelly.
g. Use a toothpick to make a ring with the petroleum jelly on the slide surface.
h. The ring should be smaller than a cover slip and half as thick as the slide thickness.
i. Put a drop of the jar water inside the ring.
j. Using the lowest power on the microscope (shortest objective), observe the specimen.
k. Take note of any microbial movement in the water.
I. Have fun and write down your observations.
CARING FOR YOUR MICROSCOPE: Your microscope is a precision optical instrument and when treated with care, should provide years of use. Here are a few tips to keep your microscope in top shape:
• Always carry the microscope with two hands.
- Always remove slides from the stage before putting the microscope away.
- Cover the microscope or store it back in the box when not in use.
- Use lens cleaning tissue ONLY when cleaning the lenses.
- Never allow the objective lenses to touch the slide or the stage.
- Remove the batteries before storing the microscope for extended periods of time (30 days or longer).
CE FC
FCC Statement
This equipment has been tested and found to comply with the limits for a Class B digital device, pursuant to part 15 of the FCC Rules. These limits are designed to provide reasonable protection against harmful interference in a residential installation. This equipment generates, uses, and can radiate radio frequency energy and, if not installed and used in accordance with the instructions, may cause harmful interference to radio communications. However, there is no guarantee that interference will not occur in a particular installation. If this equipment does cause harmful interference to radio or television reception, which can be determined by turning the equipment off and on, the user is encouraged to try to correct the interference by one or more of the following measures:
• Reorient or relocate the receiving antenna.
- Increase the separation between the equipment and receiver.
- Connect the equipment into an outlet on a circuit different from that to which the receiver is connected.
- Consult the dealer or an experienced radio/TV technician for help.
WARNING: CHOKING HAZARD. Small Parts. Not for children under 8 years.

CELESTRON®

CELESTRON
kds
Alimentation - 2 piles AA (non incluses)
CONTENU DE LA BOÎTE


E. Oculaire
Figure 2
OBSERVER
Figure 3
Figure 4
Figure 5


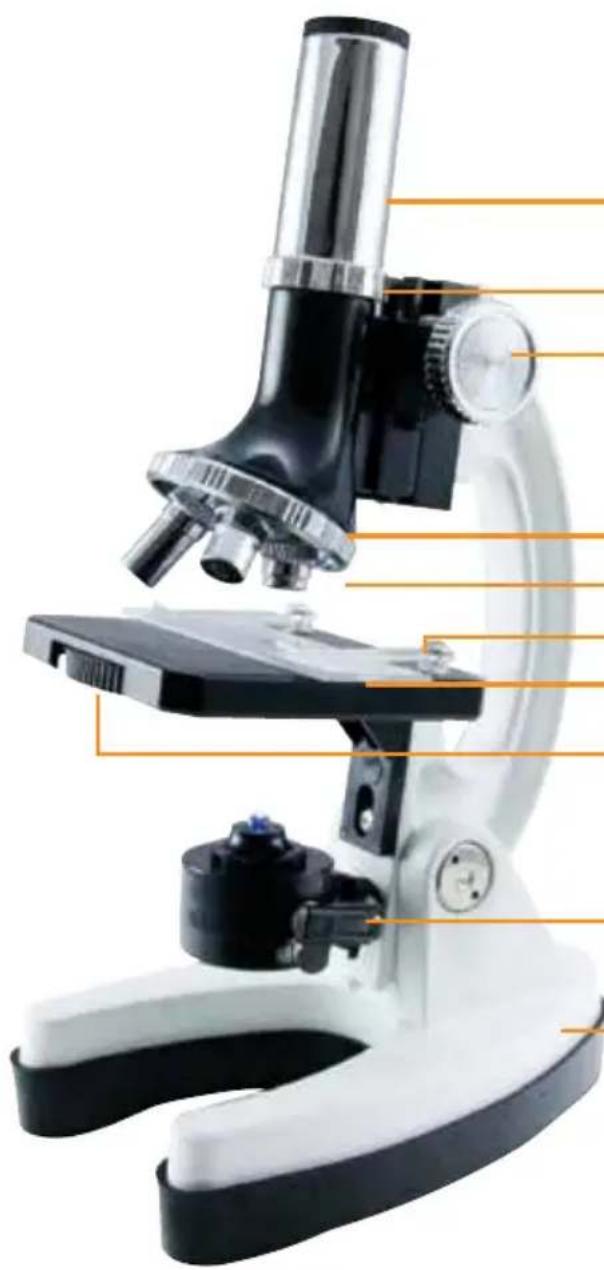
E. Okular
F. Mikroskoptubus
G. Fokussierknopf
H. Objektivrevolver
I. Objektivlinse
J. Tischklammern
K. Objekttisch
L. Filterrad
Abbildung 2
BEOBACHTEN
Abbildung 3
NÜTZLICHE TIPPS
Abbildung 4
Abbildung 5


E. Oculare
F. Corpo del tubo
Figura 2
OSSERVAZIONE
Figura 3
SUGGERIMENTI UTILI
Figura 4
Figura 5


E. Ocular
F. Tubo del chasis
G. Mando de enfoque
Figura 2
OBSERVACIÓN
Figura 3
Figura 4
Figura 5


- BASIC MICROSCOPE KIT
- CAUTION
- SPECIFICATIONS- MODEL #44124
- WHAT'S IN THE BOX
- GETTING STARTED
- OBSERVING
- HELPFUL TIPS
- FUN OBSERVATIONS
- CREATING SMEARS
- LIFE UNDER GLASS
- CE FC
- FCC STATEMENT
- CELESTRON®
- CELESTRON
- KDS
- CONTENU DE LA BOÎTE
- OBSERVER
- BEOBACHTEN
- NÜTZLICHE TIPPS
- OSSERVAZIONE
- SUGGERIMENTI UTILI
- OBSERVACIÓN
Brand : CELESTRON
Model : Microscope Kit
Category : Microscope