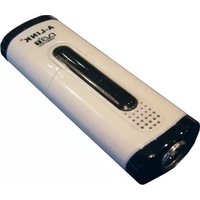
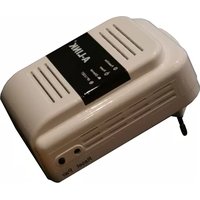
DVB-T USB TV dongle - TV receiver A-link - Free user manual and instructions
Find the device manual for free DVB-T USB TV dongle A-link in PDF.


| Product Type | USB TV Receiver (DVB-T) |
| Brand | A-link |
| Model | DVB-T USB TV Dongle |
| Dimensions (approx.) | 70 × 30 × 10 mm |
| Weight | 30 g |
| Power Supply | USB bus-powered (5V, 500mA) |
| Connector | USB 2.0 Type-A |
| TV Standard | DVB-T (Digital Video Broadcasting – Terrestrial) |
| Frequency Range | VHF III (174–230 MHz), UHF IV/V (470–862 MHz) |
| Bandwidth | 6, 7, 8 MHz |
| Demodulation | COFDM (Coded Orthogonal Frequency Division Multiplexing) |
| Antenna Input | MCX connector (includes MCX to PAL adapter) |
| Operating System Compatibility | Windows XP/Vista/7/8/10, Linux (kernel 2.6+), macOS 10.4+ |
| Included Software | TV tuner application, driver CD |
| Main Functions | Watch and record digital terrestrial TV on PC, pause live TV, electronic program guide (EPG), teletext |
| Care and Cleaning | Unplug from USB; wipe with dry cloth; avoid moisture and extreme temperatures |
| Safety Precautions | Use only with USB 2.0/3.0 ports; do not open or modify; keep away from liquids |
| Spare Parts / Repairability | No user-serviceable parts; contact manufacturer for repairs |
| In the Box | USB dongle, remote control, mini antenna, driver CD, quick start guide |
| General Information | Compact USB TV receiver for portable and desktop use; requires free USB port and TV antenna connection |
Frequently Asked Questions - DVB-T USB TV dongle A-link
User questions about DVB-T USB TV dongle A-link
0 question about this device. Answer the ones you know or ask your own.
Ask a new question about this device
Download the instructions for your TV receiver in PDF format for free! Find your manual DVB-T USB TV dongle - A-link and take your electronic device back in hand. On this page are published all the documents necessary for the use of your device. DVB-T USB TV dongle by A-link.
USER MANUAL DVB-T USB TV dongle A-link
DVB-T USB2.0 Receiver
User's Manual
DVB-T USB2.0 Receiver User's Manual
CE Mark Warning
This is a Class B product. In a domestic environment, this product may cause radio interference, in which case the user may be required to take adequate measures.
Copyright
2005 All Rights Reserved.
No part of this document can be copied or reproduced in any form without written consent from the company.
Trademarks
All trade names and trademarks are the properties of their respective companies.
Revision History
Revision
History
Date
V1.1
First release
November. 2006
Trademark of the DVB Digital Video Broadcasting Project (1991 to 1996)
Contents
1. Introduction......4
1.1 System Requirements....4
1.2 Features....4
1.3 Specification .... 5
1.4 Package Contents ....5
2.1 Connecting USB Port 6
2.2 Connecting Terrestrial Antenna 6
2.3 Remote Controller ....7
3. Software Device Driver & Application Utility Installation ..... 8
3.1 Install Microsoft DirectX9....9
3.2 Install Windows Driver (Windows 2000, XP, and MCE)....13
3.3 Install Windows Media Player 9....16
3.4 Install ArcSoft TotalMedia Software....19
4. Launching ArcSoft TotalMedia Application 24
4.1 Launch TotalMedia Monitor....24
4.2 Enable TotalMedia Monitor icon on the Tray bar....25
4.3 Main Monitor 26
4.4 Floating Toolbar 27
4.5 TV....28
4.5.1 Search TV channels 28
4.5.2 Channel Preview 32
4.5.3 Full Screen.... 34
4.5.4 Favorite Channel List.... 34
4.5.5 EPG 35
4.5.6 Channels....36
4.5.7 Recorded TV 37
4.5.8 Scheduling.... 38
4.5.9 TV Settings 40
4.6 Photo 45
4.6.1 Edit 45
4.6.2 Print.... 47
4.6.3 Slide Show Settings.... 48
4.7 Music 49
4.7.1 My Playlists.... 49
4.7.2 Ripping Music CDs 53
4.8 Video....54
4.8.1 Playing Movies – Previewing, Renaming, and Deleting...... 54
4.8.2 Capturing Video 55
4.9 Setup....55
4.9.1 General....56
4.9.2 TV 58
4.9.3 Video 59
4.9.4 Pictures....60
4.9.5 Music....61
1. Introduction
This device, DVB-T Compliant (ETS 300 744), is a USB 2.0 interfaced Digital TV Receiver that offers a complete and cost effective solution for Digital TV broadcasting. The DVB-T Receiver uses advanced chipset solution that takes advantage of the USB-based system's high bandwidth and inherent multimedia capability to turn your PC/Notebook into a high definition TV entertainment center. With the DVB-T Receiver, you not only can watch free-to-air digital terrestrial TV on your PC/Notebook but also can record real time digital TV programs directly to your PC's/Notebook's hard disk in MPEG-2 format. You also can pause while watching TV program and continue from where you left with Time-Shifting function, and will never miss a scene again.
This product is made in ISO9001 approved factory and complies with CE approval.
1.1 System Requirements
• Pentium 4 compatible processor 1.2GHz or higher (2.0GHz recommended)
• Minimum 256MB RAM or above (512MB recommended)
• VGA card with minimum 32MB memory
• AC97 compatible sound card
• 1 GB free HD space
• CD-ROM drive (For software installation)
• One available USB2.0 port
• Microsoft DirectX 9 or above
• Windows 2000 (SP4) / Windows XP (SP2) / MCE
• Windows Media Player 9 or above
1.2 Features
• Compliant with DVB-T Standard (ETS 300 744)
• Compliant with USB Specification Rev2.0
• Supports Real Time Digital Video Recording (MPEG-2 compression)
• Supports HDTV quality (requires P4 3.0GHz or higher CPU, 512MB RAM or above)
• Supports Schedule Recording
• Supports Time-Shifting
• Supports EPG (where available)
• Supports Teletext (where available)
• Supports Snap Shot in JPEG format.
• Supports multi-channel preview
• Supports channel auto scan
• Supports portable receiver
• Supports Subtitle
- Multiple language (English, German, French, Italian, Spanish, Portuguese, Traditional Chinese and Simplified Chinese).
- Software upgradeable
1.3 Specification
• Standard : DVB-T (ETS 300 744)
- Interface: USB V.2.0
- Connectors :
1 VHF/UHF connector (MCX type)
1 USB Connector (B type)
• TV Tuner : 75 Ohm (UHF/VHF) TV Antenna
• Receiving Frequency : 151-858 MHz
• Bandwidth : 6, 7, 8 MHz
• Code Rate : 1/2, 2/3, 3/4, 4/5, 5/6 and 7/8
- Dimensions (app.) : 88mm (length) x 29.5mm (wide) x 15.80mm (height)
• Net Weight (app.) : 22.4g
• Operating Temperature : 0°C \~ 65°C
• Humidity : 5 % \~ 95 % (non-condensing)
• Storage Temperature : -20°C \~ 80°C
• Supported OS : Windows 2000 / XP / MCE
- Regulations : CE
1.4 Package Contents
• DVB-T USB Receiver
- Installation CD
• Installation Guide
- Remote Control
• DVB-T TV Antenna
Note:
• If any of above items is missing or damaged, please contact your local dealer immediately.
- For Time-Shifting, a Pentium IV 2.0GHz processor or higher is required.
2. Hardware Installation
This chapter explains how to install DVB-T hardware with your PC or Notebook.
Please follow the procedures as described below
2.1 Connecting USB Port
Connect USB connector of the DVB-T Receiver to the USB port of your computer or notebook.
2.2 Connecting Terrestrial Antenna
Connect supplied DVB-T antenna to the VHF/UHF port on the backside of the DVB-T Receiver with supplied Adapter (MCX to IEC).

Note:
(1) If you install the DVB-T Receiver with Notebook, please make sure the "Power Saving" function is turned OFF. (The "Power Saving" function will lower down the CPU performance and may effect the DVB-T Receiver's operation).
(2) Be sure to connect the antenna to the DVB-T Receiver and adjust it to a better reception angle and location every time you play with the Receiver.
2.3 Remote Controller
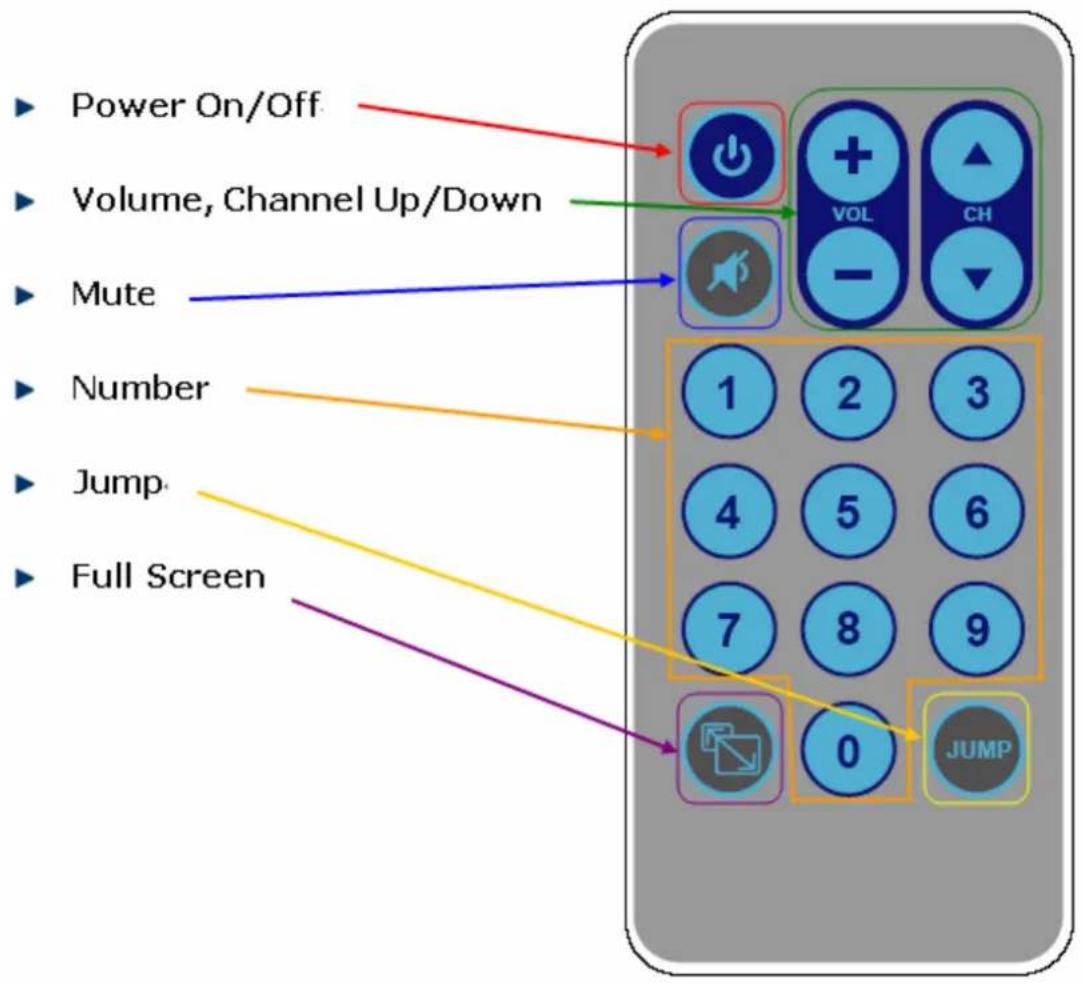
(Figure 1: The Remote Control Function)
3. Software Device Driver & Application Utility Installation
This chapter describes how to install the Device Driver and Software Utilities.
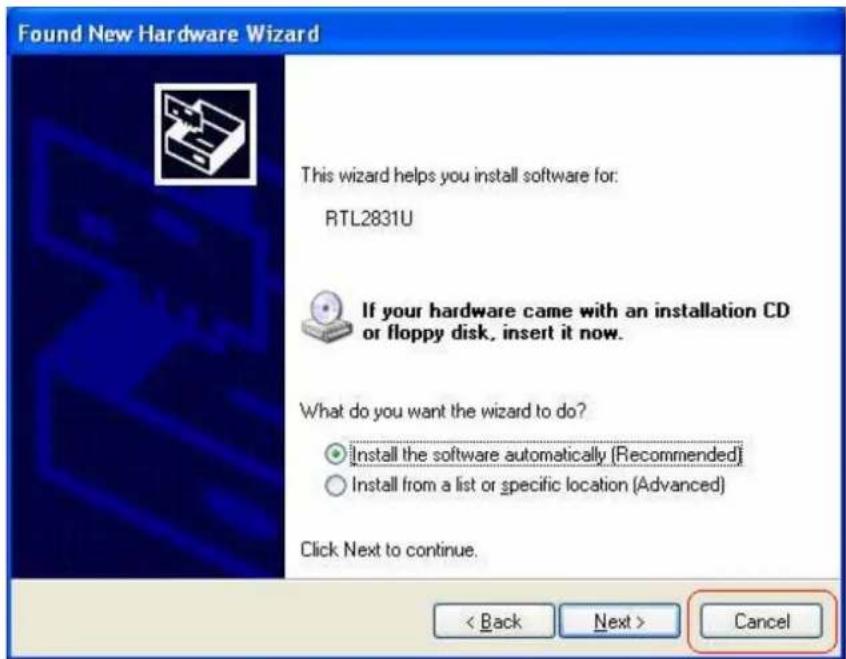
1) After installing the DVB-T Receiver in your PC or Notebook, the system will find a new hardware device and Windows of "Found New Hardware Wizard" will appear. Please click "Cancel" to exit the Wizard.

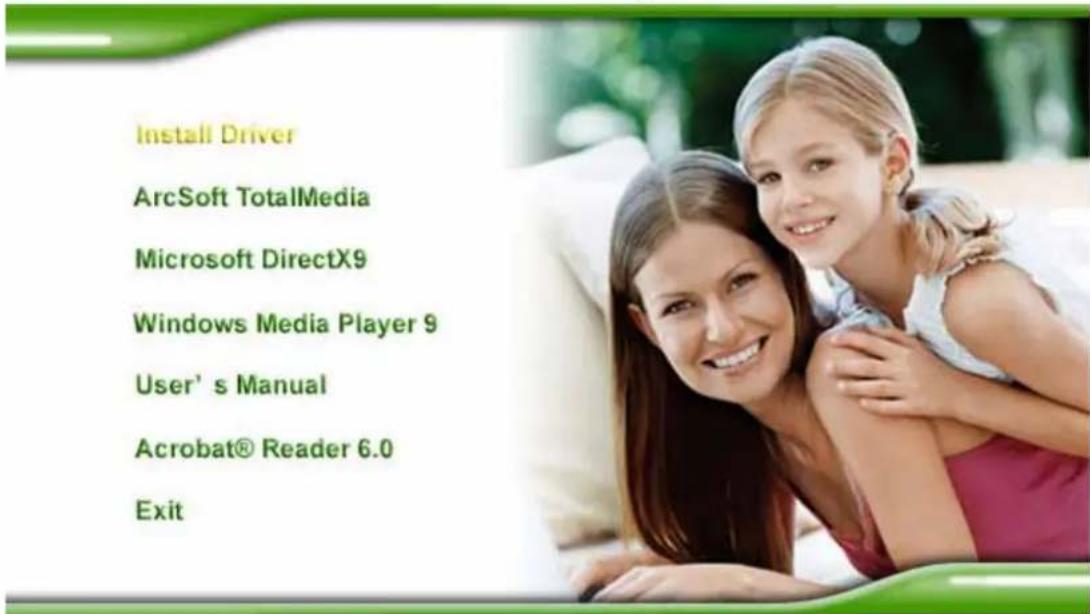
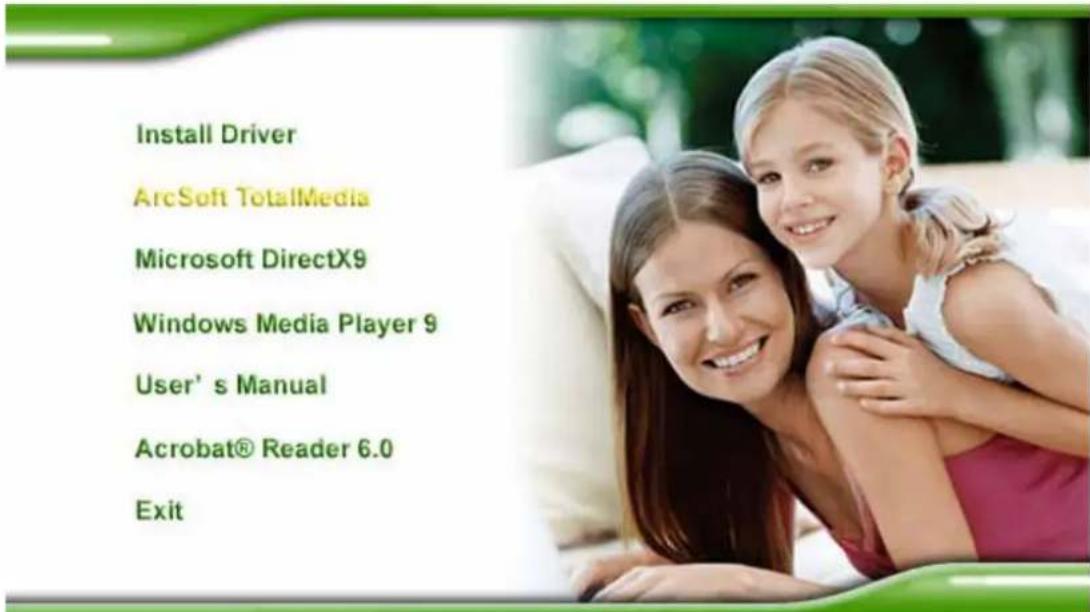
2) Please insert the Installation CD into your CD drive, the CD will auto-run and show the main installation screen as below:
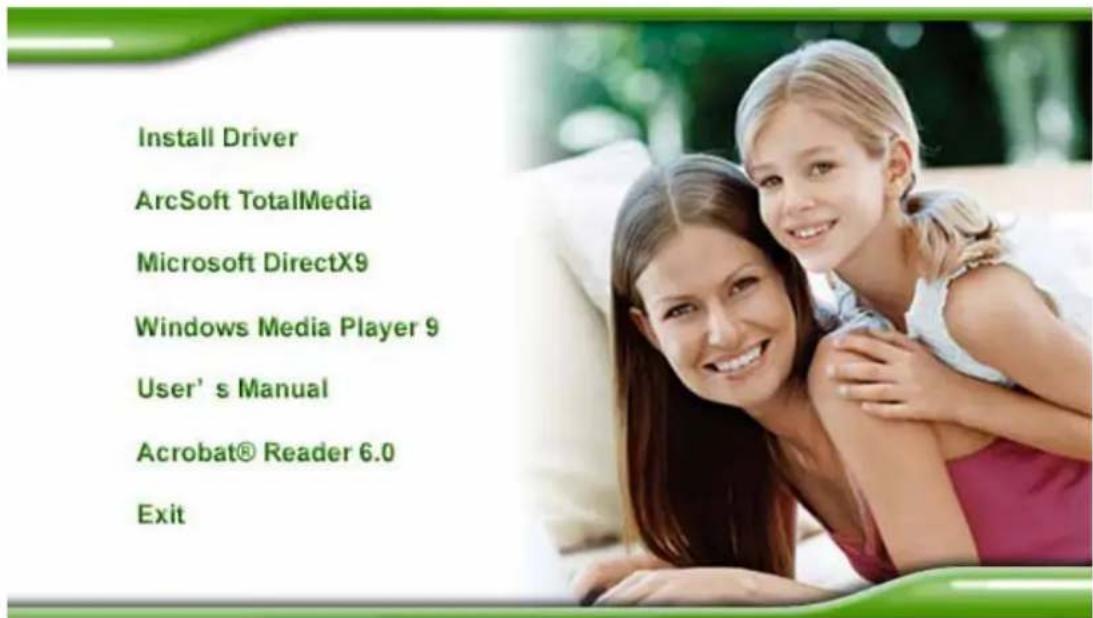
Install Driver: Click Install Driver to start device driver installation process.
ArcSoft TotalMedia: Click this option to install ArcSoft TotalMedia software.
Microsoft DirectX9: Click this option to install DirectX 9 utility.
Windows Media Player 9: Click this option to install Media Player 9 software.
User's Manual: Click this option to read user's manual and specification
Acrobat® Reader 6.0: Click this option to install Acrobat Reader
Attention: It is highly recommended to install Microsoft DirectX9 &
Windows Media Play 9 IN THE BEGINNING if your system hasn't
h a d those components yet.
3.1 Install Microsoft DirectX9
Before installing device driver, it is necessary to install DirectX 9 or higher for your Operating System. If your system already has DirectX 9 or higher version, you can skip this part of installation and go to 3.2 Install Windows Driver for device driver installation.
Step 1: Click "Microsoft DirectX9" to start installing DirectX9.
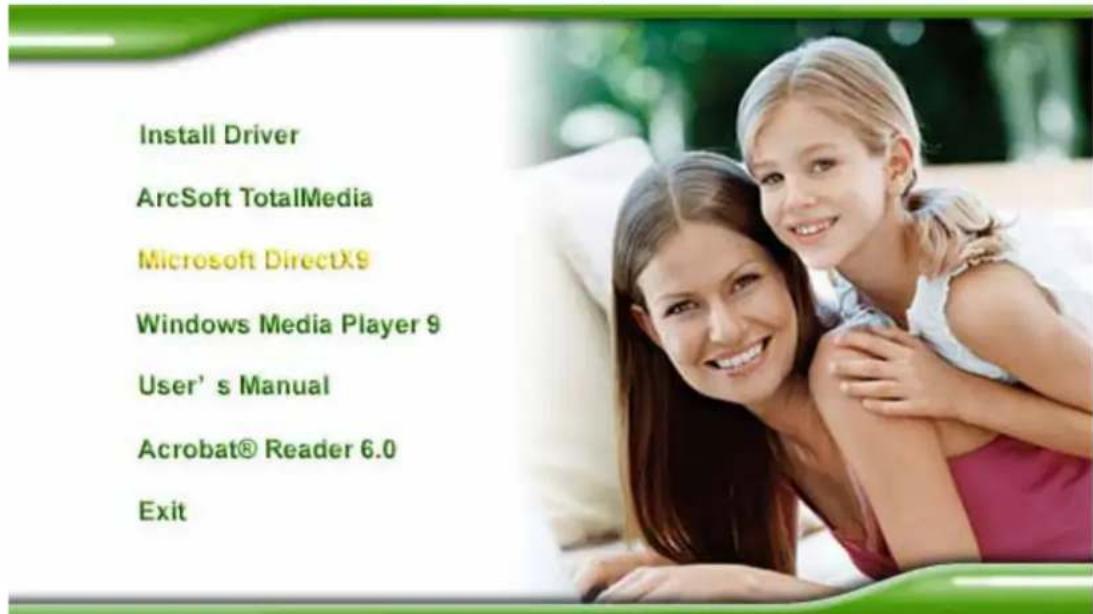
Step 2: In "Installing Microsoft® DirectX®" window, select "I accept the agreement", and then click "Next" to continue.

Step 3: Click "Next" to continue installation.
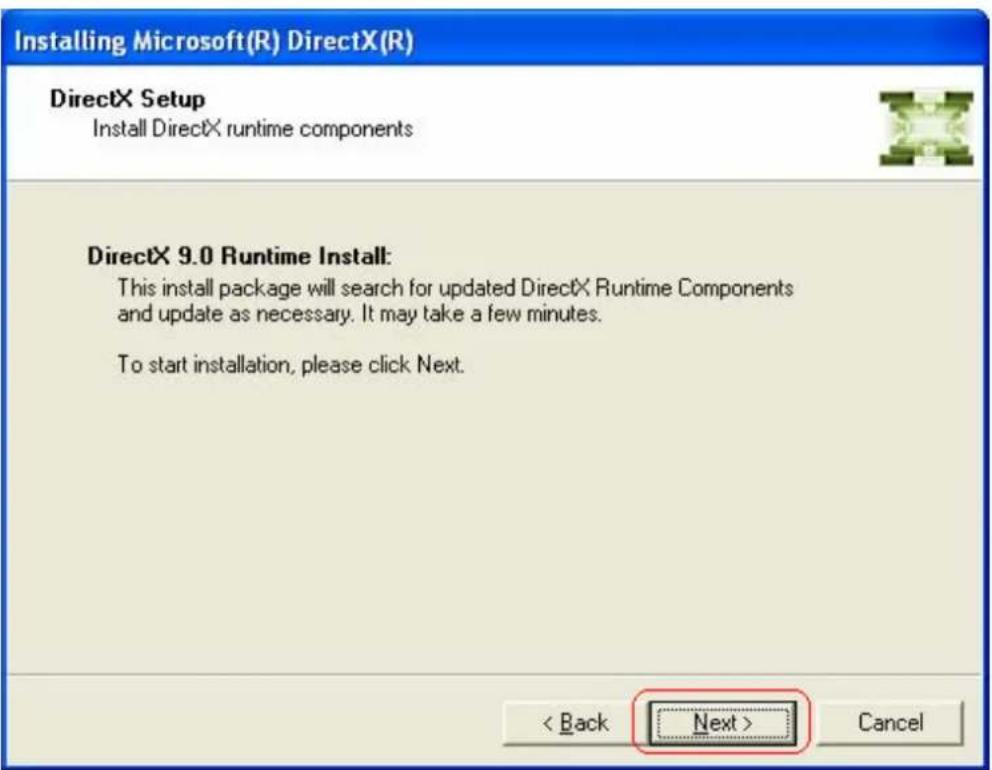
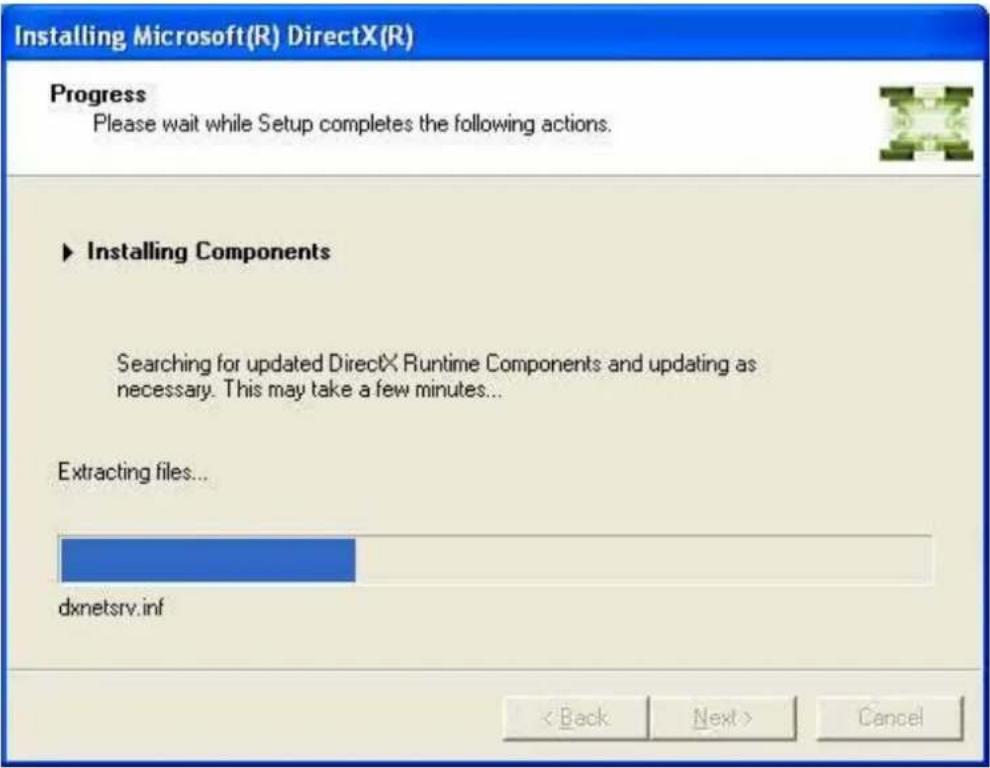
Step 4: Waiting for the operating system finishes installing DirectX 9 components.
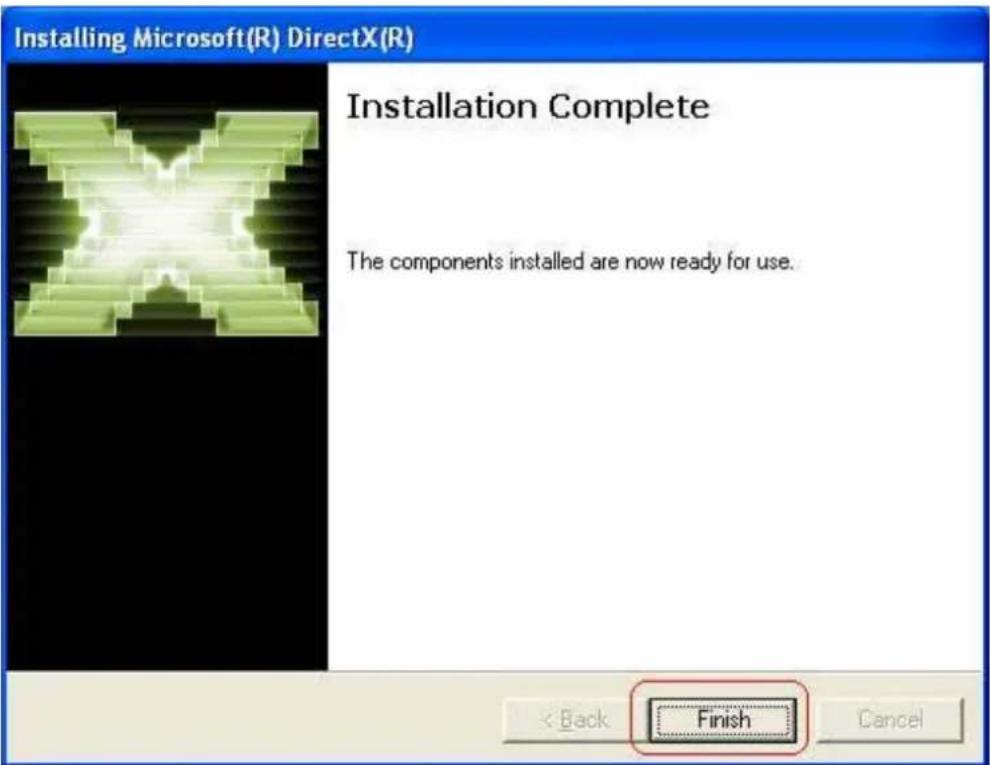
Note: If your system had already been installed DirectX9 or higher version before, the "Installation Complete" window below will appear. Click "Finish" and the components are ready to use. Then, please go to 3.2 "Install Windows Driver" for device driver installation.
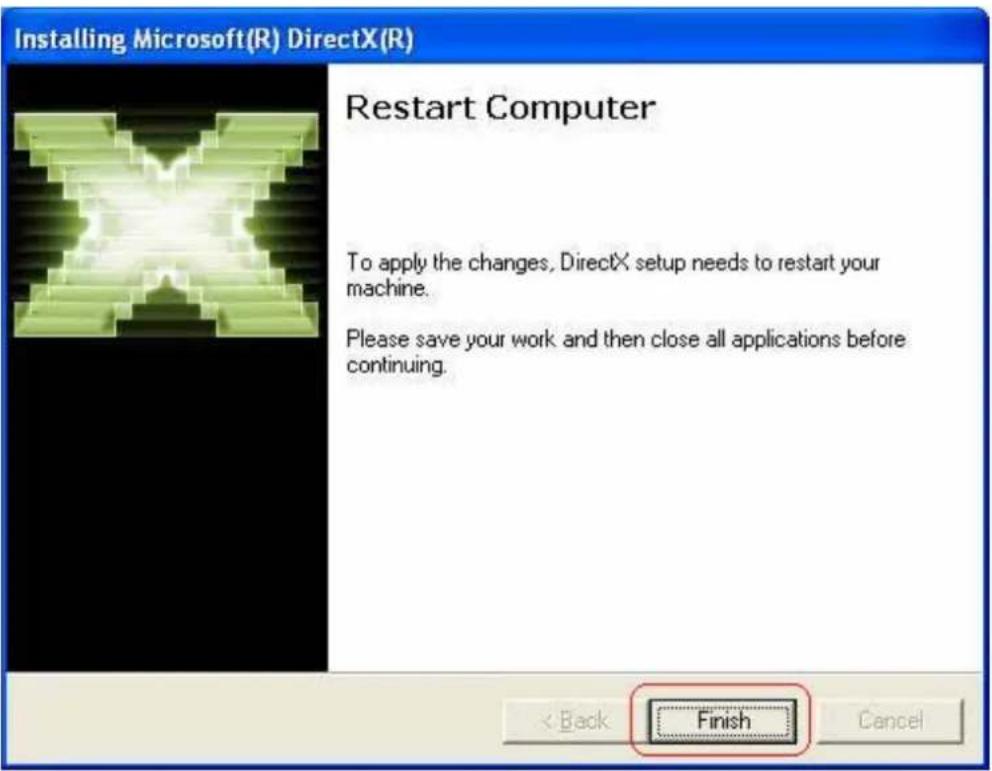
Step 5: After operating system completes DirectX9 installation, the "Restart Computer" window below will appear. Click "Finish" to restart your system.
Step 6: Once the computer is rebooted, your system will find the DTV hardware device which are not installed yet. When the below Wizard window is shown, please click "Cancel" to continue.
After you finish those steps, please run the Installation CD again and click "Install Driver" to install the Device Drivers. (Please refer to the next section "3.2 Install Driver")
3.2 Install Windows Driver (Windows 2000, XP, and MCE)
Attention: Your Operating System MUST has DirectX9 or higher version before you install the driver. If your system is not installed yet, please refer to "3.1 Install DirectX9" and begin the installation.
Step 1: Click "Install Driver" from the manual that appears to install the device driver.
Step 2: The Welcome wizard below will appear. Click "Next" to continue.

Step 3: Please wait while the Wizard prepares the setup.

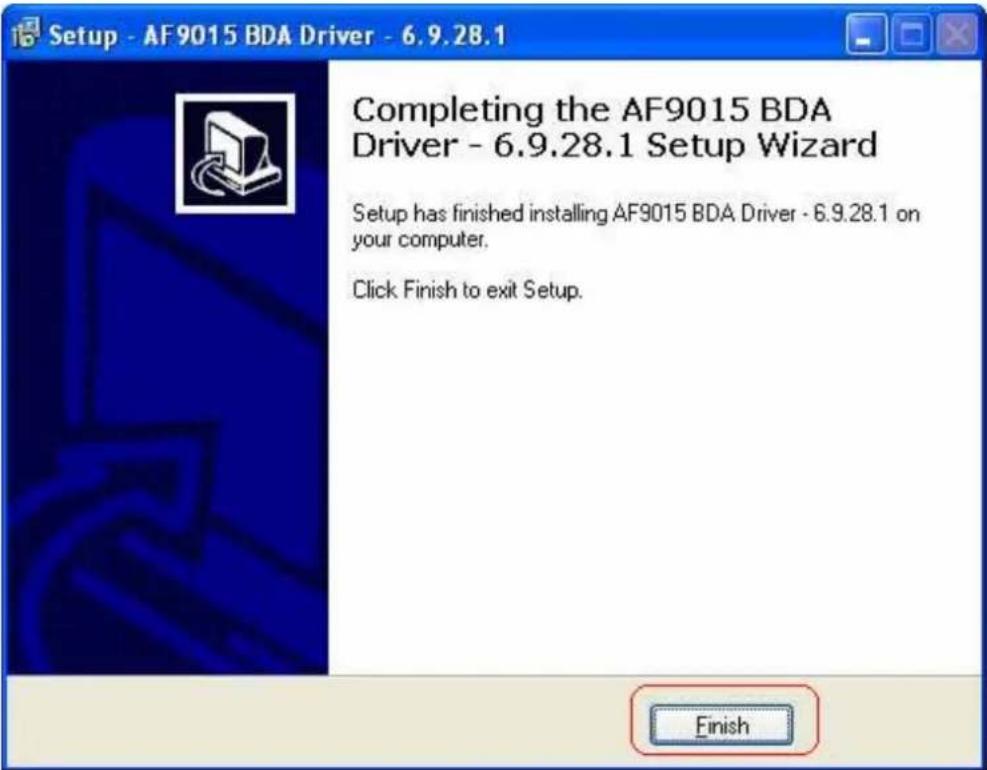
Step 4: After system completes the device driver installation, click "Finish" to exit the wizard.
Step5: To check if the driver is properly installed:
[For Windows 2000]
Click Start → Settings → Control Panel → System → "Hardware" tab → choose
"Device Manager"

[For Windows XP]
Click Start → Settings → Control Panel → System → "Hardware" tab → choose "Device Manager".
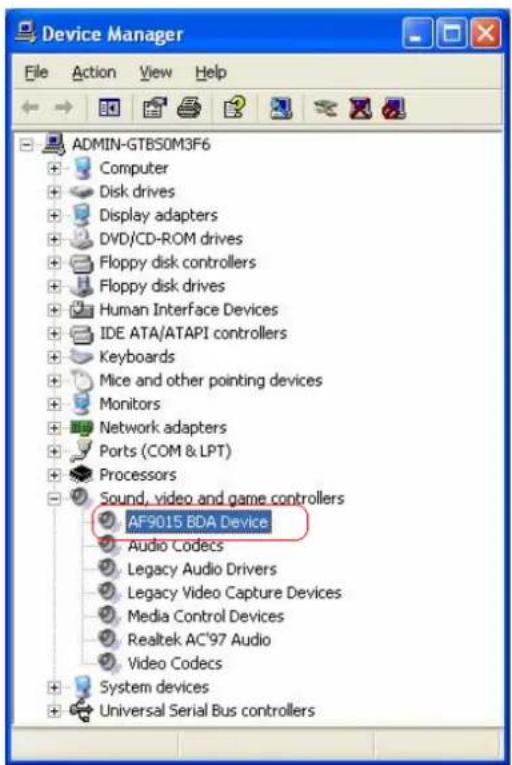
[For Windows XP - MCE]
Click Start → Settings → Control Panel → System → "Hardware" tab → choose "Device Manager".

3.3 Install Windows Media Player 9
Before installing ArcSoft TotalMedia application program, it is necessary to install Media Player 9 or higher for your Operating System. If your system already has Media Player 9, you can skip this part of installation and go to 3.4 Install ArcSoft TotalMedia software for ArcSoft TotalMedia software installation.
Step 1: Click "Windows Media Player 9" button from setup program of the installation CD.

Step 2: Select the language version which you want to install and click "OK" to continue.
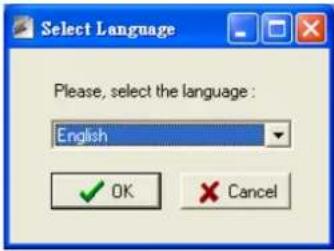
Step 3: Click "I Accept" to continue the next step.

Step 4: Please wait for a few seconds for Installing.

Step 5: Click "Next" to continue.
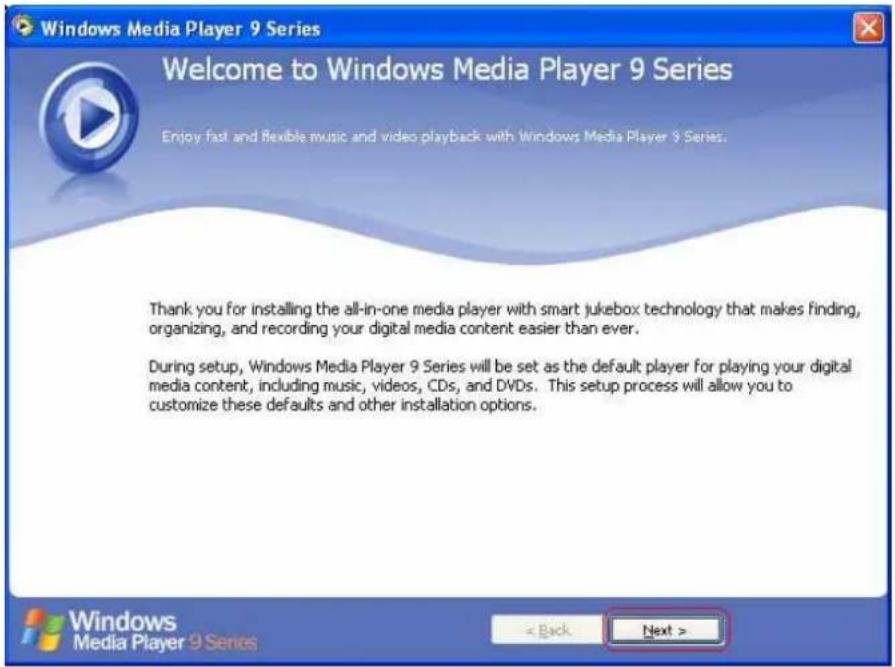
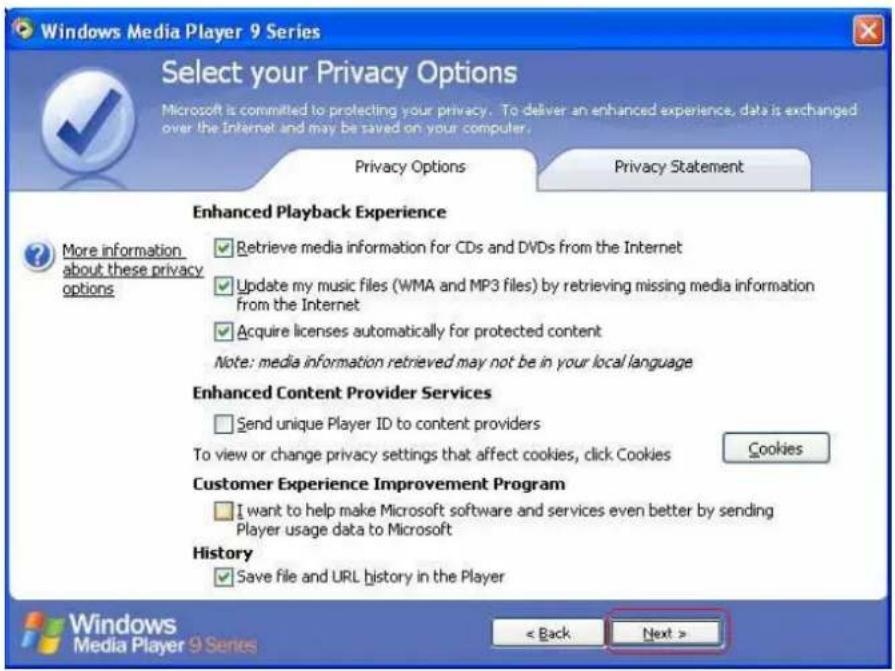
Step 6: Select your Privacy Options in this step and click "Next" to continue.
Step 7: Configure your desktop and Windows Media Player 9 Series default settings, and then click "Finish" to exit the wizard.

3.4 Install ArcSoft TotalMedia Software
Attention: To execute TotalMedia application, your system must has Media Player 9.0 or higher version. If your system doesn't have Media Player 9.0 or higher version, please refer to "3.3 Install Windows Media Player 9" section and install Media Player 9 to your computer.
Step 1: Run the Installation CD and click "ArcSoft TotalMedia" for ArcSoft TotalMedia software installation.
Step 2: Select the languages for this installation from the choices below, and then click "OK" to next step.

Step 3: The Welcome wizard below will appear. Click "Next" to continue.

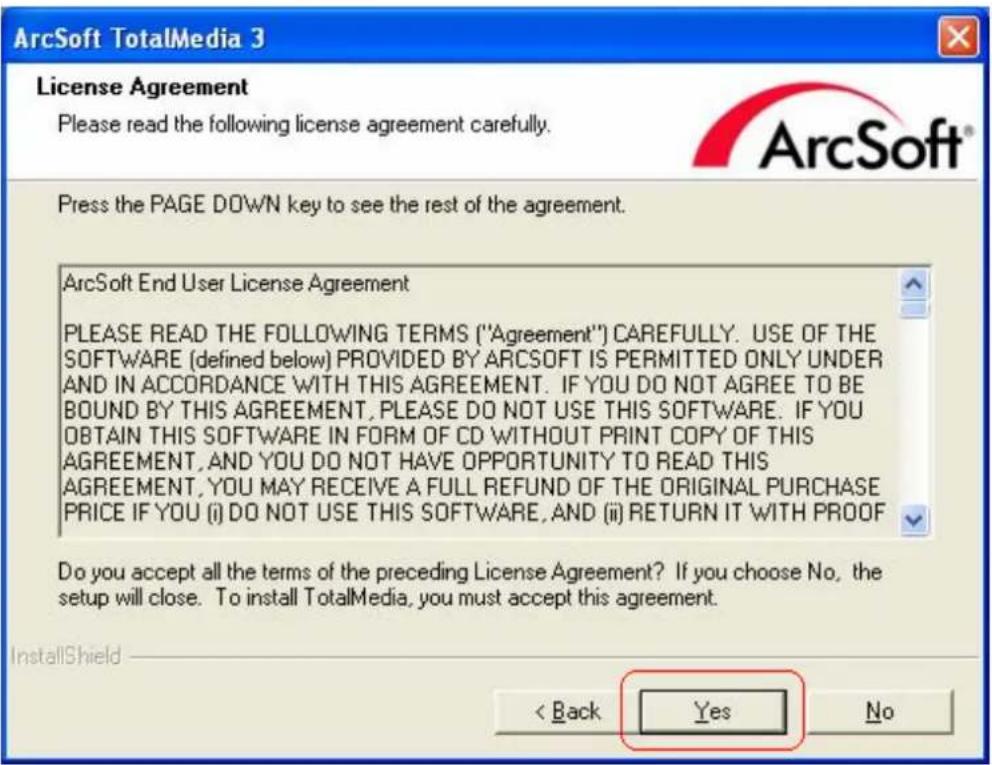
Step 4: Please read the following license agreement carefully. To install TotalMedia, you must accept this agreement and click "Yes".
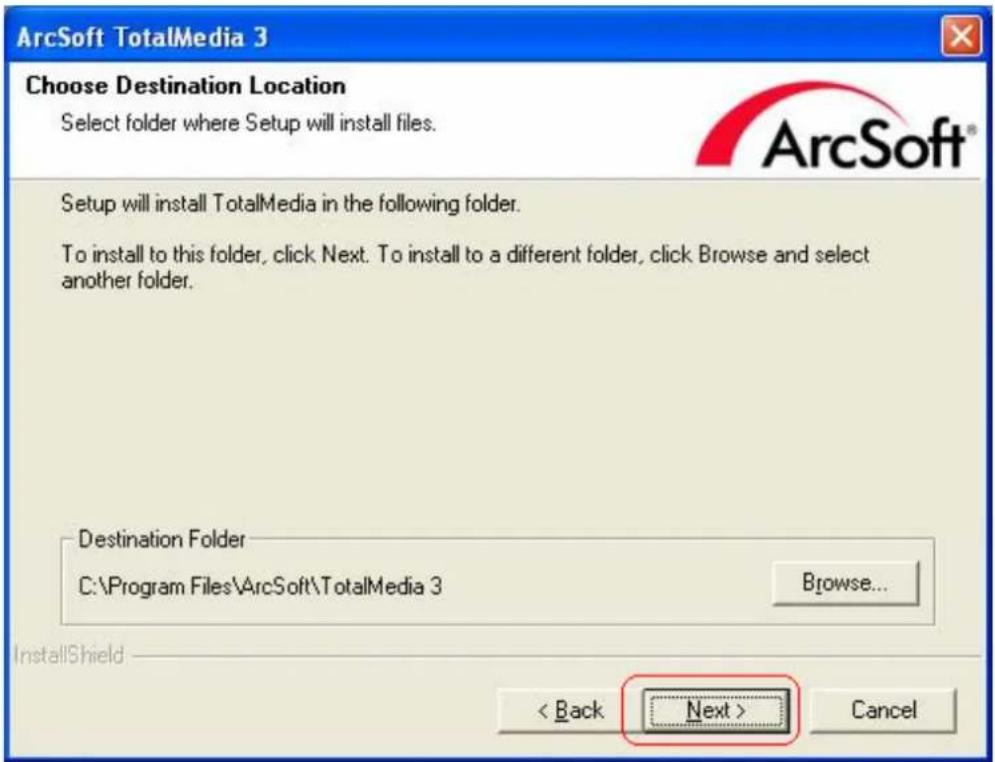
Step 5: Select folder where Setup will install files, and then click "Next".
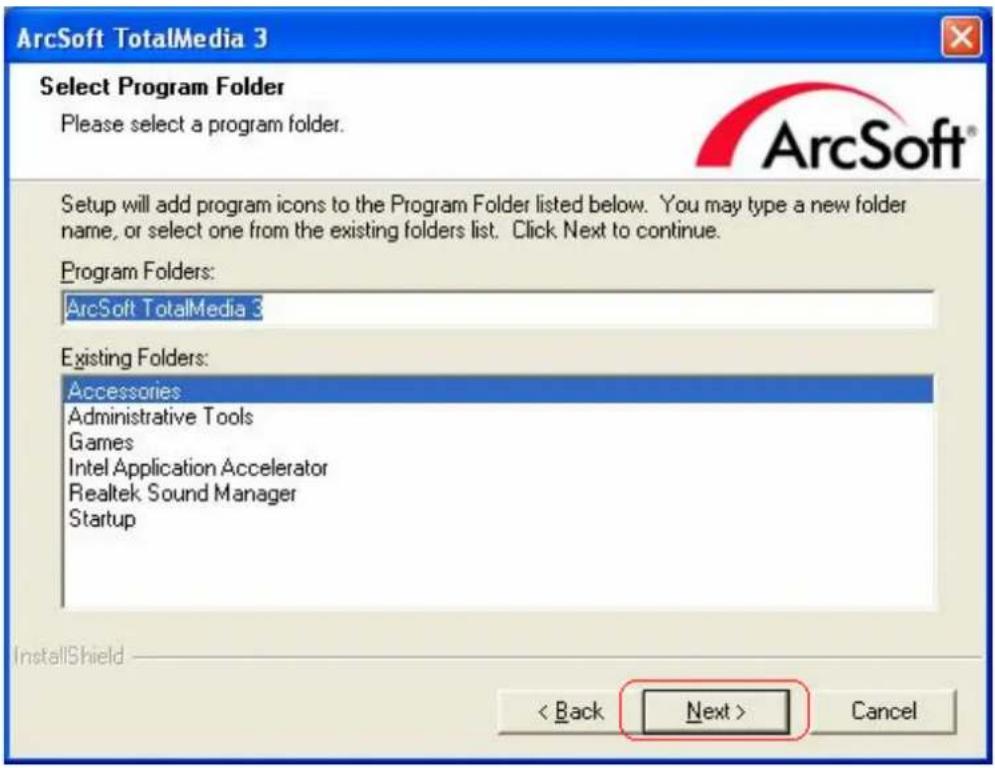
Step 6: Select Program Folder and click "Next" to continue.
Step 7: Please wait for while for setup procedure.

Step 8: After Wizard has successfully installed TotalMedia, click "Finish" to exit the Wizard.

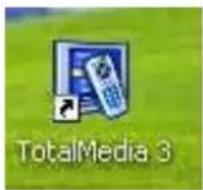
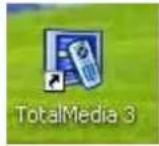
Step 9: There will be 1 desktop icon shown after the installation:
4. Launching ArcSoft TotalMedia Application
ArcSoft TotalMedia is an all-in-one multimedia application that allows you to access and work with digital photo, home video, recorded TV programs, and your digital music library directly from your TV or home computer.
This TotalMedia is divided into the main sections as TV, Photo, Music, Video, and Setup. Note that some versions of TotalMedia may not contain all sections listed on the Help file which depending on the hardware configuration, and the specific version of TotalMedia installed.
4.1 Launch TotalMedia Monitor
There are three methods to lunch your TotalMedia Monitor:
(1) Double-click Desktop Icon "TotalMedia 3"
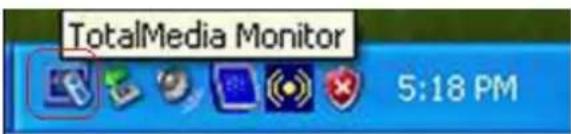
(2) Double-click Tray Bar icon "TotalMedia Monitor".
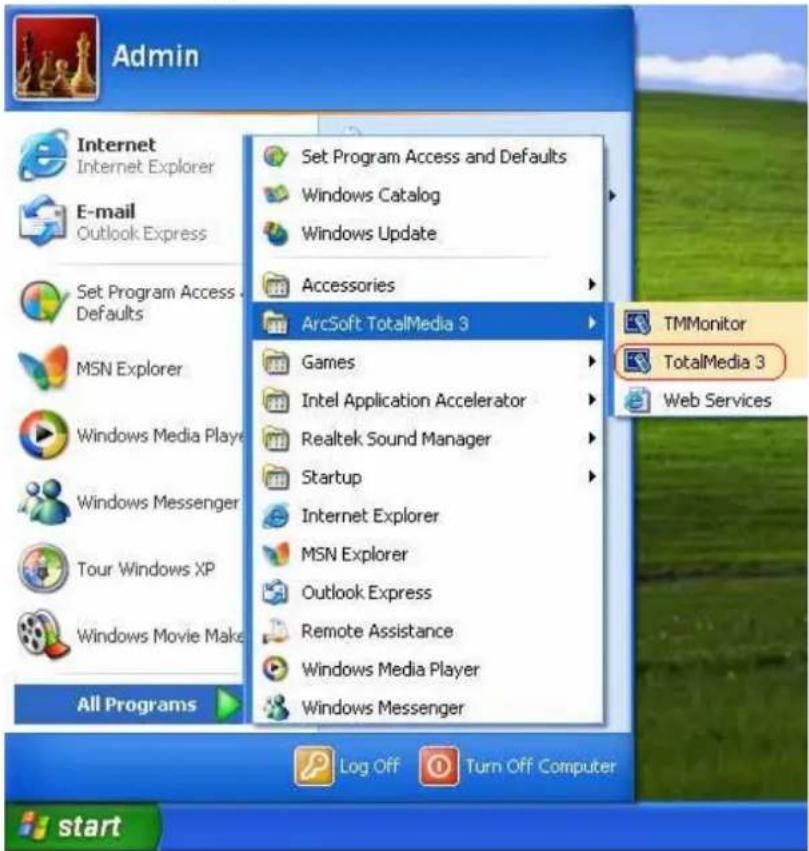
(3) From Start → All Program → ArcSoft TotalMedia 3 → TotalMedia 3
4.2 Enable TotalMedia Monitor icon on the Tray bar
(1) Go to Start → All Program → Startup → TMMonitor

(2) The TotalMedia Monitor icon will be shown on Tray bar, and then you can double-click to use it.

4.3 Main Monitor
After launch your TotalMedia Monitor, You will see the Startup screen as below:
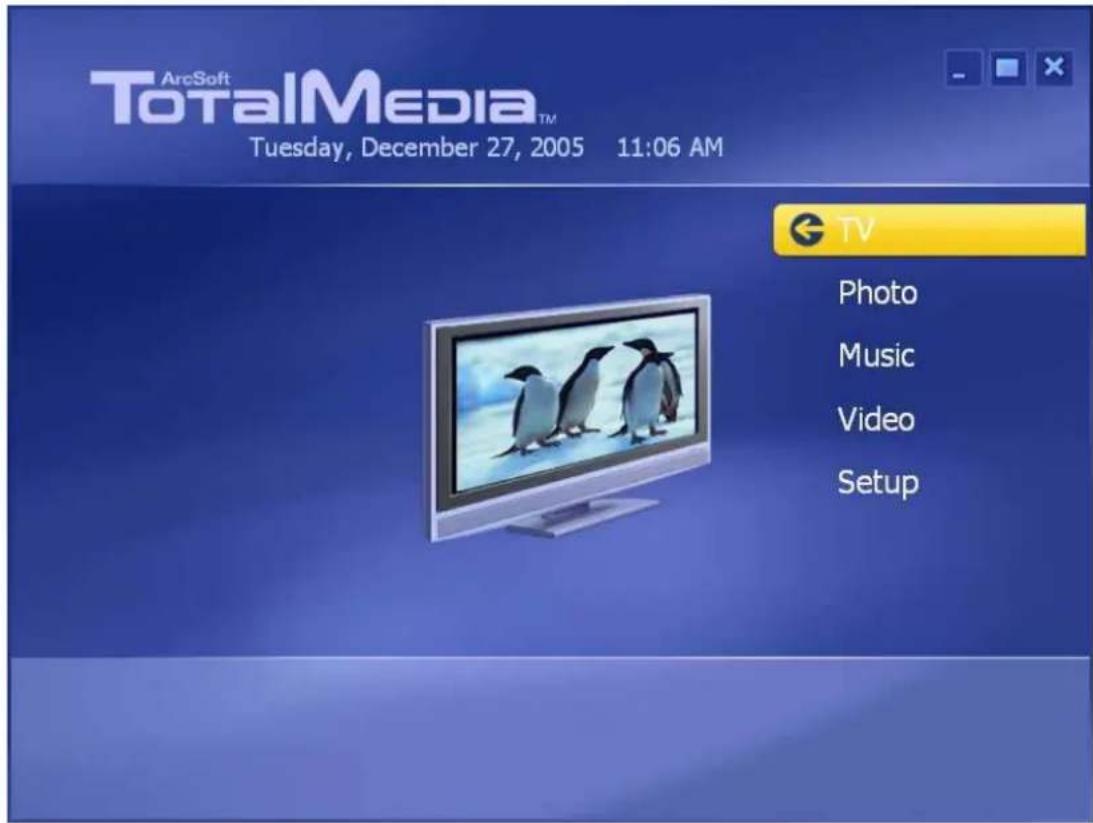
TV – This section allows you view and edit the settings for TV Recording.
Photo – This area allows you view photos stored within any folder on your computer.
Music – This area enables you to listen to, record, and transfer music files.
Video – This area enables you to play video files stored on your computer.
Setup – This area lets you configure the basic settings for each module of the program.
You can simply go to each section and start your TotalMedia. If you have any question about your TotalMedia's functions or settings, you can click “?” (Help) icon on the top-right corner of TotalMedia screen. Then, you will search any question from this Help file.

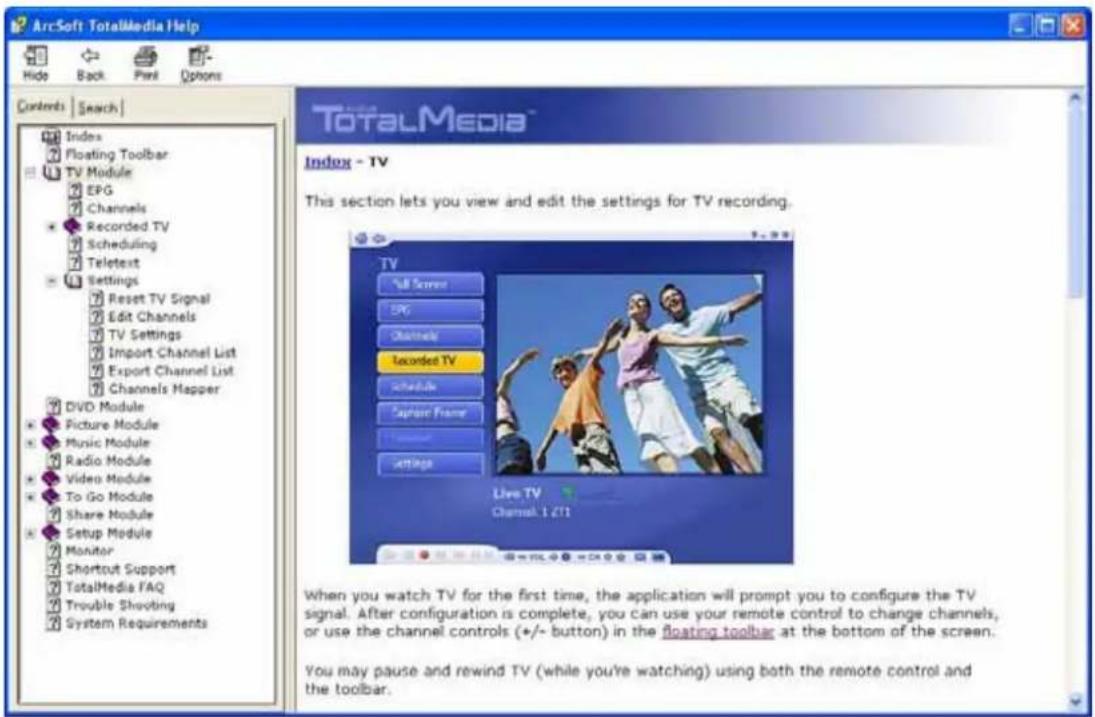
(Figure 3: TotalMedia Help file)
4.4 Floating Toolbar
This floating toolbar appears for a few seconds whenever you move the mouse:
(1) Home button: The "Home button" (It looks like a house) takes you to the program's Startup screen. The "Arrow" takes you to the previous screen.

(2) The Toolbar at the bottom of the screen: It features standard audio/video playback controls (Play/Pause, Stop, Record) plus Volume and Channel controls. Special controls for TV playback and only appear when necessary.

(3) When watching movie discs, video files, and recorded TV show: Use these buttons to adjust the playback speed at variable rates.
(4) When watching MPEG-2 videos and recoded TV shows: Use these buttons to skip forward by roughly 27 seconds, or backwards by roughly 27 seconds. These buttons are useful for bypassing commercials or skipping back slightly if you accidentally skip ahead too far.

4.5 TV
This section lets you view and edit the settings for TV recording.
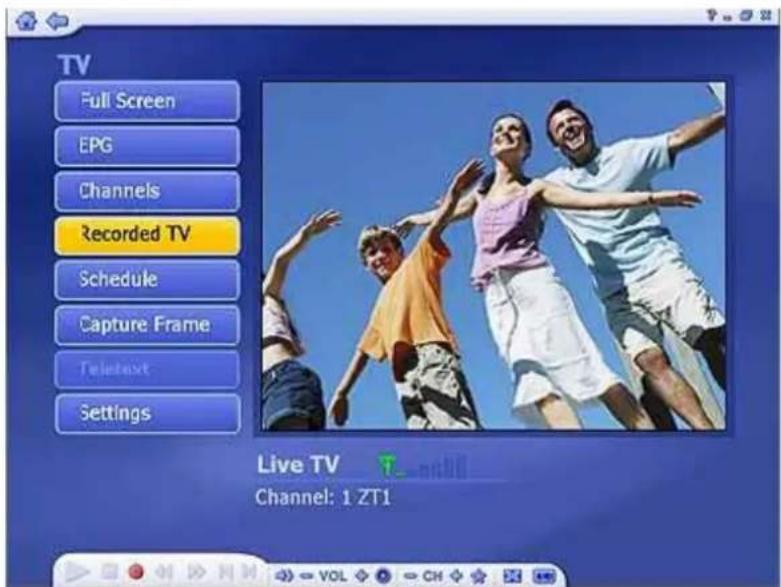
When you watch TV for the first time, the application will prompt you to configure the TV channels. After configuration is complete, you can use your remote control to change channels, or use the channel control (+/- button) in the floating toolbar at the bottom of the screen. You may pause and rewind TV (while you're watching) using both the remote control and the toolbar.
4.5.1 Search TV channels
Step1: Once you first enter TV section from ArcSoft Startup screen, you will see the Setup TV Signal wizard as below. Simply click "Next" to begin configuring your TV signal.
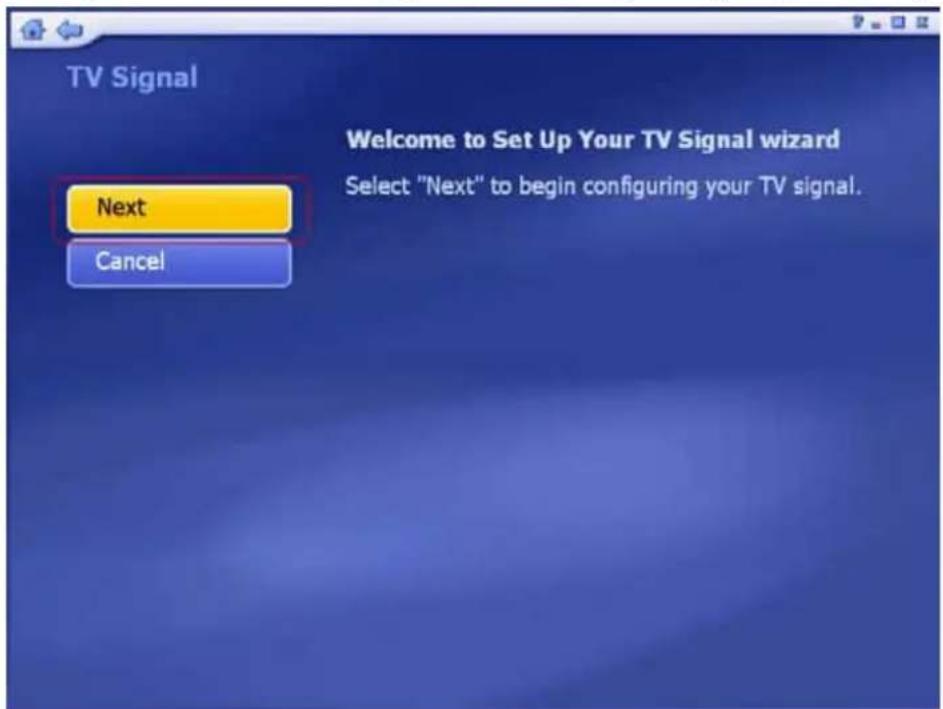
Step2: You will enter "Scan/Edit Channel List" section. Choose your country at "Region" section & your local signal at "TV Signal". And then, click "Start" button to scan the available TV channels.

Step3: Please wait for few minutes for channel scanning.
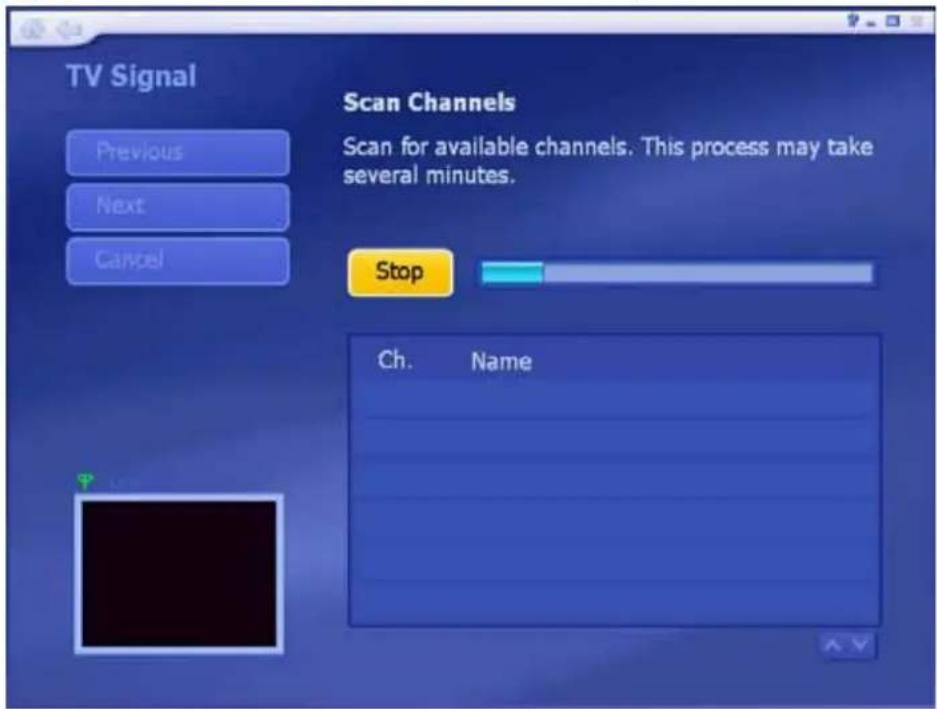
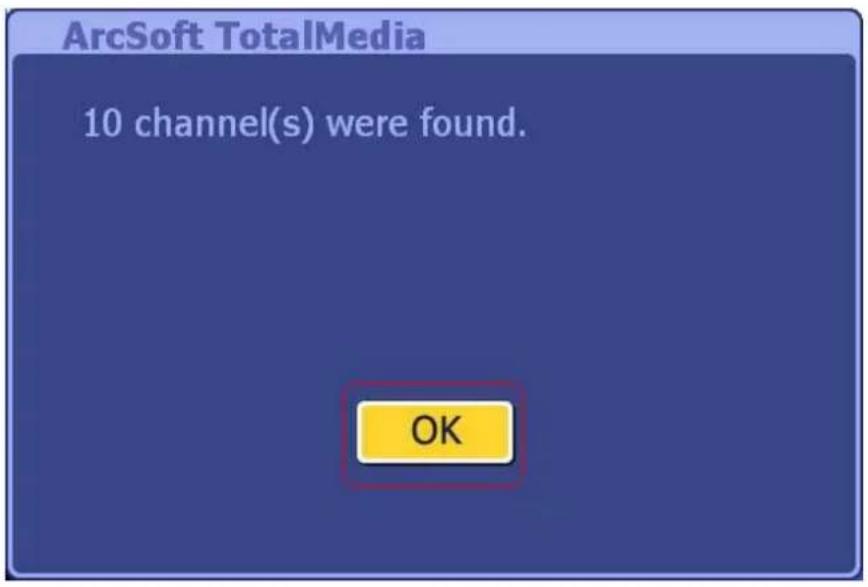
Step4: After scanning is completed, the message will show the number of available channels was found. Click "OK" to exit this screen.
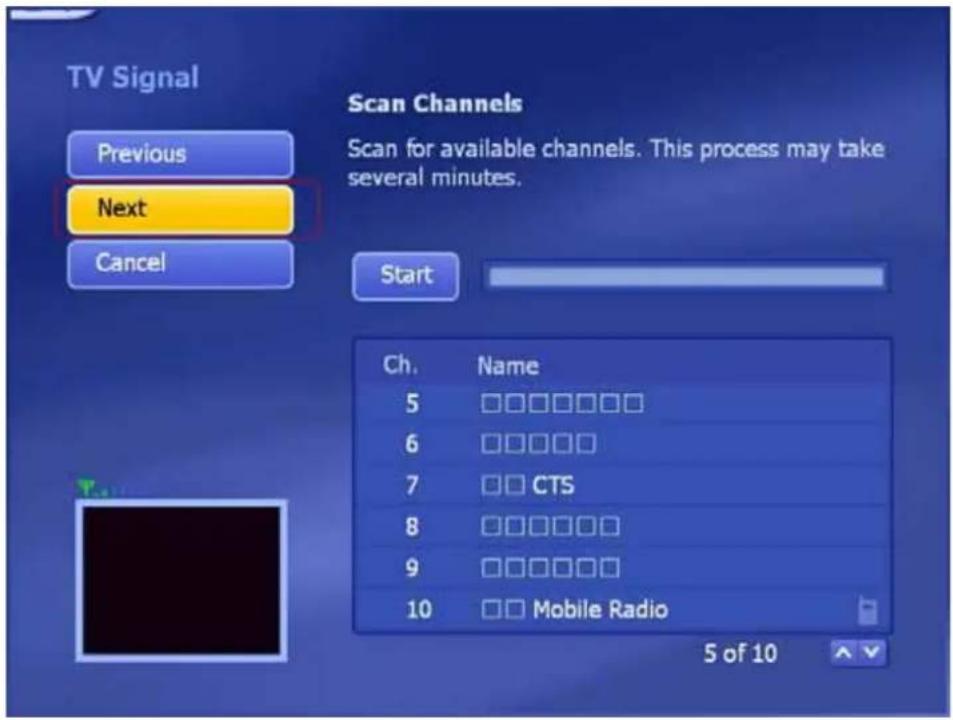
Step5: Click "Next" button to continue.
Step6: Click "Yes" to make sure you want to save the results.

Step7: Click "Finish" to exit the setup wizard
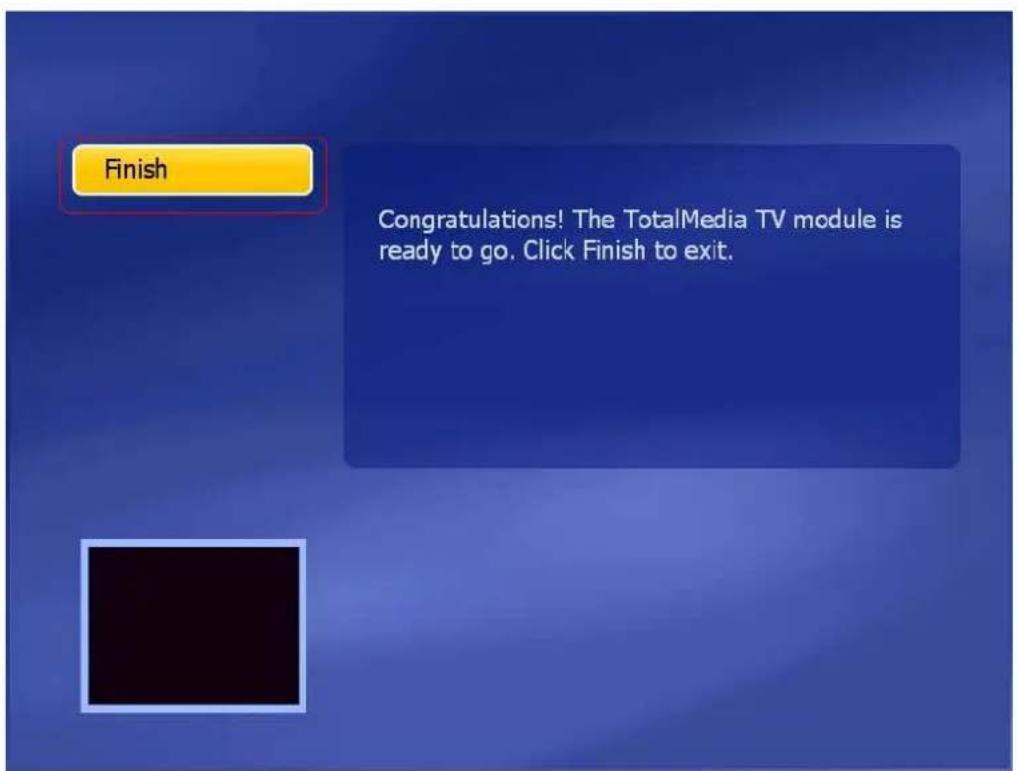
Step8: After TV channel configuration is completed, you can start watching your TV.
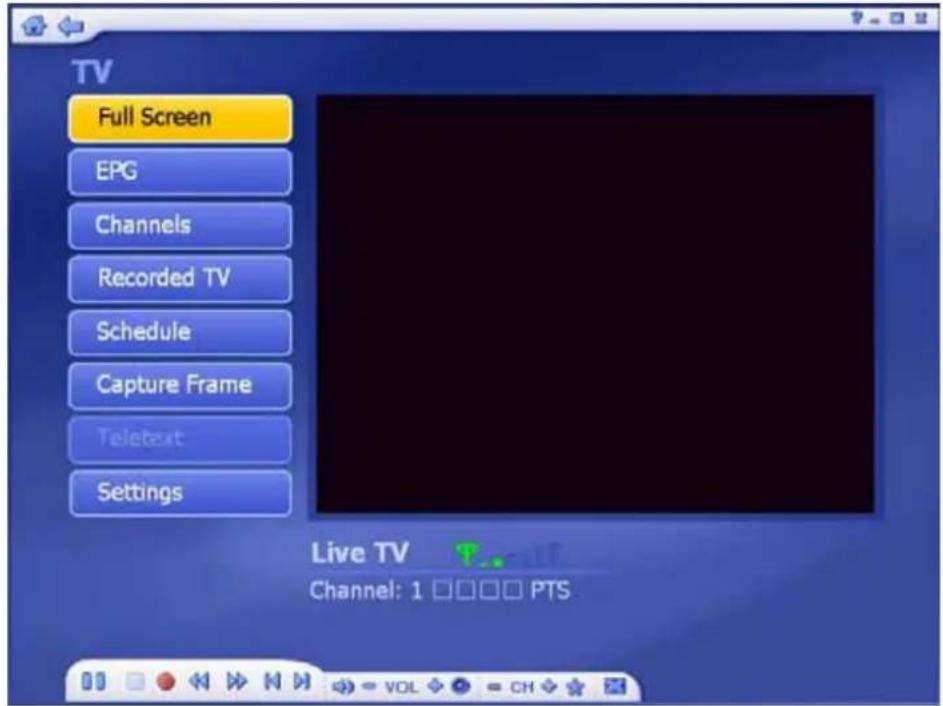
4.5.2 Channel Preview
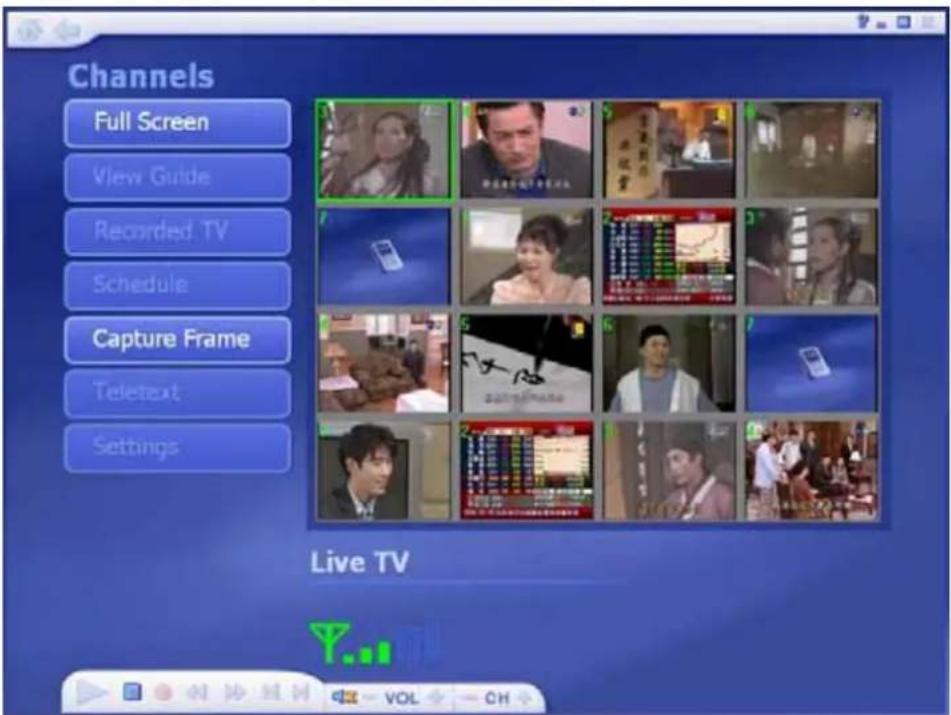
After you save all scanned TV channels, you can use hot key "Shift + Ctrl + S" to preview all channels.
Step 1: Select "TV" in the Startup Screen.

Step 2: After enter the TV section, press hot key "Shift + Ctrl + S" on keyboard.
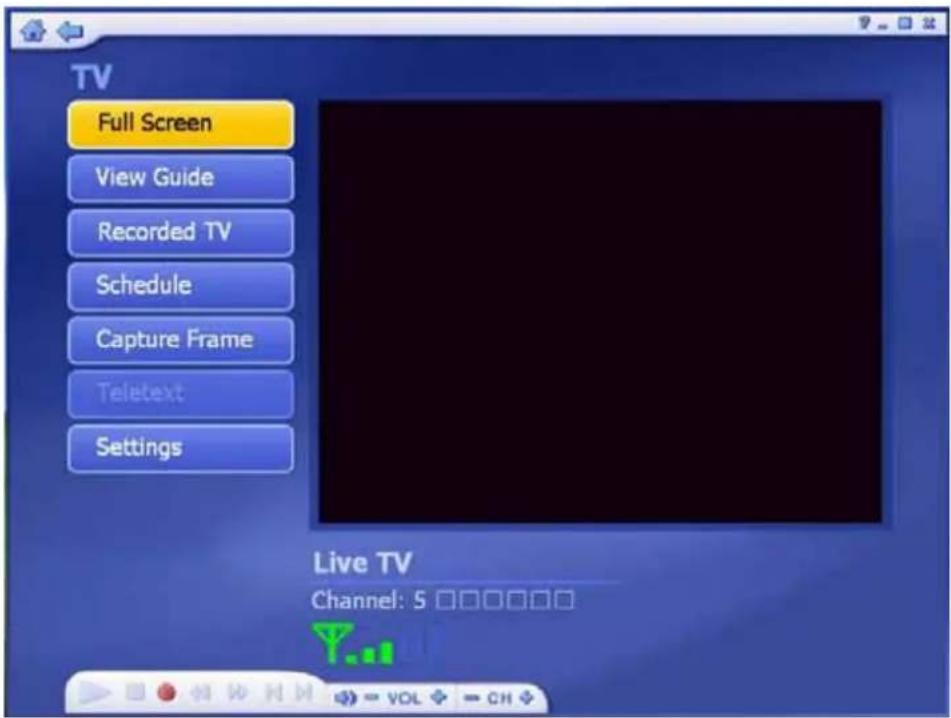
Step 3: You will see the all channels in the preview screens as below. If you want to see the particular channel on the preview screens, simply click the screen to view it.
4.5.3 Full Screen
Display the Video over the entire program display area – Typically the entire screen. You can click the Full Screen Button to switch into full screen mode. Press "Esc" or double-click the mouse to go back to a normal window.
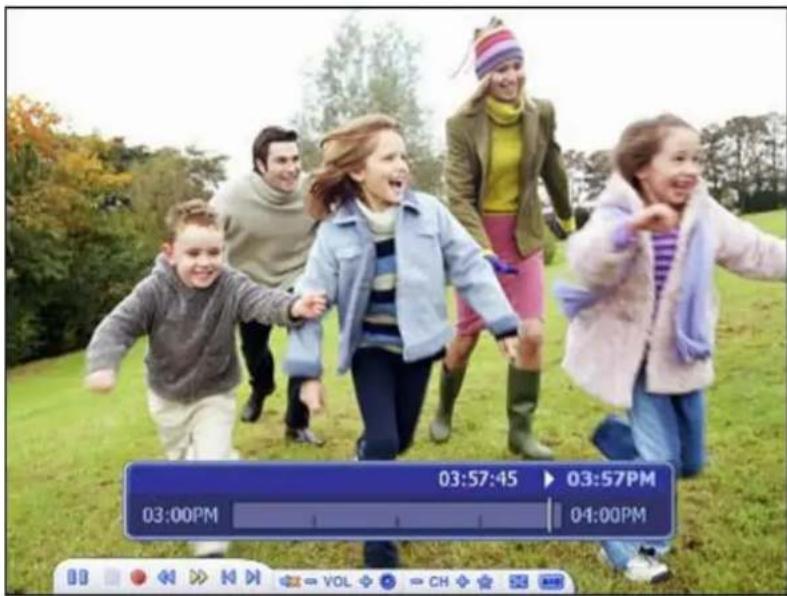
Note: You should check the "Time-Shift" option in TV Settings to display the time bar.
4.5.4 Favorite Channel List
Press "Ctrl+D" to display the Favorite Channel List and select a channel to watch.

To remove a channel, click on its corresponding "Delete" icon (trash cam)
To rearrange your list, press the UP/DOWN arrow buttons on the right of each channel.
Click on the UP/DOWN arrow buttons on the left to browse the channel list.
4.5.5 EPG
This section lets you view the channel program lists.
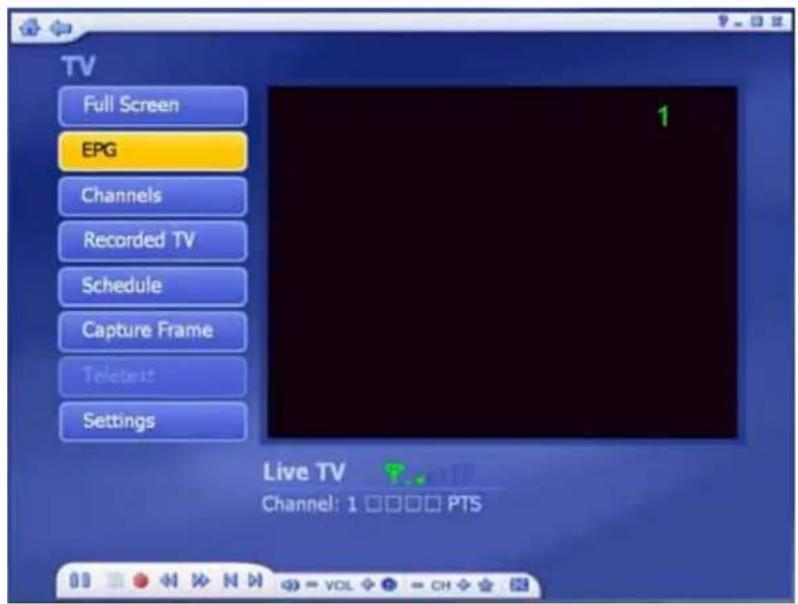
If you are using a digital device, please select to access EPG or network to view the program lists. While using analog device, the program will take you to the network EPG directly.

Note: This option is only available if you are using an EPG service. The Internet EPG may not be available in all countries and the EPG on some digital services may bit be supported.
4.5.6 Channels
This section lets you view the channel list and select a specific channel.
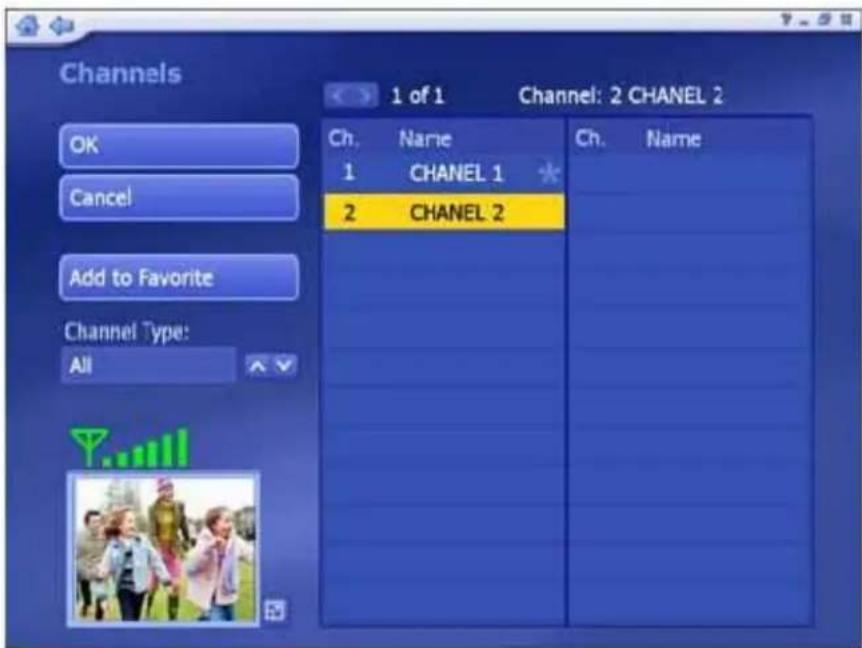
The available channels are listed here. There is a preview window in the bottom left corner of the screen. To watch a channel, click on it, and it will appear in the preview window. You can click the button next to the preview window to play it in Full Screen
mode. Press "Esc" to exit Full Screen. Double-click a channel will take you back to the TV main screen and the program will start showing.
Add to Favorite – Highlight a channel on the list and click on the button to set it as a favorite channel. A checkmark indicates favorite channel.
Delete From Favorite – If you select a favorite channel, click on this button to remove it from the favorite channels list.
Channel Type – From the Channel Type, choose either to view "All" or only the "Favorite" channels.
4.5.7 Recorded TV
This section displays your recorded TV shows.

When you playback recorded TV, you can fast forward or reverse using either the controls on your remote control, or on the floating toolbar. You can click the button next to the preview window to play it in Full Screen mode. Press "Esc" to exit Full Screen.
From the View Screen, you can choose either "Detail" or "Thumbnail" view. Both views show you thumbnails of the available photos and folders; "Detail" view includes file/folder names and dates.
From the Sort section, choose to arrange the photos according to name or date.
To trim a video, click the Scissors icon to the right of the file.
To rename a video file, click the "A_" icon to access a virtual keyboard.
Click the Delete (Trash can) icon to delete a file.
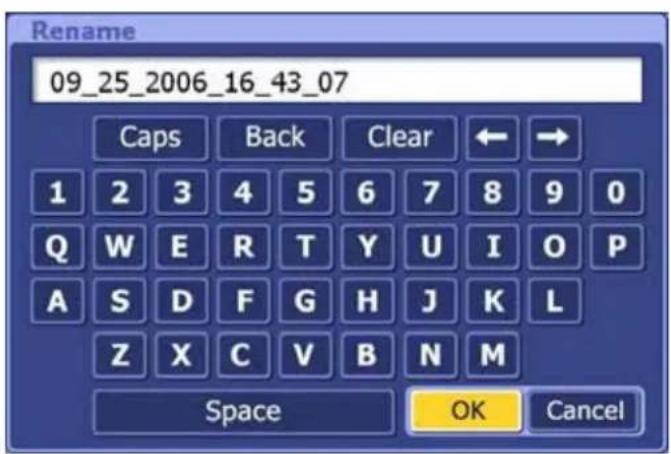
(Rename
a
video
file
name)

(Trim
a
Video)
4.5.8 Scheduling
This section lets you program the application to record TV shows, then the application will monitor the schedule and record the scheduled programs automatically on the correct day and time.

(1) Add: Let you enter in a new program for recording:
■ Enter the name of the program (Click "A_" to access a virtual keyboard), then select a channel, record frequency (once, daily, or weekly), and set the start/stop recording times.
■ The "Frequency" option enables you to filter shows by how often they are recorded (once, daily, weekly)
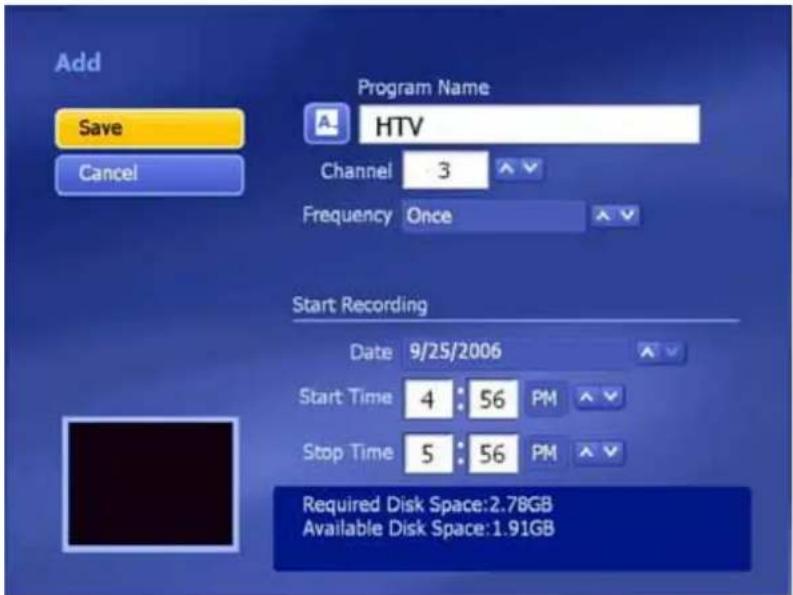
(2) Modify: Let you edit the recording details of the selected item.

(3) History: Display a history of your recorded TV shows.

(4) Deleting a scheduled recording: To delete a scheduled item, highlight the item, then choose and click the "Delete" icon that appears to its right.
(5) Scheduling conflicts: If conflicting recording sessions are scheduled, you will be presented with a summary of the conflicts and asked to update the schedule.
4.5.9 TV Settings
Here you can view and edit default settings for recording from TV.
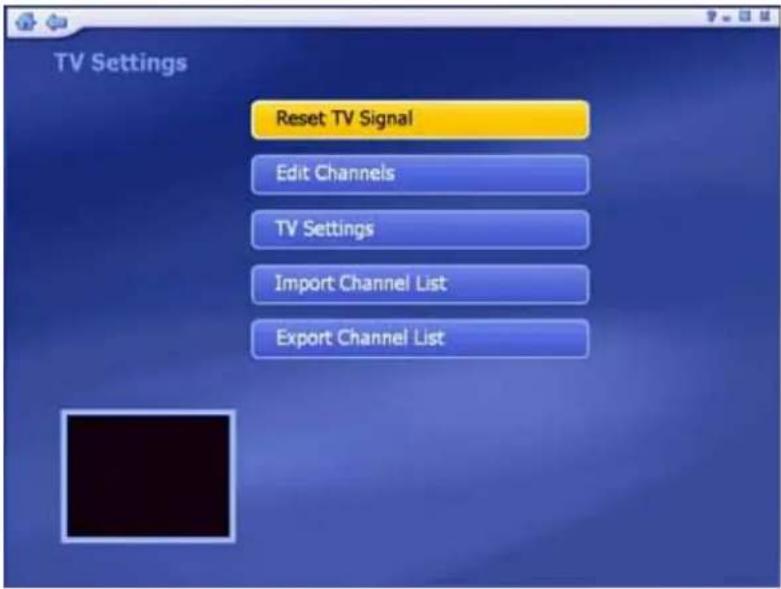
(1) Reset TV Signal: This section lets you view and edit the setting for TV Signal.
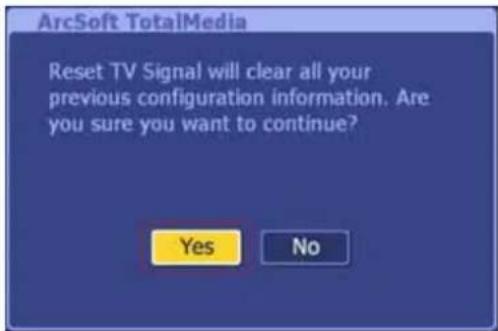
Step 1: Reset TV Signal will clear all your previous configuration data. If you want to reset the TV Signal, click "Yes" to continue.
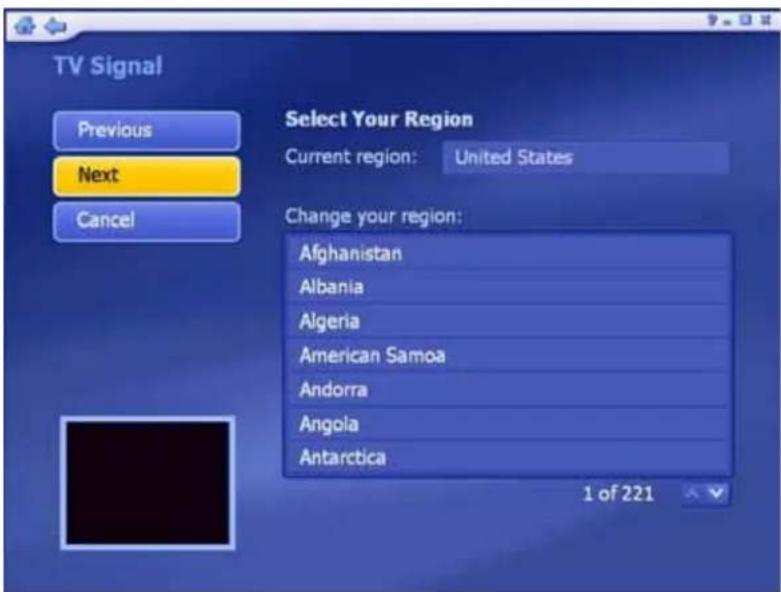
Step 2: Select your region and click "Next" to continue.
Step 3: Click "Start" to scan for available channels. This process may take several minutes.
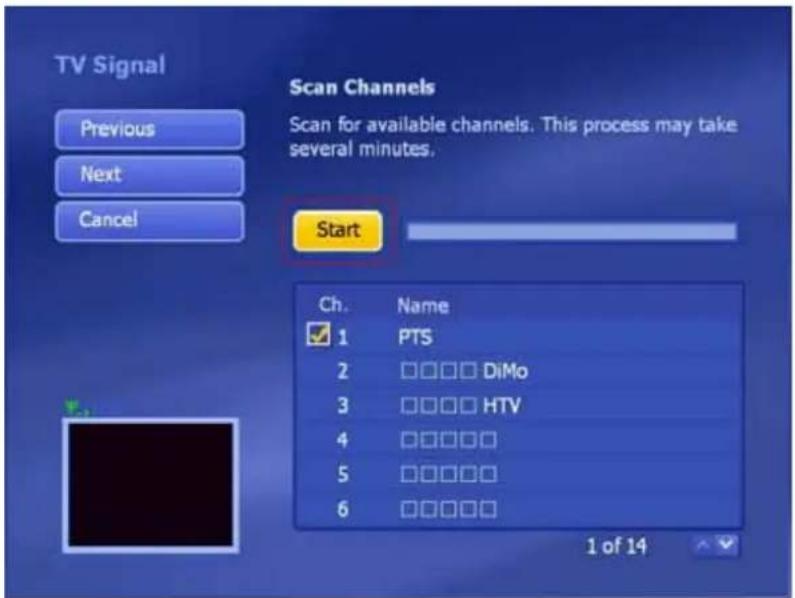
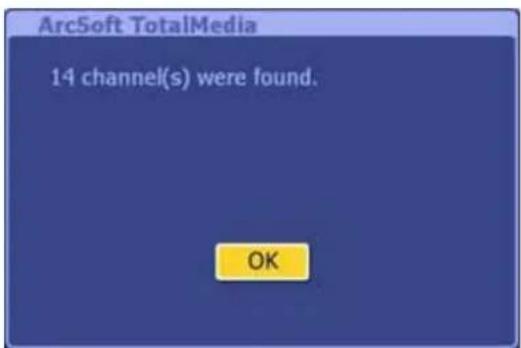
Step4: After TV Channel rescanning is completed, the message will show the number of channels are found. Click "OK" to continue.
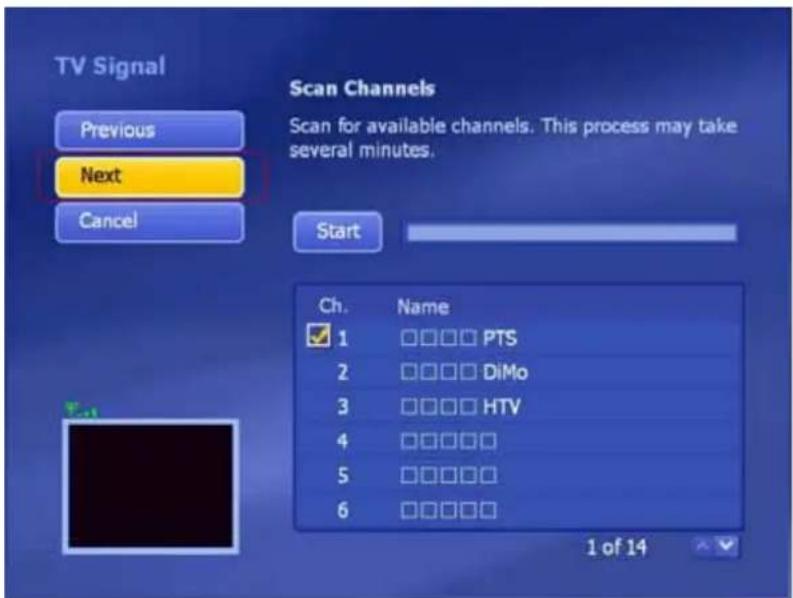
Step5: Click "Next" to continue.
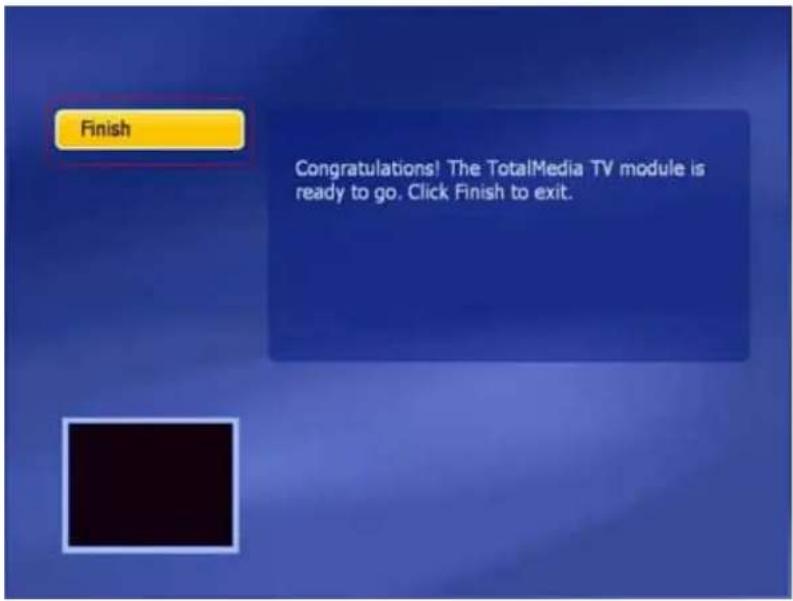
Step 6: Click "Finish" to exit.
Set up 2 tuners. After setting up one tuner, if there is another tuner in your PC, you can repeat the steps for the second tuner.
Choose the option you want from the various pull-down lists. The program also provides "Previous" and "Next" buttons to switch between setup pages.
(2) Edit Channels: View and edit channels for recording from TV.

To add channels automatically, simply click "Start". The program will scan through each channel and determine if there is an available signal. Channels will appear in the channel list.
To select the channels, you can click on one by one or using the "Select All"
option.
To rename the channel, click "A_" icon to access a virtual keyboard.
Click the "Delete" (trash can) icon to delete a channel.
(3) TV Settings: This section lets you view and edit the TV settings.

▶ Choose the device you want to use.
▶ Choose Close Caption/Subtitle and Time Shifting from the list.
Setting the Time Shifting feature to "On" enable you pausing live TV and watch recorded TV before the recording is complete. This feature requires a high performance PC.
(4) Import Channel List: This section lets you import the channel list that you saved before.
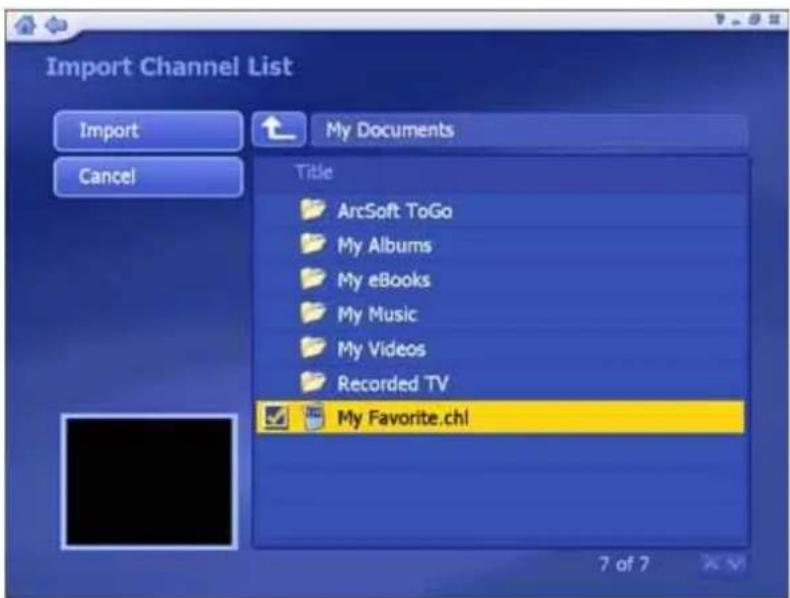
Go to the folder that contains the channel list file you want to import (for example: My Favorite.chl). Click on the "Up One Level" button to go up one directory level.
▶ Check the channel list file (.chl) you want to import.
When you are ready, click "Import"
(5) Export Channel List: This section lets you export the current channel list.

▶ Browse your computer and go to the folder that you want to save the channel list file.
To rename a channel list file, click on the "A_" icon to bring up a virtual keyboard or type in your file name directly.
When you are ready, click "Export"
4.6 Photo
This area lets you view photos stored within any folder on your computer.
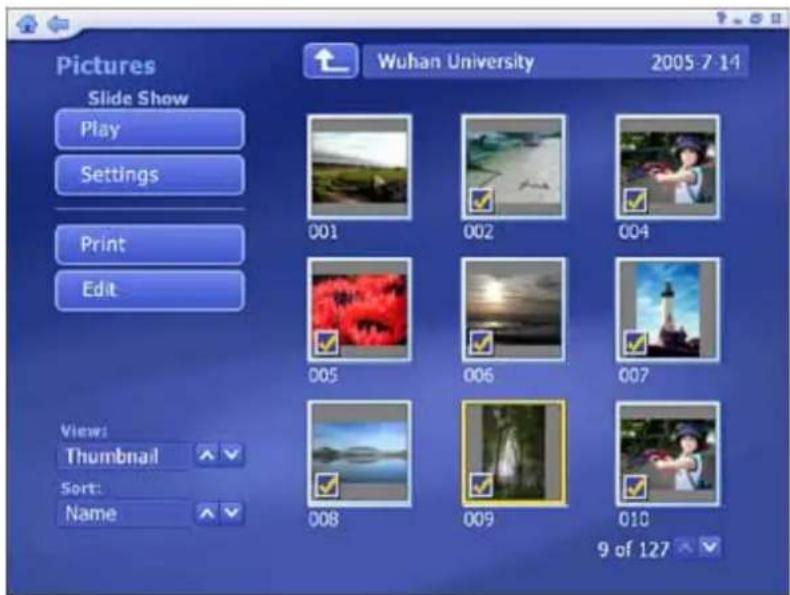
-- At the top of the screen, the currently viewed folder is listed.
Click the "Up One Level" button to go up one directory level.
-- Selecting a photo from this screen will start a slide show of the photos in the current location, starting with one you selected.
-- From the "View" section, you can choose either "Detail" or "Thumbnail" view. Both views show you thumbnails of the available photos and folders; "Detail" view includes file/folder names and dates.
-- From the "Sort" section, choose to arrange the photos according to name or date.
4.6.1 Edit
The multitude of editing options is available, each one being extremely easy to use.
Options include:

(1) Rotate: Rotate the photo 90 degrees counterclockwise or clockwise by clicking the corresponding icon.

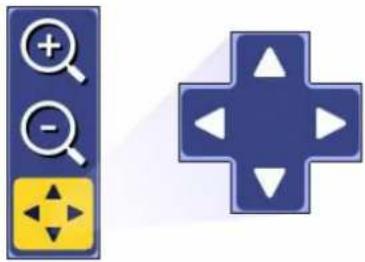
(2) Zoom In/Out & Pan: Use this tool to zoom in and out on your photo.

When zoomed in, you can move to hidden areas of the photo by switching to the
pan tool.
(3) Auto Enhance: Selecting this option presents you with three automatically enhanced versions of your photo (plus your original one). Simply choose the one you like best.

(4) Red-Eye Removal: This tool helps you remove red-eye from photos.
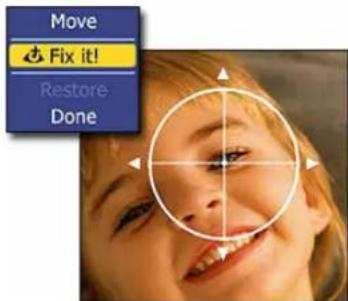
In Move mode, position the crosshairs over the redeye area.
■ Press enter, then click "Fix it!" to get rid of the red (Click "Restore" to start over).
■ When you finished, click "Done".
(5) Crop: You can crop your photo to any one of a variety of set proportions that are ideal for perfect printing.

■ Choose the proportion to which you want your photo cropped (8x6, 7x5, 4x6...etc)
■ Using the “ + ” and “ - “buttons, resize the crop box to your prefer.
- Choose "Move", and then position the crop box over the area of the photo you want to keep.
■ To execute the crop command, choose "Crop It!".
- Choose "Done" to cancel.

(6) Previous/Next Photo: These buttons let you navigate to the previous/next in the current location.

(7) Delete: Choose this option to delete the current photo.

(8) Exit: It takes you back to the previous screen.

4.6.2 Print
This feature enables you to print multiple photos across a number of pages.
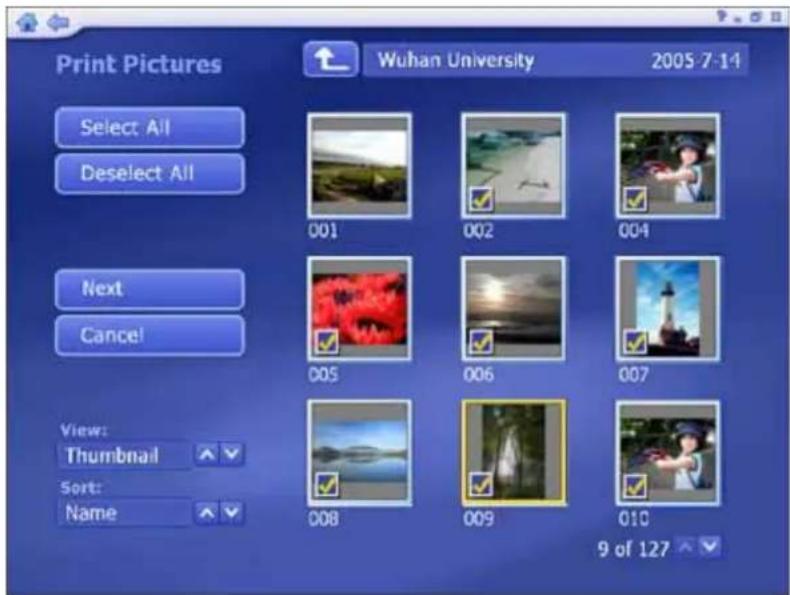
(1) Go to the folder that contains the photos you want to print.
(2) Select the photos you want to print by clicking on the photos one by one or using the "Select All" option.
(3) Choose "Next".
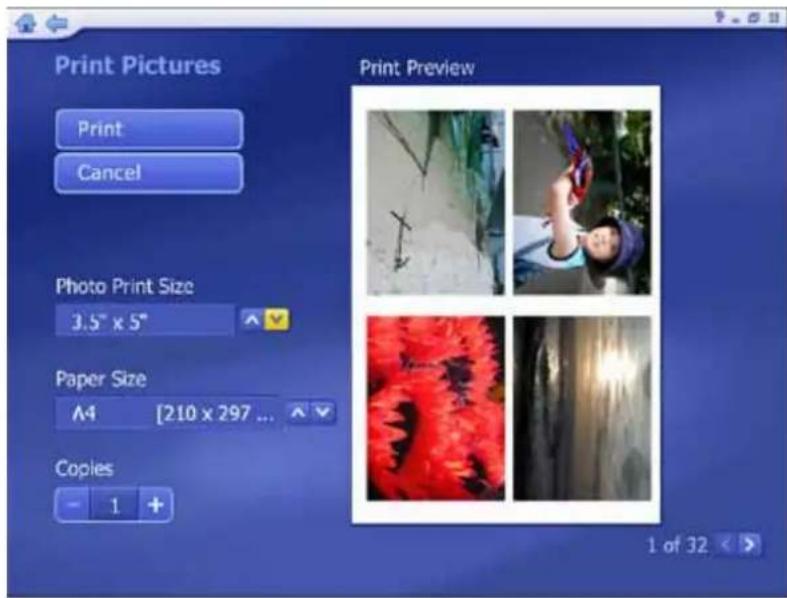
(4) Choose a "Photo Print Size" and select the "Paper Size" you are using. A preview of your choice will appear to the right.
(5) Enter the number of "Copies" you want of each printed page.
(6) Click "Print".
4.6.3 Slide Show Settings
Here you can set the transition effects, timing and background music for your slide show:
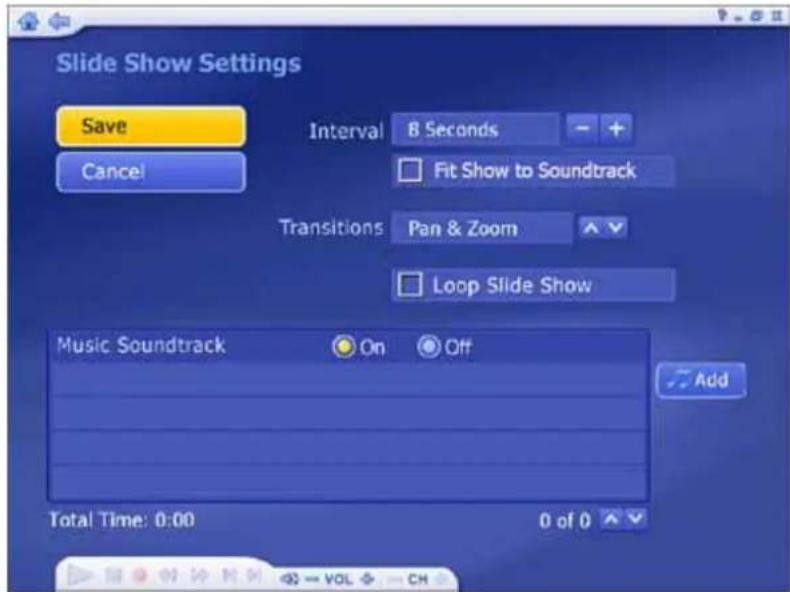
-- From the "Interval" section, set the display time for the slides.
-- Click the "Fit to Soundtrack" option to override the slide interval setting and have the slide show is timed to match the duration of your music soundtrack.
-- From the "Transitions" section, choose the effect that you would like to see as one
slide changes to the next.
-- Check the "Loop Slide show" box to have your slide show automatically loop once it completes.
-- In the "Music Soundtrack" section, choose "On" to play one or more songs during the slide show.
4.7 Music
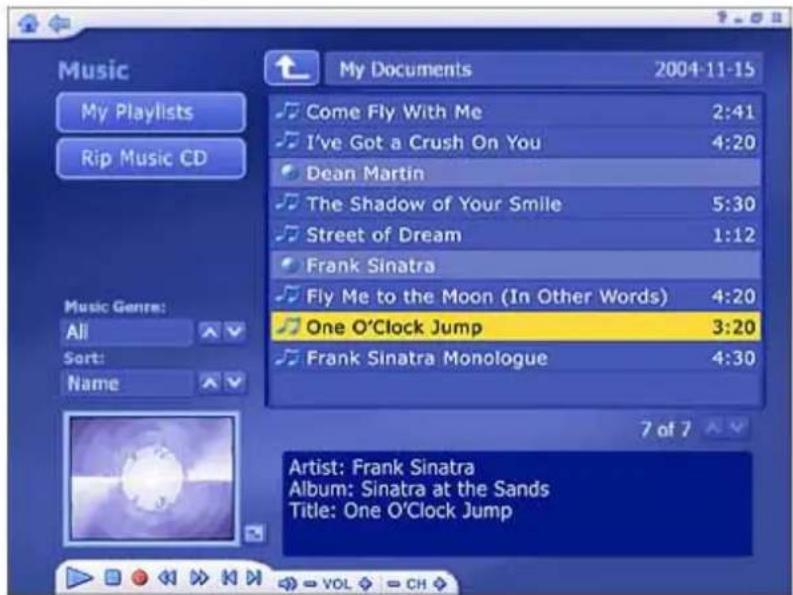
This area enables you to listen and record music files. You are also able to create custom music play lists. The music files shown here belong to the folder listed at the top of the page. Click the "Up One Level" button to go up one folder level in the directory. You can select any music file to play it. Besides, you can filter tracks by Music Genre and sort files by Name, album, artist, or date.
4.7.1 My Playlists
Here you can play, organize, and create new audio playlists. Playlists are compatible with Windows Media Player 9 and stored in the "My Documents\My Music\
My Playlists" directory. If you modify a playlist using Media Player, the changes will be reflected in TotalMedia the next time you start the program (pressing "Refresh" will also update the playlists).
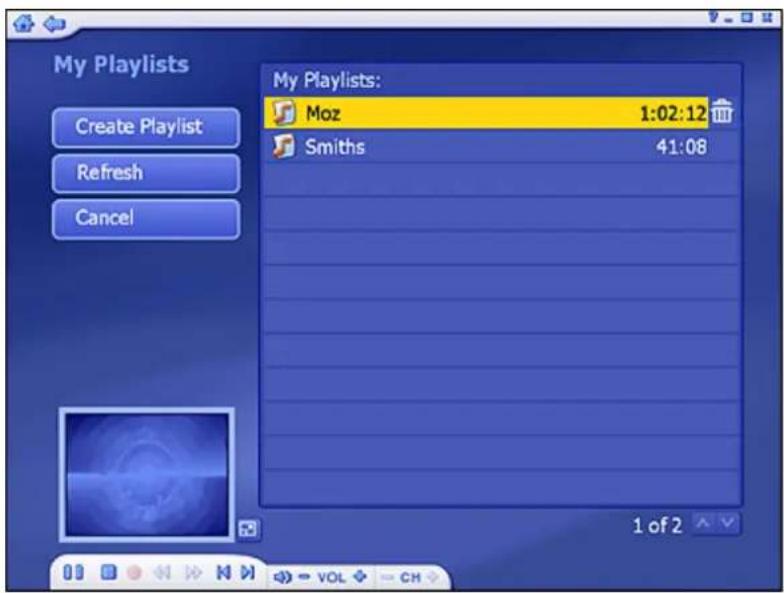
(1) Create Playlist: Here you are able to make a custom playlist from the music on your computer:

-- Go to any folder to find the music you want to add to your new playlist.
-- Check each song that you want to add, and then click "Next".

-- Arrange your songs by highlighting then and using the "Up" & "Down" buttons.
-- Remove a song by choosing the "Delete" button (It looks like a trash can).
-- Once your playlist is set, click "Save".
(2) Refresh: Updates playlist if they've been modified with Windows Media Player.
(3) Cancel: Take your back to the main Music page.
(4) Edit Playlist: Allows you to add/remove/rearrange songs within a playlist already created. Check the "Shuffle" option to have the songs play in random order.
-- Select a playlist and open it.
-- Click on a song and play it, and then you will see "Edit playlist" button as below:
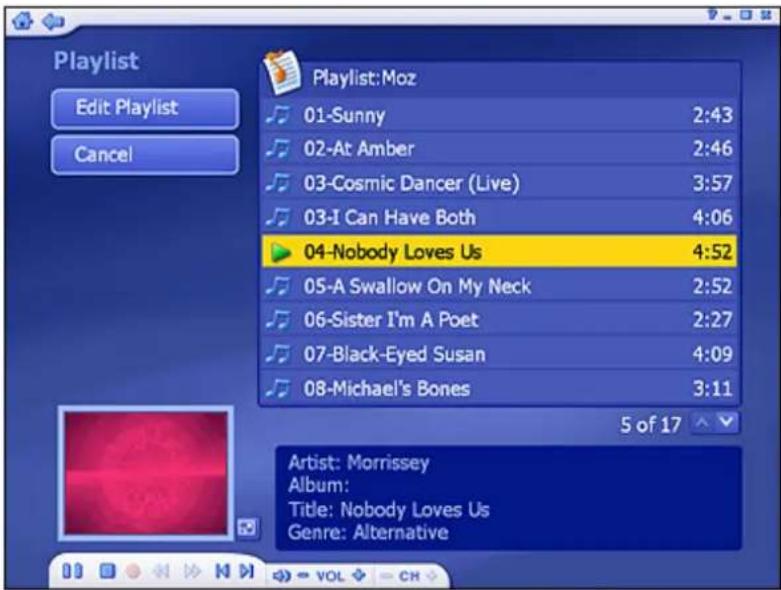
-- To move a song up or down in the playlist, highlight the song then go to the
"Move Up/Down" button to the right of the song and click up/down on your remote.
-- To remove a song by click the "Delete" button (trash can icon).
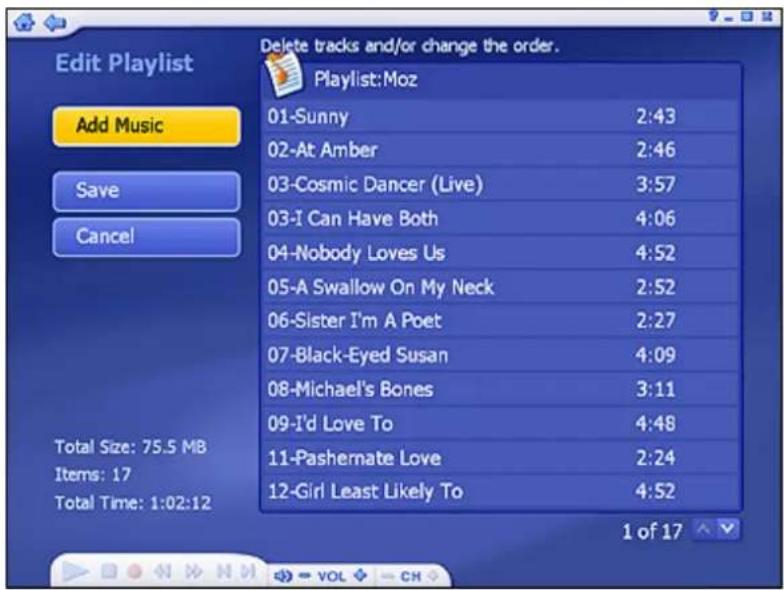
-- To add more songs to your playlist, click "Add music" navigate to the folder containing the songs you want to add, and select the songs then click "Next".
-- Once your playlist is set, click "Save".

4.7.2 Ripping Music CDs
It's easy to rip (convert) your audio CDs into audio files you can play back on your computer.

Step 1: Select the tracks you'd like to rip.
Step 2: Select "Rip".
The audio files will be ripped into the directory specified in your settings. Click “Settings” to view and change this directory:

-- The Rip CD Settings page enables you too choose a file format for ripped files (WMA), the quality setting, and the directory used for saving the ripped files.
-- The "Get CD Information from the Internet" option will automatically search the Internet for CDDB information (title, artist, album name...etc.) for the songs contained on your CD. If corresponding information is found, it will be embedded into your ripped music. To use this feature, maker sure your system is connected to
the Internet.
4.8 Video
This area enables you play video files stored on your computer and capture video.
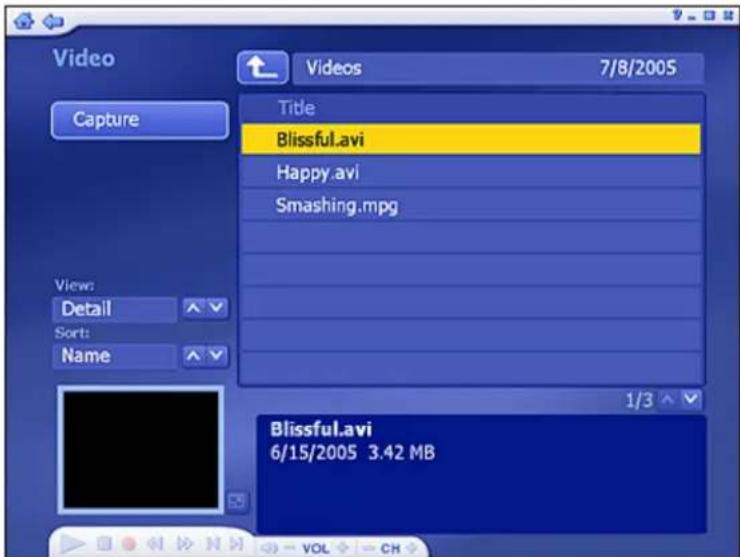
4.8.1 Playing Movies – Previewing, Renaming, and Deleting

-- To preview, rename or edit a video file, begin by selecting the video. If the file is not in the current directory, use the navigation control at the top of the screen to go to the folder containing the file.
-- To rename the video file, click "A_" icon.
-- To delete the file, click "Trash Can" icon.
-- From the "View" options you can choose either "Detail" or "Thumbnail". Both options show you the thumbnails of the available video files; "Detail" view includes file names, dates, and other information.
-- User the "Sort" features to present your video files in order by file name, file size, and date.
4.8.2 Capturing Video
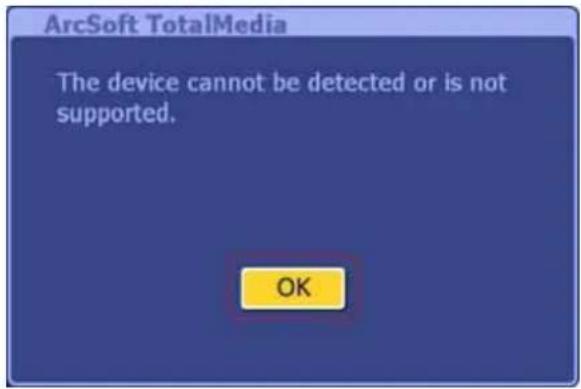
This device does NOT support Video Capture function. When you click "Capture" button on the Video section, the window below will be shown. Please click OK to leave this section.
4.9 Setup
This area lets you configure the basic settings for each module of the program:
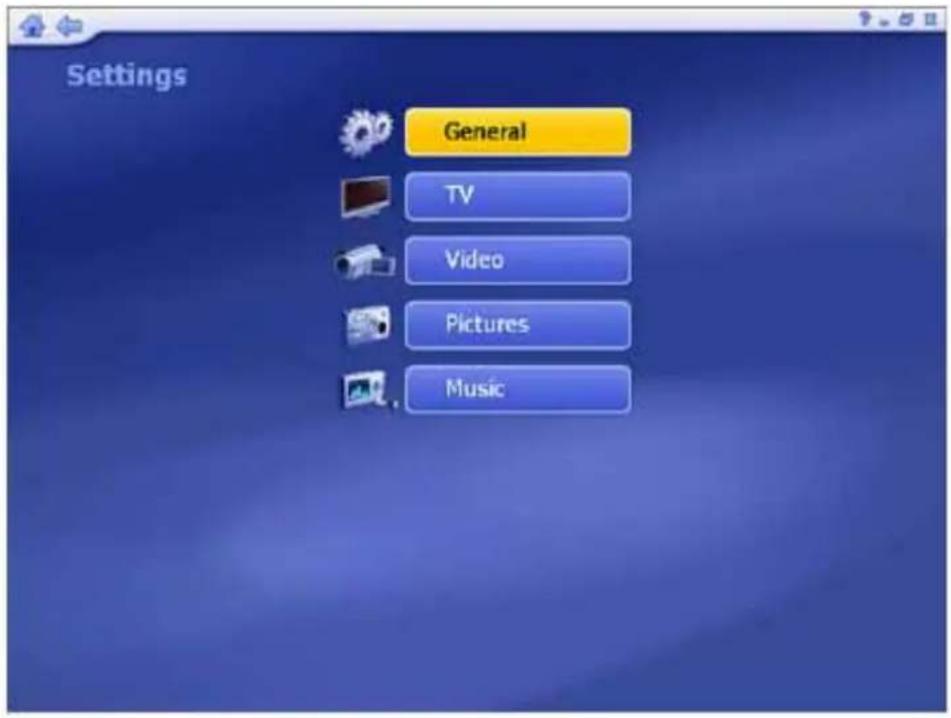
4.9.1 General
This screen enables you to view and edit basic program settings:

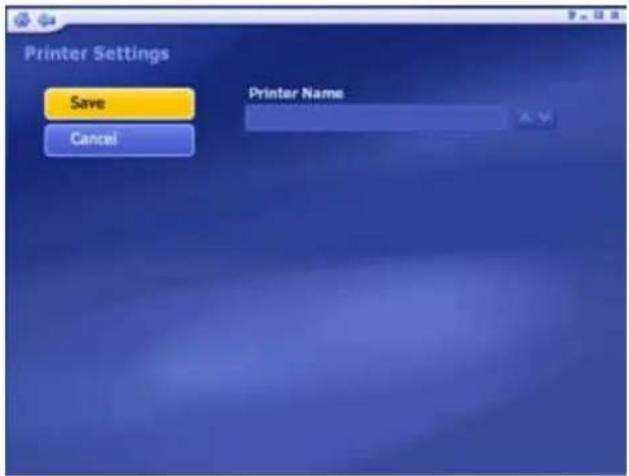
(1) PRINTER: Choose your default printer.
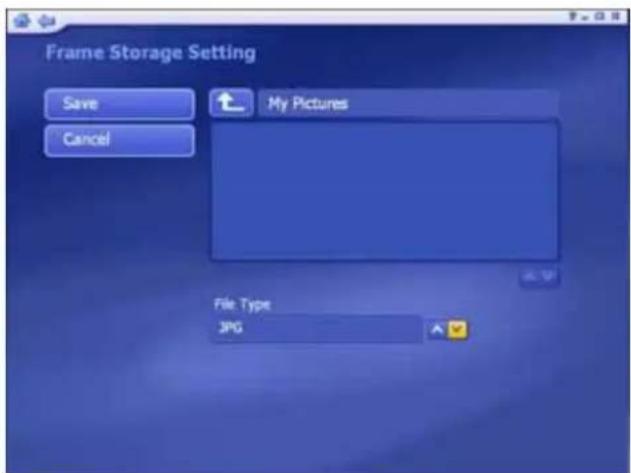
(2)Frame Storage: Here you can set the save location and file type for captured screenshots.
(3)VIDEO RECORDING STORAGE: Select the location on your computer where all of your recorded TV programs will be saved. You can also set the quality (HQ→ High Quality; SP→ Standard Play; LP→ Long Play; EP→ Extended Play).
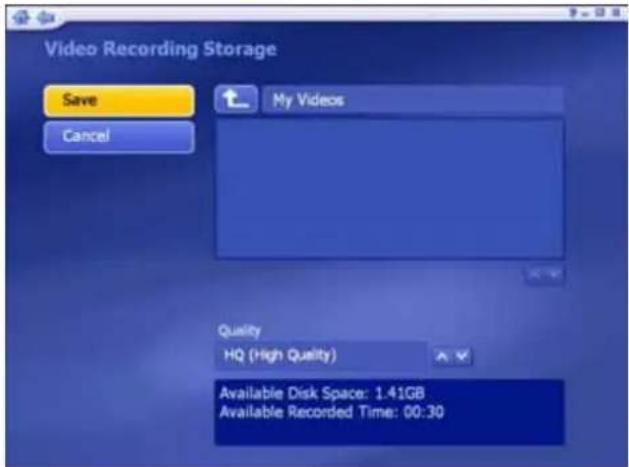
(4) Display Settings: Modify the settings for how the program displays on different type of hardware.

Hardware Acceleration should be set to On for most system that meet the system requirements, but in the case of a low performance video card, turning Hardware Acceleration Off can improve performance.
The Aspect Ratio of the monitor or television may vary (4:3 or 16:9). Set it to match your hardware, or select "Auto" to let the program choose the aspect ratio automatically.
When using a television as a display, set "Deinterlace" to Off. When using a computer monitor, set it to On.
Choose between 3D or 2D for the interface Display Effect. 2D means that there will only be a fade transition when switching between screens. 3D mean there will be a zoom and fade transition. Using the 2D Display Effect can improve performance on system that are near the minimums listed in the system requirements.
(5)ABOUT TOTALMEDIA: Get information about ArcSoft TotalMedia and access tools for registering your product and searching for program updates and patches.

4.9.2 TV
Here you can view and edit default settings for recording from TV.
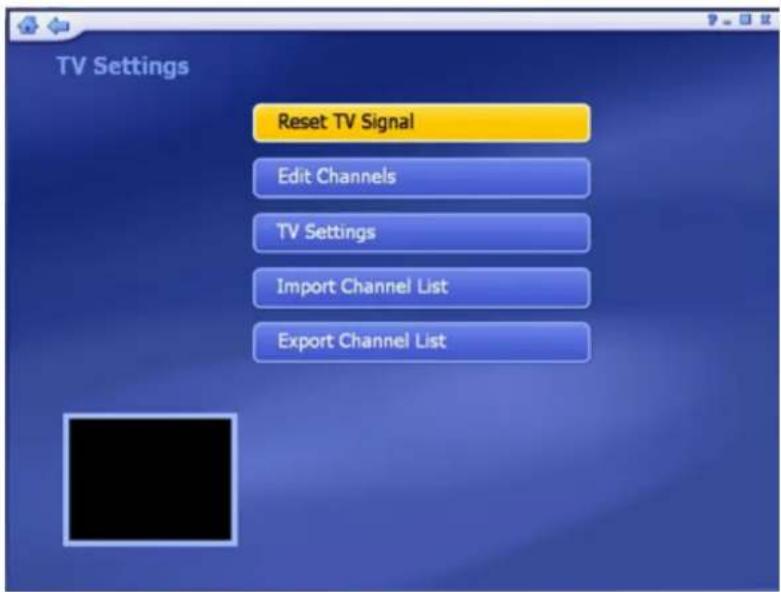
-- Reset TV Signal: This section lets you view and edit the settings for TV signal.
-- Edit Channels: View and edit channels for recording from TV.
-- TV Settings: This section lets you view and edit TV settings.
-- Import Channel List: This section lets you import the channel list that you saved before.
-- Export Channel List: This section lets you export the current channel list.
4.9.3 Video
Modify settings for capturing video:

This device does NOT support Video Capture function, please skip Video setting. If you click "Video" on the Settings section, the window below will be shown:
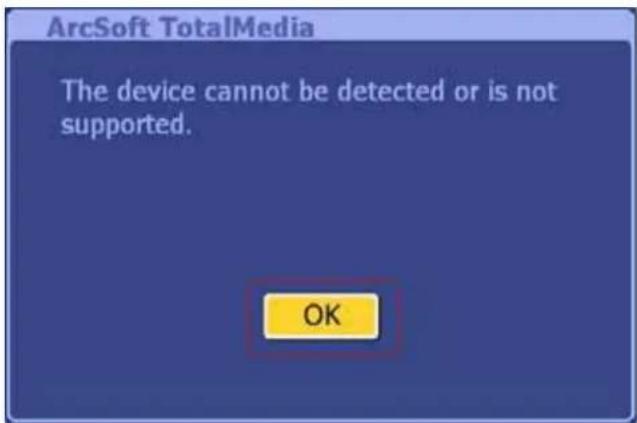
Click "OK" button to close the window and you will enter into "Capture Settings" window below. Due to this device does not support Video Capture function; you can simply click "Cancel" to leave the window.
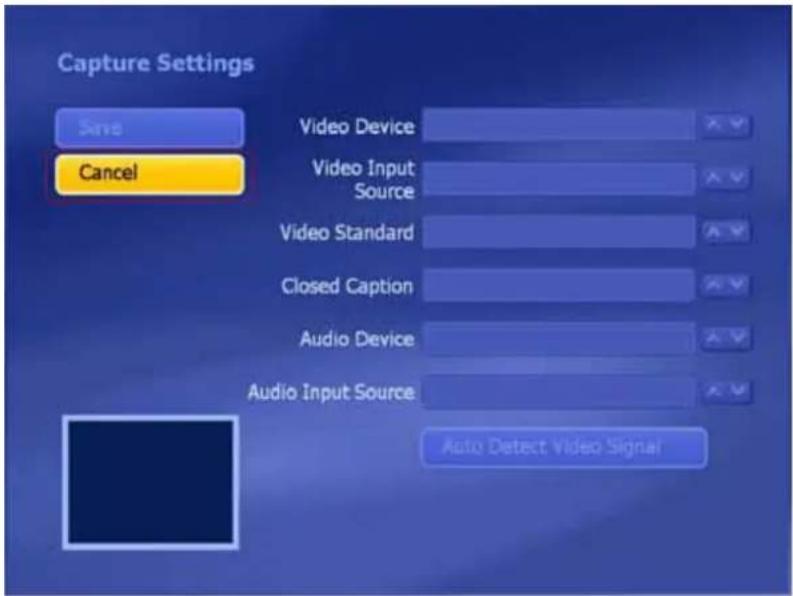
4.9.4 Pictures
Here you can set the transition effects, timing and background music for your slide show:

-- From the "Interval" section, set the display time for the slides.
-- Click the "Fit to Soundtrack" option to override the slide interval setting and have the slide show is timed to match the duration of your music soundtrack.
-- From the "Transitions" section, choose the effect that you would like to see as one slide changes to the next.
-- Check the "Loop Slide show" box to have your slide show automatically loop once it completes.
-- In the "Music Soundtrack" section, choose "On" to play one or more songs during the slide show.
4.9.5 Music
Here you can view and modify your music settings:

-- Check the "Shuffle" option to have the songs play in random order.
-- Check the "Repeat All" option to have the music start over again when it's done
-- Choose "Rip to CD Settings" to change the file format for ripped tracks (WMA).

-- Choose the quality setting, and set the destination for your ripped music.
-- The "Get CD Information for the Internet" option will automatically search the Internet for CDDB information (title, artist, album name, etc.) for the songs contained on your CD. If corresponding information is found, it will be embedded into your ripped music. To use this feature, make sure your system is connected to the Internet.


- DVB-T USB2.0 RECEIVER
- USER'S MANUAL
- DVB-T USB2.0 RECEIVER USER'S MANUAL
- CE MARK WARNING
- COPYRIGHT
- TRADEMARKS
- REVISION HISTORY
- CONTENTS
- INTRODUCTION......4
- SOFTWARE DEVICE DRIVER & APPLICATION UTILITY INSTALLATION ..... 8
- LAUNCHING ARCSOFT TOTALMEDIA APPLICATION 24
- 4.6 PHOTO 45
- 4.7 MUSIC 49
- 4.8 VIDEO....54
- 4.9 SETUP....55
- INTRODUCTION
- 1.1 SYSTEM REQUIREMENTS
- 1.2 FEATURES
- 1.3 SPECIFICATION
- 1.4 PACKAGE CONTENTS
- NOTE
- HARDWARE INSTALLATION
- 2.1 CONNECTING USB PORT
- 2.2 CONNECTING TERRESTRIAL ANTENNA
- 2.3 REMOTE CONTROLLER
- SOFTWARE DEVICE DRIVER & APPLICATION UTILITY INSTALLATION
- ATTENTION: IT IS HIGHLY RECOMMENDED TO INSTALL MICROSOFT DIRECTX9
- 3.1 INSTALL MICROSOFT DIRECTX9
- 3.2 INSTALL WINDOWS DRIVER (WINDOWS 2000, XP, AND MCE)
- 3.3 INSTALL WINDOWS MEDIA PLAYER 9
- 3.4 INSTALL ARCSOFT TOTALMEDIA SOFTWARE
- LAUNCHING ARCSOFT TOTALMEDIA APPLICATION
- 4.1 LAUNCH TOTALMEDIA MONITOR
- 4.2 ENABLE TOTALMEDIA MONITOR ICON ON THE TRAY BAR
- 4.3 MAIN MONITOR
- 4.4 FLOATING TOOLBAR
- 4.5 TV
- 4.5.1 SEARCH TV CHANNELS
- 4.5.2 CHANNEL PREVIEW
- 4.5.3 FULL SCREEN
- 4.5.4 FAVORITE CHANNEL LIST
- 4.5.5 EPG
- 4.5.6 CHANNELS
- 4.5.7 RECORDED TV
- 4.5.8 SCHEDULING
- 4.5.9 TV SETTINGS
- 4.6 PHOTO
- 4.6.1 EDIT
- 4.6.2 PRINT
- 4.6.3 SLIDE SHOW SETTINGS
- 4.7 MUSIC
- 4.7.1 MY PLAYLISTS
- 4.7.2 RIPPING MUSIC CDS
- 4.8 VIDEO
- 4.8.1 PLAYING MOVIES – PREVIEWING, RENAMING, AND DELETING
- 4.8.2 CAPTURING VIDEO
- 4.9 SETUP
- 4.9.1 GENERAL
- 4.9.2 TV
- 4.9.3 VIDEO
- 4.9.4 PICTURES
- 4.9.5 MUSIC
Brand : A-link
Model : DVB-T USB TV dongle
Category : TV receiver