
HD6180 - Deep fryer PHILIPS - Free user manual and instructions
Find the device manual for free HD6180 PHILIPS in PDF.
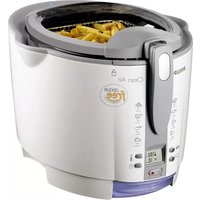


| Product Type | Deep Fryer |
| Brand | Philips |
| Model | HD6180 |
| Dimensions (approx.) | 30 x 25 x 20 cm |
| Weight (approx.) | 2.5 kg |
| Power Consumption | 1800 W |
| Oil Capacity | 1.5 L |
| Food Capacity (approx.) | 500 g |
| Temperature Control | Adjustable thermostat |
| Viewing Window | Yes |
| Cool-Touch Handles | Yes |
| Non-Stick Coating | Yes |
| Rapid Clean System | Yes |
| Automatic Shut-Off | Yes |
| Overheat Protection | Yes |
| Removable Oil Container | Yes |
| Dishwasher-Safe Parts | Yes (basket and lid) |
| Spare Parts Availability | Replacement baskets, lids available |
Frequently Asked Questions - HD6180 PHILIPS
User questions about HD6180 PHILIPS
0 question about this device. Answer the ones you know or ask your own.
Ask a new question about this device
Download the instructions for your Deep fryer in PDF format for free! Find your manual HD6180 - PHILIPS and take your electronic device back in hand. On this page are published all the documents necessary for the use of your device. HD6180 by PHILIPS.
USER MANUAL HD6180 PHILIPS


ENGLISH 6
简体中文 16
繁體中文 24
한국어 32
Read these instructions for use carefully before using the appliance and save them for future reference.
- Check if the voltage indicated on the appliance corresponds to the local mains voltage before you connect the appliance.
- Only connect the appliance to an earthed wall socket. If the mains cord is damaged, it must be replaced by Philips, a service centre authorised by Philips or similarly qualified persons in order to avoid a hazard.
- Always return the appliance to a service centre authorised by Philips for examination or repair. Do not attempt to repair the appliance yourself, otherwise your guarantee will become invalid.
- Clean the separate parts of the fryer thoroughly before using the appliance for the first time (see chapter 'Cleaning'). Make sure all parts are completely dry before you fill the fryer with oil or liquid fat.
- Never immerse the housing, which contains electrical components and the heating element, in water nor rinse it under the tap. ▶ Always unplug the appliance after use. Do not move the fryer until it has cooled down sufficiently.
- Do not switch the appliance on before you have filled it with oil or fat. Make sure the fryer is always filled to a level between the two indication marks on the inside of the inner bowl.
- Be careful of the hot steam when you open the lid.
- Keep the appliance out of the reach of children when you use it. Do not let the mains cord hang over the edge of the table or worktop on which the appliance is standing. This appliance is intended for household use only. If the appliance is used improperly or for (semi-)professional purposes or if it is used in a way that is not in accordance with the instructions for use, the guarantee will become invalid and Philips will not accept liability for any damage caused.
- The glass lid of the fryer will become hot when the appliance is in operation.
- Only use types of oil or liquid fat that are suitable for deep frying. Solid fat may only be used in accordance with the instructions in the section 'Oil and fat' in the chapter 'Preparing for use'.
- Fry food golden-yellow instead of dark or brown and remove burnt remnants! Do not fry starchy foods, especially potato and cereal products, at a temperature above 175°C (to minimise the production of acrylamide).
Safety
Thermal safety cut-out
This appliance is equipped with a thermal safety cut-out that switches the appliance off if it overheats.
This may happen if there is not enough oil or fat in the fryer or if blocks of solid fat are being melted in the fryer, which will prevent the heating element from being able to give off its heat. Take the following measures when the thermal safety cut-out has switched the appliance off:
1. Unplug the appliance. 2. Let the oil or fat cool down. 3. Carefully press the reset button at the front of the fryer, above the top right-hand corner of the display, with a very small screwdriver or an unfolded small paperclip (fig. 1).
Now the appliance is ready for use again.
If the appliance still does not work after you have reset it, please turn to your Philips dealer or a service centre authorised by Philips.
Preparing for use
1. Put the appliance on a horizontal, even and stable surface out of the reach of children. If you want to place the fryer on top of the cooker, make sure the rings of the cooker have been turned off. 2. Take the entire cord from the cord storage compartment (fig. 3). 3. Fill the dry fryer with oil, liquid fat or melted solid fat up to the top indication mark on the inside of the inner bowl (see section 'Oil and fat', for instructions on how to use solid fat) (fig. 4).
| Oil/liquid fat | Solid fat | |
| Min. | 2.2 litres | 1900 g |
| Max. | 2.5 litres | 2200 g |
Oil and fat
Never mix different types of oil or fat!
We advise you to use frying oil or liquid frying fat, preferably vegetable oil or fat that is rich in unsaturated fats (e.g. linoleic acid).
Only use types of oil or fat that are suitable for deep frying and that contain an antifoam agent. You can find this information on the package or label of the oil or fat.
It is also possible to use solid frying fat, but in that case extra precautions are necessary to prevent the fat from spattering and the heating element from overheating:
If you want to use new blocks of fat, melt them slowly over a low heat in a normal pan. 2 Pour the melted fat carefully into the fryer. 3 Store the fryer with the resolidified fat still in it at room temperature. 4 If the fat gets very cold, it may start spattering when melted. Punch some holes into the resolidified fat with a fork to prevent this (fig. 2).
Be careful not to damage the coating of the inner bowl while doing this.
Using the appliance
Frying
I Put the plug in the wall socket.
Make sure the cord does not come into contact with hot parts of the appliance.
2 Switch the fryer on by means of the on/off switch (fig. 5).
The pilot light in the on/off switch will go on and you will hear an audible signal.
This appliance is equipped with electronic temperature control. The set temperature appears on the display of the appliance.
3 Set the required temperature (150-190°C) by pushing the temperature button one or more times. The selected temperature is shown on the display (fig. 6).
- If you do not set a temperature, the oil or fat will be heated to 150°C.
- For information about which temperature to select, check the package of the food to be fried or the relevant table in these instructions for use.
- The oil or fat will be heated to the selected temperature in 10 to 15 minutes.
- While the fryer is heating up, you will see the thermometer symbol on the display being filled and emptied continuously. When the entire thermometer symbol, including the top segment, has turned black, the oil or fat has reached the selected temperature. You will hear an audible signal to indicate that the fryer is ready for frying the first batch.
- If you want to fry a number of batches in a row, wait until the thermometer symbol has turned completely black again before you start frying the next batch. In this case you will NOT hear an audible signal.
- You can leave the basket in the fryer while the oil or fat is heating up.
4 Lift the handle to raise the basket to its highest position (fig. 7). 5 Open the lid by pulling the lid release lever. The lid will open automatically (fig. 8). 6 Remove the basket from the fryer and put the food to be fried in the basket (fig. 9).
For the best frying results, we advise you not to exceed the maximum quantities mentioned in the table below. Exceeding the recommended quantity will reduce the effectiveness of the Active Air Control system and may cause some water to end up under the fryer.
| Type HD6180 | Home-made French fries | Frozen French fries |
| Max. quantity | 800 g | 800 g |
| Recommended max. quantity for best end result | 500 g | 500 g |
Do not fry Asian rice cakes (or similar types of food) in this appliance as this might cause heavy spattering or violent bubbling of the oil or fat.
7 Carefully insert the basket into the fryer without lowering it into the oil or fat.
8 Close the lid (fig. 10).
Make sure the lid is properly closed to prevent hot steam from escaping during frying and to guarantee that the Active Air Control™ system functions optimally.
9 Set the required frying time (see 'Timer'). You can also use the fryer without setting the timer.
10 Press the release button of the basket handle and carefully lower the basket to its lowest position (fig. 11).
Stick to the preparation time indicated on the package of the food to be fried or the preparation time mentioned in the relevant table in these instructions for use.
Active Air Control™
This appliance is equipped with Active Air Control™, a closed system based on the principle of condensation that offers a reduction of frying odours by up to 100% (fig. 12).
- The system condenses the steam produced by frying into water in a continuous process. The condensed water is collected in a water reservoir in the bottom of the fryer housing.
- The condensed water reservoir has a capacity of 750ml, which is enough to hold the quantity of condensed water resulting from frying 1.6 kg frozen French fries.
- The level indicator at the front of the reservoir tells you how much water has already been collected in the water reservoir and the maximum amount it can contain.
Once the fryer has been switched on by means of the on/off switch, the Active Air Control™ system starts working and the fan in the rear part of the fryer starts running, to cool down and to condense the frying steam that develops inside the fryer.
- The blue System Active indication light confirms that the Active Air Control system is working (fig. 13).
Timer
This appliance is equipped with an electronic timer on the display.
The timer indicates the end of the frying time, but does NOT switch the fryer off.
Press the timer button to set the frying time in minutes. The set time will become visible on the display (fig. 14). 2 Keep the button pressed to put the minutes forward quickly. Release the button once the required frying time has been reached. - The maximum time that can be set is 99 minutes. - A few seconds after you have set the frying time, the timer will start counting down. - While the timer is counting down, the remaining frying time blinks on the display. The last minute is displayed in seconds. If the preset time is not correct, you can erase it by pressing the timer button for 2 seconds at the moment the timer starts counting down (i.e. when the time starts to blink). Keep the button pressed until '00' appears on the display. You can now set the correct frying time. - When the preset time has elapsed, you will hear an audible signal. After 10 seconds the audible signal will be repeated. You can stop the audible signal by pressing the timer button.
ReFresh indication
For better, tastier and healthier frying results, this appliance is equipped with a ReFresh function, which advises you when to change the oil or fat. After 6 hours of frying, the ReFresh symbol will appear on the display and will start blinking, advising you to change the oil or fat (see section 'Changing the oil or fat').
After having changed the oil or fat, press the ReFresh button for at least 2 seconds to reset the frying session counter (fig. 15).
The ReFresh function does not interfere with the frying process, which means that you can always continue frying without changing oil or fat.
After frying
Lift the handle to raise the basket to its highest position, i.e. the draining position (fig. 7). 2 Open the lid by pulling the lid release lever. The lid will open automatically (fig. 8). 3 Carefully remove the basket from the fryer. If necessary, shake the basket over the fryer to remove excess oil or fat (fig. 16).
Put the fried food in a bowl or colander containing grease-absorbing paper, e.g. kitchen paper.
4 Switch the fryer off by means of the on/off switch. The pilot light in the on/off switch will go out. Unplug the appliance after use (fig. 17).
Do not move the fryer until the oil or fat has cooled down sufficiently.
Always remove and empty the water reservoir after frying.
The water reservoir and the water in it can be hot! Let the water reservoir cool down sufficiently before removing it from the fryer.
5 Empty the water reservoir in the sink (fig. 18).
The lid of the water reservoir is detachable. The reservoir and its lid can be cleaned in the dishwasher or in hot water with some washing-up liquid.
If you do not use the fryer regularly, we advise you to remove the oil or liquid fat and to store it in well-closed bottles, preferably in the refrigerator or in a cool place. Fill the bottles by pouring the oil or fat through a fine sieve to remove food particles. Remove the frying basket before emptying the inner bowl.
Cleaning
Wait until the oil or fat has cooled down sufficiently.
Do not use caustic or abrasive (liquid) cleaning agents or materials such as washing soda, scouring liquid or powder or scouring pads to clean the fryer.
Remove the lid by pressing the release button on the hinge to unlock the lid. Then lift the lid out of the hinge (fig. 19).
When putting the lid back onto the appliance, make sure that you insert it properly into the hinge.
2 Remove the frying basket from the fryer (fig. 20).
3 Lift the inner bowl out of the appliance and pour out the oil or fat (fig. 21).
PreClean function
This appliance is equipped with a PreClean function, which offers you the possibility to soak the inner bowl with hot water to allow easier cleaning.
Fill the inner bowl with cold water up to three quarters of its capacity and add some washing-up liquid (fig. 22).
2 Switch the appliance on by means of the on/off switch. Activate the PreClean function within 30 seconds by pressing the PreClean button for at least 2 seconds (fig. 23).
The water will be heated to 80°C for 30 minutes to soak the inner bowl. This will make it easier for you to clean the bowl (fig. 24).
3 When 30 minutes have passed, you will hear an audible signal to indicate that the heating element has been turned off. You can now lift the inner bowl out of the fryer, empty it and clean it with hot water and some washing-up liquid.
Dishwasher-proof parts
All parts, except the housing with electrical components and the heating element, can be cleaned in the dishwasher or in hot water with some washing-up liquid.
- Clean the housing with a moist cloth (with some washing-up liquid) and/or kitchen paper.
- Dry all parts thoroughly after cleaning (fig. 25).
Cleaning the glass lid
This appliance is equipped with a glass lid with a permanent sealing ring. To guarantee optimal functioning, the sealing ring should not be removed (fig. 26).
- Clean the glass lid in the dishwasher or in hot water with some washing-up liquid every time you have used the appliance.
Changing the oil or fat
Because oil and fat lose their favourable properties rather quickly, you should change the oil or fat regularly. The ReFresh symbol advises you when to change the oil or fat (see chapter 'Using the appliance', section 'ReFresh indication').
- If you use the fryer to prepare food that is rich in proteins (such as meat or fish), you should change the oil or fat more often.
- Never use the same oil or fat longer than 6 months and always follow the instructions on the package.
- Never add fresh oil or fat to used oil or fat.
- Never mix different types of oil or fat.
- Always change the oil or fat if it starts foaming when it is heated, if it has a strong smell or taste or if it turns dark and/or syrupy.
Disposing of used oil or fat
Pour used oil or liquid fat back into its original (resealable) plastic bottle. You can dispose of used fat by letting it solidify in the fryer (without the basket in it) and subsequently scooping it out of the fryer by means of a spatula and wrapping it in a newspaper. If applicable, you can put the bottle or newspaper in the bin for non-compostable waste (not in the compostable waste bin) or dispose of them in accordance with the regulations in your country.
Storage
Put all parts back onto/into the fryer and close the lid. When putting the lid back onto the appliance, make sure that the holder has been moved backwards and that you insert the lid properly into the hinge. 2 Roll up the cord and push it back into the storage compartment (fig. 27). 3 Lift the fryer by its handles (fig. 28). 4 If the fryer contains solid fat, let the fat solidify in the fryer and store the fryer with the fat in it (see chapter 'Preparing for use').
Frying tips
For preparation times and temperature settings, see the tables at the end of these instructions for use.
Home-made French fries
You will make the tastiest and crispiest French fries in the following way:
Use firm potatoes and cut them into sticks. Rinse the sticks with cold water. This will prevent them from sticking to each other during frying.
Dry the sticks thoroughly.
Fry the French fries twice: the first time for 4-6 minutes at a temperature of 160°C, the second time for 5-8 minutes at a temperature of 175°C.
Before you start the second frying cycle, put the home-made French fries in a bowl and shake them.
If you are frying the maximum quantity, lower the basket slowly into the fryer to prevent it from overflowing.
Frozen fries have already been precooked, so you will only have to fry them once in accordance with the instructions on the package.
Food from the freezer (-16 to -18°C) will cause the oil or fat to cool down considerably when it is immersed in it. Because the food does not sear right away, it may also absorb too much oil or fat.
Take the following measures to prevent this:
Preferably allow frozen food to defrost at room temperature before frying.
Carefully shake off as much ice and water as possible and dab the food to be fried until it is properly dry.
Do not fry very large quantities at one time (consult the relevant table with preparation times and frying temperatures).
Select the frying temperature mentioned in the relevant table in these instructions for use or on the package of the food to be fried. If there are no instructions, select a temperature of 190°C.
Lower the food into the oil or fat very gently, since frozen food may cause the hot oil or fat to start bubbling violently.
Guarantee & service
If you need information or if you have a problem, please visit the Philips website at www.philips.com or contact the Philips Customer Care Centre in your country (you will find its phone number in the worldwide guarantee leaflet). If there is no Customer Care Centre in your country, turn to your local Philips dealer or contact the Service Department of Philips Domestic Appliances and Personal Care BV.
Troubleshooting
If your fryer does not function properly or if the frying quality is insufficient, consult the table below. If you are unable to solve the problem by means of this troubleshooting guide, see chapter 'Guarantee & service'.
| Problem | Possible cause | Solution |
| The fried food does not have a golden brown colour and/or is not crispy. | The oil or fat isn't clean anymore. | Change the oil or fat. Remember to reset the ReFresh button after that. See chapter 'Using the appliance', section 'ReFresh indication'. |
| There is too much food in the basket. | Do not fry more food at one time than the recommended quantities mentioned in the tables in these instructions for use. | |
| The thermal safety cut-out has switched the appliance off. Let the oil or fat cool down and carefully press the reset button at the front of the fryer (see chapter 'Safety'). | ||
| The fryer gives off a strong unpleasant smell. | The Active Air Control system is not working properly. | The fan is not working.Turn to your Philips dealer or a service centre authorised by Philips. |
| The type of oil or fat used is not suitable for deep frying food. | Use frying oil or liquid frying fat of good quality. Never mix different types of oil or fat. | |
| A lot of steam escapes from the fryer. | The lid has not been closed properly. | Check whether the lid has been closed properly. |
| The Active Air Control system is not working properly. | The fan is not working.Turn to your Philips dealer or a service centre authorised by Philips. | |
| The sealing ring around the inside of the lid is dirty or worn. | If the ring is dirty, clean the lid in hot soapy water or in the dishwasher. If the lid is worn, tum to your Philips dealer or a service centre authorised by Philips to have the sealing ring replaced. | |
| The water reservoir leaks. | There is too much water in the reservoir. | Always empty the water reservoir after you have used the fryer. If you are frying large quantities, empty the water reservoir after having fried 1.6 kg of frozen French fries or when the maximum water level has been reached. |
| The water reservoir has not been inserted properly. | Check whether the water reservoir has been inserted properly (you will hear a click). | |
| The PreClean function cannot be activated. | More than 30 seconds elapsed between the moment the appliance was switched on and the moment the PreClean button was pressed, causing the system to reset automatically. | Switch the appliance on again by means of the on/off switch. Activate the PreClean function within 30 seconds. |
| Oil or fat spills over the edge of the fryer during frying. | There is too much oil or fat in the fryer.The food contains too much moisture. | Make sure the oil or fat in the fryer does not exceed the maximum level.Dry the food thoroughly before you start frying it and fry the food in accordance with these instructions for use. |
| There is too much food in the frying basket. | Do not fry more food at one time than the recommended quantity mentioned in the relevant table in these instructions for use. | |
| The oil or fat foams strongly during frying. | The food contains too much moisture. | Dry the food thoroughly before frying it. |
| The type of oil or fat used is unsuitable for deep frying food. | Never mix different types of oil or fat and use oil or liquid fat that contains an antifoam agent. | |
| The fryer does not work. | The inner bowl has not been placed properly in the fryer. | Move the inner bowl slightly to and fro in the appliance to ensure that it is in the correct position. |
| The thermal safety cut-out has switched the appliance off. | Let the oil or fat cool down. Carefully press the reset button at the front of the fryer (see chapter 'Safety'). | |
| Turn to your Philips dealer or a service centre authorised by Philips. | ||
| The fryer makes plopping sounds that are louder than usual (it is normal for the fryer to make soft plopping sounds). | The food contains too much moisture. | Dry the food thoroughly before frying it. |
Preparation times and temperature settings
If the instructions on the package of the food to be fried differ from those in the relevant table in these instructions for use, always follow the instructions on the package.
Do not fry Asian rice cakes (or similar types of food) in this appliance as this might cause heavy spattering or violent bubbling of the oil or fat.
FRESH OR DEFROSTED FOOD
| Temp. | Type of food | Recommended quantity for best end result | Max. quantity | Frying time (minutes) |
| 150°C | Mushrooms | 6-8 pieces | 2-3 | |
| 160°C | Home-made French fries*) 1st frying cycle | 500 g | 800 g | 4-6 |
| Fresh fish | 450 g | 5-7 | ||
| 170°C | Chicken (drumsticks) | 3-5 pieces | 12-15 | |
| Vegetable fritters (i.e. cauliflower) | 8-10 pieces | 2-3 | ||
| 175°C | Home-made French fries*) 2nd frying cycle | 500 g | 800 g | 5-8 |
| Crips (very thin potato slices) | 600 g | 3-4 | ||
| 180°C | Chinese spring rolls | 2-3 pieces | 4-6 | |
| Chicken nuggets | 8-10 pieces | 1000 g | 3-4 | |
| Mini snacks | 8-10 pieces | 1000 g | 3-4 | |
| Squid rings in batter | 8-10 pieces | 3-4 | ||
| Fish (pieces) in batter | 8-10 pieces | 3-4 | ||
| Prawns | 8-10 pieces | 2-4 | ||
| Apple fritters | 5 pieces | 3-4 | ||
| Meat/fish croquettes | 5 pieces | 4-5 | ||
| 190°C | Aubergine (slices) | 600 g | 3-4 |
FROZEN FOOD
| Temp. | Type of food | Recommended quantity for best end result | Max. quantity | Frying time (minutes) |
| 170°C | Chicken (drumsticks) | 3-4 pieces | 18-25 | |
| Mini potato pancakes | 4 pieces | 3-4 | ||
| 175°C | Frozen French fries | 500 g | 800 g | 7-8/9-10 |
| 180°C | Chinese spring rolls | 2-3 pieces | 6-10 | |
| Chicken nuggets | 8 pieces | 1000 g | 4-5 | |
| Mini snacks | 6 pieces | 1000 g | 4-5 | |
| Squid rings in batter | 8 pieces | 4-5 | ||
| Fish (pieces) in batter | 8 pieces | 4-5 | ||
| Prawns | 8 pieces | 2-5 | ||
| Meat/fish croquettes | 4 pieces | 4-6 |
IMPORTANT SAFETY INSTRUCTIONS


- ENGLISH
- SAFETY
- THERMAL SAFETY CUT-OUT
- PREPARING FOR USE
- OIL AND FAT
- NEVER MIX DIFFERENT TYPES OF OIL OR FAT
- USING THE APPLIANCE
- FRYING
- ACTIVE AIR CONTROL™
- TIMER
- REFRESH INDICATION
- AFTER FRYING
- CLEANING
- PRECLEAN FUNCTION
- DISHWASHER-PROOF PARTS
- CLEANING THE GLASS LID
- CHANGING THE OIL OR FAT
- DISPOSING OF USED OIL OR FAT
- STORAGE
- FRYING TIPS
- HOME-MADE FRENCH FRIES
- GUARANTEE & SERVICE
- TROUBLESHOOTING
- PREPARATION TIMES AND TEMPERATURE SETTINGS
- IMPORTANT SAFETY INSTRUCTIONS
Brand : PHILIPS
Model : HD6180
Category : Deep fryer