
ATC2K - Camcorder OREGON SCIENTIFIC - Free user manual and instructions
Find the device manual for free ATC2K OREGON SCIENTIFIC in PDF.


| Product Type | Action Camcorder |
| Brand | Oregon Scientific |
| Model | ATC2K |
| Dimensions | 102 x 66 x 42 mm |
| Weight | 136 g (without batteries) |
| Power Source | 2 x AAA batteries (not included) |
| Video Resolution | 640 x 480 pixels (VGA) at 30fps |
| Image Sensor | CMOS |
| Storage Media | SD/MMC card (not included, up to 1 GB recommended) |
| LCD Display | 2.0 inch color LCD |
| Waterproof Housing | Up to 30 m (with included case) |
| Lens Aperture | F/2.8 |
| Focus Range | Fixed focus (approx. 1 m to infinity) |
| Field of View | Approx. 120 degrees |
| Video Format | AVI (Motion JPEG) |
| Photo Resolution | 1280 x 960 pixels (interpolated) |
| Interface | USB 1.1 / TV out (composite) |
| Battery Life | Approx. 2 hours (with alkaline batteries) |
| Mounting | Standard tripod mount and helmet mount included |
| Maintenance | Clean lens with a soft, dry cloth; avoid solvents; dry waterproof case seals after use |
| Safety | Do not use without waterproof case underwater; keep away from children |
| Spare Parts | Batteries, SD cards, USB cable; contact Oregon Scientific for replacement parts |
| General Information | Original manufacturer: Oregon Scientific; user manual available in PDF format |
Frequently Asked Questions - ATC2K OREGON SCIENTIFIC
User questions about ATC2K OREGON SCIENTIFIC
0 question about this device. Answer the ones you know or ask your own.
Ask a new question about this device
Download the instructions for your Camcorder in PDF format for free! Find your manual ATC2K - OREGON SCIENTIFIC and take your electronic device back in hand. On this page are published all the documents necessary for the use of your device. ATC2K by OREGON SCIENTIFIC.
USER MANUAL ATC2K OREGON SCIENTIFIC
AT18_manual_US 10/20/06 14:31 Page 1
Oregon SCIENTIFIC
Oregon SCIENTIFIC

Oregon SCIENTIFIC PLAY HARD RECORD EVERYTHING
WATER-RESISTANT HANDS FREE HELMET CAM
Thank you for choosing the Oregon Scientific ATC-2K.
Designed and engineered with extreme precision.
the Oregon Scientific ATC-2K allows you to record cool action movie footage.
We recommend parents help their children with their
Oregon Scientific ATC-2K. This manual is designed using technical
information to allow you to achieve the best results.
Some children may require your guidance setting up.
learning and understanding how to use the different aspects of the ATC-2K.
OREGON SCIENTIFIC and associated trademarks and trade dress are owned by OREGON SCIENTIFIC, Inc. © 2006 ORIGON SCIENTIFIC, Inc. All Rights Reserved.
Oregon Scientific ATC-2K
- Camera Precautions 1
• Water Resistant Feature 2
II. Technical Specifications 5
III. Computer System Requirements 6
IV. Camera Description 7
V. Camera Mounting Description 9
VI. Quick Start 11
- Battery Installation 11
- Turning On/Off the Camera 12
- Inserting/Removing the SD Card 13
• Taking Video Footage 14
VII. Menu Settings 15
- Resolution 17
• Sound Recording 19
- Deleting video footage 19
- Setting Date/Time 20
- SD Memory Card 22
VIII. Connecting to PC 24
IX. Playing back video footage on a TV 25
X. Troubleshooting 26
AT18_manual_US 10/20/06 14:31 Page 3
I) Camera Precautions
Notice the following guidelines when using your camera.
- ATC-2K is not shock-proof. You should avoid dropping it.
• For your safety, do not press the buttons on the camera during sports activities.
- Do not place the camera in a damp or dusty location for extended periods of time. This may
cause a line or an electrical shock.
- Do not leave the camera in places subject to extremely high temperatures, such as under direct
sunlight for extended periods of time. This may affect the camera case and internal components
- Clean the lens with a blower (typically a small device with a rubber bulb attached to one end that you pump to produce a stream of air out the other end), or wipe it with a soft cloth in a spiraling motion to remove fingerprints or dusts.
- We recommend using Lithium batteries or Alkaline batteries with temperature between 32^ to
104°F (0°C to 40°C). It allows you to record your video for longer periods of time.
- The working temperature range of a normal Alkaline AA battery is 32^ to 104^ to 40^ . Above or below this temperature may cause the batteries to malfunction. We recommend using the lithium batteries which temperature is under 32^ (0°C).
• Turn off the camera before removing the batteries and the memory card. The card and the data
may be damaged if the SD is inserted or removed while the camera is still on.
- Remove the batteries and memory card before storing the camera for long periods of time, then
keep it in a well-ventilated place to prevent molding.
• Under the following circumstances, have the camera repaired by qualified personnel.
a) The plug is damaged or worn.
b) The device has been dropped and/or the casing has been damaged.
c) Liquid has entered the camera
Disclaimer: Oregon Scientific will not, under any circumstances, be responsible for injuries or property damages incurred during participation of any high-risk sport/activity not endorsed or recommended by Oregon Scientific; camera malfunction will not be warranted except for manufacturing defects.
Notes on copyright: Users are asked to note that the transfer of memory containing photos or data protected under copyright laws is only permissible within the restrictions imposed. Users assume all responsibility in the event that copyrights are violated by the use of this camera.
Water Resistant Feature
This ATC-2K camera is water resistant, but it cannot be used underwater. Oregon Scientific will not assume any responsibility for malfunction of the camera caused by water getting inside as a result of misuse by the user. The camera is water resistant and is not damaged by water spray from any direction.
Observe the following precautions when using the camera.
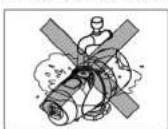
- Do not wash the camera with water.
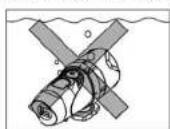
- Do not drop the camera into water.
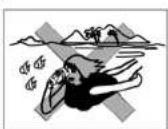
- Do not take video underwater.
Precaution:
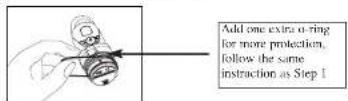
Follow the steps below to increase the water resistant of the camera
Step 1: Apply silicon grease (included)
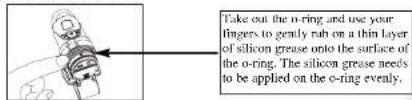
2
AT18_manual_US 10/20/06 14:31 Page 4
Step 2: Add one extra o-ring for more protection
Step 3: Make sure the cover is closed.
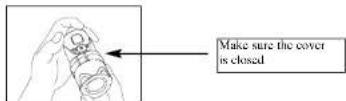
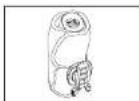
Water may get inside the camera if the battery cover is not firmly closed.
- If the camera gets wet, wipe the water off as soon as possible with a dry cloth.
- Other camera accessories are not water resistant.
Using the camera in cold weather
Cold Weather Pouch (Not included)
If you want to use your ATC-2K camera in cold weather under 32^ F to 14^ F ( 0^ C to -10^ C), you may order the pouch by completing and mailing the accessories order form found in your ATC-2K box.
Note:
a) We recommend using the "Energizer e2 lithium" batteries (not included) in temperatures under 32°F (0°C).
b) We recommend using the heat pad (not included) in temperatures under 32^ F to 14^ F ( 0^ C to -10^ C).
Don't use the camera in temperatures under 14°F (-10°C), this may cause the camera to malfunction.
AT18_manual_US 10/20/06 14:31 Page 5
II) Technical Specifications
- Sensor resolution 640x480 VGA CMOS sensor
• Built-in memory 32MB - SD memory card drive supports cards of up to 2GB (Not included)
- Movie storage:
640 x 480 pixels (30 or 15 frames per second)
320 x 240 pixels (30 or 15 frames per second)
160 x 120 pixels (30 or 15 frames per second)
• Status LCD 2-digit B/W on top for functions - Focusing Fixed range from 1.5m\~infinity
- Movie images AVI
- File format of Interface USB (1.1)
- Delete image All / last one
• Auto Shut-Off 10 minutes
• Battery 2 x AA alkaline batteries
• Dimensions 40mm diam. x 110mm long
• Operation system WIN2000/XP
III) Computer System Requirements
Minimum System Requirements
• Pentium III 800 MHz or higher
• Windows XP, Windows 2000
• 128 MB RAM
• 800 MB Free hard disk space
• SVGA 800 x 600 resolution video support (32 bit)
• 16 bit Windows compatible sound device
AT18_manual_US 10/20/06 14:31 Page 6
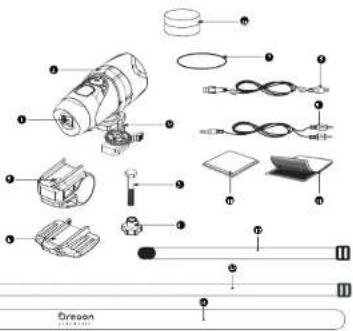
IV) Camera Description
-
Lens
-
Camera grip
-
Screw
-
Nut
-
Handlebar grip
-
Helmet grip
-
O-ring
-
USB cable
-
AV cable
-
Rubberized patch
-
Velero patch
-
Short Velcro strap
-
Long Velcro strap
-
Silicon rubber
head strap
-
Bolt
-
Silicon grease
container
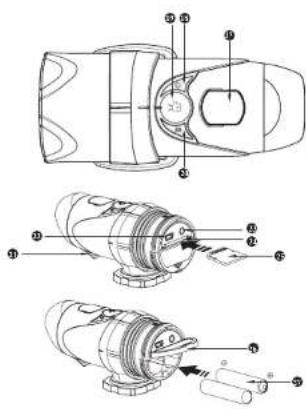
- LCD display
- ON/OFF & Enter button
- Movie shutter button
- Menu button
- Microphone
- Mini-USB port
- AV pu
- SD card slot
- SD card (Not included)
- Battery door
- Batteries (Not included)
8
AT18_manual_US 10/20/06 14:31 Page 7
V) Camera Mounting Description
The camera can be mounted in a number of ways using the straps and the Velero patch
provided. Please follow the methods of mounting as suggested below: Turn it right to
Fixing the position of the camera.
a) Turn it left to screw the camera tight to fix it into position.
b) Turn it right to unscrew the camera.
Mounting the camera onto the helmet using the silicon rubber strap
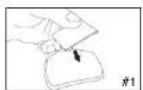
- Attach the rubberized patch to the bottom of the helmet grip.
2.+3. Thread the silicon rubber strap through the helmet grip. - Mount the helmet grip to the helmet using the silicon rubber strap.
- Slide the camera into the helmet grip.
- Adjust the angle of the camera making sure it's tight.
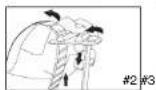
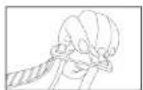
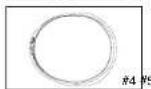
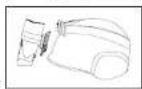
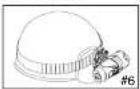
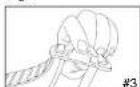
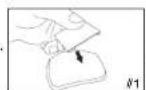
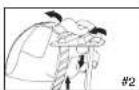
Mounting the camera using the velcro strap:
- Attach the rubberized patch to the bottom of the helmet grip.
2+3. Place the helmet grip on the helmet, and thread the velero strap
through the helmet grip. - Secure the velcro strap by fastening
it through the helmet vents. - Slide the camera into the helmet grip, and adjust the angle of the camera makig sure it's tight
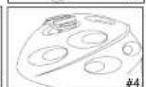
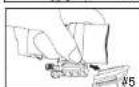
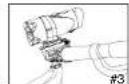
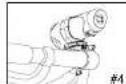
Mounting the camera using the handlebar grip:
- Place the handlebar grip on the handlebar.
- Add the screw and nut to hold the handlebar grip securely.
- Slide the camera into the handlebar grip and make sure the handlebar grip is locked with the camera.
- Adjust the angle of the camera.
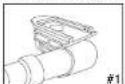
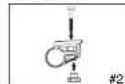
10
AT18_manual_US 10/20/06 14:31 Page 8
VI) Quick Start
Battery Installation
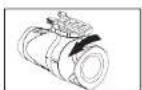
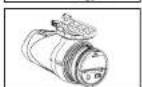
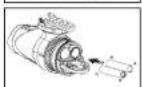
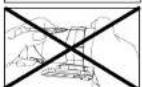
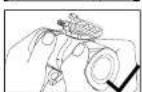
- Turn and pull to release the cover at the end of the unit.
- Release the battery tray by pushing the release hook with a pen or similar object.
- Insert 2 x AA alkaline batteries into the battery tray with the polarity in the direction as shown.
- Replace the tray and cover.
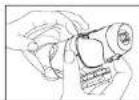
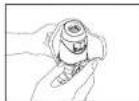
Be careful!! The edge of the clip is sharp, when turning and pulling the cover, make sure the clip is in the same direction as the lens. Observe the following precautions when turning and pulling the cover of the camera.
Important: When the camera is low in battery, the low battery icon will appear on the LCD display.
Always download video footages to your PC prior to replacing batteries to avoid memory loss.
Note:
a) Battery installation should be done under adult supervision.
b) Do not mix old and new batteries together. Replace all the batteries at the same time.
c) Remove the batteries if the camera is not going to be used for long periods of time. This will save battery life.
d) Do not mix alkaline, standard (carbon-zinc) or rechargeable (nickel-cadmium) batteries. Only batteries of the same or equivalent type as recommended are to be used.
e) Non-rechargeable batteries are not to be recharged.
f) Rechargeable batteries are to be removed from the camera before being charged.
g) Rechargeable batteries are only to be charged under adult supervision.
h) Exhausted batteries are to be removed from the camera.
i) The supply terminals are not to be short-circuited.
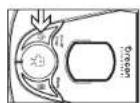
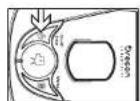
Turning On the Camera
Press and hold the ⏻ for 2 seconds (two beeping sounds). The LCD display will light up.
For your safety, do not press any buttons on the camera during sports activities.
Turning Off the Camera
- Press and hold the Ⓐ for 2 seconds (two beeping sounds). The LCD display will turn off.
- The camera will be turned off automatically after 10 minutes of not being used unless it is in USB mode.
AT18_manual_US 10/20/06 14:31 Page 9
Note: If the camera is connected to your PC, you have to unplug the USB cable to turn off the camera.
Inserting/Removing the SD memory Card
Make sure the ATC-2K is turned off during the insertion or the removal of the SD card.
Warning: The card and the data may be damaged if the SD card is inserted or removed while the camera is on.
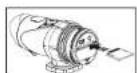
Insert:
- Turn off ATC-2K
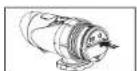
- Turn and pull to release the cover at the end of the unit.
- Insert the card carefully and completely.
- Close the cover at the end of the unit.
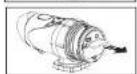
Remove:
- Turn off ATC-2K
- Turn and pull to release the cover at the end of the unit.
- Push the card until it clicks, then pull the card out.
- Close the cover at the end of the unit.
Note:
a. Make sure the card is inserted correctly
b. Do not touch the connect terminals on the back of the SD card.
c. The card may be damaged if it is not fully inserted.
d. The card and the data may be damaged if the SD card is inserted or removed while the camera is still on.
Taking Video Footage
- Aim at the subject you want to shoot.
- Press the 'Movie shutter button' to start recording. (One beeping sound) The time elapsed will be shown on the LCD display.
- Press the 'Movie shutter button' again to stop recording (Two beeping sounds). The length of the video footage will show on the LCD display for 3 seconds, after which the remaining time will be shown. (The remaining time is only an estimate).
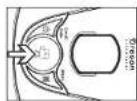
- Press and hold the Menu button for 2 seconds to select the desired resolution (640 x 480, 320 x 240, 160 x 120). Press the Menu button again to shift through the icons representing these resolutions (at the top of the LCD display), as described on page 15. The icons will flash until you press Enter to confirm your selection.
Note:
- Default resolution is 640 x 480 (VGA).
- When the time is shown, you will see 'H' for hour, 'M' for minute, and 'S' for second.
- If the recording time is long, the video file may be separated into two files automatically.
AT18_manual_US 10/20/06 14:31 Page 10
VII) Menu Settings
- Press and hold the Menu button for 2 seconds (one beeping sound) to start selecting options.
- You can shift through different shooting modes by pressing the Menu button repeatedly. The LCD will display each mode as you press the Menu button.
- Press the Enter button to confirm the selection. (Two beeping sounds)
- When you want to exit the Menu Selection mode, shift through the icons by pressing the Menu button repeatedly until the selected icon stops flashing.

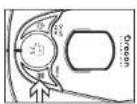
- The different mode icons are shown in the table below.
| Icon Title Description | ||
| High resolution(640x480 pixels) | Large video format/less storage capability | |
| Medium resolution(320x240 pixels) | Medium video format | |
| Low resolution(160x120 pixels) | Smallest video format/more storage capability | |
| Sound | Sound recording | |
| Delete the last video footage | Erases the last video footage taken | |
| Delete all video footages | Erases all video footagesstored in the camera or SD memory card | |
| Date and Time | Set the date and time | |
| 30 frames per second | The frame rate of video footage is 30 frames persecond (Smoother and less storage capability) | |
| 15 frames per second | The frame rate of video footage is 15 frames persecond (Less smooth and more storage capability) | |
| Low battery | Battery is low | |
| SD card | SD card is inserted in the camera | |
AT18_manual_US 10/20/06 14:31 Page 11
Resolution
a) 640 x 480, 320 x 240, 160 x 120 pixels resolution
To change the resolution, press the Menu button until the desired resolution icon is displayed on the LCD. Press the Enter button to confirm your selection.
This camera allows you to choose from three video resolutions:
640 x 480, 240, and 161.20 pixels. High resolution video footage has better quality because it has more pixels, while lower resolutions have fewer pixels but allow taking longer video footage. The duration of video footage your camera can take depends on the resolution you choose. To switch between high resolution, medium resolution and low resolution, press the Menu button until the Status LCD displays the correct icon. Press the Enter button to confirm your selection.
Frame rate (fps)
When the resolution icon is flashing, press 'Movie shutter' button to select 30 fps 5 fps . fps (frames per second); This refers to the number of frames used in 1 second.
- You can record smoother motion pictures with 30 fps.
- You can record longer motion pictures with 15 fps although the picture quality is lower.
| Item Picture size fps | |||
| VGA | 640 X 480 pixel | 30 | |
| VGA | 15 | ||
| QVGA | 30 | ||
| QVGA | 15 | ||
| QQVGA | 30 | ||
| QQVGA | 15 | ||

AT18_manual_US 10/20/06 14:31 Page 12
Sound Recording
When the sound icon is flashing, the "ON" will be shown on screen. "ON" means recording sound during filming. Press the 'Movie shutter button' (one beeping sound) to switch to "OFF" which means no recording sound. After "OFF", it will loop back to "ON" after pressing "Movie shutter button" again. Press the Enter button (two beeping sounds) to confirm the setting and to go to the next function icon.

Deleting video footage
To delete the last video footage that was recorded, press the Menu button until the Status LCD displays ☑Press the Enter button to confirm. Repeat these two steps to individually delete your files. Note: After file deletion, the LCD display will adjust the remaining number of files accordingly.

Delete All Video Footage
To delete all video footage stored in your camera, press the Menu button until the LCD displays Press the Enter button to confirm. Note: It may take a few minutes to delete multiple files at one time.
Setting Date/Time (Clock Set)
Shift to the Date icon in the Menu mode by pressing the Menu button repeatedly. When the Date icon is flashing, press the Enter button to change the date and time.
Setting the Year
- Press the 'Movie shutter button' to adjust the last digit of the year (2000-2009). Press the Enter button to confirm the last digit
- Press the 'Movie shutter button' to adjust the 3rd digit of the year (201X-209X). Press the Enter button to confirm, after which you would be able to adjust the month.

AT18_manual_US 10/20/06 14:31 Page 13
Setting the Month
When adjusting the month, the "M" will be turned on. Press the 'Movie shutter button' to adjust the month. Press the Enter button to confirm, after which you would be able to adjust the day.

Setting the Day
When adjusting the day, the "D" will be turned on. Press the 'Movie shutter button' to adjust the day. Press the Enter button to confirm, after which you would be able to adjust the Time.

Setting the Time
When adjusting the hour, the "H" will be turned on. Press the 'Movie shutter button' to adjust the hour. Press the Enter button to confirm the hour, after which you would be able to adjust the minute.

When adjusting the minute, the "M" will be turned on. Press the 'Movie shutter button' to adjust the minute. Click on the Enter button to confirm the time and quit this mode.
SD Memory Card
On this unit, you can use SD Memory Cards of the following capacity (from 8MB to 2 GB)
To use a SD memory card, turn off the ATC-2K and insert the SD memory card. When the camera is turned on again the SD card icon will be displayed on the LCD.
The remaining time will also be displayed on the LCD. All the new captured video footages will be saved onto the SD card.
Note:
- If there is an error on the SD memory card, the SD card icon and the letters 'Err' will be displayed on the LCD. In this case, turn off the camera and remove the SD card.
- The SD card is equipped with a Write-Protect switch that can prevent writing and formatting to the card. 'The letters 'Err' will be displayed if the SD card is locked with Write-Protect switch.
- Keep the Memory Card out of reach of children to prevent swallowing.
- We recommend using SanDisk regular or Sandisk Ultra II SD card.
AT18_manual_US 10/20/06 14:31 Page 14
Available Recording Time
The available recording time is an approximation. (These vary depending on the recording conditions and the type of card.
| Picture quality setting | VGA VGA 30 fps 15 | QVGA QV 30 fps | VGA QQVGA 15 fps | QQVGA 30 fps | QQVGA 15 fps | |||
| Internal Memory | 32 MB | 52 s | 1 min 20 s | 1 min 36 s | 3 min 14 s | 5 min | 1 min 10 s | |
| SD Memory Card | 32 MB | 52 s | 1 min 20 s | 1 min 36 s | 3 min 14 s | 5 min | 1 min 10 s | |
| 64 MB | 2 min 3 min | 4 min 7 min | 11 min 25 min | |||||
| 128 MB | 4 min 6 min | 7 min 14 min | 23 min 50 min | |||||
| 256 MB | 8 min 12 min | 14 min 28 min | 45 min 99 min | |||||
| 512 MB | 15 min 24 min | 28 min 57 min | 89 min 198 min | |||||
| 1 GB | 30 min 48 min | 57 min 115 min | 178 min 397 min | |||||
| 2 GB | 60 min 96 min | 114 min 230 min | 356 min 794 min | |||||
VIII) Connecting to PC
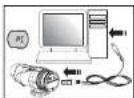
You can acquire recorded video footage from a PC by connecting the ATC-2K to the PC. Connect your camera to your PC using the USB cable. This enables you to download your video footage to your PC.
- Turn on ATC-2K.
- Connect ATC-2K to a PC via the USB cable.
- "PC" appears on the ATC-2K screen, which means ATC-2K is connected to your PC.
- The ATC-2K drive appears in the [My Computer] folder. *If you are connecting the camera to a PC for the first time, the required driver is installed automatically so that the camera can be recognized by Windows Plug and Play. The ATC-2K drive then appears on the [My Computer] folder.
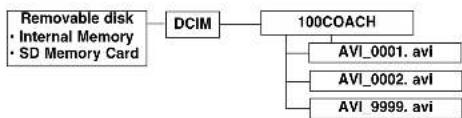
- Open the '100COACH' folder in the [DCIM] folder to start selecting your desired video files. Copy the desired video to your PC.
- Folder Composition
flowchart
graph TD
    A["Removable disk\n• Internal Memory\n• SD Memory Card"] --> B["DCIM"]
    B --> C["100COACH"]
    C --> D["AVI_0001.avi"]
    C --> E["AVI_0002.avi"]
    C --> F["AVI_9999.avi"]

AT18_manual_US 10/20/06 14:31 Page 15
Note:
-
Videos will be saved in AVI format.
-
ATC-2K is connected to the PC when the SD card is inserted in the camera, the '100COACH' folder will show the files on the SD card.
IX) Playing back video footage on a TV
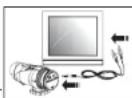
- Turn the ATC-2K and TV off.
-
Connect your ATC-2K to your TV using the AV cable.
-
Turn the TV and ATC-2K on.
-
"AU" appears on the ATC-2K screen. TV mode is automatically activated when the AV cable is connected to the ATC-2K. Once the cable is connected, the function keys will be shown on the TV screen. The function keys include Pause Stop, Reverse, Play Forward and Delete-One
- Press the Menu button to move the highlight cursor along the function keys.
- Press the Enter button when the desired function key is highlighted.
- To delete one file, select the Delete-One icon and confirm by pressing the Enter button.
ATC-2K Website
Please use the link below to check for the latest information. http://www.oregonscientific.com/atc2k/us
X) Troubleshooting
Before contacting an authorized service center at 1-800-853-8883 or sending an email to atc@oregonscientific.com. Please carry out the following simple checks as they may save you the time of an unnecessary service call.
There's no display
-Arc the batteries properly installed? -Do the batteries need replacing?
After ATC-2K is connected to my PC, it cannot find the new drive in My Computer folder
-Make sure each end of the ATC-2K USB cable is properly and firmly connected. -Make sure your USB port is working properly. Try connecting another USB device into the port. If the other device does not work, the USB port may be malfunctioned. In this case, contact your system manufacturer or the manufacturer of your USB card.
AT18_manual_US 10/20/06 14:31 Page 16
I can't capture the video footage
-Make sure there is enough space on the internal memory of ATC-2K or the SD card; the display will tell you how much time there is left for video recording.
-Make sure the SD card is not locked if you have inserted the SD card. The letters "Err" will be displayed if the SD card is locked.
Troubleshooting (continued)
The remaining time is not accurate
-The remaining time is not always accurate because it is only an estimate.
The remaining time depends not only on the time recorded, but on the color density of the video footage. Under conditions with high contrast, such as outdoors, the actual time available will be less than under low-contrast conditions, such as indoors.
I can't play the video footage on my television
-Make sure each end of the AV cable is properly and firmly connected to
ATC-2K and to your television.
-Make sure the ATC-2K is turned on.
Some captured video footage cannot be found when SD card is inserted.
-The video footage may be stored on the internal memory.
Connect ATC-2K to your PC without an SD card, and it will show the files in the internal memory.
Further Help
We make every effort to ensure the accuracy and appropriateness of the information provided on our products. However, errors can sometimes occur.
We believe it is important for us to stand behind our products and we
encourage you to email us at atc@oregonscientific.com, or call our Customer Service Department at 1-800-853-8883 with any problems and/or suggestions that you might have. Our service representatives will be happy to help you.
AT18_manual_US 10/20/06 14:31 Page 17
Note




natural_image
Pure geometric lines forming a cross and vertical shape without any text, numbers, or symbols



natural_image
Pure geometric lines forming a cross and vertical shape without any text, numbers, or symbols



natural_image
Pure geometric lines forming a cross and vertical shape without any text, numbers, or symbols
natural_image
Pure geometric lines forming a cross and vertical shape without any text, numbers, or symbols
natural_image
Pure geometric lines forming a cross and vertical shape without any text, numbers, or symbols
natural_image
Pure geometric lines forming a cross and vertical shape without any text, numbers, or symbols
AT18_manual_US 10/20/06 14:31 Page 18
Oregon
SCIENTIFIC
Oregon Scientific, Inc.
19861 SW 95th Avenue
Tualatin, OR \$7062, USA
Hotline: 1-800-853-8883
Website: www.oregonscientific.com
This device implies with Part 15 of the FCC Rules. Operation is subject to the following two conditions:
(1) this device may not cause harmful interference, and (2) this device must accept any interference received, including
interference that may cause undesirable operation.
WARNING:
Changes or modifications to this unit not expressly approved by the party responsible for compliance could void the user's authority to operate the equipment.
NOTE:
This equipment has been issued and forced or comply with the limits for a Class D digital device, pursuant to Part 15 of the PCC Rules. These limits are designed to provide reasonable protection against harmful interference in a residential installation. This equipment generates, users, and can reduce radio frequency energy and, if not installed and used in accordance with the instructions, may cause harmful interference to radio communications. However, there is no guarantee that interference will not occur in a particular installation. If this equipment does cause harmful interference by radio or television reception, which can be determined by turning the equipment off and on, the user is encouraged to try to connect the interference by one or more of the following measures:
• Reorient or relocate the receiving antenna.
• Increase the separation between the equipment and receiver
- Connect the equipment into an outlet on a circuit different from that to which the receiver is connected.
• Consult the dealer or an experienced radio TV technician for help.
"This Class B digital apparatus complies with Canadian ICES-1003."
" Cet annouéil numérienne de la class B est sanderme à la norme NME-003 du Canola"
086-004591-013
- Oregon Scientific ATC-2K
- I) Camera Precautions
- Water Resistant Feature
- Precaution:
- Using the camera in cold weather
- Note:
- II) Technical Specifications
- III) Computer System Requirements
- IV) Camera Description
- V) Camera Mounting Description
- Fixing the position of the camera.
- Mounting the camera onto the helmet using the silicon rubber strap
- Mounting the camera using the velcro strap:
- Mounting the camera using the handlebar grip:
- VI) Quick Start
- Battery Installation
- Turning On the Camera
- Turning Off the Camera
- Inserting/Removing the SD memory Card
- Insert:
- Remove:
- Taking Video Footage
- VII) Menu Settings
- Resolution
- Frame rate (fps)
- Sound Recording
- Deleting video footage
- Delete All Video Footage
- Setting Date/Time (Clock Set)
- Setting the Year
- Setting the Month
- Setting the Day
- Setting the Time
- SD Memory Card
- Available Recording Time
- VIII) Connecting to PC
- IX) Playing back video footage on a TV
- ATC-2K Website
- X) Troubleshooting
- There's no display
- After ATC-2K is connected to my PC, it cannot find the new drive in My Computer folder
- I can't capture the video footage
- Troubleshooting (continued)
- I can't play the video footage on my television
- Further Help
- Oregon
- Oregon Scientific, Inc.
- WARNING:
Brand : OREGON SCIENTIFIC
Model : ATC2K
Category : Camcorder