
APRTC100UW - Radio AKAI - Free user manual and instructions
Find the device manual for free APRTC100UW AKAI in PDF.


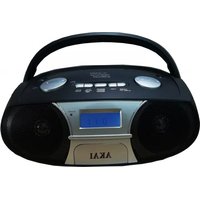
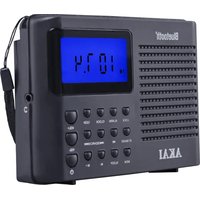
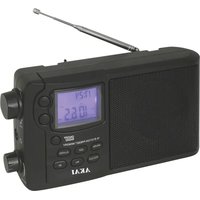
| Product Type | Portable Radio |
| Brand | AKAI |
| Model | APRTC100UW |
| Dimensions (W x H x D) | Approx. 200 x 120 x 60 mm |
| Weight | Approx. 400 g (without batteries) |
| Power Source | 3 x AA batteries (not included) or AC adapter (not included) |
| Frequency Bands | FM (88-108 MHz) and AM (530-1600 kHz) |
| Tuning | Analog dial |
| Speaker | Built-in monaural speaker, 3 W output |
| Headphone Jack | 3.5 mm stereo jack |
| Antenna | Telescopic rod antenna for FM; built-in ferrite bar for AM |
| Controls | Power/volume knob, tuning knob, band selector |
| Display | No display (analog tuning) |
| Additional Features | Carry handle, belt clip |
| Cleaning | Wipe with a soft, dry cloth; do not use solvents |
| Safety | Do not expose to rain or moisture; remove batteries if not used for long periods |
| Spare Parts / Repairability | Contact AKAI service center; user-replaceable batteries only |
| General Information | Intended for indoor/outdoor personal use |
Frequently Asked Questions - APRTC100UW AKAI
User questions about APRTC100UW AKAI
0 question about this device. Answer the ones you know or ask your own.
Ask a new question about this device
Download the instructions for your Radio in PDF format for free! Find your manual APRTC100UW - AKAI and take your electronic device back in hand. On this page are published all the documents necessary for the use of your device. APRTC100UW by AKAI.
USER MANUAL APRTC100UW AKAI
GEBRUIKERSHANDLEIDING
1-25
MANUEL DE L'UTILISATEUR
26-50
INSTRUCTION MANUAL
51-75
Special notes
WARNINGS:
- When the unit is set at STAND-BY mode, mains voltage is still present inside the unit.
- This unit contains no user serviceable parts. Never remove covers unless qualified to do so. This unit contains dangerous voltages, always remove mains plug from the socket before any service operation and when not in use for a long period.
- To prevent fire or shock hazard, do not expose this appliance todripping or splashing. No objects filled with liquids, such as vases, shall be placed on the apparatus.
Note:
Audio-visual material may consist of copyrighted works which must not be recorded without the authority of the owner of the copyright. Please refer to the relevant laws in your country.
CAUTION:
- This product is classified as a CLASS 1 LASER product.
- Use of controls, adjustments or performance of procedures other than those specified herein may result in hazardous radiation exposure.
As the laser beam used in this compact disc player is harmful to the eyes, do not attempt to disassemble the cabinet. Refer servicing to qualified personnel only.
Laser Diode Properties
Material: AlGaAs
Wavelength: 790 nm
Emission Duration: continuous
Laser Output: max. 0.6 mW
Special Note
Supply of this product does not convey a license nor imply any right to distribute content created with this product in revenue-generating broadcast systems (terrestrial, satellite, cable and/or other distribution channels), revenue-generating streaming applications (via Internet, intranets and/or other networks), other revenue-generating content distribution systems (pay-audio or audio-on-demand applications and the like) or on revenue-generating physical media (compact discs, digital versatile discs, semiconductor chips, hard drives, memory cards and the like). An independent license for such use is required. For details, please visit http://mp3licensing.com.
MPEG Layer-3 audio coding technology licensed from FraunhoferIIS and Thomson.
Accessory
Please confirm that the following accessory is included.
Note:
Only the above accessory is included.

AC power lead x 1
Contents
Page
■ General Information
Precautions ....53
Controls and indicators 54 - 55
■ Preparation for Use
Operation with AC power 56
Operation with batteries 56
■ Basic Operation
General control 57
■ CD or MP3/WMA disc Playback
Listening to a CD or MP3/WMA disc 58 - 59
Advanced CD or MP3/WMA disc playback 60 - 62
MP3/WMA folder mode (only for MP3/WMA files) 63
■ USB Memory Playback
Listening to USB mass storage device / MP3 player 64 - 65
To remove USB memory device 65
Advanced USB playback 66 - 67
Radio
Listening to the radio 68 - 69
■ Tape Playback
Listening to a cassette tape....70
■ Tape Recording
Recording to a cassette tape....71 - 72
■ Advanced Feature
Enhancing your system 72
■ References
Troubleshooting chart 73 - 74
Maintenance....74
Specifications 75
Precautions
■ General
- Use the unit on a firm, level surface free from vibration.
- Keep the unit away from direct sunlight, strong magnetic fields, excessive dust, humidity and electronic/electrical equipment (home computers, facsimiles, etc.) which generate electrical noise.
- Do not place anything on top of the unit.
- Do not expose the unit to moisture, to temperatures higher than 60°C (140°F) or to extremely low temperatures.
- If your system does not work properly, disconnect the AC power lead from the wall socket. Plug the AC power lead back in, and then turn on your system.
- In case of an electrical storm, unplug the unit for safety.
- Hold the AC power lead by the head when removing it from the wall socket, as pulling the lead can damage internal wires.
- The AC power lead is used as disconnect device and shall always remain readily operable.
- Do not remove the outer cover, as this may result in electric shock. Refer internal service to your local AKAI service facility.
- The ventilation should not be impeded by covering the ventilation openings with items, such as newspapers, tablecloths, curtains, etc.
- No naked flame sources, such as lighted candles, should beplaced on the apparatus.
- Attention should be drawn to the environmental aspects of batterydisposal.
- This unit should only be used within the range of 5°C - 35°C(41°F - 95°F) .
• The apparatus is designed for use in moderate climate.
Warning:
The voltage used must be the same as that specified on this unit. Using this product with a higher voltage other than that which is specified is dangerous and may result in a fire or other type of accident causing damage. AKAI will not be held responsible for any damage resulting from use of this unit with a voltage other than that which is specified.
Volume control
The sound level at a given volume setting depends on speaker efficiency, location, and various other factors. It is advisable to avoid exposure to high volume levels. Do not turn the volume on to full at switch on and listen to music at moderate levels.


Controls and indicators
■ Front panel
- Standby Indicator
2.ON/Stand-by
3.Memory/Display Button
4.CD Play/Pause Button
5.Tuner Band Button
6.Tape Button/Pause Button
7.Repeat/Random Button
8.USB Play
9.CD/USB Stop Button
10.Fast Reverse/Track Down/Tuner
Preset Down Button
11.Fast Forward/ Track Up/Tuner Preset Up Button
12.Tuner Tuning Down/Folder Down Button
13.Tuner Tuning Up/Folder Up Button
14.Volume Up and Down Button
15.EQ Button
16.Remote Sensor

■ Top panel
1.CD Compartment
2.Tape Record Button
3.Tape Play Button
4. Tape Rewind Button
5.Tape Fast Forward Button
6.Tape Stop/Eject Button
7.Tape Pause Button
8.USB Terminal
9.Cassette Compartment

Controls and indicators (continued)

■ Back panel
- Battery Compartment
2.FM Stereo/Mono mode/Beat Cancel Selector
3.AC Input Socket - Headphone Socket
5.FM/AM Aerial
6.Power Switch


■ Display
- Memory Indicator
2.Folder Indicator
3.Repeat mode Indicator - Random Indicator
5.Track Indicator
6.WMA Indicator
7.MP3 Indicator
8.CD Indicator - Disc or USB Play/Pause Indicator
10.USB Indicator - Equaliser modes Indicators
12.Tuner Stereo Indicator
■ Remote Control
- Standby on ⏻/IButton
3.Tape Button
4.TUNER/BAND Button
5.USB (▶/II) Button
6.CD (▶/II) Button
7.Preset (▶▶▶▶1, ◀◀◀◀◀) Button - Stop ■ Button
9.Tuning/Folder (▼, ▲) Button
10.Sleep Button
11.Muting Button
12.Memory/Display Button
13.Repeat/Random - Vol (▼, ▲) Button
15.X-Bass Button
16.EQ Button
17.Number Buttons (0, +10) Buttons
Operation with AC power

To AC INPUT
Connect the AC power lead to the AC power input socket, then connect the AC power lead plug to the wall socket.
Notes:
- If the unit will not be used for a long period of time, remove the AC power lead from the wall socket.
- Connection of the AC power lead to the unit disconnects the batteries.
- Never use a power lead other than the one supplied. It may cause an electric shock or Pre.
Operation with batteries

1 Disconnect the AC power lead, and remove the battery compartment cover.
2 Insert 8 "D", size batteries into the battery compartment.
- Insert the batteries according to the direction indicated on the rear panel.
- When inserting or removing the batteries, push them towards the ⊖ battery terminals.
- Installing the batteries incorrectly may cause the unit to malfunction.
3 Replace the battery compartment cover.
Battery replacement:
Replace the batteries when they become weak and/or recording or playback is impaired. This may occur even though radio broadcasts are audible.
Notes:
- Replace all old batteries with new ones at the same time.
- Do not mix old and new batteries.
- Remove the batteries if they are weak or if the unit will not be used for long periods of time. This will prevent potential damage due to battery leakage.
- Batteries are not included.
Caution:
Do not use rechargeable batteries (nickel-cadmium battery, etc.).
Corrosion, oxidation, battery-leakage and any other gradually acidic defect of this nature will invalidate the guarantee.
General control
■ To turn the power on
Turn the power switch to ON position, this will bring the set to standby mode.
Press the ON/STAND-BY button to turn the power on.
After use:
Press the ON/STAND-BY button to enter the power stand-by mode. At STANDBY mode, red led will lights up.
Volume control
Press the VOLUME (+ or -) button to increase or decrease the volume.

Equaliser
When the EQUALIZER button is pressed, the current mode setting will be displayed. To change to a different mode, press the EQUALIZER button repeatedly until the desired sound mode appears.
![graph TD A["FLAT (Not displayed) No equalisation."] --> B["ROCK For rock music."] B --> C["CLASSIC For classical music."] C --> D["POPS For pop music."] D --> E["JAZZ For jazz."]](/content/2026/06/1278456/images/8f56d1bf8915c606bdcfb81e1fc24cc0e05151c4219eb6b1e80d5504d0e40408.jpg)
■ Extra Bass (X-BASS)
Press the X-BASS button to emphasise bass sound.
Listening to a CD or MP3/WMA disc
This system can play back a standard CD, CD-R/RW in the CD format and CD-R/RW with MP3 or WMA Ples, but cannot record on them. Some audio CD-R and CD-RW discs may not be playable due to the state of the disc or the device that was used for recording.
MP3:
MP3 is a form of compression. It is an acronym which stands for MPEG Audio Layer 3.
MP3 is a type of audio code which is processed by significant compression from the original audio source with very little lossin sound quality.
- This system supports MPEG 1 Layer 3, MPEG 2 Layer 3, and VBR files.
- During VBR Ple playback, time counter in the FL display may differ from its actual playback time.
- Bitrate which is supported by MP3 is 32 \~ 320 kbps.
WMA:
WMA files are Advanced System Format files that include audio files which are compressed with Windows Media Audio codec. WMA is developed by Microsoft as an audio format file for Windows Media Player.
- "MP3" and "WMA" indicator will light up after the unit reads information on an MP3 or WMA disc.
- Bitrate which is supported by WMA is 64 \~ 160 kbps.

■ Playback
1 Press the ON/STAND-BY button to turn the power on.
2 Press the CD ▶ button.
3 Open the CD door by pushing the area marked "PUSH OPEN/CLOSE".
4 Place the disc on the spindle, label side up.
Be sure to place 8 cm (3") disc in the middle of the disc compartment.

5 Close the CD door by firmly pushing the right corner of it.
6 Press the CD ▶ button to start playback.
To stop playback:
Press the button.
To remove the discs:
In the stop mode, press the PUSH OPEN/CLOSE portion on the CD door.
Caution:
- Do not place two discs in the spindle.
- Do not play discs with special shapes (heart- or octagonshaped). It may cause malfunctions.
- If TV or radio interference occurs during CD operation, move the unit away from the TV or radio.
- If a disc is damaged, dirty, or loaded upside down, the disc will not play back.
Listening to a CD or MP3/WMA disc (continued)
■ Various disc functions
| Function Main unit Operation | ||
Play Press in  | the stop mode.  | |
| Stop Press in [IMAGE] | the playback mode.  | |
Pause Press in the playback mode. Press  | [IMAGE] | Press the ▶ button to resume play-back from the paused point. |
| Track up/ Track down |  | Press in the playback or stop mode. If you press the button in the stop mode, press the ▶ button to start the desired track. |
 | ||
 |  | Press and hold down in the play-back mode. Release the button to resume playback. |
 | ||
Note:
- Rewritable multi session discs which writing is not finished, can still be played.
■ To change the display (MP3 discs only)
Whilst in the stop mode or playback mode, press the MEMORY/DISP button. ID3 will on.

Press again the MEMORY/DISP button. ID3 will off.

[When in the playback mode]
![graph TD A["1 2"] --> B["02 1 22"] B --> C["TITLE"] C --> D["DREAM"] D --> E["ARTIST"] F["1006"] --> G["ALBUM"] G --> H["AKRI"] H --> I["ARTIST"] J["FOLDER TRACK NUMBER NUMBER"] --> B K["TITLE NAME"] --> C L["ALBUM NAME ARTIST NAME"] --> G](/content/2026/06/1278456/images/9f16e0cd12f8a56dc955df70922f661e7ebf90db84e677a503d4e50078e6f36d.jpg)
Notes:
• Title, Artist and Album name is displayed if it is recorded on the disc.
• MP3 ID3-Tag only support version 1.x.
Advanced CD or MP3/WMA disc playback
■ Repeat play and Random play
All tracks or a programmed sequence can be continuously repeated. The track on the disc can be played in random order automatically.
1 Whilst a disc is stop or playing, press the REPEAT/RANDOM button to Repeat 1.
REPEAT/RANDOM

2 Each time the button is pressed, the repeat play mode changes in the following order.
The repeat play mode changes as follows on CD.
![graph TD A["REPEAT 1\n19 7050"] --> B["REPEAT ALL\n19 7050"] C["NORMAL\n19 7050"] --> A D["RANDOM\n19 7050"] --> E["RANDOM\n19 7050"]](/content/2026/06/1278456/images/9813d1f0bf9982487faff20c0adc3307ac2b1691bc56df25d3a2a6a4096fa081.jpg)
The repeat play mode changes as follows on MP3/WMA disc.
![graph TD A["REPEAT 1"] --> B["REPEAT ALL"] B --> C["REPEAT FOLDER"] C --> D["RANDOM"] D --> E["NORMAL"] E --> A](/content/2026/06/1278456/images/790b25788dc28347e7222728d60eecd266a1a5dc04ec00dbe96af9ce7727232b.jpg)
Notes:
- If you press the button during random play, you can move to the track selected next by the random operation. On the other hand, the button does not allow you to move to the previous track. The beginning of the track being played will be located.
- In random play, the unit will select and play tracks automatically. (You cannot select the order of the tracks.)
Caution:
After performing repeat or random play, be sure to press the button. Otherwise, the disc will play continuously.
Notes:
- This unit only supports "MPEG-1 Audio Layer-3" format. (Sampling Frequency is 32, 44.1, 48kHz)" MPEG-2 Audio Layer-3", "MPEG-2.5 Audio Layer-3" and MP1, MP2 format are not supported.
- Playback order for MP3 files may differ sometimes depending on the writing software used during file download.
- Bitrate which is supported by MP3 is 32\~320 kbps, WMA is 64\~160 kbps.
- For MP3/WMA files, please put ".MP3" ".WMA" extension. Files cannot be played back if there is no MP3/WMA extension.
- Playlists are not supported on this unit.
- This unit can display Folder Name or File Name up to 32 characters.
- This unit only supports MP3 ID3-Tag version 1.x.
- The display playback time may not be displayed correctly when playing back a variable bitrate file.
- Time display cannot be changed by the MEMORY/DISP button.
- Title name and artist name can be displayed by pressing the MEMORY/DISP button during file playback or pause mode.
- WMA meta tag also supports title, artist and album name which are recorded in WMA files.
• Copyright protected WMA Ples cannot be played back.
Advanced CD or MP3/WMA disc playback (continued)
■ Programmed play
You can choose up to 32 selections for playback in the order you like.
1 Whilst in the stop mode, press the MEMORY/DISP button to enter the programming save mode.  | MEMORY//DISP  |
2 Select a track by pressing the ←← ←r button.  Selected track number Selected track number | |
3 Press the MEMORY/DISP button to save the track number.  | |
| 4 Repeat steps 2 - 3 for other tracks and programmed number will automatically increase. Up to 32 tracks can be programmed."PROGFUL" indicator will display on LCD after programmed up to 32 tracks.If you make a mistake, the programmed tracks can be cleared by pressing the ■button. | |
| 5 Press the CD ▶ button to start playback. | |
6 Press the ■button.The total number of memory will appear.  | |
| 7 Press the CD ▶ button to start playback. | |
To cancel the programmed play mode:
Whilst in the stop mode and the "MEMORY" indicator is lit, press the ■ button. The "MEMORY" indicator will disappear and all the programmed contents will be cleared.
Adding track to the programme:
If a programme has been previously stored, the "MEMORY" indicator will be displayed. Then follow step 1 - 3 to add tracks. The new track will be stored after the last track of the original programme.
To check which tracks are programmed:
Whilst the unit is stopped in the programmed play mode, press the ◀◀◀ or ▶▶▶▶ button.
Notes:
- When you open the CD compartment, the programme is automatically cancelled.
- After you change the function from CD to another, the programmed selections will be cleared.
- During programme operation, random play is not possible.
■ Programmed play (Folder mode)
1 Whilst in the stop mode, press the MEMORY/DISP button to enter the programming save mode.
2 Press the TUNING/FOLDER ( √r ) button to select the desired folder.
3 Press the MEMORY/DISP button to save the folder number.
4 Press the ◀◀ ◀◀ or ▶▶ ▶▶ button to select the desired tracks.
5 Press the MEMORY/DISP button to save the track number.
6 Repeat steps 2 - 5 for other folder/tracks. Up to 32 tracks can be programmed.
7 Press the CD ▶ button to start playback.


MP3/WMA folder mode (only for MP3/WMA files)
To playback MP3/WMA (Windows Media Audio) file
There are many music sites on the internet that you can download MP3/WMA (Windows Media Audio) music Files. Follow the instructions from the website on how to download the music files. You can then playback these downloaded music files by burning them to a CD-R/RW disc or by connecting a USB Memory Player device.
- Your downloaded song/files are for personal use only. Any other usage of the song without owner's permission, is against the law.
■ About folder playback order
If MP3/WMA files are recorded in several folders, total number of folder and track number will be display.
The folder and file order information which is recorded on the disc depends on the writing software. There maybe possibilities that this unit will playback the files not according to our expected playback order.
■ Procedure to playback MP3/WMA disc
To playback CD-R/RW.
1 Press the OPEN button, and load a MP3/WMA disc.● After disc is loaded, the disc info will be displayed. |
2 Whilst in the stop or playback mode, select the desired folder by pressing the FOLDER (or) button. (s (s |
3 Select the desired track by pressing the ▶◀◀ar ▶▶▶▶▶ button. (per (per |
| 4 Press the CD ▶/ □ button.Playback will start. |
Listening to USB mass storage device / MP3 player


Note:
This product is not compatible with MTP and AAC file systems.
1 Press the USB button, and push down the USB door. Connect the USB Memory device that has MP3/WMA format files on the unit.

When the USB memory is connected to the main unit, the device information will be displayed.

2 Whilst play mode or stop mode, press the FOLDER (or) button to select desired playback folder.
* IMPORTANT INFORMATION:
BECAUSE OF THE GREAT VARIETY OF PRODUCTS WITH USB, PORTS AND THEIR SOMETIMES QUITE MANUFACTURER-SPECIFIC FUNCTIONS WE CAN NEITHER GUARANTEE THAT ALL DEVICES WILL BE RECOGNIZED NOR THAT ALL OPERATING OPTIONS THAT ARE POSSIBLE IN THEORY WILL ACTUALLY WORK
Listening to USB mass storage device/ MP3 player (continued)
3 Select desired file to be played back by pressing the / ◀◀ ◀◀ button.

4 Press the USB ▶ / || button.
Playback will be start and the MP3 or WMA indicator will be displayed.
- Title, Artist and Album name is displayed if it is recorded on the disc.
- Display content can be changed by pressing the MEMORY/DISP button.
![graph TD A["1.2"] --> B["02:22"] B --> C["TITLE"] C --> D["BREAM"] D --> E["ARTIST"] F["1006"] --> G["ALBUM"] G --> H["AKAI"] H --> I["ARTIST"] style A fill:#f9f,stroke:#333 style B fill:#ccf,stroke:#333 style C fill:#cfc,stroke:#333 style D fill:#fcc,stroke:#333 style E fill:#cff,stroke:#333 style…](/content/2026/06/1278456/images/de5437fa22d227a64ecc6d58ee574ffc593958d88bda8f3d3d4d3b22c4066d89.jpg)
MP3 ID3-Tag only support version 1.x.
Note:
To pause playback:
Press the USB ▶ / □ button.
To remove USB memory device
1 Press the USB ■ button on main unit.
2 Disconnect USB memory device from the USB terminal.

3 "NO USB" will appears on FL display.

Notes:
- AKAI will not be held liable for the loss of data whilst the USB memory device is connected to the audio system.
- Files compressed in MP3 and / or WMA format can be played back when connected to the USB terminal.
- This USB memory's format supports FAT 16 or FAT 32.
-
AKAI cannot guarantee that all USB memory devices will work on this audio system.
-
This USB memory cannot be operated via USB hub.
- If "NO SUPPORT" is displayed, it means "Copyright protected WMA file" or "Not supported playback file" is selected.
- In case the data inside the USB memory is large, it may take a longer time for data to be read.
- External storages cannot be playback via the USB terminal.
- The USB terminal in this unit is not intended for a PC connection but is used for music streaming with a USB memory device.
Advanced USB playback
■ Repeat play and Random play
All tracks or a programmed sequence can be continuously repeated. The track on the disc can be played in random order automatically.
1 Whilst a disc is stop or playing, press the REPEAT/RANDOM button to Repeat 1.
REPEAT/RANDOM

2 Each time the button is pressed, the repeat play mode changes in the following order.
The repeat play mode changes as follows on USB without FOLDER.
![graph TD A["REPEAT 1"] --> B["REPEAT ALL"] B --> C["NORMAL"] C --> D["RANDOM"] D --> E["NORMAL"]](/content/2026/06/1278456/images/ac461676a4c4ac280879336d8bd49e477e5f3bdc574452ab039bc5cf44af09d2.jpg)
The repeat play mode changes as follows on USB with FOLDERS.
![graph TD A["REPEAT 1\n02 27"] --> B["REPEAT ALL\n02 27"] B --> C["REPEAT FOLDER\n02 27"] C --> D["RANDOM\n02 27"] D --> E["NORMAL\n02 27"] E --> A](/content/2026/06/1278456/images/42ff13f53e41243462590fe00ccf1c1a4e92d900763184ffb2588c05c9afbf7c.jpg)
- Bitrate which is supported by MP3 is 32\~320 kbps, WMA is 64\~160 kbps.
- For MP3/WMA files, please put ".MP3" ".WMA" extension. Files cannot be played back if there is no MP3/WMA extension.
- Playlists are not supported on this unit.
- This unit can display Folder Name or File Name up to 32 characters.
- This unit only supports MP3 ID3-Tag version 1.x.
- The display playback time may not be displayed correctly when playing back a variable bitrate file.
- Time display cannot be changed by the MEMORY/DISP button.
- Title name and artist name can be displayed by pressing the MEMORY/DISP button during file playback or pause mode.
- WMA meta tag also supports title, artist and album name which are recorded in WMA files.
• Copyright protected WMA Ples cannot be played back. - Bitrate which is supported by MP3 is 32\~320 kbps, WMA is 64\~160 kbps.
- For MP3/WMA files, please put ".MP3" ".WMA" extension. Files cannot be played back if there is no MP3/WMA extension.
- Playlists are not supported on this unit.
- This unit can display Folder Name or File Name up to 32 characters.
- This unit only supports MP3 ID3-Tag version 1.x.
- The display playback time may not be displayed correctly when playing back a variable bitrate file.
- Time display cannot be changed by the MEMORY/DISP button.
- WMA meta tag also supports title, artist and album name which are recorded in WMA files.
• Copyright protected WMA Ples cannot be played back.
Notes:
- If you press the ▶▶▶▶button during random play, you can move to the track selected next by the random operation. On the other hand, the ◀◀◀◀button does not allow you to move to the previous track. The beginning of the track being played will be located.
- In random play, the unit will select and play tracks automatically. (You cannot select the order of the tracks.)
Caution:
After performing repeat or random play, be sure to press the ■ button. Otherwise, the disc will play continuously.
Notes:
- This unit only supports "MPEG-1 Audio Layer-3" format. (Sampling Frequency is 32, 44.1, 48kHz)" MPEG-2 Audio Layer-3", "MPEG-2.5 Audio Layer-3" and MP1, MP2 format are not supported.
- Playback order for MP3 Ples may differ sometimes depending on the writing software used during file download.
Advanced USB playback (continued)
■ Programmed play (Folder mode)
1 Whilst in the stop mode, press the MEMORY/DISP button to enter the programming save mode.

2 Press the TUNING/FOLDER (or) button to select the desired folder.

3 Press the MEMORY/DISP button to save the folder number.

4 Press the ◀◀ ◀◀ or ▶▶ ▶▶ button to select the desired tracks.

5 Press the MEMORY/DISP button to save the track number.

6 Repeat steps 2 - 5 for other folder/tracks. Up to 32 tracks can be programmed.
7 Press the USB ▶ button to start playback.
Listening to the radio


Note:
This product can receive FM stereo/FM monaural and AM monaural broadcast. AM stereo broadcasts will not be played in stereo.
■ Tuning
| 1 Press the ON/STAND-BY button to turn the power on. |
| 2 Press the TUNER/BAND button repeatedly to select the desired frequency band (FM or AM). |
| 3 Press the TUNING (√ or ↗button to tune in to the desired station.Manual tuning:Press the TUNING button as many times as required to tune in to the desired station.Auto tuning:When the TUNING button is pressed for more than 0.5 seconds, scanning will start automatically and the tuner will stop at the first receivable broadcast station. |
Notes:
- When radio interference occurs, auto scan tuning may stop automatically at that point.
• Auto scan tuning will skip weak signal stations.
• To stop the auto tuning, press the TUNING button again.
To receive an FM stereo transmission:
Press the TUNER/BAND button to display the "ST" indicator.
- " ∞" will appear when an FM broadcast is in stereo.
- If the FM reception is weak, press the TUNER/BAND button to extinguish the "ST" indicator. The reception changes to monaural, and the sound becomes clearer.

Listening to the radio (continued)
Aerial adjustment:


Beat cancel switch:
- If a whistling noise occurs when recording from an FM or AM station, set the BEAT CANCEL switch to 1 or 2, whichever gives the best reception.
■ Memorising a station
You can store 20 FM and 10 AM stations in memory and recall themat the push of a button. (Preset tuning)
| 1 Perform steps 1 - 3 in "Tuning" on page 18. |
2 Press the MEMORY/DISP button to enter the preset tuning saving mode. |
| 3 Within 10 seconds, press the PRESET (or) button to select the preset channel number.Store the stations in memory, in order, starting with preset channel 1. |
| 4 Within 10 seconds, press the MEMORY/DISP button to store that station in memory.[IMAGE]If the "MEMORY" and preset number indicators disappear before the station is memorised, repeat the operation from step 2. |
| 5 Repeat steps 1 - 4 to set other stations, or to change a pre-set station.When a new station is stored in memory, the station previously memorised will be erased. |
Note:
The backup function protects the memorised stations for a few hours should there be a power failure or the AC power lead disconnection.
■ To recall a memorised station
Press the PRESET (√ or ) button to select the desired station.
Listening to a cassette tape
■ Cassette Tape
Before playback:
- For playback, use normal or low-noise tapes for the best sound. (Metal or CrO2 tapes are not recommended.)
- Do not use C-120 tapes or poor-quality tapes, as they may cause malfunctions.
- Before loading a tape into the cassette compartment, tighten the slack with a pen or a pencil.


| 1 | Press the ON/STAND-BY button to turn the power on. |
| 2 | Press the TAPE button. |
| 3 | Open the cassette compartment by pushing the STOP/EJECT ▼ button. |
| 4 | Load a cassette into the cassette compartment with the side to be played facing up. |
| 5 | Press the PLAY ▶button. |
| 6 | To advance the tape, press the STOP/EJECT ▼/▲ button, then press the F.FWD ▶button. To rewind, press the STOP/EJECT ▼/▲ button, then press the REWIND ▶button. |
To interrupt playback:
Press the PAUSE ▪ button during playback.
Press the PAUSE ■ button again to resume playback.
To stop playback:
Press the STOP/EJECT ■/▲button.
Precautions:
- Be sure not to press the PLAY▶ and REWIND ◀◀ buttons simultaneously, or the tape will become damaged.
- Before changing from one tape operation to another, press theSTOP/EJECT ▪/▲ button.
- Do not press the PAUSE ▪ button whilst the fast forward or rewind operations are in progress. The F.FWD ▶ or REWIND ◀ button will not be released when the tape end is reached. Once this occurs, press the STOP/EJECT ▪/▲ button.
Notes:
- Tape play button will automatically released when the end of the tape has been reached.
- Fast forward or rewind button cannot automatically released when the end of the tape has been reached. Make sure to press the STOP/EJECT ▪/▲ button when the end of the tape has been reached.
Recording to a cassette tape
Before recording:
- When recording important selections, make a preliminary test to ensure that the desired material is properly recorded.
- AKAI is not liable for damage or loss of your recording arising from malfunction of this unit.
- The volume and sound controls can be adjusted with no effect on the recorded signal (Variable Sound Monitor).
- For recording, use only normal tapes. Do not use metal or CrO 2 tapes.
Erase-prevention tab of cassette tapes:
- When recording on a cassette tape, make sure that the eraseprevention tabs are not removed. Cassettes have removable tabs that prevent accidental recording or erasing.
- To protect the recorded sound, remove the tab after recording. Cover the tab hole with adhesive tape to record on the tape without the tab.


■ Recording from the radio
| 1 Set the FUNCTION switch to RADIO. |
| 2 Set the BAND SELECTOR switch to FM or AM. |
| 3 Tune in to the station to be recorded. |
| 4 Load a blank cassette into the cassette compartment with the side to be recorded on facing up. |
| 5 Press the PAUSE ▪ button. |
| 6 Press the RECORD ● button. |
| 7 Press the PAUSE ▪ button again to begin recording. |
To stop recording:
Press the STOP/EJECT ■/▲button.
Note:
Play and record buttons will automatically released when the end of tape has been reached.
Beat cancel switch:
If a whistling noise occurs when recording from an FM or AM station, set the BEAT CANCEL switch to 1 or 2, whichever gives the best reception.
■ Recording from CD/USB
| 1 Set the FUNCTION switch to CD or USB. |
| 2 Load a blank cassette into the cassette compartment with the side to be recorded on facing up. |
| 3 Press the RECORD button, the recording will begin. |
4 When press the STOP/EJECT /button during recording, display will appear, but CD still spinning. |
| 5 To stop the CD spinning press the button. |
■ Programmed track recording from CD/USB
| 1 Select the memories track you want to record. |
| 2 After memories the selected track, press the RECORD ● button. The recording for memory track will begin until end. |
| 3 After recording is completed, disc will stop to rotate, but tape still rotating. |
| 4 Press the STOP/EJECT /■button to stop recording. |
Note:
- Cassette play and record buttons will automatically release when the end of tape has been reached.
Enhancing your system
■ Headphone
- Before plugging in or unplugging the headphones, make sure the volume level is reduced.
- Be sure your headphones have a 3.5 mm (1/8") diameter plug and are between 16 ohms and 50 ohms impedance. The recommended impedance is 32 ohms.
- When headphones are connected, the speakers are disconnected automatically. Adjust the VOLUME control for desired volume.

Troubleshooting chart
Many potential problems can be resolved by the owner without calling a service technician.
If something is wrong with this product, check the following before calling your authorised AKAI dealer or service centre.
General
| Symptom Possible cause | |
| When a button is pressed, the unit does not respond. | Set the unit to the power stand-by mode and then turn it back on.Is the volume level set to "0"? |
| No sound is heard. | Are the headphones connected? |
■ CD player
| Symptom Possible | cause |
| ● Playback does not start. ● Playback stops in the middle or is not performed properly. | ● Is the disc loaded upside down? ● Does the disc satisfy the standards? ● Is the disc distorted or scratched? |
| ● Playback sounds are skipped, or stopped in the middle of a track. | ● Is the unit located near excessive vibrations? ● Is the disc very dirty? ● Has condensation formed inside the unit? |
Tuner
| Symptom Possible | cause |
| ● The radio makes unusual noises continuously. | ● Is the unit placed near the TV or computer? ● Is the FM aerial placed properly? Move the aerial away from the AC power lead if it's located nearby. |
■ Cassette deck
| Symptom Possible cause | |
| ● Cannot record. | ● Is the erase-prevention tab removed? |
| ● Cannot record tracks with proper sound quality. ● Cannot erase completely. | ● Is it a normal tape? (You cannotrecord on a metal or CrO2 tape.) |
| ● Sound skipping. ● Cannot hear treble. ● Sound fluctuation. | ● Is there any slack? ● Is the tape stretched? ● Are the capstan, pinch roller, or headdirty? |
| ● Cannot remove the tape. | ● If a power failure occurs during playback, the head remain engaged with the tape. Do not open thecompartment with great force. |
Condensation
Sudden temperature changes, storage or operation in an extremely humid environment may cause condensation inside the cabinet (CD pickup, etc.).
Condensation can cause the unit to malfunction. If this happens, leave the power on with no disc in the unit until normal playback is possible (about 1 hour). Wipe off any condensation on the transmitter with a soft cloth before operating the unit.
■ If trouble occurs
When this product is subjected to strong external interference (mechanical shock, excessive static electricity, abnormal supply voltage due to lightning, etc.) or if it is operated incorrectly, it may malfunction.
If such a problem occurs, do the following:
1 Set the unit to the stand-by mode and turn the power on again.
2 If the unit is not restored in the previous operation, unplug and plug in the unit, and then turn the power on.
■ Before transporting the unit
Remove CD from the unit. Make sure there is no CD in the disc compartment. Then, set the unit to the power stand-by mode. Carrying the unit with disc left inside can damage the unit.
■ Care of compact discs
Compact discs are fairly resistant to damage, however mistracking can occur due to an accumulation of dirt on the disc surface. Follow the guidelines below for maximum enjoyment from your CD collection and player.
- Do not write on either side of the disc, particularly the non-label side from which signals are read. Do not mark this surface.
- Keep your discs away from direct sunlight, heat, and excessive moisture.
- Always hold the CDs by the edges. Fingerprints, dirt, or water on the CDs can cause noise or mistracking. If a CD is dirty or does not play properly, clean it with a soft, dry cloth, wiping straight out from the centre, along the radius.

Maintenance
■ Cleaning the cabinet
Periodically wipe the cabinet with a soft cloth and a diluted soap solution, then with a dry cloth.
Caution:
- Do not use chemicals for cleaning (petrol, paint thinner, etc.). I tmay damage the cabinet finish.
- Do not apply oil to the inside of the unit. It may cause malfunctions.
■ Cleaning the lens and tape-handling parts
- Do not touch the laser pickup lens, if finger prints or dust accumulate on the pickup, clean it gently with a dry cotton swab.
- Dirty head, capstan or pinch roller can cause poor sound and tape jams. Clean these parts with a cotton swab moistened with commercial head/pinch roller cleaner or isopropyl alcohol.
- When cleaning the head, pinch roller, etc., unplug the unit which contains high voltages.
- After long use, the deck's head and capstan may become magnetised, causing poor sound. Demagnetise these parts once every 30 hours of playing/recording time by using a commercial tape head demagnetiser. Read the demagnetiser's instructions carefully before use.

Ⓐ Laser pickup lens Pinch roller
© Capstan Recording/Playback head
E Erase head
Specifications
As part of our policy of continuous improvement, AKAI reserves the right to make design and specification changes for product improvement without prior notice. The performance specification figures indicated are nominal values of production units. There may be some deviations from these values in individual units.
■ General
| Power source | AC 230 V, 50 HzDC12V ["D" size battery x 8] |
| Power consumption | Power on: 12 WPower stand-by: 0.6 W |
| Output power | PMPO: 32 WMPO: 5.4 W (2.7 W + 2.7 W)(AC OPERATION, DIN 45 324)RMS: 4 W (2 W + 2 W)(DC OPERATION, DIN 45 324) |
| Speaker type | 2 way speaker system10 cm (4") - 8 ohms x 2 - Speaker4 cm (1 - 3/5") - 8 ohms x 2 - Tweeter |
| Dimensions | Width: 435 mm (17-1/8")Height: 165 mm (6-1/2")Depth: 240 mm (9-1/2") |
| Weight | 3.4 kg (7.5 lbs.) without battery |
Radio
| Frequency range | FM: 87.5 - 108.0 MHzMW: 522 - 1620 kHz |
■ Tape recorder
| Frequency response | 80 - 8000 Hz (Normal tape) |
| Signal/noise ratio | 40 dB |
| Wow and flutter | 0.3% (DIN 45 511) |
| Motor | DC 9 V electric governor |
| Bias system | AC bias |
| Erase system | Magnet erase |
■ CD player
| Type | Compact disc player |
| Signal readout | Non-contact, 3-beam semiconductor laser pickup |
| D/A converter | 1-bit D/A converter |
| Frequency response | 60 - 20,000 Hz |
USB
| Class | Mass storage class |
| Support File | MP3/WMA(do not support DRM file) |
| Format support | FAT 16 or FAT 32 |
| Bitrate support | MP3 (32 ~ 320 kbps)WMA (64 ~ 160 kbps) |
| Other | USB supports version 2.0 |
Packing Clause
We recommend that you retain the original carton and packing materials in case it ever becomes necessary to return your product for service. This is the only way to safely protect the product against damage in transit. If you do dispose of the carton and the packing materials, please remember to recycle with due care to the environment.
Design and specifications subject to change without notice.

Disposal of Used Electrical & Electronic Equipment The meaning of the symbol on the product, its accessory or packaging indicates that this product shall not be treated as household waste. Please, dispose of this equipment at your applicable collection point for the recycling of electrical & electronic equipments waste. In the European Union and Other European countries which there are separate collection systems for used electrical and electronic product. By ensuring the correct disposal of this product, you will help prevent potentially hazardous to the environment and to human health, which could otherwise be caused by unsuitable waste handling of this product. The recycling of materials will help conserve natural resources. Please do not therefore dispose of your old electrical and electronic equipment with your household waste. For more detailed information about recycling of this product, please contact your local city office, your household waste disposal service or the shop where you purchased the product.
For more information and warranty conditions, please visit : www.akai.eu


- SPECIAL NOTES
- WARNINGS
- NOTE
- CAUTION
- SPECIAL NOTE
- ACCESSORY
- CONTENTS
- GENERAL INFORMATION
- PREPARATION FOR USE
- BASIC OPERATION
- CD OR MP3/WMA DISC PLAYBACK
- USB MEMORY PLAYBACK
- RADIO
- TAPE PLAYBACK
- TAPE RECORDING
- ADVANCED FEATURE
- REFERENCES
- PRECAUTIONS
- GENERAL
- WARNING
- VOLUME CONTROL
- CONTROLS AND INDICATORS
- FRONT PANEL
- TOP PANEL
- CONTROLS AND INDICATORS (CONTINUED)
- BACK PANEL
- DISPLAY
- REMOTE CONTROL
- OPERATION WITH AC POWER
- NOTES
- OPERATION WITH BATTERIES
- BATTERY REPLACEMENT
- GENERAL CONTROL
- TO TURN THE POWER ON
- AFTER USE
- EQUALISER
- EXTRA BASS (X-BASS)
- LISTENING TO A CD OR MP3/WMA DISC
- MP3
- WMA
- PLAYBACK
- TO STOP PLAYBACK
- TO REMOVE THE DISCS
- LISTENING TO A CD OR MP3/WMA DISC (CONTINUED)
- TO CHANGE THE DISPLAY (MP3 DISCS ONLY)
- ADVANCED CD OR MP3/WMA DISC PLAYBACK
- REPEAT PLAY AND RANDOM PLAY
- ADVANCED CD OR MP3/WMA DISC PLAYBACK (CONTINUED)
- PROGRAMMED PLAY
- TO CANCEL THE PROGRAMMED PLAY MODE
- ADDING TRACK TO THE PROGRAMME
- TO CHECK WHICH TRACKS ARE PROGRAMMED
- PROGRAMMED PLAY (FOLDER MODE)
- MP3/WMA FOLDER MODE (ONLY FOR MP3/WMA FILES)
- TO PLAYBACK MP3/WMA (WINDOWS MEDIA AUDIO) FILE
- ABOUT FOLDER PLAYBACK ORDER
- PROCEDURE TO PLAYBACK MP3/WMA DISC
- LISTENING TO USB MASS STORAGE DEVICE / MP3 PLAYER
- IMPORTANT INFORMATION
- LISTENING TO USB MASS STORAGE DEVICE/ MP3 PLAYER (CONTINUED)
- 3 SELECT DESIRED FILE TO BE PLAYED BACK BY PRESSING THE / ◀◀ ◀◀ BUTTON
- 4 PRESS THE USB ▶ / || BUTTON
- TO REMOVE USB MEMORY DEVICE
- 1 PRESS THE USB ■ BUTTON ON MAIN UNIT
- 2 DISCONNECT USB MEMORY DEVICE FROM THE USB TERMINAL
- 3 "NO USB" WILL APPEARS ON FL DISPLAY
- ADVANCED USB PLAYBACK
- ADVANCED USB PLAYBACK (CONTINUED)
- LISTENING TO THE RADIO
- TUNING
- TO RECEIVE AN FM STEREO TRANSMISSION
- LISTENING TO THE RADIO (CONTINUED)
- AERIAL ADJUSTMENT
- BEAT CANCEL SWITCH
- MEMORISING A STATION
- TO RECALL A MEMORISED STATION
- LISTENING TO A CASSETTE TAPE
- CASSETTE TAPE
- BEFORE PLAYBACK
- TO INTERRUPT PLAYBACK
- RECORDING TO A CASSETTE TAPE
- BEFORE RECORDING
- ERASE-PREVENTION TAB OF CASSETTE TAPES
- RECORDING FROM THE RADIO
- TO STOP RECORDING
- RECORDING FROM CD/USB
- PROGRAMMED TRACK RECORDING FROM CD/USB
- ENHANCING YOUR SYSTEM
- HEADPHONE
- TROUBLESHOOTING CHART
- CONDENSATION
- IF TROUBLE OCCURS
- IF SUCH A PROBLEM OCCURS, DO THE FOLLOWING
- BEFORE TRANSPORTING THE UNIT
- CARE OF COMPACT DISCS
- MAINTENANCE
- CLEANING THE CABINET
- CLEANING THE LENS AND TAPE-HANDLING PARTS
- SPECIFICATIONS
- PACKING CLAUSE
- DESIGN AND SPECIFICATIONS SUBJECT TO CHANGE WITHOUT NOTICE
Brand : AKAI
Model : APRTC100UW
Category : Radio