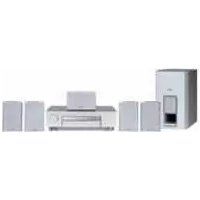
DPL660HT - Home Theater System THOMSON - Free user manual and instructions
Find the device manual for free DPL660HT THOMSON in PDF.


| Product Type | Home Theater System |
| Brand | Thomson |
| Model | DPL660HT |
| Color | Black |
| Dimensions (Main Unit) | 430 x 60 x 300 mm (W x H x D) |
| Dimensions (Speakers) | Front: 260 x 1100 x 260 mm each; Center: 260 x 110 x 110 mm; Surround: 260 x 1100 x 260 mm each; Subwoofer: 400 x 400 x 400 mm |
| Weight (Main Unit) | 3.2 kg |
| Weight (Total System) | Approx. 15 kg |
| Power Supply | AC 110-240 V, 50/60 Hz |
| Power Consumption | 100 W (standby: <1 W) |
| Amplifier Power (RMS) | 600 W total (5.1 channels, 100 W per channel) |
| Speaker Configuration | 5.1: Front (2), Center (1), Surround (2), Subwoofer (1) |
| Frequency Response | 20 Hz - 20 kHz |
| Audio Formats Supported | Dolby Digital, DTS, MP3, WMA, AAC, FLAC |
| Connectivity | HDMI (in/out), Optical, Coaxial, AUX (RCA), USB 2.0, FM Antenna |
| Video | DVD playback (PAL/NTSC), HDMI upscaling to 1080p |
| Radio Tuner | FM with RDS |
| Remote Control | Included |
| Maintenance | Clean with dry cloth; avoid liquids |
| Safety Features | Auto power-off, overheating protection |
| Repairability | Replaceable fuse; service by qualified personnel |
| Included Accessories | Remote control, batteries, audio cable, FM antenna, user manual |
Frequently Asked Questions - DPL660HT THOMSON
User questions about DPL660HT THOMSON
0 question about this device. Answer the ones you know or ask your own.
Ask a new question about this device
Download the instructions for your Home Theater System in PDF format for free! Find your manual DPL660HT - THOMSON and take your electronic device back in hand. On this page are published all the documents necessary for the use of your device. DPL660HT by THOMSON.
USER MANUAL DPL660HT THOMSON
Rating Information: At bottom of the unit this unit comply with the existing requirements
CE
In accordance with the rating plate of the unit, this unit complies with current standards concerning electrical safety and electromagnetic compatibility.

Please respect the environment Before throwing any batteries away, consult your distributor who may be able to take them back for specific recycling.

Have a Blast- Just Not in Your Eardrums Make sure you turn down the volume on the unit before you put on headphones. Increase the volume to the desired level only after headphone are in place.

THE LIGHTNING FLASH AND ARROWHEAD WITHIN THE TRIANGLE IS A WARNING SIGN ALERTING YOU OF "DANGEROUS VOLTAGE" INSIDE THE PRODUCT.
CAUTION RISK OF ELECTRIC SHOCK DO NOT OPEN
CAUTION: TO REDUCE THE RISK OF ELECTRIC SHOCK, DO NOT REMOVE COVER (OR BACK). NO USER-SERVICEABLE PARTS INSIDE. REFER SERVICING TO QUALIFIED SERVICE PERSONNEL.

THE EXCLAMATION POINT WITHIN THE TRIANGLE IS A WARNING SIGN ALERTING YOU OF IMPORTANT INSTRUCTIONS ACCOMPANYING THE PRODUCT.
SEE MARKING ON BOTTOM / BACK OF PRODUCT
WARNING: TO PREVENT FIRE OR ELECTRICAL SHOCK HAZARD, DO NOT EXPOSE THIS PRODUCT TO RAIN OR MOISTURE.
Safety Information
Getting Started
Unpacking the Receiver .....2
Unpacking the Speakers .....2
Inserting Batteries into Remote Control .3
Set Up and Maintenance of the Receiver ....3
Protect your Components from Overheating ....3
Connecting to Audio-Visual Components 4
Digital Connection 5
Connecting Antennas ....5
Connecting the Speakers .....6
Connecting the Subwoofer .....6
Positioning your Speaker .....7
Front Speaker Placement .....7
Surround Placement .....8
Advanced Surround Setting .....8
Test Tone / Channel Balance .....9
Using Headphones 9
Factory Setting 9
Operating your Receiver
Receiver Controls ....10
Your Remote Control .....11
Display 12
Switching On/Off 13
Selection of Audio/Video Source .....13
Using the receiver to play a Source . . . .14
Operating the Radio 15
Advanced Sound Control
Sound Enhancement Systems .....19
Fine Setting of Components .....20
Fine Setting of the Speakers .....21
Advanced Setting .....21
Troubleshooting Tips
Troubleshooting Tips 23
Receiver/Tuner Operation .....23
Remote Control Operation .....23
General 23
Cleaning the Exterior .....23
Equipment Specifications .....23
Care and Maintenance 24
Universal Remote Control
TV Functions .....25
VCR/SAT Functions .....25
DVD/CD Functions .....26
Language Codes 27
Unpacking the Receiver
You should receive the following items:

One receiver unit

One pair of "AA" batteries

One Pig-Tail
Antenna Wire

One external AM loop antenna

one video cable (single wire) with yellow RCA connectors;
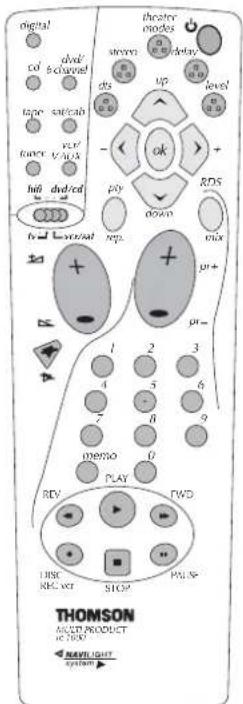
One Thomson Universal Remote Control

• one instruction book;
- one safety leaflet;
• one Quick Connection Guide

one audio cable (two wires) with red and white RCA connectors;

one SCART cable;
Unpacking The Speakers
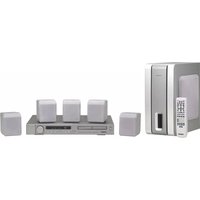
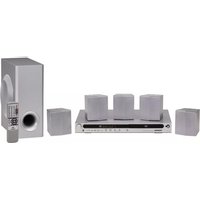
- one set of speakers including 2 front speakers, 1 centre speaker, 1 subwoofer and 2 rear speakers.
- 6 speaker wires including:

1 X green/black wire for center speaker

1 X red/black wire for front right speaker

1 X white/black wire for front left speaker

1 X purple/black wire for subwoofer
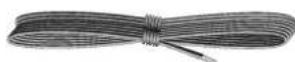
1 X blue/black wire for rear left speaker

1 X gray/black wire for rear right speaker
Inserting Batteries into Remote Control
- Press the part indicated and push in the direction of the arrow to open the battery compartment door.
- Insert two AA(LR06) batteries according to the + and - signs on the battery compartment.
- Press to close the cover.
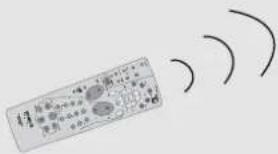
To use the remote control, point it directly at your receiver.

Set up and Maintenance of the Receiver

IMPORTANT NOTE
- Provide spaces for sufficient ventilation as indicated below. If the space is insufficient, the unit may overheat resulting in malfunction and shorter life time.

- Do not connect to the AC power cords until all connections are completed.
- Do not use your set immediately after transferring it from a cold place to a warm place: there is risk of condensation.
- Do not expose your set to water and excessively high temperatures.
• After having disconnected your set, clean the case with a soft cloth, or with a slightly damp leather chamois. Never use strong solvents.

Protect your Components from Overheating
- Do not block ventilation holes in any component. Arrange the components so that air can circulate freely.
- Do not stack components directly on top of each other.
- Allow adequate ventilation when placing your components in a stand.
- Place an amplifier near the top shelf of the stand so heated air rising from it will not affect other components. If you have a satellite receiver, you should place it on the top shelf.
Connecting to Audio-Visual Components
S-VIDEO
If your video component has a S-Video jack included, you can make use of it to enjoy enhanced video quality by connecting it to the relevant S-Video jack at the rear side of the receiver. One S-video cable is needed for each component. When S-Video cable is used, composite video (yellow RCA connector) cable must also be connected for VCR recording. Note: Before plugging in the optical cable or S-Video cable, make sure to match the shape of the plug and jack, otherwise, you will not be able to plug in completely.
DIGITAL CONNECTION
If you have a SAT receiver DVD player or CD player with a digital output, you can make use of an optical digital cable (not supplied) or coaxial digital cable (not supplied) to carry the audio portion of the signal and enjoy Dolby Digital sound quality. One optical or coaxial cable is needed for each SAT receiver, DVD player or CD player. When optical or coaxial cable is used, the analog audio cables are still needed if recording through a tape or VCR is desired. This receiver provides one optical and one coaxial digital input for the connection of your components. Please connect your components (e.g. DVD, SAT or CD) to the appropriate digital inputs and press DIGITAL INPUT to select the corresponding digital input source. Note: Optical and coax cables carry only the audio portion of the signal. A video connection must also be established for a SAT receiver and DVD player. S-video provides the best connection for the video portion of the signal. Composite video (yellow RCA connector) can also be used. It is important that the same type of cable (S-video or composite) that is connected from the Home Theater to the TV is used to connect the SAT receiver or DVD player to the Home Theater.
![graph TD A["Digital Input"] -->|Connect components capable of outputting Dolby Digital (e.g. DVD or SAT) or standard PCM (CD) format digital signals. Read section on "Input Signal Setting" under "Advanced Sound Control" carefully to adjust the matching input settings.| B["CD Player"] B -->|to LINE O…](/content/2026/06/1277799/images/f8fa11f633775a91fe4e779999f981eeb181cc5d73d714a9e235199c7fcc37fe.jpg)
If your CD player is equipped with digital optical jacks, use of optical cable is preferred. What you need is just one more optical digital connecting cable (not supplied). Plug it in the digital input jack of the receiver and select OPTICAL on the receiver setting (see details on pg 20 chapter "Input Signal Setting"). You can enjoy better sound quality brought to you by the optical cable. When optical cable is used, analog cables are still needed for recording to tape output.
FRONT TERMINAL
Remark: If you have a video camera, video game machine, or an extra VCR, connect it to VAUX input at the front of the receiver
Digital Connections
Read instructions carefully when connecting components to the receiver.
Digital In Jacks can accept Dolby Digital (AC-3), DTS or PCM signals when compatible components are connected.

Connecting the Antennas
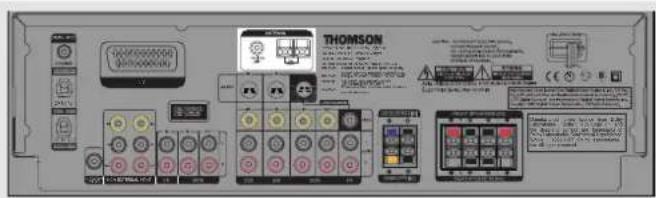
The AM and FM antennas connect to the AM and FM terminals on the system's back panel.
They must be hooked up in order to receive clear reception.
AM Loop Antenna and FM Indoor Antenna
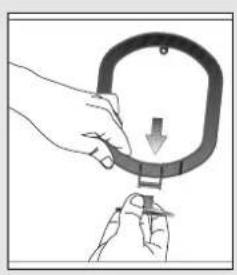
- Uncoil the Antenna wire and locate the base end of the AM antenna and snap into place as shown below in AM Loop Antenna.
- Press down on the Antenna tab to open the terminal

AM Loop Antenna
HINT
- For FM reception, extend antenna to its full length and arrange the Antenna as a T Shape
- For AM reception, rotate the antenna horizontally to get better reception.
Connecting the Speakers
![graph TD A["CENTER Speaker"] -->|GREEN / BLACK| B["CENTER Speaker"] C["FRONT Speaker"] -->|RED BLACK| B D["SUB WOOFER"] -->|PURPLE / BLACK| B E["REAR Speaker (SURROUND SOUND)"] -->|RED BLACK| B B --> F["Sub WOOFER"] style A fill:#f9f,stroke:#333 style C fill:#f9f,stroke:#333 style D fill:#f9f,stroke…](/content/2026/06/1277799/images/d3d7ce6982bc904cd1d555e456958363844f1f8fe9b87f472fa90c27240acf27.jpg)
Speakers
There are 6 speakers equipped with the unit (2 front, 1 center, 2 rear, 1 subwoofer). In order to enjoy good surround effects, all six speakers need to be connected to the receiver.
At least two front speakers (left and right) are required. For better sound quality, Center speaker, rear speakers and Subwoofer should also be connected. Adding center and rear speakers will enhance surround effects. Adding a Subwoofer will increase bass response.
If you want to enjoy full range of sound effects, with small speakers, it is a must to use the subwoofer with the speakers to maintain adequate bass signal.
Speaker wires
1 for each speaker, is needed for connection. Twist the stripped ends of speaker cord about 2/3 inch (15 mm). Press down on the tab to open the terminal and insert the wire. Release tab to lock wire in the terminal.
Antenna and Speaker Wire Connection

Push terminal tab down to insert wire.

Release tab to lock wire in the terminal.
NOTE: Make sure the insulation is completely removed from the ends of the Antenna and speaker wires at all connection points.
To ease speaker connections, the speaker wires and the terminals are color-coded.
- White/Black (Front Left Speaker),
• Red/Black (Front Right Speaker),
• Green/Black (Center Speaker)
• Blue/Black (Rear Left Speaker). - Grey/Black (Rear Right Speaker).
• Purple/Black (Subwoofer)
Connect the L, R speakers at the back of the speakers to the corresponding color on the receiver. Do the same for center (with green/black terminal), rear speaker and the subwoofer (with purple/black terminal).
Speaker Polarity
When connecting the speakers, make sure the polarities ("+" speaker wire to "+" on the receiver) of speaker wires and terminals are matched. If the wires are reversed, the sound will be distorted and will lack bass ("out of phase" effect).
Connecting the Subwoofer
Connect the subwoofer with the speaker wire (purple/ black) provided.
This receiver offers a high flexibility for user to use a large variety of speakers and subwoofers. For more information please refer to section "Fine Setting of the Speakers" in "Advanced Sound Control" on page 21.
Positioning your speaker
① Left, Right (Front Speakers)
They carry primarily music and sound effects
② Center
In surround mode, the center speaker carries much of the dialogue as well as music and effects. It should be set between the left and right speakers.
③ Surround (Rear Speakers)
Their overall sound balance should be as close as possible to the front speakers. Proper placement is vital to establish an evenly distributed sound field.
Subwoofer
A subwoofer is designed to reproduce powerful low bass effects (explosions, the rumble of spaceships, etc.) which dramatically heightens involvement with the action on the screen. It is therefore recommended to connect subwoofers when small speakers are used.
Magnetic shielding
Speakers placed less than two feet from the TV set must be magnetically shielded in order to prevent picture distortion. Front and center speakers provided with DPL660HT are magnetically shielded to protect your TV set.
It is not recommended to place the rear speakers near the TV set.
![graph TD A["Step 1"] --> B["Step 2"] B --> C["Step 3"] style A fill:#f9f,stroke:#333 style B fill:#bbf,stroke:#333 style C fill:#dfd,stroke:#333](/content/2026/06/1277799/images/81414e40480fa20543f778c9d67a378bf9e33814c6d3c9693f73bdb38d525d82.jpg)
Courtesy Dolby Laboratories
Front Speaker Placement
Even if you can't duplicate this ideal home theater setup exactly, the suggestions for speaker placement that follow will help you get good results.
Alignment
Align the center speaker evenly with (A), or slightly behind (B), the left and right speakers, but not ahead of them.

Courtesy Dolby Laboratories
Advanced Setting
Angle
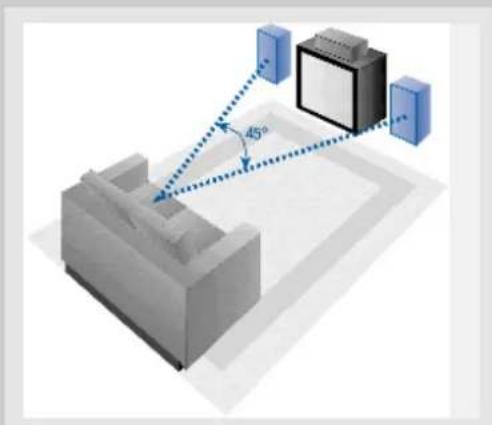
Placing the left and right speakers to form a 45-degree angle with your favorite viewing position will duplicate the soundtrack mixer's perspective.
Courtesy Dolby Laboratories
Height
The three speakers should be as close as possible to the same height. This often requires placing the center speaker directly atop (A) or beneath (B) the TV set.
![graph TD subgraph A A1["Speaker 1"] --> A2["Speaker 2"] A3["Speaker 3"] --> A4["Speaker 4"] A5["Speaker 5"] --> A6["Speaker 6"] end subgraph B B1["Speaker 1"] --> B2["Speaker 2"] B3["Speaker 3"] --> B4["Speaker 4"] B5["Speaker 5"] --> B6["Speaker 6"] end A1 -.-> B1 A2 -.-> B2 A3 -.-> B3 A4 -.-> B4 A…](/content/2026/06/1277799/images/85a8444a588aa144820774b3c5631b55b340674954e142ff643603805c26eb72.jpg)
Courtesy Dolby Laboratories
Preferred surround placement
Location
If possible, place surround speakers to either side of the listening area, not behind it.

Courtesy Dolby Laboratories
Height
If space permits, install surrounds 2-3 feet (60 - 90 cm) above viewers. This helps to minimize localization effects.

Courtesy Dolby Laboratories
Aiming
Aiming surrounds straight across the room, not down at viewers, helps create a more open, spacious surround sound field.

Courtesy Dolby Laboratories
Advanced Setting
Alternative Surround Placement
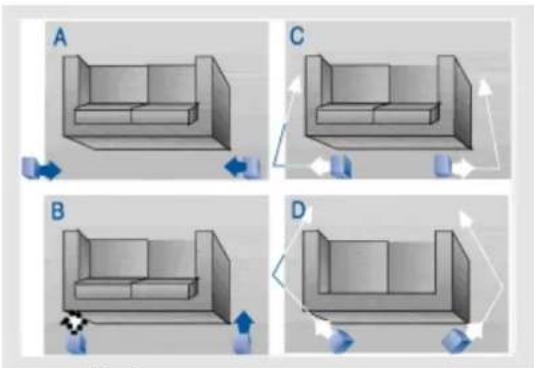
Rear wall
If rear wall mounting is the only choice, aim the speakers at each other (A), towards the front (B) or even towards the sidewalls (C, D). Experiment with placement until surround sounds seem to envelop you, rather than coming from behind you.
Courtesy Dolby Laboratories
No adjacent walls
Surrounds can go on stands facing each other to approximate the preferred sidewall mounting (A), or to the sides or rear of the viewing area aimed upwards. In the latter case, they can go right on the floor, or preferably, a few feet off the floor such as on end tables (B).
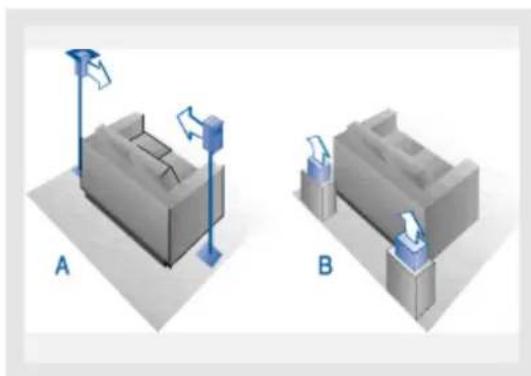
Courtesy Dolby Laboratories
Test Tone / Channel balance
Channel balance
Your receiver is equipped with a test signal generator for balancing the channels. As the signal "travels" from channel to channel, adjust the level controls until each channel plays at the same loudness level.
![graph TD A["Step 1"] --> B["Step 2"] B --> C["Step 3"] C --> D["Step 4"] D --> A](/content/2026/06/1277799/images/a14868d4f6245cb46106f9bfa319930eb194a6f6eb8d674f73511b9c32454cec.jpg)
Courtesy Dolby Laboratories
Level adjustment & surround channel level expectation
Even though you adjust the surround channel to be as loud as the others on the test signal, you'll find that on actual program material the surround channel is usually much lower than the front. Don't be tempted to readjust the surround level; program producers use surround mostly for subtle atmospherics and ambience, and only rarely for special effects. A good surround mix doesn't call attention to itself; if it did, it would soon become distracting.
NOTE
The system is equipped with Dolby Digital, and manufactured under License from Dolby Laboratories.

DOLBY
DIGITAL
Dolby Digital
Manufactured under
license from Dolby
Laboratories. "Dolby",
"Pro Logic" and the double-D symbol are trademarks of Dolby Laboratories. Copyright 1992-1997 Dolby Laboratories, Inc. All Rights Reserved.

Manufactured under License from Digital Theater Systems, Inc. US Pat. No. 5,451,942 and other world wide patents issued and pending. "DTS
Digital Surround", are trademarks of Digital Theater Systems, Inc. copyright 1996 Digital Theater Systems, Inc. All Rights Reserved.
Using Headphones
To listen privately through your audio system, use the PHONES jack on the receiver. However, make sure you turn down the volume before you put on the headphones. Increase the volume to the desired level after headphones are in place.

EN
Once headphones are connected, "HEADPHONE DOWN MIX 2 CHANNEL" will scroll on display. This feature automatically converts multi-channel speaker outputs to 2 channel stereo for your listening pleasure.
Hearing Comfort & Well-Being
- Do not play your headset at a high volume. Hearing experts advise against continuous extended play.
- If you experience a ringing in your ears, reduce volume or discontinue use.
Factory Setting
The unit is preset to the following settings when you first power the receiver up right out of the box:
Function = Tuner
Volume setting = 45
Bass & treble = 0 dB
Speaker settings: Center, rear, front = small
Subwoofer = on
EQ: FLAT
NOTE
Reset to Factory Settings:
All preset radio stations and surround sound setting will be lost after factory setting is restored. You may restore factory setting with the following procedures:
- Enter Standby mode
- Press SURR. MODE key when holding SOURCE UP.
- All preset stations will reset to FM87.5MHz and all receiver settings restore to default settings as described above.
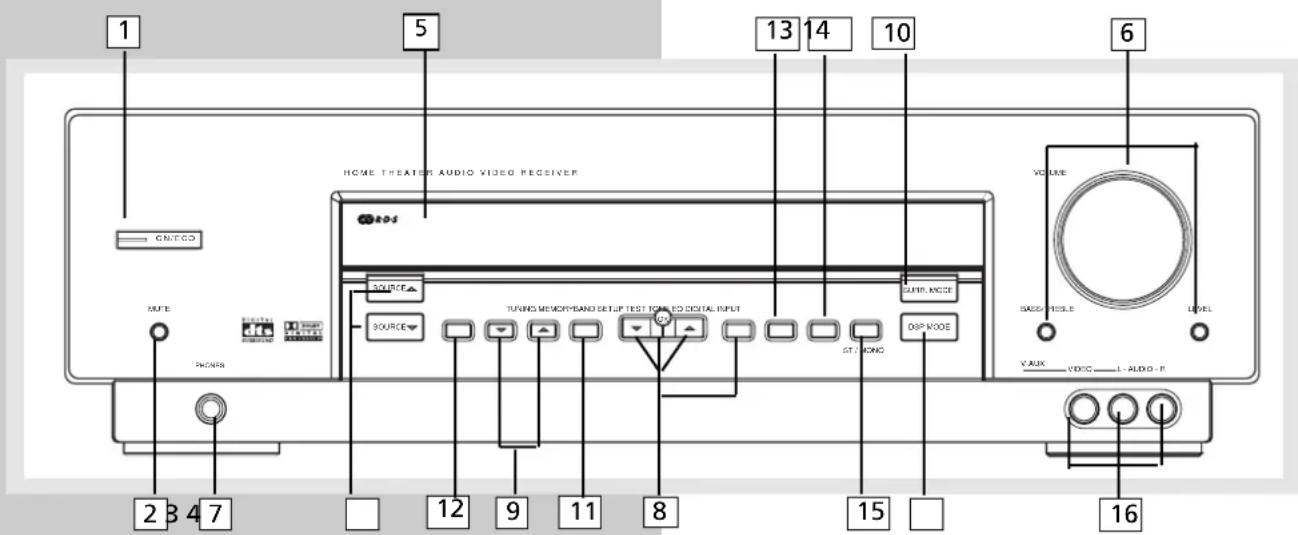
Receiver Controls
1. ON/ECO
Toturn the unit on/off. When the system is turned on, the unit will go to the mode it was in before powered off.
2. MUTE
Tomute speakers and headphone out.
3. PHONES
Plug your headphones (not supplied) into it for your private enjoyment. Speakers will be off when phones are inserted.
4. Source Buttons
Toselect sound source. For example, CD, SAT, Tuner etc.
5. Display
Todisplay current status of the receiver.
6. Sound Control
Let you adjust the sound – volume, treble, bass & level.
• To change the VOLUME, turn the large knob.
- To adjust TREBLE or BASS, press relevant button and turn the knob.
- Bass/Treble can only be activated under stereo mode. Bass/Treble effects are only active when there is no custom EQ effect. When pressing BASS/TREBLE, the unit will automatically go to EQ OFF mode.
- To change the volume of individual speaker, press LEVEL button repeatedly to select the speaker, then turn the knob to adjust the level.
7. DSP (Digital Sound Processor)
Press this button to select the DSP mode (STADIUM/THEATER/CONCERT/CLUB/CHURCH/ARENA/DSP OFF) you want.
8. SETUP FUNCTION
- To adjust the speaker size, speaker distance, speaker phase, night mode, sleep and display dimmer.
- In SLEEP mode, you can set the receiver to turn off from 5 to 120 minutes.
9. TUNING
Press for about 2 seconds to search previous / next station in descending / ascending frequency direction.
In Preset mode, press to review all preset stations.
In Tuner mode, press to increase/decrease tuner frequencies.
10. SURR. MODE
Press repeatedly to select the surround mode you want. (refer to "Advanced Sound Control" on page 20)
11. MEMORY
Press to toggle between manual tuning mode and preset station mode, Press and hold to manually store tuner station in preset mode.
12. BAND
Press to choose between FM/MW/LW in TUNER mode.
Press and hold to automatically search and save preset stations. BAND button can only switch tuner bands and can not select Tuner source.
13. TEST tone
When pressing it briefly, a short noise (test tone) will be generated in the speakers one by one so that you can adjust the volume of individual speaker. (See page 9 for details)
14. EQ
Press repeatedly to select the desirable EQ mode (music style) – FLAT, ROCK, POP, JAZZ, CLASSIC, VOCAL. Your choice will be saved automatically.(Only available in Stereo mode)
15. DIGITAL INPUT/ ST / MONO
Press repeatedly to select the input device (analog / optical / optical 2 / coaxial). In FM mode, press to toggle between stereo and mono.
16. V-AUX Input
For convenient use of your digital camera, family game machines, second VCR, etc.
Operating Your Receiver
Your Remote Control
Please be sure you have inserted the batteries into the remote control (see relevant section on page 3.)

NOTE
Remote control selector must be on hifi.

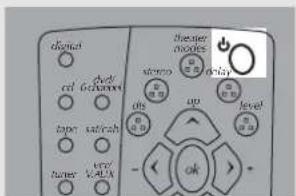
1. ON/OFF
To turn on or off the receiver and other auxiliary components (see page 14 "Using the Remote to Control Additional Components").
2. Digital
Select the way your SAT external audio/video devices are connected to the receiver (Analog, Optical or Coaxial) through the SAT audio input.
In Tuner mode, press to toggle between stereo and mono sound.
3. Source Buttons
To turn on and select various audio/video sources and enable related functions.
4. Source Selector
To select which unit/mode you want to control with your remote.
5. Speaker Settings
Selects speaker settings in AV receiver mode.
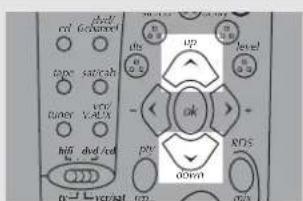
6. Up / Down
In Tuner mode, press to access programmed stations.
7.-/+
Press to adjust parameters of different kinds of sound source.
8. RDS/Mix
In Tuner mode, press to show Radio Data System information if available. ( Frequency station, Station name, program type, clock and radio text)
9. Pty
In Tuner mode, press to activate search by program type.
10. Volume - / +
Adjusts the volume.
11. pr+ / pr -
In Tuner mode, press to select programmed stations.
12. Mute
Mutes audio output
13. Number Buttons
In Tuner mode, press to select a preset station.
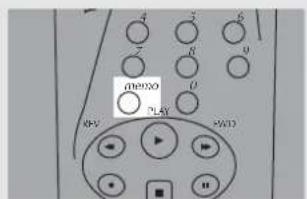
14. memo
In Tuner mode, press to enter program function to store desired frequency in memory.
MEMORY will flash in red on the display. Input your desired channel number while the work is still flashing and the frequency will be sstored. (For details, refer to "Storing Radio Stations" under "Maual Preset" on pg 16)
15. Operations Buttons
In Tuner mode, press REV or FWD keys to tune down or up radio frequency.
The remote control currently operates most
Thomson, RCA and GE products, but it can be programmed to operate devices from other manufacturers
DVD
▶ VCR
SAT
▶ TUNI
▶ TAPE
▶ V-AUX
CD
TV
D DIGITAL
PRO LOGIC II
dts MEMORY
FM AM MW LW
OPT 123

COAX 123

8 ST

ST
TUNED


SLEEP

EQ

[Non-Text]
RDS


[NO TEXT]


[NO TEXT]

DVD / VCR / SAT / TUNER / TAPE / V-AUX / CD / TV
- The arrow points to the respective icon to show the current source.

Digital
• Audio output is in Dolby Digital mode.

Pro Logic
• Audio output is in Dolby Pro Logic mode.

Pro Logic II
- Audio output is in Dolby Pro Logic II mode.

• Audio output is in dts mode
MEMORY
- Unit in Memory or Preset mode.
FM / AM / MW / LW
- The respective tuner icon will lite showing current radio frequency.
OPT12
• Optical 1 or 2 digital Input detected
COAX
- Coaxial digital input detected.
ST
- Tuner stereo signal detected.
TUNED
- Tuner station detected.
SLEEP
- Unit in Sleep mode.
EQ
- EQ effect activated.
RDS
• Radio data system is activated.
KHz / MHz
- Tuner frequency unit.
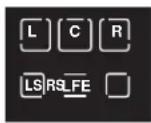
- Speaker Icons.
Switching on/off
- To switch on the receiver, press ON/ECO button once, or any source button on the remote control.

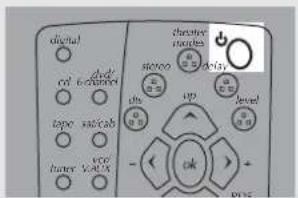

- Standby: when the receiver is on, press the ON/ECO button once to activate the standby mode.
- To switch off the unit completely, unplug the power cord from the socket.
Selection of Audio/Video source
When one of the audio/video source is selected, the audio and video input corresponding to the name will be activated.
The receiver acts as a switching device between all the sources that are plugged into it.

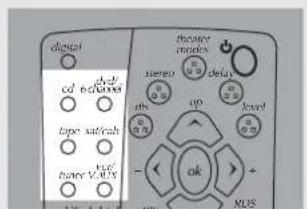
NOTE
Remote control selector must be on hifi.

Operating Your Receiver
Example 1:
If you connect a VCR player to the VCR input (audio + video) on the receiver and press the SOURCE △ or ▼ button on the main unit until VCR1/ANL shows on the display. You can also press vcr/V.AUX on the remote to select the source directly. You will be able to have the sound and image transmitted by the VCR.


NOTE
Remote control selector must be on vcrlsat to operate VCR features.

Example 2:
Based on example 1, the VCR input is selected. If SAT is selected, image and sound from the SAT source will replace the VCR.
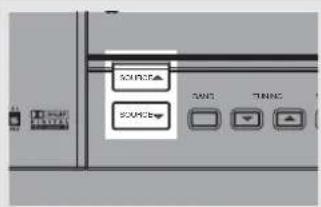

NOTE
Remote control selector must be on vcrl/sat to operate SAT features.

Operating your Receiver
You can connect up to 7 audio/video sources to this amplifier:
Source button Corresponding connector (receiver front panel) (receiver back panel)
- DVD DVD IN (audio / video)
- SAT SAT IN (audio / video)
- VCR VCR IN/OUT (audio / video)
- V-AUX V-AUX IN (audio / video)
- CD CD IN (audio only)
- TV TV IN (audio only)
- TAPE TAPE IN/OUT (audio only)
- FM/AM built-in
When a source is selected, the arrow will point to the source name on the display.
Example: Press DVD to select DVD as the source to the amplifier.
NOTE
- Your receiver has a built in tuner. Just connect the appropriate antenna on the back of the receiver and you will be able to listen to radio stations. (See details in Tuner section)
- Other sources can be connected to the above standard source. Example: you can connect a LD into the DVD inputs.
- Refer to the "Connecting To Audio-Visual Components" section for details on connection.
Using the receiver to play a source
After having properly connected a source (DVD, CD, VCR) to the receiver, you can partly control them through the receiver.
Playing a DVD with the receiver
- Connect a DVD player to the receiver (see connecting your receiver for details)
NOTE
To play Dolby Digital or DTS sound, the source must be connected to the receiver via the optical or coaxial terminal
- Press ON/ECO to switch on the receiver
- Select the DVD source.
- Switch ON the DVD player and start playback
- Switch ON your TV
- Select the appropriate A/V channel on the TV (refer to your TV manual for details) until the image from the DVD player is displayed
- Set the sound Mode if needed (see "Advanced sound control" for details)
Example 1:
To play 5.1 Dolby Digital surround sound Press SURR. MODE button until "Dolby Digital" appears on the Display and all of the speaker" icons light up.
Example 2:
DVD: You may also need to select the Dolby Digital 5.1 on the DVD disc menu to have the digital surround enabled providing that the disc is encoded with Dolby Digital 5.1 (please refer to the DVD player and DVD disc instruction)
Example 3:
LD: You may need to select a different Audio Channel on your LD (refer to your LD player manual)
- Adjust volume knob accordingly
Operating the Radio
The receiver has a built-in tuner that allows for AM/FM radio function.
NOTE
The remote control selector must be set on hifi.

Manual tuning
-
Connect the FM and AM antenna accordingly (see "Connecting the Antenna" on page 5 section for details)
-
Press ON/ECO to switch on the receiver.
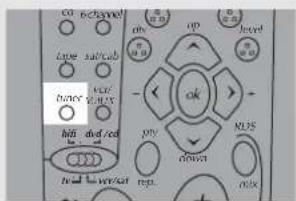
- Press SOURCE or Keys on the main unit or tuner on the remote control to enter TUNER mode.
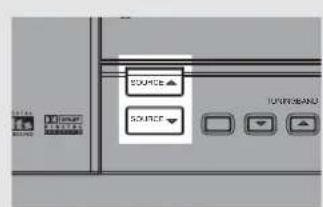

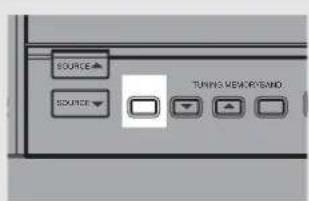
4- To select band, press the BAND button on the main unit or tuner on the remote control to toggle between FM/MW/LW mode.
Operating your Receiver
5- Tune the stations by pressing TUNING UP or DOWN on the main unit or REV or FWD on the remote control repeatedly until the desired station is found.
Alternatively, you can press and hold the respective buttons for about one second to activate the automatic SEARCH function. In this mode the receiver will automatically tune frequencies until it finds a station


NOTE
-
If there is interference, modify the location of the antenna until the optimal sound is heard. TV and other electronic devices could be the cause of interferences so try to position the antenna away from them.
-
Weak signal can affect the "auto Search function". Adjust the antenna for better reception for more efficient search.
Select sound effect if needed by pressing Preset EQ or DSP sound (see "Advance sound section" for details).
Selecting Mono or Stereo Sound
Press ST/MONO on the main unit or the DIGITAL button on the remote control to toggle between mono and stereo sound in FM tuner mode (when available).


Operating your Receiver
Storing radio stations:
The receiver can store up to 40 radio stations in memory. You can enter every single radio station yourself or the receiver can store all available radio station automatically in an ascending order.
Automatic preset storing
- Select the band by pressing BAND on the main unit or tuner on the remote control.

2- Press and hold BAND on the main unit for 3 seconds. "MEMORY" will be displayed in red and will blink during the automatic storing process.

Radio frequencies will be scanned and radio station stored automatically. When all available radio stations are stored or if all 40 memory locations are full, the auto preset will stop.
NOTE
Weak signal can affect the "Automatic Preset Storing function" efficiency. Adjust the antenna for the best reception for more efficient search.
Manual preset
- Select FM or AM band by pressing BAND on the main unit or tuner on the remote control repeatedly.
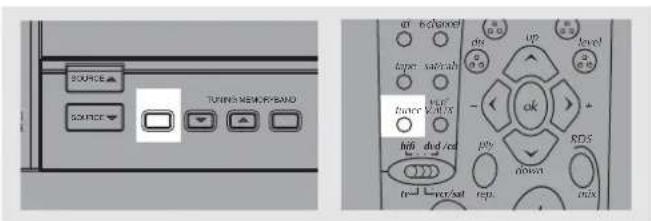
- Tune to the radio station to be stored. (see "Manual tuning" on page 16 above for details)
- Press and hold the MEMORY button on the front panel or MEMO on the remote control. "MEMORY" and a preset number will flash on the display.
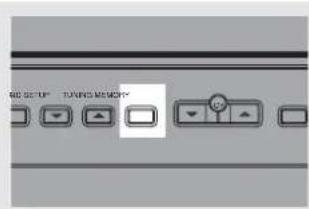

- Press TUNING UP/DOWN on the main unit or pr+ / pr - on the remote control while MEMORY is still flashing to select the desired preset memory location.


- Press the MEMORY button on the front panel or the MEMO button on the remote control to store frequency in selected preset location.
- Repeat steps 1-5 to store other frequencies.
Operating your Receiver
Retrieving preset stations
- Press SOURCE △ or on the main unit or tuner on the remote control to select tuner mode.


- Press MEMORY button on the main unit or MEMO on the remote control to enter preset setting mode (MEMORY icon shows on display), Press TUNING UP/DOWN on the unit or pr+ / pr - on the remote control to select preset station.



RDS (Radio Data System) for FM Only
The RDS icon shows on display when RDS data are received. The following information may be available on certain stations:
- Frequency station,
- Station name,
- Program type,
- Clock,
- Radio text
Press RDS on the remote control repeatedly to select the type of information you want to display.

Search Station by Program Type
- Press PTY on the remote control repeatedly to display the desired program type.

- Press TUNING UP/DOWN on the main unit or the UP or DOWN arrows on the remote control to begin search.

NOTE
NO PTY will be displayed if selected kind of program is not broadcasted
- The search will stop when a station broadcasting the program type you have selected is found.
Operating your Receiver
You can search for stations using one of the following program types:
NEWS = news
AFFAIRS = current affairs
INFO = information
SPORT = Sport
EDUCAT = education
DRAMA = series and plays
CULTURE = religion or national culture
SCIENCE = science and technology
VARIED = miscellaneous
POP M = pop music
ROCK M = rock music
MOR M = middle-of-the-road music, easy listening music
LIGHT M = classical music
CLASSICS = serious classical
OTHER M = not classed
WEATHER = weather, medical
FINANCE = stock market reports
CHILDREN = children's programs
SOCIAL AFFAIR = sociology, history, geography, psychology, society
RELIGION = any aspect of beliefs, faith & God or Gods
PHONE IN = public forum by phone
TRAVEL = feature and programs concerning travelling
HOBBY = recreational activities & leisure
JAZZ = jazz music
COUNTRY = country music
NATIONAL = national music
OLDIES = oldies music
FOLK = folk music
DOCUMENTARY = documentaries
NOTE
The remote control selector must be set on hifi.

6 Channel external input
An external decoder (Dts, Dolby Digital, etc...) or a device with built-in multi-channel decoder and 6 channel output connector (DVD player, TV...) can be connected to the 6CH input. It is therefore possible to play any future 6 Channels coding (SACD, DVD Audio) thanks to this connection. The external decoder device will send the separated audio information to the receiver that will then amplify the signal and send to appropriate speakers.
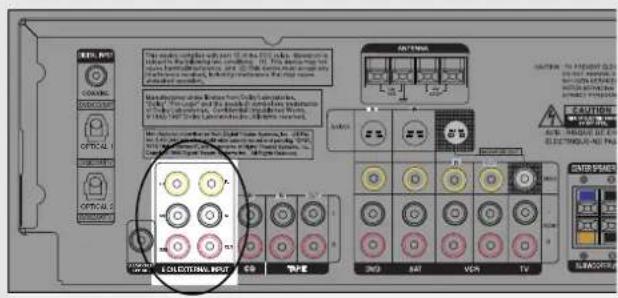
To activate 6 Channel external input, press the SOURCE on the receiver until 6 CH is selected or press dvd/6 channel twice on the remote control.


NOTE
During 6-Channel direct input mode, TAPE OUT and REC OUT of VCR mode will not be available.
Advanced Sound Control
Sound Enhancement Systems
This receiver is equipped with several built-in sound enhancement systems.
Dolby Pro Logic II
The Pro Logic II mode uses the built-in circuit to steer the Left, Center, Right and Surround left and right channel audio signals and uses all five speakers to play both stereo and Dolby Pro Logic program source, such as TV and VCR. Dolby Pro Logic II includes Dolby Pro Logic II Movie, Dolby Pro Logic II Music and Dolby Pro Logic.
Use this mode to suit the type of program (such as VCR).

Front Left Speaker


Center Speaker

Front Right Speaker

Listening Zone
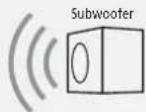

Rear Left Speaker

Rear Right Speaker
Dolby Digital
The Dolby Digital mode lets you enjoy full digital surround from software processed in the Dolby Digital format. Dolby Digital provides better sound quality and more powerful presence than conventional Dolby Surround.
This unit is equipped with Dolby Digital 5.1-channel so that you can enjoy enhanced full digital surround sound. Being different from Dolby Pro Logic in which only four channels (Front Left, Front Right, Centre and Rear) are used, the new system provides stereo separation of the rear speakers (Rear-Right, Rear-Left). These 5 channels, together with the subwoofer channel for bass sounds (counted as 0.1 channel), constitute as 5.1-Channel (or 6 Channels) Input for Dolby Digital that brings you the most sophisticated sound enjoyment.
Digital Theater Systems (DTS)
DTS is a digital surround system which delivers six channels of master-quality, 20-bit audio. It offers five full-range channels plus a special low frequency effect (LFE) channel for subwoofer, resulting commonly know 5.1 channels. It can be applied with existing 5.1 speaker configurations.
DTS is available in DVD, SAT/CAB, TV and CD mode. (When digital cable is connected)

Front Left Speaker


Center Speaker
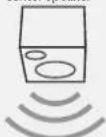
Front Right Speaker

Listening Zone
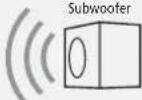

Rear Left Speaker

Rear Right Speaker
Stereo
The Stereo mode uses the two main channel outputs from the front speakers. Use this mode if you have connected the front speakers only.
DSP (Digital Sound Processor)
These digital sound effects resemble sounds in a real environment such as (STADIUM/THEATER/CONCERT/CLUB/CHURCH/ARENA). DSP automatically converts analog audio signals to digital ones which enables you to adjust the sound without degrading the sound quality. Different modes will give you different feel of size and type of listening environment. Press DSP
MODE on the main unit to select among DSP options.(Not available in Dolby Digital/DTS)
Fine Setting of the Components
The receiver has pre-selected surround mode once you turn on the unit by pressing the Source Buttons (like DVD, SAT, CD) directly. The default surround modes for different components are listed in the table below.
If you decide to change the surround mode, you can press the SURR MODE button on the main unit or theater modes on the remote control repeatedly to toggle among the different surround mode choices and select the one you want.
DOLBY ▶ DOLBY ▶ DTS ▶ DOLBY Stereo PL2 MOVIE PL2 MUSIC PROLOGIC/
Source/ If Digital Input (optical If Analog Input Input or coaxial) is selected is selected
DVD Dolby Digital/DTS PRO LOGIC
SAT Dolby Digital/DTS PRO LOGIC
VCR N/A PRO LOGIC
V-AUX N/A PRO LOGIC
TV Dolby Digital/DTS STEREO
CD STEREO STEREO
TAPE N/A STEREO
TUNER N/A STEREO
The receiver will keep the last selection in memory.
NOTE
If linear PCM source (CD), format will be Dolby Prologic even with Digital Input.
Input Signal Setting
The receiver defaults to the most convenient settings for your easiest use (see table).
If your connection is different from the default setting,
- Select the source
- Press DIGITAL INPUT button on the main unit or digital button on the remote control to toggle among optical/ coaxial/ analog to match your connection. Your selection will be stored automatically.
The selected source and input source will be displayed on the display as long as they are active, except for some temporary change of display (e.g. adjusting volume).
Digital Input
Select this setting to play digital signals from a DVD, CD, LD player, SAT or TV.
| SOURCE | DEFAULT INPUT (as seen on display) |
| SAT | Analog (SAT/ ANL) |
| DVD | Analog (DVD/ ANL) |
| CD | Analog (CD/ ANL) |
| VCR | Analog (VCR/ ANL) |
| V-AUX | Analog (V AUX/ ANL) |
| FM/AM | Built-in Tuner |
| TAPE | Analog (TAPE/ ANL) |
| TV | Analog (TV / ANL) |
NOTE
Digital input is only available for DVD, SAT, CD and TV
Analog Input
Select this setting to play analog signals from a cassette deck, VCR or turntable.
| SOURCE | AVAILABLE INPUT |
| SAT | Analog / Optical / Optical2 / Coaxial |
| DVD | Analog / Optical / Optical2 / Coaxial |
| CD | Analog / Optical / Optical2 / Coaxial |
| VCR | Analog / - / - |
| V-AUX | Analog / - / - |
| TAPE | Analog / - / - |
| TV | Analog / Optical / Optical2 / - |
Advanced Sound Control
Fine Setting of the Speakers
This receiver supports a wide range of speakers and subwoofers. For optimal surround sound enjoyment, you need to register the speaker selection settings of your audio system. If you buy this receiver with accompanied speaker package, then this step has been done for you.
Also, to make the surround sound more effective and suit the acoustic conditions in your listening room, you need to delay the signal from some of the speakers. Such channel delay compensates for center or surround speakers that are closer to listening position than the front speakers. You can make use of the SETUP button to adjust the speakers' relative loudness.
The TEST TONE button
You can adjust the relative loudness of the individual speakers by the TEST TONE button.
- In Surround (Dolby Digital/Pro Logic/DTS) modes, press TEST TONE briefly. A short noise will be heard in the speakers one by one. The speaker having the noise at that moment will be shown in the display.
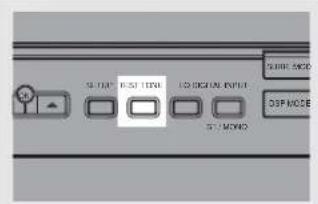
- To adjust the volume level of the test tone, turn up/down the VOLUME knob or press vol + / - key on the remote control.
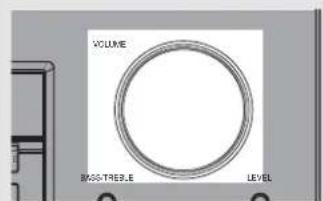

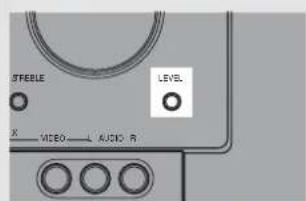
- To adjust individual speaker volume level, press the LEVEL button when the short noise is played on the speaker you want to adjust then turn the VOLUME knob to modify the output level.
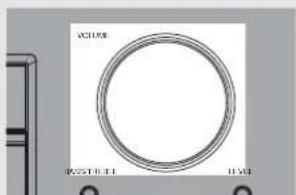
-
Press LEVEL again to save your setting.
-
Repeat step 3 to adjust other speaker volume levels.
NOTE
To adjust the level of all speakers (center and surround speakers), you must select Pro Logic mode first by pressing the SURROUND key
Advanced Setting
Factory defaulted Advance setting indication from VFD
The receiver has defaulted the following distances:
![graph TD A["Front Left"] --> B["Center"] C["Front Right"] --> B D["Rch"] --> B E["Rear Right"] --> B F["Lch"] --> B G["L/S"] --> B H["Rear Left"] --> B I["R/S"] --> B J["Cch"] --> B](/content/2026/06/1277799/images/f5be4530c2f89a1d39340e287f3cc8cf2d63ad7470bd3af0a2ed6f07fab2f881.jpg)
Front speakers (L/R) 4.5m
Center speaker (Cch) 4.5m
Rear speaker (SUR) 3m
Speaker Configurations
You can also change the setup of the speakers by pressing the SETUP button until the display shows L/R SML or L/R LRG which enables you to set the size of the front speaker.
Available Selections:
Front Speaker selection Large/ Small
Center Speaker selection Large/ Small/ None
Surround Speaker selection Large/ Small/ None
Subwoofer selection Yes/ No
Subwoofer Phase + / -
Front Speaker distance 0.9-12m
Centre Speaker distance 0-12m
Rear Speaker distance 0-12m
Pressing SETUP button once, while the display is still showing L/R LRG, you may press the OK button to toggle among: front, center, surround, subwoofer, subwoofer phase and speakers' distance, sleep and dimmer setup. Set the speaker size or speakers' distance by pressing UP/DOWN ARROW button.
NOTE
- The sub-woofer selection will always be YES when the main speakers are set to small (SML).
- For the subwoofer phase setting, it will be affected by how you locate the subwoofer. Try both + and - settings and select the one that has better bass effect.
- If your unit comes with speakers, always set all speakers size to "small" to protect them and optimize the sound quality.
- When left and right front speakers are set to SMALL, center and surround speakers can not be set to LARGE.
Use a subwoofer to enjoy optimum sound.
- Subwoofer Phase: Try both settings and select the sound preferred.
-
Speaker distance: For optimum surround experience measure the distance between the speaker and your favorite listening position.
-
Press SETUP once.

- While the VFD display is showing L/R SML, press UP/DOWN ARROW button to select.

- Press OK button once to move to the next speaker setting.
- Repeat step 3 to set up the next speaker
- When set up is done, wait for 5 seconds to automatically save your settings or press any key to save your selection and set up mode.
Speaker Icons
The receiver shows you the speakers' types and settings on the display with the following icons:

Displaying Program Formats
When a digital source is playing, the receiver will automatically switch to the proper surround mode and indicates on the speaker icons on the right-hand side of the display. (See diagram)

It is important to note, however, that not all Dolby Digital sources are encoded with the full complement of five channels plus LFE*. Speaker icons show how many and which speaker you have enabled (See "Fine Setting of the Speakers") and the letters inside the speaker icons show which channel is present in the source information. For example, the diagram shown means you have all the five speakers and subwoofer enabled and the digital sources you played have five channels plus LFE complemented.
* LFE stands for Low Frequency Effect. The indication "LFE" appears if the digital source contains LFE information. In this case, the bass signal will be delivered to the subwoofer, offering more dynamic deep bass sound effects. If the letter is flashing, the signal is either too weak or just gone.
Receiver/Tuner Operation
ST indicator is off.
- Adjust the antenna.
- Press DIGITAL INPUT/ST/MONO button to insure you are not outputting in mono.
The signal is Mono. Severe hum or noise.
- The signal is too weak. Connect an external antenna.
- Adjust Antenna
- Reposition Antenna away from any electronics.
Remote Control Operation
The remote control does not operate the unit.
- Another source mode is selected on the remote. Press the correct Source Button.
- No batteries installed. (included with your system) Install the batteries before attempting to operate the remote. Be sure to match the + and - ends of each battery to the symbols shown in the remote battery compartment.
- The batteries are weak. Replace all batteries.
- The remote is not pointed at the remote control sensor on the main unit or there is an obstacle between the remote and the main unit.
- The remote control is too far from the main unit, move closer.
Remote loses Programmed codes.
- Weak batteries, replace batteries.
Remote forgets what source was selected.
- Weak batteries, replace batteries.
General
No audio.
- Make sure the speakers are connected.
- Check the input connections.
- Check the power cord connections.
- Make sure the MUTE signal on the front panel is off.
- Make sure the digital setting (optical, coaxial or analog) is correct.
- Check that the headphone is not inserted.
No audio from one channel.
- Check the speaker level setting.
- Check the speaker wire or external source cable connections.
Noise occurs when the TV is turned on.
- The TV is too close to the audio system.
Specific instruments sound displaced.
- Check the connections between the receiver and the speakers if the sound does not match the video.
- Check if the video and audio cable are correctly inserted.
TAPE OUT and REC OUT do not operate in VCR mode.
- Check to make sure the unit is not in 6-channel direct input mode.
Cleaning the Exterior
- Disconnect the system from AC power before cleaning the exterior of the system with a soft dust cloth, or with a slightly damp leather chamois. Never use strong solvents.
Equipment Specifications:
AMPLIFIER SECTION:
All 5 channels: each 100W at 8 ohm. <0.9% THD
@40Hz to 20KHz
Subwoofer channel: 150w at 8Ω, < @100 Hz
Muting Attenuation: 65dB
Frequency Response: 40Hz to 20kHz +/-3dB
Signal to Noise Ratio: 65dB (Dolby digital mode mode)
VIDEO SECTION:
Input ( Sensitivity/ Impedance ):1Vp-p/ 75ohm
Output (Level/ Impedance): 1Vp-p/ 75 ohm
Frequency Response: 10Hz to 6MHz at +/- 3dB
Signal to noise ratio: 40dB
Crosstalk @3.58MHz: 40dB
AM TUNER SECTION:
Frequency Response: 80Hz - 2kHz +/-6dB
Usable Sensitivity: 800uV/m @ S/N 20dB
Signal to Noise: 38dB
Image Ratio: 27dB @ 1000kHz
IF Rejection: 35dB
FM TUNER SECTION:
Frequency Response: 40Hz - 15kHz +/-3dB
Quieting: 24dBu
Signal to Noise: 60dB(stereo) / 65dB(mono)
Image Ratio: 40dB
IF Rejection: 50dB
Dimensions (H x W x D mm) :
Unit - 130 x 430 x 400
Speaker - 175 x 116 x 115
Subwoofer - 355 x 160 x 355
Care and Maintenance
Disconnect the audio system from the power source before performing any maintenance.
Cleaning
Clean the exterior of the system using a soft dust cloth.
Important battery information
- Remove the batteries to avoid leakage if you do not use your remote control for more than one month.
- Discard leaky batteries immediately as leaking batteries may cause skin burns or other personal injuries.
- Dispose of batteries in the proper manner, according to provincial and local regulations.
- Any battery may leak electrolyte if mixed with a different battery type, if inserted incorrectly, if all batteries are not replaced at the same time, if disposed of in fire, or if an attempt is made to charge a battery not intended to be recharged.
Safety precautions
- Never open the cabinet under any circumstances. Any repairs or internal adjustments should be made only by a trained technician.
- Never operate this product with the cabinet removed.
- Do not touch the player with wet hands. If any liquid enters the player cabinet, take the player to a trained technician for inspection.
- The apparatus shall not be exposed to dripping and splashing.
Headset safety
- Do not play your headset at a high volume. Hearing experts warn against extended high-volume play.
- If you experience a ringing in your ears, reduce volume or discontinue use.
- You should use extreme caution or temporarily discontinue use in potentially hazardous situations.
- Even if your headset is an open-air type designed to let you hear outside sounds, don't turn up the volume so high that you are unable to hear what is around you.
Don't infringe
This product should only be used for the purposes for which it is sold, that is, entertainment, violating no copyright law. Any attempts to use this product for which it is not intended is unlawful and therefore not condoned by Thomson multimedia.
TV functions


According to the devices and when they were put on the market, all the functions represented on this page will not inevitably be available.

Standby/on
Switch the key to tv position to control the TV.

Access to the menu with the setting functions

To exit a menu

Up/Down selection in the menus

Confirm

Left/Right selection in the menus

Call up the sound and picture settings (red button)

Call up a programme list (green button)

Display of channel name, time, sound, type (yellow button) and zoom for models with this function.

Call up NEXTVIEW Electronic Program Guide (for models with this function) or Teletext (Fasttext) headings (blue button)

Call up the Teletext/Toptext/Fastext function (purple key)
Volume level adjustment


To change channels

Sound mute

Direct access to the channels and input of the digital values
VCR/SAT functions

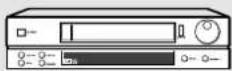
VCR
Satellite Receiver

Switch the key to vcr/sat position to control the THOMSON VCR or a SAT
According to the devices and when they were put on the market, all the functions represented on this page will not inevitably be available.

Standby/on

Access to the menu with the setting functions

To exit a menu

Up/Down selection in the menus

Confirm

Left/Right selection in the menus

Access to the Menu

Access to the tape functions

SHOW VIEW function

VPS-PDC function

Information displayed on the screen and setting of the menus

To change channels
AV input selection (VCR only)
sat/cab

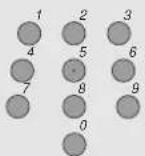

Direct access to the channels and input of the digital values
Playing of the tape (VCR only)
DVD-CD functions

Switch the key to dvd/CD position to control the Thomson DVD or CD unit
According to the devices and when they were put on the market, all the functions represented on this page will not inevitably be available.

Standby/on
Access to the menu with the setting functions
DVD only
Back


Up/Down selection in the menus
Confirmation
Left/Right selection in the menus
DVD only

Audio

Subtitle

Info

Guide

Angle

To change channels

Direct access to the channels and input of the digital values

Disc Playing
Universal remote control Programming
You can program your remote control to control other devices.
Before making the following adjustments, see below for the 3 number code which corresponds to the brand of your device, and write it down in the chart below.
TV Functions
| hifi | dvd/cd |
| tv | vcr/sat |
VCR/SAT receiver
| hiti | dvd/cd |
| tv | L-1 vcr/sat |
DVD or CD unit
| hill dvd/cd |
| tv ∪ L vcr/sat |
- Position the key on the device that you want to control.
- Keep the RDS menu key down and enter the 3 number code.
- Release the RDS menu key.
- Try to control the device by turning it off and then on with
- If this code does not work, repeat the process from step 2 with another 3 number code.
-
Some devices cannot be controlled by using this remote control.
-
Test the functions that you can control by using this remote control.
- According to the device and when they were put on the market, all the functions will not inevitably be available.
- If you have programmed your remote control with other than Thomson devices, it may be necessary to reprogram it when you change the batteries.

Remote codes
| Satellite receivers | GOLDSTAR | 371 | 413 -423 | DIGITAL | |
| GOODMANS | 372 | 450 | |||
| GRUNDIG | 338/374/376 | PROSAT 424 | CANAL SATELLITE 442 | ||
| HANSEATIC | 377 | RADIX 348/451 | NOKIA 405 | ||
| HIRSCHMANN | 378 -382 | REVOX 400 | PACE 454 | ||
| HITACHI | 383 | SABA 446 -448 | SAGEM 443 | ||
| AKAI 301 | CITYCOM 345 | HUTH | 384, 385 | SALORA 425 -426 | SKY DIGITAL 452 |
| ALBA 302 -309 | CIATRONIC 346 | ITT | 386, 387 | SENTRA 444 | VIA DIGITAL 453 |
| ALDES 310 | CONNEXION 349 -350 | KATHREIN 388 -391 | STRONG 427 | XSAT 449 | |
| AMSTRAD 315 -321 | DRAKE 351 | LASAT | 392 -396 | TATUNG 429 | |
| ARCON 322 -326 | ECHOSTAR 353 -354 | LENCO | 397 | TECHNISAT 430 -433 | |
| AST 327 -330 | EEC 355 | MATSUI | 398 | ||
| ASTRA 331 -336 | EUROPA 356 | MICRO TECHNOLOGY | 399 | THOMSON 445 | |
| ASTRO 337 -340 | FERGUSON 357 -361 | MORGANS | 401 | THORENS 434 | |
| BT SATELLITE 341 | FINLUX 362 -364 | NOKIA | 404 | UNIDEN 435, 436 | |
| BUSH 342 | FTE 365, 366 | ORBITECH | 406, 407 | WISI 437 - 440 | |
| CAMBRIDGE 343 | FUBA 367 -369 | PACE | 408 -412 | ZEHNDER 441 | |
| CHAPARRAL 344 | GALAXIS 370 | PHILIPS | 373 / 375 | ||
| DVD | hill dvcl/cftv 1 Lver/sat |
| THOMSON | 200, 201 |
| PHILIPS | 202, 203 |
| PANASONIC | 204 |
| TOSHIBA | 205 |
| PIONEER | 206 |
| SONY | 207 |
| DENON | 208 |
| SAMSUNG | 209 |
| LD | |
| DENON | 221 |
| HITACHI | 222 |
| MITSUBISHI | 223 |
| PHILIPS | 224 |
| SONY | 225 |
| SONY | 226 |
| THORN | 228 |
| PIONEER | 229 |
| AKAI | 603-608 |
| AUDIO TECHNICA | 609 |
| DENON 610, 611 | |
| HARMAN KARDON | 612-614 |
| HITACHI | 615-620 |
| JVC | 621 |
| KENWOOD | 622-625 |
| KODAK | 626 |
| LUXMAN | 627 |
| SONY | 652 -654 |
| TECHNICS | 655 |
| YAMAHA | 625 -658 |
| TV | [IMAGE] | ELBE | 005, 015, 023 | LUXOR 005 | RADIOLA | 019, 020, 021 | SINGER | 001, 002, 019 | |
| FERGUSON | 000, 001 | METZ | 013, 019, 023 | RADIOMARELLI | 019 | SINUDYNE 019 | |||
| 003, 004, 010, 020 | MITSUBISHI | 017, 018, 020 | REX | 005 | SONITRON | 008 | |||
| FINLUX | 019, 020, 024 | MIVAR | 016 | SABA | 000, 001, 005, 010 | SONY | 014, 018 | ||
| AKAI | 008, 020 | FISHER | 008 | NOKIA | 005 | 019, 020 | TELEFUNKEN | 000, 001, | |
| AKARI 028 | FORMENTI | 019 | NORDMENDE | 000, 001, 010, | SALORA | 005 | 002, 010, 020 | ||
| BANG & OLUFSEN | 009, 019 | GOLDSTAR | 020 | 020 | SAMSUNG 020, 030 | TELEAVIA | 001, 010, 020 | ||
| BLAUPUNKT 023 | GRUNDIG | 016, 023, 024 | ORION 005, 020 | SANYO | 008, 018 | THOMSON | 000, 001, 002, | ||
| BRANDT | 000, 001, 010, 020 | HITACHI | 007 | PANASONIC/NATIONAL | SCHAUB-LORENZ | 005, 016, | 010, 020 | ||
| BRIONVEGA | 019 | IMPERIAL 016 | 005, 012, 026 | 020 | TOSHIBA | 006, 016, 018,024 | |||
| BLUESKY | 020 | JVC | 013 | PHILIPS | 019, 020, 021 | SCHNEIDER | 019, 020, 021 | WEGA 019 | |
| CGE | 016 | KNEISSEL | 020, 025 | PHONOLA | 019, 020, 021 | SELECO | 005 | YOKAN | 020, 025 |
| CONTINENTAL EDISON | 004 | LOEWE | 020 | PIONEER | 001, 005 | SHARP | 018, 022 | YOKO | 020 |
| DAEWOO | 020, 025 | LOEWE OPTA | 019, 020 | POLYTRON | 020, 027, 029 | SIEMENS 023 | |||
| VCR | [IMAGE] | JVC | 106, 110, 113 | PHILIPS | 161 -166 | TELEAVIA | 101, 102, 112, 155, 156 | ||
| MITSUBISHI | 148, 149 | RADIOLA | 161 -166 | TELEFUNKEN | 101, 102, 112, 155, 156, 159 | ||||
| NEC | 139 | SABA | 101, 102, 112, 153, | ||||||
| NOKIA | 103, 110, 135, 138 | 155, 156, 157, 158 | THOMSON | 101, 102, 112, 154, 156, 157, 158 | |||||
| AIWA | 167, 168 | 155, 156, 157, 160 | NORDMENDE | 101, 102, 112, 154, 156, 157, 158 | SAMSUNG | 133 | |||
| AKAI | 103 -107 | FISHER | 135, 136, 137 | SANYO | 119, 120, 121 | TOSHIBA | 110, 111, 114 | ||
| BLAUPUNKT | 108, 109, 162 | FUNAI | 130 | ORION | 124, 125, 126, 127, 128, 129 | SCHNEIDER | 161 -166 | ||
| BRANDT | 101, 102, 112, 156 | GOLDSTAR | 123, 134 | SHARP | 131, 132 | ||||
| DAEWOO | 140 147 | GRUNDIG | 161, 169, 170 | PANASONIC | 108, 109, 162 | SONY | 115, 116, 117, 118 | ||
| FERGUSON | 101, 102, 112, 153, | HITACHI | 110, 112, 122, 123 | ||||||
For audio track and subtitle selection, see p.25,26.
| Abkhazian 6566 | Kashmiri | 7583 | Tatar | 8484 | |
| Afar 6566 | Kazakh | 7575 | Telugu 8469 | ||
| Afrikaans 6570 | Kanyarwanda | 8287 | Thai | 8472 | |
| Albanian 8381 | Kirghiz 7589 | Tibetan | 6679 | ||
| Amehanie 6577 | Kirundi | 8278 | Tigrinya | 8473 | |
| Arabic 6582 | Korean 7579 | Tonga | 8479 | ||
| Armenian 7289 | Kurdish 7585 | Tsonga | 8483 | ||
| Assamese 6583 | Laothian | 7679 | Turkish 8482 | ||
| Aymara 6588 | Latin | 7665 | Turkmen | 8475 | |
| Azerbaijani 6590 | Latvian, Leltish | 7684 | Twi | 8487 | |
| Bashkir 6665 | Lingala 7678 | Ukrainian | 8575 | ||
| Basque 6985 | Lithuanian 7684 | Urdu | 8582 | ||
| Bengali, Bangla 6678 | Macedonian | 7775 | Uzbek | 8590 | |
| Bhutani 6890 | Malagasy | 7771 | Vietnamese | 8673 | |
| Bihari 6672 | Malay | 7783 | Volapuk | 8679 | |
| Bislama 6673 | Malayalam | 7776 | Welsh | 6789 | |
| Breton 6682 | Maltese 7784 | Wolaf | 8779 | ||
| Bulgarian | 6671 | Maori | 7773 | Xhosa | 8872 |
| Burmese | 7789 | Marathi | 7782 | Yiddish 7473 | |
| Byelorussian | 6669 | Moldavian | 7779 | Yoruba 8979 | |
| Cambodian 7577 | Mongolian | 7778 | Zulu 9085 | ||
| Catalan 6765 | Naru | 7865 | |||
| Chinese 9072 | Nepali 7869 | ||||
| Corsican | 6779 | Norwegian | 7879 | ||
| Croatian | 7282 | Occitan | 7967 | ||
| Czech 6783 | Oriya | 7982 | |||
| Danish 6865 | Oroma (Atan) | 7977 | |||
| Dutch | 7876 | Punjabi | 8065 | ||
| English 6978 | Pashto, Pushao | 8083 | |||
| Esperanto | 6979 | Persian 7065 | |||
| Estonian | 6984 | Polish 8075 | |||
| Faeroese | 7079 | Portuguese | 8084 | ||
| Fiji | 7074 | Quechua | 8185 | ||
| Finnish | 7073 | Ahaero- Romance | 8277 | ||
| French | 7082 | Romanian | 8279 | ||
| Frisian 7089 | Russian | 8285 | |||
| Galiean 7176 | Samoan | 8377 | |||
| Georgian | 7565 | Sangbo | 8371 | ||
| German | 6869 | Sanskrit 8365 | |||
| Greek | 6976 | Sents Gaelic | 7168 | ||
| Greenland | 7576 | Serbian | 8382 | ||
| Guarani | 7178 | Servo-Croatian | 8372 | ||
| Gujarati | 7185 | Sesotho 8384 | |||
| Hausa | 7265 | Setswana | 8478 | ||
| Hebrew 7387 | Sindhi | 8368 | |||
| Hindi | 7273 | Singhalese | 8373 | ||
| Hungarian | 7285 | Siswati | 8383 | ||
| Icelandic | 7383 | Slovak 8375 | |||
| Indonesian | 7378 | Slovenian | 8376 | ||
| Interlingua | 7365 | Somali | 8379 | ||
| Interlingue | 7369 | Spanish 6983 | |||
| Inupiaic 7375 | Sudanese | 8385 | |||
| Irish | 7165 | Swahili 8387 | |||
| Italian | 7384 | Swedish | 8386 | ||
| Japanese 7465 | Tagalog | 8476 | |||
| Javanese | 7487 | Tajik | 8471 | ||
| Kannada | 7578 | Tamil | 8465 |


- CAUTION RISK OF ELECTRIC SHOCK DO NOT OPEN
- SAFETY INFORMATION
- GETTING STARTED
- OPERATING YOUR RECEIVER
- ADVANCED SOUND CONTROL
- TROUBLESHOOTING TIPS
- CARE AND MAINTENANCE 24
- UNIVERSAL REMOTE CONTROL
- LANGUAGE CODES 27
- UNPACKING THE RECEIVER
- UNPACKING THE SPEAKERS
- INSERTING BATTERIES INTO REMOTE CONTROL
- SET UP AND MAINTENANCE OF THE RECEIVER
- IMPORTANT NOTE
- PROTECT YOUR COMPONENTS FROM OVERHEATING
- CONNECTING TO AUDIO-VISUAL COMPONENTS
- S-VIDEO
- DIGITAL CONNECTION
- FRONT TERMINAL
- DIGITAL CONNECTIONS
- AM LOOP ANTENNA AND FM INDOOR ANTENNA
- HINT
- CONNECTING THE SPEAKERS
- SPEAKERS
- SPEAKER WIRES
- SPEAKER POLARITY
- CONNECTING THE SUBWOOFER
- POSITIONING YOUR SPEAKER
- ① LEFT, RIGHT (FRONT SPEAKERS)
- ② CENTER
- ③ SURROUND (REAR SPEAKERS)
- SUBWOOFER
- MAGNETIC SHIELDING
- FRONT SPEAKER PLACEMENT
- ALIGNMENT
- ADVANCED SETTING
- ANGLE
- HEIGHT
- PREFERRED SURROUND PLACEMENT
- LOCATION
- AIMING
- ALTERNATIVE SURROUND PLACEMENT
- REAR WALL
- NO ADJACENT WALLS
- TEST TONE / CHANNEL BALANCE
- CHANNEL BALANCE
- LEVEL ADJUSTMENT & SURROUND CHANNEL LEVEL EXPECTATION
- NOTE
- USING HEADPHONES
- HEARING COMFORT & WELL-BEING
- FACTORY SETTING
- RESET TO FACTORY SETTINGS
- RECEIVER CONTROLS
- ON/ECO
- MUTE
- PHONES
- SOURCE BUTTONS
- DISPLAY
- SOUND CONTROL
- DSP (DIGITAL SOUND PROCESSOR)
- SETUP FUNCTION
- TUNING
- SURR. MODE
- MEMORY
- BAND
- TEST TONE
- EQ
- DIGITAL INPUT/ ST / MONO
- V-AUX INPUT
- YOUR REMOTE CONTROL
- ON/OFF
- DIGITAL
- SOURCE SELECTOR
- SPEAKER SETTINGS
- UP / DOWN
- 7
- RDS/MIX
- PTY
- VOLUME
- PR+ / PR
- NUMBER BUTTONS
- MEMO
- OPERATIONS BUTTONS
- DVD / VCR / SAT / TUNER / TAPE / V-AUX / CD / TV
- PRO LOGIC
- PRO LOGIC II
- FM / AM / MW / LW
- OPT12
- COAX
- ST
- TUNED
- SLEEP
- RDS
- KHZ / MHZ
- SWITCHING ON/OFF
- SELECTION OF AUDIO/VIDEO SOURCE
- EXAMPLE 1
- EXAMPLE 2
- USING THE RECEIVER TO PLAY A SOURCE
- PLAYING A DVD WITH THE RECEIVER
- EXAMPLE 3
- OPERATING THE RADIO
- MANUAL TUNING
- SELECTING MONO OR STEREO SOUND
- STORING RADIO STATIONS
- AUTOMATIC PRESET STORING
- MANUAL PRESET
- RETRIEVING PRESET STATIONS
- RDS (RADIO DATA SYSTEM) FOR FM ONLY
- SEARCH STATION BY PROGRAM TYPE
- 6 CHANNEL EXTERNAL INPUT
- SOUND ENHANCEMENT SYSTEMS
- DOLBY PRO LOGIC II
- DOLBY DIGITAL
- DIGITAL THEATER SYSTEMS (DTS)
- STEREO
- FINE SETTING OF THE COMPONENTS
- SOURCE/ IF DIGITAL INPUT (OPTICAL IF ANALOG INPUT INPUT OR COAXIAL) IS SELECTED IS SELECTED
- INPUT SIGNAL SETTING
- DIGITAL INPUT
- ANALOG INPUT
- FINE SETTING OF THE SPEAKERS
- THE TEST TONE BUTTON
- FACTORY DEFAULTED ADVANCE SETTING INDICATION FROM VFD
- SPEAKER CONFIGURATIONS
- SPEAKER ICONS
- DISPLAYING PROGRAM FORMATS
- RECEIVER/TUNER OPERATION
- ST INDICATOR IS OFF
- THE SIGNAL IS MONO. SEVERE HUM OR NOISE
- REMOTE CONTROL OPERATION
- THE REMOTE CONTROL DOES NOT OPERATE THE UNIT
- REMOTE LOSES PROGRAMMED CODES
- REMOTE FORGETS WHAT SOURCE WAS SELECTED
- GENERAL
- NO AUDIO
- NO AUDIO FROM ONE CHANNEL
- NOISE OCCURS WHEN THE TV IS TURNED ON
- SPECIFIC INSTRUMENTS SOUND DISPLACED
- TAPE OUT AND REC OUT DO NOT OPERATE IN VCR MODE
- CLEANING THE EXTERIOR
- EQUIPMENT SPECIFICATIONS
- AMPLIFIER SECTION
- VIDEO SECTION
- AM TUNER SECTION
- FM TUNER SECTION
- DIMENSIONS (H X W X D MM)
- CARE AND MAINTENANCE
- CLEANING
- IMPORTANT BATTERY INFORMATION
- SAFETY PRECAUTIONS
- HEADSET SAFETY
- DON'T INFRINGE
- TV FUNCTIONS
- VCR/SAT FUNCTIONS
- UNIVERSAL REMOTE CONTROL PROGRAMMING
Brand : THOMSON
Model : DPL660HT
Category : Home Theater System